David Holman
-
Posts
4,359 -
Joined
-
Last visited
-
Days Won
117
Content Type
Profiles
Forums
Events
Gallery
Blogs
Everything posted by David Holman
-
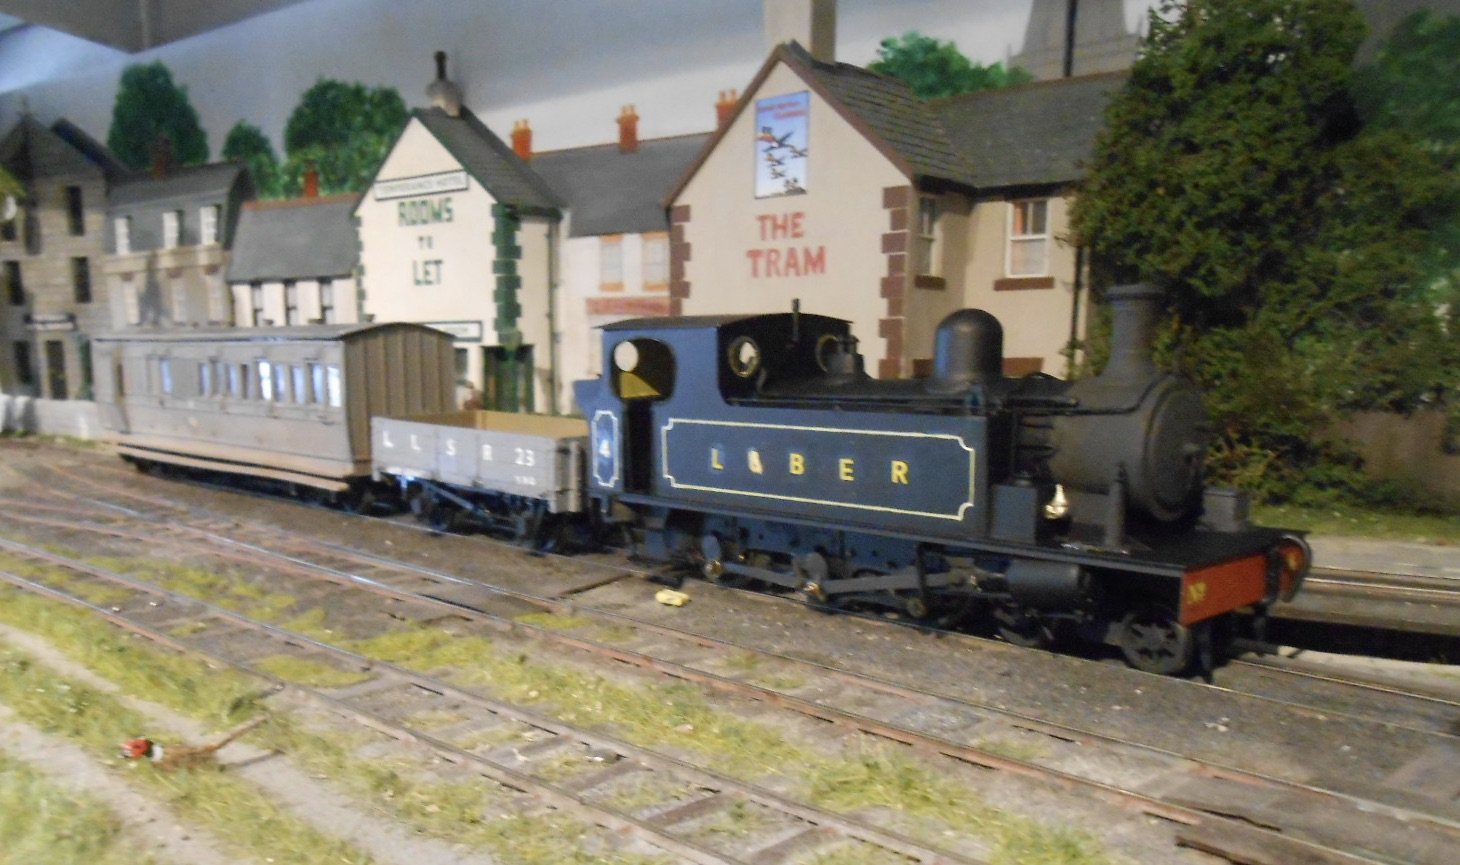
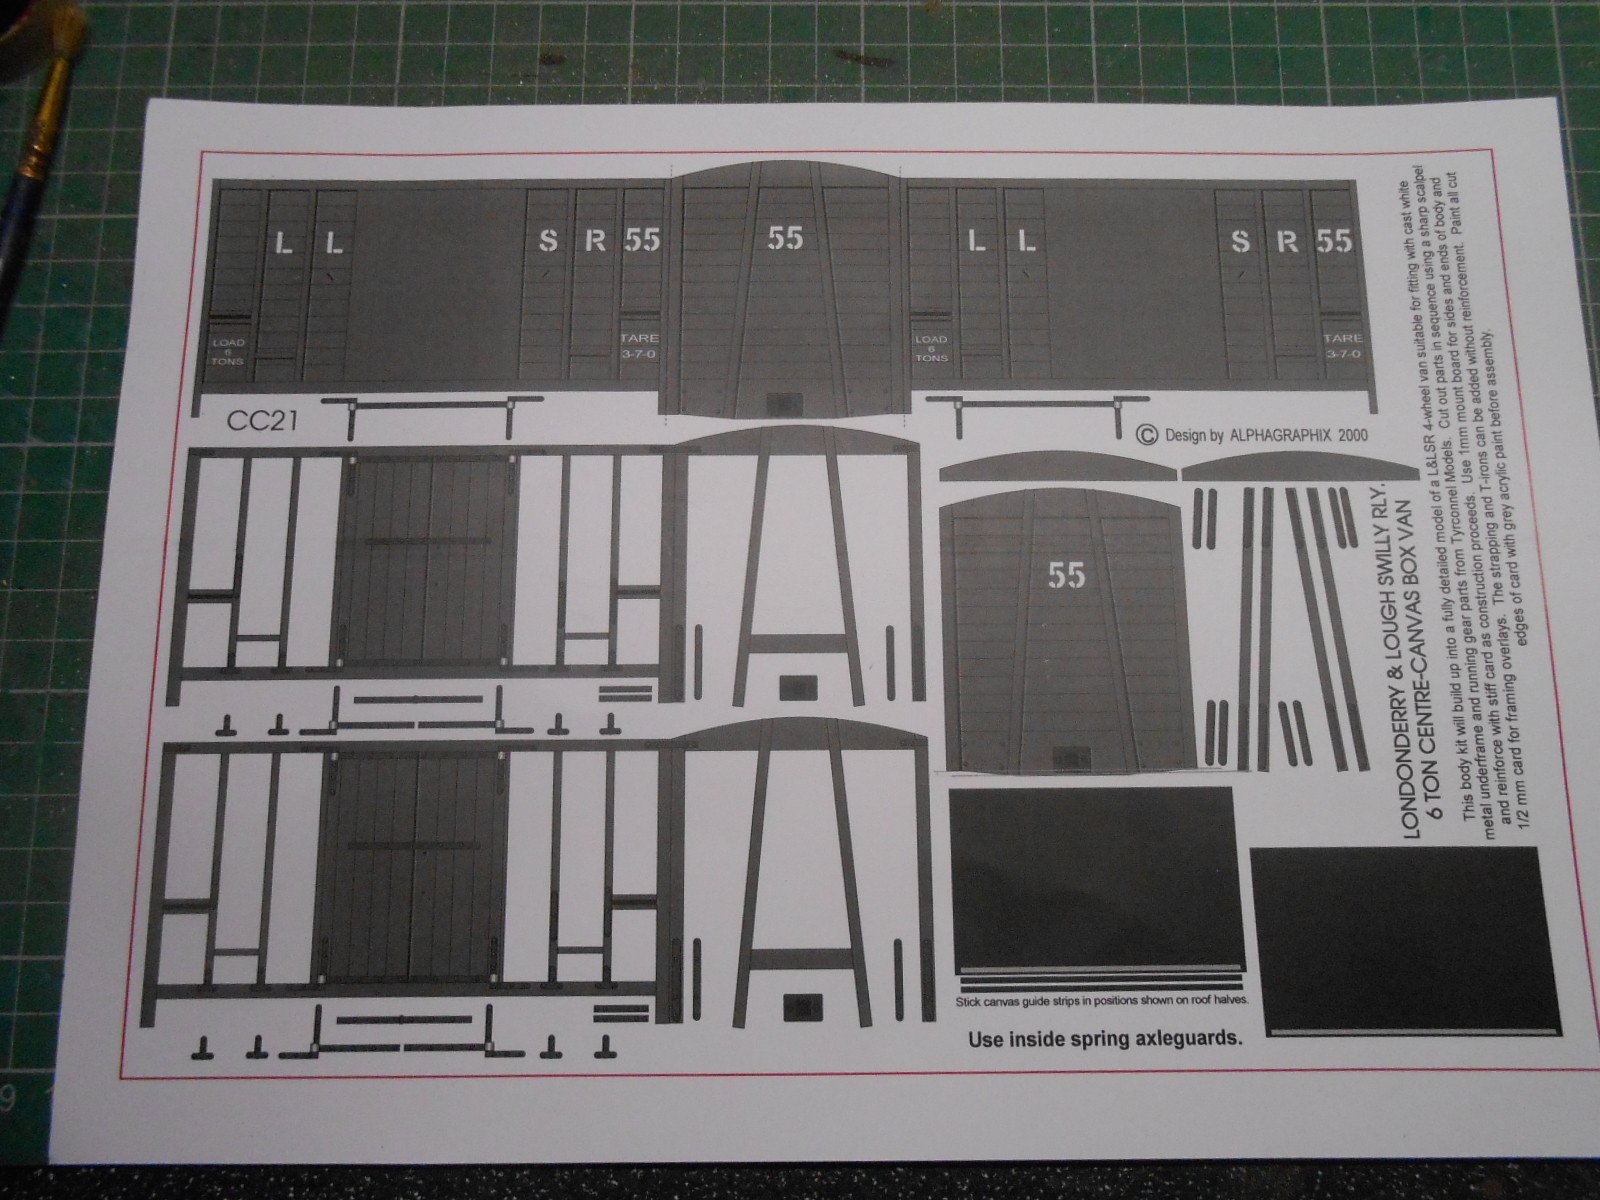
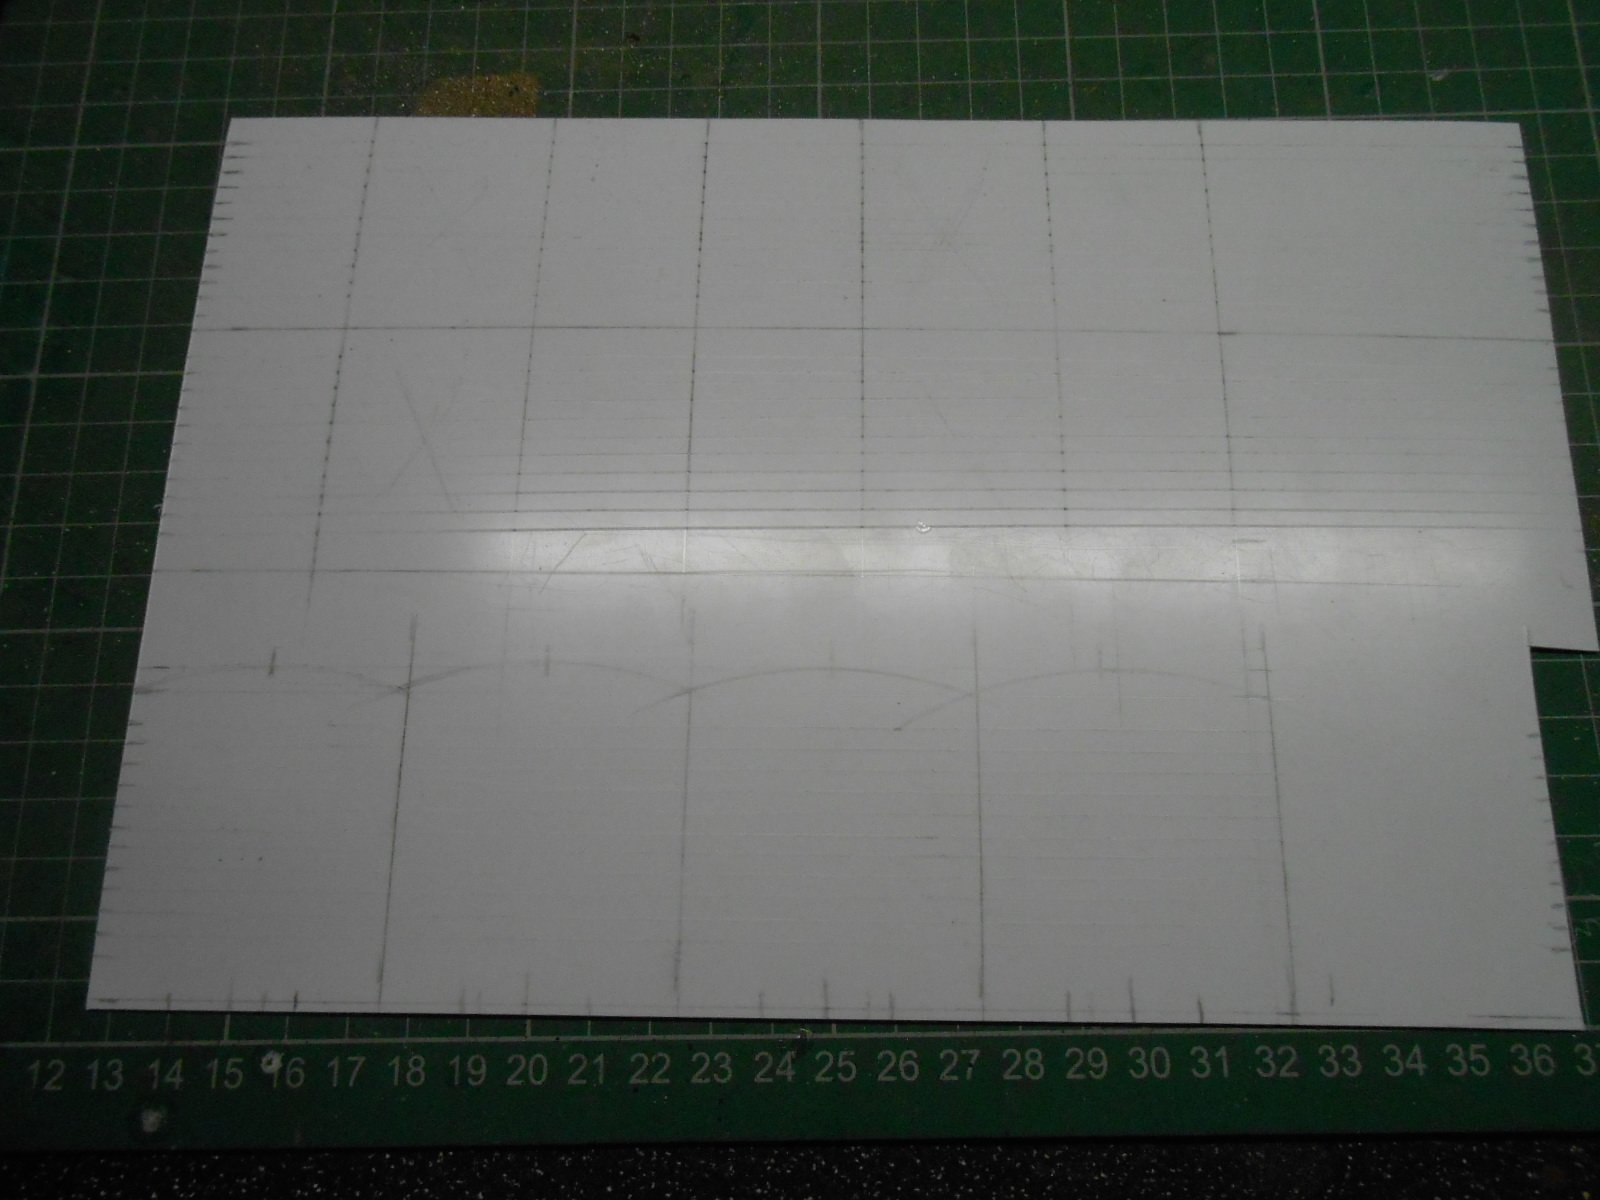
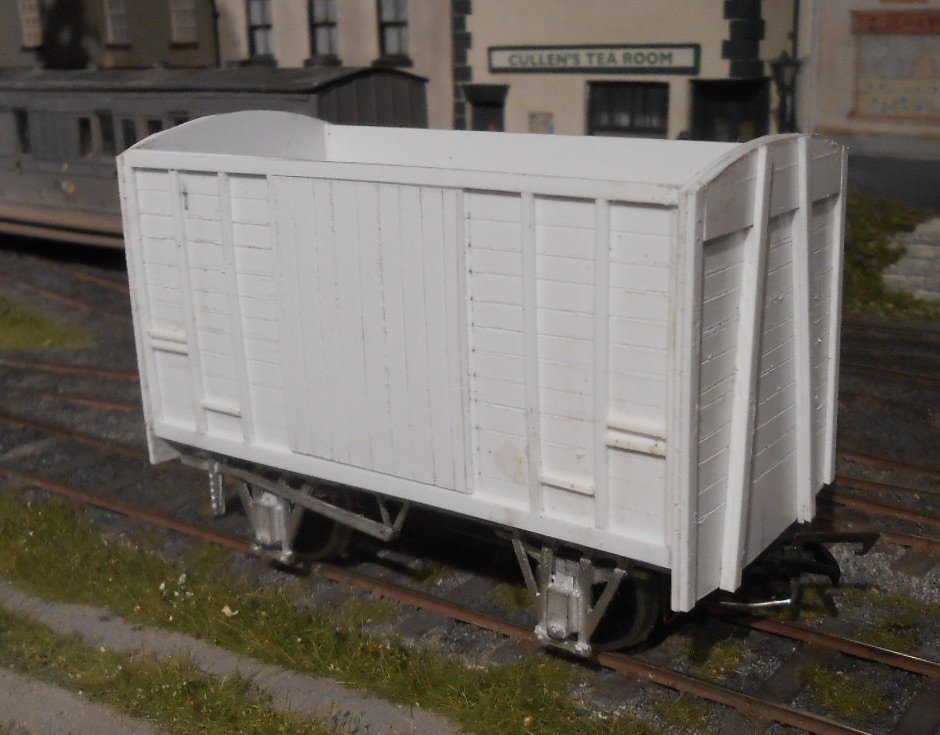
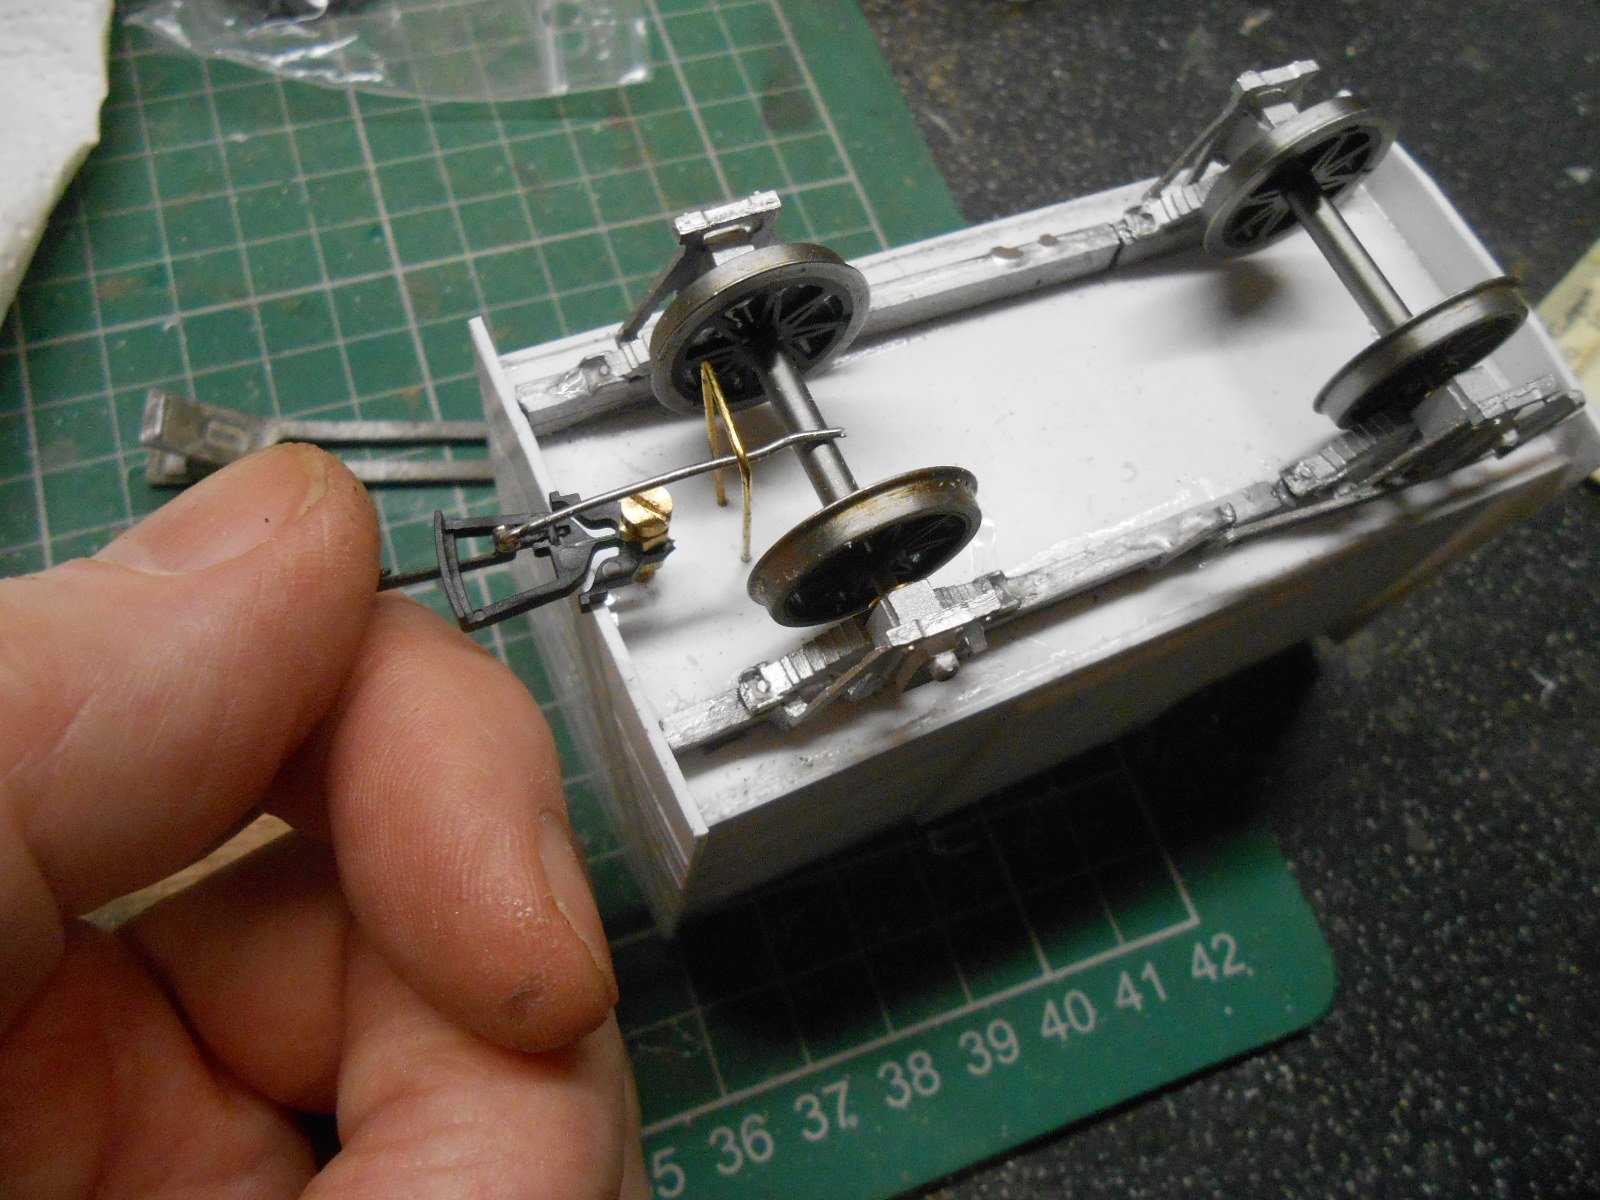
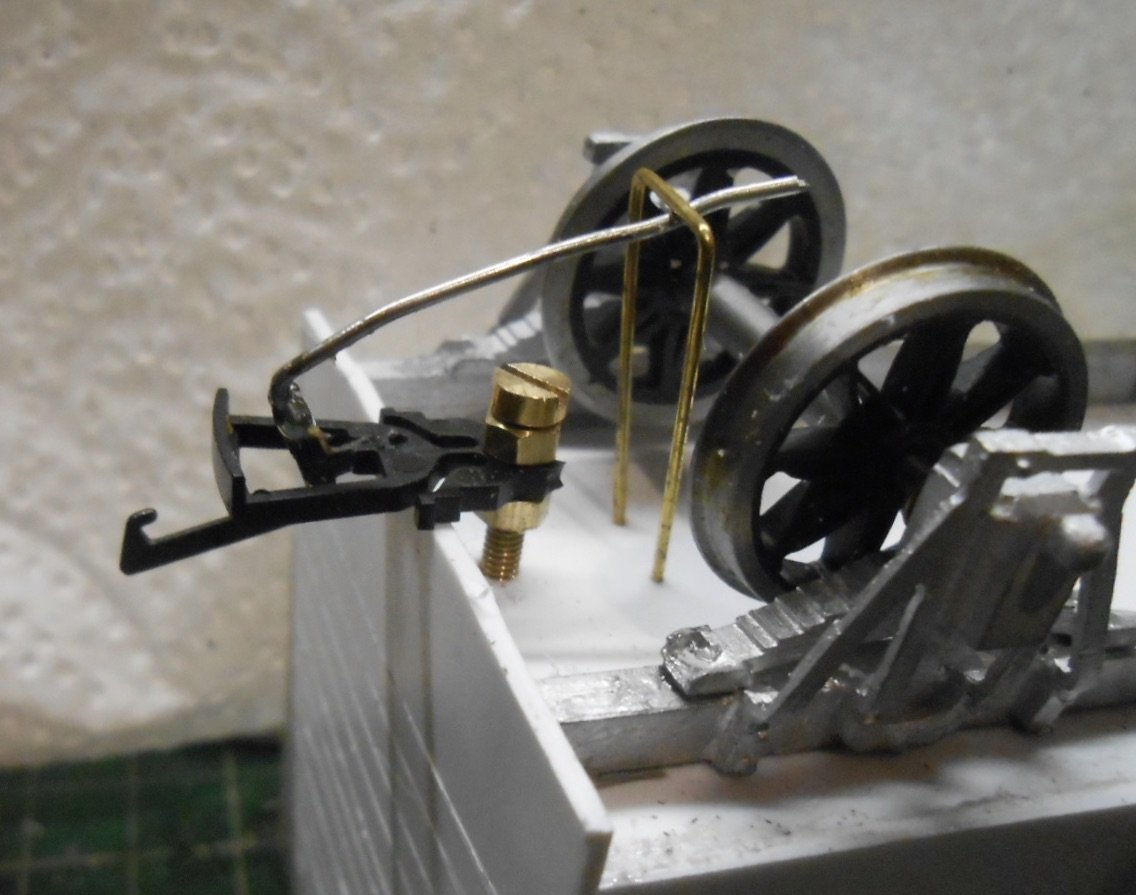
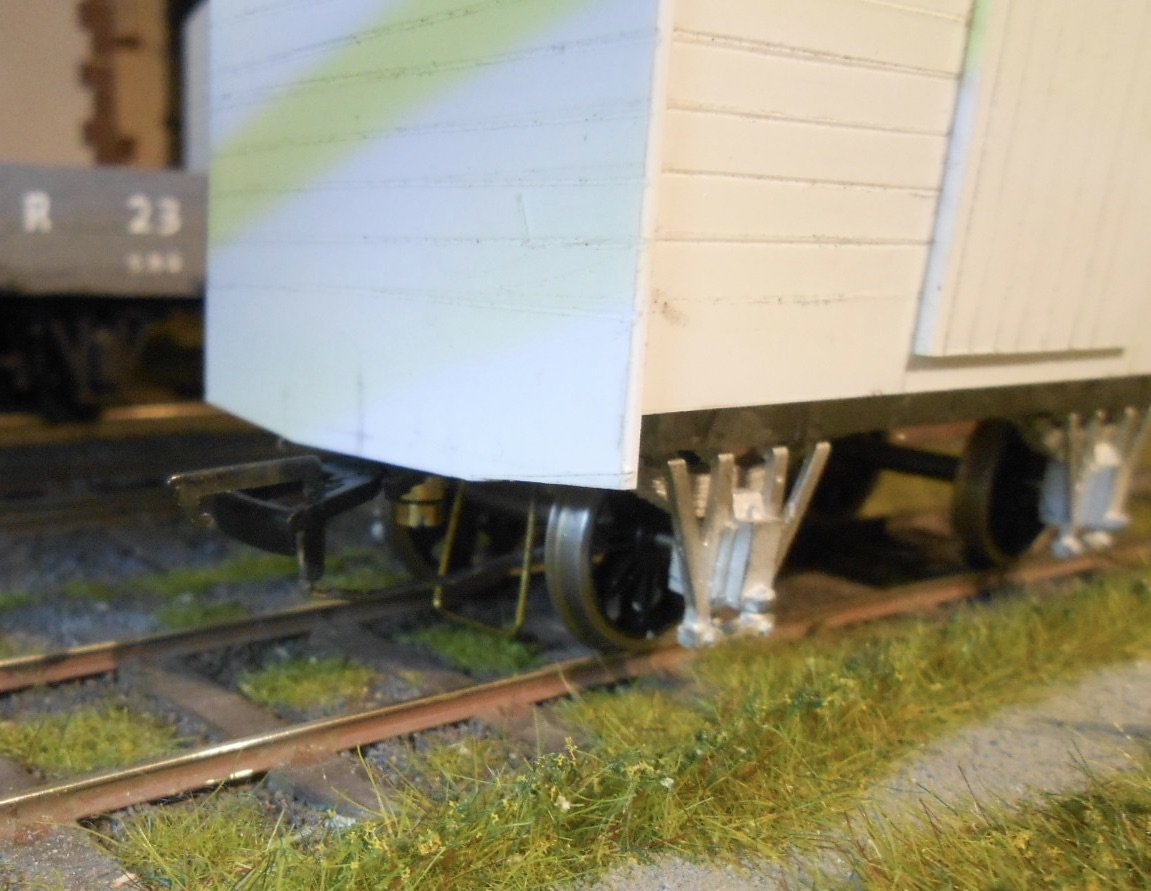
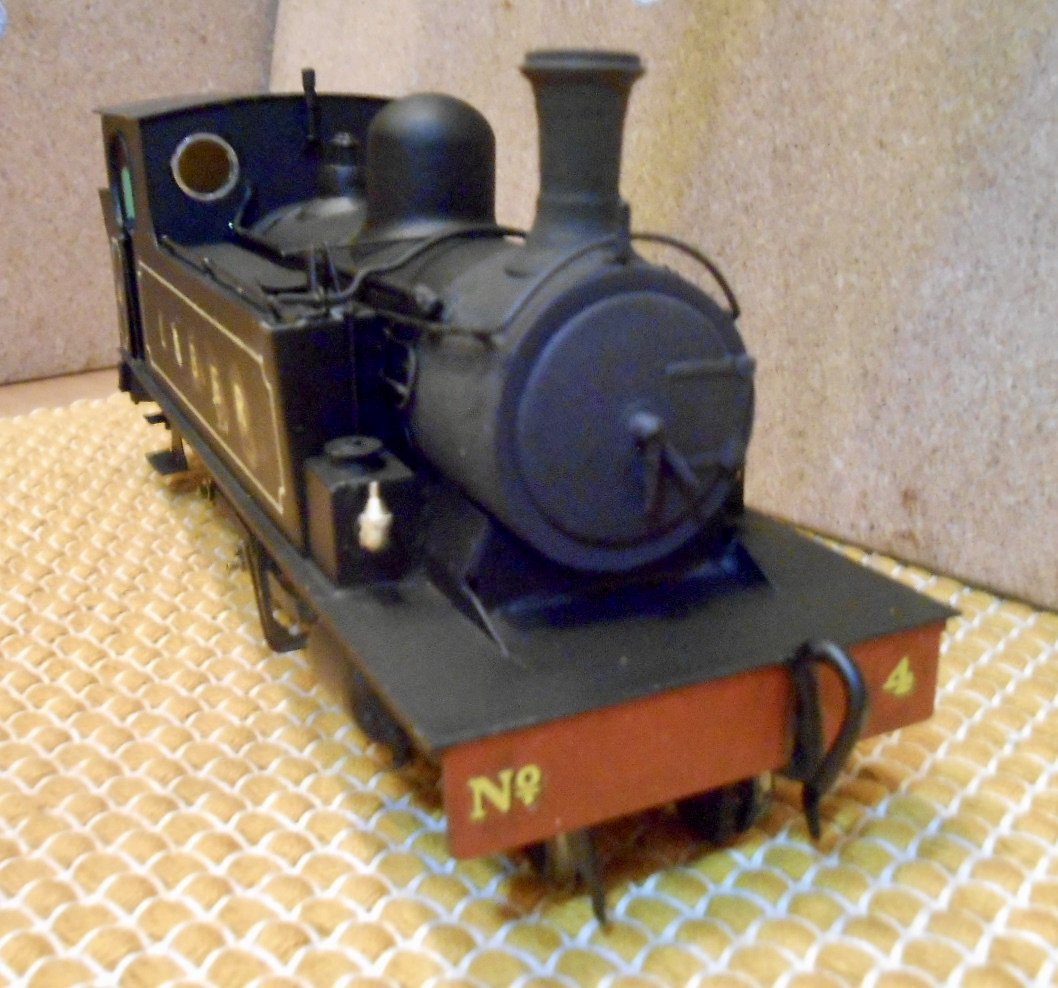
Currently awaiting a few things to finish off the Barclay [eg crew, builder's plates] & don't want to do the weathering just yet either. However, have added some coal to the bunker, plus the ever present jack and toolbox on the front footplate. Therefore felt it worth posing the loco with my Swilly coach and wagon on Fintonagh, as shown below. This week, attention has turned to providing the rest of the mixed train that will go with the Barclay, along with trying to address the thorny topic of which couplings to use. Alphagraphix were able to supply me with the Swilly open wagon kit in the picture above, along with half a dozen Donegal 9' wagon chassis and a card kit of a Swilly 'large van'. However, Swilly wagons all seem to be on 8' wheel bases, so a bit of adapting has been required. Decided I wanted two large vans to go with the open [& brake coach], so as I've been doing for several years now, used the card kit as a basis for making body sides and ends from plastic sheet. For anyone who has never scratch built stock before, a van is a good place to start. The sides are just two rectangles; the ends the same, but with curved tops. I've used 40thou plastic sheet, marked & then scribed to represent the planking. Wagon doors are two more rectangles done the same way, then the various different bits of strapping are made from 40x40/60/80 thou strip. The floor is a rectangle of 80thou sheet. The various stages are shown below., though only one side and end [of one van] has been done so far. The white metal chassis has had a scale foot cut from the middle and six inches from each end to fit the Swilly vans; brake gear is yet to be fitted. The question of which couplings to use has caused much head scratching over the last few weeks. Have been using Kadees on Fintonagh [ok, but not perfect] but the change to 2'7 wheels compared to the Clogher's 2' diameter have needed a change of plan. Tried 0 gauge Kadees, but they look too big and the in track uncoupling magnets are grabbing at the steel wheels. Did consider using Kadee S scale couplings, because size wise they look better, but the magnet problem remains, while they only seem available direct from the USA, with high postage costs... Plan B was to use Zamzoodleds, which are correct profile, narrow gauge 'chopper' couplings. However, these are currently not available, plus they are relatively expensive too. So to Plan C. Looking at the chopper couplings, it seemed to me that they are not a million miles from a bog standard 'tension lock', especially in slimline form. A bit of research on the web suggested that it should be possible to make them uncouple with electromagnets, while they are much cheaper than Kaydees or Zamzoodleds. Would have happily used Alex Jacksons, now I've got used to them, but these need standard buffers on all stock which don't exist on narrow gauge. Nevertheless the AJ concept helps, because, by soldering a piece of steel wire [paper clip] to the hinged coupling hook, facing backwards into the wagon chassis, this can then be acted on by a below track electro-magnet [Dingham type from the Gauge 0 Guild], enabling remote uncoupling. A basic set up is shown below. Still work in progress, but the principle seems ok. A further issue with all types of 'hook and bar' type couplings is that they are 'handed' with a hook and loop one end and just a loop at the other. When your layout has both a loco turntable and a turntable fiddle yard, this really causes problems as you soon find you have two hooks [or two loops], face to face. However, have now managed to solve this, as if you have just loops at each end of all locos, then all that is needed is a 'barrier wagon', with hooks at both ends, for those times when two loops are facing each other. To go through an entire sequence, would take far too long to explain, but over 3-4 sequences the Barclay, with the two vans I'm building, plus the open wagon [which will have hooks at both ends] can arrive, swap one van/wagon with one from a siding, turn the engine and depart. No doubt it will give operators [me included] a bit of brain ache, but with just these vehicles to worry about, shouldn't be too complex. Hopefully. The other Swilly train I want to build will just involve one of the Kerr Stuart pacific tanks and two coaches, so hooks at each end of these and just loop on the loco is all that is needed. Cunning plan, Baldrick... Also have to mention the small matter of Ipswich 1, Maidstone United 2. The Stones are 4 leagues and 96 places below Ipswich in the football pyramid, but despite the latter have 38 shots on target to Maidstone's two, my local team prevailed and are now through to the 5th round of the FA Cup! Magic.

-
What other gems do you have lurking away, unseen? Love the idea of a scenic shuttle to test stuff and as an antidote to construction woes. Am already wondering what I might do with a 5'3 and 3' diorama. Broad and narrow gauge transfer sidings perhaps? A simple, but inspirational concept. Those of you with lots of model locos but no layout to run them on take note.
-
Still work in progress, single lines aren't too bad. Rathbone's book is full of helpful information and in many ways, lining with a pen can take less time than using transfers. Have managed to get rid of most of the marks made by Decalfix in the same way as cutting back paint blobs. However, thinners will not remove white gel pen (dots to mark the corners), so these have been carefully covered with matt black and a fine brush - one to remember... Still not sure about the lettering, which may be too big, so am hoping a light weathering will help tone it all down. Locos rarely look good to me in solid black, probably because a couple days out the paint shop they no longer were.
-
Can only concur with all the above. How many individual pieces are there? No, don't!! Beautiful.
-
A real blast from the past. A group of us were discussing MTK kits at the club only last week. Pretty good for their day, though also known for the El Crappo range of 7mmNG kits. The models have turned out rather well, methinks!
-
Great to see more views of this remarkable railway!
-
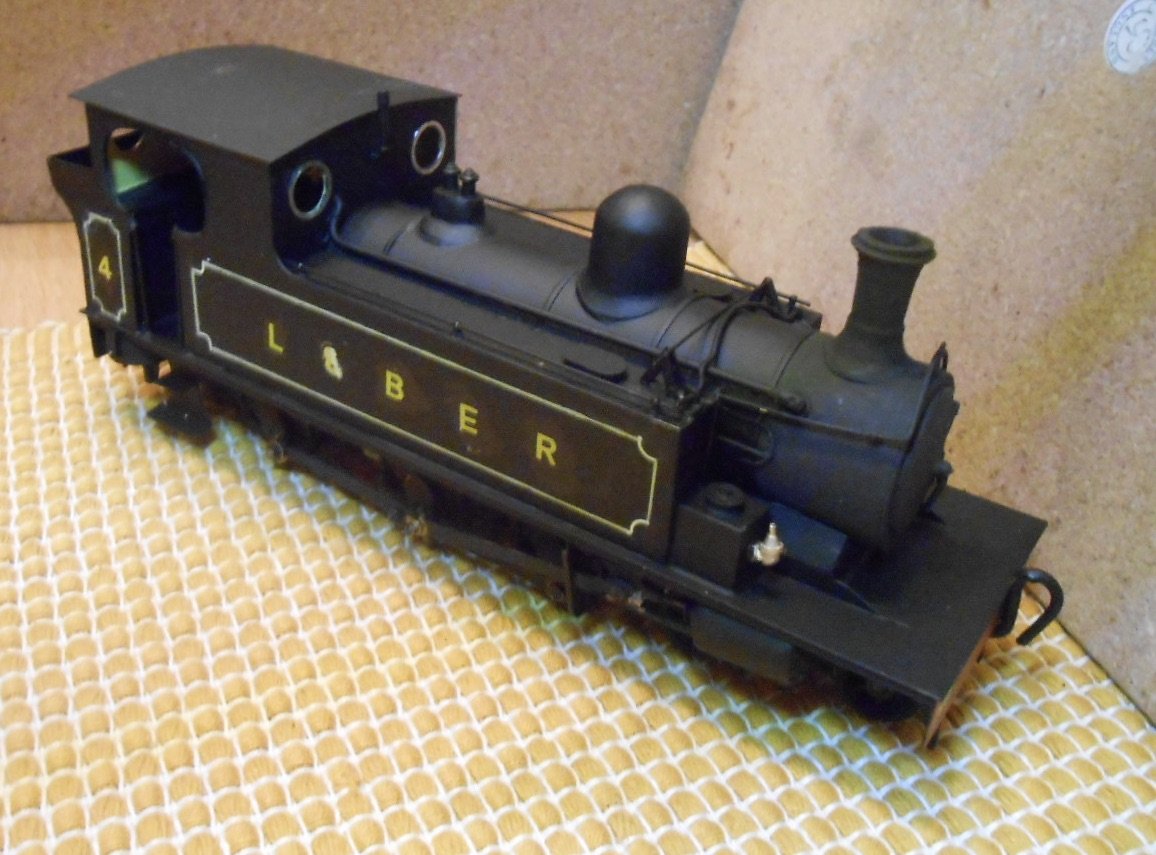
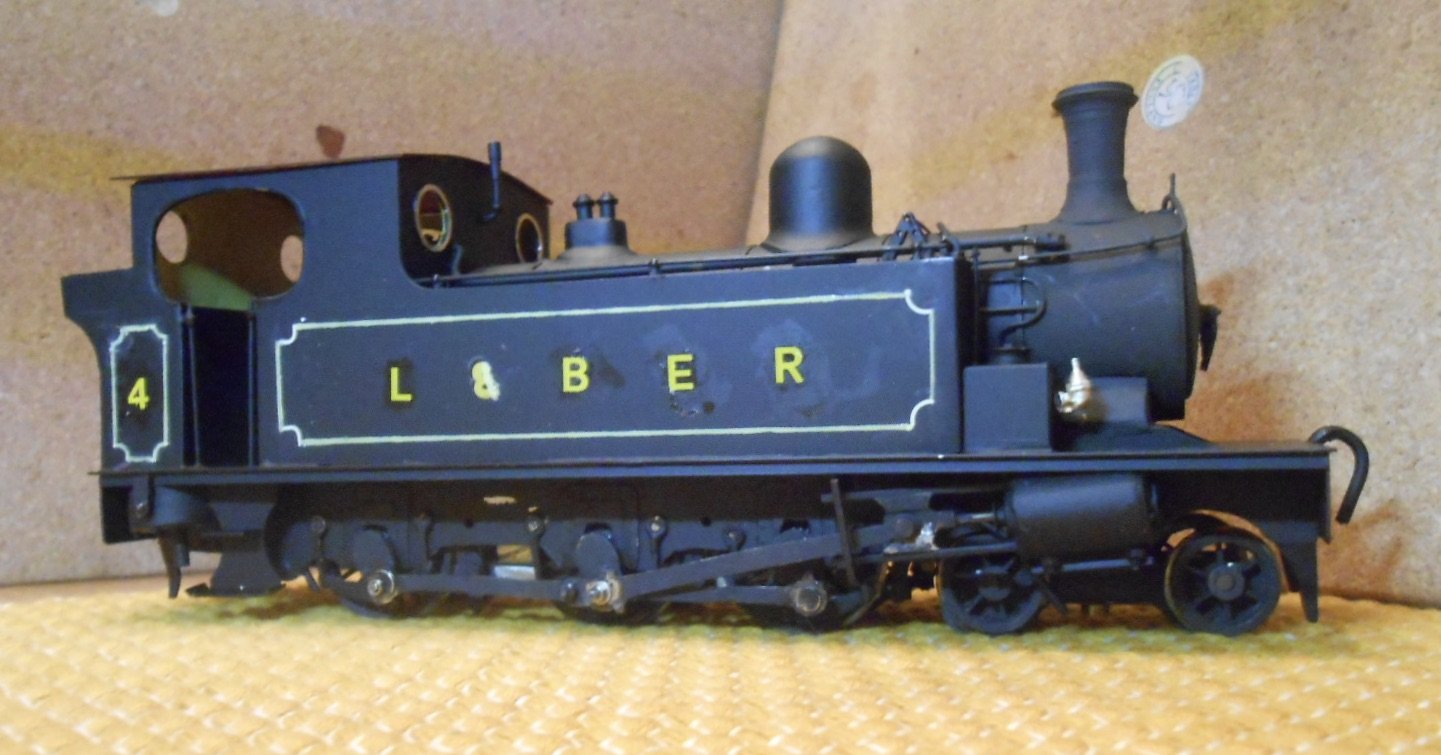
Red primer, followed by 'go faster' matt black rattle can, then the order from Laurie Griffin Miniatures arrived, enabling me to do most of the cab detailing, though it still needs the reversing lever, crew, glazing and so on. This gave time for the top coats to harden & then it was a case of girding up the loins to do lettering and numbering. Quite high up on my list of things I don't like much - mainly because it is so easy to spoil all the previous hard work... Anyway, managed to find some nice HMRS pressfix transfers for the buffer beam numbers [L&SWR shaded], while a set of waterslide letters & numbers provided most of the L&BER [Letterkenny and Burtonport Extension Railway] that the Barclays seemed to carry for much of their existence. Unfortunately, couldn't find an 'ampersand' on any of my transfer sheets, so have cobbled two together from a couple of '3's. Annoyingly, the lettering transfers have a very noticeable carrier film on them & though I've managed to cut most of this away, only time [& some weathering] will tell if the appearance is acceptable. And then there was the lining! Wasted an hour or so this morning with some nice looking lining from a Fox Transfer sheet, but this must have been sitting around for a while as it broke up into [very] short pieces, every time I tried to apply it. Better luck with the inverted corner pieces, though again, turned out there were not enough on the sheet to do the corners of the bunker. Such is life - so it was a case of out with the bow pen & some suitable enamel paint. Swilly loco lining seemed to vary quite a lot over the years, particularly the Barclays. At various time they had none, a double yellow line with rounded corners, or a single yellow line with inverted corners, the latter being what I've done. A VERY useful tip from Ian Rathbone's book on the subject is that, by using a very fine brush, moistened with enamel thinners, any imperfections can be [fairly] easily removed. Took a while [because there were quite few], but so far, so good. It hasn't turned out too badly and [fingers crossed], a bit of light weathering will hide the worst of the blemishes. Still a fair bit to do mind, not least making sure the chassis works well when mated with the body, but the photos hopefully give a reasonable impression of what the finished loco might look like. The smokebox handrails need straightening though!
-
Clogherhead - A GNR(I) Seaside Terminus
David Holman replied to Patrick Davey's topic in Irish Model Layouts
Am sure there must be plenty more where that came from - no mention of brother Red Shanks, famed for his bright socks? -
What Happens After The Warranty Expires?
David Holman replied to DJ Dangerous's topic in General Chat
An interesting conundrum, but if all the model does is stay in its box, then one will never know if it works or not. Guess it is the same with all those unmade kits stuck in cupboards for that rainy day. Ultimately making, using, playing with models is good for you and even if you don't currently have the time or space for a full layout, suggest that there is little to stop anyone from setting up a bit of track to run a loco and a few wagons on. It doesn't have to be scenic (though eventually it could be), but will certainly enable stock to be tested, with a bit of fun along the way too. -
Feel their pain and they are right to go out on a high. The Chatham Club's Dockyard exhibition initially disappeared due to problems in the venue itself, but ultimately withered on the vine for similar reasons cited by the Warley Club. Exhibitions are seriously hard work for those who run them and the bigger the show, the greater the work. However, for Chatham, it seems there may still be a yearning to return to the past. This year's new show, back in the Covered Slipway in the Dockyard has generated masses of interest with traders, layouts and societies actually asking to be included, simply on the back of the memories of twenty years ago. And at the time, it was great, because the venue added that special something - like Cultra - which a sports hall can't do on its own, however good the layouts and traders. The Chatham Show was a proper day out, because it was not just about the model railways - there was a whole lot of other stuff to see too. Come the last weekend in July, we will see if nostalgia actually is what it used to be, but (fingers crossed), it is looking good from a financial point of view, while post Covid, the Club has seen a large influx of new, younger members, who have breathed new life into not just the evenings, but daytime meetings too. Some of this is down to our large 00 layout which is fully DCC and last night up to a dozen people were happily running their trains via their mobile phones. Seems weird to me, but it works and that is what is important. The rest of us get to see all the wonderful latest new models trundling around in a realistic setting too. Our big 0 gauge tail chaser is likewise important for folk to run their trains, while we now have new projects 0 and 0n16.5 which are focussing on layout construction and which will eventually become small exhibition layouts too and the main 00 layout is being continuously developed. Somehow, and in a very short time, things have moved from the Doldrums to being very positive - and long may it continue. Still not entirely sure why things have blossomed, but newer members are very active on social media and this has generated a lot of interest which in turn brings more people down to the club to see what is going on, who then want to join in. So the virtual world can contribute and the delights of the real world of model railways can still work its magic.
-
Clogherhead - A GNR(I) Seaside Terminus
David Holman replied to Patrick Davey's topic in Irish Model Layouts
Nice one - and think you are right to avoid the sea itself. Waves can look great in photographs but (beyond ripples) start to lose something in reality. The shoreline detritus works really well and is not something you see very often. -
Thanks folks. Black it is!
-
Thanks, Paul. In the revised edition of Patterson's book on the Swilly, he quoted a Mr H S Irvine as saying that in 1948, No4 was black, lined in yellow with the number 4 on both the bunker and bufferbeams. Norman Johnson's Narrow Gauge in Colour shows No2 in 1953 and the tank sides appear the same colour as the smokebox: black, lined in yellow with red buffer beams, while the rods are black. It has the LSR lozenge on the tank side, whereas pictures in the 1940s still have the LBER initials on the tanks. Much as I really like the Swilly dark green (and the colour picture in NJs book of No5 shows it to be very dark), my preferred period is the mid 1940s, where all the evidence this far points to black. Ultimately, suspect that with a light coating of grime, it will be hard for anyone to tell the difference, but when I do one of the Pacific tanks, hopefully it can have the dark green.
-
Successes and failures in layout building.
David Holman replied to Mayner's topic in Irish Model Layouts
As a former head teacher and leadership advisor, getting colleagues to reflect was a key part of my work, particularly in the annual appraisal cycle. In education, folk tend not to dwell on the past, mainly because there is always another new challenge around the corner, be it self imposed, or from our political masters. Maybe because of that, I've long kept what I call my model railway 'journal', an informal diary that I use to record thoughts and experiences - a bit like some of my ramblings here, so am in danger of repeating myself! Whatever, it is good to reflect and to look back on those reflections once in a while, because it helps in avoiding mistakes and realising you solved a particular problem several years ago, but had forgotten about it. John's little essay soon got me thinking, because over the dozen or so layouts I've built some have been a lot more effective than others. However, as they were almost all built for exhibition purposes, the criteria are different because factors like ease of transportation, setting up times, reliability and so on are just as important as operational enjoyment. On balance, Fintonagh remains a firm favourite and now very much a benchmark for other projects. Easy to transport, quick to set up and, though small, more than enough operational potential to be enjoyable to run. At the other end of the scale was an 0 gauge continuous run, called Eatonswell. Four, four foot by 2'6 scenic boards were joined to similar sized storage loops by double track half circles. The whole lot was about 30x13, took forever to set up and was very unwieldy, to say the least! Did one show with it before the continuous run was scrapped and replaced by fiddle yard each end. Forgot to mention it was on two levels as well - a double track secondary line with a low level goods yard. So, in effect, four fiddle yards and up to six operators. What was I thinking? Eventually, stripped off the buildings and used them on a decent terminus to fiddle yard project of the same name that was much more effective. I still dream of a roundy roundy layout, but the nightmare of the original Eatonswell soon brings me back to earth. -
Got a drawer full, if anyone's interested! Looks great.
-
Colour is such an emotive thing and so much depends on ambient lighting, to say nothing about the effects of dirt, fading and so on. The variations display really are significant though!
-
Thanks folks. The shiny metal is now covered with primer and (fingers crossed), now awaits a black top coat. If anyone can tell me the Barclays were given the Swilly dark green in the 1940s, then I have a can of Ford laurel green to go over the black, which should work. Otherwise, I'm going to need to do a bit of lining. Been fine tuning the chassis this afternoon to get everything running sweetly before reuniting it with the body.
-
N Scale Ballywillan, Co Longford.
David Holman replied to Kevin Sweeney's topic in Irish Model Layouts
Yep, that's a wow from me too. -
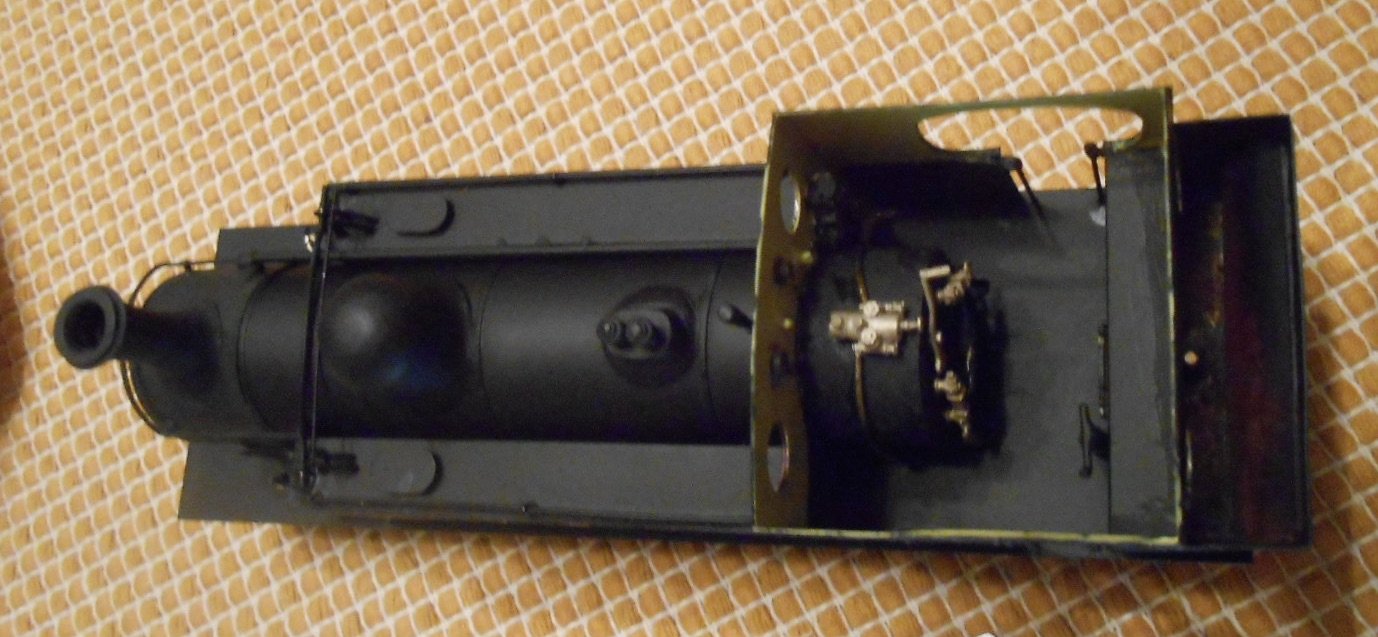
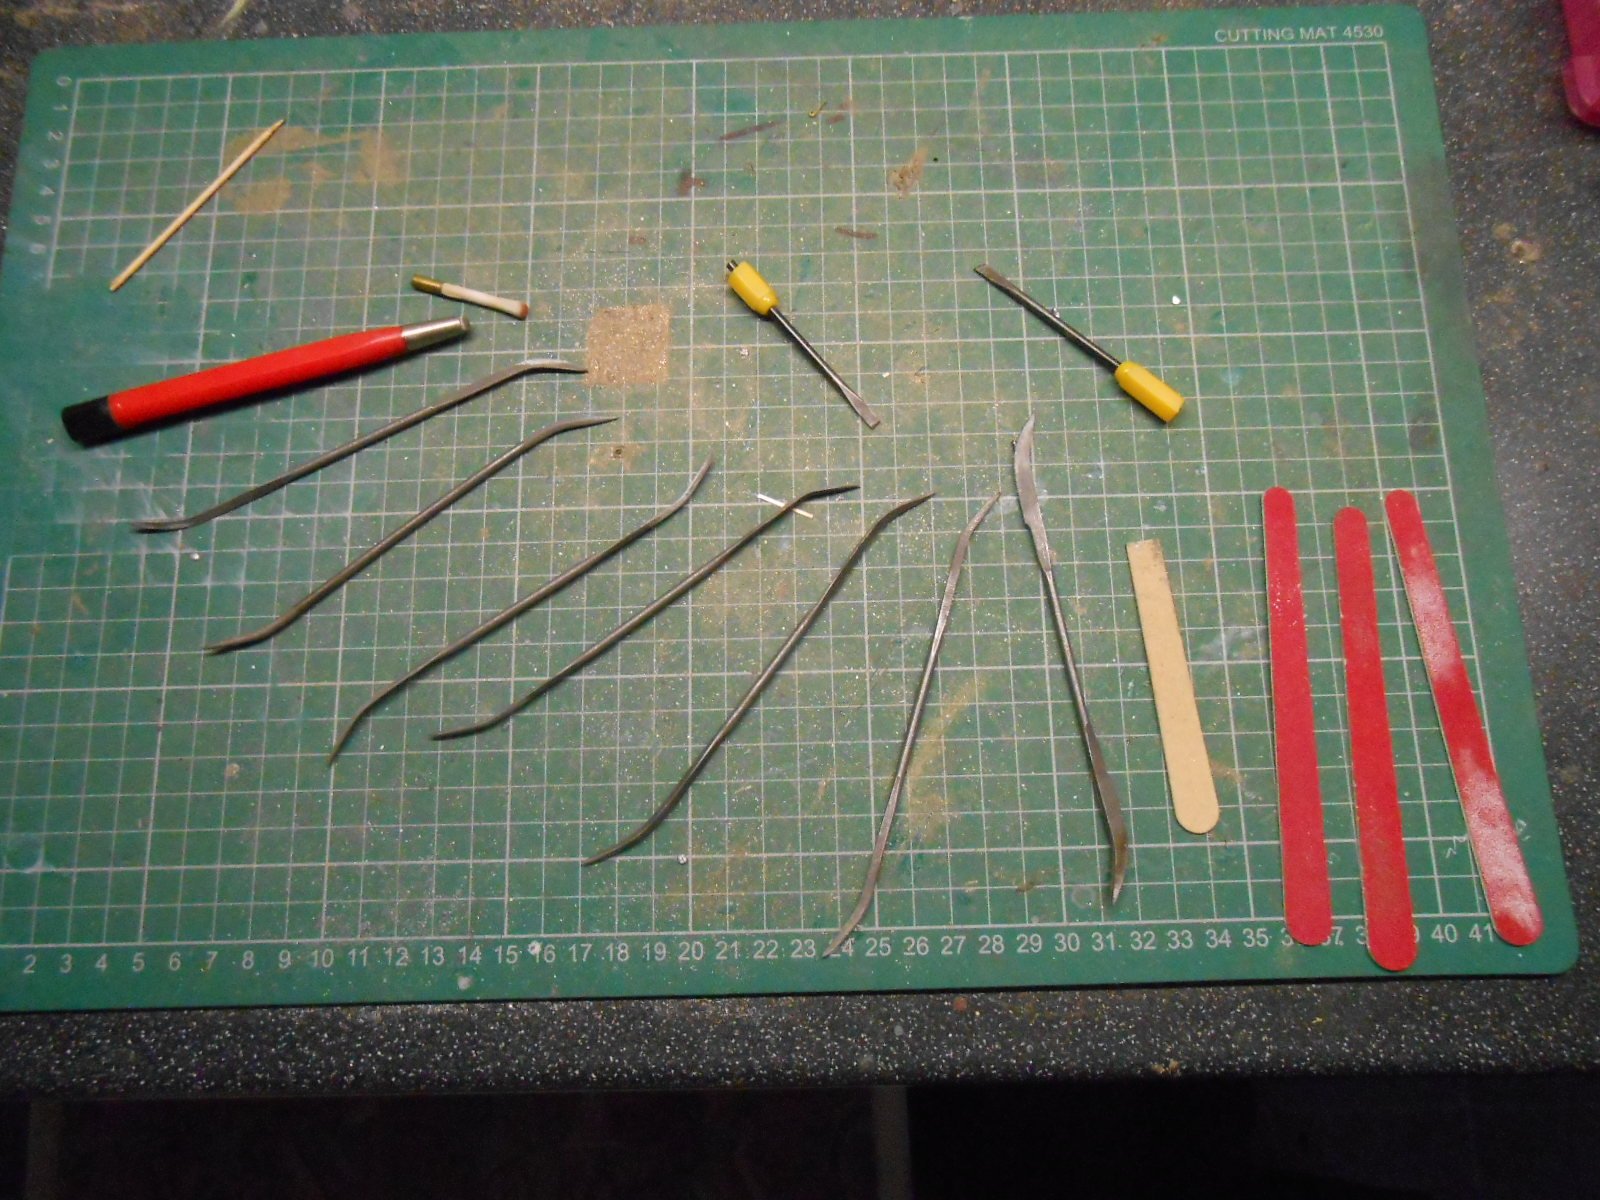
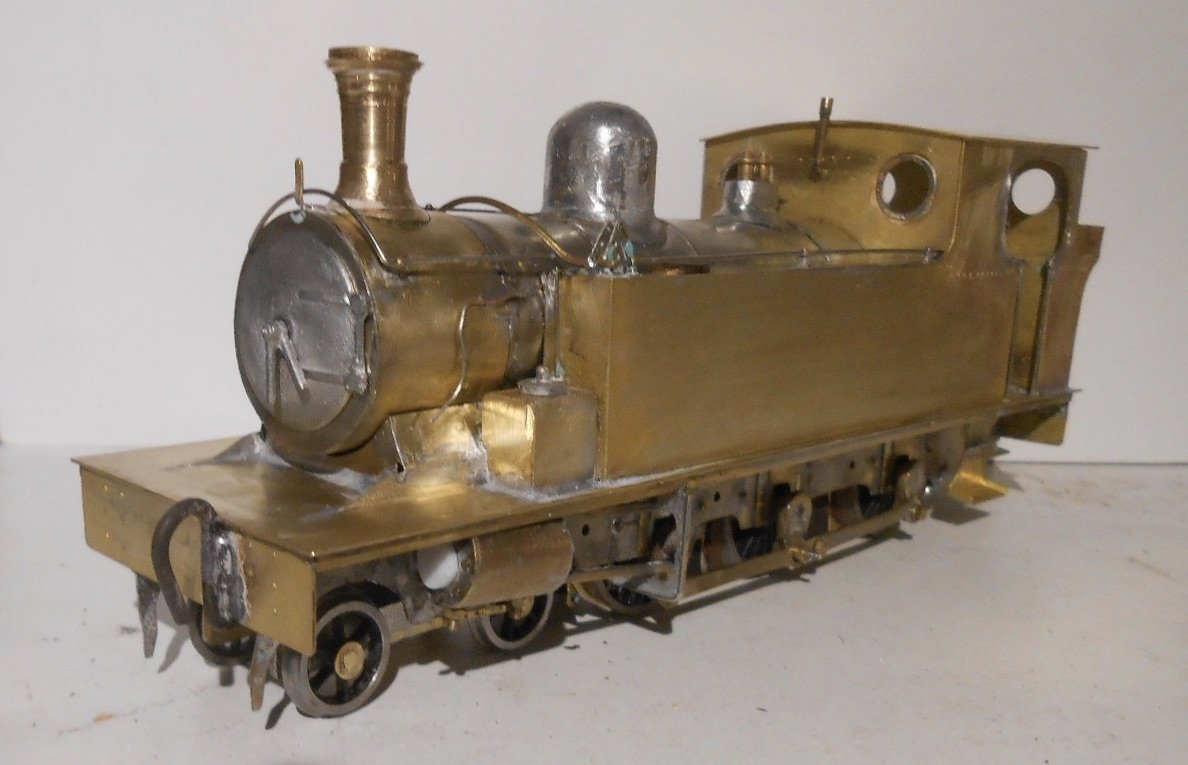
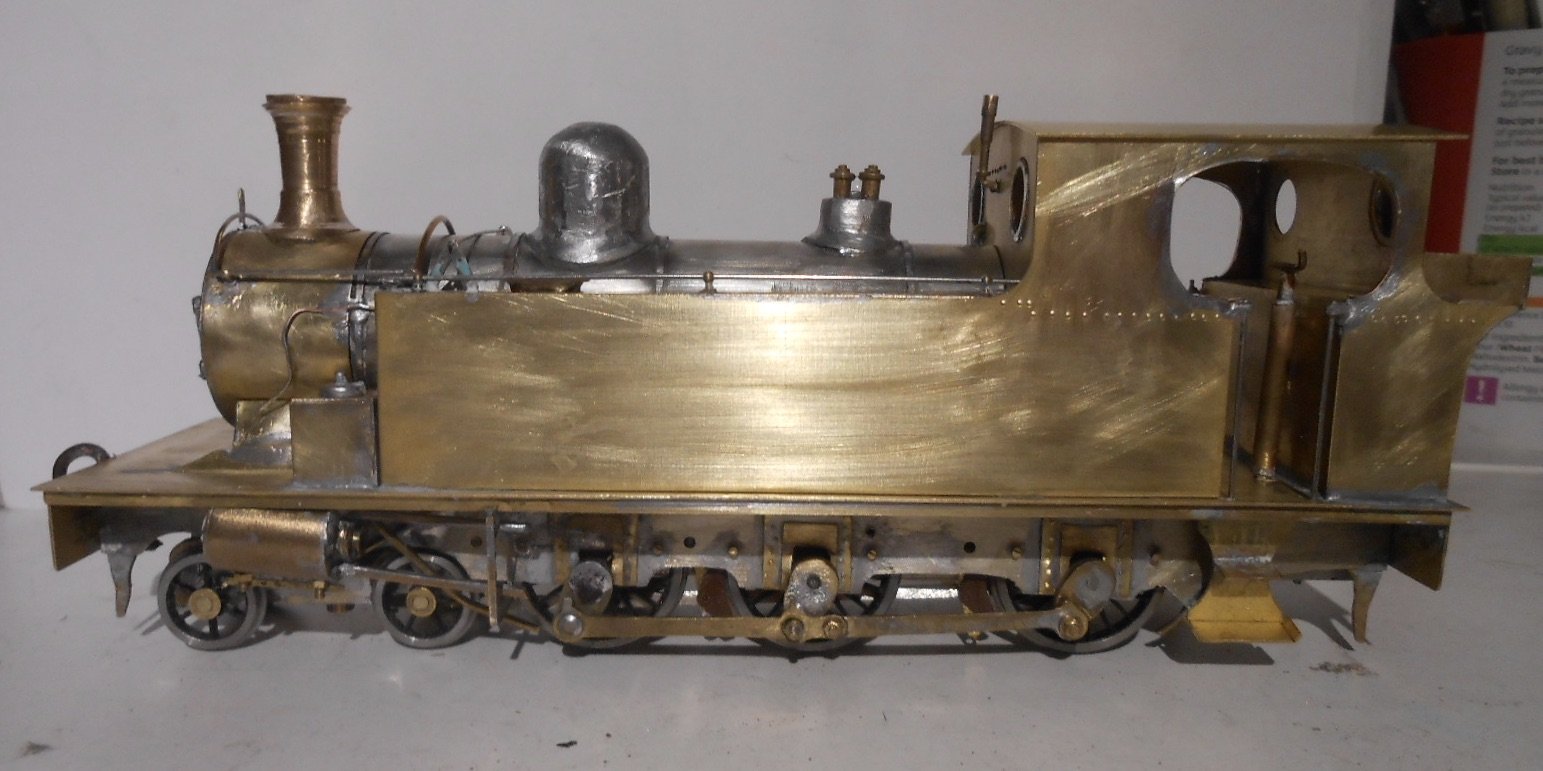
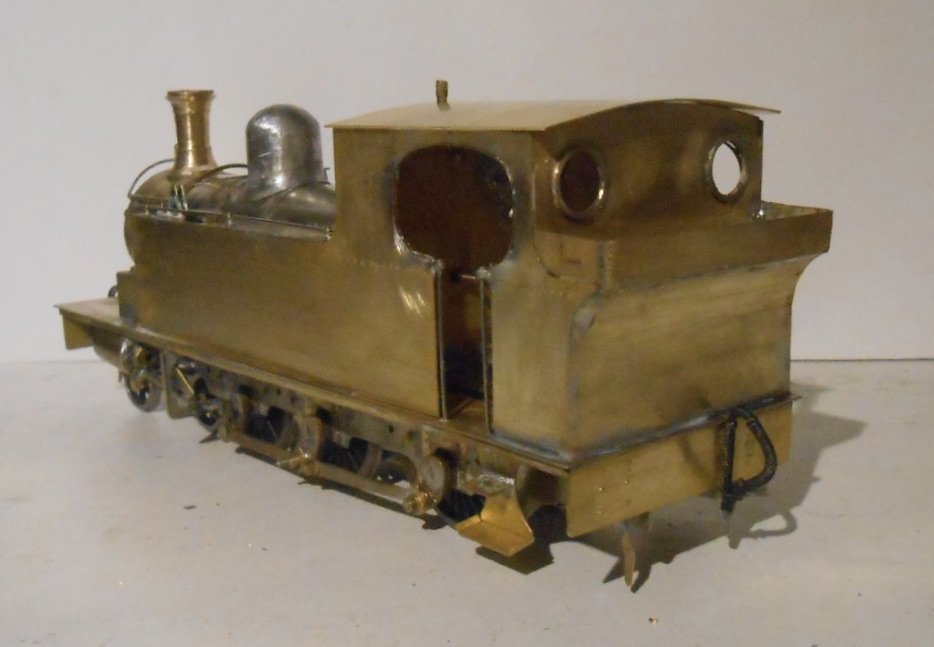
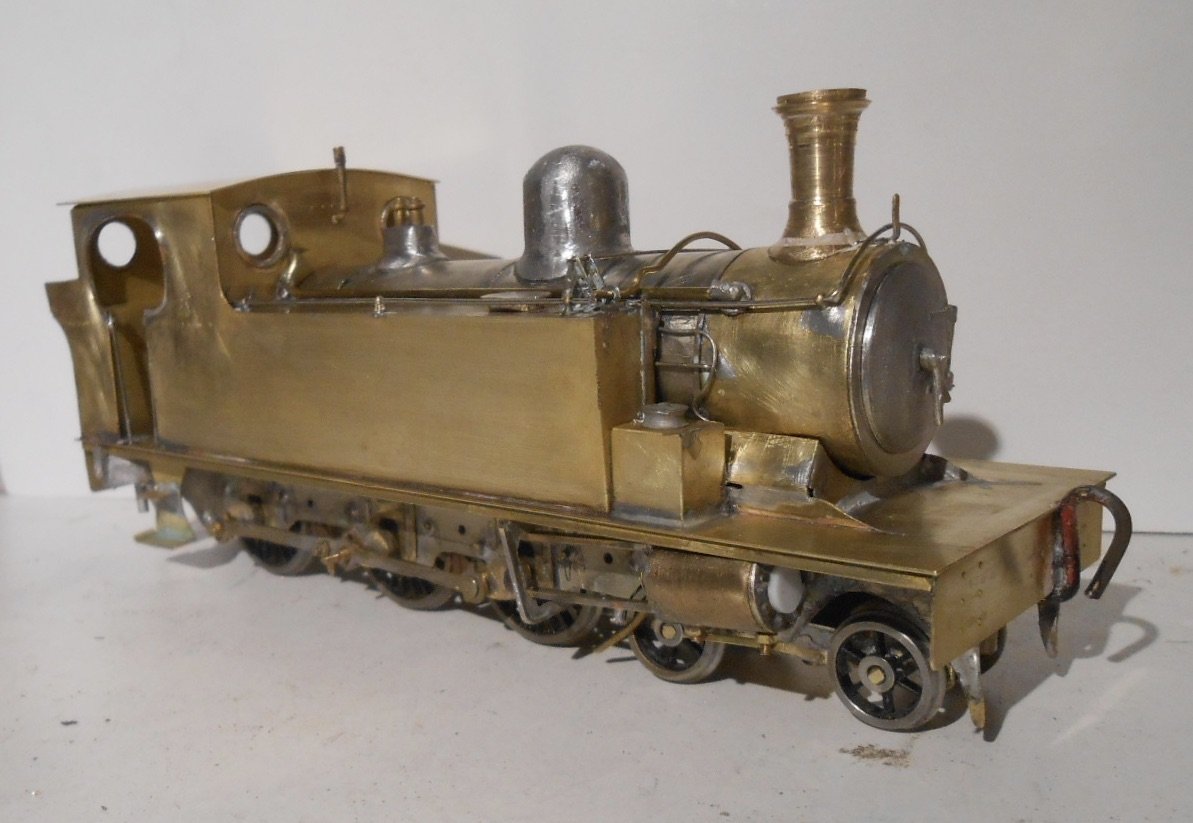
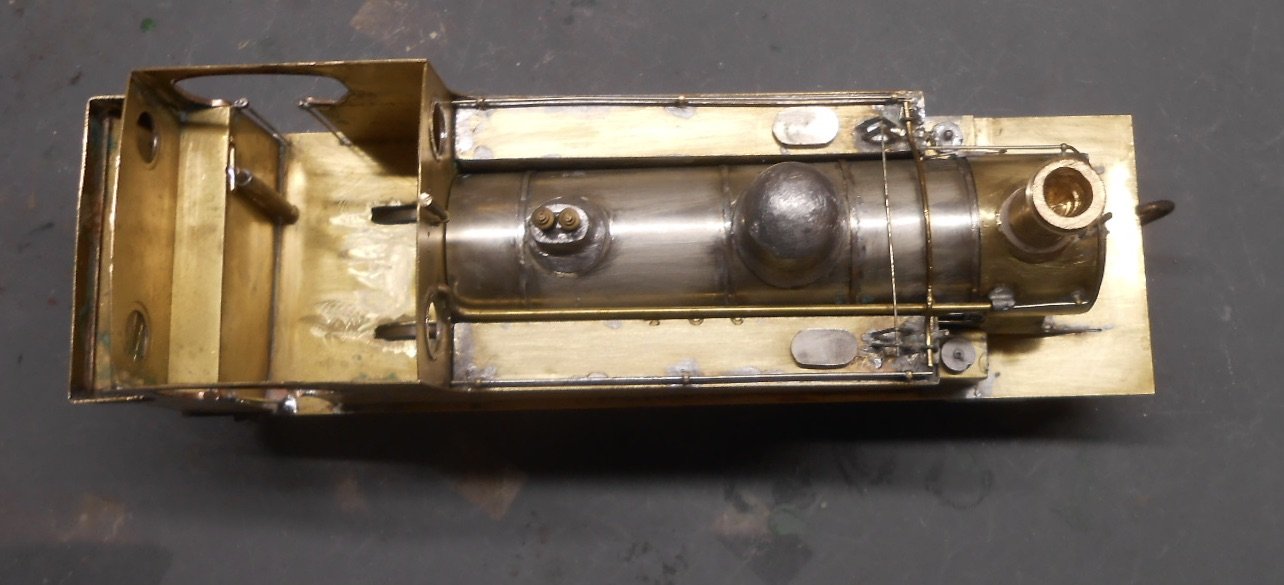
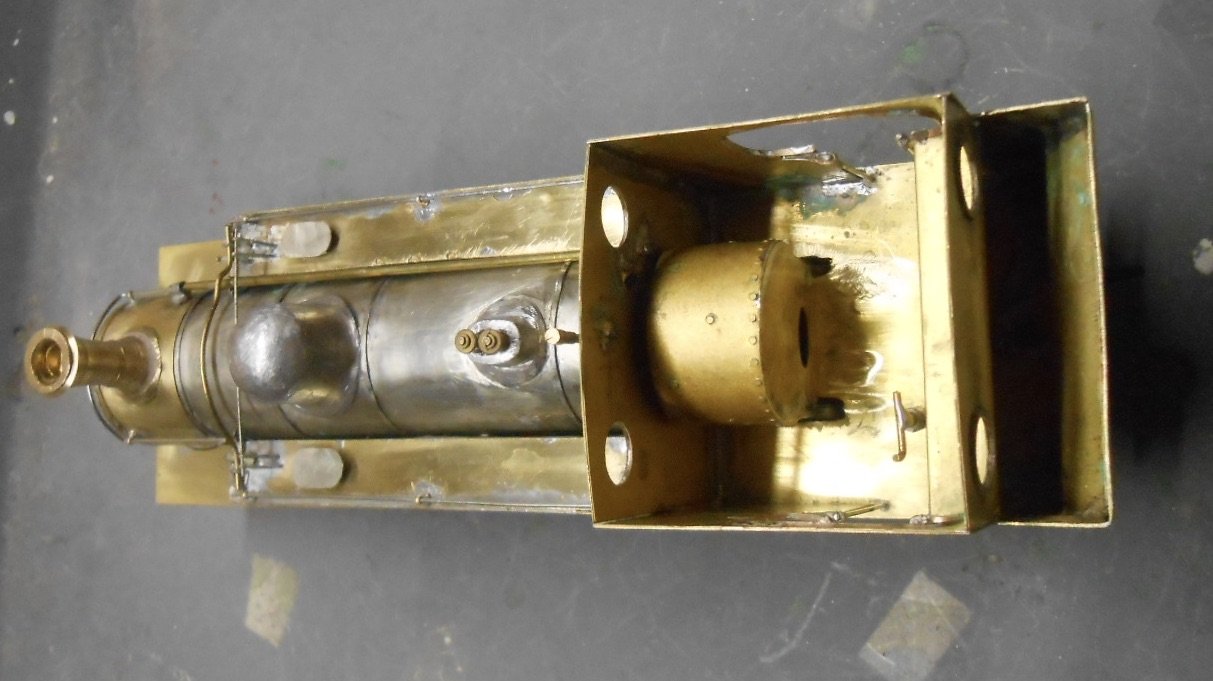
Have been adding various bits and pieces this week - a case of studying as many photos as you can, because a lot of stuff doesn't make it into a line drawing, let alone a Worsley etch! In no particular order I have: tidied up the smokebox saddle, filling in gaps with thin brass sheet and solder added the four cab handrails, cursing myself for cutting off the thin strip of brass in the space. Had I just cut it in the centre, it would have been perfect for a simple fold back around the top of each handrail instead fiddling around with tiny bits of brass strip handrails along the tank tops fitted bunker extension pieces: on three of the class, it was the usual coal rails, but No4 had them plated over, so this is what I've done added vacuum pipes, from the spares box tank filler caps, made by adding a thin oval of nickel silver to a thick oval of brass smokebox lamp iron, simply made from a piece of bent brass strip cab beading, from phosphor bronze strip cab spectacle plates - thankfully in the etches, because they would be a swine to make otherwise a white metal brake cylinder, from the spares box various pipe runs along the boiler from cab to smokebox various operating rods, mostly I'm guessing for the sanding gear The cab interior still needs to be done, but have put in an order to Laurie Griffin Miniatures for a suitable set of castings, plus a sset of loco jacks for the footplate and something to represent the curious spherical valve [taps? sticking out of the front of the sand boxes. I'm also pondering on couplings, having come across the Zamzoodles, which are working chopper couplings and would really look the part. However, the curse of the turntable makes them problematic for shunting mixed and goods trains because, like Dinghams and others having two hooks together is not recommended, so I may yet be sticking with Kaydees. So, while waiting for my orders to arrive, have started on the Great Clean Up, prior to the first 'witness coat' of primer & then however many further sessions of filing, scraping and sanding in order to get a decent paint finish. The various implements of torture are shown below: The set of 'whiffers' [variously shaped needle files] are always useful, as is the dreaded glass fibre brush meaning I can look forward to the usual nasty little splinters in my fingers for the next few days. As already mentioned, the loco is going to be No4 and a correct set of Barclay builders plates have been ordered from the Light Railway Stores for well under a tenner [including postage], which is great value. I'd been looking forward to creating that rather splendid Swilly [very] dark green, but Patterson's book says the Barclays were black with yellow lining for No4, though if anyone knows different, please let me know. The remaining pictures show the loco ready for that first witness coat, so it will soon be goodbye to all that shiny brass and nickel silver.
-
Oh my. Well done Ken. This is where the 3D thing can be so effective, because you have already done all the hard work. Respect!
-
Alternatively get the Alphagraphix card kit of the Sligo brake van, for about four quid, in 7mm scale. They also do various other wagons for the same price.
-
So reassuring when things work as they should. Never heard of that gearbox tab before, yet so simple. Am inclined find a way of adding it to future builds. A couple of bits of brass, soldered to the outside of the gear box, engaging on a bit of brass wire fitted between the frames might do it.
-
Software Suggestions for Converting Logos to SVG Format?
David Holman replied to DJ Dangerous's question in Questions & Answers
Will such a thing work in making your own transfers? I wil be needing some L&LSR logos. -
Amen to the above! Rule number one - never, EVER, start with a loco kit. A wagon much better and you could do a lot worse than JM's products. The golden rule of soldering is undoubtedly 'cleanliness comes before godliness' - hence Galteemore's suggestion of the glass fibre pencil. A necessary evil as you will forever be getting bits in your fingers. Flux is essential too - I use Fry's Powerflux paste because it stays where you want it, though it does leave a residue to clean up afterwards and other brands are certainly available! While I use 240 degree multicore solder for electrical work, my go to for kit making is 145 solder, which is ideal because if you want to solder several pieces close together, it can be useful to use different temperatures - I've got 80 and 188 as well for that very reason. However, no need to get ahead of yourself. Practice on bits and pieces first. Soldering can be seen as a bit of a black art, but it just requires care and the right tools. Another one is the iron itself - you will not be able to solder large or thick pieces of brass together with a 15 watt iron. I use mine for layout wiring, but have a 50 watt one for loco and kit building - though I work in 7mm scale, where my 100watt iron also comes in useful. Another tip - try not to pick up the iron by the hot end. Seems obvious, but we've all done it - and it really hurts!
-
Always sad to see institutions like this go, especially as it is because of the B word. There are still a few big guns around, if the adverts in Railway Modeller are to be believed, not least Kernow, who have been expanding of late. Something that is also very noticeable is the rise of the "We buy your model railway" concerns, which shows how the second hand trade is booming and there are a few folk happy to buy up stuff to sell on. Mind you, when you look at the cost of brand new, that is hardly surprising. As a builder, rather than a buyer of rtr, the loss of folk selling components is just as worrying. Maplin was the easy go to for electrical bits and pieces, while the gap left by Eileen's still hasn't been filled. As for getting hold of fine metal strip, it is becoming almost impossible without going on line. Such is progress...