David Holman
-
Posts
4,359 -
Joined
-
Last visited
-
Days Won
117
Content Type
Profiles
Forums
Events
Gallery
Blogs
Everything posted by David Holman
-
Lovely stuff Ken and done with your usual panache for detail and neatness.
-
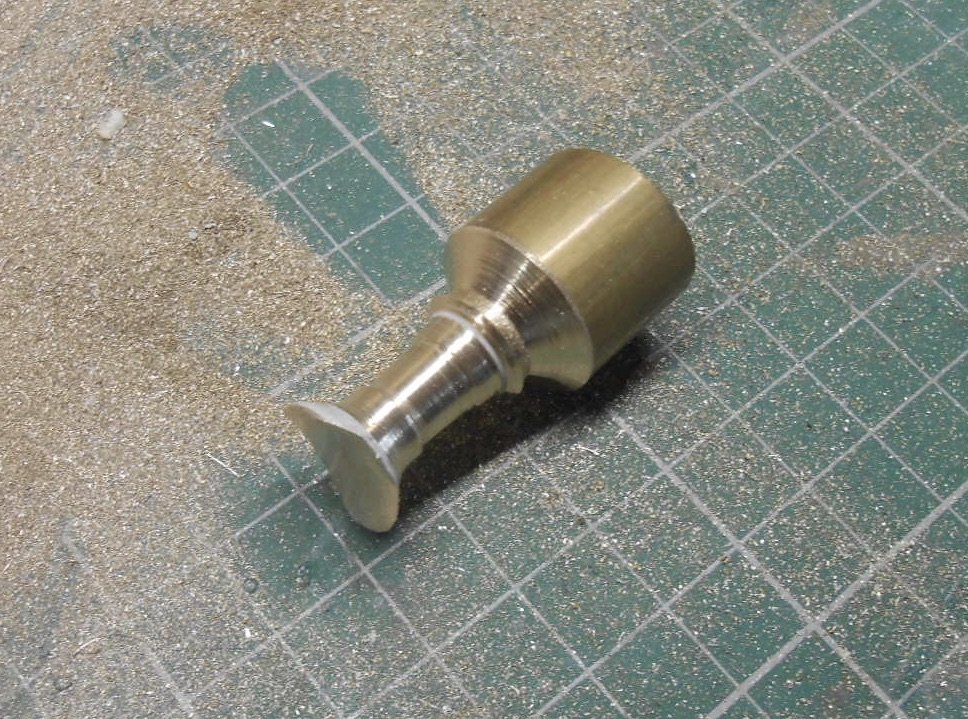
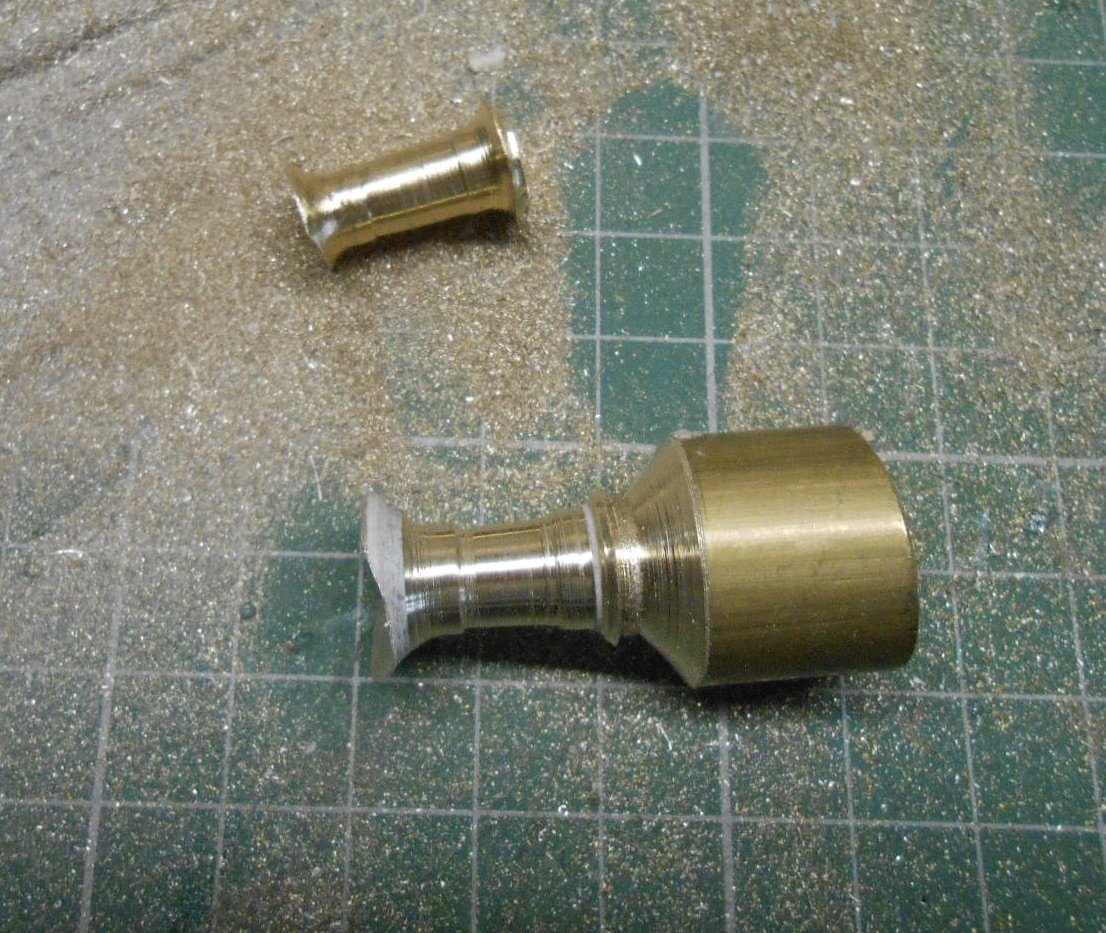
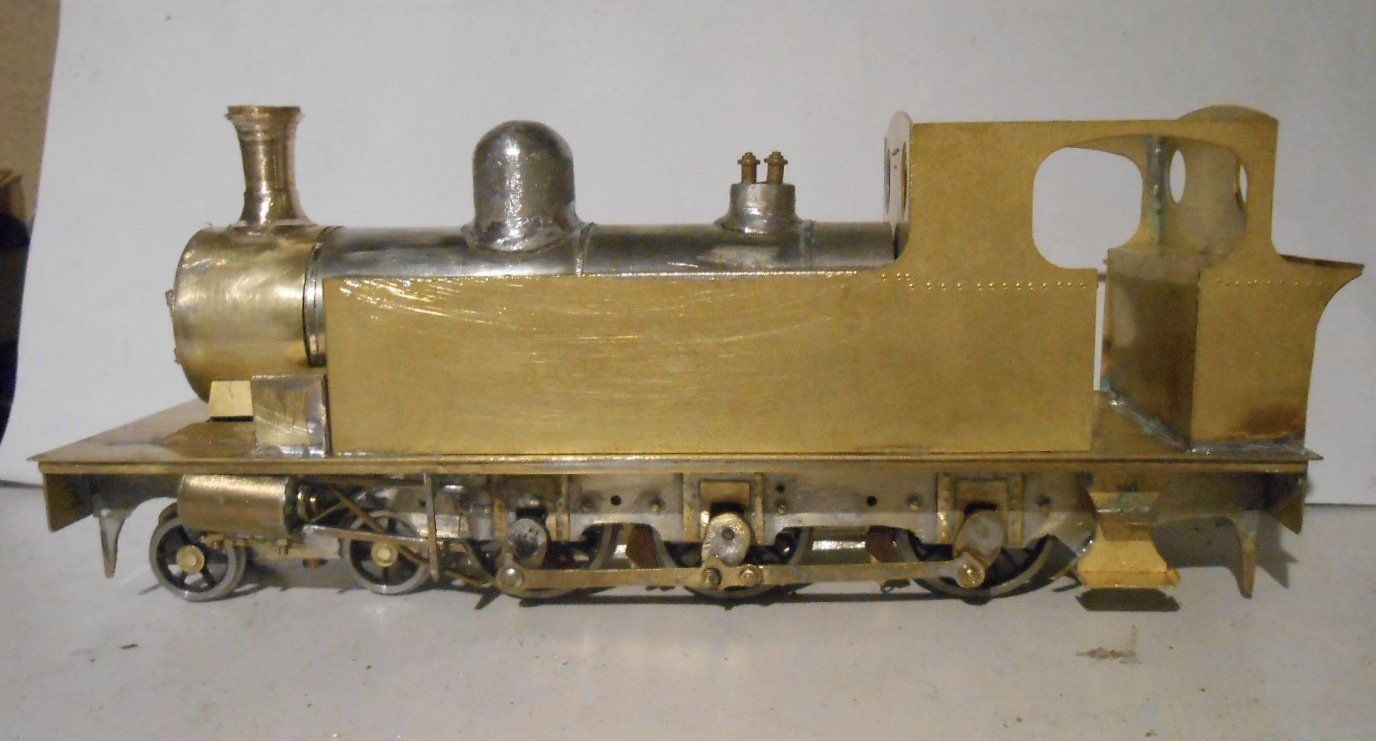
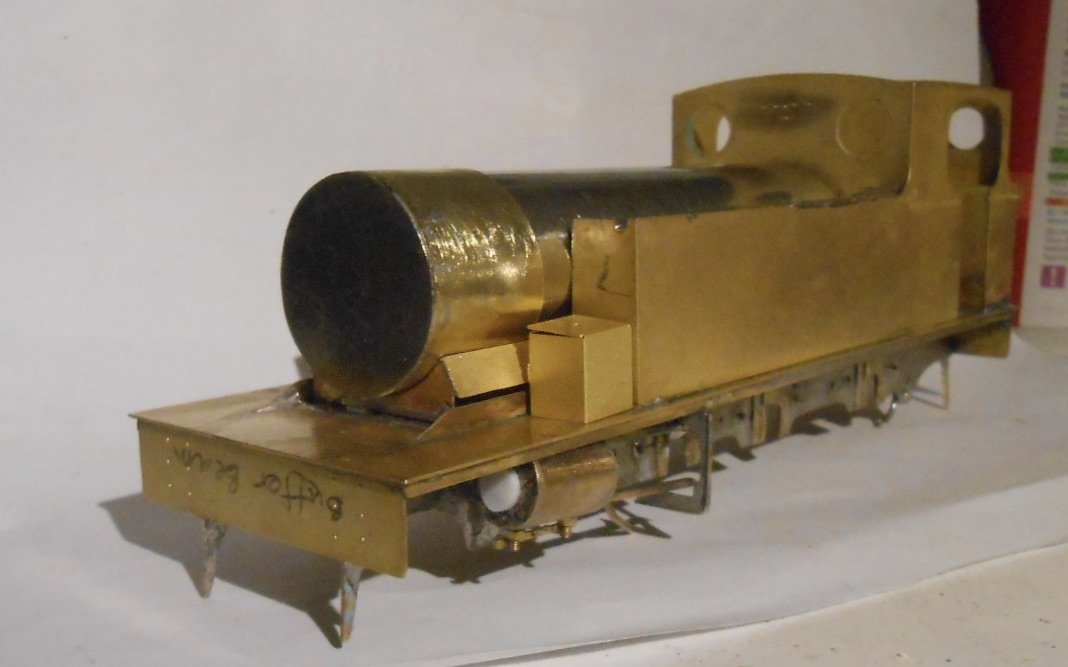
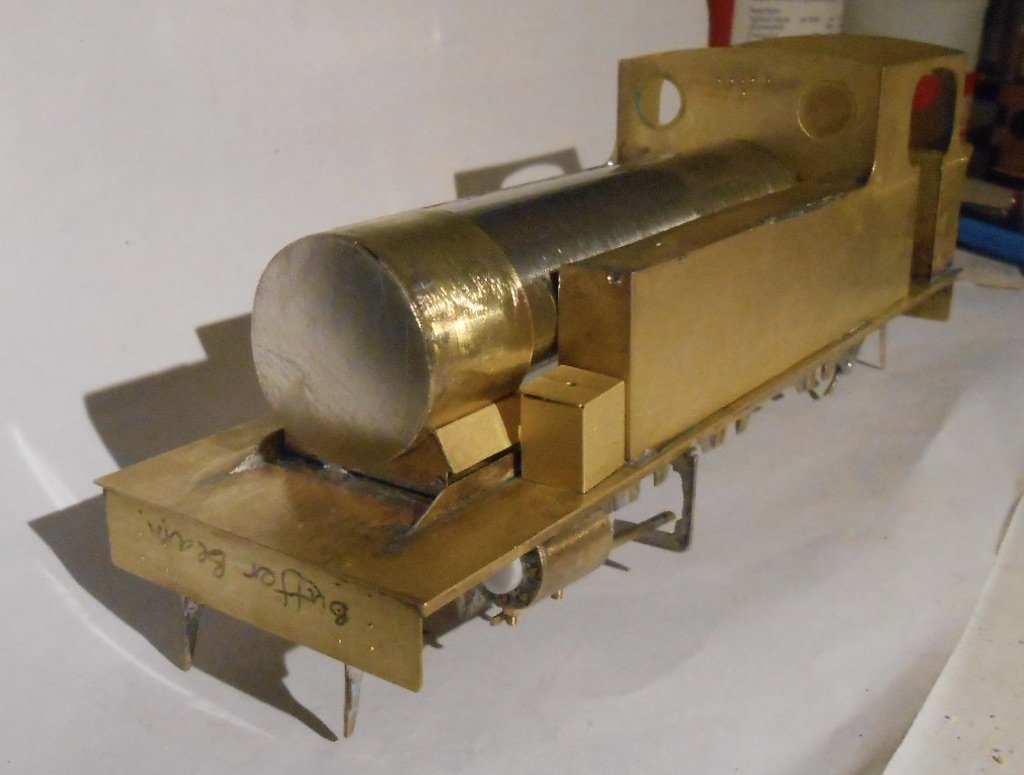
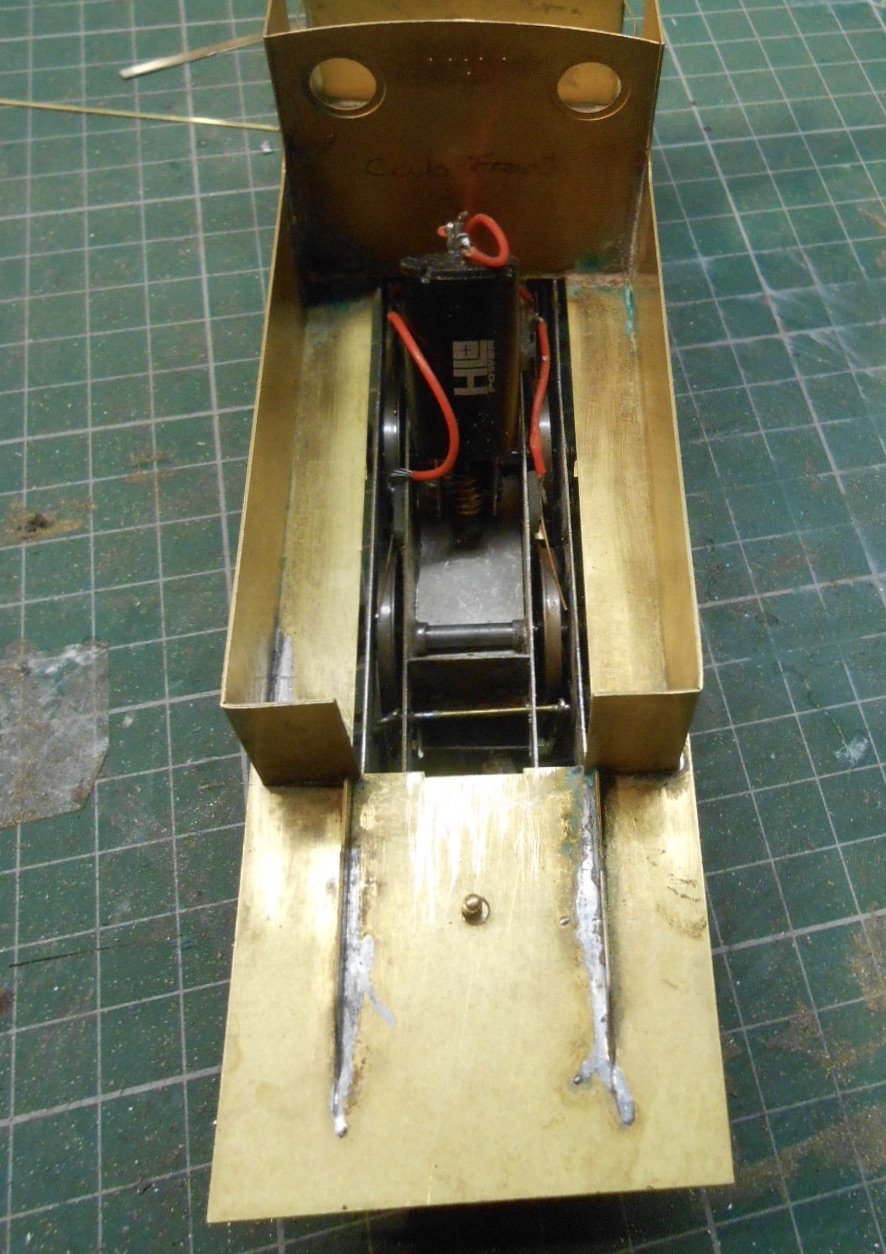
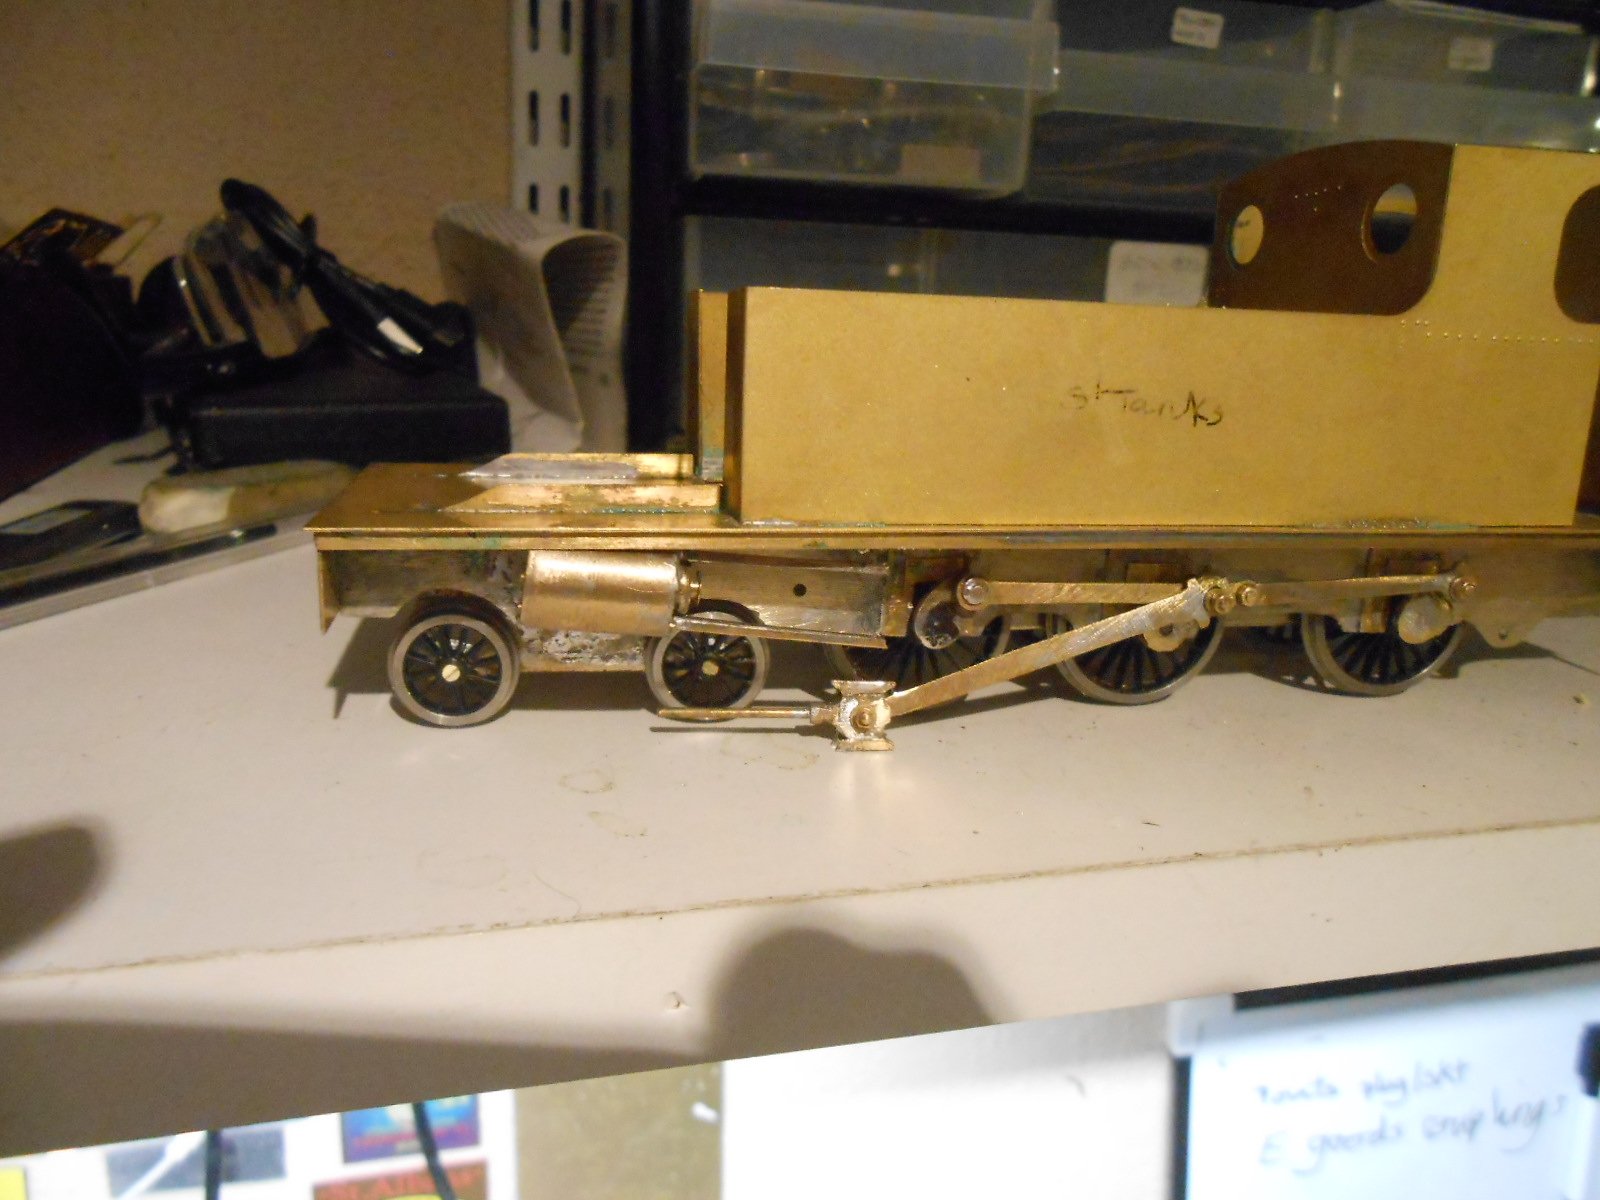
Slow, but steady progress this week, adding most of the remaining Worsley etches [cab steps and sand boxes], then making the major boiler fittings. I also had to cut a section out of the boiler, so it would slot over the motor-gearbox. Dome, safety valves and smokebox door, all came [to greater or lesser degrees] from the spares box. As a kit builder for many years, it is amazing how many bits you accumulate, though I've no longer any idea which kits they came from! The smoke box door seems about right for two of the four Barclays - the other two had a thicker version with the brackets much closer together, but beggars can't be choosers and I found a suitable 'dart' too. A point to remember here is that one of the handles should always be pointing at six o'clock. The dome is a white metal casting that was the right diameter, but just needed shortening a little, while for the safety valves another casting had the valves cut off and replaced by two brass castings. A curious thing about both items is that, by the 1940s, they were no longer is the positions indicated on the drawing - both having moved forwards along the boiler. Annoyingly, this meant moving the boiler bands to accommodate them. Not sure if they are in the exact position, as I don't have side on view of the loco, but three quarter views enable you to line them up with the driving wheels, so this is what I have done. No luck in sourcing a chimney, so out came my micro lathe and some round brass bar. My first attempt turned out to be too slim, though it may well be adaptable for one of the Swilly 4-6-2Ts I want to build. Came close to making a bit of a Horlicks on the second attempt too, but managed to rescue it via the application of some car body filler and then using various files in the lathe to get the shape right. After, a lot of work with a half round file to get it to sit nicely on the smokebox. As per my usual practice, all these fittings are fixed with 5 minute epoxy, which is ideal in terms of getting the positions right.

-
GER J15s are pretty engines, but to my eyes seem a long way from an Irish one. For one thing the dome on the former is well forward, quite close to the chimney, whereas it is well back on a 101. Very different tender outline too, while the loco body shape is likewise very different. However, far be it from me to spoil anyone's fun, it's your railway, to do with as you please and a J15 is a very nice model. Nevertheless, an alternative thought might simply to assume one or more somehow found their way to Ireland, after all, several went to France in the Great War and in their long lives they proved themselves to be very useful, go anywhere engines. Feel sure there must be a space in the CIE numbers list for a couple. Meanwhile, such a scenario might also beg the question of what else could have made its way over the water? Ideally, any steam loco with a high footplate and no splashers, probably. Stainer 8F, or any of the Standards? Exits, stage left, pursued by a bear...
-
Nice, very nice! Just as well you are not modelling 5'3 though, as a fair bit more surgery would be needed. From what I remember, even the full sized version had issues with wheels and splashers because of the broad gauge.
-
Know little to nothing about these wagons, but that weathering looks very good indeed.
-
Yep, the colours look really good.
-
Splendid and as you say, fiendishly difficult. A coach is a box (albeit with many add ons), a steam loco is a box with a boiler (ok, sweeping generalisations for both), but a railbus is another level in terms of all the complex curves and glazing. Road vehicles likewise, which is why we don't see many scratchbuilds of such things. Seriously multimedia and great to see a whole host of techniques brought together. Very neat on the trailer too and will have to look into the idea of a capacitor for my 2b. Shame they never ran the two back to back, Colonel Stephens style - it would solve the problem of turntables!
-
Many thanks, Brack. A couple of folk have sent me pictures looking down on the tanks, which confirm what you say. Also a reminder to me to adjust the front of the tanks! Thanks also to you Ken, for your kind words. Just wish my soldering was a neat as yours! Worsley etches haven't been too bad for me, the Barclay set cost me £50 and the combined tank and cab sides saved a lot of awkward cutting out. For me the biggest problem is always trying to identify the parts. Don't expect instructions, but it would be nice to know what each etch is meant to be, because (to me anyway), they are not always obvious.
-
I wonder how many of us got a train set for Christmas!..........
David Holman replied to LARNE CABIN's topic in General Chat
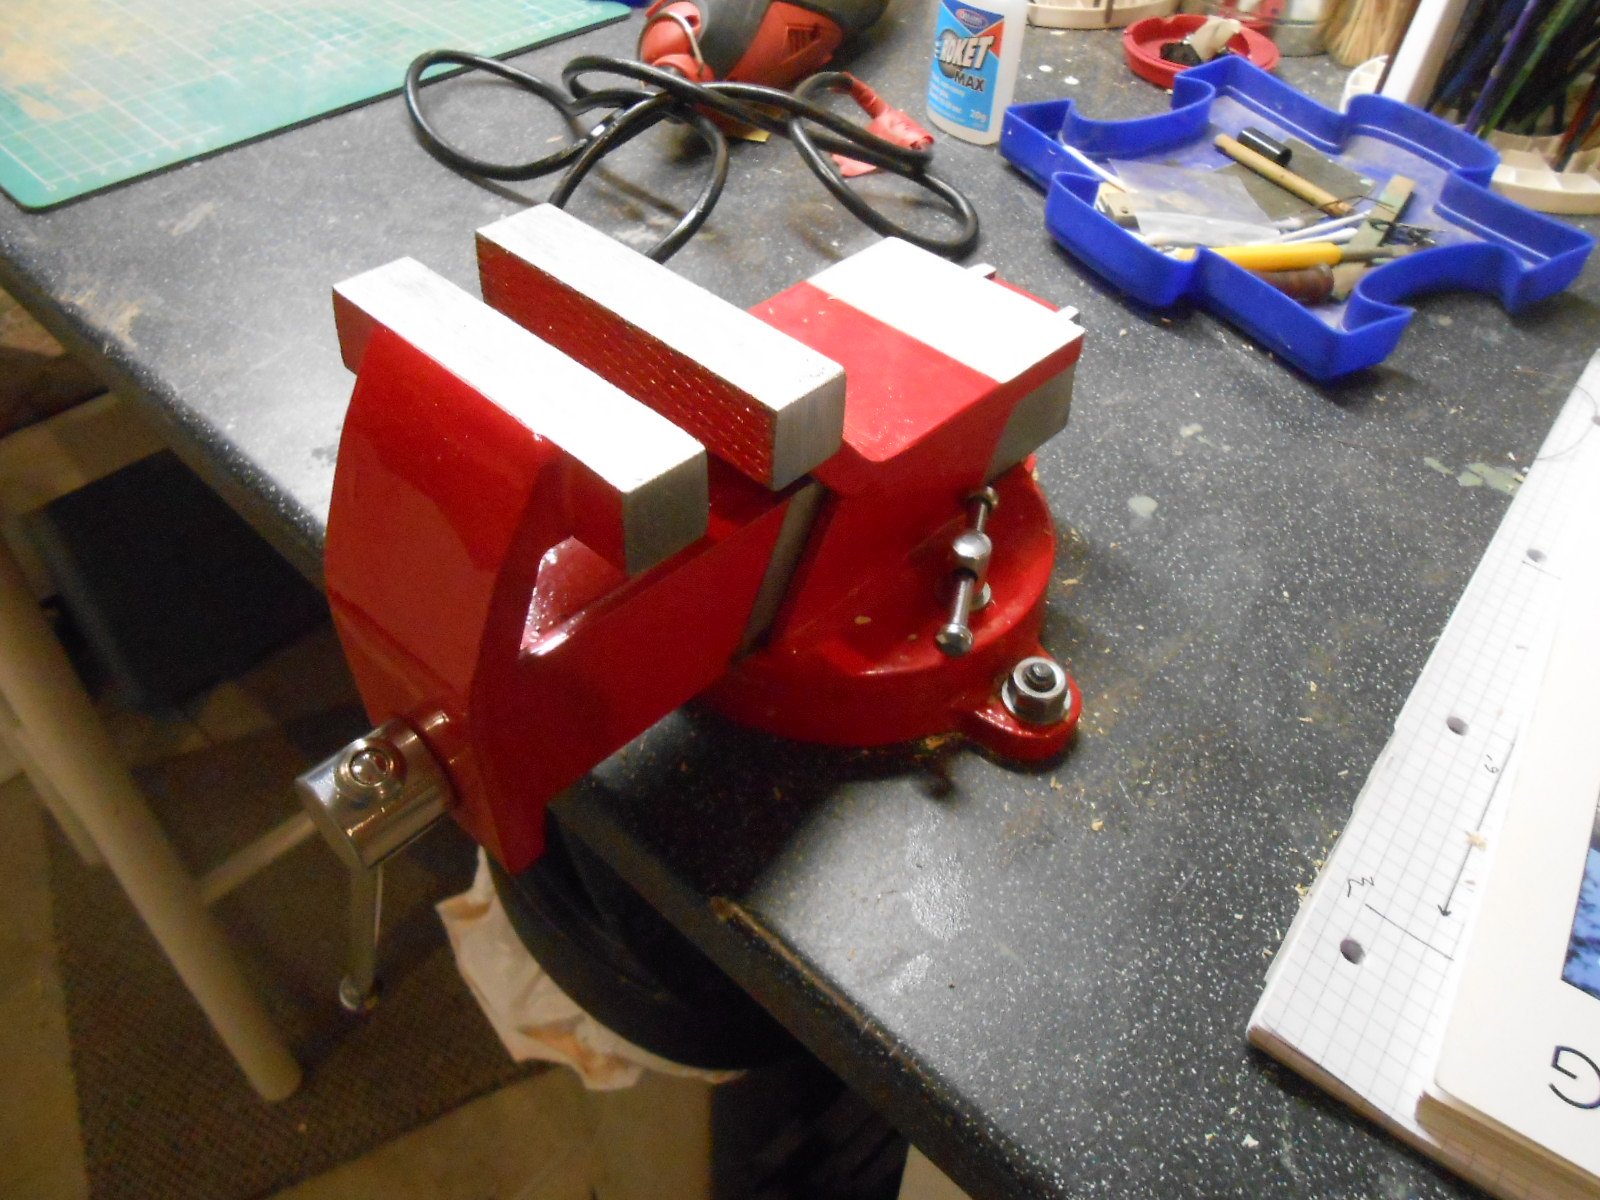
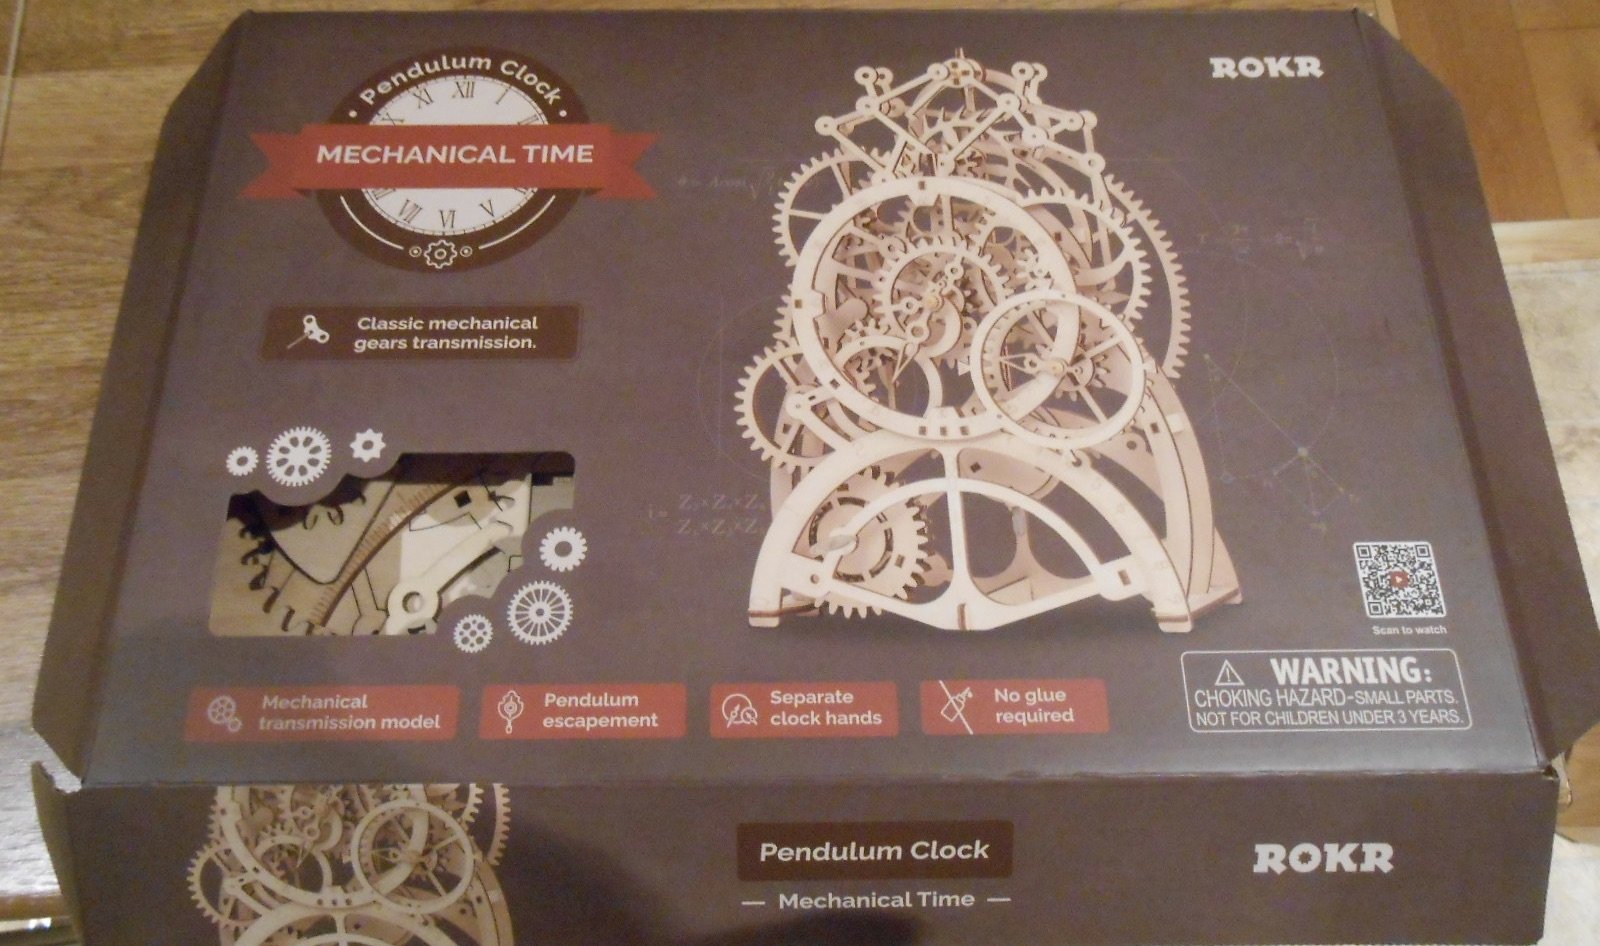
A [very] long time since I had a train set for Christmas and these days, my wife knows only too well that my model making tastes are decidedly niche. However, there is still stuff I can put in a request for and two things came up this year. First was a proper bench vice, the sort that needs bolting to the bench, instead of a basic clamp. And very nice it is too and is already being put to good use. The other item is a kit - one of those laser cut plywood jobbies that you can buy in garden centres this side of the water. It's a pendulum clock [or will be, hopefully], one of a growing range of models that require no glue or anything else in the way of tools, but plenty of patience and careful reading of the instructions. Love watching the Repair Shop on TV, so am copying horologist Steven Fletcher's method of keeping all the various parts and sub-assemblies in separate containers. Having always wondered how mechanical clocks actually work, hopefully I'm going to learn a bit more about them.
-
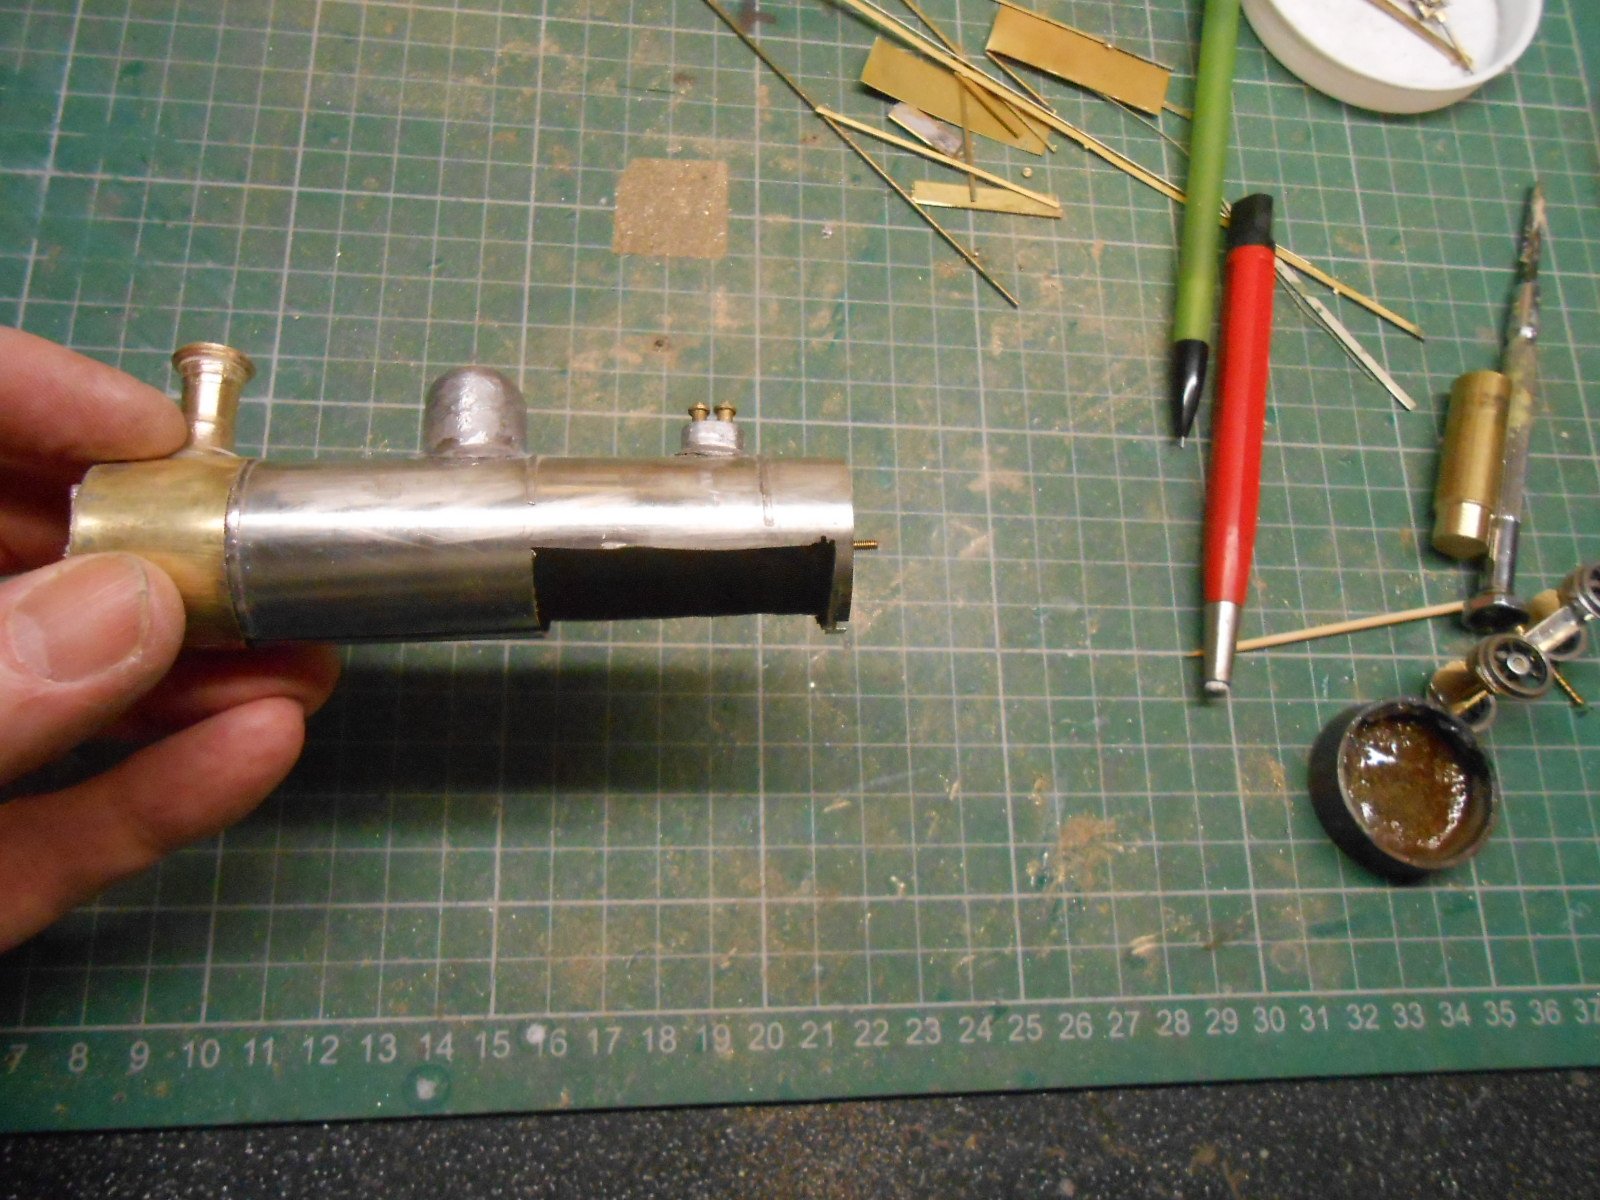
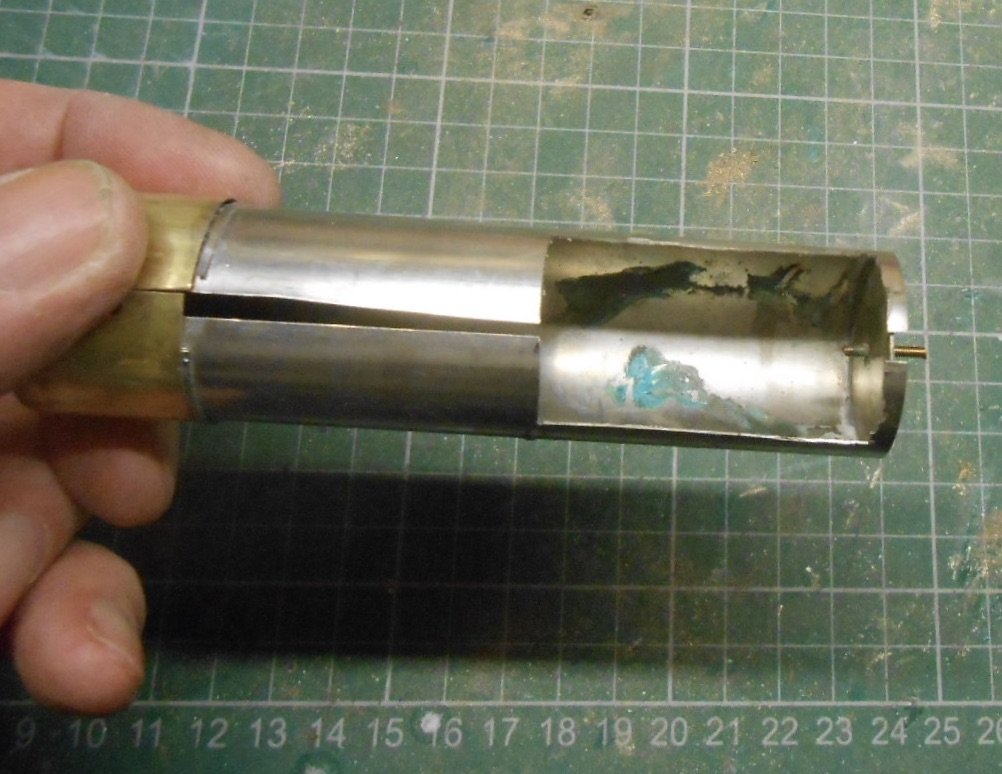
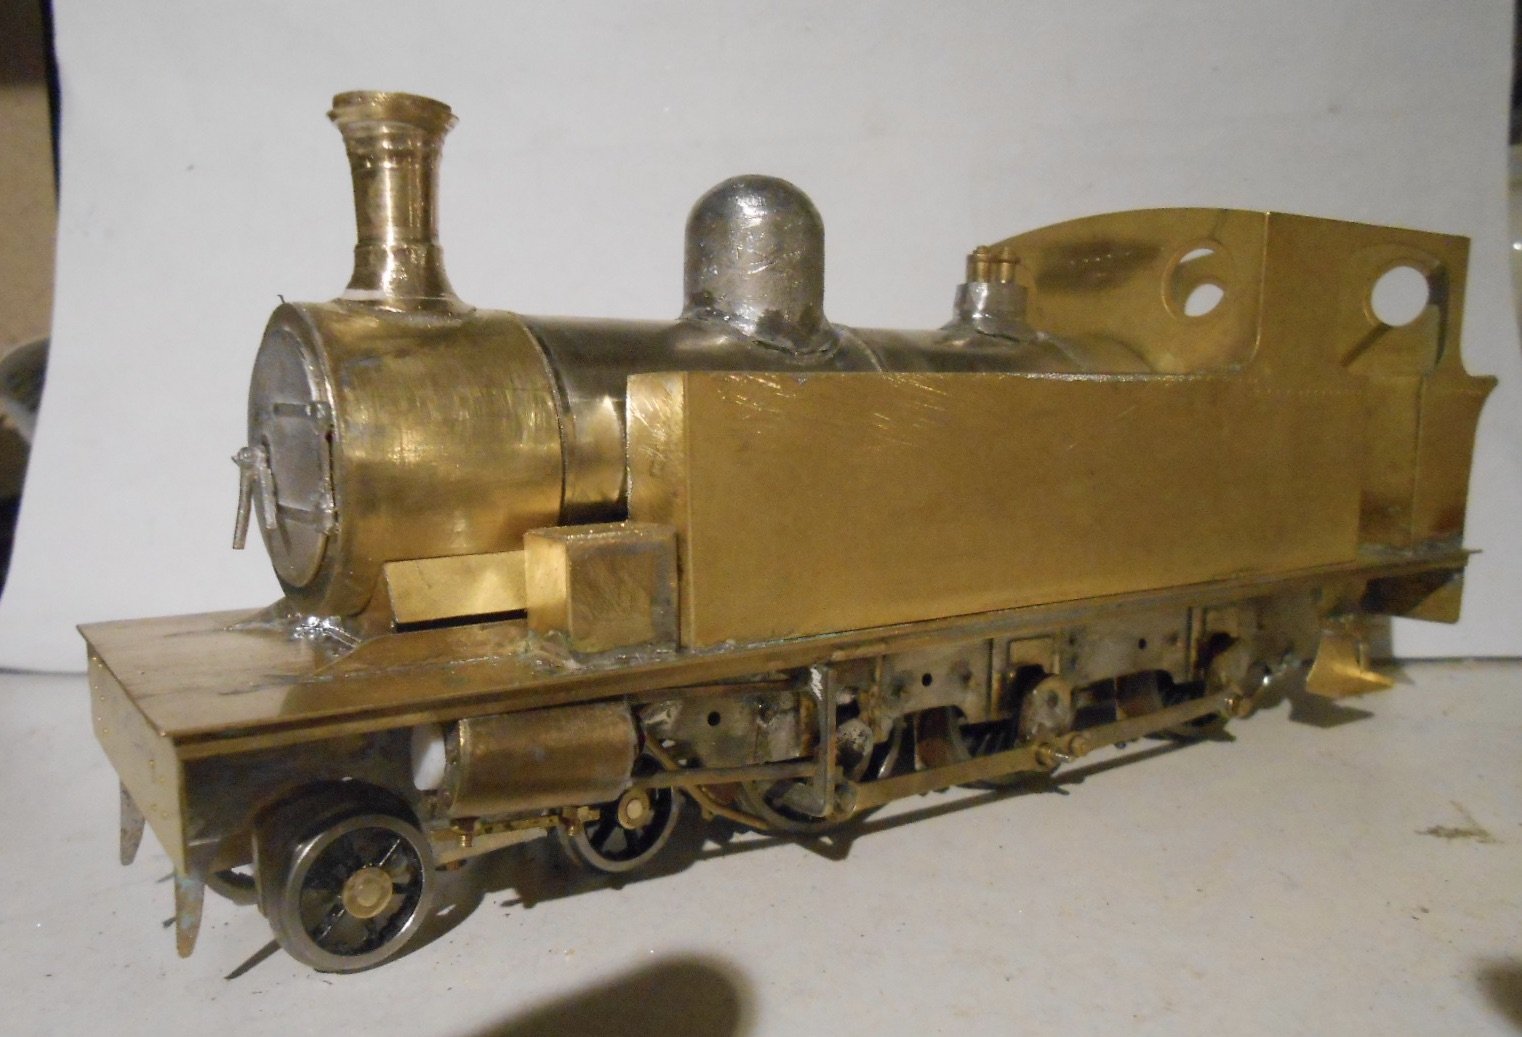
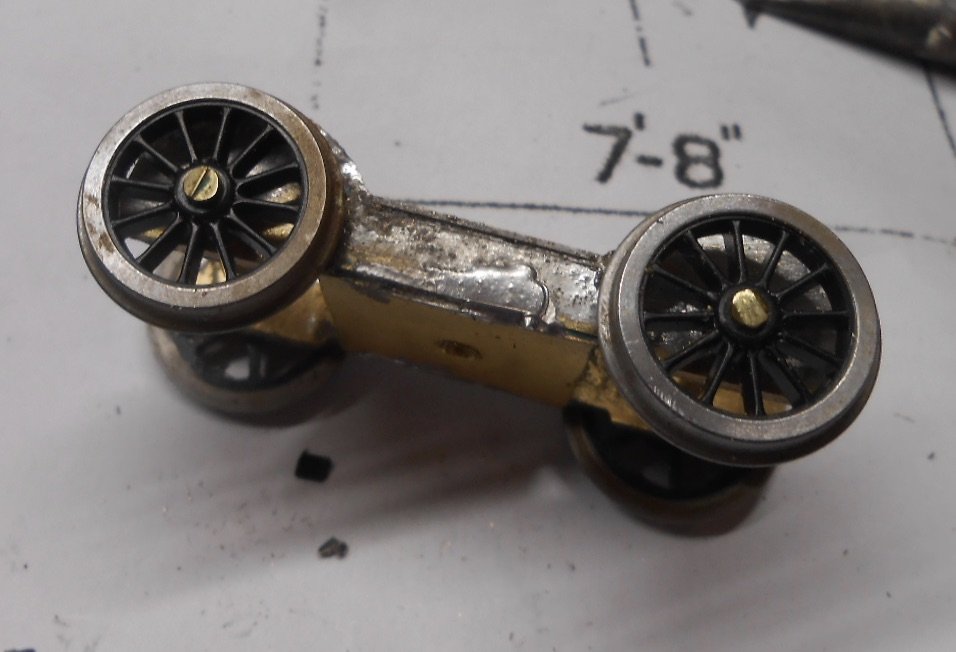
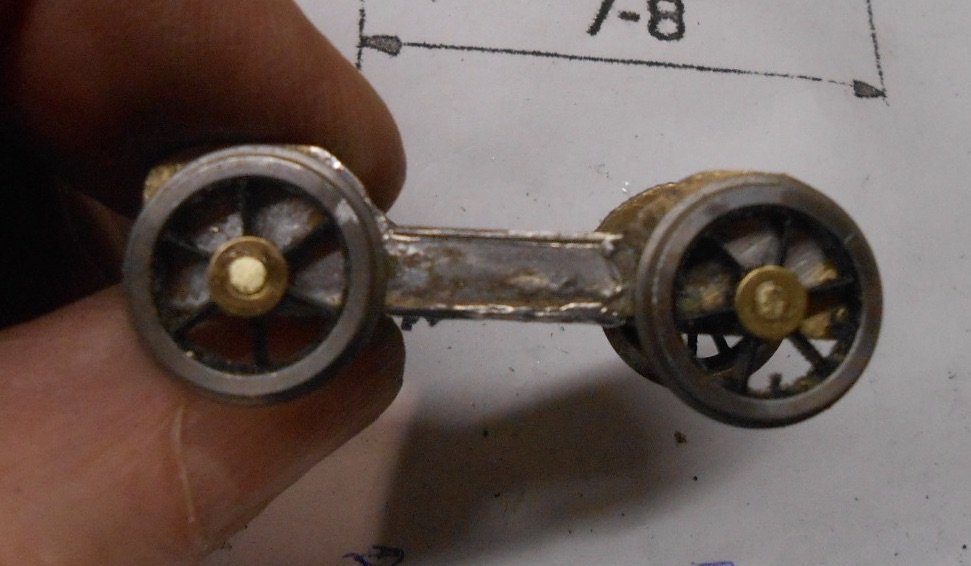
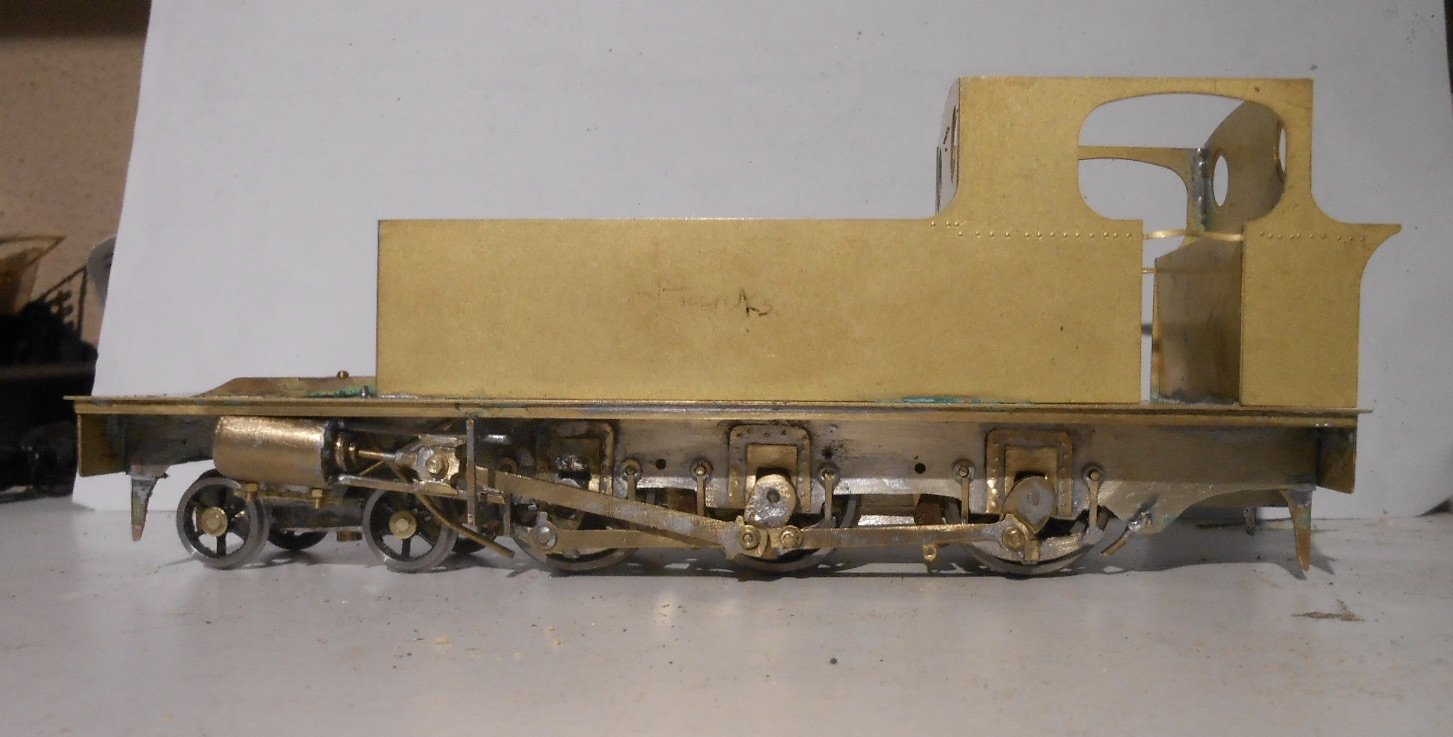
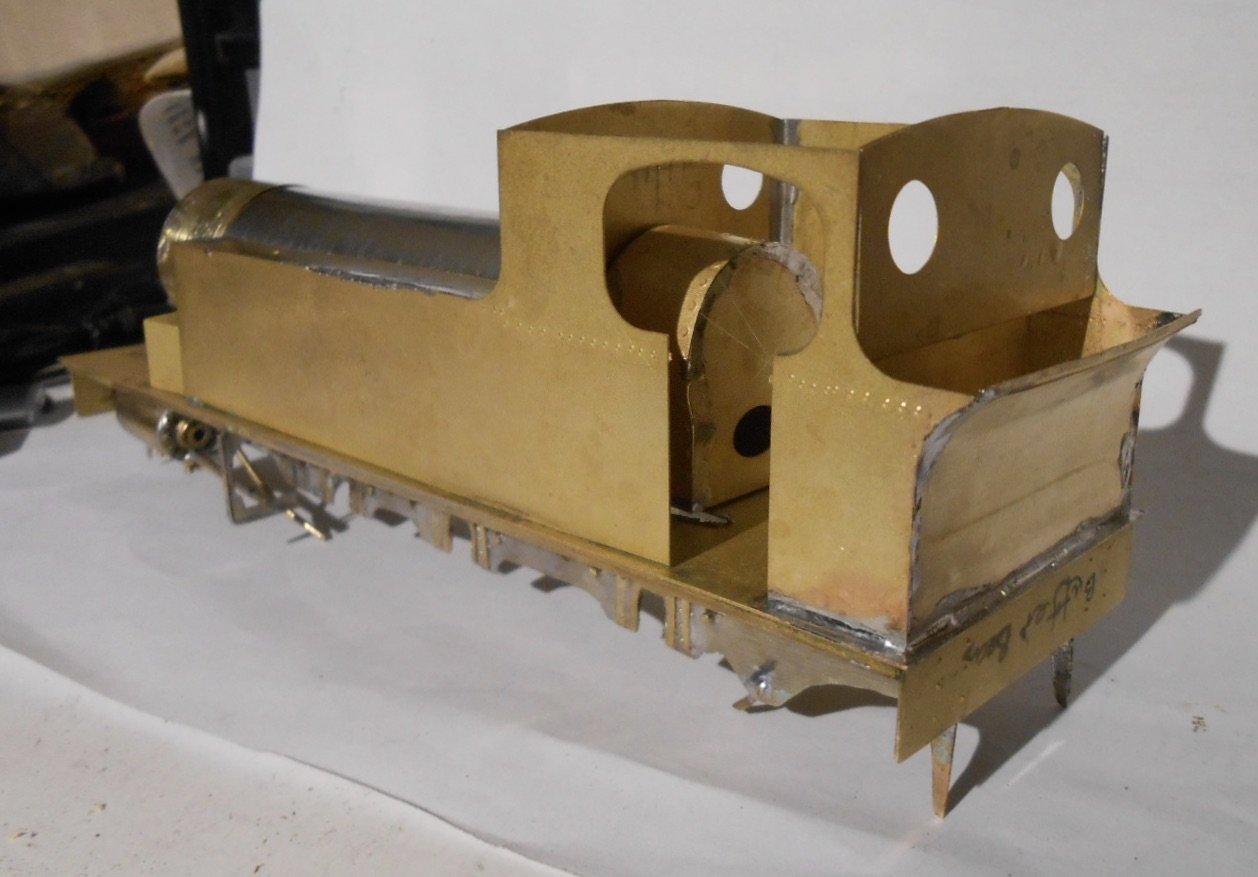
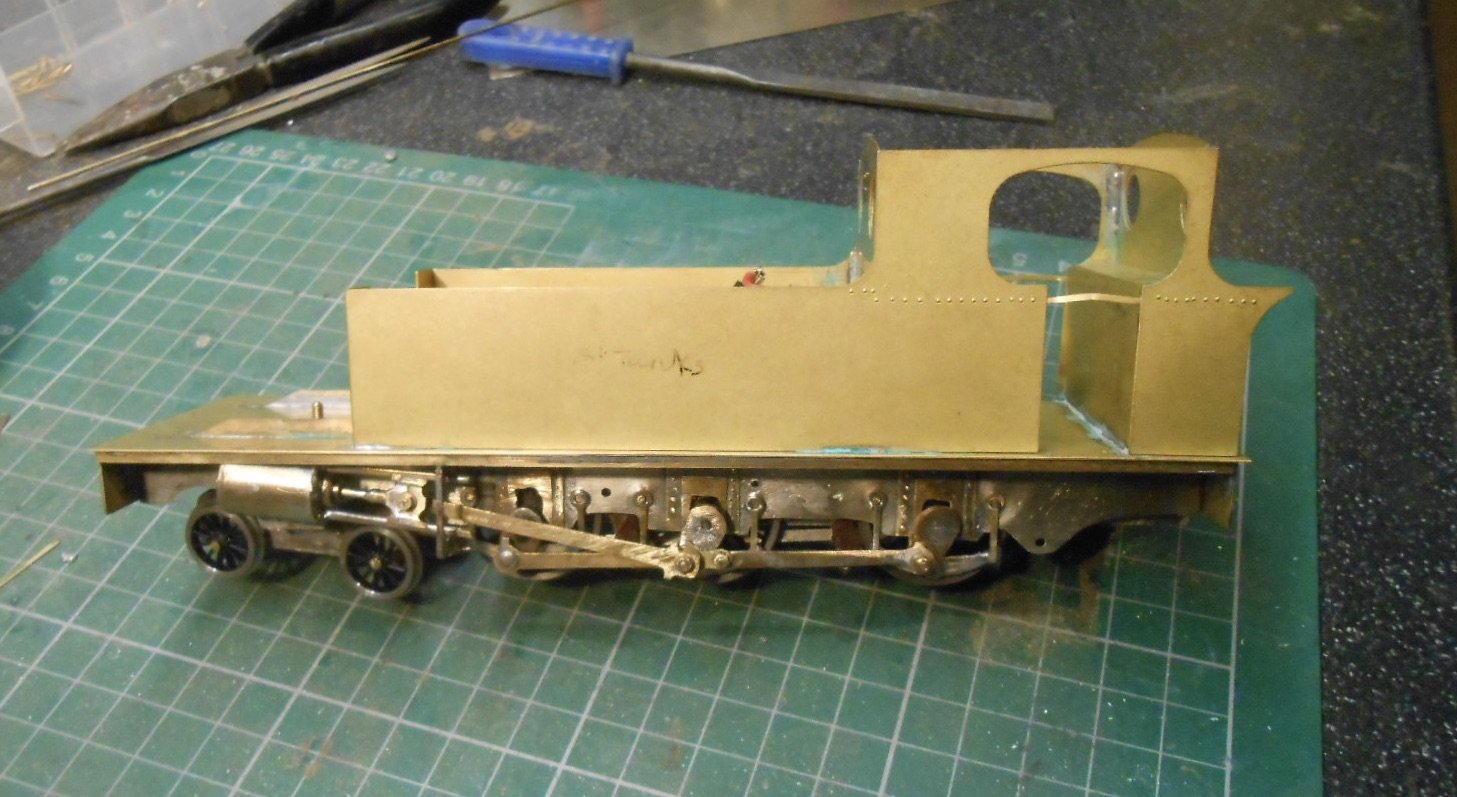
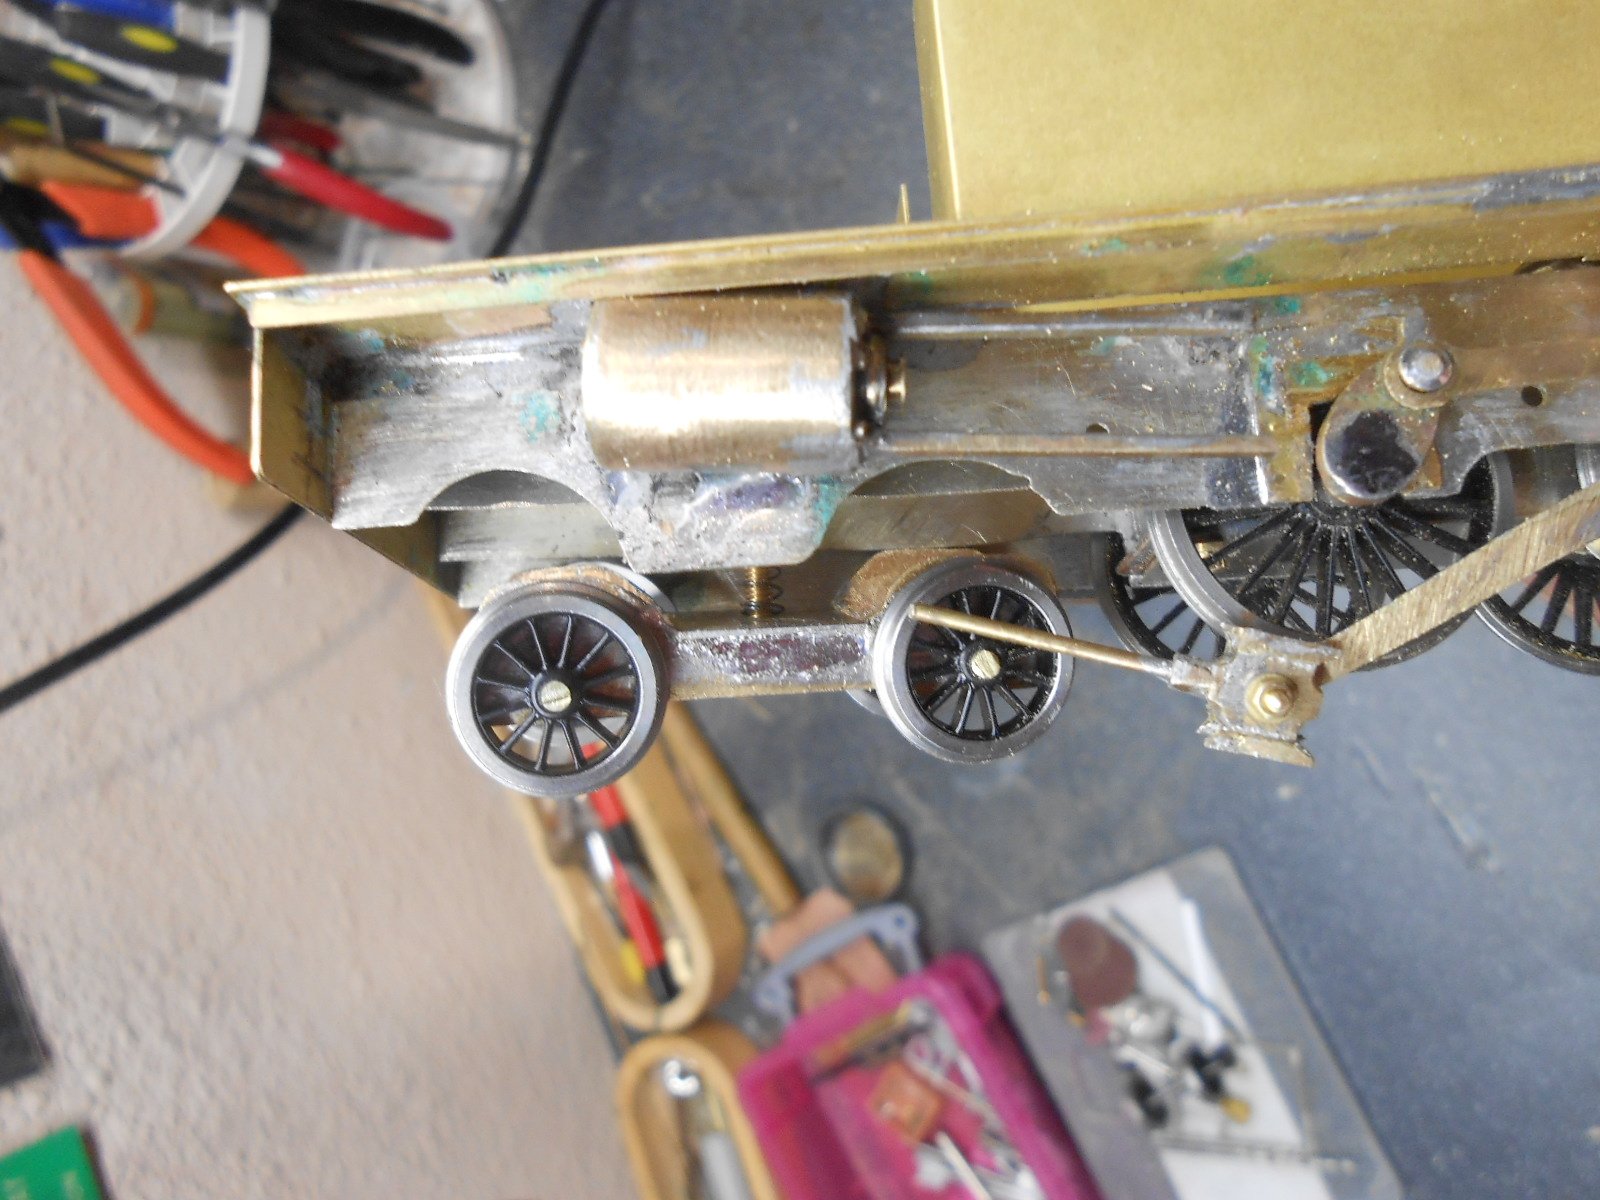
We were away for Christmas, which seriously limited my modelling time, but since then have been getting back into the swing of things with the Barclay tank. First job was to finish off the chassis and as if it wasn't crowded enough down there, have now added front and rear guard irons, front and rear sanding pipes, plus an extra bit of brake rodding under the cab, ostensibly connecting to the brake cylinder, though as the latter can't be seen, it ain't being modelled! Another job was to sort out the bogie wheels. These are 4mm scale and have 12 spokes, but on the Barclay tank, there should only be 6 spokes, so a bit of fettling with a fine pointed craft knife and some needle files soon reduced the spokes to the correct number. The centre boss looks a bit chunkier on the actual loco, so have beefed mine up with some 10BA washers. So, after reassembling chassis and body, to check a few things against the drawings, it was now time to look at the bodywork. A few bits needed resoldering, but the next step was to add the tank tops. The Worsley etches contain a curious piece, somehow intended to make the entire tank tops into a single box, which [thanks to info gratefully received from the Questions thread], clearly isn't the case, as the two tanks are separate, with the boiler barrel in between. However, the etching does contain holes for handrail knobs and tank fillers, so I cut these areas away and soldered them flush with the top of the sides. Time to roll the boiler next, so after cutting a suitably sized rectangle from some 15thou nickel silver sheet, used my GW Models rolling bars to make a tube. More involved was cutting a couple of discs from 18thou NS, to fit inside the tube at each end. While I was at it, I drilled a hole in the centre of one of the discs & opened it out to take a 10ba bolt. I then carefully measured for another hole in the cab front, for the bolt to go through, thereby ensuring the boiler will sit level and central. None of these parts are in the Worsley etches, but a smokebox saddle is there, so this was folded up & soldered in place. Afterwards, I cut a rectangle of 10thou brass & rolled this into a tube to go over the boiler to represent the smokebox and then added a further disc to which the smokebox door can eventually be fitted. With the bolt at the cab end and the saddle at the front, the boiler/smokebox unit could then be sat in place to check all was square and level. I'd originally though that one of the Worsley etchings was for the smokebox, though an oval hole points to the fact that it is for the firebox, with another etch as the wrapper. So a couple of bits soon added to the cab & then, following some fiddly being to shape, the bunker rear was soldered in place as well. So, there we are - things are starting to take shape, but [apart from some fold up sandboxes and the cab roof], there is not much left of the etches, so pretty much everything else needs to be made from scratch - more than enough to keep me amused[!] for a while...
-
Oh dear, I seem to be dribbling. Am guessing you have it for 32mm gauge at the moment? Presumably wider frame spacers would work for 36.75? What the above shows is just how much thought and planning has to go into a project like this. All power to you, Ken!
-
Now that is very neat indeed - both in terms of concept AND execution.
-
Who might have built a line to Craggy Island
David Holman replied to Bob49's question in Questions & Answers
Speaking of isolated, narrow gauge railways, what about the one near Clifden that was built to serve the Marconi wireless station? Seem to remember it was 2' gauge and mainly built to carry peat as fuel. A Dick, Kerr 0-4-0T steam loco was used, though perhaps more famous was the Lancia railcar on which Alcock and Brown were taken after crash landing nearby at the end of the first ever transatlantic flight in 1919. Apparently, the line had no passing loops, but there was a turntable at each end, in best Irish practice. Might make an interesting project - would be tempted to use 7mmNG, with Peco 16.5 track. Hornby 'Smokey Joe' engines are cheap as chips and easy to convert to the larger scale by adding a taller chimney and cab. Wagons and coaches [very much freelance] could be simple to bash from 00 doners, while something like the Lancia railcar is likewise possible with [say] a Corgi classic doner body. I once made a 'rail lorry' in this scale from the Lipton's Tea Van. However, for a Father Ted timescale, maybe a Bord Na Mona type diesel might be more appropriate, with a Landrover as the railcar? The great thing about freelance projects like this is nobody can say you are wrong! -
Clogherhead - A GNR(I) Seaside Terminus
David Holman replied to Patrick Davey's topic in Irish Model Layouts
At least it rhymes! One definition of sophistication is, when listening to the William Tell Overture, you actually think of the Lone Ranger. I know my place... -
Fairly sure the Queens only ran on the Dublin to Cork mainline. Assuming the megafunds, several million euros, were not a problem, then it would all depend on track and bridge capacity, in terms of axle weight, then things like platform clearances and also where turntables of suitable length are available. If any. However, if enough money available to get the Queen up and running again, it may not be too big a step to ensure there are turntables at Cork and Dublin. That or triangles...
-
Clogherhead - A GNR(I) Seaside Terminus
David Holman replied to Patrick Davey's topic in Irish Model Layouts
Looks 12" to the foot to me! -
N Scale Ballywillan, Co Longford.
David Holman replied to Kevin Sweeney's topic in Irish Model Layouts
It's a hobby, so meant to be enjoyed. Allegedly... However, still a case of some things being less enjoyable than others. In my case, ballasting, brake gear (all types), painting stonework, to name just three. Half an hour a day generally gets things done, but the adage of a bit of what you fancy doing you good also applies. And why not, when you (and us) can sit back and enjoy another creation? -
Plain, simple, but VERY good. Creates a real atmosphere. A mouse is less less than 3 inches long, with same again for the tail, so in 4mm scale that will be a one millimetre body. No doubt somebody will have done it...
-
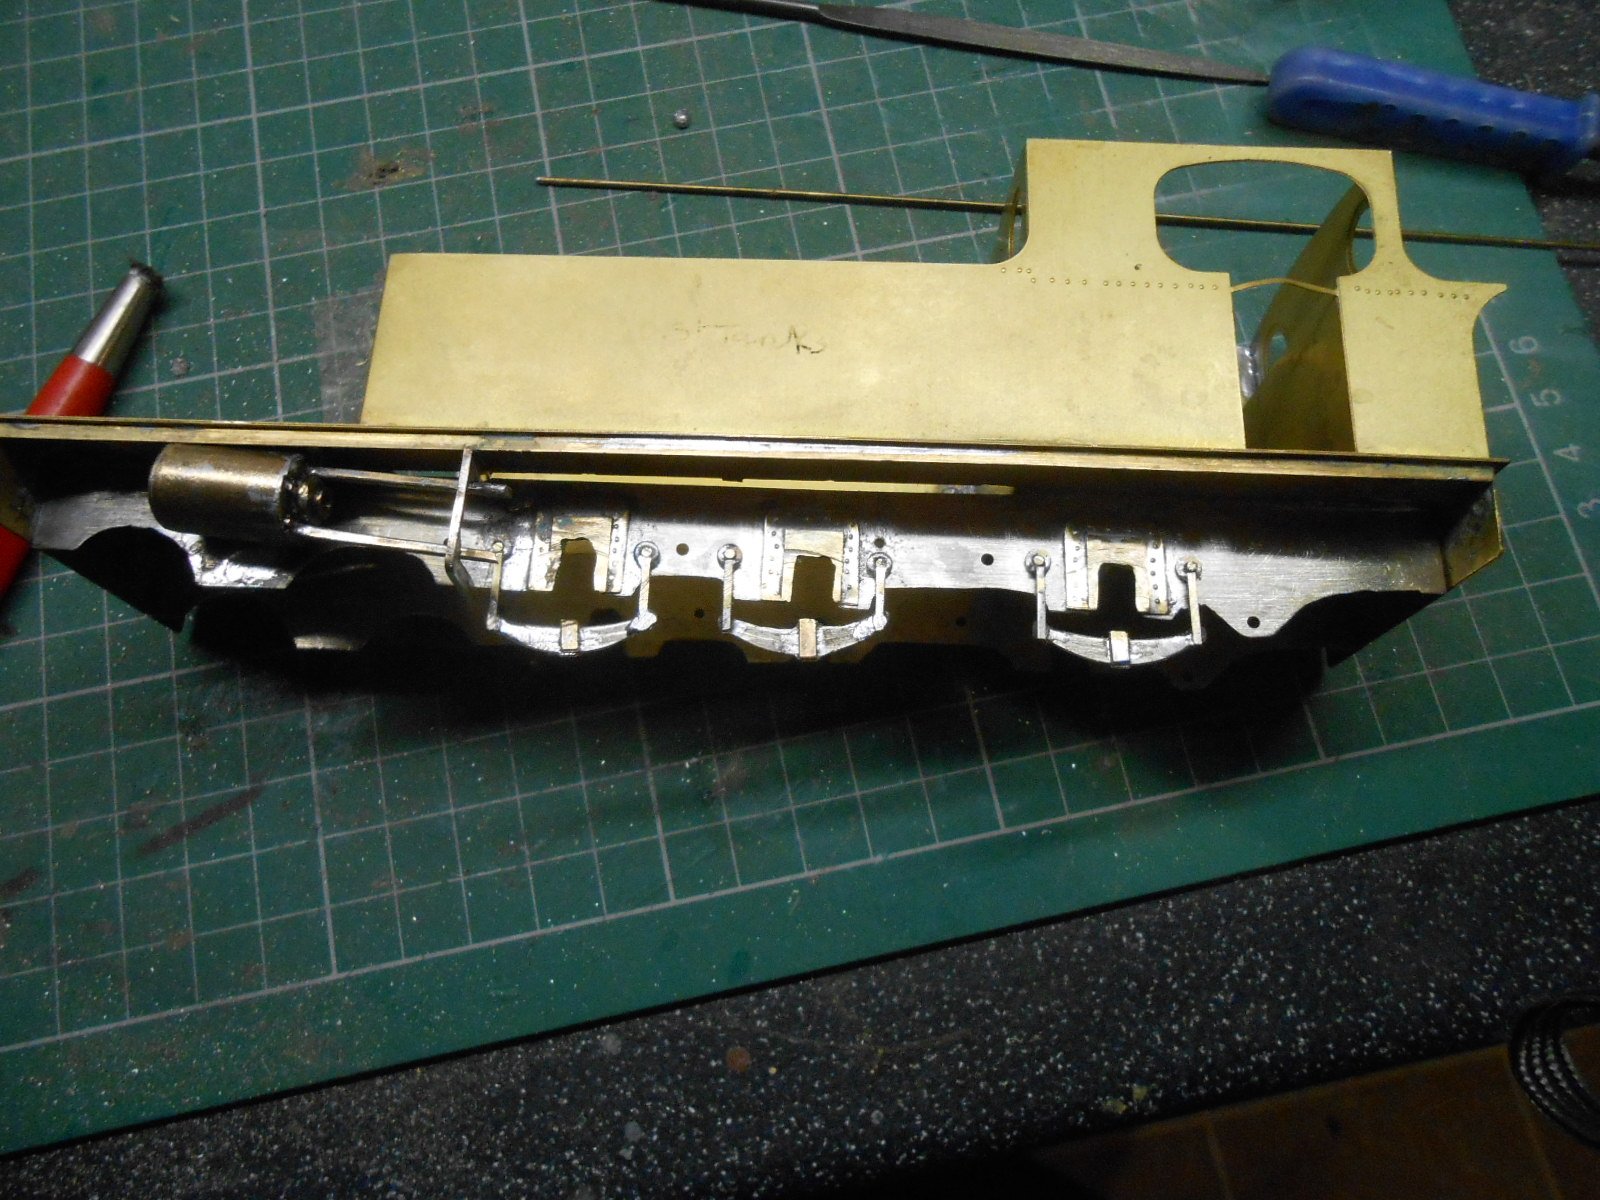
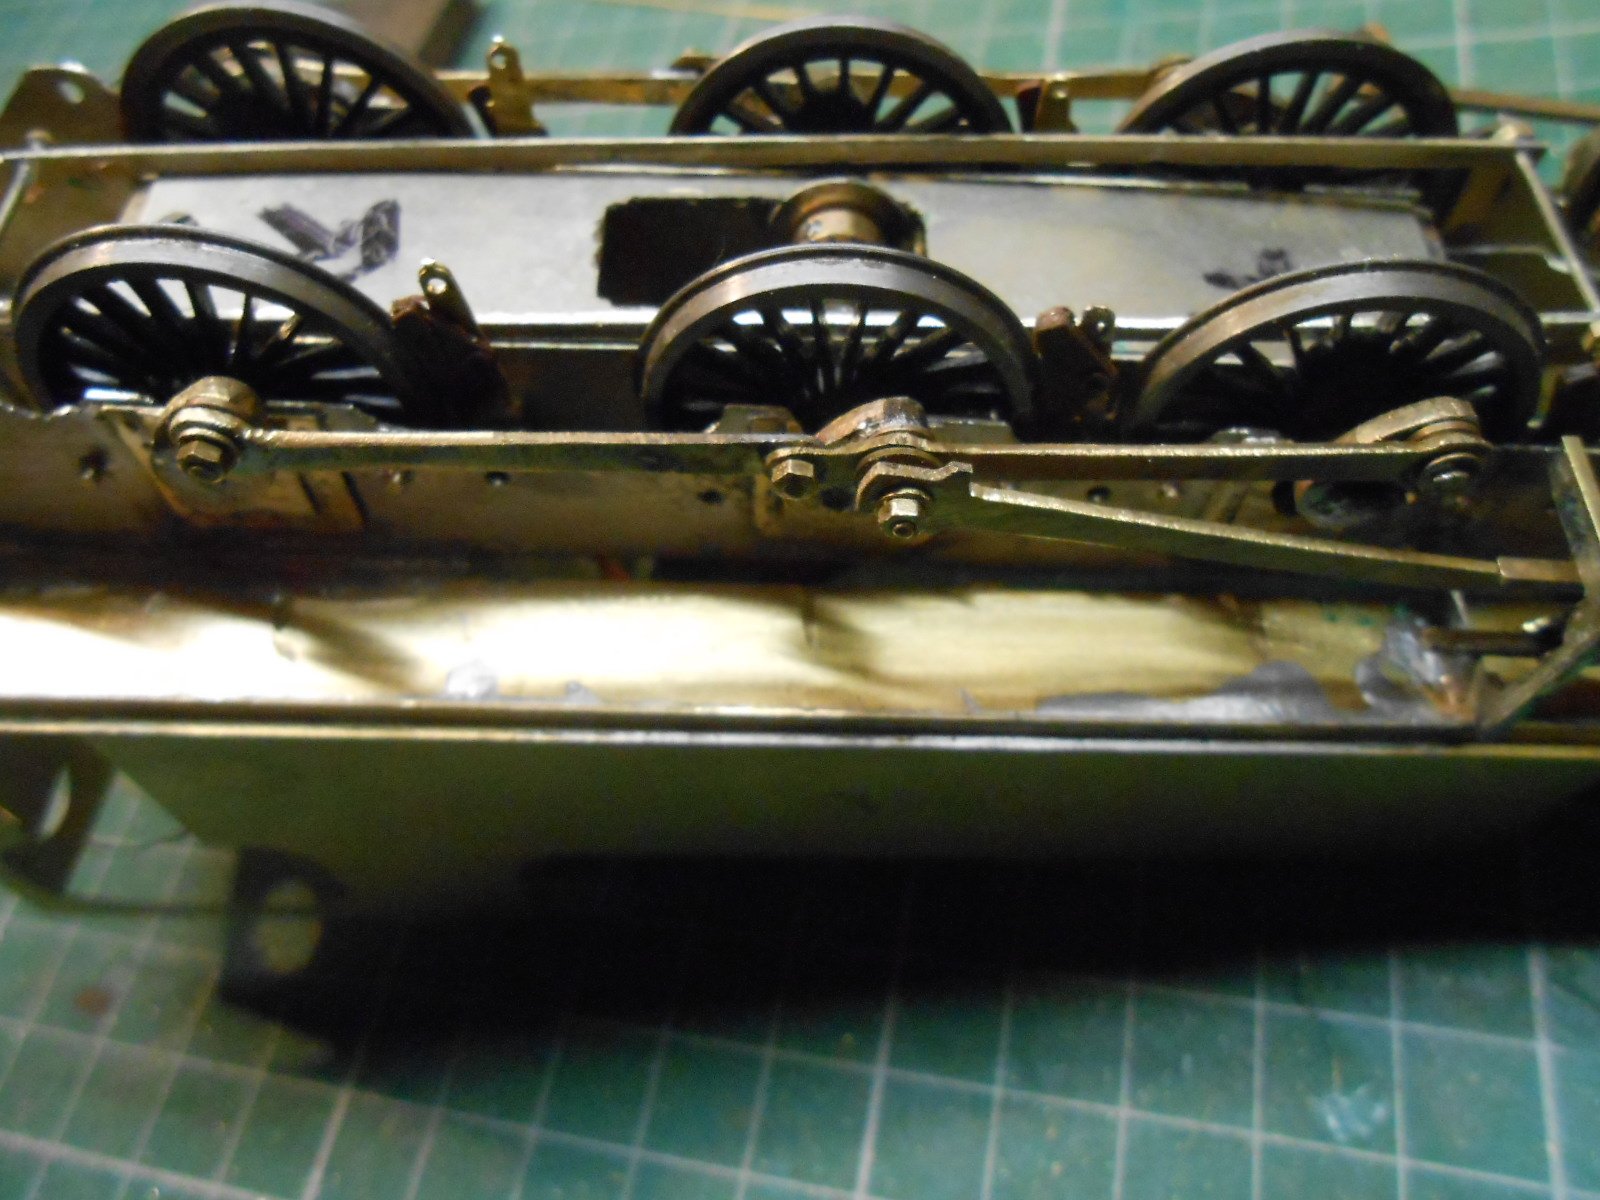
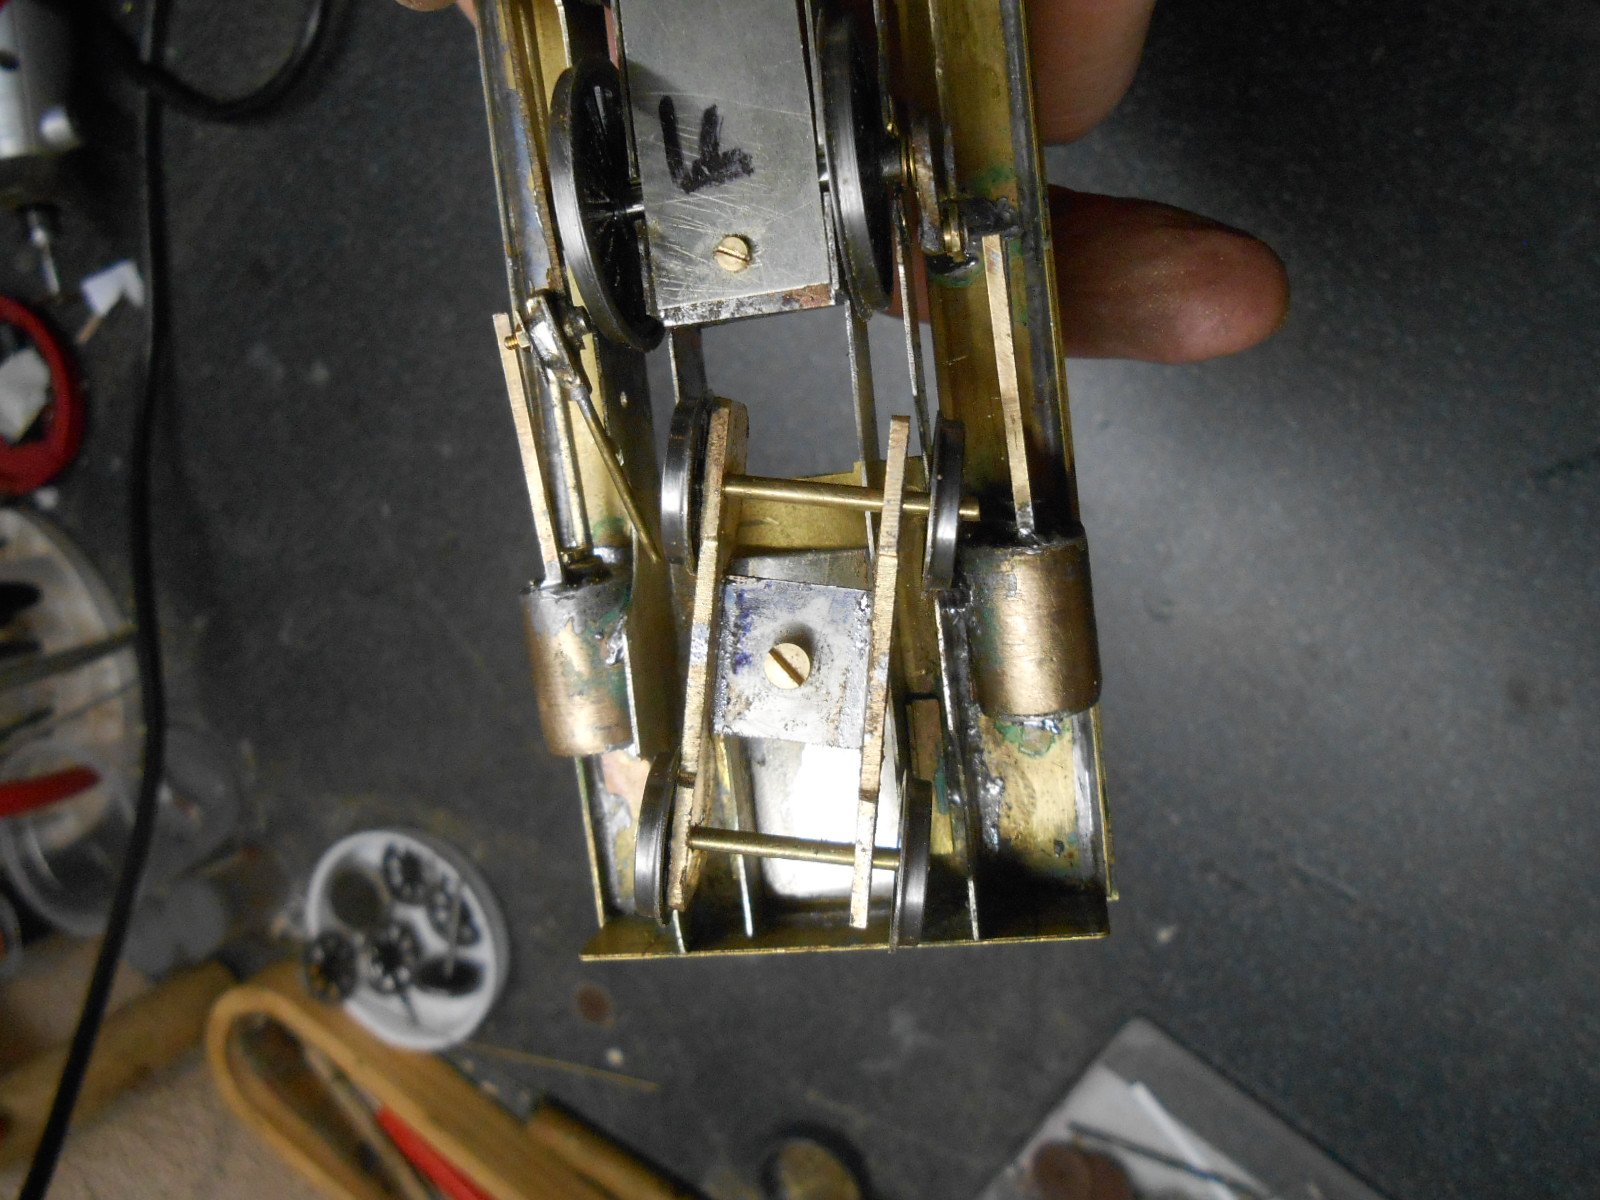
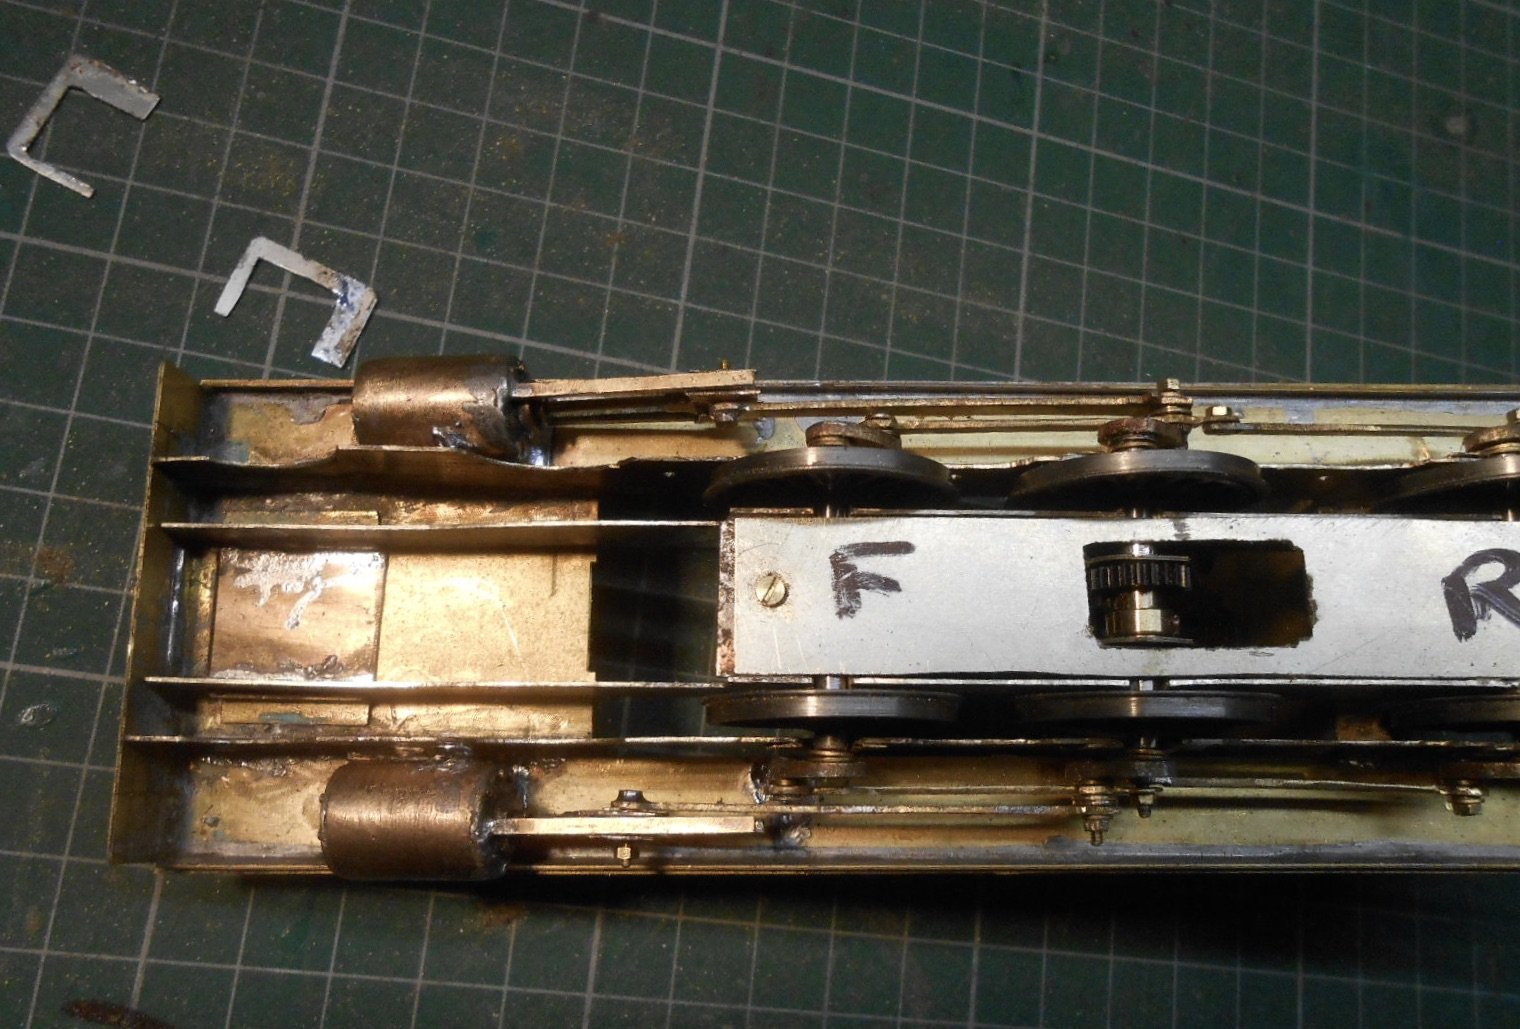
Things get ever more fiddly on the chassis as each new bit gets added. Clearances are becoming very tight! Having got the chassis rolling nicely, the next job was to add the pick ups. Pretty conventional here, with small pieces of copper clad glued to the inner frames, then phosphor bone wire acting as wipers on the driving wheel treads. Thankfully, the large side tanks and outside frames mean there is no problem hiding all this stuff. Followed this with the brakes & was tempted to leave them out, but they can be seen poking down behind the outer frames, so needed including. Brass strip was cut and filed to shape for the hangers. The middle and rear pair are soldered to the frames and not connected to the brake rodding. The front pair are also soldered to the frames, but the hangers are hinged here and then at the rear are clipped to the frames so can be swung out of the way if required. Brake blocks are plastic mouldings from Slaters, just glued in place. The job that has been causing most stirring of the grey matter has been the main springs under each driving wheel. It is essential that these can be detached, in order to remove the inner chassis for maintenance. Various ideas were sketched out, but in the end I loosely followed prototype practice, as each spring appears to be hung from the outer frames by two brackets. I had some nickel silver spring 'blanks' left over from a previous kit, so have used these, filing an impression of the leaves into the surface. I then soldered pieces of brass strip each end, to act as the hangers & then added a 12BA washer to the top end. The outer frames were then drilled to take short pieces of 1.2mm brass wire, to which the 12BA washers clip over. Eventually, the springs will be lightly glued in place at one end, but not until I am happy that the chassis is painted and working efficiently, as I don't want to be removing them any more than the bare minimum. That's it now, until after Christmas, as escaping to the workshop is [probably rightly] frowned upon - though looking at the TV listings I will be needing a lot distractions to avoid catatonic boredom. It would have been nice to get the chassis complete before Christmas, but have learned by hard experience that these things cannot be rushed, as it only ends in tears!
-
Beagnach end: A Branchline terminus.
David Holman replied to Metrovik's topic in Irish Model Layouts
One of the many joys of this forum is how helpful, encouraging and knowledgeable folk are. -
Beagnach end: A Branchline terminus.
David Holman replied to Metrovik's topic in Irish Model Layouts
You are right, JB. The Airfix is 65 feet diameter, same for SE Finecast. They work out at about 40 feet in 7mm scale... Kitwood Hill do a variety of sizes. They are American in outline, but easy to adapt and a joy to make. The smallest is a 5 inch 0n2, which works out at about 32 feet in 4mm scale. There is a nine inch one, which will equate to about 55 feet. Peco do a HOn3 TT which works out at about 50 feet. All that is needed is to make the deck wider, which is simple enough. They cost over £60 though... -
Beagnach end: A Branchline terminus.
David Holman replied to Metrovik's topic in Irish Model Layouts
Turntables are tricky beasts, but by far the cheapest is the old Airfix, now Dapol plastic kit which is still less than a tenner. Frizinghall Models in Leeds do a Meccano based hand cranked kit for about twenty quid, but there is still the problem of getting power to the track on the deck. The Peco turntable does this for you for about thirty quid or so and may be worth investing in because of that. Next up comes South Eastern Finecast, whose TT is a development of the Airfix one, while the best I've come across are Kitwood Hill Models who do laser cut ply kits for around £75. These need little extra effort and are pretty much complete, whereas all the others require some ingenuity to work properly. Another option for mounting a TT is to use a standard stereo jackplug and socket as the spindle - you can get the wiring to the track through this. Well worth doing an internet search for other ideas, while my Workshop and layout threads (Arigna Town, Belmullet and Fintonagh) contain posts of my various turntables over the last few years. As for point motors, the cheapest way is to use servos at less than two quid each, though again, they need a mounting and some way to control them. MERG, the Model Railway Electronic Group have lots of cheap ideas on this. Alternatively, use wire in tube for simplicity. -
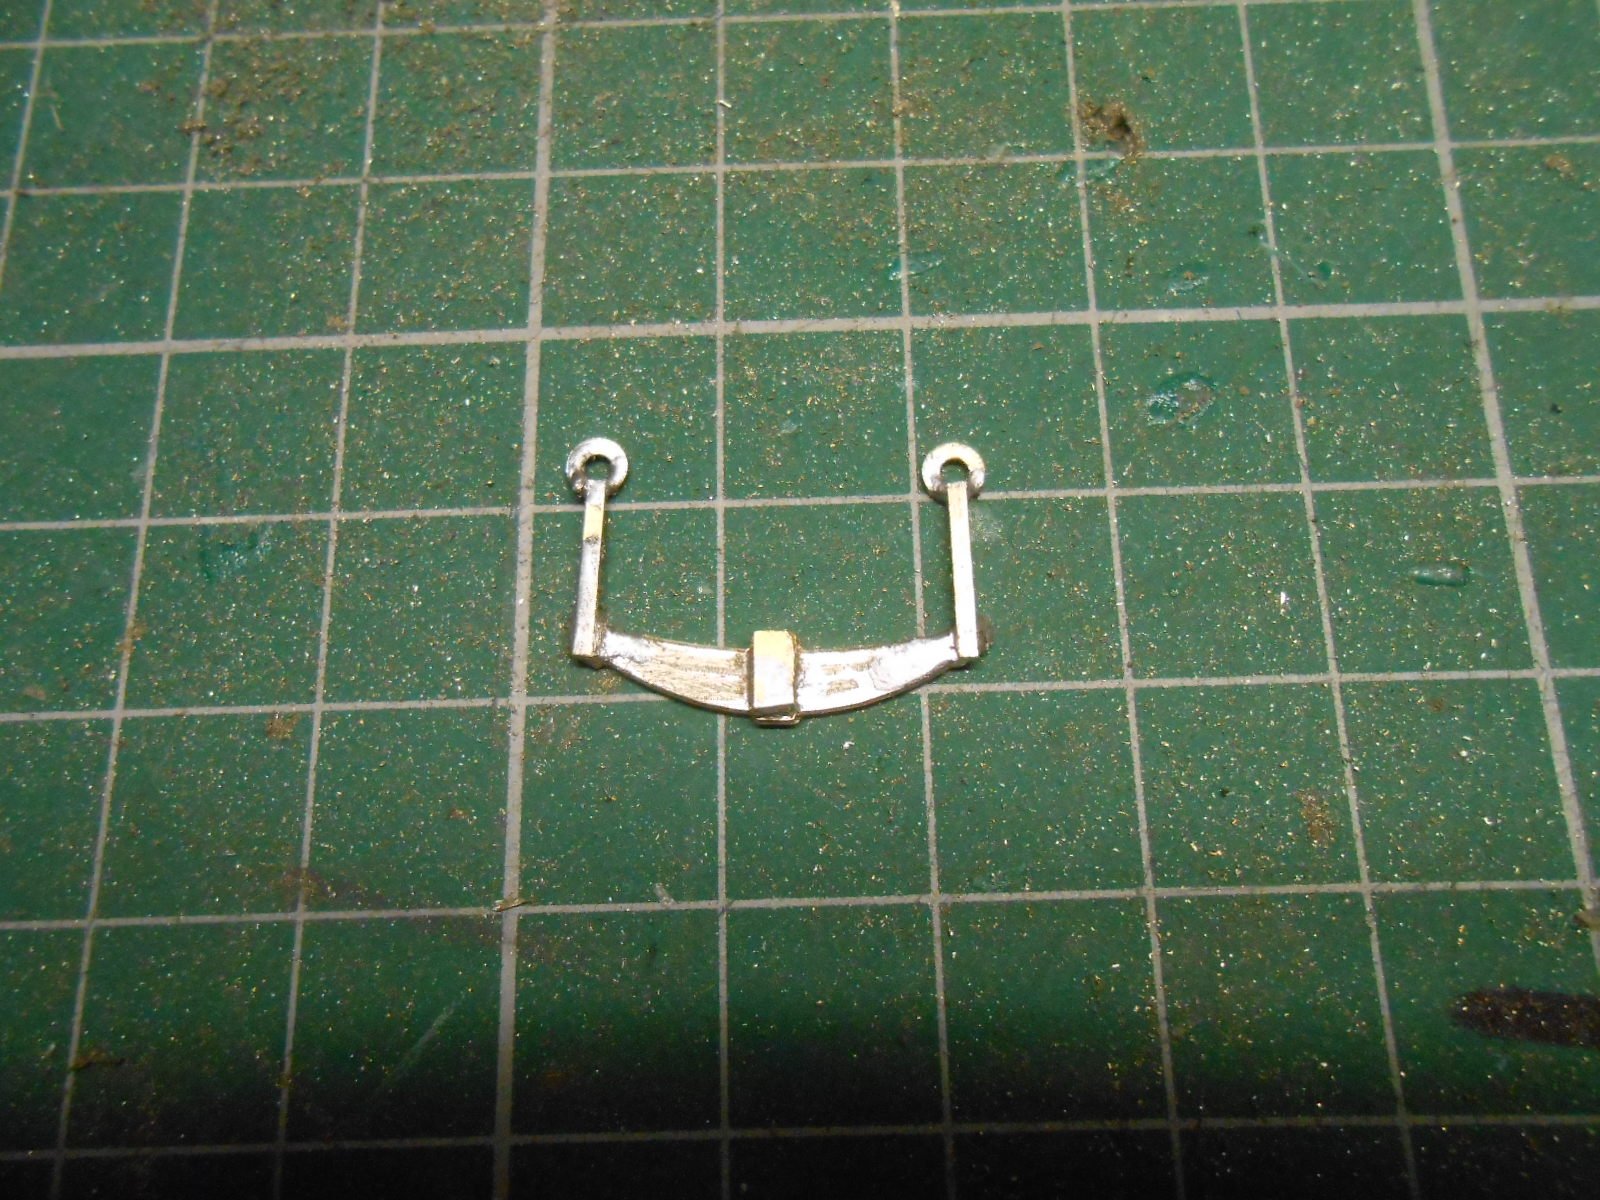
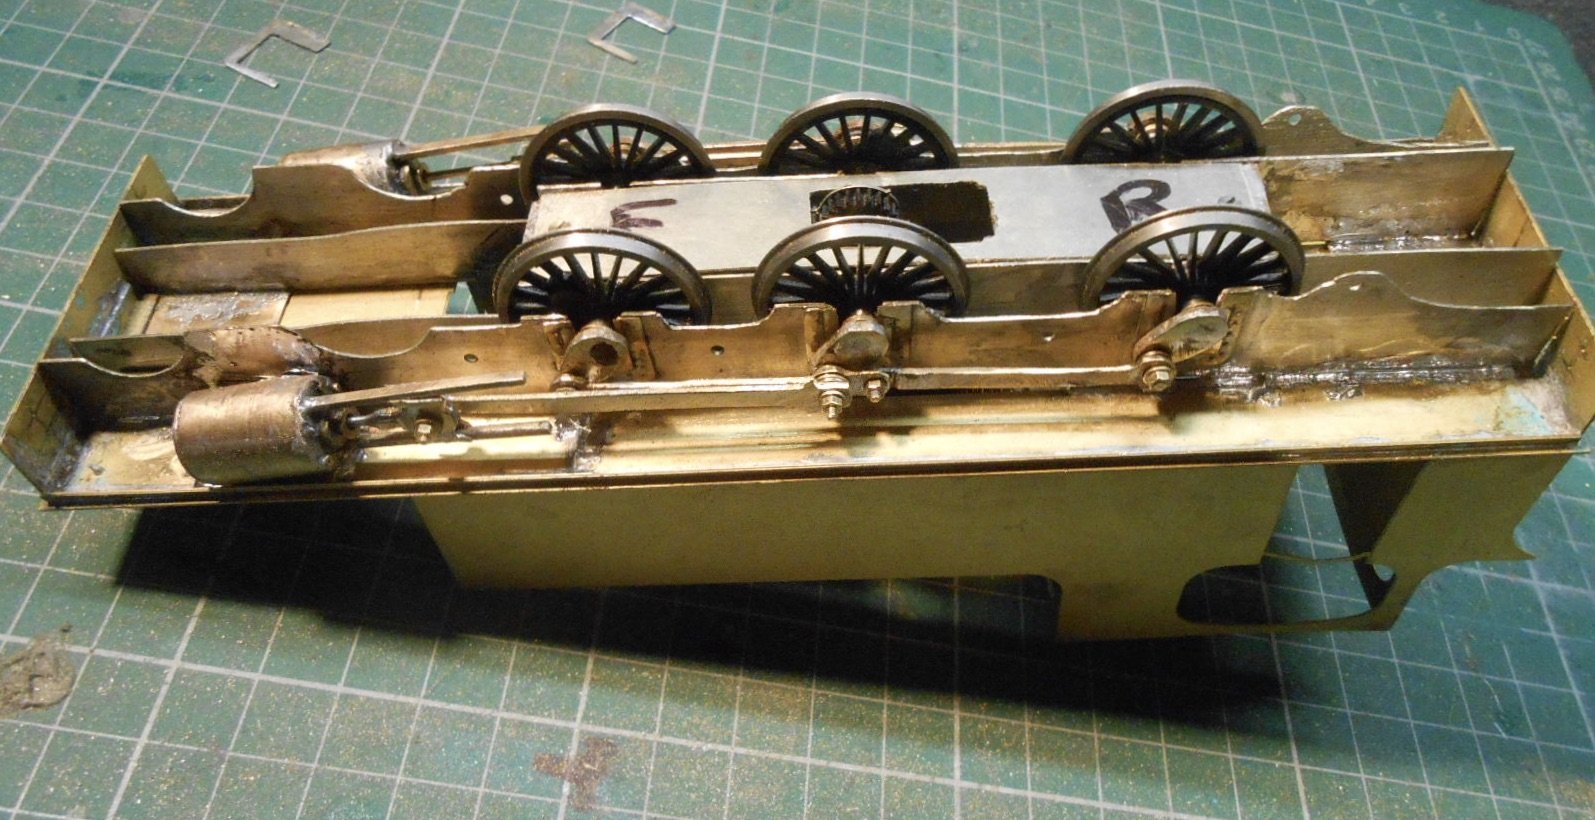
When the lady of the house [She Who Must Be Obeyed], comes in from carol singing in the village square and you excitedly announce you have spent the afternoon making a bogie, it is a tad disappointing to find she is not impressed. Or maybe not... Anyway, I was pleased. Nothing too complex, though using 3mm thick brass sheet for the frames took a bit of effort - the reason for this being to add a bit of weight to the unit. Otherwise, it was the usual case of solder the two rectangles of brass together, mark and drill out the 2mm axle holes, cut/file to shape then separate and make a suitable frame spacer from 18thou nickel silver. At the moment, the unit is fixed to the main frames with an 8BA bolt to a captive nut, with a light spring around the bolt, which I hope will be just enough to keep the bogie wheels on the track, without lifting the drivers off it. We'll see... The bogie wheels are Gibson, with slightly too many spokes and 2mm brass wire for the axles, as per Fintonagh. A few more ticklish problems still to do on the chassis, in terms of pickups, brake gear and especially the underslung springs on the the driving wheels. The issue with the latter is that these need to be removable if I am going to be able to drop the wheels and motor, as a single unit, out of the chassis. Have a couple of ideas, but nothing certain yet other than maybe somehow all attached to longitudinal wires, a bit like the way Mayner does his brake gear.
-
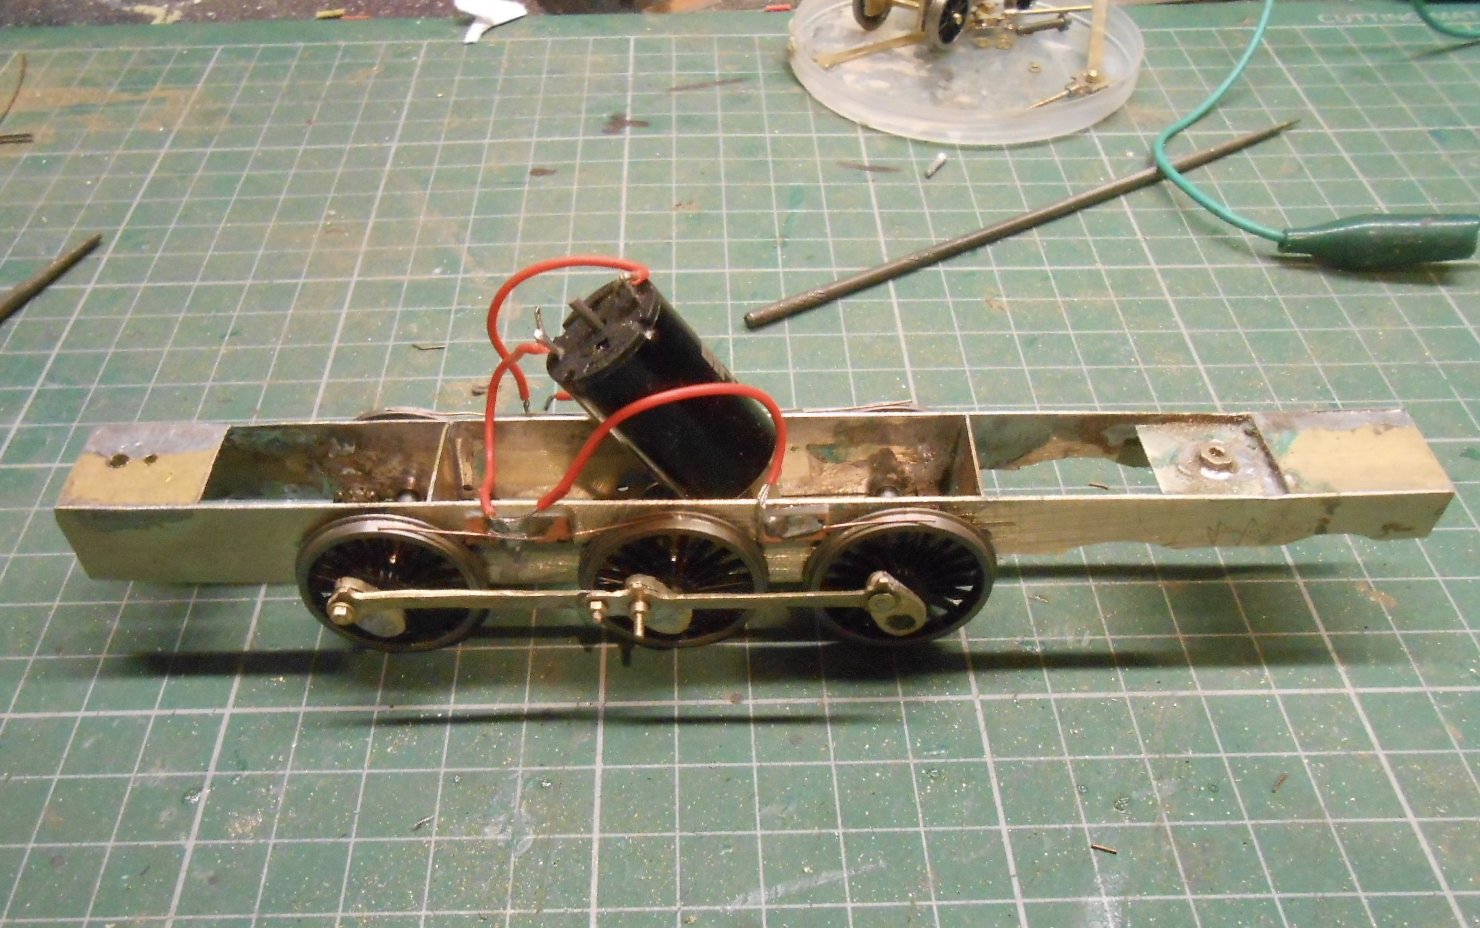
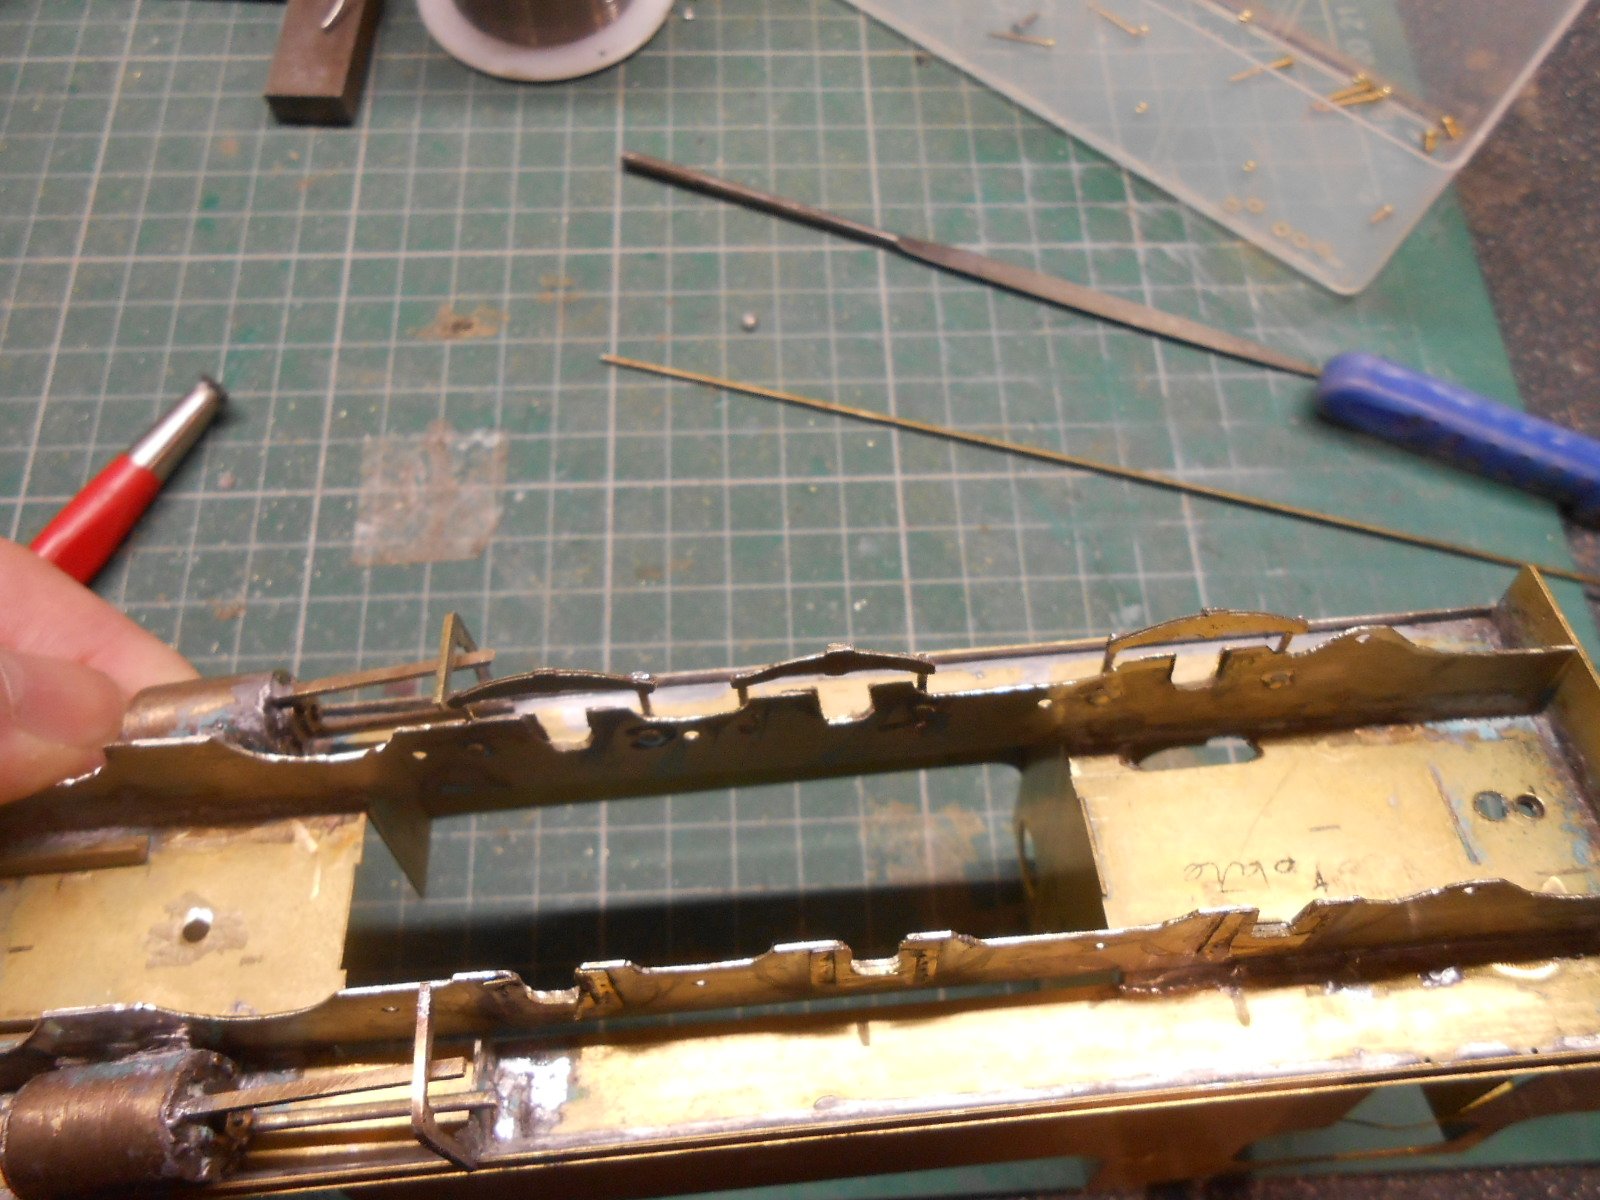
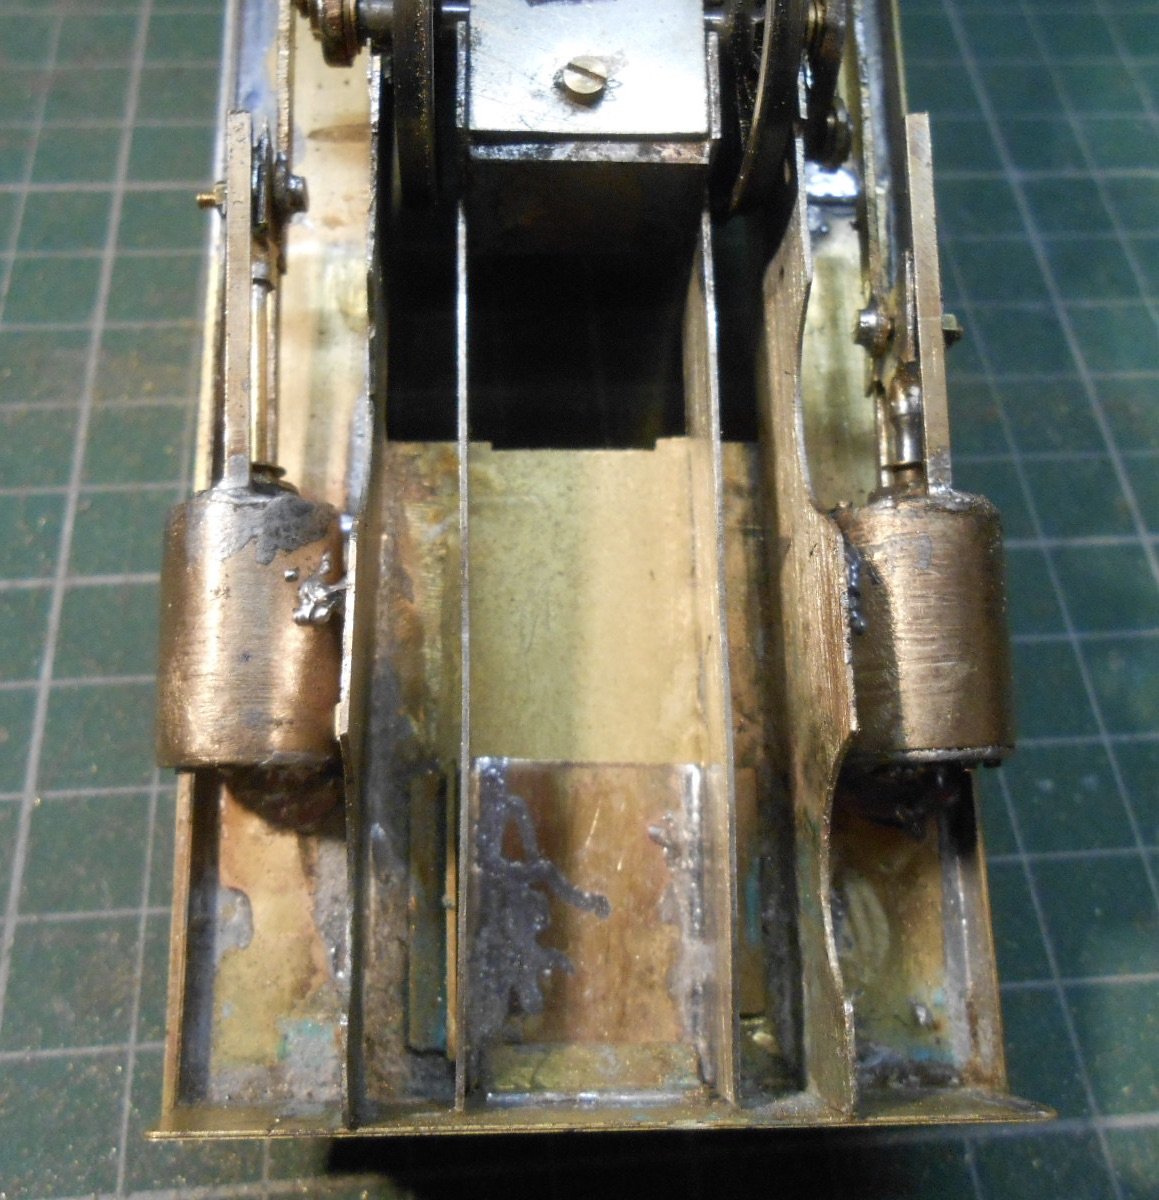
Well, it may not look very different, but believe me the last week has been a catalogue of blood, sweat, tears, singed fingers and a serious pain in the primary orifice! Prime among the problems was my own carelessness. In removing one of the cranks to fit the new motor, I managed to partially melt one of the driving wheels. Yes, really... A bit of tweaking and some superglue seems to have restored order and this is how the cranks are fixed now. I learn, eventually. However, this is getting ahead of things, because despite my best efforts, I must have spent two days trying to just get the basic chassis to roll freely. Unlike a simple 0-6-0, there really are a shedload of variables in an outside frame chassis & at one stage I was contemplating making another new one, or even throwing it all in the bin. However, a two day break in France [Arras Christmas Market] was just what was needed & suitably refreshed [with a full wine rack as well] I stripped the chassis down and reassembled it using my Poppy's Woodtech jig. Turns out things were not quite as square as I thought. While rebuilding, I made sure all the bearings, cranks and so on were nice and snug, because the initial slack was also causing problems. I then took my time building the new gearbox, reaming out its bearings and cleaning the loco axles so everything was nice and smooth. And hey presto, it all worked. There was also a lot of slop in the keeper plate, so that is now tighter too. Fingers crossed, I will not be removing the wheels again any time soon. Being hidden away, I'm not even going to paint the inner chassis. Another job was making the coupling rods jointed & this made quartering the wheels easier as I could do a pair of axles at a time. So, it was at last possible to start some new work. Only two new parts - the coupling rods - but to say fitting them was a fiddle is more than a bit of an understatement, though it pretty much sums up the project thus far. Nowhere near enough fingers! Considerable care is needed on any loco with outside cylinders. There are clearances to check all over the place and some of them are fag paper thin. At least there is plenty of room behind the crossheads, but very little between the con rods and coupling rods, while the cranks also want to clout the slidebars. The cylinders are angled too... However, eventually all seems to have gone well and the outside motion appears to work nicely. The connecting rods take all the slop from the centre crank pins, while at the crosshead, there is just a 12BA nut and bolt. The motion bracket still needs work though, but it really was a case of stop while I was winning. The moral of this project is at the extreme end of measure twice, cut once. I've been working it out as I've gone along, but it's caught me out at every stage, so really must write up an abridged version of these notes for future reference.