David Holman
-
Posts
4,359 -
Joined
-
Last visited
-
Days Won
117
Content Type
Profiles
Forums
Events
Gallery
Blogs
Community Map
Everything posted by David Holman
-
Just goes t show you can get a nice range of colour and texture without static grass, while careful ballasting is doing a decent job of making the 00 track. Really hangs together well Patrick - full of atmosphere. Top job.
-
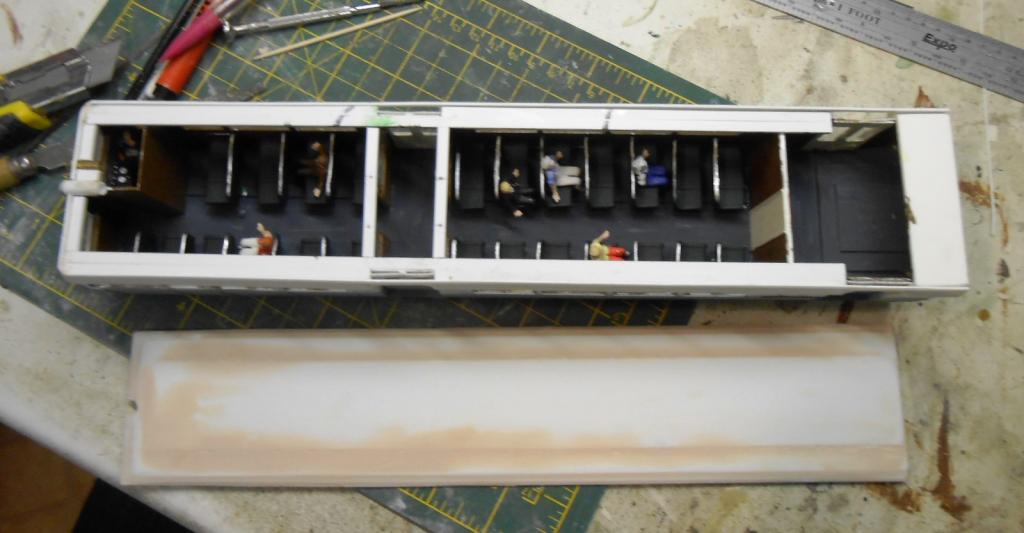
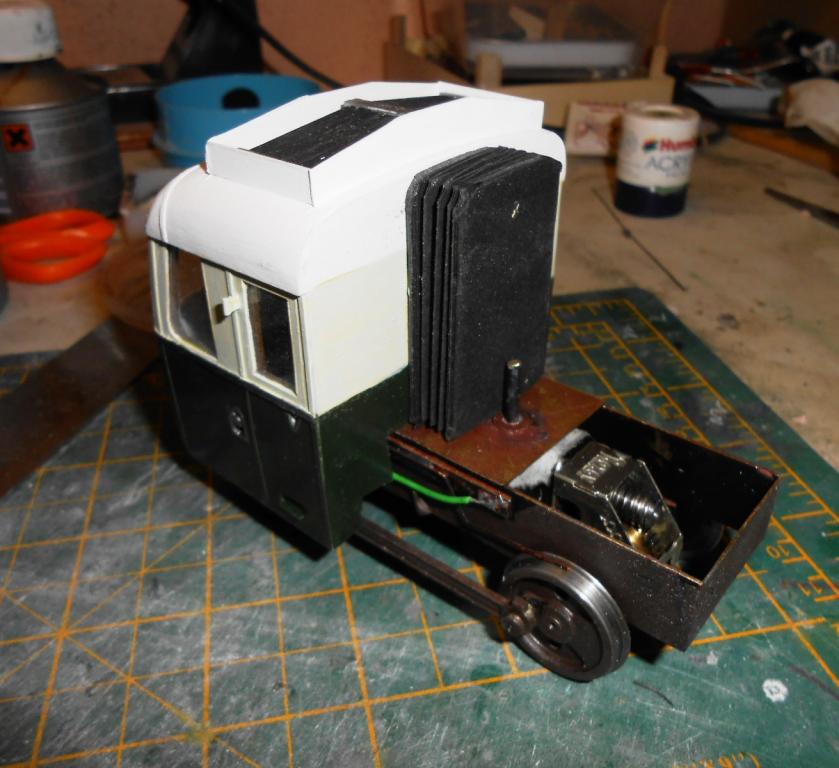
The railcar is coming together now, with the trailer-saloon interior fitted out, which has enabled glazing to be fitted and the roof added. The latter always a bit of a worrying time, because I could not think of a way to make it easily removable, so if anything comes loose now, those of you over the water will undoubtedly pick up the cries of anguish. Am also having to be careful to keep dust [from sanding] out of the interior, because I’ve modelled some of the toplights in the open position… Meanwhile, the tractor unit really is almost there. Sprayed the main [green] body colour, so could then add the buffing gear and guard irons. This was made in a single unit, from brass strip, bent to shape, with a few rivets put in using my GW Models press. The has earned its purchase price many times over & is a lovely tool to use. The actual buffer heads are from some old ABS buffers I had in the spares box. In other words, they are small drawing pins [yes, really], but seem the ideal size for the purpose. Now, the main body colour… Roof is easy – white. Upper and lower body are more difficult. The best colour pictures I have are two from Irish Railways in Colour, which show the railcar in bright sunshine. The lower body ‘green’ shows as an olive shade, to my eyes not dissimilar to that used by the Southern Railway in England. The upper body is decidedly cream in one picture, but more like a pale green [light olive oil?] in the other. However, in Irish Traction in Colour, B is pictured in somewhat ‘softer’ weather and while the upper body is again a light olive oil green shade, the lower body is much darker – more like Brunswick green. Now, all three pictures were taken in May 1957, so the paintwork should be the same in all cases. Hence, it just goes to show what the effect of light can have & then if we factor in the type of film used & exposure on the camera & it all gets very complicated… At the moment, the lower body is sprayed Brunswick green, while the upper body is brush painted with Humbrol acrylic light olive, toned down with more white. I bought a Humbrol spray can of a more olive green shade, but this [to my wife’s eyes, as well as mine] looks too green and maybe a bit too light. Tried a test spray on top of the Brunswick green [on a bit of grey card], which is closer to the ‘bright sunshine’ photo, but am not completely convinced. Add in the fact that models themselves can look very different under varying lighting conditions [ALWAYS paint your models under the same type of light as you intend displaying them] and you can begin to appreciate my uncertainty. Comments most welcome, though note that the weather on Arigna Town is deemed to be permanently ‘mainly cloudy, with a high chance of showers’. My exhibition lights are Clipspots, with bulbs that give a slightly yellow light. Still at least the tractor seems to run well. Have given it an hour in each direction on my rolling road - far more than it will ever get on my layout!

-
Arigna Town branch - a revised histoy
David Holman commented on David Holman's blog entry in David Holman's Blog
. Am guessing one siding will be plenty! As for the power station, 7mm scale buildings tend to expand beyond available space, though have thought about it. A siding/mineral line going off scene is one way to deal with the issue without building extra baseboards - as per my line to the Arigna mines. Certainly a good excuse to build some more wagons. -
Arigna Town branch - a revised histoy
David Holman commented on David Holman's blog entry in David Holman's Blog
-
Wonderfully creative modelling!
-
Superb work Popeye - as set me thinking about how to do a 7mm version. interesting thing about wagon kits is that the expensive bits are the running gear, buffers etc, while the bodywork is about a fiver at the most. So, what brakevan did you start with? Am hoping could do the same with a Slaters or Parkside kit.
-
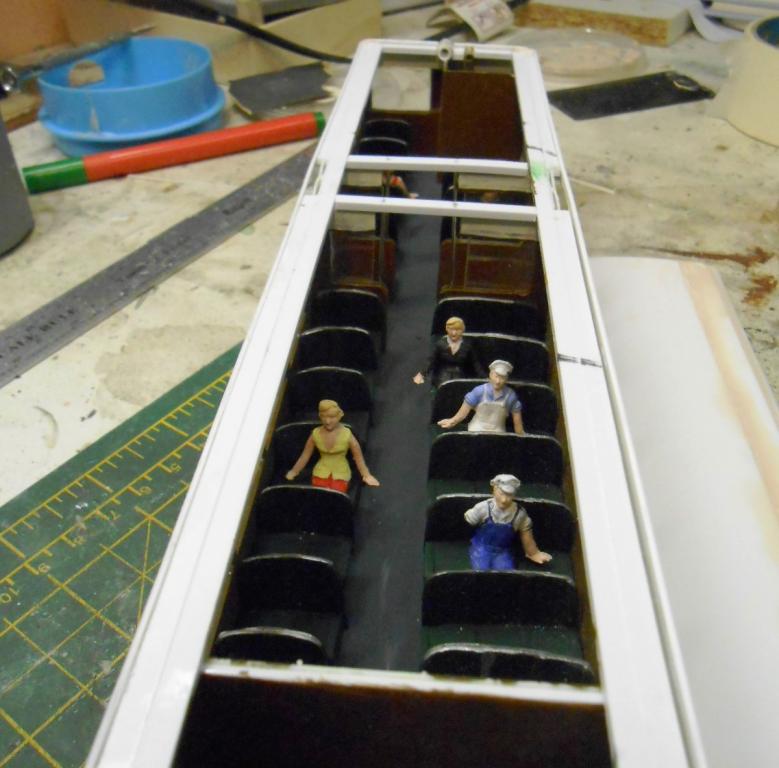
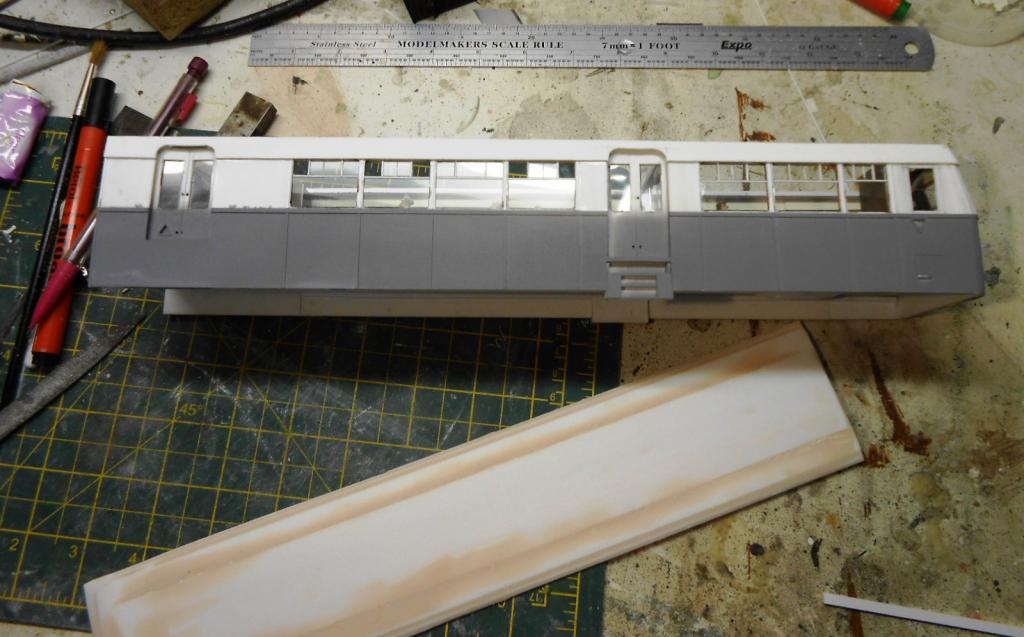
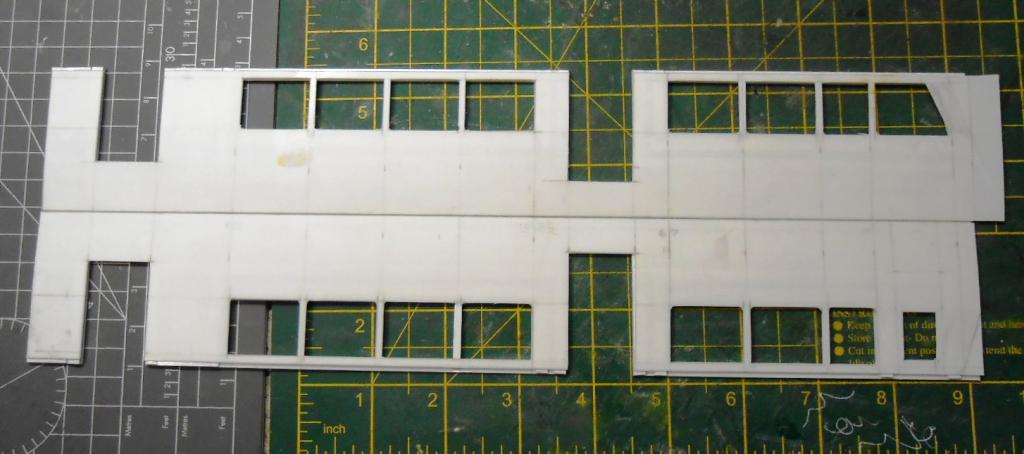
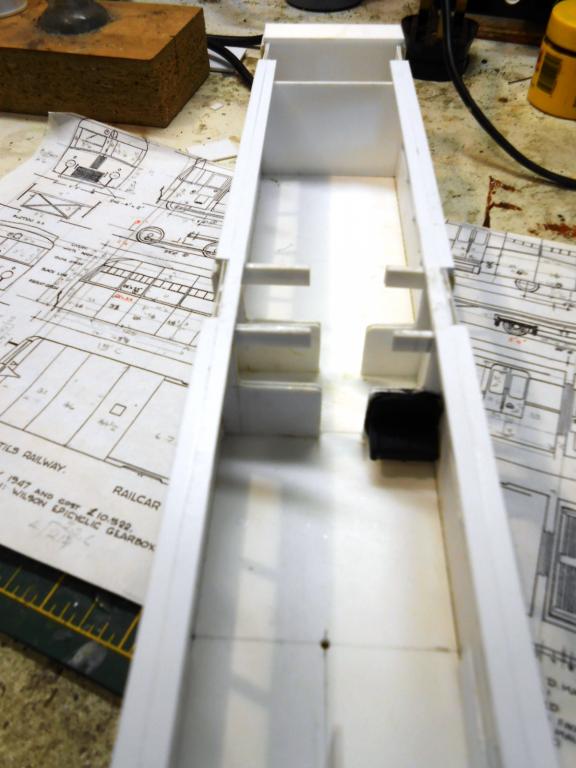
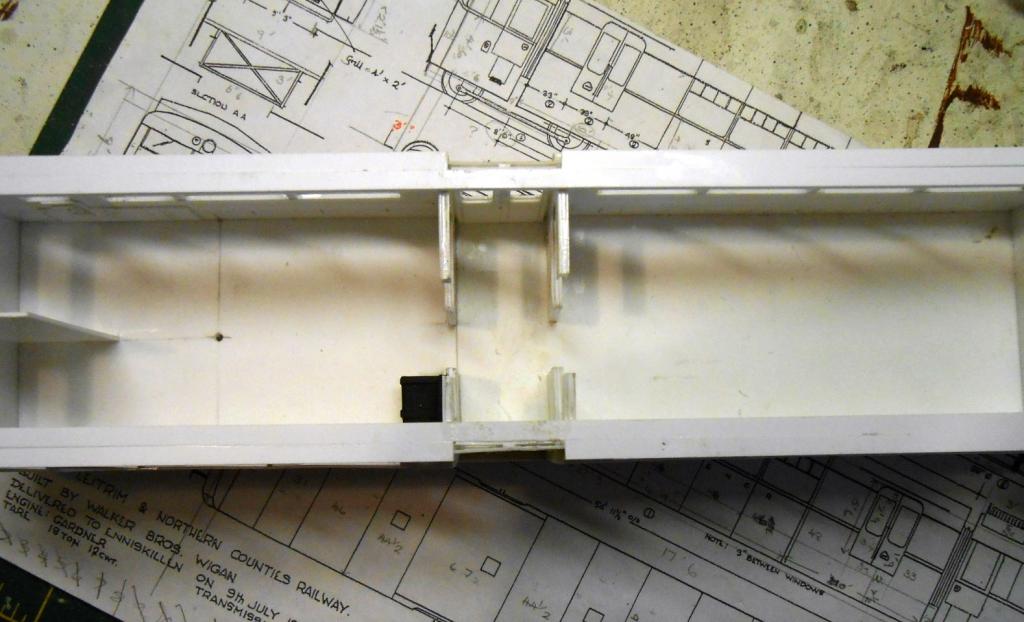
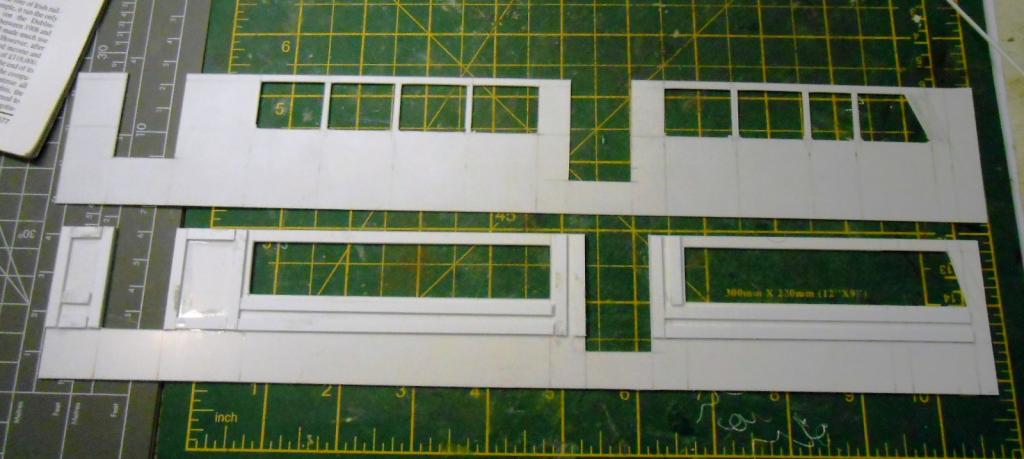
Have been making good progress on the passenger trailer to 'B' Using the Jenkinson method, cut out an inner shell from 40thou plastic sheet and an outer skin from 20 thou. 40 thou square microstrip at waist and top of windows enable the tumblehome to be formed. However, left gaps above the windows, which will enable 30thou glazing pieces to be slipped between the two made sheets. The floor is 80thou, while the ends are layers of 40thou, which will be sanded to shape later. The roof is planned to be laminated plastic sheet and will sit above the window line. Included the central partition to help keep the sides in shape. The partition to the luggage compartment does the same thing. The only ticklish bit was the cut outs for the sliding doors, which made that bit of the sides quite week until all the bits were stuck together. So far, what is most noticeable is the size of the thing. The saloon is quite a bit longer than the bogie coach and at 9' 6 wide had me checking it would not foul the platforms. for once my luck has held!
-
Gorgeous. Model really captures the prototype.
-
Great to know there is another version of this lovely railway. Will very much look forward to seeing pictures. Happy to share info, drawings etc too.
-
Colour of CIE wagon rooves 1960's and '70's
David Holman replied to John McGahern's topic in General Chat
I use Halfords spray primers for the two wagon body colours and Precision Paints roof dirt. Humbrol do something similar. Dont be afraid to mix some talc in with the roof dirt to add a bit of texture to canvas type roof. -
As the old saying goes, every journey begins with the first step... With so many stunning rtr models now available, I am convinced that a good model railway is within the reach of anyone. The trick is knowing where to start. For me it was making buildings. These have the distinct advantage of just needing to look good, with no need to run well! The same can be said of scenery. What really got me going was 7mm narrow gauge, where freelance modelling meant I did not have to worry about total accuracy. Good fun too, making my own loco and coach or wagon bodies to run on commercial chassis. Start simple and make haste slowly - too many people getup off by trying kits that are too complex. As for scratch building, it is only a kit where you make the parts yourself and plastikard is very quick to get going with. Ordinary card too. I have been doing this for25 years now and have built up a range of skills in that time. For me that is the great joy of model making.
-
Tis great to be giving a bit of inspiration to others. The basics of this model (and indeed the railbus and coach number nine), is David Jenkinson's Carriage Modeliing Made Easy, from Wild Swan. Sadly no longer with us, he writes and illustrates in a very easy to understand way. Along with the Art of Weathering and Iain Rice's books on layout design, it is one of my most used guides. Plus Gordon Gravett's ones on scenery of course. While all are more aimed at 7mm scale, there is so much that is transferable and most of all, you are given a clear feeling that their ideas are achieve able by the average modeller. More than anything else, these books have helped immensely in developing my skills and I really cannot recommend them highly enough
-
Whose are the etchings? Tempting to think they could be blown up to 7mm... Have a thing about 2-4-0s. My Great Eastern E4 [much fettled Gibson kit] is a real favourite and the 650 looks another little gem.
-
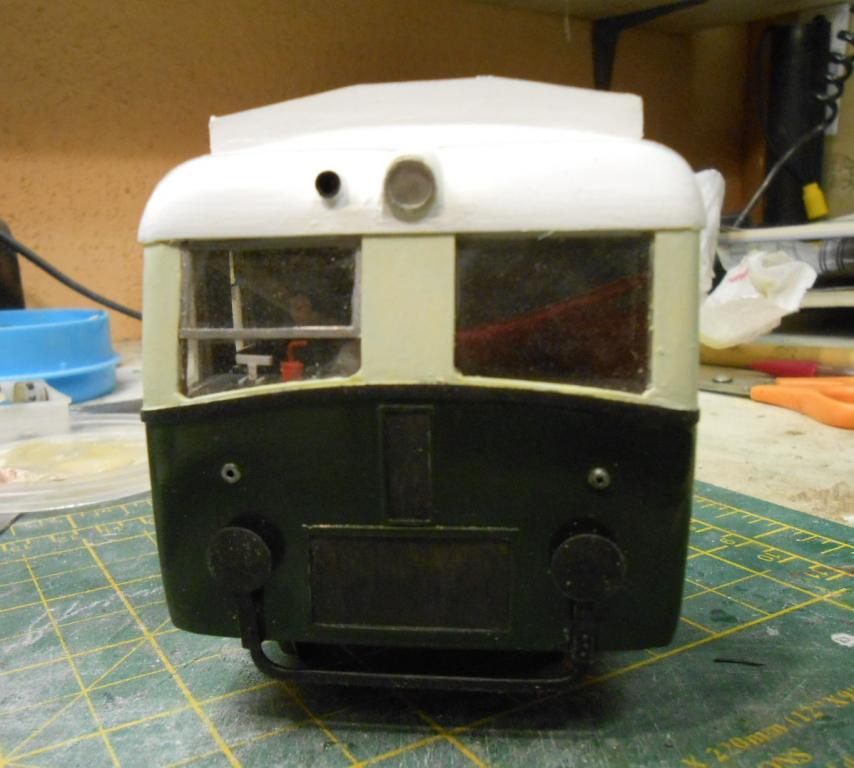
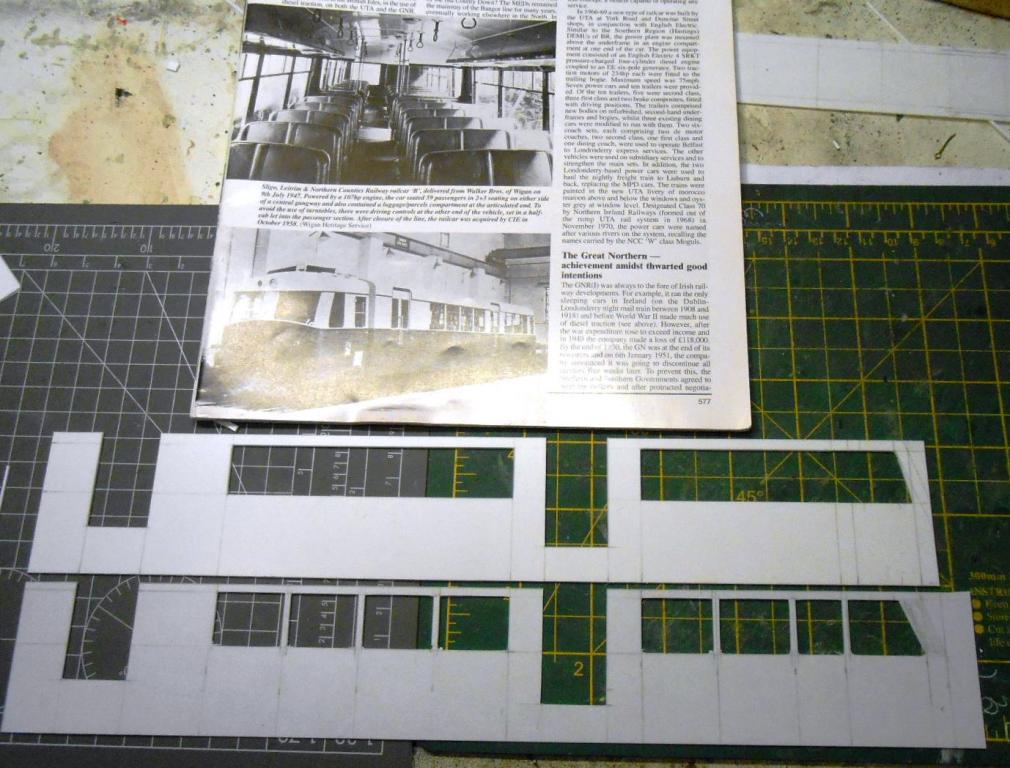
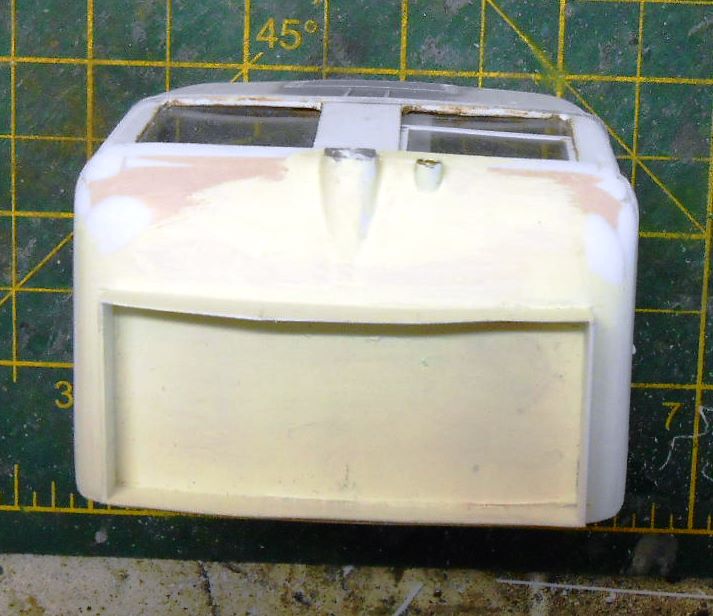
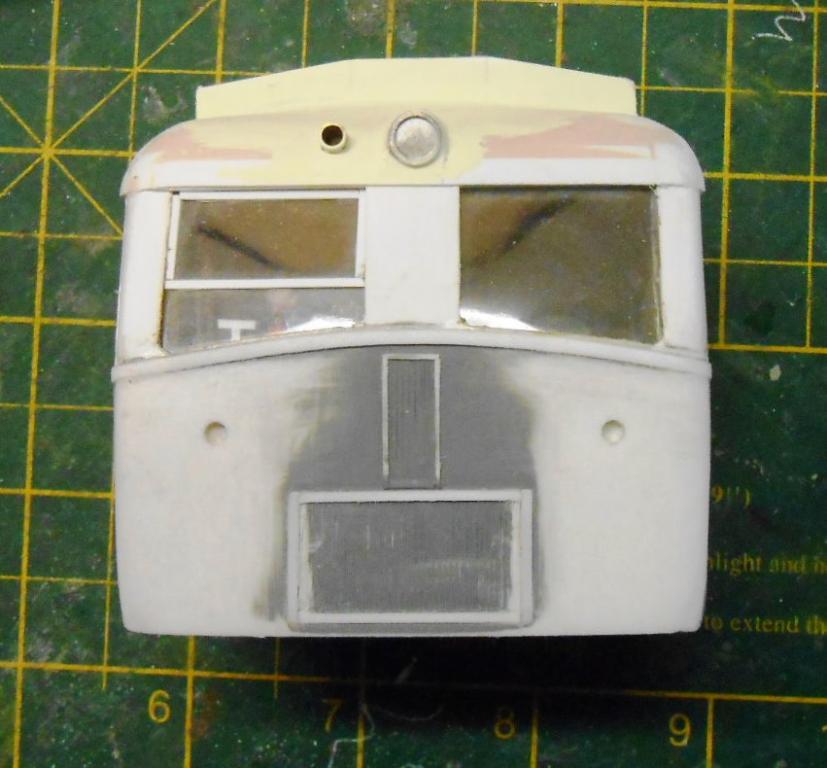
Following John’s gentle [& entirely justified] comments on the railcar’s front end, have been trying to improve matters. The slight curve he mentions is there, but hardly shows. I’d used a piece of 40 thou to pack out the centre [as you can see from the pics] & at the time wondered if 60 or even 80 thou would have been better, but decided that was too much. Space now for rude words… Short of a complete rebuild have tried to fettle it up a little by sanding down the corners and feathering this towards the centre – hence adding about another millimetre to the curve. Have also thinned the waist beading and that round the grille, all with the aim of telling the eye there is more to it than it thinks. Could still do with a bit more, but that is as far as I dare go for now. At least the pics against a gridline show that there IS a curve, even if it is not so apparent away from them. Just goes to show that total accuracy doesn’t always work & some things need exaggerating to show up well – something weathering guru Martyn Welch often mentions. Ho hum – have begun work on the trailer, so will endeavour to make the curve more apparent. Could well be that with the waist beading being straight at that end, things will look better anyway. A couple of pics of the sides to show what I’ve been up to.
-
Hear what you say John - getting the subtle curves right is what makes diesels and the like difficult. Have just had a look at the colour albums and think the waist beading may be too wide. I used 60 x20 strip and maybe 40 would have been better. Am also increasing the tumble home on the bottom corners, with a bit more off the sides too. The dark green top coat may well make a difference as well. Will do a bit more fretting before that, but would not like to be making such adjustments in a smaller scale. Only goes to show how much effort goes into getting 4mm modern diesels right.
-
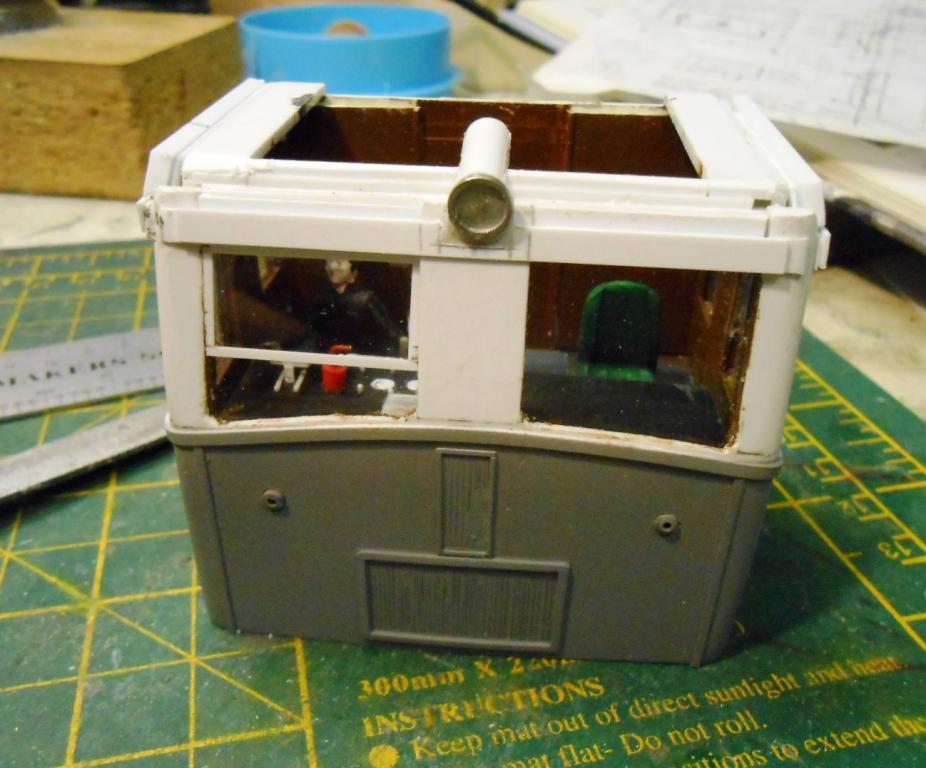
Thankyou kind sir. Appreciate B is currently somewhat undressed and unwell, to say the least. The cab controls on my model are very much a guestimate of what might be there, based on the preserved Walker Railcar at the Finn Valley in Donegal. Not sure now if I want to know how accurate I've been, though could always call my model Railcar C and assume a second one was built later! The photo link goes to some mouth watering pictures. If you ever come across any pre-CIE wagons, I for one would be very interested.
-
The Sligo, Leitrim & Northern Counties Railway opened in 1882 & ran from Carrignat Junction, near Sligo, to Enniskillen. Broad gauge, it remained independent until closure in 1957. While no additions were made, there were proposals for branchlines to Swalinbar [from Florencecourt in 1883] and Arigna. The latter would have left the mainline at Dromahair and run via Drumkeeran, where there had been ironworks in the 18th century, then down the western shore of Lough Allen to Arigna. Here there were coal desposits, which were the basis of the proposal. In fact, there were at least two, the SLNCR’s just mentioned in 1904 and an independent line from Collooney, via Ballyfarnon in 1914. The latter was my initial proposal in an earlier blog, but the former is now the fiction behind my layout. The reason for the change is partly from the acquisition of Neil Sprink’s history of the SLNCR, but also because the orientation of the backscene on the layout better relects the likely SLNCR route and physical geography of the area. On the map, the station has been rotated 180 degrees, with the line exiting to the east & also moved north of the minor road from the actual Cavan & Leitrim station. Had the line been built, subsequent history would have most likely followed that of its parent, with railbus & railcar taking most passenger traffic and steam power for freight. However, I still like the idea of the M&GWR/GSR having a hand in the coal traffic, which is the excuse for my J26 tank. Being wholly in the Republic, it seems likely that most traffic would have been to/from Sligo, so a timetable will be created to link with mainline ones at Dromahair. Had the line been built, I guess it is just possible that it might have outlived the main SLNCR’s closure in 1957, not least because coal traffic could have continued to run & perhaps a link to the new power station on Lough Allen in 1959 would have brought welcome extra revenue. This could even have kept the line open until that closed in the 1990s. My larger version of the Arigna community might even have kept passenger trains running too. If so, the Railcar B could easily have continued into the 1980s, with C or G class diesels on freight. It is something to keep me interested as far as future stock building is concerned! [attachment=:name]
-
Arigna Town - this week's scenery
David Holman replied to David Holman's topic in Irish Model Layouts
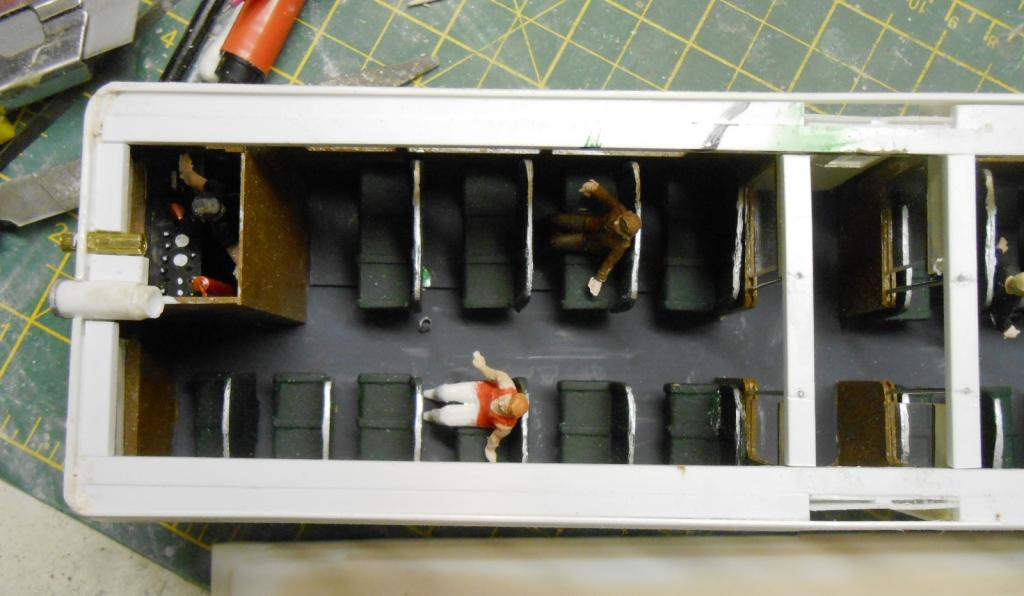
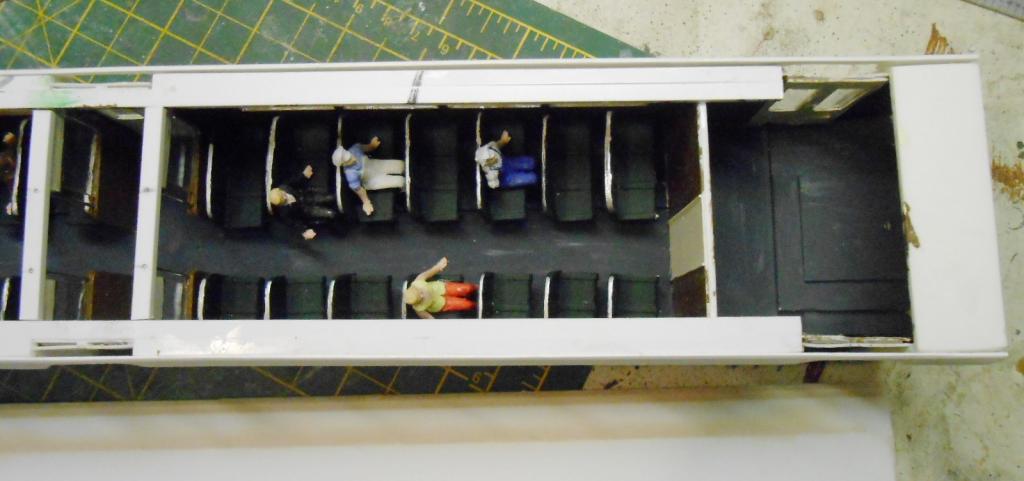
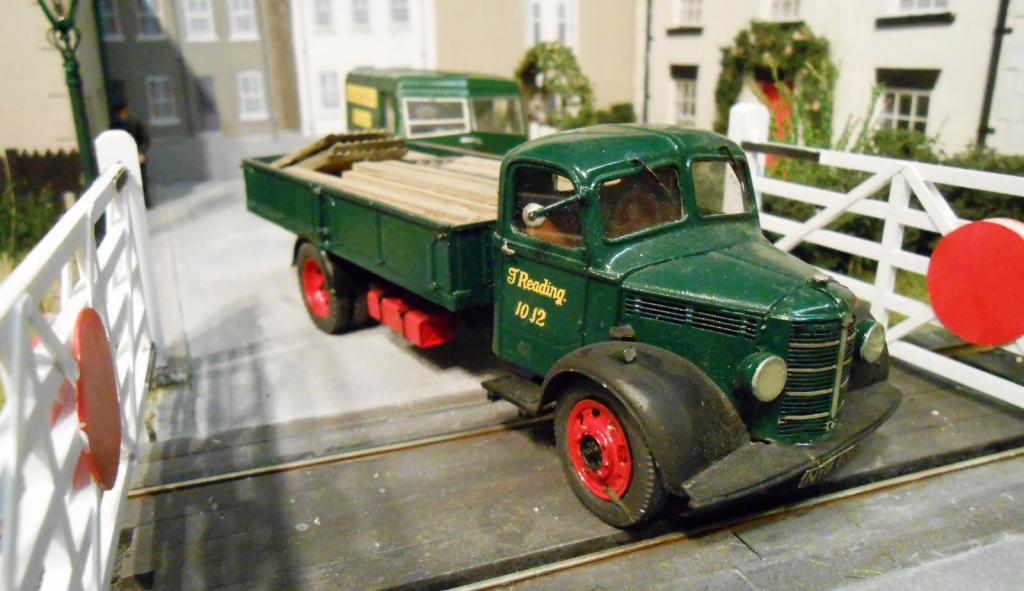
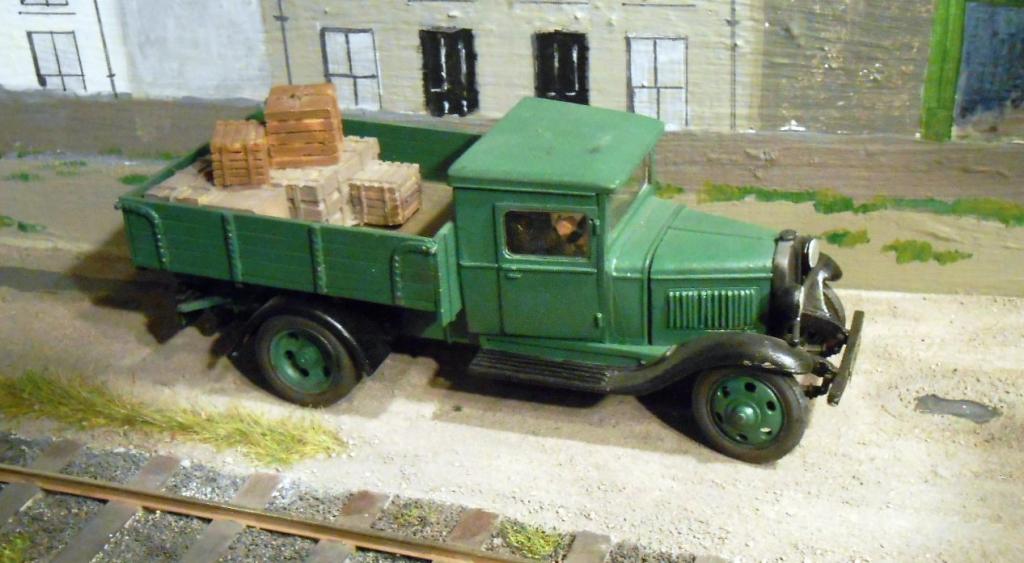
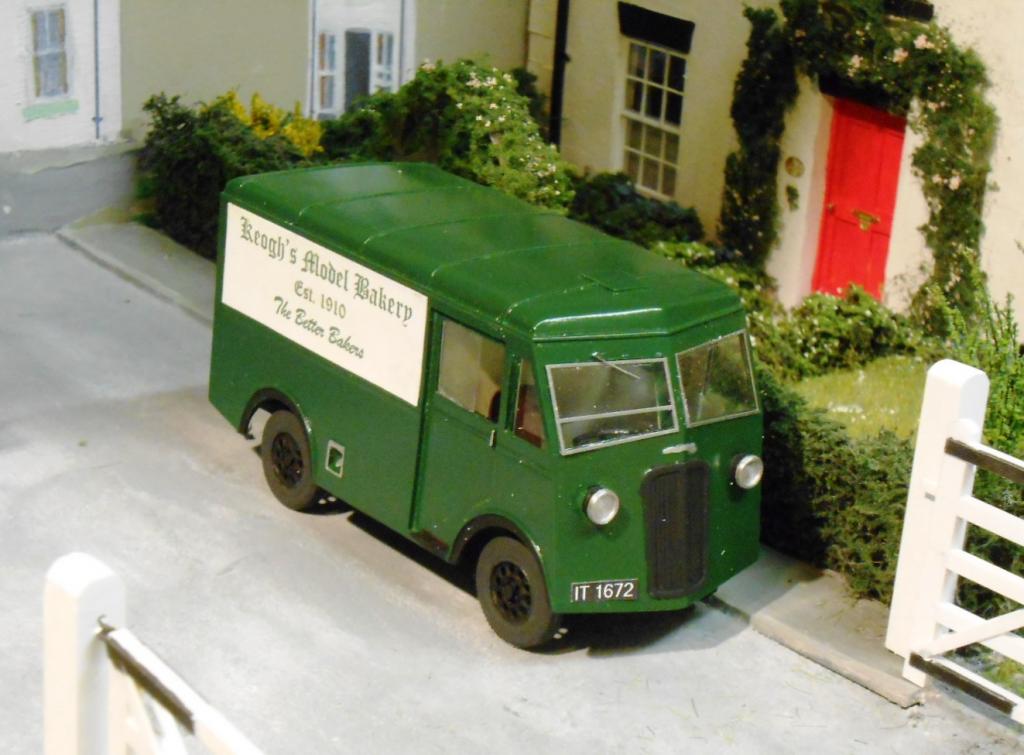
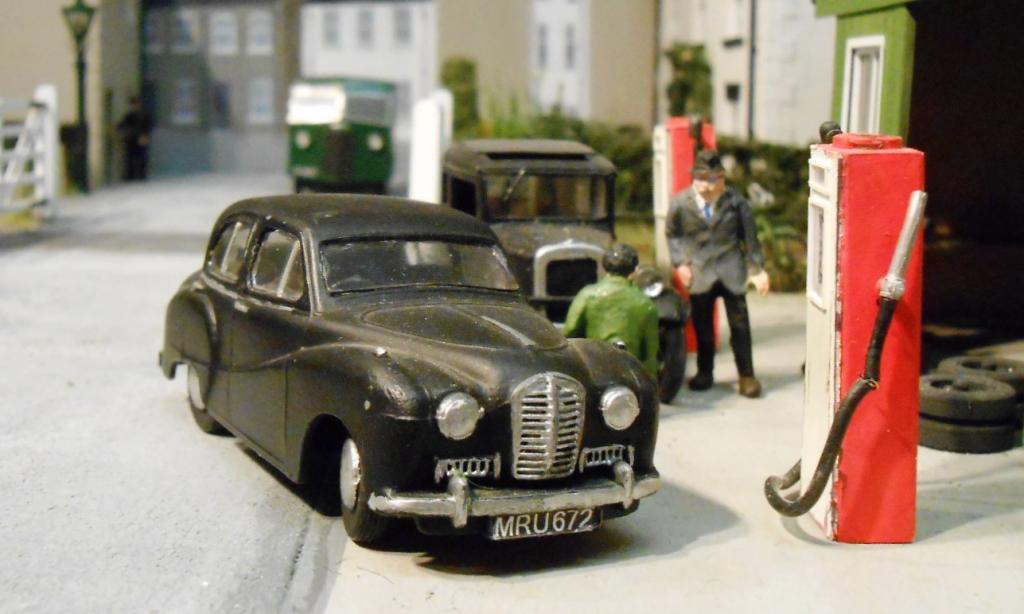
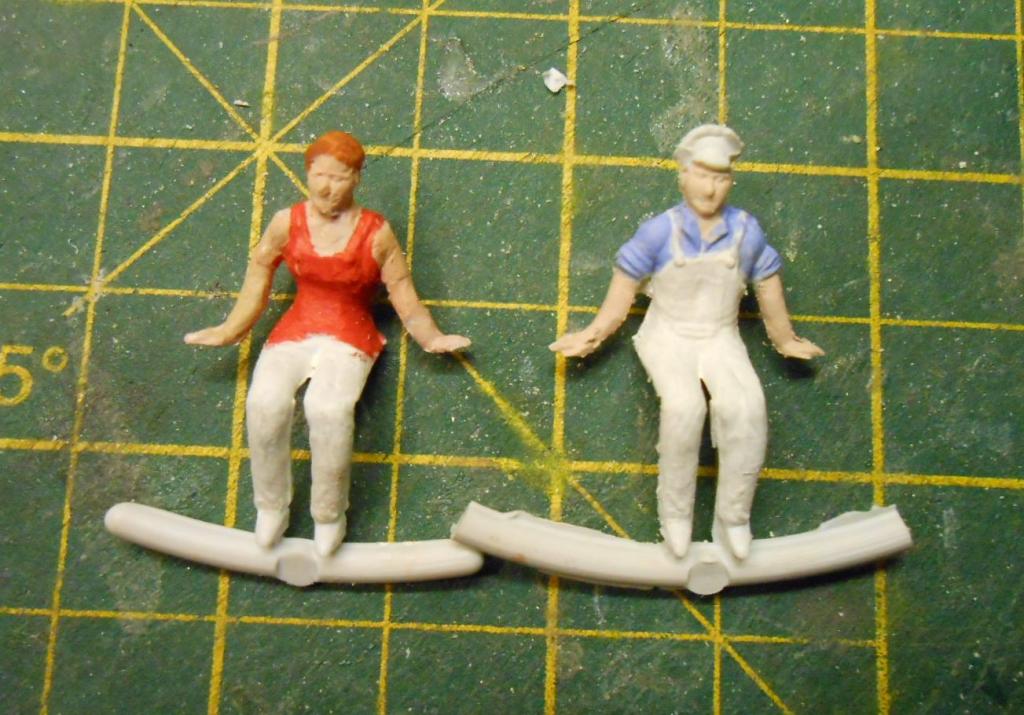
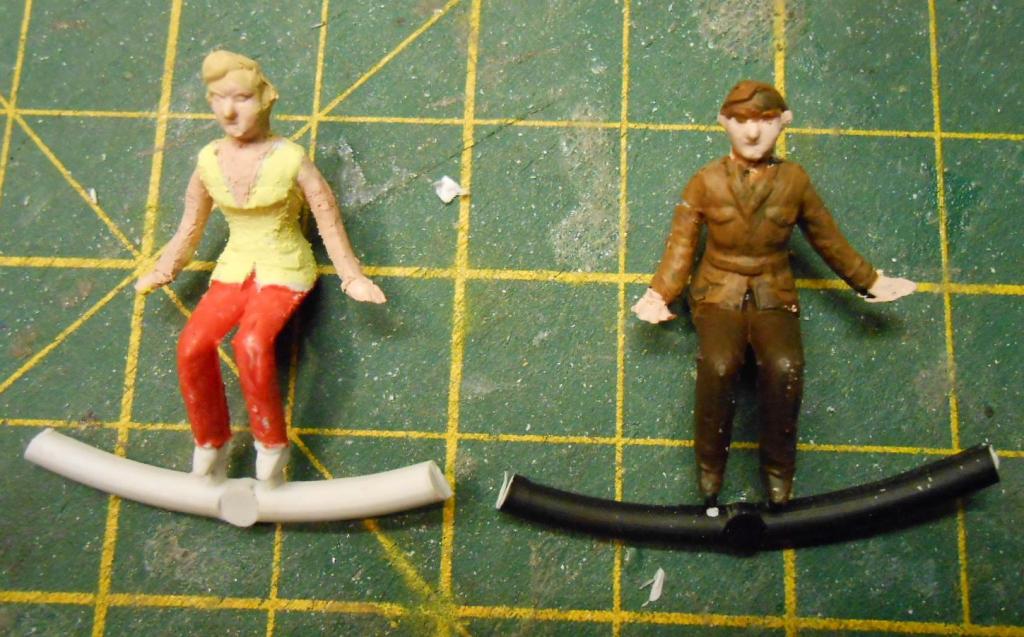
Like scenery, road vehicles are a key part of making a model railway seem realistic. However, while they can look ok in photos, at an exhibition, one needs to be careful about where to put them, as unlike the trains, they are not going to move. Faller systems excepted that is. As in most 7mm scale layouts, Arigna Town does not have a lot of room for stuff beyond the railway fence, so I’ve tried to be selective in what to include. Apart from the little donkey cart and the Austin 7 at the garage, there are three commercial vehicles and a car. Even so, not all should be on scene at the same time as I am determined not to fall into the trap on making it look like the M25. The two lorries are both Classic Commercial kits. One is a Leyland lorry, loaded with building materials. It is mainly resin castings, with some etched and whitemetal details. The other is a much older, whitemetal kit, revamped under the CC label. I’m not sure of the prototype, but am hopeful some of you will tell me. The Morris PV box van is my latest acquisition. Also Classic Commercial and again mainly resin, with some very fine stainless steel etches for the windows and finely cast whitemetal wheels. Took ages to build because you need to stop and paint things every so often. Like the other vehicles, the wheels are sanded flat where they sit on the ground, a subtle, but very effective treatment I recommend to anyone. The only other vehicle is the oldest, being a Dinky Austin Somerset from my childhood. Committed sacrilege by removing the paint and chassis, then added seat, new wheels and glazing. The numberplate is that of Dr Ian Allen, the Suffolk GP who took many railway photos in the 50s & 60s. Doubt if he made it to Ireland though. Old Dinky and Corgi toys can by useful in 7mm scale, but one needs to be careful where they are put as most are to either 1:50 [or 1:48] scale so are much too small when put alongside a 1:43 model. The last pictures are some figures for the interior of Railcar B. I mainly use the Peco figures for passengers. They are cheap, but also rather nasty, with lots of flash and rather mediocre detail. The 6 I had left were of just two different types, but am rather pleased with the adaptions I’ve made, not least because three have changed sex! A bit of work with some needle files gave them more of a waist [& even a bit of a bosom]. Similar work got rid of caps. Guess I could have got the filler out to make trousers into skirts, but for inside a coach compartment, they’ll hopefully pass muster. Rather cruel enlargement though.
-
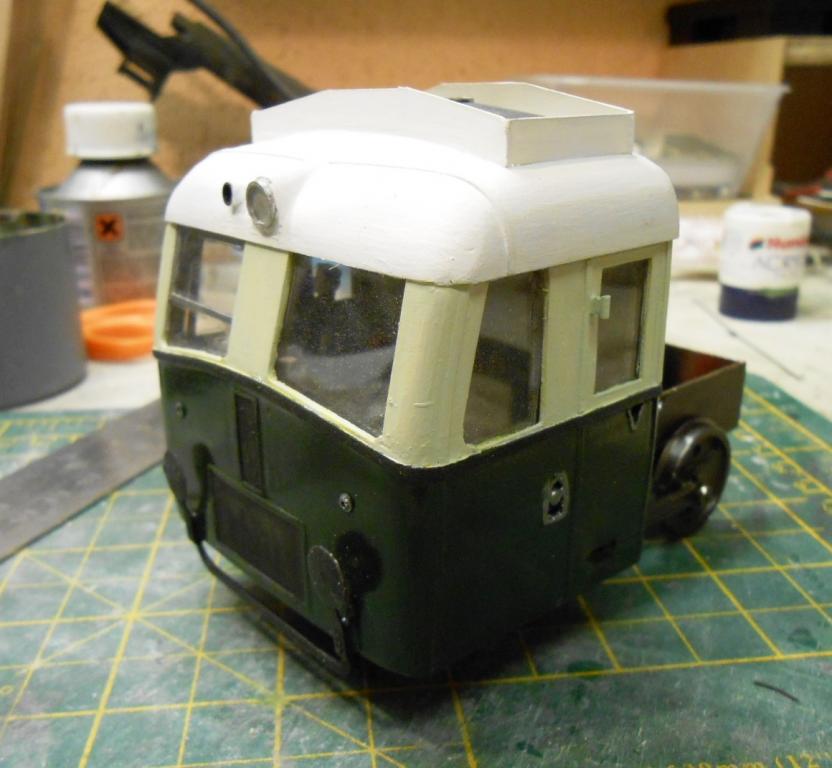
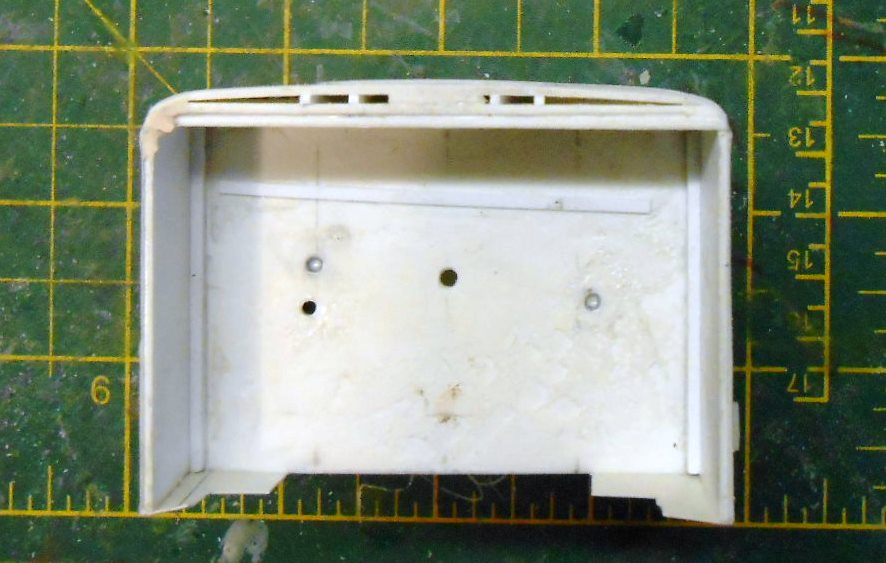
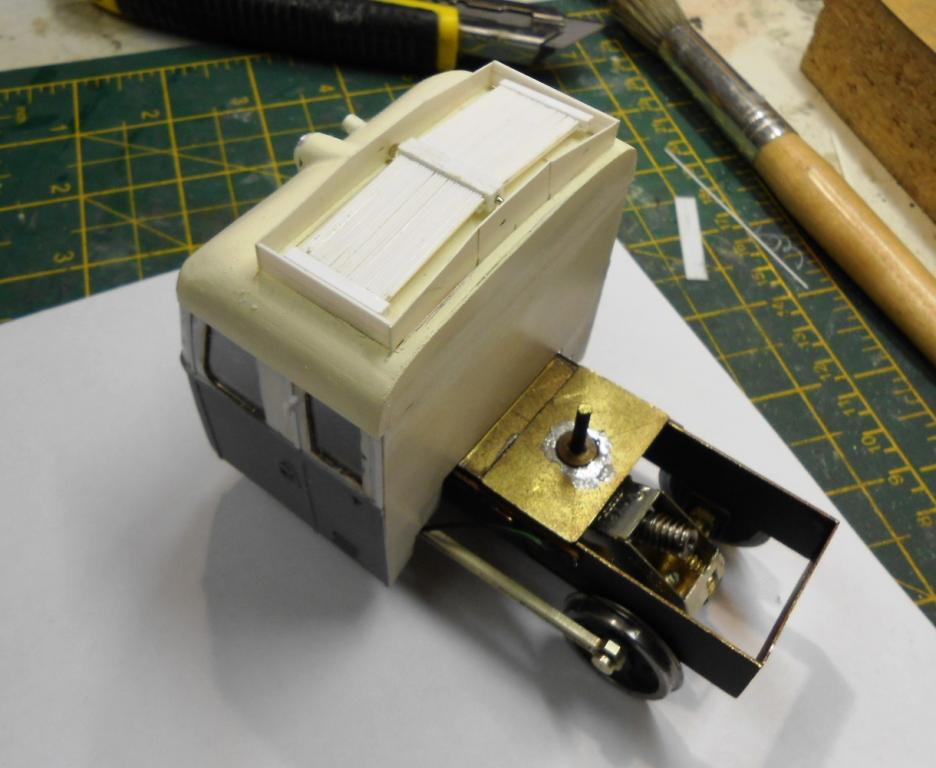
Railcar B’s tractor unit is now taking shape. The body part is not very big [less than 2 metres long] and built around a shell of 40 thou plastikard, with 20 thou overlays to form the right tumblehome. The advantage of this is that it leaves a nice little slot to fit the glazing. Sections were also cut out for the door handles and footsteps. The complex shape of the roof was very much made up as I went along. Began with various layers of plastic strip, then added filler and began the careful process of sanding it all to shape. This was made less easy by the headlight, which is a piece of plastic tube fronted with a spare casting from the Morris van kit. The two marker lights are two pieces of brass tube, fitted into holes drilled in the body, while the beading is 10 and 20 thou strip. Made up a radiator unit for the roof using plastic rod and strip, with 10 thou plastic used for the box it sits in. This is let into the roof by sawing two slots. Thus far, the simple chassis seems to run well, so must hope it has enough power to pull the trailer…
-
Lovely artwork on the kit and the A class looks good too. Never realised CIE ran jets though...
-
Pancake motor and probably the same amount of detail, or lack of it, as the O gauge 4F. Appallingly crude by today's standards, so why do these things hold such a fascination and command such prices? I too could be tempted, but no idea why!
-
Bob Symes and the Dukedog on the Bluebell. Bet nobody then thought the loco would be available rtr...
-
Very nice indeed. I would need at least ten metres to do that in 7mm scale!
-
Cement is heavy, though the plants were not necessarily large. Somewhere in the back of my mind lurks a thought that there were a couple of Sentinels bought by CIE to shunt the factory near Limerick? For those of us working in 7mm scale, there is the option of ready to run as Skytrex produced a model a few years ago, while Walsworthmodels models will build you one for just £150.
-
Yes please!