David Holman
-
Posts
4,359 -
Joined
-
Last visited
-
Days Won
117
Content Type
Profiles
Forums
Events
Gallery
Blogs
Everything posted by David Holman
-
Seriously clever stuff, John! As you say, real modelling, but without the mess, though I guess rude words are still an option! Not my scene (yet, anyway), but doesn't mean I can't admire the quality. Really interesting too.
-
That's it. Thanks!
-
Fintonagh makes its last appearance for a while this Saturday at the Letchworth Model Show, which is actually at the Priory School, Bedford Road, Hitchin. Hopefully, it will reappear in two or three years time, but made over with a Donegal/Swilly theme.
-
Somebody did something like that once, though it was the same scene four times in each of the four seasons. It rotated about a central axis and was more a diorama than a layout. Fairly sure it appeared in an early MRJ and no doubt someone will dig it up for us. As for your idea, accessing the wiring might be a challenge, methinks! However, there are some clever folk out there, so who knows?
-
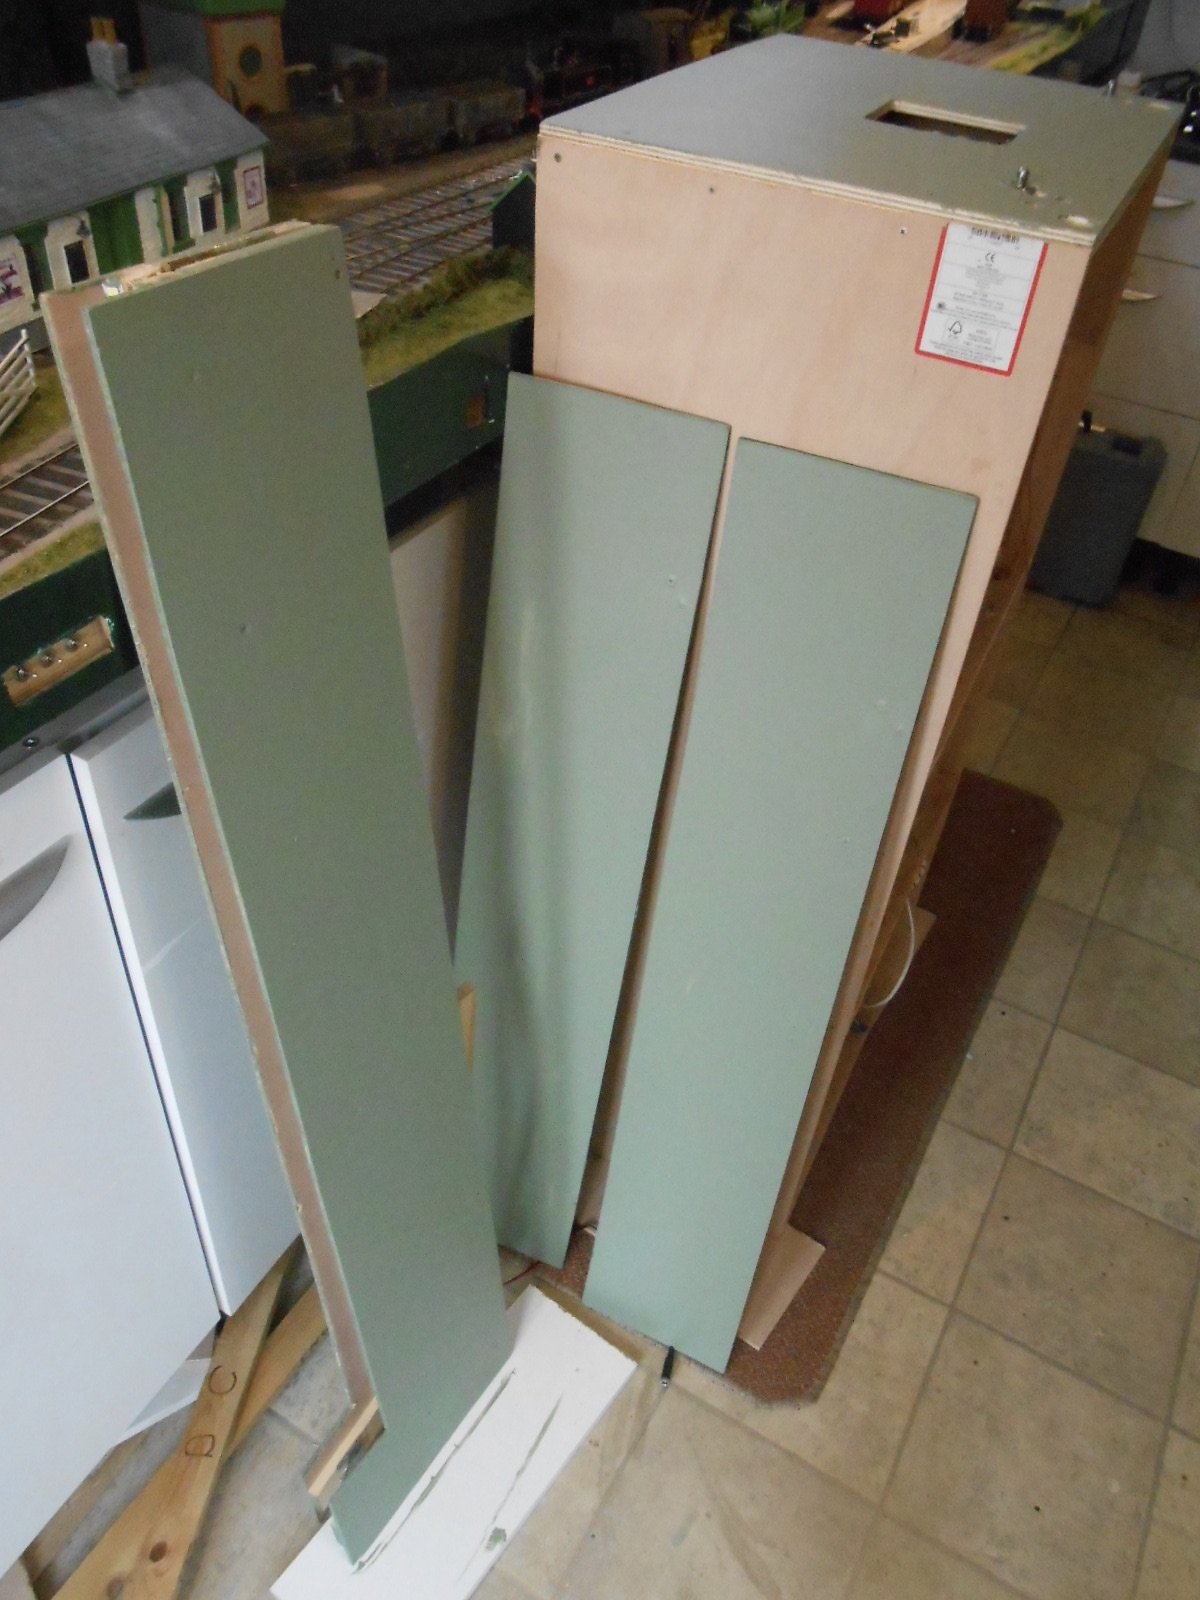
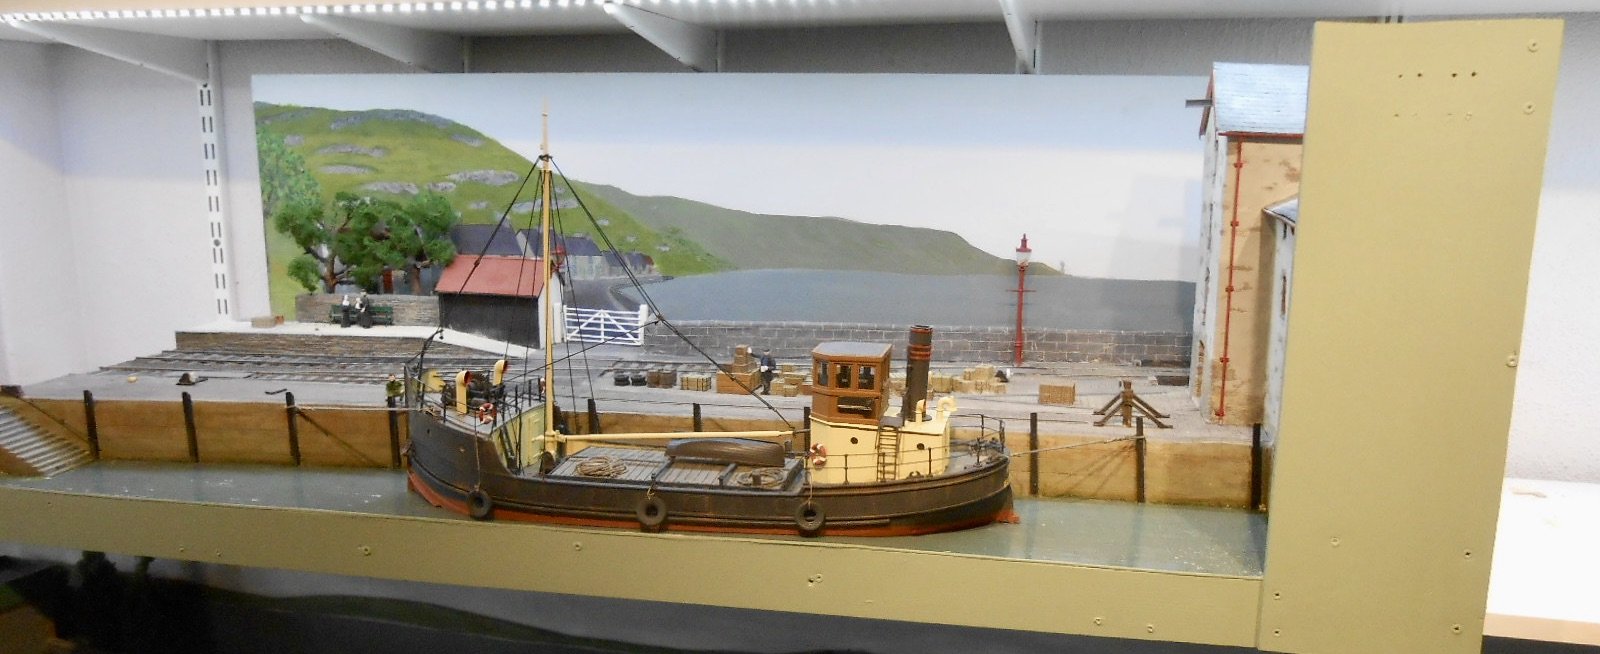
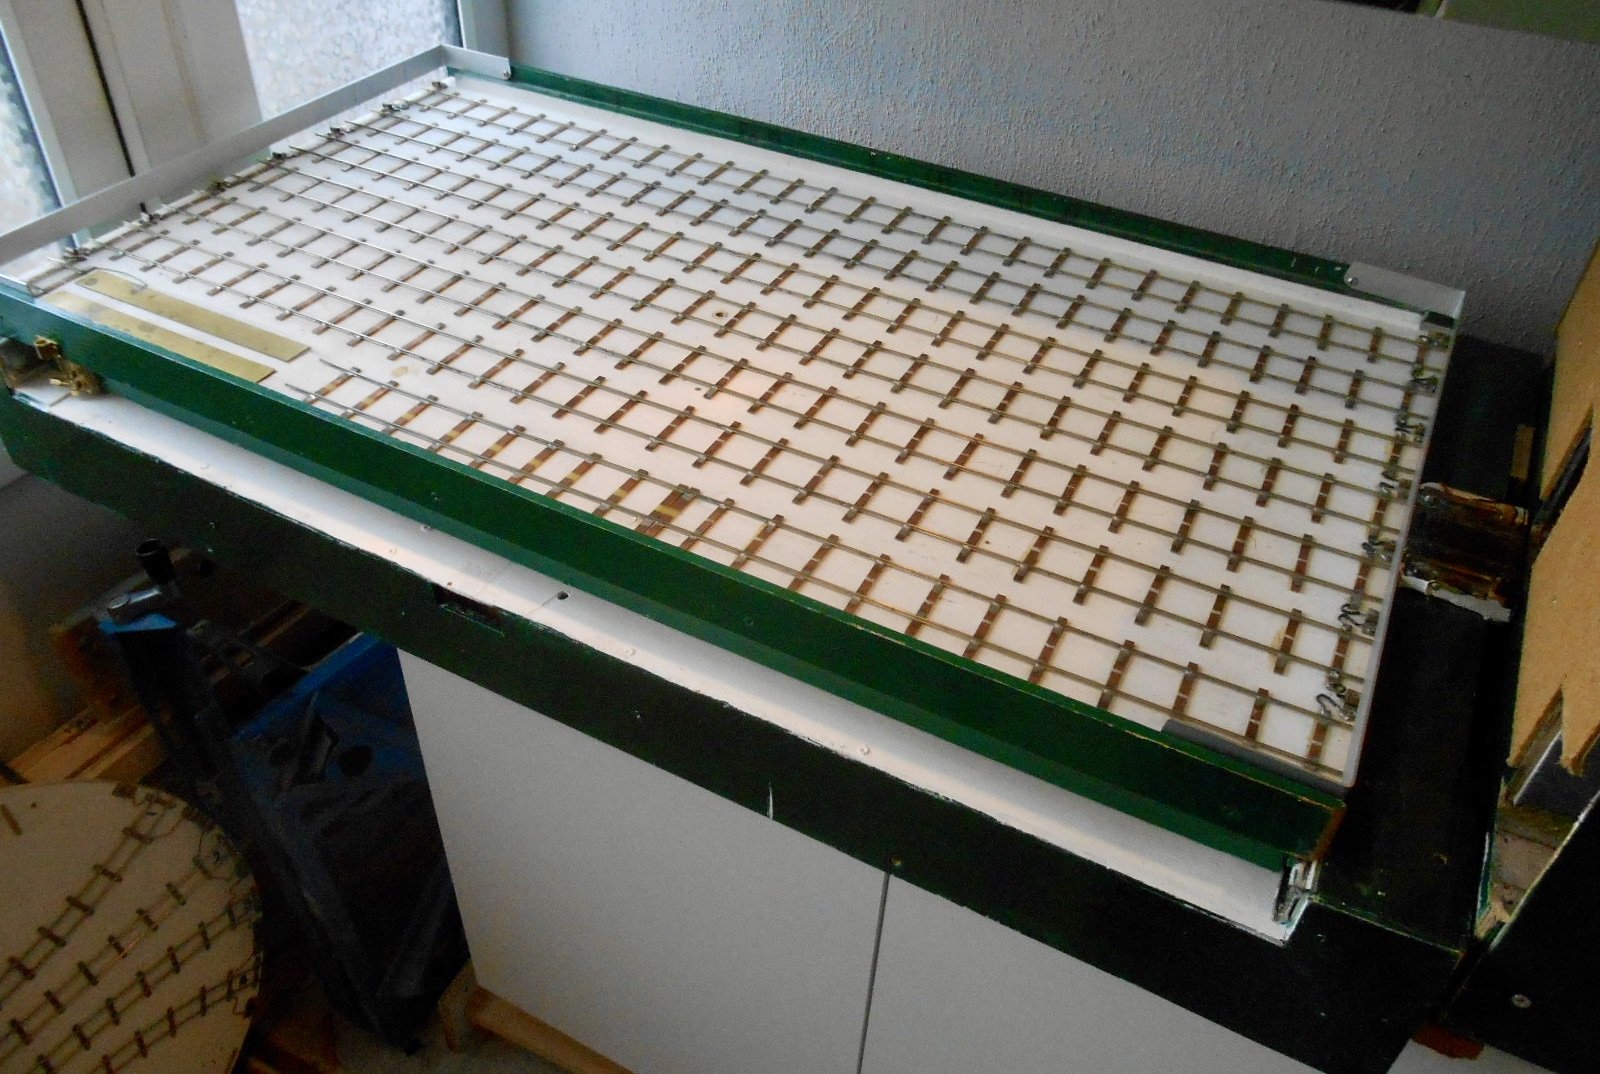
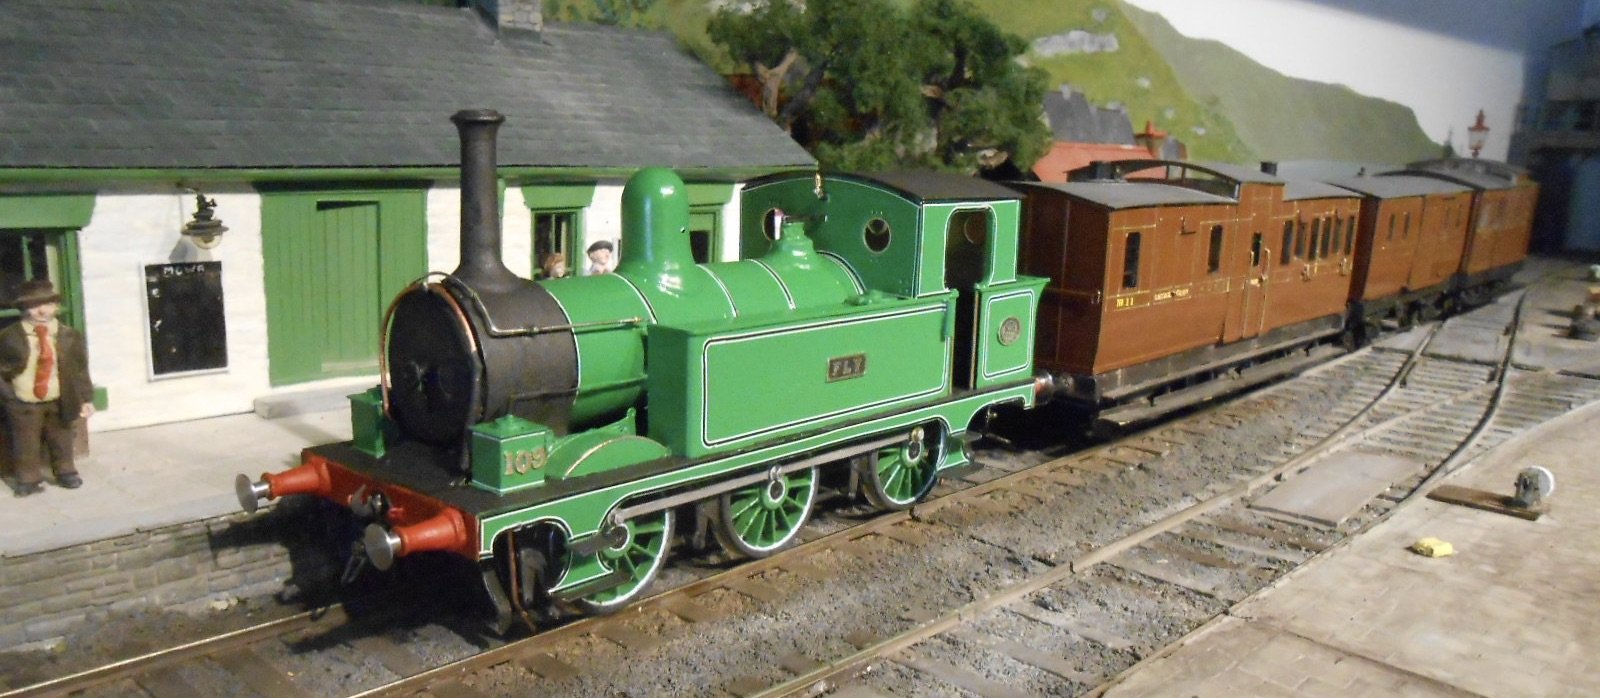
After a couple of months break, the layout comes up on the to do list again - this time under the 'general presentation' heading. The pelmets and fascias that I made back in April needed painting, so decided to use the same 'herb green' as on Fintonagh. It is the same colour in both pictures below - which only goes to show the effect lighting can have. In the last few weeks, I've also been brooding over the overall make up of NPQ. The original plan was for there to be a line exiting 'stage right' to the pier. However, there were two issues with this - firstly it would mean the need for an operator at that end and second that my existing drapes would not be long enough. On top of this, a fiddle yard at this end also meant something else to fit in the car, so in the end, decided it had to go. So, the hole in the sky has been boarded over. Operationally, this means the goods train which was supposed to shunt wagons on and off the pier, needed an alternative operation. I think I've solved this by shunting a single wagon to and from the right hand siding. This was originally intended as a sort of shunting neck for the pier manoeuvres, because I don't want a rake of wagons blocking the view at this end. However, a single wagon, alternatively dropped off or added to the goods [itself only three vans and a brake], shouldn't block much of the view. What I do need to do is add a second uncoupling magnet in the platform road to enable the move to happen fairly simply. Th train loco will uncouple, run forward into the headshunt and then reverse into the loop to pick up the van from the siding.. This will then be attached to the brake van and the two vehicles pushed back to the headshunt, ready to be coupled up for departure. My other concern has been the main, left hand fiddle yard. This has been a very effective feature of both Arigna Town and Belmullet, being able to both slide from side to side and rotate as well. Hence no handling of stock is necessary. Unfortunately it is very heavy, so will be cut down from 118cm to 100cm and have 10cm sawn off the overall depth too. The 7 track train table will remain, though the central axis will be off centre. The shortened frame will eventually gain a narrow gauge track table, so it can be used when Fintonagh goes out again after its Donegal/Swilly make over - saving a bit of space in the workshop too... So, lots still to do and NPQ's debut at Uckfield in October feels like it draws ever nearer!

- 257 replies
-
- 14
-

-
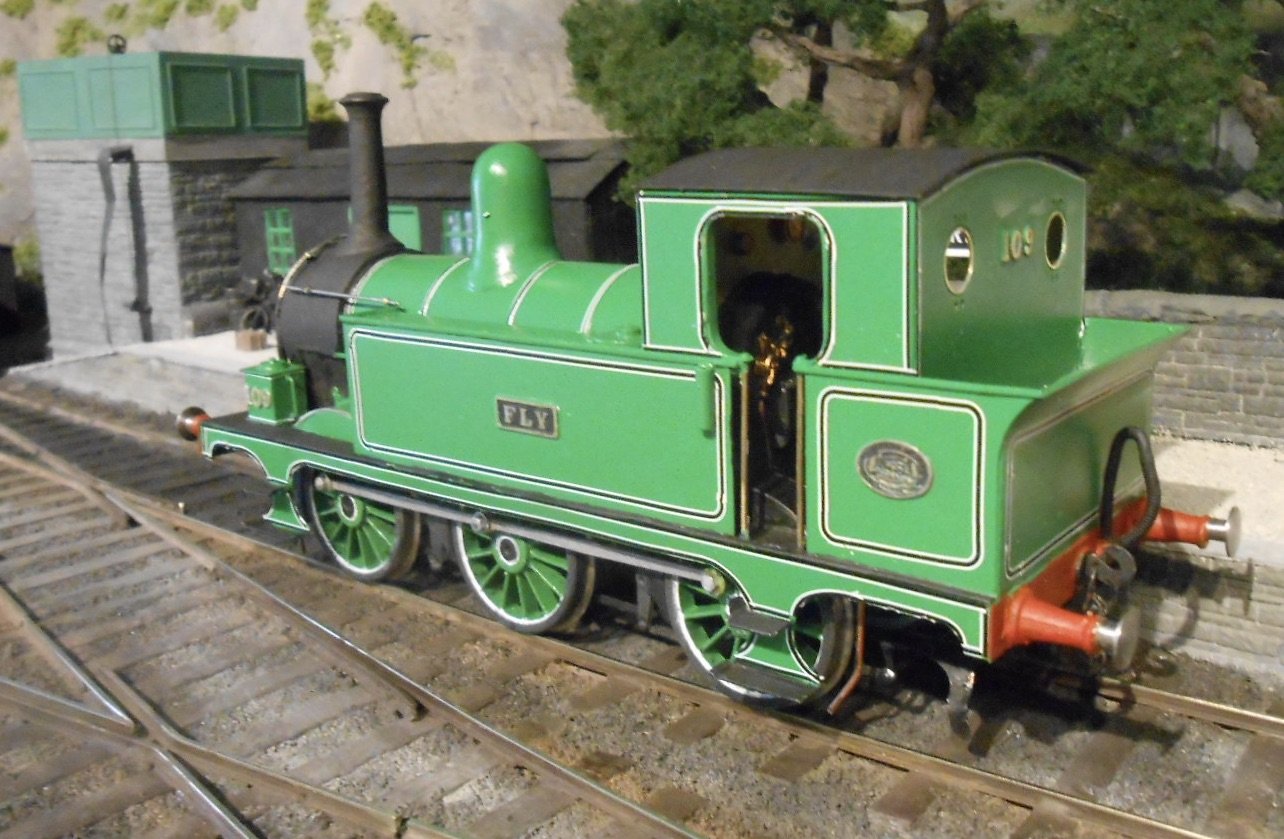
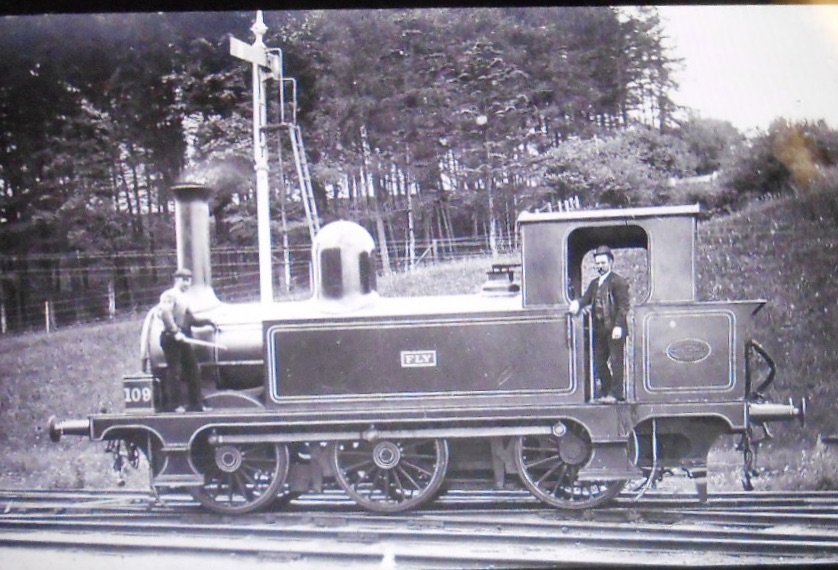
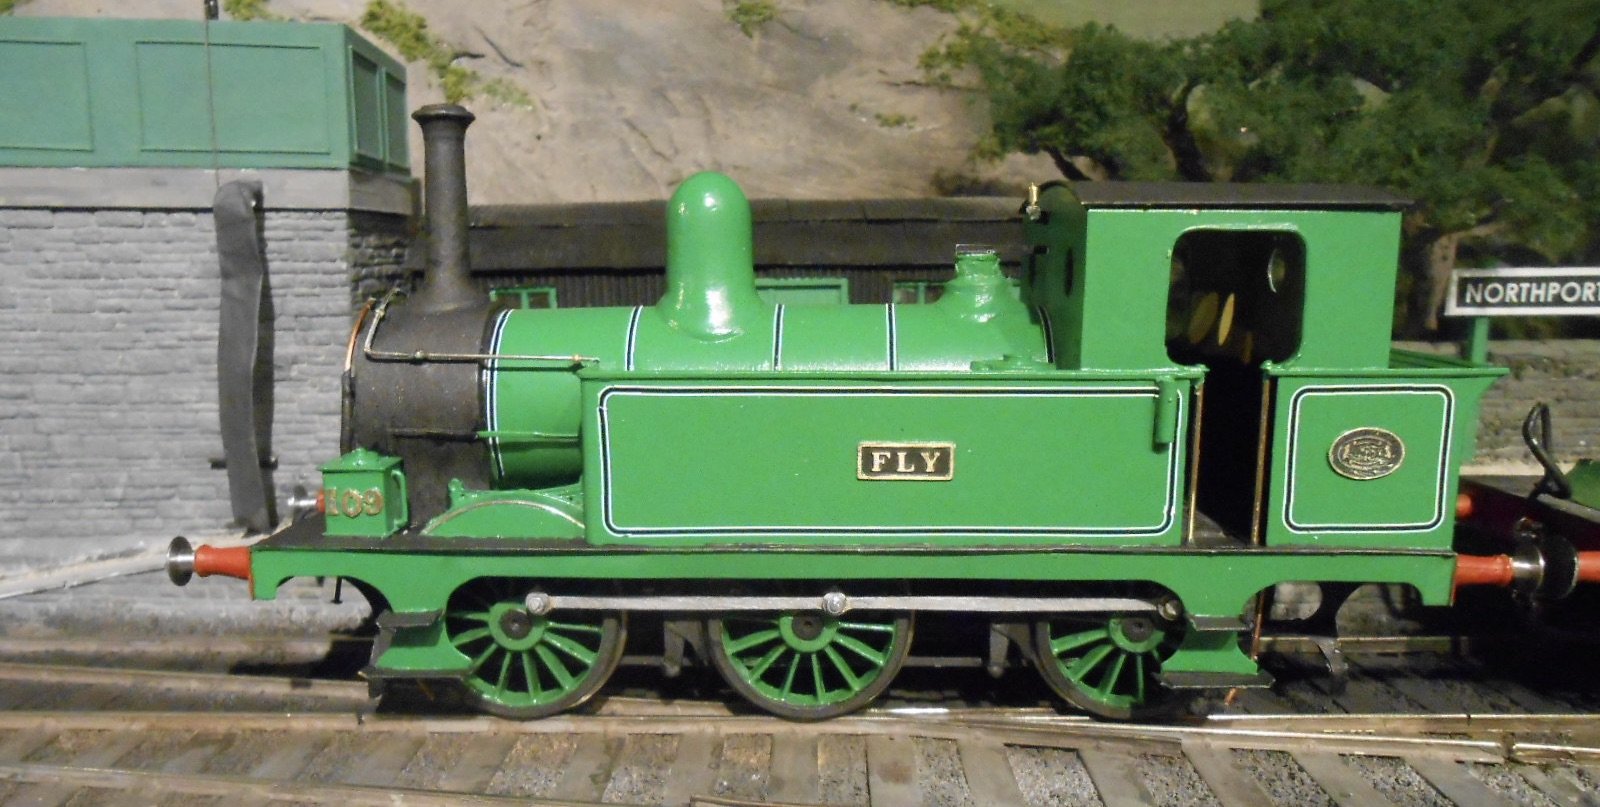
I shudder think how small that number plate must be! Soldering 109 to the sandboxes of Fly was more that enough of a trial for me. Seriously delicate work.
-
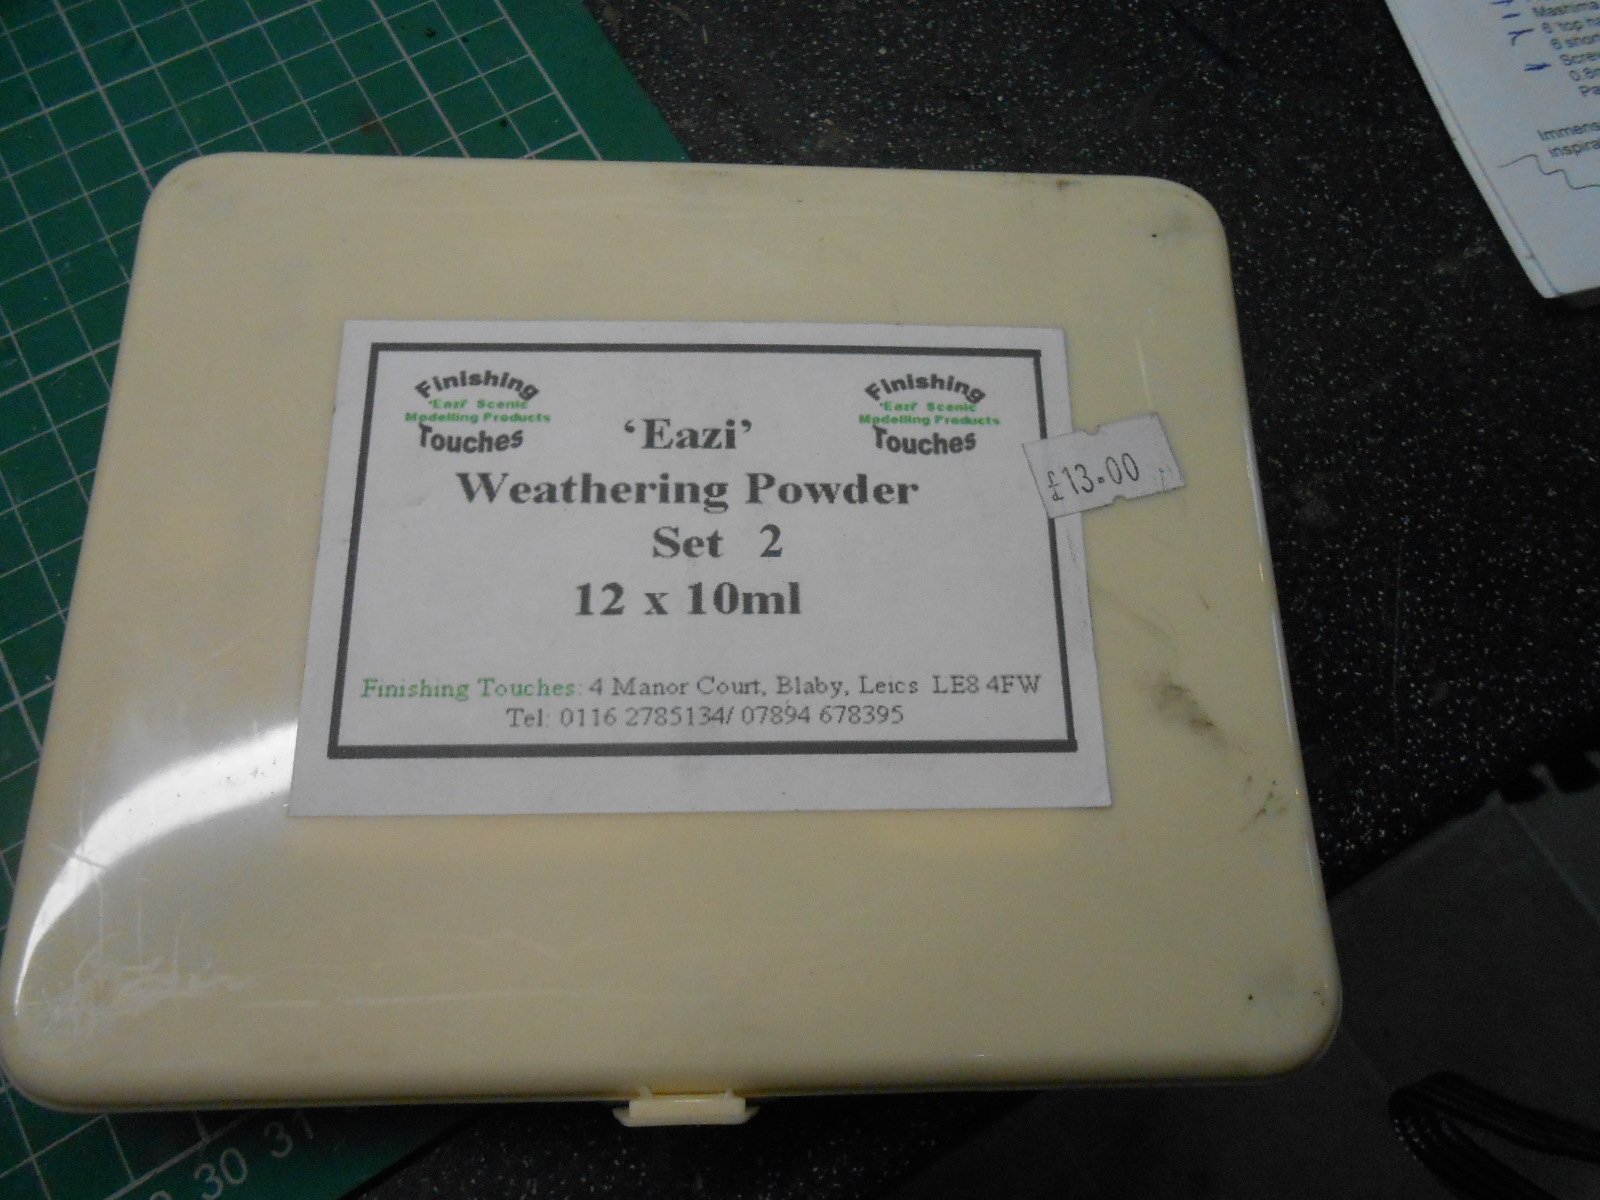
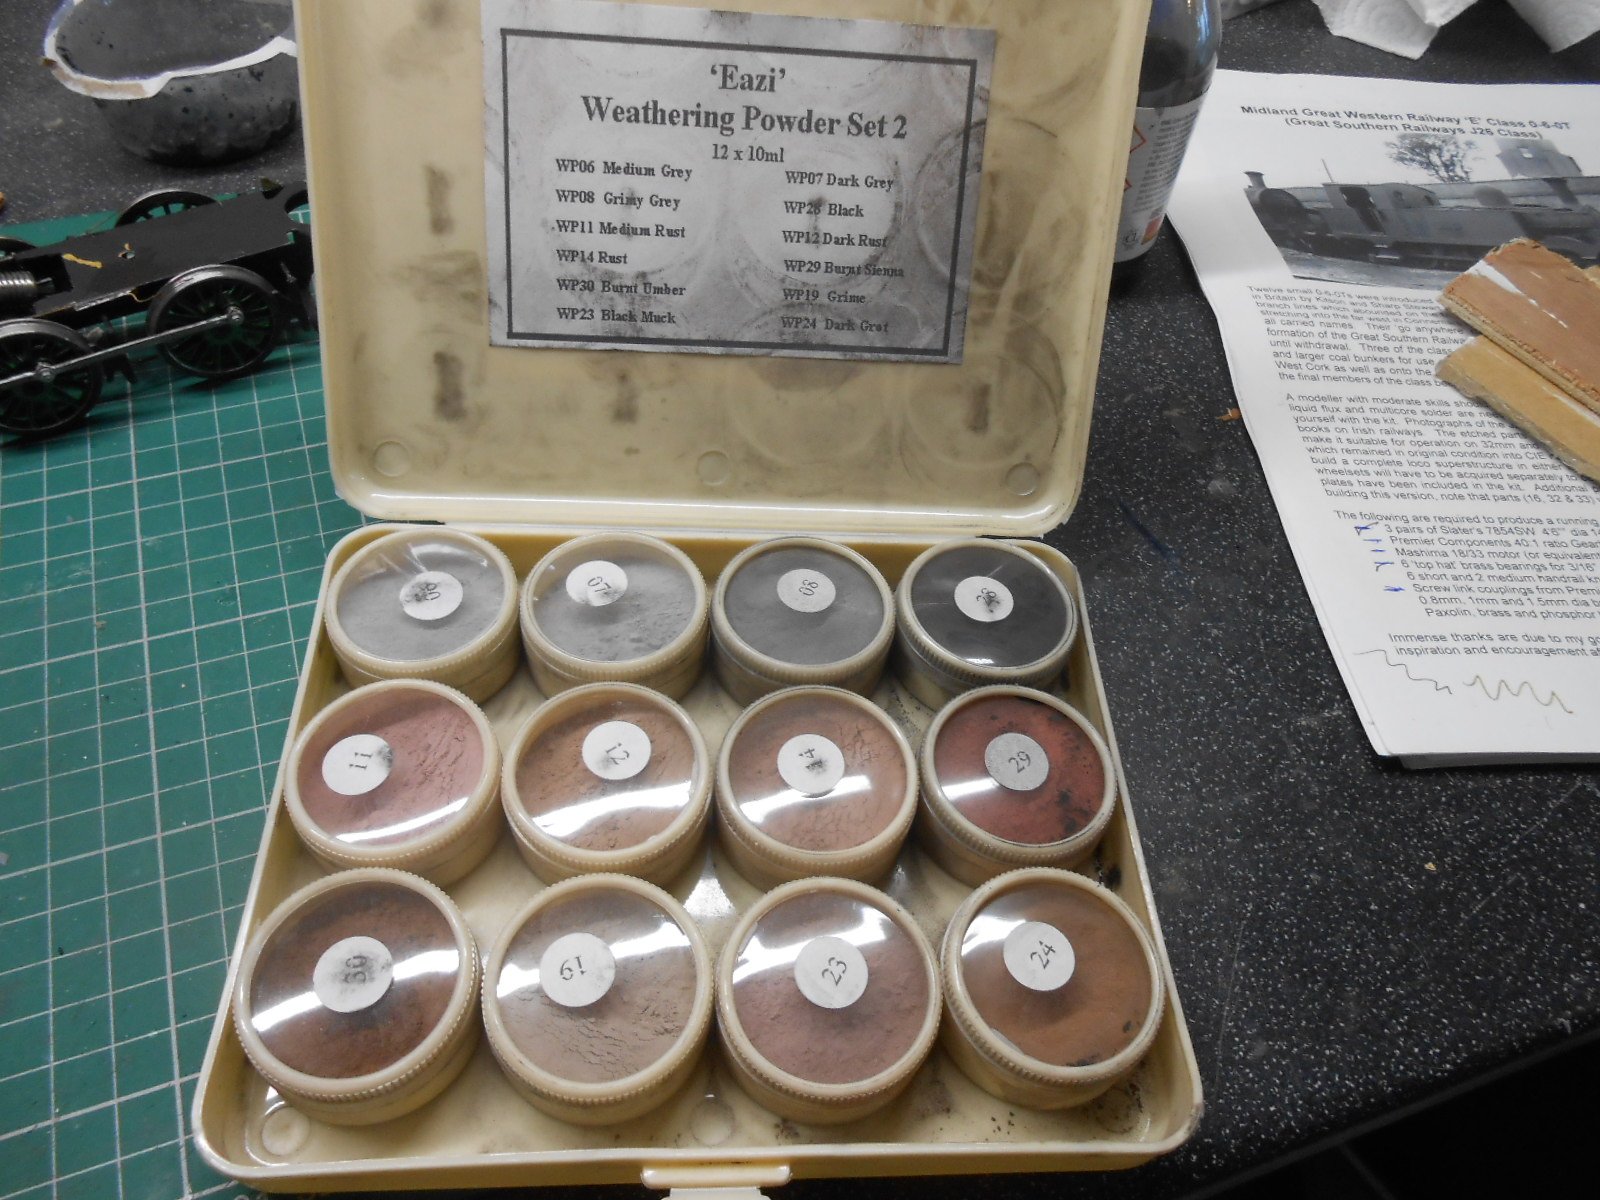
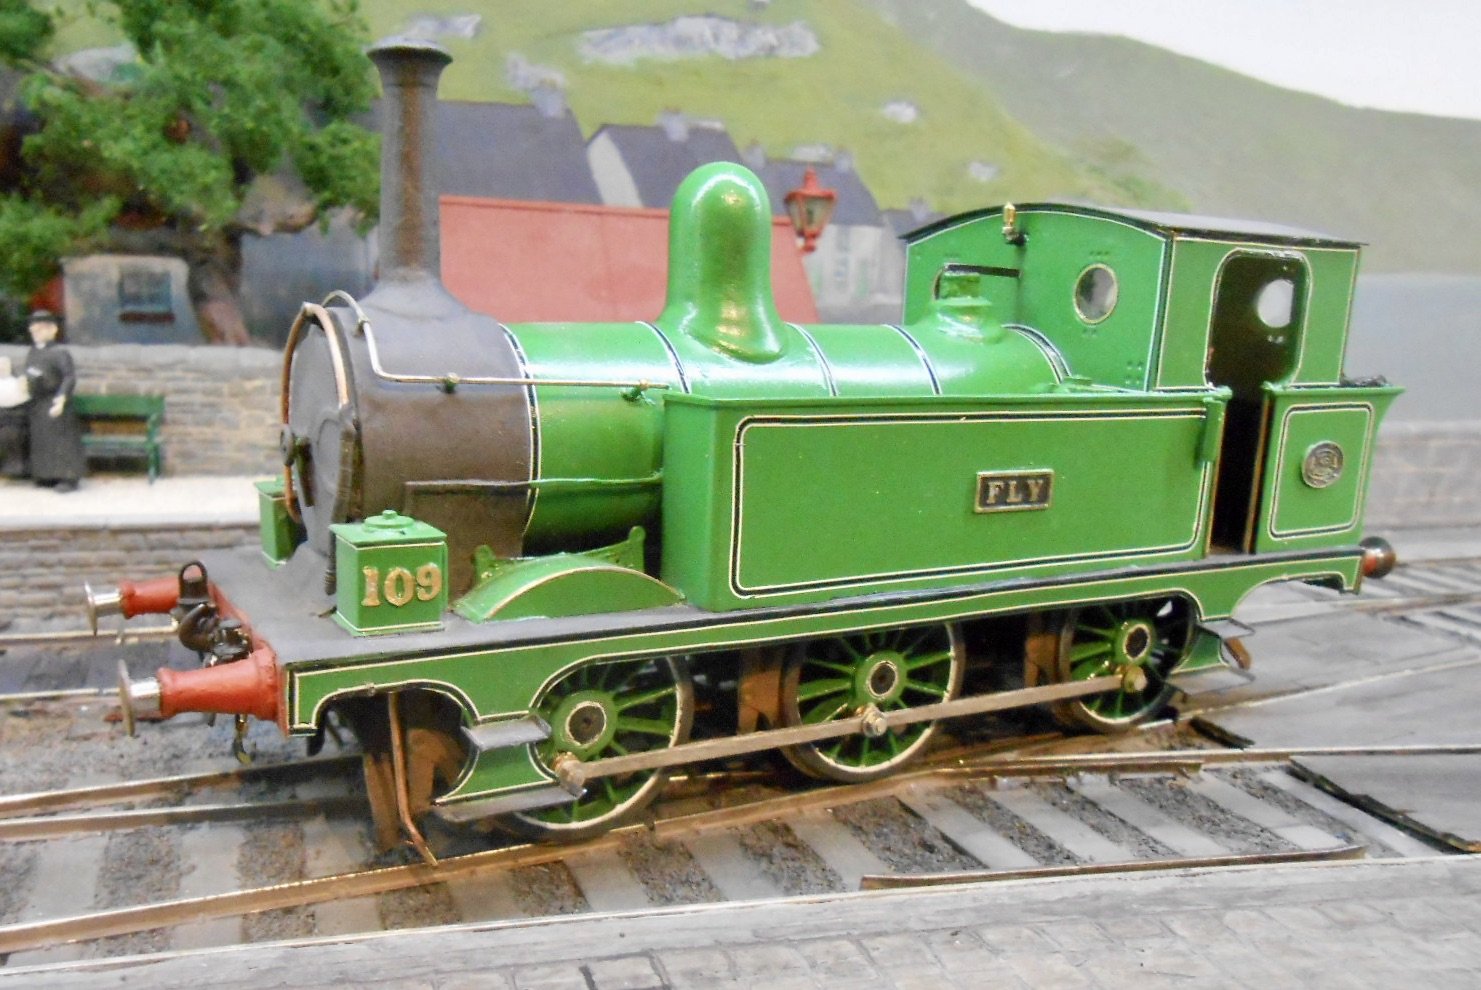
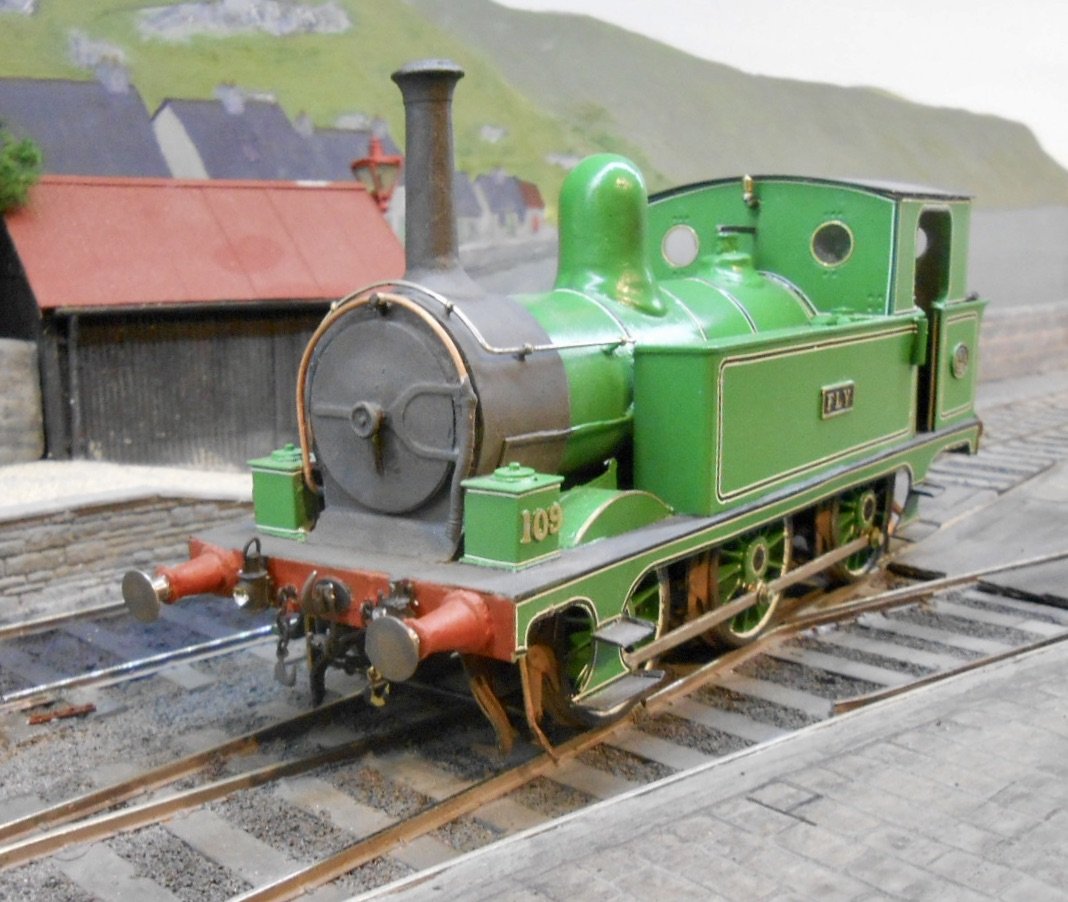
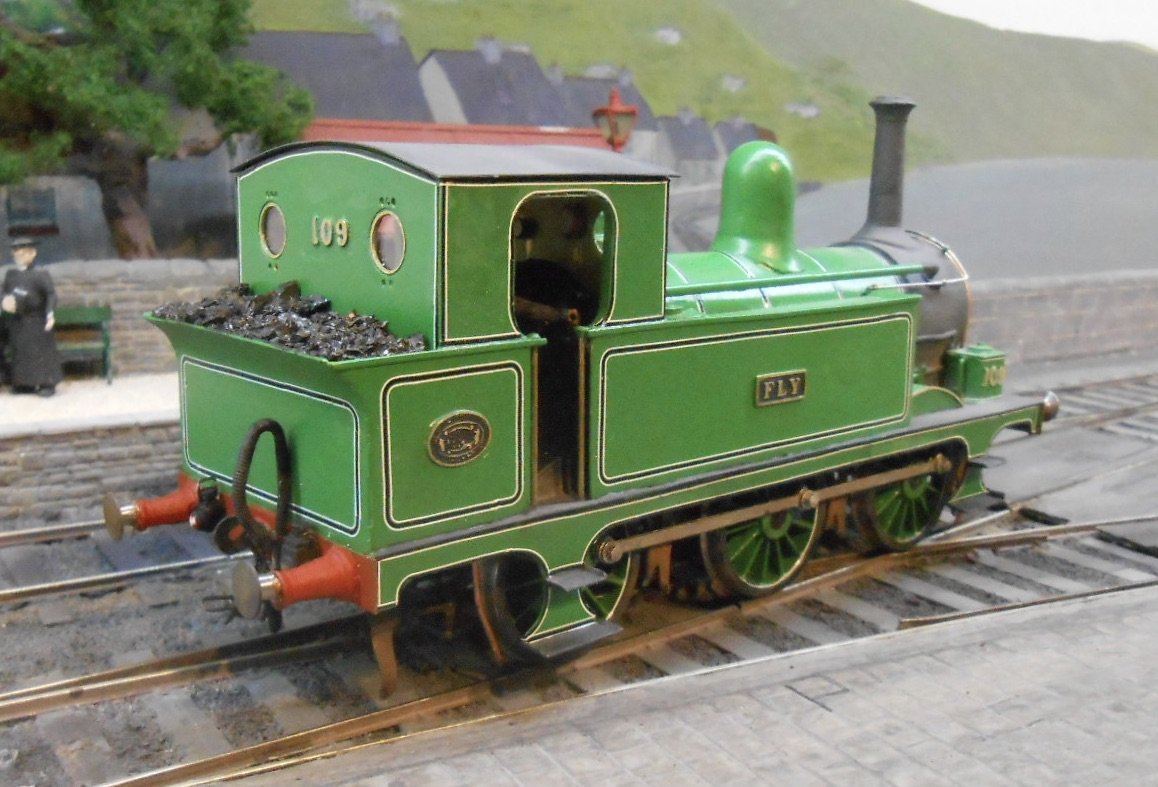
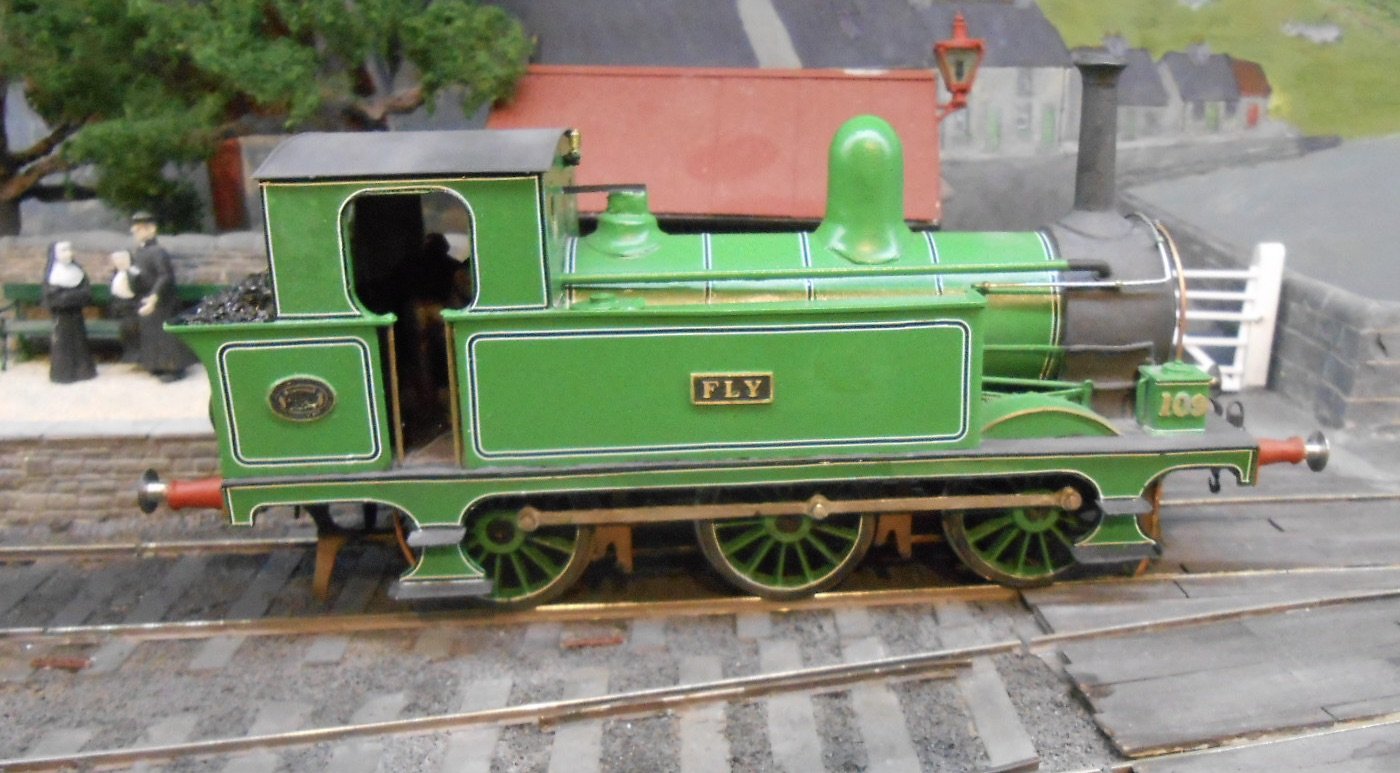
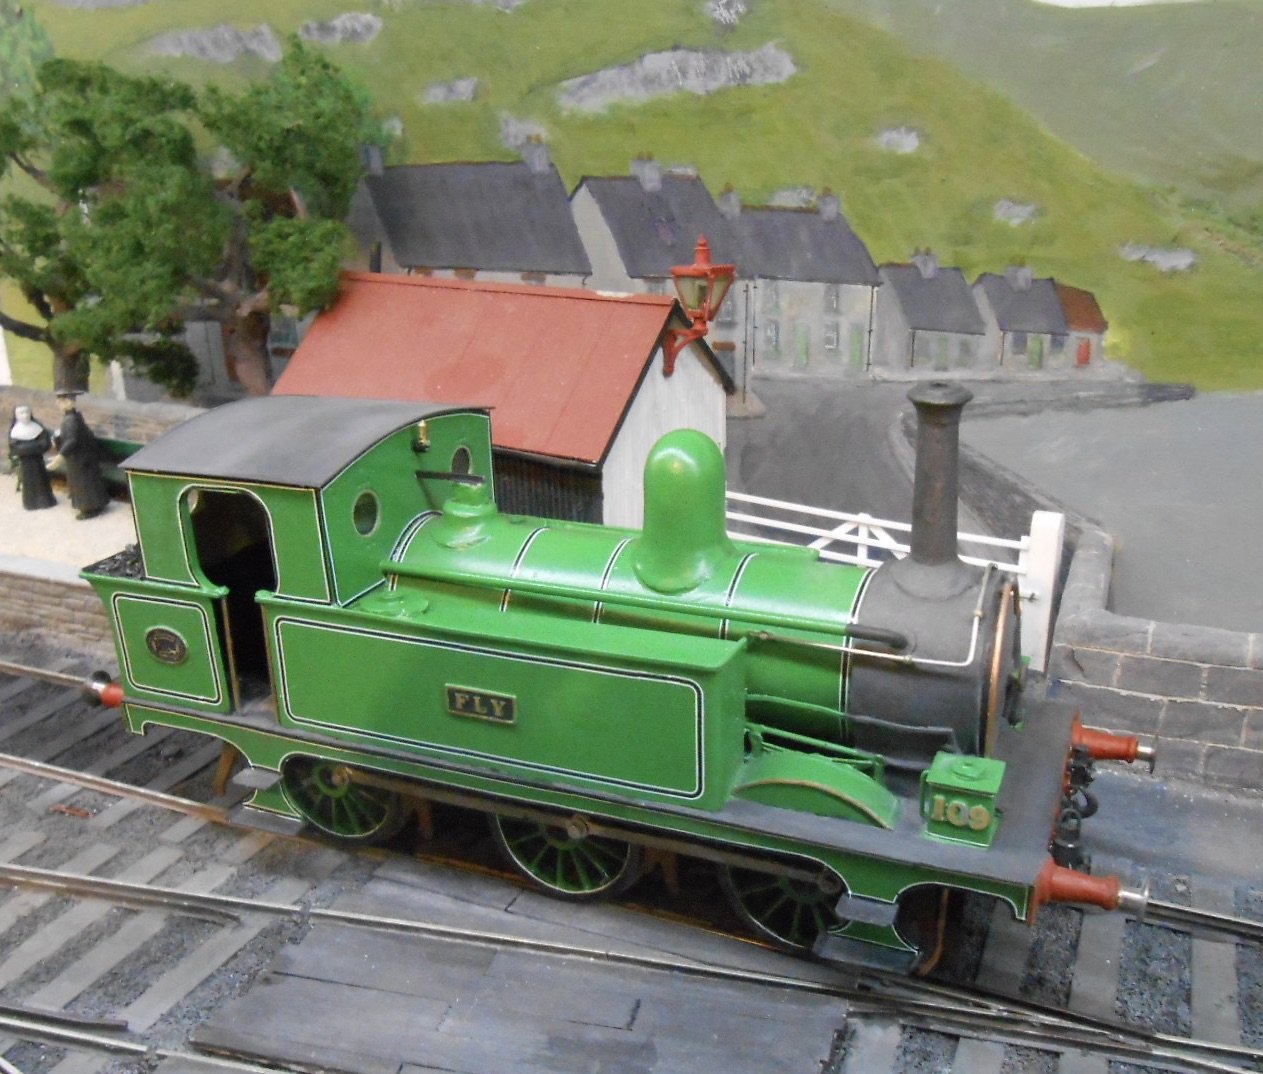
Fly is at last about as finished as any model is likely to be - the recent hiatus in modelling work partly down to a week on the Costa Brava and as a retired teacher I reserve the right to avoid going anywhere in the school holidays. Partly cost, partly avoiding former customers... Anyway, the remaining work was initially about getting the lining on the other side of the loco done, then adding a few final details. The latter have included things like the pair of lamps on the buffer beams, crew and one of those Spawns of Satan, the safety chains and hooks. These really are a pain in the primary orifice and I must either decide to omit such things in future, or reconcile myself to the fact they they will take at least four times as long as I want to spend on the job. The other task was a bit of light weathering. Earlier this year, was delighted to find the following set. Now produced by 'Finishing Touches', it looks very similar to one sold by Roger Freestone quite a few years ago. I think it is made of of little make up tubs, and as can be seen, there is a nice range of tints. I use the darkest rust on brake blocks and guard irons, then lighter greys and buffs on the footplate, smokebox and cab roof to suggest general daily dirt and the effects of smoke. Fly now looks like it works for its living, while retaining a well cared for appearance. While far from perfect, it is certainly a pretty little engine. I haven't properly logged the time taken on painting and lining, but would guess the latter has taken about the same time as overall construction, so about 60 hours in all.
-
Looks very much at home on your layout.
-
A very special model. Well done, Alan.
-
An absolute beauty, Alan. Take away the track it is sat on and it could be a much larger scale, which says everything about the model's quality. Regarding weathering, the powders route might be the safest option - any issues and it can be wiped off with damp cotton buds. Agree that all locos benefit from a bit of weathering, so maybe sticking to the black bits is the way to go? Brakes, smokebox, footplate, cab roof and so on. We also need to see it on Loughan Quay with some wagons. Very much worth all the effort!
-
Been on holiday, so only just caught with this. One word, three syllables: Fab u Lous!
-
Clogherhead - A GNR(I) Seaside Terminus
David Holman replied to Patrick Davey's topic in Irish Model Layouts
The proper stuff is freeze dried, which makes it easier to grind down the carcasses... -
Clogherhead - A GNR(I) Seaside Terminus
David Holman replied to Patrick Davey's topic in Irish Model Layouts
Then there's the story about the man who took his pet to the vet because it was unwell. After a few days with no improvement, he took it back to another appointment. The vet couldn't find anything wrong, but the man asked for a second opinion. The vet agreed and went to open a connecting door, whereupon a Labrador came in, looked at the pet, shook its head and walked out again. The vet opened a second door and a cat came in and did the same. There you are, said the vet, both the cat scan and lab report agree with me. As for sand, try Chinchilla dust. You can get a large bag from larger pet shops for not very much. Fix with pva, as per ballast. Lighter than sand too and contains no salt. -
Lovely stuff! In 7mm scale, Branchlines do an etched chassis, to which it is not that difficult to add a body from plasticard. Indeed, Fintonagh has four - made a side and an end, then a mould for each to cast the rest in resin. Yet to learn CAD and maybe never will, but always impressed by what can be done.
-
No shame required - they are fine models and anyone would be proud to have created them. As the late Cyril Freezer once said - you can't count the spokes on a driving wheel when it is turning. When models look right, as here, detail becomes less important. Keep sharing - there is so much for us all to enjoy and learn from models like these.
-
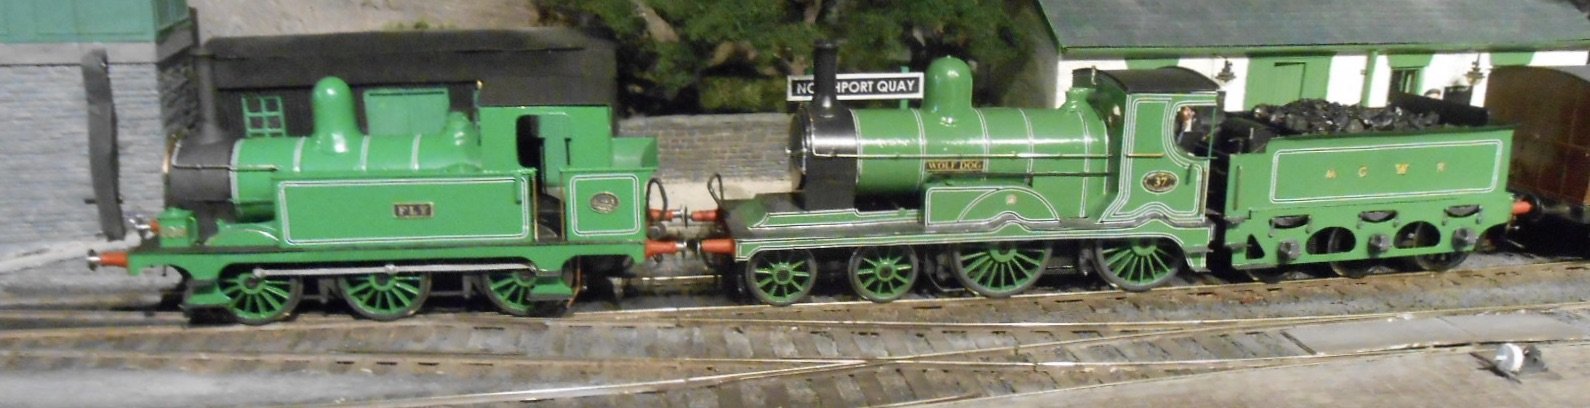
Nice comparison of GSWR and MGW green. I guess that in terms of fine detail, these locos don't have as much as we like to see these days: no brake gear, the rather vestigial front splasher on 34 for example... ... and yet they look lovely don't they? Only goes to show the importance of getting the basic proportions right, along with a good paint job. Am assuming they run well too, after which all the finer stuff blurs into insignificance. Keep the pictures coming Leslie!
-
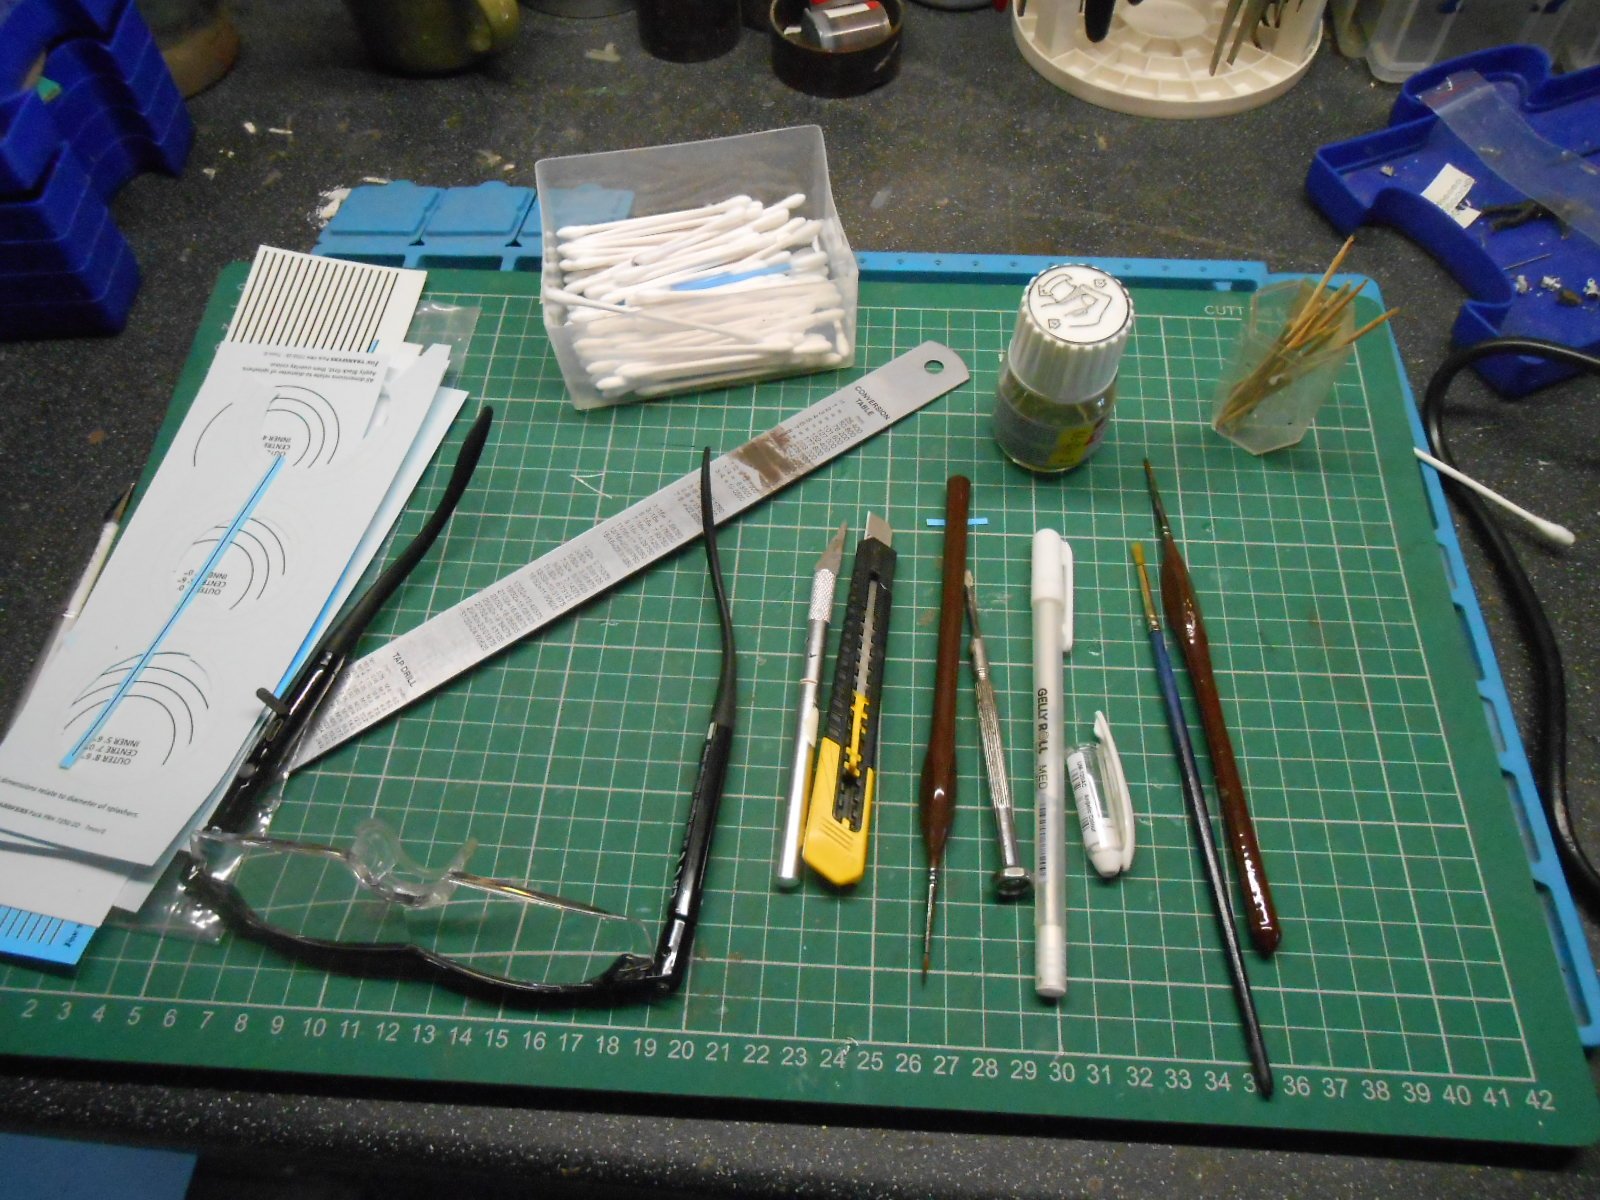
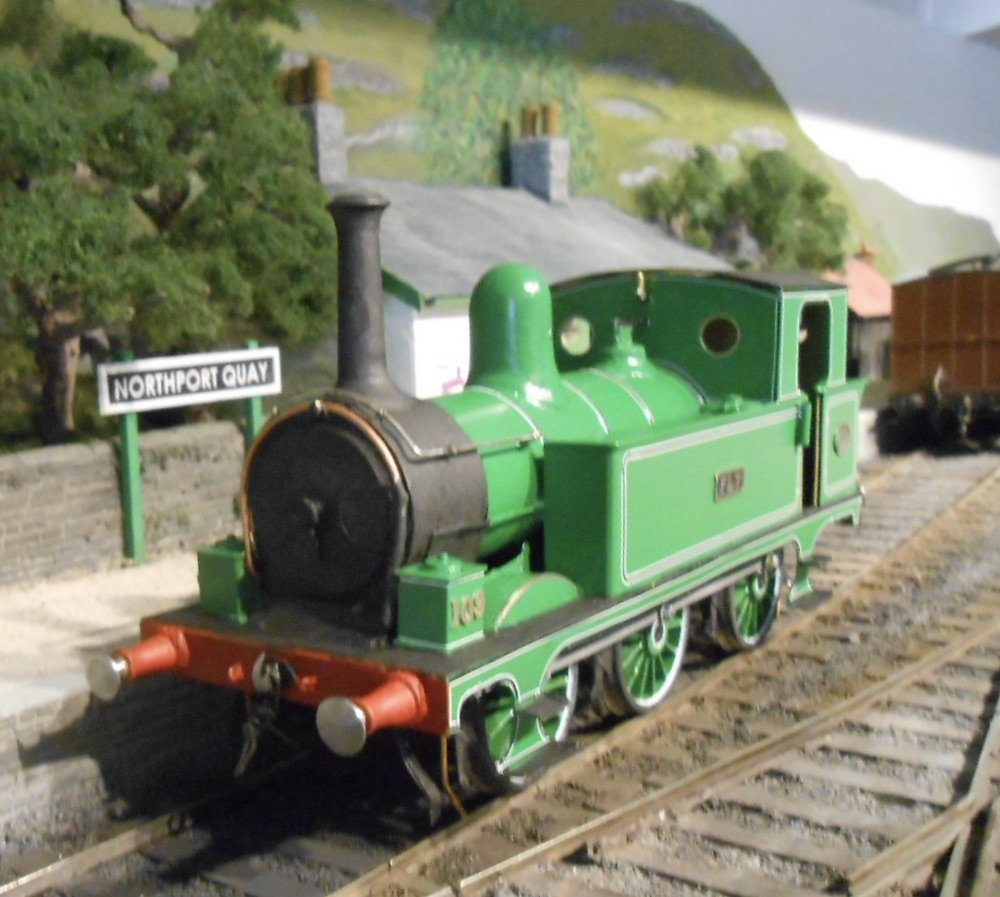
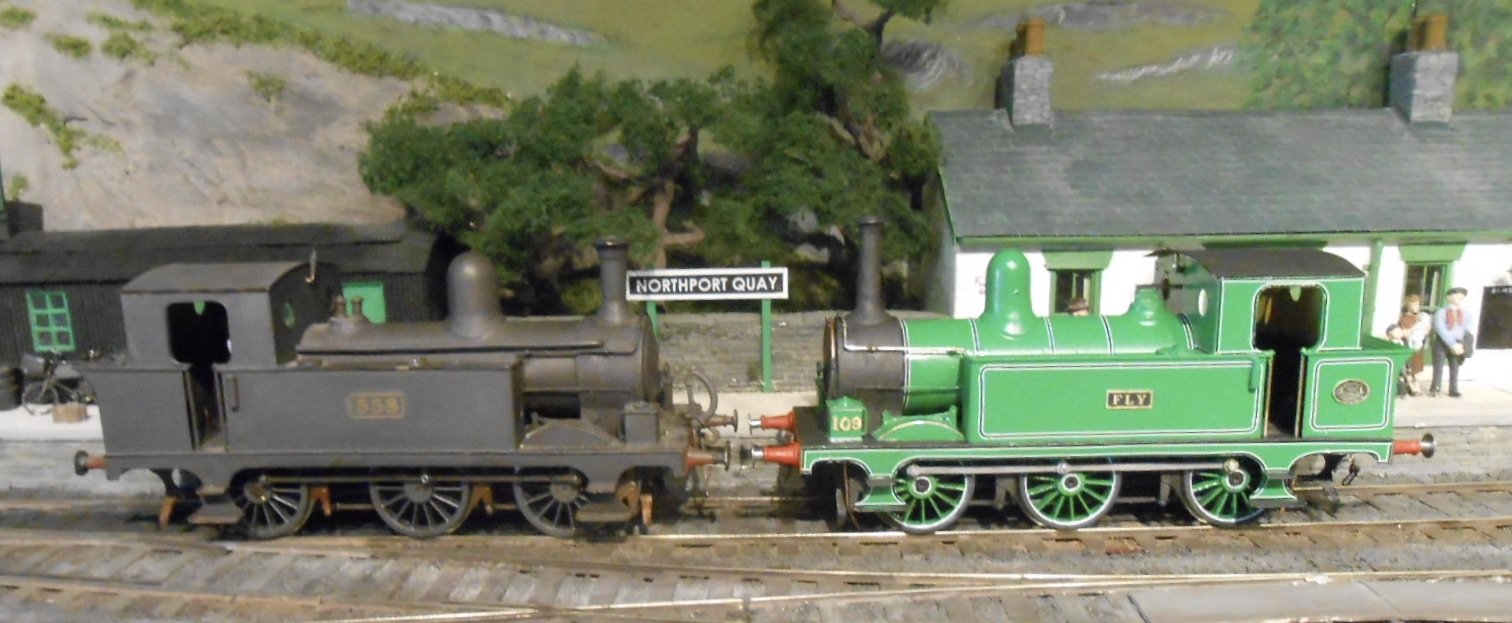
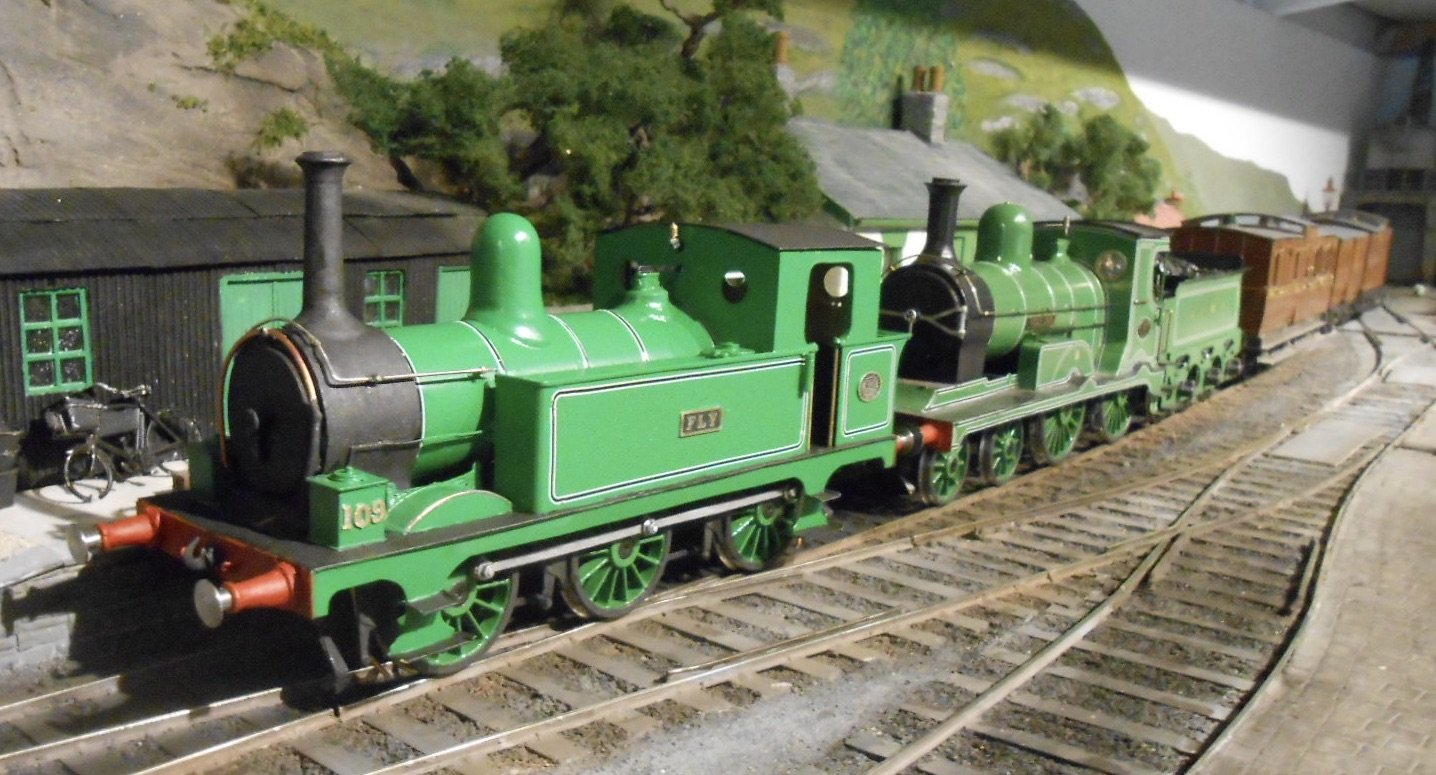
The E class project plods on, not helped by recent hot weather hereabouts - stuff gets done in the morning, or not at all. I guess it is about three quarters done in terms of lining, but after that, there is still the crew and cab glazing to fit, along with some coal in the bunker, some general tidying up and a bit of light weathering. Indeed, I reckon that painting and finishing will probably take as long as actual construction in the end. The current tools of the trade are shown above. Craft knives and steel edge for cutting out bits of transfer, plus fine paint brushes and a cocktail stick for persuading each piece to go in place. The bottle is Humbrol Decalfix. The cotton buds are useful to help transfers come off the backing paper and are a useful halfway house to finding you have left the piece in water too long and it has floated off in a tangle. Straight bits are easiest, corner pieces can be a real pain because they seem to knot themselves far too readily. Some of the lining has been cut so that it is just a single white & black stripe - as per the cab sides, front and rear. Valences likewise. Driving wheels are a bit work in progress - used a single white transfer on one side, but this proved such a faff that have had a go with a white gel pen on the other side, though this looks like it could do with toning down a bit. Note that the cab roof is still not fixed, though I have used a scalpel to scrape away the paint on the spectacle surrounds to show the brass beneath. Below is a picture of Fly alongside my J26. The latter is a real plain Jane by comparison & it is interesting to compare the two models as, apart from the obvious paint job, the only major differences are the smokebox and chimney.
-
Reminds me of our first trip to Ireland. It was spring and we were following (at a very prudent distance) a cattle lorry whose inmates had clearly been enjoying the new grass. A steady stream of scutter was dribbling from the back of the lorry, but when we got to a town, a small traffic jam resulted in a large pond of the stuff accumulating behind the lorry, much to the consternation of two ladies who had just finished cleaning their front steps and pavement area outside their house!
-
Rightly or wrongly, I plastered my E class in Nitromores paint stripper. Wouldn't recommend it on plastic though...
-
That will certainly paint well. Sure it's not 7mm (and you have very big hands)?
-
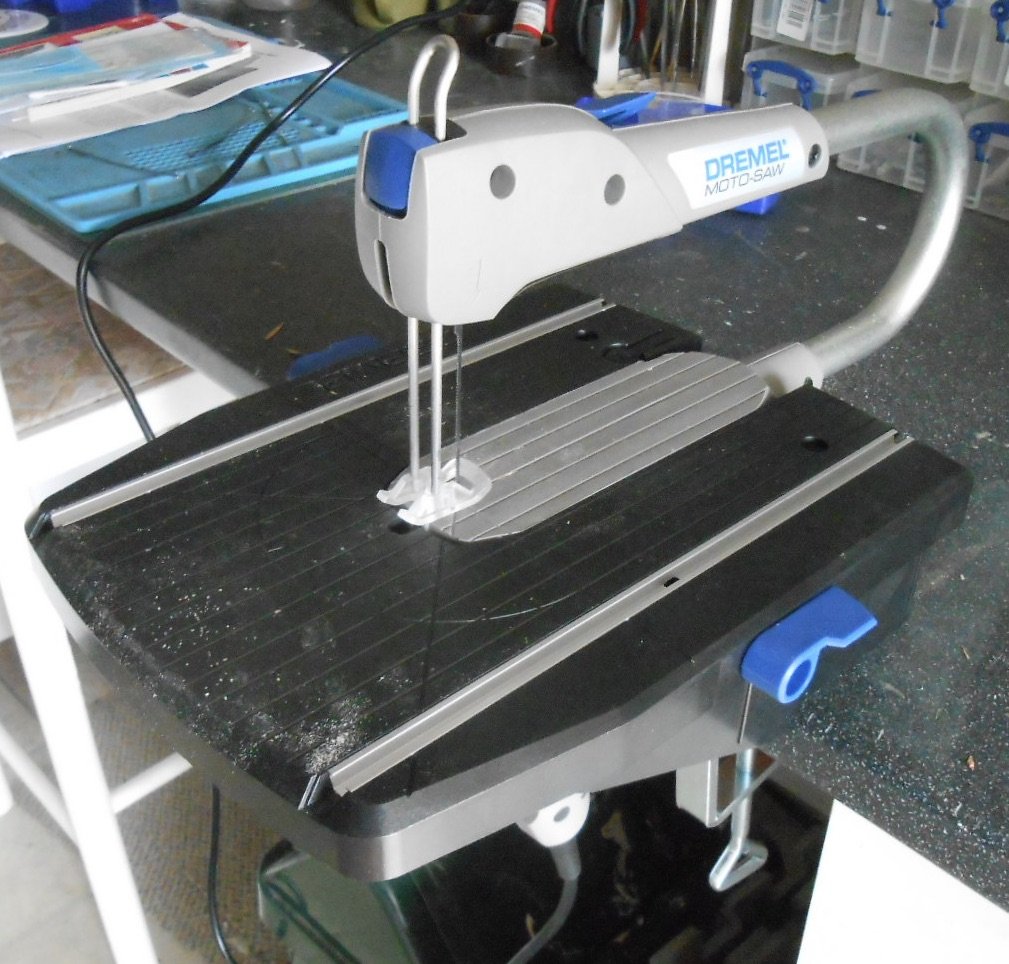
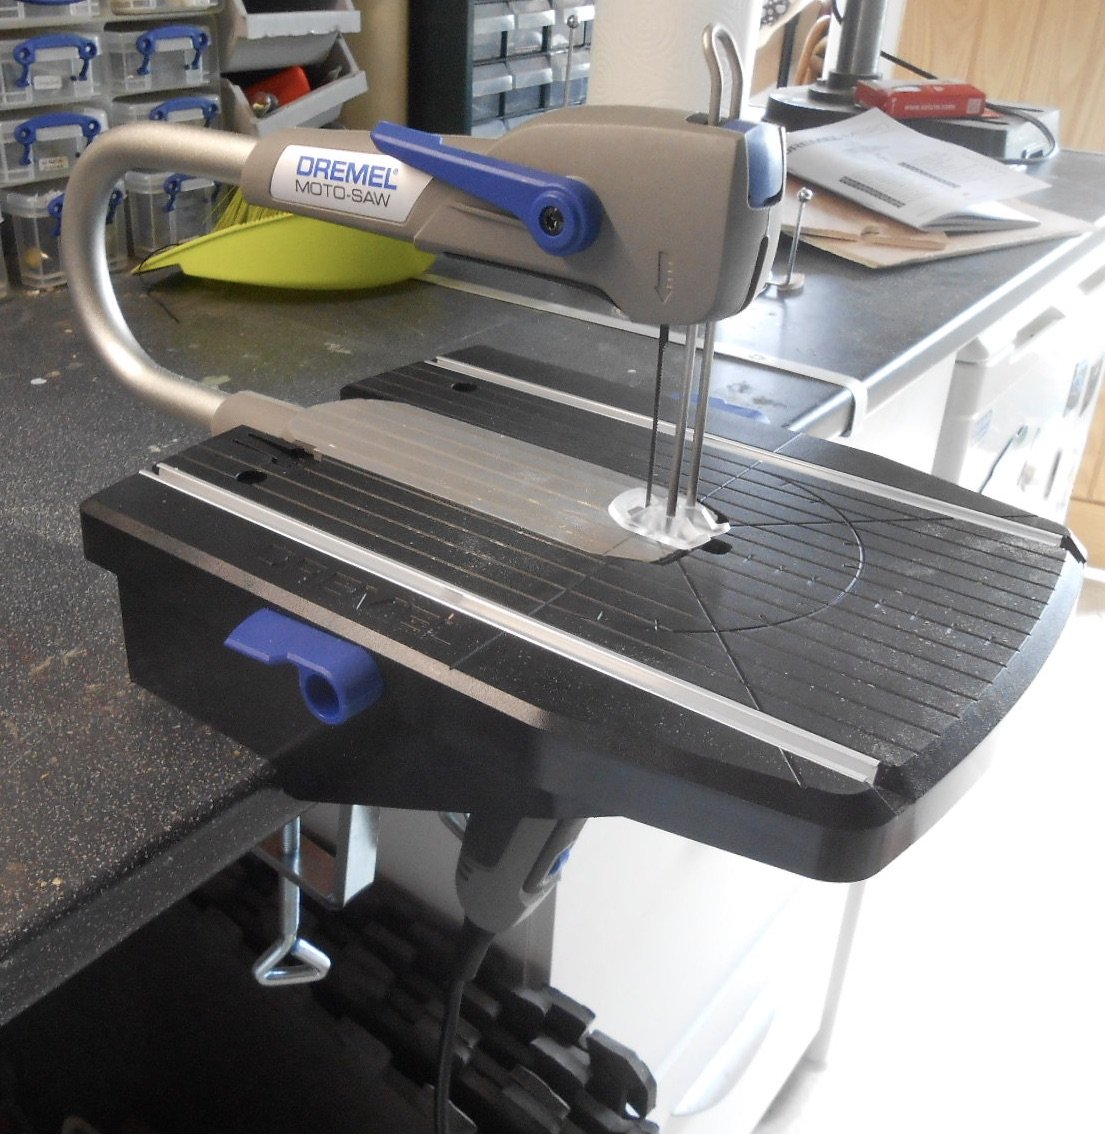
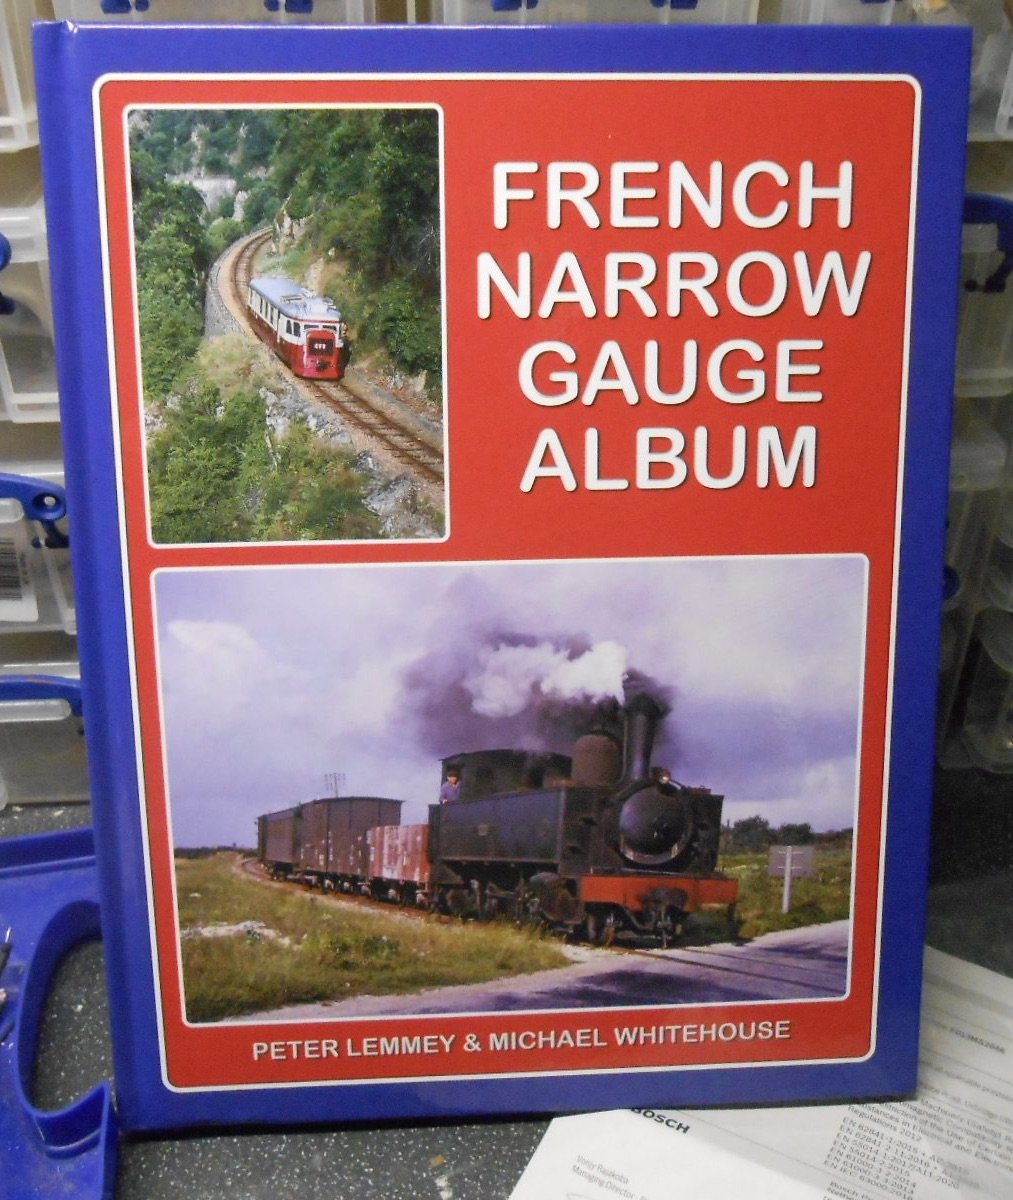
Am taking a break from the lining, not least because its given me stiff neck. However for a recent birthday, persuaded my wife to buy me the Dremel Motosaw. And very nice it is too. It comes in a robust plastic case and can be used as both a bench tool [as illustrated] or just hand held. Not sure I will be doing the latter, but it can certainly do the business with a variety of materials, depending on which blade you use. The coarse ones will easily cut plywood, MDF and so on, up to around 3-5mm thickness. The finest blade [actually only 10 teeth per cm] can cope with soft, non-ferrous metals down to 0.2mm. Thus far, have tried it on some 0.5mm brass and nickel silver sheet and it should save me a lot of effort cutting out loco frames and on other scratch building work. Dremel, but the way is an off shoot of Bosch, so hopefully that augers well for my latest toy. Another nice present is the Michael Whitehouse & Peter Lemmy French Narrow Gauge Album. At just over half the cost of the T&D tome, it is very good value, with some stunning photos and lots of informative text too. It is perhaps just as well that Patrick Whitehouse extensively toured Ireland, or I could easily have been tempted into things the other side of another narrow stretch of water!
-
Not my scene, but certainly doesn't stop me admiring the modelling!
-
That's not a bad idea. Ian Rathbone's book on painting and lining suggests something similar to remove bits of over painting or small errors with a bow pen. Wait until the paint is nearly dry and then use a fine brush, dipped in thinners on the area concerned. The paint comes away like magic. Wipe the brush on tissue and repeat until the area is cleared. Worth a try?
-
I feel your pain! Hopefully only one side affected? Really looking the business too... And never mind the counselling, where's the drinks cupboard?!
-
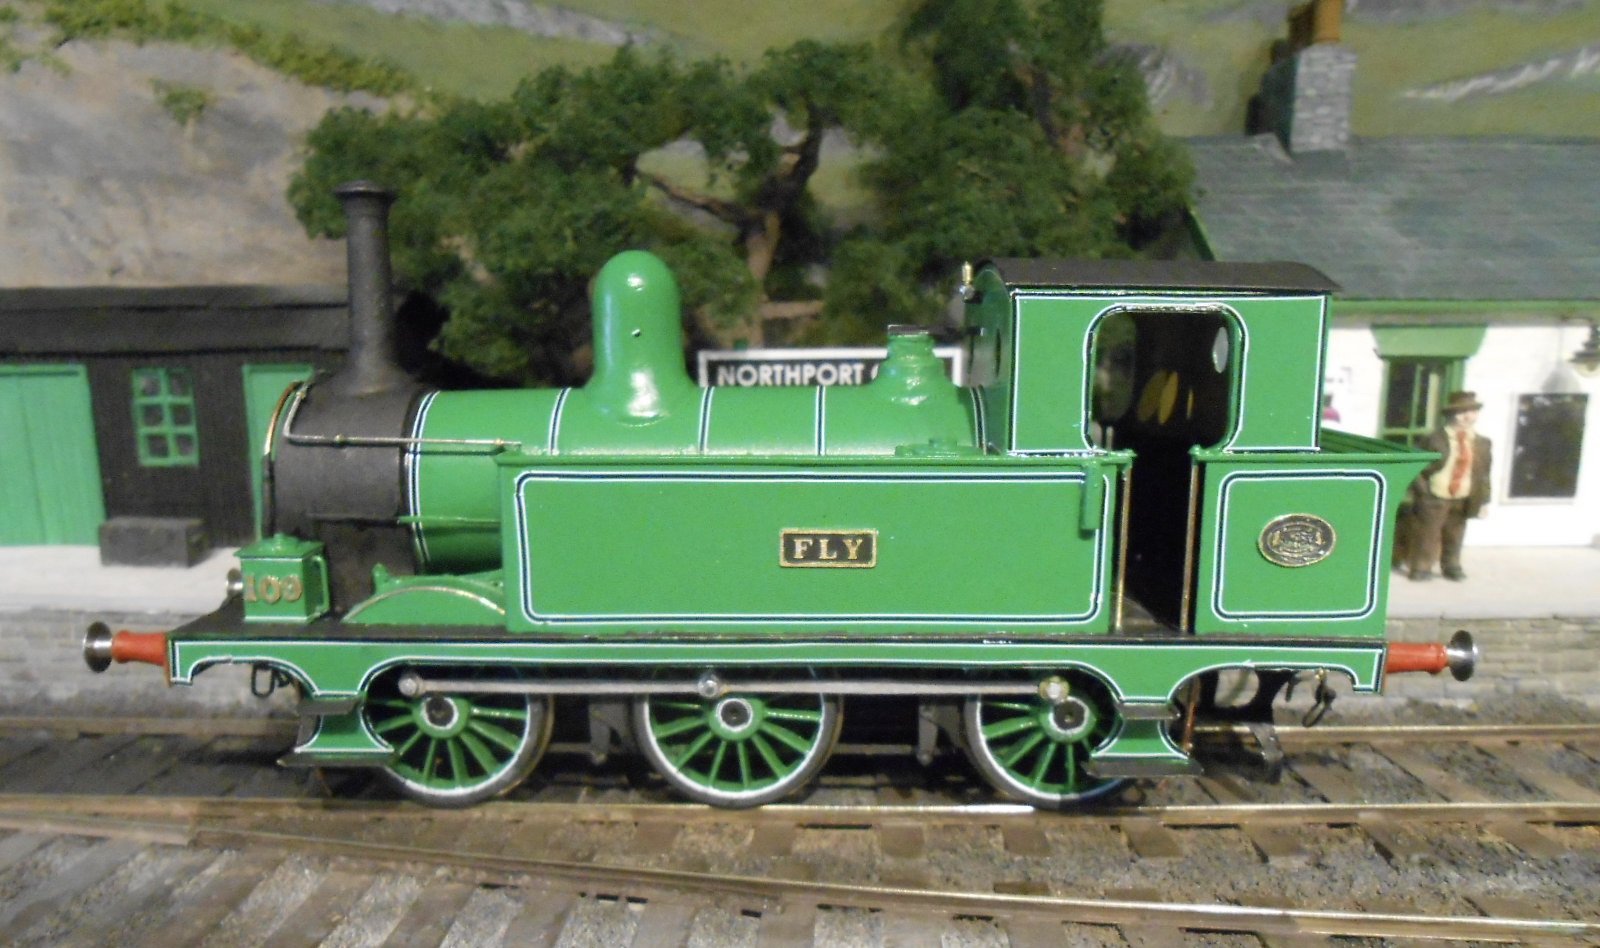
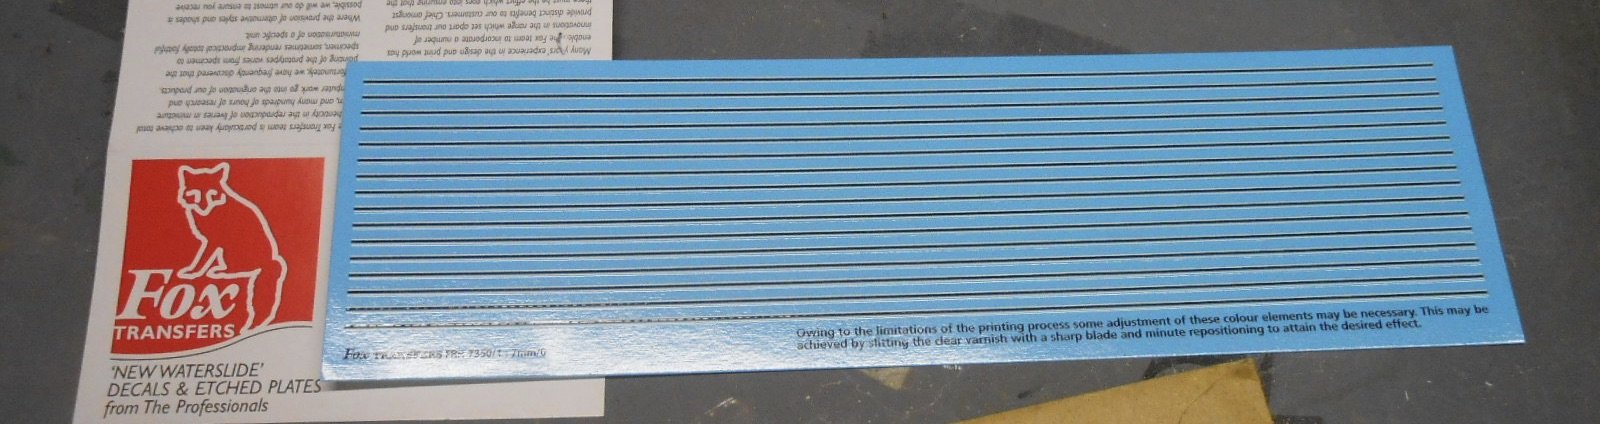
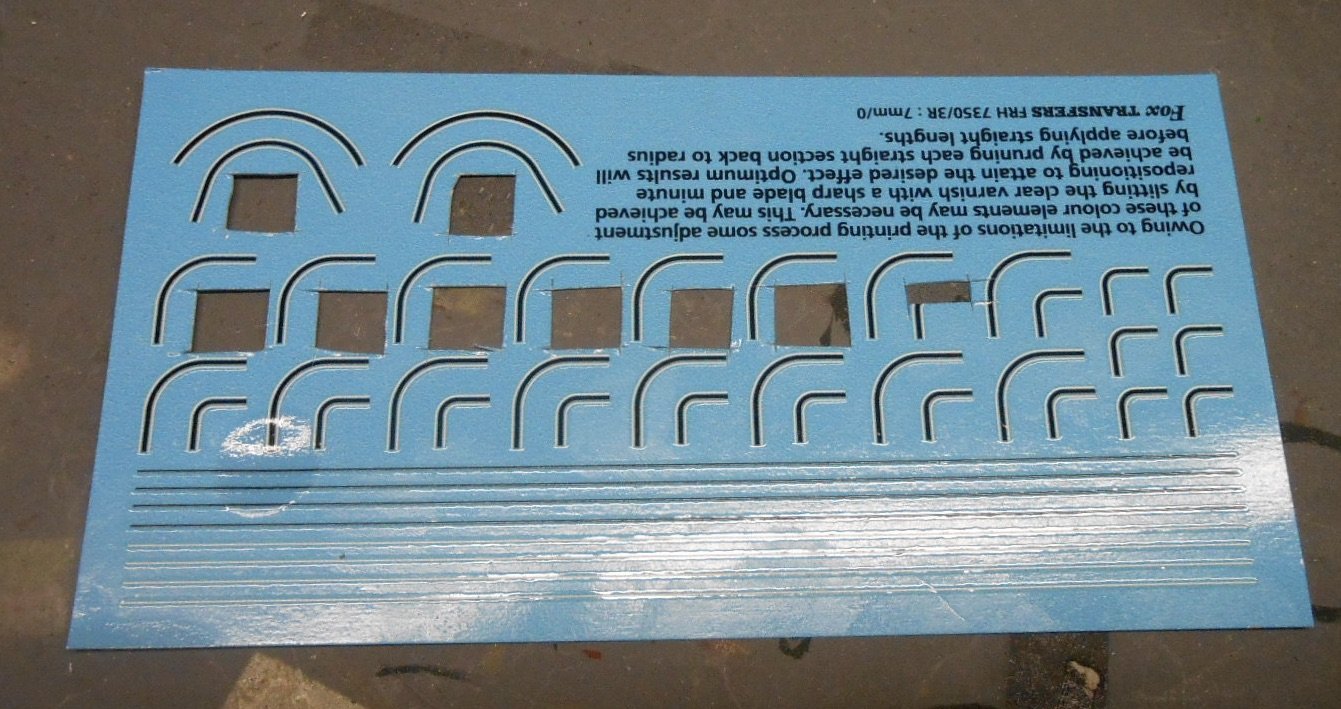
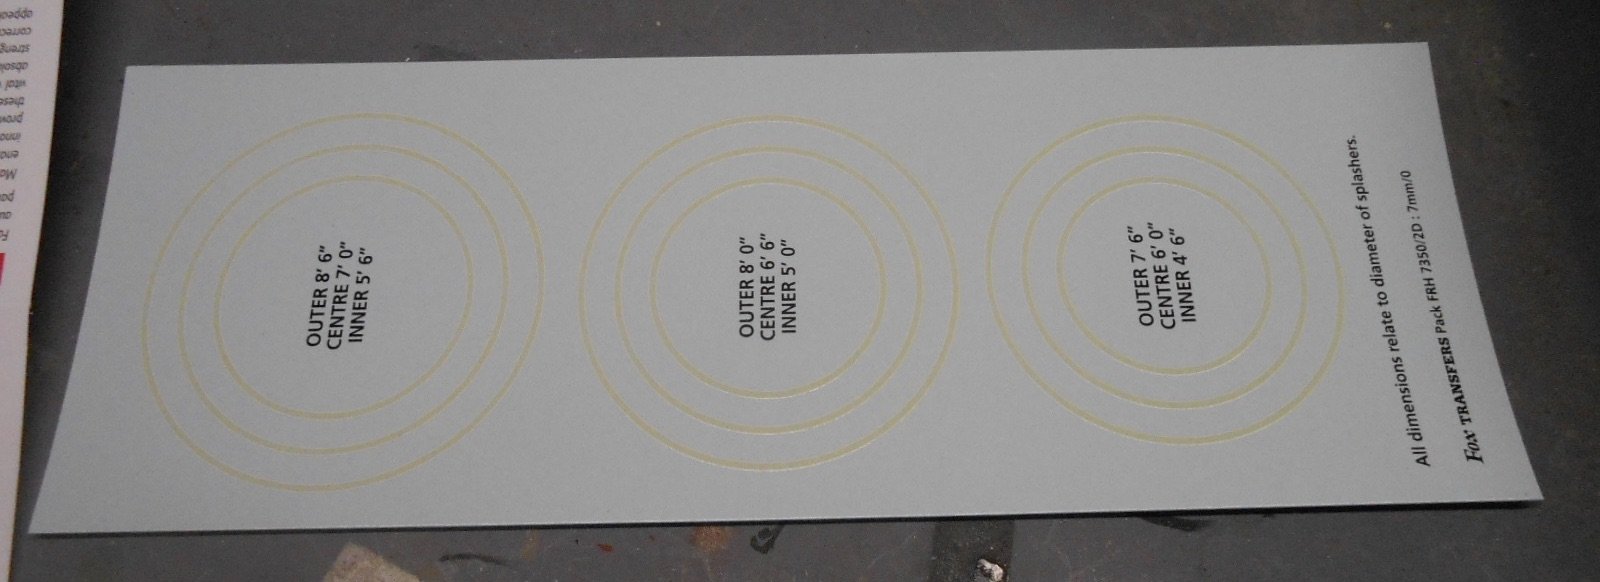
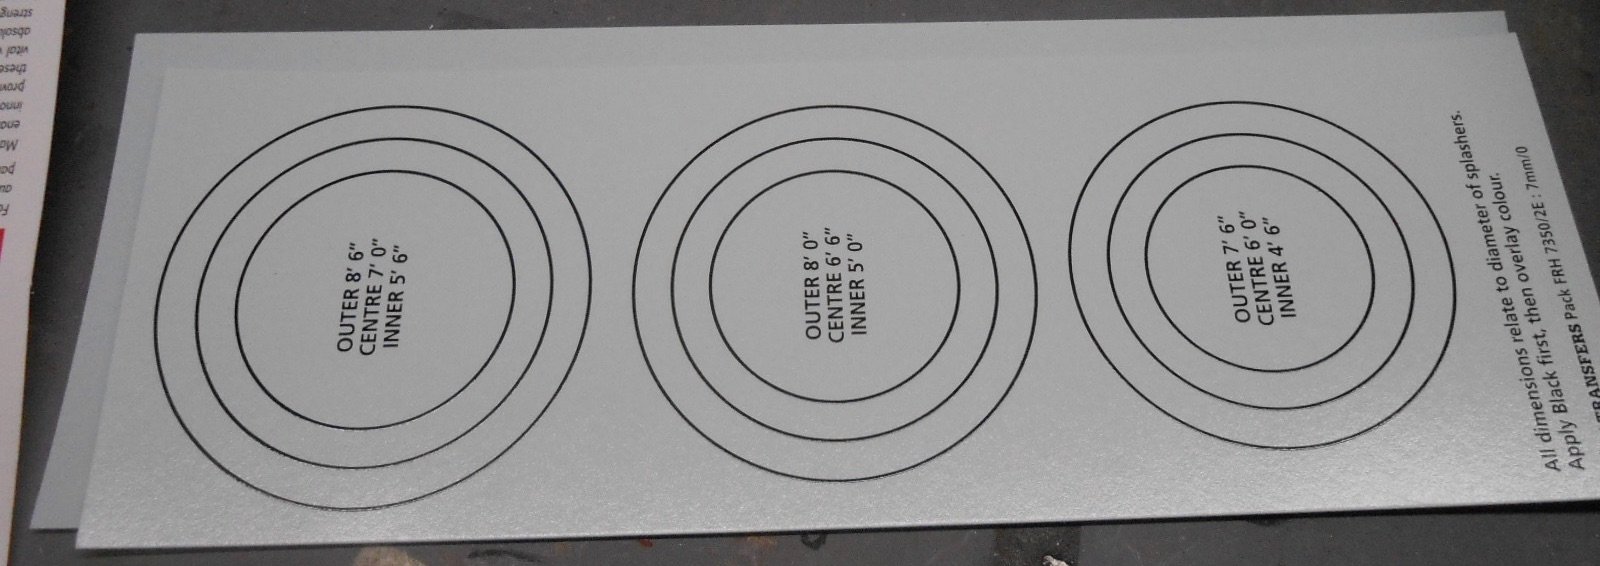
Lining can often be, quite literally, a pain in the neck. I've tried most methods over the years: transfers [pressfix, meths fix, waterslide], various lining pens [Bob Moore, bow pen, etc], even a bit of brush lining and I've grown to hate them all in equal amounts! Therefore, it is not without a fair bit of trepidation when it comes to a MGWR engine. Just look at it... ... side tanks, bunker sidescab sides, boiler bands, valences, wheels, plus of course the cab front/rear and bunker rear. This is the real Fly and it is interesting to compare its working lining with that of locos in 'photographic grey' - seems there was a bit of variation between locos at times. Most of the lining is white/black white and I resort to Fox Tranfers for the necessary pieces, which you can see below: As you can see, they provide corners of two different radii, plus a couple of more random curves and arcs which are useful for splashers. They also do circles of different radii in just black or white, which are not just for wheels, but also other odd shapes that the MGWR are keen to include where they can! By and large these water slide transfers are fairly user friendly once you get used to them, though the process is not without rude words and increased blood pressure at times! I started with one of the corner pieces - a bit of a pig the first time round, but it gets easier with practice. The problem is that the transfer wants to fold over itself, becoming increasing hard to untangle until you are forced to throw it away. However, once in place, you can then go on to add the straight bits, which are easier to manipulate, provided you keep the lengths to no more than 3-5cm. Happily, they are easy to join up to make longer lengths without the joint being apparent. After that, it is a case of repeat ad infinitum, or so it seems because there are at least 36 rounded corners. Thus far, I've taken about three hours to do one side of the tank and bunker, along with the boiler bands. Hopefully the practice on the straight and rectangular bits will eventually help me when it comes to the cab sides and valances. The pictures below show progress so far, along with a comparison to my D16 4-4-0 Wolf Dog. Interestingly, despite the paint code being the same on both rattle cans, the green on Fly seems noticeably brighter, so it is perhaps just as well that Northport Quay will be one engine in steam and they won't often be seen side by side.