David Holman
-
Posts
4,359 -
Joined
-
Last visited
-
Days Won
117
Content Type
Profiles
Forums
Events
Gallery
Blogs
Everything posted by David Holman
-
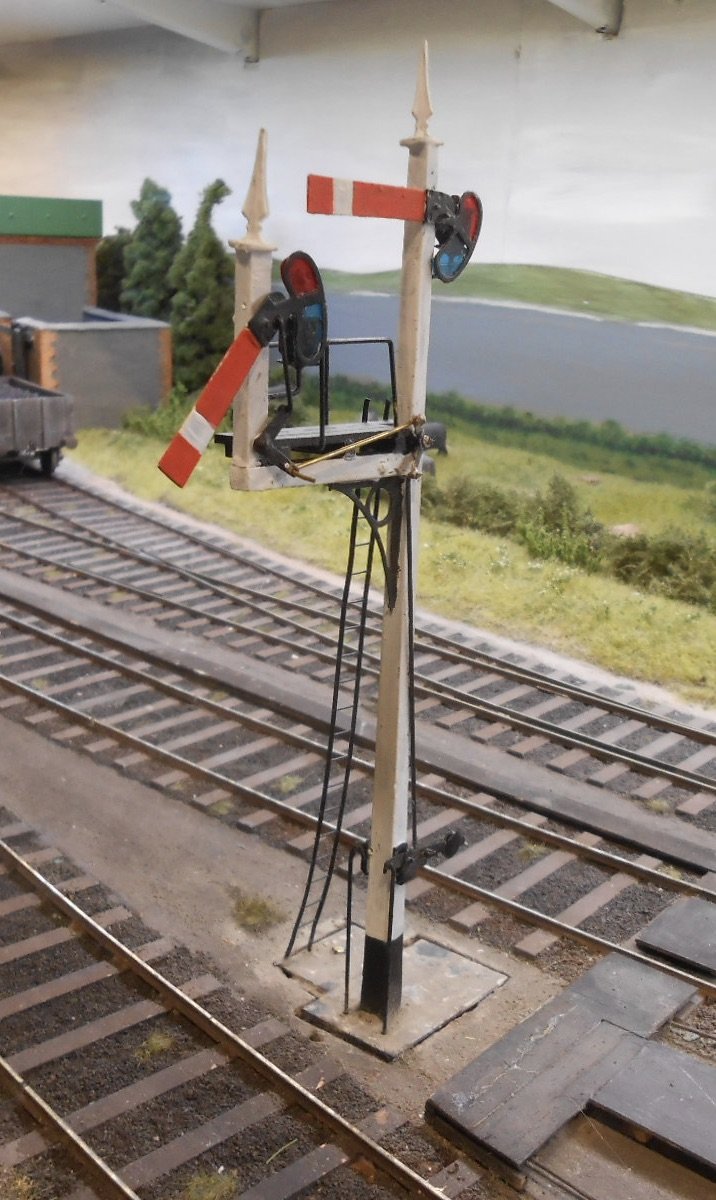
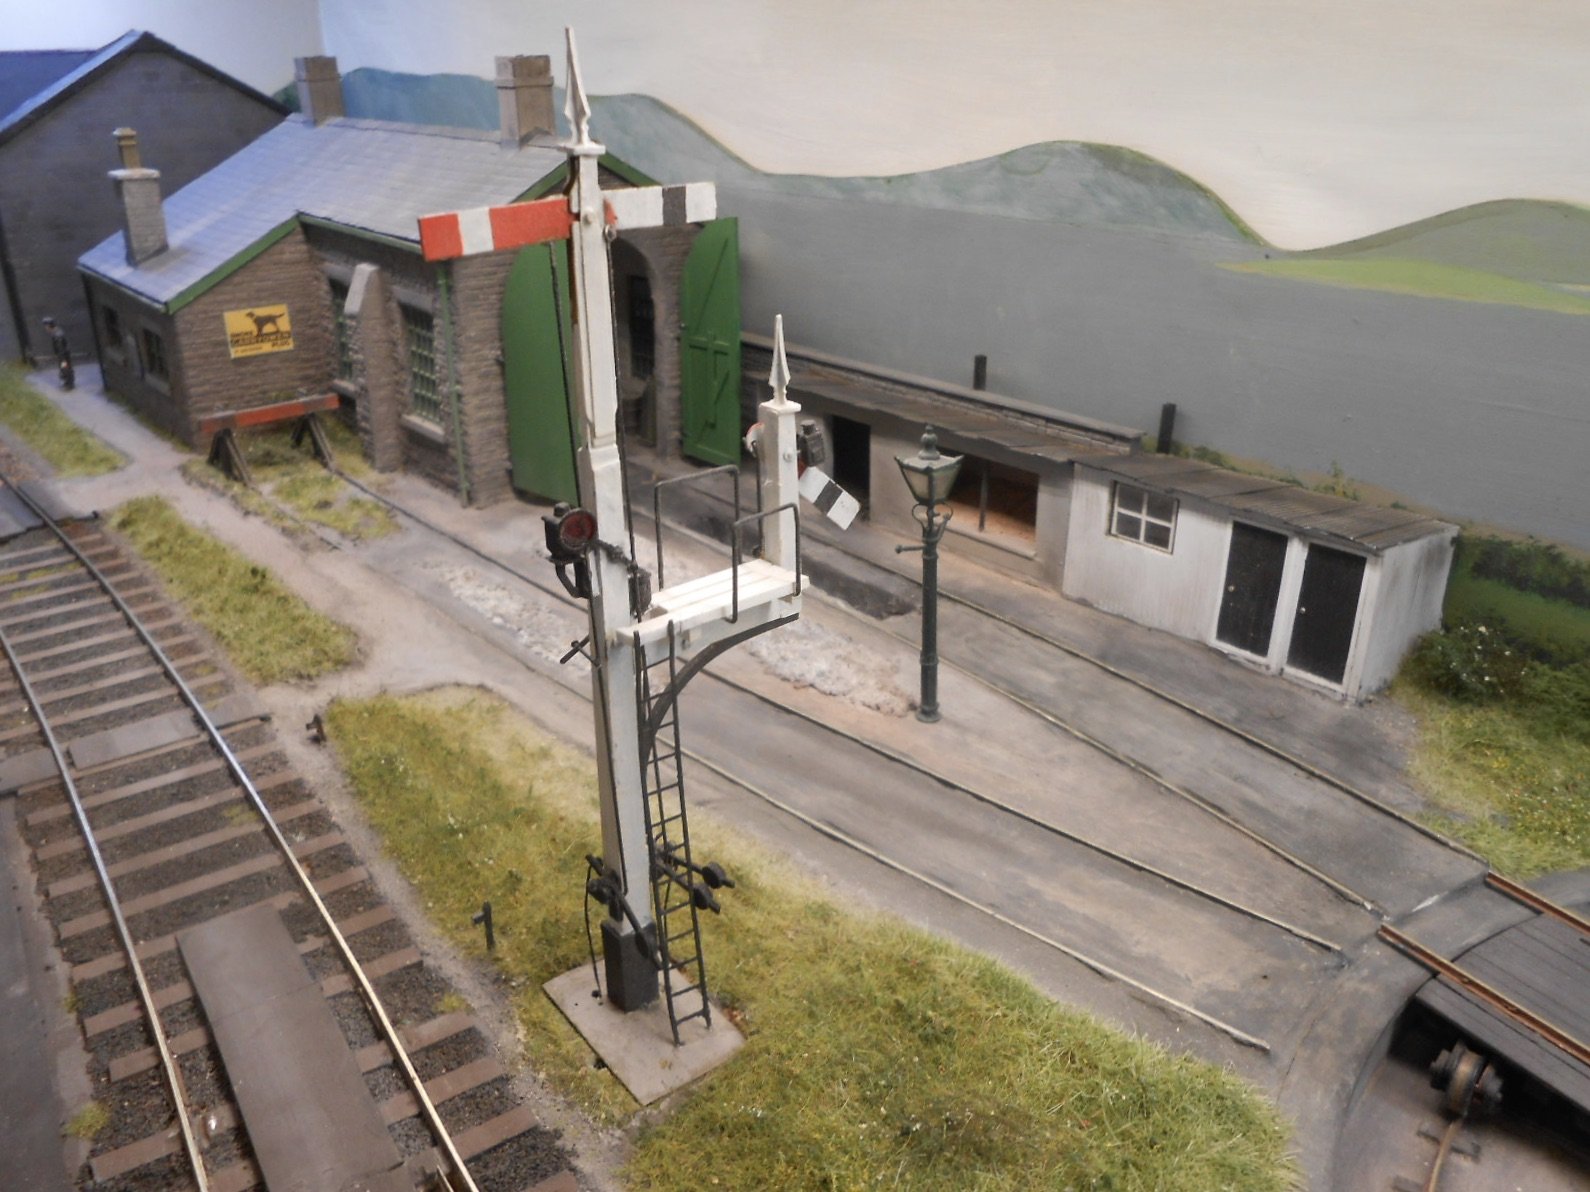
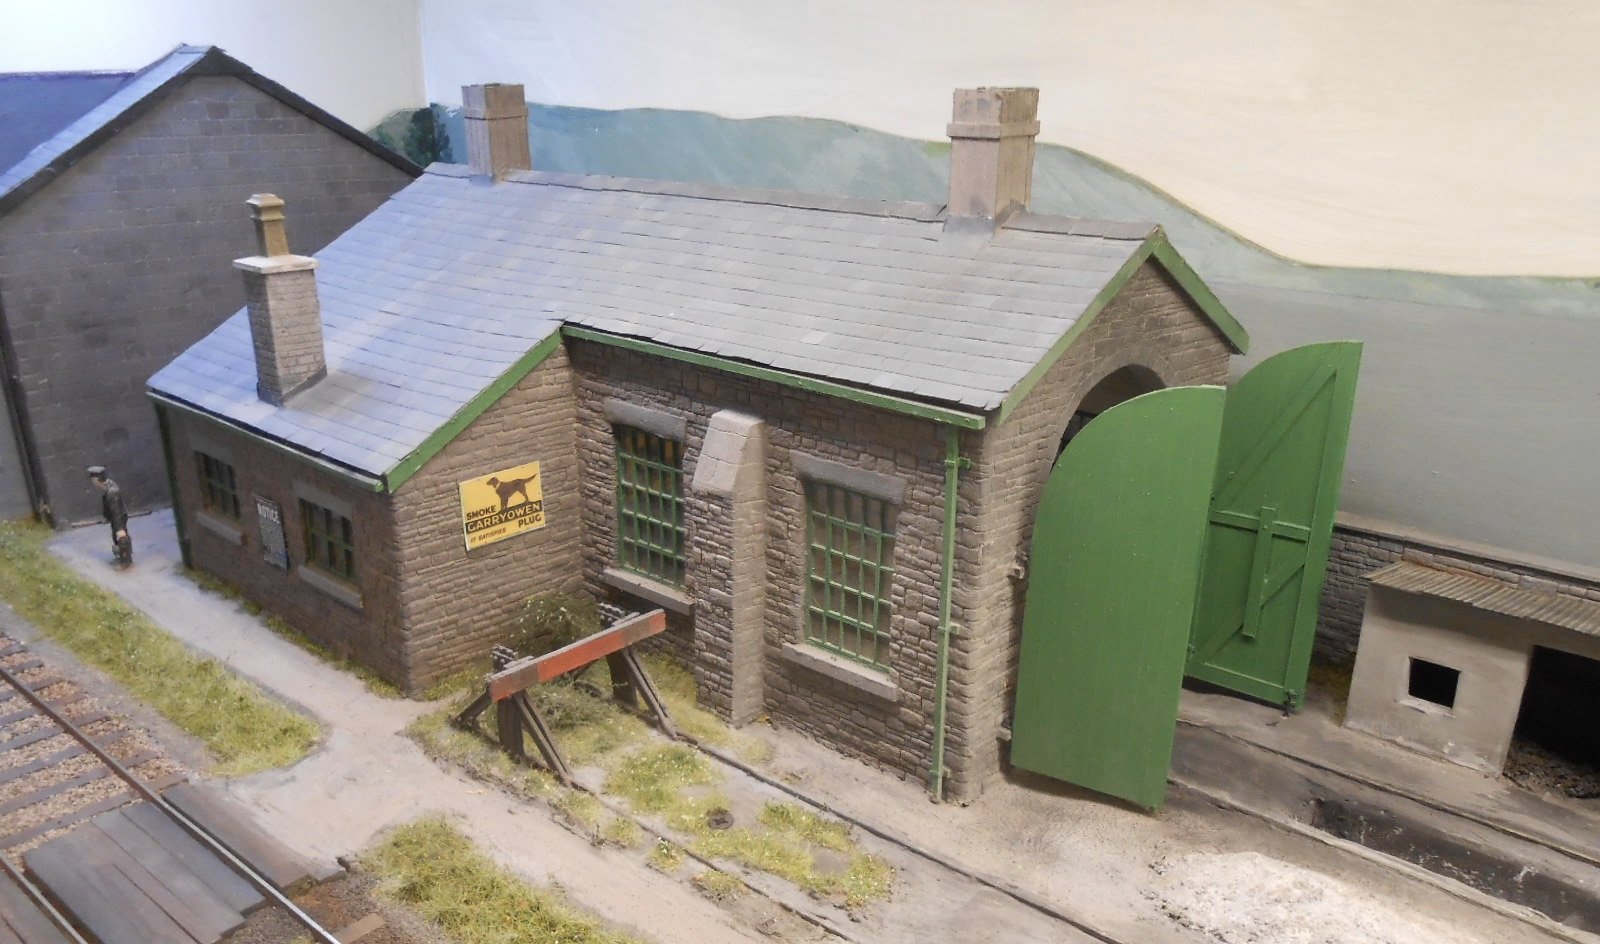
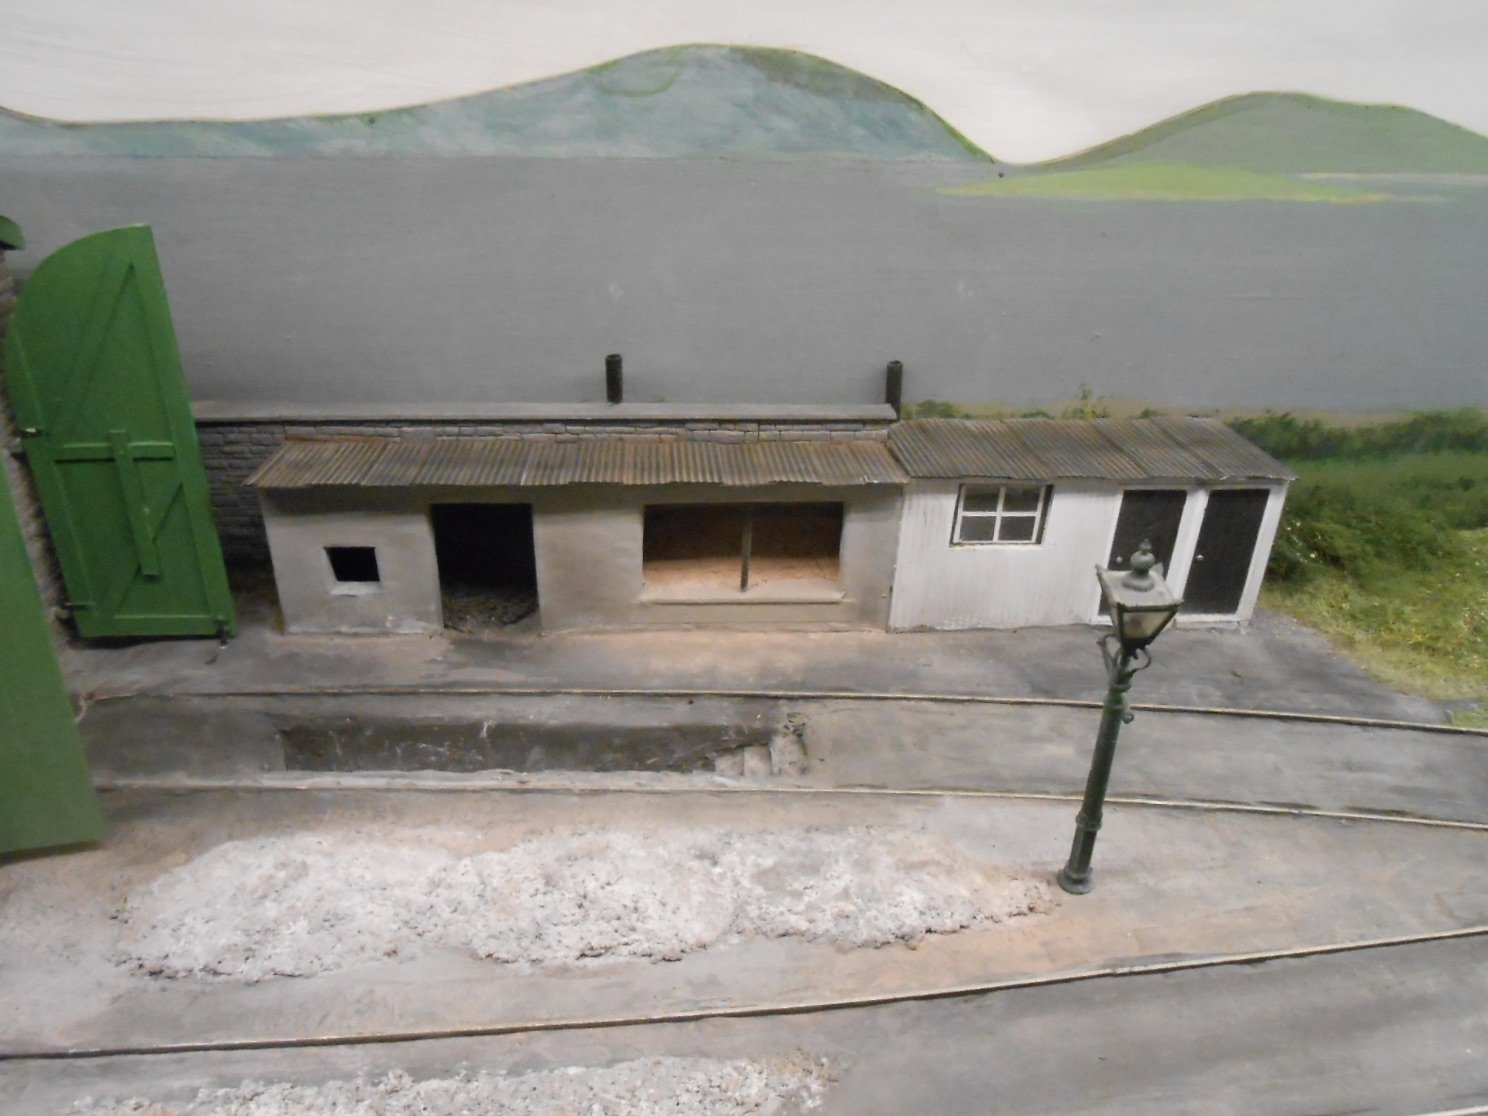
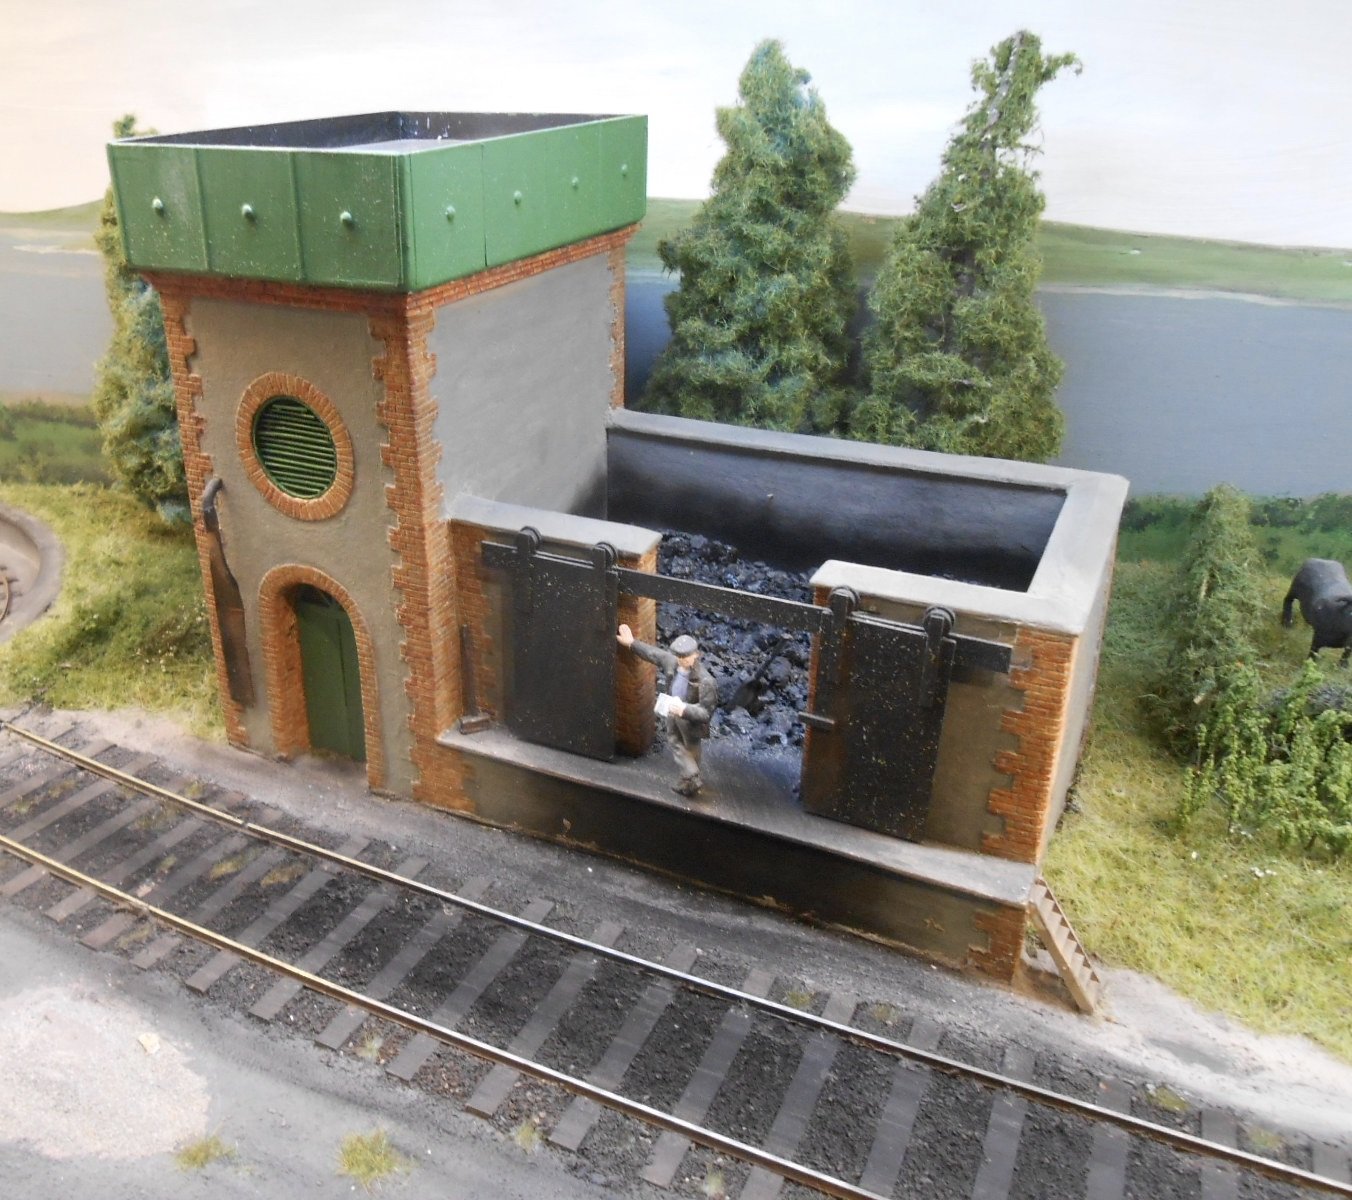
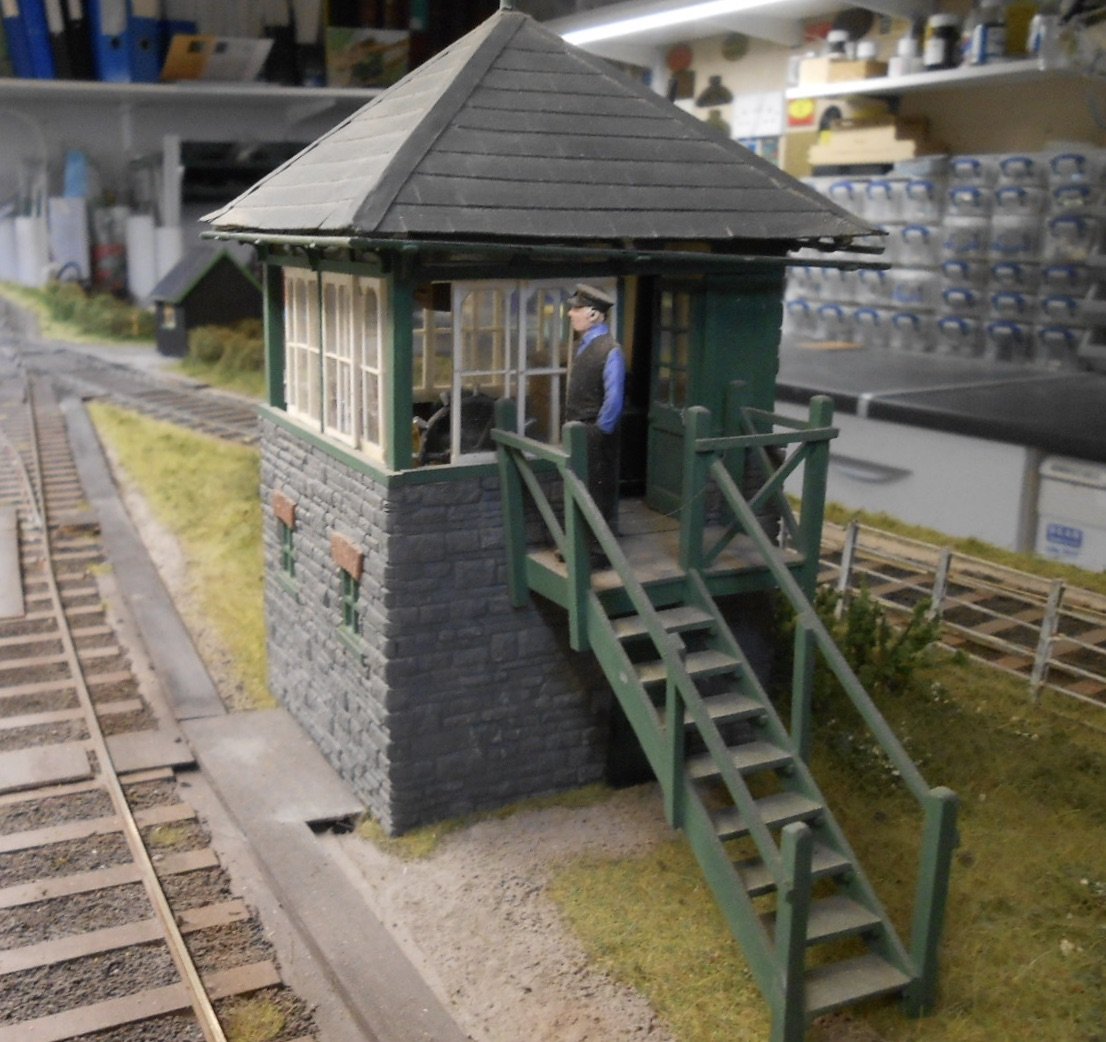
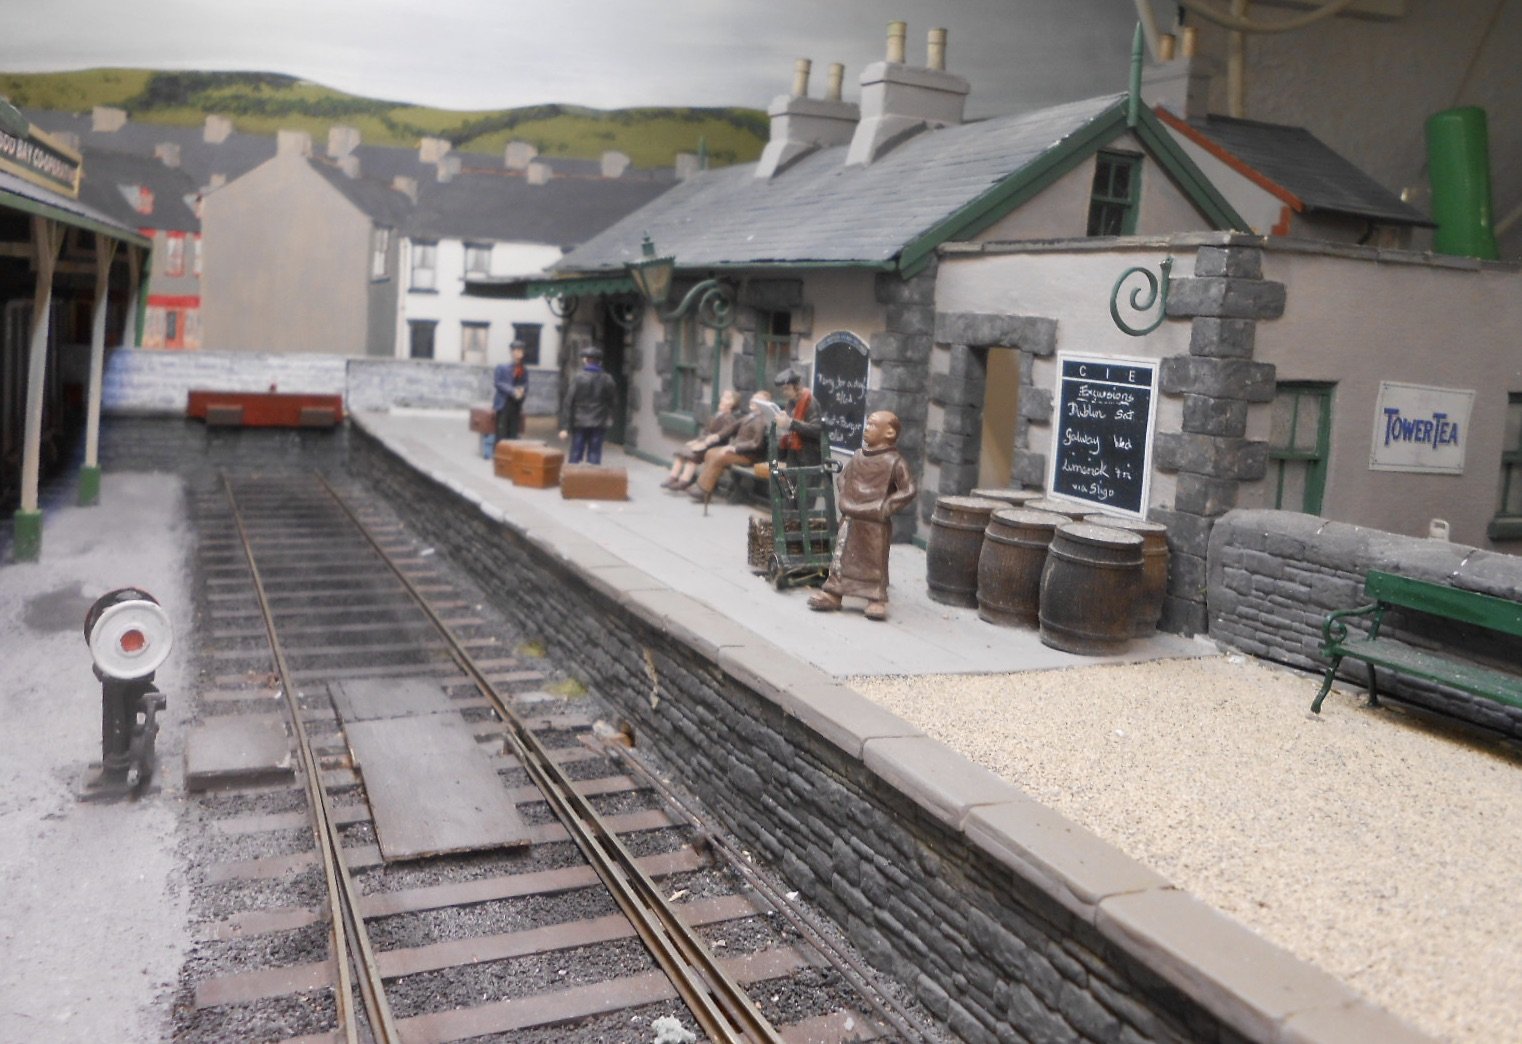
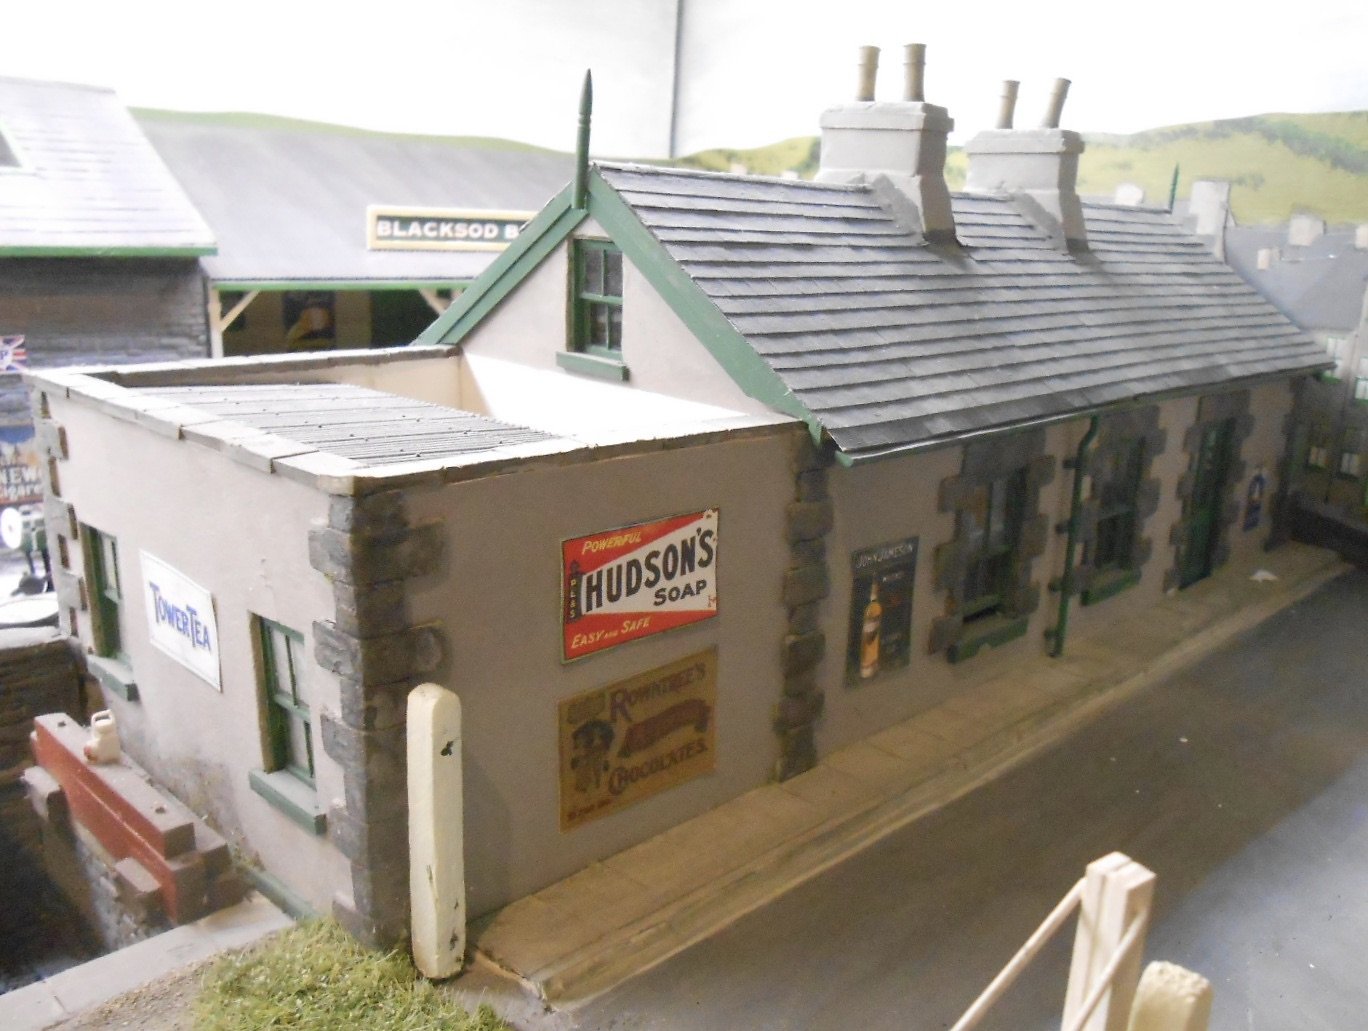
Before moving on to narrow gauge stuff, thought I'd include some of my broad gauge infrastructure, starting with signals. I found the three doll signal [controlling three level crossings] on the Sligo Leitrim particularly interesting & there were most of the parts required to make it from Wizard Models, while there are various useful books available to help too. It controls the entrance to Belmullet loop and also acts as the advance starter. Saxby and Farmer equipment seemed to be much favoured by Irish railways, so went back to Wizard Models for more bits and pieces to make the two doll starter at the platform end. Signals are fiddly things to build, even in 7mm scale and, especially on an exhibition layout, rather vulnerable too, so both can be unplugged for transport. Initially, the three doll signal was worked by simple wire in tube, but when Arigna Town was rebuilt as Belmullet, I used servos with Megapoint circuit board control, which includes a nice 'bounce' feature when returning to danger. On Belmullet, two of the Arigna Town buildings survive. One is the station, the other the signal box. Both were developed from Alphagraphix card kits, but using very different techniques. The signal box is based on the one at Manorhamilton and was built around a core of 1mm thick perspex, adding walls from plastic sheet [Wills 4mm 'random stone'] and windows from plastic strip. It has a fully detailed interior using a set of Springside castings. The station is modelled on the one at Florencecourt [also SLNCR], this time using a substructure of 5mm foam board, with a mixture of card and plastic for the details, like doors and windows. I clearly need to straighten a couple of chimney pots though... When I created Belmullet, a key scene was the loco shed. This includes a small sand drying plant [based on one at Athlone], plus one of the splendid MGW 'fortress' coal and water towers [Sligo]. Both are built around a foam board core. The shed itself is another MGW building, built using photos of the one at Ballaghadereen. Locosheds can be awkward things to build, because they are not only open at one end, but also have to do without a base, so they can be placed over the track. This one is foam board again, covered in DAS clay, which was then scribed to represent the stonework. So, there we are - a summary of my stuff thus far. Anyone interested can look up details in my Workshop, Belmullet and Arigna Town threads, but I thought it would be nice to produce a brief summary as an antidote to those AJ couplings!

- 56 replies
-
- 17
-

-

-
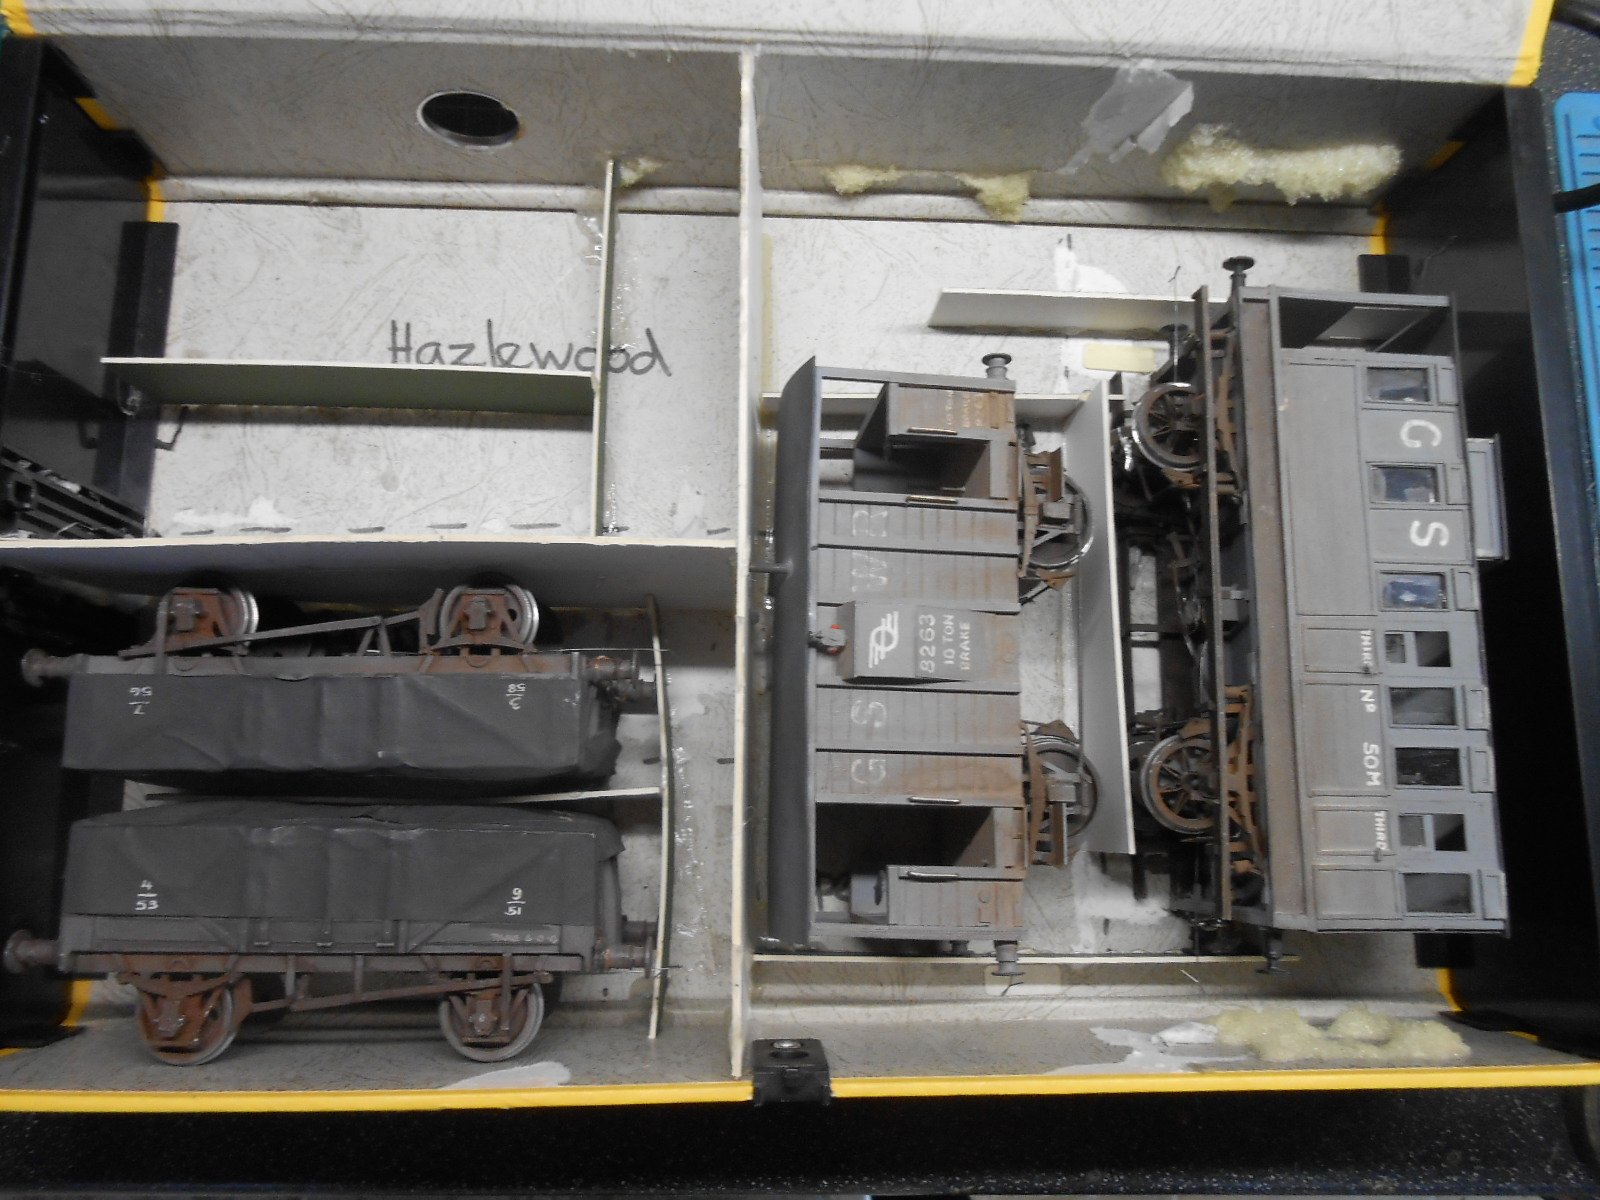
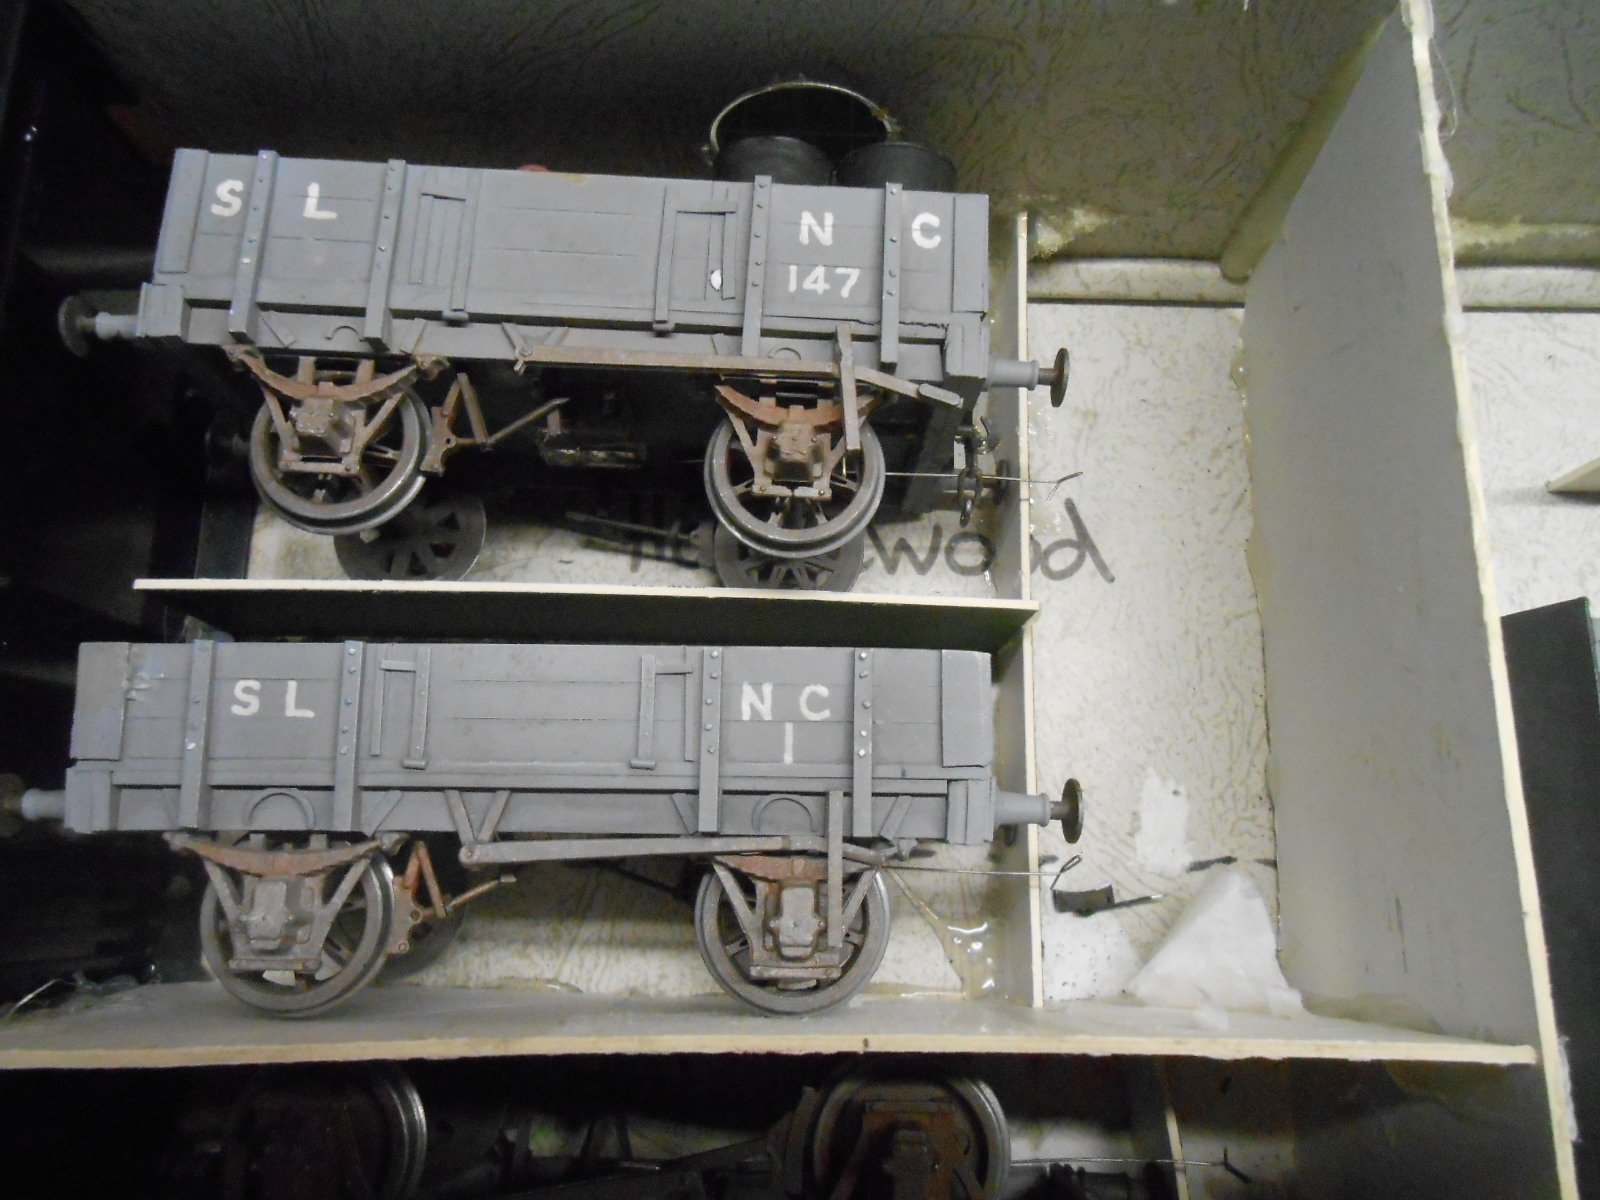
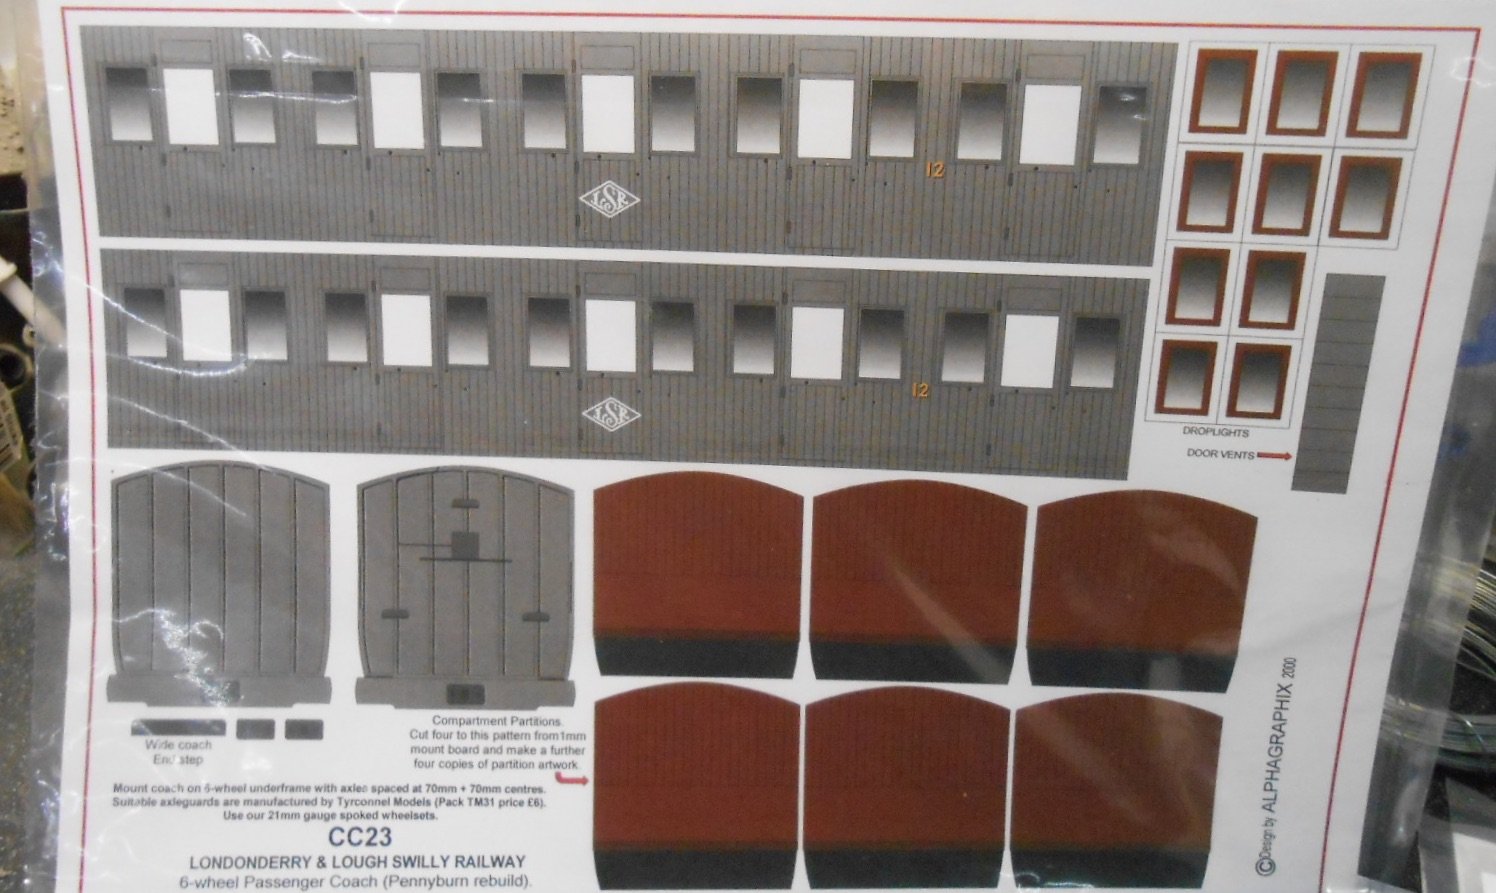
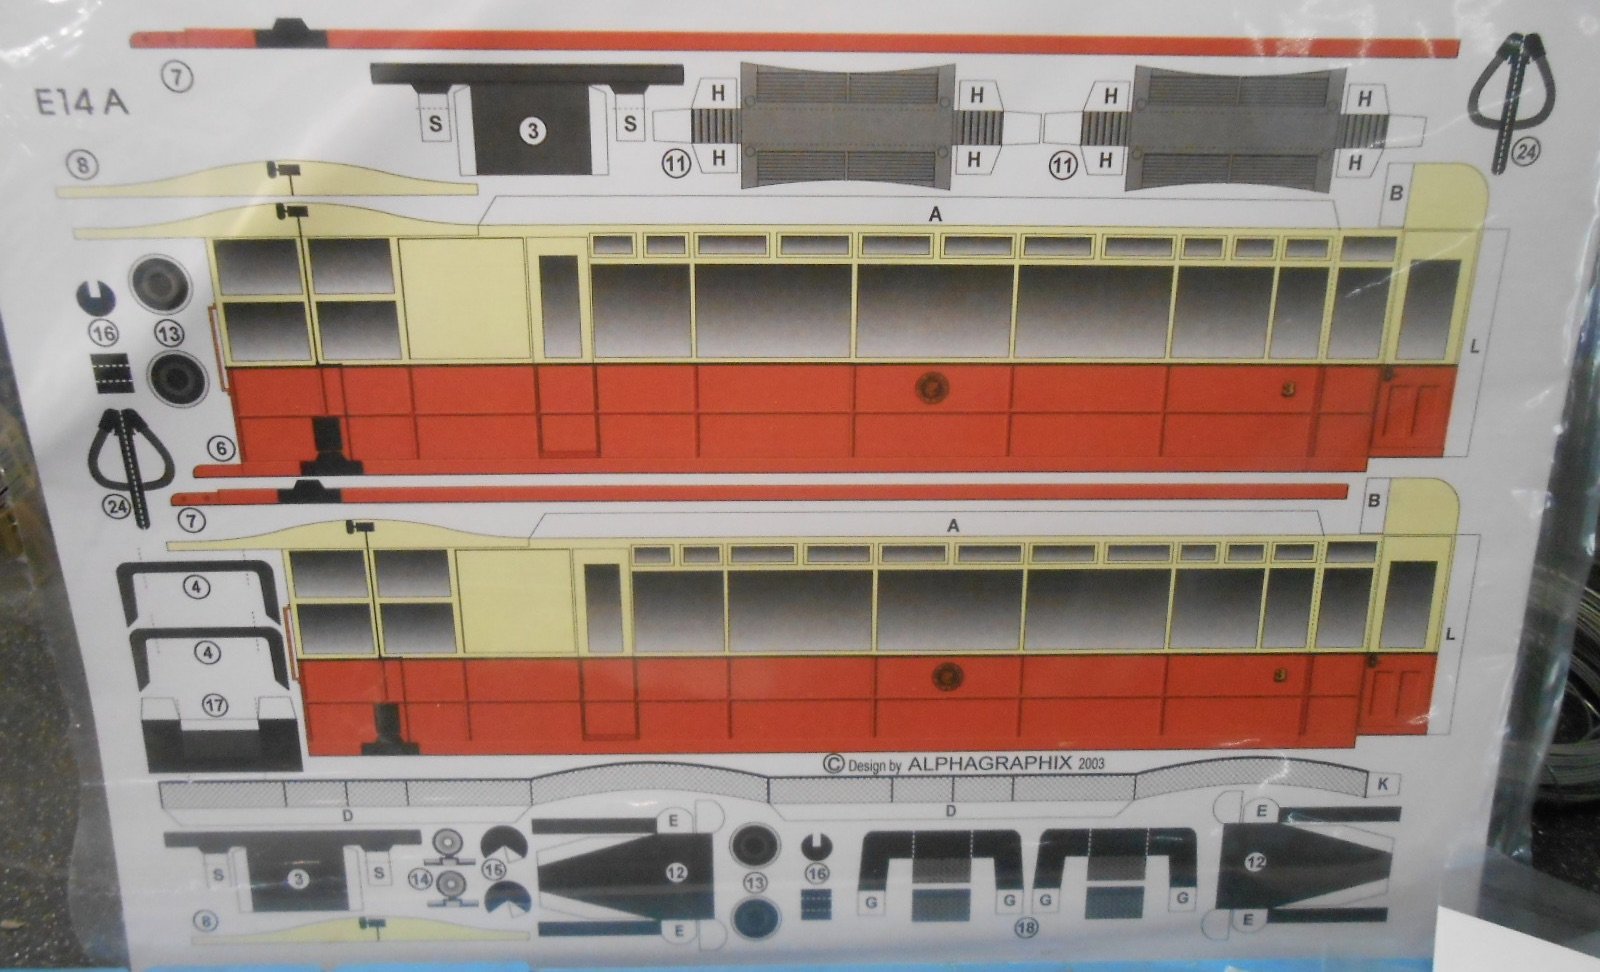
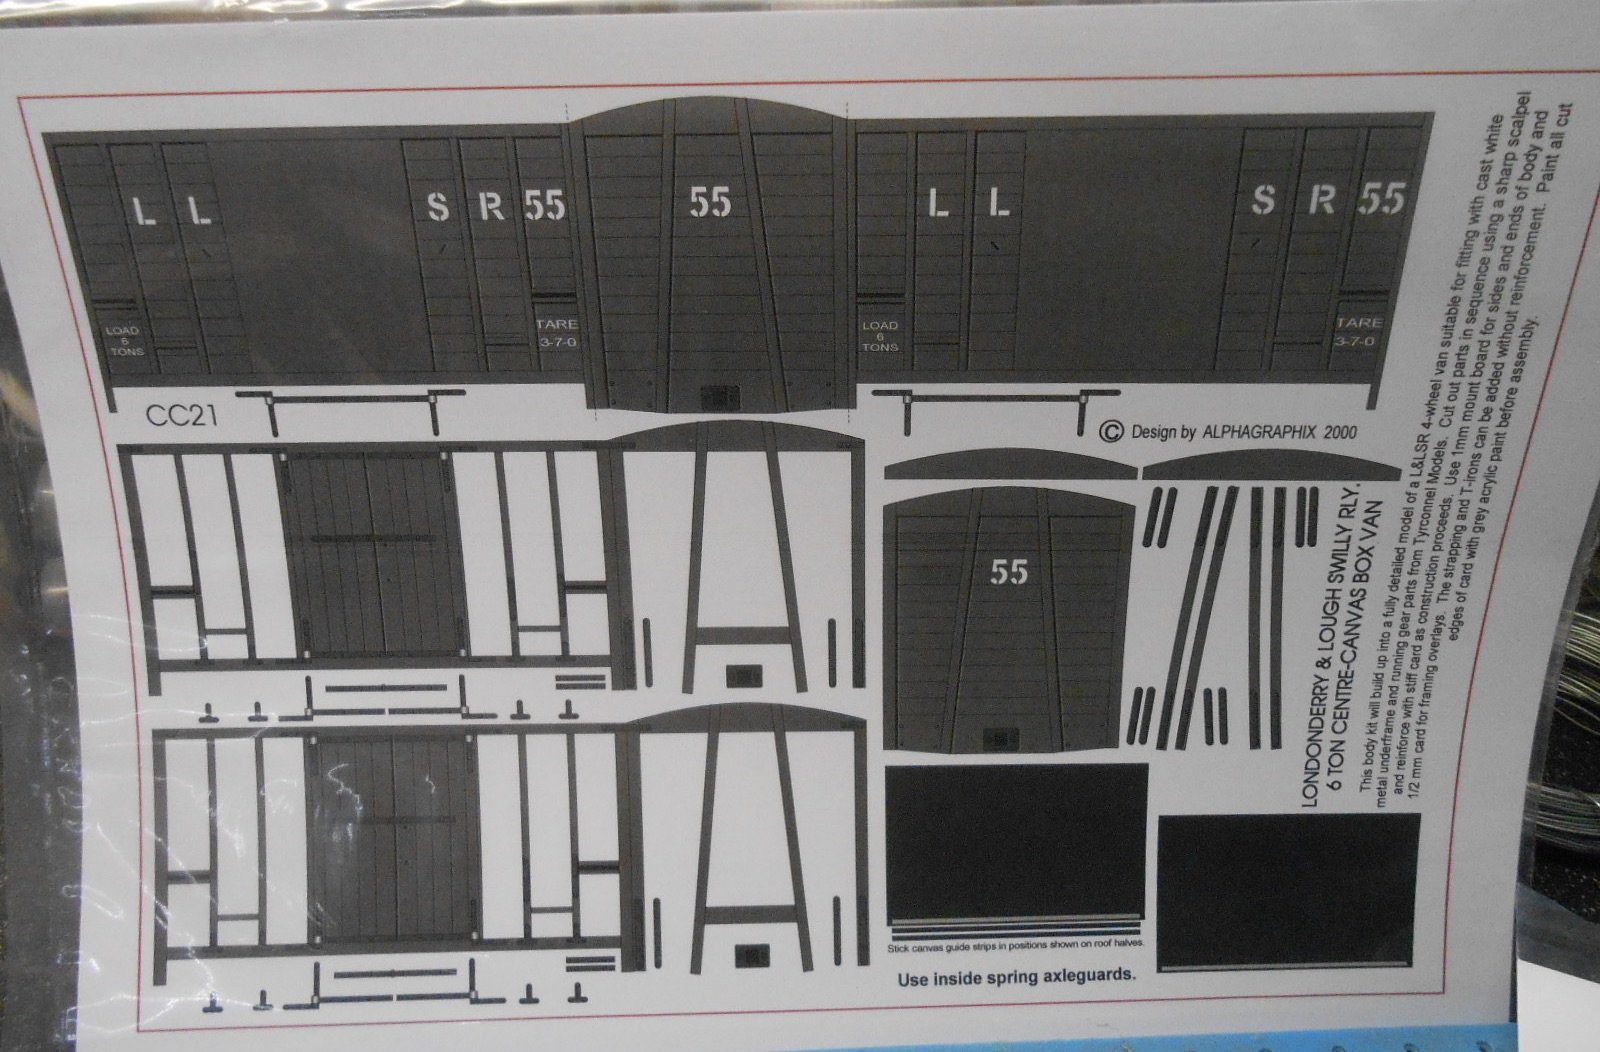
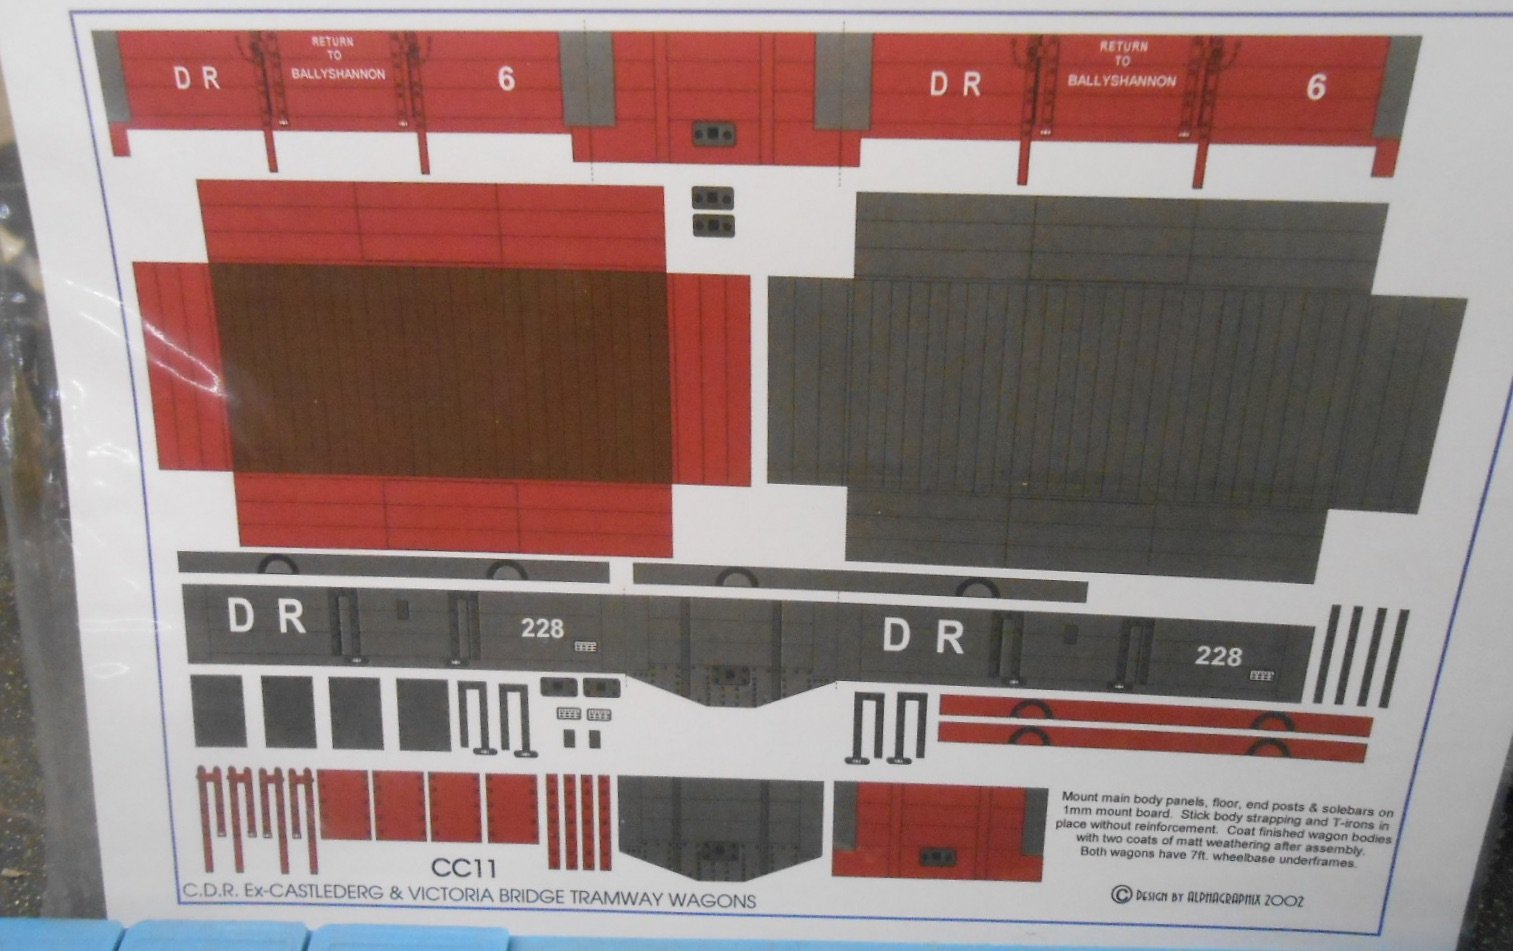
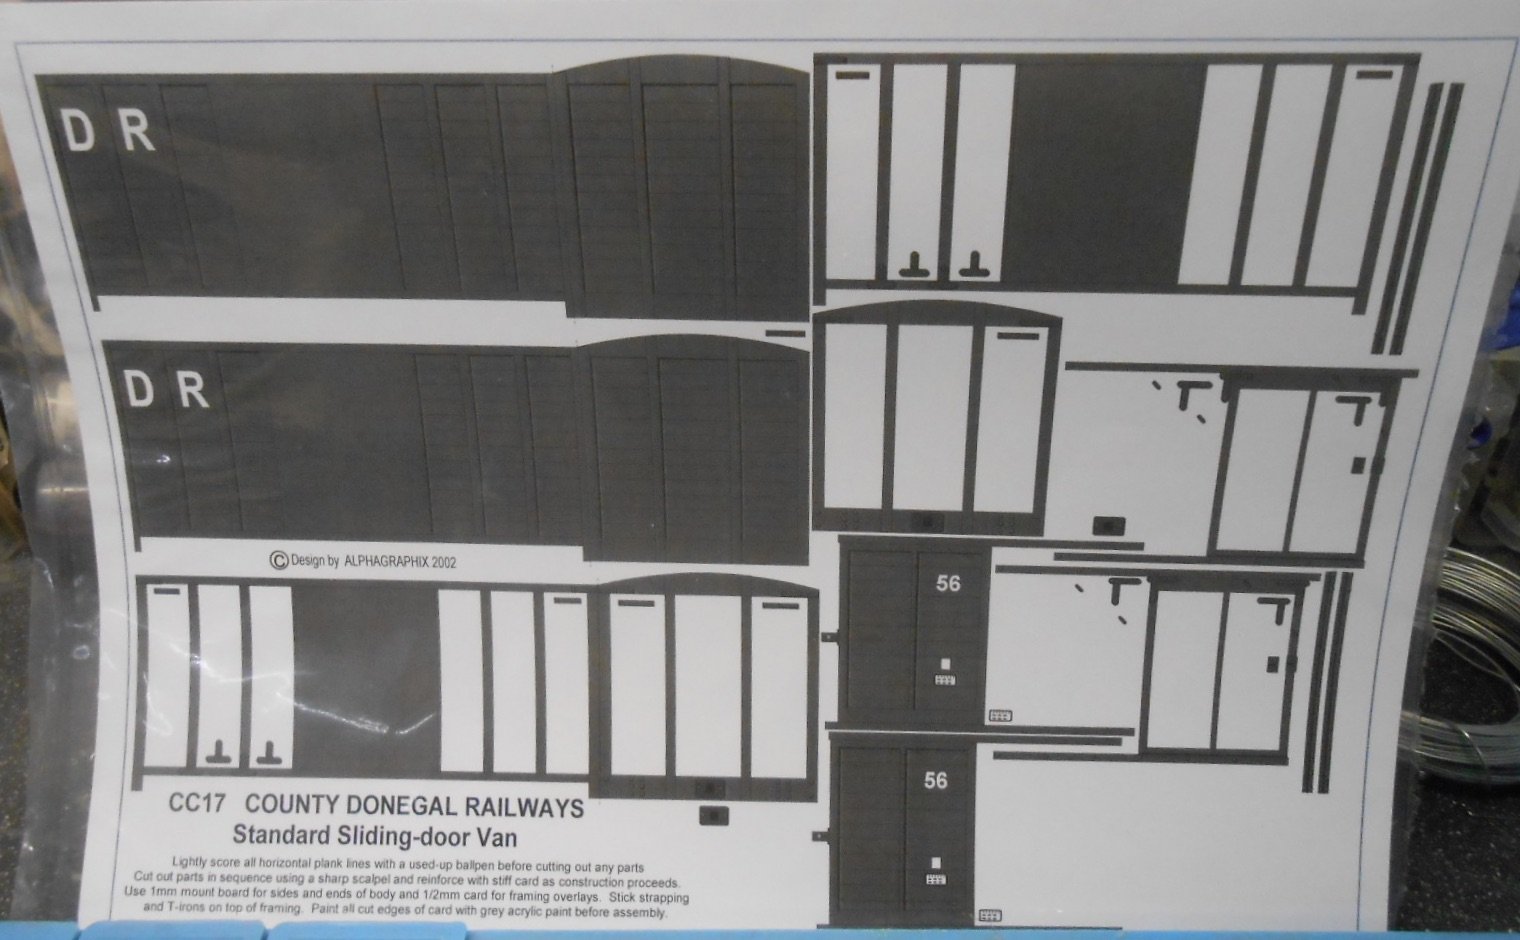
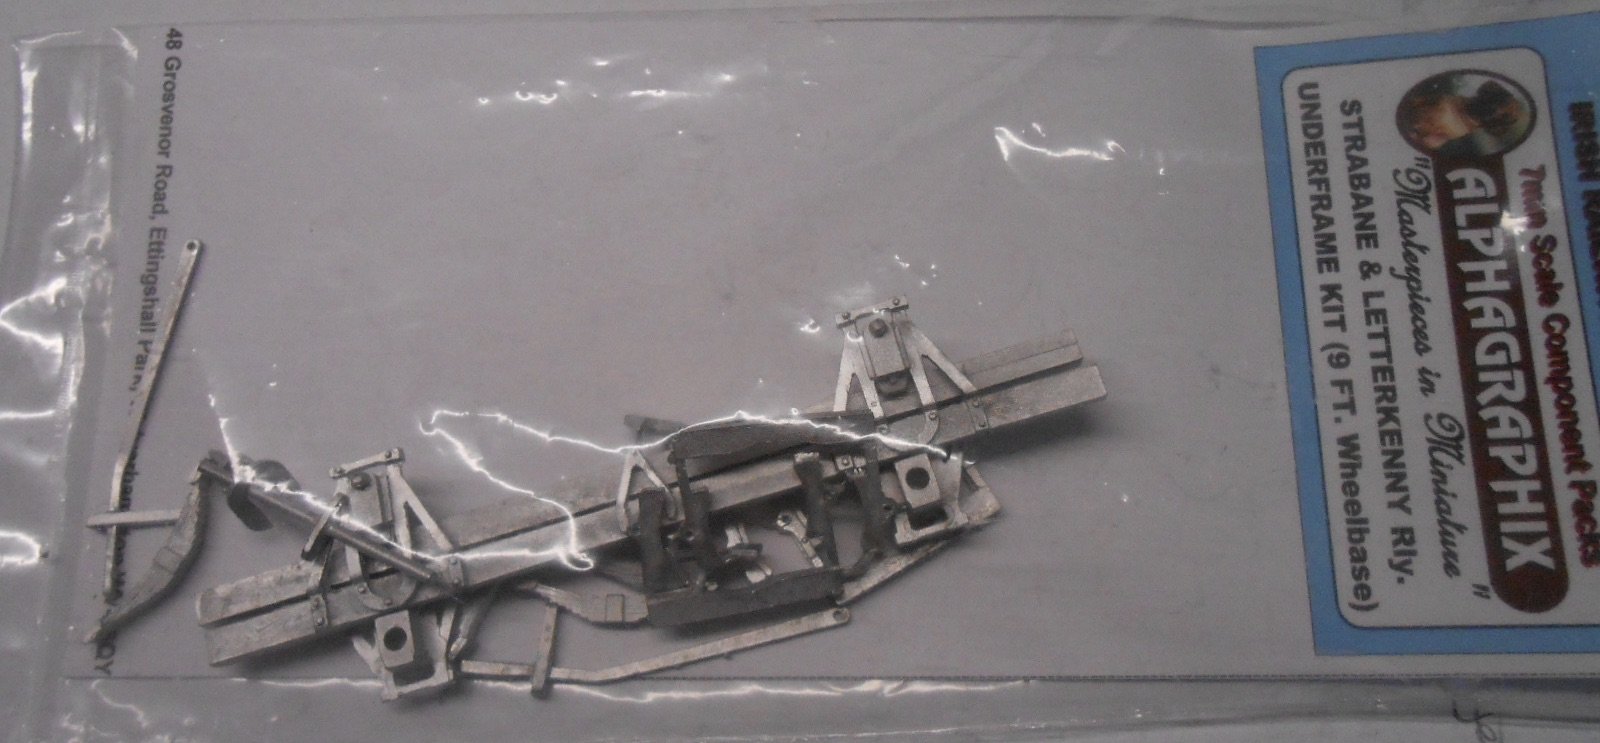
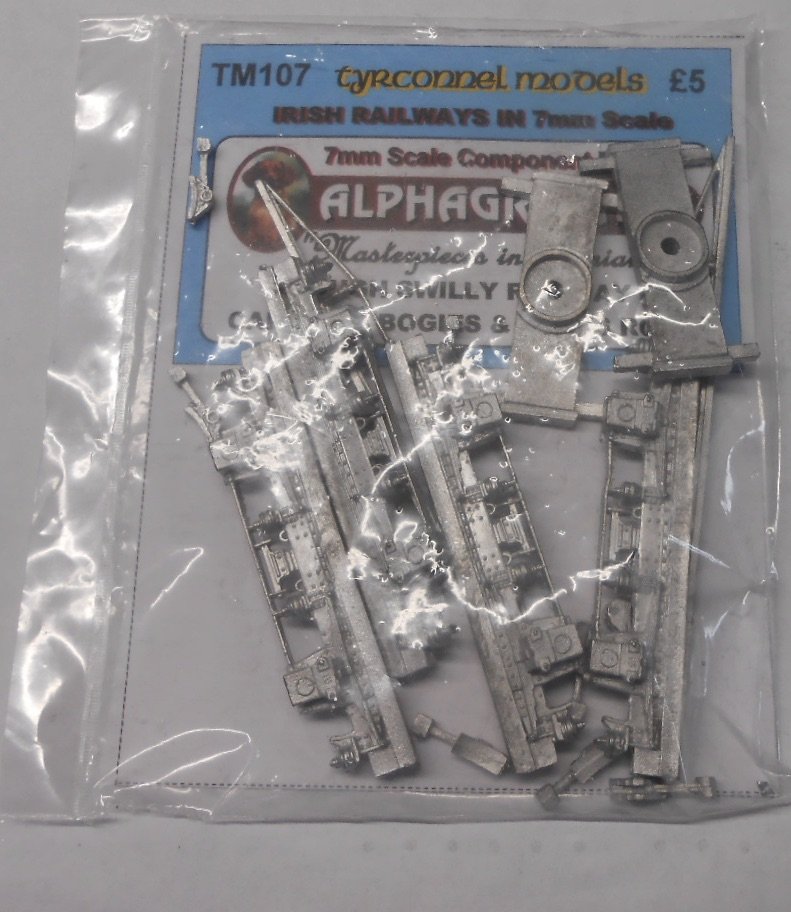
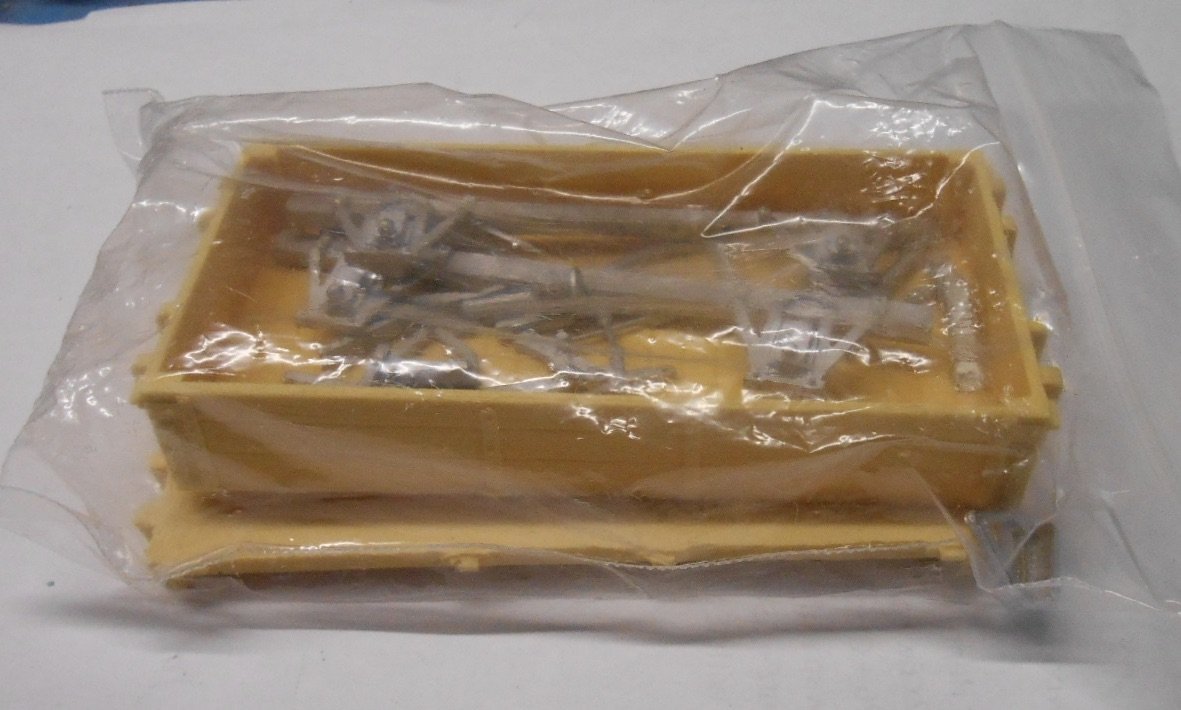
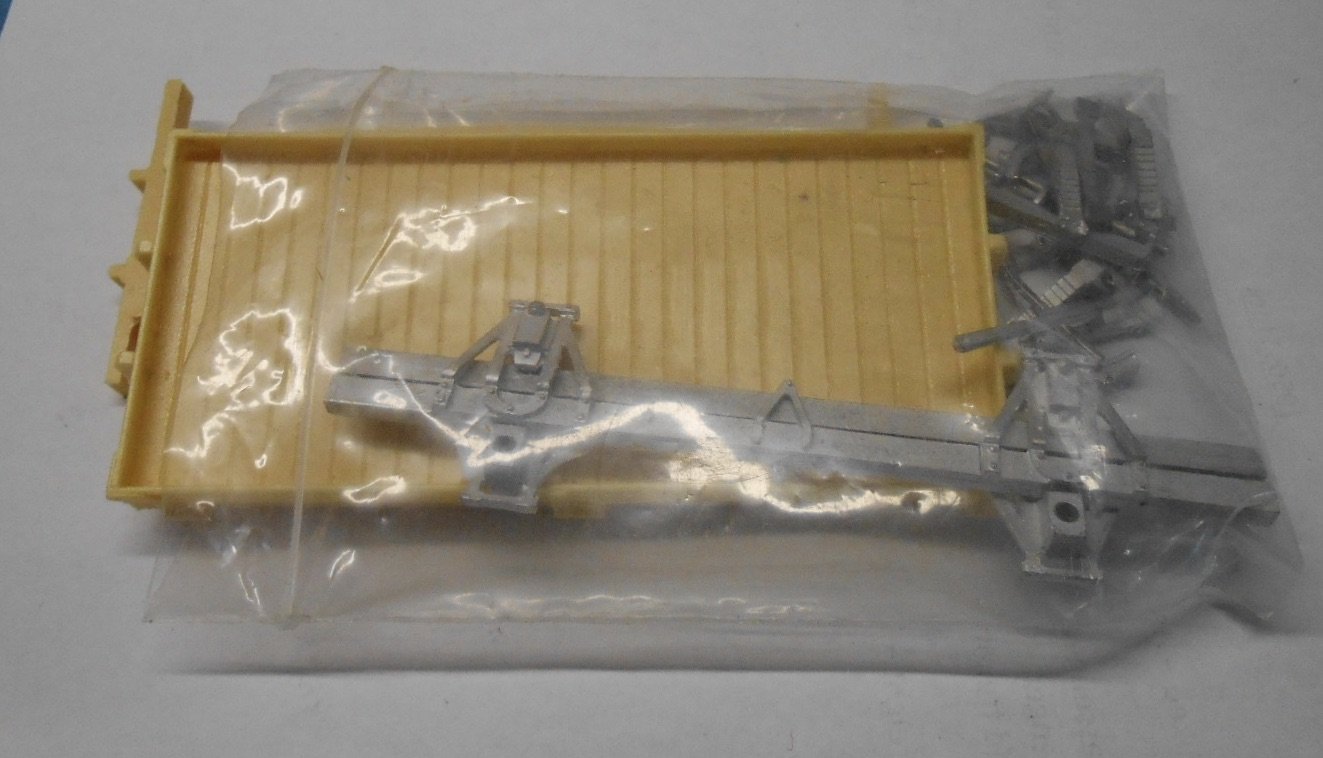
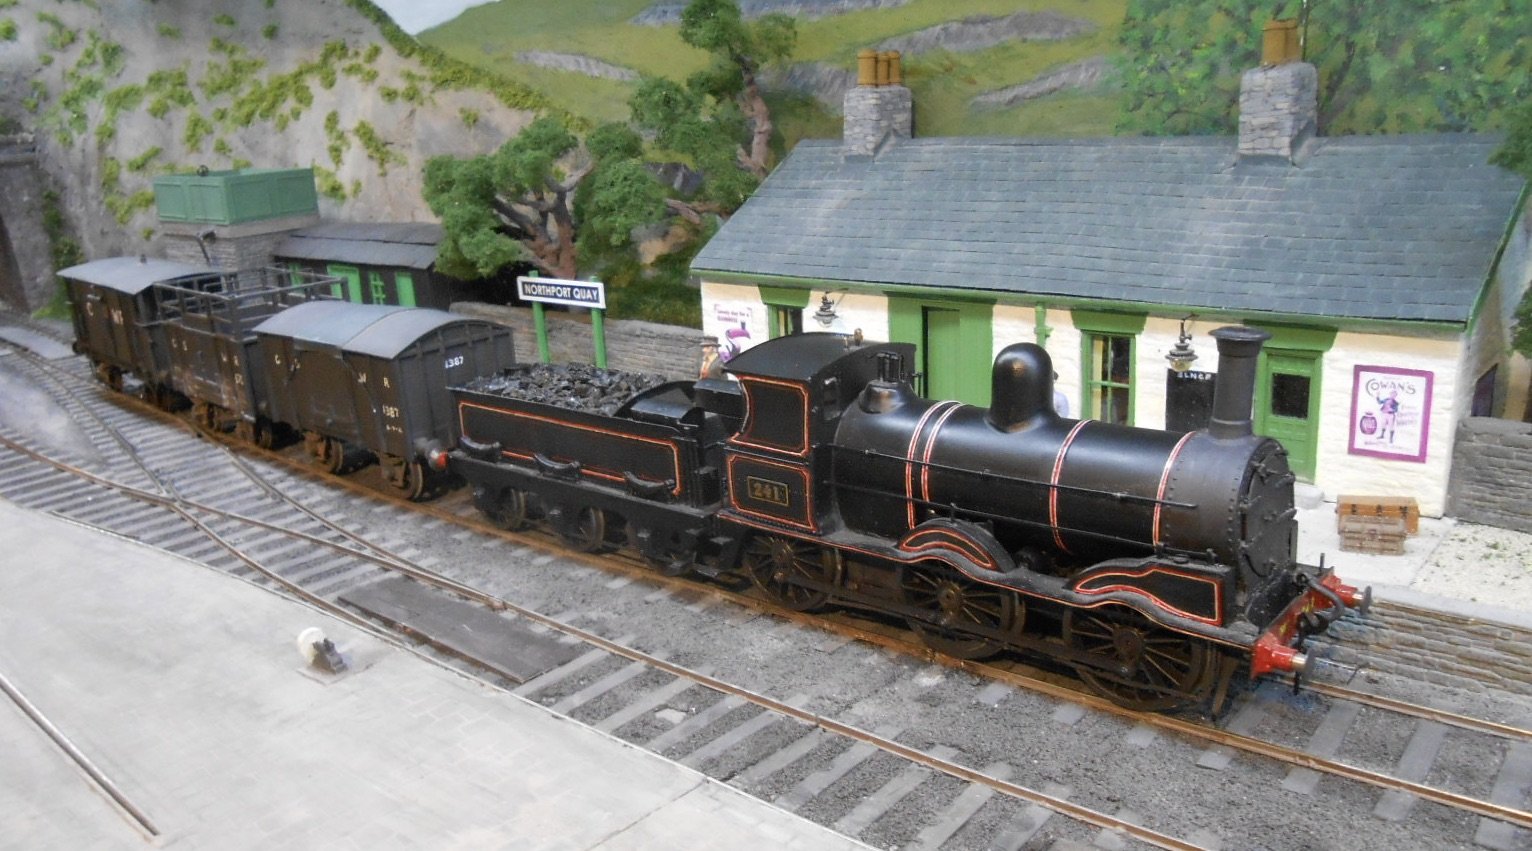
It's been quite a few weeks, but I've finally finished fitting all the Alex Jackson couplings to the stock that needs them to operate Northport Quay. Bending 64 pieces of steel piano wire doesn't seem that much work [and indeed isn't], but fitting them, along with testing has certainly taken a lot of time, while all my stock boxes have needed adapting to protect the coupling wires while travelling to shows. There is still more testing to do, in order to fine tune things, but [fingers crossed], the basic moves of running a train into the station, stopping, then setting back slightly to uncouple the loco before running round, seems fine and this is the case for about two thirds of all trains. There are four goods trains which have rather more complex moves and it is these that will no doubt need more practice in the coming months. Talking to Gordon Gravett, who helped me with Fintonagh at the recent Nailsea show, found he uses a 15 volt transformer to power his electromagnets on Pempoul and Arun Quay, so have invested in one myself to replace the 12v plug in I currently use. The pictures below show one of my stock boxes [actually an A4 box file], newly divided up for one of the goods trains and showing the pieces of thick card being used to protect the coupling wires. I mostly use these box files for rolling stock, with 'Really Useful Box Company' plastic containers for locos in twos and threes, depending on size. So, what next, I asked myself? Northport Quay now needs to have its presentation sorted & was pleased to discover that I should be able to reuse the pelmets, lights and fascias from Belmullet's sole outing, while NPQ was designed to use the beams and trestles from Fintonagh. Just as well, because storage space in my workshop is ever more limited... There are however, a few other things in the pipeline - the E class 0-6-0T I mentioned in my Irish Models thread and then a host of goodies for later in the year to start re-imagining Fintonagh as a Swilly/Donegal branch. For this, I've got some of the Alphagraphix card kits of Swilly coaches and Donegal wagons, plus a couple of railcars [all bargains at just £3 each], but in mentioning my next project to proprietor Roger Cromblehome, he not only found some white metal chassis for the coaches, but other stuff as well, including Donegal Wagon chassis, three open wagon kits and even a drawing for the chassis of the Andrew Barclay 4-6-0T: the importance of the latter being that Worsley Works do a body kit in 7mm scale! So, having spent my entire model making time with never more than a couple of unmade kits in store, I now have loads - itches that are going to need scratching! A few examples are shown below: I use the card kits as drawings to scratch build models in plastic, or make my own resin castings if multiple examples are needed.
-
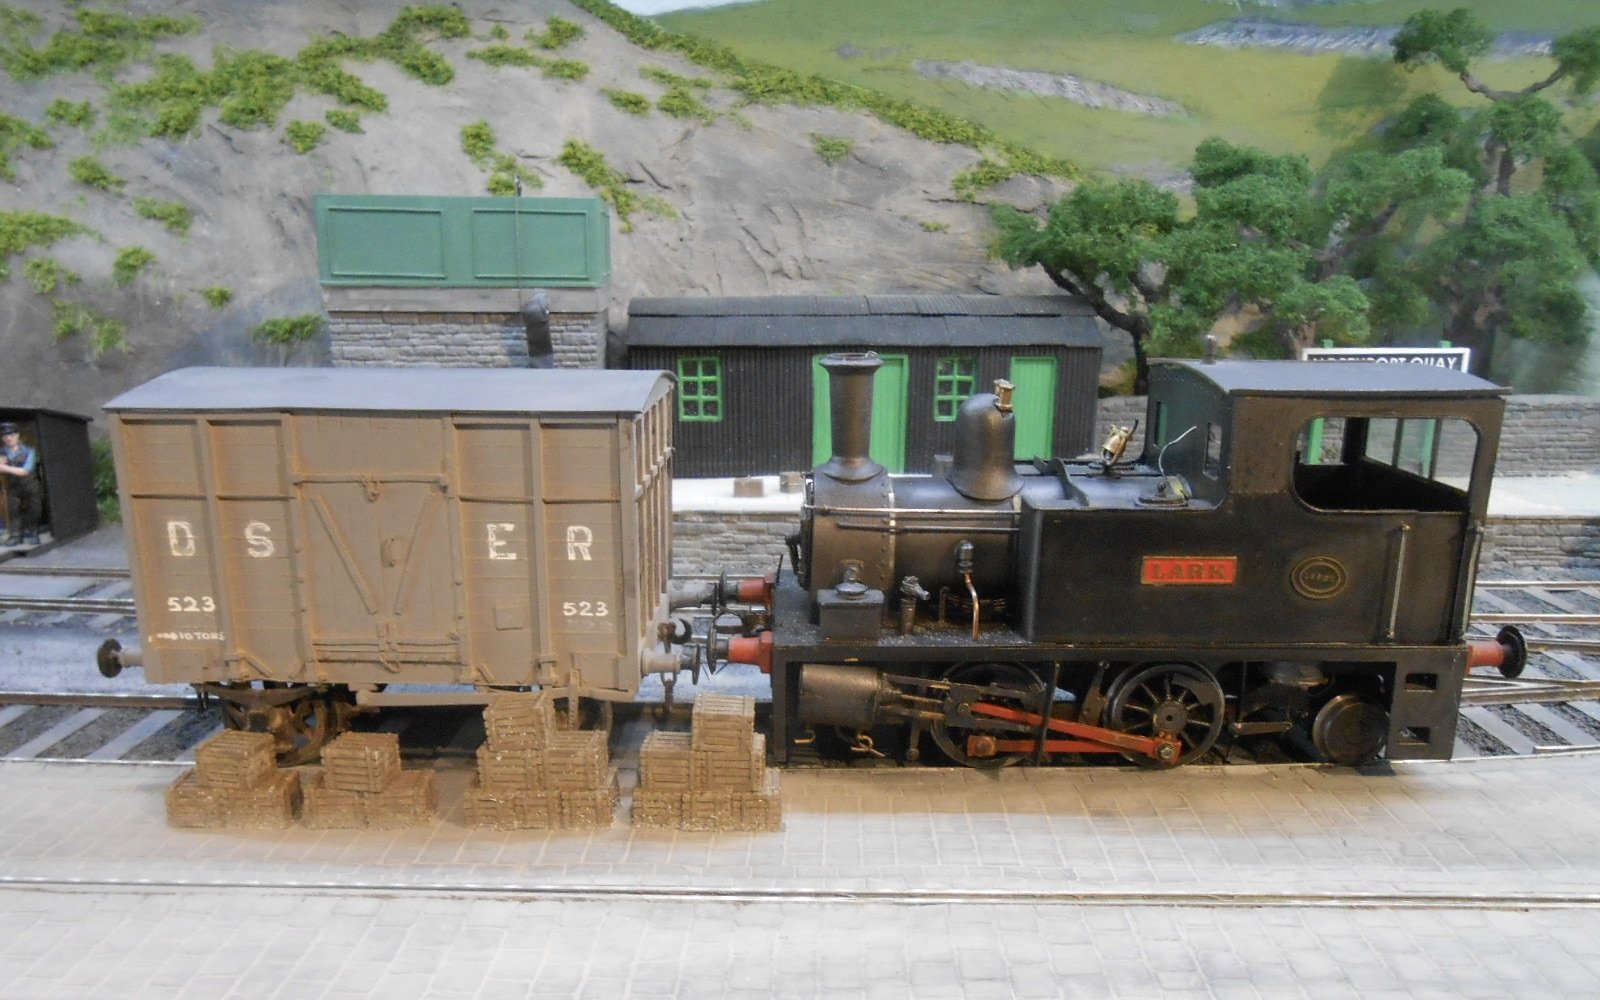
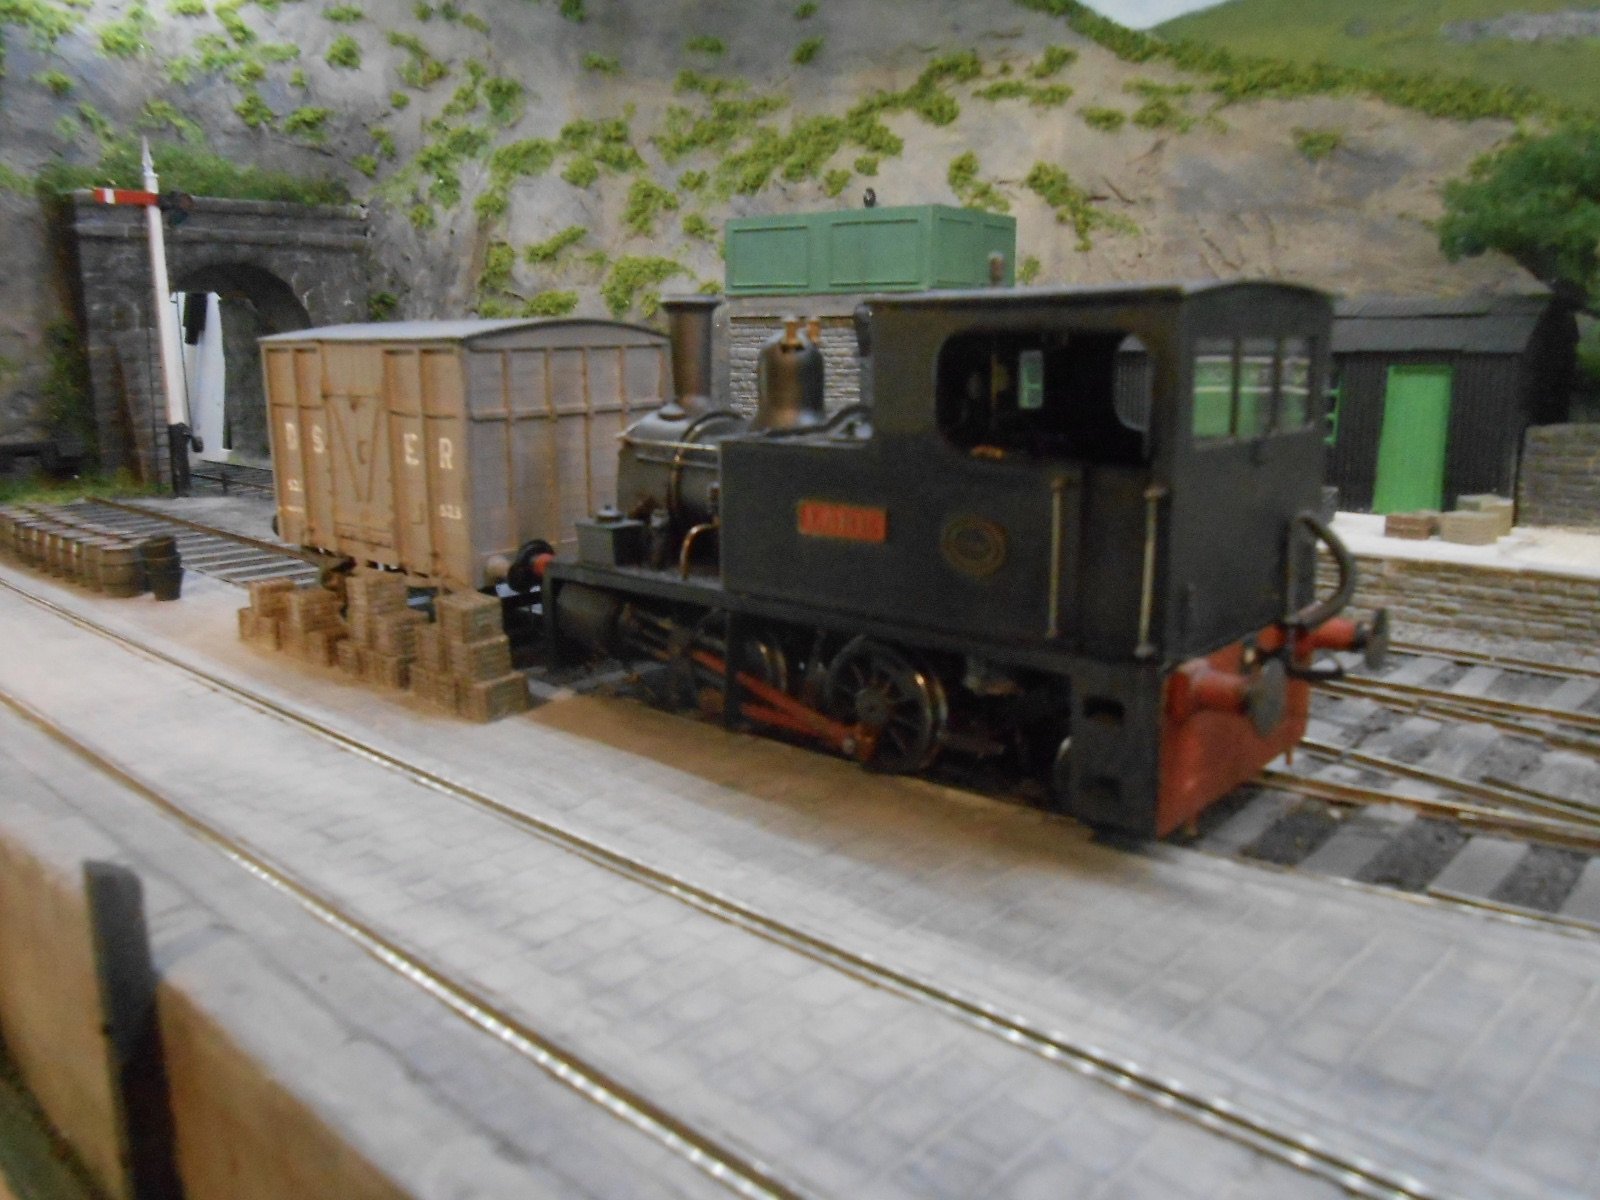
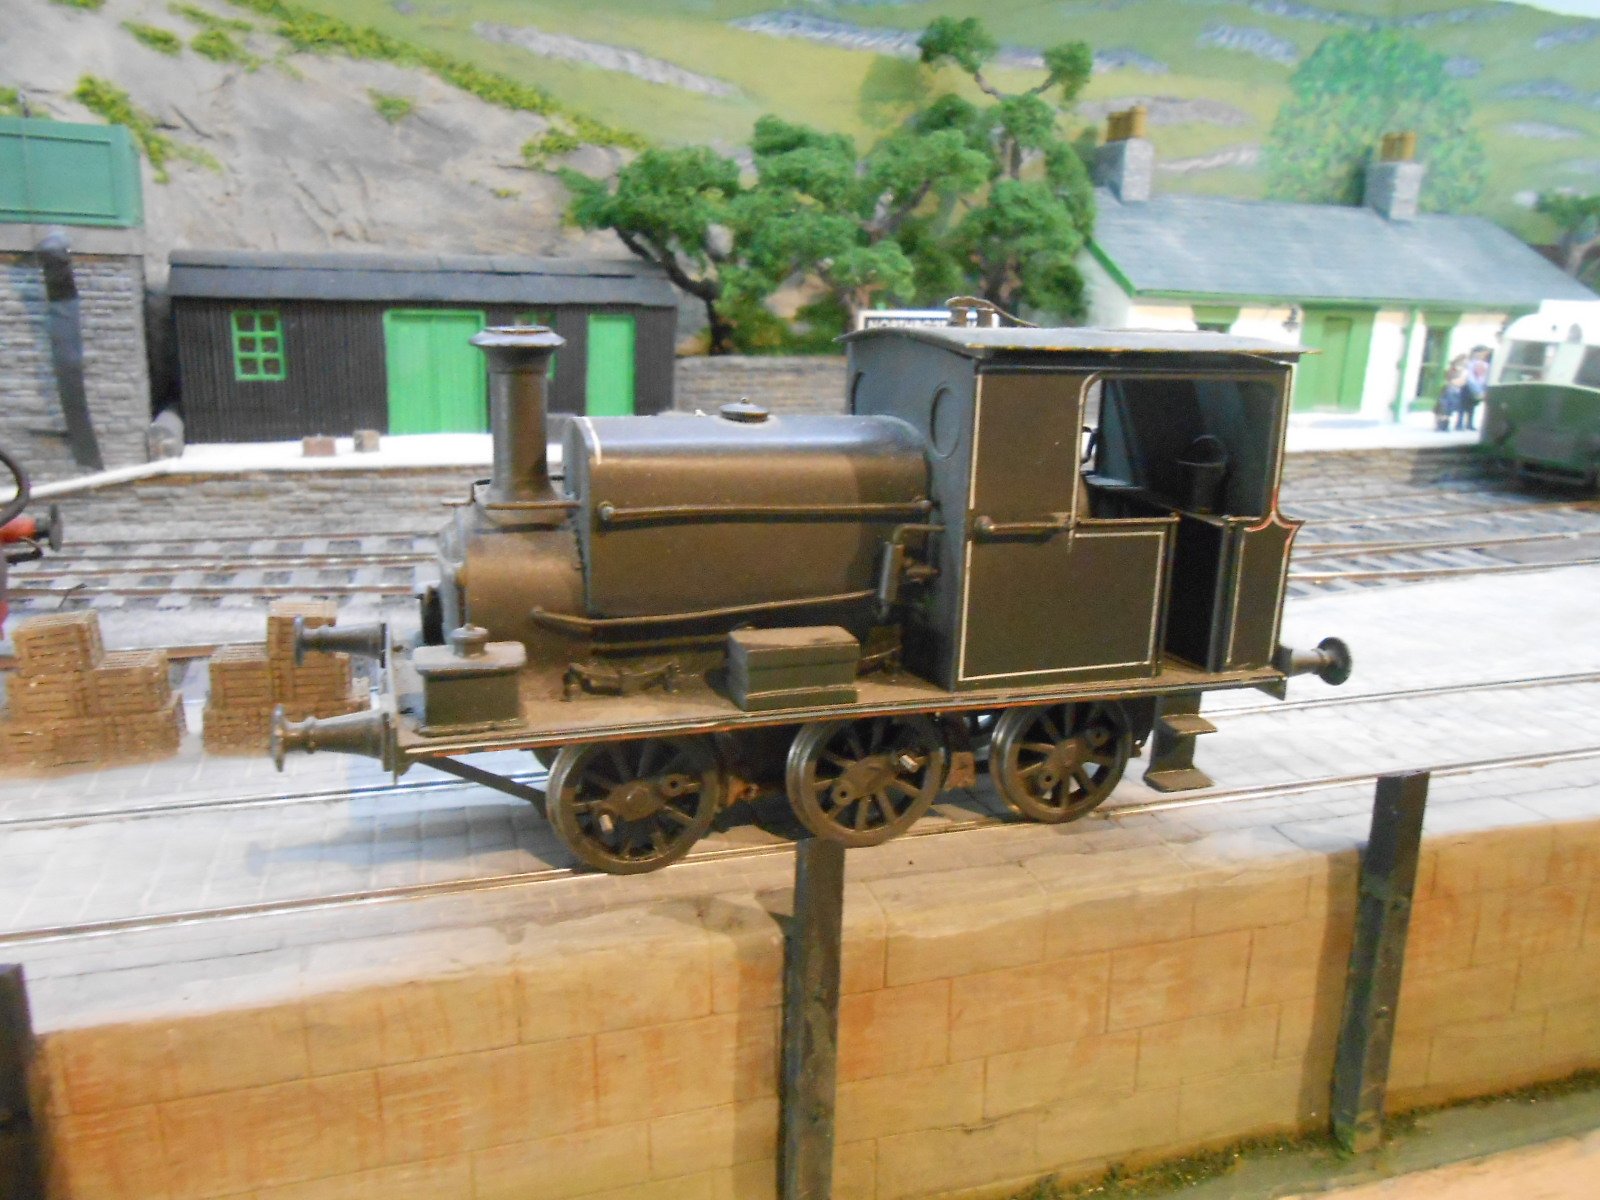
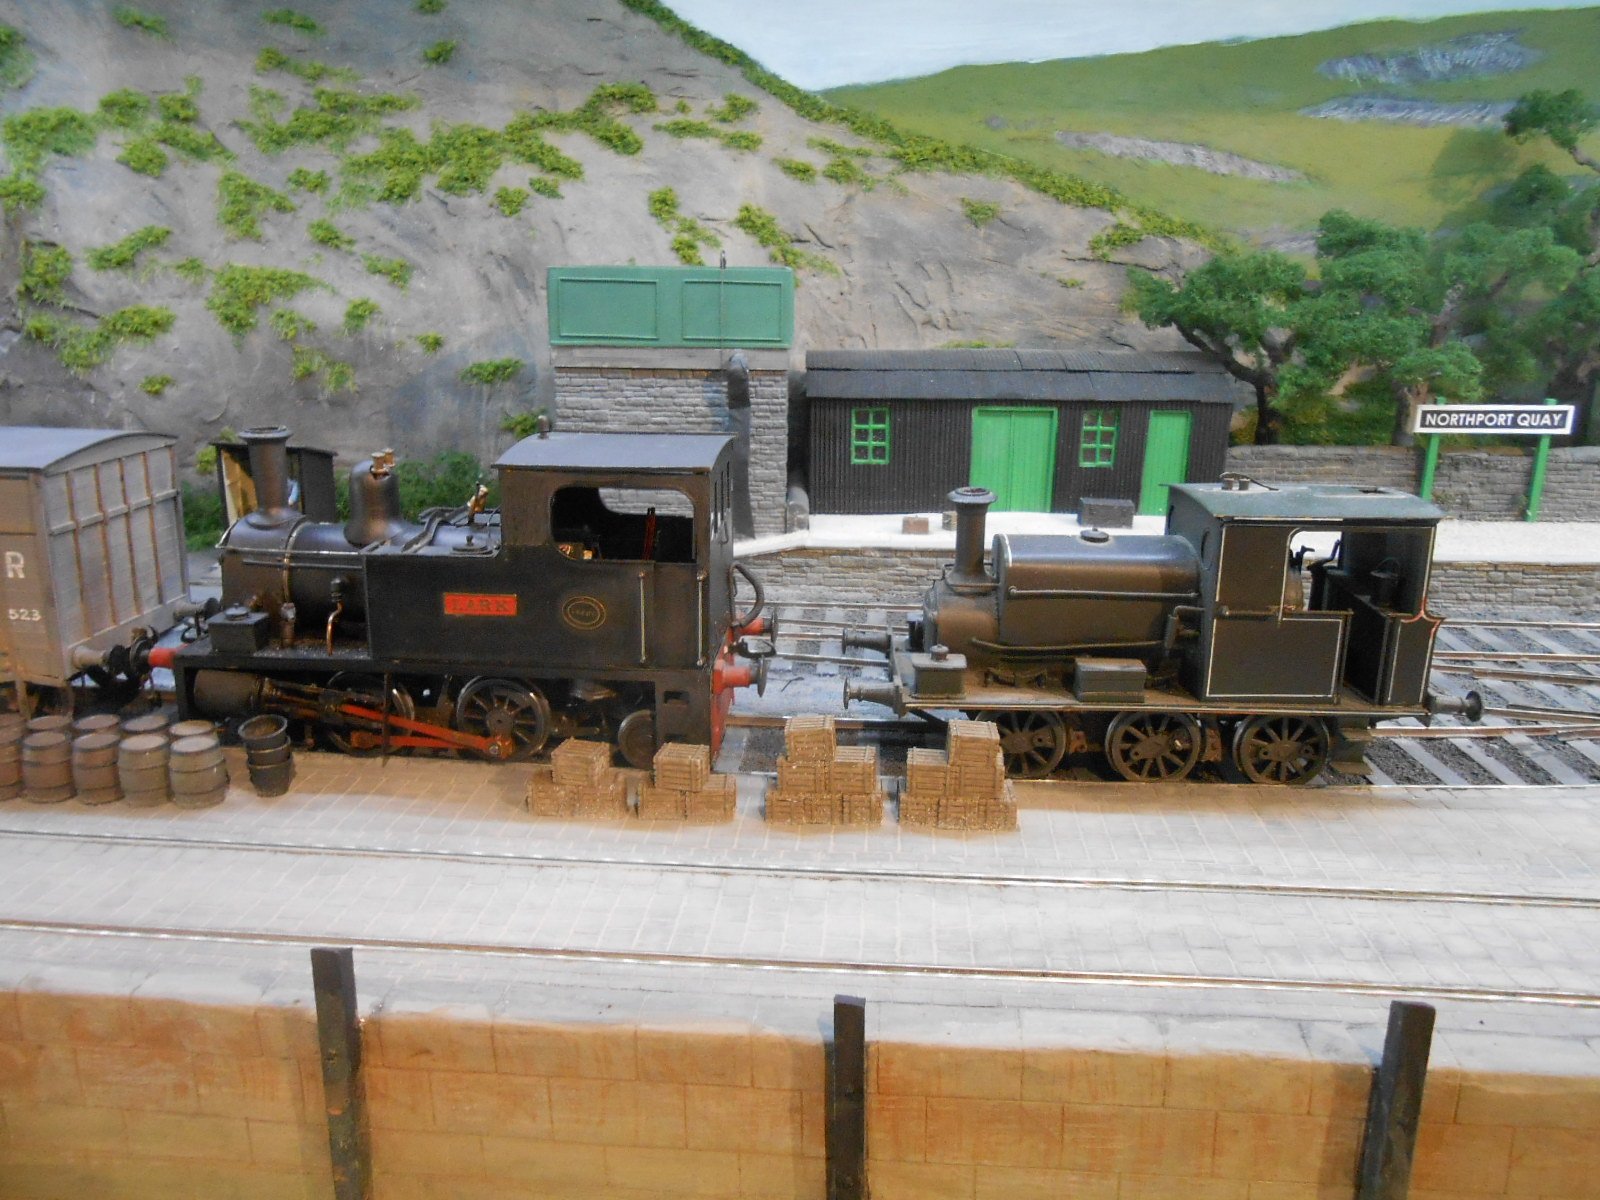
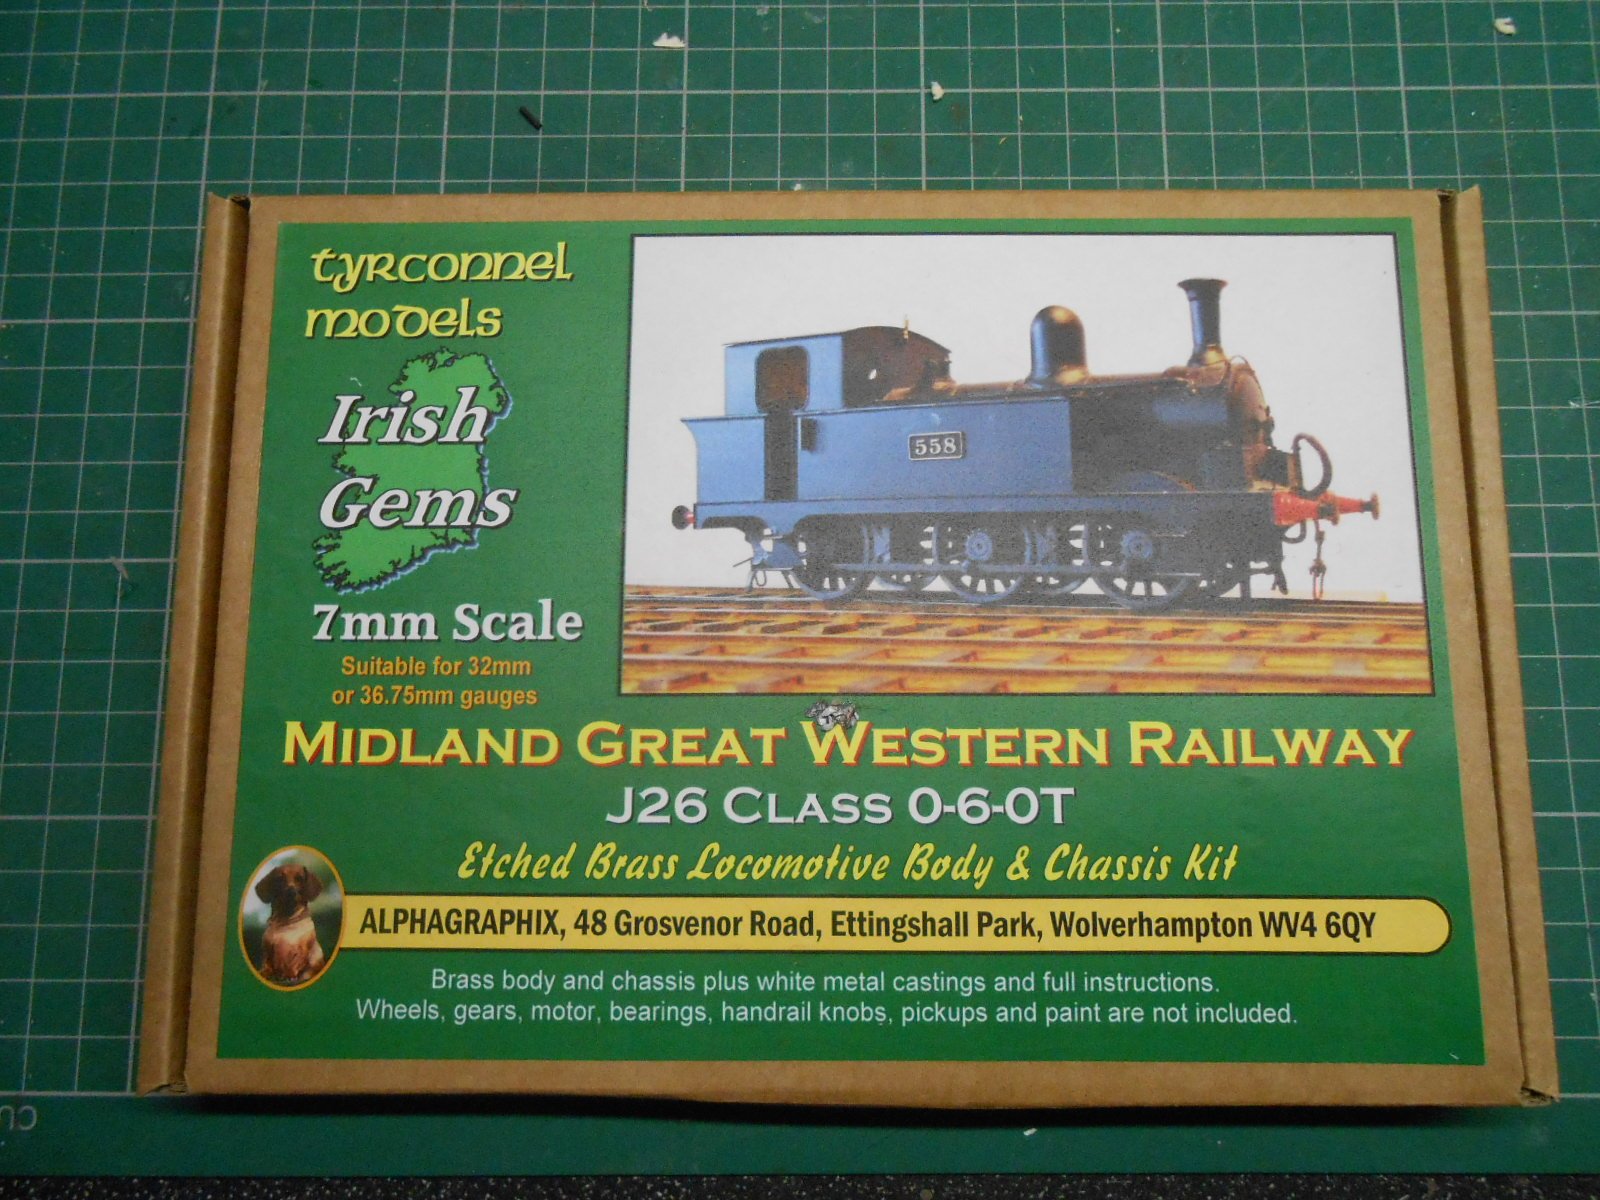
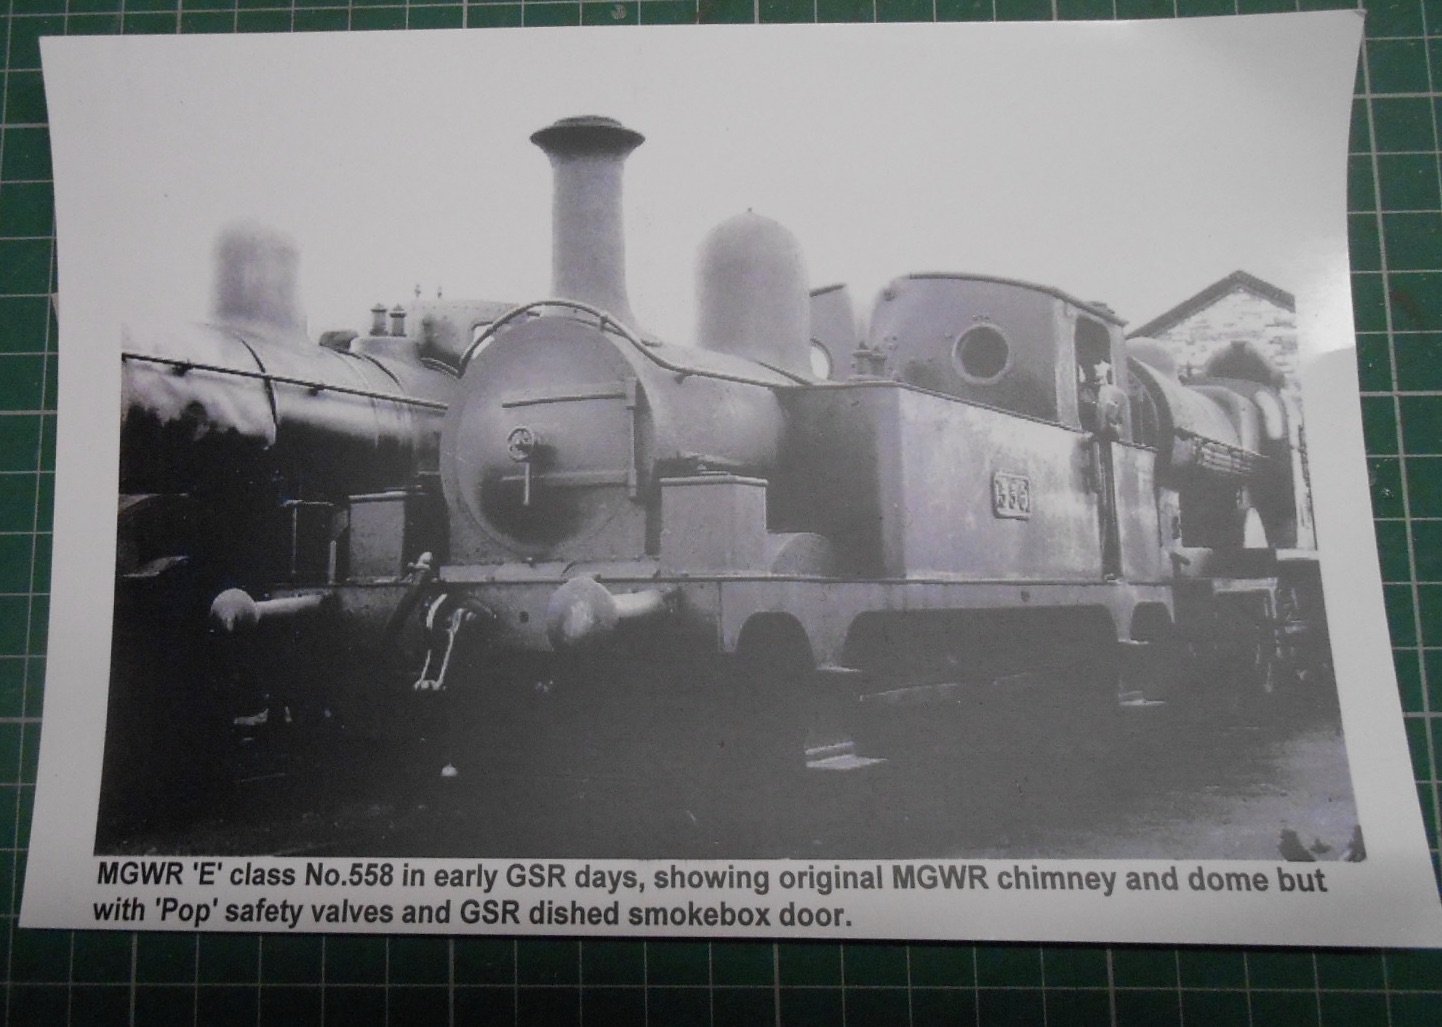
Waifs and strays A few other bits of stock complete my broad gauge models, for now. First is 'Lark', though others will recognise it as Timoleague and Courtmacsherry Tramway loco 'St Mologa'. Yet another Alphagraphix/Tyrconnel kit, this tiny engine proved a bit of a challenge with its outside cylinders creating fagpaper clearances. However, it is a pretty engine & I assumed that Hunslet built a second one for the Arigna Mines, where it was named 'Lark' - one of the spare sets of plates from the J26 kit. It will eventually morph into the Northport Quay shunter. Another exile is a DSER van, though justification for this comes from a photo of one in the Rails to Achill book. Scratchbuilt in plastic sheet & strip with white metal fittings. Slightly more tenuous is this little industrial loco, which was actually my first ever 7mm scale model. Can't even remember what the kit was, while it has languished, unloved, for more than a few years, awaiting new wheels and chassis. Its main purpose has been to practice painting & lining! Note how it is even smaller than 'Lark'. Finally, for now, a sign of things to come, with another Alphagraphix J26 kit, though this one is going to be finished in full MGWR livery - see Galteemore's workbench thread for one he built earlier. The picture on the box is actually my own model & my first broad gauge engine, while the photo kindly supplied by Roger shows some of the differences when the prototype was first built. Looking back, it is remarkable to think that I joined this forum in 2012, so have actually only been modelling Irish railways for about 12 years. There is the narrow gauge stuff as well - more of which anon...
- 56 replies
-
- 11
-
-
Super work, Ken. A real gem.
-
We're you once homeless and living on a bench in the local shopping Mall? Google is a strange thing. Several times have looked up stuff only to find my own posts, including maps of fictitious railways coming back at me. Shades of disappearing up your own primary orifice... Remember talking to Maggie Gravett who had a great idea for retirement homes for aging modellers: Big house, with each resident's room containing a work bench area for modelling Community rooms with armchairs for that branch of modelling and large library Bar and cafe, as above Several large railway rooms, one for each scale with layouts for playing trains Younger, more agile folk on hand to do awkward stuff like bending and lifting A large garden with outdoor railway, staffed as above Am sure the list could be added to.
-
A fine obituary in the latest Model Railway Journal for probably the finest loco builder ever. His models were simply breathtaking in their detail and rightly commanded huge fees. In an earlier era, James Beeson was the accepted master, but Tony took things to a new level.
-
Thanks Patrick (and everyone), the turf wagon/carriages have a false floor about 5mm below the top. I used a tool called the Chopper, which is a simple guillotine affair with a razor blade as the cutter to chop the matches. Really hoping to get back to some actual modelling soon. Converting to AJ couplings is taking a lot of time, while next up is going to be the whole presentation of Northport Quay (lighting, pelmet, fascia), along with fitting in the car for going to shows. All made worse by the fact I have several unmade kits to build too, which is very unlike me.
-
Worth noting how the sky is not a uniform blue and changes hue as it nears the horizon. Like the phone gizmo thingy - does the app have a name and is the same thing possible to doctor a digital photo on a laptop?
-
And the one eyed dinosaur - doyouthinkhesaurus.
-
Certainly looks the part and always nice when things come together like this.
-
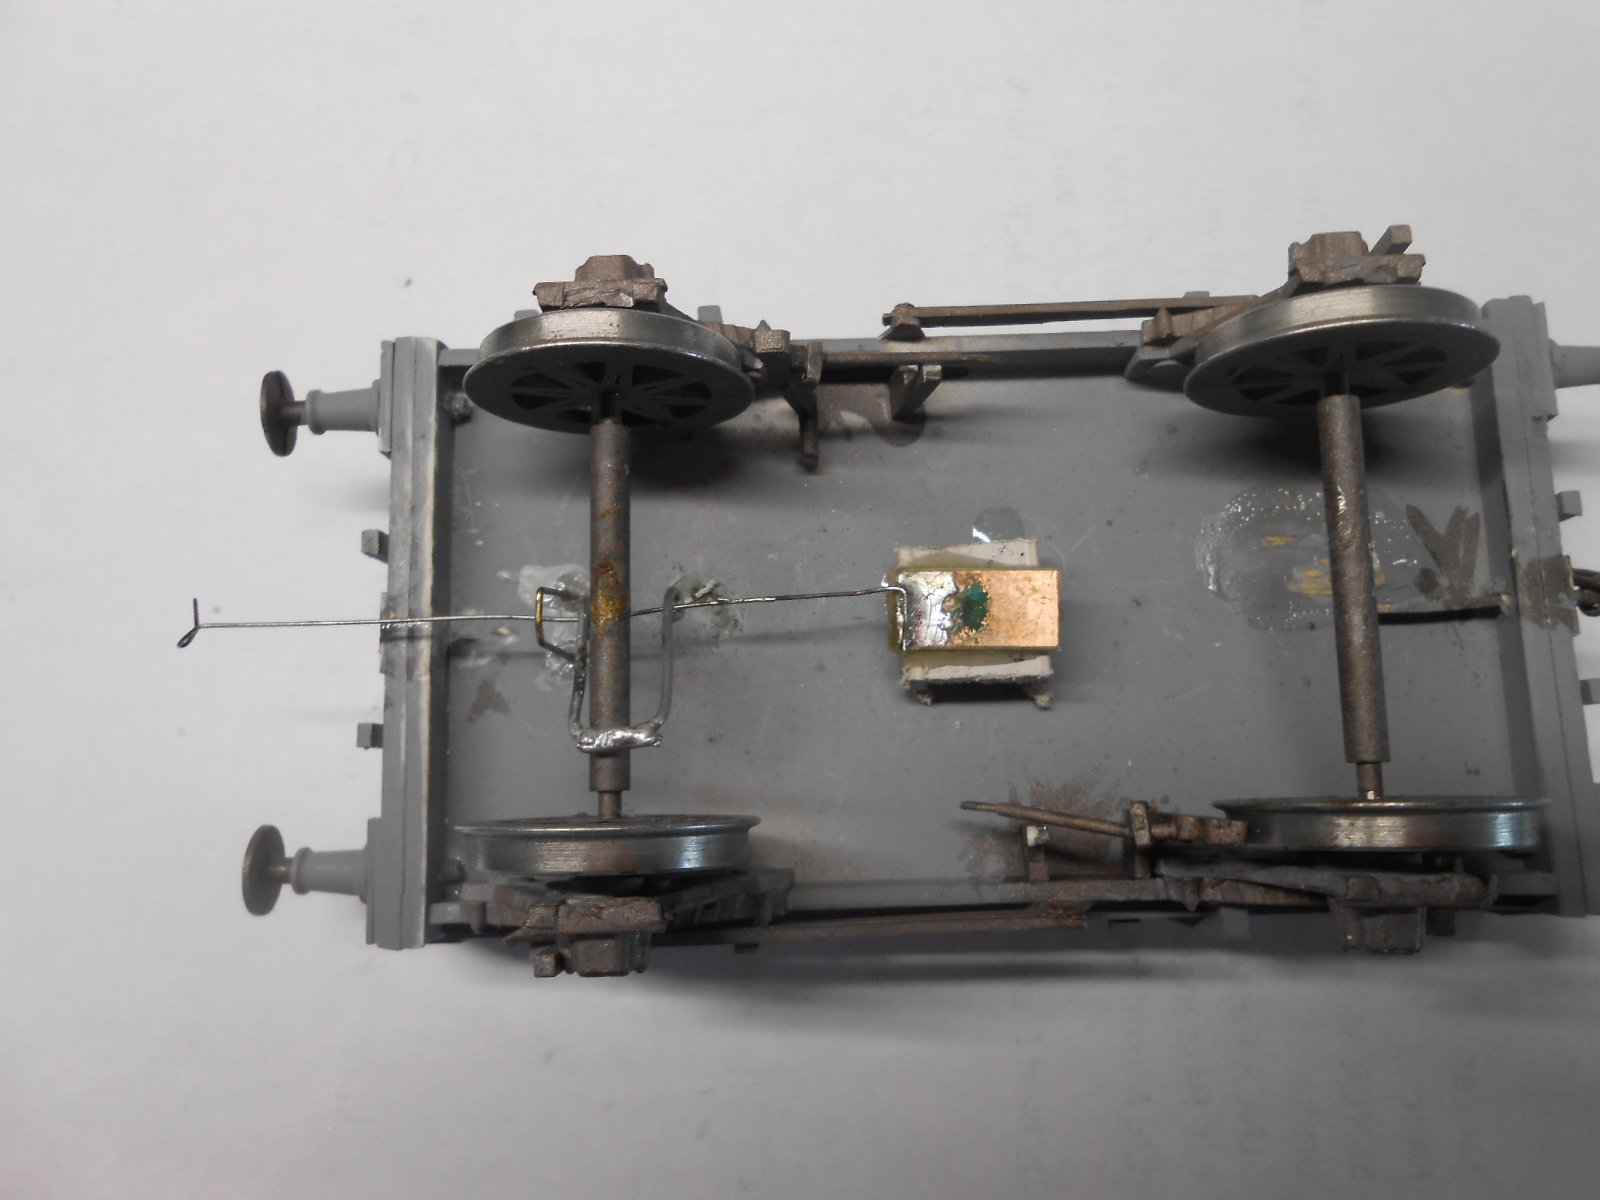
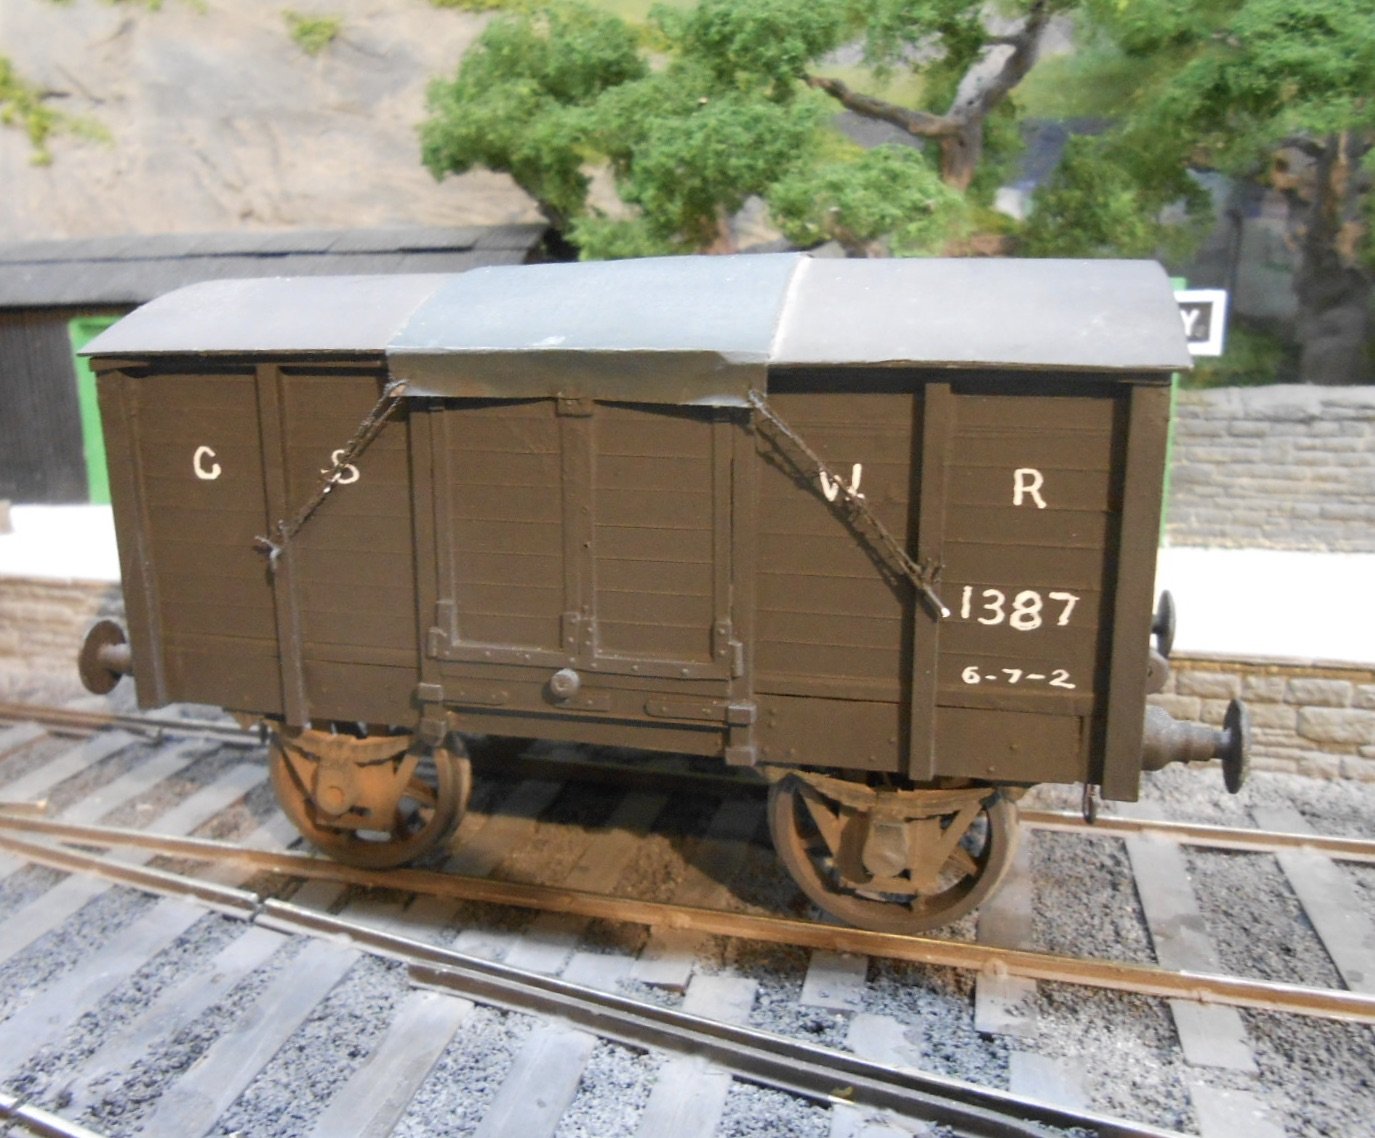
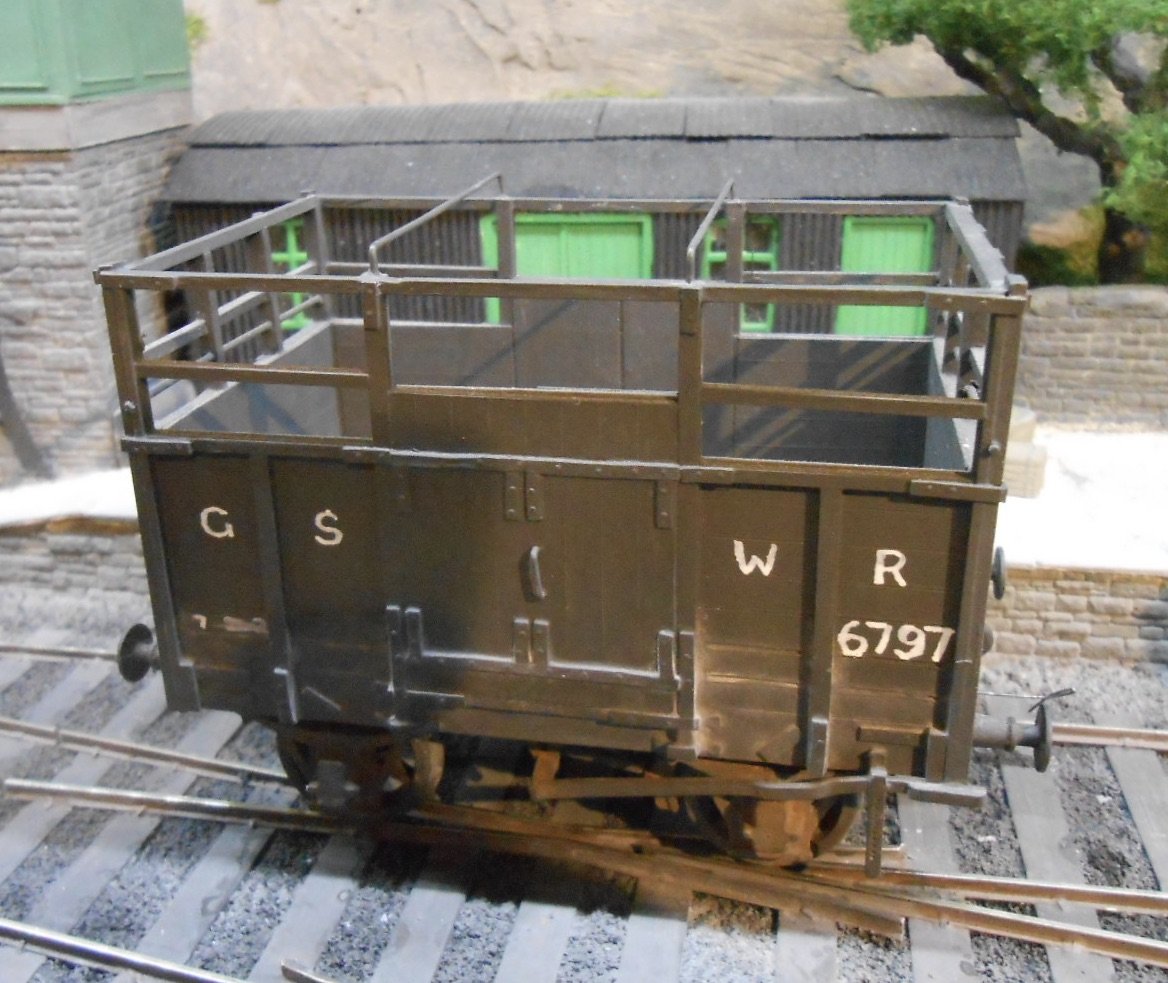
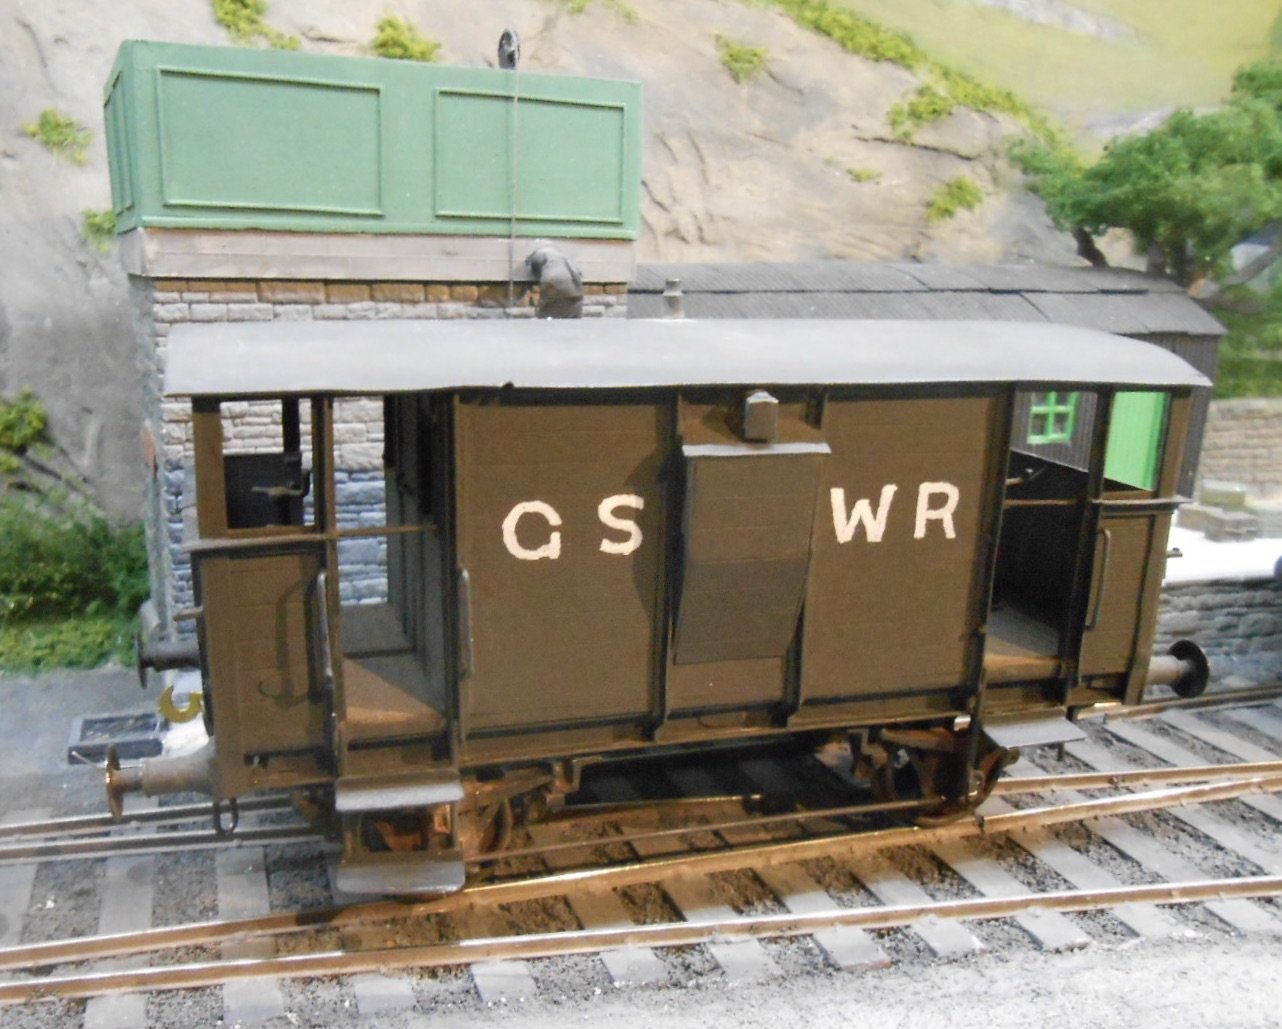
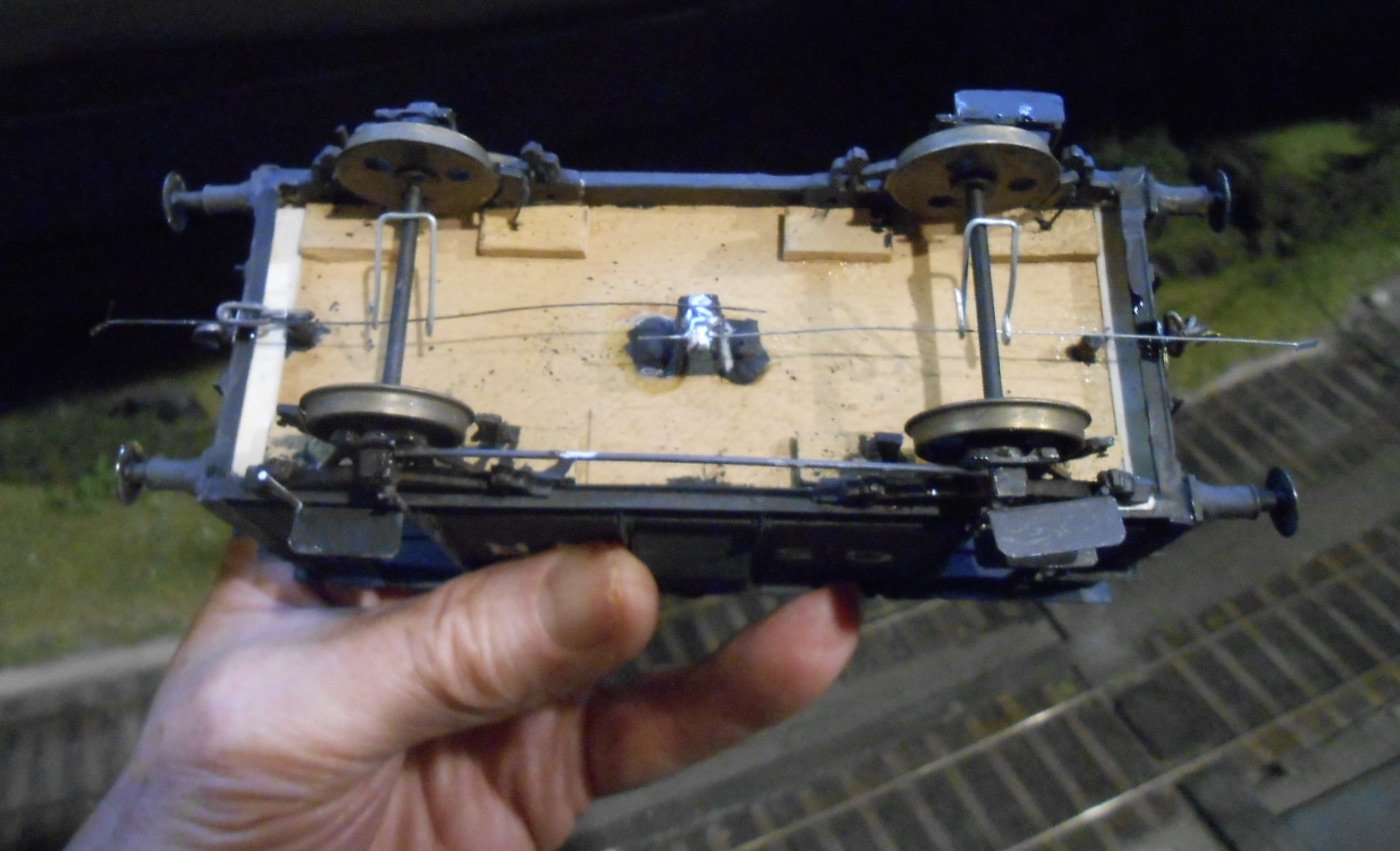
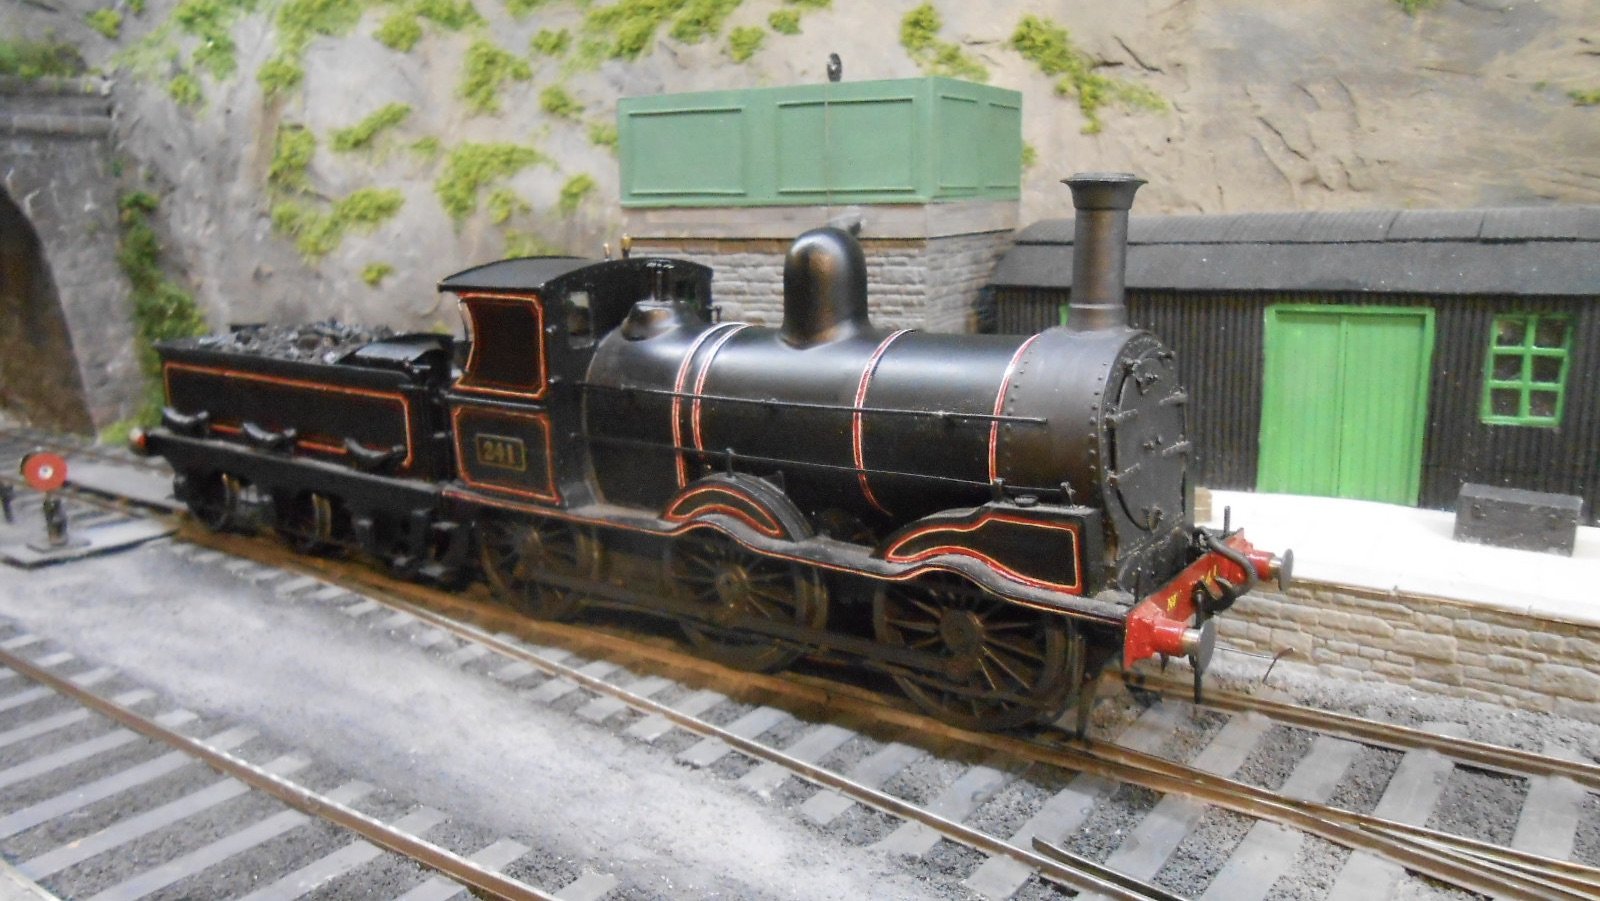
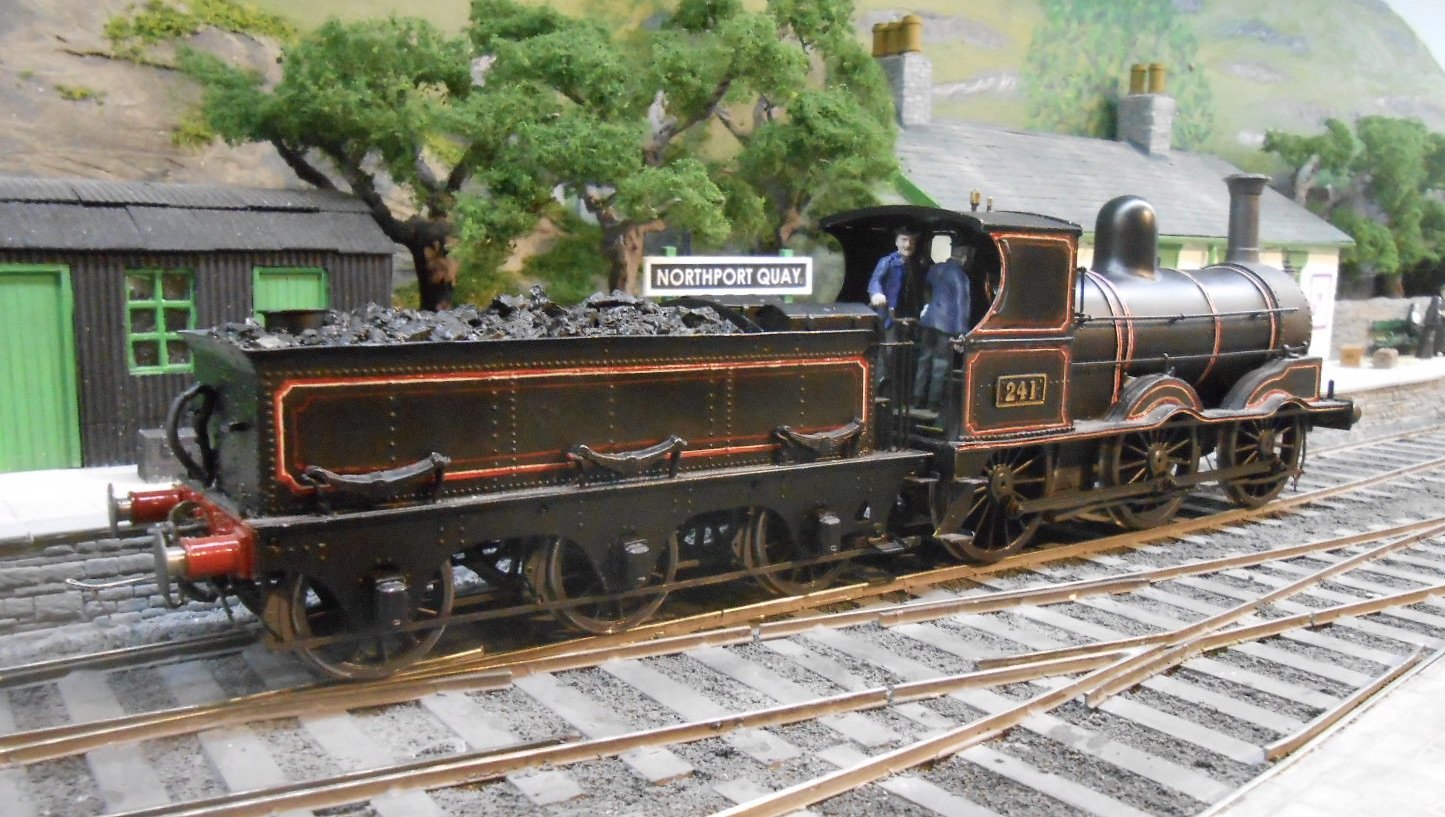
The rest of my GS&WR stock has more than a hint of Richard Chown about it. First is a brake van that I got in the same bid for the D&M brakes. Scratchbuilt, Richard used a range of materials including wood, plastic and metal. The second picture shows the underside, with its wooden base; it also shows the mounting point for the Alex Jackson couplings he used. At first, I removed these, but recently have put them back. Looks like I need to repair the right hand footsteps! The second item is a 101 [J15] class 0-6-0. I was at the Gauge 0 Guild Convention in Telford, a year after he died, when I was offered the chance to buy some of the remaining items from Richard's estate. Among some wagon and coach wheels, plus some signals was an unmade etched kit by Terry McDermott. Incredibly, Richard had originally bought it in 1998, apparently a bit of an one off & inside the box was a letter from Terry to Richard, reminding him he still owed the postage! Although needing wheels, gears and motor, there were instructions & so on the 20th anniversary of Richard acquiring it, I made a start on the kit. It proved an interesting, if challenging build, not because there was anything wrong with the etchings - far from it, but the 101s are complex beasts with their curved footplate and outside springs on the tender. Adding lined black livery further complicated the task... However, it has made up into a very nice model. I built it as one of the later, Coey, engines and it is proving to be a good runner, not least because I put pick ups on the tender wheels as well. I eventually built a couple of other GSWR wagons. One is a fairly straightforward 'semi' - one of those vans with the centre section of the roof covered with a tarpaulin, so it can double up to carry livestock. The other is one of those completely open cattle wagons [ie, devoid of a roof]. I've not seen many models of these & thought it would make an interesting subject. A lot of plastic strip went into the body work, while it is also a much shorter wagon than usual.
- 56 replies
-
- 14
-
-
-
LARNE CABIN's LMS Upper Quadrant Semaphore Signals Workbench
David Holman replied to LARNE CABIN's topic in Workbench
All that fine work and not operating? Servos can be very effective, but need some sort of electronic control; however, simple wire in tube (under the baseboard) worth a try. -
Those High Level gearboxes are an absolute joy. Great to see some traditional modelling skills too.
-
Fantastic post!
-
Colour can be a really difficult thing to get right. While there is an enamel tinlet or acrylic bottle for seemingly every shade in creation, there are still variations and blending them together really is an art, rather than a science. That and careful observation of the real thing. Very well observed Alan!
-
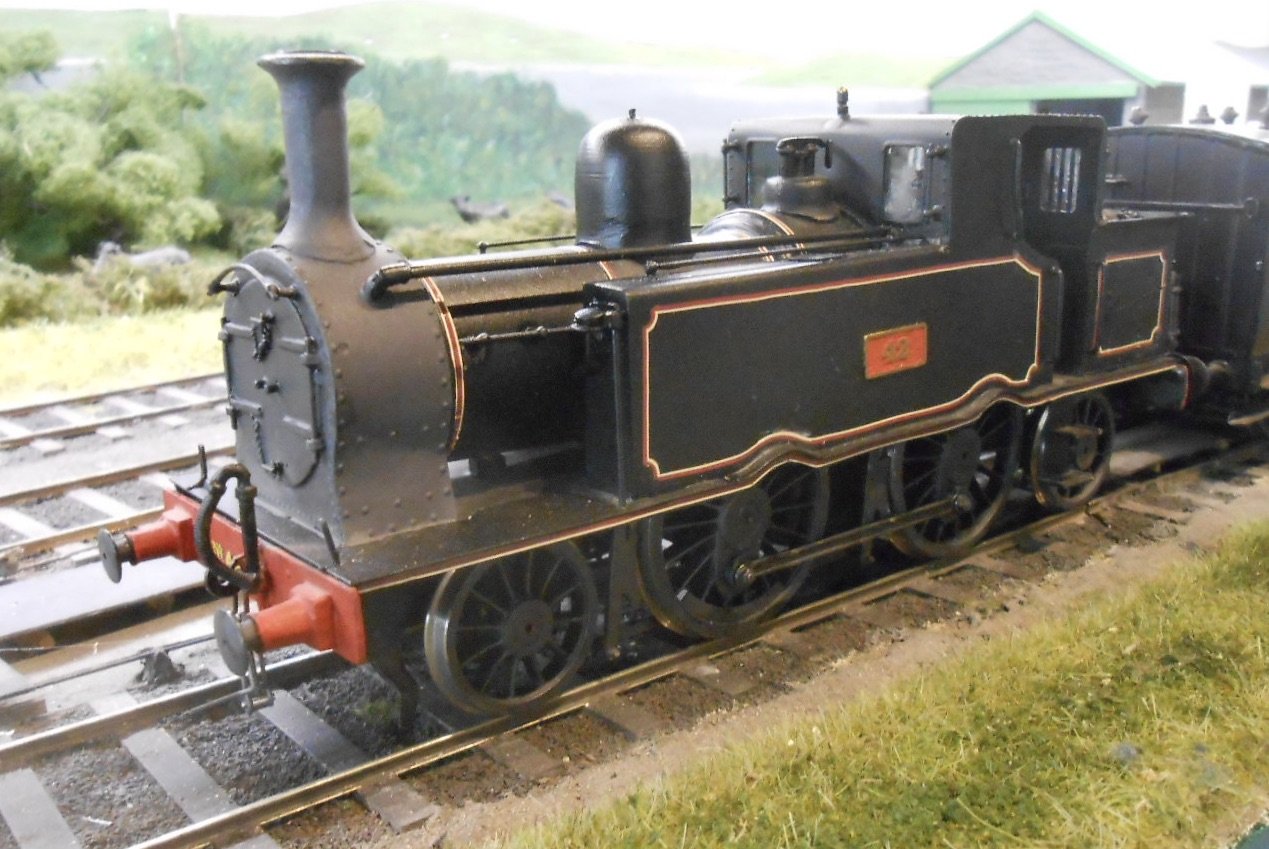
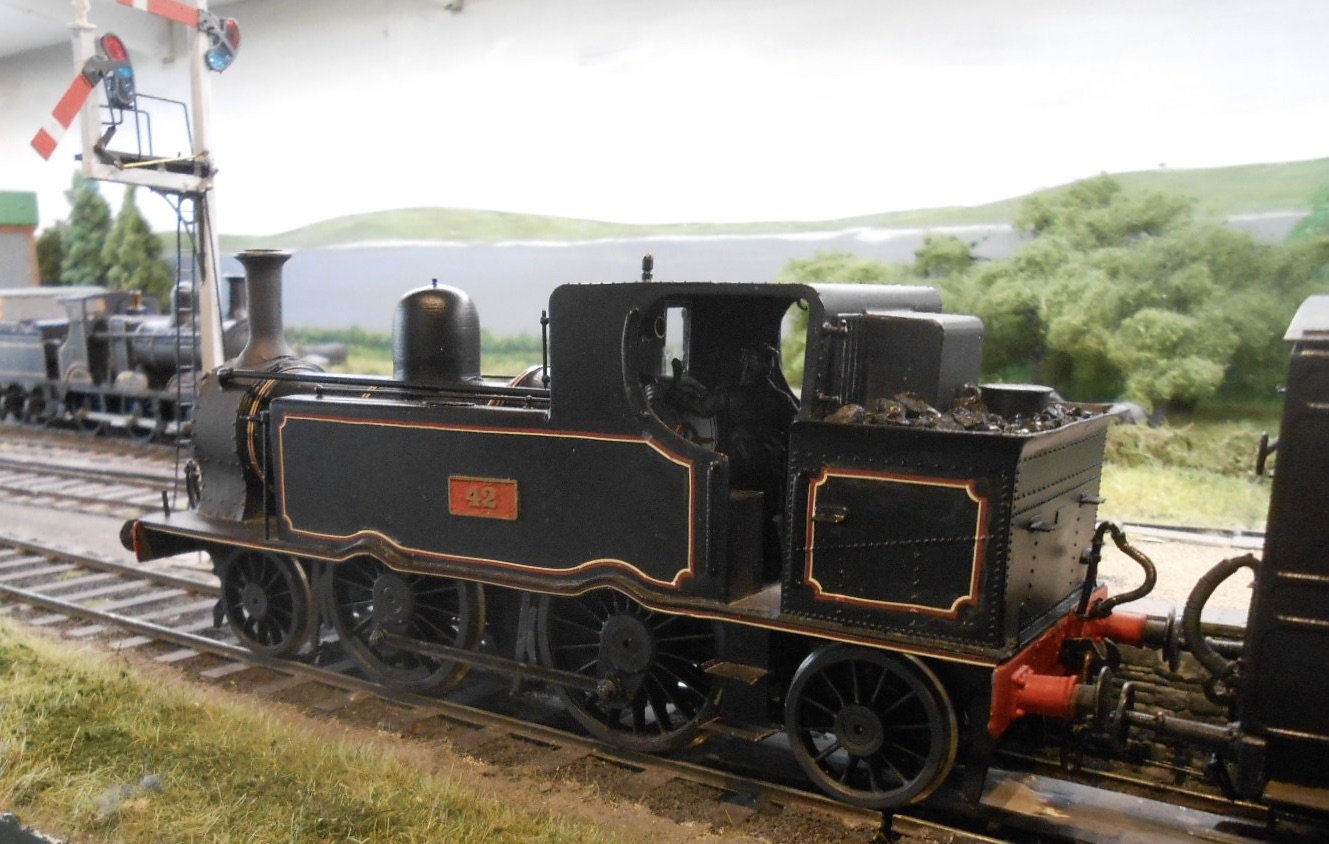
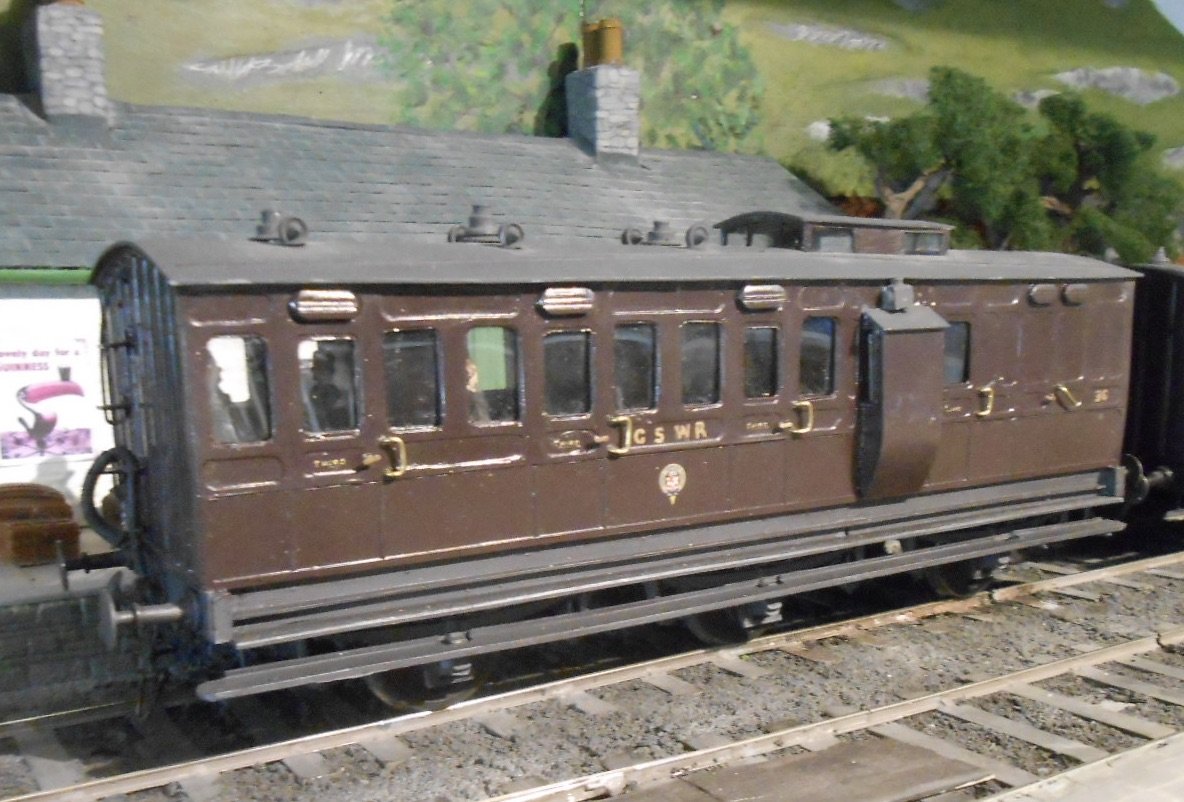
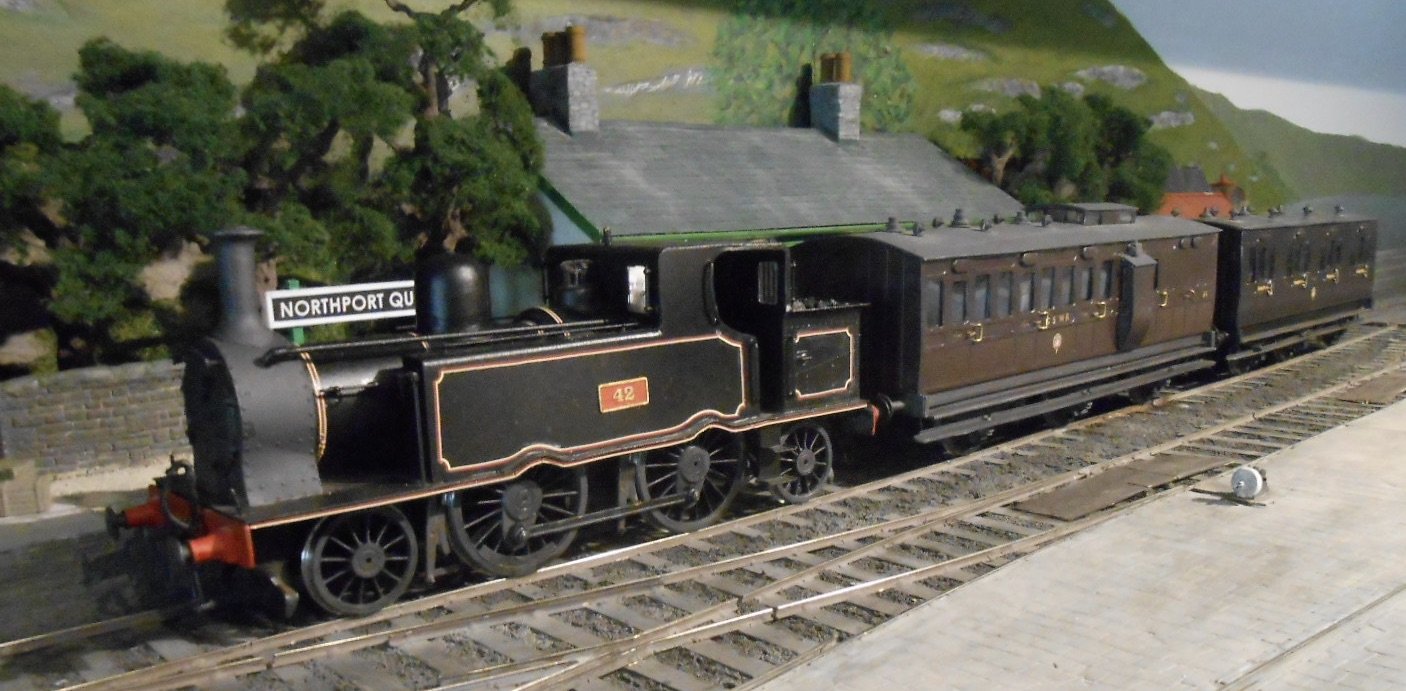
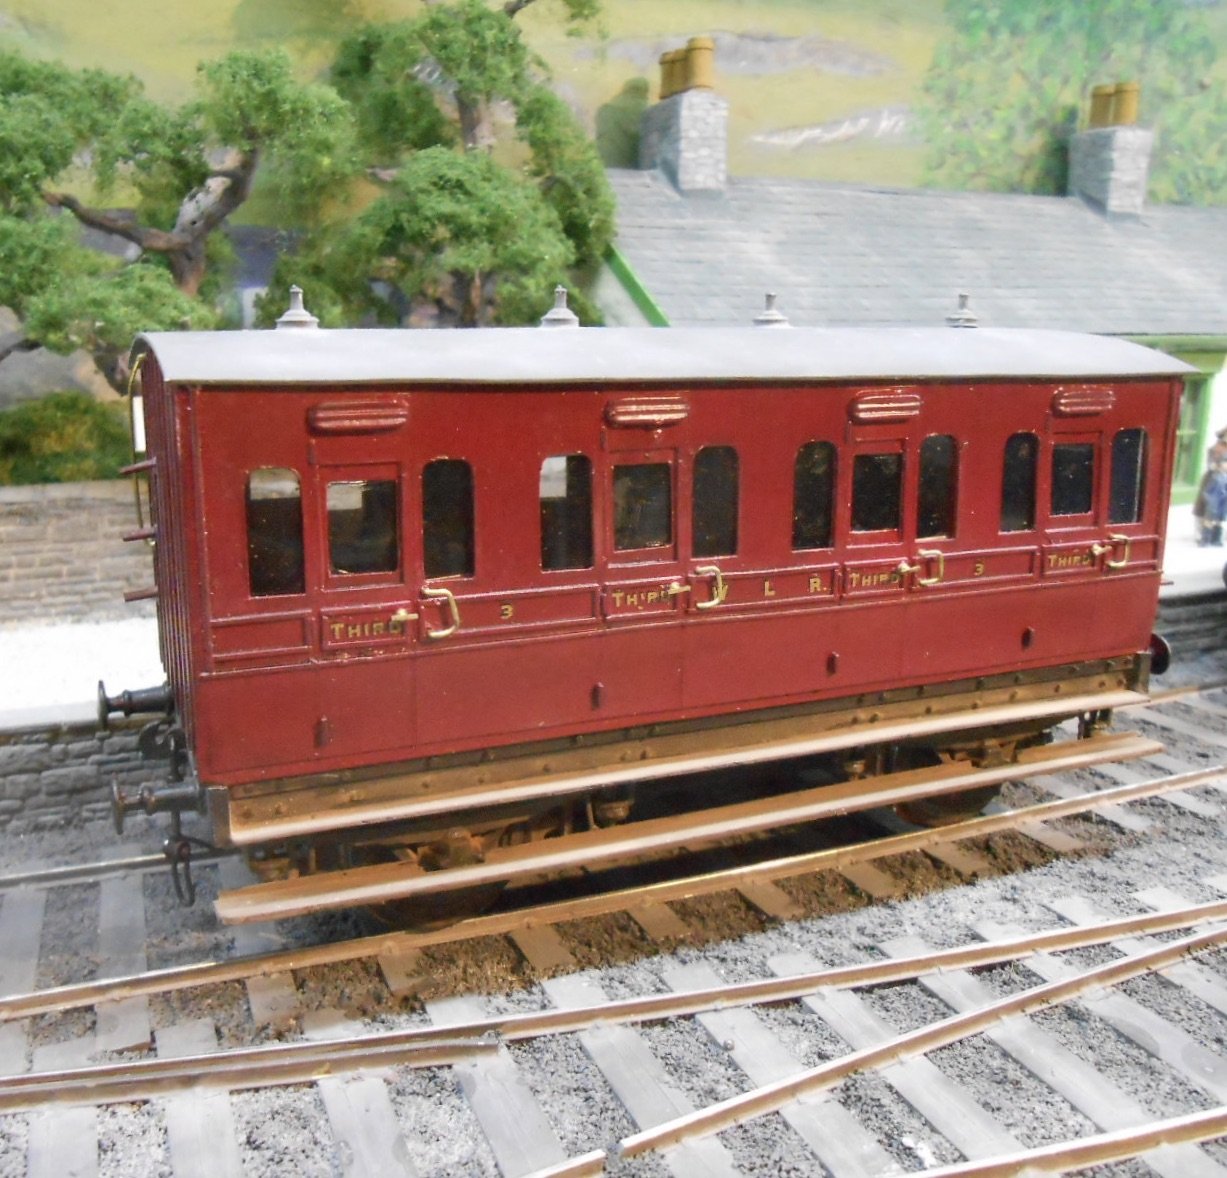
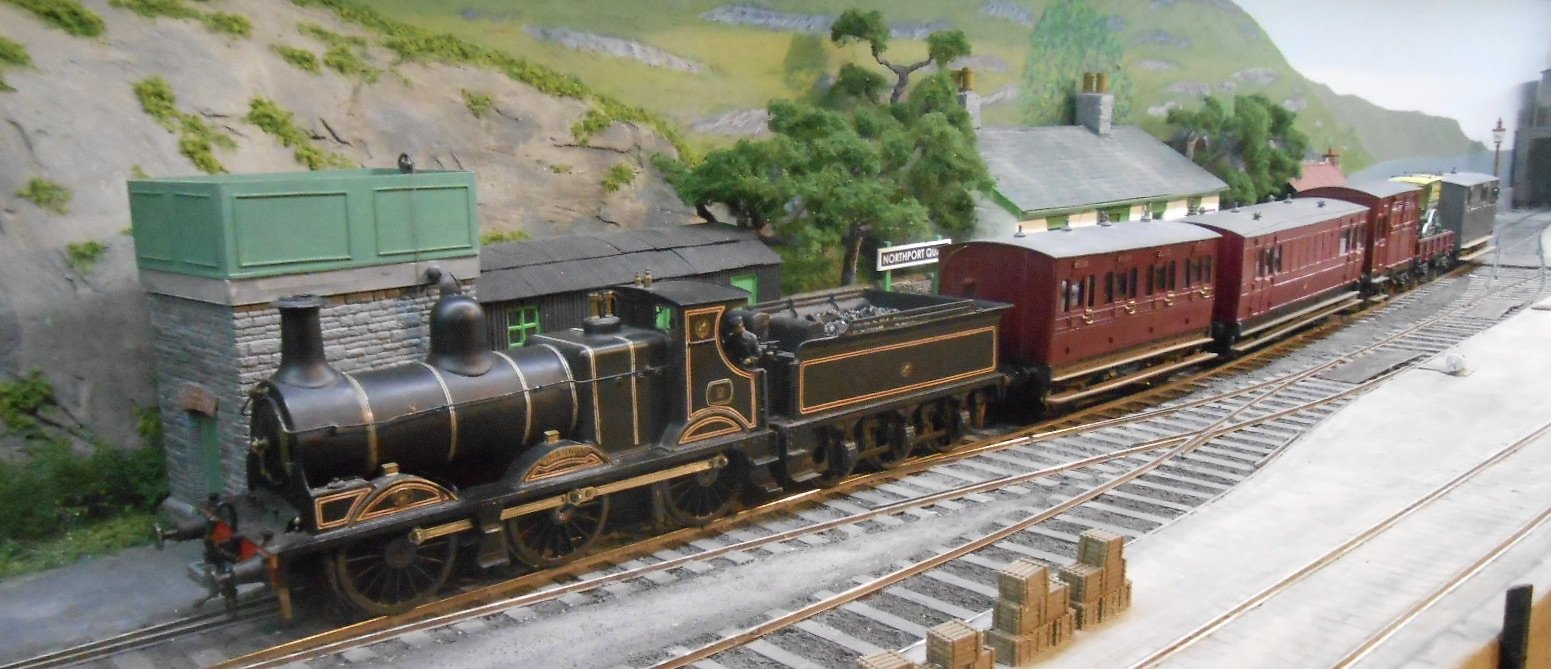
With the WL&WR stock now AJ'd, attention turns to GS&WR vehicles. My F6 2-4-2T recently got the best loco award at the club competition, so this seems a good place to start. Worth mentioning that one reason the AJs are such a protracted process, is that I first need to remove the Dinghams and in most cases refit screw or three link couplings as well... Anyway, have always thought the F6 were pretty little engines; built for the Kerry branches. My reasoning is that they were also tried out on the [fictitious] Belmullet line. The model is built from an Alphagraphix etched brass kit. Mostly conventional, but a bit more complex because of the curved footplate. The lined black livery looks very smart to my eyes - not a million miles from the lined BR black I remember at the end of steam. Number 42 has a short train made up of two six wheel coaches. The first class one is another AlphaG etched brass kit, while the brake third is plastic card and strip on an AlphaG etched chassis. The combination is the ideal train length for Northport Quay. The photos also show how lighting affects colour - look at the final picture. Both coaches are the same colour and in daylight look like the rear one!
- 56 replies
-
- 10
-
-
One of the many good things about Eileen's was they sold A1 sized sheets of plasticard on their stand at shows, usually for only about twice the price of an A4 sheet. Anyone know of a retailer doing A1 sheets? Mail order probably a waste of time as am guessing they would be rolled up.
-
Shows how the little details matter and the importance of careful observation too. Lovely!
-
Thanks John - this may well explain why Richard built the D&M brakes. An all crimson lake consist now beckons too.
-
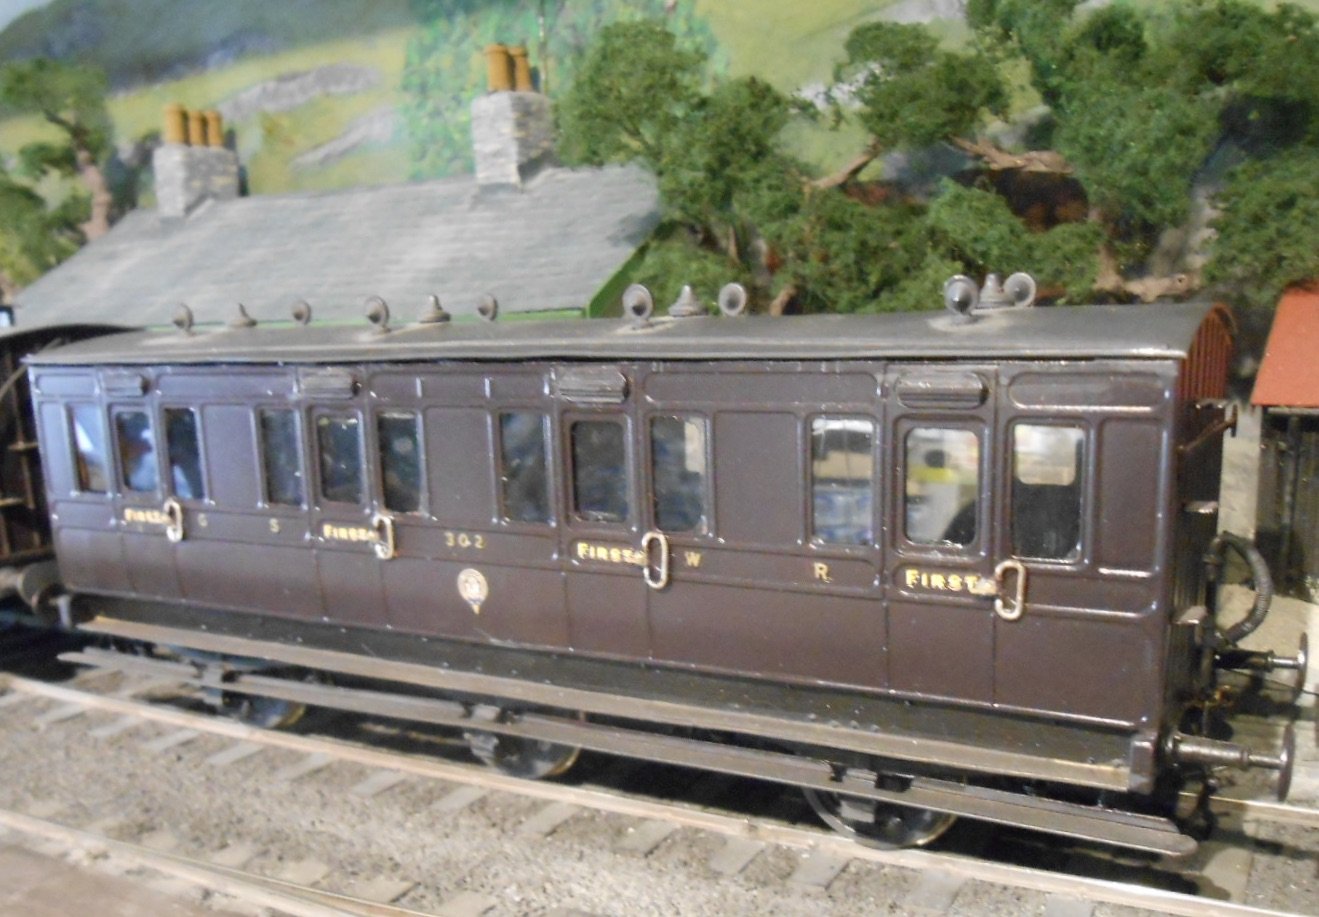
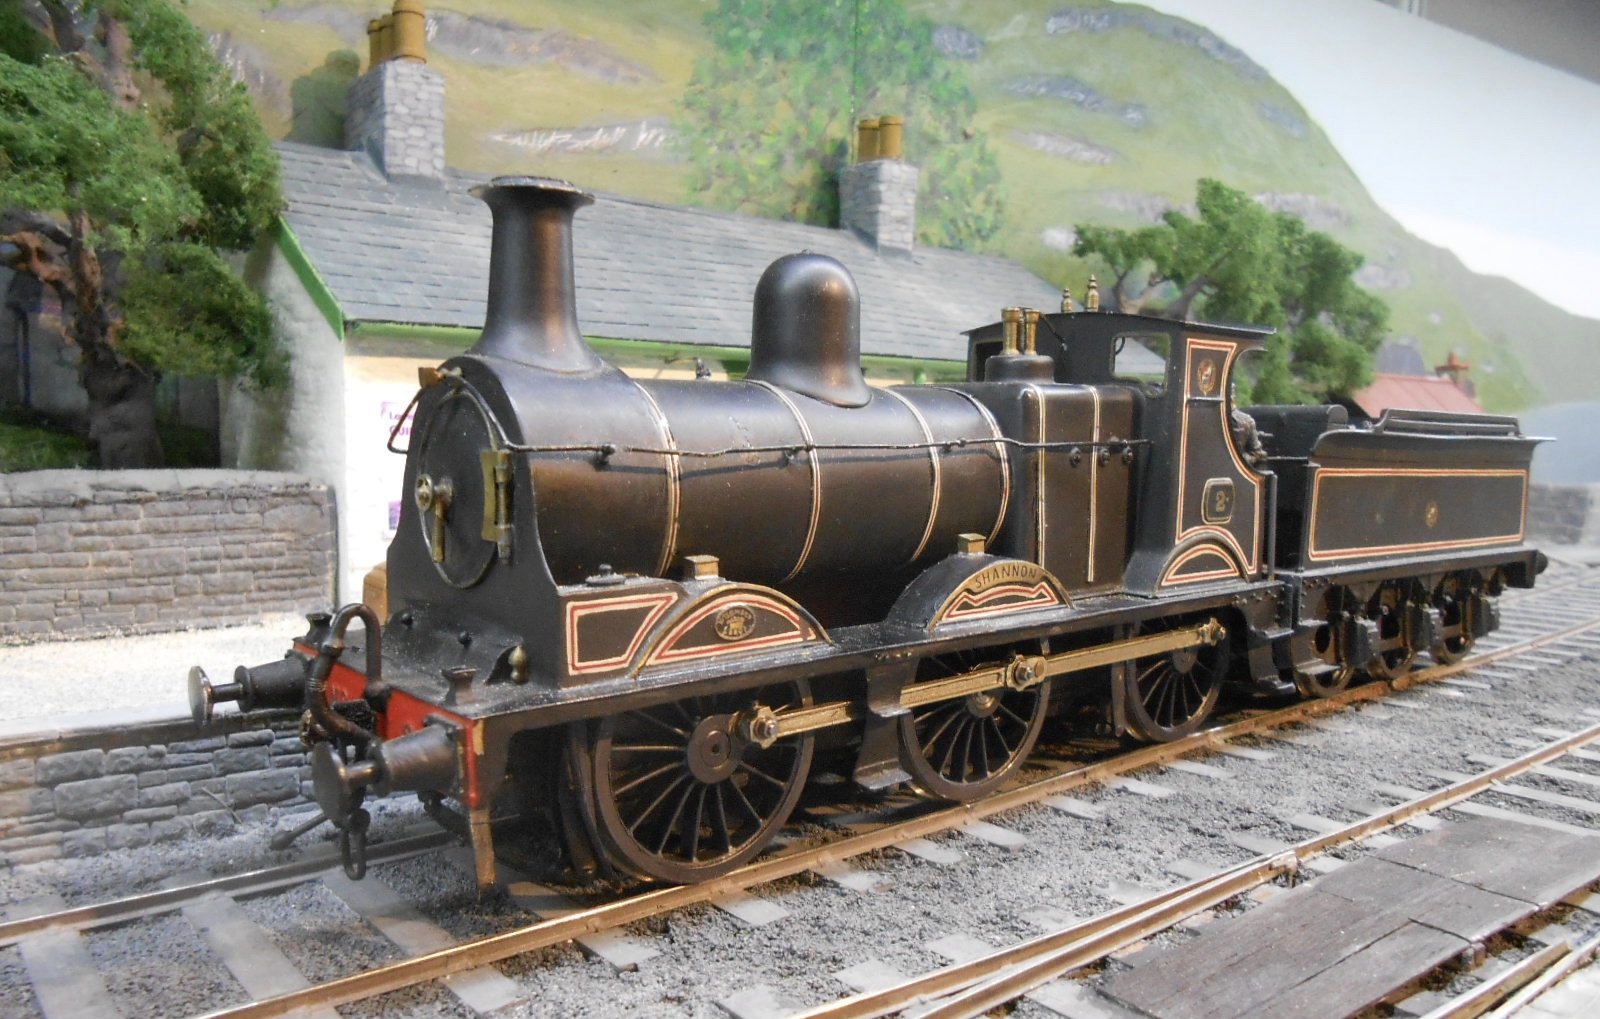
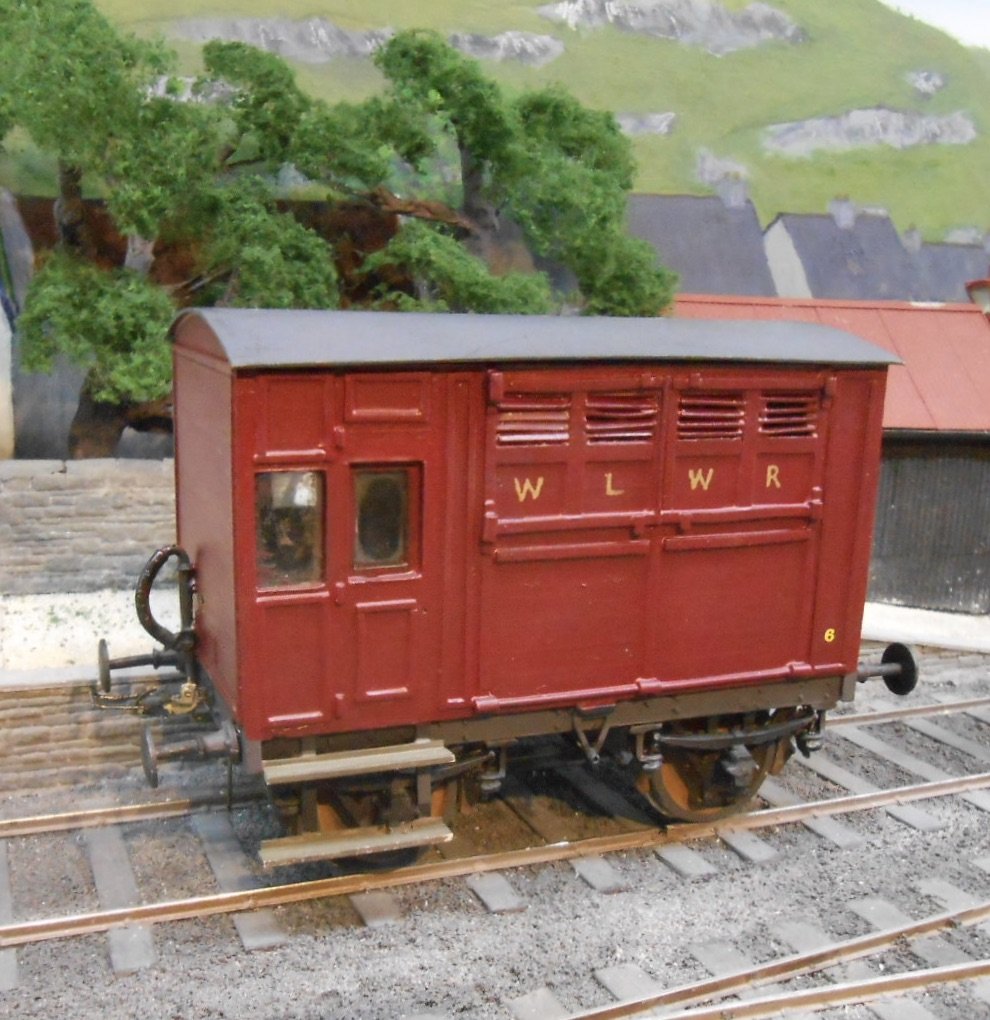
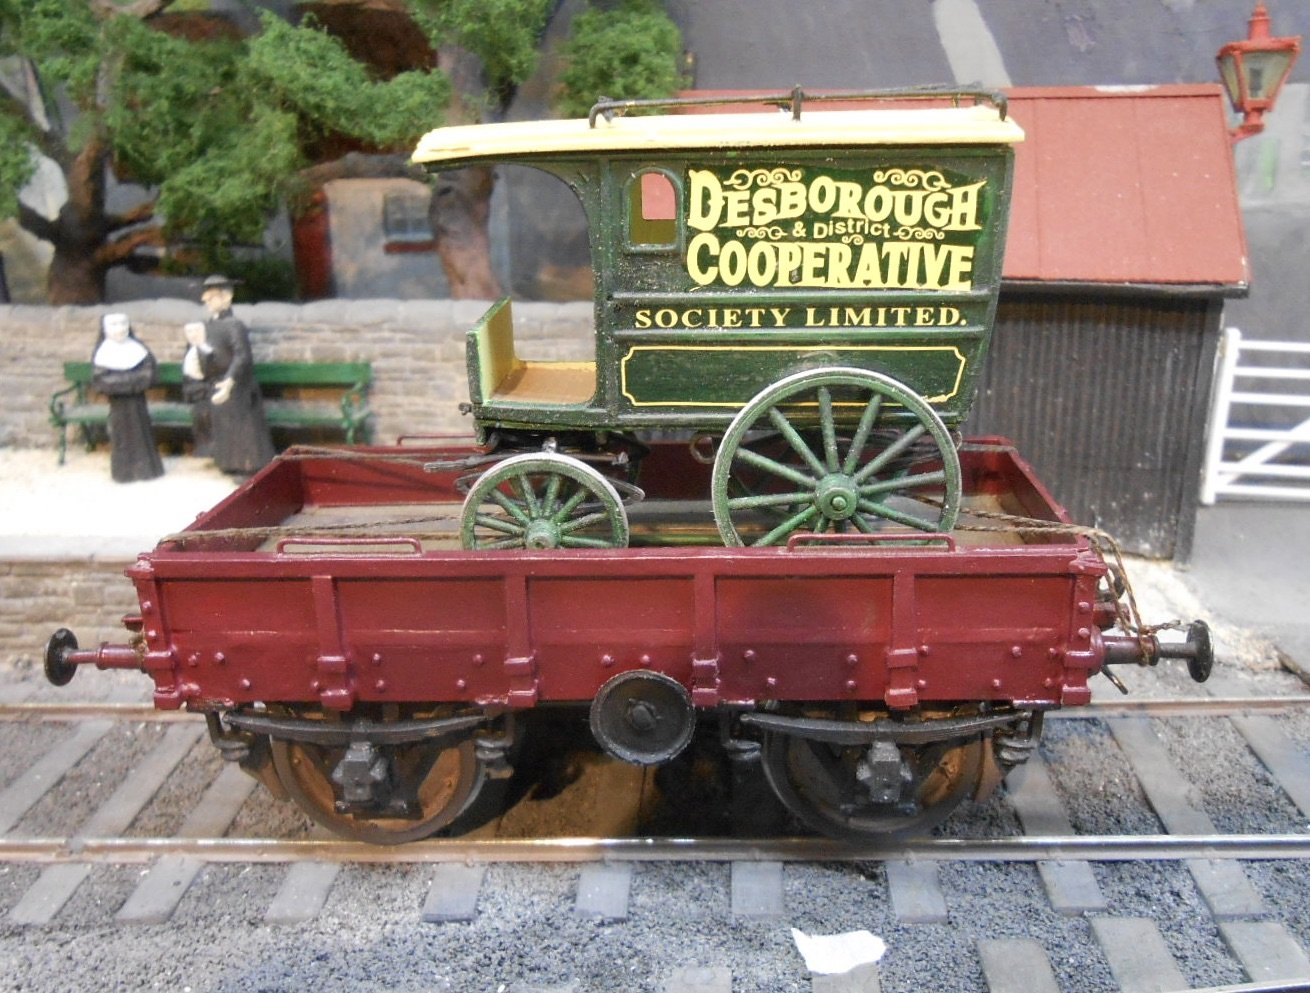
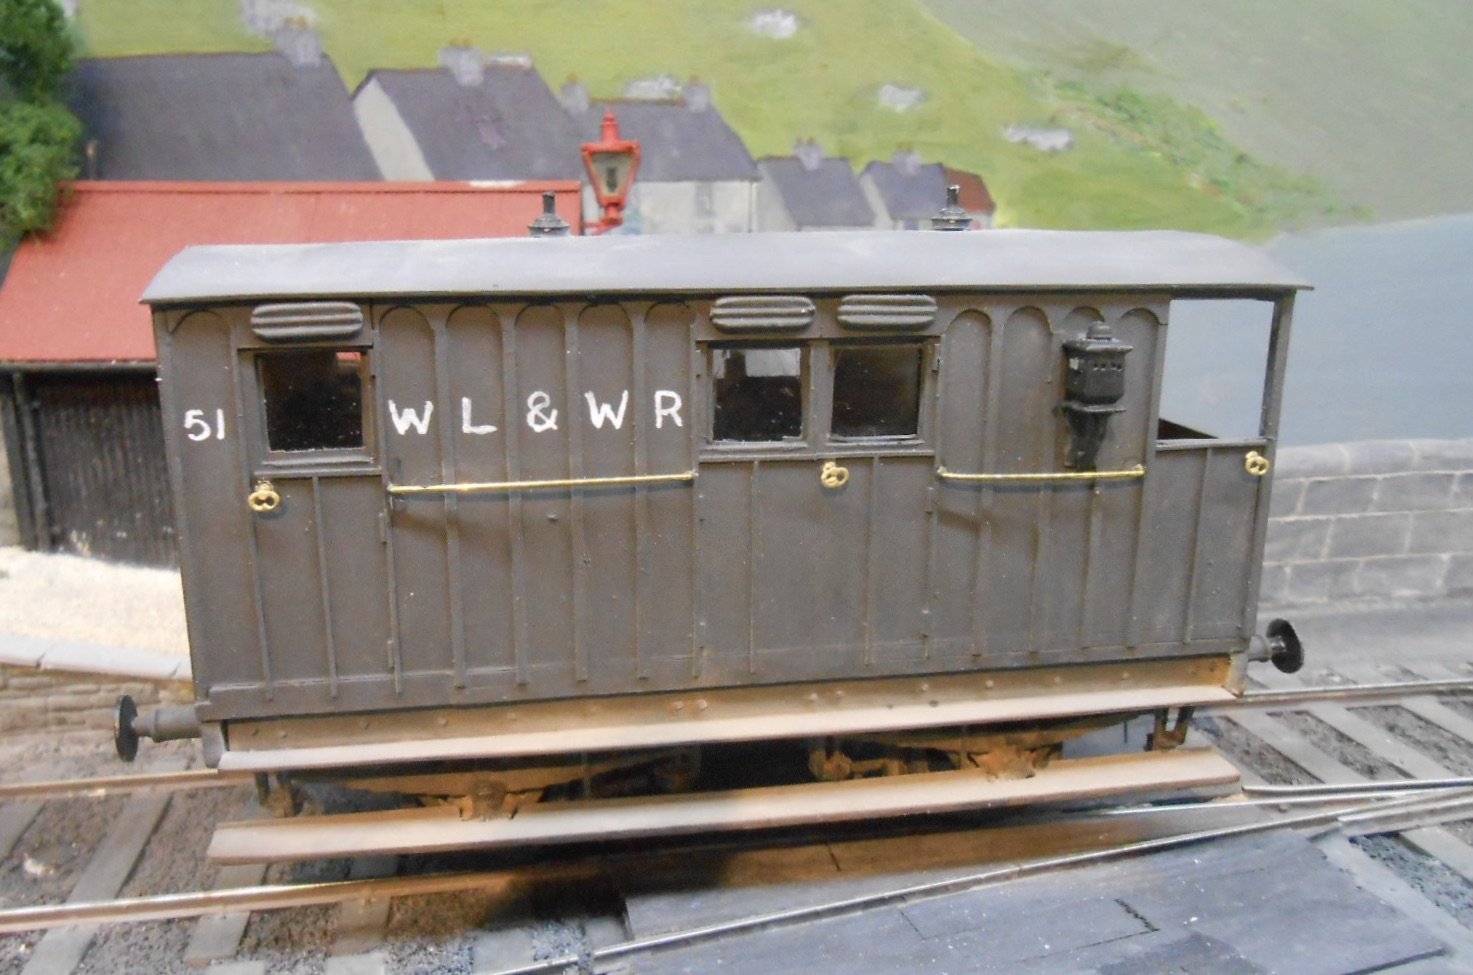
Yesterday, I managed to complete fitting AJ couplings to my 1950s stock, so in going through my 1900s stuff, took a few photos to begin this phase of my models. It all started with Shannon, of course though truth be known, I was originally looking at adding a couple of diesels [C and 121] to extend into the 1960s, when news of Richard Chown's demise saw me putting in sealed bids for some of his stuff and Shannon was the main result. Scratchbuilt by Richard in the mid 1970s, it was over 40 years old when I acquired it and looked like it hadn't been cleaned since he built it! The wheels were badly worn too, but nothing could detract from the quality of this scratch built model, which is very much a prized possession. A bit of TLC, mainly with T-cut, soon had Shannon looking better, but I had nothing to run with it and so embarked on a programme of building some Waterford, Limerick and Western stock to make up a 'Mail Goods', a train which was a feature on Castle Rackrent. Apart from Ernie Shepherd's book on the WLW and a few photos in Desmond Coakham's carriages book, there isn't a lot of material available., but I haven't got room for long trains, so it turned out there was just enough for my needs. I began with a six wheel full brake. This has a plasticard body on an Alphagraphix chassis. The tricky bit was drawing and cutting out all the panelling from a sheet of 20thou. I already had a WLW horse box, though it was masquerading as the Sligo Leitrim model in very faded green. Hence a quick repaint was all that was required to return it to original condition. A 4w carriage truck soon joined it, complete with a horse drawn delivery cart [Langley Kit], not unlike one seen in photos of Castle Rackrent. A small passenger coach came next, scratch built in my usual way, to provide basic accommodation for any hardy souls willing to endure the inevitable slow progress of a train stopping to shunt and load goods at most wayside stations. The product of a photo in Ernie's book, I can't claim any great accuracy, other than it seems to look the part. Finally, I needed a brake van & struggled for quite a while to find something. I could have used one of the Dublin & Meath vans from Richard's estate, but though the right colour, the D&M became part of the MGW and I wanted something authentically WLW. A return to Ernie's book finally turned up a photo of a Waterford & Central Ireland Railway train, where behind an 0-4-2T was a panelled brake van. The model below is the result, so is very much a representation rather than anything accurate. As before, it is a plasticard body with white metal fittings for the chassis. A photo of the whole train completes the picture, though on Northport Quay the horse box runs in a different one.
-
See that Irish Railway Models have a stand here this weekend.
-
Had to check, because I thought it was one of the Sligo Large Tanks! Then I looked at the cab... Quite a lot more rivets than I first thought too, but then it's Beyer Peacock and easy to see the family resemblance to the Sligo locos. Where does it for in the overall time line?
-
Looks quite a nice loco for scratchbuilding - straight footplate, no splashers, plenty of room to hide the motor, not even many rivets. Handsome too, so definitely needs building! After the complexities of the BC diesel should be fun!
-
Brookhall Mill - A GNR(I) Micro Layout
David Holman replied to Patrick Davey's topic in Irish Model Layouts
His historical non fiction is very good! -
Got my first (and only) sound chip loco about ten years ago. It was a Bachmann H0 three truck shay with a Tsunami sound chip. Given the chip was £100, I got the loco for a tenner, which was quite a bargain at the time. It was good fun for a while and I even built an androgynous scenic shunting plank so I could run my 7mmNG shay as well. However the novelty soon faded, both for sound and dcc - just found it all too complex: 100 page handbooks didn't help either. Each to his own! What hasn't faded is the price of sound - almost doubling the cost it seems - while nobody has cracked exhaust effects, especially for steam, so anything that brings the cost down has to be worth looking at. Provided it works, of course. In the latest RM, there is a review of a nice three coach set of L&SWR bogie coaches, but it costs £225. With sound fitted 00 locos now well north of £200, add on a ten coach train and you are looking at £1000... Am very glad my interests have always been in minor railways with short trains (Sligo cattle traffic excepted that is).