Richard EH
-
Posts
175 -
Joined
-
Last visited
Content Type
Profiles
Forums
Events
Gallery
Blogs
Everything posted by Richard EH
-
She's working well on that spiral with all those cravens!!
-
You're in for a treat Nelson, very pleased with my 'U'! Richard.
-
Hi all, Received my 2nd batch OO works (U) class 4-4-0 yesterday. It does look very, very nice - lining, rivet detail and overall impression really captures the look of these locos. Not run it yet before anyone asks, but as my layout is just baseboards at present, that might well be a while.... For those who want to upgrade from the printed nameplates, 247 developments can help with the 'Down' etched plates: http://www.247developments.co.uk/Irish.html I'm planning to see if Narrow planet can assist with the beyer peacock plates: https://narrowplanet.myshopify.com/collections/custom-etched-products/products/npp-219 Even with the right year! If that works, I'll be in touch. Cheers for now. Richard.
-
4mm scale 'WT' rebuild from a Fowler 2-6-4T
Richard EH replied to Richard EH's topic in Irish Models
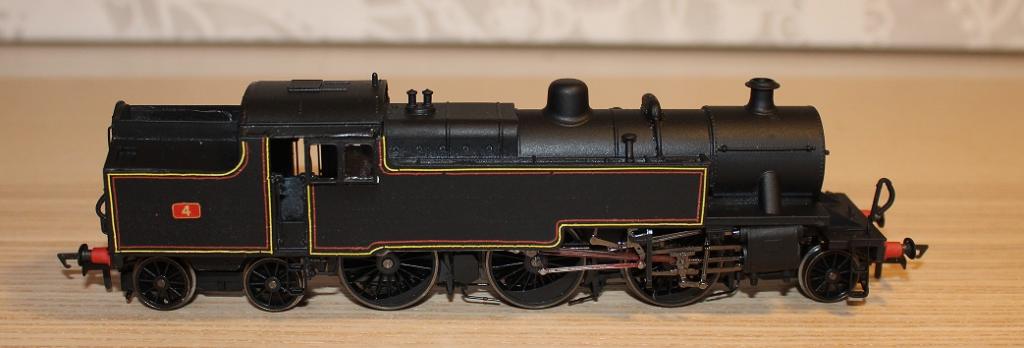
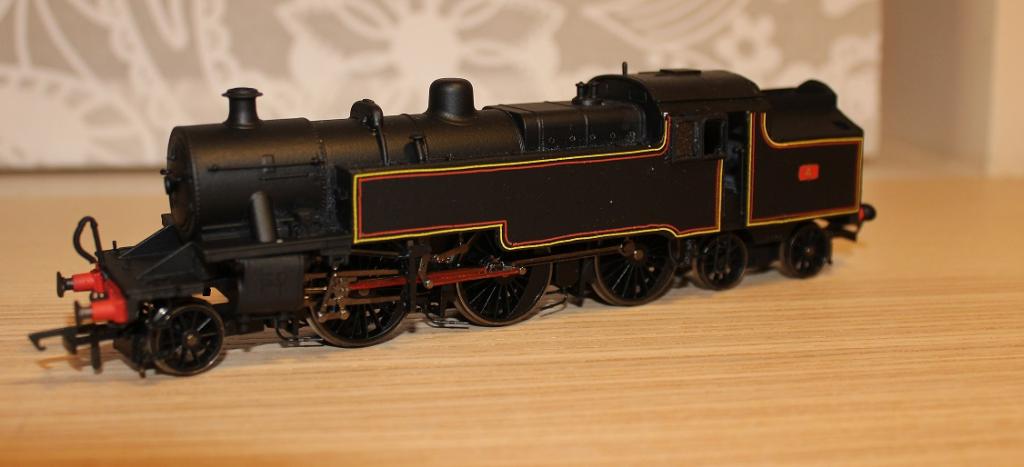
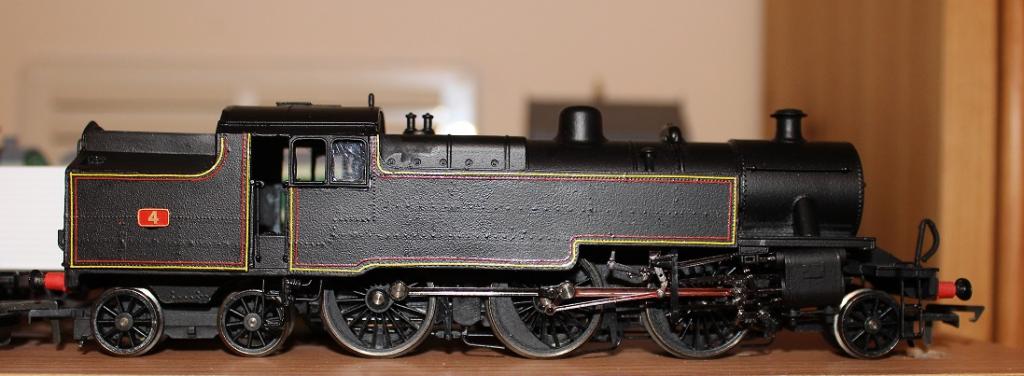
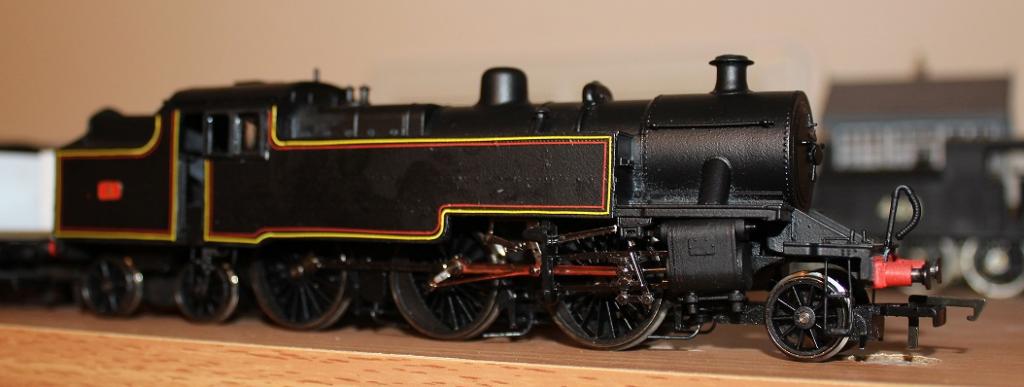
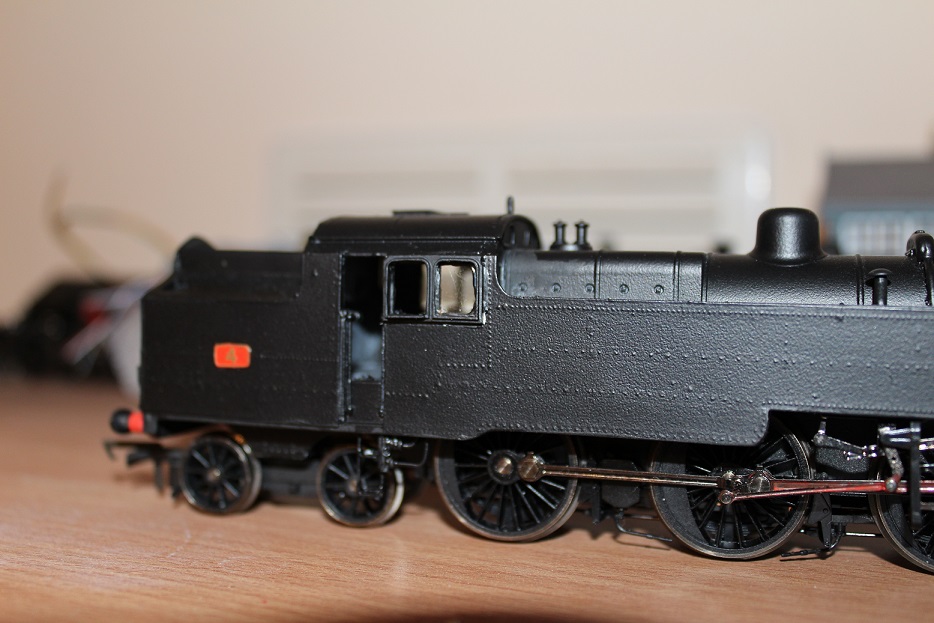
Hi all, It's been quite a job to get the lining on the loco, and sealed: As I went through with one line, it was fine, but getting the second line on and sealed was a terrible job..... however, all done now! All it's waiting for now is the Railtec UTA crests on the tanks(on order) and it'll be sorted.....Would I do it again.... better give it a while....!! Very pleased with how it's turned out now though.... Cheers for now Richard.
-
Provincial Wagons CIE 1953 "H" Van kit now available
Richard EH replied to leslie10646's topic in News
Looks excellent to me leslie! Richard. -
This would be nice, please count me in for one in due course! Many thanks! Richard.
-
I've been 3d printing for over five years now, it's developing all the time. It'll get there, the same way other technologies developed in their own time. I really enjoy it, but its' not for everyone at the moment - that's fine, but there are ways to improve and get a smooth finish. Cheers for now. Richard.
-
Hmmn, might have a crack at some printed bits for this - including the roof for the 700. The dome shape on the 600/900 would defeat my 3d design skills! Richard.
-
I totally agree with the post downthread that transferring some of the weight from the tender to the loco in the Mike Sharman style is the way to to. From Kirley's photos it looks like that's the intent with the tender/tender coupling arrangement between tender and loco. These locos are exceptionally front heavy - you really do need to make sure that you get the centre of gravity as far back as you can. An additional point (and one that has been apparent on the OOWorks Adams Radial) is that you also need sufficient space for the leading bogie to move otherwise it has the potential to lift off the front driving wheel too. So I'd say definitely worth taking it steady and trying to see if you can do any of the above. I'd hasten to add that I've no connection with ooworks other than having one of these lovely looking locos on order - which I can't wait to receive! Cheers for now. Richard.
-
Kieran, Lovely job! I may well follow your example there in due course. Did you use the Oxford one or Hornby? There might be a few cheaper ones about of the oxford one now..... I was looking at it for a GNRi T2, but you'd need to chop the front bogie back a little... Cheers for now. Richard.
-
Leslie, Now those coaches look good! (Well, I would say that wouldn't I! but...... HOW Good is that!! WOW!! Having had a crack at the GNRi blue livery, and made... well... an ok job of it.... I have to say that is simply superb and I've taken the plunge and have one on order..... Bit of speculation from me - Looking at how they've designed it, it's very clever and allows them to do the U / UG really easily - they've gone for the side window cab version, so with a separate cab, the earlier version would seem to be a shoe in for a future version... and the tender was used with other classes well, even a PPs....! So I really do hope this sells well and that OO Works have a go at what must surely be a popular choice - an S class.....might start saving now :') Interestingly, mines in batch 2, so sounds like they're going well for them.... Cheers for now. Richard.
-
Looking forward to the review Leslie!
-
I have to say, that prototype looks really good.....! I'm keen to support the product, but it is a lot! I guess a sound file from a 4-4-0 would be something to go for... the tricky thing would be a GN whistle? Some enterprising person may have to record the whistle from Slieve Guillion.... Cheers for now. Richard.
-
4mm scale 'WT' rebuild from a Fowler 2-6-4T
Richard EH replied to Richard EH's topic in Irish Models
Some progress on the lining over the last few weeks. I've used Fox Transfers 0.35mm width 'straw' and 'red' applied individually. Fox do a number of straight and curved sections so it's just a matter of applying the straw, and then the red on the inside to match. This is the first side, and I'll give this a coat of varnish for now to fix the transfers. Bunker, and left hand side to follow. Awaiting the UTA logos from Railtec - they're out of stock at present. I've also now found the DCC blanking plug so it runs well without needing something else to donate a chip! Cheers for now. Richard.
-
Website update for the OO Works. News page is here: http://www.ooworks.co.uk/news looks like they're a month late at present... still no photo though.... Cheers for now. Richard.
-
Great Northern Railway of Ireland - Ballast Plough Van No.120
Richard EH replied to Richard EH's topic in Workbench
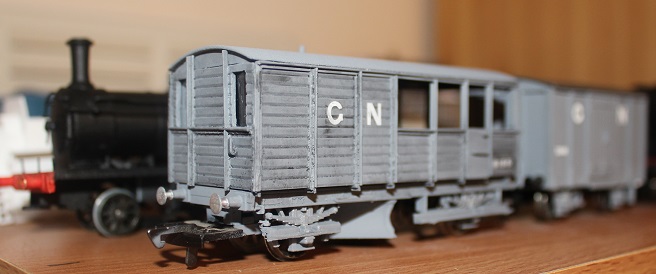
Hi all, Many thanks for the hints and tips - and especially the photos DiveController! That's really clinched it for me and I've modified the transfers as per the photos - I've not made it quite as used as it's shown in the photo, but have weathered it to give it a used look. Some photos attached of the finished vehicle. Cheers for now! Richard.
-
Nice one Kieran! We've chatted as you've gone along and I think you've made a cracking job of it... it's only the fourth one in captivity, so to speak. At some point over next few weeks I'll update the shapeways page with the details of which chimney/dome/wheels etc to buy to go with it/.. but as you'll see from my brake van thread, I'm generally otherwise engaged at present..... Cheers for now Richard.
-
Great Northern Railway of Ireland - Ballast Plough Van No.120
Richard EH replied to Richard EH's topic in Workbench
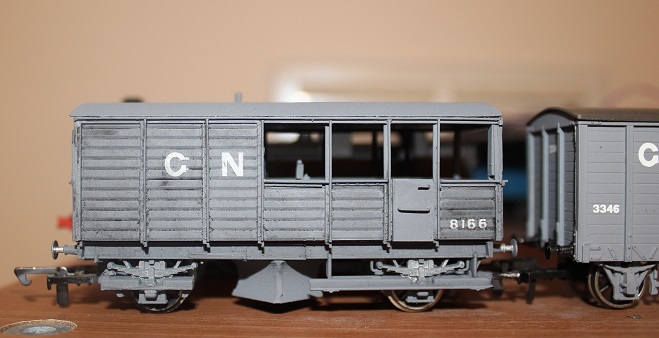
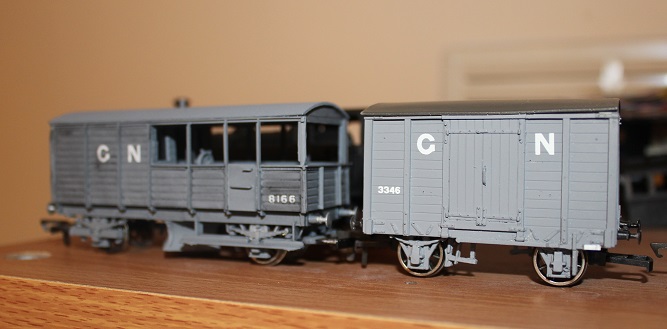
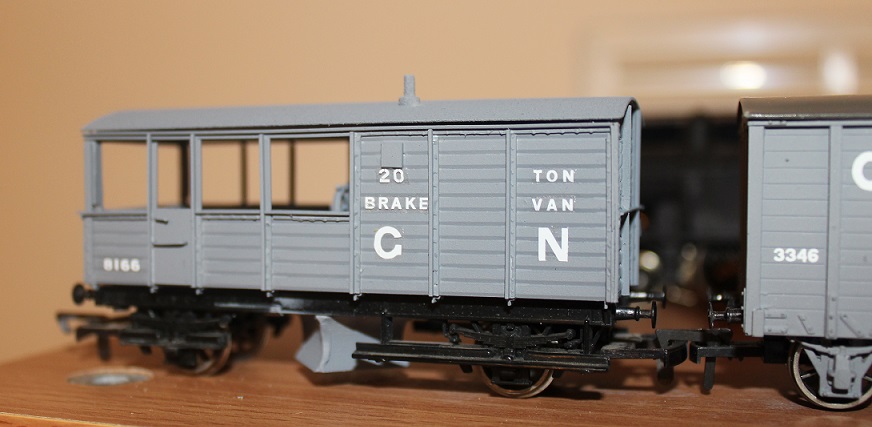
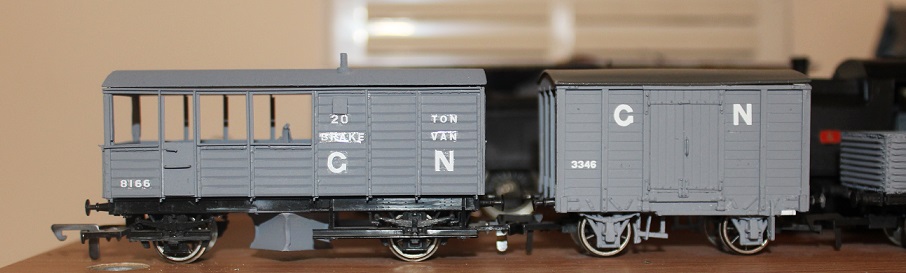
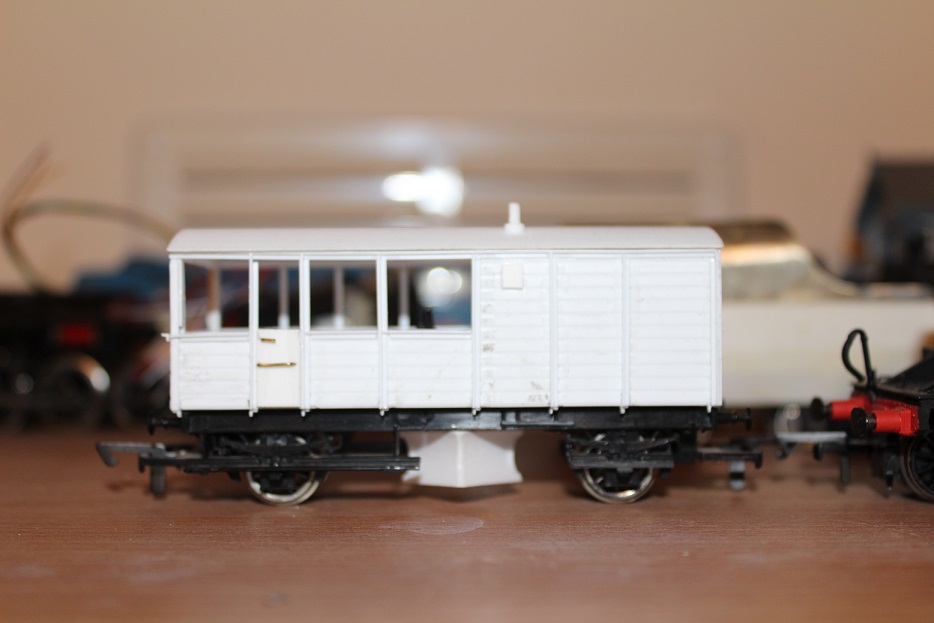
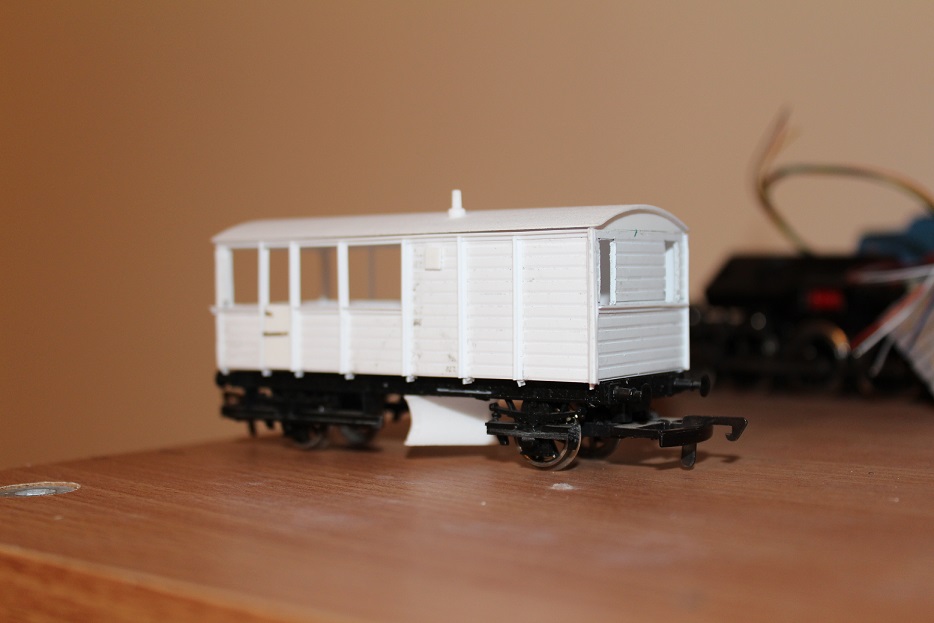
Hi all, Bit more of an update which includes a=few week or so's progress since the last time I updated the thread. For a good reason - the birth of our second child, a boy! All doing great, and a bit of downtime to relax so updating the thread on the van..... won't last for long, for sure! So, I spent a lot of time applying the remaining set of archer rivet sheets to the angle iron... it's actually quite relaxing process. The rivets have really come out well and lifted the model I think. I've then given it a blow over with a Halfords rattle can of grey primer and I think it's come out looking rather nice. I've failed to find any photos of these vans, beyond what is the makers photo, I guess the attractions of a blue 4-4-0 would've come first over a ballast plough van! Even the usual trick of something poking into shot has drawn a blank! If anyone does have a photo, I'd really welcome a look at it! For now though, I've used the railtec GNRi transfer sheet to add transfers using roughly the same layout as the Provincial Wagons GNRi van and I think it looks good. A further read of the NiL article revealed that 120 may not have been the real number, actually 8166/8167 were there numbers, so that's what I've used.... Cheers for now! Richard.
-
Great Northern Railway of Ireland - Ballast Plough Van No.120
Richard EH replied to Richard EH's topic in Workbench
Cheers for the kind comments guys, I'll keep the thread updated as it progresses. The 3d design stuff isn't so tricky these days, more help becoming available all the time as it becomes more popular - give it a go, I'm sure you'll find it a useful addition to your modelling skills! The couplings are what they are at this stage, it's an old chassis so unless I replace the chassis completely they'll be staying - and if I replaced it, I may as well have kept the original GWR toad van..... some might say I should've done that anyway! Cheers for now. Richard -
4mm scale 'WT' rebuild from a Fowler 2-6-4T
Richard EH replied to Richard EH's topic in Irish Models
Little bit more work on the WT. I've designed a set of 3d printed window frames, and printed them off in one of the newer more precise materials. I've now attached and painted them - reckon they're looking good! Cheers for now Richard.
-
Great Northern Railway of Ireland - Ballast Plough Van No.120
Richard EH posted a topic in Workbench
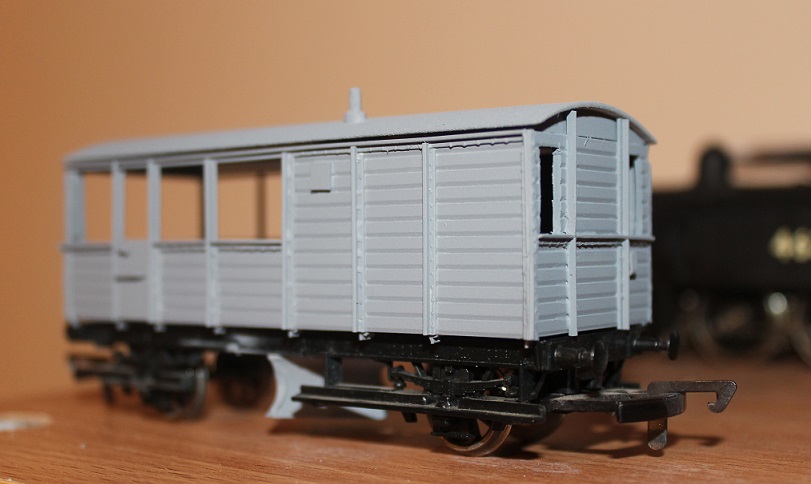
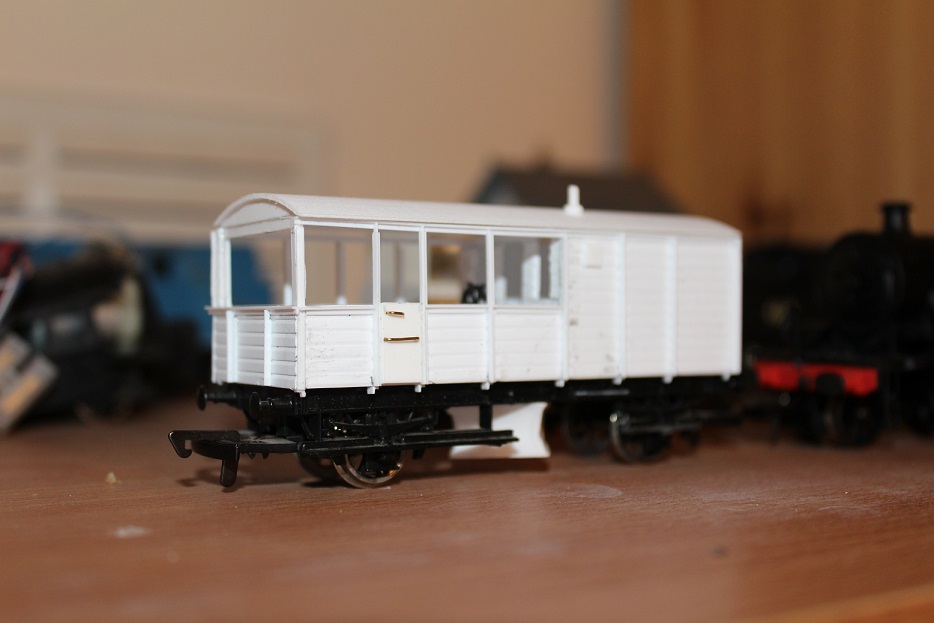
The idea for this model sprang from two sources. An article in New Irish Lines Volume 5 No.2, which provided the scale drawing and a photo to work from, and the availability in my ‘things to do one day’ pile – this was actually one I’ve had since my childhood of an old Airfix Great Western Toad brake van which initially looked as though it might be a good quick start for a conversion….In addition I have a cambrian BR ‘shark’ van in stock which looked as though it might provide a ballast plough… Once I’d had a closer look, it became apparent that the bodywork of the GN van, whilst initially similar would need a lot of work to convert, so I resolved to replace the bodywork with a scratchbuilt bodyshell. This has been built from evergreen 2.1mm planked plasticard siding as the basic shell, with 30 thou plasticard for the floor and internal partitions. Once the basic box was built up, I used plastruct 90501 1.2mm ‘L’ section to produce the distinctive ironwork. However, it was apparent that the body was slightly wider than the old airfix toad roof, so I couldn’t use that either and it also had to go…..I’ve replaced that with a 3d printed roof I designed to fit. For the chassis, I took the razor saw to it to take a section of the chassis out and shorten it down to the length of the GN van. Careful reglueing is required here to keep the chassis square, and a section of plasticard was glued across the join. Looking at the photo of the GN van, it’s apparent that the footboards do not extend the length of the vehicle, so more careful razor sawing was required to carefully cut these out. There’s a section over one axle which is difficult to remove, I left that in as it wouldn’t be worth removing it and I don’t think it’s too noticeable. For the ballast plough, I ended up drawing a plough rather than using the Cambrian shark which I resolved to keep for a project to provide a ballast plough for my IFM wagons which are on order… The plough is quite a complex shape which would be a tricky build in plasticard but is simplicity itself for a 3d print. Using the drawing I took a broad look at the shape which has come out well – I also printed a couple of supports to attach it to the chassis as a strong one piece item. I did then cape the plan to keep the Cambrian shark as a complete kit straight away by using the plough wheel in the open section of the GN van, as it’s quite a noticeable feature…. Oh well….! Final detailing is now underway, using various brass wire and offcuts for the handrails and lamp irons. I’ve also plenty of archer transfer rivets left so attaching some of these is the next job followed by painting and transfers from railtec. I’ve no photos of these vans in later life, only the photo in New Irish Lines, therefore I’m not sure how long the GNR(I) shown lasted, I may well finish it off just with GN and the number of the van shown in the photo, that’ll be fine for me in the absence of any other info. So now it looks like I’ve got a GNRi ballast plough van, three CIE ballast hoppers on order, and could’ve kept the toad if I’d sourced a chassis from elsewhere – oh well….!I’ll have to also look at a a few GN hoppers which are also in the NiL article – I suspect Cambrian kit C110 (Herring) may be a good start, or even the recent Cambrian ‘open’ chassis kit C105 with a printed hopper. The Cambrian open is a good development - this will also be useful for the GN cement van/hoppers I think, more on that when I manage to get hold of a couple of these, apparent semi mythical, beasts….. perhaps a CIE van will turn up from other sources in due course……
-
Train wreck - RIP BBC Top Gear - Total Rubbish
Richard EH replied to Noel's topic in Letting off Steam
I thought it was ok, matt le blanc quite funny, Chris Evans is a good presenter so I'm sure he'll settle into it. Sabine Schmitz is hilarious too, more air time for her, and her crazy driving! Cheers for now Richard. -
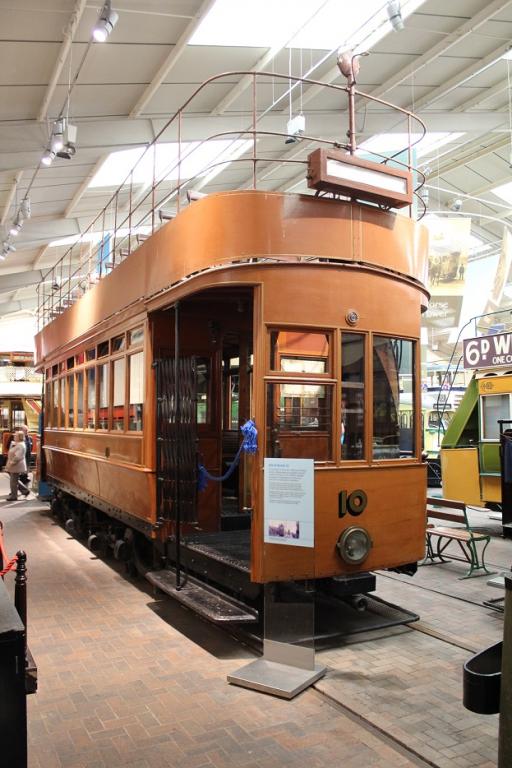
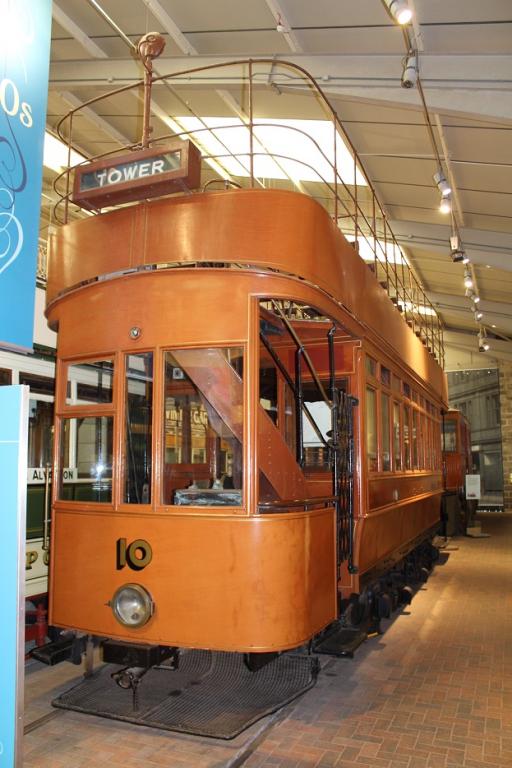
Hi all, Had a family visit to Crich Tramway Museum today. As some may know, this is the home of GNRi Hill of Howth Tram No.10. As you can see from the attached photos, it's in very good condition in their main exhibition space, and kept undercover. I don't know if the finish is authentic GNRi, but it's in very good cosmetic condition. I don't know if it's currently operational - but apparently it has been regauged and did work on the Blackpool Tramway in the late 80's... Hope it's of interest! Richard.
-
Fair enough, visually similar then, but nothing else.... Kind Regards Richard.
-
That's an interesting reference to some parts being prepainted before assembly.... clearly there's a lot of cross over between the U and UG so it makes sense given the Great Northern's design approach within classes. I think the U/UG family is a good choice, though as I and others have mentioned, the painting and lining quality will be key. As the tenders seemed to move around a little, you can even use it towards a PPs......! Here's a question, is the tender on a 'W' the same as that on a U/UG? I do think though that Hornby are missing a trick with their fowler tank. As I've been working through my WT project it's really hit me how much material Hornby have to work with there which really is on a plate.... Kind Regards Richard