Richard EH
-
Posts
172 -
Joined
-
Last visited
Content Type
Profiles
Forums
Events
Gallery
Blogs
Store
Community Map
Everything posted by Richard EH
-
4mm scale 'WT' rebuild from a Fowler 2-6-4T
Richard EH replied to Richard EH's topic in Irish Models
Hi, yes, that's it - does anyone do it in 4mm do we know? Now it's painted the black covers a lot of the detail, I'll try and get it out in some natural light soon....! Kind Regards Richard. -
4mm scale 'WT' rebuild from a Fowler 2-6-4T
Richard EH replied to Richard EH's topic in Irish Models
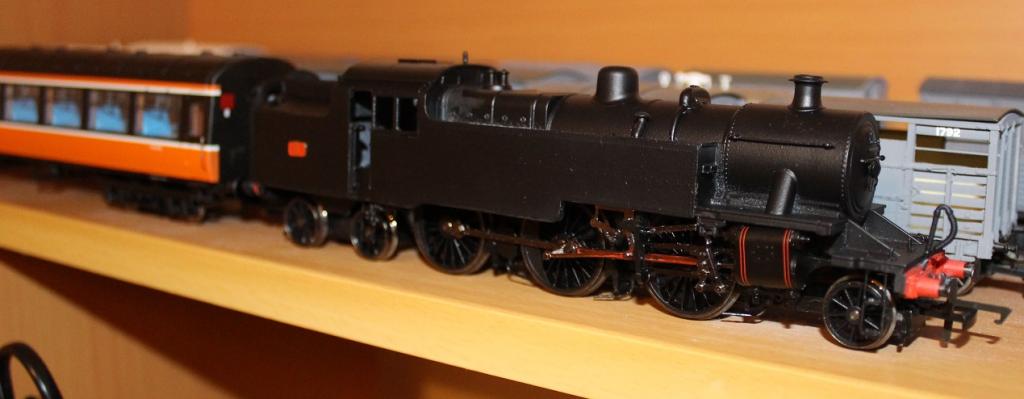
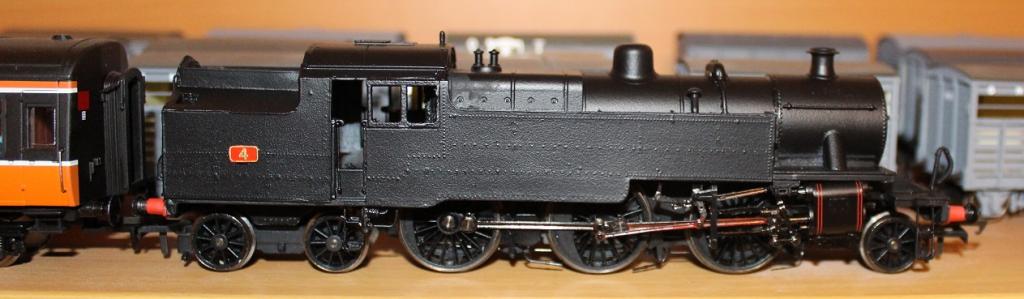
Hi all, A few photos of more progress with No.4 now that' I've a coat of black paint on it, and a suggestion of red on the connecting rod and valve gear. Think she's it's looking the part now!! Does anyone have an idea of a good source of lining for these? It looks like straw and another colour on some of the photos I've seen, if it was ever straw on it's own, that'll make life a lot simpler....! Kind Regards Richard,
-
Back to the '70s and '80s
Richard EH replied to jhb171achill's topic in Photos & Videos of the Prototype
Interesting variant on the end of the van on the right. This would be a good conversion from the parkside kit for a BR plywood sided van. Kind Regards Richard. -
4mm scale 'WT' rebuild from a Fowler 2-6-4T
Richard EH replied to Richard EH's topic in Irish Models
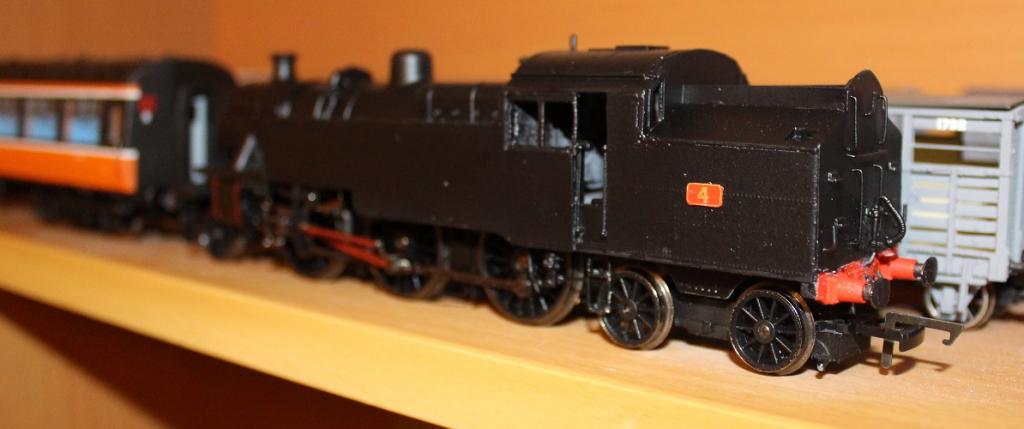
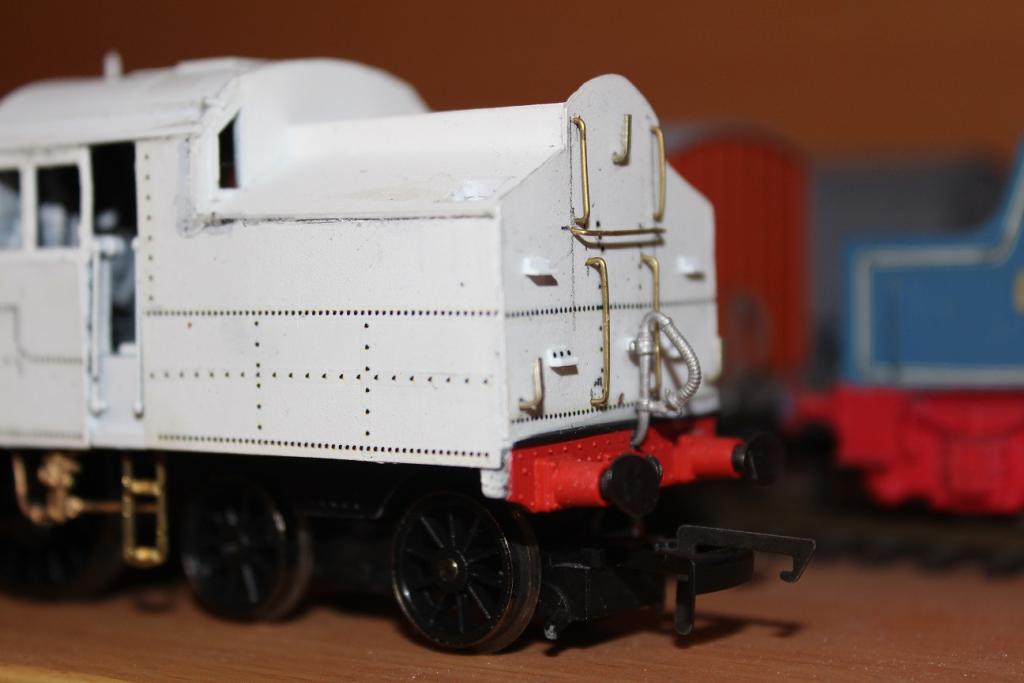
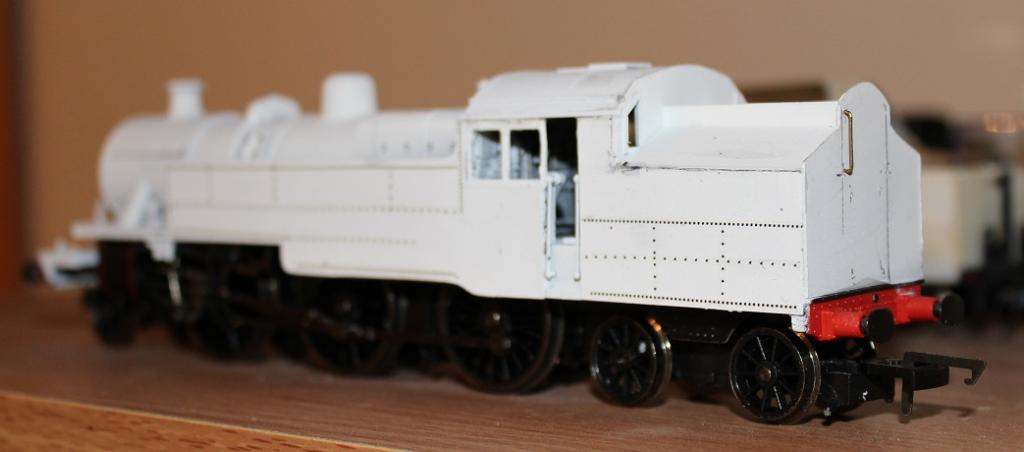
Hi all, A few more photos of progress of the WT. I've yet to order the front steps above the buffer beam, but have finished the detail for the rear of the bunker which has a nice 1940's utilitarian feel to it. The bunker steps are made from some L shaped plasticard and with a few more resin rivets added I think they look the part. I've also added the cab steps and injectors below the cab which give it all a nice detailed feel. I've been using it as a test rig for a sound chip for another project, and am tempted to add a suitable sound chip to the engine. Does anyone know of a suitable sound chip which would be suitable? No doubt a fowler tank sound file (if available) would work - but what tone would be correct for the whistle?! Cheers for now. Richard.
-
3. The Irish Steam Loco Register has now been sold. Kind Regards Richard.
-
Hi all, I've been having a clearout of my collection and have the following books for sale: 1. 'The Ballymena Lines, Part Two' by Edward Patterson(1968). Very Good Condition for age. Dust jacket a little worn, but complete. £12 + postage (Tbc). 2. Irish Railways in Colour, a second glance 1947 - 1970, by Tom Ferris (1995). Excellent condition, small mark where a label was on the front cover. £10 + postage(TB) 3. Irish Steam Loco Register, by JWP Rowledge, (1993). Excellent condition soft back book, no marks £10 + Postage (Tbc) First come first served. Paypal preferred for these. For all of these I intend to use 2nd class recorded signed for (or equivalent), and once agreed via PM will confirm price with you, if any of these are of interest. Richard.
-
4mm scale 'WT' rebuild from a Fowler 2-6-4T
Richard EH replied to Richard EH's topic in Irish Models
Hi all, A bit more progress to report, I've: Looked at the rear bunker and included the cut outs on the sloped section at the side. Does anyone know what's in there? (Tank filler perhaps - but there's a filler on the top of the side tanks, so maybe not....) Shifted the whistle from the top of the firebox to the top of the cab Bought from 51L models, now that they're selling the comet range of detailing parts LS22 Ivatt live and exhaust steam injectors, and LS36 LMS two rung cab steps for the steps into the cab Both of these are great castings and I now need another set of steps for the front footplate above the leading pony truck and to complete the rear bunker steps and it's nearly ready for painting. Will post up a photo when I get the latter two items complete. Cheers for now. Richard. -
I am quite, oh ok, very tempted to go for one of these. We've discussed the rivets on the tender - whilst a minor feature, is it ok for a 'layout loco?' can you see them at 2ft away? Probably not, the magazine article illustrates that well - they're practically invisible in the prototype photo.... so that's not a problem for me... I do want to see the lining though.... I've already a U, No.201 and the lining.... well, that's the most difficult bit.... so I may hang back until there's a painted sample before ordering. But it's right in the model of my modelling period, is the right loco for me and... well, you can tell I'm not taking much persuading, it' just the price! Richard.
-
This is a shame. It's gone from a definite to a see what it looks like thing for me, I think. The rivet detail on the tender tank is quite a distinctive feature of these locomotives - it points to the origin being something other than the worsley works scratch aid parts as the tender rivet details on these is really very good. If the lining and painting is good it still might be good. It might've been easier to have gone for one of the 1915 locos with a more traditional tender.... Richard.
-
4mm scale 'WT' rebuild from a Fowler 2-6-4T
Richard EH replied to Richard EH's topic in Irish Models
Hi Guys, Many thanks for those kind words, will keep the thread updated with progress. Kind Regards Richard. -
Very much looking forward to this one! Richard.
-
4mm scale 'WT' rebuild from a Fowler 2-6-4T
Richard EH replied to Richard EH's topic in Irish Models
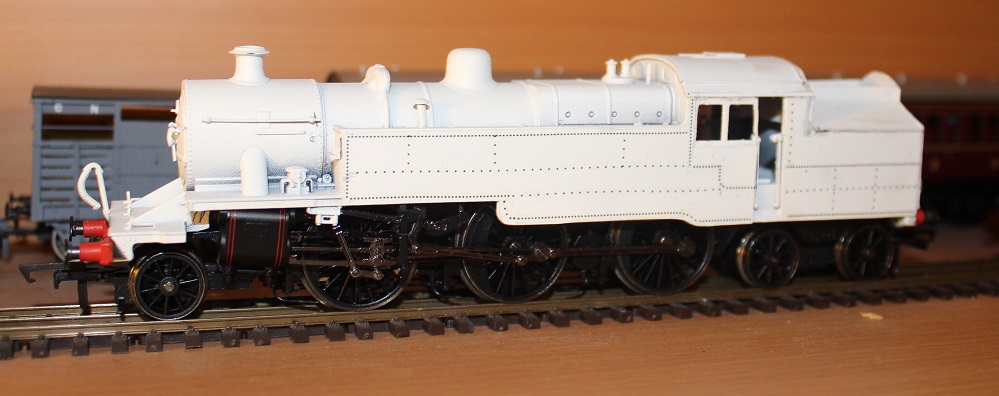
Hi all, Happy New Year to all on the forum! Managed some progress on the WT over Christmas in between all the celebrations and mince pies! Really all I've now done is completed the riveting on the side tanks using the archer resin rivets. As mentioned previously, I've used the sample pack to get the various spacing of rivets. The tricky bit was getting the corners right and I've generally cut each rivet out and applied them individually. Done a few at a time and then applied some matt varnish to make sure the next set didn't lift the previous set... was straightforward but was time consuming...! Next step is to sort the cab steps, cab rainstrip, relocate the whistle, and sort some steps for the back of the bunker. That'll sort the body I think ready for painting and after that it's about looking at some replacement wheels as helpfully set out upthread. All the best for now. Richard.
-
ooooh yes.That's good, so very good!! Very well done! Kind Regards Richard.
-
And as a postscript, I hope they can do some good quality lining on the u for the price.... That'll be tricky having tried it myself! Richard
-
This is a great development, and although pricy, is one I look forward to supporting..... A u/ug cuts down on development time and therefore cost as the tender, cab, boiler and smoke box are the same... So you get two for most of the development costs of one.... Richard
-
4mm scale 'WT' rebuild from a Fowler 2-6-4T
Richard EH replied to Richard EH's topic in Irish Models
Hi all, Many thanks for the kind comments. progress stopped for a while whilst I awaited a new tin of testors dullcote: until I could put a quick blow of varnish over it, I couldn't make progress with the rivet detail. That's now arrived and by coincidence it's currently drying as I've pretty much finished the left hand side, rear bunker and have made a start on the right hand side. Will post up a photo or two when the rivets are done. Just a bit of detailing I think then, cab steps and maybe relocate the whistle. Thanks for the clues on the driving wheels, will take a look at those and see what I can get hold of. Richard. -
They do look good. You get what you pay for and of course, you don't have to buy them....I'll keep an eye on their website and see if anything of interest for me emerges. Kind Regards Richard.
-
4mm scale 'WT' rebuild from a Fowler 2-6-4T
Richard EH replied to Richard EH's topic in Irish Models
Many thanks for the kind comments all, that's much appreciated! I've done some experimenting, and what seems to work for the curved section of rivets is to: 1. cut out a line of rivets 2. cut into individual rivets on the cutting mat 3. then move into a small puddle of water on the cutting mat so that the water is soaked up 4. pick up with the knife when loose and apply carefully 5. Repeat.... a lot!! Gonna be here a while....! Will update when I've some pore progress to report....! Cheers for now Richard. -
4mm scale 'WT' rebuild from a Fowler 2-6-4T
Richard EH replied to Richard EH's topic in Irish Models
Apologies, PM sent! Richard. -
oh well! Another cunning plan, dashed!! Clearly you've looked into it in some detail=D Kind Regards Richard.
-
Had a closer look and the hopper does seem very similar, the axles/supports look more modern, not a surprise I guess... oh, and order placed as well, good luck with the project! Richard.
-
Hi guys, The hopper looks very similar to the GRNi one as well as shown in the oakwood press book - not sure if they share the same design, but there may be an additional opportunity for a model if they are the same! (and one which would appeal to steam era modellers as well.....) Kind Regards Richard.
-
4mm scale 'WT' rebuild from a Fowler 2-6-4T
Richard EH replied to Richard EH's topic in Irish Models
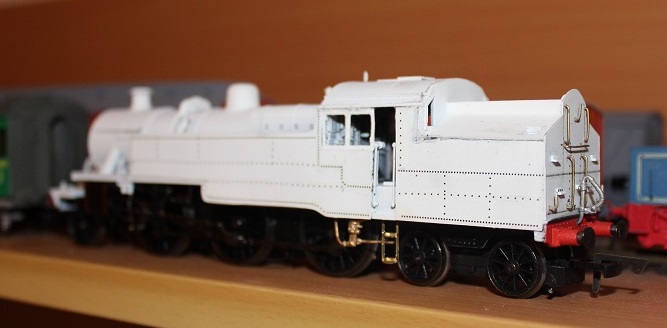
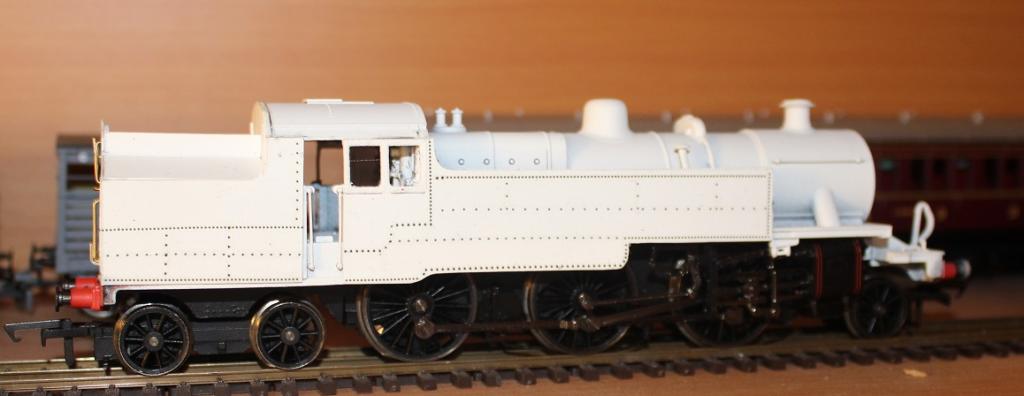
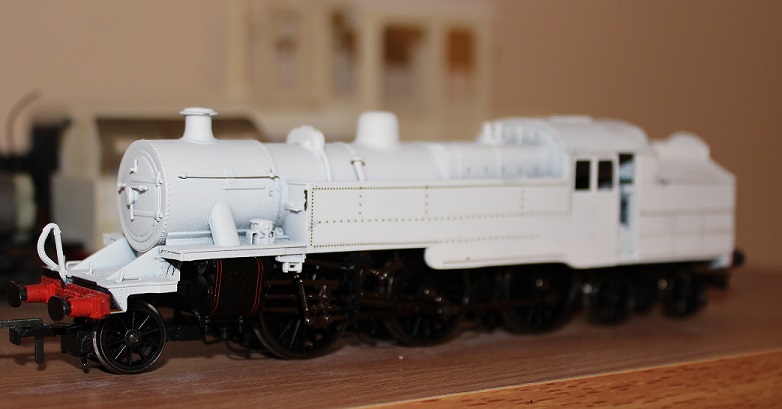
Hi all, Quick update as I've progressed a bit further. I've shortened the cab at the rear and replaced the rear spectacle plates with a new plasticard back to the cab. I've also completed the platework on the bunker - though it needs a bit more work at the back of the cab. The main bit of progress is a quick blow over with some white primer, and I've started to add the archer resin rivets. The pack I've bought was the demo pack with a variety of rivets per centimetre, so I've been poring over some of the good side on shots of these machines to get the right look to the multiple rows of rivets. The main problem with these is that all of the rows are in straight lines, so I'm mulling over how to apply the rivets on the few curved sections on the tank. I think the best way will be to cut individual rivets out on their strip, soak on the workbench then pick up with the knife and apply gently....I've already put a thin coat of dullcote on so the existing rivets won't be going anywhere... Final bit of progress is the handrails going onto the rear of the bunker. Anyhow, looking good for now, Cheers for now! Richard
-
This is a fantastic development, well done! Not quite my era.... but, ok, I'll go for a set I think! Richard.
-
4mm scale 'WT' rebuild from a Fowler 2-6-4T
Richard EH replied to Richard EH's topic in Irish Models
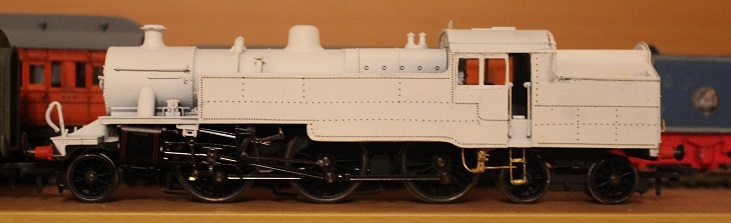
So I’ve been giving the WT some thought and went to expo em the other weekend. I’ve decided to take option B and shorten the cab on what is, by using a fowler tank as a base, not a 100% WT clearly! I do wonder if the loading gauge is slightly bigger compared to the fowler tank as it just seems a bit… fatter… all round. In any case, the photo shows the chopped cab in profile which I think looks pretty good. Certainly matching it with some of the side on shots in ‘parting shot’ seems to give something which doesn’t cause any problems for me and I think looks the part. I was wandering round Expo em to search for some etched rear cab spectacle plates but there didn’t appear to be anything suitable, so the next step is to make something suitable up in plasticard, remake the top of the bunker behind the cab after the razor saw has been at it and make good. After that, lots of fun with rivets beckons for the tank sides, and some scrap etch for the cab steps. Cheers for now. Richard.