Si2020
-
Posts
236 -
Joined
-
Days Won
10
Content Type
Profiles
Forums
Events
Gallery
Blogs
Store
Community Map
Everything posted by Si2020
-
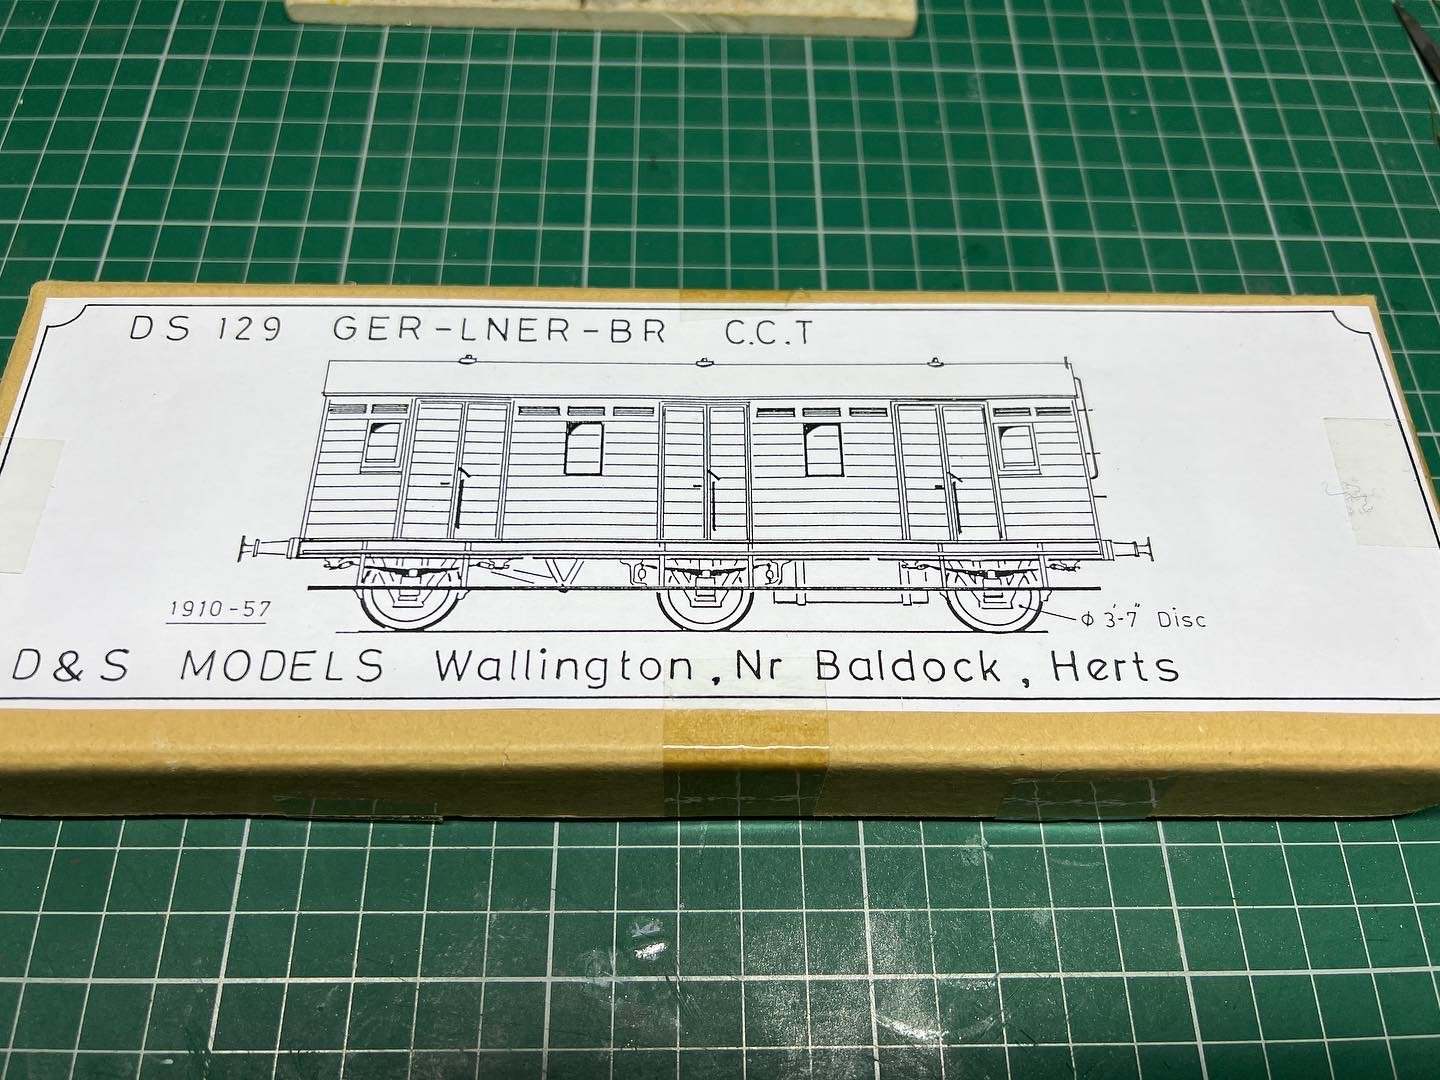
A GER cattle wagon. Ready for painting.

-
Thanks Jaz, I also forgot to mention that the houses come off for when the layout is being transported and knowing my luck I would also be forever gluing the figures back on. Its always a diffcult one when modelling pre-grouping years, as we only really have photos to work from and I know that when im doing a project for the layout that it can take as long if not longer looking at photos to make sure that things are correct for what I'm doing. I have to say though that its always nice to look back to see what things where like, pre modern times.
-
A couple of coach kit builds have been on the bench recentley. And here a few hours later.
-
Thanks, when the layout was built the standard of the figures for this period was in my opinion poor and I've not really got round to looking adding anything extra as this area is hidden from view a bit when you are viewing the layout from the front. I did look at the cobbles and having lived in a town in North Yorkshire which is cobbles everywhere, when you start looking at them and even back in the 20s with photos, they where and are quite clean with the traffic going over them. It was only areas where livestock stood when you got any sort of dirt or what you could call rubbish at that time.
-
They look great and has spured me on to get some finished that have been sat in the half started kit box as i didnt fancy doing all the lining by hand.
-
HI all, So lots has been happening on the bench since I last posted on here so thought I had better start updating, First up is this,
-
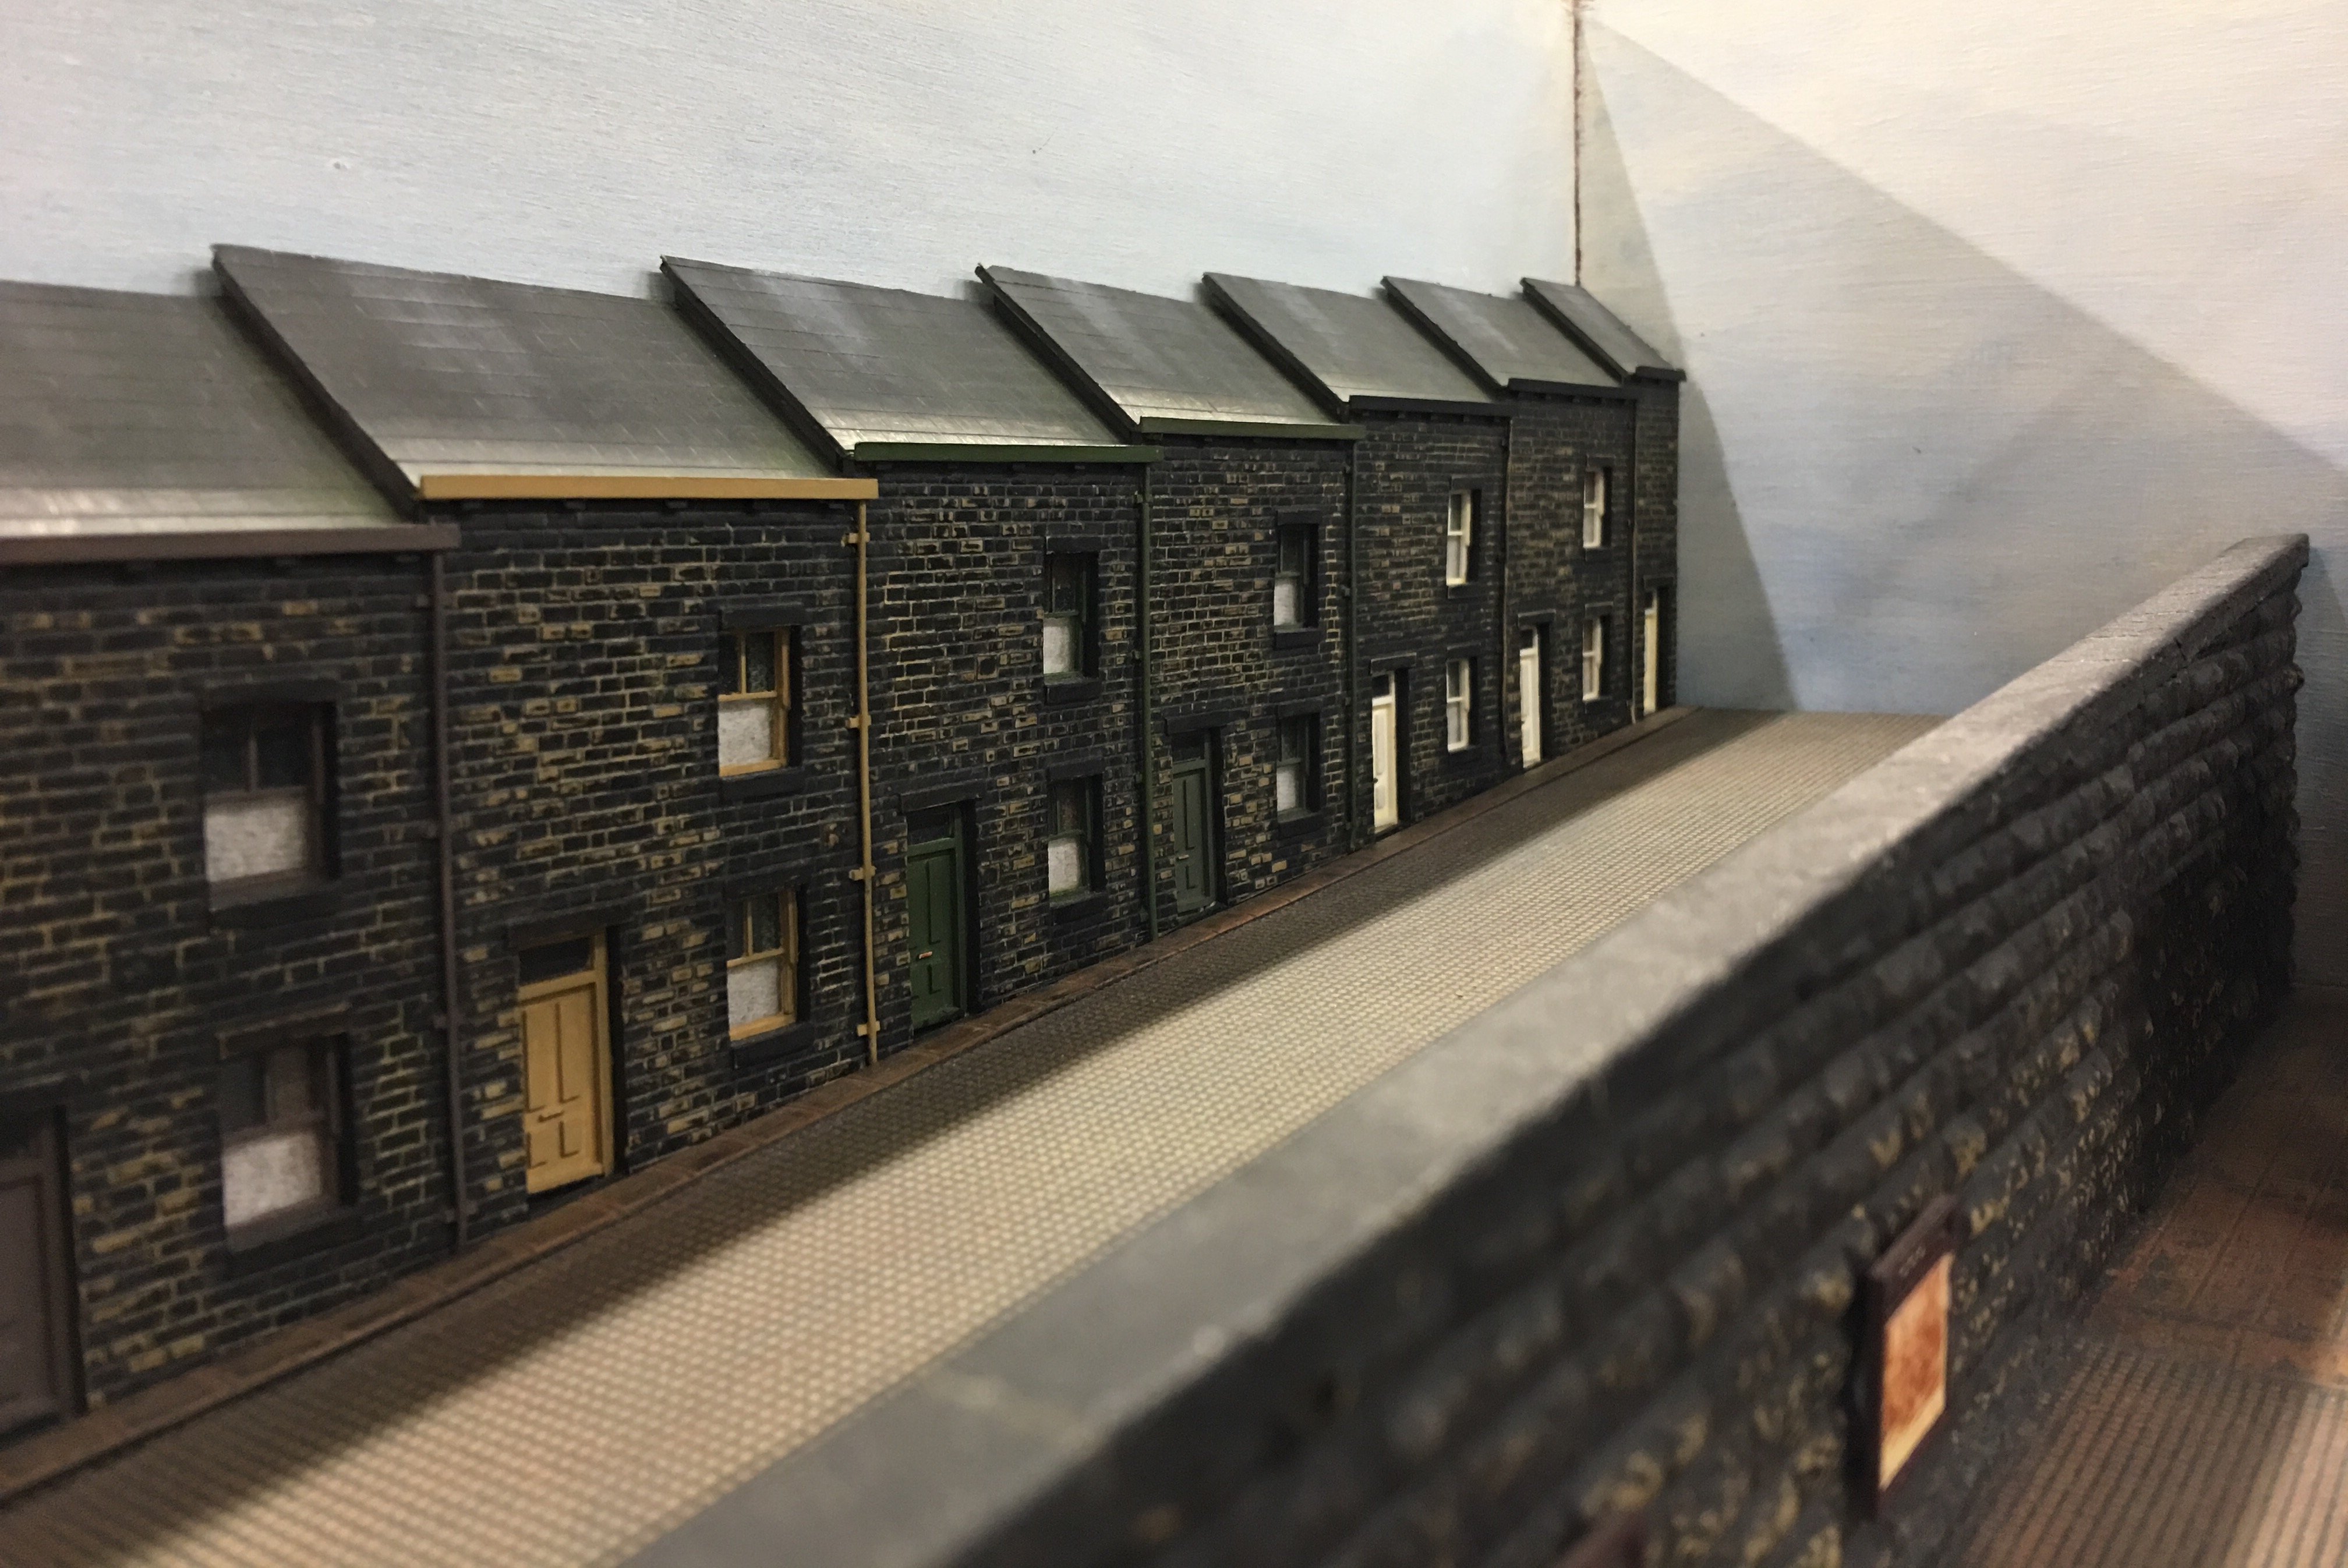
Close up of the houses that run up the road at the end of the station
-
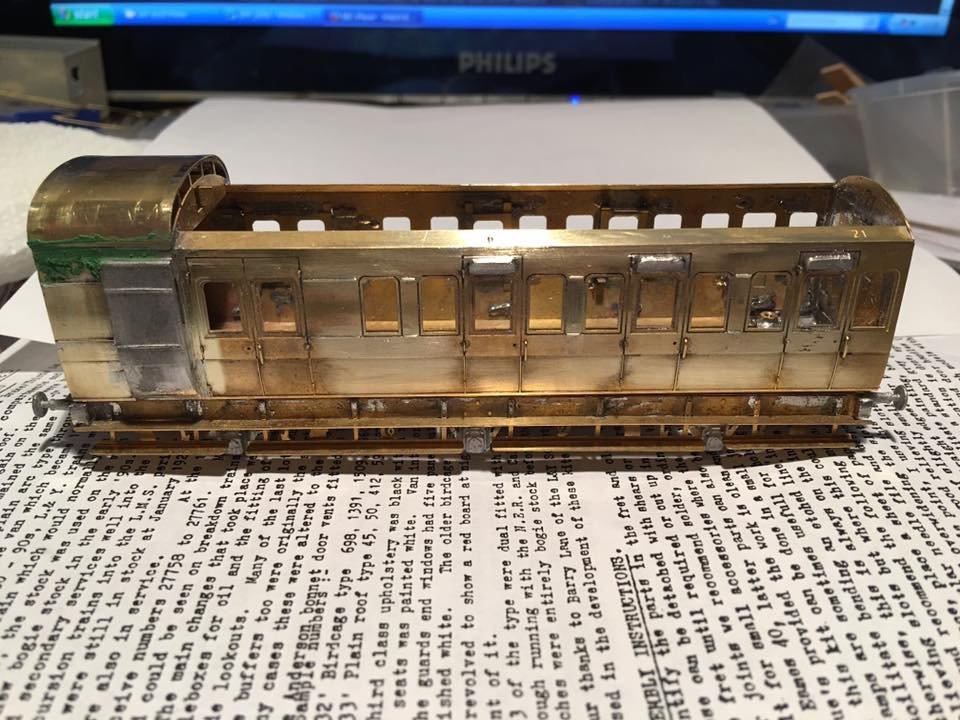
Thank you, The most complex part to do was adding the beading between the windows and doors, as in the instructions it says to use fuse wire. I can't remember what ampage but it equates to under 0.3 wire in size, so I need to thin it down a bit more. Just another 2 carragies to do.
-
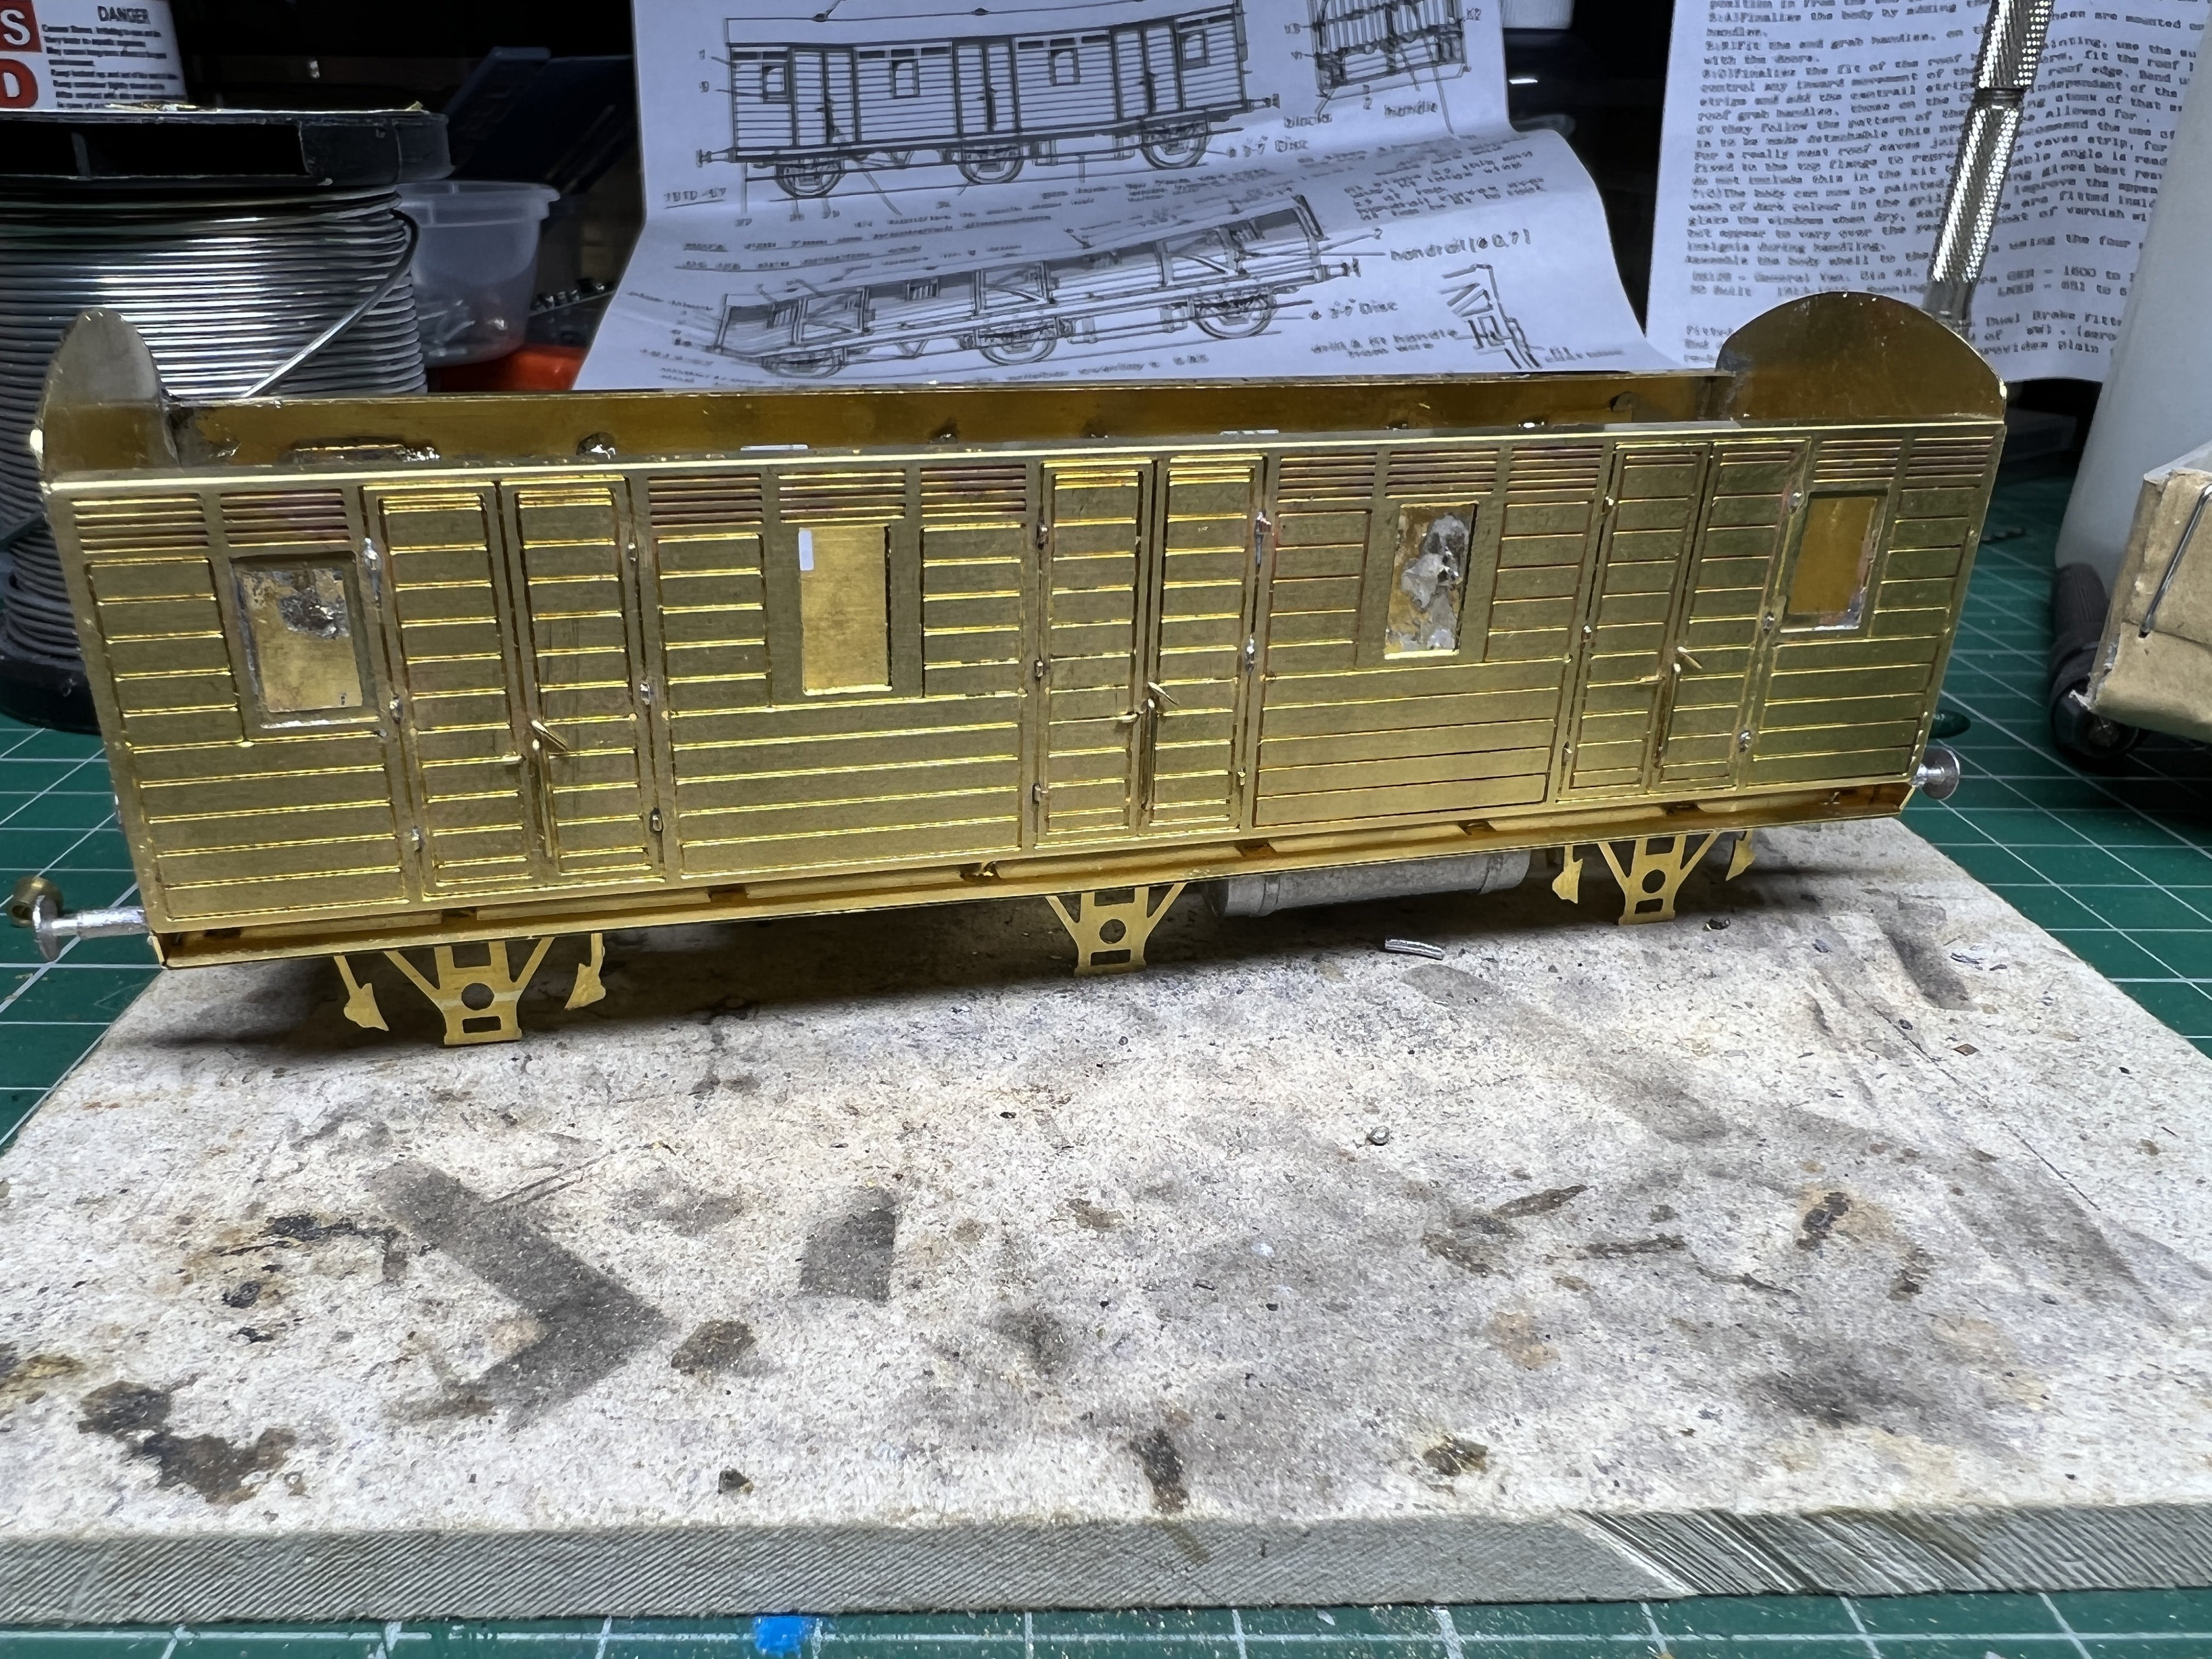
Hi all, So with a exhibtion booking for the Ally Pally show March 2022 getting ever closer I thought it was a good idea to crack on with some more stock for the layout. So we have a L&YR 6 wheel brake third coach for the other end of the short 6 wheel coach set. In real life it was a 5 coach set but the platform isn't that big so its down to 3. Still needs a bit more body work doing on the birdcage but its getting there.
-
Birmingham / WMT Leyland Fleetline Buses from Rapido Trains UK
Si2020 replied to DJ Dangerous's topic in Bus models
It's crazy and as you say as they bring out more buses then it will change. They just don't know what they are missing in the mean time. Plus you can add the 'heft' by making the wheels look natural with a sanding stick to make the tyres look as though they have weight on them. plastic ki modellers have been going it for years. I did to the two bachmann BE enginnering buses they brought out. -
Birmingham / WMT Leyland Fleetline Buses from Rapido Trains UK
Si2020 replied to DJ Dangerous's topic in Bus models
Just to give you a bit of brackground, Jason the boss at Rapido went to Uni in Birmingham and being the transport nut he is spent time riding the buses and has an intrest in them, owning his own in Canada. There are several reason for using plastic but the main two from memory are better body detail and thinner body sides, which woud be more difficult to do on a diecast body. -
I heard of that etched model but didnt know any more about it. May have to sit down and draw up my own etches for one. Best add it to the project list. You never know what might turn up from certain manufacters these days but if one certain one brings out a 4mm verison before I've built mine there will be trouble
-
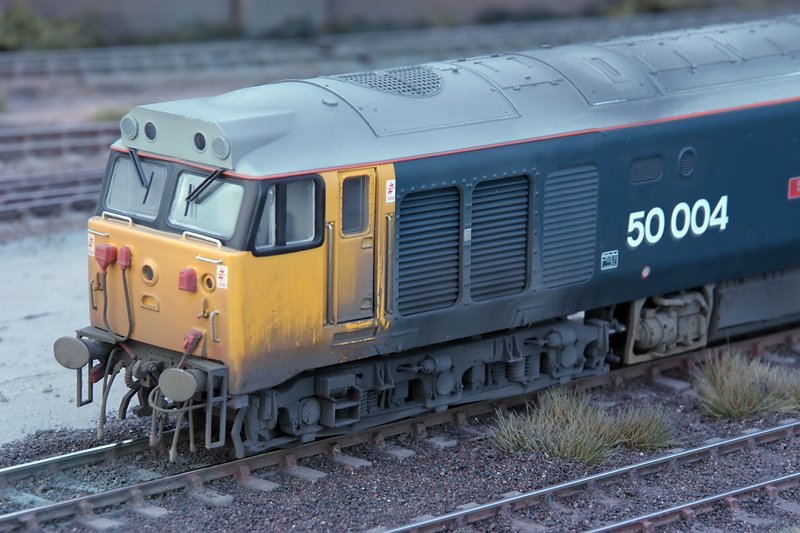
Hi, Thanks for the kind comments. If someone did a kit of it in 2mm then I would give it a go (with the lights too), but for me personally its too modern for my eras that I model. Having said thst I still have my 2 to build. Now if a 07-16 was in 2mm then that would be a must to add to the collection. Got a couple of those to build in 4mm but thats for another post.
-
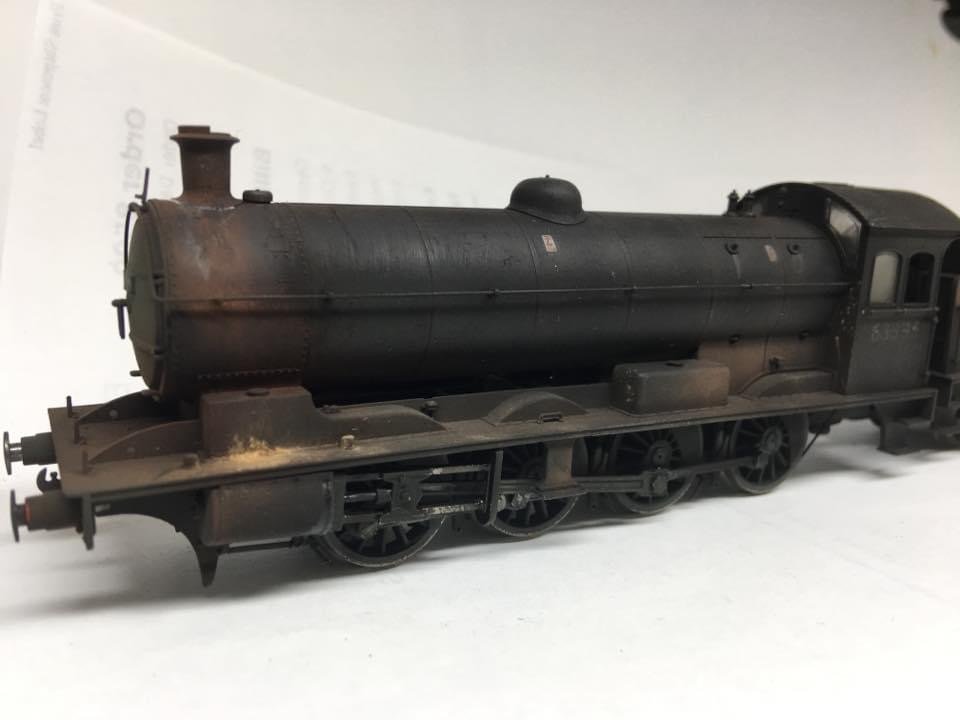
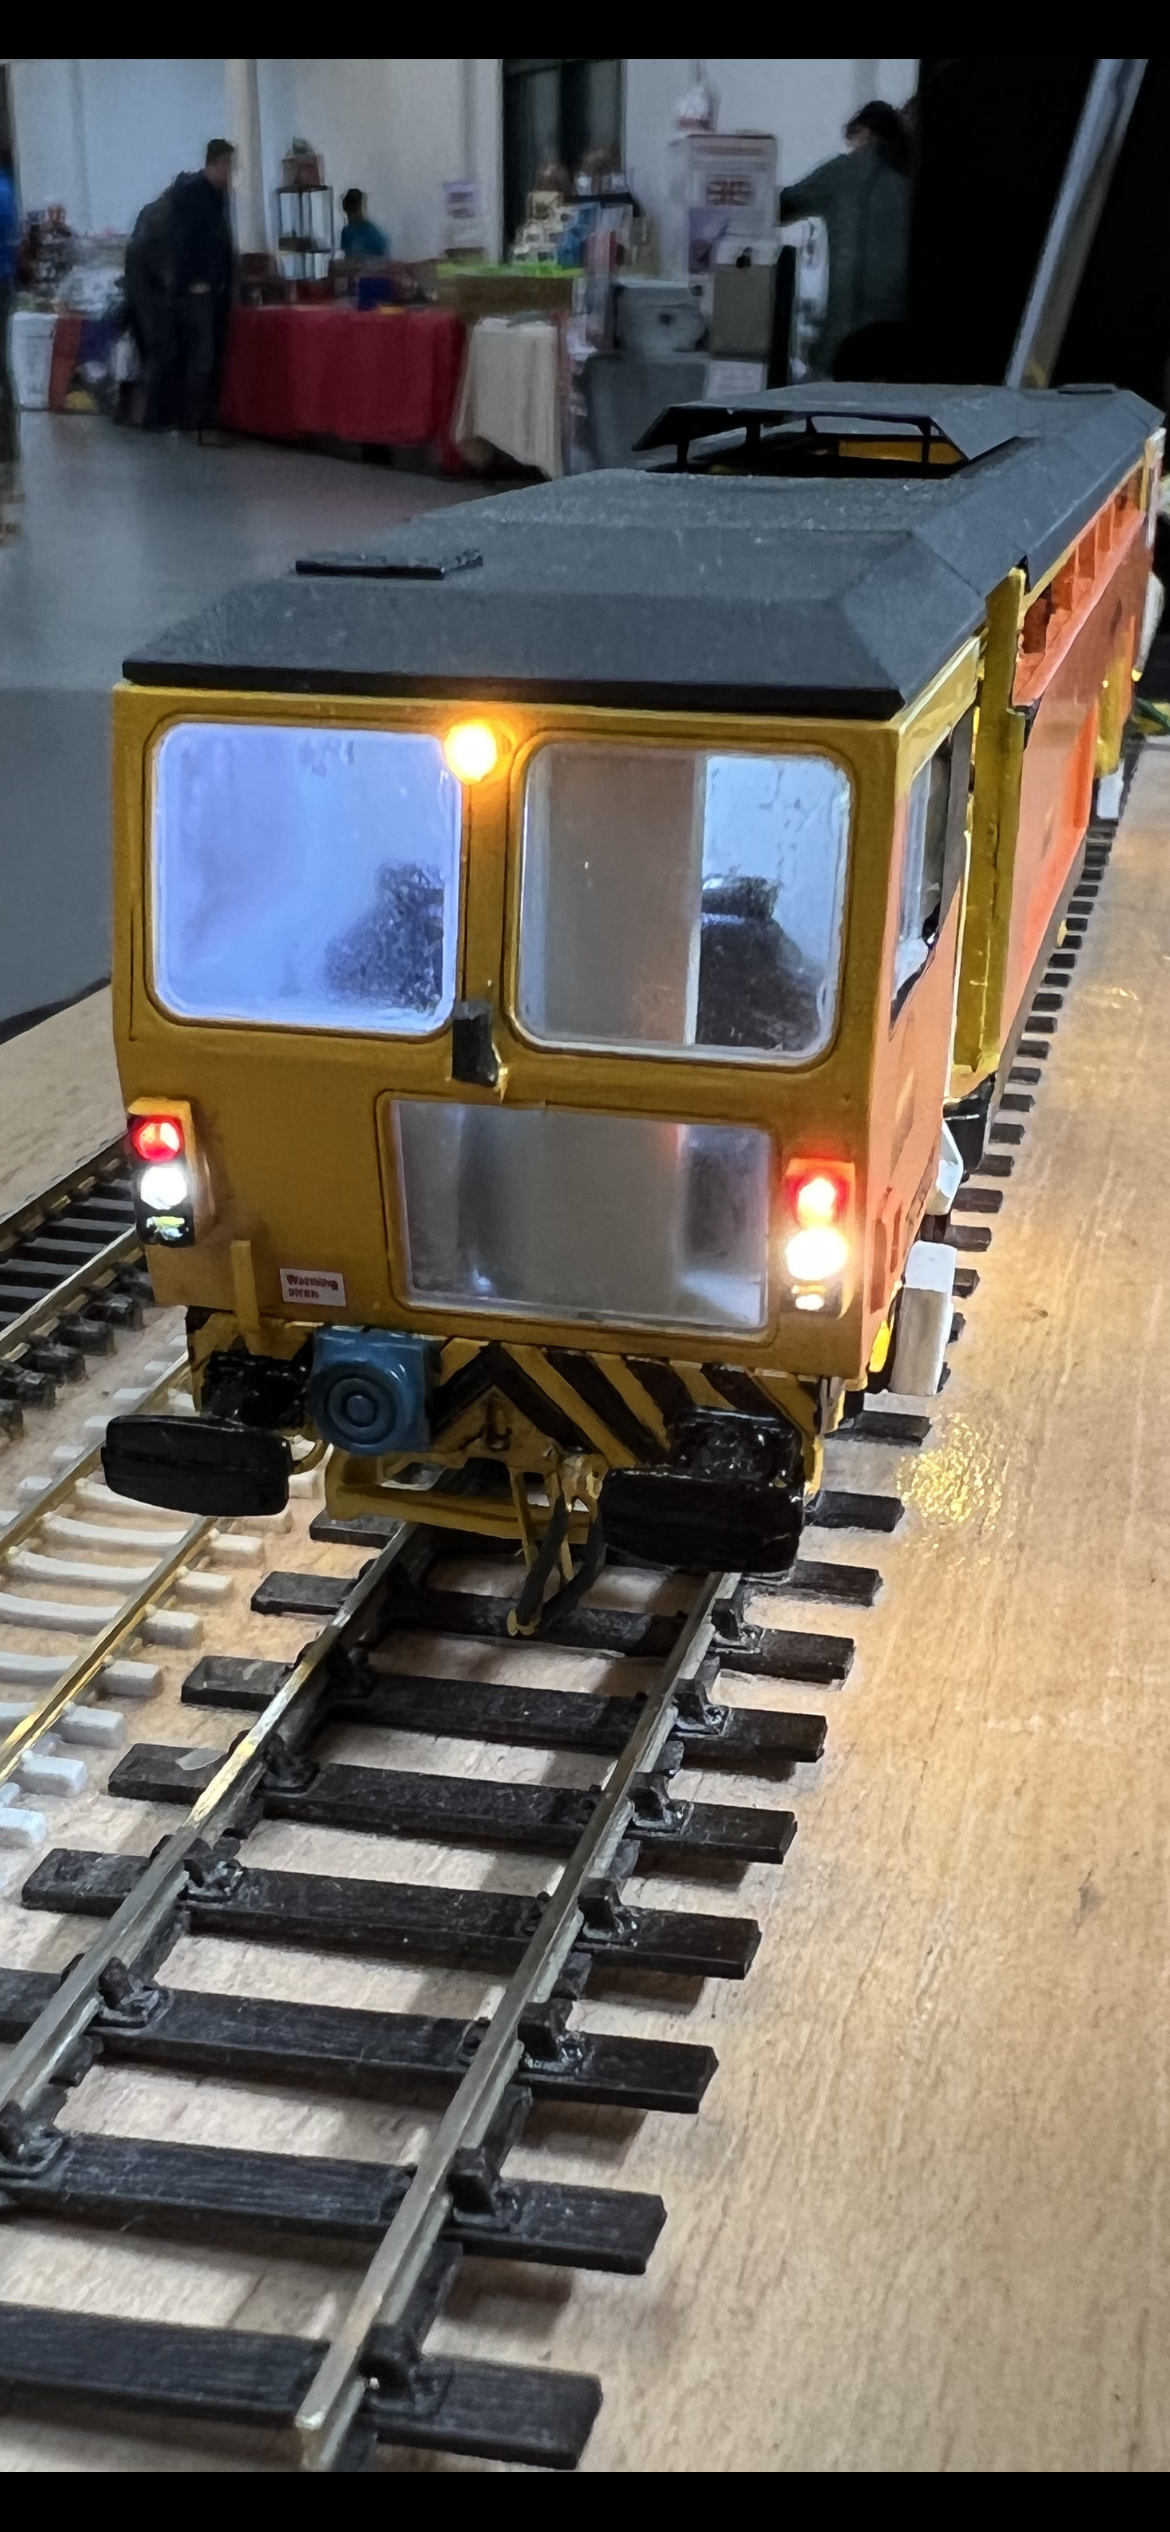
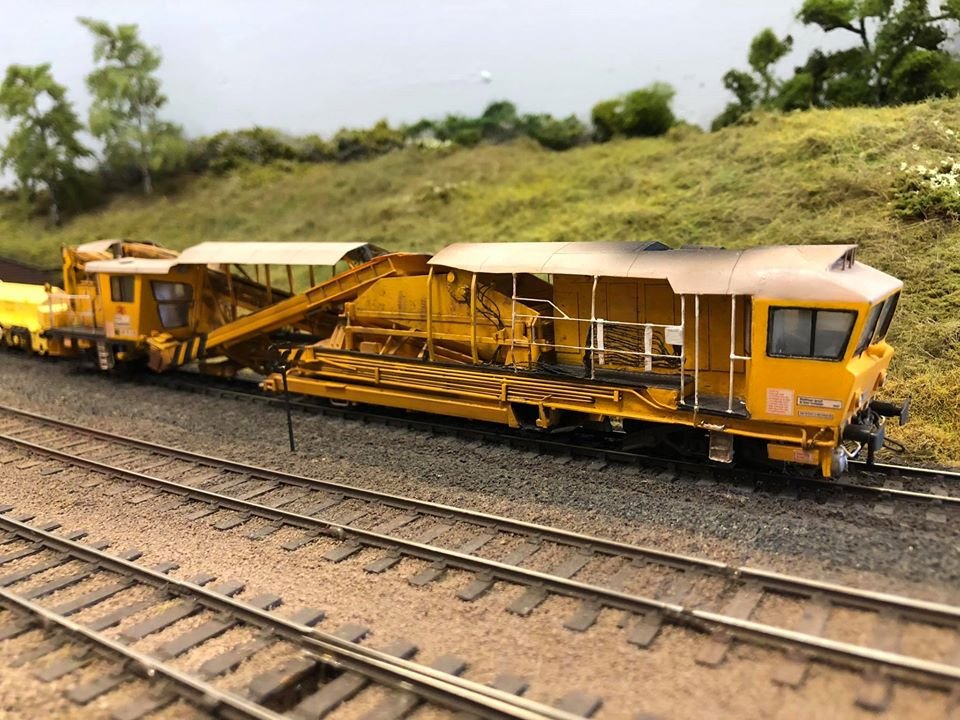
Another view of the tamper with the upper light fitted and under going testing at a recent show that I demonstrated at. Now making a start on another one which will be one of mine for a change.
-
Morning, I haven't got the new function list on the phone (I'm sure the IRM guys can point you in the right direction of it), but off the top of my head i think the following are the Function keys you need to press to get the ones you list to work: F0 Lights - if you mean the marker lights F22 - head light F23? - Cab lights - this is one of the ones that changed so I may be wrong so sorry in advance. F25 - engine room Hope the above helps and there is a Fucntion list on the back inside cover of the manual. Thanks Simon
-
Hi, Hope Garfield doesn't mind me popping up to possibly help. Having had a play with the decoder and I apologise if im teaching you to suck eggs as they say, but the functions you mention are sound ones and not physicle ones. So pressing them and expecting to see something happen, wont get a result you could see in say a light lighting up. F5 is listed as drive hold, so when the loco is moving you press F5 which keeps it at that speed and then when you increase the speed steps then the engine revs up but loco stays a the same speed. F6 - you would only notice if you move the loco forwards and then stop straight away. Ie it will stop suddenly and not roll as per normal operation F7 - is down as flange squeal so you wouldnt hear that unless the loco is moving and im guessing it may only trigger after a certain speed step. Hope this helps a bit. Thanks Simon
-
Been a while since I've updated this thread and not one to take things seriously....... So occasionally at shows for the last hour or so we sometimes get some of the other EM stock that I own out and give it a run as I can't always have the layout set up at home. So here we have, well I think the photo explains it all.
-
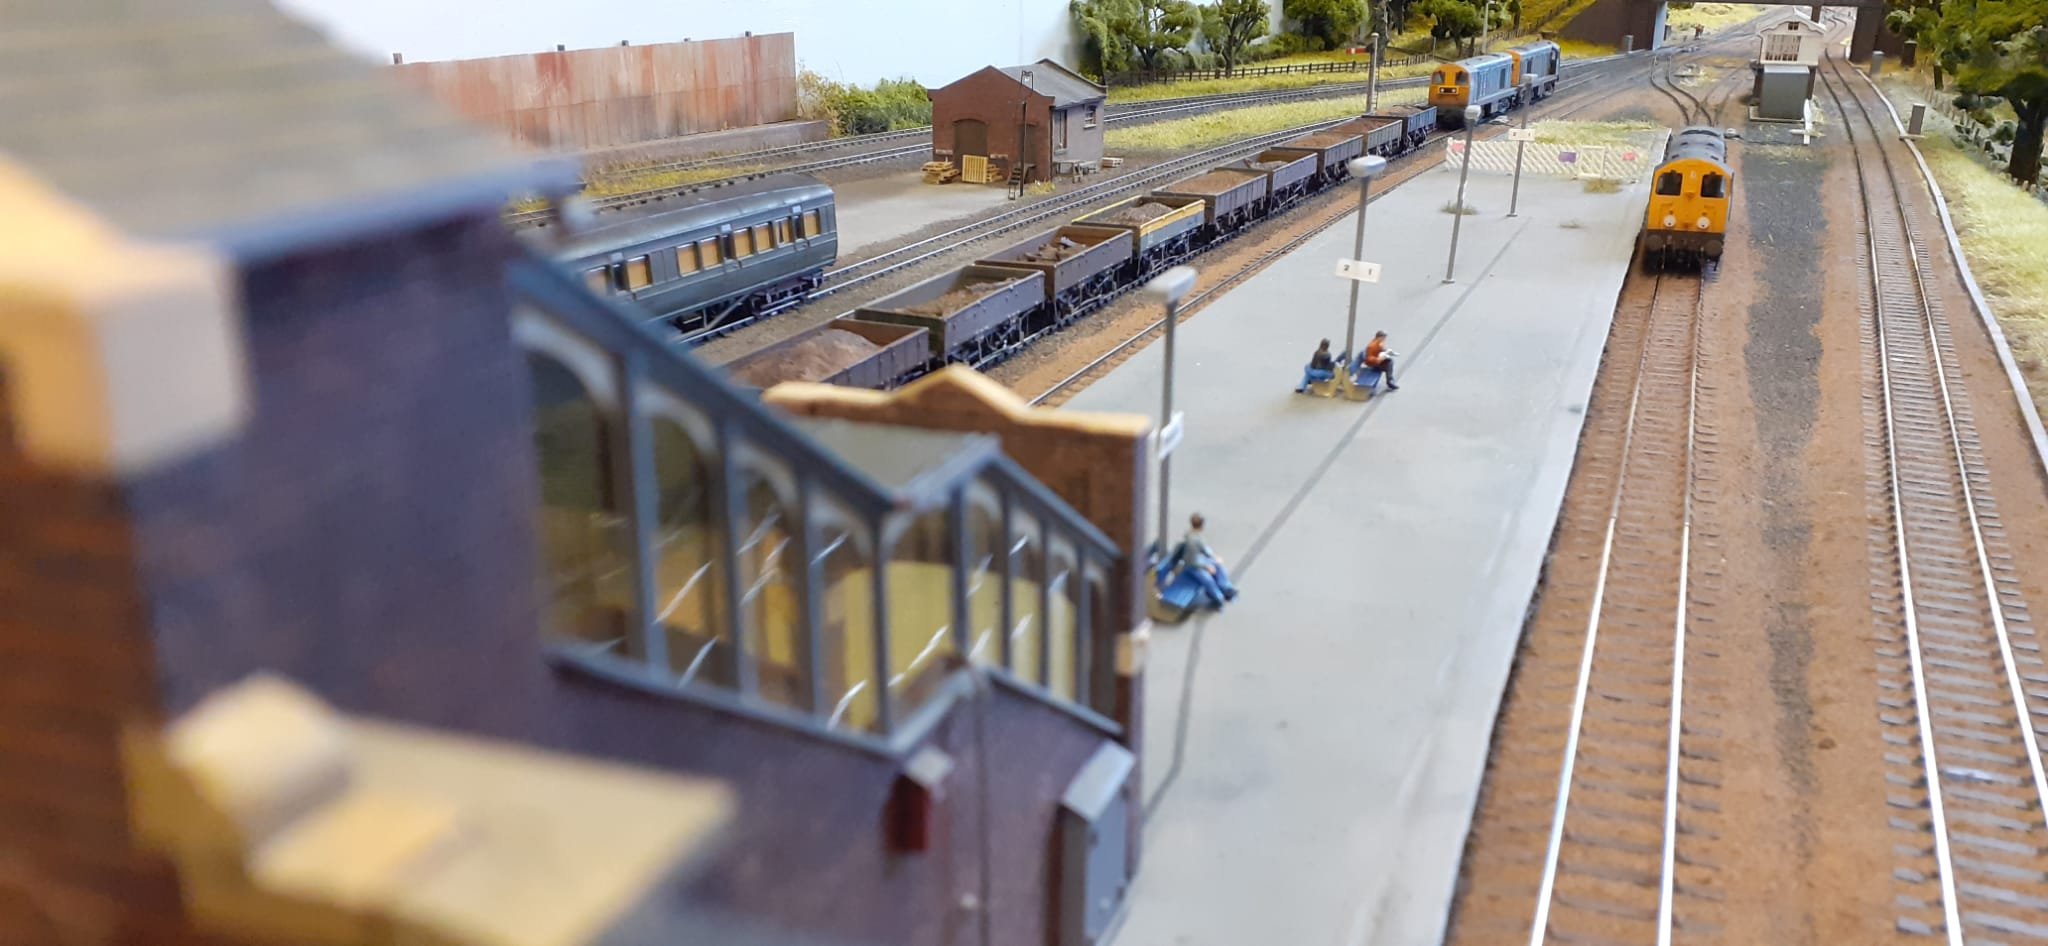
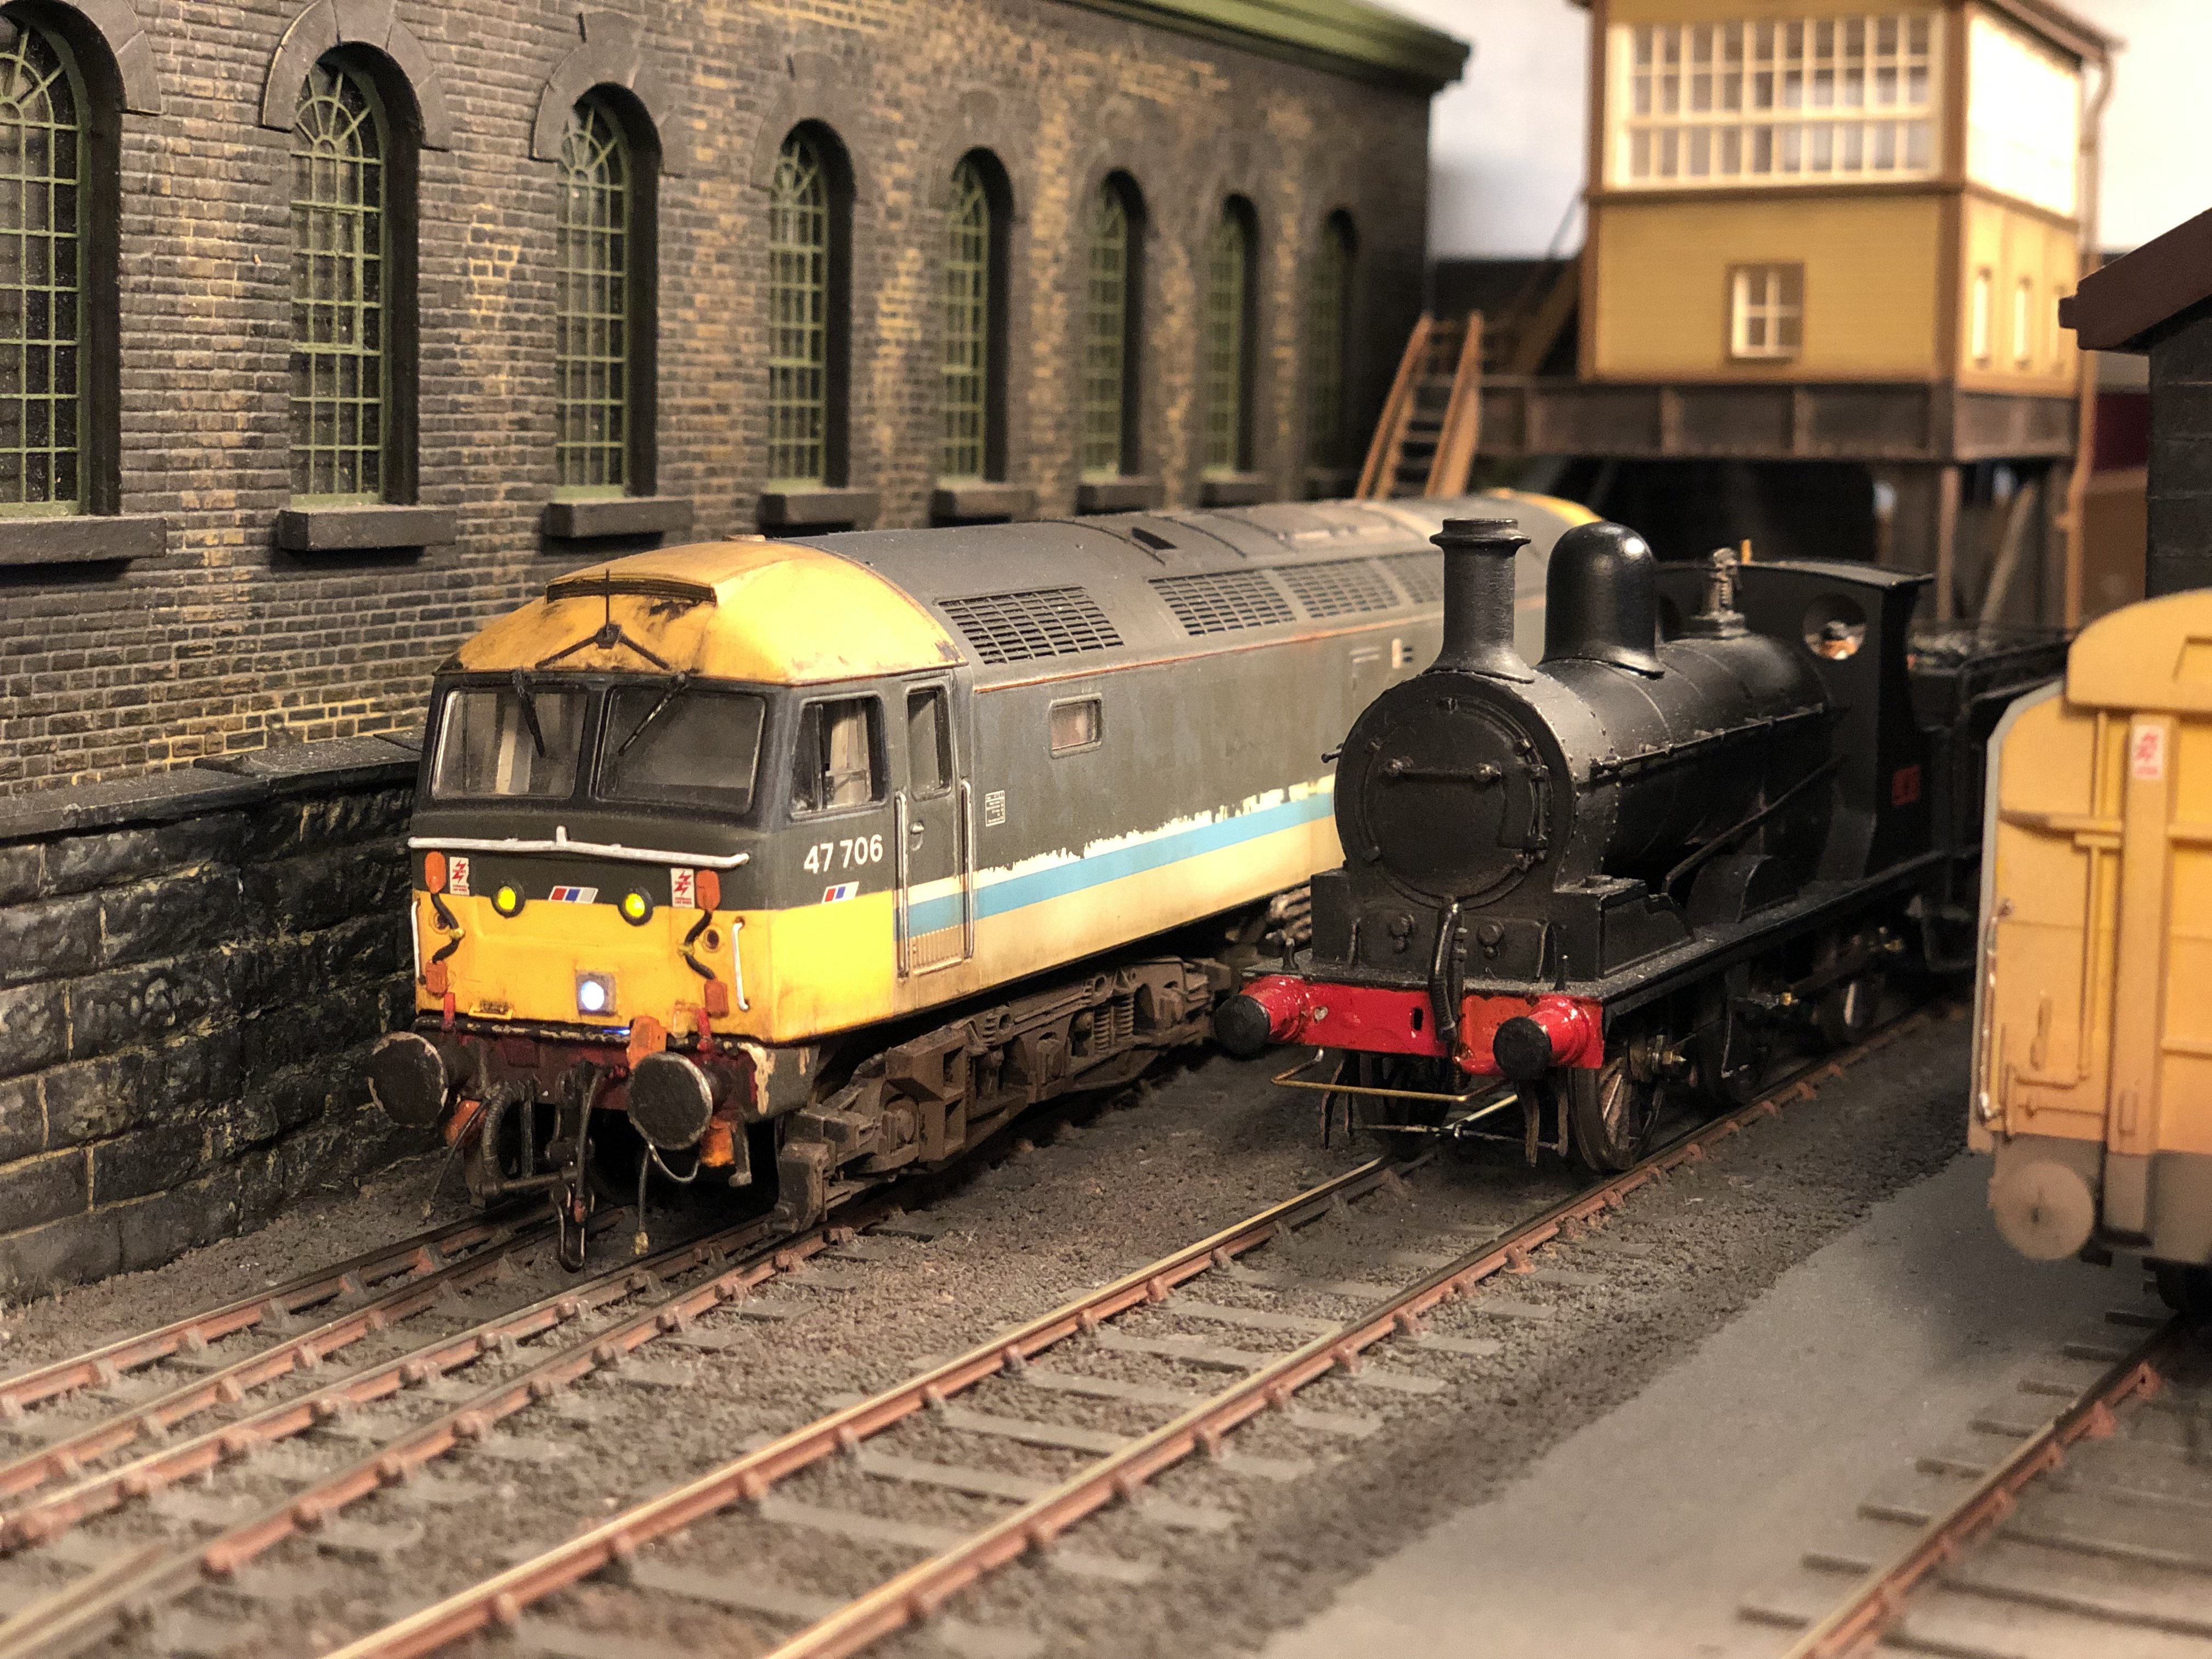
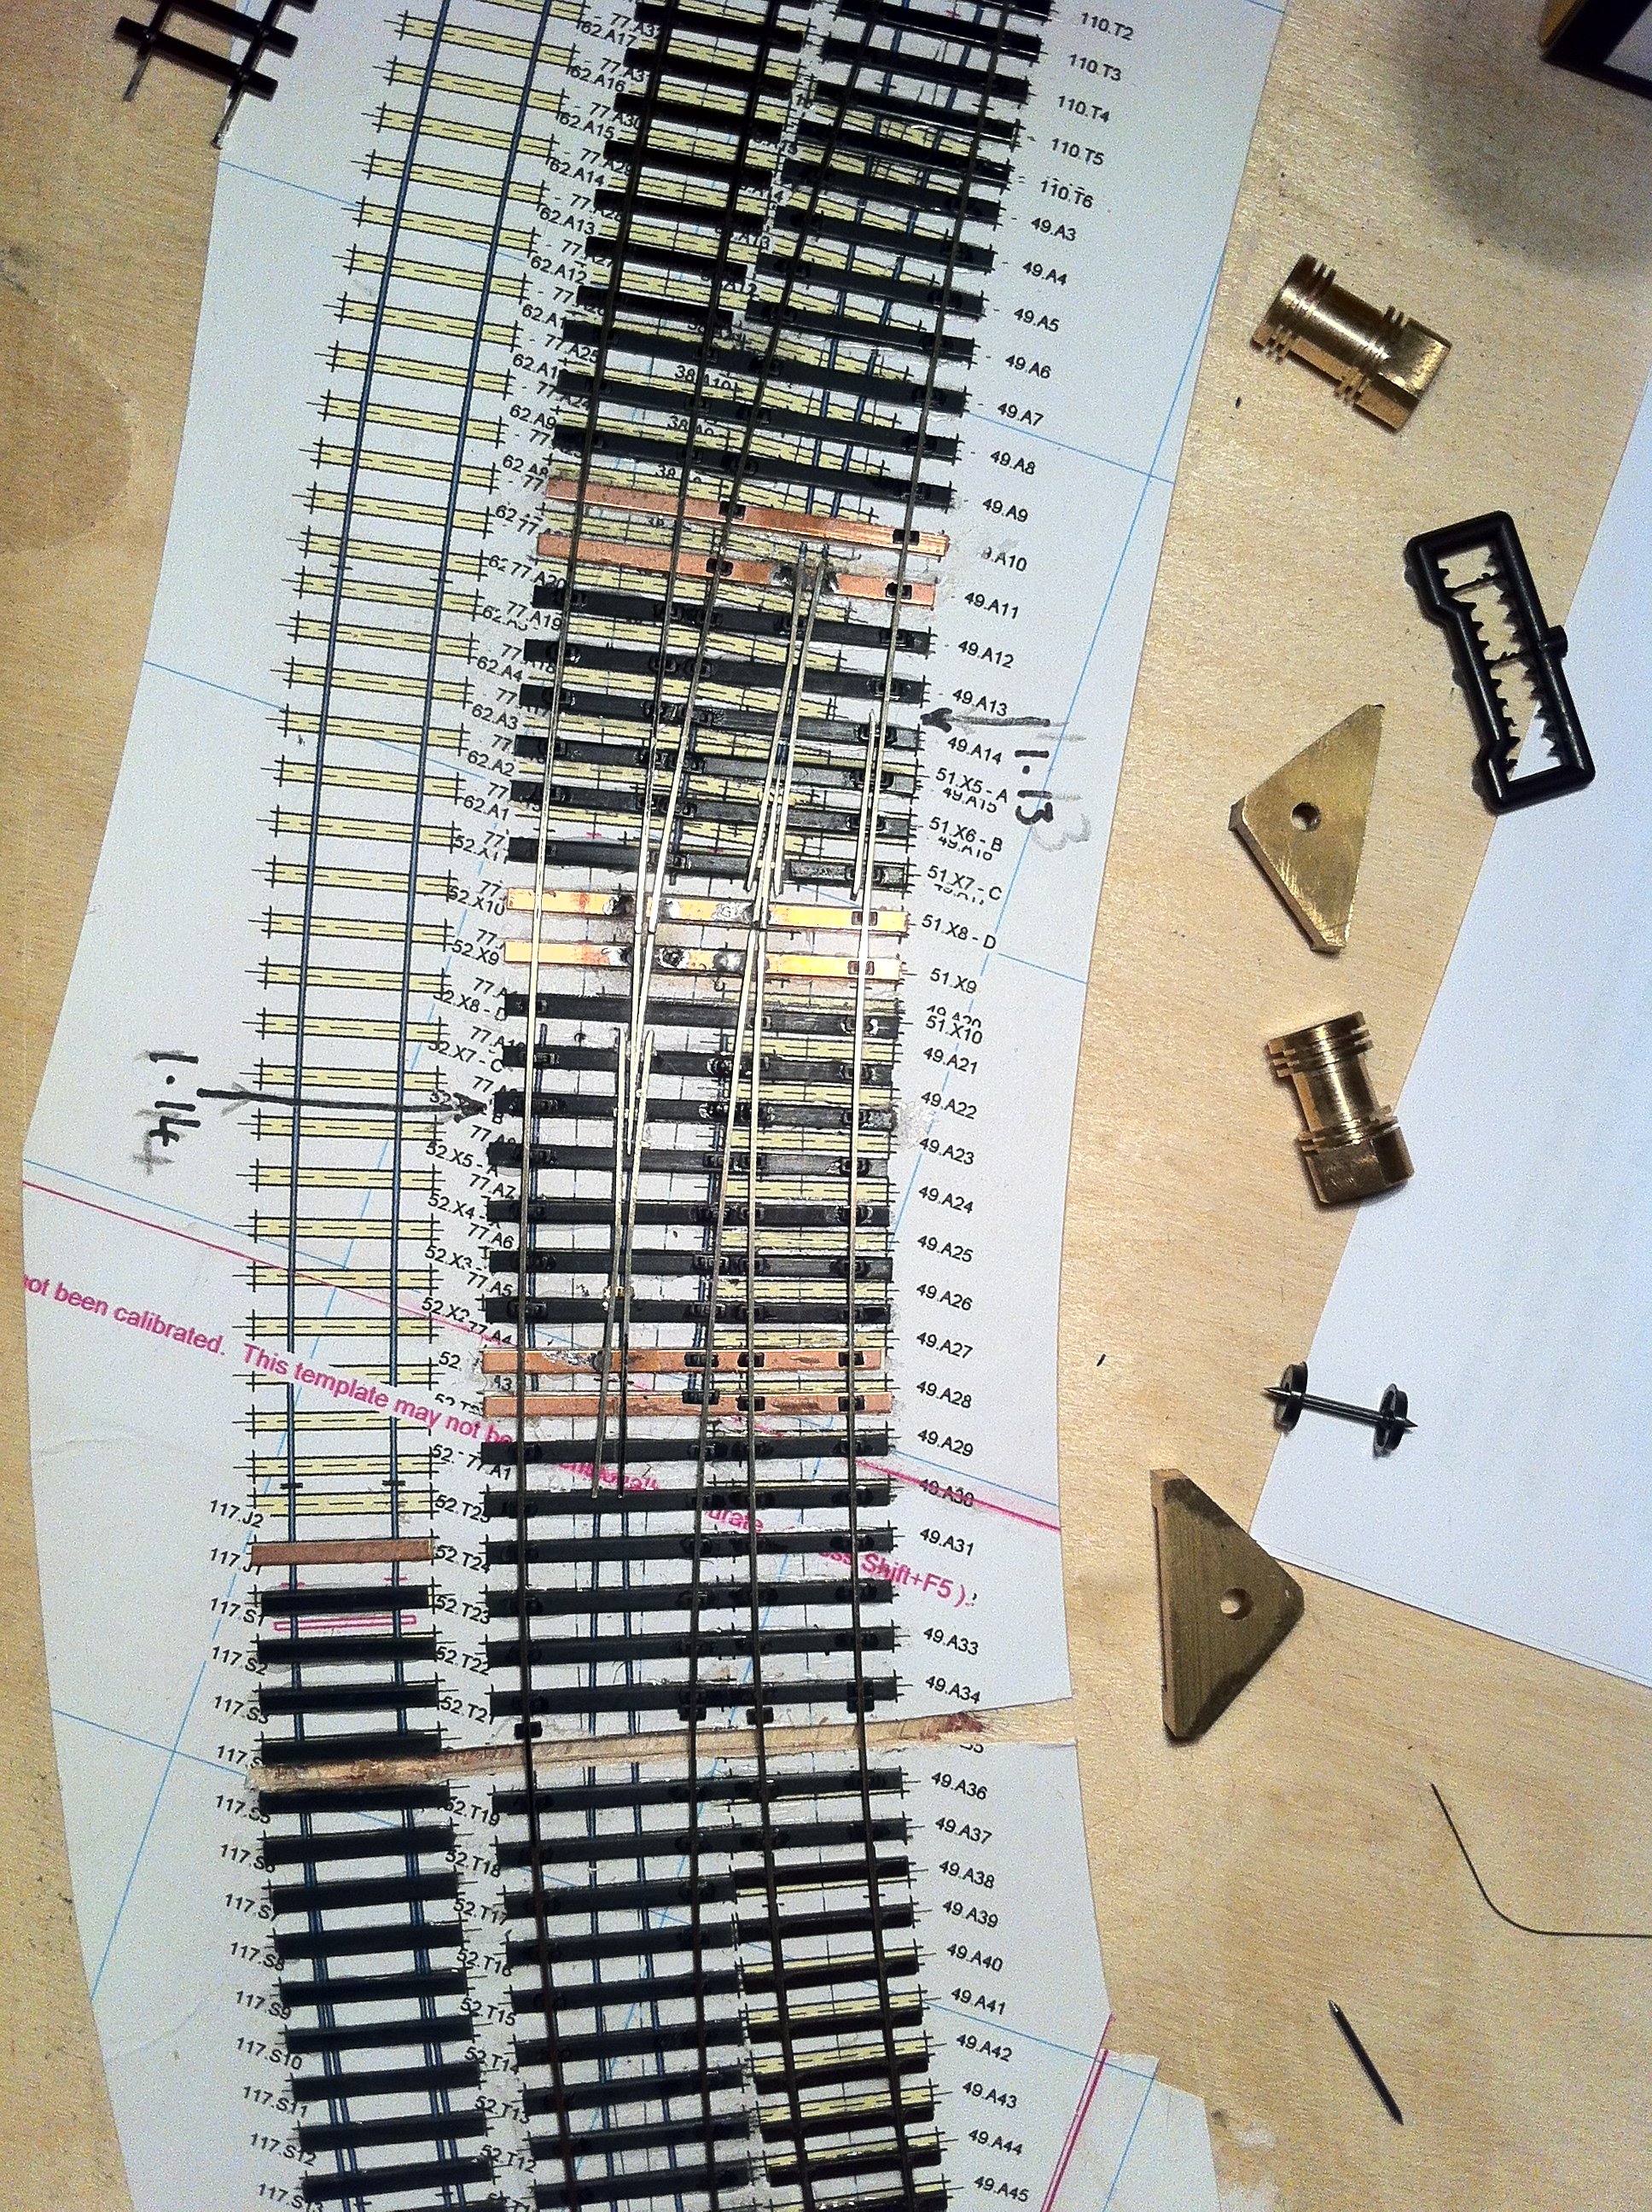
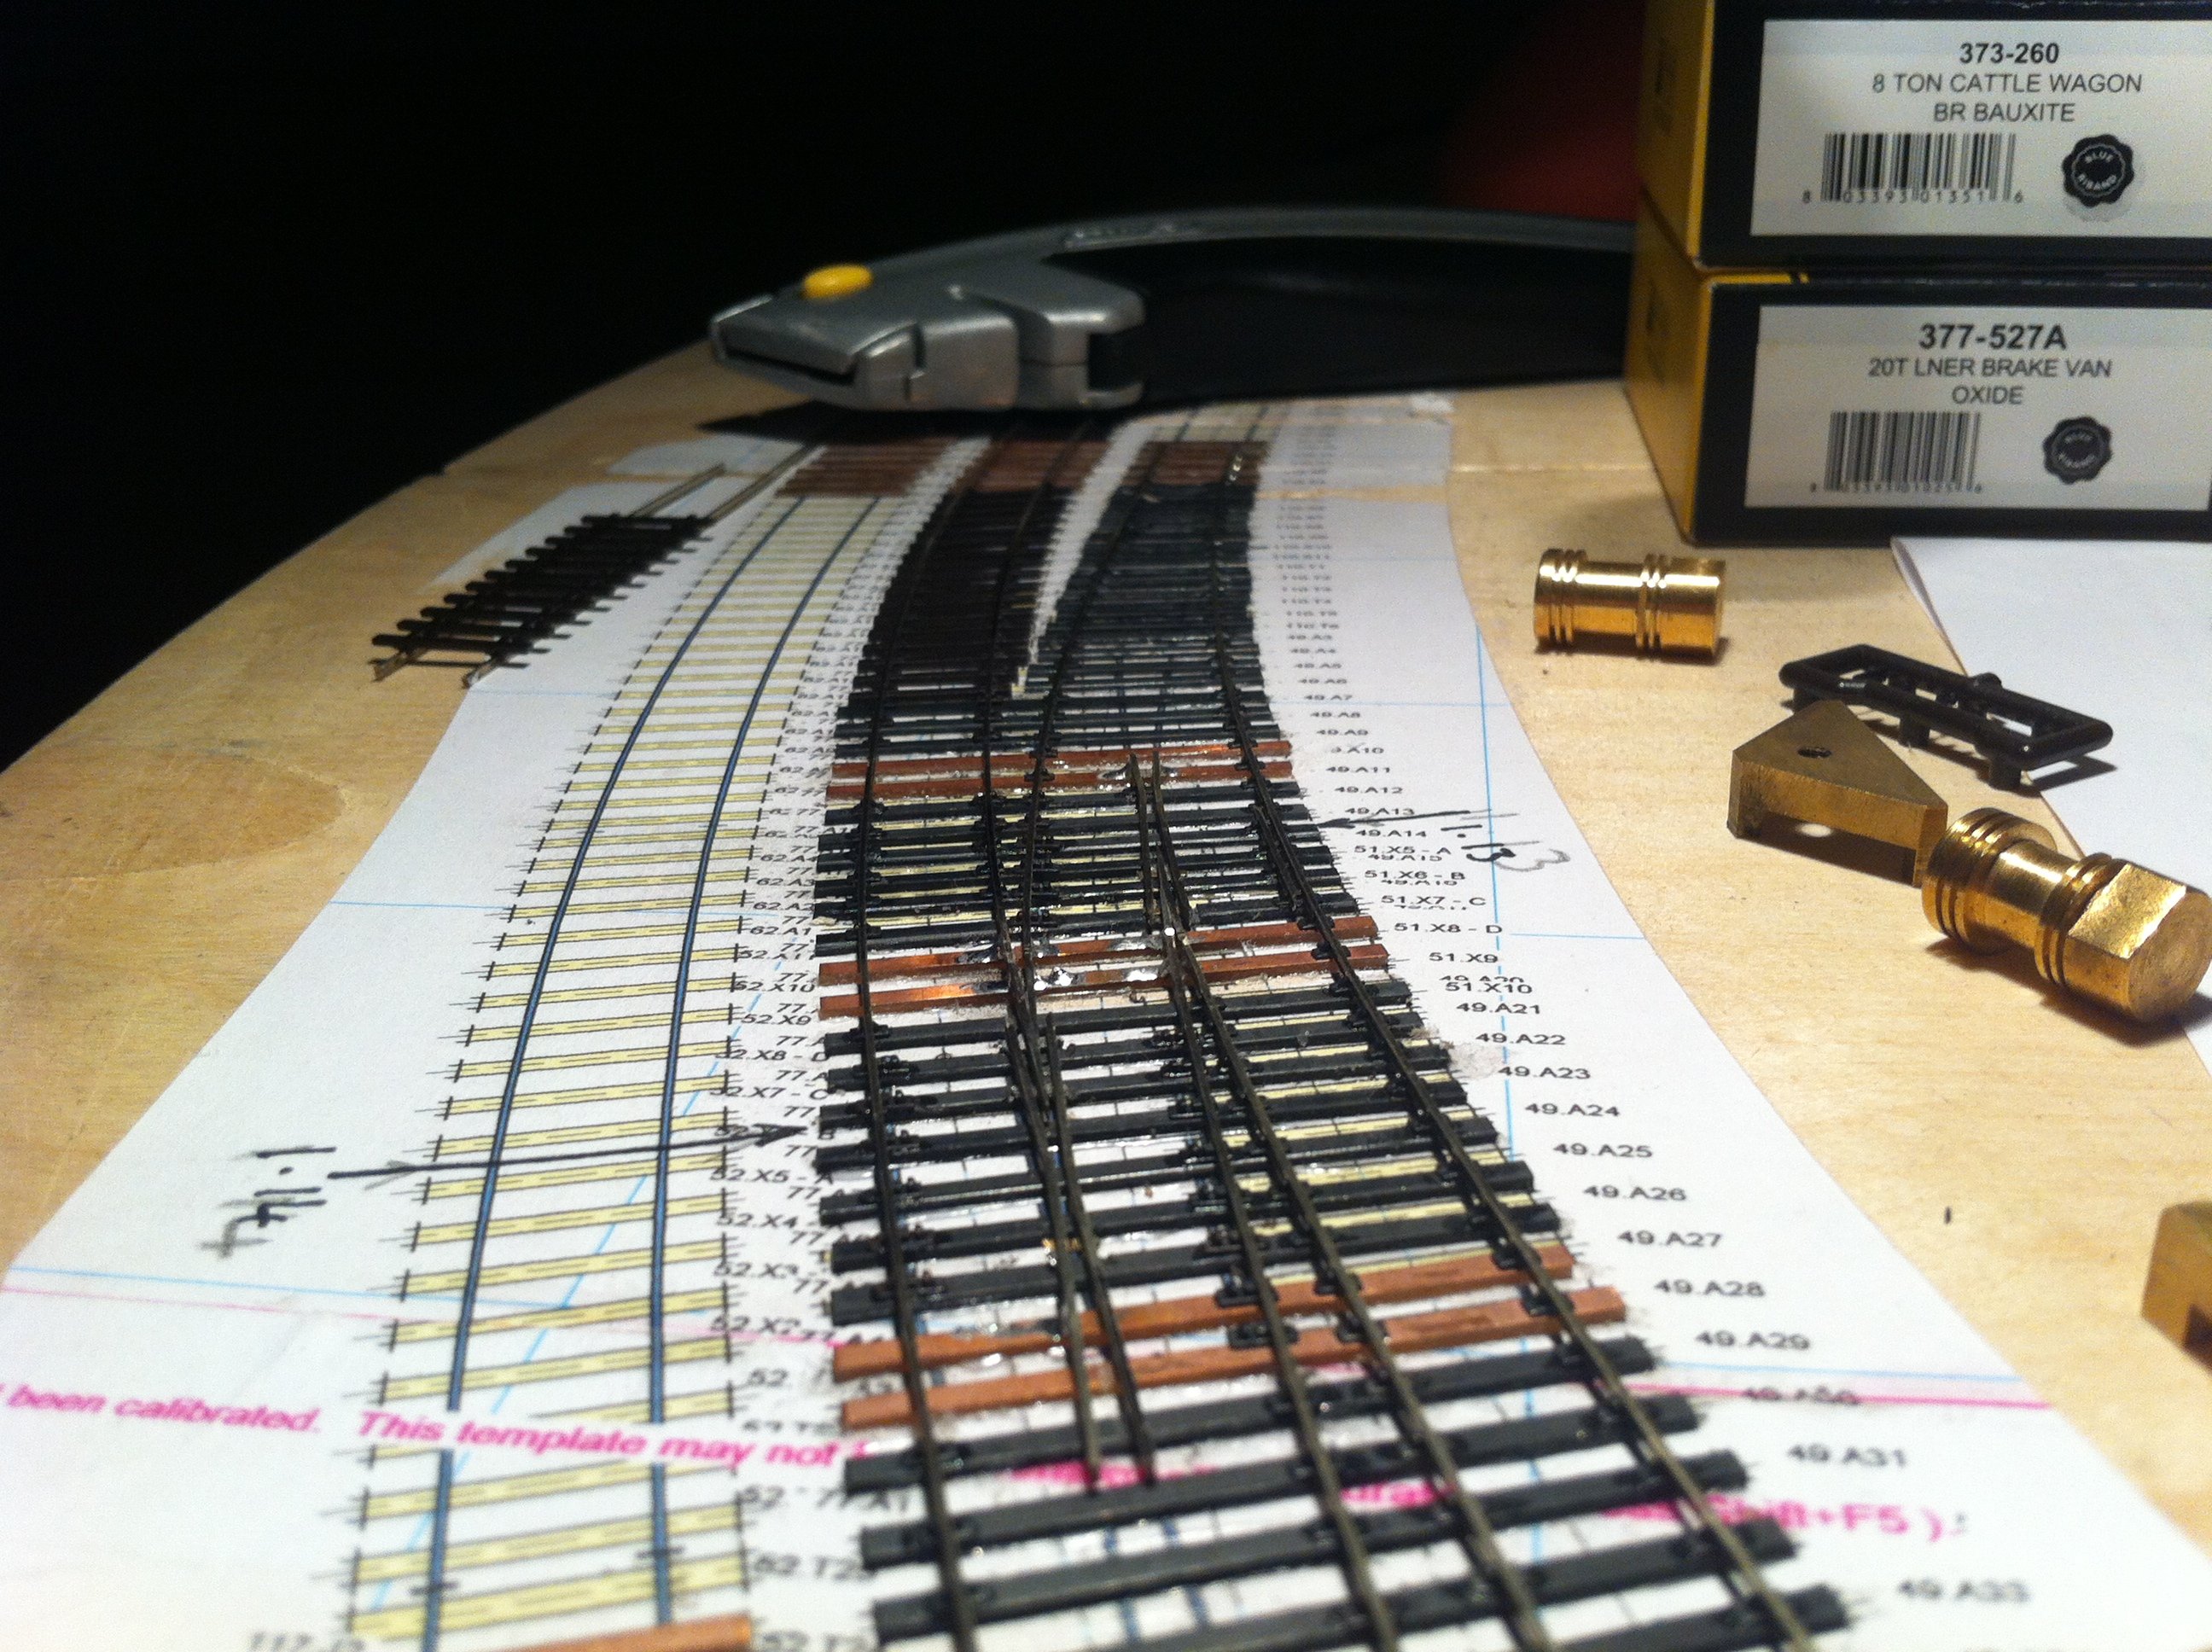
The track work is progressing along. A couple of bits need tidying up and then on to the electrical testing.
-
These things are like Gremlins, detail and weather then after midnight and they multiply!! This was taken whilst the PW team were testing the rack in the yard as being the crazy bunch that we are......... we plan on shunting a rake of grampus (or is it Grampi?? ) into the yard!! Good job we have a breakdown crane!!
-
I wish it was that easy Robert, The model has a sound decoder and a function decoder fitted inside what would be the engine housing. The main issus is the sound decoder only has a few powered outputs with the remaining ones being logic and there isn't enough room to fit a ESU 21 pin board that enables the logic ones to be converted into a power ou put. Plus the marker lights are controlled by the sound decoder to make best use of the outputs as this thing looks like a christmas tree when its lit up