David Holman
-
Posts
4,359 -
Joined
-
Last visited
-
Days Won
117
Content Type
Profiles
Forums
Events
Gallery
Blogs
Everything posted by David Holman
-
Am a big fan of dioramas. Fairly quick to do and a great way to try out new techniques. Will look forward to following progress!
-
With track laid as well as this, the trains ought to run very nicely indeed.
-
Looking good!
-
That looks interesting, Eoin. Where might we get one, perchance, please?
-
A GW Models rivet press, no less. Had one for years and am sure I will wear out before it does! Money well spent.
-
Grandt Line do packs of individual rivets (in strips and various sizes). However, having tried both these and the plasticard squares method, I prefer the latter, not least because you need to drill holes for the Grandt Line ones, so it takes twice as long! Haven't tried the transfer rivets, but they sound promising. As for the Sligo van - certainly looks good to me.
-
It will look fine with the talc treatment. Get the cheapest possible and stipple it on with a half inch brush, then vacuum off. Works a treat. After use weathering powders where brake dust, oil etc would have been deposited.
-
Thanks JB, it is all soldered construction. The plain track is my work, but the double slip is by Marcway - all £180 worth of it. Well outside my abilities, so a necessary investment.
-
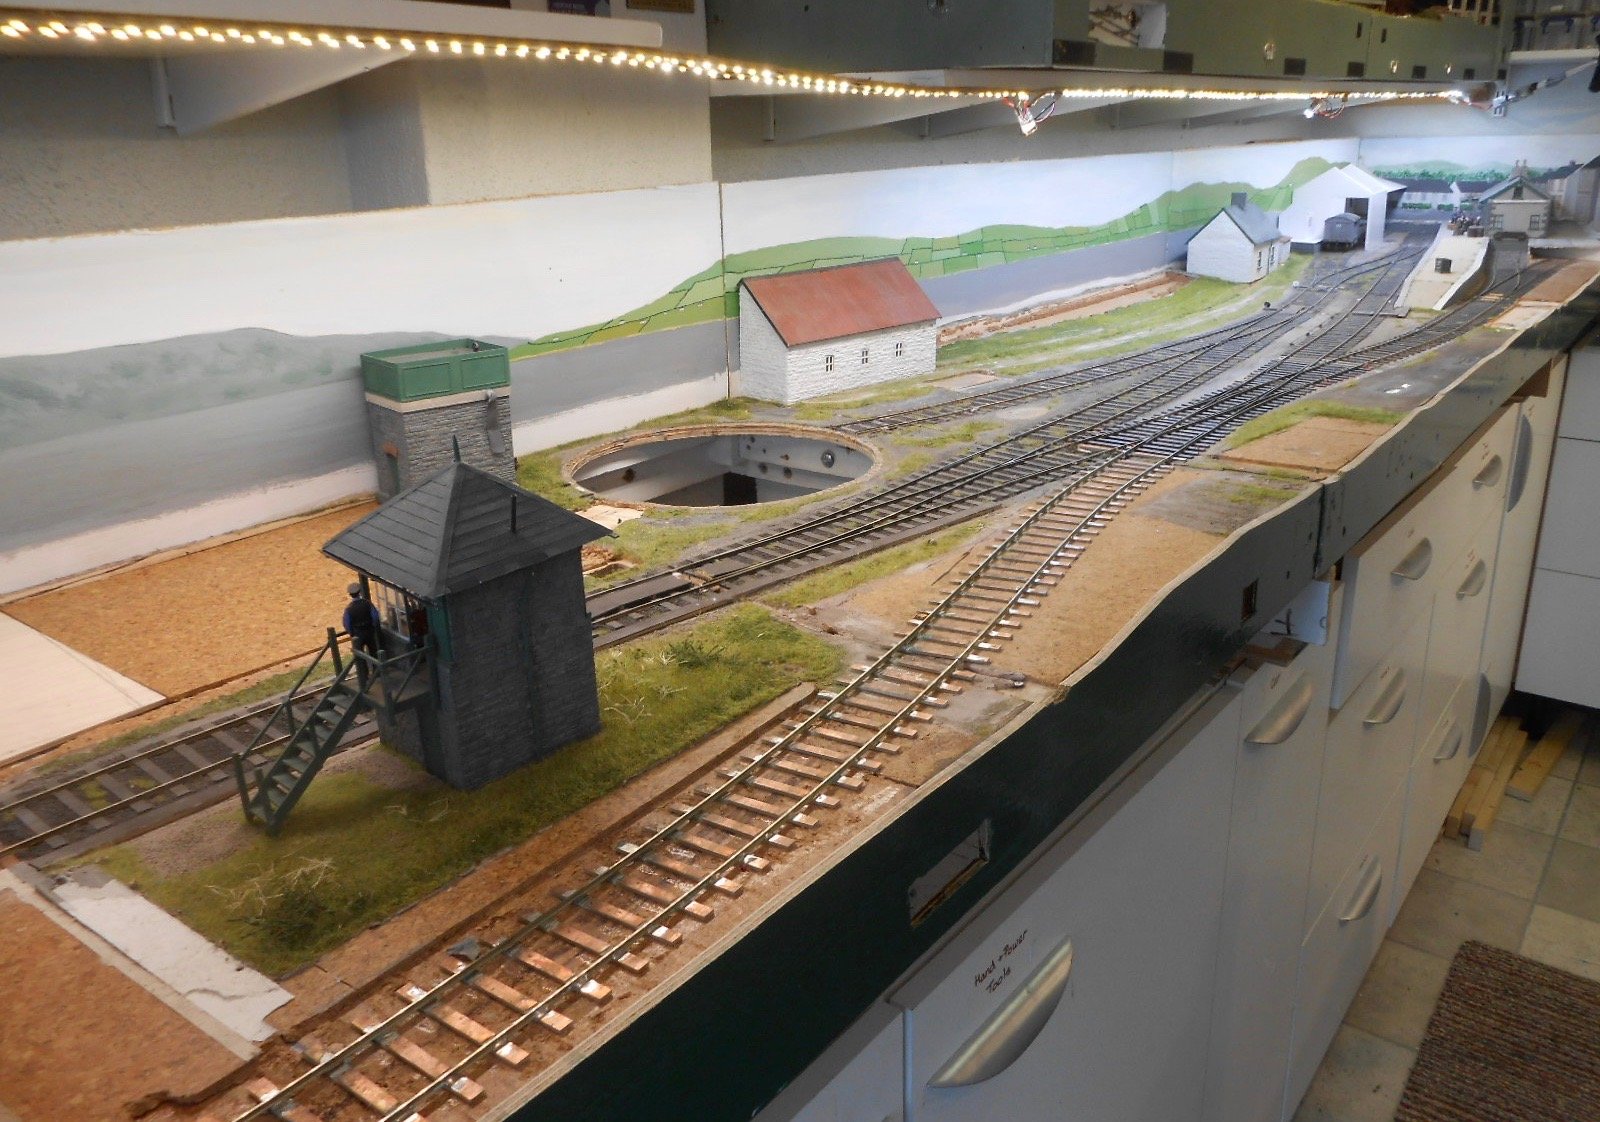
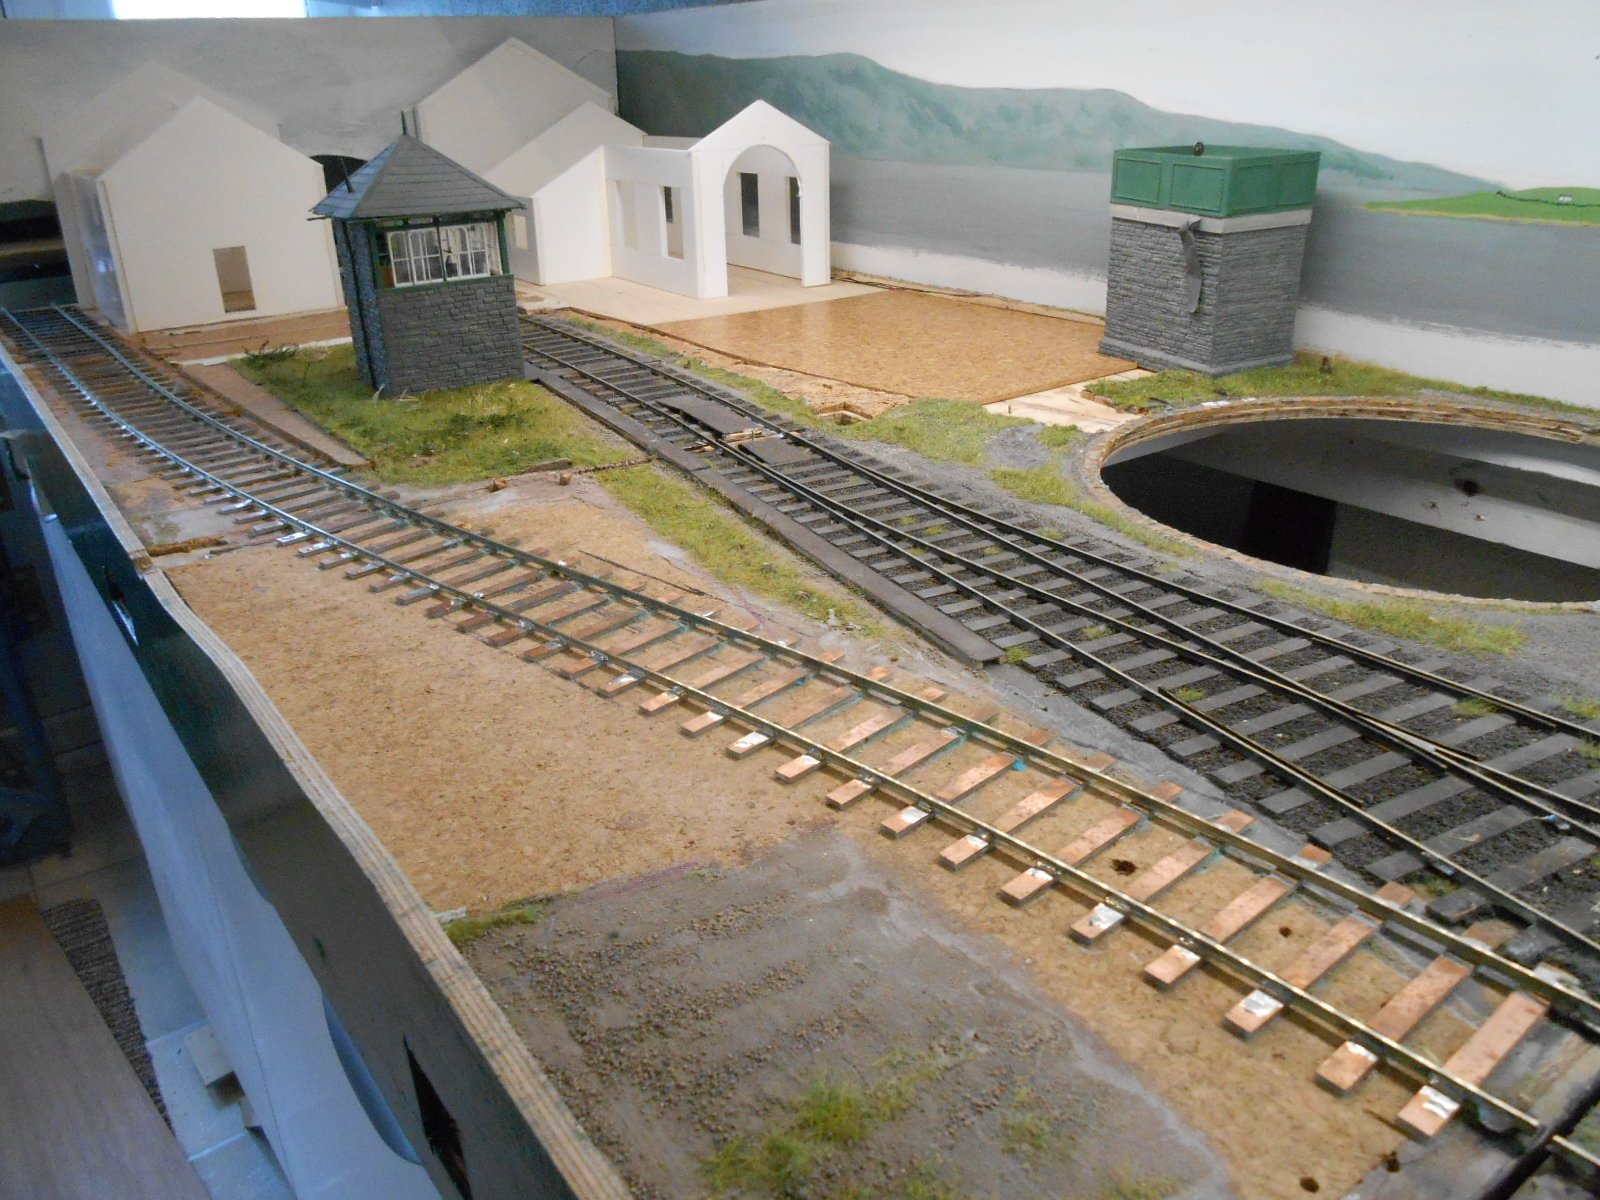
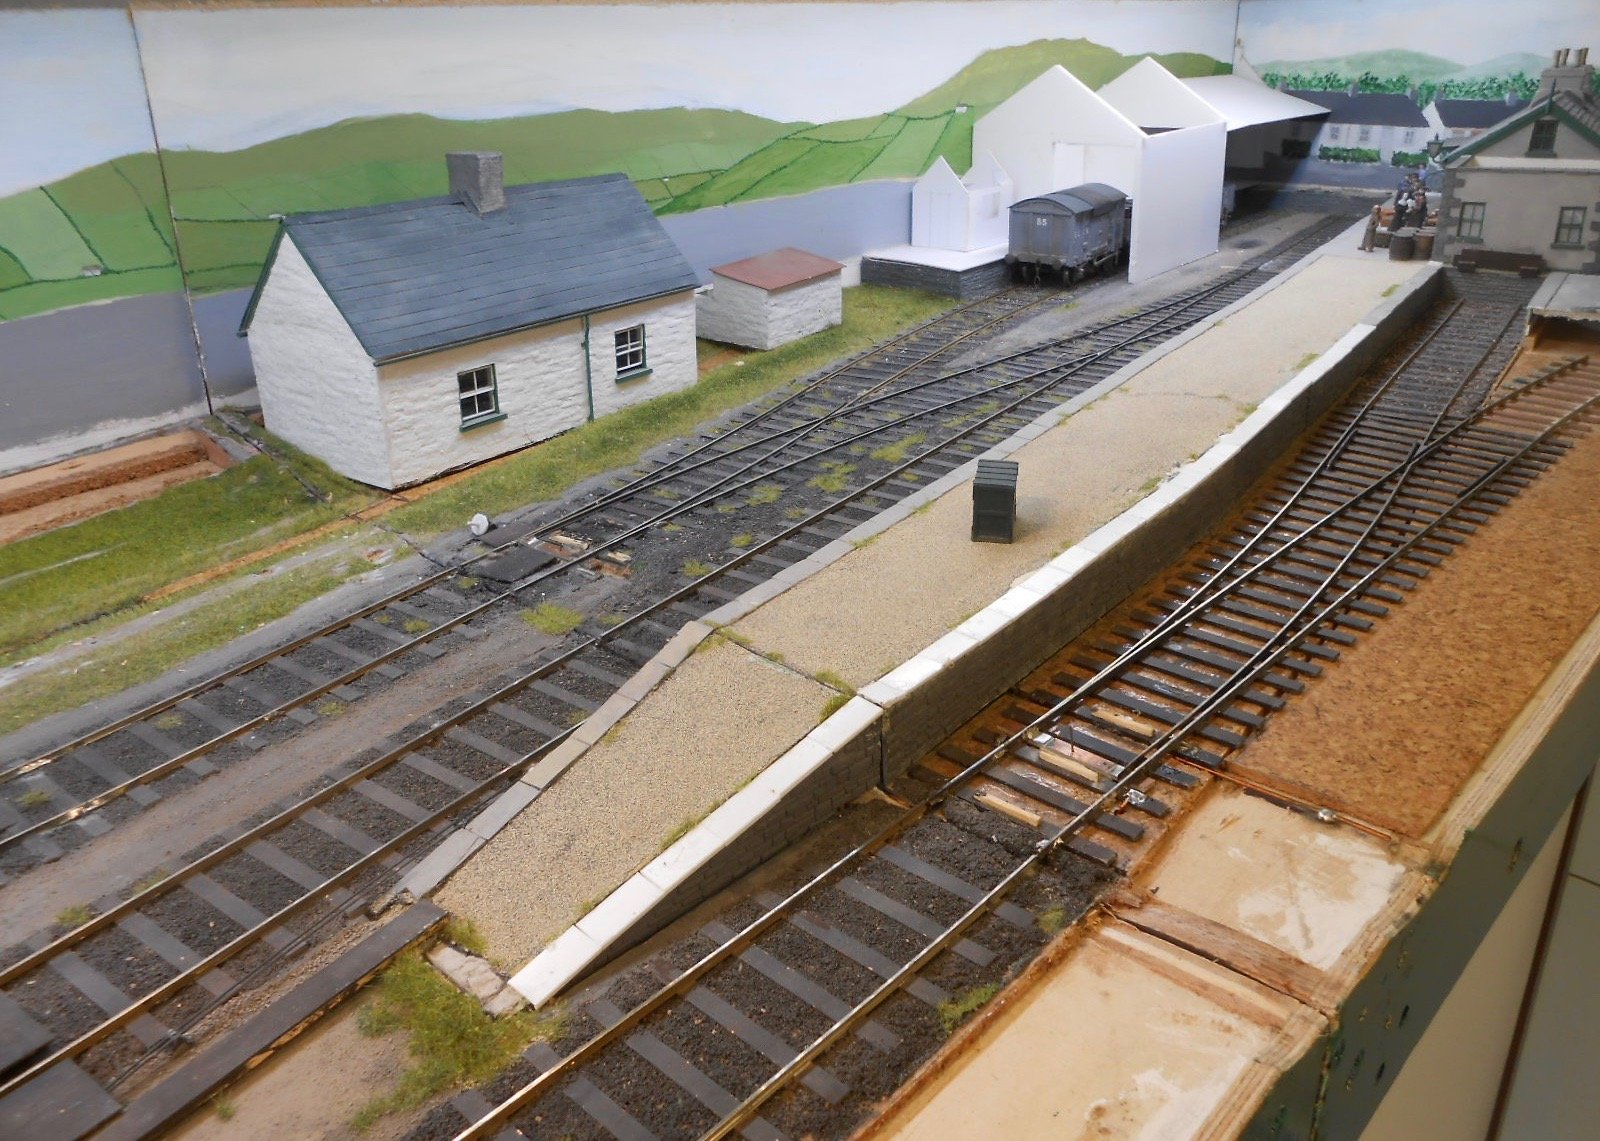
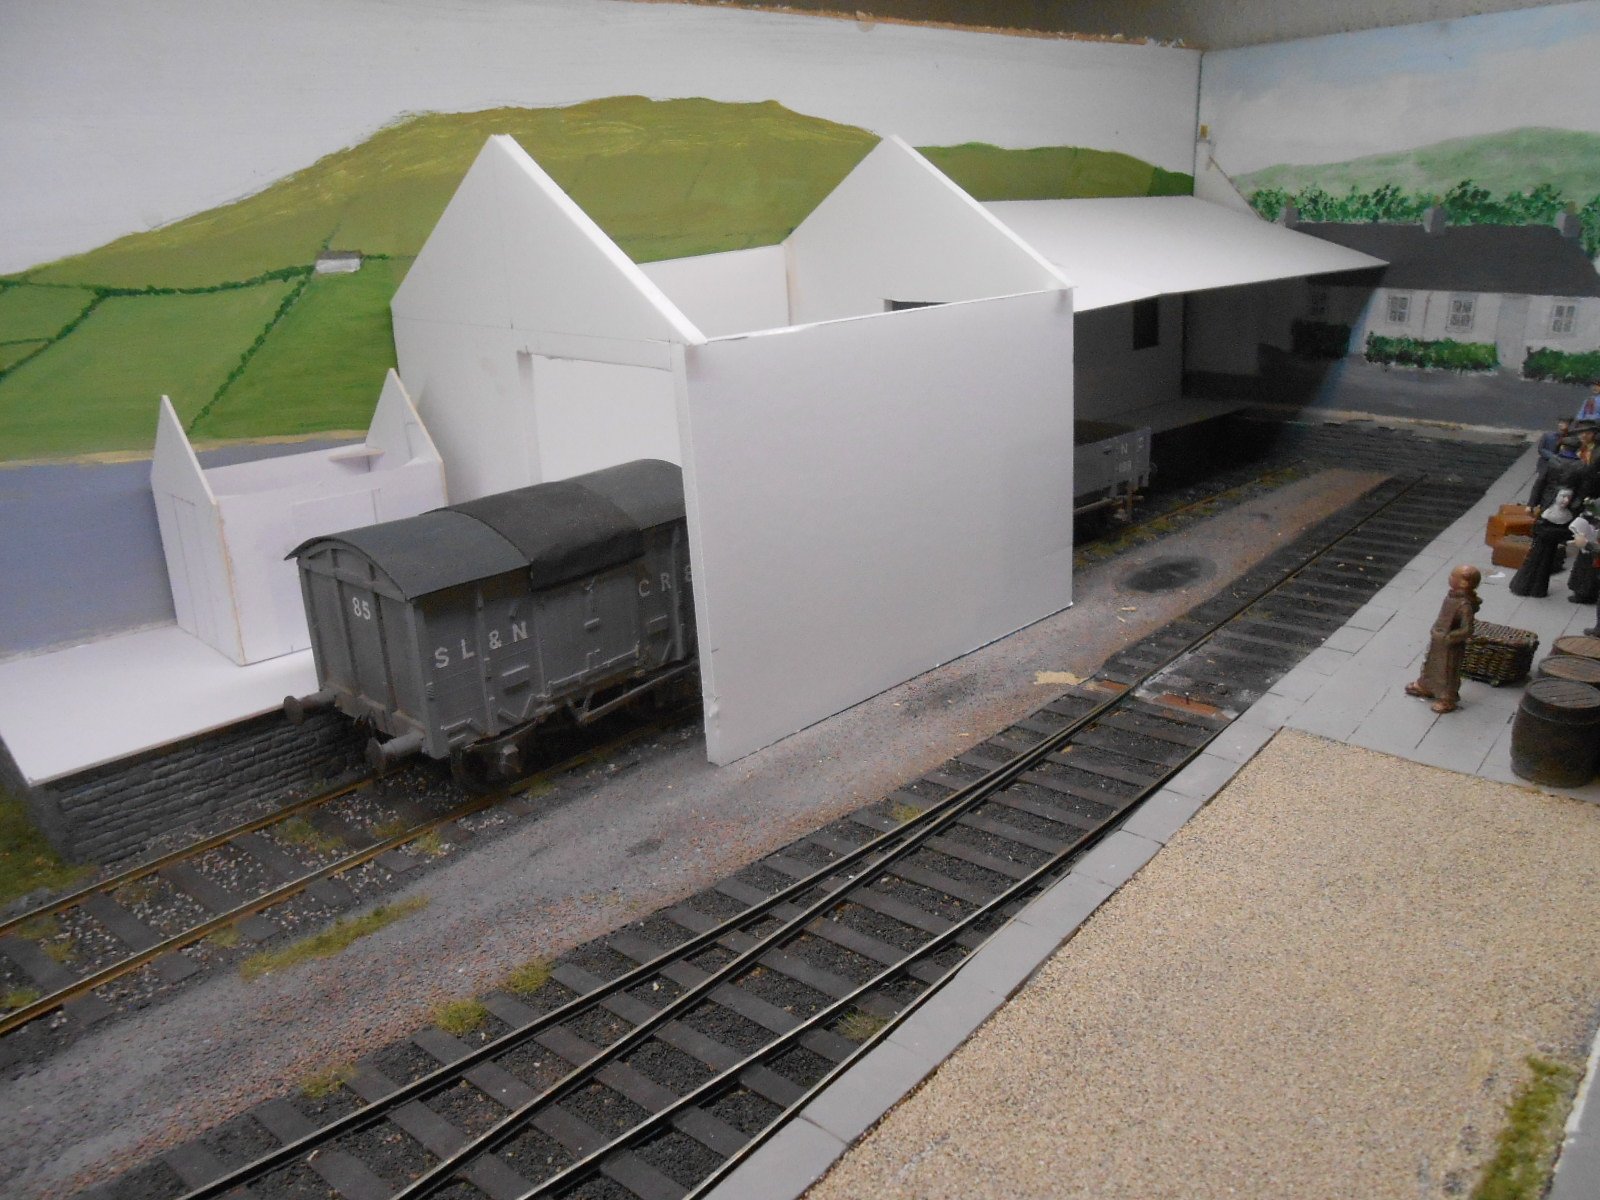
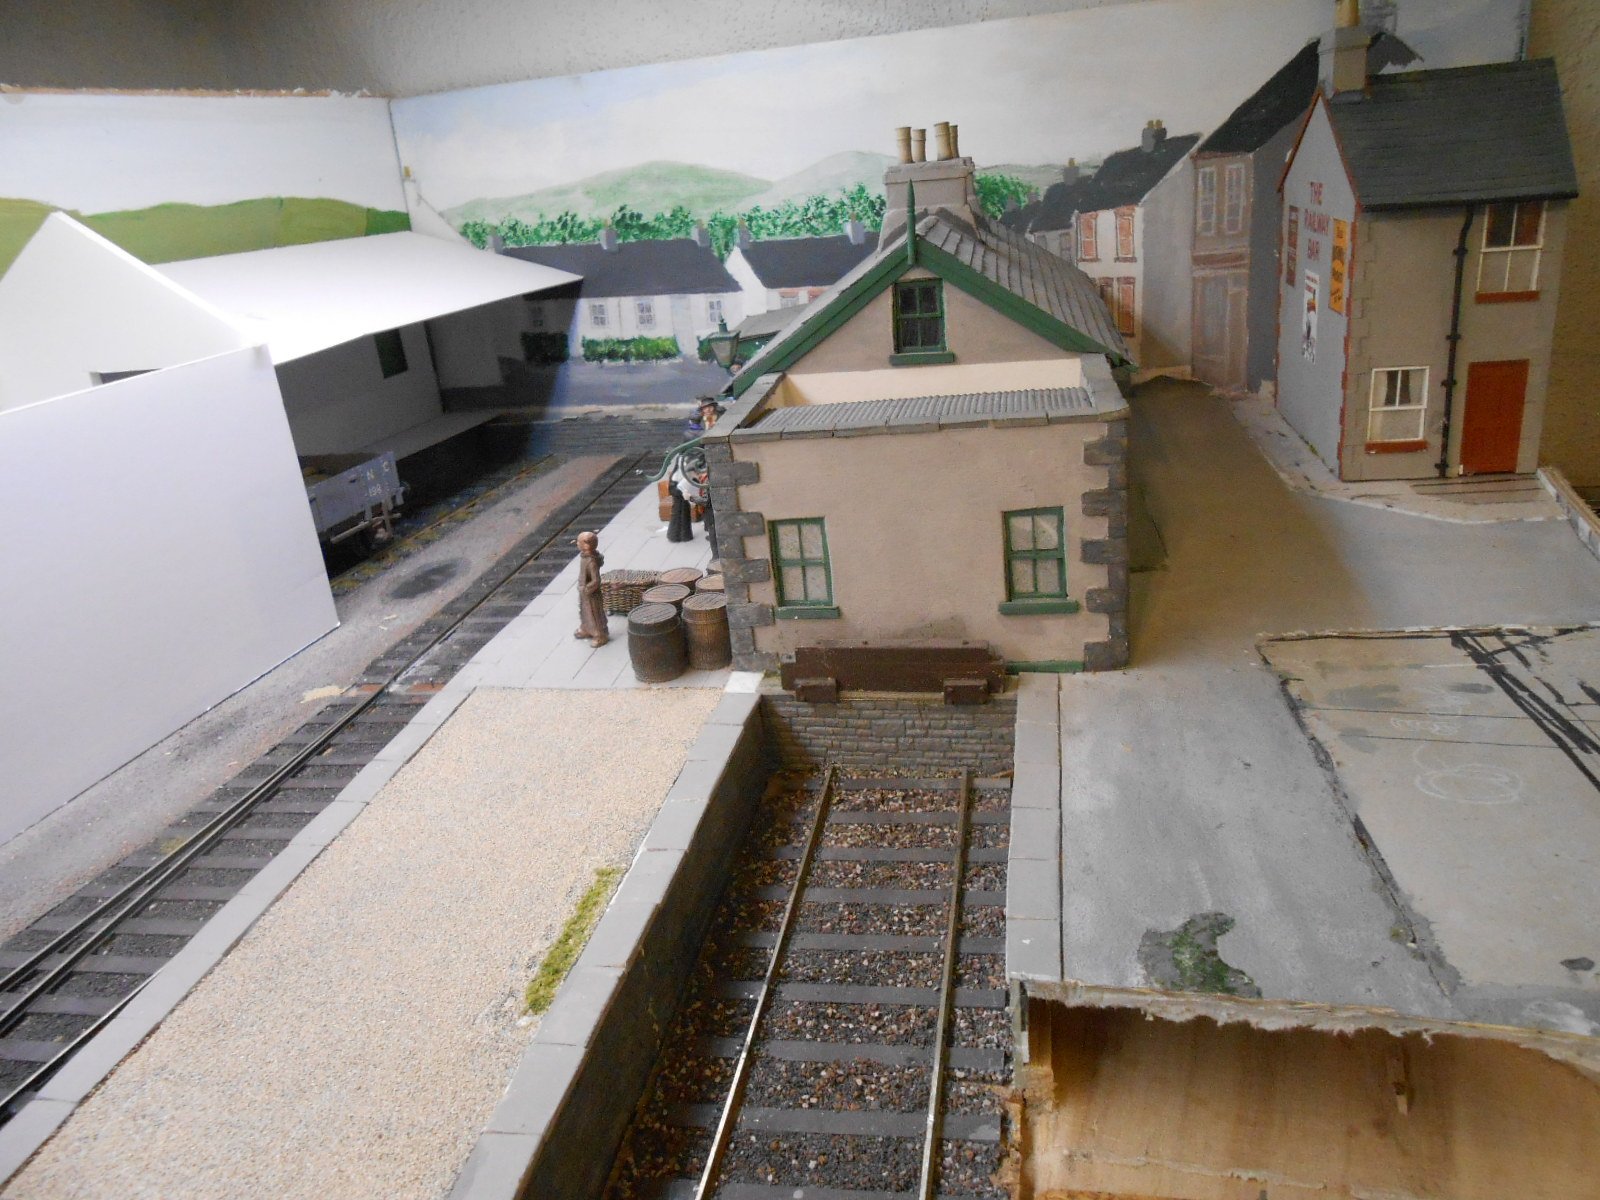
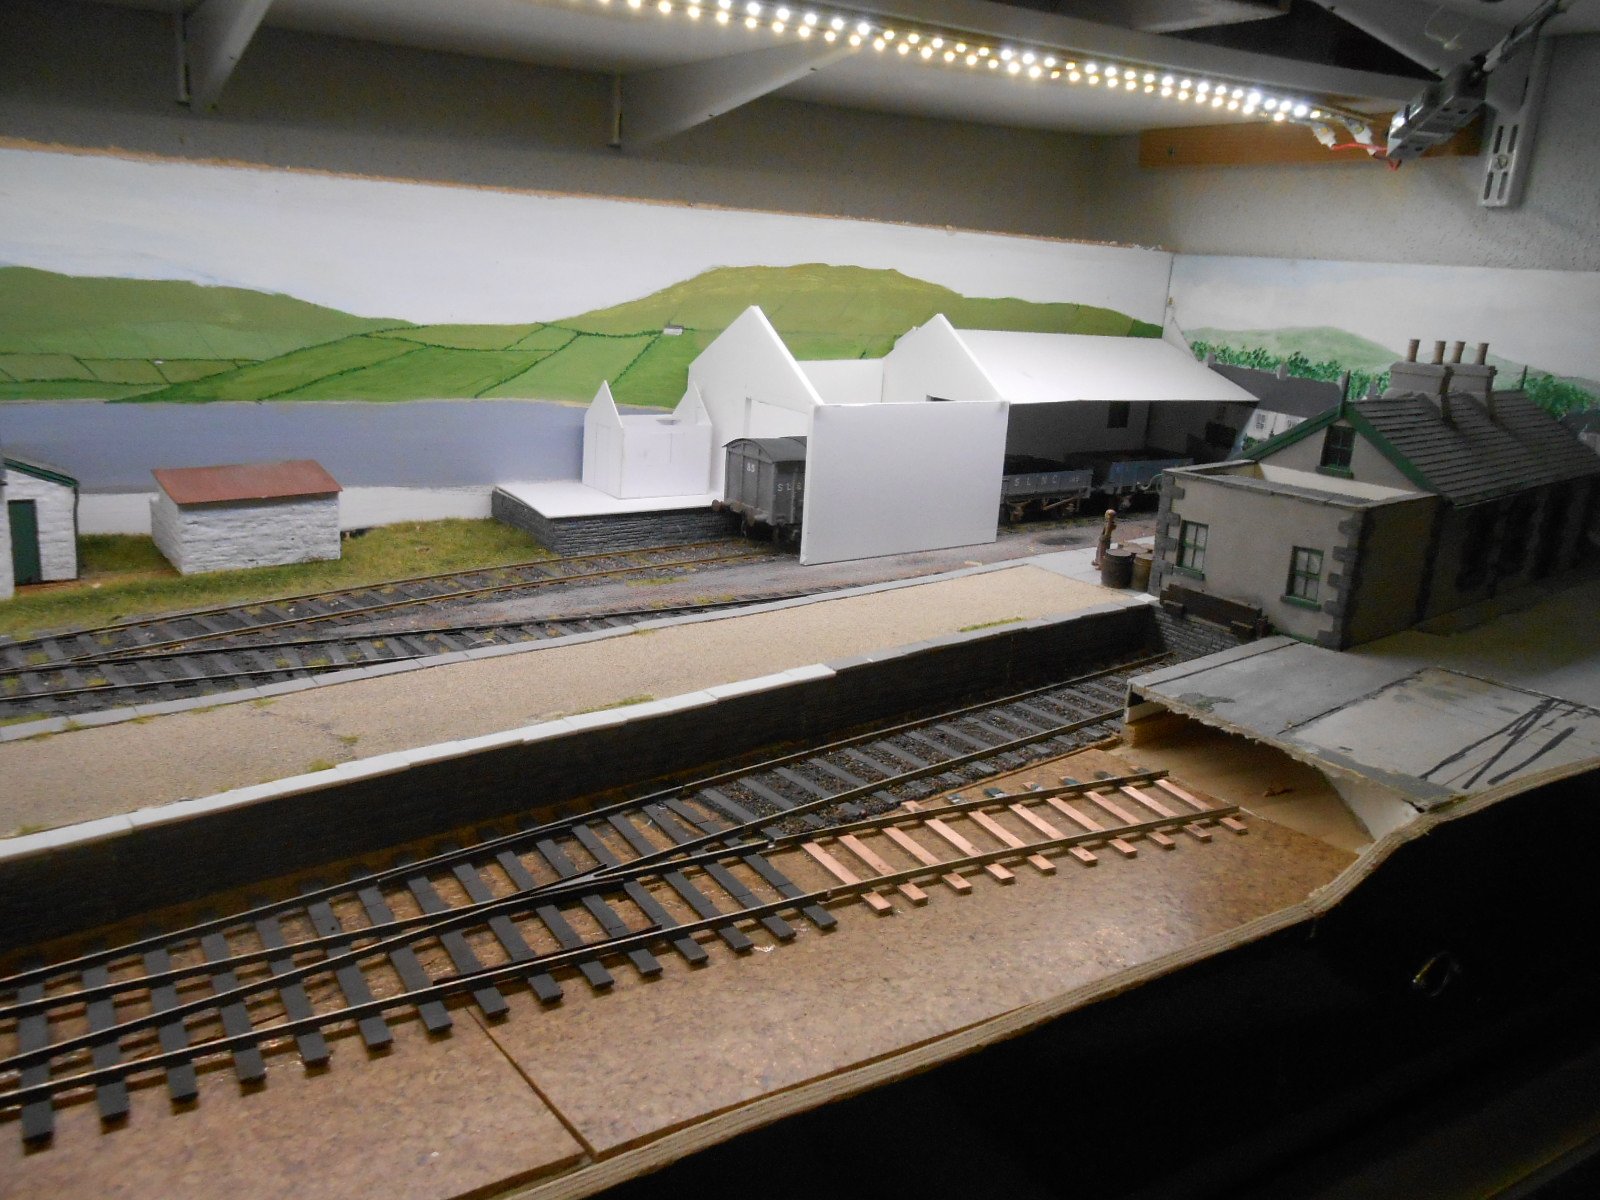
Getting creative at last Having spent what seemed like an age with the electrics, even though they are not yet complete, I really needed to do something creative for a change. The recent focus has been on the back scenes, as these will go a long way towards defining the setting of the layout. However, before that I needed to get the layout set up as it will eventually be when exhibited again. Arigna Town had built in legs on all baseboards, but these required lots of coach bolts, plus I wanted to be able to use the trestles and beams from Fintonagh as storage space in my workshop is tight. A slight problem is that Fintonagh is just under 3 metres long, while Belmullet [like Arigna] is nearer five. Therefore what I have done is to make extension pieces to the longitudinal beams used under Fintonagh, so they now take the three scenic boards of Belmullet. The sliding/rotating fiddle yard keeps a single pair of hinged legs, adjusted to match the 120cm track height, and piggy backs off the end of the three scenic boards. With that settled, I could then focus on making new back scene boards. These will eventually be in two parts - a permanently attached 'landscape' layer, with separately attached 'skyboards', behind. If I had gone with an all in one back scene, high enough to be covered by the front pelmet, it would have made the baseboards too big to get in the car for transport. I did think about having the sky on a separate, fabric back scene and may yet still go for this, but the structure the latter would require would be complicated and require more setting up time at shows. At the moment, the back scene includes sky on it, simply because I am 'blocking in' the main scenic elements, to help me visualise what the scene will look like when it is finished. Had a railway actually been built to Belmullet, like as not the station would have been parallel to the Blacksod Bay shoreline and a right angles to the canal built to join it to Broadwater Bay. Hence the scene tries to represent a bit of the Belmullet peninsula on the right hand side, with it then opening out to the dark and brooding Achill Island in the distance. The latter section is one I'm so far fairly pleased with, but the peninsula section is currently looking too bright - even for Ireland's vivid greens, so will be toned down as more detail is added. However, I don't want the back scene to dominate the model railway. Other 'blocking in' work has been to make shells for the new buildings and cut out spaces for ones that are being recycled from Arigna. The latter include the signal box, station building, water tower, cottage and barn. The new loco shed and goods shed will both be covered in Wills 'random stone', while in the corner, next to the goods shed will be a 'co-operative' warehouse clad with corrugated iron from the same source. Front left will be a small representation of a distillery - offices full relief, the rest very much low relief. Not exactly prototypical, but it adds a useful extra source of traffic for more interesting operation. One other thing I've done is to transfer the LED strip lighting from Arigna to the underside of the shelves above where the layout mostly lives. This is important as I need to paint the back scenes in the same light as they will be exhibited - it is amazing how much difference different sorts of lighting can make to your palette.

-
Fine detail and a big layout don't always go hand in hand. No problems here though!
-
Good stuff, Tony - as ever! I also use Woodlands cinder ballast, the fine grade - even in 7mm. However, it can look a bit dark, so I dust it with talc [as well as other weathering colours, as appropriate]. Wait till the glue has throughly dried though, or when you vacuum it off, most of the ballast will come with it.
-
Scale Link probably do some as well
-
Behind the scenes is often just as interesting as the scenic side. One of the many impressive things about this layout is the very high standard of presentation. Would that my workshop was this tidy!!
-
In 10mm scale I would definitely go for wagon and coach bodies made from wood. David Jenkinson made Gauge One coaches from plastic sheet, but as the model sizes increase, can't help thinking that using full size material becomes more appropriate.
-
Missed my week without IRM and glad it is now back among us.
-
Martyn Welch very much shows the way to go in his Weathering book. Put on the base colours first - wood/primer/rust/darker original etc - then gradually rub back to reveal once dried. Glass fibre pencil, fine wetndry, T-Cut or whatever. That simulates actual wear. It should only be dirt that goes on top and rust comes through from underneath.
-
Stoke Summit was a rare layout where people would stand and watch for half an hour and then go back for more later. I know I did. Even saw folk noting down loco numbers on more than one occasion! And yet all it was, was a double track mainline with a downside loop. No station, few buildings, but a very large fiddle yard. As a watching the trains go by layout, it has not been bettered. Roy also wrote some forthright articles about managing big layouts and the strain they placed on locos in particular. These perhaps didn't appeal to the rivet counter end of the hobby, but made absolute sense for his layouts and those like them. A significant presence in the hobby who will be sadly missed.
-
Fascinating thread. For what it's worth ' Gauge 1NG' was something I explored for a while, though never got any further than a few track plans. However, the whole Gauge 1 thing has been pretty nebulous over the years - anything from 10mm/ft on 45mm track (clearly wrong), or 1/32 (double S scale), plus the modern Aristocraft diesels (very tempting at the price!), which are approx 1:28ish, I believe. Therefore doing 10mm/ft on 0 gauge track isn't going to be far out and certainly far better than other scale/gauge combinations I could mention! If building a layout, then 6ft radius points need about 18"/45cm of space, so it is then possible to quickly work out how much space a terminus layout would need. Doable in about 3metres, plus fiddle yard maybe? As others have said, wheels will need exploring, but as many NG locos had outside frames, then the correct number of spokes should not be a problem and Slater's 7mm wheels of the appropriate diameter ought to be ok. All in all, could be the start of a fine project!
-
Getting a really worn appearance like that is just as hard as doing a pristine one and easy to over exaggerate too. This one is nicely subtle and very convincing. Fine job.
-
...but then not sure even a trader would have the kilometre or so required! Worth the effort though, as it already looks stunning.
-
The 'drumlins' book is great, but even better is 'Narrow Gauge Album 1950-1965 in Colour' by Michael Whitehouse, son of the great photographer, Patrick. Chapter One 'To Arigna for Coal' has text from JC Boyd with simply jaw dropping photos, the quality of the colour is just astonishing. With sections on the Isle of Man, North Wales narrow gauge, English ironstone plus both the Donegal and the West Clare, it is possibly the best album ever on the narrow gauge. Lightmoor Press ISBN 9781911038 49 8
-
Have both books - more accurately A4 notes and drawings in a binder - and there are indeed lots of Irish NG drawings, including several railcars too. Well worth having.
-
For my 21mm gauge Fintonagh stock, I use Branchlines wagon chassis (correct for the CVR) and 14mm wheels from the same source. However, I've replaced the steel axles with 2mm diameter brass rod because I'm using Kadee couplings with rare earth button magnets for uncouplers and don't want the magnets grabbing the axles. Have found it easy to make pin point ends to the axles by either spinning the rod in a drill chuck against a file/sandpaper, or twirling the axle between my fingers against a slitting disc in the drill.
-
Looking good! Reassured about both the tender chute ( just as confused in 7mm scale) and the fixing hole, though only found too late it lines up neatly with the rear axle...
-
A build of epic proportions! Both enjoyable and enlightening to follow, with all sorts of clever hints and tips along the way. Most of all though, a fabulous model with quality all the way through. Well done. REALLY, well done. Be very proud. So, what's next dare we ask?!