David Holman
-
Posts
4,359 -
Joined
-
Last visited
-
Days Won
117
Content Type
Profiles
Forums
Events
Gallery
Blogs
Community Map
Everything posted by David Holman
-
Never ceases to amaze me at the stuff that it out there. A 2mm 3D printed SLNCR railcar for goodness sake - and looks good too! Can the body be articulated I wonder? Don't know a lot about 2FS, but would think Code 40 rail should be fine, especially compared to Peco's Code 55 and the wider gauge would definitely set the scene.
-
Proper job!
-
Proper gauge is definitely alright by me! Would imagine 2mm broad gauge is a fairly exclusive club too, but am sure someone will know of others. One to watch for sure.
-
Wadebridge! First saw it 20 odd years ago and it is still going strong.
-
Fine work!
-
Trackwork in the yard has a nice, spacious look to it. Plenty of room for a motorised, fully working, radio controlled crane then (!)... Giles Flavell has mastered the technique in 7mm scale and there were half a dozen of his models wandering around the Tonbridge Club's layout The Yard, at Littlehampton on Saturday. Included a Commer van, Land rover, flatbed and articulated lorries, plus a working gantry crane. Different matter in 4mm scale methinks, but check out the latest Model Railway Journal for a couple of his models.
-
Probably said it before, but a classic case of less is more. It is very easy to over do things, but this captures rural Ireland really well.
-
That's good to know, John. As for black, I like it better than the grey, but MGW 4-4-0 Wolfdog is down to be my next engine and it will be in green!
-
Reading Large Scale Show Fintonagh attended this show on Saturday and after a bit of a dodgy start, soon settled down and ran reasonably well. Indeed, we welcomed Galtee Moor, of this parish, to the operating team and very well he did too, bringing more than a touch of authenticity with an accent very much from the area and coping very well indeed with the challenge of using the fixed magnets to uncouple the Kadees when shunting. Thank you, good sir! I now know how Fintonagh should be pronounced and realise I had no idea how to say Stranorlar either! I took a few photos, but they are too large in format to post here, as I'm trying to build up enough shots for a magazine article. The 'cool white' LED lighting strips seem to work really well though, with many people commenting favourably on the daylight tones they produce. If you ever get a chance to go to an ALSRM [Association of Larger Scale Railway Modellers], it is well worth while. Like most, if not all society shows, they are a friendly bunch and it is always a pleasure to spend the day with knowledgeable folk who don't need the things like scale and gauge explaining. You pick up some good tips too. ALSRM covers everything from S scale upwards, so you get a fantastic mixture. Opposite Fintonagh, there was a G scale display, while nearby was a Gauge 3 layout of a GW branchline [stock boxes are enormous] and a 5" gauge ride on track too. Meanwhile, the trade hall was full with all sorts of fabulous stuff to really get you salivating. There are all manner of cottage industries out there that just don't advertise in the mainstream magazines, but do track, locos, rolling stock and buildings in all the larger scales. It would be possible to spend an absolute fortune. However, what I would certainly recommend is a recent book called Narrow Gauge Album in Colour 1950-1965, by Michael Whitehouse - son of Patrick, of that Bentley fame. The quality of the photography is just fabulous and includes some amazing pictures of the Cavan & Leitrim, Donegal and West Clare - along with plenty of other gems from my side of the water too. They are a modeller's delight, containing as they do amazing details of mundane things like buffer stops, sacks, wagon loads and even a bunch of teddy boys on the C&. Published by Lightmoor Press, it really is a gem.
-
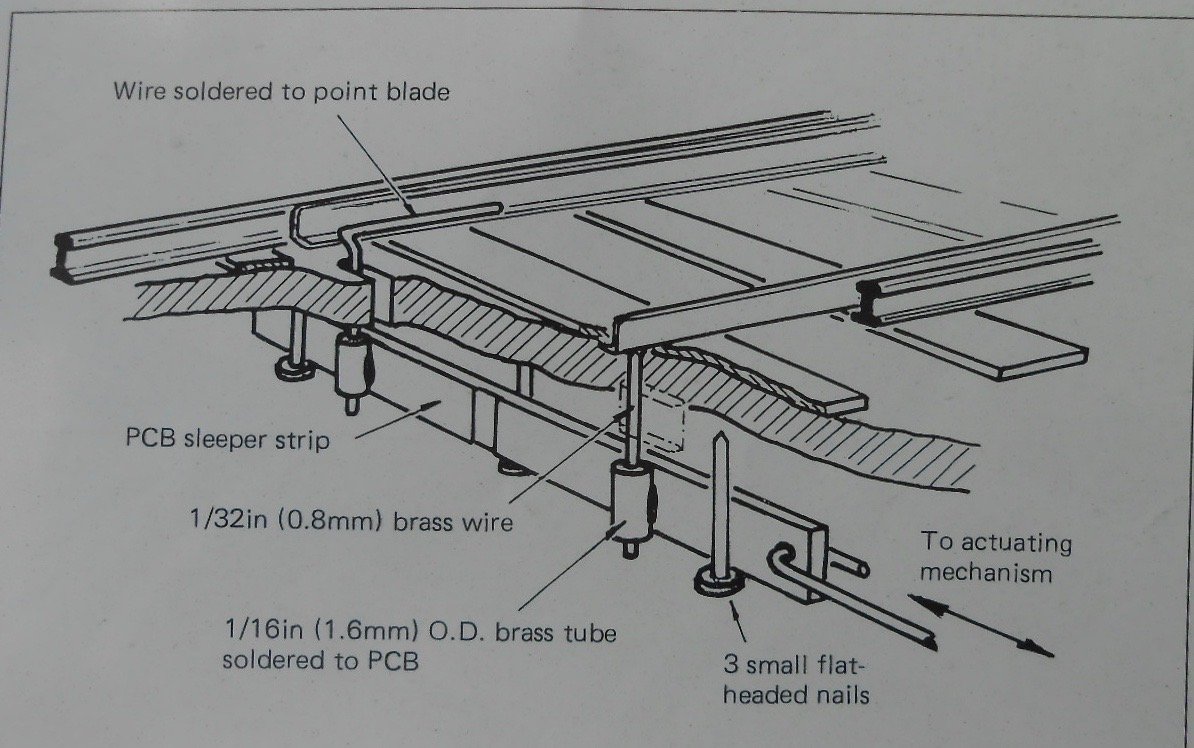
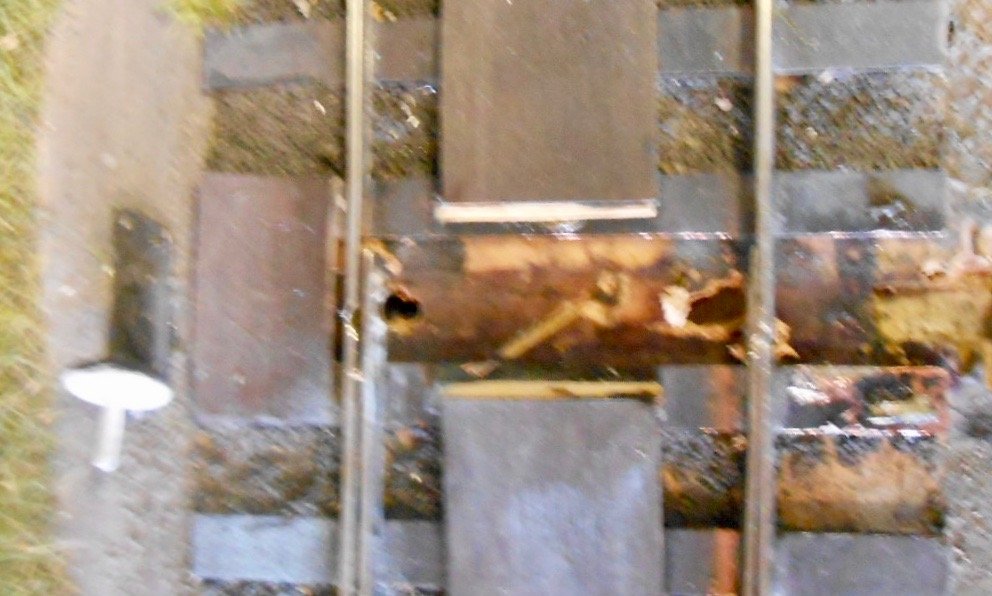
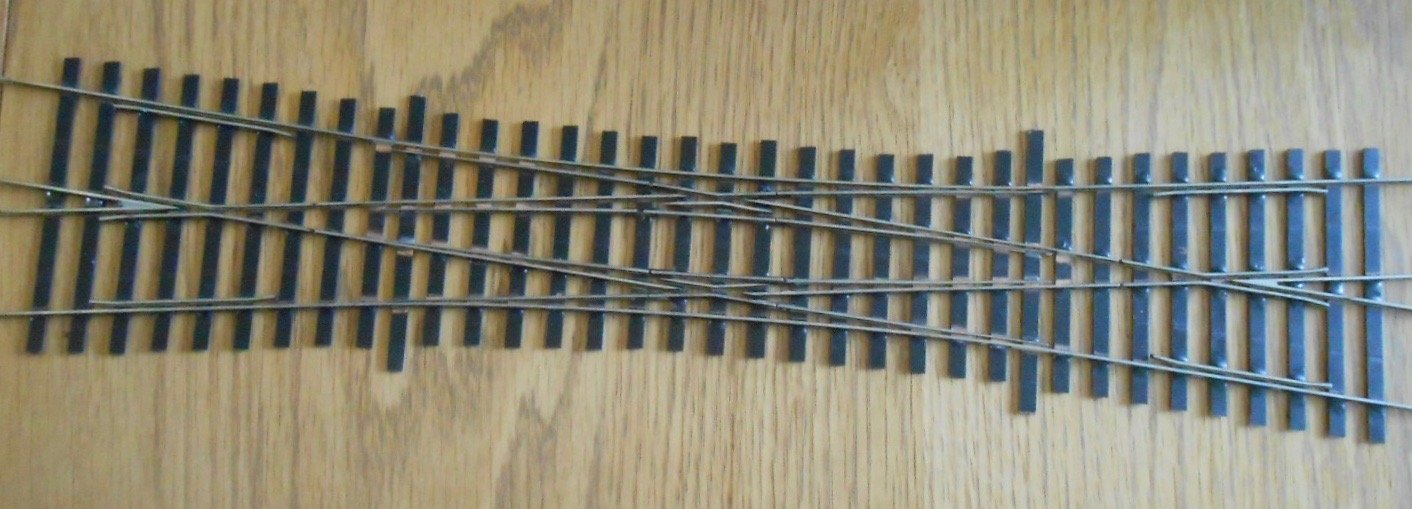
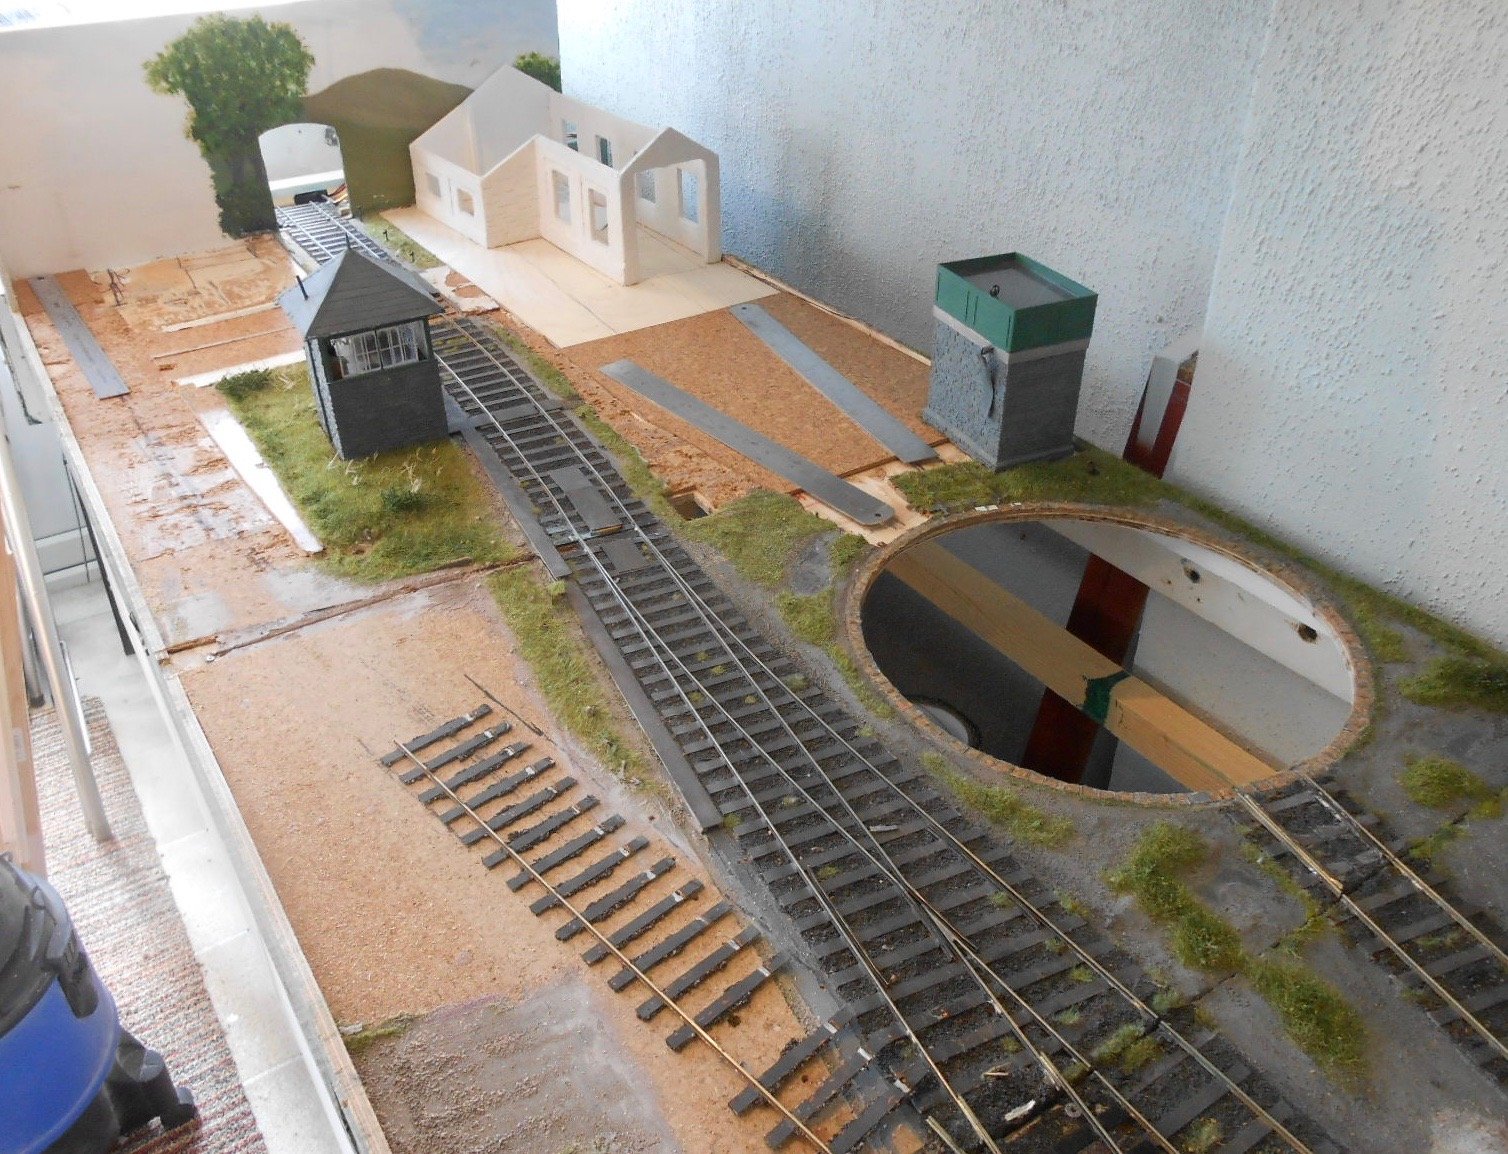
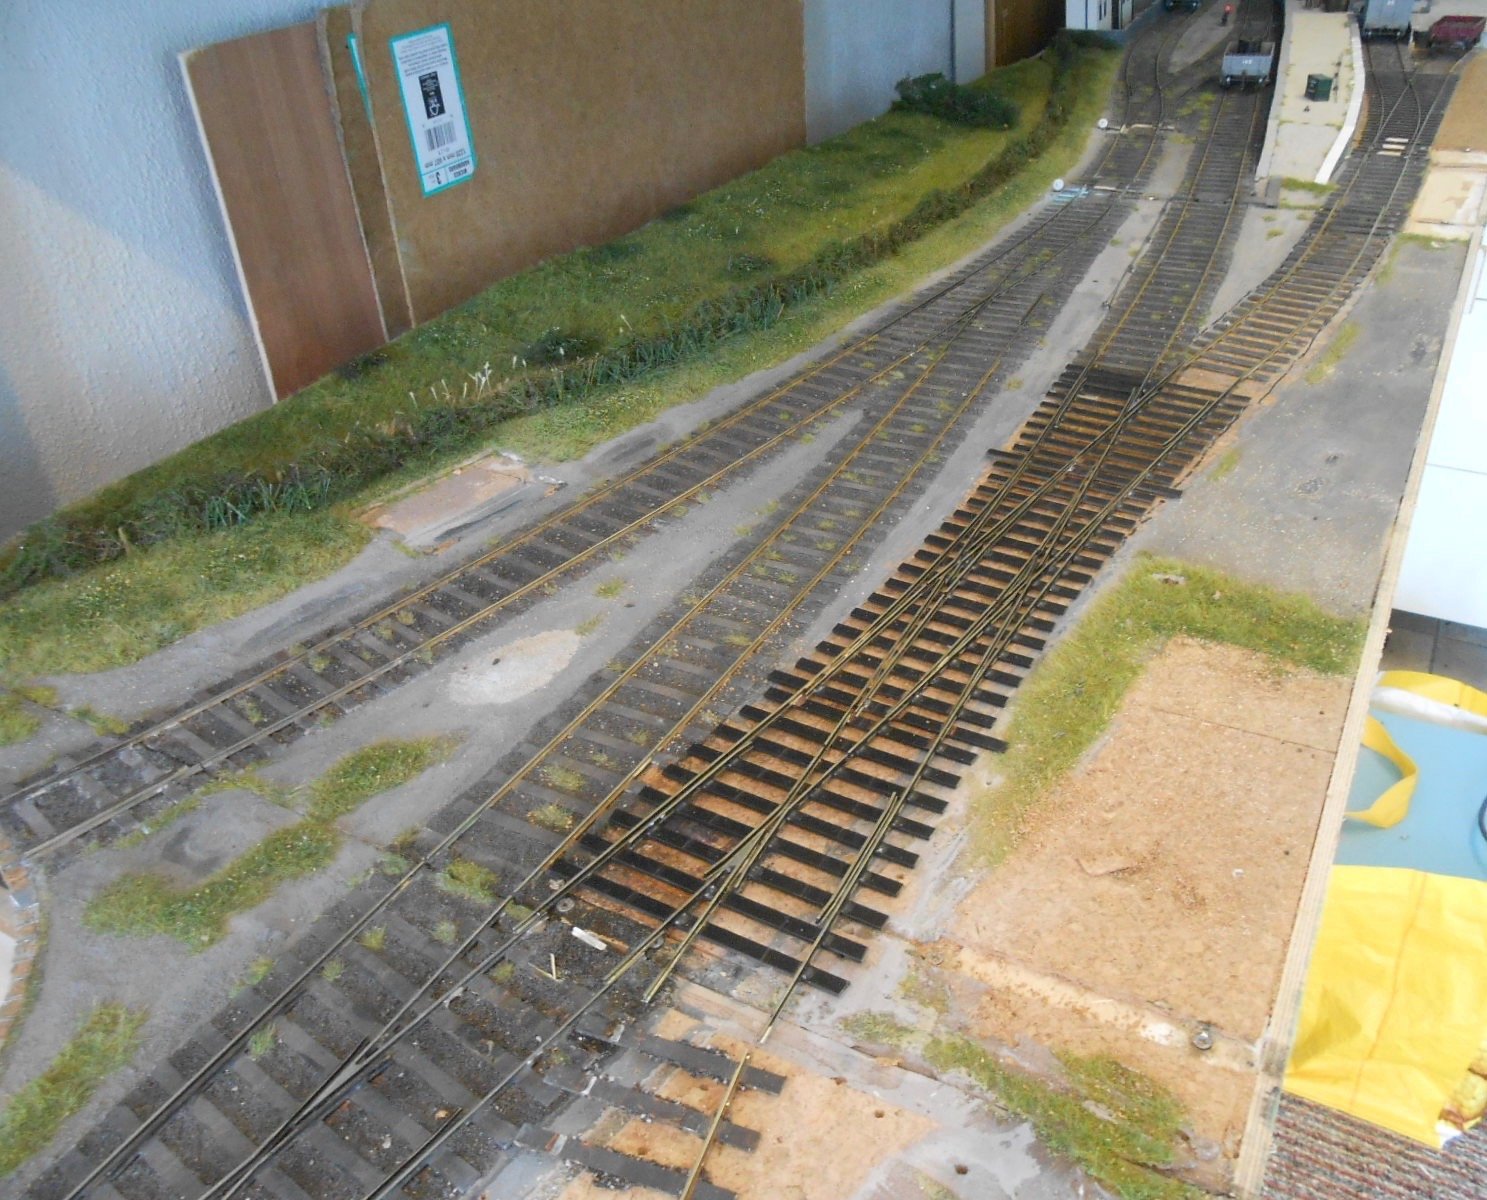
Things have been quiet of late on the modelling front - though I have done two exhibitions in three weeks, with another next Saturday too. However, have decided to start a new broad gauge thread, post Arigna Town, as have made the decision to call the revised layout Belmullet. And it will remain that now, as I have invested in a bespoke control panel which now carries that name. The rest however, is as outlined in the brief thread called Blacksod Bay. As can be seen from the photos, the new panel is being supplied by Megapoints and will use servos to work the points and signals. Am hoping that using this system will cut down significantly on the amount of soldering required to set up all the controls, with a lot less wiring as well. Time will tell. The other thing I've been spending my hard earned cash on is a bespoke piece of track work, namely a double slip from Marcway of Sheffield. At least, that is what has arrived, even though I actually ordered a single slip. I realise of course, that either piece of track would have been pretty rare on any Irish branch line, especially one in the far west of County Mayo. Nevertheless, with only 11'8" of scenic space available, compromises are required and a slip of one sort or another was the only way to make the track plan work. Whether I stick with the double slip as supplied, or convert it to a single, I'm not yet sure - though the former certainly gives me more operational flexibility. The former Arigna Town boards are now about as stripped down as they can be: The display boards at the front have been removed, as this face will eventually be the back scene. This will have a profiled inner board, following the contours of the distant hills on Achill Island and the Blacksod peninsula, with taller sky boards slotting in behind All buildings have been removed apart from the station itself, though the signal box will eventually go back where it was, with the water tower, Co-op warehouses and Railway Inn moving to new locations. A loco shed and a warehouse/distillery will be new. Trackwork is undergoing some radical changes, with the new slip temporarily in place in the photos, plus the turnout it replaced now enabling an end loading dock by what is now an island platform. All points have had their tiebars removed. New ones will be fitted below the baseboards, with dropper wires from the point blades connecting to them, so the operating servos are kept out of sight. Eventually, there will be three new signals controlling departures at the platform end. A large hole awaits the arrival of a new, electrically driven turntable. This is a laser cut plywood model from Kitwood Hill Models Store. Two tracks will lead from the far end - one to the loco shed [a mock up of which can be seen in one of the photos], with the other running just in front of it, which will be useful for stabling stock in the open. So, there we are, Belmullet it will be. Am hoping to get busy making up some half track, so I can at least get the new rails along the front of the model laid - by which time maybe the turntable and all the wiring components will have arrived.

- 179 replies
-
- 12
-

-

-
Fine work and all the better for being hand crafted and not something simply bought off a shelf. Nothing wrong with the latter of course, there is some lovely stuff out there that clever, talented people are relying on us buying from time to time. Equally, when scratch and kitbuilding, we are supporting a small army of suppliers who also deserve attention too and the results are just as satisfying. Long may both sides of our hobby prosper!
-
Super work. Well done Tony.
-
Weathered asbestos in 2019 shouldn't be too different to any period in the last 100 years, apart from being a bit less sooty probably. I am often tempted to paint what I think, but then my art teacher's words immediately come back to 'paint what you see' and out come photos, Google pics etc. Dart's picture suggests to me a combination of stippling darker tones on the concrete basecoat, but also using paper towel and thinners to wipe away some areas. Using enamels, this can be done up to 24 hours after the paint has been applied, though wait up to 48 hours for the base coat to harden before adding the darker top coat. Weathering powders and talc help add texture too. When you think a roof like this weathered over many years, it means painting and weathering time on the model will be an extended process too. Worth it though, because it is such a fine model and the roof inevitably stands out because it is such a large part of it.
-
The sky adds a new dimension, as will ground cover (track and trains even!). Also worth considering even presentation, because it deserves a wider audience, so proper 'proscenium arch' type framing, as per Iain Rice, plus lighting, well worth while considering, eventually?
-
Great buildings and scenery, but now we see them brought even more to life by the trains. Sublime.
-
Coming on a treat!
-
Inchicore shrunk and moved a few thousand miles. Lovely stuff.
-
Doesn't just do great buildings then! Not surprised.
-
Saxby and Farmer supplied equipment to several Irish railways, so Wizard Models may well be able to help too.
-
Great piece of work, Ken
-
Have always used photocopier paper, cut into strips, then snipped for separate slates, works well. Slates are very thin, so paper is enough even in 7mm scale. A couple of coats of slate/tarmac enamel paint gives a good covering, with a few individual ones picked out in lighter/darker shades for variety.
-
A fine weekend at Epsom and very nice to meet with a fellow modeller of this parish, along with many others who I have got to know over the years. Epsom is a quality show, not just for layouts, but traders too. Any show that includes Roxey, Branchlines, C&L, Greenscene, Railbooks and Eileen's is worth a visit for them alone in my book. Fintonagh didn't initially cover itself in glory on Saturday. The AW tractor was running badly, while we had trouble with couplings and magnets. However, once the tractor's problem was identified to one of its pickups, it ran a whole lot better and put in a good shift over the weekend. Uncoupling magnets were gradually overcome, while a couple of wagons were withdrawn and operation rationalised to make the sequences more reliable. Hence Sunday was more relaxed and apart from the turntable needing a bit of attention, there isn't too much of a list to sort out before Reading in two weeks time.
-
Difficult stuff to find these days, but the alternative corrugated cement, I think, should still be around. Martyn Welch's weathering book suggests treating asbestos like cement. Hence mix Humbrol 110 with 95 concrete and apply with a little stippled in talc for extra texture. When dry, stain by mixing a watery tarmac or slate, or just dirty thinners and let this run down the channeling. After dry brush darker and lighter shades of the grey/brown mix across the ridges. Try weathering powders for yellow/orange lichen, but as ever, keep it subtle. A final dusting of talc always helps to tone things down. The Art of Weathering is the bible for all things colour related! ISBN 1 874103119
-
Fintonagh making its second appearance and the first of several this year, with Reading ALSRMS on 11th May, Littlehampton 18th May and 7mmNGS Convention at Burton on 8th June. Come and say hello if you are at any of these.
-
As JB says, it is the randomness that it is all about. That and being bold, but not too bold, with some fairly bright colours to capture the lichen. One thing to remember is to paint under the same lighting as you are going to display the model. Flourescent v spotlights v LEDs all have noticeably different effects. Super work.