David Holman
-
Posts
4,359 -
Joined
-
Last visited
-
Days Won
117
Content Type
Profiles
Forums
Events
Gallery
Blogs
Community Map
Everything posted by David Holman
-
Looks pretty darned good to me. Very sharp.
-
Mmm. Dribbling again. Lovely stuff.
-
A shining example of 'less is more'. Hopefully Patrick will forgive me if I say it is not state of the art, but everything is to a consistency high standard and it just all hangs together so well and the artistry produces the atmosphere that isn't always there on other layouts, no matter how good technically. Would make a very good magazine article methinks and must be a great place to watch the trains go by.
-
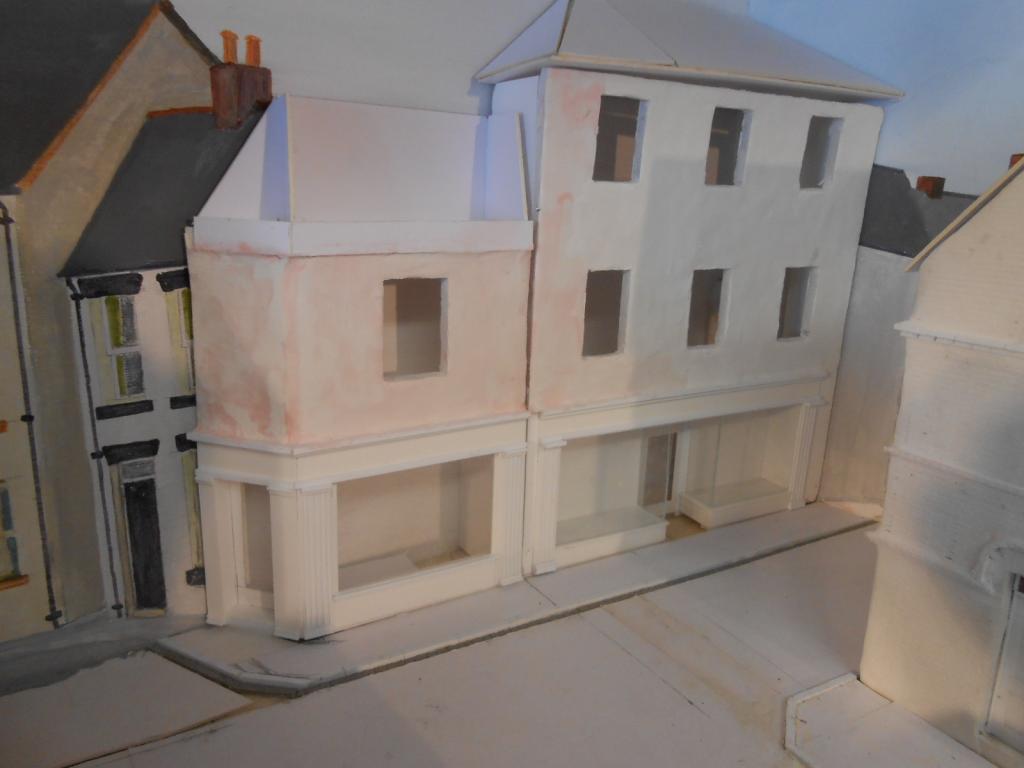
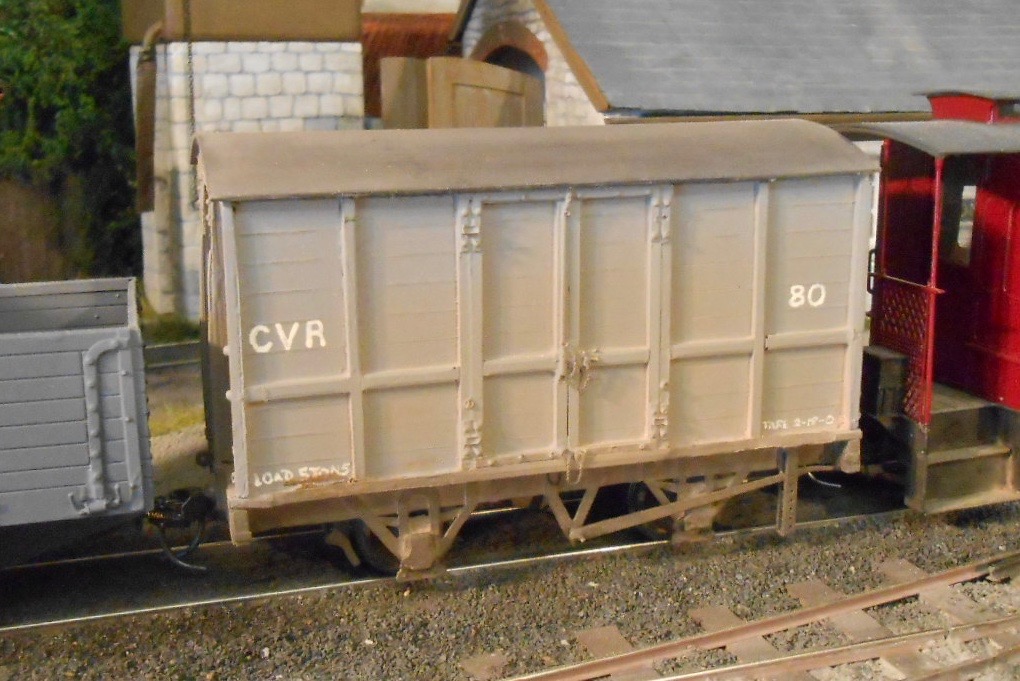
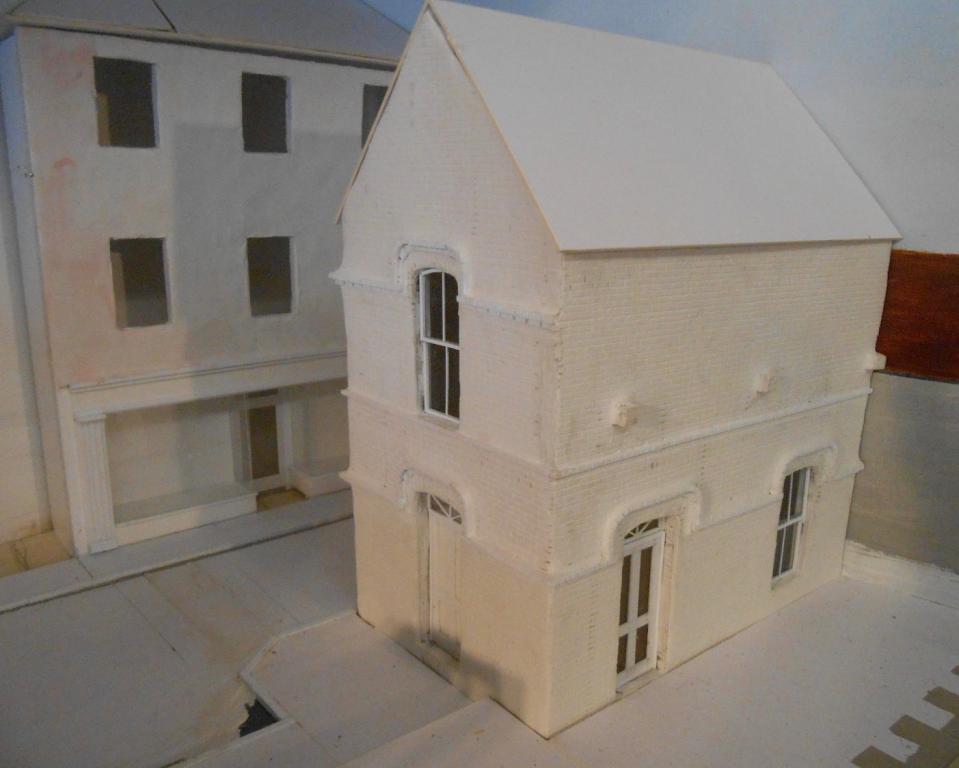
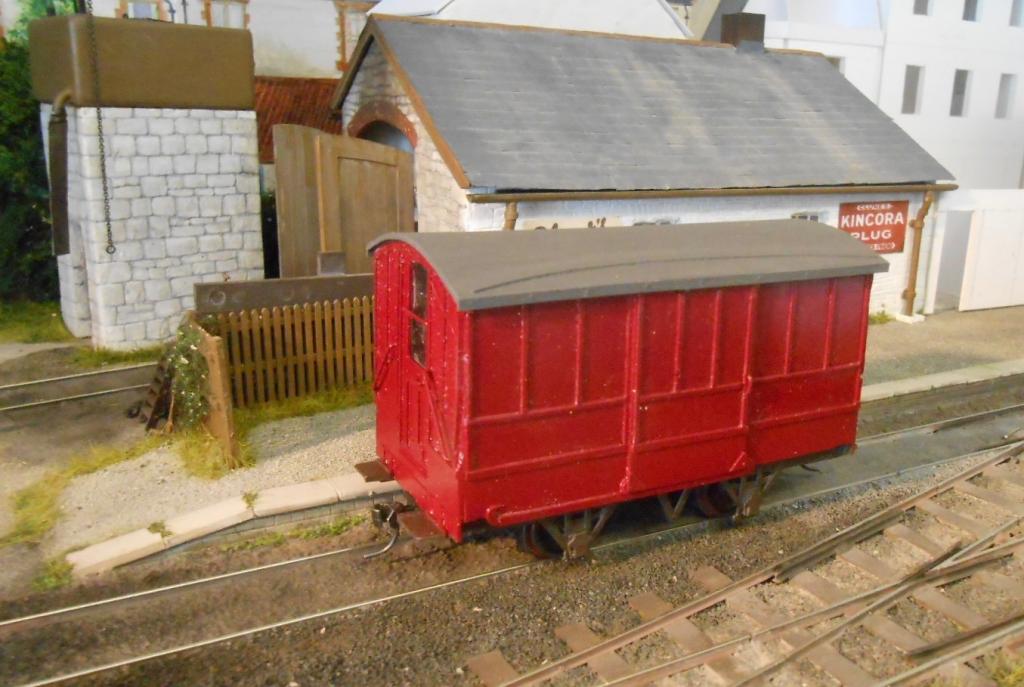
It seems to me that modelling sometimes goes through phases where you feel you are busy doing stuff, but don't have anything to show for it. Such has been my workbench of late and not particularly helped by preparing for the Chatham Club's Exhibition in June either. By the by, Andy Cundick's Valentia Harbour is appearing, so worth coming along on 3-4 June if you are in the area - details in the magazines & RMWeb. So, the Unit now sports a red buffer beam, but that hardly counts as it was all of 5 mins work. However, did make a start on my home made 'resin kits' for some CVR vans and do now have one completed. Took me a while to get my head round it, because I'd cast the sides quite a while ago and couldn't remember how I'd intended to build them! Anyway, the resin sides stick together well with cyano, then it was a case of adding a 60thou plastic floor and 20thou roof to make the van body. Despite trying to add everything to the masters, there are one or two bits of strapping that needed adding, plus making up the Branchlines etched chassis. More work include the wheels, which need new [brass] axles to cope with 21mm gauge, plus Slaters top hat wagon bearings. So, kit of parts, but not really a kit at all. The cast sides and ends will prove a real time saver though. The chains on the doors are twisted fuse wire and are a nice touch in this scale. One of Barry Norman's ideas. Photo shows it in weathered grey [spray primer], hand lettered with a gel pen, as per my SLNCR wagons. Note the wagon itself is less than half the size it will appear on the average laptop screen. The other pictures are of progress on some of the buildings. These are being made from 5mm foam board, covered in DAS clay. In the case of the station building, this has been [tediously] scribed for brickwork. Effective, but wouldn't say it was my favourite pass time. The two shops will have a plain, rendered finish, which is much easier. The shop windows are all plasticard & strip and require detailed interiors. Still trying to decide what sort of emporia they will be, but plenty of info online, plus there are the Alphagraphix kits which can be quite useful for such things, even if you don't use the rest. Not really showing in the pictures is the end terrace behind the good shed. I've built it as a workshop, but can't decide what is made there. Sensible, vernacular suggestions welcome, but not the manufacture of holes for toothbrush handles, please...

-
Nowt so funny as folk, as they say where I originate from... Seem to remember seeing stuff on the Antique's Road Show - Dinky Toys or such, that had never been out of their boxes or seen the light of day. Evidently worth a fortune, but as nobody knew what was actually inside, could have been the Emperer's New Clothes. Down in Kent, we have an artist by the name of Bob Fridd, who creates all sorts of amazing things from scrap card, but one of his party pieces is to reproduce Dinky/Corgi Toy boxes [hand painted] and then get folk to tell the difference from the originals. I use the above merely to illustrate what can & does float different people's boats. For me, I'd rather pay three grand for a quality scratch build that the same for a mint, boxed, rare Wrenn A4 or some such, because the latter [though good for its day] is nothing compared even to a Bachmann today. Slight exaggeration, of course - wouldn't pay big money for anything I could build myself and have the pleasure, dubious or otherwise, of doing so. You pays your money and makes your choice, but sometimes I wonder...
-
Excellent work, Mick. Sits well with the coach too and both are going to look good on Bantry.
-
It can be interesting to see how others have built things! Indeed, am not entirely sure what folk would think of my stuff if they knew what was under the paint, filler etc... For me, the crucial things are it looks good and runs well [if applicable]. What Eoin is doing is pure craftsmanship, which the rest of us can only look on in awe and wonder - hoping it inspires us to make our own stuff a bit better as a result.
-
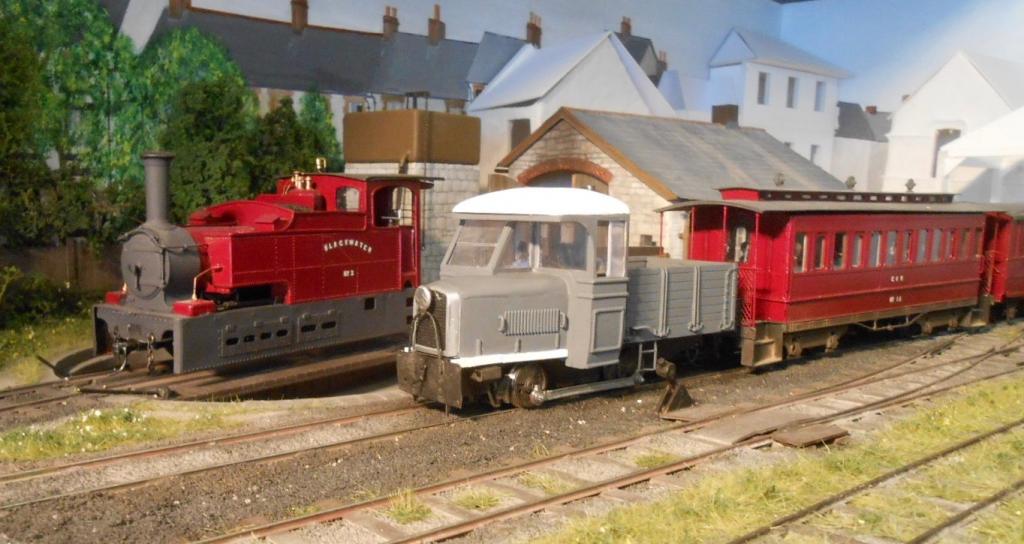
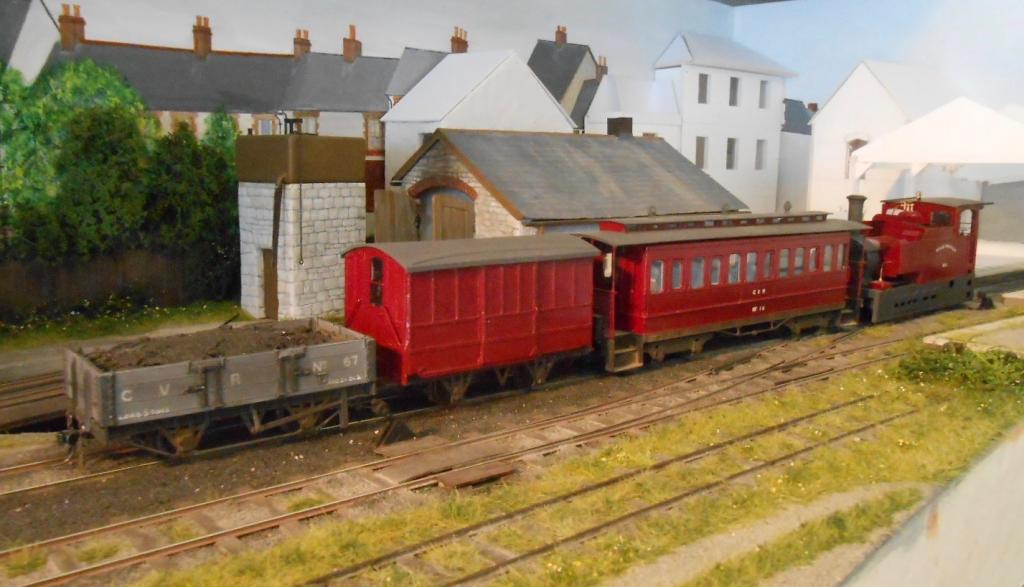
Now at the painting and finishing stage. Photos in Patterson's book show that the Unit was a couple of shades darker than 'wagon grey', so have hand painted the top coat in Humbrol No 27. Underframes are my usual weathering mix of matt black, 133 brown and gunmetal 53. It now needs weathering, but before that will have to work out how i'm going to do the lettering. A bit of research into transfers [either home made or suitable commercial fonts/colours] is required.
-
Nice one, Mike, the backscene successfully ties the individual scenes together.
-
Fab. love the colours.
-
Back in my [primary school] teaching days, I always told the kids to paint what you see, not what you think, whenever we did any observational work. Therefore direct observation is the key, though this inevitably also means using photographs, both of which introduce a range of additional parameters. Season/time of year, plus time of day and weather will all influence colour tones, while the period in history being modelled is also important, for what is in the landscape is continually being influenced by humans. When using photographs, the above also applies, plus the caveat that early colour film was significantly slower than today, so tones may not be accurate. Then there is lighting on the layout itself. Fluorescent tubes are notorious for flattening colours, so the old maxim of modelling in the same light you are presenting in applies. A further issue lies [quite literally] in the eyes of the beholder - not just degrees of colour blindness either. Men's eyesight increasingly sees shades of green less well as we get older, so getting the opinion of your significant other may be of value - as well as when getting dressed in the mornings... So, research your subjects carefully and don't rely on memory. Indeed, even with the verdant shades which come from Ireland's plentiful 'liquid sunshine', I'd advise going for more subdued tones than you might first think. Colour fades with distance, so the smaller the scale and the wider the baseboards, the lighter the tones need to be. That especially goes for back scenes. Also, whatever materials you use, aim to blend as much as possible. Personally, I never use a single shade of scatter or fibre and with electrostatic fibres often have three or more colours mixed together.
-
That is one serious piece of gingerbread. Very intricate, very impressive.
-
My fault, I'm afraid. Got an invite last year, filled in the form, but didn't put the date in my diary for some reason. Hence when details arrived in the post last week for second weekend in May, it was a bit of a shock as I am already committed to stuff with family and friends that weekend. Not good though, when the layout features in many adverts... Many shows do actually confirm attendance after you've sent in the form, but not all and I was caught out earlier in the year, but in that case was actually free, albeit at short notice. Doubly disappointing, as I visited the Derby works open days many times in my 'spotting' days. Next year, hopefully. So, apologies if anyone was hoping to see the layout there and in particularly to the show's organisers.
-
The two part resin from Easy Composites lasted over four years, but the new stuff looks different, so who knows. Have already used a fair bit in the first week, so fingers crossed! The mould making stuff definitely has a shelf life, less than six months once opened, then it won't set. Traders Hobby Holidays recently told me they no longer stock it for that reason. Shame, as mail order costs really jack up the price.
-
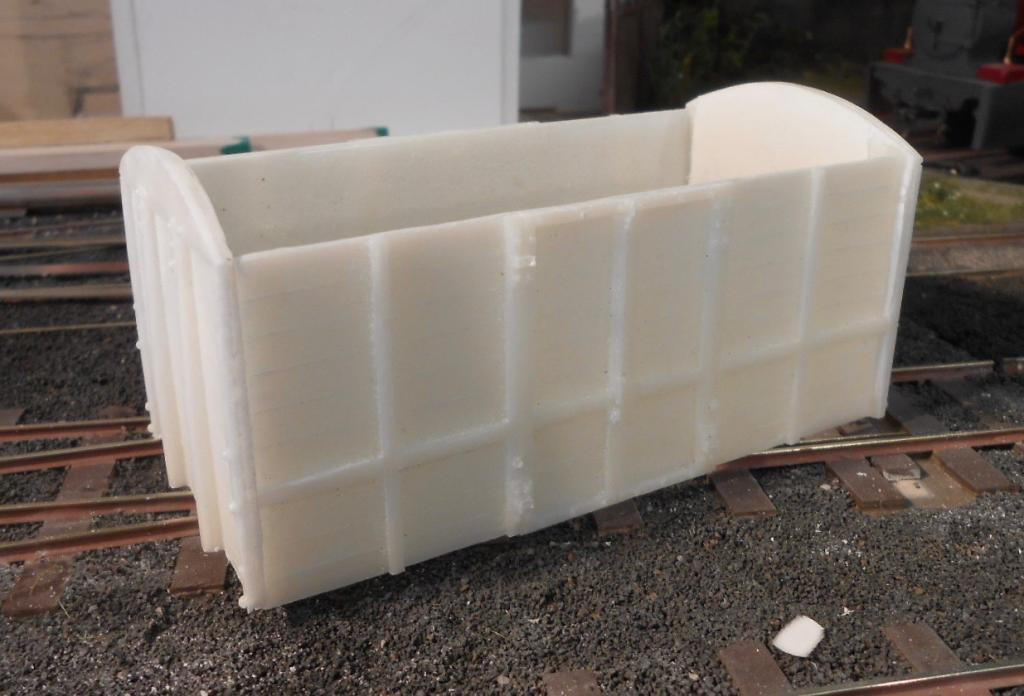
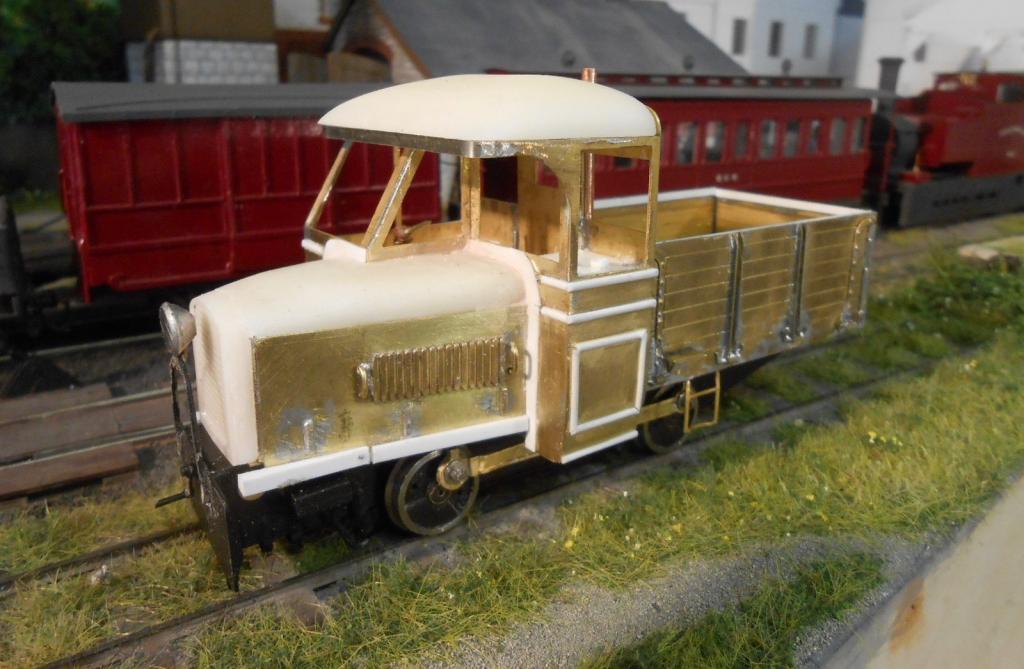
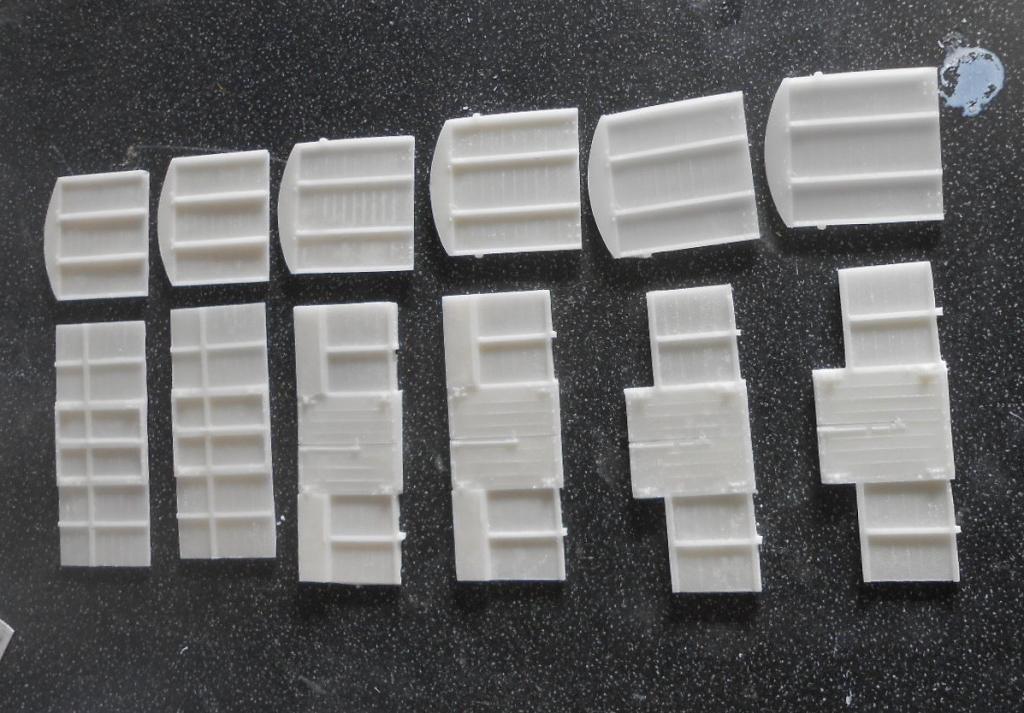
It has been three weeks since I did much modelling, unusual for me, as I like to keep things ticking over. However, home decorating and school governor duties took precedence, plus I was held up by a lack of casting resin. Easy Composites did not have any of their basic stuff in stock and the more advanced type needs a 'de-gasser', so I had to wait. Anyway, casting resin arrived on Monday, so have been busy running off sides and ends for CVR wagons. I'd made the masters & moulds a while ago, so could get on with producing parts for cattle wagons, dual purpose vans and goods vans, plus a CVR brake. The latter I'd already had a go with using the last of my old resin, but am not convinced the castings are as sharp as they could be, so have only made up one for now. It looks ok, provided you don't get too close! Construction involved glueing the sides and ends together [cyano], then mounting on a base of 60thou plasticard, this in turn being fixed to a standard Branchlines etched chassis. Foot steps [two each end], various hand rails, glazing and a roof were then all that was needed - plus couplings and I still need to psyche myself up to add the safety hooks and chains. Fiddly ain't the word. It will eventually get a fair bit of weathering, though not until I've worked out a way to produce the CVR logo. I also cast the bonnet, radiator grill & cab roof for the Unit. The first two have been fixed in place, but the roof must wait until I've painted the cab interior, added a driver & done the glazing. However, it is nearing completion, so the next time you see it, hopefully it will at least have been sprayed with primer.
-
Finally got round to completing my first CVR brake - though in truth it still lacks lettering. See my workshop pages for more details.
-
Indeed, best wishes Seamus.
-
Sutton's Locomotive Works - Outstanding Products and Sound too.
David Holman replied to Old Blarney's topic in News
They are indeed very good models. We had Sutton at last year's Chatham Show & I can certainly recommend their products too. -
Splendid work Mick. Well done. Reading JBs notes on livery, my MGW G2 was done using Martin Welch's standard weathering mix of Humbrol matt black, gunmetal 53, and brown 133 (used to be called bauxite). Depends how dirty you want it and don't have much knowledge of the condition Bandon engines got into. That said, with no undercover accommodation at Cork, they may have been pretty grimey.
-
That loco shed is lovely.
-
Yup, salivating again...
-
Only just read your thread, Tony, but there is no doubt that space, or rather lack of it, is the bane ofany modellers. However, a small layout can make an excellent project because you will see good progress and it can always be incorporated into a larger scheme later. Much also depends on what you want to do. Personally, model making is my thing and I only operate my trains at exhibitions, but as others have already suggested, you can nevertheless get a lot of operation even from a small layout. What you don't get is the chance to sit back and watch trains go by on a continuous run. Try and get hold of Iain Rice's latest book 'Cameo Layout s'. It is crammed full of inspirational ideas for the space starved modeller. One other thought is that smaller layouts get finished quickly, so you can soon start thinking about building another one! Oh, and Omagh North is indeed coming on very nicely indeed.
-
Cassettes for me too, Tony. They may be short, but you can have as many as you like. The Peco loco lift is another alternative.
-
Done more ballasting than I care to remember, B, but it pays to take your time and go carefully. The best ballast for me is Woodlands Scenics. Fairly light in weight & nicely graded, it takes well to the diluted PVA with a drop of washing up liquid method. Re size, I'd always advise using a grade smaller than the scale suggested. So fine, rather than medium for 4mm scale. That said, current track ballast seems to be a bit larger than in steam days and it really does pay to refer to photos of what you are trying to portray. Likewise colour - study your prototype and don't be afraid to mix things a little. Once the ballasting is dry, don't forget to then weather the track accordingly. Where tracks approach platforms, there will be a build up of brake dust. Where locos are stationary, a built up of oily deposits. Don't forget to paint the rails and sleepers too, it really will make a difference to how your track looks.
-
Indeed Noel. Forever telling myself model making is not a race. Don't always listen though! These days, always try to stop while things are going well. So many times, the last job needs doing again next time. Great work with the airbrush.