David Holman
Members-
Posts
4,359 -
Joined
-
Last visited
-
Days Won
117
Content Type
Profiles
Forums
Events
Gallery
Everything posted by David Holman
-
21mm gauge track; the pros and cons?
David Holman replied to jhb171achill's topic in Irish Model Layouts
Alternatively, for anyone seeking a completely fresh start, a simple shunting layout in 7mm scale would require the following: One Tyrconnel/Alphagraphix loco kit. Approx £200 with wheels, motor, gears. About £2-300 for track. Assume points at £60 each if custom made, half that if you build them yourself. Assume around £35 per wagon. Wheels are £10, couplings, axlebox/Wirons, brakes, buffers about £5 each set. A kit is the same as a scratch building in this scale, with the wagon body costing almost nothing if you make it yourself from plastic or card. An Alphagraphix wagon kit, made from card will cost maybe a fiver less, with their white metal fittings and Slater's wheels A workable model can be done in around 8 feet, so total cost would be approaching £1000 (say it quick) and occupy around a year or so to complete. Compare that to a 4mm scale layout with a dozen locos, 20 coaches and 40 wagons and it is not quite so scary. Less is more, especially with the added satisfaction of making it yourself. Beware though, 7mm scale is VERY addictive! -
at least it is a J15, even if not the correct one! Love the colours on the building.
-
21mm gauge track; the pros and cons?
David Holman replied to jhb171achill's topic in Irish Model Layouts
Good for you, JB, all power to your elbows! John-r, the answer to your question is a scale 1 foot two inches. 00 track is a gauge of 16.5mm in 4mm to the foot scale [1:72]. In this scale, the correct gauge should be 18.83mm for 'standard gauge [4'8.5"]. In other words 00 track is around 7 inches too narrow. Irish track being 5'3, to use 00[16.5mm] gauge track means you are modelling at 4'1 inch gauge, or 14 inches too narrow. Now, I sincerely hope I don't offend anyone here, not least because so many on this site have been incredibly helpful and complimentary to my own modelling. However, I do find it extraordinary that apart from the late, great, Tony Miles' Adavoyle, I do not know of a single layout built in the island of Ireland that is to the correct track gauge of 5'3, in any scale and it seems to be a handful of people in Britain who have flown the flag. Please tell me I'm wrong! Indeed, I will hazard to opine that railway modellers in Ireland prefer to find excuses not to work to the correct gauge, rather than attempt to do the right thing. I find this doubly strange when there are clearly many talented modellers out there, as this website illustrates so well, with many real sticklers [rightly in my opinion] for getting everything else right, yet happy to work in a gauge that is 25% too narrow! Now, I very much appreciate the reasons why folk might stick to what is available - commercial support and ease of modelling, the latter especially important to those who are not confident at building locos or adapting mechanisms.Be that as it may, I must stress that I was not born with a silvered soldering iron in my mouth. I have no formal training in wood or metal work and am essentially self taught. By that I mean reading widely and having a go - not being put off by failures [and there have been a few, believe me], plus talking to those who have succeeded to find out how it is done. I am sure for most that the hardest thing in contemplating 21mm gauge will be the combination of making track and widening the wheels to suit. In 7mm scale, the latter is a piece of cake. You go on the Slater's website and order the appropriate loco axles, while the wagon and coach wheels simply get pushed out to the wider gauge. In 4mm scale, I can't see that track should be a problem for anyone willing to have a go. C&L do point kits with ready assembled crossing vees and machined blades. All you have to do is slide chairs on to the rails and then weld them to the plastic sleepers with solvent. The only soldering will be to add the tie bars. The single issue is that of a track gauge. It ought not be too difficult to get a 21mm roller gauge turned up somewhere. C&L may be able to do one on request. Alternatively, talk to Marcway [phone number in their advert in Railway Modeller]. They do custom track for pretty much any scale or gauge, using soldered, copper clad sleeper construction. Plain track is easy to do: make a simple jig using card to get sleeper spaces. Solder one rail in place, then put this half track on the layout and then solder the second rail, using a 21mm gauge. On Arigna, my 36.75 [ish]mm track gauge is a piece of flat aluminium I filed up. The layout has never suffered from derailments because of this, while the Marcway points I commissioned have been superb and the layout has its 30th exhibition outing in January. Now, I have no experience of building 21mm gauge locos or rolling stock, but I am fairly sure I've read in several places that replacement wheels/axles for Murphy's diesels are little more than a drop in. However, if not, then this is probably where the main barrier lies. A wagon kit [or indeed regauging a proprietary wagon] should not hold any terrors. Chop off the narrow gauge W-iron/axlebox castings and fit new ones wider apart. If 21mm axles are not readily available, buy some brass/steel/nickel silver rod of 2mm diameter [an internet search will soon find you some] and cut some yourself. This is what I have done on Fintonagh, using 2mm brass wire/rod and making 'pinpoint' ends [to go in the bearing cups] by spinning the rod in my fingers while holding it against a slitting disk in a mini drill. It takes less than a minute... The issue with a locomotive is that [if steam outline], the wheels need quartering, to ensure they turn smoothly when the coupling rods are attached. Not the case with diesels & I would think that something similar to the wagon exercise could be done - you just need to make sure the main gear is a good fit. However, I'm sure this must be the heart of the problem - where do you get 21mm loco axles from, that are easily quartered [like, say Romfords] because they have square ends? Fear not though, because the Scalefour Society website tells you how to do it with plain ended axles & it is very simple. It must be, because I've done it several times. If a kit of your chosen loco only comes with narrow frames, note that , by fitting the wheel bearings back to front, you get the right spacing, without the need to resort to making new frame spacers. I could go on & no doubt some of you will be thinking 'its alright for him, he has years of experience'. Remember though, I started with zero knowledge and zero experience and has simply persevered and learned as I've gone along. What I do really isn't that difficult - otherwise I would have given up years ago. Believe me when I say I am in no way criticising those who want to stick with 16.5mm track. It is your hobby, to do with as you wish & as long as you enjoy it, so much the better. I guess what does disappoint me though is that there appear to be so few people doing 5'3 [in any scale] & it really would be wonderful to get a few more on board. Currently, its lonely out here! It does look rather splendid after all & makes the extra effort so worthwhile. There, I've said my piece and sincere apologies if I've offended anyone. -
21mm gauge track; the pros and cons?
David Holman replied to jhb171achill's topic in Irish Model Layouts
One 25th of an inch JB. Code 100 is a tenth, code 75 is 75/100ths -
21mm gauge track; the pros and cons?
David Holman replied to jhb171achill's topic in Irish Model Layouts
No prizes for guessing my view on this JB - just do it! If wary about track, phone Marcway in Sheffield. They custom made my points for Arigna for not a lot more than Peco. They are robust and self isolating, so no extra switches required and can be operated by wire in tube so overall cost no more than if points motors are used . Plain track can easily be made using copper clad sleepers, or C&L components, which only require glue. A 21mm roller gauge will be needed, but again, Marcway could turn one of those for you if you didn't"t want to make your own. For Arigna, I filed a thick piece of brass to 36.75mmish and have no derailments whatsoever. As Eoin says, locos and stock need not be a problem if you choose carefully. With only a couple of locos needed, it should not be expensive to pay someone to convert them anyway. Everything else is the same and with a small layout, there is little to lose and everything to gain. Remember, 21mm gauge does NOT mean P4 standards. You can specify finescale flangeways on points so they will take mainstream wheels. The main reason though is why model 4'1 when the gauge is 5'3, especially on a small layout? It bugs me that there are now only three 5'3 layouts being exhibited. Mine, Valencia Harbour and Ballyconnel Road. Correct gauge really isn't anymore difficult once you get started, but as Henry Ford famously said 'if you think can, or if you think you can't - you are right'. I would also say, ' come on in, the water's lovely!' -
Arigna Town - this week's scenery
David Holman replied to David Holman's topic in Irish Model Layouts
Bexleyheath today. The new G Class, Deutz diesel acquitted itself very well today, in somewhat trying circumstances. Nothing wrong with the show, or indeed the hospitality, but the weather highlighted the problems of a winter show. The day began in pouring rain and 1c, soon turning to snow, so by the time I reached the venue at 8am, there was an inch of slush on the ground and it was snowing hard. Not the best recipe for getting a layout 50 yards from car to halls, especially when other exhibitors vehicles blocked the way necessitating sackbarrowing the boards across more mud and slush. With the doors open, the hall was pretty damned cold, but unfortunately it stayed that way as this was the entrance and, there was NO heating! Arigna Town lives in what was once an integral garage, but now my workshop, complete with central heating, so it does not enjoy the cold. Axles boxes seem to tighten, meaning the two small tanks especially suffer from wheel slip, while the turntable also tends to catch the coping stones around its edge. Add in a broken toggle on one of the points [meaning the wire in tube could only be push/pulled using pliers] and it was a more trying day than usual, with a fair bit of remedial work needed for the next outing at the end of January. Equally, such things are all part and parcel of the exhibition scene. Layouts lead a hard life on the road, with 7-8 hours of intensive use each day, so you tend to expect stuff to happen from time to time. If only it hadn't been quite so cold! However, the little G did itself proud, substituting for the J26 on the stores/coal trains. It could probably do with a bit of weight in the bonnet to help the four wheel drive, but has proved to be a smooth, slow runner, ideal for such duties. By packing up time, at least it had stopped snowing and the roads were mercifully clear on the way home. -
B*****. And there it is, in my 1960s Observers book...
-
Indeed! A 4mm scale Merit GPO sack masquerading as such. Don't look too closely at the builders plate either. It actually reads 'Built in Derby'...
-
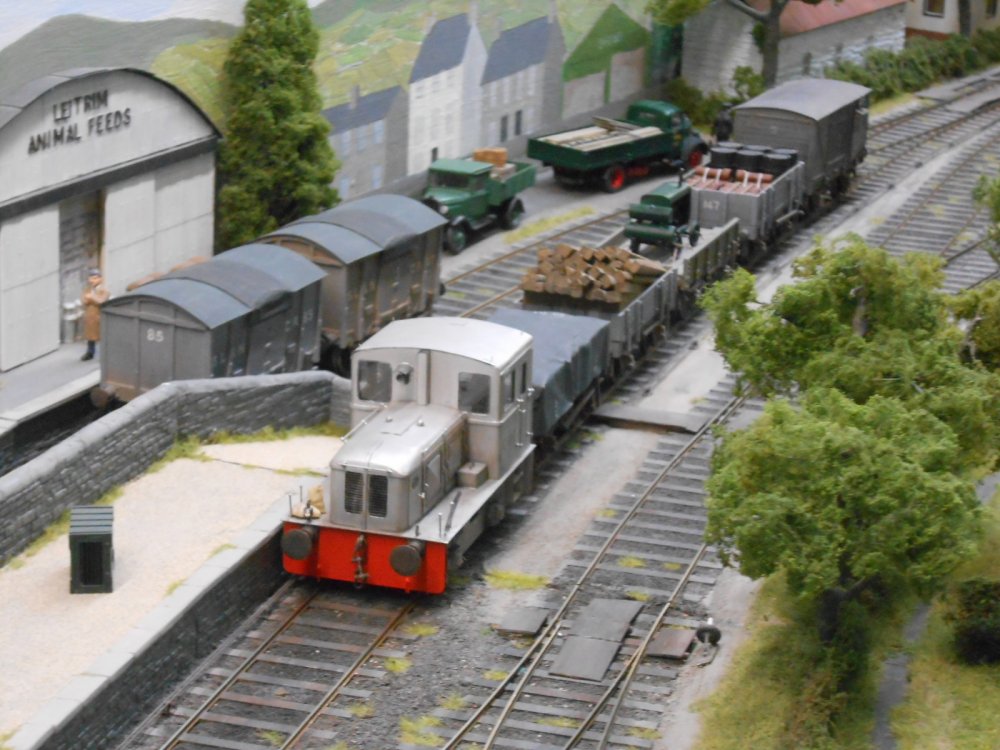
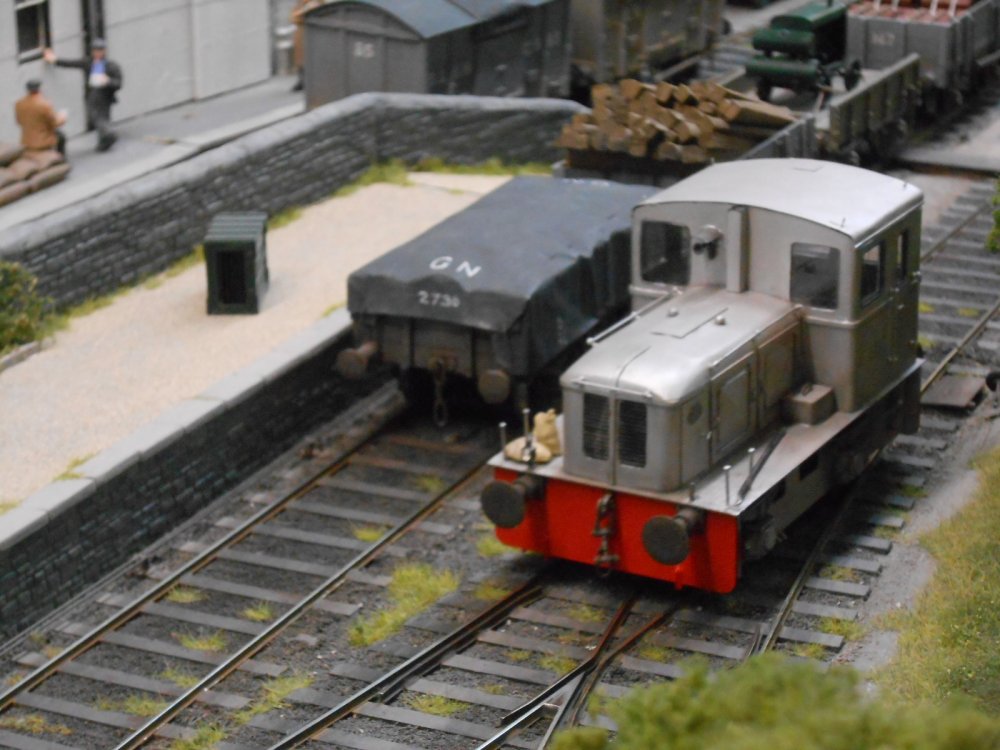
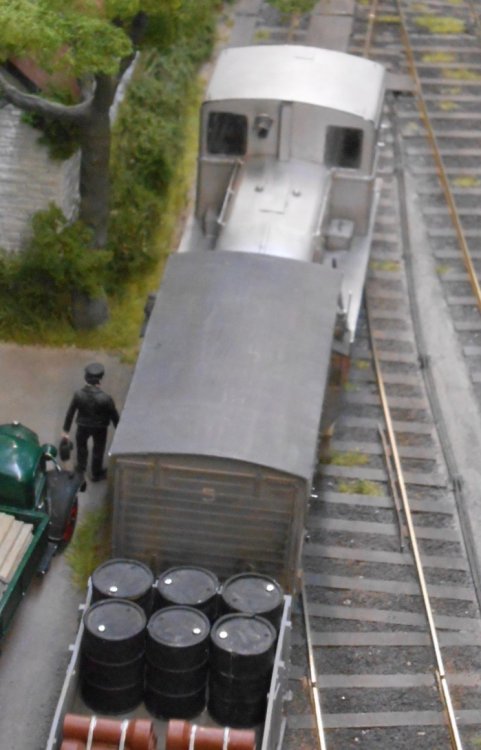
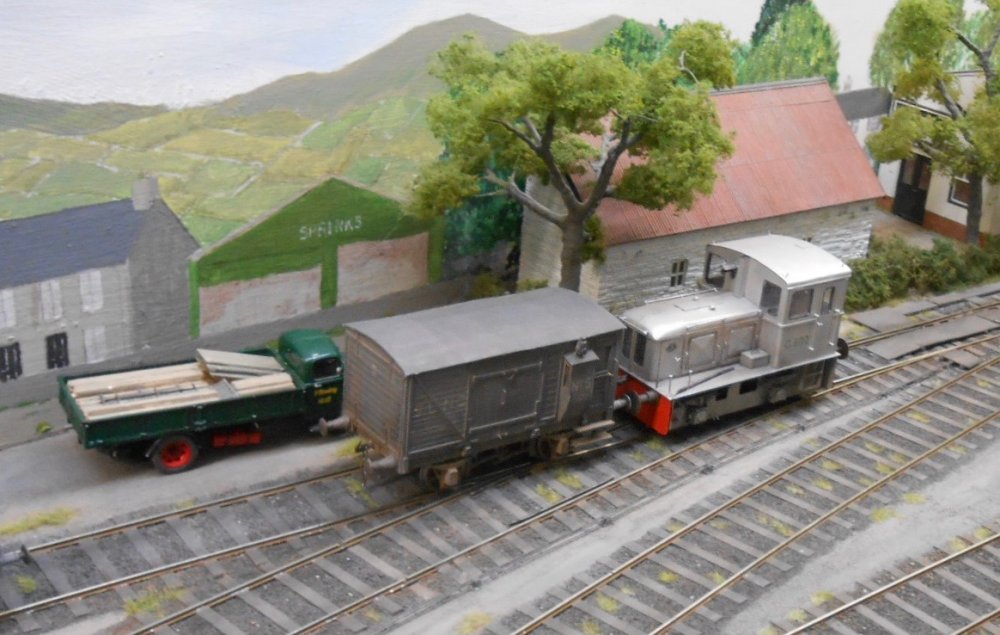
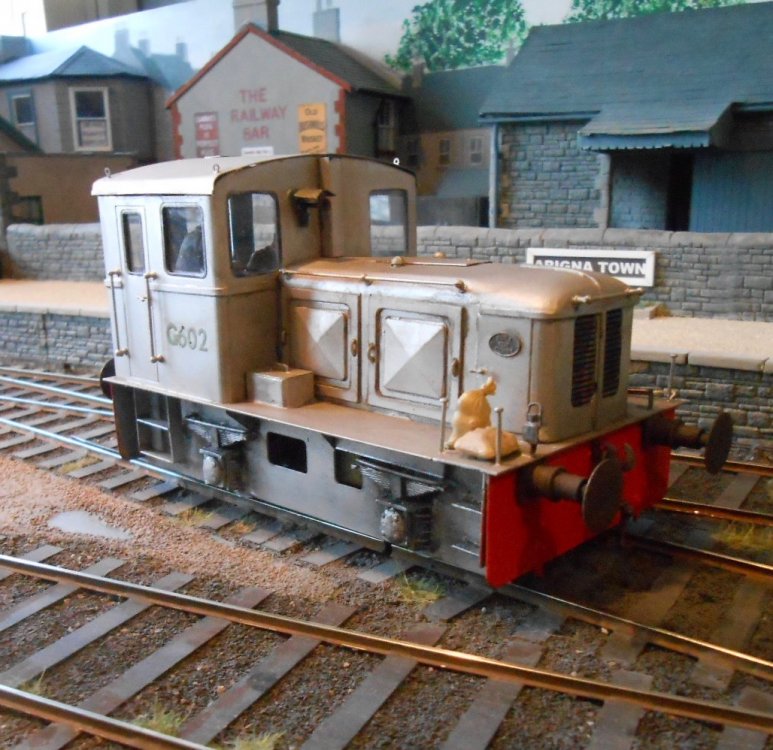
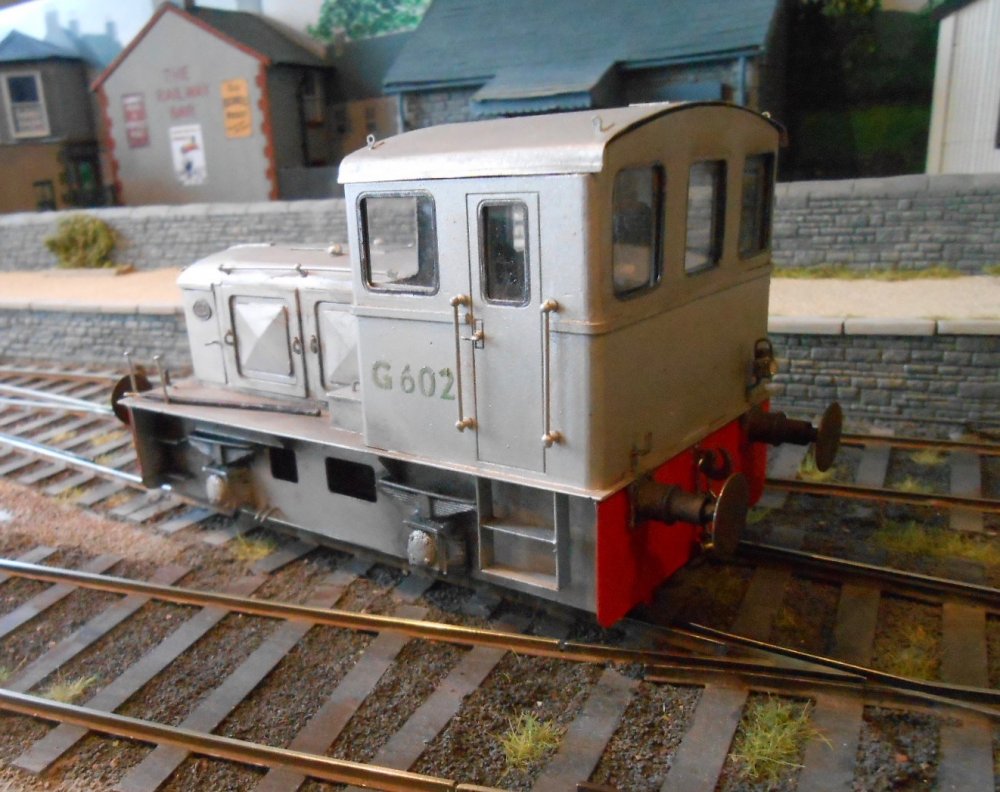
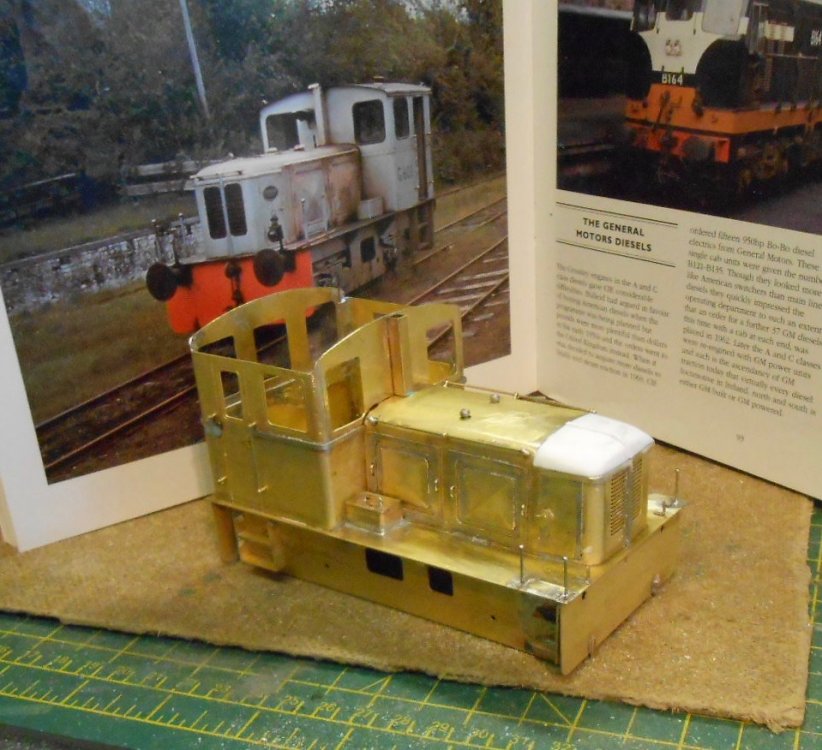
G Class complete -ish. Remaining work was to fit the bits I'd bought at Reading. A nice set of sprung buffers [Markits from Roxey] and a much less pleasant set of axles box/spring castings from JPL, which I may well replace when I can find something better. Not their fault, these were just the best of a bad job in terms of trying to find something suitable. Despite being cut down, they are still too chunky. Thanks to all the photos and advice, I've managed to do a representation of the cab interior, while the roof [being etched in thinner brass than the rest of the 'kit'] was easy to form. A long wax casting of a horn [EDM Models], with a bit of brass shim soldered above it as a weathershield completes the picture. So to painting. I'd figured that getting some silver grey car spray paint wouldn't be difficult, as 50% of models in Britain seem to be this colour. However, there lies the problem - 50 shades of grey [at least] and all of them metallic, so not really suitable. Eventually, I found a can of 'aluminium', a bit shiny, but of course, like all other CIE silver diesels, this was never going to be clean. In fact, it is much dirtier than the pictures show, but certainly nowhere near as shiny as it started. Numbers are a bit of a bodge. I found some prefix transfers in my collection, so it is a GWR 'G', with BR numerals. Was briefly tempted to make it G604, as an extra loco for the SLNCR, but went for 602, with the cream colour painted over in green with a fine brush. Overall, not too bad, considering I only began the model a week last Wednesday and Sunday - Tuesday was at Birmingham Christmas market.
-
Easy-Build Coaches, Eoin. Got them at the Reading Trade Show last Saturday. They do a lovely range of coaches, DMUs and the like, plus various bogie kits that are so good you only need to shake the box to make them. Well, nearly... Website is easybuildcoaches.co.uk Proprietor is Shawn Kay, based in Camelford, Cornwall.
-
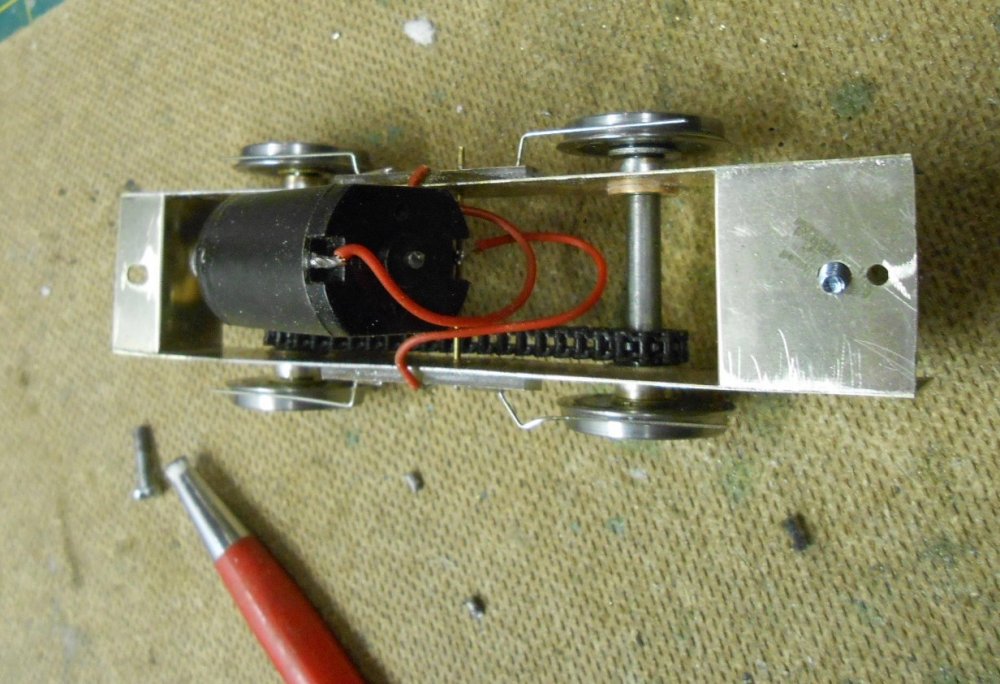
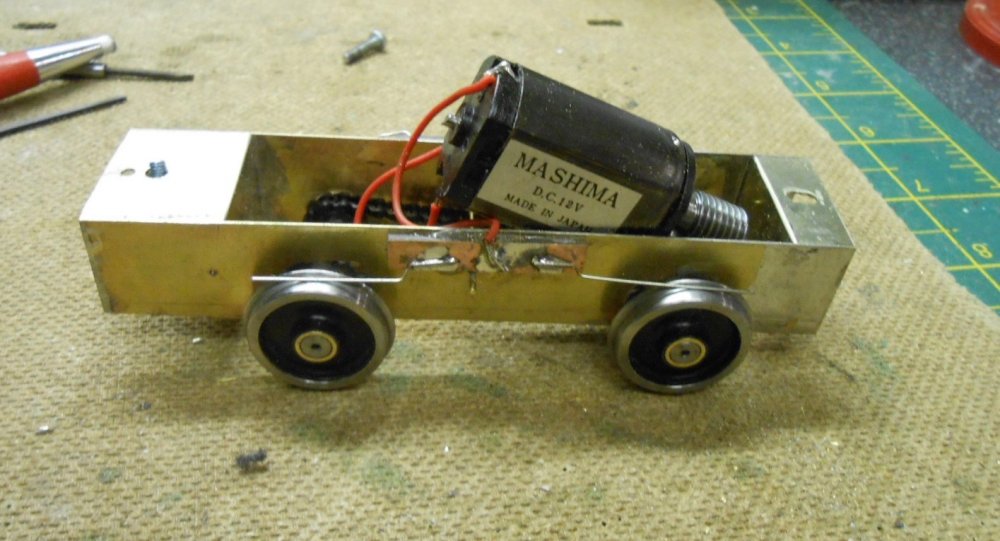
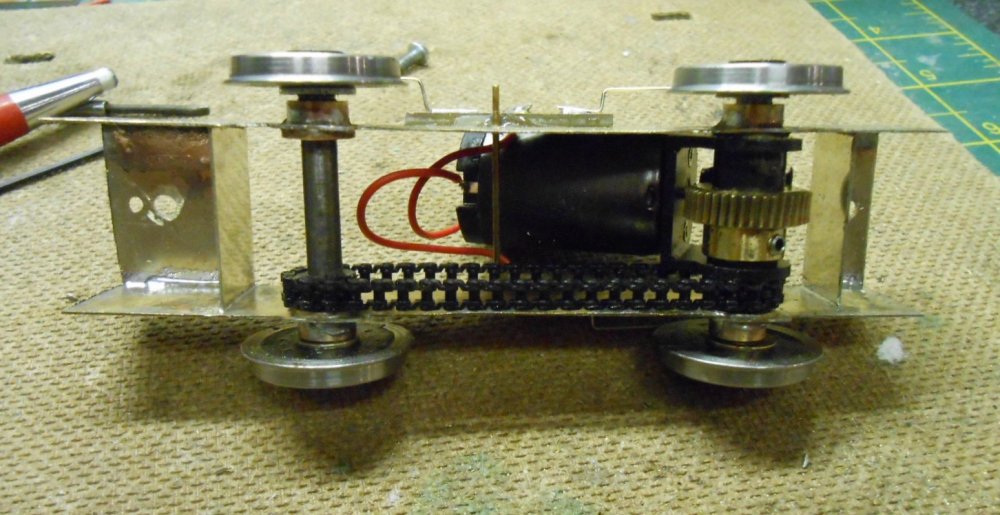
Thanks yet again, JB. The model is making decent progress, though am saving pictures of it until finished. However, built the chassis today. It is a sub unit, with the frames made from brass strip. Soldered two pieces together so I could drill out the bearing holes, then after separating them used some 32mm gauge spacers left over from my SLNCR Small Tank kits. As this inner frame cannot be seen, I've used the Alphagraphix/Tyrconnel trick of soldering the top hat bearings in back to front to give the correct wheel spacings. Unfortunately, I wasn't able to get any broad gauge axles at the Reading Trade Show, so I've borrowed a pair from my J26 loco, to go with some 3'1 DMU wheels I was able to buy. Power comes from a Premier Components 40:1 gearbox and Mashima 1933 motor - this is a ready made unit & ideal for this model. I also got some Delrin chain and idler wheels from Easy-Build Coaches. The idler gears had to be cut down a little to fit between the frames, but the model now has 4 wheel drive. Pick ups could be very basic, as they are hidden behind the outer frames, so not much more than a morning's work and the G could move smoothly under its own power. The Delrin gears make it a little more noisy than the other locos, but so far, so good.
-
shunting freight HELP DESIGNING A SMALL SHUNTING MODULE
David Holman replied to pauldelany's topic in Irish Model Layouts
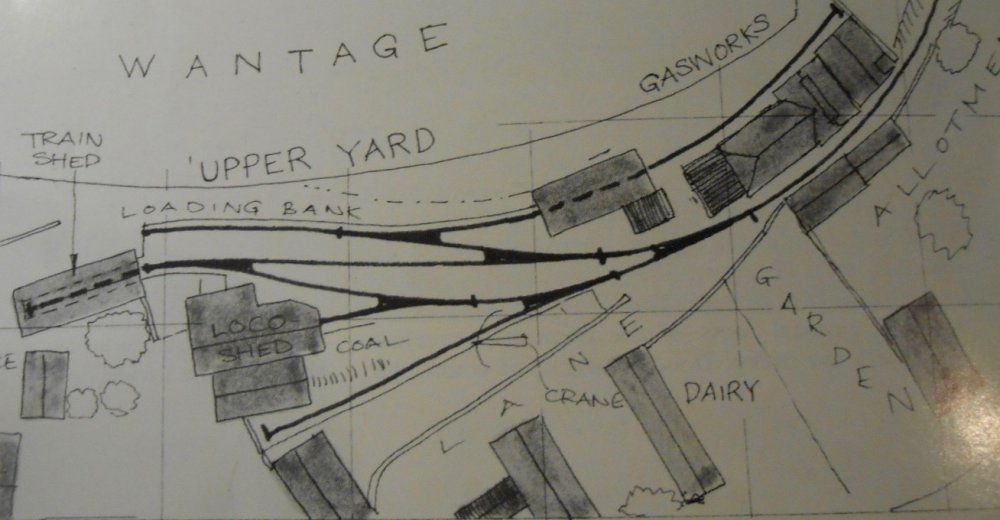
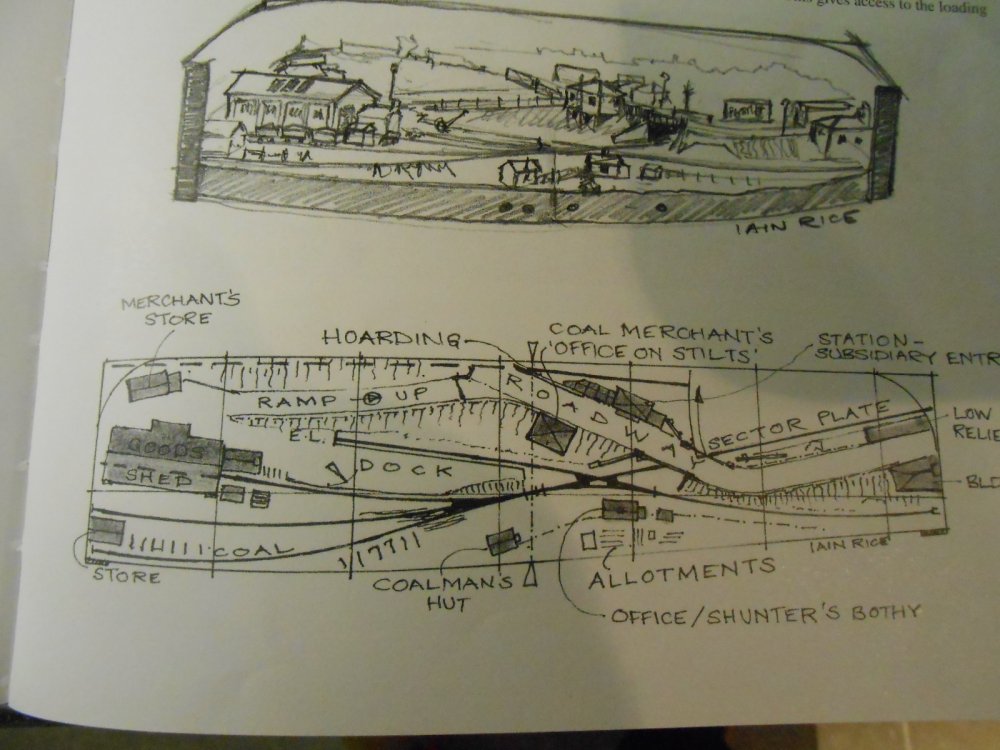
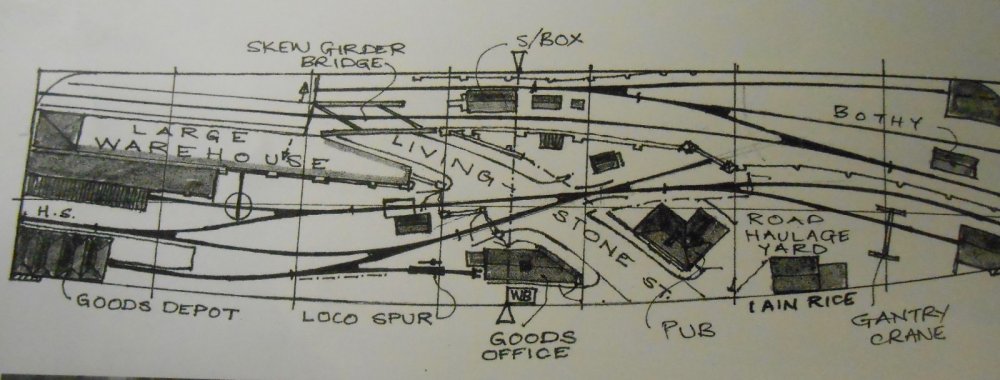
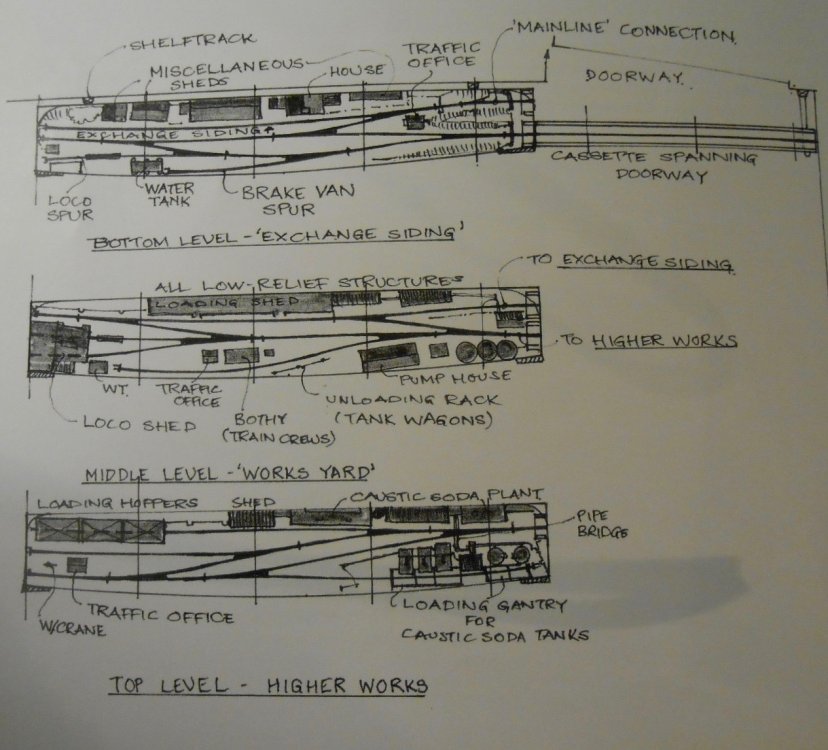
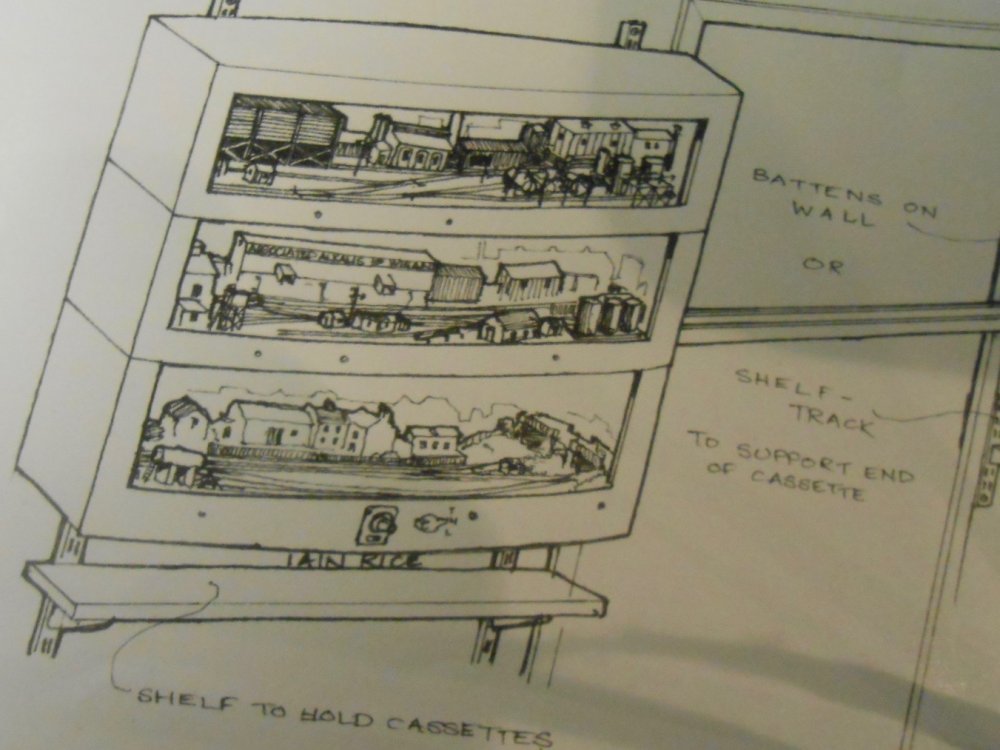
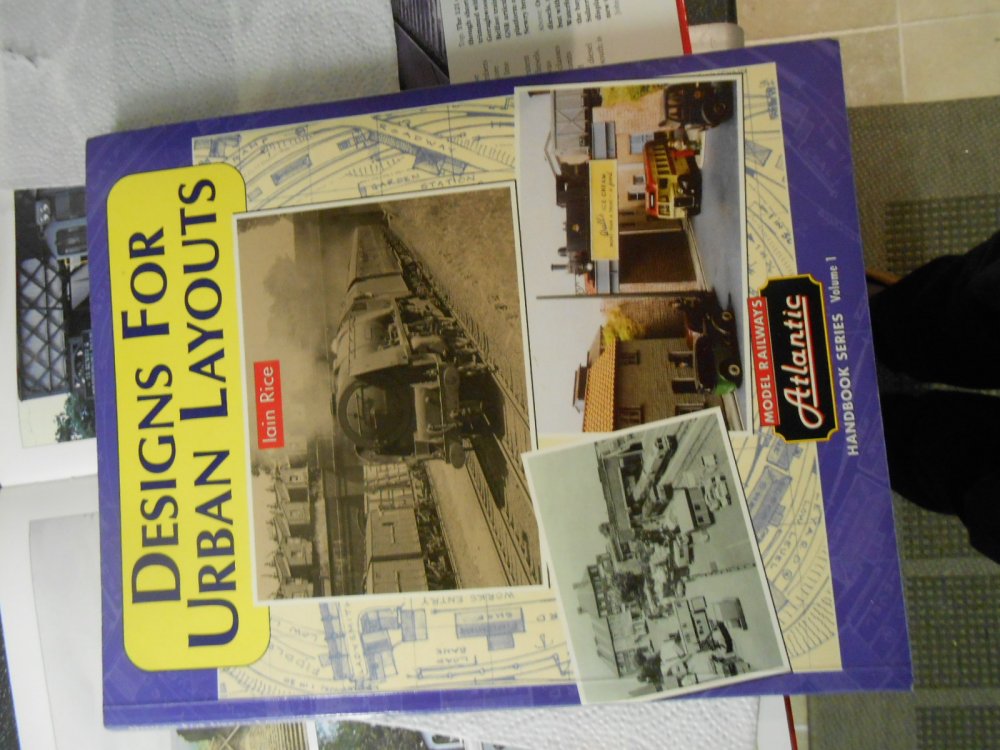
Probably the best designer of small layouts is Iain Rice & have attached a photo of his drawing of Wantage Town, where you can see that the station is only 4' long AND, this is very much to scale! However, in his book 'Urban Layouts', he has created some real gems, including a straightforward shunting yard, but also a super little two level layout in just over 6' and finally three separate 4'6 modules, designed to be linked together vertically using cassettes. If you can get the book, it is well worth reading. -
Superb. Thank you. However, at the risk of stretching things even further, given the 601s had no vacuum brakes, presumably there must have been a handbrake somewhere. Was it a wheel type or the old style brake stand we see on Steam locos. And if so, where, please...?
-
It is on the Irish Traction Group website, Eoin. I found it by googling CIE G class diesel. On the site are notes about various withdrawn classes and among them the G. Each loco has a click on section and one of them shows a before and after shot of the control desk.
-
shunting freight HELP DESIGNING A SMALL SHUNTING MODULE
David Holman replied to pauldelany's topic in Irish Model Layouts
Does the 4x1 include the fiddle yard/headshunt? The smallest prototype yard I can think of is Wantage Town, which scales out at just over 4' in 4mm scale. Not Irish of course but not dissimilar to Irish practice. The other thought is Inglenook Sidings, a shunting plank designed some years ago. No loop, just three tracks for wagon shuffling using a card system to create a puzzle. Either way, nothing is really that small, so you are better off with a track plan that suits your needs and the make it Irish in theme by deciding what the traffic source(s) will be. -
Interesting to hear there were no seats in the cab, which saves me a job! Found pictures of the control desk on the web, so thank you JB. Replacement windows were done by cutting out the front and rear cab sections down to waist level with a slitting disc in a mini drill. The replacement sections were cut from same thickness brass sheet. Windows were marked out with a scriber, the corners drilled 3mm diameter while the two sheets were still soldered together. Am afraid I then used the slitting disc again to join the holes (a piercing saw would be better) and then tidied up with files. Tedious but effective.
-
Simple, elegant.
-
Should be plenty of room for weight in the bonnet, but the plan is also to use Delrin gears & chain to make it four wheel drive. Quite apt really, as when you Google a G class, a certain Mercedes 4x4 comes up.
-
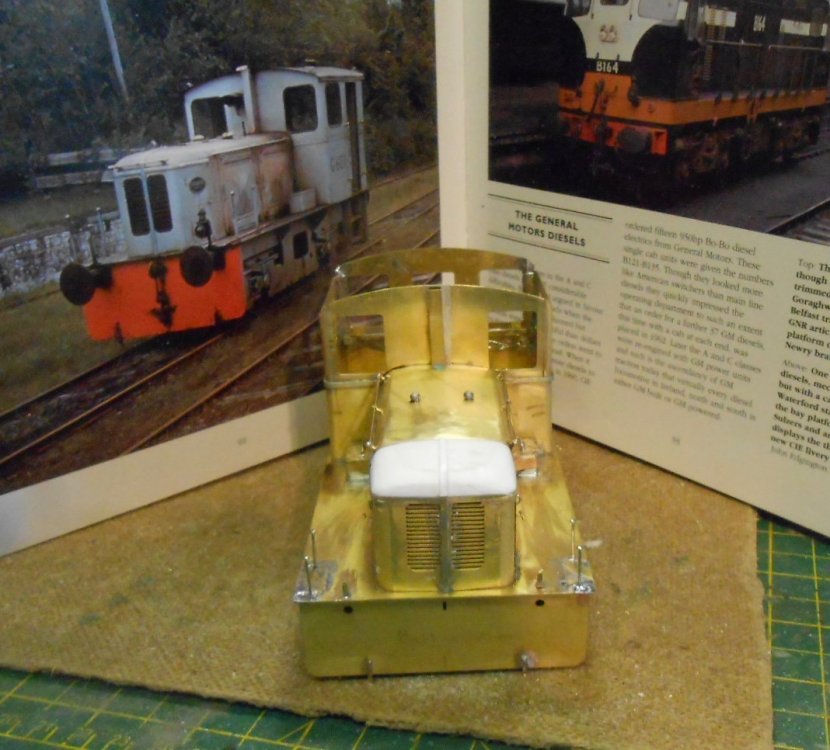
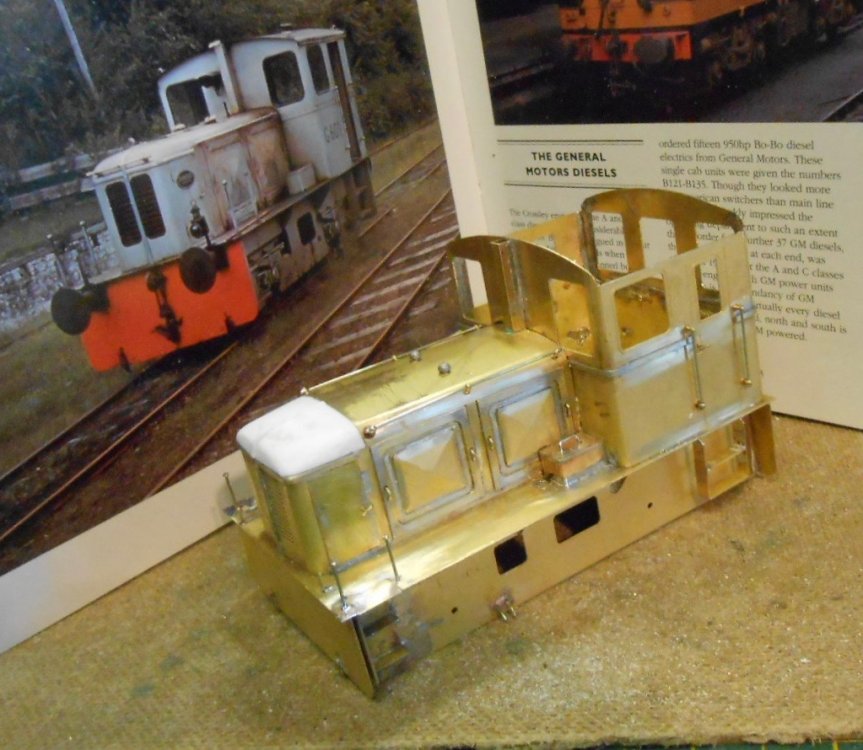
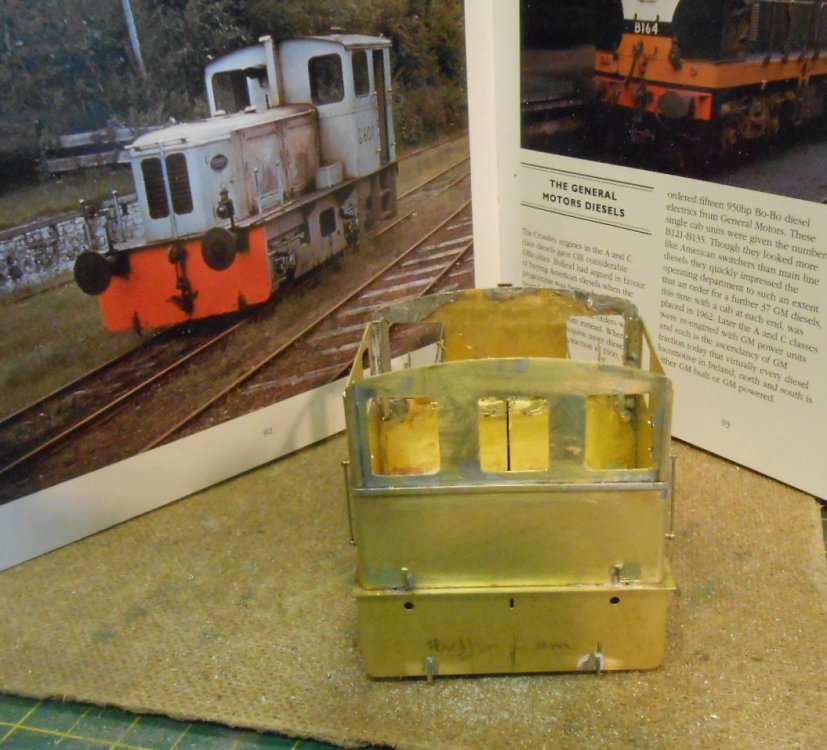
A bit of a diversion... As reported elsewhere, I've somehow got myself building the set of Worsley Works etches I bought at ExpoNG in October. This time it is the G class, Deutz, shunter. The Reading O Gauge Trade Show was probably the stimulus, as I suddenly realised I ought to try and get all the bits and pieces for the model. Hence I dug out the etches & soon found that it should go together fairly quickly. However, model making is not like that... The Worsley etches only cover the footplate, outer frames and general bodywork, but go together very quickly - no more than 3 hours work in total. So good, so far. Now we come to the measure twice, cut once bit, or in this case, read up on the prototype first. Ought to know better really, but it quickly became obvious that my preferred prototype was the 601 class, while the Worsley etches are for the later 611 type. B*gger. So, a bit more work needed, in addition to the stuff that the etches do not cover. The list is considerable, though nothing terrible: The 601s had smaller windows, necessitating a new front and rear to the cab There is no cut away for the front steps on the footplate, so a plate needed to be soldered in place each side. Lots of hand rails and grab handles 4 brackets below the footplate A filed up top for the front of the bonnet A door each side of the bonnet, instead of a grill on the later versions Various bits of beading on the cab & bonnet Guard irons Lamp irons A horn Cab interior Lifting rings on cab roof Exhaust stack Buffers Axlebox/spring castings The small matter of a chassis/sub-frame [none provided] including wheels/motor/gears. The photos show where I've got to thus far - not bad considering I only opened the packet on Wednesday afternoon, though I did give it my full attention throughout yesterday & today. Apologies to Eoin for the poor quality of my soldering - I must do more cleaning up than most! However, it does show where I've been working. Fingers crossed I can get the bits I need tomorrow as it would be nice to finish the model for the Bexley show on Sunday week, though, as I keep reminding myself, it is a hobby, not a race.
-
Wow! Thanks chaps, you are all stars. Having parted with fifty squid for the Worsley etches, it seemed that I could knock up a model fairly quickly and given it is the Reading Trade Show this weekend, there was the opportunity to get the other bits I'd need. However, and I'm sure you guessed this was coming, not everything in the modelling world is ever straightforward. Life is complicated - that's why it's fun, as the saying goes. Problem numero uno is that I want to do the early version, so it can run on Arigna. Hence windows need to be altered and a cut out in the footplate filled in at the front steps. Nevertheless, the Worsley etches do go together quickly (inside three hours in fact), but of course I'm now busy back tracking and extremely grateful for the info to add to my own research. Some pictures to follow in the workshop section later. Now, can anyone tell me what the cab interior was like???
-
What colours were the Deutz G class diesels painted, please? Realise that they had the usual black and orange, but some photos (eg in Tom Ferris and Derek Huntress colour albums) suggest a pale blue/grey, while on Google there are a couple of models in a pale green. Am guessing the latter is the shade that followed the early silver. Is the blue/grey the shade that the 121s were painted in during the early 1960s? This would be my preferred colour for a 7mm model based around the Worsley etches, so will await answers with great interest.
-
As Eoin says, it could be mechanical. However, it could be electrical instead. Suggest you remove the body and check wiring from pick ups to motor. A loose wire anywhere would explain why the loco is dead... Poor, as opposed to none, running could be dirty wheels and/or pickups not touching the wheels. Alternatively, if you can hear the motor, then it might be part of the gear train is loose. Eg, the worm is not fixed to the motor spindle, or the main gear attached to the loco axle has come loose. Don't know anything about these locos, but on kit built locos the gears are held in place with grub screws and one of these may have come loose.
-
Good to see that there IS interest out there. No wonder 21mm looks better than 4'1... For anyone doing 7mm scale, it really is no more difficult than 32mm gauge. Loco axle available, wagon/coach axles easily adaptable, C&L bullhead track only needs a 36.75mm gauge. Plus there are plenty of kits available too. With all the high quality RTR out there, it is no surprise folk stick with what they know, but there is even more satisfaction to be had in doing your own thing and being different. Well, I would say that, wouldn't I?
-
Before anyone gets too disappointed, this was a small show, last weekend, with just eight layouts, however, two of them were Valencia Harbour and Arigna Town, which we also think represented two thirds of the broad gauge Irish layouts currently being exhibited. I'd love to be proved wrong but with Richard Chown no longer with us, it is likely Castle Rackrent will not be seen for a while, while Paul Green's S scale layout does not seem to go out at the moment. So that just leaves Ballyconnel Road as the third. So, tell me I'm wrong, because it would be great to see some more 5'3, in any scale!
-
By the way - is it the right gauge?
- 45 replies
-
- gsr class 551
- j26
-
(and 1 more)
Tagged with:
.png.c363cdf5c3fb7955cd92a55eb6dbbae0.png)

