David Holman
-
Posts
4,359 -
Joined
-
Last visited
-
Days Won
117
Content Type
Profiles
Forums
Events
Gallery
Blogs
Everything posted by David Holman
-
Quite simply, it is! Previous Peco was a 'universal' track system, playing as much to HO as OO. The new stuff follows British practice, with correct sleeper spacings. So, still not the right gauge, but a big improvement.
-
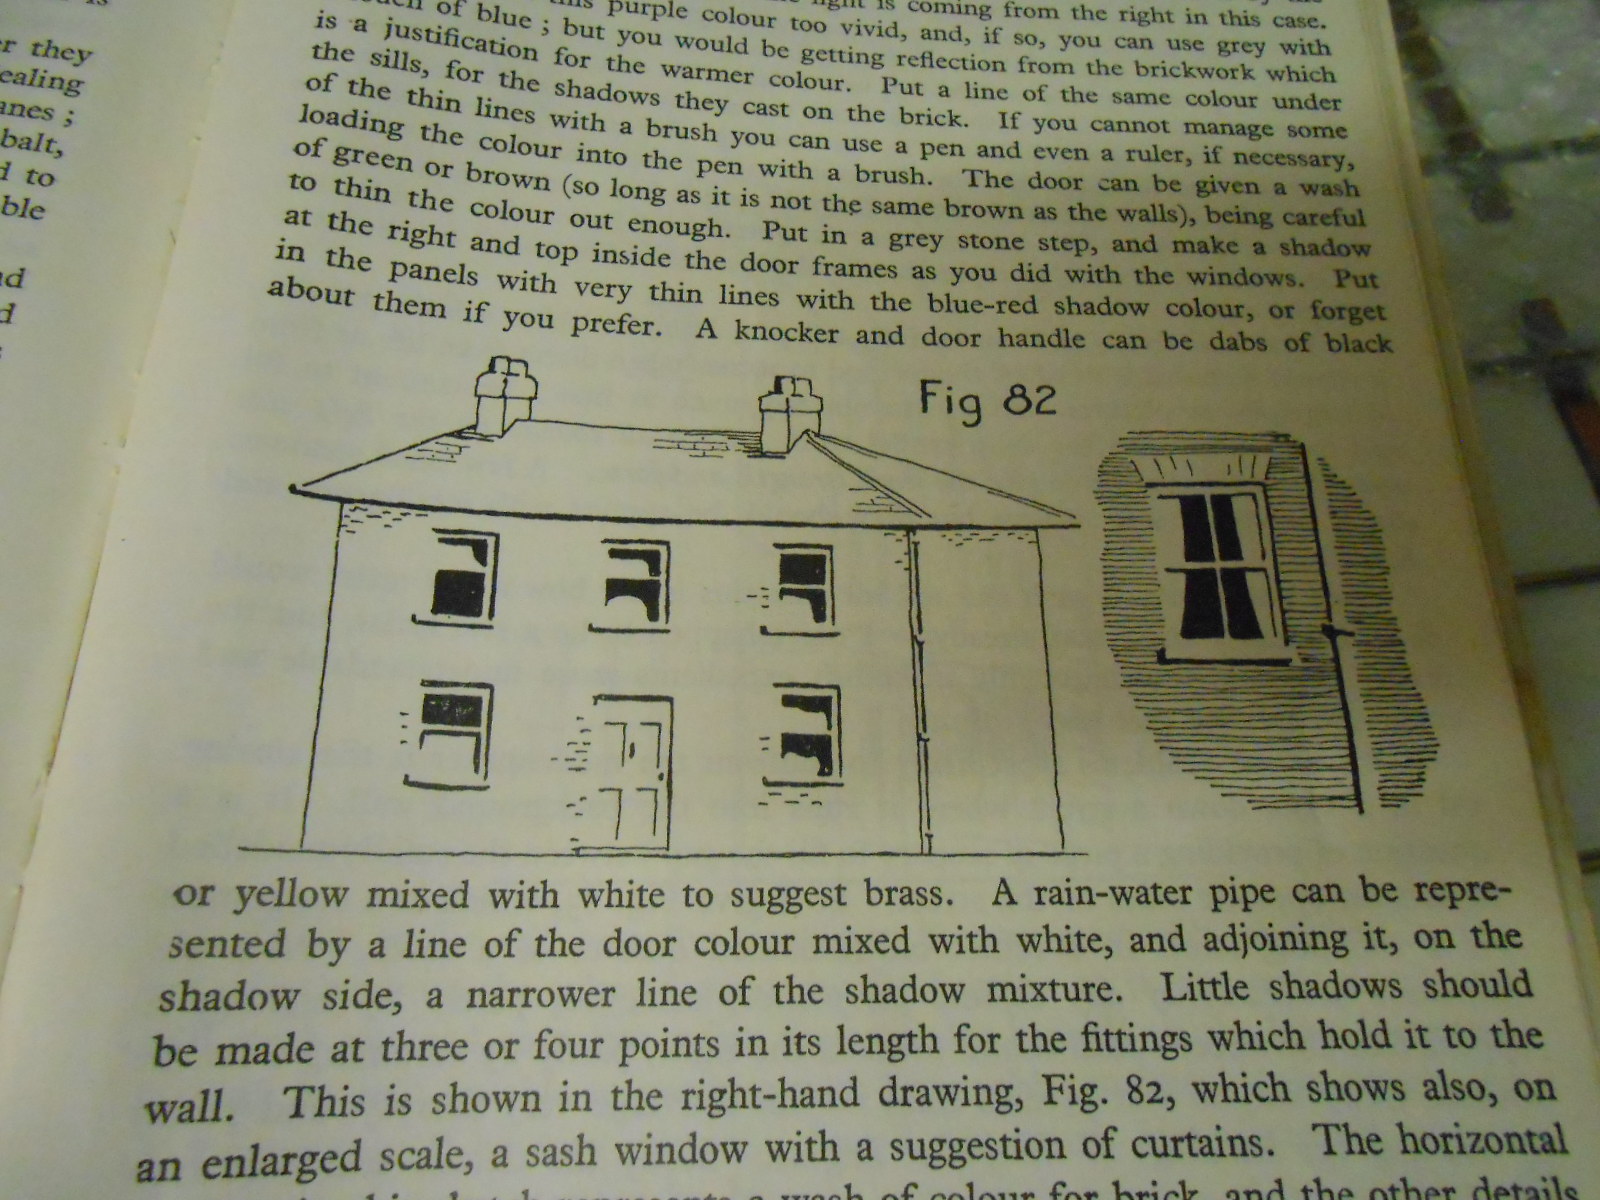
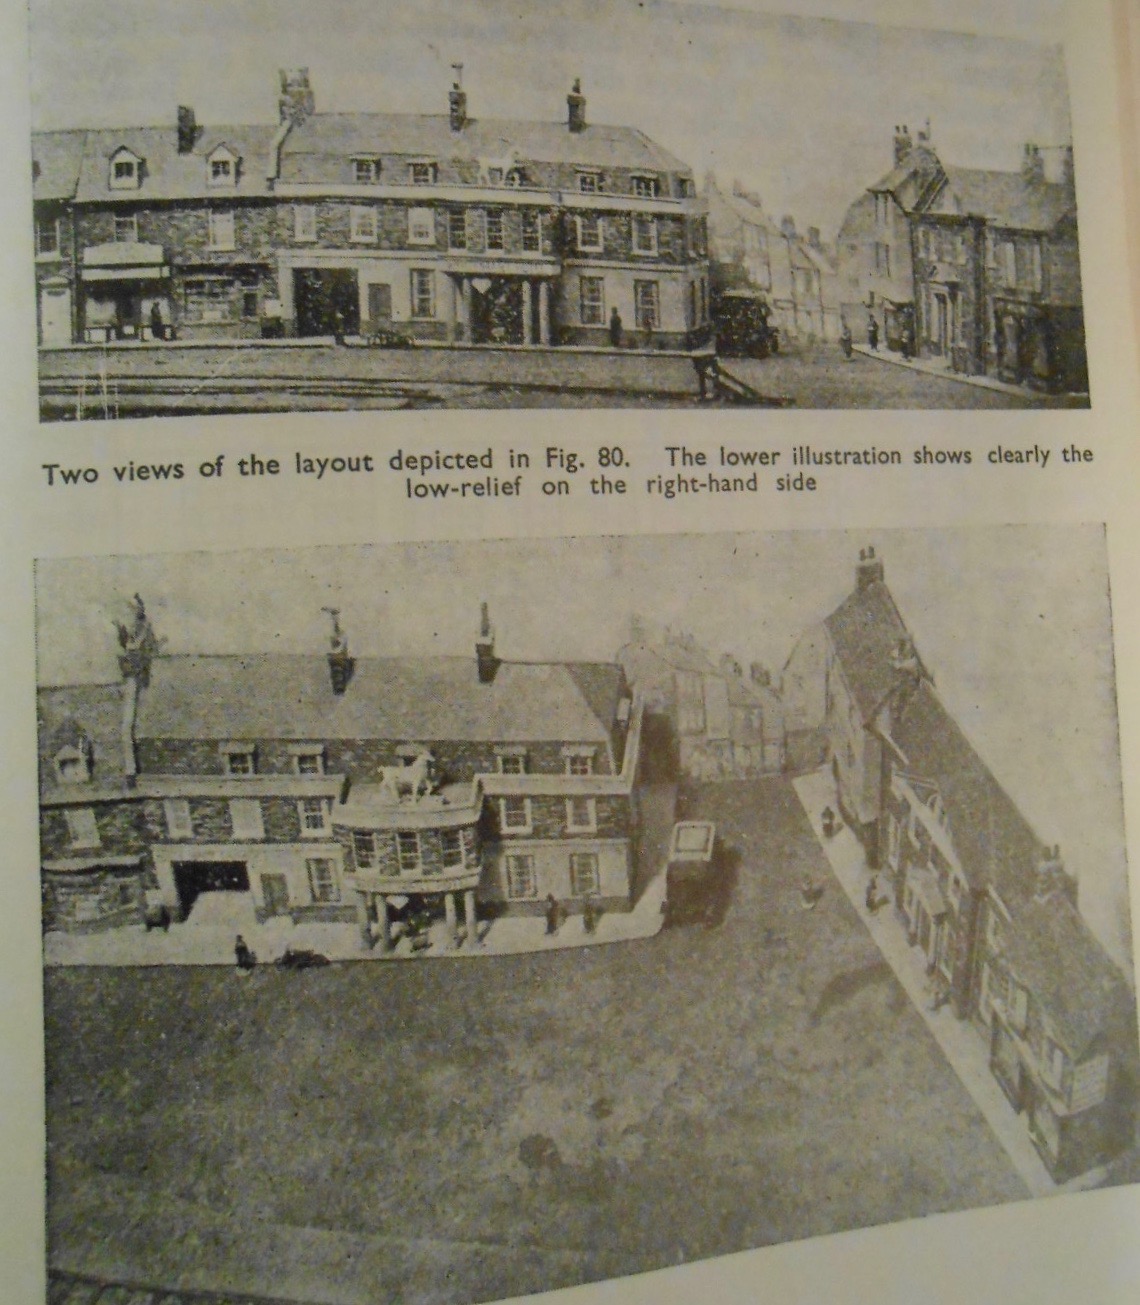
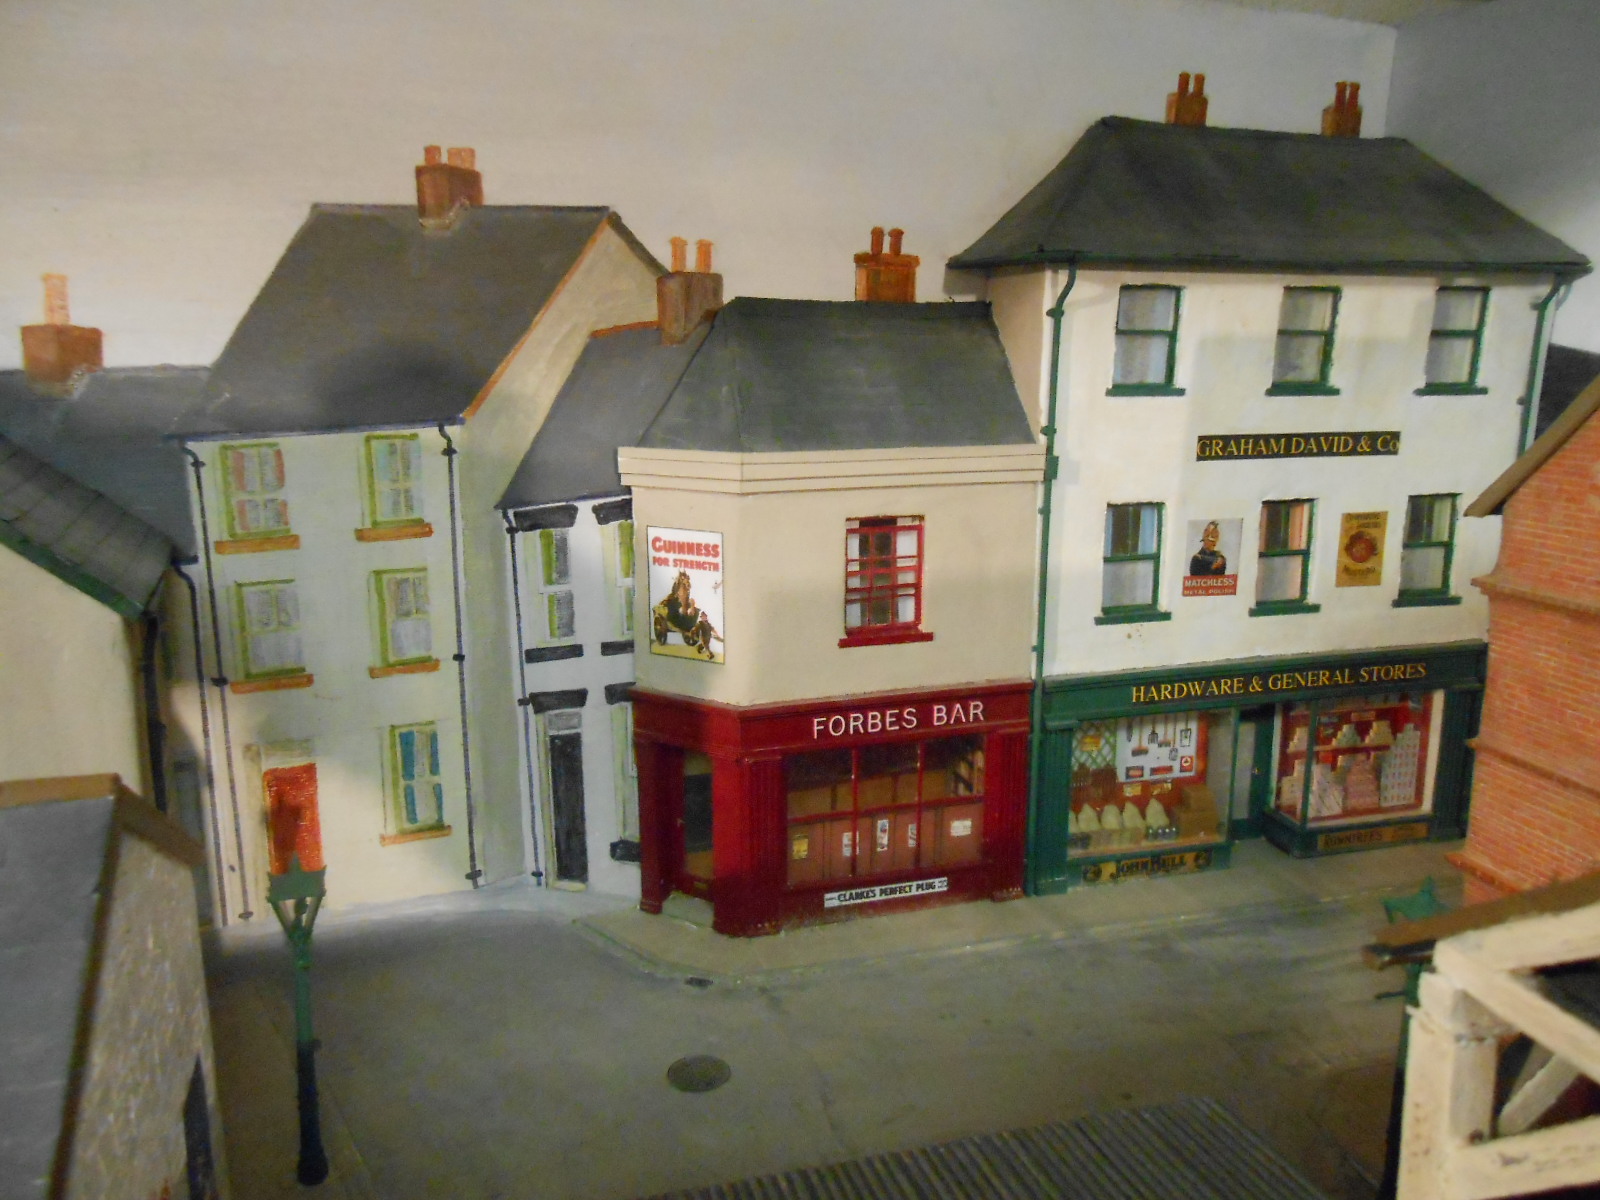
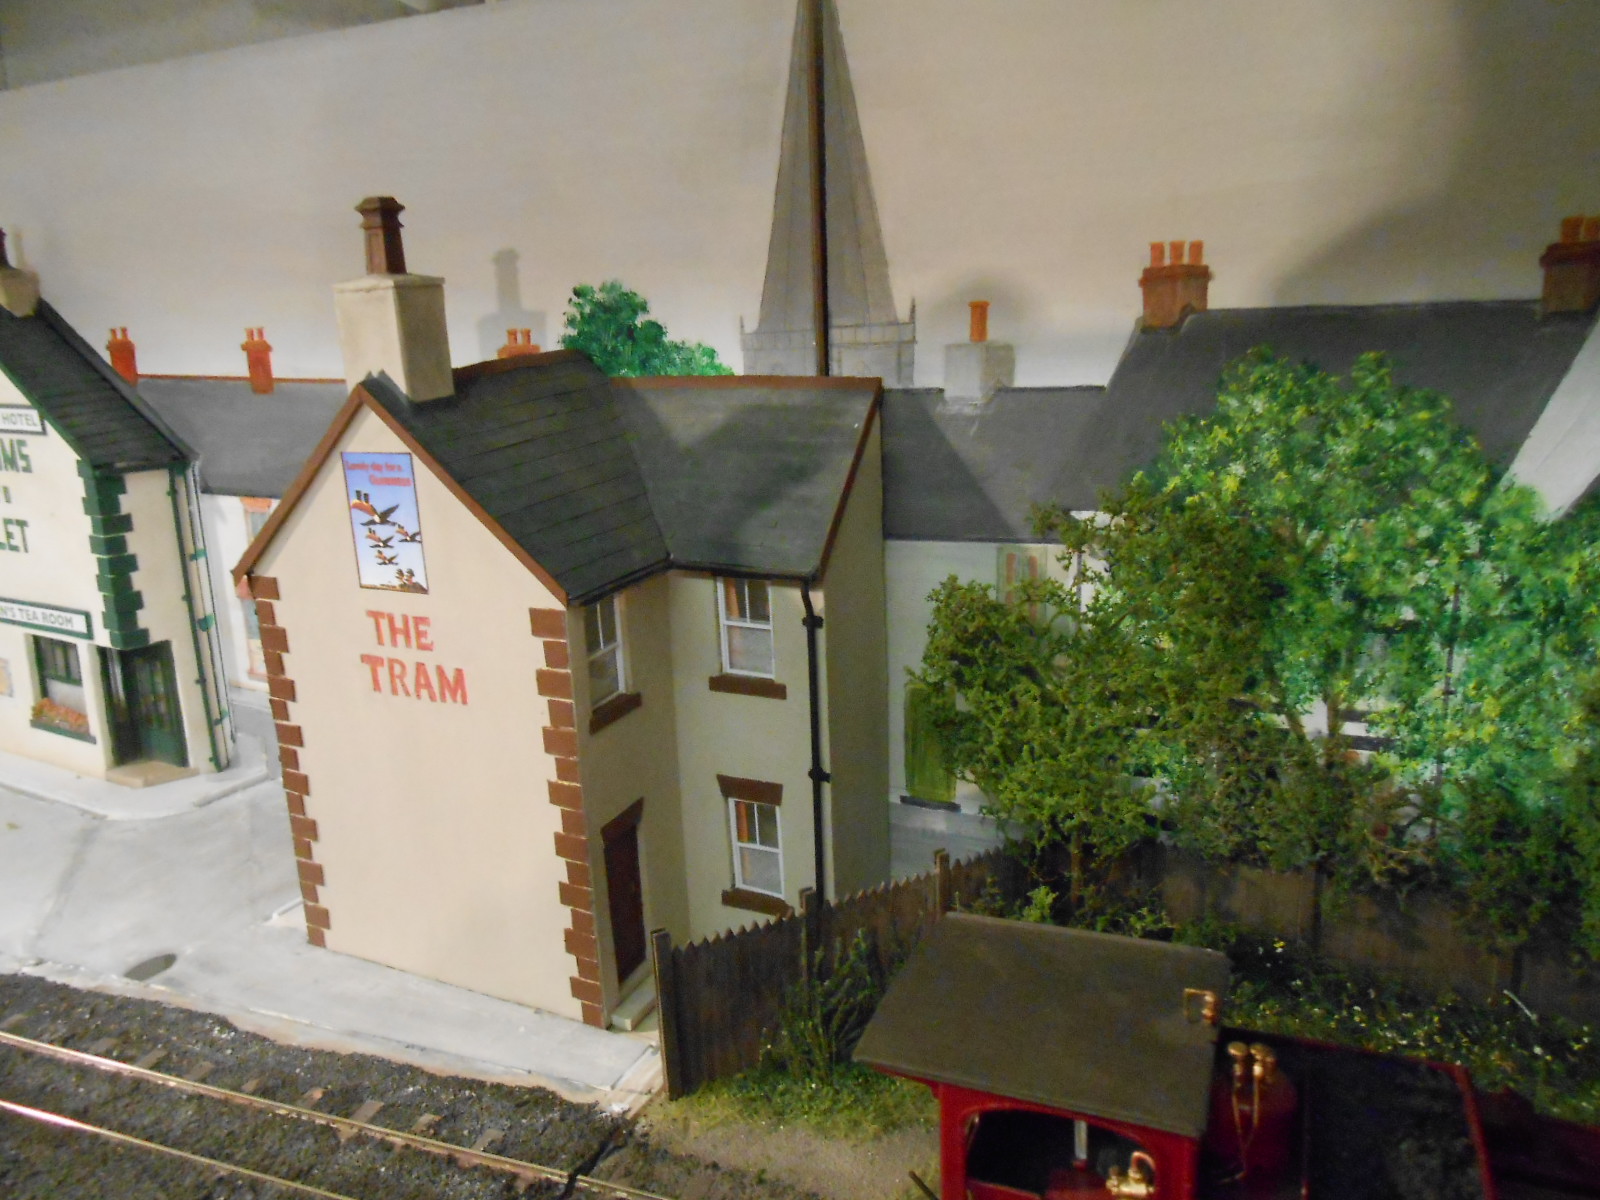
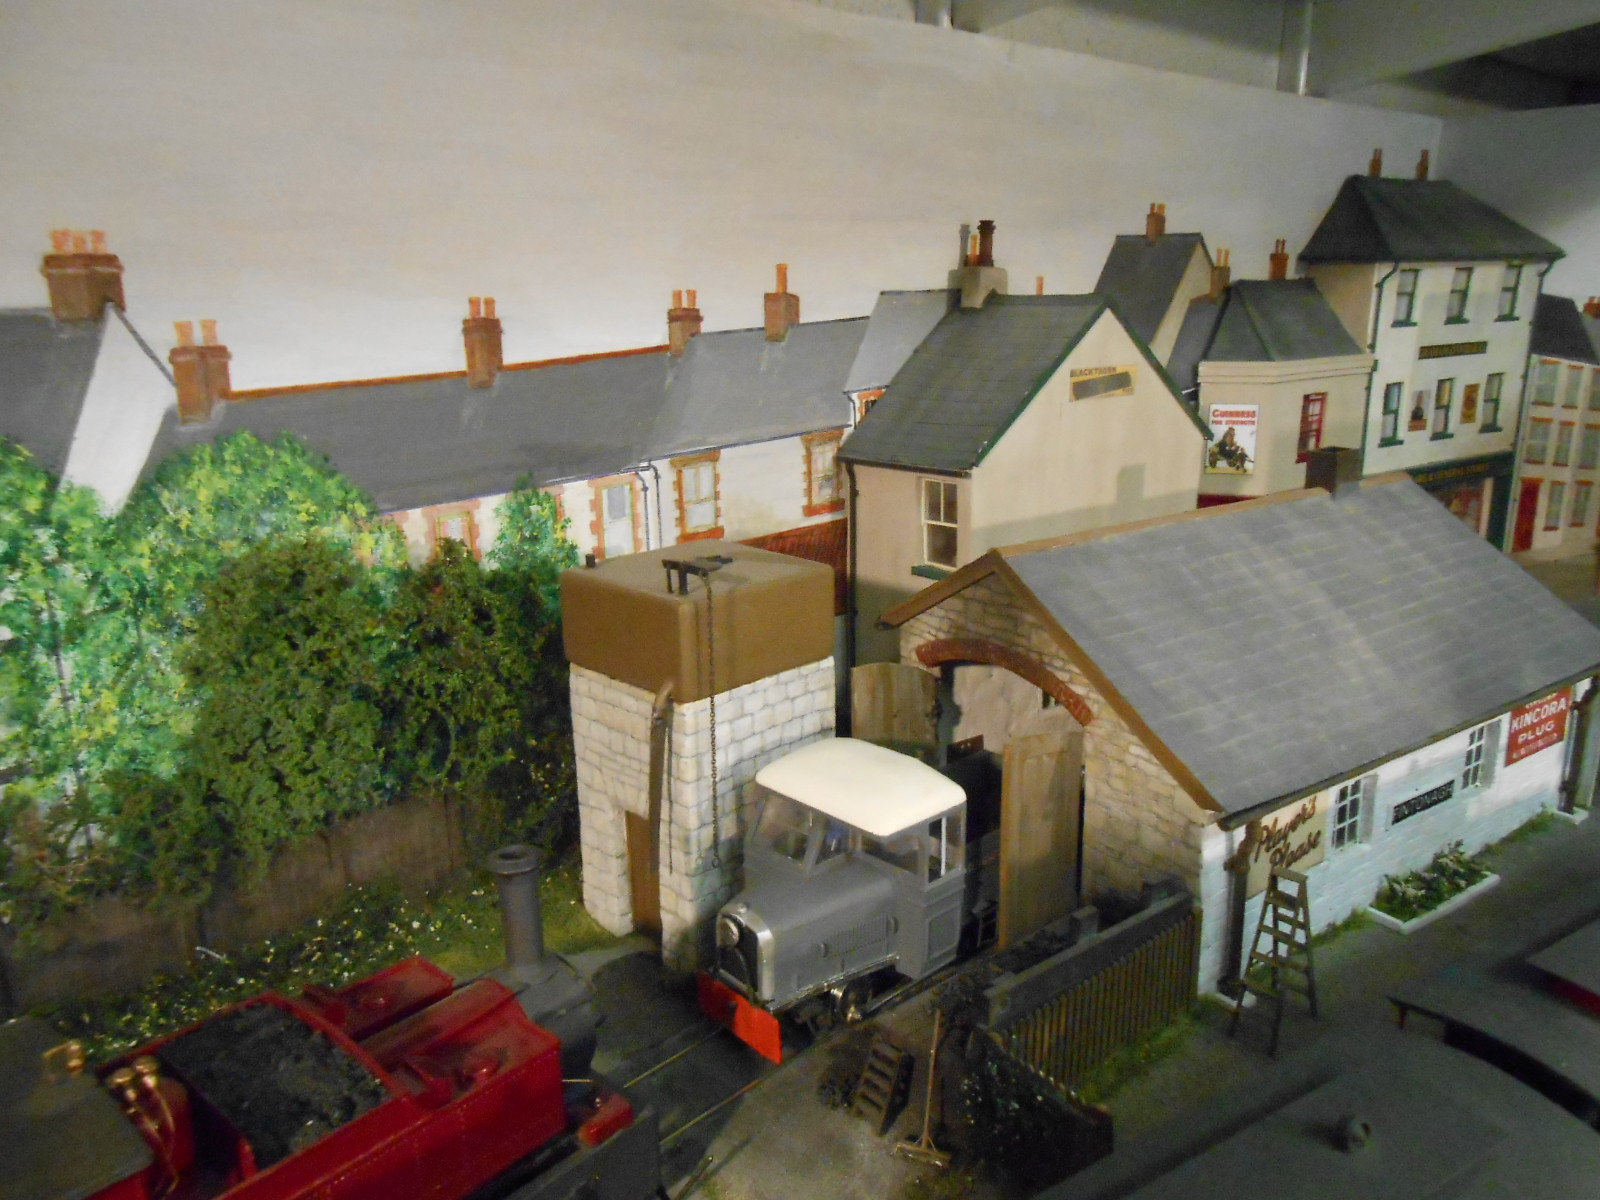
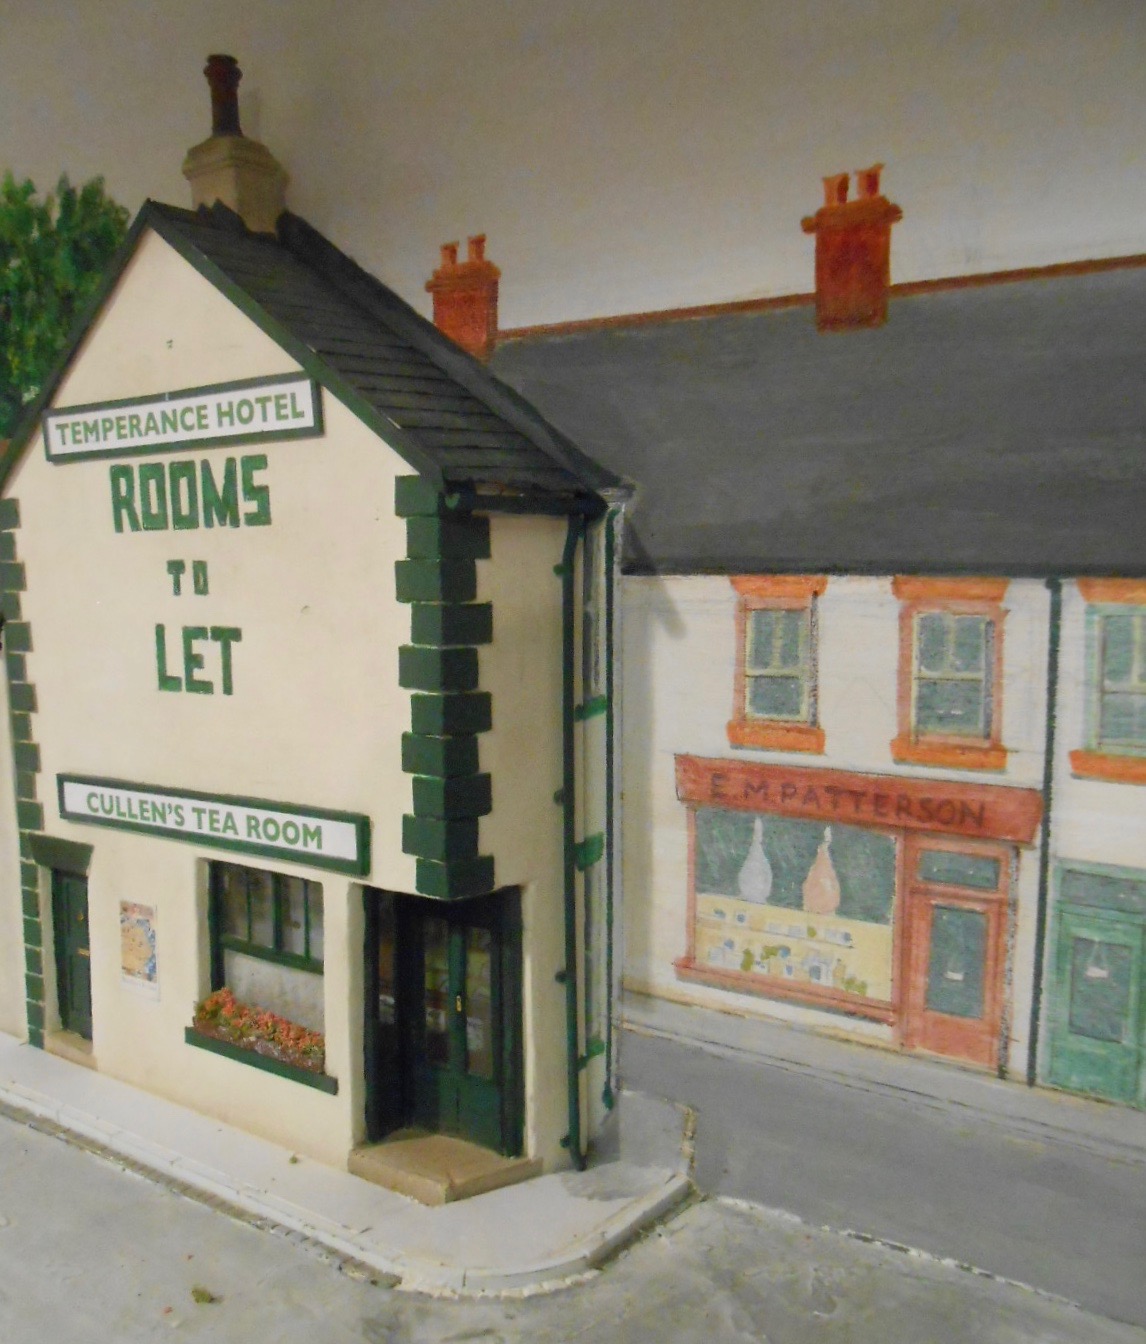
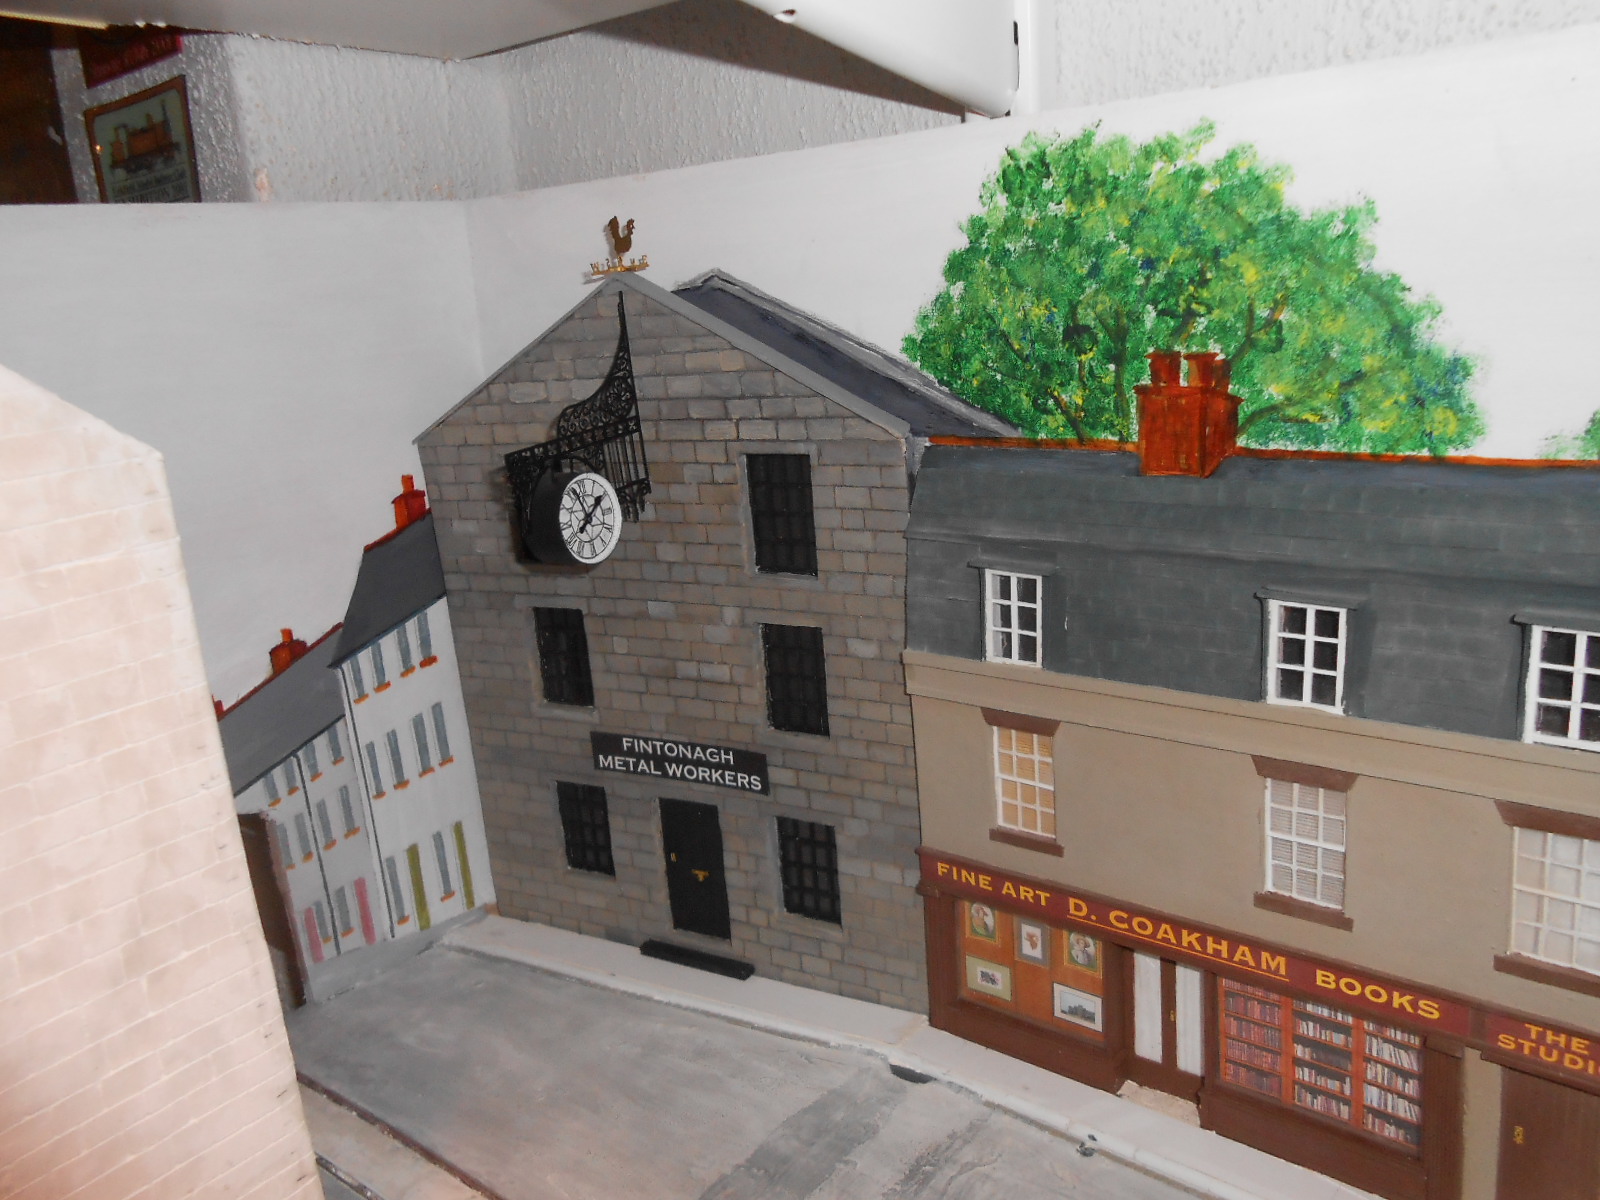
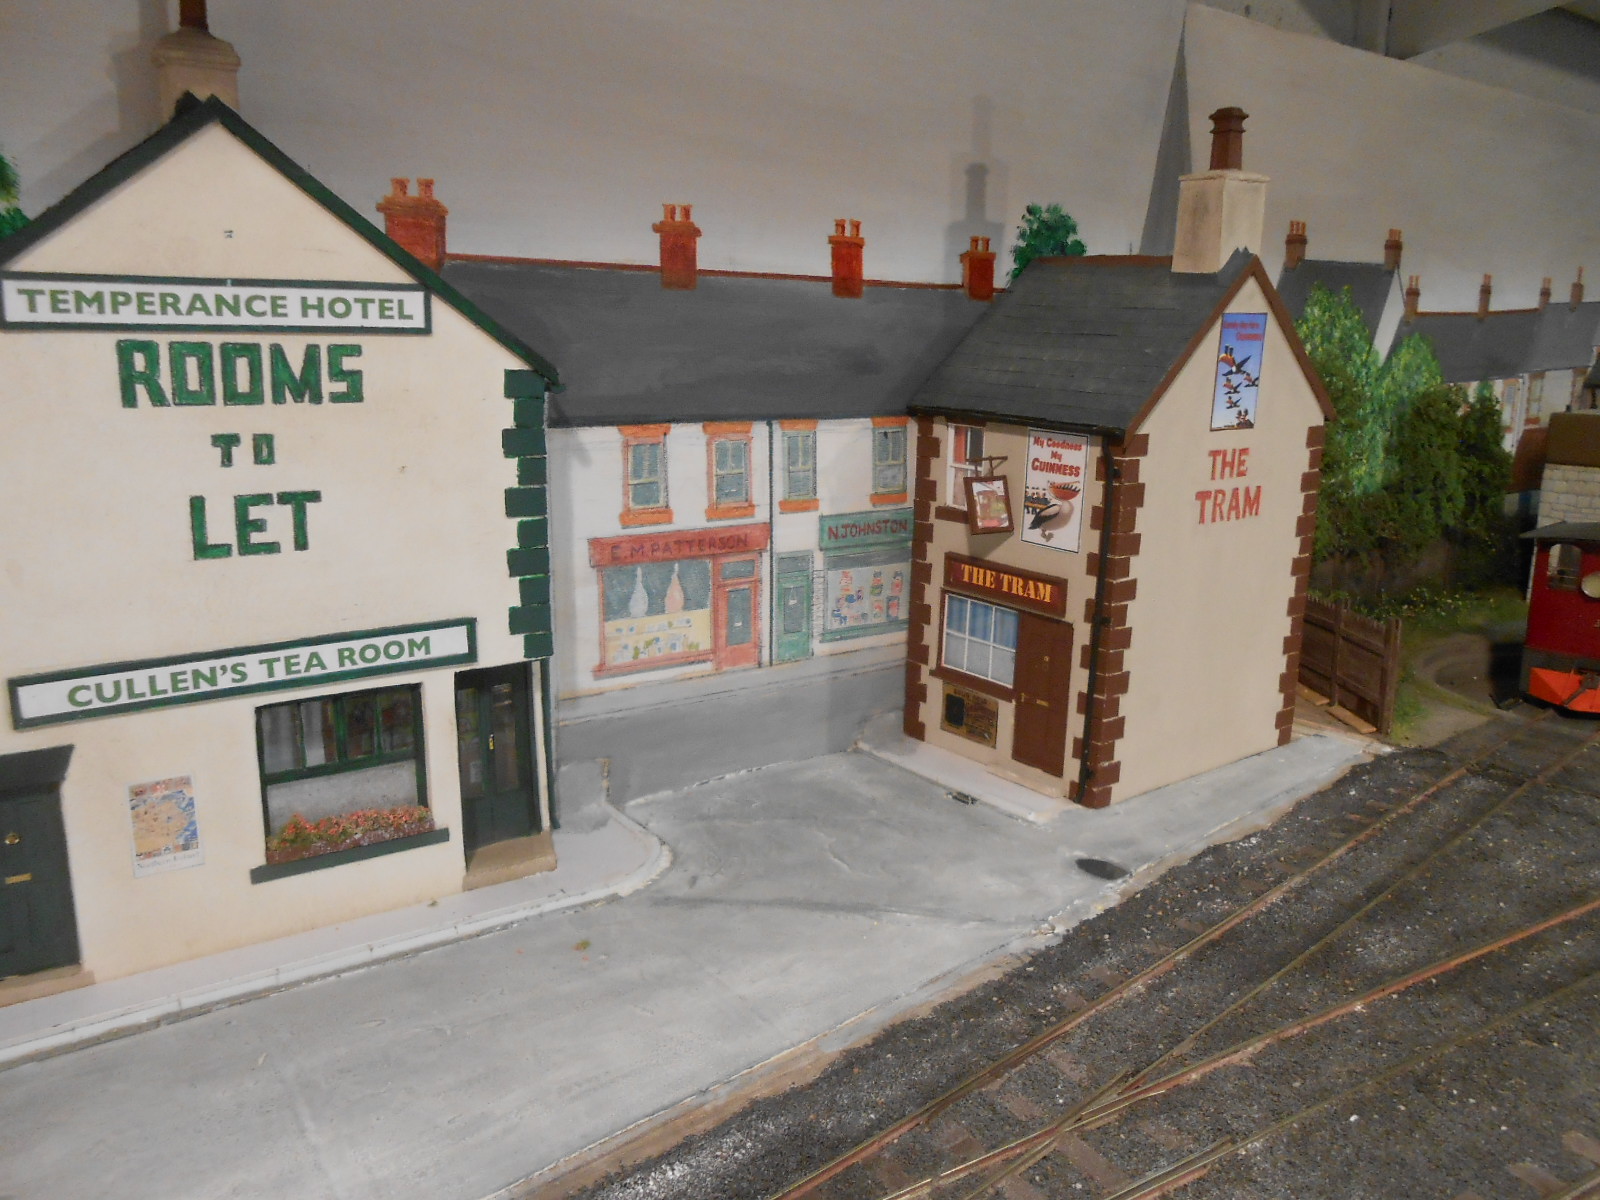
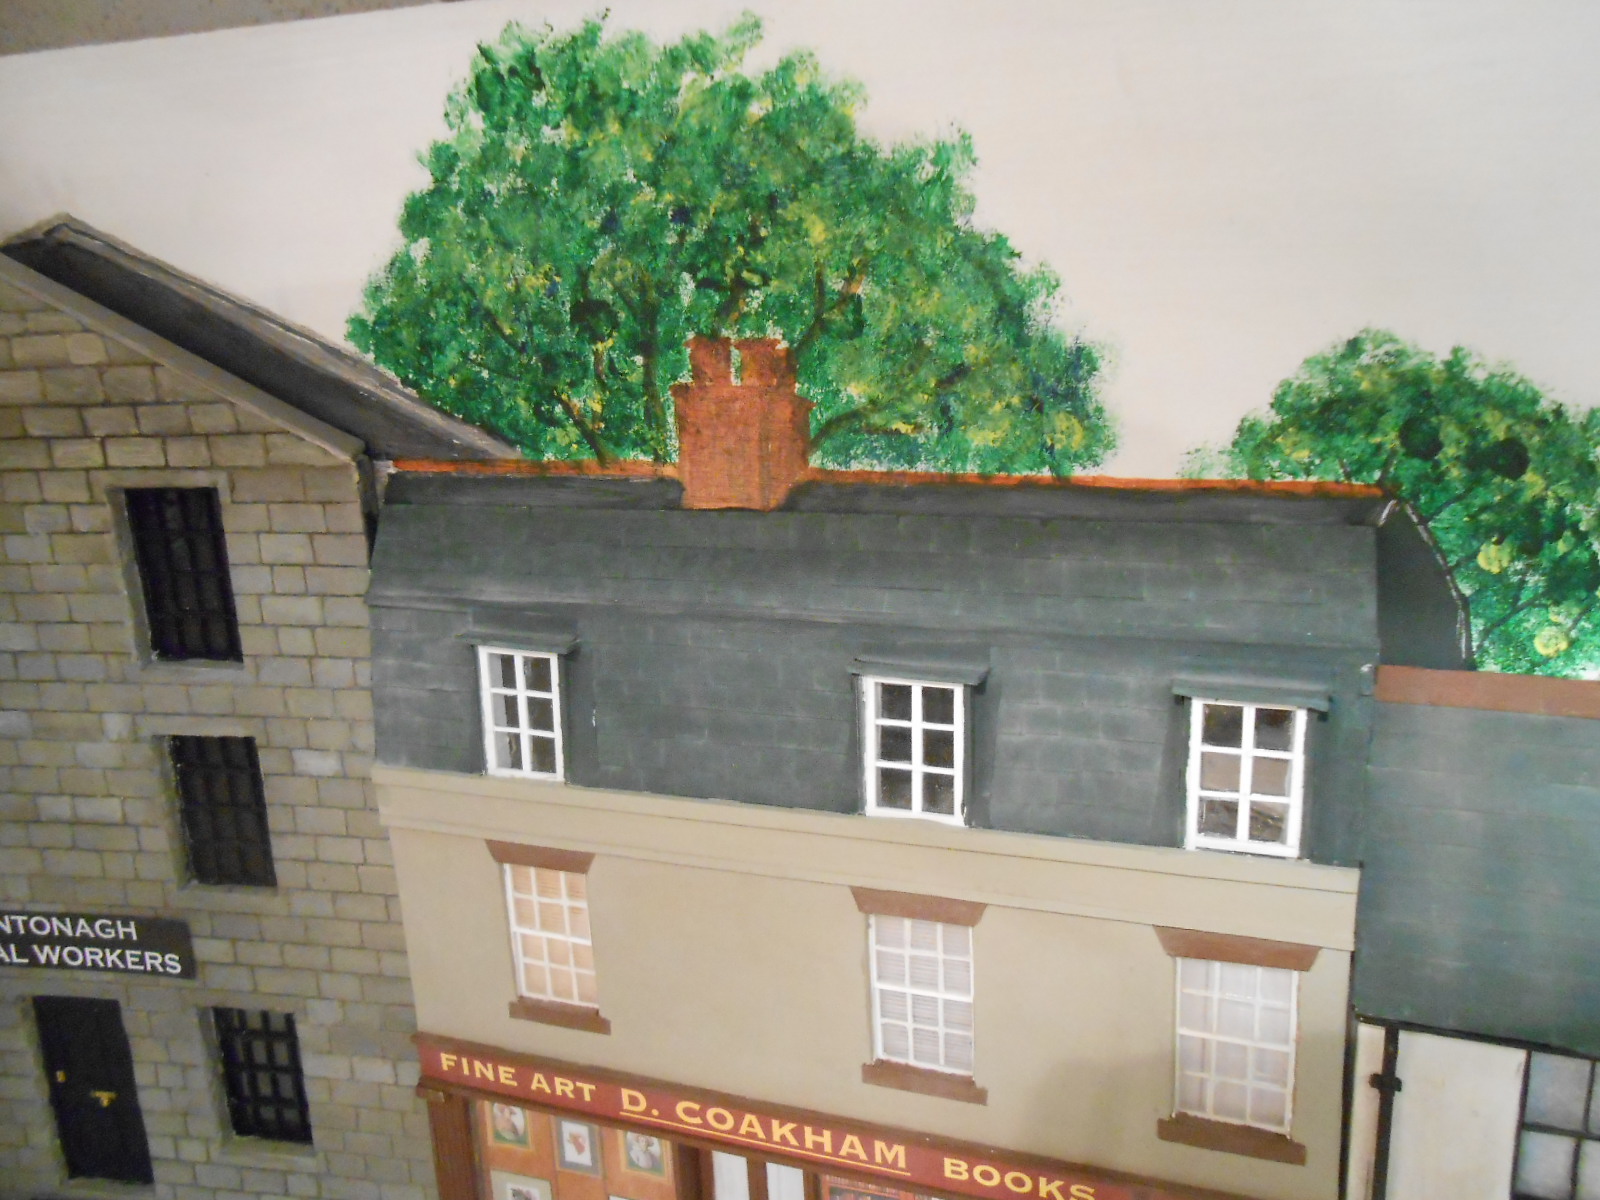
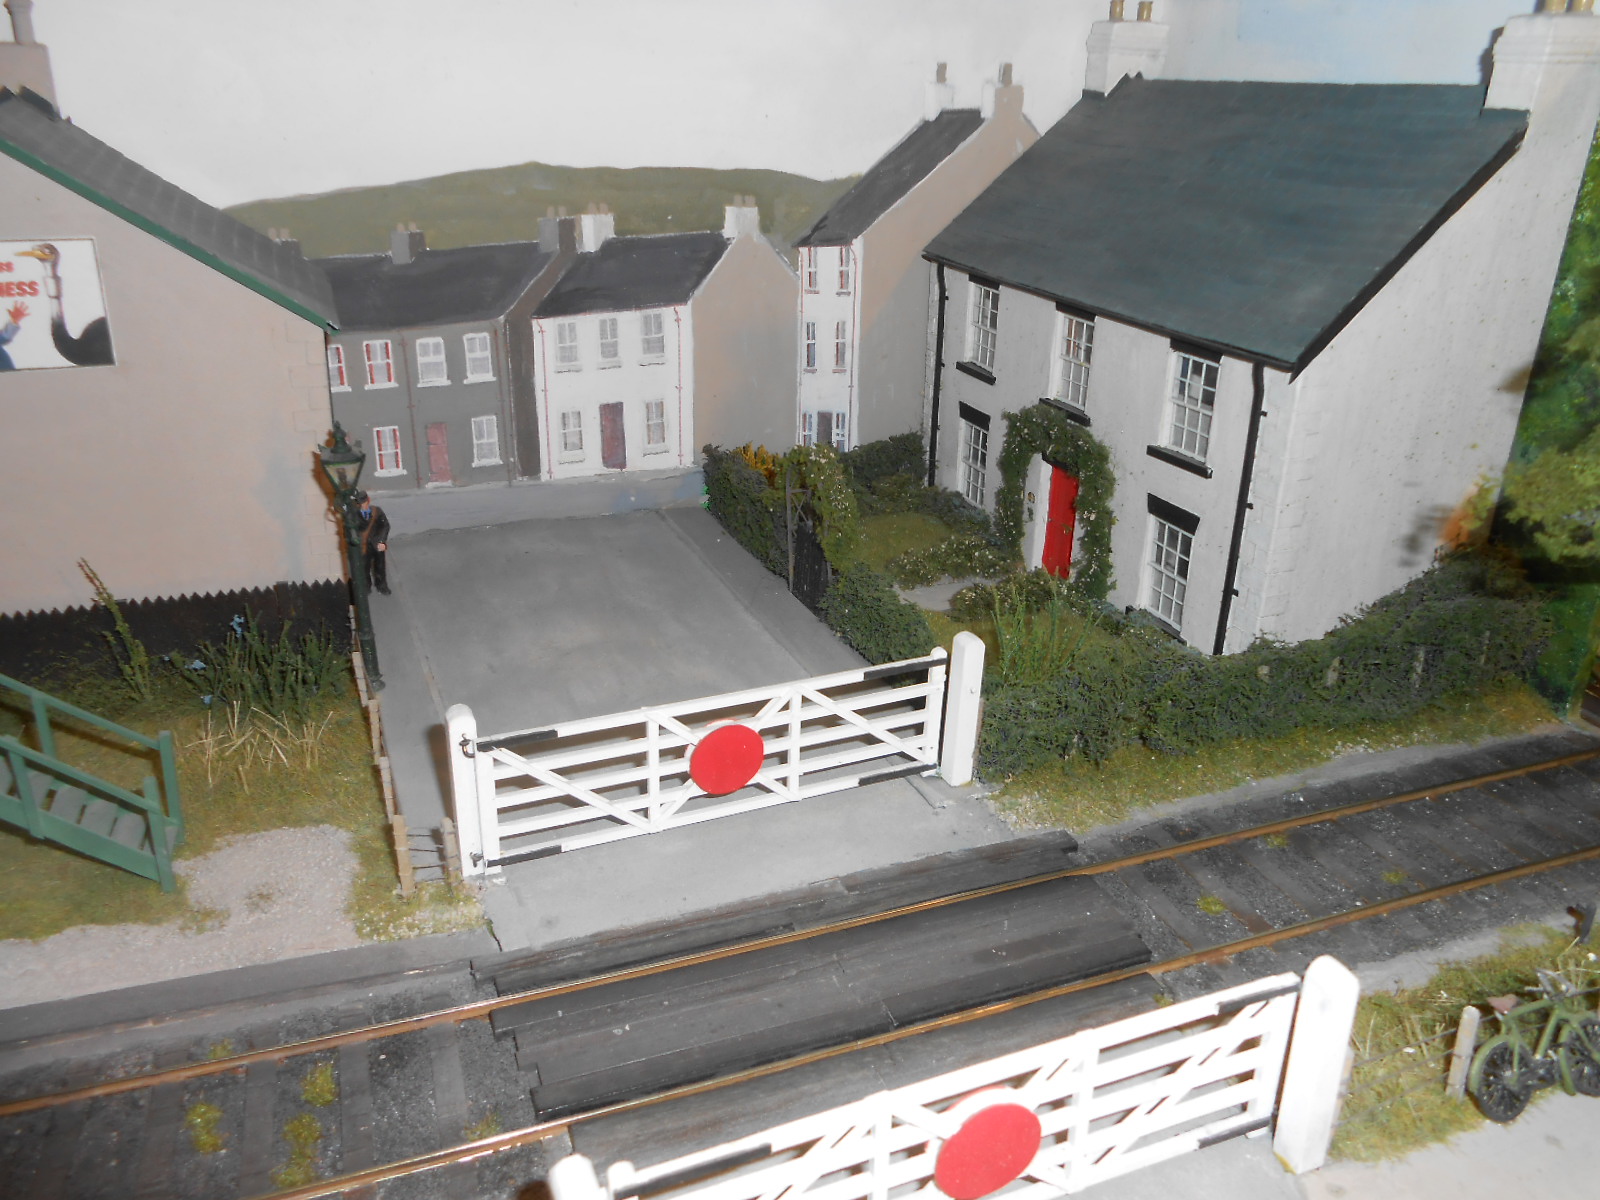
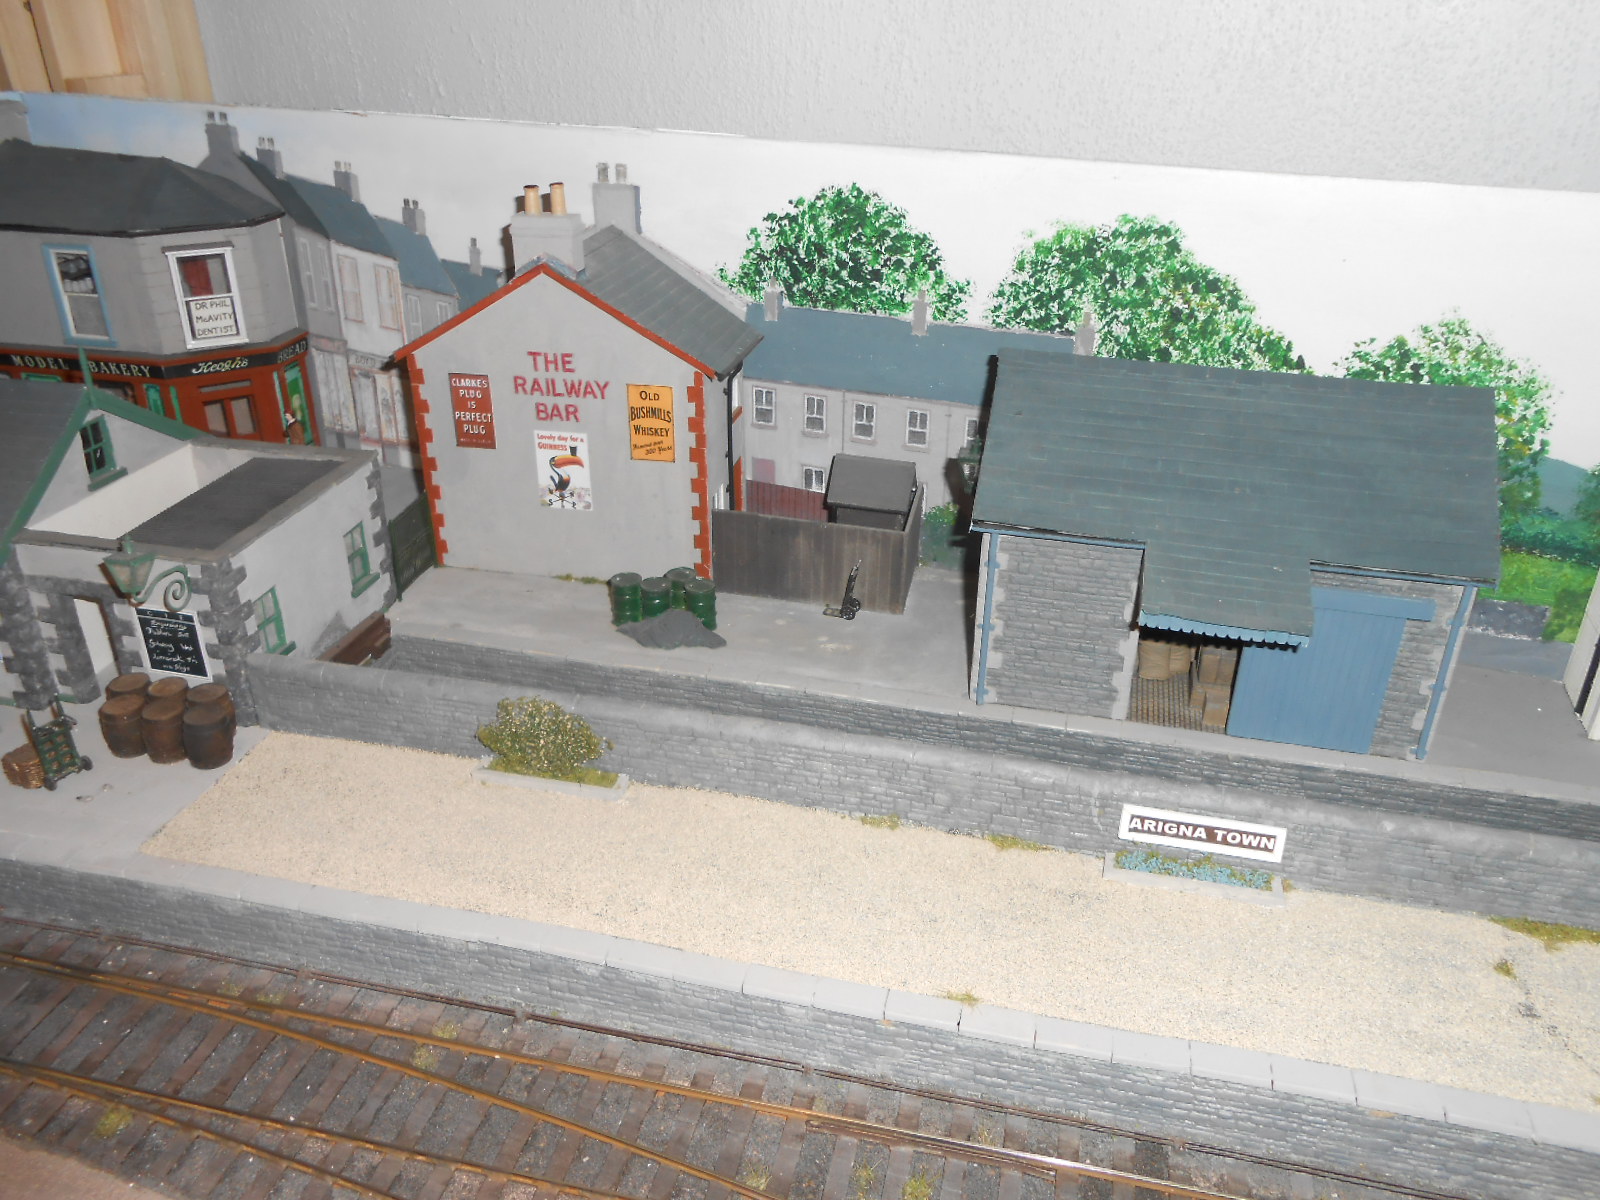
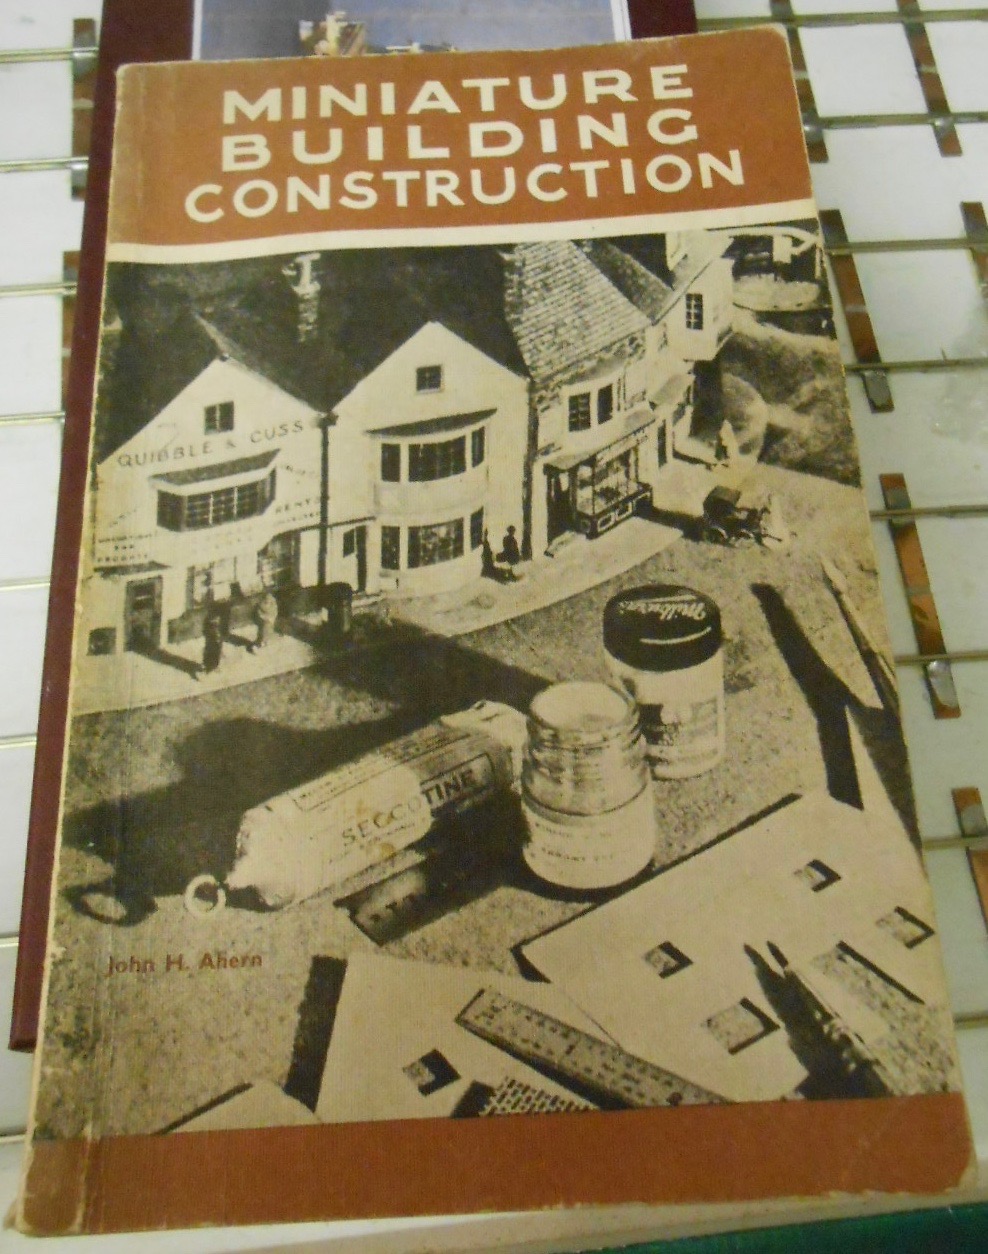
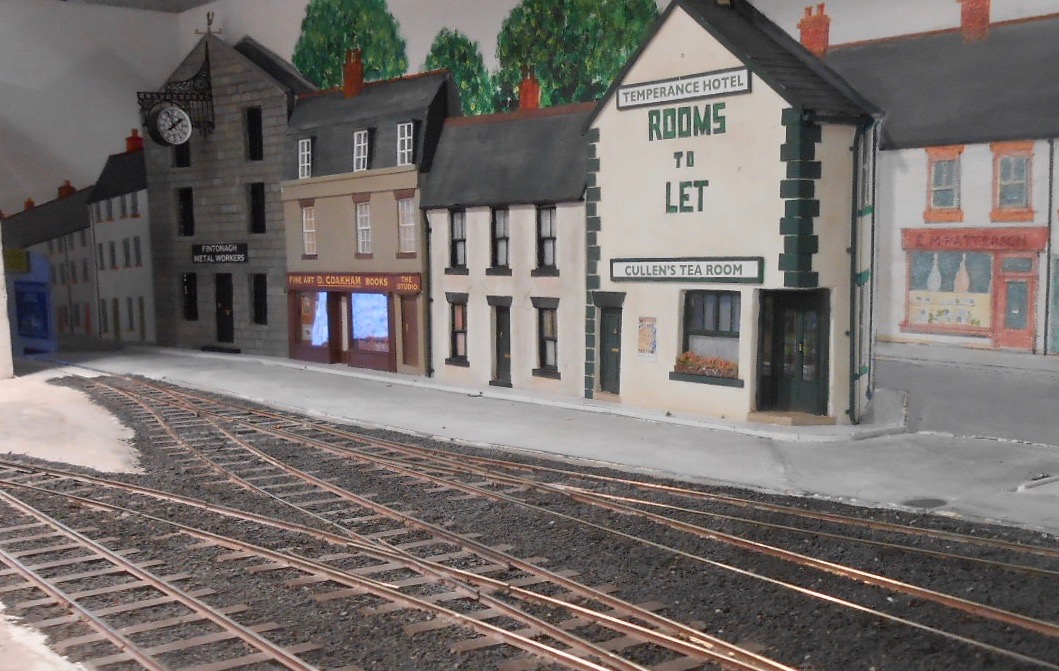
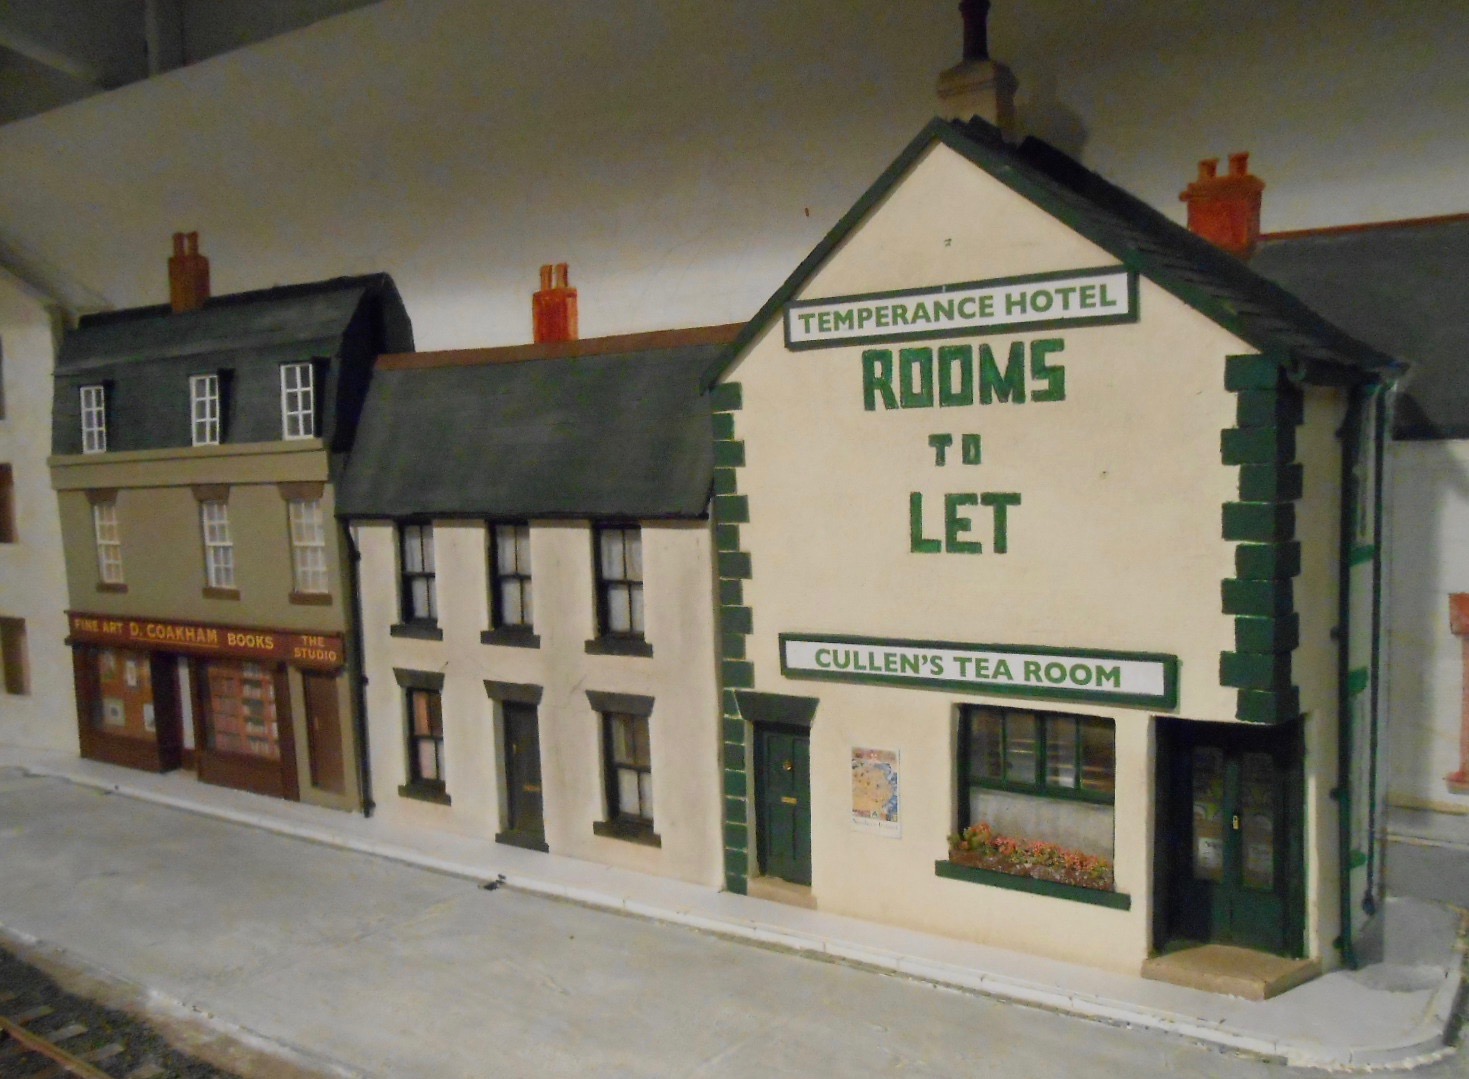
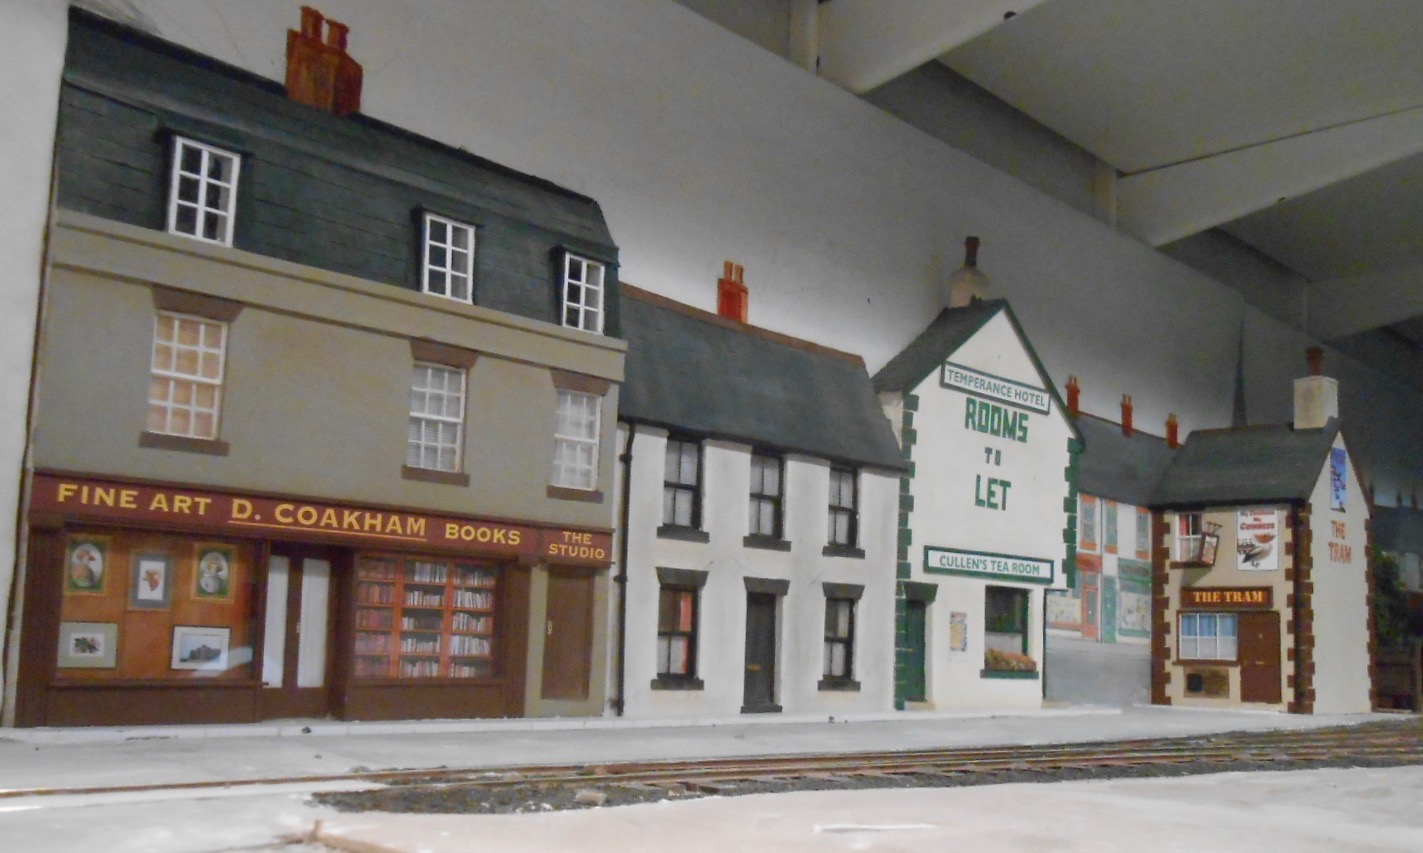
Thanks for the positive comments, folks - much appreciated, as always. In answer to some of Paddy's questions, below are some of the things I do to try and make my layouts seem bigger [& especially] deeper. The latter is a real issue in 7mm scale, as there is often very little space outside the tracks, so you have to resort to low relief modelling and painted back scenes to create depth. First of all, another of my 'Bibles'. John Ahern's book on model railway buildings first came out nearly 70 years ago, but still has enormous value today and should be available second hand. The chapters on low relief and painted backgrounds are invaluable & I have adapted that street scene on pretty much every layout I've built [and am now into double figures]. Check out the photos of both Fintonagh and Arigna & am sure you will be able to spot where I've done this. The first picture of Fintonagh shows that Forbes Bar is only about 2cm deep. However, along with the store on its right, it is tucked into the corner of the layout, so the viewer can only see it from one direction. Hence the painted houses to the left of the bar can follow a road which also goes left into the back scene & the view is then cut off by the bicycle repair shop opposite Forbes. The next picture, taken from the other side of the Bicycle Shop shows how that road has gone behind it & we now see the rear of the buildings. These then disappear behind painted and low relief trees, until we meet the next view blocker, which is the Tram Inn. This building is removable, as it hides most of the baseboard joint in the back scene. The church spire covers the rest and a lighting bracket will act as an alignment clip to keep the edges of both boards parallel. In this picture, you can see a pronounced gap, but when both boards are closed up, there will just be a line that will look like one of the angles on the spire. The other side of the Tram Inn is the Temperance Hotel, just across the road. This road is part of the painted back scene, with a row of shops at the end, supposedly on the same road that branched off at Forbes Bar. As this is a very narrow view [only about 15cm], I have just painted the front of the shops with just a hint of a second side on the chimney stacks. The second face of the Temperance is only about 2cm deep, so I have tried to suggest it is deeper by painting a narrow strip on the back scene. Because the view down the street is so narrow, I can just about get away with this, though I may well disguise it further with a lamppost on the street corner. Further down the street to the left, we have the other back corner of the baseboards & here is a bit of the John Ahern trickery again. Before then, both the Fintonagh Metalworkers and Coakham's shop are also only a couple of cm deep, so in an effort to give the roofs some depth, part of this aspect is just painted on the back scene. A Mansard roof line helps with the shop & I really like to try and avoid having a gable end just appearing as a 'flat'. However, to make sure viewers will only be able to see this scene from one angle, the large warehouse at the front of the layout hides the hole in the sky, while a large tree will be put to the right of this to ensure the perspective can only be seen from one angle too. In the picture below, the shop roof is just painted on the back scene from a line level with the base of the chimney stack. Mix your paint carefully and the joint is hardly noticeable from a couple of feet away. Note that this aspect still needs a bit of tidying up. Other pictures below show the same effects on Arigna. Depending on the angle of the camera, they may well look wrong, but from the viewing angle I want you to have of the layout at shows, hopefully, they look ok and add to the depth of the scene - which is where I came in.

-
The simple answer is John Ahern's book Model Railway Buildings, Paddy. First printed in the 1950s when cow gum was the norm and 'Seccotine' was high tech adhesive! There are excellent chapters of low relief work and backscene which I have copied for years. The main problem is disguising the false perspectives and ensuring the viewer can only see from one direction, otherwise things like chimney pots would have three sides on view. Putting in view blockers mostly does the trick and a large tree will be planted to do that on Fintonagh. Will take some more pictures and hopefully explain a bit more.
-
Already starting to look very convincing, while the way it is being built follows prototype practice with engineering coming before track laying, which adds a little extra to the story.
-
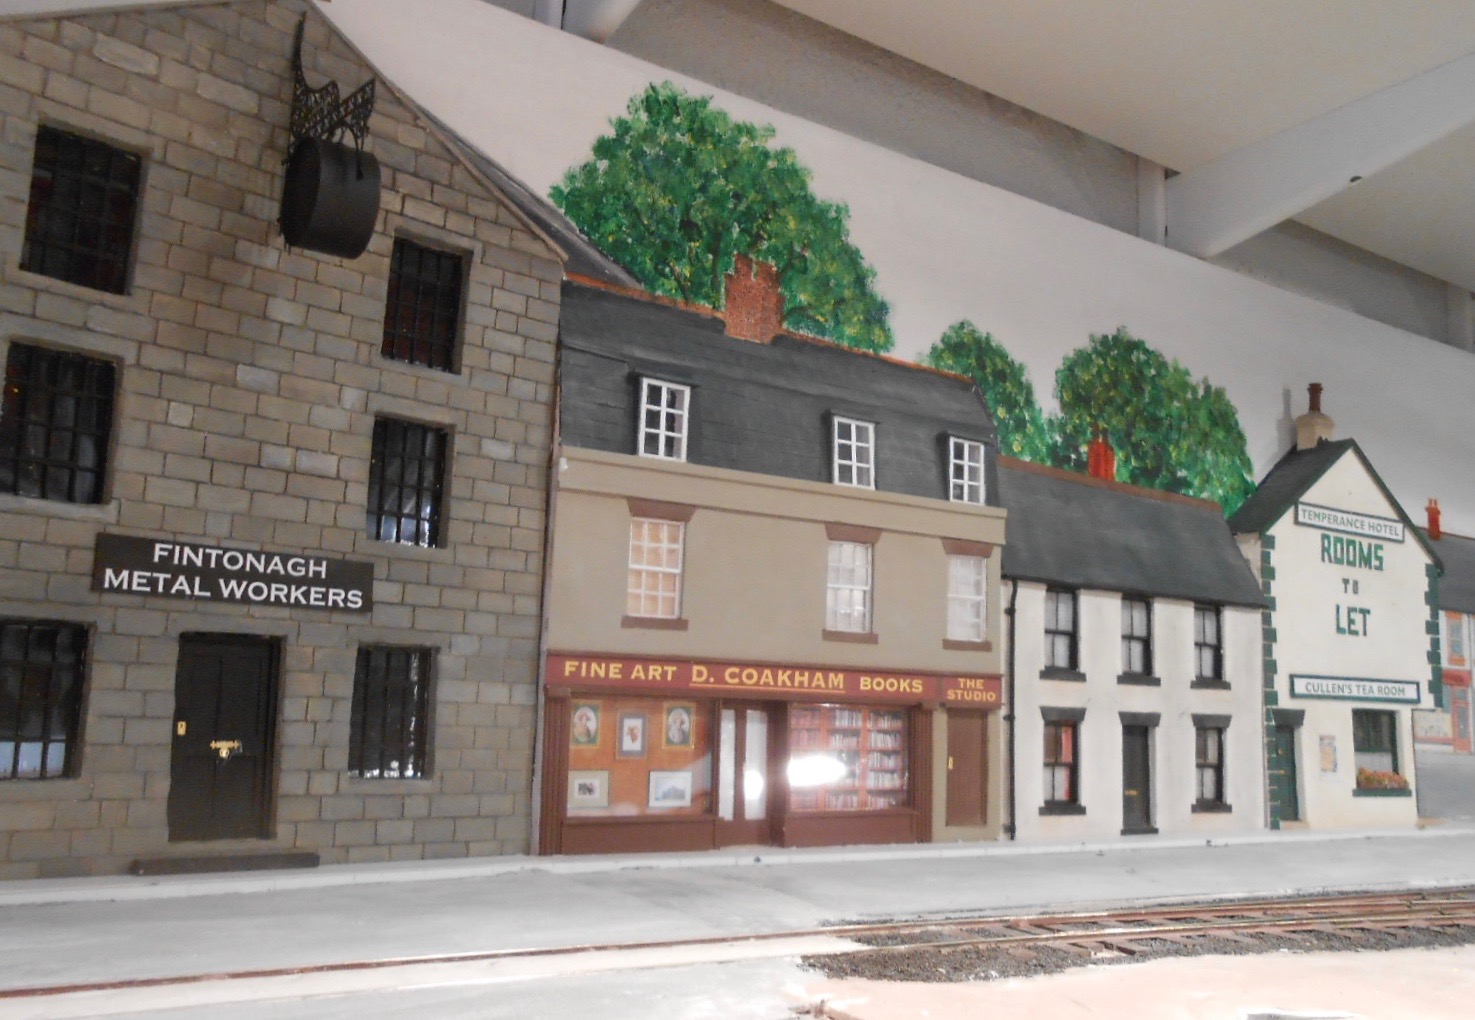
Baseboard 2 developments Start with the background and work forwards is what most art teachers recommend and it is much the same with model railway scenery - after all, there is little point in trying to work beyond something you have already planted. So, recent work on Fintonagh has been focussing on the low relief buildings making up the rear edge of the layout and trying to incorporate them into a painted back scene. More snake oil than tromp l'oeuil and it is not quite right yet, but the photos hopefully show what I'm aiming at. The latest creation is the Fintonagh Metalworkers building. On the actual Clogher Valley line there was 'Fivemiletown Industries', so this exercise, little more than a 'flat' pays homage to that. I'm assuming a local co-operative offering wrought ironwork, welding, brazing and the like, with the rather OTT clock an advert for some of their work & small weather vane likewise. Both came from Scalelink etches, though the clock needed rather more work than just chopping out. The windows are laser cut jobbies from York Modelmaking. The next work will be to fill in the gaps between buildings with DAS clay and make good the paintwork, then I can add paving stones, drain & manhole covers etc, before working outwards into the front part of the layout. There will be a long stone wall between the railway and road, while a large tree will hopefully hide some of the liberties I've had to take with perspective on the back scene. What might look ok in the pictures is not necessarily so as you move along the layout. The tree and the mill/animal feed warehouse [haven't decided which yet] will both hide the hole in the sky where the layout disappears into the back scene.
-
No expert on the prototype, but that is certainly a good piece of modelling.
-
Definitely one to watch.
-
That's going to be a very impressive rake.
-
Looks very thorough to me. The only thing I would add is to consider drawing out the whole thing full size on wall paper lining, though if ready made track is used, this is probably not so important. Gettting down to eye level to check for alignment is also important
-
Arigna Town - this week's scenery
David Holman replied to David Holman's topic in Irish Model Layouts
Thanks everyone. If you go on RMweb, there are pictures of yours truly - not for the faint hearted though! -
Would be a liar if I said I had no scars (picking up a soldering iron at the hot end is a bad idea too). However, provided the blade is really sharp, then you don't need to apply too much pressure and hence the knife is less likely to slip. Have used craft knives with snap off blades for years. As soon as the tip starts to wear, simply snap off a new one. (Mostly) works for me, though the Olfa gizmo certainly looks good.
-
Ballasting is undoubtedly a pain, but a necessary evil that just has to be done. Agree re underlay, the sound deadening effect is minimal. Hence for station boards not worth it, but on mainline sections where there is a 'cess' beside the track, underlay lifts the rails enough to create this.
-
The Ragstone kit of the Clogher 0-4-2T that I bought at the Reading Trade Show on 1st December last year is still in its box, as I am concentrating on buildings for Fintonagh. Apart from when I bought the two Sligo small tanks and one remained in its box for six months, that is a record for me - I've always got on with what I buy straight away. Most modellers I know are the opposite though. A standing joke at the Chatham club is to mention the Pressflow cement wagons. Half a dozen on these 7mm scale kits were bought about 20 years ago and shared among members to build. So far, less than half completed... Mayner is right about the Impetus kits. They were state of the art when Robin Arkinsall was producing them many years ago - probably the equivalent of Judith Edge kits today. Am sure I would not have been able to resist and likewise all those juicy Backwoods Miniatures. Had they been done in 7mm scale, I might well have been doing both Swilly and Donegal instead of the Sligo.
-
Wills sheets are 2-3mm thick, but easy to score and snap using a craft knife. No experience of laser cutters, but sounds like they come with a few things to beware of. An alternative might be to try York Model Makers. They advertise in the magazines and produce a host of architectural fittings such as doors and windows. High quality and good value. In 7mm scale windows come in under a pound a piece and when microstrip now costs around 45p per 300mm length, it makes you stop and think.
-
Arigna Town - this week's scenery
David Holman replied to David Holman's topic in Irish Model Layouts
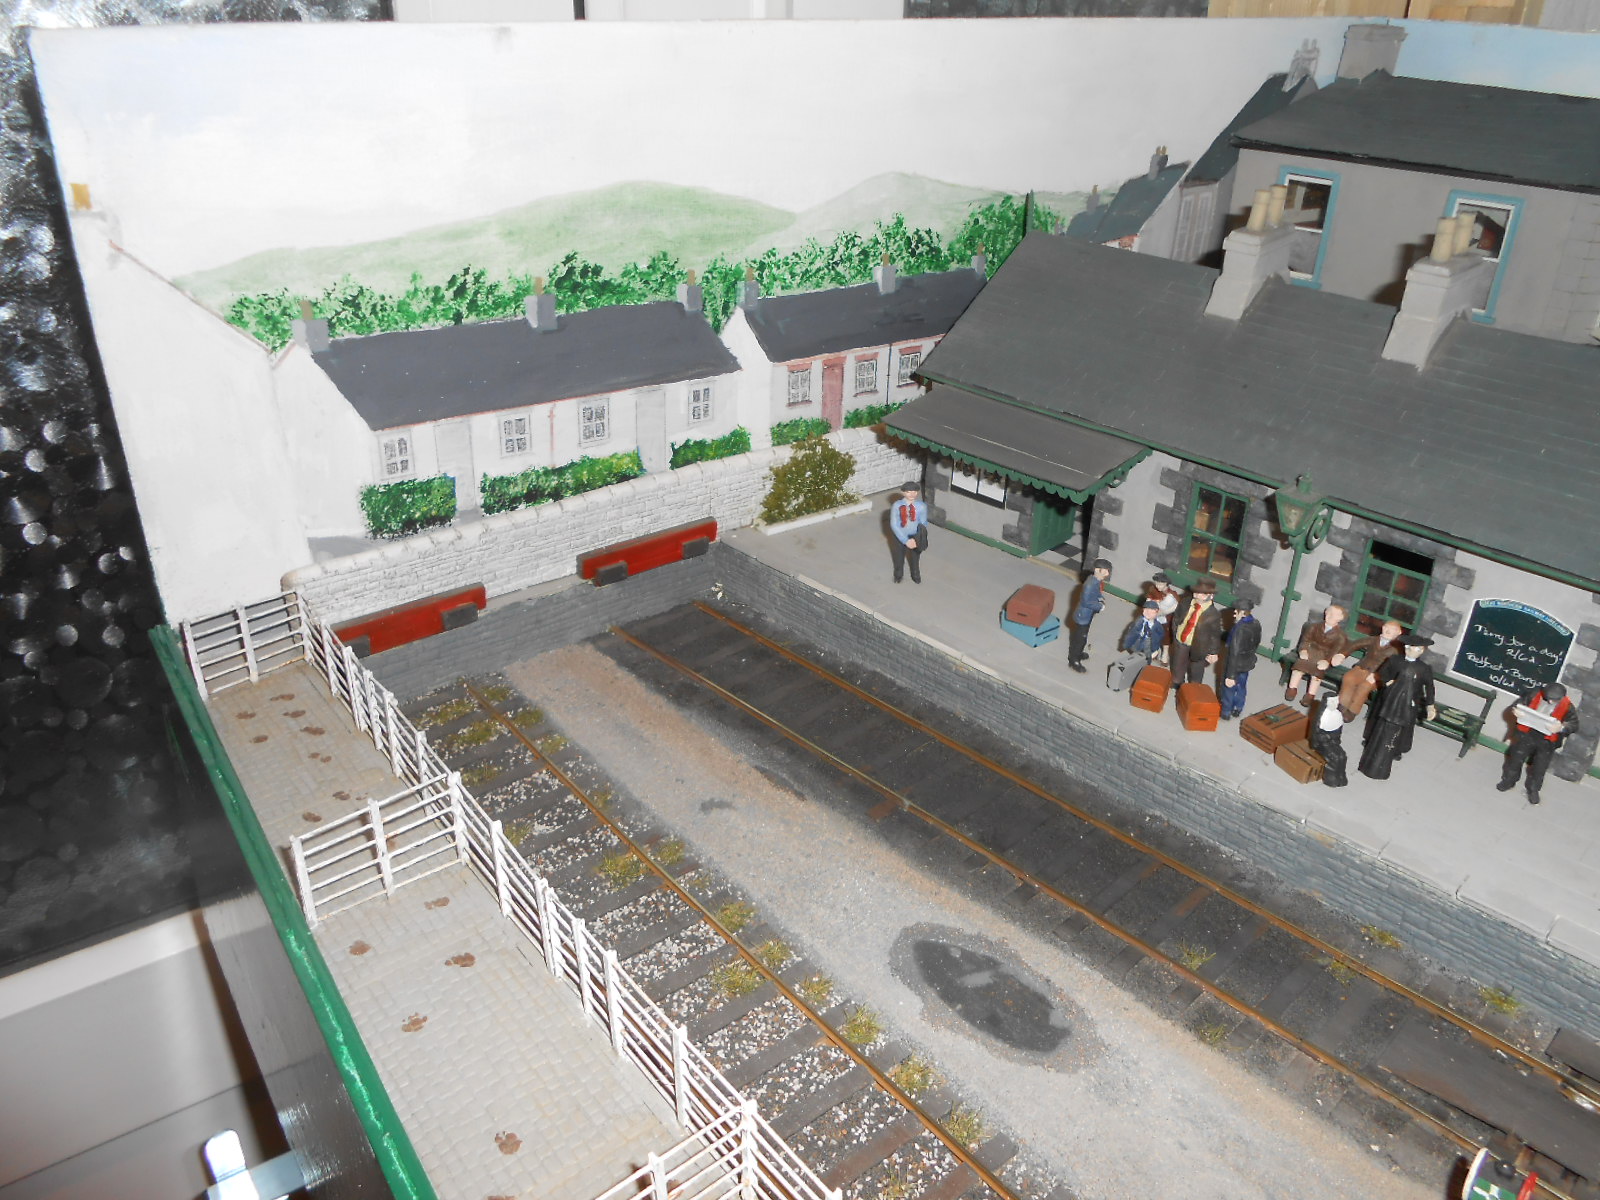
Milton Keynes, Saturday Interesting day in the land of the roundabout and concrete cows and probably the biggest single day attendance of any show I've exhibited at, with around 3,000 people. Not the easiest place to access, but the club worked hard in quite challenging circumstances when even traders were muttering about it being 'too crowded' at times! Challenging for Arigna too, with a broken point linkage and a broken pickup on Fermanagh early on. Nobody seemed to mind we had to change the goods siding point with a screwdriver, while the new Deutz diesel had to double up on both the stores and cattle trains as I have not yet got any new axles for the J26. Never hurts to have a spare engine at shows... Otherwise the day went ok as was topped off by us getting the 'best visiting layout' award. Thanks to all concerned, am sure the club treasurer will be very happy with around £20k on the door!
-
These are very nice indeed. Am guessing they are to 4mm scale, but the detail and especially the windows make them seem more like 7mm. Love the deep eaves on the signal cabin. Anybody would think it rained a bit thereabouts!
-
The only real bonus of a continuous run is for testing and running in stock. Not to be sniffed at, but not necessarily essential either. Timetabled/sequence running not a problem on a circuit either, but the terminus-fiddle yard set up very much replicates the rest of the world in terms of giving a sense of purpose to operation. For many people in Britain, it is the only option when only one or two walls are available as layout space. Arigna Town is little more than a loop and two sidings, but at exhibitions we run eight different trains in a sequence that lasts up to an hour. Complex shunting moves can be set up, but actually, we find it more satisfying to keep things simple and make sure they run really well. As others have said, it is all a matter of personal taste.
-
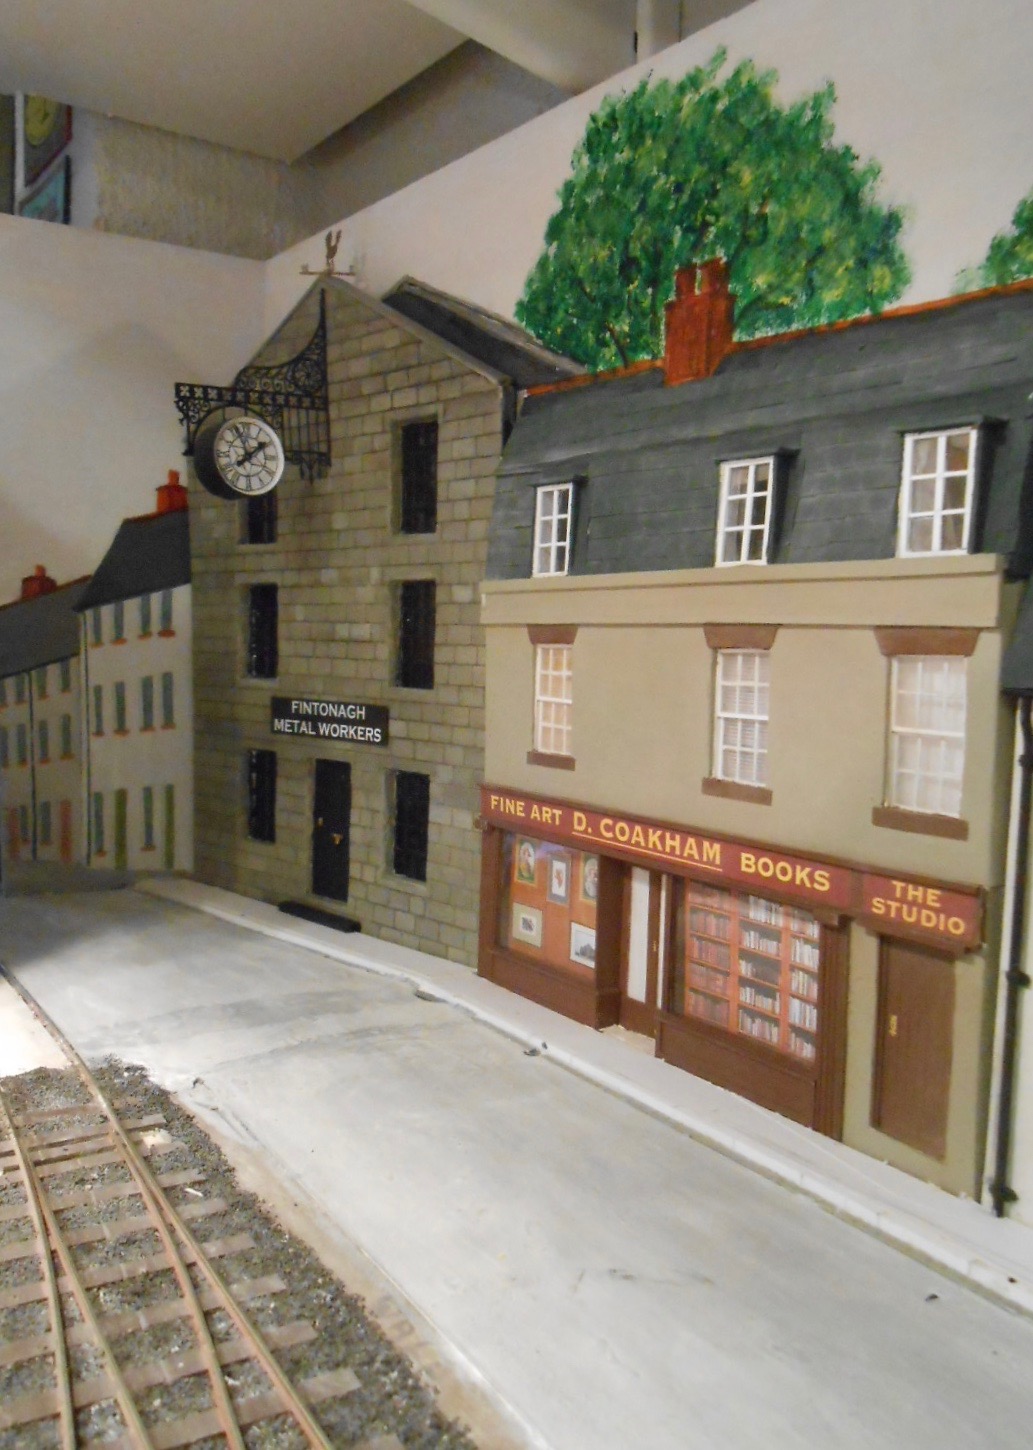
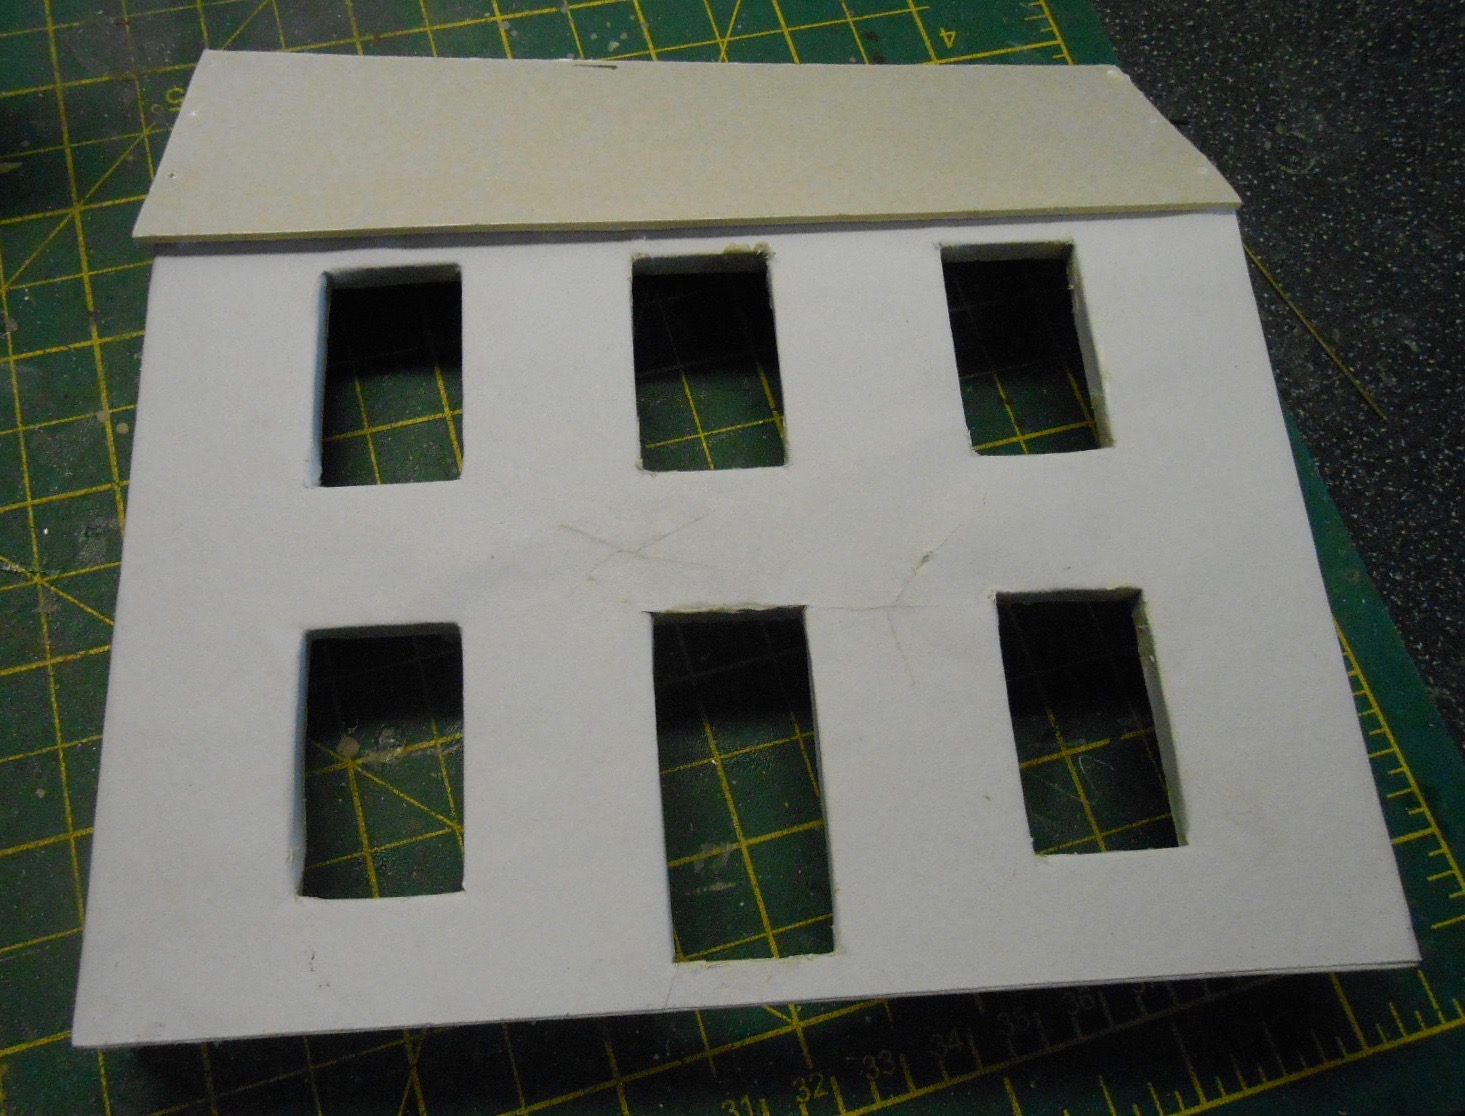
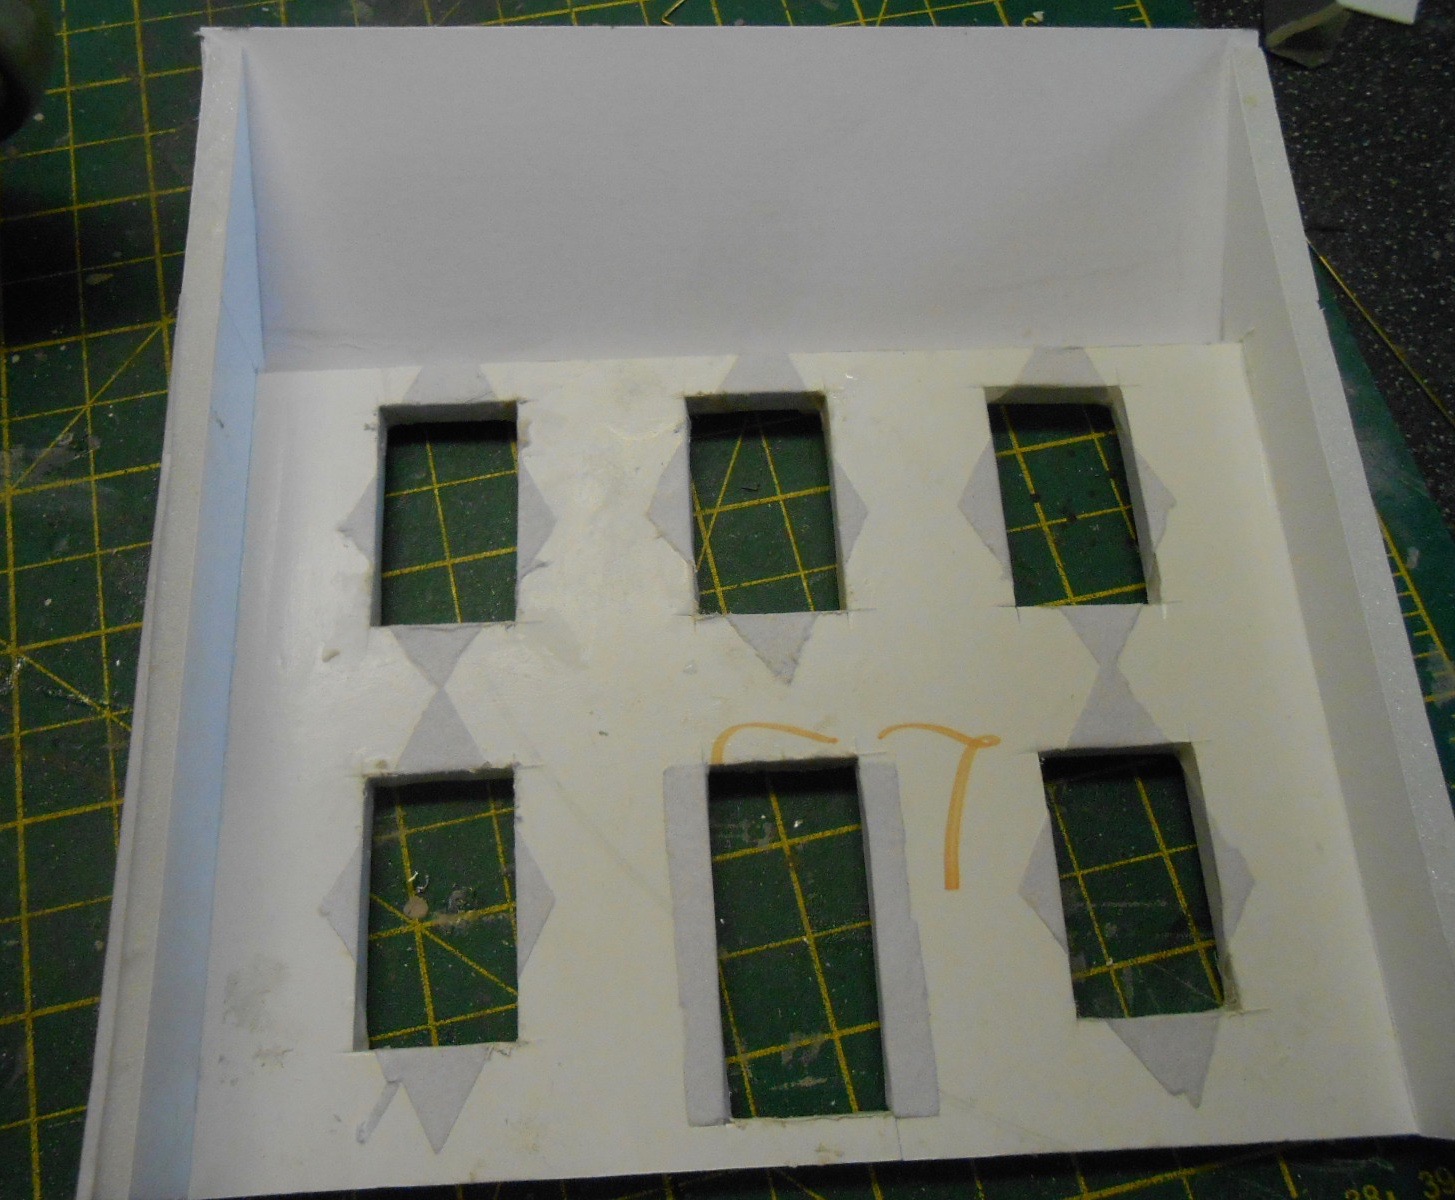
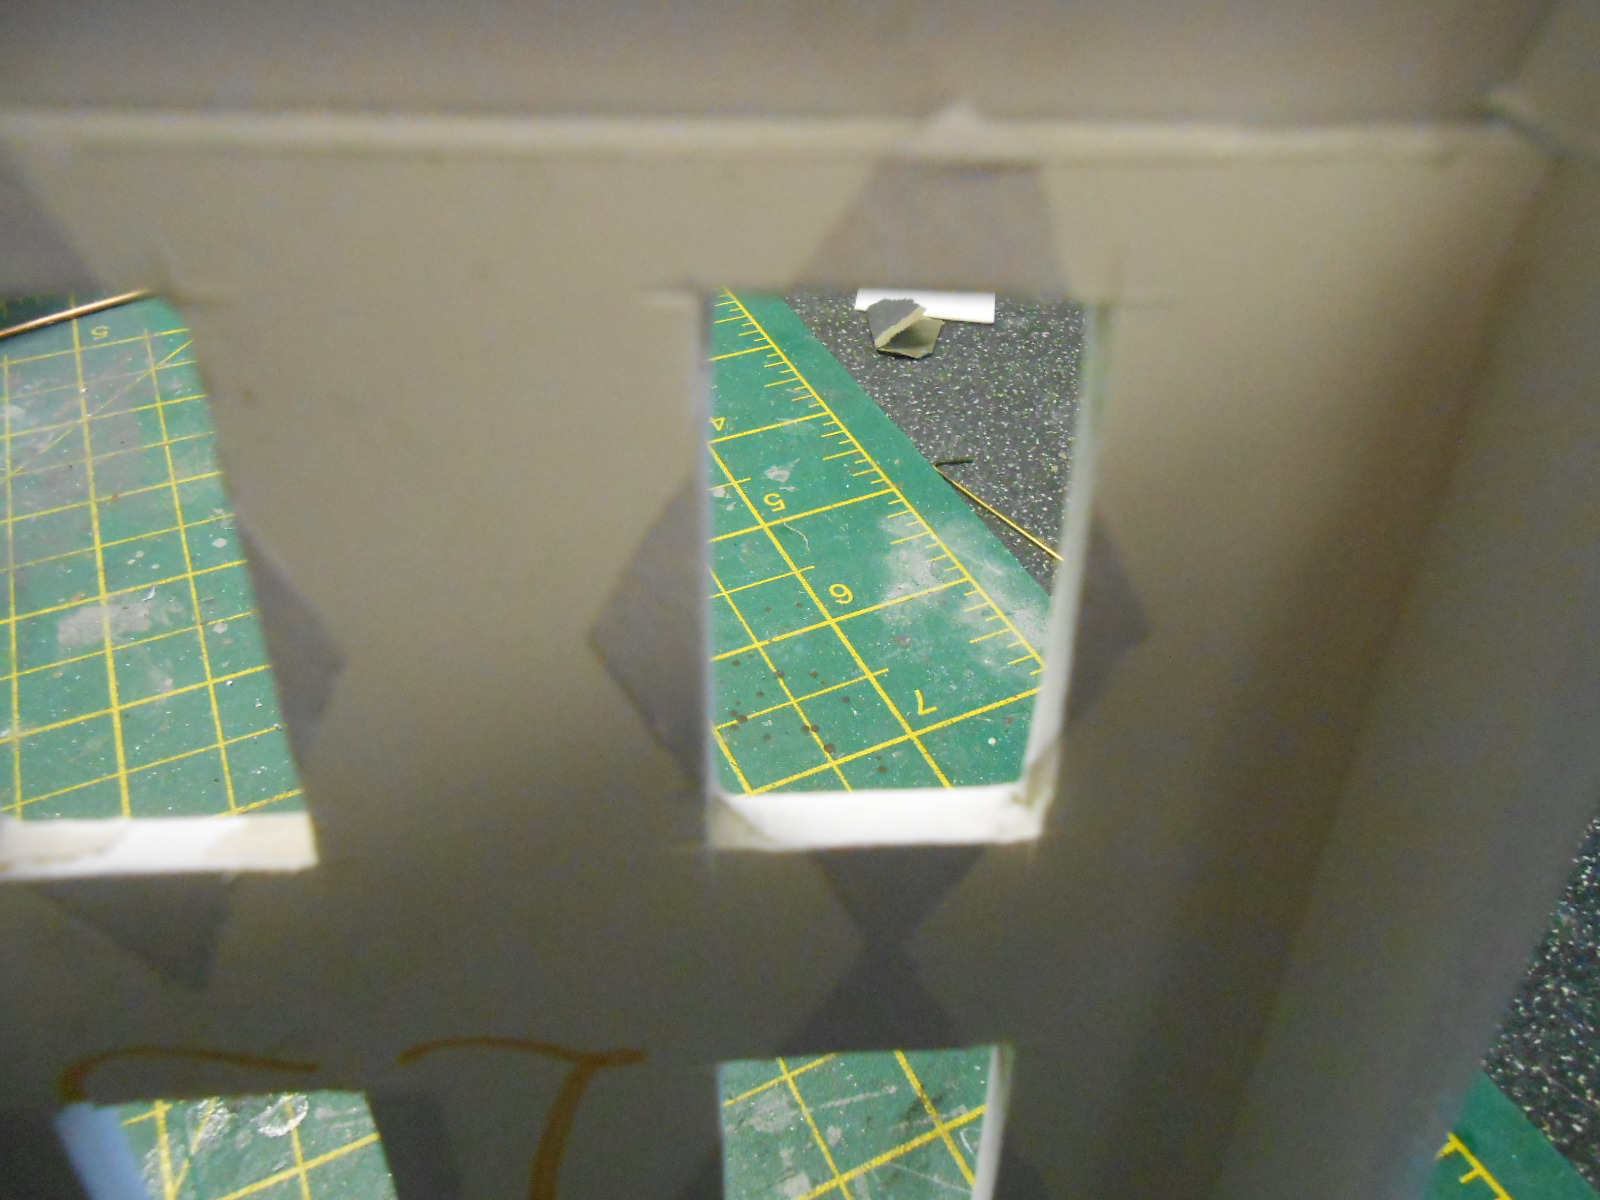
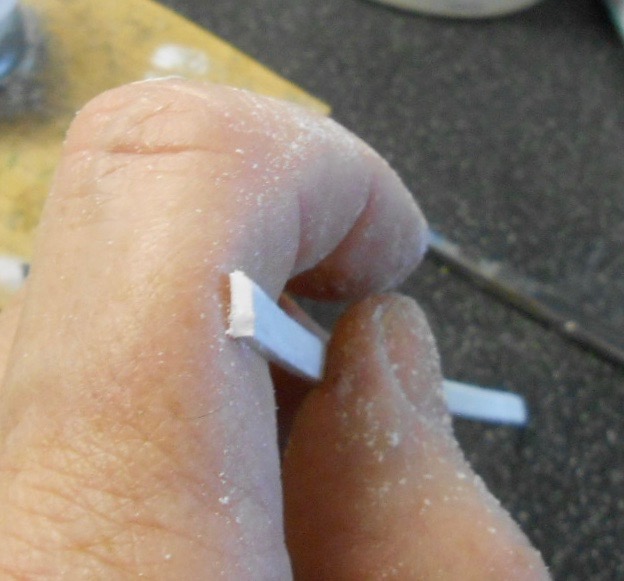
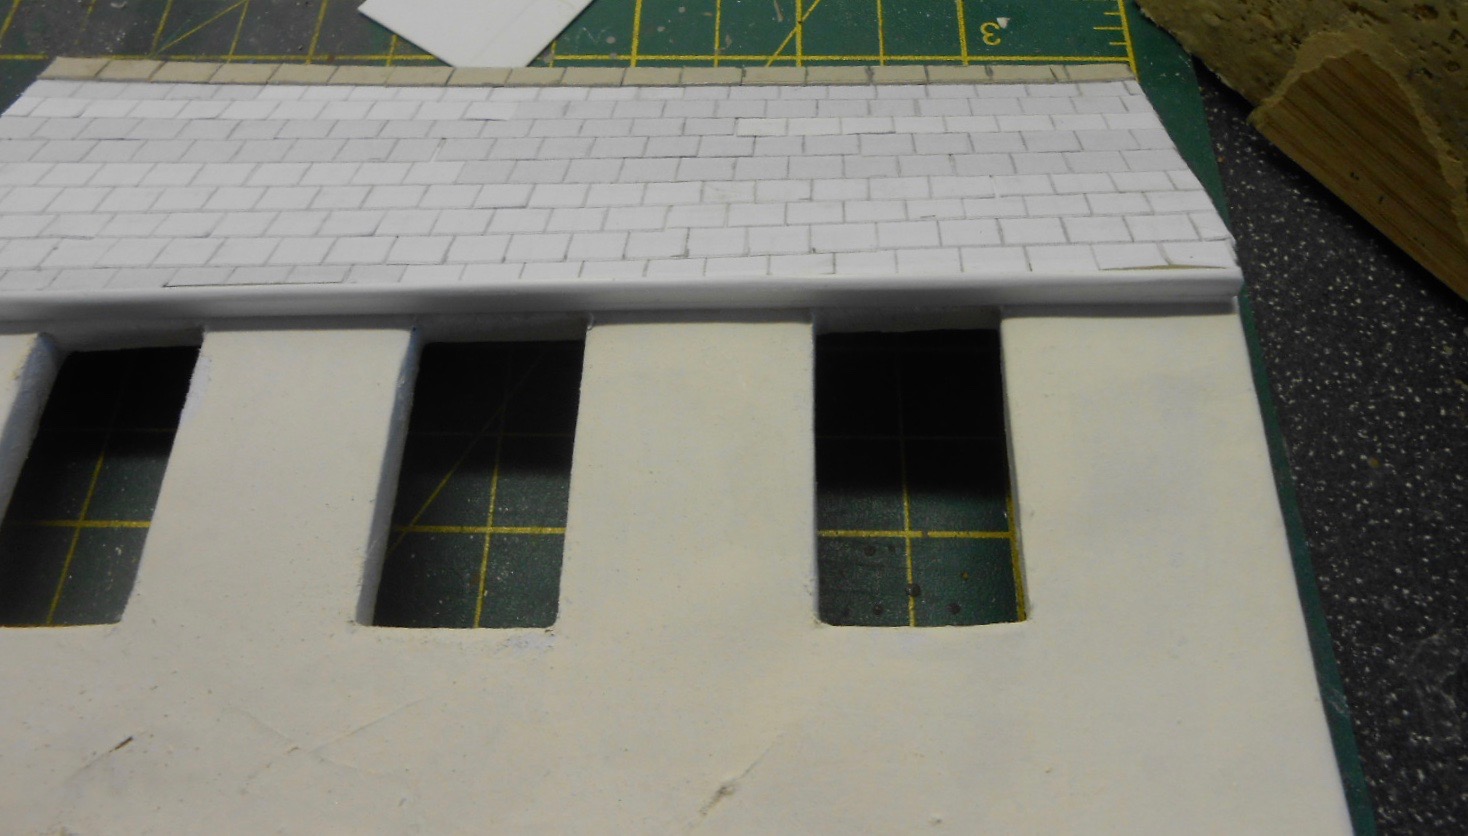
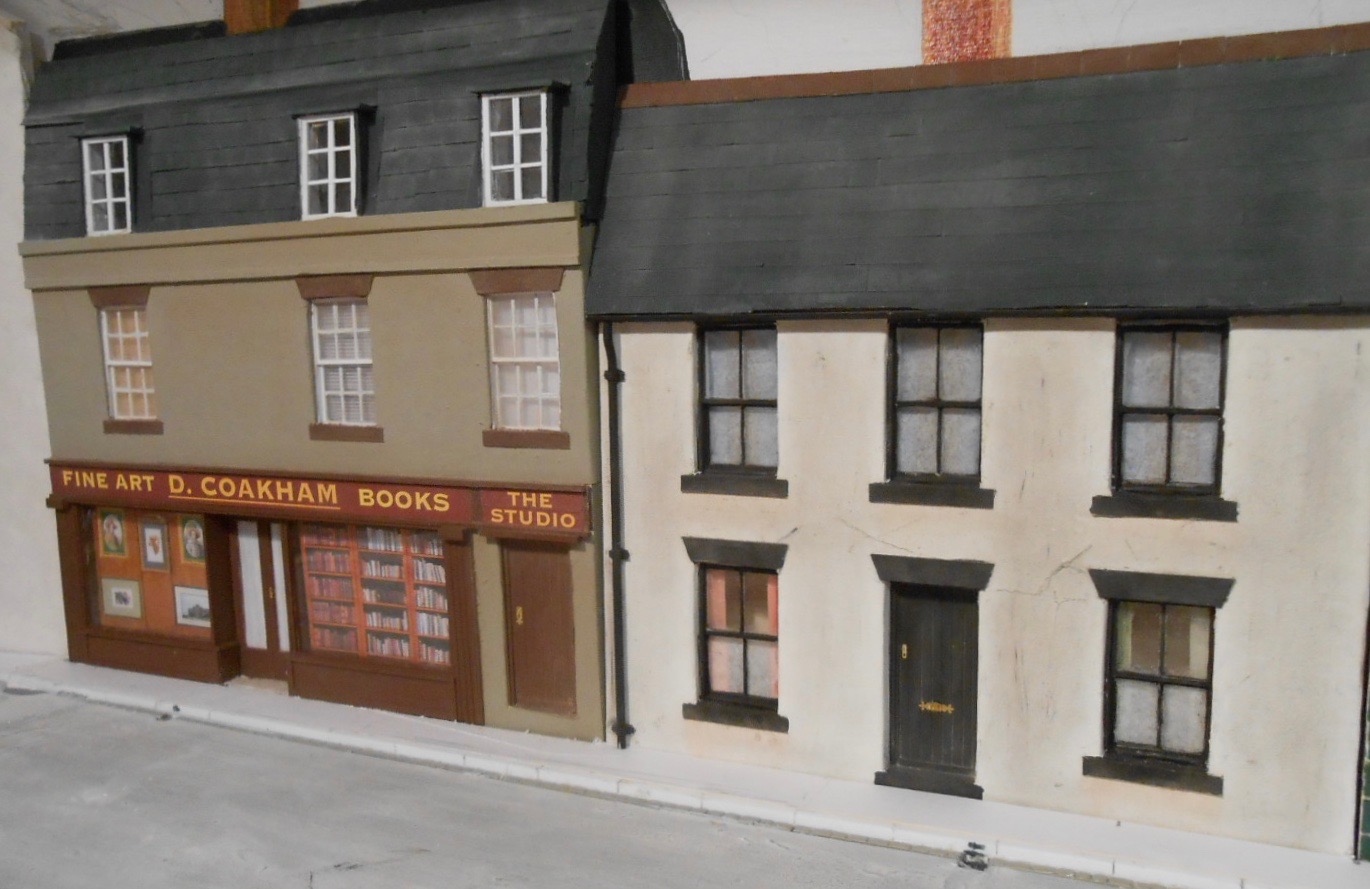
Two more buildings The half relief back scene is creeping towards the left hand end of the layout with two more structures. The first is just a plain, rendered house, deliberately scruffy looking, while the second is a shop selling old books and paintings, with an art studio on the floors above. The first few photos show how the 'rendered' walls are simply watercolour paper stuck on to the foam board walls, over the window and door apertures, which are then cut through with a scalpel and folded back on the inside. There is also a picture showing how I make guttering, by filing a rounded edge on a strip of plasticard. From most angles [apart from below], the ruse is not noticeable. Another picture shows the roof slates, made from overlapping strips of the same watercolour paper. Both the art shop and the house are inspired by pictures of buildings in MRJ's 'Inkerman Street' layout by the incomparable late Bob Barlow. For me, they perfectly captured the scene in the 1940s. The window displays are just printouts available from the CG textures website, which also gave me the curtains and venetian blinds in the windows. The latter are made up from micro strip on perspex sheet - tedious to fabricate, but it gives a decent impression of the depth with sash windows. In several places, I have tried to blend the low relief into the painted back scene, while eventually a largish tree will hopefully hide some of the issues with perspective. More 'snake oil' than 'trompe l'oeil' though! Just one more building to go on the back scene now & then I can start working outwards towards the front.
-
Sublime and an object lesson on chassis building. You WILL be taking the thing apart and re-assembling it several times during construction. Even the best kits require some fettling, while the worst can be the catalyst to scratch building. Indeed, am inclined to think that there is less fettling with a scratch build - though you do spend more time making bits of course!
-
Make haste slowly. It is not a race and is supposed to be enjoyable!
-
Walker Diesel Class F - ECMbuild in 4mm for OOn3
David Holman replied to murrayec's topic in Irish Models
Sharp, neat, clean as always! Must remember the lamp casting trick in future.- 136 replies
-
- 1
-

-
- class f
- west clare
- (and 1 more)
-
I think the answer is essentially it's a bit of a minefield, JB. There are indeed quite a few folk out there who will build stuff for a fee, but from what I hear, price and quality are highly variable, with the former not always a guarantee of the latter. In addition, where locos and coaches are concerned, the paint job can be a further added extra. Perusing the small ads in the model press may help and from there you could make contact and ask for references. A while ago, a general guide for building a loco kit was around 2-3 times the original price, so a £100 kit would end up as a £3-400 model. While that might seem a lot, £200 to built a kit which may take 50-100 hours is a long way short of minimum wage! I well remember the look I got when doing a buildings demo at a show a few years ago. The man asked if I did commissions. No was the reply, but when I commented that the locoshed on display represented over 100 hours work, you could see the cogs going round as he worked out it was potentially a £1000 model, even though the materials probably came to less than £20.
-
Splendid - as usual!
-
21mm gauge track; the pros and cons?
David Holman replied to jhb171achill's topic in Irish Model Layouts
Arigna Town likewise has no chairs or fixings, just code 100 rail on copperclad sleepers and 36.75ish gauge for 7mm scale. Re 21mm gauge and Templot, the website include templates for 'IrishEM' points at 20.2mm gauge and 1mm (finescale, not P4) flangeways. On my new Fintonagh project (3'gauge,7mm scale), I printed a left and right point, then made the gauge up to 21mm on the photocopier. Using Peco Code83fb rail and Marcway copper clad sleepers, a point took just over an hour to make, including filing up the blades and vee. Note, this was the first point I had made in at least ten years and trackwork is something I normally avoid where possible. Really proved not at all difficult or unpleasant. Given the low cost, would suggest anyone thinking about it should at least have a go. Not much to lose in time or money if it doesn't work and could be the start of something special. -
While the grass mat should be fine as a foundation for your scenery, it could look a bit plain after a while. I find the first bit of greenery always lifts a layout, but try experimenting with a variety of materials and textures. Study the real thing and do it a bit at a time. Feel sure you will find it both enjoyable and satisfying.