David Holman
-
Posts
4,359 -
Joined
-
Last visited
-
Days Won
117
Content Type
Profiles
Forums
Events
Gallery
Blogs
Everything posted by David Holman
-
Thanks folks! Nothing special about the weathering, all it took was a 5 minutes dusting with weathering powders. The effect is really pleasing for the effort required. I use a set available from Freestone Models Larger scale is indeed addictive, but applying 100x 1mm and 0.5mm bolts and rivets certainly tests the eyesight. More than a few disappeared into the ether, along with a similar number of rude words.
-
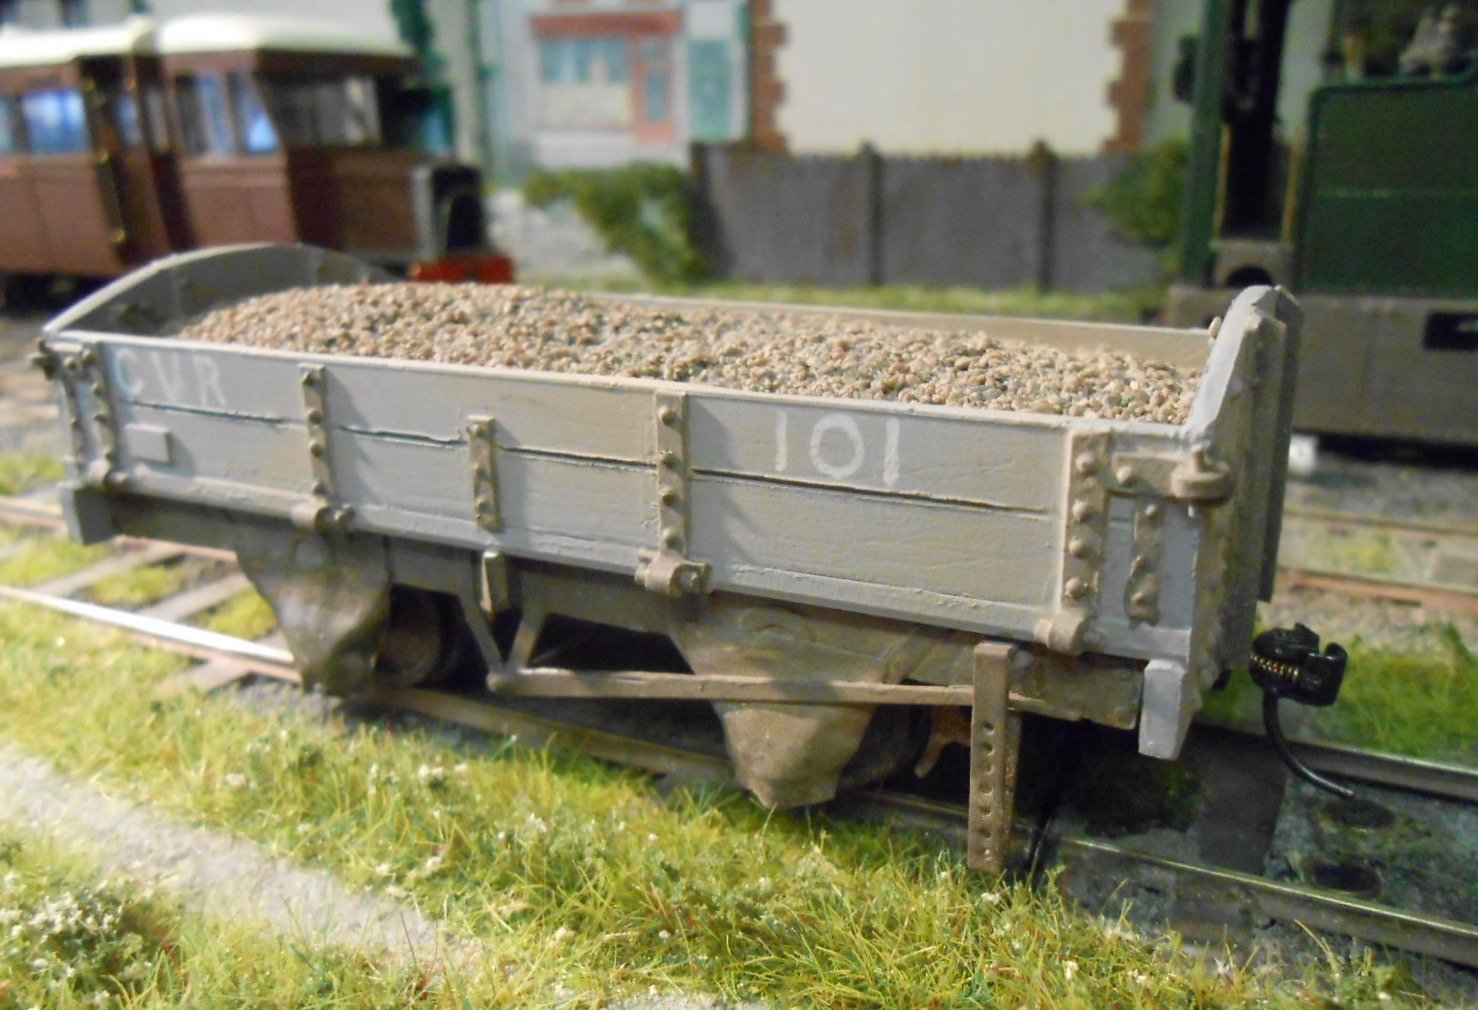
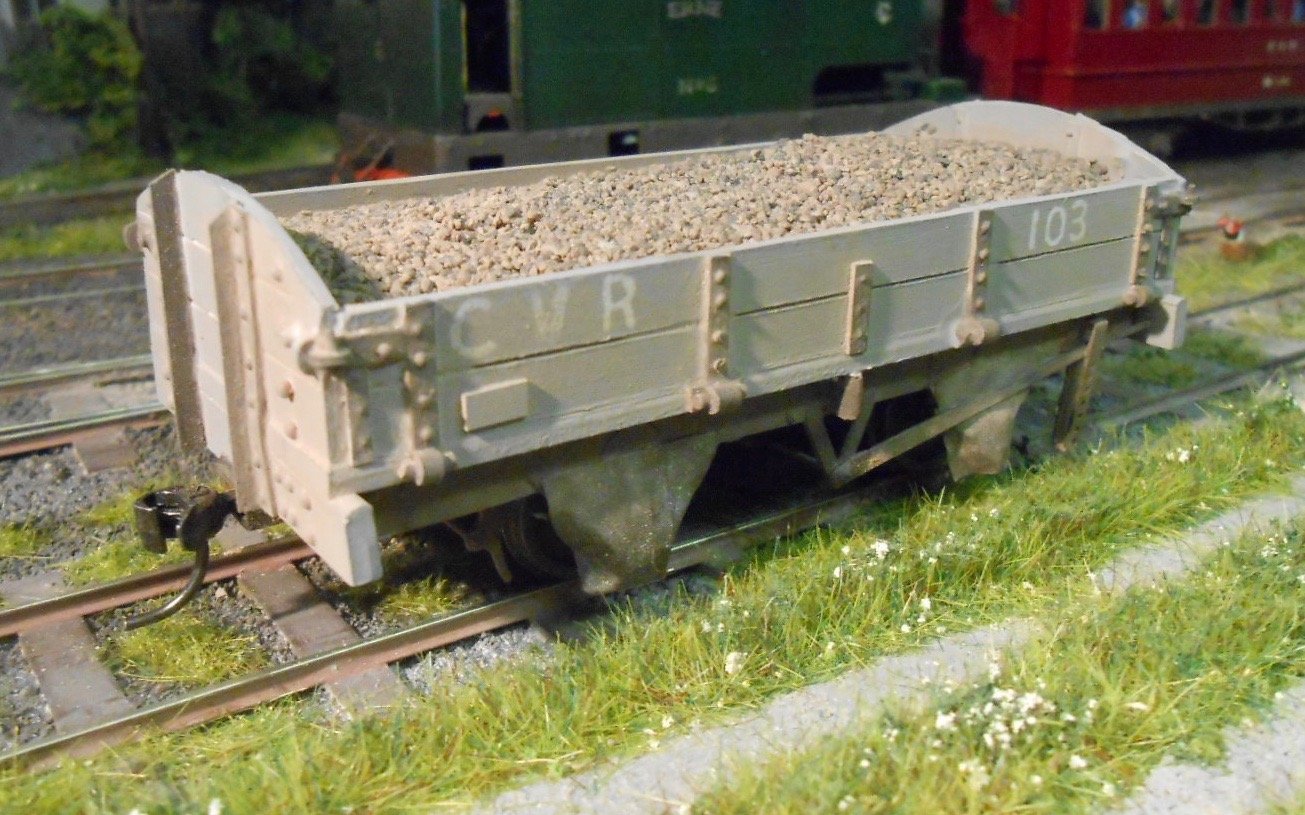
A pair of new wagons Well, sort of, as I've only built one, but given it a different number each side. A review of my potential operating sequence showed I had a couple of problems in that the railcar, when turned, fouls the platform line, hence it will not be able to shunt a butter van to/from the loading dock as planned. Meanwhile, van traffic obscures the view of the turntable from both ends, so mixed trains will have to have open wagons, with vans being confined to the goods train. The latter is as much for variety as anything, because Clogher Valley timetables suggest that all trains were mixed, with little if any, separate freight. However, as this is my branchline, then one shorts goods per day is going to be included - probably hauled by the Unit. The vans [plus loaded coal opens] will be shunted off scene, via the kickback siding front left, so won't present the same problem of blocking the turntable as on the mixed train. That's the plan anyway! The new model is a ballast wagon. The CVR had half a dozen of these, characterised by being 6" narrower than the other opens, with curved ends and what look like canvas shields over the axle boxes. Construction is the same as the other opens - tedious, in a word, for there are loads of rivets and bolt heads to attach. Used some Grandt line ones this time, but with over 100 needed, it was still a pain. The chassis is the usual Branchlines etched kit, with home made brass axles for 21mm gauge. Maybe I should have made a couple of masters for my open wagons and then cast sides and ends in resin. With hindsight, I could have saved quite a bit of time, though I have never tried casting double sided items, which of course any open wagon side or end requires.

-
Thought it looked a PD kit. Got a fair few 7mm ones and they always go together well. That NE van looks especially crisp and neat though.
-
Absolutely no doubting the effect of correct loco, train and gauge combination - though I would say that! Lovely stuff, John
-
Love the mixed train! Maybe it's my surname being Col. Stephens first name, but mixed trains and light railways have always done it for me.
-
I'd be inclined to do some serious planning first. What sort of layout do you want, which then dictates the stock you need. Consider that you may not do all your modelling in the shed, so things like stock and buildings may be made elsewhere and the work can be parallel to that in the shed. There is no definitive way, I think. Go where the muse takes you and enjoy the journey.
-
Look to be some lovely flowing curves there, while the height of the backscene will enable the viewer to really immerse themselves in the scene. Nice!
-
Remarkable. The vision required to create this scene, let alone the enthusiasm to build it, is fantastic. We can only hope it will get public outings so we can all enjoy it. Looks like about £100 worth over Evergreen strip there. Still not bad when you think how much it would cost to commission such a building, but start up costs seem to be growing exponentially these days. For example, I must have close to 100 Humbrol tinlets. Replacing them with Tamiya acrylics would be quite an expense were I to do it all at once. There again, how many colours do you really need? Three, five? As for plastic sheet, a full sized A1 piece from Eileen's will set you back the same as an A4 from your local model shop. Hence a very good reason to plan your shopping if visiting a show and with no Maplins on the High Street anymore, the same goes for electrical bits too. Enough already! Barrow Street is sublime.
-
Arigna Town - this week's scenery
David Holman replied to David Holman's topic in Irish Model Layouts
Thanks Eoin, Tony Wright's photos the highlight for me. Sadly, too many megapixels for this site. -
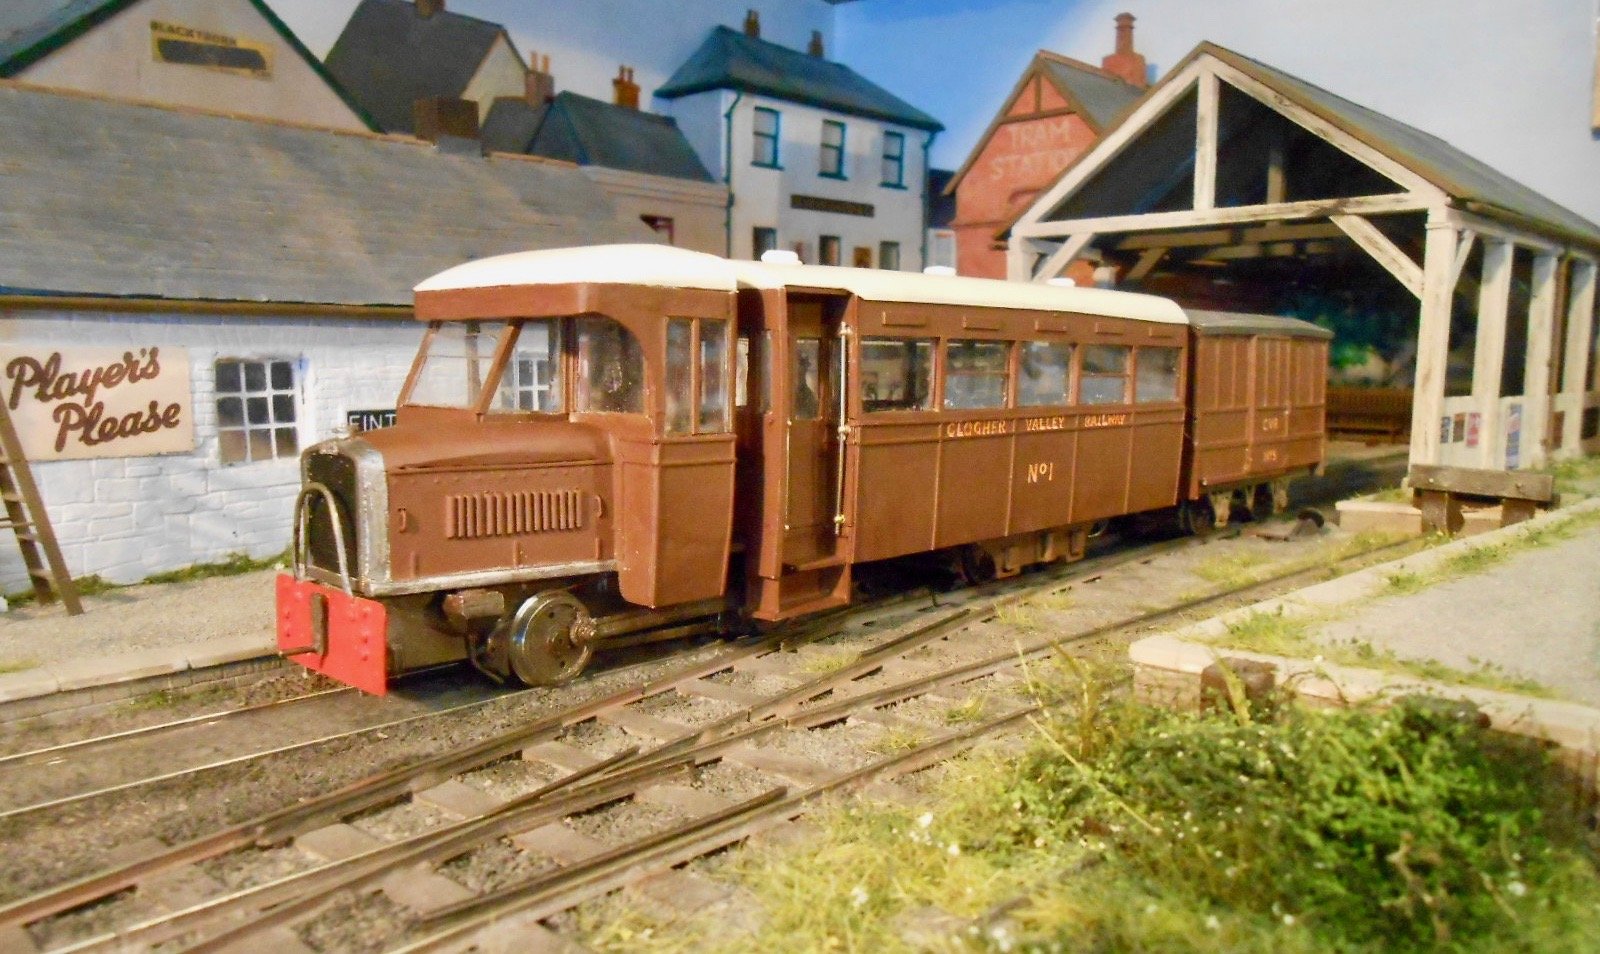
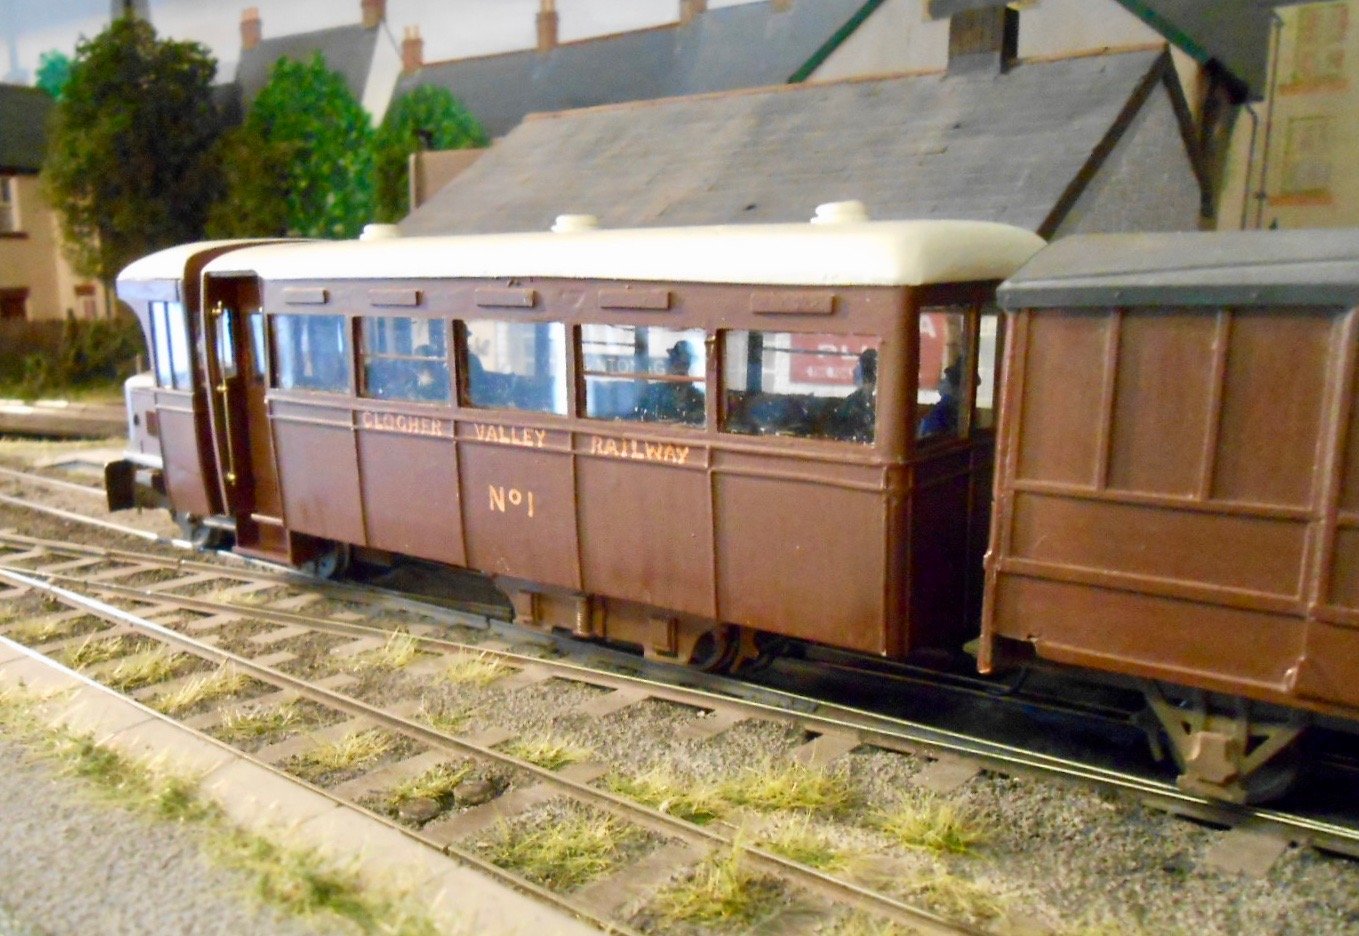
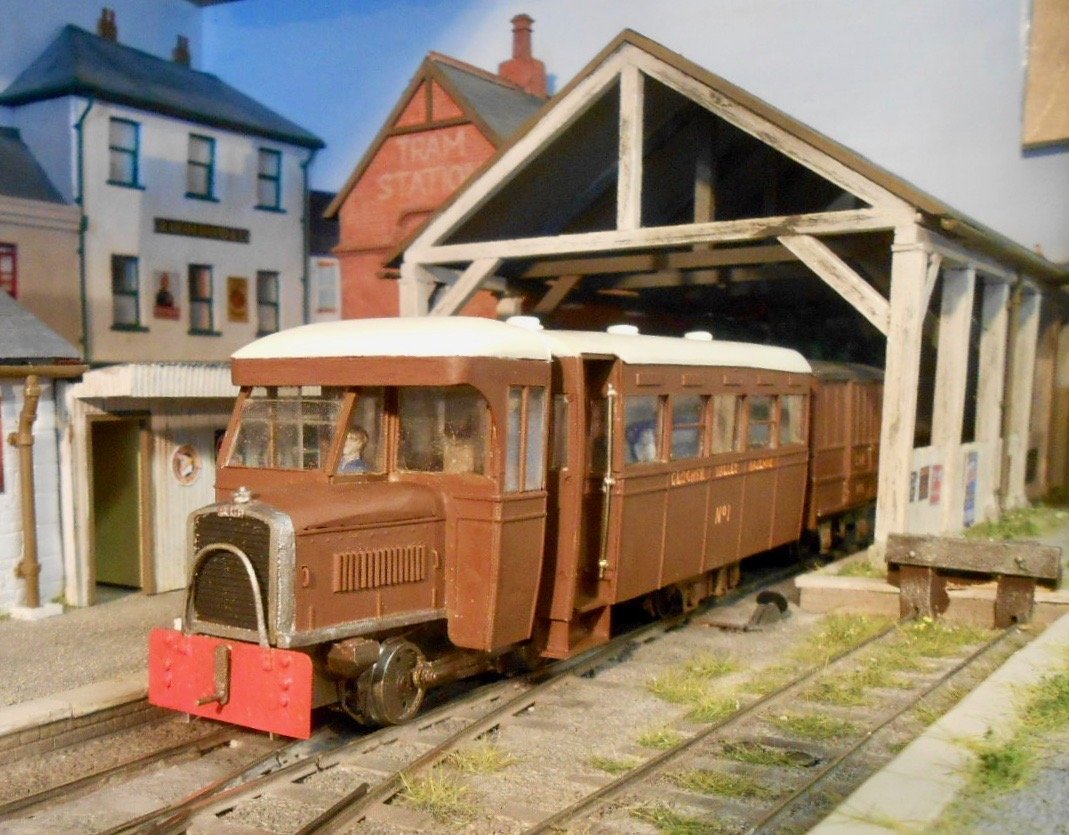
Railcar No 1, again Earlier in the year, you may remember I shared photos of a model of CVR Railcar No1 and also that I was less than happy with the result. I'd made a right Horlicks of the glazing, while in fitting the roof I'd somehow squeezed the sides of the passenger trailer resulting in a horrible concave bow. At least the tractor unit was ok! Anyway, the poor thing has been languishing on a shelf the past few months, while I drummed up the courage to rebuild it. The 'muse' eventually overtook me last week, when I simply ripped trailer mark one apart. Drastic, but it got what it deserved... Happily, I managed to salvage the roof and the false floor of the passenger compartment, complete with seats and figures. The rebuild took much less time than I'd imagined, with only the section around the front doors causing problems. As might be expected, I took a lot more care with the glazing, also bracing the sides to prevent them warping inwards. The original roof sits inside the tops of the sides, so once glued in place, the passenger compartment became a strong box. Much as I would have liked to spray paint the body, I didn't want to mess up the glazing again, so it was brush painted with Tamiya acrylics. Lettering is done by hand, using white acrylic ink and a dipping pen. Once dry, I went over it with a dark yellow fine tipped marker. There are still a couple of jobs to do, not least adding the headlight and exhaust pipe. It also needs a Kadee coupler so it can tow brake Van No5, which I believe was the usual choice. Fingers crossed, the model should run well: the tractor unit is compensated and the trailer's bogie will have pickups fitted. Next job will be to build one of the butter vans for it to tow. Perfect, it ain't, but I can certainly live with the discrepancies much, much better than the previous version.
-
Ok, hello, it's been a while, but worth the wait. Will it be raining on the model? Pretty wet on all three of my visits. Remember a layout seen at a show, years ago, where it was made to look wet by liberal use of gloss varnish. Set in the valley of the River Puddle in Dorset, it was called 'Piddling Down'... Scenic guru Tony Hill reckons WD40 can work well too, though not sure I'd try it without some serious experimentation!
-
Not much double track in Ireland anyway is there? Apart from Larne, Belfast, Dublin, Cork and on to Cobh/Middleton, pretty much everything else is/was single, including much of the Derry Road.
-
Unless blessed with unlimited space and budget, everything is a compromise, Tony. Capturing the character and feel of our chosen subject is about as far as most of us get. Foynes and Bembridge (Isle of Wight), both had turntables doubling up as one end of the loop. Richard Chown did the same on Castle Rackrent, so if it was good enough for him, who are we to argue? Real railways were limited by geography, just as we are limited by space. Rules that seem to work are: Beware filling every available space with track. Less is more, leave room for scenery. Several short sidings are better than one long one. It makes operation more interesting as each siding can have a specific purpose/traffic. Watching trains go round is very nice, but you need somewhere to store them, when not running and that means storage sidings, unless they are going to be changed by hand every time. Storage sidings also represent the 'rest of the world', giving opportunities for timetables or sequences, with trains given real purpose in going to/from somewhere. You could create storage by having a siding on the right, going off scene to a cassette. Each need be no more than a length of track on a strip of ply/MDF. You have as many as you like (as your collections grow), and they can be stored on shelves above/below the layout. Much more flexible than giving up space for storage loops too. Will post some pictures later.
-
SeeSo, no passing loop, just a crossover 'twist the Mainlines. The yard can only be shunted by trains on the inside circuit, via a convoluted set of manoeuvres using that crossover. With its penchant for avoiding facing ipoints, the Midland Railway did this a lot, but not deal from a modelling point of view. One option would be to have two cross overs on the left hand side, thereby creating a run round loop. Another would be to extend the siding top right, around the curve and hence have an outer loop/lay by. Could even join the fourth siding. Alternatively, make the other side of the layout single track, with the left side becoming a long crossing loop. Looks like room on the right for some storage sidings, or is the whole layout going to be scenic?
-
Presume there is a run round loop somewhere? Otherwise only a turntable or triangle are the only options I can think of to turn a loco. While most Irish termini had a TT, not all did. Valencia Harbour for one, plus most intermediate stations did without too. Some intermediate stations did without a loop and hence could only be shunted in one direction, although chain/rope shunting was resorted to on occasion. Not exactly recommended in 4mm scale! Having said that, Trevor Nunn does it in S gauge and I've had the privilege a couple of times. Great fun, though hard on the nerves...
-
Hardly a straight bit of track anywhere. The curves flow well too. Lovely!
-
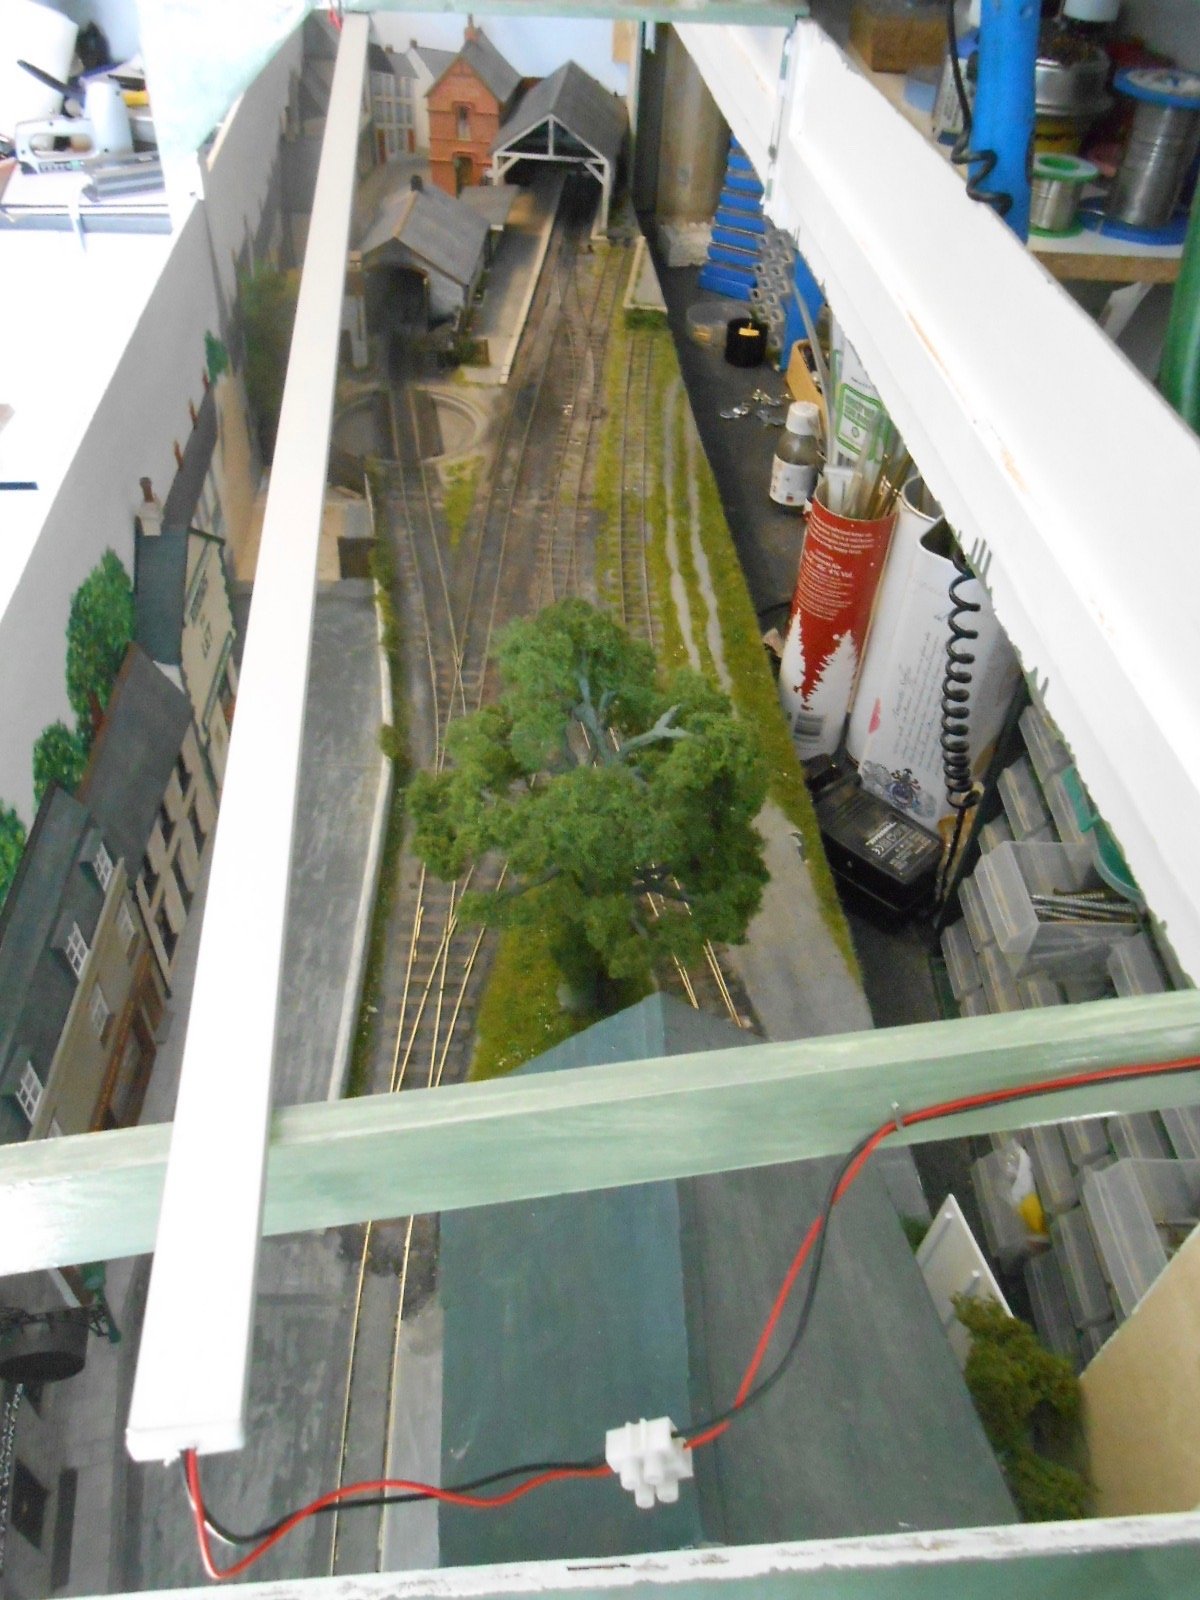
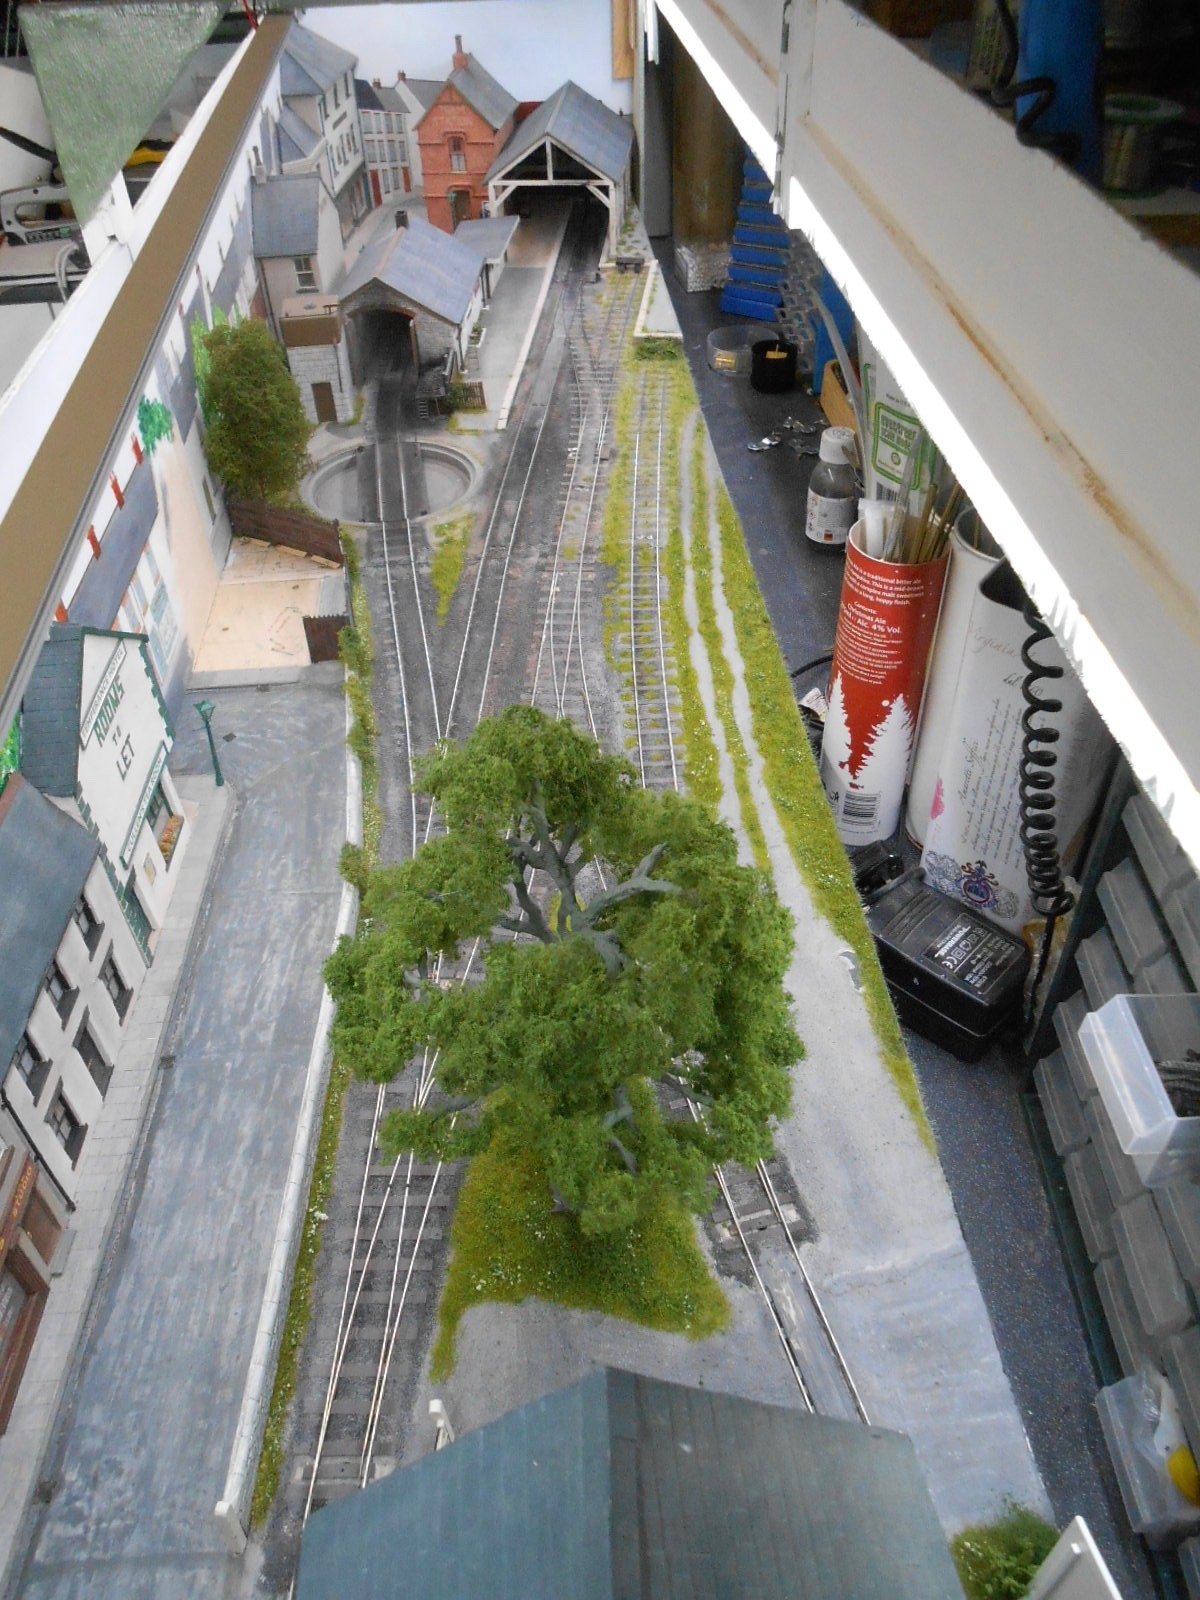
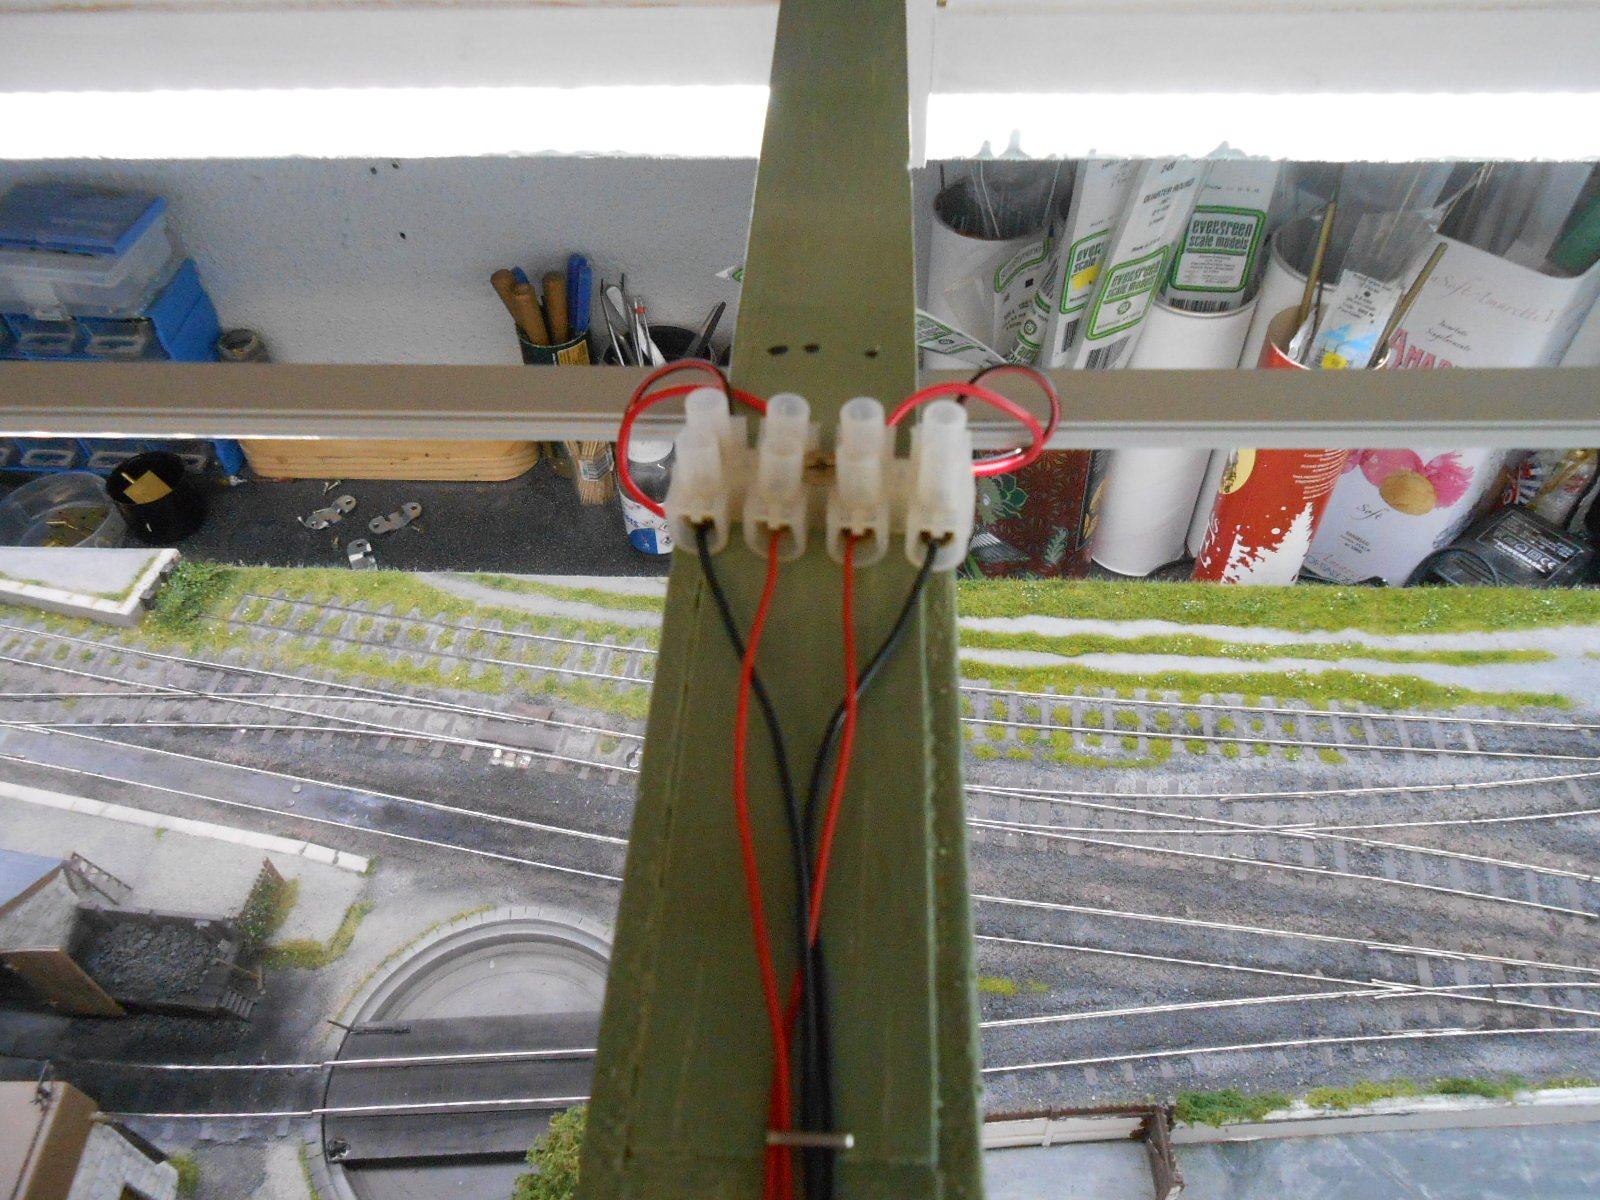
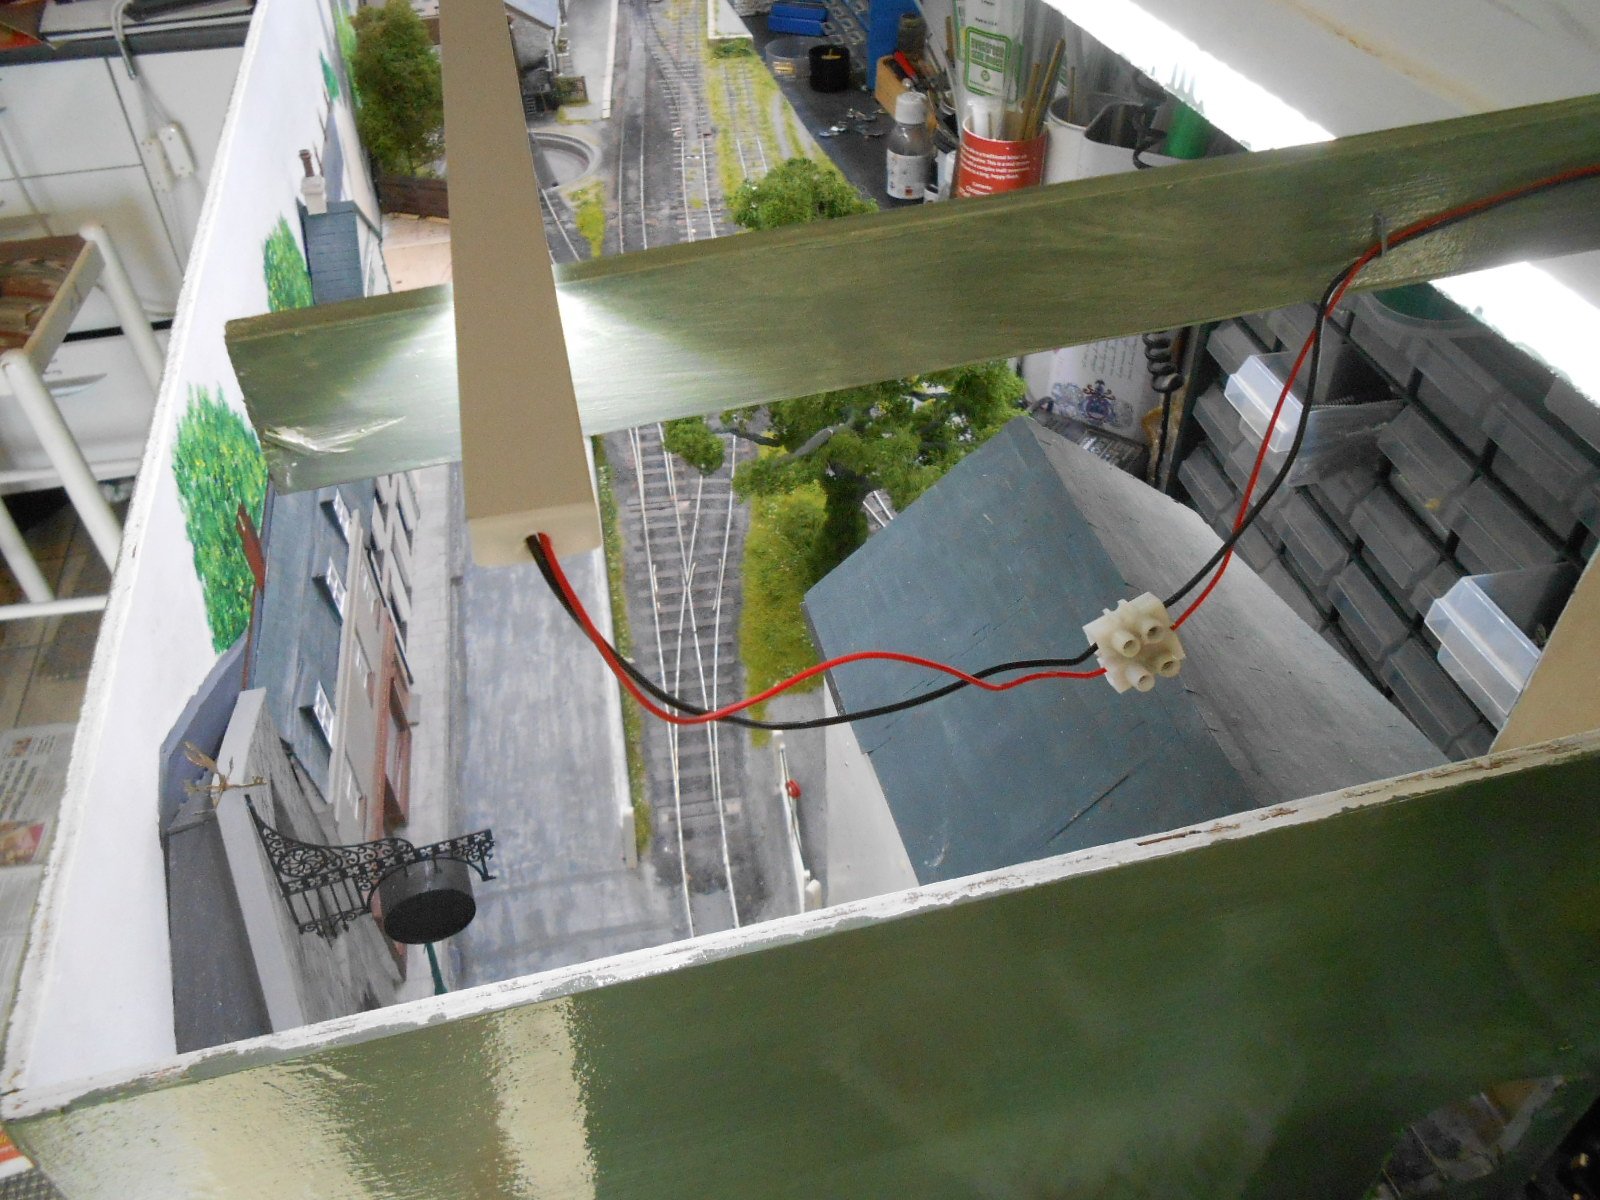
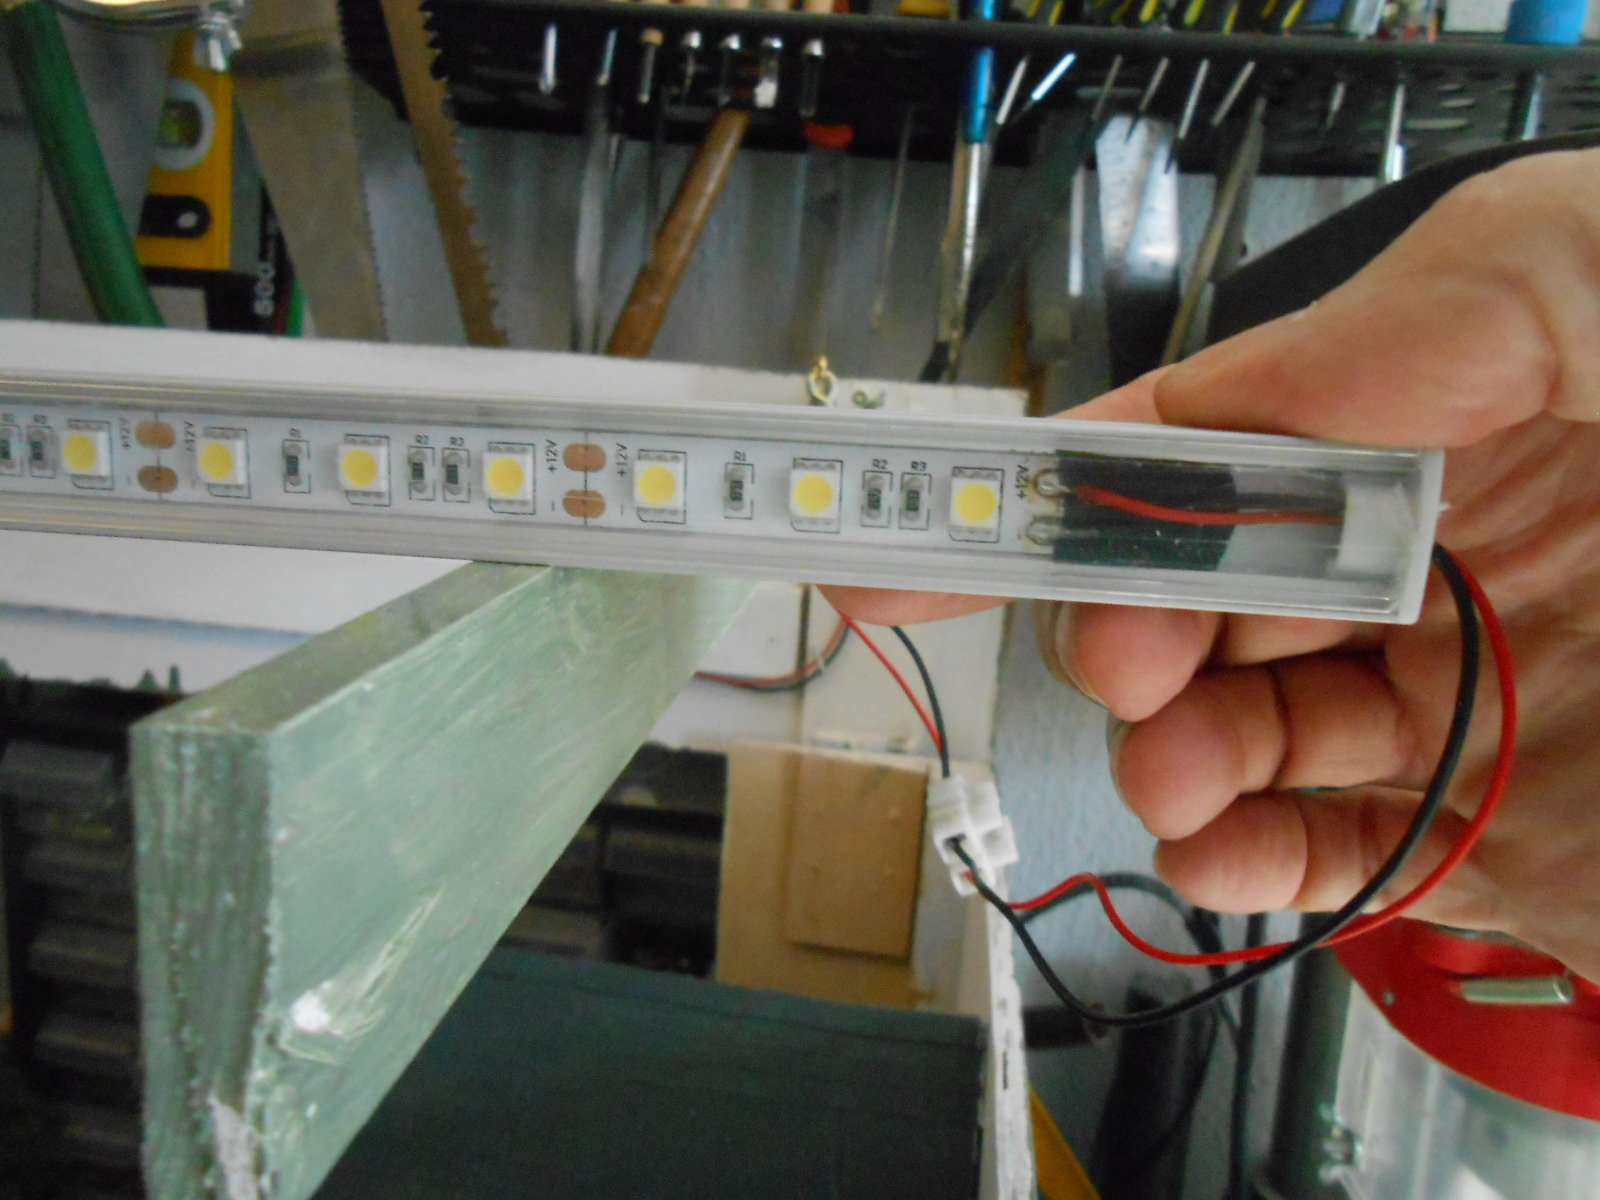
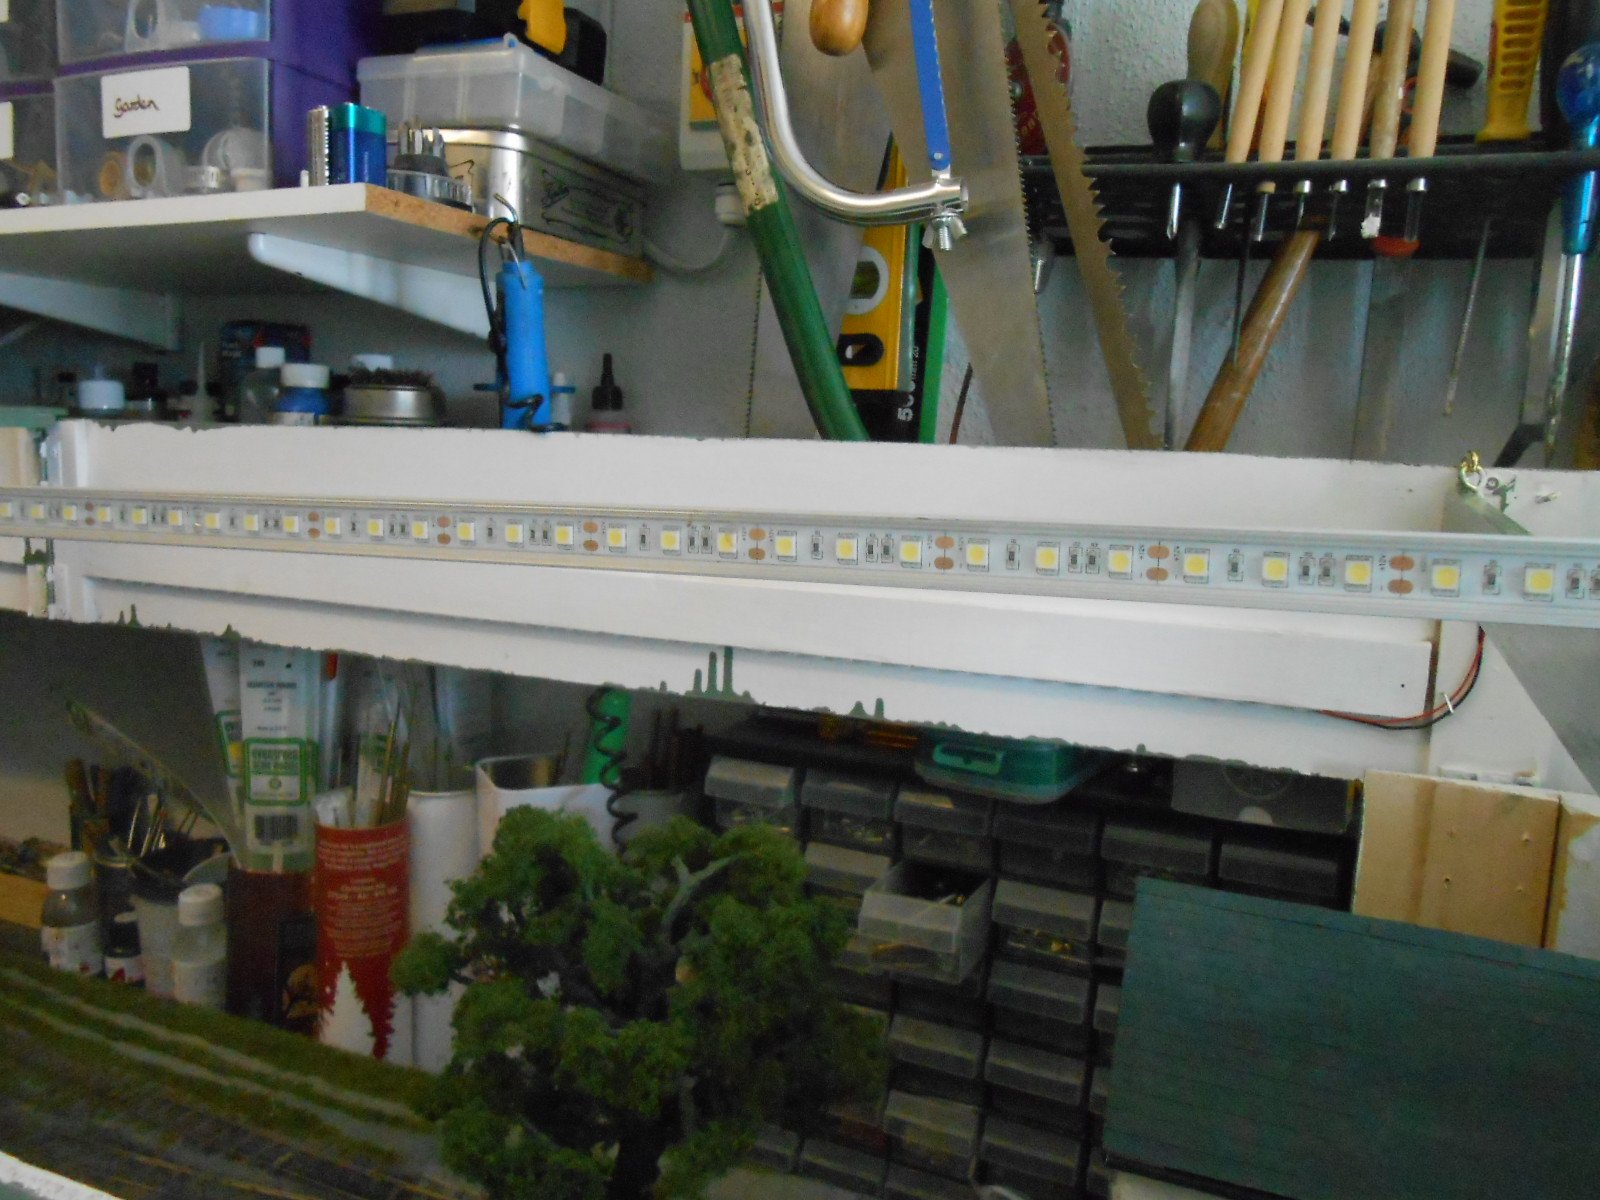
Let there be light! Ordered Thursday evening, delivered Saturday, such is the service of LED Hut, so quickly tempted to set everything up. I bought a 5 metre roll of 'cool white' self adhesive strip, along with a 2 metre pack of conduit. This comprises a length of extruded aluminium, the same width as the LEDs, a similar length of clear plastic cover for the aluminium, which slots neatly into place, plus some end caps and sprung mounting clips. I cut the aluminium and plastic cover in half to make two one metre units and fitted LED strip in each. A further 2x one metre LED strips were stuck to the underside of the pelmet framing, in order to light the front edge of the layout. Using Arigna Town's LED transformer, I then wired the four sections together, starting from the central support bracket. This has a nine way computer socket fixed to it, enabling the leads from the transformer to be plugged in, out of sight at the back of the layout. At the moment, chocolate block connectors split the incoming leads, one going to each aluminium housing. Further connectors then link each housing to the front pelmet. These connectors will be replaced with jack plug & socket once I can buy some. Not that long ago, there were three Maplin stores locally where you could even shop on a Sunday. No more sadly & the only option now is shopping on line or waiting for a model show. Anyway, much to my surprise [I am always surprised when my electrics work], it all works just fine and the two [2 metre] LED strips provide what seems to be the right amount of light, though I'll leave the final decision on that to the punters at Uckfield in October. The rear strips are about 15cm from the back scene. Buoyed by this success, I've been attempting to fill in some of the details still required on the scenic section. I'd liked to have put another coat of paint on the fascias & pelmet, but 30c+ heat hereabouts is stopping the earlier coats hardening properly, so I've got to wait. Instead, I've made and planted a load of nettles, which now adorn the base of the hoarding and are around the big tree. This afternoon, made up some basic [cosmetic] point levers, plus some boarding to cover the point mechanisms. Haven't yet decided whether Fintonagh merits a ground frame. The branch would probably have been one engine in steam, so simple ground levers may well suffice. Photos hopefully illustrate my ramblings!
-
What a beast! This must be one of the largest individual 4mm scale buildings on a private model railway. Can't think of anything comparable, though did see a 13 storey tower block on a 7mm scale American outline model which was similarly impressive. Notable too for its pre dcc Pacific Fast Mail sound system hooked up to the mother and father of all stereo systems with five foot speaker stacks. When the triple unit diesel started up, the earth moved, as did most of your body's internal organs! Presume it will fit through the door to the railway room?!? Stunning stuff.
-
Excellent advice by Broithe. 550mm is fairly tight as a minimum radius. 600 better, 750, indeed 900 or more ideal, but then few are blessed with such luxuries. Seem to remember mainline diesels could do 12 chains = 66x12= approx 800 feet or 3.2 metres minimum radius!! In dockyards, things got down to 3 chains or less, so maybe 750mm, but certainly not for mainline locos or bogie stock. Transition curves not only help with running, but visually too. Hence you might go down to 450mm radius at the tightest points, but hopefully, these can be hidden behind buildings, scenic features etc, allowing transition points to be more generous - hopefully towards 750mm. Another advantage you have is observing trains from inside the curve, where sharpness is less pronounced that the outside. Likewise, avoiding over long bogie vehicles will be better too. 50' coaches better than 60+, while short, four wheel wagons will be fine.
-
I dabbled with the idea of 1:50, as 32mm track gives 5'3, while EM track gives 3'. However, it all falls down over wheels. In 7 mm scale a 5'6 driver would be 38.5mm diameter, with, say, 20 spokes. In 6mm(1:50) scale that driver would be 6'6 and should have many more spokes. Hence it is far easier to stick with 7mm and just build the track.
-
Well inside two feet I'd say!
-
Ok, been there, got the t-shirt! Correct gauge in 7mm scale is 36.75. Plain track simple, indeed the first piece I made was with code 100fb rail glued to card sleepers with contact adhesive. Assume the the Blessington probably used FB rail so that combination could work on a diorama, but better with solder construction using copper clad sleepers. Marcway of Sheffield my source and they did my points too. At £60 each, they are around 25% more than Peco, but worth it, as being self isolating do not need switches and can be worked by wire in tube. Simples! Honestly, JB, broad gauge is FAR easier in 7mm scale. Slater's wagon and coach wheels are easily moved out to 34mm back to back, while they do a 34mm loco axle as an extra. Everything else is the same as British outline, pretty much, so castings are available from Northamptonshire Models and several other suppliers. Join the Guild for all the trade knowledge and surprise your friends by telling them you have become a 'Gauge 0'... Iain Rice's recent book 'Cameo Layouts' contains a wealth of ideas and inspiration, including track plans, with Gauge 1 diorama in five feet among them. Such a project is a great way to have a dabble in 7mm scale, but beware, it is very addictive!
-
Decided to stick with LED strip Adrian. LED Hut now do some neat conduit with a clear cover, so am guessing that does the same thing. Feel a bit guilty about the height, Eoin, but many folk now bring small folding stools and we have a couple at home I could take too. Doesn't help the wheel chair users though, so might have to make a periscope like the St Alban's club ones.
-
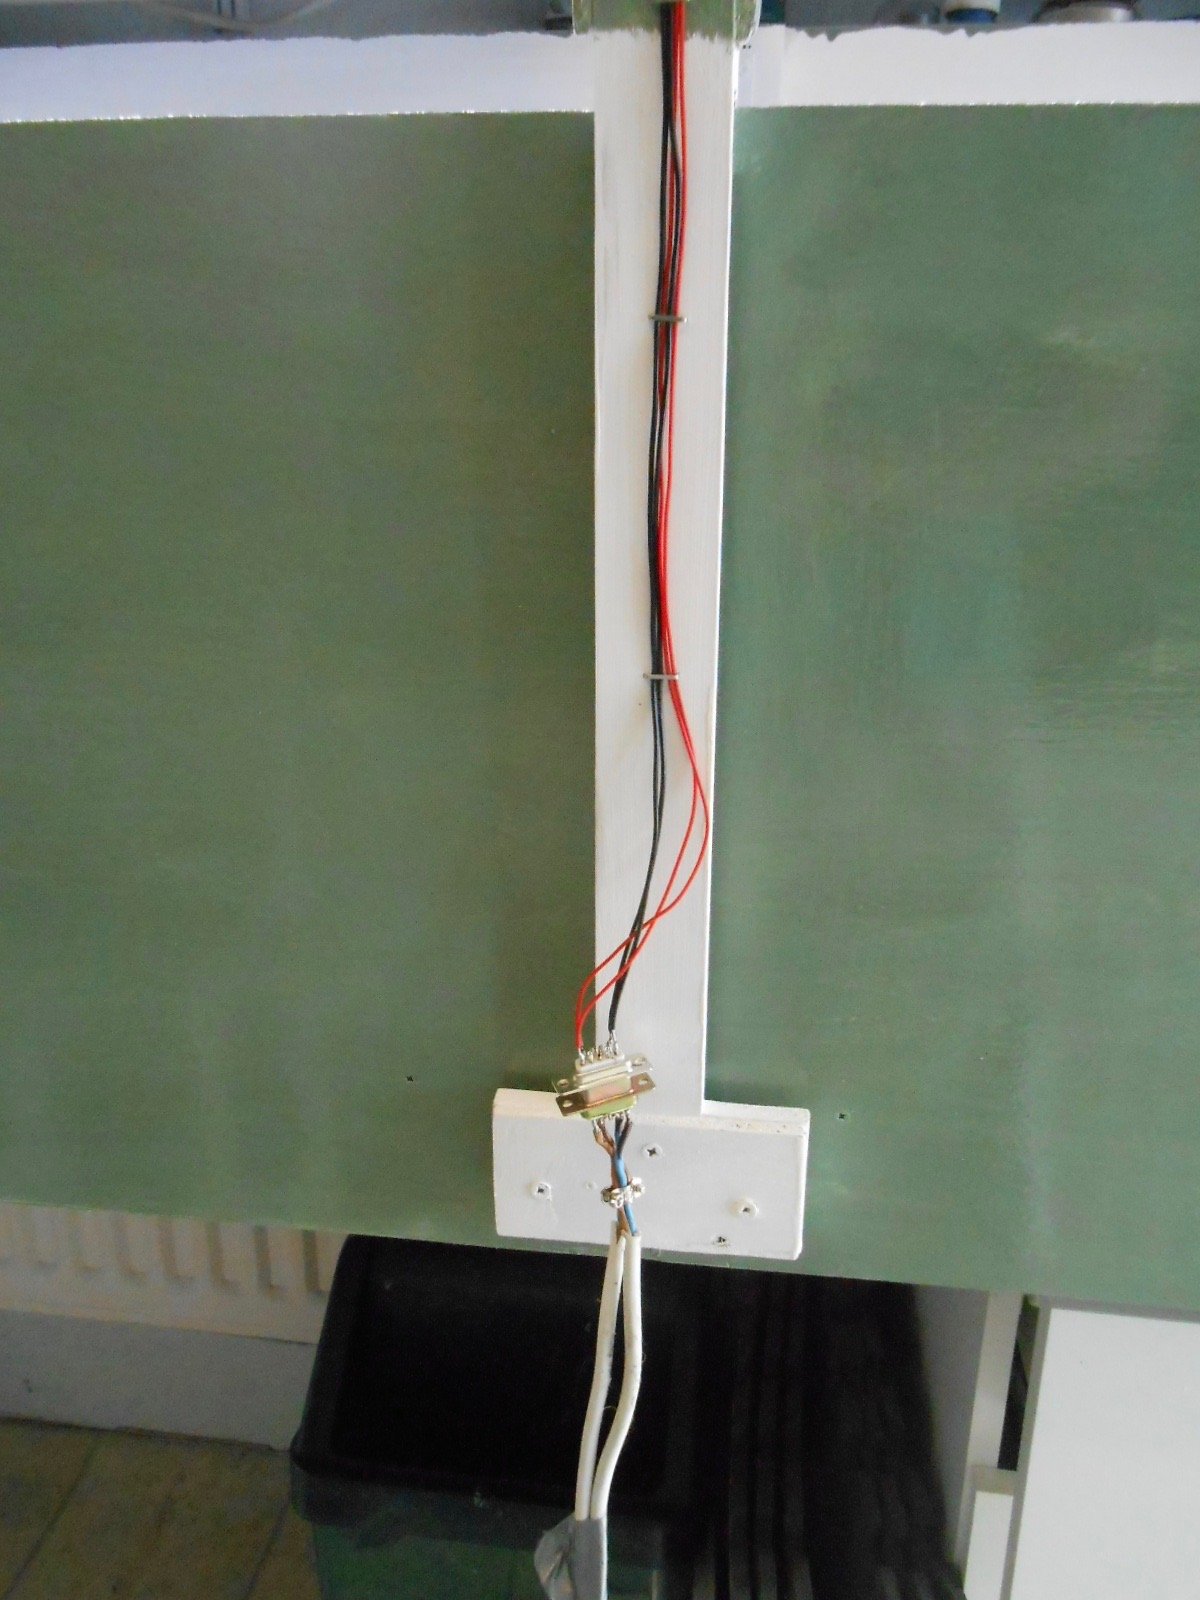
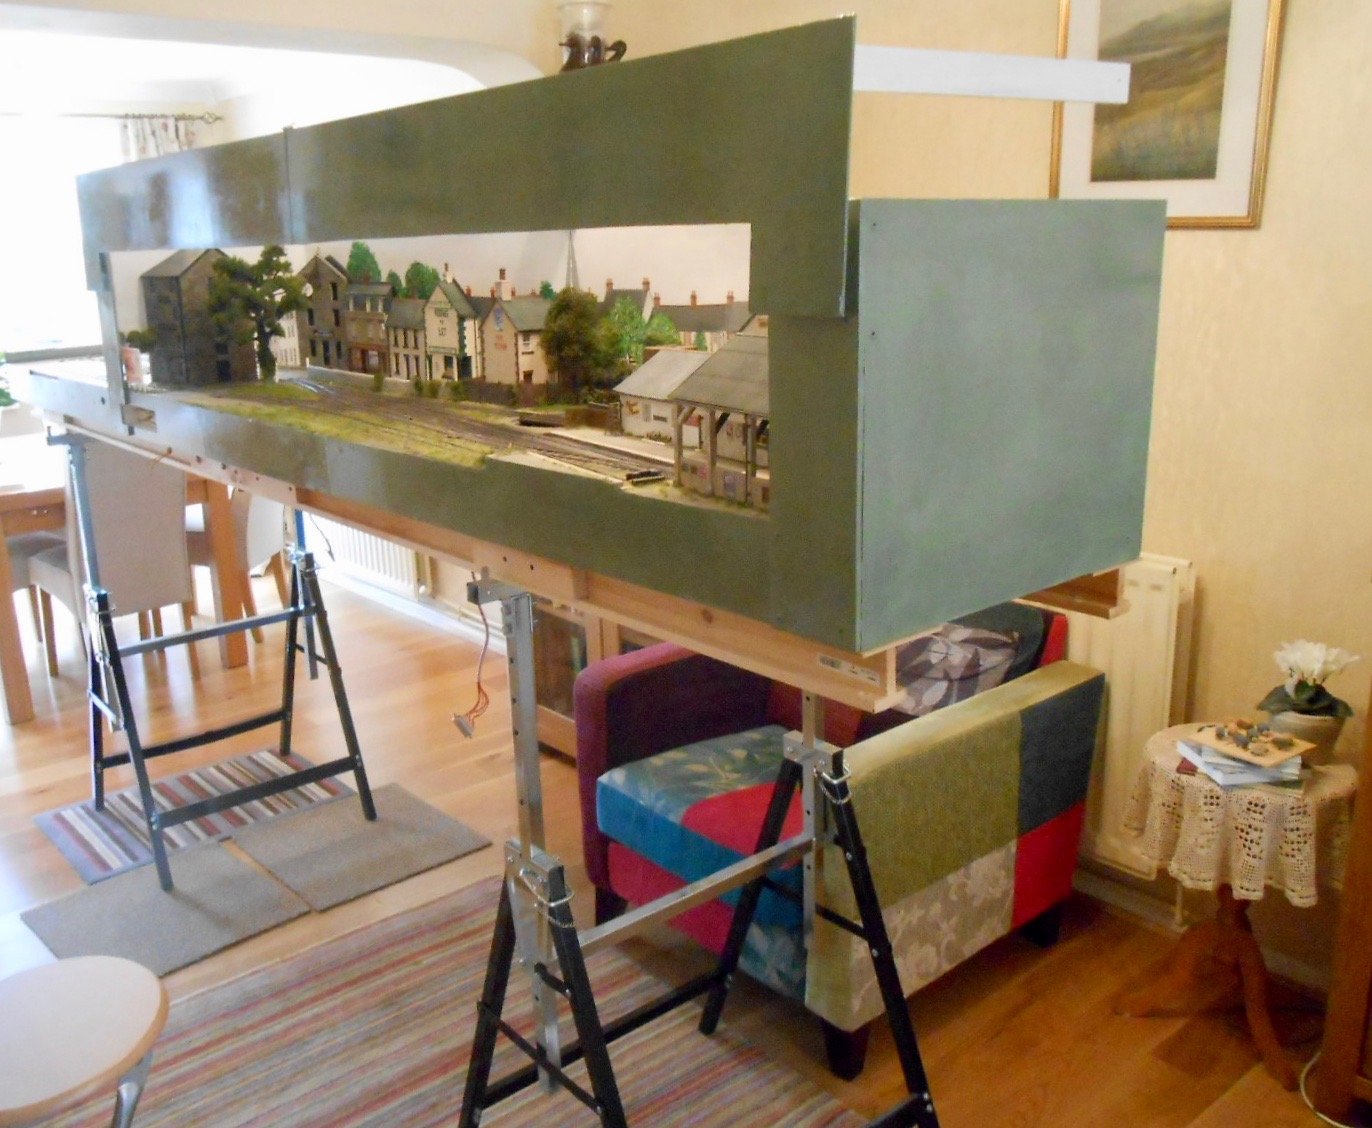
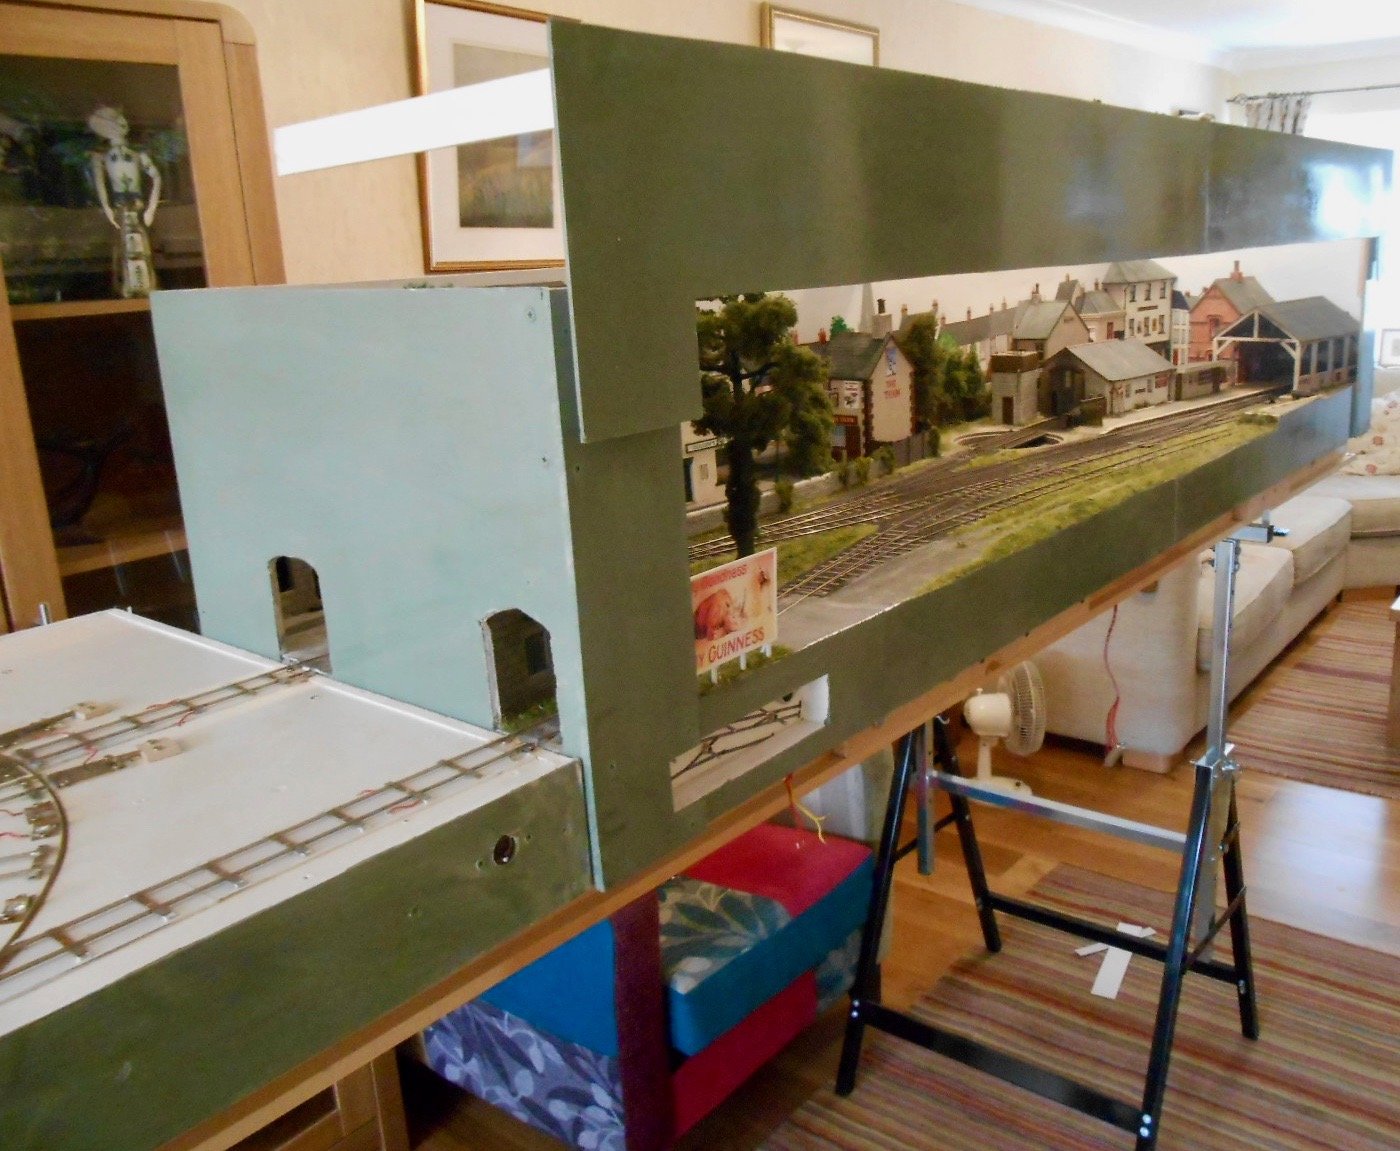
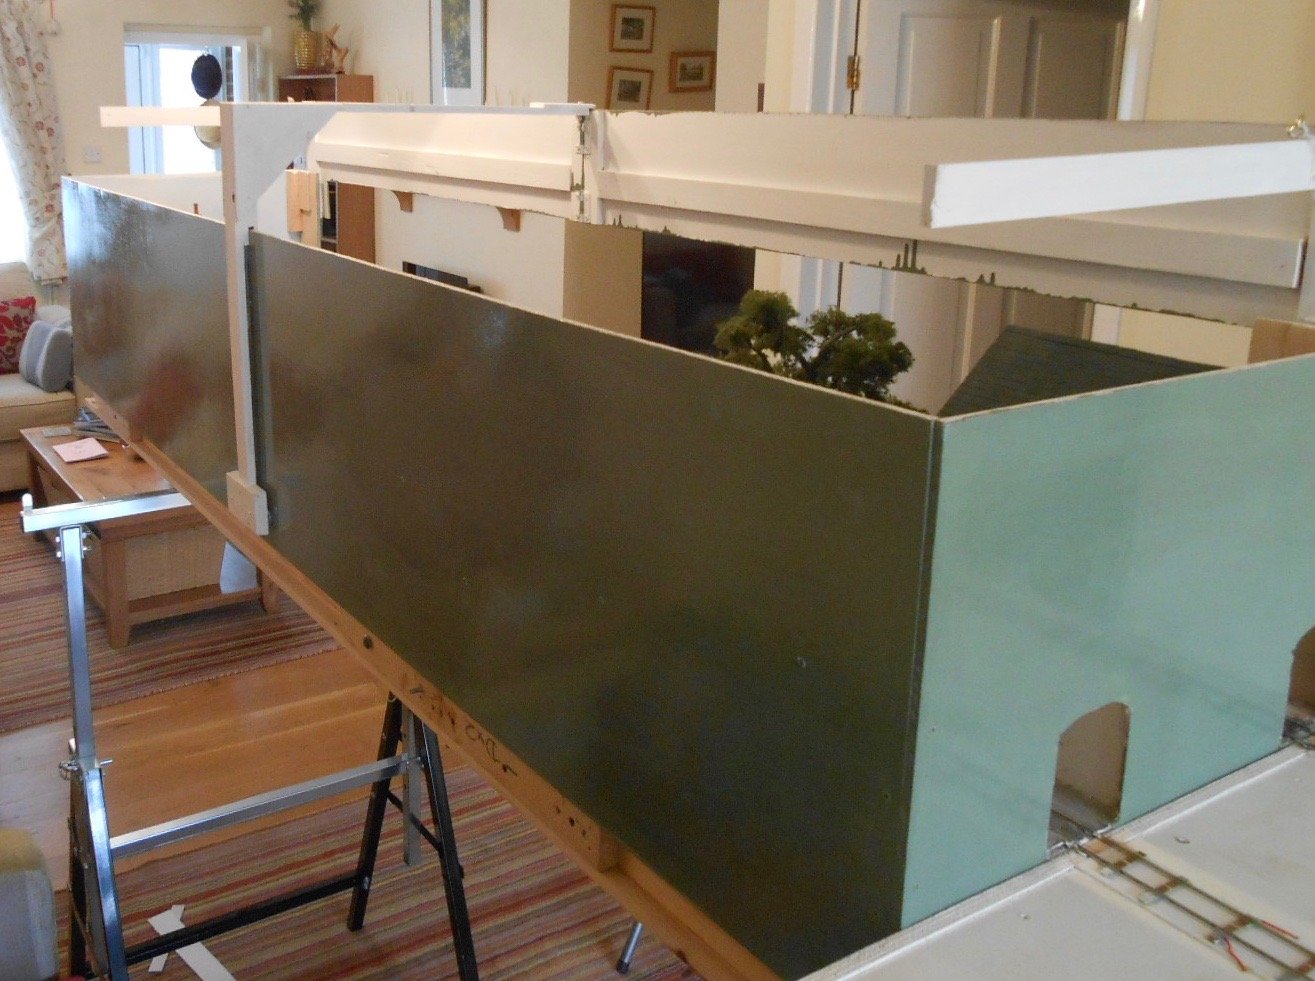
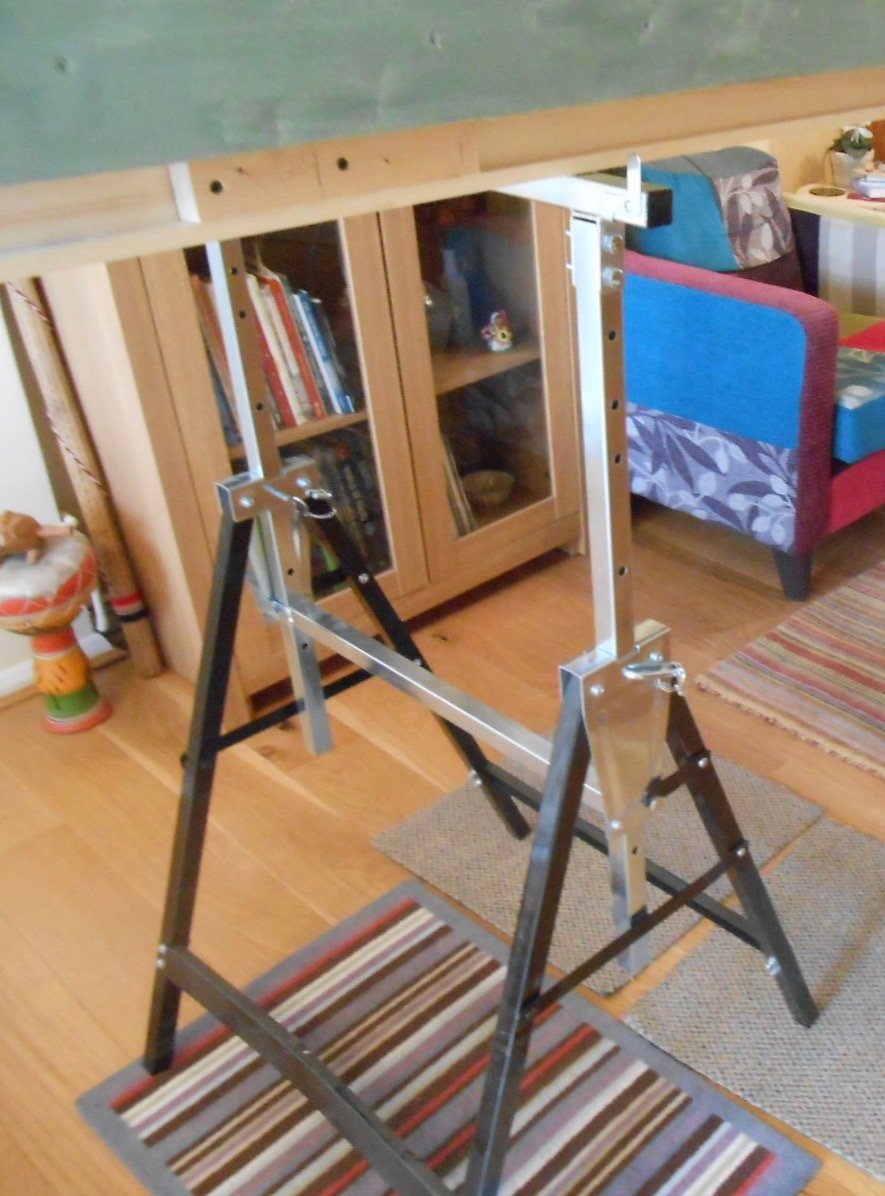
Setting up for exhibitions Despite a lack of postings, things have nevertheless been busy hereabouts, though a week in Croatia [very nice too], put the modelling on hold for a bit. Iain Rice's latest book 'Cameo Layouts' has been at the centre of my thinking for a while now & am aiming to make Fintonagh fully framed, so that is what recent work has been all about. Apart from a pelmet to hide the lights, Arigna Town has little in the way of 'framing', but to me, there is now no doubting the impact such things can have visually. A bit like when you crop holiday snaps [or indeed stuff for this site] on the computer, a frame round the layout is very useful in blocking out all that you don't want to be seen. The problem with such things is that, when exhibiting, they are just more stuff to take with you. Hence have been trying to both minimise the individual pieces and make sure as much as possible is fixed using flush mount plates - which are exponentially quicker than using M6 bolts and wing nuts. Hopefully the pictures show what I've been up to. Firstly, the layout sits on two adjustable decorator's trestles, giving a track height of around 48"/120cm. Two folding longitudinal beams support the layout itself, the three sections being held together by just two M6 bolts. The pelmet slots on the front wings with two flush mounts. It is hinged in the middle and will have an LED strip to light the front edge of the scenery. Also on the pelmet are two hinged arms, one each end, which swing out to eventually support another LED unit. There is a central bracket, at the back, which both keeps the back scene aligned and [with a small drop in bolt] the pelmet nice and straight. The lower edge of the layout will have drapes to hide the trestles, but there will also be a slot in display board giving information about the Clogher Valley Railway, layout construction & so on. Current thinking is that the join between the two scenic boards will be hidden by a couple of removable plaques - one with the layout name & the other the CVR crest. Show badges and the like will be banished in order to keep an uncluttered fascia. The sage green colour was chosen to reflect the greens and greys of the foliage and buildings, though still needs at least another coat. Fintonagh's debut is now starting to feel close. Mid October sounds a way off, but it is nearly August and Arigna has two show before then too, so lots still to do!
-
Really like the way this has been thought out, with trains and traffic all part of the overall concept. Likewise the 'less is more' track plan - the late Richard Chown would certainly approve. One thing to consider though is the preponderance of straight lines, parallel to the baseboard edges. Subtle (sinuous even!), curves are more attractive to the human eye, while avoiding too much parallel to the baseboard edge improves the overall feeling of spaciousness. Making the double loop go diagonally across the boards would be a way of avoiding the three way point, though am sure there is a prototype for it somewhere. Space wasn't usually a problem in Irish country termini, but a harbour setting may well be tighter and need a more fancy track plan like the one shown.