David Holman
-
Posts
4,359 -
Joined
-
Last visited
-
Days Won
117
Content Type
Profiles
Forums
Events
Gallery
Blogs
Everything posted by David Holman
-
Didn't Kenny Rogers once do ' You picked a fine time to leave me, Loose Wheel'?
-
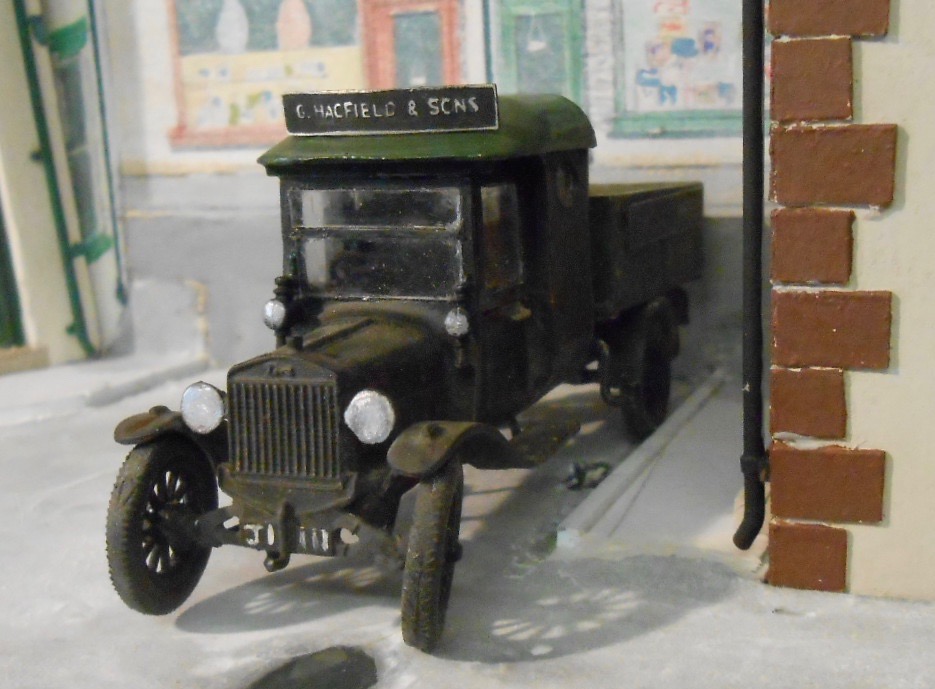
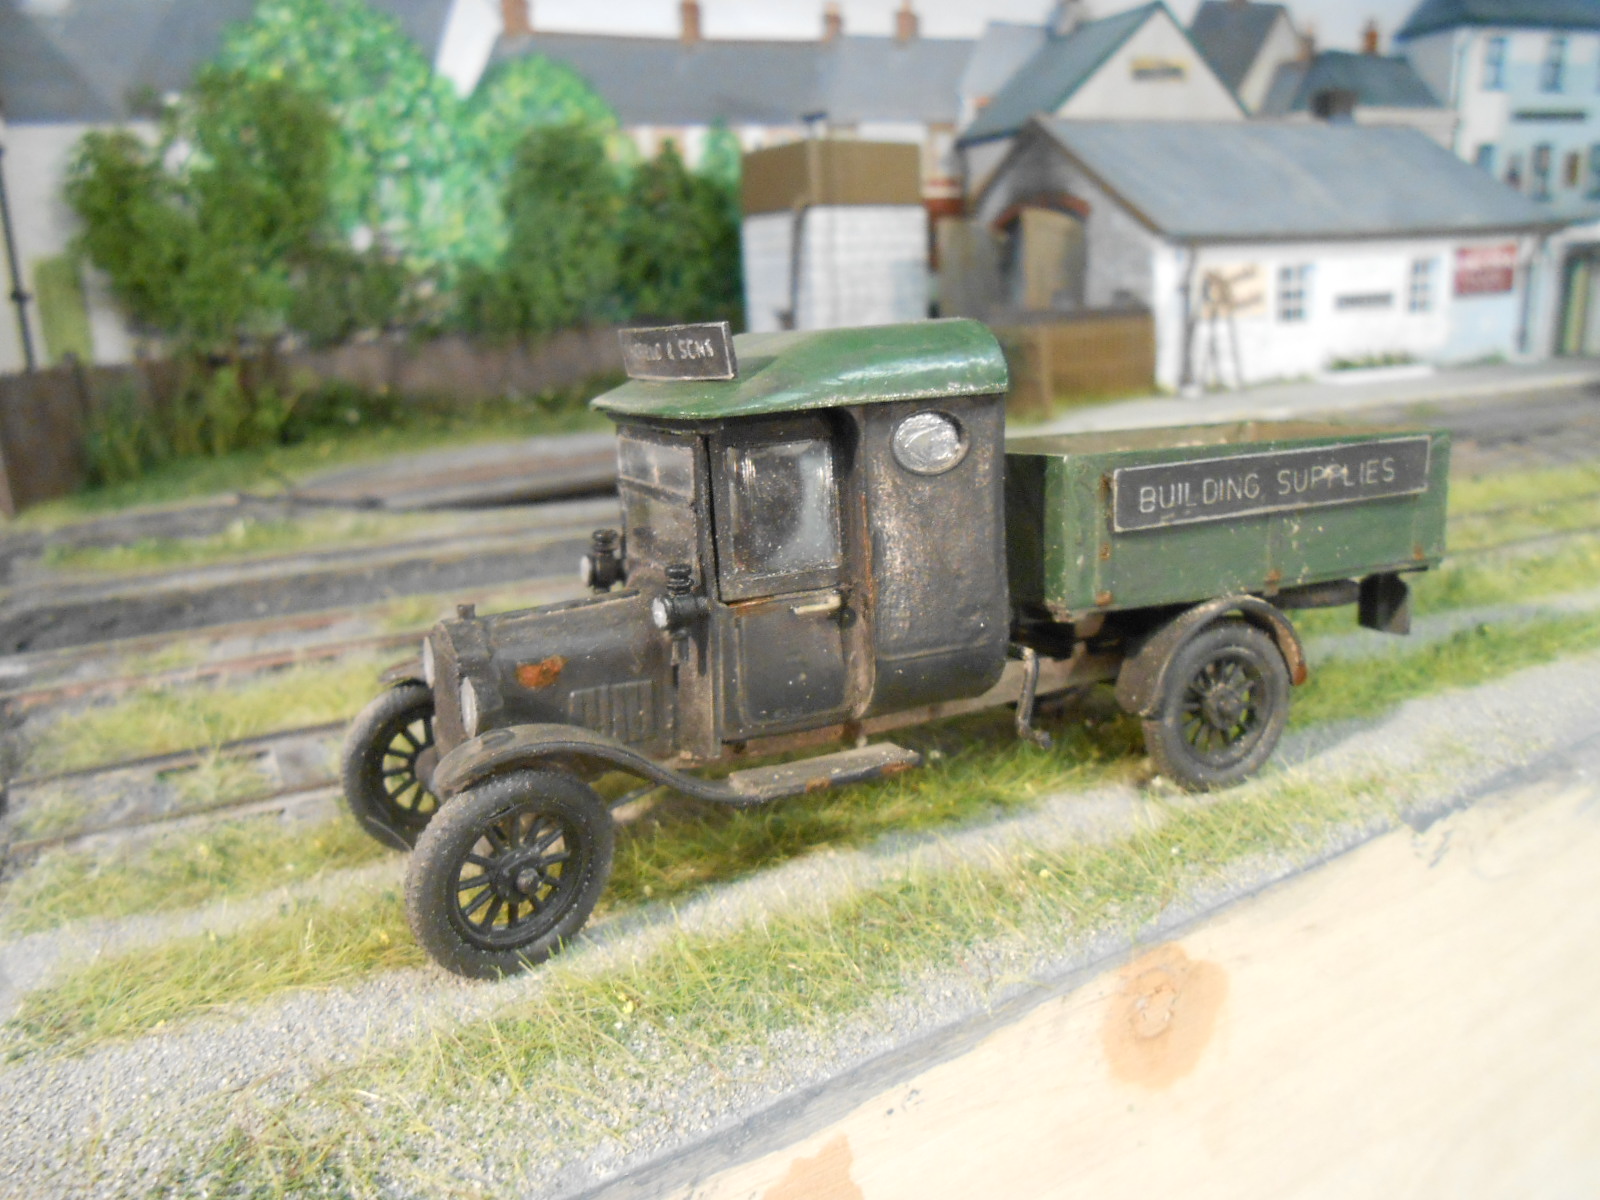
Model T Ford Tipper Truck This was my Christmas present to me - in other words, the missus gave me some spending money for the Reading Trade Show back in early December. It is a Duncan Models white metal kit. I started it on Boxing Day and have been faffing around with it ever since, mainly because I'd forgotten what a pain white metal kits are to put together. The castings are ok, though the very nature of them makes things rather chunky, with overthink edges. The main problem I find with white metal is that nothing much wants to stick to it, apart from 5 minute epoxy. Yes, I could have used low melt solder, but I don't have a temperature controlled iron, while superglue really doesn't like it at all - something to do with the release agent on the castings. So, clean up a piece, mix & apply the epoxy, find a way of holding the two pieces together for 5 minutes & repeat an nauseam... Life would have been a little easier had some of the parts fitted better, the front mud guards being especially awkward. The instructions were a bit basic too and although there was an exploded diagram, it wasn't completely helpful in telling me where to put things. So, constant referral to Google was needed to get a better idea. However, Model T Fords came in a huge number of varieties and were subsequently altered by their owners to suit their needs, so in the end, I rather made it up as I went along. For example, the kit comes with a rather open cab [no side windows] & I'm guessing it would not have taken too many soft days to add a more enclosed version. A bit of work with plastic sheet sorted that out. The front end gave me all sorts of angst - at one point, I was going to make up my own springs and steering arms from brass, but in the end, just added a few bits from wire. As for the hand cracked mechanism to make the tipper work, I really have no idea how the castings provided would work. Suffice to say, the vertical column with a screw thread was replaced with a 10BA bolt after the casting broke - another issue with white metal - and the other bits stuck in place as per instructions. As for painting, though it seems a lot were indeed 'any colour you like, as long as it is black', though many got 'improved' by their owners. Given that this one will be at least 15-20 years old [Fintonagh is set in the late '30s], more than a bit of rust and dirt has accumulated. The tipper section and roof are Ford Laurel Green, while the rest is the usual spray can matt black. Thankfully, it doesn't have to run [!] being just a static model that will probably end up at the front edge of the goods yard, collecting builders sand/gravel from one of the open wagons.

-
Good stuff. Got the Boyd boon not long after it came out and found it a really enjoyable read. Scary to think that Irish narrow gauge steam finished nearly 60 years ago, so memories like this are precious. Likewise photos of the period.
-
Kit building v RTR - Sometimes a false economy?
David Holman replied to Noel's topic in General Chat
When I rejoined the hobby in the late '80s, the majority of RTR was so lacking in both detail and accuracy, that kit building was often the only way to get anything that wasn't aimed at the toy market. It was also the only way to achieve decent running, so dire were some of the chassis/mechanisms. Nowadays the opposite applies to some extent. Yes, there are some superb kits out there, but a degree of skill and experience is needed to put them together, plus you still have the paint job as well. Most current RTR is aimed at the adult market, with fabulous detail and superb running. There are 7mm scale RTR locos coming on stream with working inside valve gear for under £300 for goodness sake! An etched brass kit will cost about the same as RTR, but probably involved 50-100 hours work. Fine by me, because that is what I enjoy doing. But if I was starting again? No way, I'd still want to build things, but am sure it would be buildings and scenery, with locos being RTR. -
Exciting times, go for it!
-
Checkout current Railway Modeller. Somebody has done a 6x4 oval layout, copy Rev Awdry's Ffarquhar from 60 plus years ago. Set track points and curves down to 450mm, it looks really good. Small locos and four wheeled stock - just goes to show what can be done. So, pass me the sauce, I have a hat to eat.
-
Superb and colour too! So much detail in every frame.
-
One of the redoubtable Mr Gravett's ideas, JB. The sub structure of the road is mounting board, set with a piece running longitudinally down the centre, to give the camber. The card is then covered with gloss enamel paint [dark grey] and then liberally coated with talc while still wet. Spread evenly and allow to dry before vacuuming up the residue. The crack you mention is actually a joint between two pieces of card, filled with DAS clay and sanded smooth. Tippex works well to simulate road repairs too. More paint/talc on top of course. Another way of doing road surfaces is to use wet & dry sandpaper. Precision paints do a nice matt tarmac is you go this way. Given the layout is 7mm scale, a smooth road surface still works well, so smaller scales certainly don't need anything coarse.
-
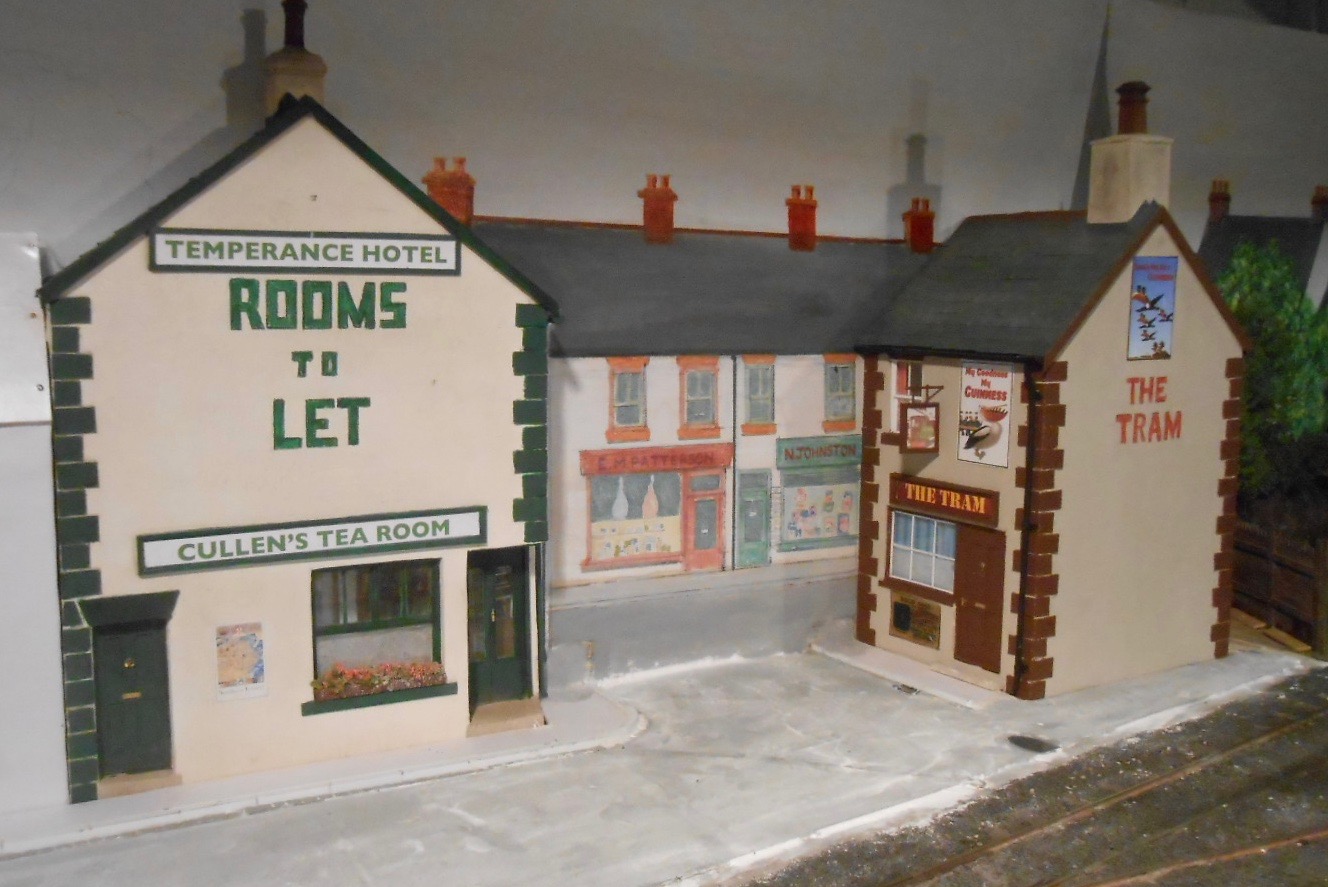
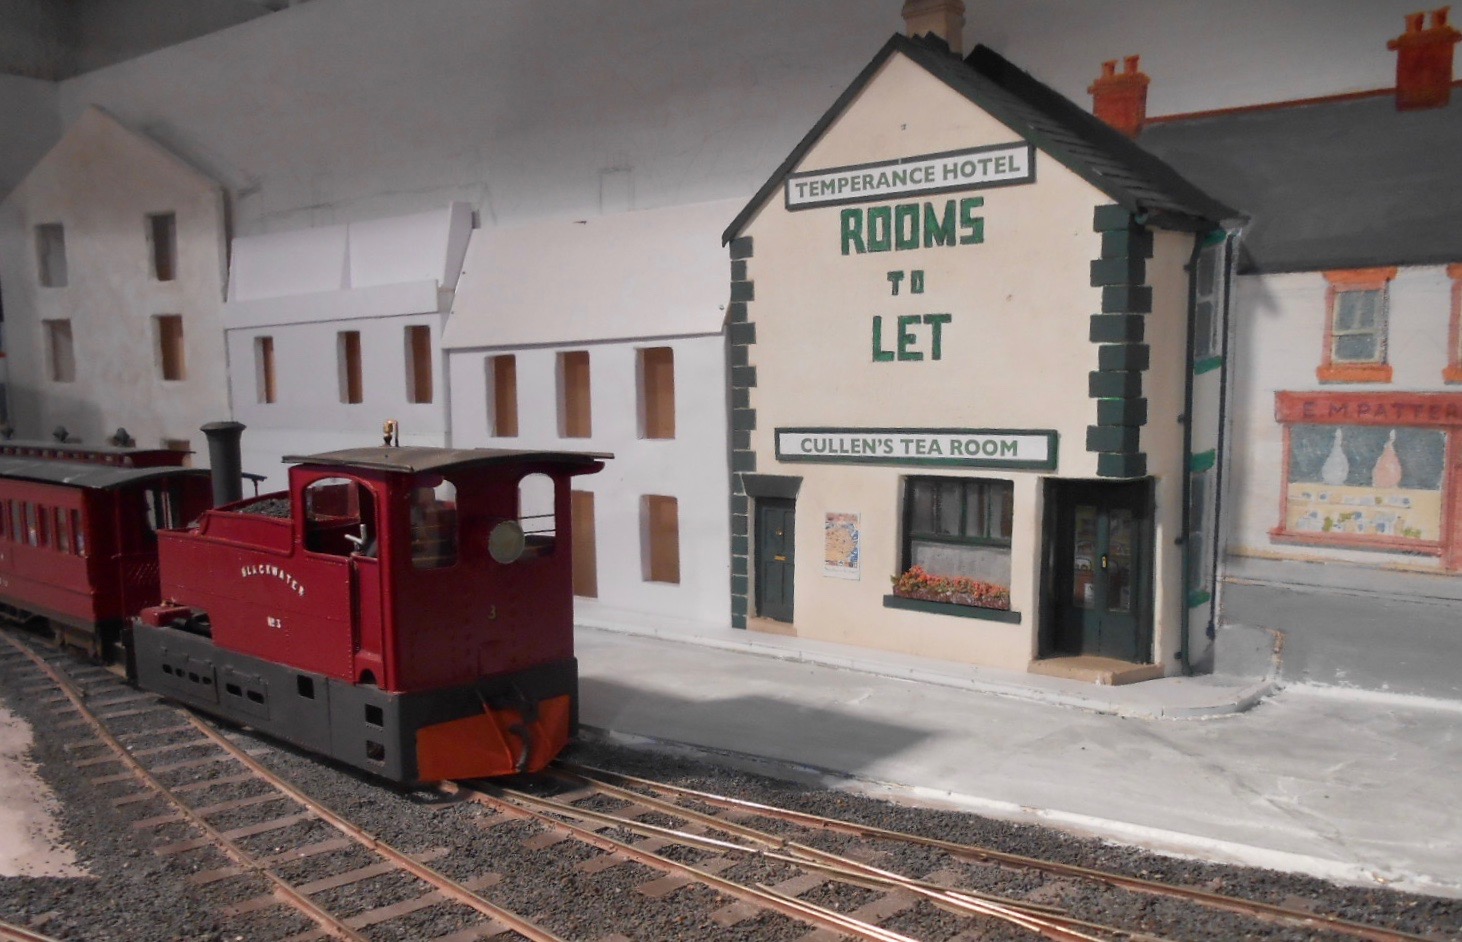
The Temperance Hotel With a couple of boozers on the layout, I thought it might be an idea to do something for the Temperance movement. Purely historical interest of course - as someone with a 50 bottle wine rack, happy to refill it with a 'booze run' a couple of times a year, I'm not about to sign the pledge any time soon! A small advantage to living in SE England is its proximity to France and a day trip to a supermarche makes a nice outing, especially as it will include lunch too. Indeed, it is arguably quicker for me to drive to Switzerland, than it is to Scotland. Be that as it may, having got the bit between my teeth with the Tram Inn, the next building along, being very low relief, promised a fairly quick build - and so it has proved. Perhaps the hardest bit was deciding what the building would be, but a leaf through one of my favourite books soon provided the answer. John Ahern's 'Model Building Construction' was first produced in 1950, when 'cow gum' and 'Seccotine' were the acme in terms of adhesives, while PVA probably hadn't even been thought of. However, what the book does is take you through all the techniques you might need in terms of building structures, while [because of its age], the models described are ideal for the period of 1930s to 1950s. John Ahern of course was the man who built the Madder Valley Railway - one of the first ever truly scenic layouts - which can still be seen at Pendon Museum. The Temperance Hotel can be seen in Madderport & this gave me the spark of an idea. According to Google, the temperance movement in Ireland, dedicated to lowering alcohol consumption, involved both Protestant & Catholic leaders. The Teetotal Abstinence Society was founded in 1838, with thousands signing the pledge. However, in 1898 one James Cullen founded the Pioneer Total Abstinance Association, apparently because enthusiasm for the original group was fading. Hence, it seemed appropriate to give him a mention on my hotel & tea rooms. All in all then, a lengthy pre-amble to a bit of low relief modelling. The building is made in the same way as the Tram Inn. I did add a bit of interior detail, which can just be seen above the net curtains & through the doors. Extra colour is provided by the window box, which is just a piece of balsa, covered in Woodlands 'medium scatter' and sprinkled with a red flower mix. The tricky bit has been trying to blend the model into the back scene. The roof line needs adjusting slightly & of course the paving slabs are yet to be added, but overall, it was an enjoyable little exercise.
-
The current RM has a fine article on a model of one of the Lincolnshire potato railways. Spud growing on an industrial scale and some very nice buildings & scenery. There is also another interesting piece showing a 6x4 layout in 00, which shows how it is possible to disguise tight curves. The design could be incorporated in other scales - notably 009 - and makes N gauge in 4x2 looking a tempting proposition.
-
St Neots is a good show and they get over 3000 visitors over the weekend. I've heard Milton Keynes get good attendance, especially for a one day show. Catering more for the non specialist side of the hobby, there may be lots of folk who would like custom made boards there.
-
Looks good to me. On Arigna I have a Marcway 6' Y point. Unlike Peco, the curve starts at the toe, so from there to the clearance point is just 12" - in 7mm scale too, less than two thirds the length of a standard turnout.
-
Depends what you mean by small. In 4mm scale 900mm radius is desirable, especially from a visual point of view and you could get away with 750mm by judicious use of transition curves and scenery. Set track points meanwhile go down to below 450mm and while some locos and stock will still go round them, to my eyes they certainly ain't pretty! Ok if hidden in a tunnel, I guess. Another factor is the length of individual items of stock. The shorter they are, the tighter the curves you can get away with. 20m coaches and 500mm curves to be avoided if you can.
-
And that is the joy of our hobby. Some folk like collecting, others like operating, some get a buzz from the electronic side of things. I quite enjoy operating, but making things is what I really enjoy and while some specialise in locos, or buildings or scenery, I enjoy all aspects because of the diversity and challenge it offers. All I would say to anyone is don't be afraid to have a go. We all had to start somewhere but as Henry Ford once said, 'If you think you can, or you think you can't - you're right!'
-
Interesting article 'Clifton and Lowther' using something called fiNetraX code 40 plain track. British sleeper spacing and looks stunning. Thought it was 2mmFS, but actually just N gauge. Definitely food for thought for anyone contemplating Irish N and we'll worth a look.
-
Excellent news! A station very much in need of modelling and can only look forward to seeing it develop. Photos soon?
-
Saturday 10th February sees another chance to see 67% of current Irish Broad Gauge exhibition layouts when both Valencia Harbour [4mm scale 21mm gauge] and Arigna Town [7mm scale 36.75mm gauge] feature. Well within range of many in middle earth [aka the south Midlands].
-
Not surprised to hear that about Norman Johnson, while modellers and historians are forever in his debt. The likes of Des Coakham, E M Patterson, JC Boyd etc to name but a few as well. In mainland Britain, there were a great number of people recording the railway scene. Indeed, probably a book or two on pretty much any subject you could wish for. Researching the Irish scene nowhere near as easy, so we must also be thankful for the IRRS, Neil Sprinks, Tom Ferris and JHB of this parish of course. Thank you all!
-
Correct, JB and next door is Patterson's chemist. Not sure what 'Edward M' was a doctor of, but I like to include these pioneering authors where I can. When I went to college, beer was 14p a pint, though with a friend behind the bar you could get 7/8 of a pint of McEwan's Export with a [pint] bottle of Newcastle Brown for 22p. Guinness was available for a while, but the suppliers insisted on a minimum of one nine gallon barrel a week, which proved a bit much with only 4 of us drinking it on a regular basis.
-
I've got one of these, Noel and find that, with a bit of practice, it works well. Won't produce those handrails that wrap around a locomotive smokebox though. For me, only trial, error and [a lot of] rude words eventually produces results.
-
Classy models in a lovely setting - a bit of weathering eventually?
-
Have to agree with the others, a 4F is way better than a LSWR 'Black Motor', however nice the model & prototype are. I have every sympathy for 4mm, steam outline, modellers - there is not a great deal to go on, though the Woolwich Moguls don't need much work. There is however some merit in Mayner's ideas of 'might have beens' - or indeed, even a bit of freelancing. At the end of the day, you do what you like with your own railway and if a model runs well, so much the better. However, trying to make things a realistic as possible is what works for me, which is why this forum is so useful in terms of improving accuracy.
-
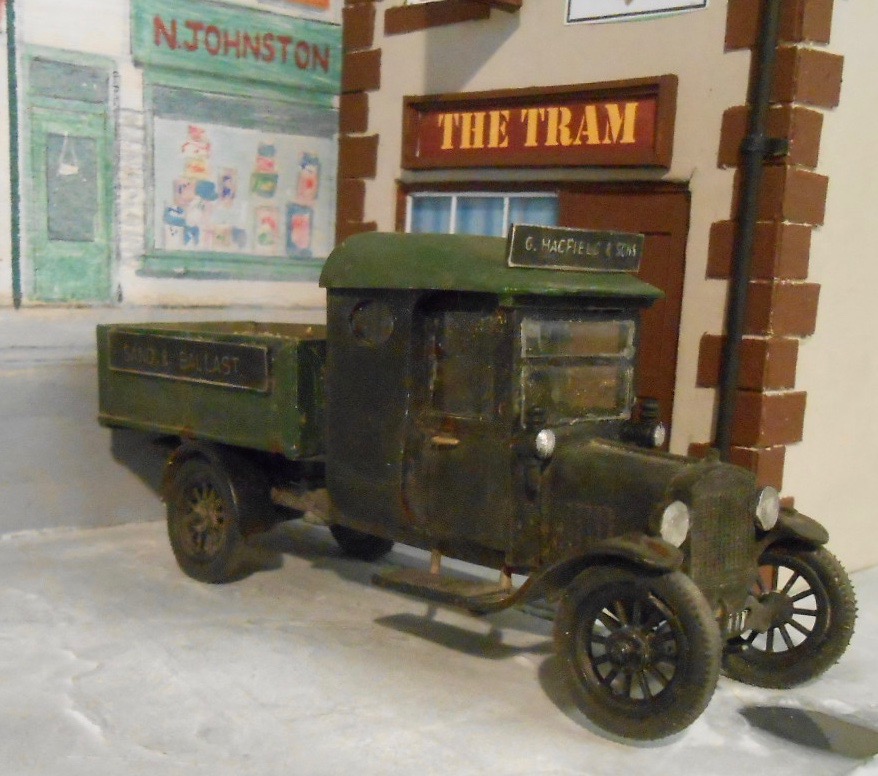
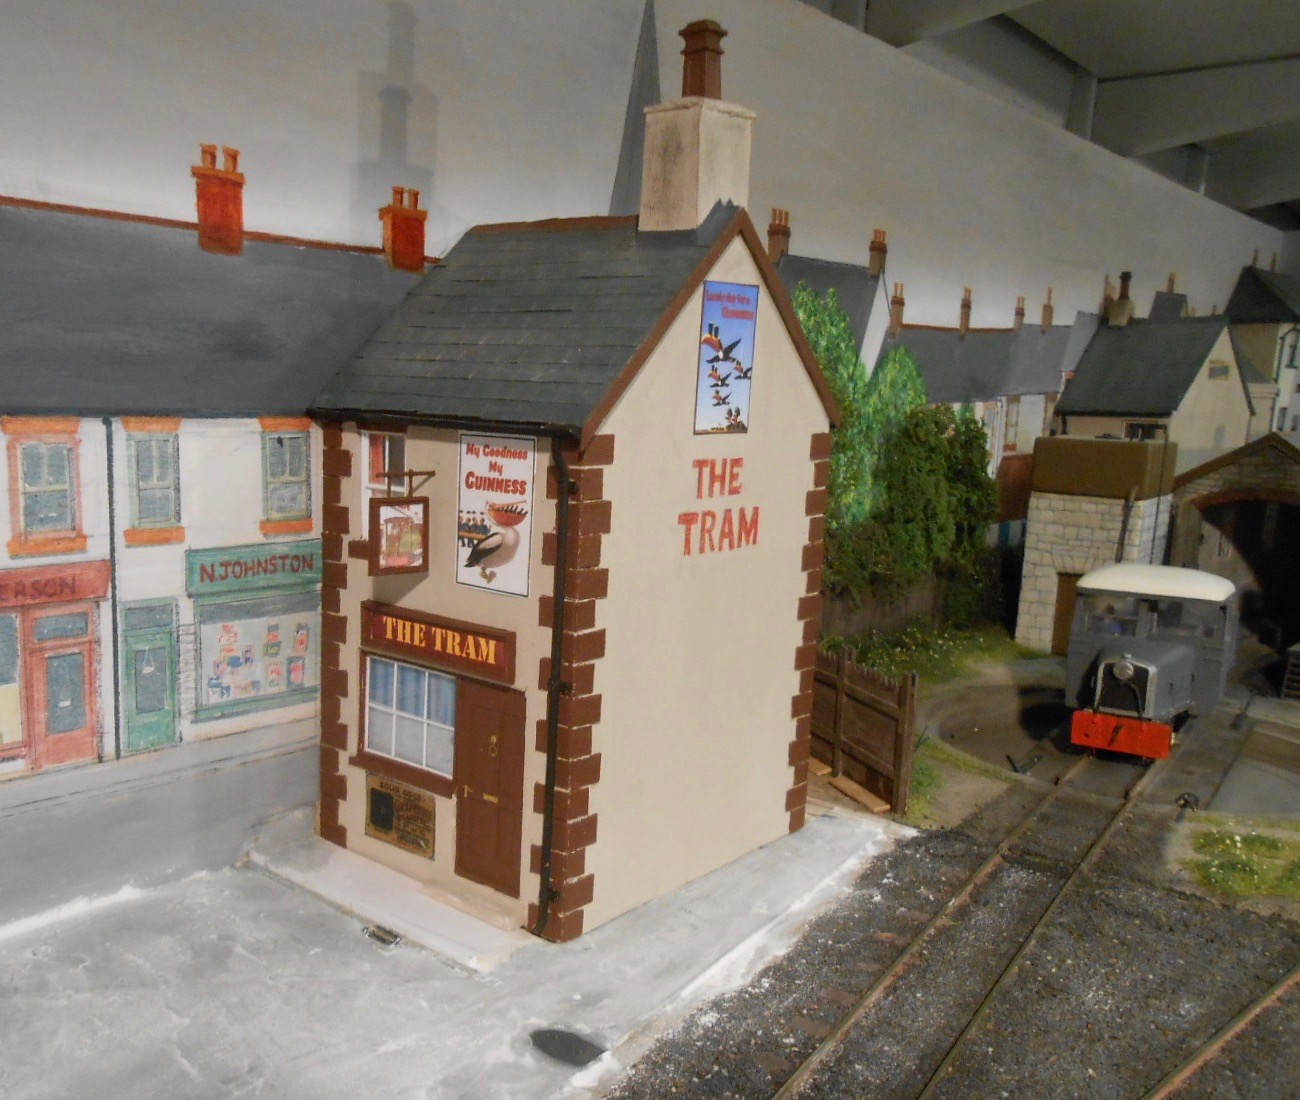
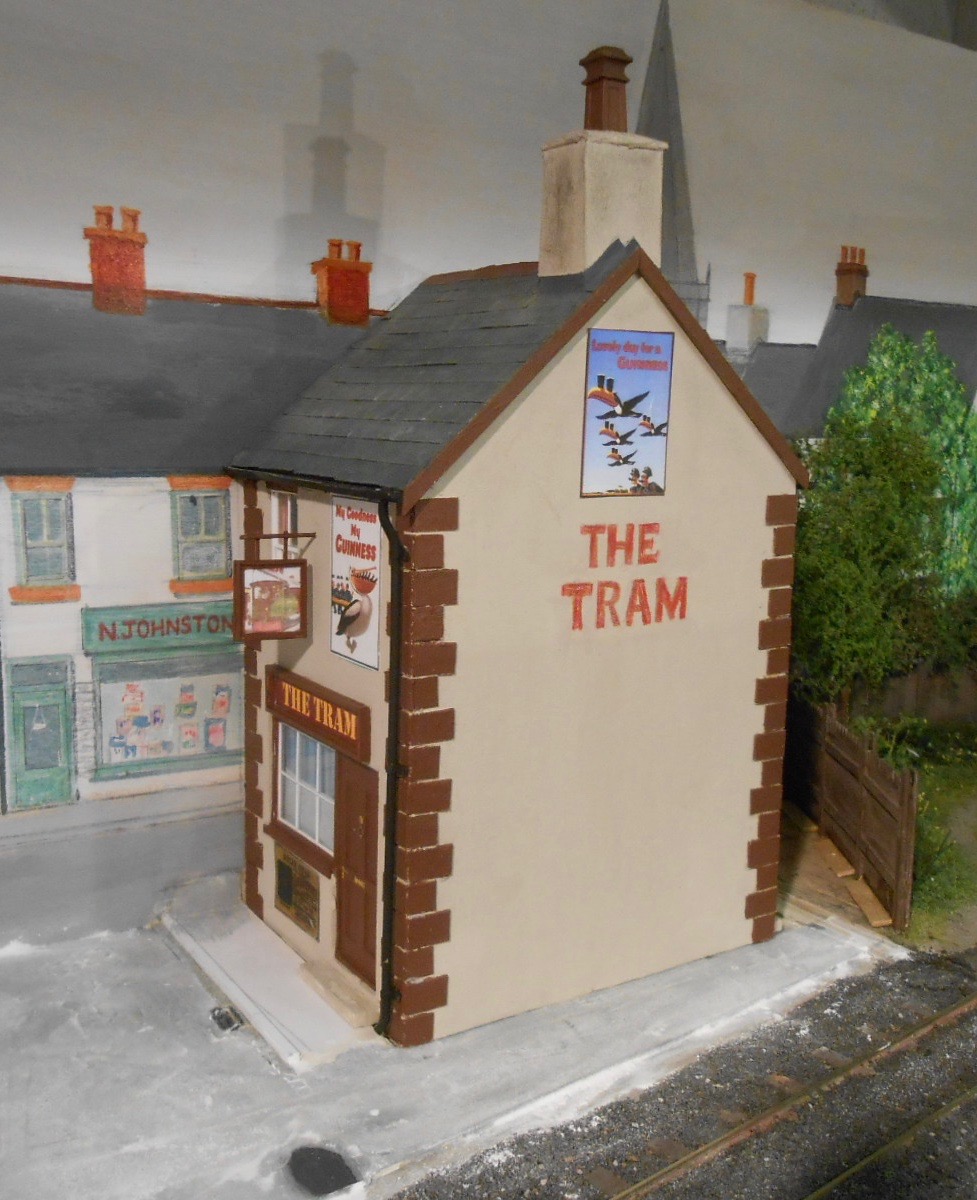
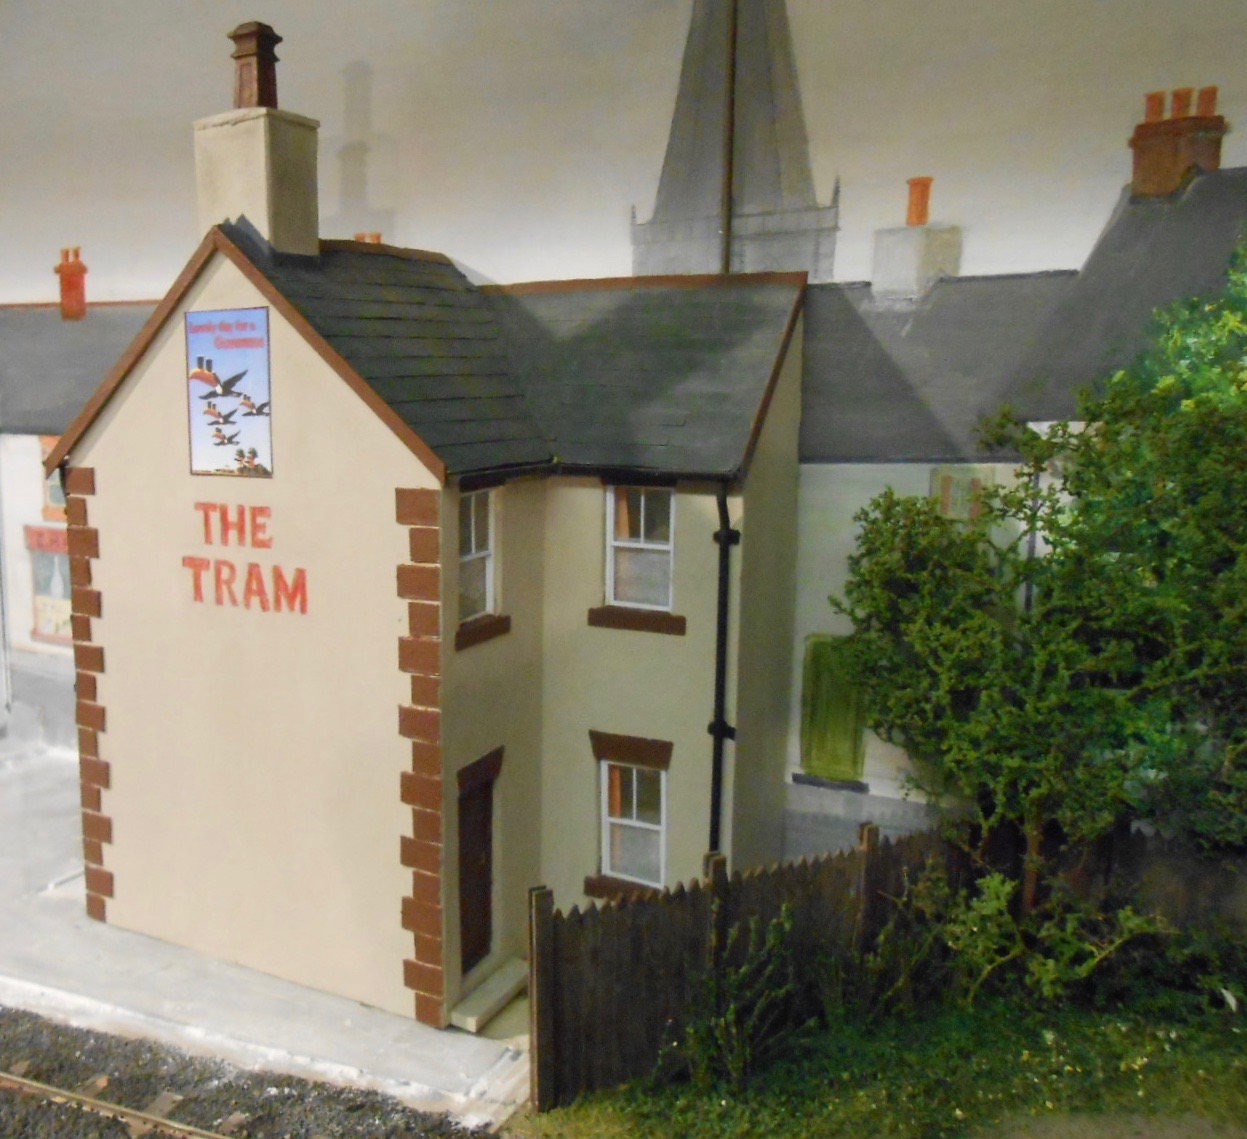
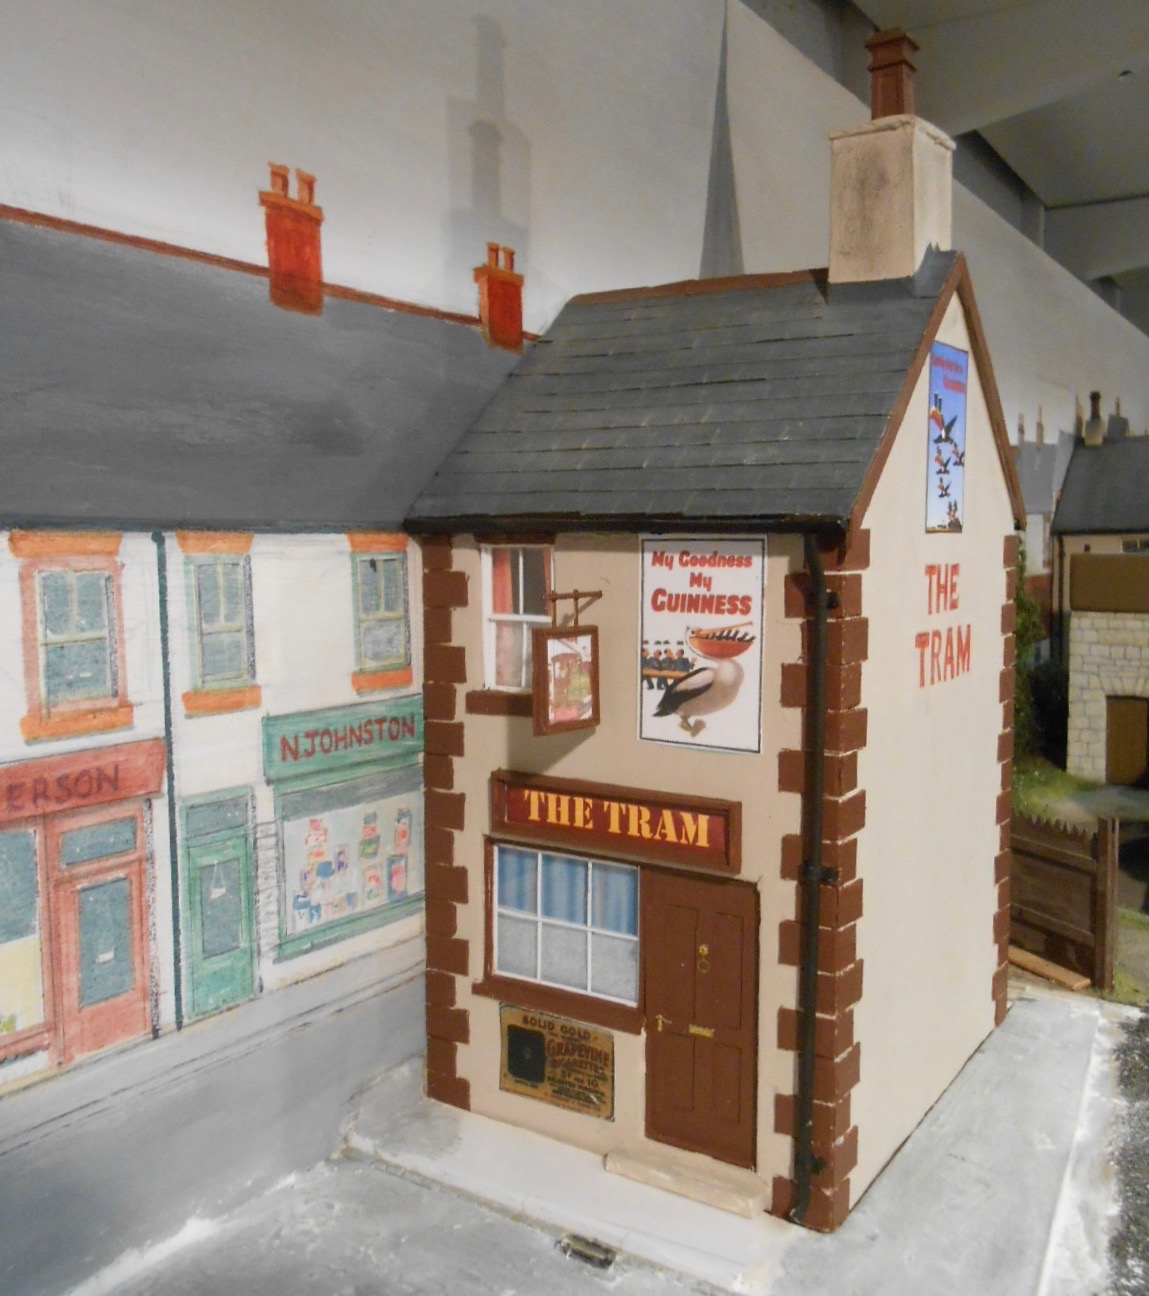
A new building I've probably said this before, but what I love most about our hobby is that it takes you in so many different directions and after the self induced stresses of the railcar, it seemed something different was appropriate. Hence another building for Fintonagh - 'The Tram'. Yet another pub/bar, this one slightly different in that it will not be fixed down, as it covers the baseboard & back scene joint. Very much freelance, inspiration came from some of my own pictures, plus one or two in the Alphagraphix catalogue. Construction is around a foam board core, though the rendering is more simply done than before, using good quality drawing paper stuck down with PVA. The paper has a degree of texture and can be cut & folded into window & door apertures, saving quite a bit of time compared to covering with DAS clay. This works even better in smaller scales & when painted [Precision 'weathered rendering'], it seems to enhance the textured surface a little too. Windows & doors are plasticard sheet & strip, the former built on clear glazing to give the correct rebate you see on sashes. The roof is mounting board, covered with strips of drawing paper snipped with scissors to give 18" x 12" slates. Guttering is my usual 80thou plastic, with the outer edge sanded round and 80thou plastic rod for the down pipes. Two layers of masking tape, cut into thin strips represent the mounting plates. Other details included some etched door furniture [Scale Link], a cast white metal chimney pot, tissue paper for net curtains and coloured paper for the main curtains. The pub sign is a colour picture reduced from the one in the Ragstone kit of the Sharp Stewart 0-4-2T, while the name board was done on the computer. Painting is mostly Tamiya acrylics [apart from the rendering] , plus Precision 'slate' for the roof. Needless to say, a fair amount of care was taken with the glazing! A bit more weathering is still required - I imagine this will a local more on the seedy side of life. The fact that the curtains are drawn on the bar, even in daytime, suggests something nefarious is going on inside, perhaps. Eventually, while groundwork will be built up around the base of the building, much of it will be hidden by a 6 foot stone wall that will separate the railway track from the road, while an extra tree should hide the right hand side where it meets the back scene..
-
Fascinating thread, on an extraordinary structure.
-
Mmm, despite purporting to make railway modellers appear as normal human beings, not sure everyone involved is a good advert for that [ok, takes one to know one!], though the Colonel certainly gives it some street cred. Star of the show for me is the loco & well done to Roundhouse for taking a risk in their product. If I had a garden line, I know what my first engine would be.