David Holman
-
Posts
4,359 -
Joined
-
Last visited
-
Days Won
117
Content Type
Profiles
Forums
Events
Gallery
Blogs
Everything posted by David Holman
-
Looks good to me, plus there is a lot of very nice 'gingerbread' detail on these models. How things have changed over the last few years - and still improving too.
-
A layout that just keeps on giving. I have always loved the 'railway in the landscape' concept, with less = more where track is concerned. Barrow Street is lifting things to new levels with its additional vertical elements. Not something many of us have space for, so all the more admirable.
-
Many thanks for the kind comments. It is great to know folk think my layouts are capturing the essence of rural Ireland, as that is very much the aim. As far as I'm aware, there is no Irish blood in me, but my visits have always been enjoyable. Inspiration comes from those photographers and authors who recorded the scene in the 30s onwards, so they are a vital source of reference. As my art teacher said many years ago - 'paint what you SEE, not what you think' and this forms the backbone of my modelling. Still doesn't mean I get it right, of course which is why this forum is so important for information and 'proof reading's of finished models.
-
Oh my. 4mm scale, 10 foot per storey = 180 feet and 720 mm, or two foot six in old money. Wouldn't like to do it in 7mm...
-
The maximum 'less is more' can be very important in track planning, so try not to be tempted by too much track and enjoy making the railway part of the overall scene.
-
Visually, keeping the running line radii as generous as possible is very important, though you can always hide the tightest bits with buildings/scenery I guess. Hence, mainline on the outside (where bogie stock will look better) and goods yard inside, where four wheel stock on tighter curves is less intrusive. Mind you, if that inner main line is currently no worse than say 30", it should be ok anyway.
-
Or Darleks! Not seeing the wheels is a bit of a negative, but their overall charm makes up for it, I think.
-
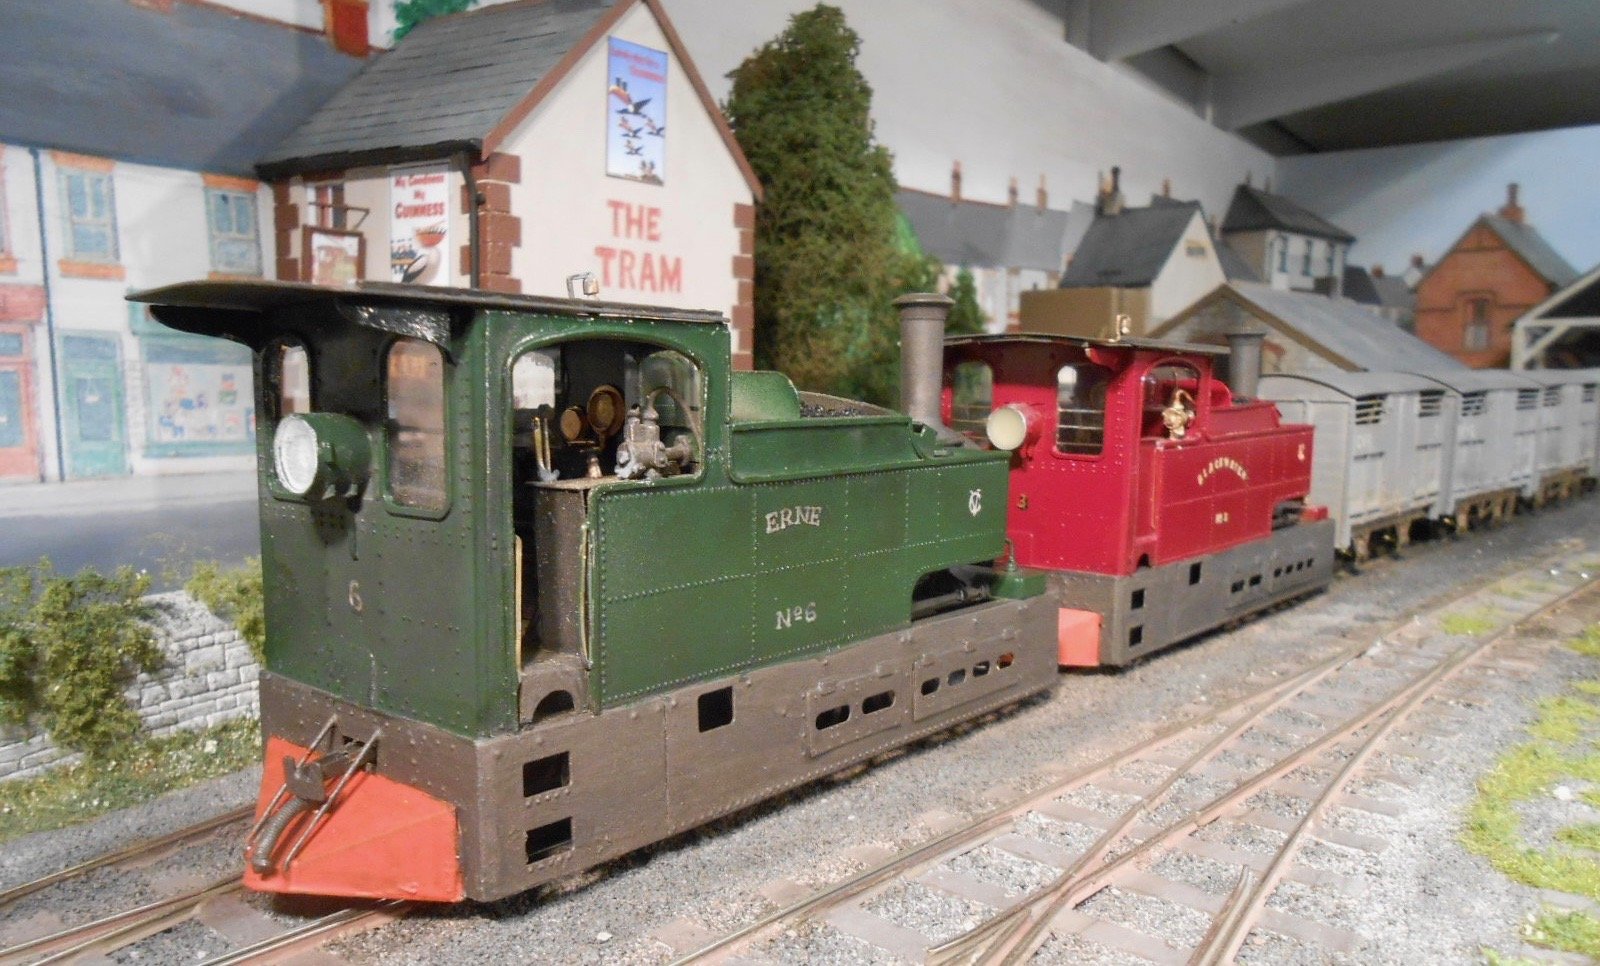
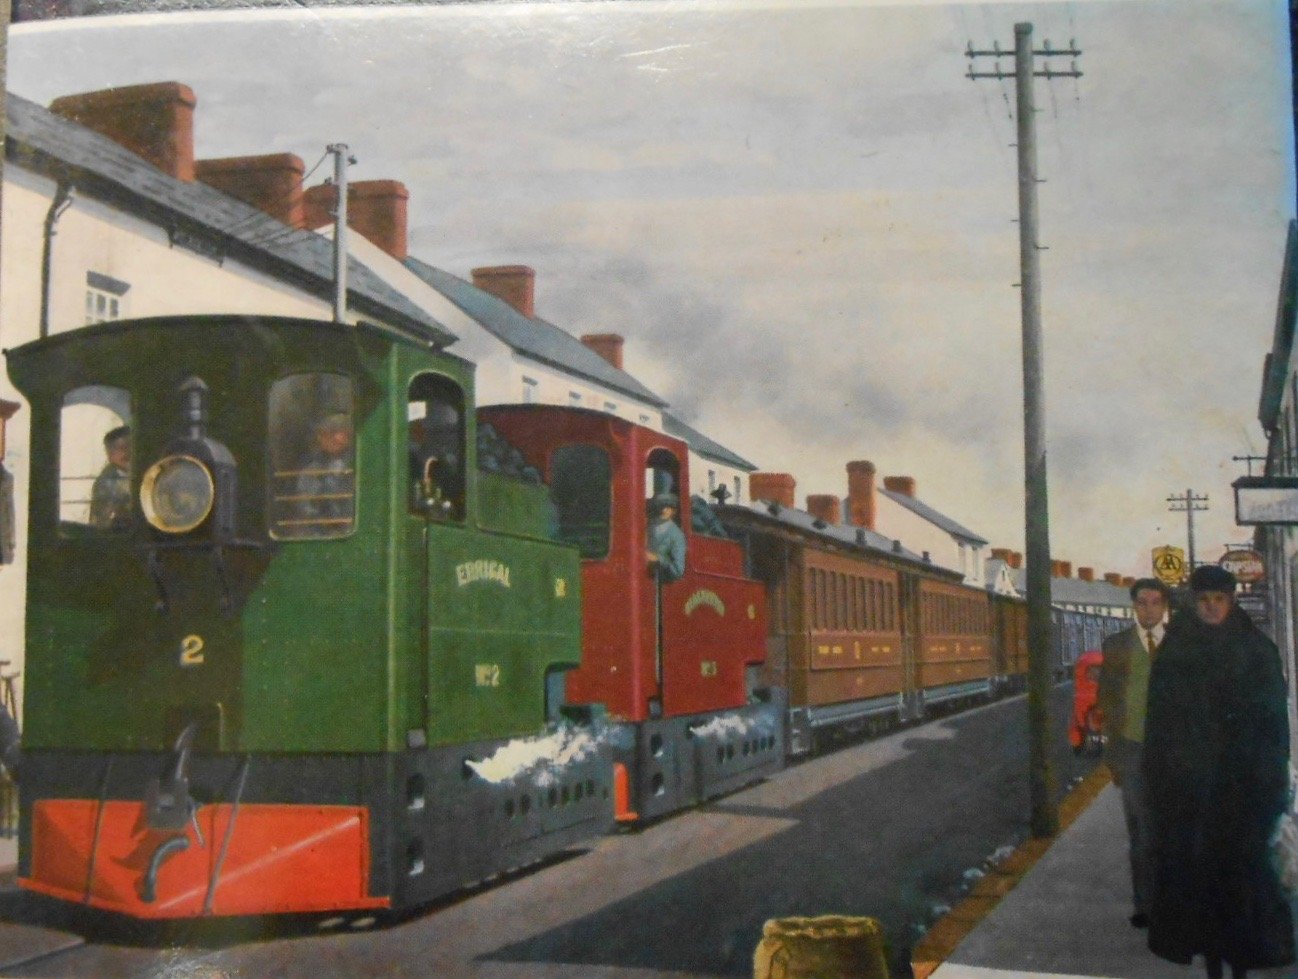
Eric and Erne Second Sharp, Stewart 0-4-2T Erne has now joined Eric [aka Blackwater] in the fleet. However, as neither of them have any crew yet, their cab roofs are not fixed. What I can now do is [sort of] recreate the Vic Welch painting on the cover of the original book by Dr Patterson. Erne was spray painted in Ford Laurel Green [using a Halford's spray can] and hand lettered with a fine nibbed dipping pen - initially in white acrylic ink & then gone over with a dark yellow fine marker pen. After, a small amount of shading was put in with a 0.3mm black drawing pen. This method has also enabled me to do the overlapping 'CV' logo on both tanks' sides.

- 266 replies
-
- 12
-

-

-
Super NG stock and models, plus I guess the 0 gauge is (slightly) narrow too, but then I would say that! Lovely stuff, either way. Would I be right in thinking the SLNCR 'small tank' is the same a certain Mr Sullivan of this parish, brought to Cultra when Arigna Town was there two years ago? Or, is it the fifth such model I've now seen (my two, Richard Chown's, Des's, plus one more)? Or indeed 6th, as there are two of them. Nice 0-6-0 and 4-4-0 too. Where are they now I wonder?
-
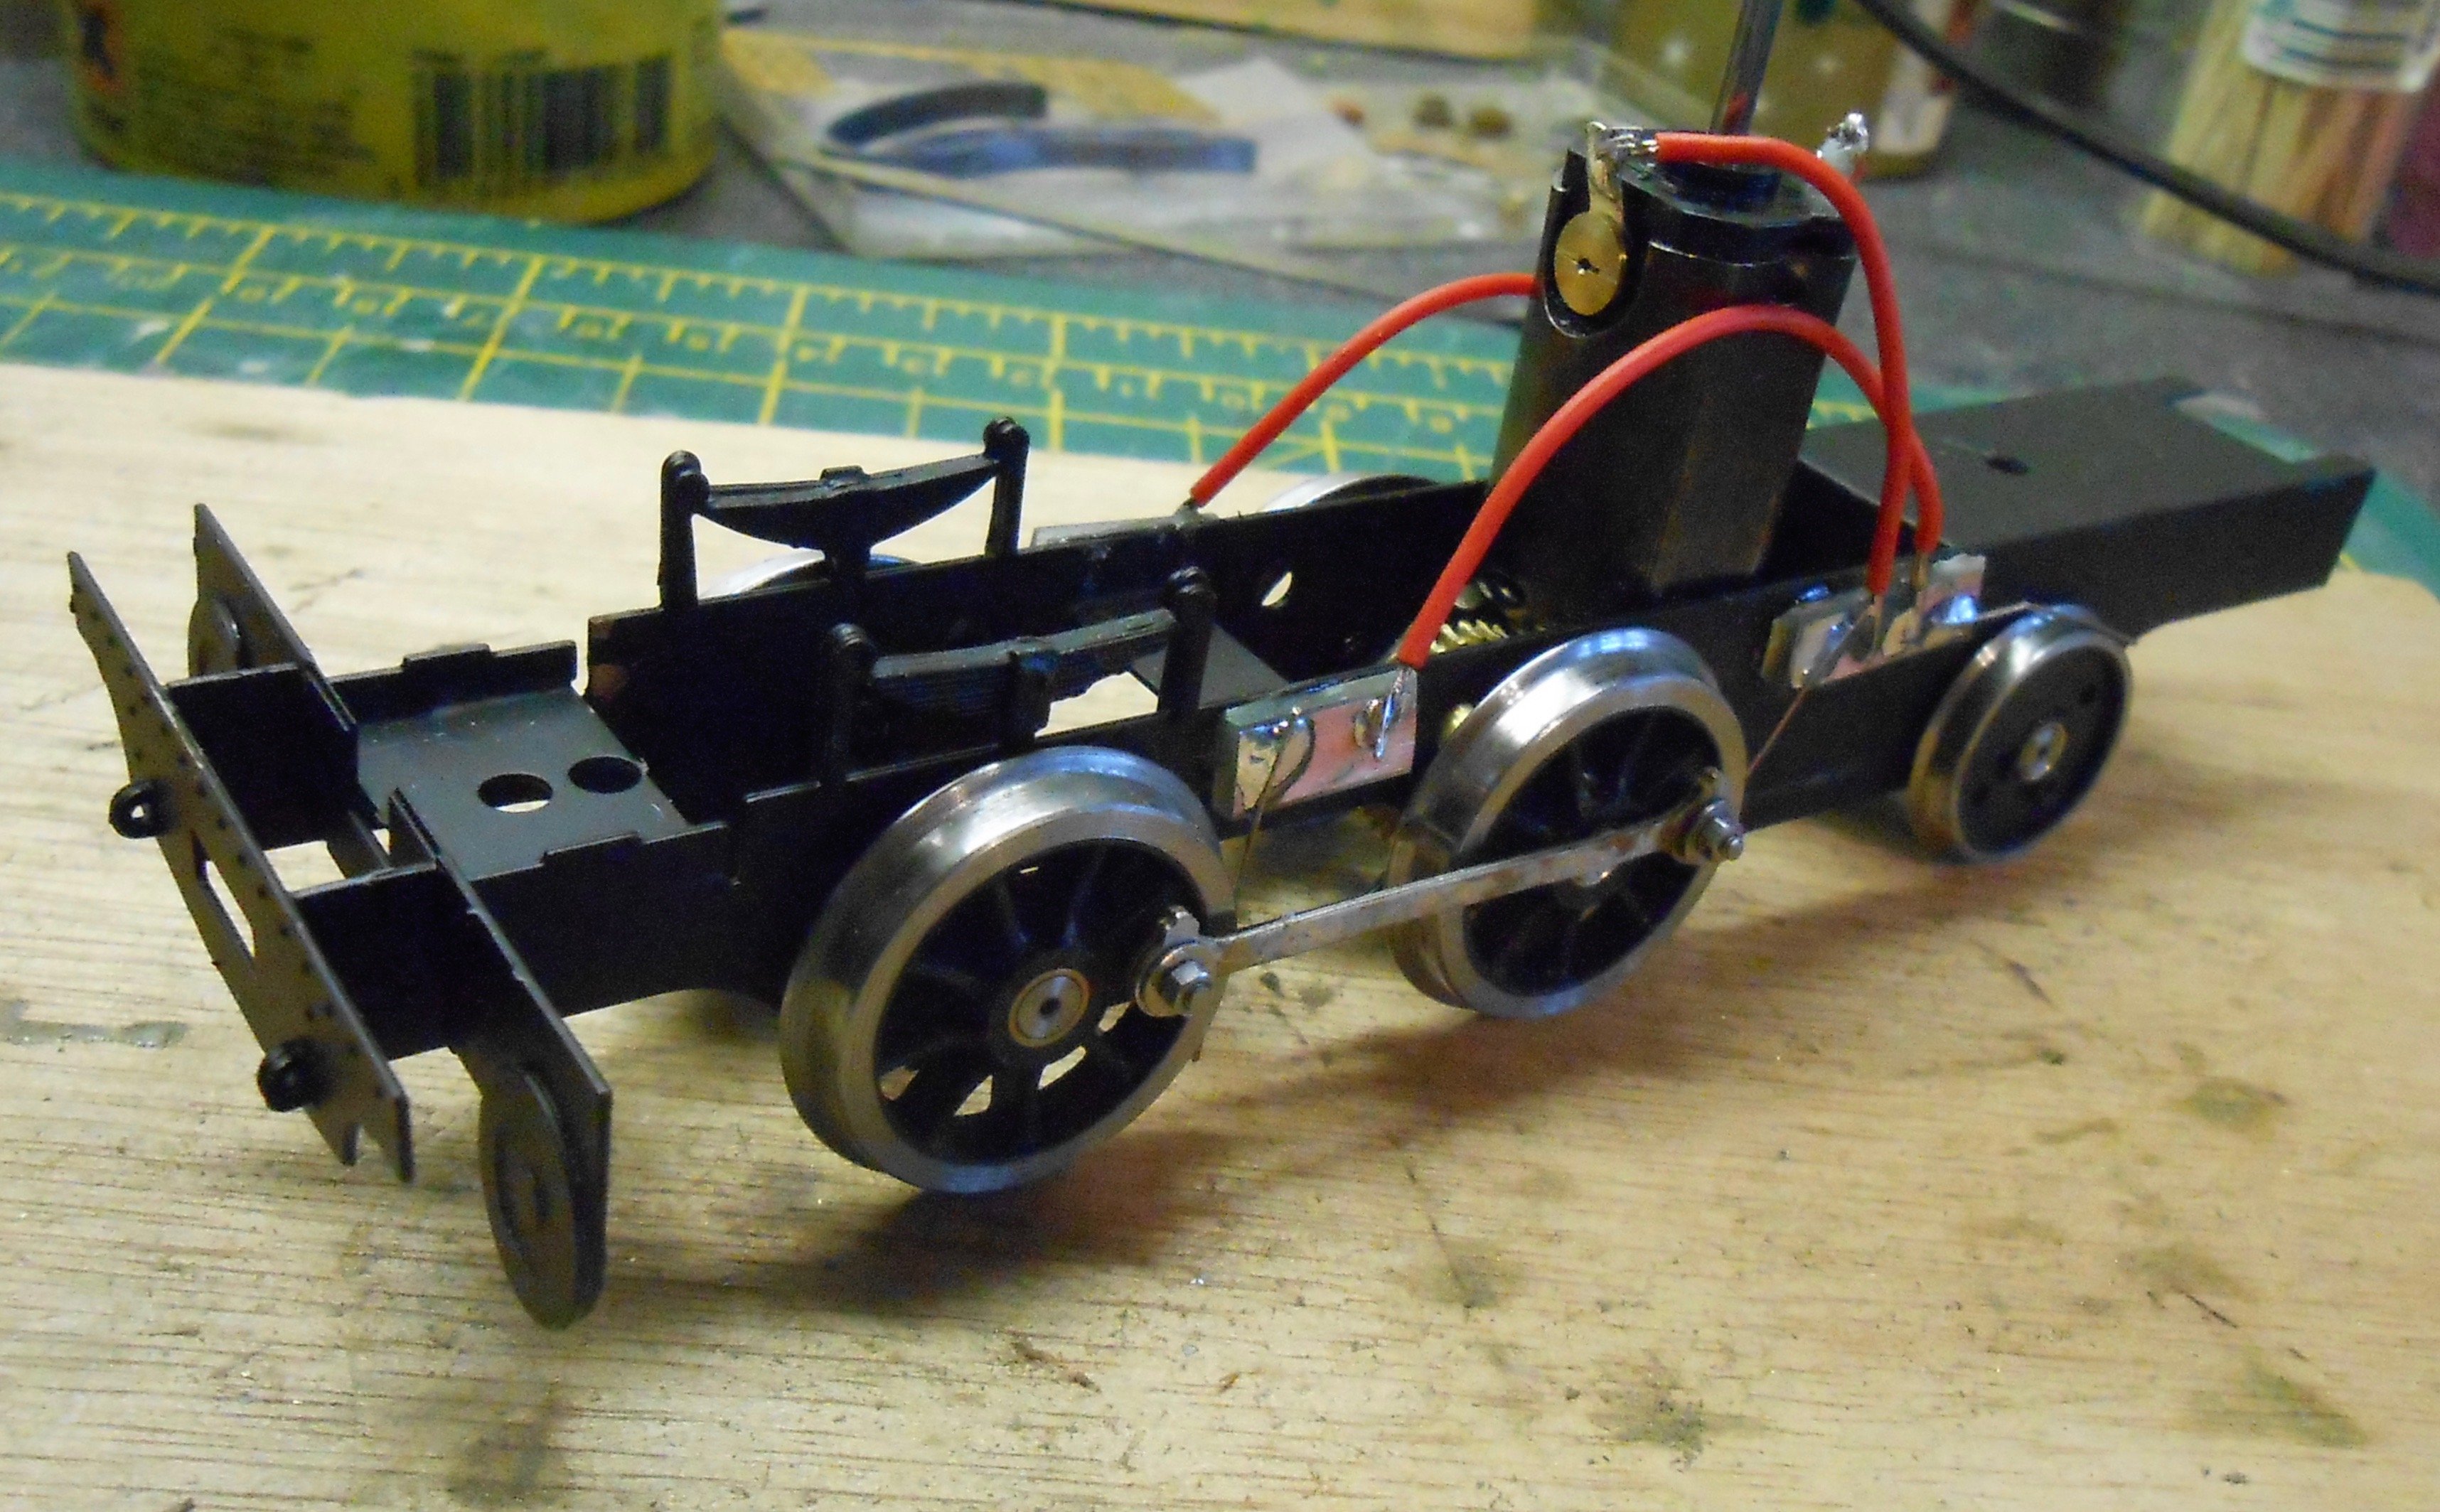
You're never alone with a clone... Hay fever season in these parts, so despite the nice weather, it is easier for me to lurk in the workshop. Back at Expo Narrow Gauge at the end of October, I bought a second Clogher Valley Sharp Stewart 0-4-2T kit from Ragstone Models. Unusually for me, it has been malingering on a shelf for the last eight months, so it seemed time to get it built, especially as I'd bought the additional bits and pieces from the Branchlines stand at the Chatham exhibition three weeks ago. There is not much point in re-iterating how I built it, for the kit is pretty painless and goes together really well. The etches are very accurate [little filler needed], with good quality castings and sensible instructions. It has got this far in just a week. Hence a clone of Blackwater, the first model. This one will be 'Erne' and as per the colour plate on Dr Patterson's book, is going to be green. As can be seen, it has already been given a witness coat of primer. The chassis rolled beautifully first time the rods were added and, unlike last time, I am not going to faff around with trying to make Joy valve gear as the motion is all hidden under the skirts. The only differences to Blackwater lie under the surface, as I somehow ended up with a 30:1 gearbox, instead of 40:1. Hence Blackwater will not be challenging it to a race.
-
And Hatton's are bringing one out soon for a mere £750... Am sure there will be plenty of takers, but Eoin's model shows that the journey can be so much more than the destination! As for livery, it is his customer's choice of course, bit for me, growing up by the East Coast mainline, it would have to be Brunswick green. All it needs now will be a rake of ten Gresley coaches...
-
One of these on my list as a 7mm scale model, so lovely to see it done so well in 4mm. Not tried citrus flux before, but certainly looks decent stuff. My Powerflux works a treat, but requires regular cleaning as I go along or everything will be green next day! Stainless steel sink cleaner does the job though.
-
Am just starting on researching a future project and am interested in the following, please: Woodwork colours on WLW, MGW and GSR buildings WLW carriage livery in 1900 MGW carriage livery in 1900 GSR carriage livery in the 1930s Have Ernie Shepherd's books on the WLW and MGW, which say crimson lake for the former and brown the latter, but anything more detailed would be appreciated and as for GSR, what best describes 'purple lake'? Realise these things are subjective and rather lost in the mists of time, but any help appreciated.
-
There is a school of thought that says in smaller scales, well printed papers work just as well as scribed or embossed finishes, especially from normal viewing distances of 60-90cms. What does stand out with Metcalf's parts is the corner joint. Easily covered with individually cut pieces of card and folded round the corners.
-
A stunningly ugly building, beautifully done!
-
It would be good if they did, but MRJ is notoriously fickle. For a long time, they never went outside Britain, then Pempoul came along and broke the mould, as it were. Since then, there have been a couple of Irish layouts, so who knows? With guest editors these days, depends on Barrow Road catching their attention. I sent an article on Arigna Town once, by post (they don't do email), and included a CD with text and photos. One of the latter made it into the magazine, but otherwise I never received any acknowledgement. By and large, they stick with what (and who) they know, which is not being derogatory, it is just how it is. I have got every issue, including zero, and still enjoy each new copy, even though the content isn't always what I am interested in. It's all about pushing the boundaries and getting back to Barrow Road, that is certainly a criteria you can apply. Let's hope it gets the attention it deserves.
-
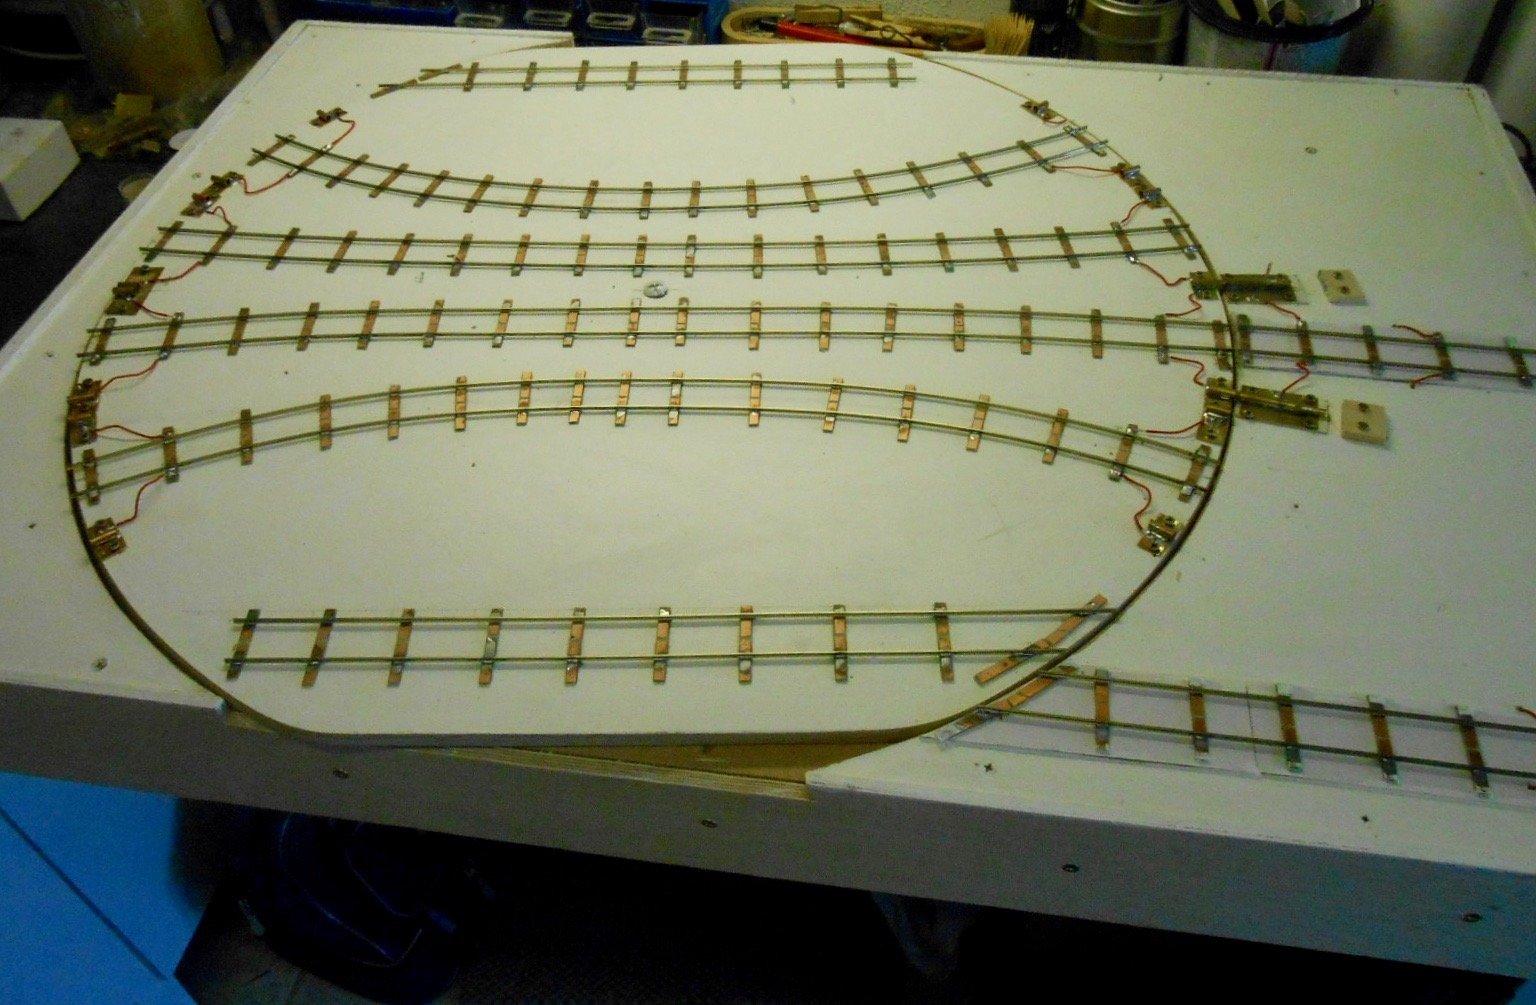
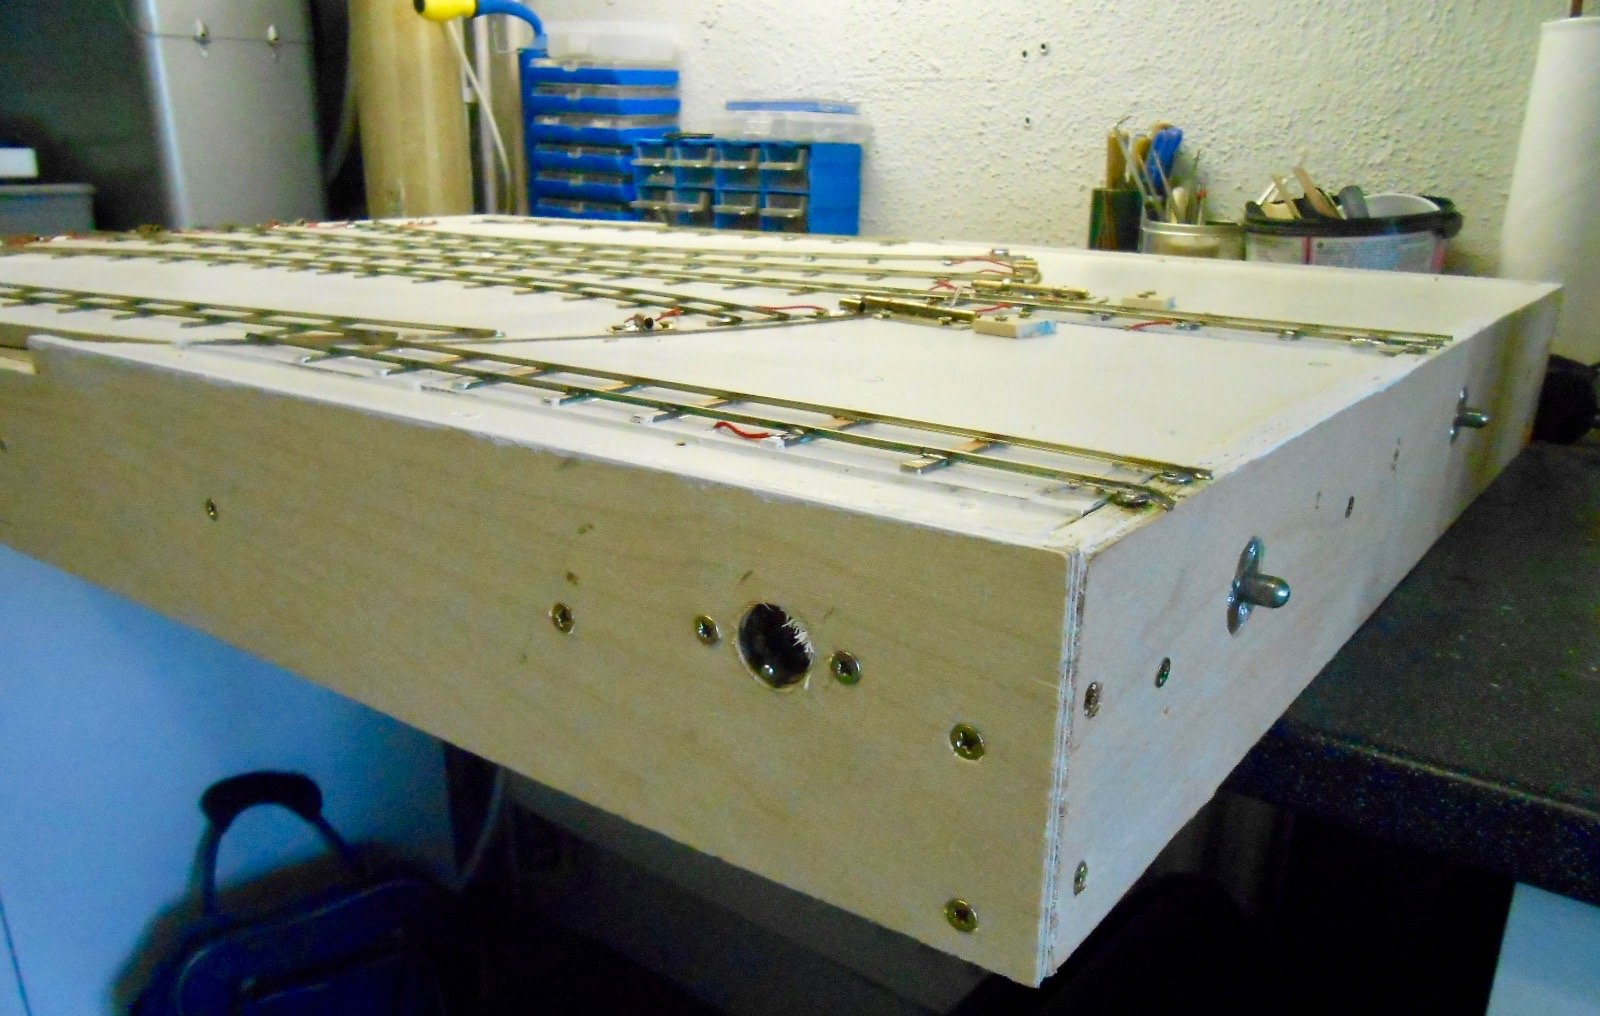
Seems like it has been a long time since I posted anything on Fintonagh, but actually only a couple of weeks. However, that time did involve organising the club exhibition, so no wonder it seemed ages. In spare moments, have been working on the fiddle yard. The baseboard had been built at the start, along with the other two, so it has been about track laying, bolts and wiring. Usual flat bottomed code 83 rail, soldered to copper clad sleepers, though the latter more spaced out as it is not a scenic area. Unlike Arigna Town, this is just a turntable [not sliding/rotating], so have had to be careful with the geometry & the two outer tracks are quite tightly curved [about 60cm in places]. Home made bolts, using brass rod, tube and plate cater with alignment & these are just screwed into the MDF turntable. The latter sits on a large steel washer to help make rotation smoother. Electrical connection is also via the bolts, as can be seen from the short wires on the surface. The only other bit of electrickery is a simple SPST switch to isolate the from siding, which just about sums up my wiring ability... First indications are that stock runs ok, but fancy a bit of fine tuning will be needed, once I get the whole layout set up.
-
Rapidly developing into one of the finest modern image layouts of recent years. Atmosphere like this does not just happen, it needs masses of observation and artist skill to reach such a level.
-
Arigna Town gets another outing at my own Club's show next weekend, with Shannon putting in an appearance too. While Arigna is the only Irish layout this year, there is plenty of other good stuff, including Gordon Gravett 'Shannon' new layout 'Arun Quay', plus Melton Mowbray North in N gauge and Haverhill South in 2mm timescale. With American, Continental, narrow gauge, plus Z, 3mm, 4mm and 7mm scales all represented, there should be something for everyone. Extensive trade support too. If you are in Kent next weekend, come and visit. £6 for adults, with accompanied children under 16 free. Ample parking, easy access and quality catering at Victory Academy, Magpie Hall Road, Chatham.
- 1 reply
-
- 1
-
-
Arigna Town gets another outing at my own Club's show next weekend, with Shannon putting in an appearance too. While Arigna is the only Irish layout this year, there is plenty of other good stuff, including Gordon Gravett 'Shannon' new layout 'Arun Quay', plus Melton Mowbray North in N gauge and Haverhill South in 2mm timescale. With American, Continental, narrow gauge, plus Z, 3mm, 4mm and 7mm scales all represented, there should be something for everyone. Extensive trade support too. If you are in Kent next weekend, come and visit. £6 for adults, with accompanied children under 16 free. Ample parking, easy access and quality catering at Victory Academy, Magpie Hall Road, Chatham.
-
Kit building v RTR - Sometimes a false economy?
David Holman replied to Noel's topic in General Chat
DIY has always been an integral part of modelling less popular subjects, though these days, obscure prototypes, light railways and the like are increasingly well served by RTR. In some ways, this is a shame, because it is arguable there is now too much RTR and ready to plant structures, which may ultimately de-skill the hobby, if all you need to do is open a box and plonk a building on the layout. However, for those more interested in operation, clearly there is nothing wrong with that, which is why our hobby is so good for all sorts of interests. -
There is a school of thought that even in 7mm scale, any surface relief for brickwork is actually negligible, so printed card is all anyone needs. In 4mm, that would be even more appropriate. However, it is also arguable that emphasising certain aspects, such as brick and stonework helps create a better impression. The middle paths are either scribed Das clay (tedious, but very effective in 7mm), or something like the Howard Scenics embossed brickwork that Freestone Models sells. Can be coloured fairly easily with pastels or water colour crayons. Being a thick paper, you can easily get the mortar lines round corners too.
-
Always good to get a few mock ups in place to help visualise the scene.
-
..end of an era, by Conrad Natzio. Another fine Colourpoint book, published last year. Bought mine at the Derby show and very good it is too. Most of all an excellent reference on colours, not just rolling stock, but infrastructure, buildings and scenery, plus useful info in the extended captions. Not sure if it has been mentioned before and if so apologies. Otherwise can only say highly recommend.
-
- 1
-

-
Just did a Google search, Noel.Magnets4U, I think, who do a next day delivery. A pack of ten was less than a fiver.