David Holman
Members-
Posts
4,359 -
Joined
-
Last visited
-
Days Won
117
Content Type
Profiles
Forums
Events
Gallery
Blogs
Community Map
Everything posted by David Holman
-
My Arigna Town layout will be St the Croydon show in October, Colin. By all means come and say hello. Likewise you may be interested in my new project, which is Clogher Valley in 7mm scale/21mm gauge
-
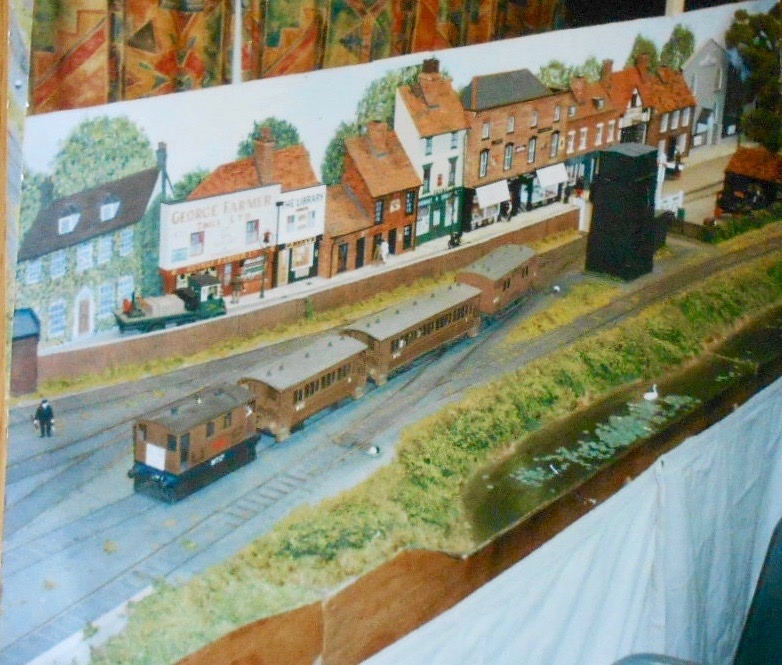
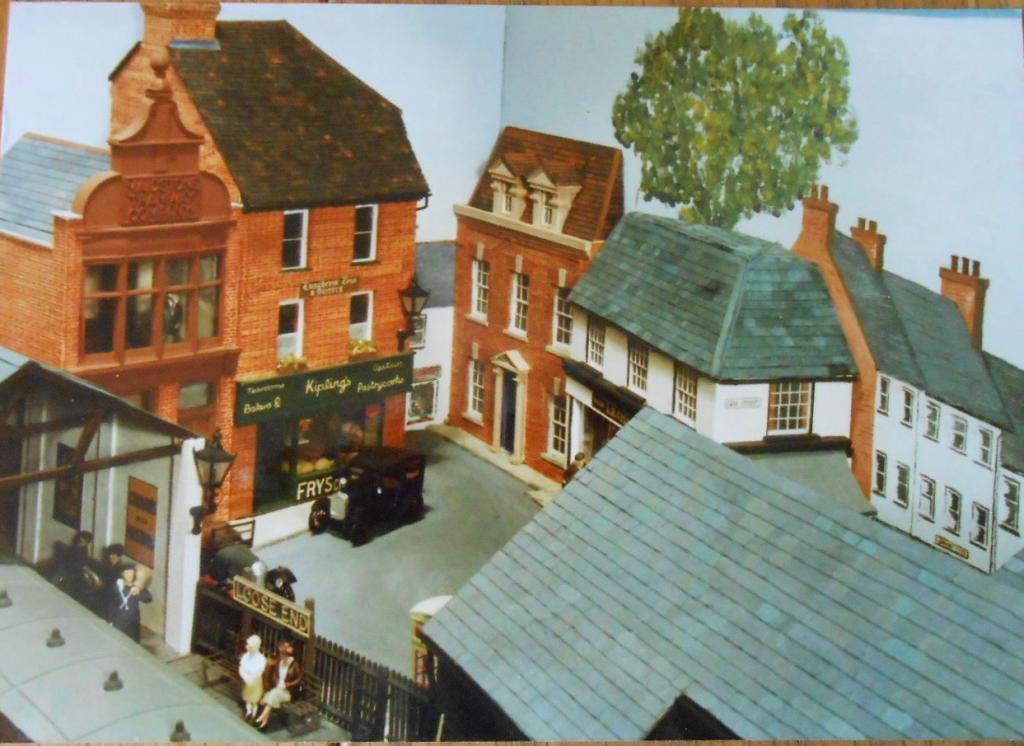
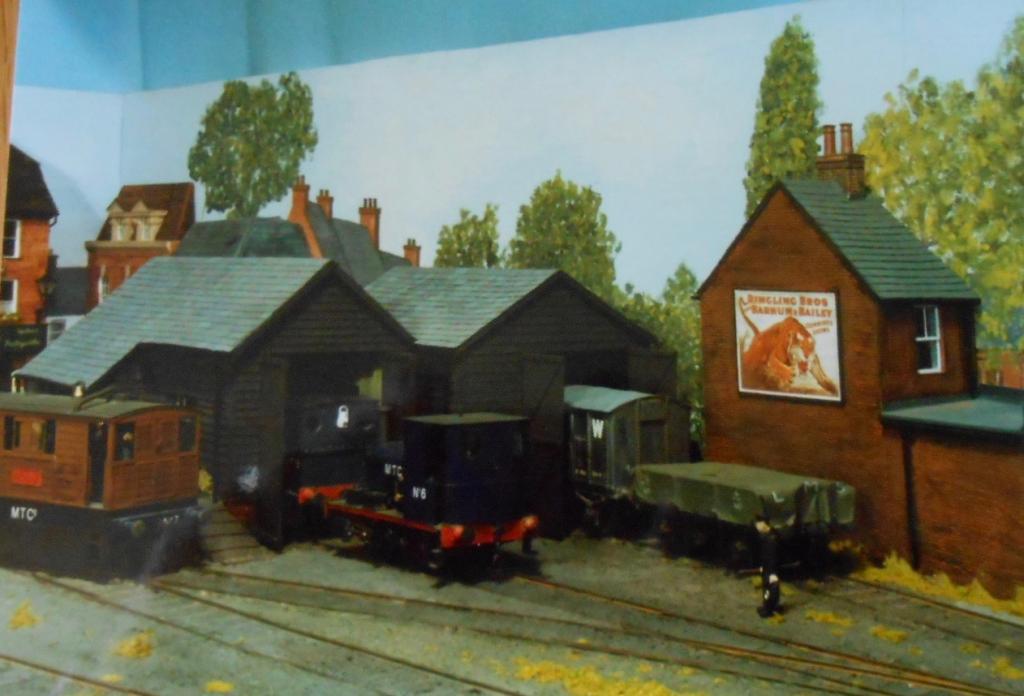
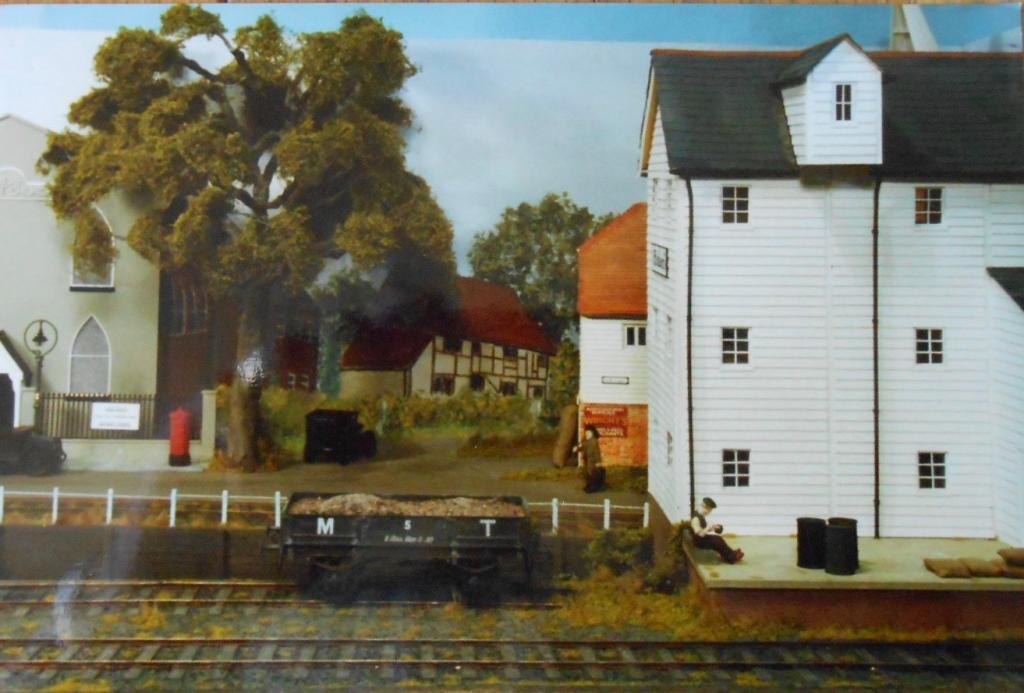
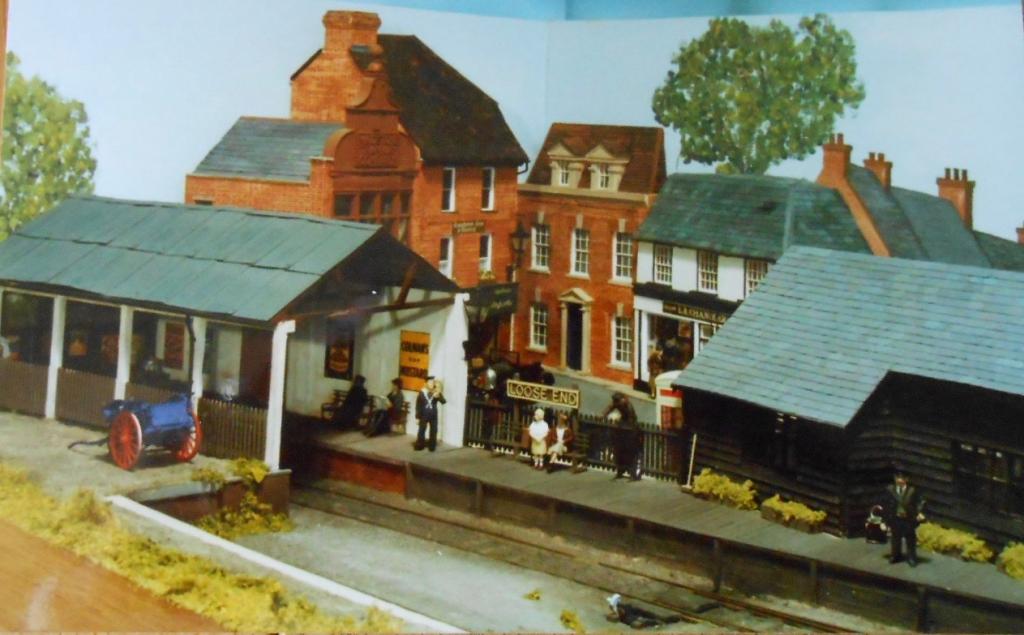
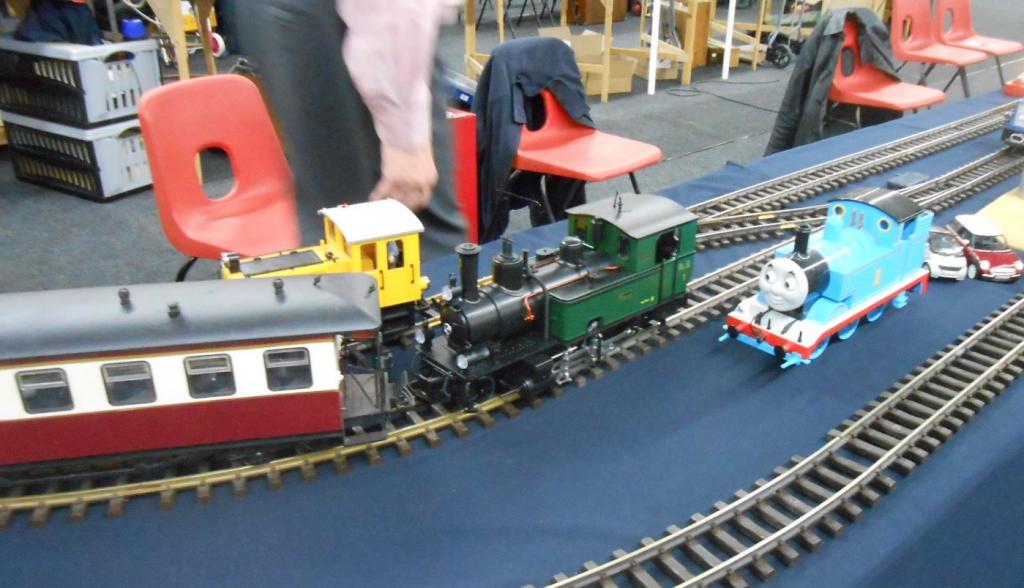
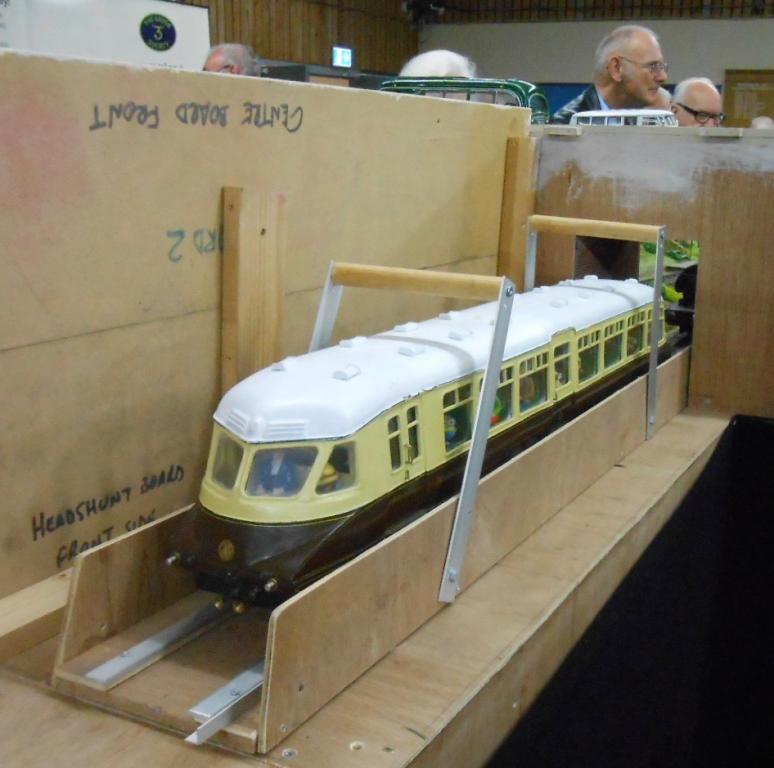
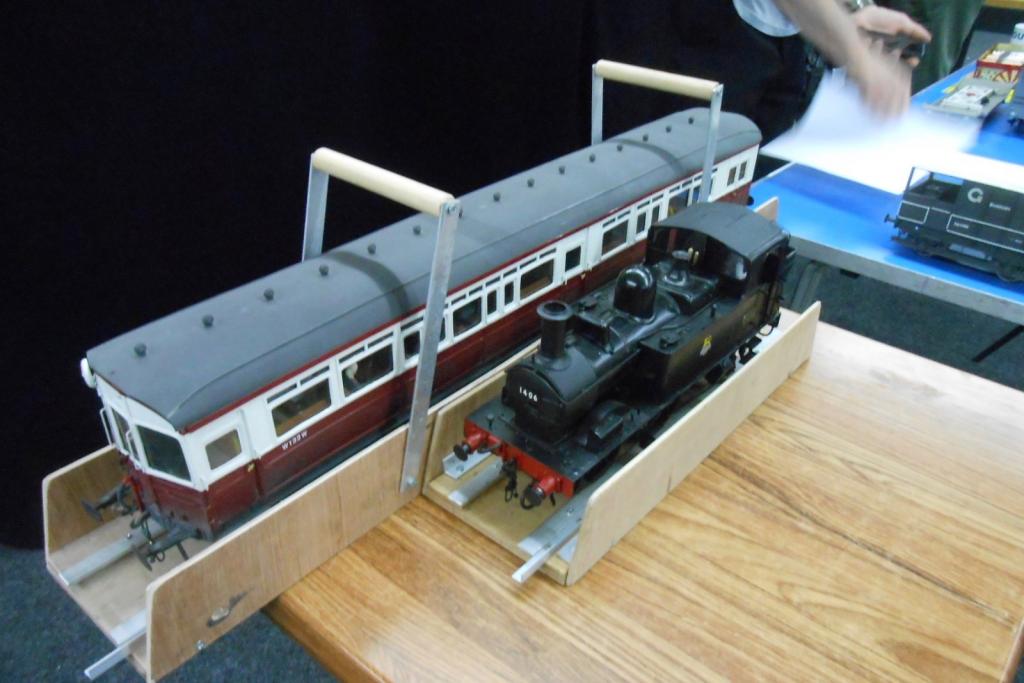
Glad you like it, Eoin. Loose End was built in the mid '90s. It was three approx 1 metre scenic boards (10ft in old money), with a similar length fiddle yard which used cassettes. Track was code 100 fb with points from Marcway, same as Arigna. Locos were a mix of kit and scratch built, focussing on prototypes that fitted the roadside tramway theme. Included a Connoisseur GE tram engine, painted to represent Toby of Rev Awdrey fame, complete with smiley face. A couple of Manning Wardles, GE coffee pot (full tramway skirts); also a double cab Sentinel. Wisbech tramway coaches were ideal and also modelled a Wantage tram loco and tramcar. Pride of the line was Jane, the Wantage George England well tank that MRJ articles took you on a scratchbuilding journey. Taught me a lot, that little loco. Jane is pretty much all that survives in my possession, the layout was sold on in about 2005. Since then, it has moved again and last I heard now lives in the same barn in France as Gordon Gravett's Ditchling Green - esteemed company indeed. Operationally, it worked on the principal of a terminus junction, with a 'twig' trailing into the branch terminus. Fintonagh will use the same principal, with a siding going off scene, via the linen mill, to a broad gauge exchange yard. This can be a good way of creating extra traffic, on what is after all, a very small layout.
-
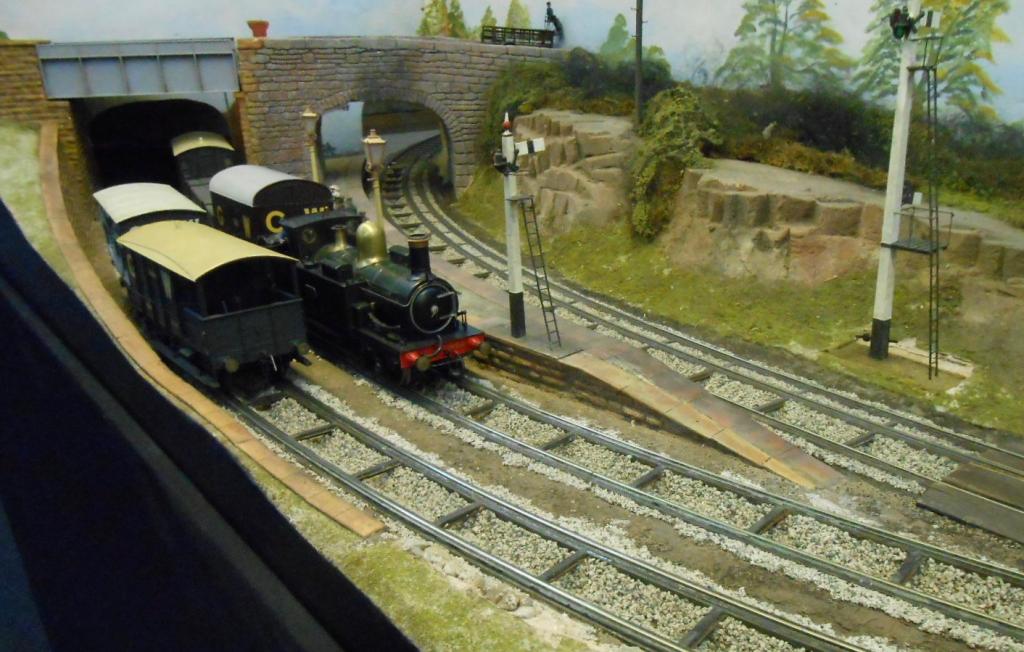
Things seem to have gone a bit quiet on the layout and workshop fronts lately, so here is the start of my new project - a layout based on a Clogher Valley Railway theme. Arigna Town still has plenty of life left in it, but I have a shelf space above it which gives me approx 2m long x 45cm deep and 30cm high. Initially, I draw out quite detailed plans of a small through station, with no loop, but two sidings [see pics below]. This would have been worked from turntable fiddle yards at each end. However, though I was happy with the design, in terms of operating, it would have kept two people very busy, for the 4-5 trains would have meant a sequence lasting no more than 10 minutes or so. Now, like the SLNCR, the CVR was a through line, with no branches, but I had a rethink to see if a terminus-fiddle yard layout could be done in the space available. The answer lay in a layout called Loose End, which I build around 20 years ago. This was a standard gauge, roadside line, based on the Wantage Tramway, where [in 7mm scale] the track plan for Wantage Town station is a mere 2.3metres long. Add in the fact that the train shed is very similar in appearance to the one at Fintona AND the latter is only about 10 miles from Clogher & you can easily see where my mind was going. Looking through Patterson's book on the CVR, it seems there were early plans for a line from Fintona to Armagh [long before the CVR was built], while the improbable Ulster & Connaught would have seen a line to Newry, via Keady. So, things were now starting to fall in place & with a proposed name of Fintonagh, my terminus could be a town in either direction! Have attached a plan I've been working on. The track work is fairly well inked in at the moment. It will be 21mm gauge [of course!], using hand built track with [probably] code 75 rail and copper clad sleepers. Am toying with the idea of making it DCC, so I can control the points without a control panel and [just maybe] introduce a bit of sound - though not sure on the latter. Probably use Kadee couplings and electro magnets for shunting. Stock most likely a couple of Sharp Stewart tanks, the railcar & 'Unit', while Branchlines coaches and wagon chassis will provide much help with the rest. To give you a flavour of what I hope the overall scene will look like, have included some photos of Loose End. This was set in Kent, where there is indeed a village called Loose, just outside Maidstone, though most of the buildings come from another small town nearby called West Malling. Overall, I think the layout was probably the most visually well balanced of the dozen or so projects I've built, so am hoping to repeat the process, with an Irish flavour. With a couple of trips planned to come over the water this year [including Cultra in November], there should be no excuse for not getting the flavour right. Am intending to get started on the baseboards soon, so watch this space, as they say...
-
Lovely modelling, though wrong sort of J15 methinks! Lovely engine nevertheless. Maybe one day someone will do the Irish version...
-
Seems OK to me, but hard to tell re absolute smoothness on video footage. As you say, extra weight over the drivers should help. Pick ups may affect running. On Arigna Town, two locos exhibited a surging type movement. Found it was the pickups not being properly adjusted and the feedback controllers I used in compensating for the poor connection causing the surges.
-
In the latest Gauge O Guild Gazette [say it carefully], Perfect Miniatures are advertising no less than three E class for sale. One is a Tyrconnel kit, the other two are Leinster Models [one with wheels and motor. They also say they have some Alphagraphix wagon kits in card but with white metal castings for chassis. Perfect Miniatures are in Sudbury. Email them at perfectminiaturesS7@btinternet.com - no prices given I'm afraid. Meanwhile, renowned kit maker David Andrews apparently now has enough people interested to go ahead with a V class 4-4-0. Far too big for Arigna town, but anyone interested should contact him on davidandrews@locomotivekits.com - his website is http://www.locomotivelits.com
-
Arigna Town - this week's scenery
David Holman replied to David Holman's topic in Irish Model Layouts
This weekend's Reading ALSRM show will be AT's last outing for a while, as its next shows are not until the autumn, starting with Croydon in October, the the east London fine scale show in November and Cultra a week after, with Manchester rounding things up in December. Hopefully, the break will be an opportunity for a bit of remedial work on the layout. The turntable well's wall is starting to show outside the coping stones in places, so am hoping to increase the diameter a little to hide this. Maybe I'll add a catwalk on one side too - the drop from a loco footplate to the floor of the well must be at least a scale 9 feet... Many of the trees could do with being re-foliated too. Indeed, I might even replace some of them with more detailed versions. Equally, despite attending over 20 shows in the last three years, most of the layout is standing up well. However, the Chatham show comes first [only a month away now], so will be busy with the organisation for that and also checking out some of my 32mm scale models for the club's North Circular layout. Will keep you posted. -
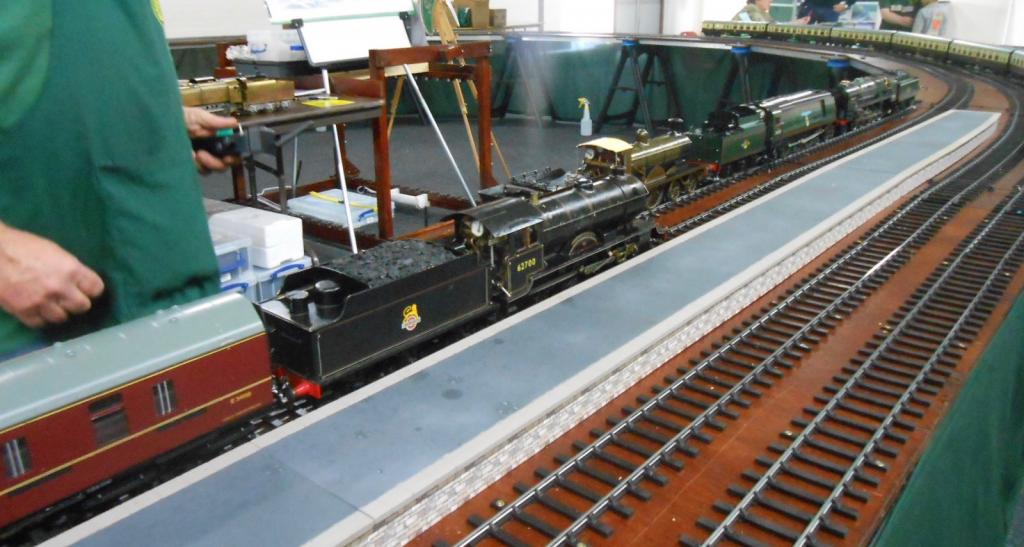
Reading was a very pleasant experience. Arigna Town seemed to run well, though I did little operating, spending most of the time talking to visitors. The ALSRM is very much an enthusiasts show, so for once I did not have to answer the 'why 5'3?', or even the 'is it still 5'3?'. Indeed spoke to several other folk who are into Irish modelling, including one chap working in 1:24 [half inch] scale. Excellent trade support - indeed, could have spent a small fortune! Ragstone were there, sporting a 16mm scale etch of the Clogher tank [very big], while all the usual favourites were present, including Eileen's, Laurie Griffin, Connoisseur, Slater's etc. Also had a chat with Sir William McAlpine - former owner of Flying Scotsman, who featured on the ITV Robson Green documentary about the loco recently. Layouts included several 7mm scale, including one of Brunel baulk road mixed gauge. Hence AT by no means the widest tracks for there was Gauge 1 live steam and a fascinating couple of Gauge 3 layouts, one fully scenic.
-
Arigna Town will be at Reading this weekend for the Association of Large Scale Models show. Have been there before with a club layout & it is a fascinating experience. ALSRM caters for S scale upwards, so that means 0, Gauges 1 & 3, G, 16mm etc, plus three and five inch gauge live steam. As a result, there are some fascinating models & layouts on show - many less familiar than usual [probably why AT got invited!]. The same goes for traders, where you see all sorts of esoteric stuff. Slaters bring out their 16mm scale Welsh slate locos, while from the second hand stands a few years ago one had the choice of a 5" gauge L&Y Pug or a pre-war 3.5" gauge Bassett-Lowke GWR 4-4-0. Both around five grand I seem to remember... Will try to take a few pictures - hopefully there might be plenty of interest - even if not much of it will be Irish.
-
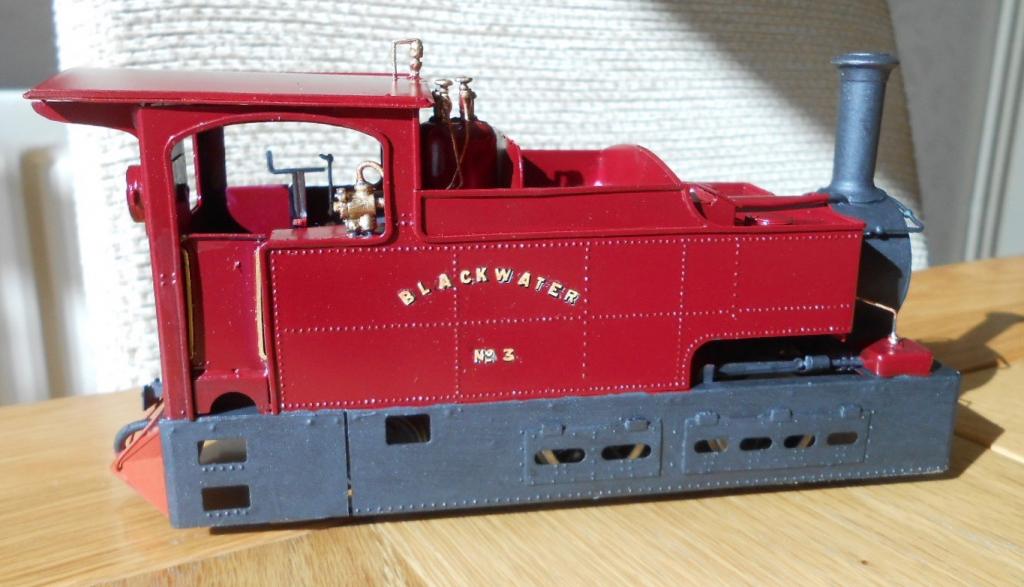
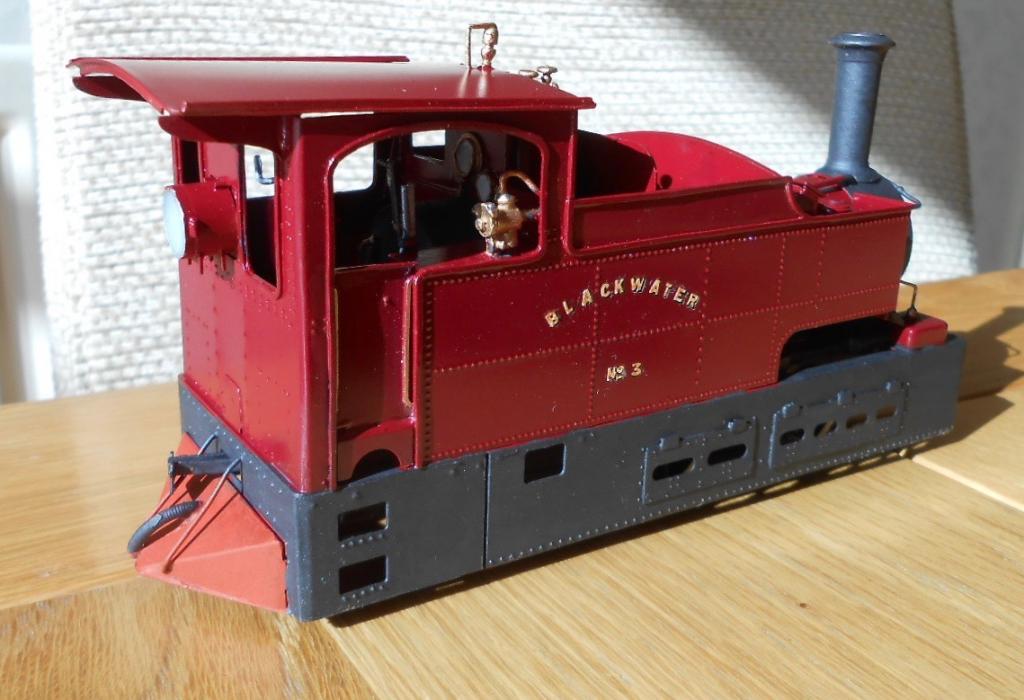
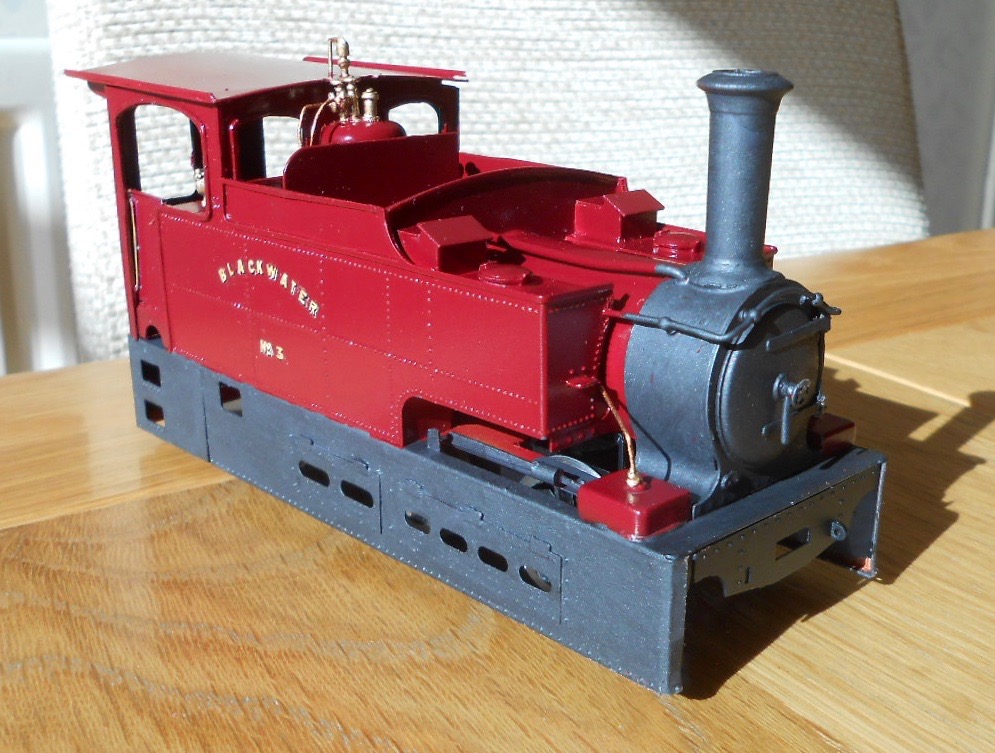
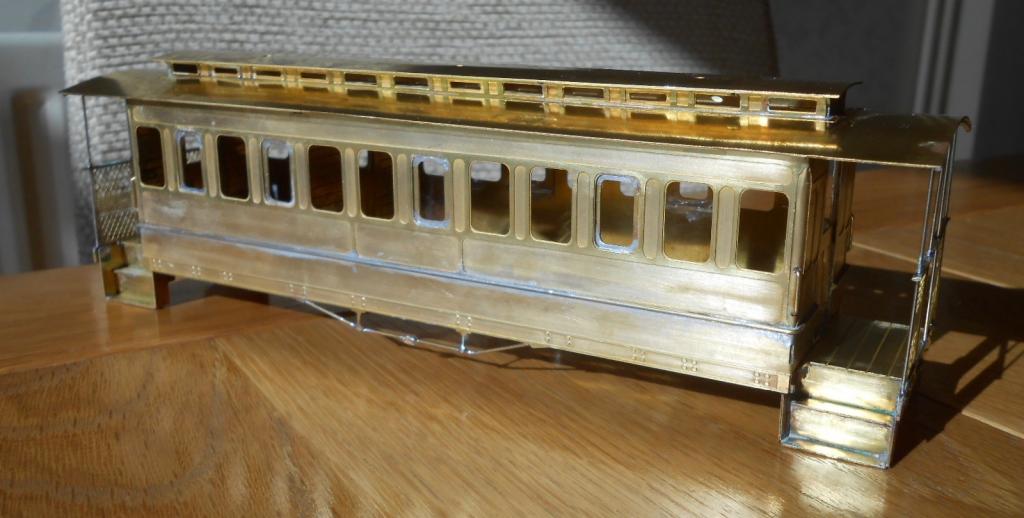
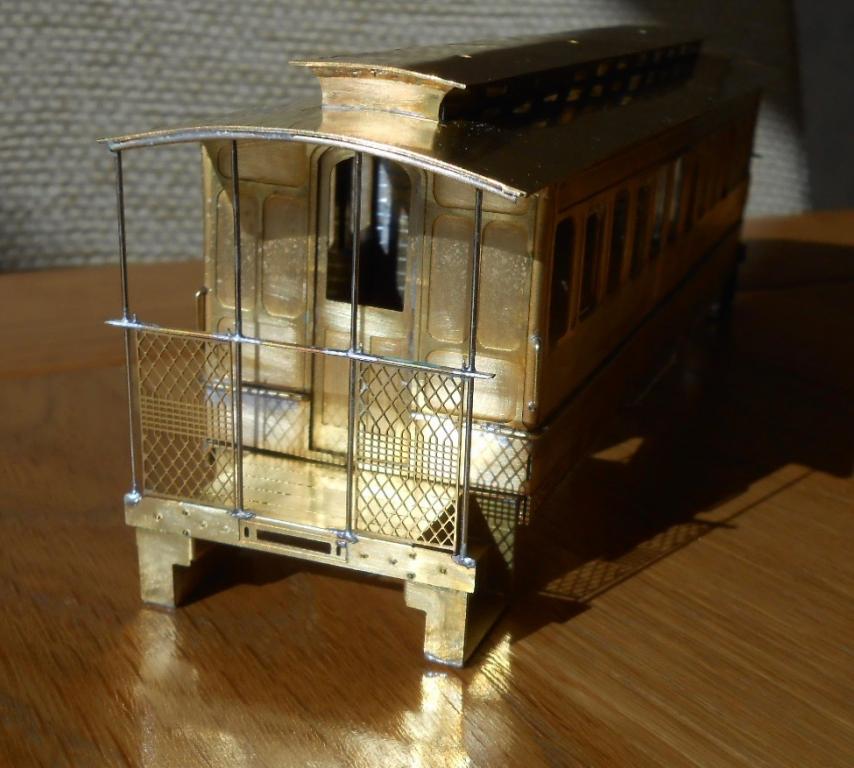
Decision time on which livery to use taken over by simple availability. Halford did not have anything approaching bronze green, but did have Rover Damask Red, which is a pretty good crimson lake. So, Blackwater it had to be. Final livery for CVR locos was a real paint palette, for the two types were augmented by black skirts, footplate & smokebox, plus vermillion on the cowcatcher. In my transfers box found a sheet of press fix covering all the alphabet in suitably sized shaded sans serif, plus numbers and underscored 'No' too. Only problem is it has no indication of who made it... So, red primer as sprayed on as the first coat & with a coat of varnish will probably do for the cow catcher. The skirts were masked off & the rest of the body sprayed Damask. A couple of days to dry & then matt black [with a little gun metal] was brush painted on the skirts and smokebox, plus the firebox area in the cab. Brass, steel and copper paint was also brush painted on various pipes and fittings as appropriate. The loco is still some way from being finished. The cab roof is not fixed, as crew and glazing are needed, plus coal while a mist of light weathering will be given too, the latter will tone down the gloss finish, which is nowhere near as bright as it appears in the photos anyway - these were done in bright sunshine. Before the latter, need to create the interlaced CVR logo. Currently intending to draw it out large size, then reduce on the copier/printer & print out onto clear transfer sheet. While waiting for the paint to dry, made a start on the Branchlines coach kit. Am building it as an all 3rd. Considering the kit must be getting on for 30 years old, it stands up well, with the end balcony wire mesh etches particularly nice. Built as per instructions, the roof will be soldered to the body and the latter has been set up to bolt to the base. Photos show progress so far & with neither body not roof yet fixed shows how well things fit together.
-
Arigna Town - this week's scenery
David Holman replied to David Holman's topic in Irish Model Layouts
This the Dapol/Airfix 00 kit, Paul, though heavily doctored to suit 7mm scale and 36.75 gauge. The kit is an old plastic moulding, so lots of flash to clean up, but very cheap. Mine was £4.99 Basically, I used the base plate as it came, but reversed the girders so it became an underslung model. The out rider wheels that run on the circular track are 7mm scale from a lowmac wagon. Operation is by a Frizinghall Models hand crank kit. This is made from Meccano plates and gears. Power to the track comes from wiper pick ups in the turntable well's wall, where rub on small brass plates on each end of the main girders, while alignment is simply by eye. A bit of extra stability comes from the spindle passing through a piece of brass tube set in the baseboard surface. The unit as a whole drops down from beneath for maintenance. In many ways it is simpler than it sounds and for me the only alternative would have been a Metalsmith version costing the thick end of £200. Depending on your scale/gauge, suggest you check out the Peco 7mm narrow gauge turntable. It was a bit too big for my site but has very good possibilities for various scales. -
Must remember not to read this thread in public. The dribble of saliva does nothing for my image...
-
Thanks JB, but don't hold your breath, am thinking it will be at least a couple of years before even the small layout I have in mind is ready. Only in drawing form so far!
-
Arigna Town - this week's scenery
David Holman replied to David Holman's topic in Irish Model Layouts
The All Components controlled worked well at Horsham. The light action and toggle switch for direction made it just that bit easier to use than my Gaugemaster unit. Not sure if the loco control is noticeably any better than the GM unit - maybe just a tad - but then that might be just the fact I want to think that because it costs more! The show itself was a nice to be part of, though being next to an outside door meant coats were on all day Saturday and extra layers put on for the Sunday. Equally, being in the smallest of the three hall, with never more than 30 or so visitors present, meant that it was possible to talk to them without raising my voice for once. It was also a pleasure to spend most of the weekend in the company of Gordon & Maggie Gravett - the former being my chief operator and yes, he operates as well as he models! -
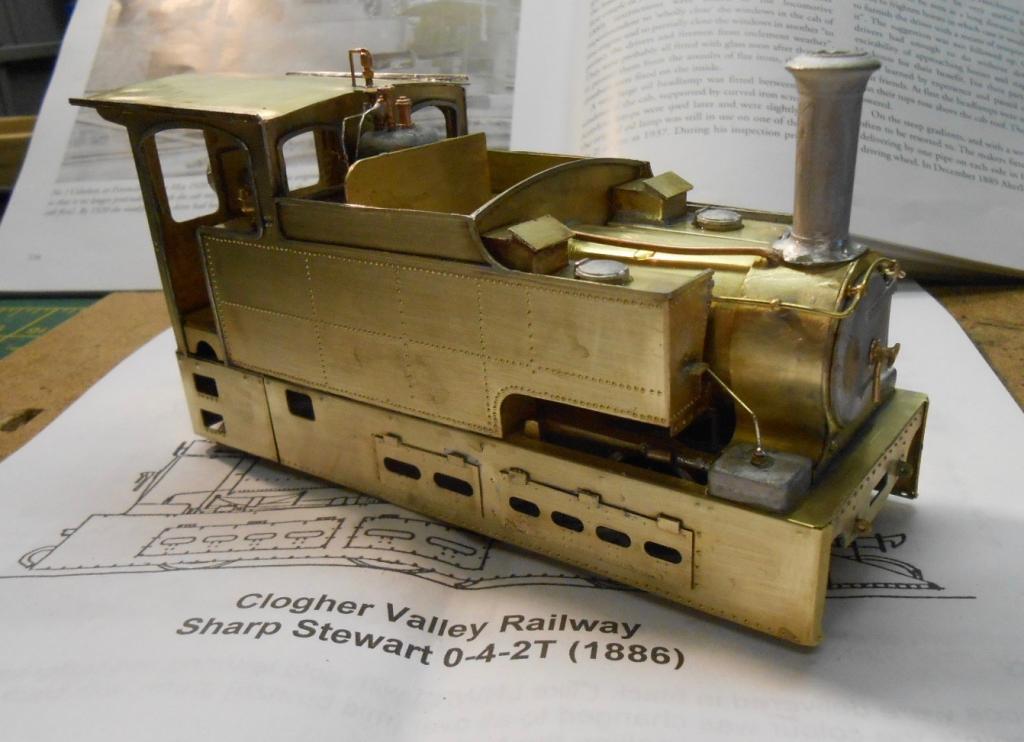
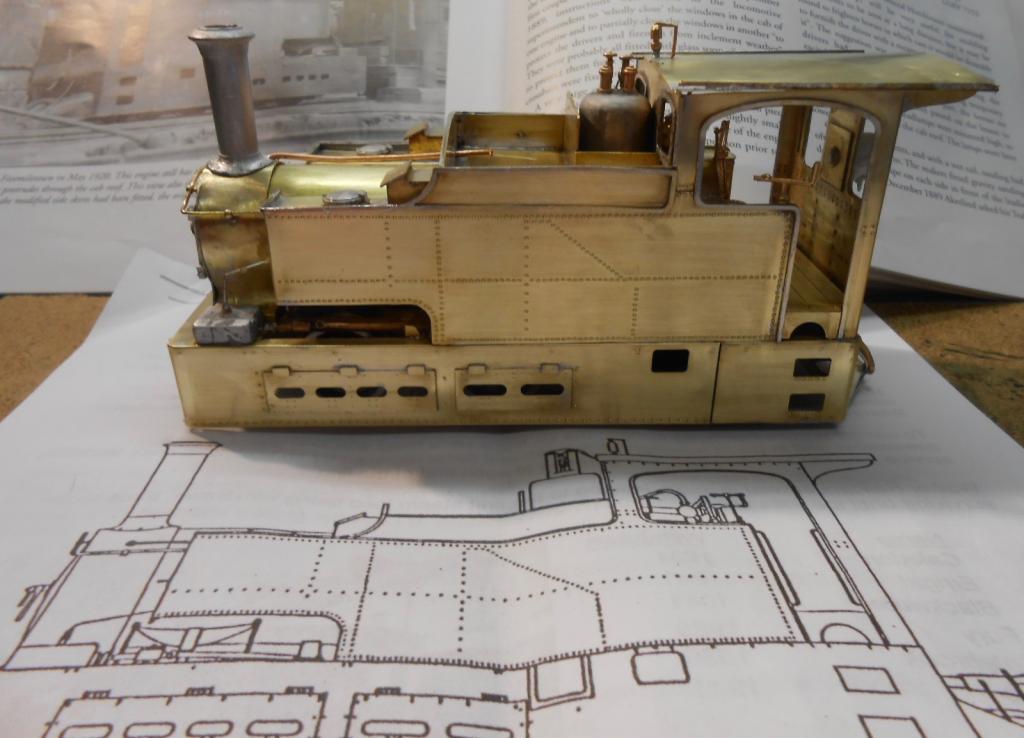
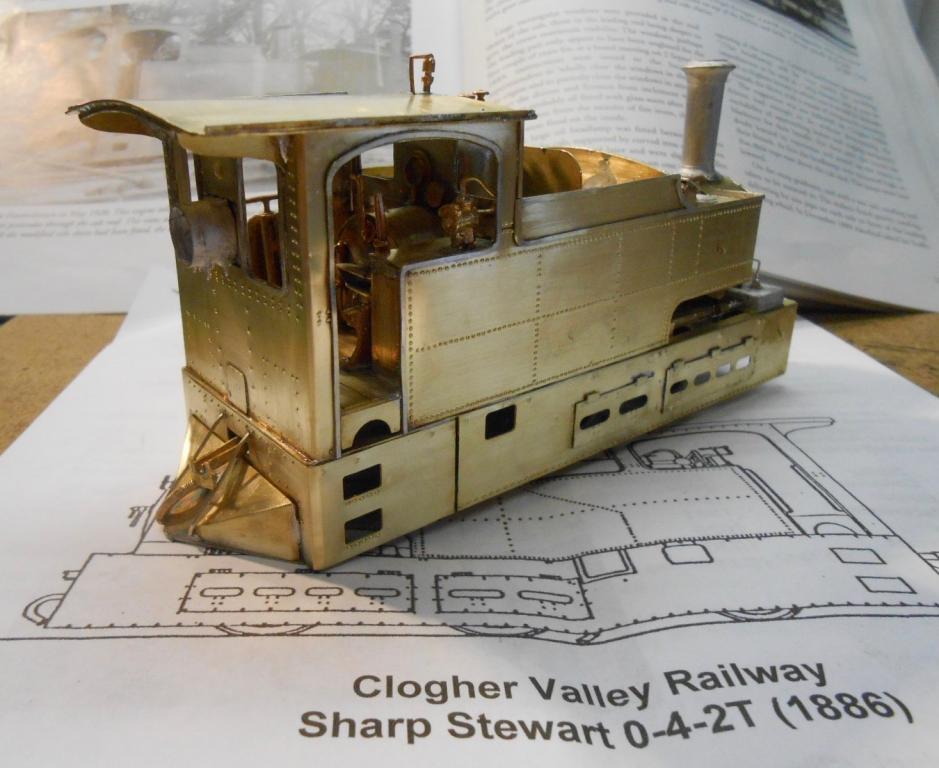
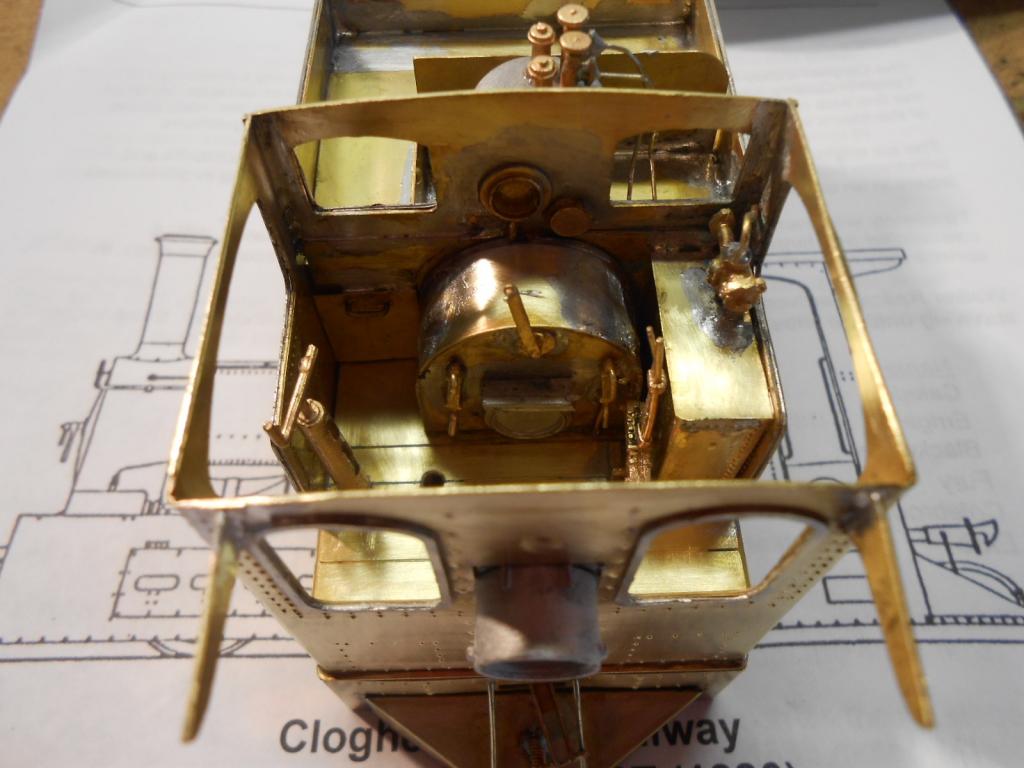
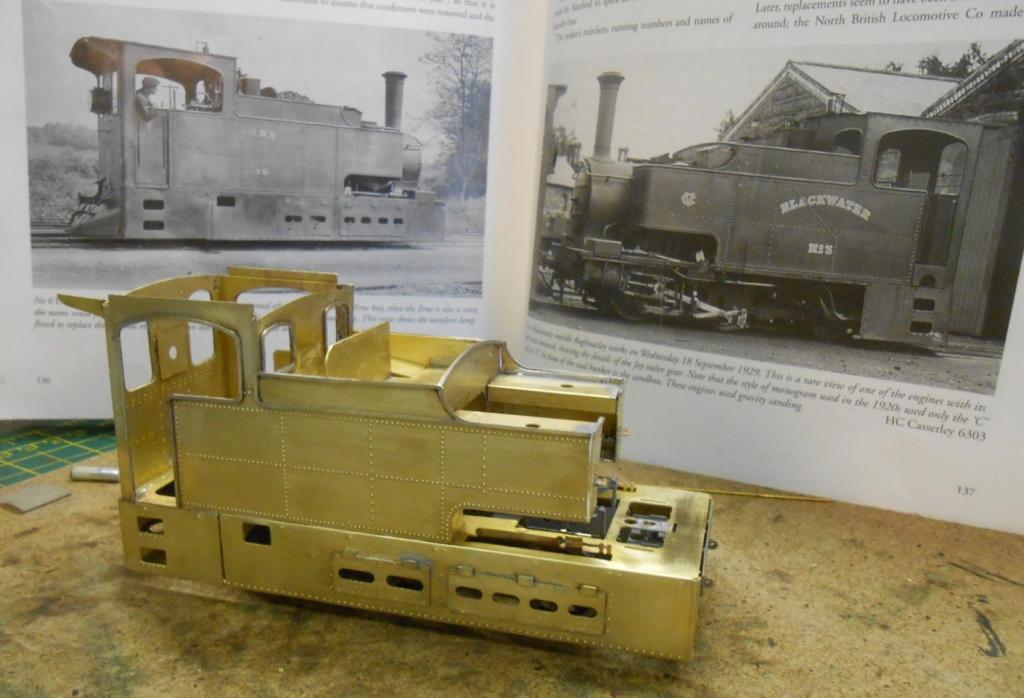
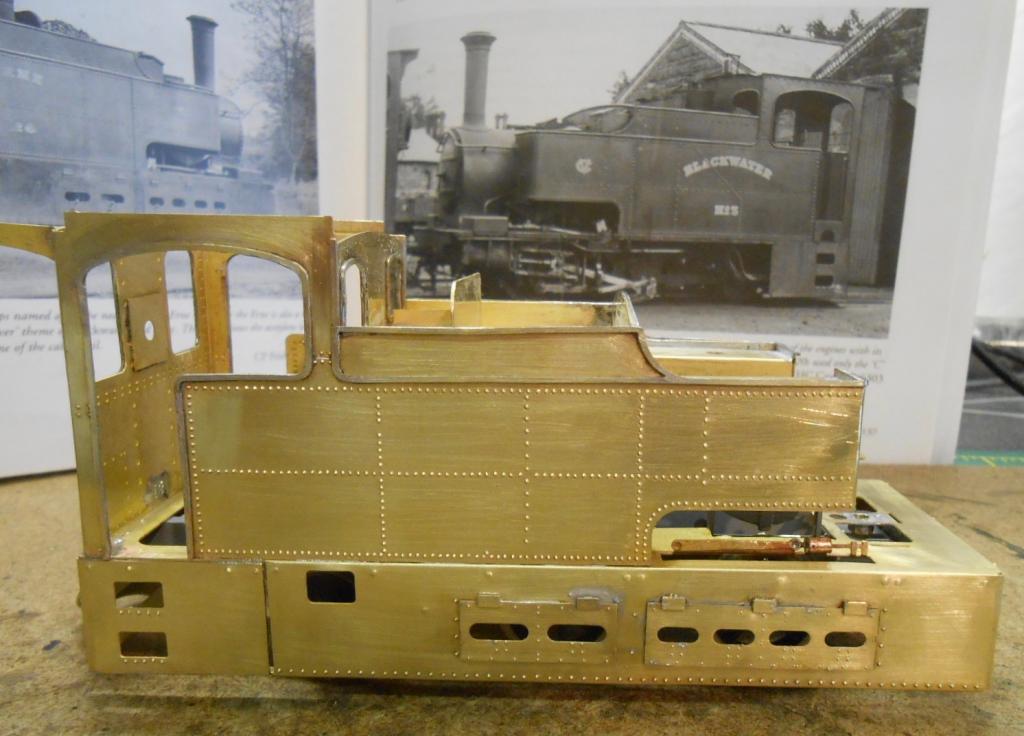
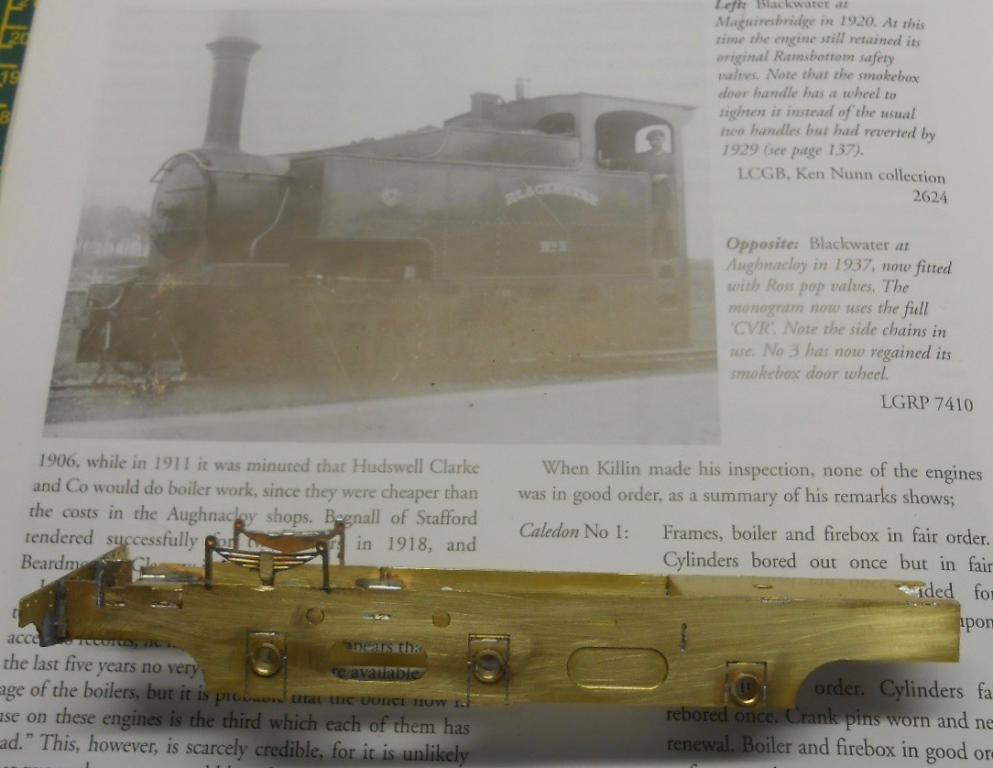
Construction of the Clogher Valley loco is nearing completion. Indeed, did a bit of a clean up this morning & thought it worthwhile to share a few photos. By and large, construction has continued to be straightforward, though as before, some of the instructions are a little wanting - especially detailing the cab and adding some of the minor castings. The words 'now add details, castings etc as per your chosen loco' leave a lot to be desired, especially when photos of the cab interior are few and far between. Goodness knows how the firebox door handles and hinges are meant to fit & given the manufacturer supplies both white metal and lost wax brass versions, he seems to think they are important! However, the crew will hide my omitting them. Overall though, this is a very nice kit & everything fits together pretty well. To my eye, the final result is of a chunky little engine which captures the look of the prototype really well. At the moment, the cab roof is still loose [pending painting the interior], while the chimney end vacuum pipe and coupling are yet to be added. Probably Kaydee for the latter. It is as yet without motor/gearbox too, but Branchlines are coming to the Chatham Show, so should be able to get something suitable in June
-
Seem to remember reading that a loco on Westport turntable could foul the running line while being turned and hence the table was interlocked with the signal box to prevent collisions. Arigna has a similar problem, especially the G2, but the 'one engine in steam' nature of the branch largely avoids this...
-
Guess it would make an interesting wagon load. Probably need one or more barrier wagons for those antennae too... Am guessing ready to run, rather than kit or scratch built, though clearly the latter well within your talents John!
-
Thanks chaps, interesting, especially the stencils which I have not seen before. Hand lettering with a gel pen has worked OK so far. I did have a Rotting pen but must confess I could not get on with it. If anything found it rather scratchy and had difficulty getting the ink to flow. Same with those pens which rely on pressing down the tip to get the ink flowing. All that happens to me with these is lots of blobs! So, I persevere with the gel pen... While I am here. Thanks for the PM, JB. Re the CVR letter crest am hoping I can do a large scale version and then shrink it on the photocopier, then create my own transfers. Alternatively, might approach Fox Transfers. Maybe the Ragstone kit and Branchlines coaches may yet lead to somebody producing transfers anyway?
-
Decent progress on the Sharpie thus far, though I wasted a lot of time trying to make the top section of the Joy valve gear work. At the moment, have given up on that - partly because all efforts have failed thus far & also because I am increasingly unsure if the movement will be seen anyway! What you might just see is a small piece of half round brass rod soldered to the front of the etched dummy motion, to make that bit look less flat. Maybe I'll have a go at making it work in the future. Inside motion on Sir Henry seemed much easier by comparison... However, this is certainly not the fault of the kit, for apart from a few exploded diagrams which would help make the instructions clearer, there is little to fault. The etchings are nicely done and join up extremely well so far. Like the Sligo tanks, there are a lot of rivets to press out [several hundred at least], but easy to do with the GW press. Am hoping to built two of the tanks, so this one will be either Errigal or Blackwater, the last two to work the line - though Erne also survived to the end, if very worn out. Interestingly, Errigal was painted green & Blackwater red [ish], which will make for a bit of variety.
-
Arigna Town - this week's scenery
David Holman replied to David Holman's topic in Irish Model Layouts
Many thanks Andy and Joe. After a bit of research went for the All Components model. Interestingly were still issues with Fermanagh hunting/surging at moderate speed. However eventually traced the problem to a couple of poorly adjusted pick ups. Overall the issue with feedback controllers seems to be any loss of contact causes the feedback bit to over compensate and hence the surge. Am sure the more technical with have a proper explanation! In some ways have bought a new controller when none needed. On the other hand, I like the light action of the AC unit and its toggle switch for direction instead of slide on the GM unit. The latter also shut down when hot. Will be interesting to see how the new unit gets on at Crawley/Horsham next weekend. -
Seems Worsley Works do etches for the railcar and unit in 4mm, so might be they can do me ones in 7mm, which would save some work. As for the lettering, it is white gel pen. Got mine from the local art shop. Always think it is a shame that Rotring and others do not do white, fine tipped marker pens as the gel pen is not as controllable as I would like. Similarly, would do my own transfers on the laptop, but no white printer ink either. Thank goodness the lettering is fairly simple. What I will have to sort out is transfers for the CVR logo and loco names.
-
Argadeen and St Mologa are two of the prettiest engines ever in my book JB. One day I'll get round to the former. Both are in the Alphagraphix/Tyrconnel catalogue (which is where St M came from) along with 90 too. Have long thought this makes the T&C an absolute banker for 7mm scale, especially as the coaches are available too. Why then has nobody taken up the challenge? The Swilly is also on my wish list (of course), though what many folk do not realise is that the Donegal 2-6-4Ts were almost as large as the former's 4-8-4Ts, only a couple of tons lighter in fact. Might still have the line drawing of StM. Will post it if I can find it, though hopefully Roger can supply too.
-
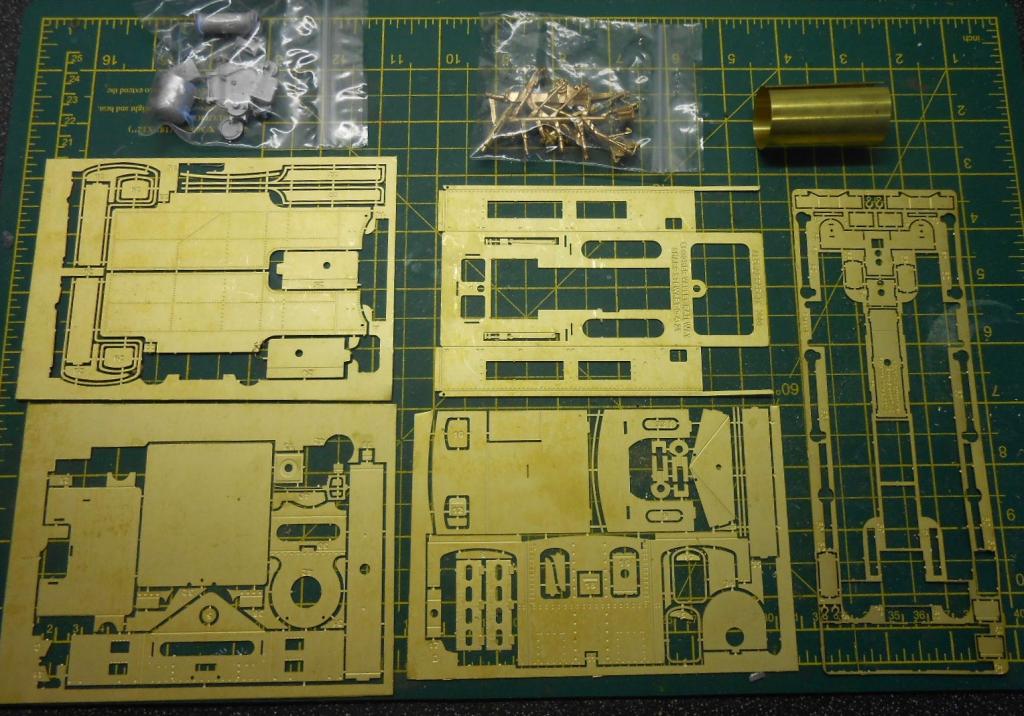
Thought it was time I got on with the Ragstone Models kit I bought at the Reading Trade Show in December. Before that I had to order wheels from Slaters, including an extra 21mm axle for the trailing pair, as noted earlier, this project will be to correct 3' gauge. Opening the box, one is faced with some very nice etchings, some labelled 'Alphagraphix 2001', so it seems the drawings had been around for sometime before Ragstone got hold of them. There are also nice sets of white metal and lost wax casting, the former for boiler fittings, the latter in the cab. The instructions seem reasonably clear, though can't help feeling it would help if there were one or two diagrams as it is not always obvious which way round some things go. Starting [as per instructions] with the chassis, one soon realises that this part is nice and easy. The side skirts mean much of the motion is hidden - indeed, there is more going on with a Dalek! The accuracy of the etching is very good indeed, with the coupling rods and axle holes matching exactly. So, two frame sides and three spacers later I was laminating the coupling rods so that within a couple of hours I had a smoothly rolling chassis. Very satisfying, so I can from here on concentrate on making the model look right, with no need to worry it might not run well. So far have resisted the temptation to fit sprung horn blocks, but have not ruled it out in the future. The kit partly caters for working cylinders, as it has slide bars and connecting rods, but no crosshead. The Joy valve gear is only represented by a fold up dummy etch on the footplate, which is also a bit of a shame, as this is the only visible working part of the finished model. Patterson's book has a nice picture of one loco in a state of undress, so am pondering how I can represent this. Am thinking it could be done without building the crosshead/cylinder/con rod bits. The completed chassis shows the loco is about the same length as St Mologa on the T&C tramway, though pretty chunky for a narrow gauge engine. Next step will be to get out the GW rivet press, as like the SLNCR locos, CVR ones were also well adorned and the etch dimples: should make the job a doddle.
-
I agree with John. A reverse loop will make a big difference to operation. As folk will realise, I am more of a scenics man, but those who help with Arigna Town often comment how much operation can be had from a loop, two sidings and a turntable. No surprise then that I think the design falls into the 'fill a big space with as much track as possible' trap. There are some pretty ugly curves there, first radius presumably? Nine feet to climb six inches is 1 in 18, which sounds like trouble. My other thoughts revolve around previous experience. Much better to start with a small project and get quick success than dive into something huge. The cost of the plan will be substantial in terms of track and wiring alone. Then there is operation. Is this to be a solo project or involve a group. If the latter, then fine as it appears to need a fair few operators to reach its potential. If a solo project, then it will be hard to make the most of a big station when one person can only run one train at a time. Some sort of automatic control essential methinks. My advise would be to make the most of the big terminal by building in some decent storage siding space and including that reverse loop. Any other space leave as plain track, for there is much pleasure to be had watching long trains run by on an unencumbered mainline. More manageable for the solo operator but expandable when friends join in too.
-
Arigna Town - this week's scenery
David Holman replied to David Holman's topic in Irish Model Layouts
Seems that for the last umpteen shows, I have been using the wrong controller. Have both Gaugemaster handhelds, the W and its feedback brother. Mainly use the latter, but with Mashima 1824 motors, a slight 'hunting' motion is evident at slow speed. Rang GM and turns out they do not recommend the feedback unit for higher quality Mashimas. Knew about coreless, but not these. So back to the W. But not as smooth as I would like. Anyone got experience of other handhelds? No DCC thanks!
.png.c363cdf5c3fb7955cd92a55eb6dbbae0.png)


