David Holman
-
Posts
4,359 -
Joined
-
Last visited
-
Days Won
117
Content Type
Profiles
Forums
Events
Gallery
Everything posted by David Holman
-
The delights of 7mm narrow gauge
David Holman replied to David Holman's topic in Irish Model Layouts
That's good to know, Paul. Sounds like the layout has moved around a bit since I built it! You may have seen I've just built another CVR coach, twenty years after the first one. This one to 21mm gauge. -
Don't know if this kit maker has featured before, but it has a huge range of Irish locos and coaches in a range of scales. Generally basic etched brass, so probably for the more experienced modeller, but well worth a look. For example, they can do all the Clogher Valley stuff (railcar, unit and tractor), while a new addition is the G class shunter in 7mm scale. The website shows lots of coaches and they are clearly keen to expand the range. A Google search will quickly get you there
-
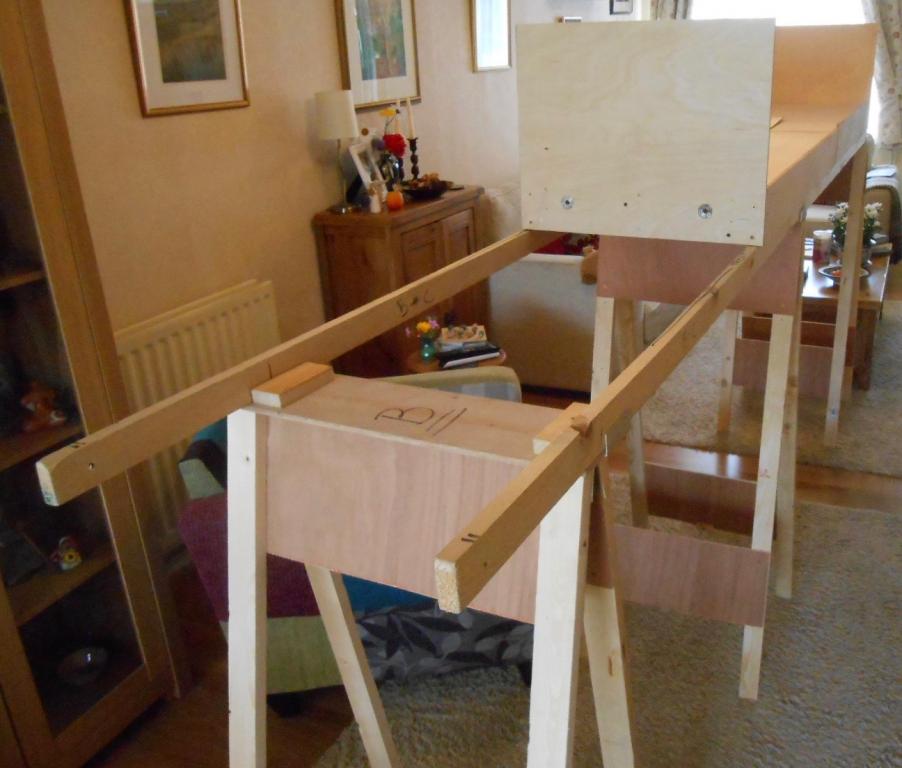
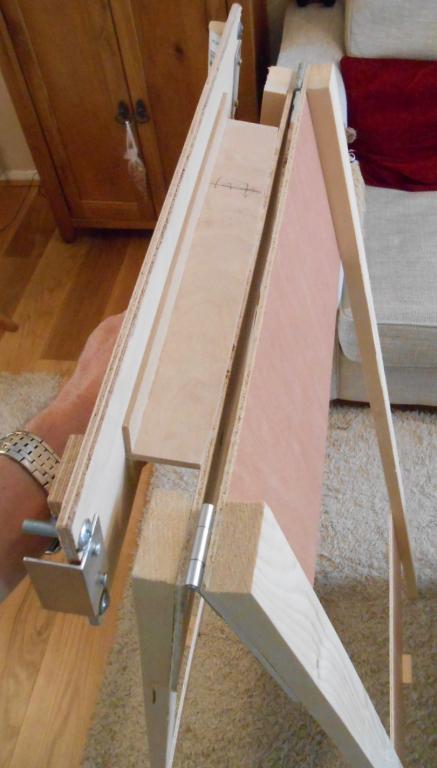
This is very much intended as an exhibition layout, so it therefore needs something to stand on a shows. In the past, I've used used integral legs [hinged from the baseboards], but for several layouts now I've adopted Iain Rice's 'ulysses' idea. The acronym stands for universal layout support system, or some such, and is made up of a number of trestles, kept apart/together by longitudinal beams, upon which the layout itself sits. The advantage of this system is that [with a little adjustment] it can be used by successive layouts. I'd been hoping to use the same trestles from Arigna Town, but with 30cm risers to get the overall track height to around 1.5 metres. Unfortunately, the risers proved to be be rather unstable, so instead I've made three new trestles. These are very simple, just 4 pieces of 2x1 timber, some 4mm plywood and a couple of back hinges made up each one. To hold the longitudinal beams [more 2x1, 1.6m long], further piece of plywood slots into the gap at the top of each trestle. M6 bolts project upwards from this ply piece and the main beams slot onto these. This means it only takes 5 minutes to assemble the whole layout at a show - though adding lights, stock, drapes etc expands this somewhat, depending on the size of the layout. Arigna Town is fully up and running inside an hour from arriving at a venue. Being smaller, I am hoping the new project will be done in not much more than half that.

-
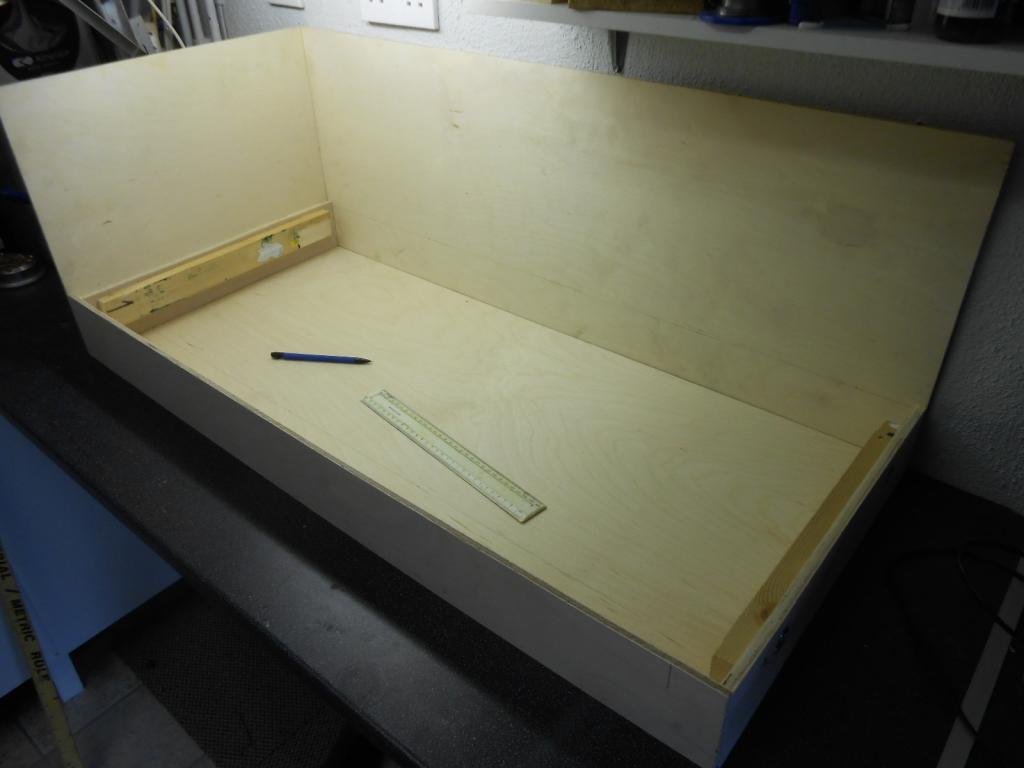
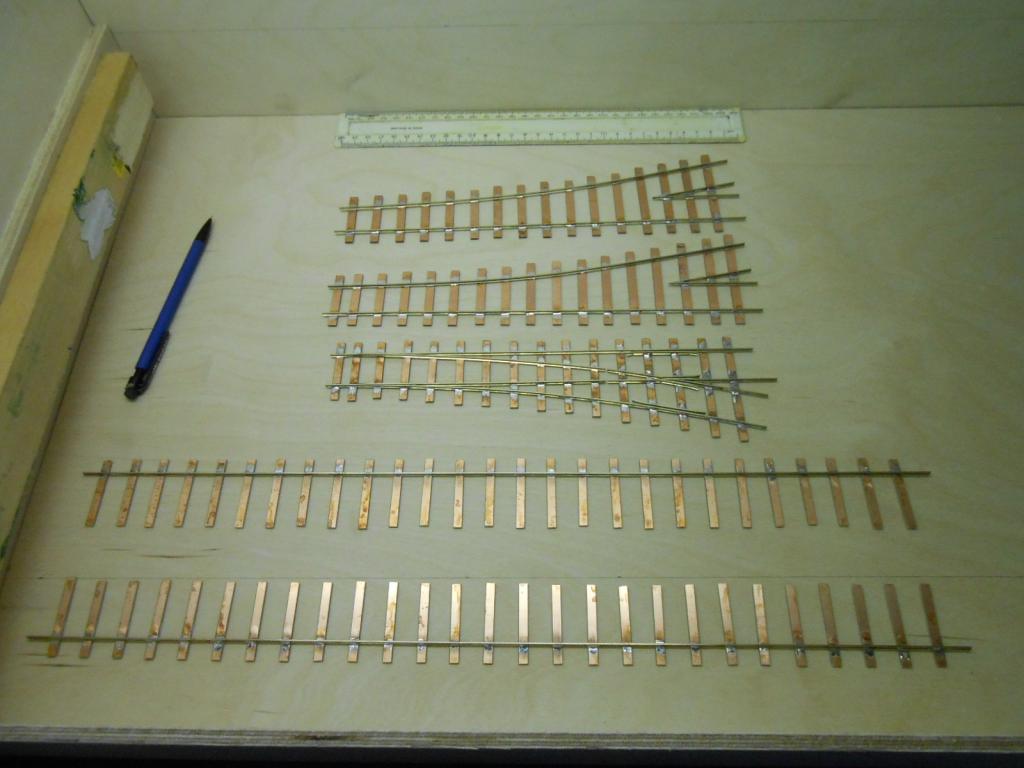
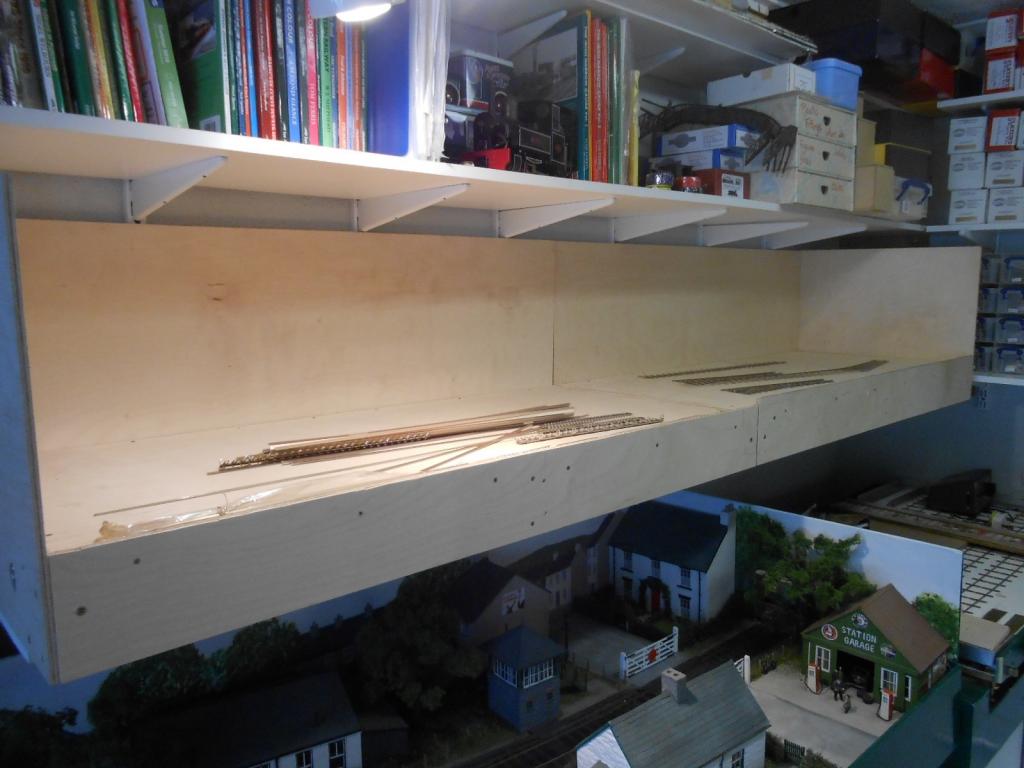
At long last, the 6mm birch ply arrived, so I could start the baseboards. To help, I bought a new 22 inch hand saw, as I prefer one to a circular saw & they certainly cut straighter lines than a jigsaw - in my hands anyway. Basic dimensions of each of the two scenic boards are 1000 x 450mm, with a back scene 375mm high [including framing]. There is nothing fancy in their construction, though the baseboard top sits inside the framing, including the 12mm ply 'end plates'. These have the C&L baseboard joiners sunk into them & it means the baseboards not only line up accurately, but are flush faced with each other too. Was hoping to use Arigna Town's trestles, but have decided to make new ones, which will be 48" high, so with the tops, beams and baseboard framing, track height will be around 54"/1.5m. First photo shows one board under construction, while the second shows the pair together on the vacated shelf above Arigna Town in my workshop. The fiddle yard will come later & will only be used at exhibitions. For home use, a short cassette will enable me to do shunting/testing etc. The other picture shows a couple of items of track that I've made up, in order to enable me to start drawing out the track plan & working out where buildings, scenic features etc will go. [ATTACH=CONFIG]24782[/ATTACH[ATTACH=CONFIG]24783[/ATTACH
-
The knees of the bee, poodles privates and mutts nuts!
-
Only just caught with my recordings of this. Can only say it mostly made me cringe. Sort of Springwatch for trains, except there is far more variety in wildlife than on our railways these days. A programme like this from the 1950s, 60s or even 70-80s would have had much more variety and interest. Not sure it will have improved the public image of the humble trainspotter either...
-
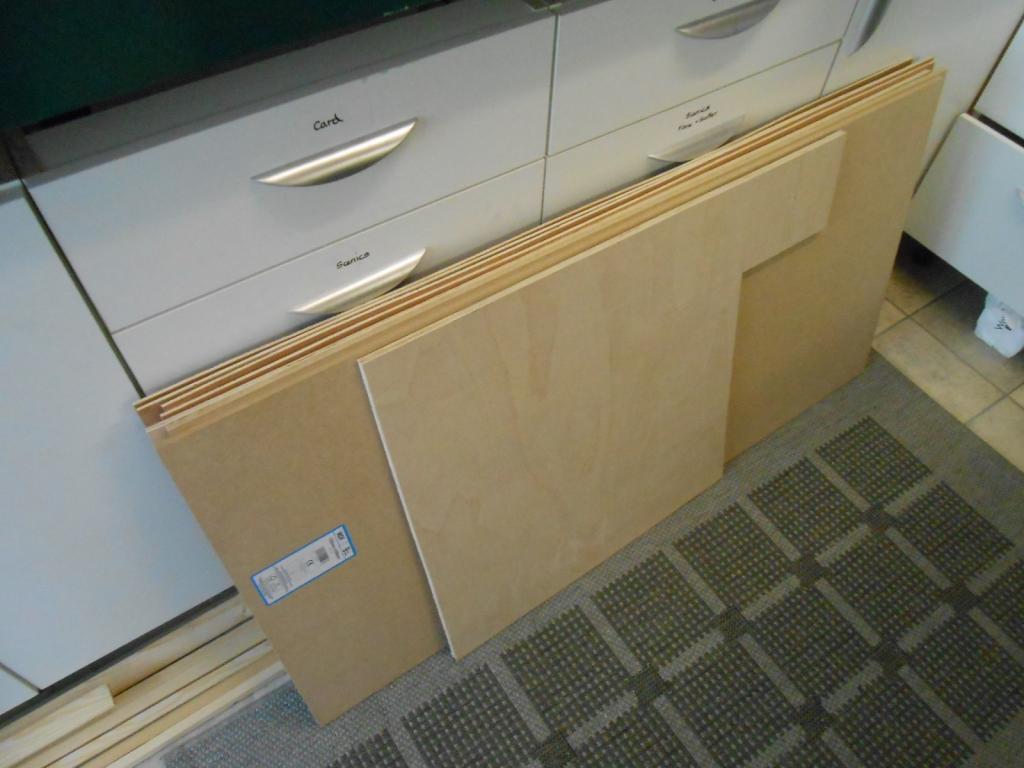
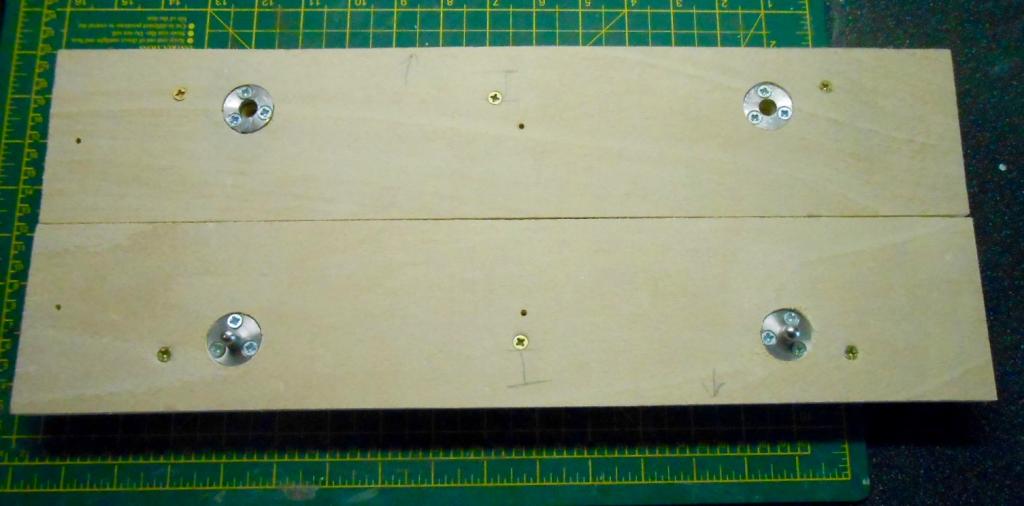
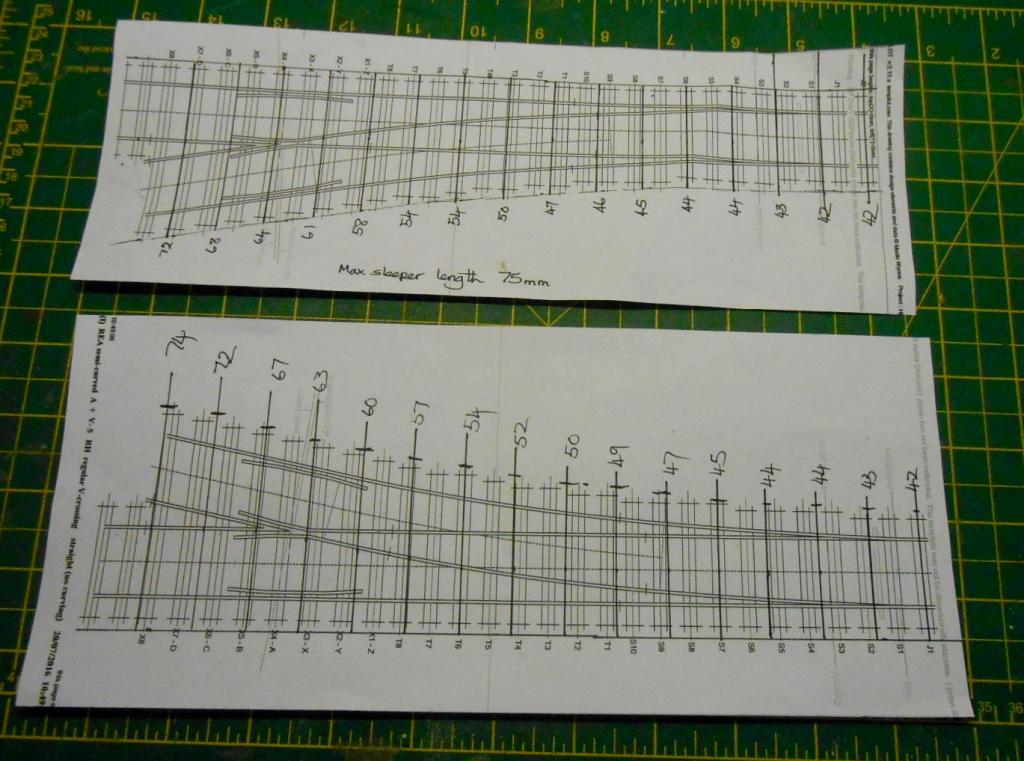
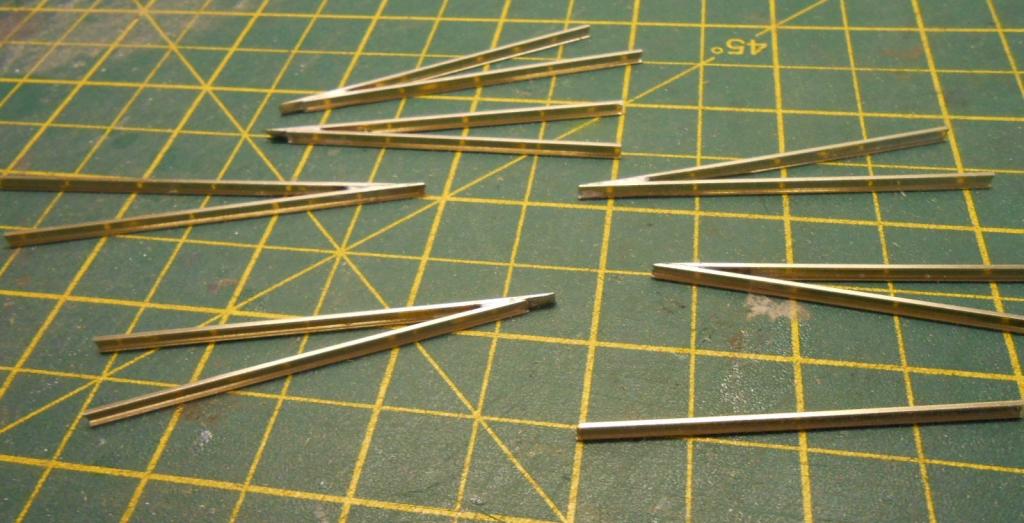
Always promised myself that I would make a start on this new project once I'd got the Chatham Show & our trip to Ireland completed. Trouble is, while some of the materials I need were procured at the Show, others are slow to arrive and/or not available off the shelf at the local DIY store. A key ingredient for baseboards is 6mm birch plywood. Used extensively on Arigna Town, it has proved to be robust, stable and fairly light - very important with exhibition layouts. However, it has to be specially ordered from a timber merchant, so I'm still waiting at the moment. At least it is not any more expensive than hardwood ply of the same thickness, and being five layers instead of three, cuts cleanly too. So, for now have only cut four pieces of 12mm ply for the end frames of the two scenic boards. These go outside the baseboard surfaces. It is easier at this stage to fit the baseboard joiners, before any frames are added. I prefer to use the ones from C&L, not cheap, but very robust. The first two photos show the materials I've bought so far [thin ply for fascias, pelmets etc & MDF for the turntable-fiddle yard], plus the mated pair of end boards with the joiners in place. Unable to do any more woodwork, I've turned my attention to the track. I was fortunate here if finding a quantity of unwanted Peco code 82 flat bottom rail in the club rooms, which is exactly what I need. Normal 7mm NG tends towards code 100 rail, but [like Arigna], I wanted something a bit lighter & code 82 is ideal. I also found I had a fair quantity of 5mm copper clad sleepers left over from the Arigna layout. These are 63mm [9'] long, so some will be fine for point timbers while others will be cut down to the 42mm [6'] used on the CVR. Further supplies are on order from Marcway. I was tempted to ask Marcway to make the points for me, but finding I had the rail & sleepers to hand, have decided to have a go myself. Track building is not my favourite occupation, but it is time to have another try. Main problem is finding suitable drawings. Salvation came in the form of Templot, which has [among its vast library] basic B5 turnout drawings of approx 1 metre radius. Unfortunately, there was no 21mm narrow gauge drawing and the only alternative was for broad gauge P4. The issue here is much narrower flange ways, not really suitable for this project. However, there were plans for 'Irish EM' at 20.2mm gauge and 1 mm flange ways - ideal for my needs. A few seconds with a calculator showed that by copying them at 104%, this would give a 21mm track plan, to which I have then marked in where the narrow gauge sleepers will go. Total accuracy isn't too important, as I will be using gauges to construct the track and points, with the drawings only as a base to build on. When you think about it, making track shouldn't be too difficult [or so I tell myself] & there is plenty of help on line. So far, I've made the six crossing 'vees', following the method used by C&L in their pre-made units. Hopefully the close up photo shows how you file the straight on rail first, then file the angled vee to go against it. This way, both routes of the point should line up with the track on the other side of the crossing, in what is sometimes [though incorrectly, I believe] known as the 'frog'. Again, photos show where I've got to & the next stage will be to lay out the two construction jigs for the points, plus a third for plain track.
-
Gilding the lily, Patrick. As others have said, your layout would make a fine feature in magazines. Suggest you get in touch with Railway Modeller - am sure they would be interested.
-
Certainly is Eoin and what is more, it is free. I just googled points plans and found the link very quickly. A full on drawing programming that will do entire layouts if you have the time to master it. I printed a left and right hand point and then copied at 105%. That was because I used Irish EM plans, which give a gauge of 20.2mm and a flangeway of 1mm instead of 0.67 for P4 standards. Opportunity there for any 4mm scale modeller who wants something better than 16.5 but not the extra work needed for P4. Drop in axles for Murphy's diesels could make modern image very achievable methinks.
-
Problem solved - now have Templot. Will use Irish EM (20.2mm) expanded to 21mm on the copier so I can have 1mm flangeways.
-
My new Clogher Valley project is to be 7mm scale, so I want to build 21mm track. I have enough code 82 flat bottom rail and am ordering 5mm copperclad strip for the sleepers. So can anyone suggest a source for 21mm gauge point plans. Around three foot radius, am thinking maybe P4 might work, though, in 7mm scale 'EM' flangeways of around 1mm seem appropriate for the wheels I am using. Fingers firmly crossed!
-
Interesting. Many thanks chaps. Real shame about both the S&S and the T&D. On our first trip to Ireland, came across the newly restored line at Blenneville & seeing the Hunslet in steam ranks as one of the best railway experiences I've had - alongside a cab ride in a Shay on Vancouver Island and various loco driver 'courses' for Christmas and birthdays. As suspected, will mostly need white paint when I start doing the buildings for my Clogher Valley project.
-
Thanks Eoin, sounds like another good excuse for further visits. Another question I forgot to ask is about the brightly painted houses and shops one sees in towns and villages these days. Have they always been this way? Potentially makes for fine modelling opportunities, but (before WW2), am thinking whitewash was a more likely covering for walls/rendering. Doors and window frames a different matter as gloss white paint is very much a post war invention?
-
Just back from a 6 day tour of SW Ireland. Several soft days [inevitably!], but enough good weather to appreciate most of the scenery. Our tour started from Shannon & went north and west via the Burren & Cliffs of Moher on a lovely day when we quickly realised our [very] cheap hire car had not air-con and aerobic windows - the latter a neat idea, but one I can't see catching on... The carefully planned route also took in Moyasta Junction & although shut, I did manage to photograph a few things, including the steam loco and several industrial diesels, albeit with the former hiding in its shed. Am sure the interior of Moyata station will feature in a future model building, as it was a real time warp. First question though - what is all the broad gauge stuff going to be used for over the road? As well numerous carriages, seemed to me there was either a C or an A lurking under tarpaulins. The Shannon ferry was a bit of fun & of course soon after, we rolled into Listowell, only to find we had missed the last train by less than half an hour. They must shut up shop pretty quickly mind as nobody was about, so could only poke the camera lens through the fence to take a couple of pics of the track. Not anywhere on my modelling radar mind, though did meet a young chap at St Albans this year who was well on the way to creating a station scene with lots of superb track built from his own etchings. That was Day 1, which ended in our base for three nights at a very nice hotel in Killarney. Day 2 was the Ring of Kerry, sadly spoiled by a white out from Kenmore pretty much all the way to Cahirciveen. Kenmore seems a fine town & presumably the station was fairly close to the centre as the church spire features in several Casserley photos. Presume it is now part of the supermarket? Had to visit the Valencia railhead, almost lost in the murk, but did see much of the old trackbed on the way back to Killarney. As for the 'Reeks', cloud base was below 100feet and in it, visibility below 50 feet, so that is twice we've missed the scenery here. Day 3 was Dingle, which started a bit like Day 2, but at least cleared in the afternoon. My goodness, the peninsula is stunning, while tracing the route of the railway makes you wonder if the gradients were actually steeper than 1 in 29 in places? No problems tracing the route, especially with Castlegregory Junction so easily identifiable. Another question here though - what, if anything, is happening to the 'preserved' stretch from Tralee to Blennerville? Track in place, but very rusty & no sign of life as we passed. Day 4 was a tour [with more rain] via Bantry, Skibbereen, Clonakilty and Kinsale [spell checker wants to put Kindle here!] to our final base in Cork. Hence stopped at Ballydehob for the Schull & Skibbereen viaduct. Nice to see it in such a good state of repair, but disappointed to find no references to its origins - just the birds & other wildlife you might see in the estuary. Am afraid we passed on the model village at Clonakilty - 11 euros each seemed a bit much, even though it is presumably housed in the old Bandon station? Did we miss much? What we did do was call in at Courtmacsherry. What a superb little place that was, with the trackbed of the tramway clearly traceable, right into the old station site. Am presuming that is the old station building, now converted into a house? Likewise, that is the former loco shed in the garden? What about the stone building next to it though? Certainly looks old, while am guessing that the railway must have run right in front of the school as it came into the village. For me, this is just about the perfect branch terminus, especially with the siding out onto the pier as well & with Tyrconnel doing kits for all the locos and stock, it surprises me than nobody has had a go at building it. Certainly on my list, though not anytime soon. There was even a race meeting on the 'strand' [mudflats, really], again great fun & would make an interesting scenic item in a smaller scale methinks. Day 5 saw the morning spent in Cork, but much more enjoyable was a rail trip out to Cobh. Very pretty town, spoiled a little by the Carribbean Princess cruise ship being in port. Hence many [mostly elderly, it seemed] Americans and Aussies wandering around. Very good for local trade though! Nice to see the town makes much of its railway history, with several good display boards. Likewise the semaphore signal still standing at the Cobh end of Cork station.. Am guessing they are not working now though? Saw two Class 201s in Cork - one in the yard, the other just in with an express from Dublin. Am guessing the station has been much altered of late. Did it always only have just two through platforms though? On the way out of Cork the next day, glimpsed what I though might have been a smaller diesel in the station. Certainly looked a bit short for a 200, but was in the new green livery, at the head of passenger stock. Unable to stop at the time, but perhaps someone can enlighten? Our last day was about getting back to Shannon, for our evening flight. Managed to visit Youghal, which is a very fine little town & it would be nice to see the line from Middleton extended there - certainly the trains were rode on were very busy to & from Cobh. Crossed the Mallow - Waterford line on our way to Limerick, but no further railway sightings. Lovely holiday - splendid scenery, lovely people [great music in the bars] and excellent food. Pretty good value too, even with the euro falling through the floor. We'll be back - and not just for Cultra in November, though am thinking the only way I'm likely to see the Ring of Kerry in all its glory would be to live locally for six months and get out when/if a fine day is ever forecast!
-
Gingerbread of the highest quality.
-
Superb presentation. Well done sir!
-
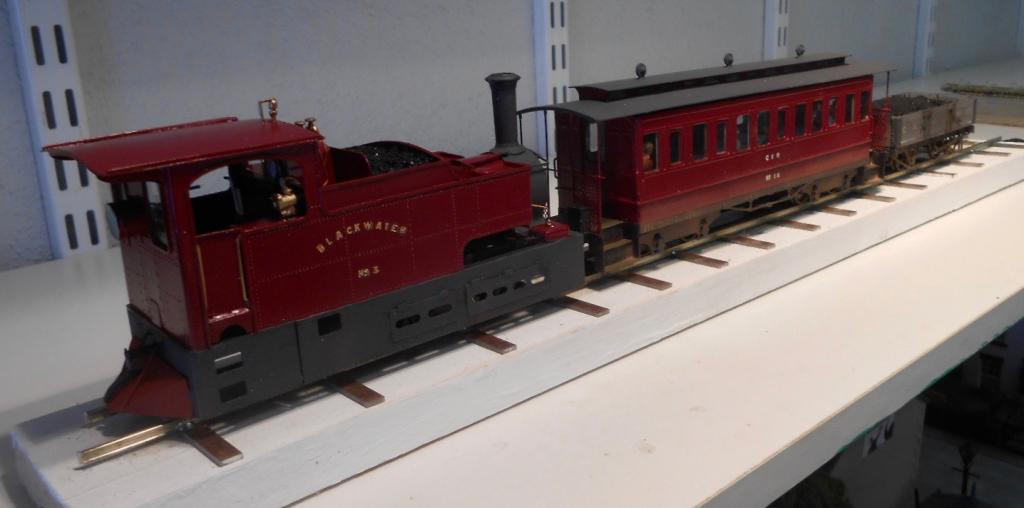
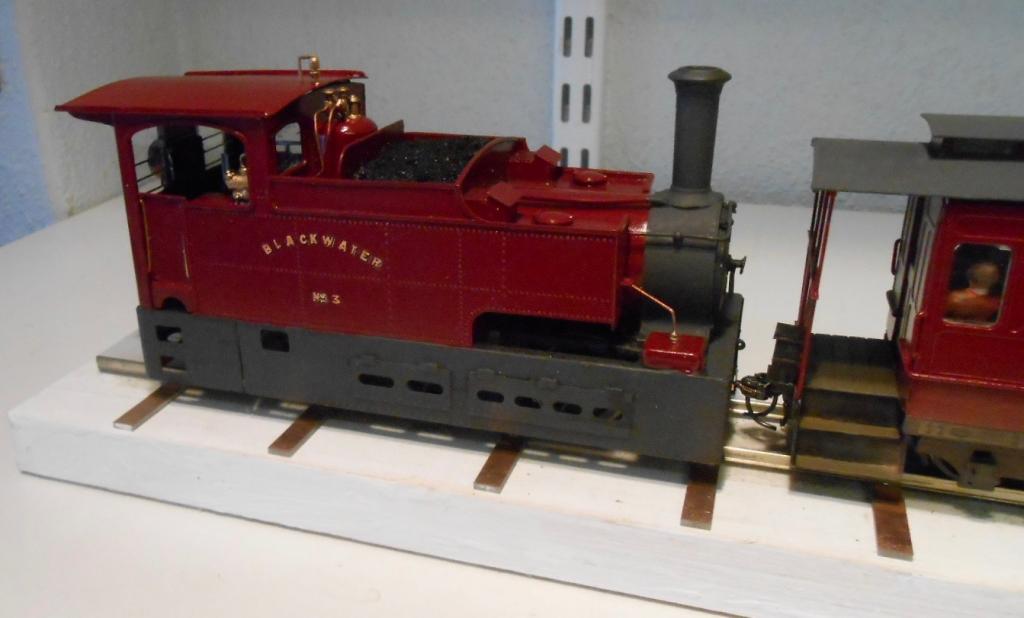
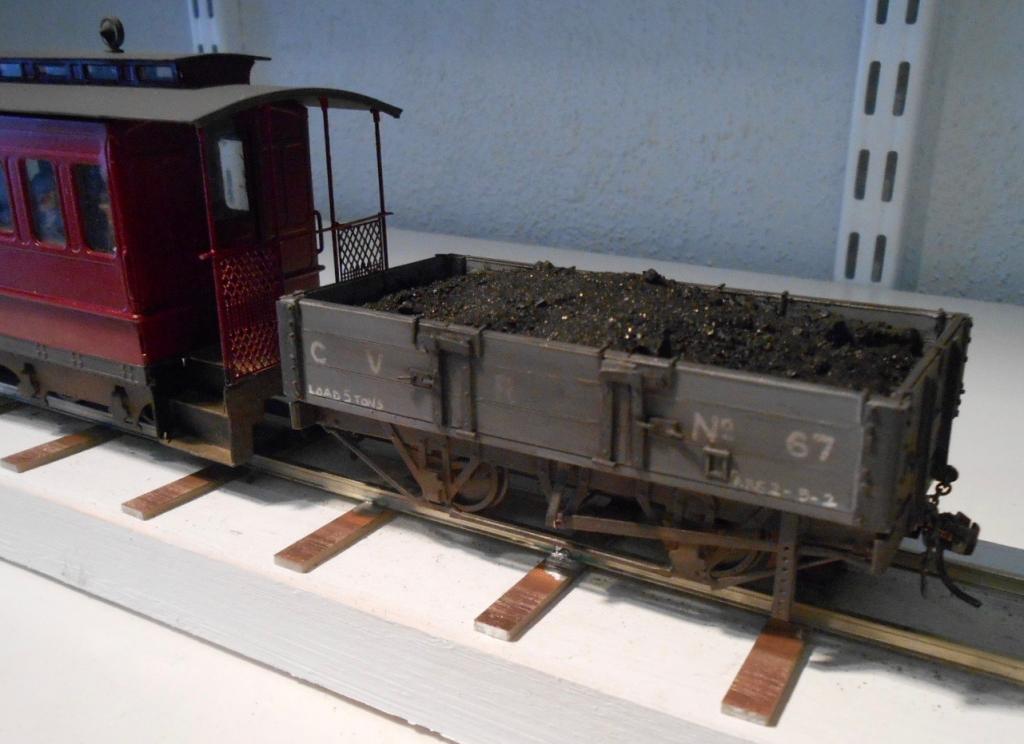
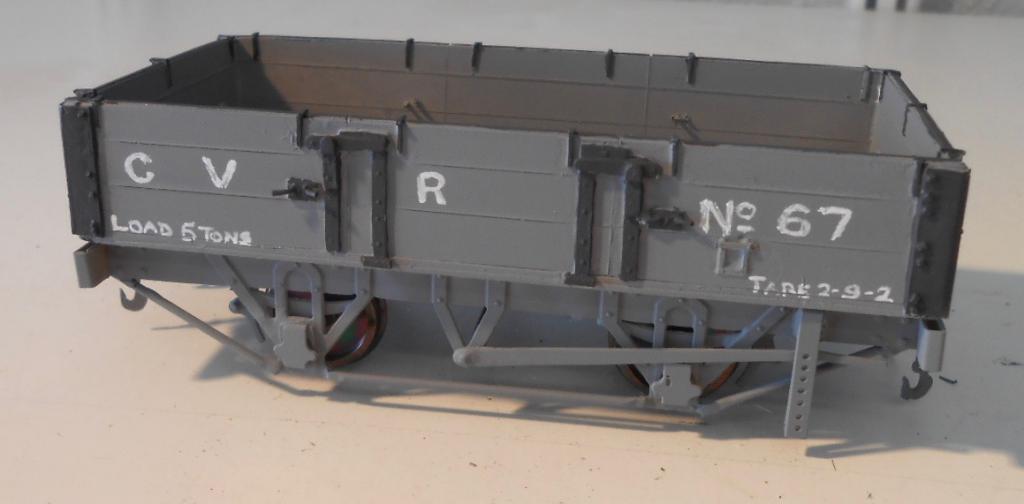
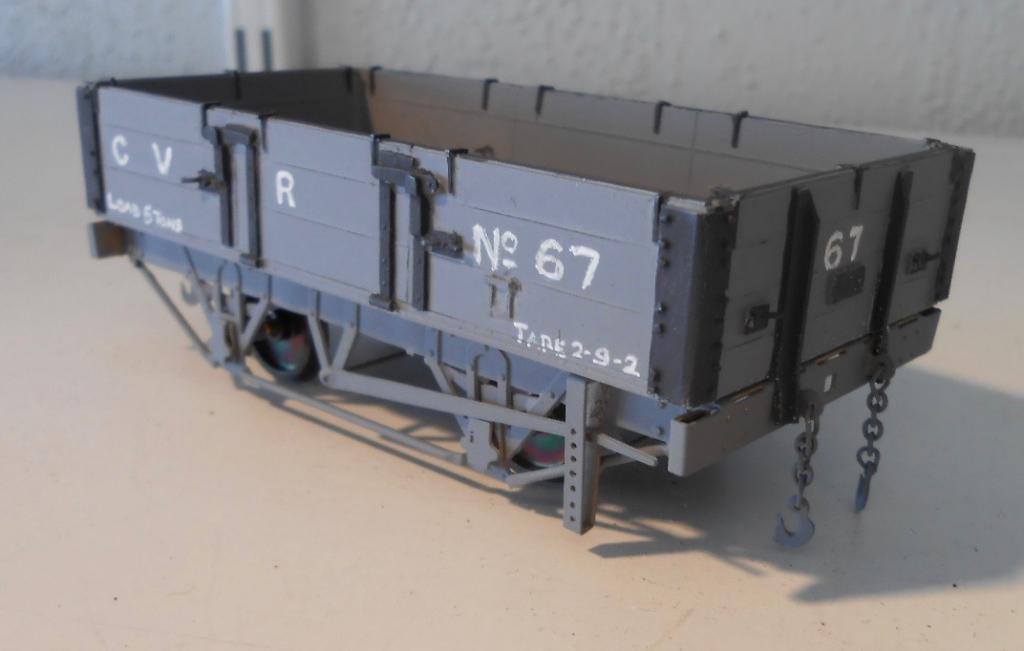
Hay fever season [which also co-incides with the rainy season here] has meant a bit of very unseasonal modelling time in the workshop. An opportunity therefore to try and complete the three CVR vehicles I'd started. The Sharpie tank didn't need too much work - just coal in the top bunker and glazing to the cab, plus a bit of painting. Likewise the open wagon just needed a load & having plenty of spare crushed coal from the loco, this went in the wagon. Other work needed was painting and weathering of the chassis. It seems CVR wagons were overall grey, but am assuming that the under frames got pretty grubby, while the bodywork would inevitably have got rather blackened by carrying coal. The coach needed most of the work. Much of this was interior detail. The longitudinal seats are fairly basic & made from plastic sheet, though I did make an effort to install interior panelling. This sandwiches the glazing against the etched brass sides - and wasn't added until after the body had been sprayed with Halford's crimson lake, actually Rover Damask Red & the same colour as the loco. Information on CVR livery is fairly limited, the Branchlines instructions seem to be taken from Patterson's book & make no mention of what colour underframes, bogies etc were. Am assuming they would have been black or dark grey, covered with a layer of dust & grime, hence my usual weathering mix covers everything below sole bar level. Other detailing involved making the acetylene gas container on one buffer beam [plasticard] and capping the end handrails with small rivets to simulate the turned tops on the prototype. As yet, the prominent steam heating pipe along one sole bar is missing & will only be added once I know how much the bogies will swing once track is laid. The are a good number of Peco passengers on board though. The other work has been to install couplings on all vehicles & to this end I bought some Kadee 5s, along with a delayed action uncoupler and a mounting gauge. Unfortunately Kadee 5s need to sit below the buffer beam, whereas the actual chopper couplings are mounted inside. Being small, the Kadees are fairly discreet & an 0 gauge version I have was certainly too big. Maybe S gauge [very much alive and well commercially over the Pond] might be a good compromise, but for now, I will stick with the 5s. To check their working, I made up a short piece of plain track using copper clad sleepers and Code 124 bull head rail. The layout will have much finer Code 75 or 83 rail, but early signs indicate hands free uncoupling should be effective. As usual, photos show progress thus far, while next I am aiming to make masters of the sides and ends of the brake, cattle and covered vans, so I can cast them in resin, as per Arigna's wagons.
-
My first trip to Ireland was the Saturday of the ill fated Grand National, which after several false starts did not happen. Wags on the ferry cheerily suggested that a donkey derby in Ireland would be better organised. The same could be said of Brexit, where the latest (of many) issues is the likely delay of HS2.
-
Arigna Town - this week's scenery
David Holman replied to David Holman's topic in Irish Model Layouts
You bet, Stephen. Tony Wright's photos are just lovely, while they made a fine job of my layout diagram too. I especially like the BRM 'large photo' format. RM's often tend to be smaller and don't always do justice to the photographer's work I feel. Either way, it is really nice to have something published and I definitely encourage everyone to have a go, for this site has much to offer. -
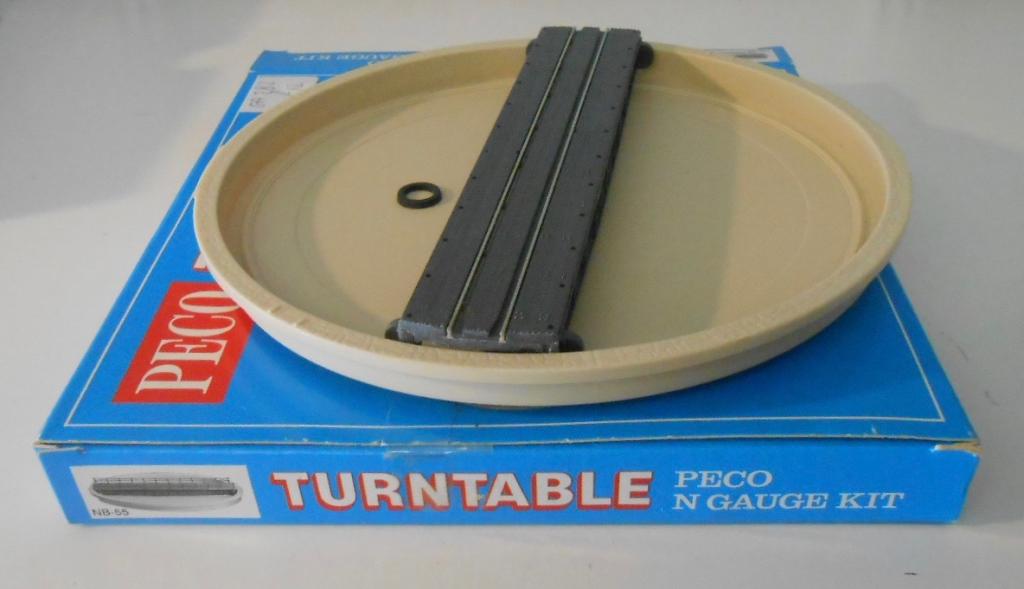
I get the impression that most of the layouts in this section are home based, while mine are intended for exhibitions, which puts a very different perspective on your planning. This will be my sixth layout to go on the road and, truth be told, I have yet to get it right in terms of transport - and probably never will. Everything is a bit of a compromise. One key factor is weight & another is manageability. With just two scenic boards [100cm x 45cm], neither should be a problem, though I do want to be able to pair them up for transport and to give a bit of added protection. A couple of recent shows have involved loading up in the rain - not recommended! Another factor is the number of trips you need to make to and from the car. Arigna needs at least 12, so not surprisingly, I want to reduce that. Equally, I want to make as much use as possible of Ariana's superstructure, i.e. the trestles and support beams, because I have no room to store any new ones. Fintonagh, will sit on a 150cm high shelf at home, so I want to try and replicate that at shows, which means 30cm risers. hopefully, I have figured out a plan to do that, one which will enable a set of information boards along the front of the layout. Other considerations involving internet research at the moment are couplings and point motors. While I would like prototype chopper couplings, I also want hands free uncoupling & from what I have seen do far, those types which look prototypical are handed and only work one way. Not good when i want turntables. Hanging after a seated operating position at the front, means electric points too. Tortoise have always been my favourite, though the new Cobalt models are smaller and cheaper. One thing I have decided is that the layout will be analogue control - DCC seems too much of a liability on an exhibition layout. Others may disagree, but I know plenty who think the same as me Picked up a nice bargain at the Chatham Show in the form of a Peco N gauge turntable. At 6 inches diameter, it scales out at 22ft in 7mm scale & forms the ideal basis for a CVR model, this time with electric drive - eventually!
-
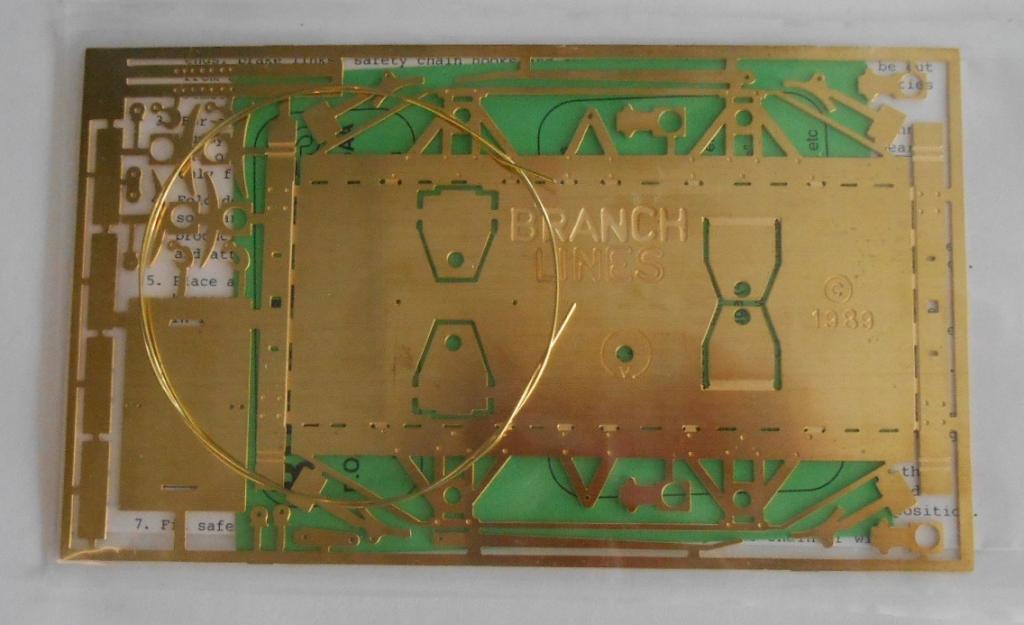
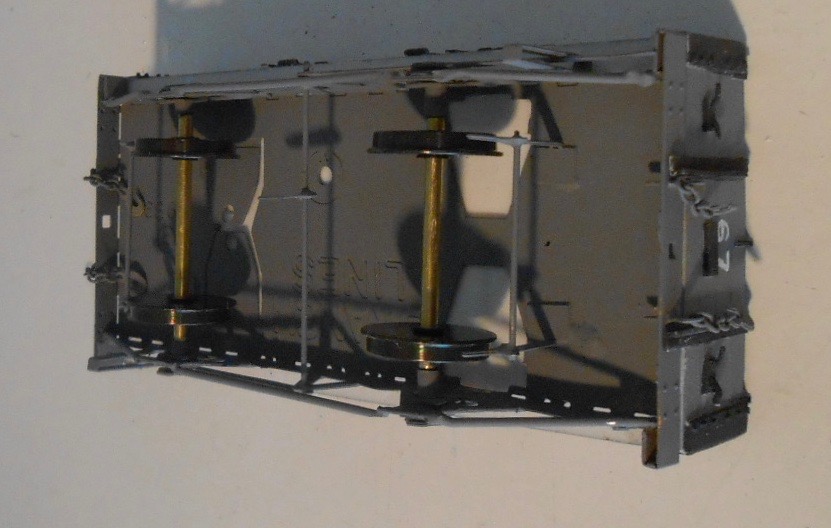
Being heavily involved in the Chatham Show has limited modelling of late, though with Branchlines attending, there was the opportunity to lay down a few stores. I am the show Trade Officer, so this might have influenced my desire to have the stand present! So, the bogie first class CVR coach has been added, along with a stack of wagon chassis. Despite being dated 1989, the etches still stand up very well. Not cheap, but they do give a fair bit of work/entertainment, especially as I am choosing 21mm gauge. I am using 2mm tube in lieu of axle bearings, while also having to make my own axles too. Was going to use steel, then realised that this could cause problems with any coupling magnets, so have used 2mm brass rod instead. Sounds a bit of a faff, but it does not take long to cut a suitable length and then mount in a drill chuck to file the ends to a point. Also cut out the bracing strips between axle boxes/frames, replacing them with .8mm nickel silver wire to represent the round bar used on the prototypes. Couplings are still missing, indeed not finally decided, though am still leaning towards Kadees, as alternatives seem to be 'handed' and like Arigna, the new layout will have loco and fiddle yard turntables. Note too that that wagon is just 10cm long, so the photo is a somewhat cruel enlargement. It is not fixed to the chassis yet either. Added wheels to the coach bogie and a motor gearbox to the loco too. Fingers crossed, after some running in on the workbench, it will be a smooth runner - though with no track yet, it is still a case of wait & see.
-
Arigna Town - this week's scenery
David Holman replied to David Holman's topic in Irish Model Layouts
Just heard from the editor of British Railway Modelling that Arigna Town features in the July issue, including a selection of lovely photos taken at the St Albans show earlier this year. While I've had quite a few articles published over the years, there is always a real thrill to see your work in print and I very much encourage everyone with something to share to have a go. -
Proper job. Well done Mick!
-
My Arigna Town layout will be St the Croydon show in October, Colin. By all means come and say hello. Likewise you may be interested in my new project, which is Clogher Valley in 7mm scale/21mm gauge
-
Glad you like it, Eoin. Loose End was built in the mid '90s. It was three approx 1 metre scenic boards (10ft in old money), with a similar length fiddle yard which used cassettes. Track was code 100 fb with points from Marcway, same as Arigna. Locos were a mix of kit and scratch built, focussing on prototypes that fitted the roadside tramway theme. Included a Connoisseur GE tram engine, painted to represent Toby of Rev Awdrey fame, complete with smiley face. A couple of Manning Wardles, GE coffee pot (full tramway skirts); also a double cab Sentinel. Wisbech tramway coaches were ideal and also modelled a Wantage tram loco and tramcar. Pride of the line was Jane, the Wantage George England well tank that MRJ articles took you on a scratchbuilding journey. Taught me a lot, that little loco. Jane is pretty much all that survives in my possession, the layout was sold on in about 2005. Since then, it has moved again and last I heard now lives in the same barn in France as Gordon Gravett's Ditchling Green - esteemed company indeed. Operationally, it worked on the principal of a terminus junction, with a 'twig' trailing into the branch terminus. Fintonagh will use the same principal, with a siding going off scene, via the linen mill, to a broad gauge exchange yard. This can be a good way of creating extra traffic, on what is after all, a very small layout.


.jpg.c1af8eebebac00cf366166dcdd526bd6.jpg)