murrayec
-
Posts
2,731 -
Joined
-
Last visited
-
Days Won
70
Content Type
Profiles
Forums
Events
Gallery
Everything posted by murrayec
-
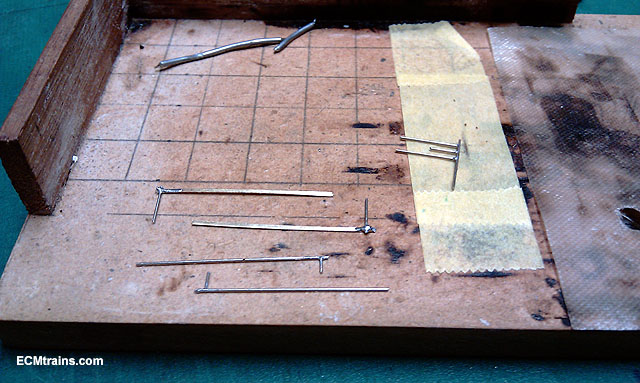
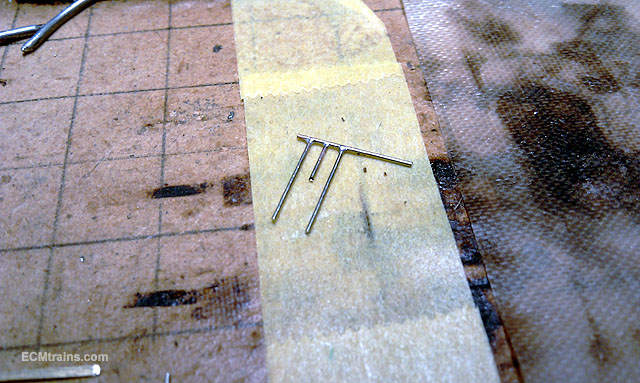
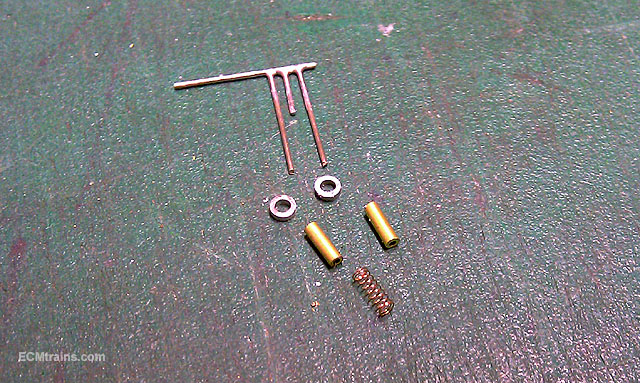
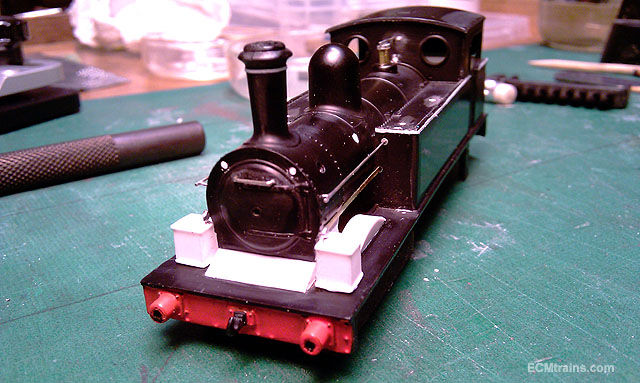
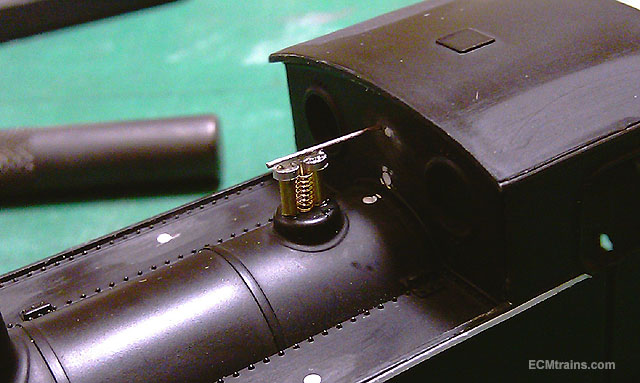
Thanks guys for comments Ironmongery fabrication this evening... Smoke box door lamp rail, sand box actuator rods, footplate hand rails, and the safety valves. All in .4mm NS wire with some brass n aluminium tube for the valves. Paper strips were used for the detail on the chimney and along the top of the tanks all the way to the back end. The safety valves was good fun, the solder on the NS wire broke while test fitting the assembly, I could not re-solder because the tubes making the valve bodies was epoxied and that would have been a mess, I'll silver solder the next time I make one of these. Thats a Kadee coupler spring between the valves. Eoin

-
Ah Kirley, would you stop, you have been one of the great contributors to this forum, sure look at those amazing photos of your stock you last posted- that would be sorely missed. Listen to wrennie- he's a big B***x and we all hate him but I do agree with him;) don't do it, take a few weeks away from this annoying place and things will look different when you return.... ...and I will finish those bogie sides, I promise I better run I can hear wrennie's car starting! Eoin
-
untilAt Bray Wheelers Clubhouse, Schools Raod, off Boghall Road. Bray. From 11.00 to 4.00
-
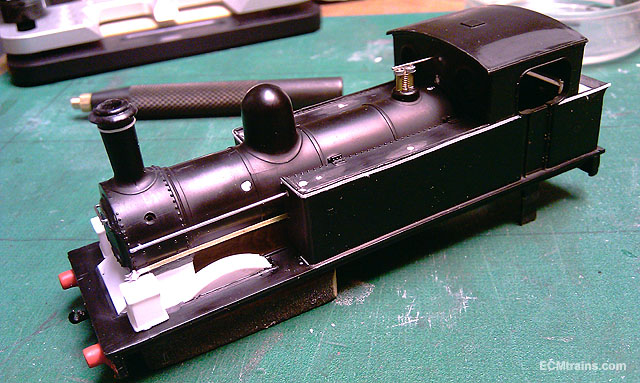
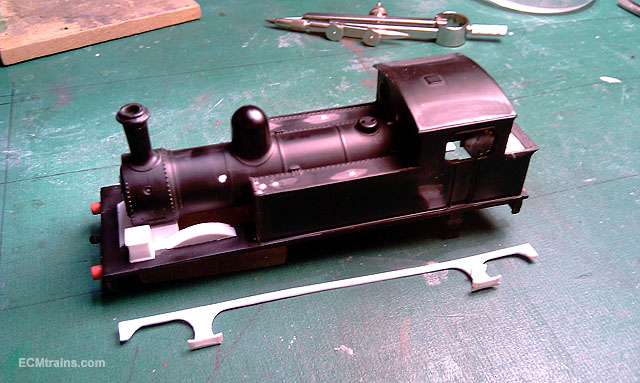
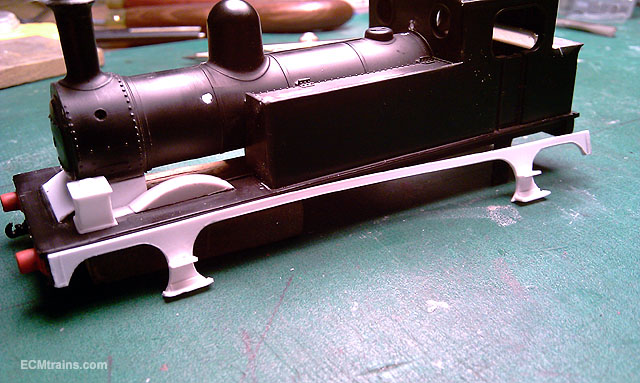
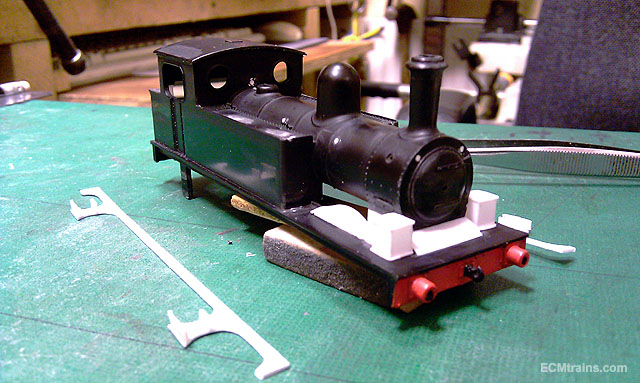
A bit of body work done today Splashers, sandboxes, coal bunker infill, valance & steps, made in styrene, all just propped in position for the photos. I think the valances will have to go on last and have a bit of brass reinforcing behind the steps! You cant see it in these shots with the glare of the white styrene but the sandboxes have a nice little filler cap on top... Eoin
-
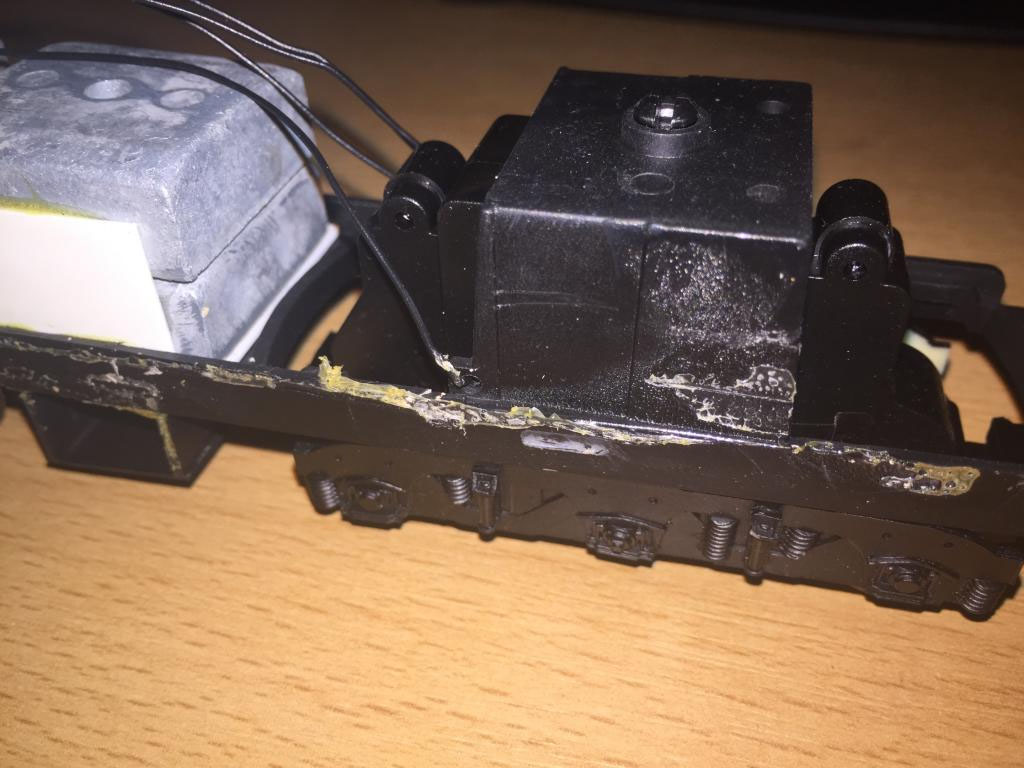
Hi Mark Flowing in the footsteps of JHB I see! with the upside down photos:) The wires look like they are still making contact, check to see if many strands are broken, even better check it with a meter continuity test, if there is you'll need to solder and insulate them. If still intact stick a blob of tek7 or the like on them to insulate and reinforce them.... If its a Mac camera you use and you take a photo with the camera upside down Windows cannot rotate it automatically like a Mac, you have to do it manually Eoin
-

Fabulous weather - model railway activity curtailed
murrayec replied to Noel's topic in Letting off Steam
Railway Modeller Boating
-
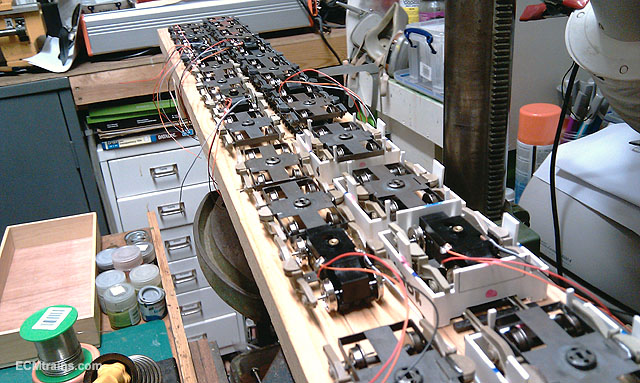
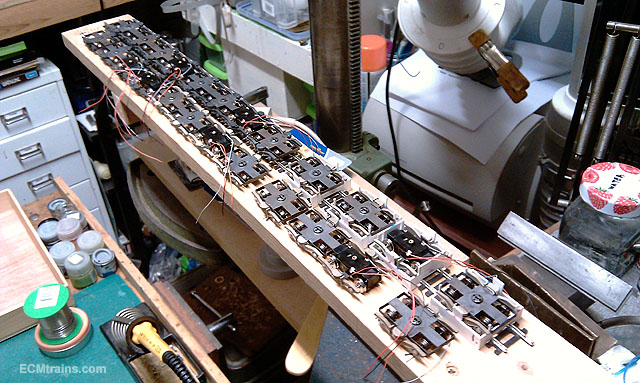
Hi Have you ever wondered what 6 sets of two car DART bogies looks like;- Contents;- 7 no. Modified motors and wired for DCC. (there is two motors in one of the sets) 7 no. Motor outriggers made up in brass and blackened. 18 no. Brass bogie frame etchings, folded and soldered and blackened. 72 no. Wheel bearings soldered in. 18 no. Press buttons soldered on. 48 no. Plastic bogie sides cast, processed and glued on. 36 no. Wheel sets installed. 18 no. Brass chassis connections, etched, folded and soldered to the chassis I have posted this list so that some may be able to grasp what is going on here! this is the final batch of three batches of 6 sets of running gear, so multiply that list by 3 and that's for a total of 18 sets. The processing time for this batch only was in the region of 8 weeks, while at the same time other processes on the DARTs was taking place- body assembly, chassis components fixed on, body interiors made, wiring loom, directional lights, cast pantograph, and final assembly of complete sets. 4 sets have gone out to customers and two more are just about to. Some see this in isolation- their order only! they think its liner- start at the beginning work straight through to the end and give me my DART! Well its not, the nature of batch building is you make all the same parts at one time and then move on to the next, not necessarily in an order that DARTs can be part assembled as you go. Some processes go on for months and are similar to process that might be only needed at the end but everything is set up so that end item is made first. This is where storage boxes come in.... Bottom line is, I'm working along 3 to 4 days a week on it, all major components are made and most of the time from here on in is assembling the remaining 12 sets.... I appreciate the majority of the order's patiences and for the others 'Damn them for they know not what I do' I will never build a batch of DARTs again, and there will be a cost adjustment for future orders on these models. I'm looking at a conversion DART from a ?? (like the N DART Conversion I posted in the other thread) as this seems to be more what people want to pay for and wait for! Eoin
-
....phosphoric acid! its phosphoric Eoin bloddy spel chker!! Eoin
-
Hi Have to agree here with TDR's words, sorry Richey The main problem with types of flux is what your doing after the thing is soldered- say on a fine delicate model if one uses plumbing or electrical fluxes you have to be diligent in cleaning they are corrosive, can harden incredibly, and hide in seams difficult to clean out without damaging fine detail! Then you spend time applying beautiful layers of paint only to find in a couple months time your paint along that seam is corroding! that may be OK for the weathered look but not for pristine stuff. Using paint friendly flux is a better bet, Carrs and phosphorous fluxes are very paint friendly- one can dip the model in phosphorous flux, not clean it off, let it dry and paint it- it's an excellent surface for paint to adhere to. Using a pickling solution after soldering a model is a very good idea and can safeguard against creepy things happening later on..... There is a difference Eoin
-
Hi Baseboard Dave shifted a fair few at the shows we attended up to the new year Eoin
-
?? Astronomy, archery, hunting, shooting & many more current uses.... Eoin
-
Go for it Borithe???
-
Hi My Mom made elderberry wine many moons ago- that could be used for paint stripping!! Eoin
-
Hi roxyguy I'm super detailing it and painting it black n brown with CIE logo, I know its not Irish but I like them.... Eoin
-
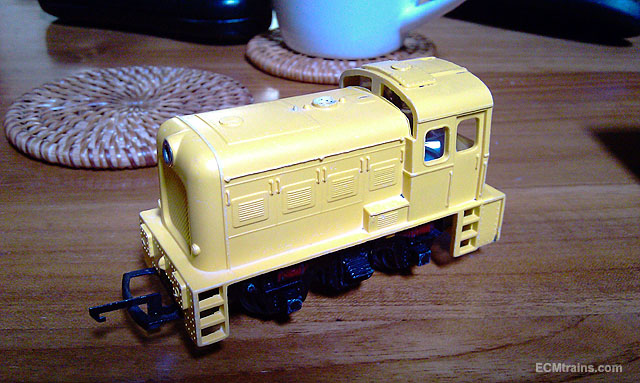
Hi roxyguy This came to me very crudely hand painted green with enamel oil paint, popped it into MMO in bag, 15 minutes later it came out just as you see it in the photo after a rinse in water Eoin
-
Yes, don't do it...... You could use DIY stripper but only water base and test first!!
-
Hi roxguy Try Mr Muscle Oven in a plastic bag, leave for about 15 minutes and squidge it around in the hands while in the bag and see if the paint comes off, wash with water I use this method for most applied paints- I did recommend this method to Peter recently but it did not work for him! Also IPA seems to harden up paint when it drys, so MMO may not work now, also IPA is very risky stuff to use on plastic models- paint can be removed but so can the body shell!! Eoin
-
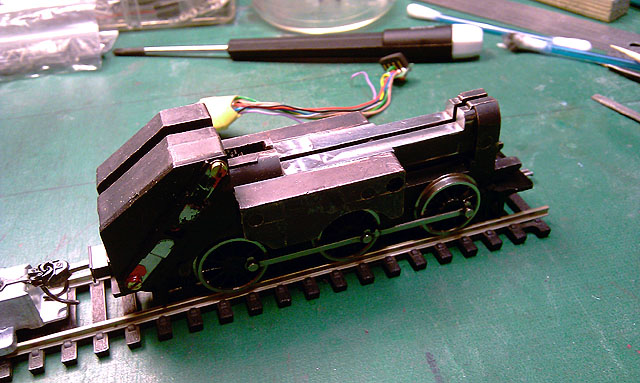
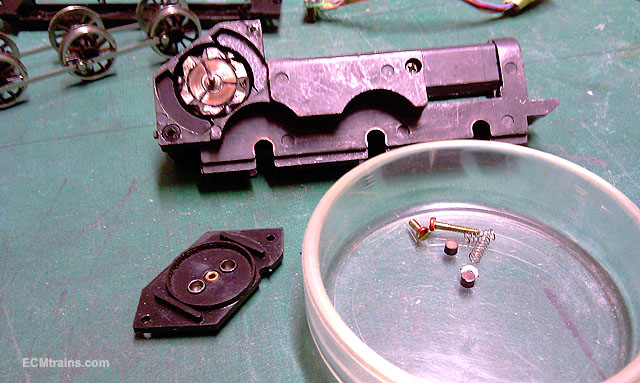
Thanks Noel Yes split chassis require a bit more work, The decoder will be connected to two little brass screws that will be tapped into that shiny cut I just made on the top- the wires can be soldered to the screws far easier than to the die-cast metal Eoin
-
Hi Noel OOPS! I gave a link to the soldering paste! it should have been to the soldering & flux head page..... but one can find it from there. Ordinary electrical solder can be used on brass work, but I recommend don't- its already fluxed with messy stuff and with this solder the flux is going in at the wrong time- with the solder! Its a better join to flux independently, heat the work with the solder on the iron, the flux boils and cleans the metal and then the solder flows where the flux once was. Most brass solders have a little lead in them, lead is good for this, it helps the solder to flow beautifully and create a good join. Just work in a well ventilated area and use a soldering extract fan if possible- sure I used to drink me water through it in my gran's old house when I was a kid and I turned out normal:SORRY: Best flux I use is 12% phospheric & water- see my tips on soldering in the Workbench thread http://irishrailwaymodeller.com/showthread.php/3869-Soldering-Tips-by-murrayec?p=59978&viewfull=1#post59978 Eoin
-
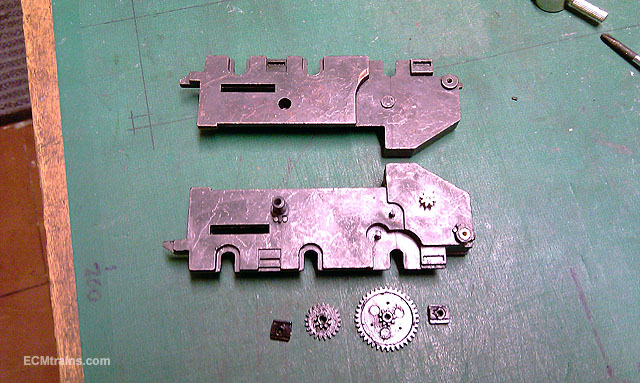
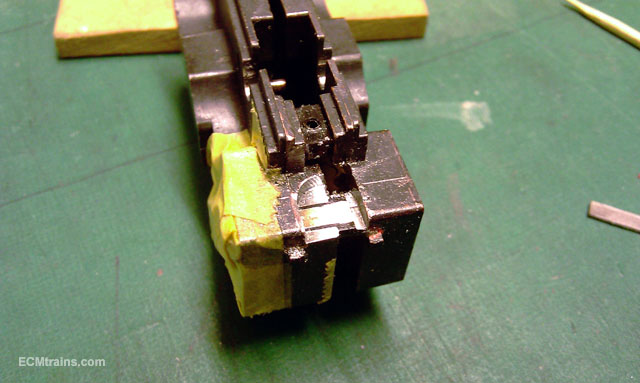
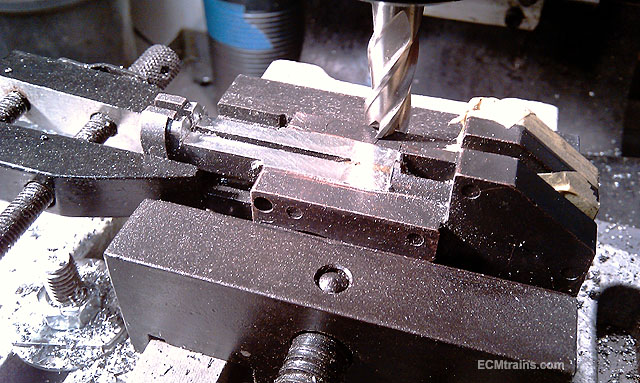
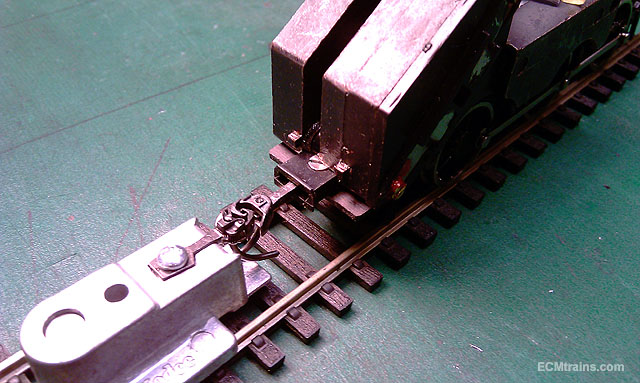
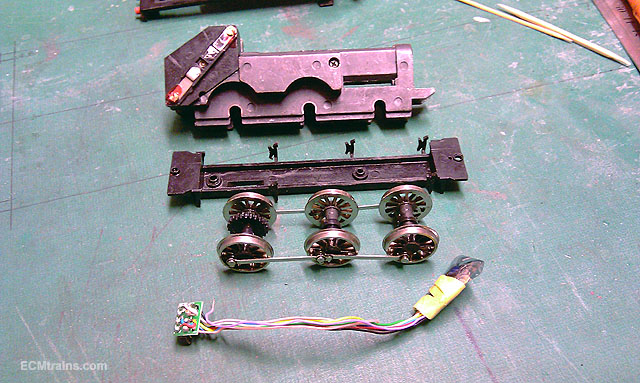
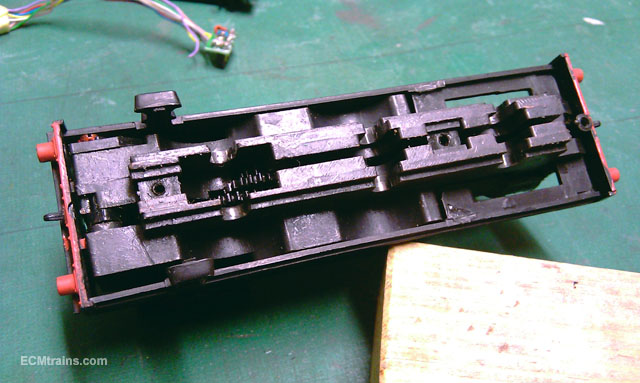
Bashed some metal this evening.... Split chassis was taken apart to remove the gears, seal up the motor with masking tape and put some packing into the split so that the machine vice would not crush the plastic insulators. First I machined out the recess for the Kadee box on the under of the chassis, this was very close to one of the screws so I went into it, through the brass contact and insulator until I could see the threads of the screw and stopped there! It worked, just enough clearance to get the Kadee at the right height. Next was machining out the space for the DCC chip in the top of the chassis, took off 3.5mm. Now you see it Now you don't The Kadee box is fixed to the chassis keeper plate with a counter-sunk screw, just made it! had to sand the box a bit to adjust the level. and loads of space for chip n wires Eoin
-
https://eileensemporium.com/index.php?option=com_hikashop&ctrl=product&task=show&cid=956&name=solderpaste-188-deg-50gr-jar&Itemid=189&category_pathway=1124
-
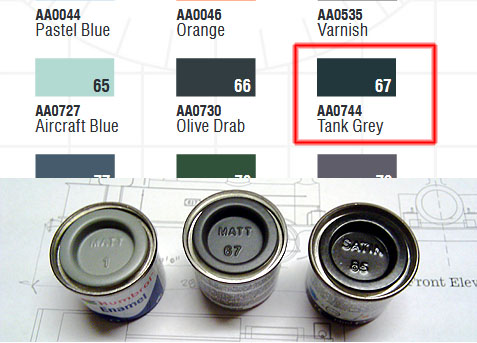
Hi jhb The body shell above is still in LNER black livery- not painted yet, I'm waiting until all fixups and bits are on before painting.... Here is a snippet of the Humbrol Reference Chart and a photo of the tinlet, its the middle one, the other two are for comparison- light grey and black What do you reckon? Eoin
-
Hi jhb Yes, I picked up a dark gery for this project- Humbrol Matt 67, look it up and let me know what you think. It looked dark in the shop but in the workshop it looks like it may need a bit of black added! Eoin Edit;- Something went a bit funny with the computer and doubled up!!
-
Hi jhb Yes, I picked up a dark gery for this project- Humbrol Matt 67, look it up and let me know what you think. It looked dark in the shop but in the workshop it looks like it may need a bit of black added! Eoin
-
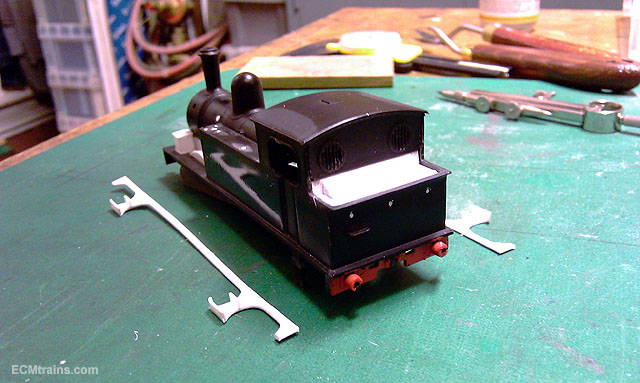
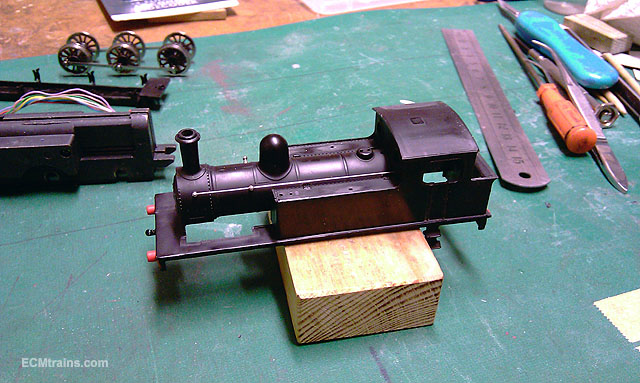
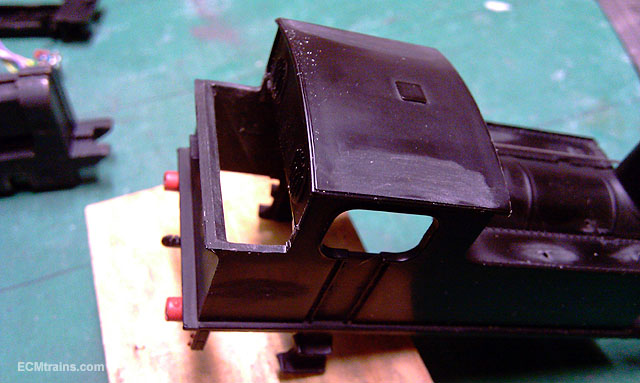
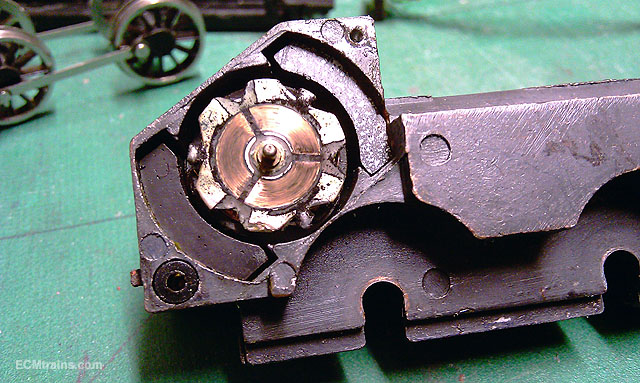
Some progress The body is now all cleaned up and sanded, ready for hole filling and bits to go on. The cab roof overhang was reduced, rain strips were removed, rounded edge formed on the back of the bunker, and moulding seams removed. The moulded dart and number plate were removed from the smoke box door. I then took a look at the chassis to see if it had implications on the changes to the body shell, one thing stood out- the upstand of the split chassis which houses the motor protrudes into the bunker, but should be able to cover it! A small amount of chassis will have to be removed at rear base to get the rear coupler in, a Kadee 146. To DCC this lump of metal is going to be fun! There is no space between chassis and body shell but I have a plan. It requires a bit of metal to be removed on the top of the chassis between the tanks, there is just about enough room for the DCC chip & wires. The motor will have to be hacked by cutting the brush tabs to isolate them from the chassis- the original screws that hold the brush plate are the contacts between these plates and the chassis, which has to be eliminated. Eoin