murrayec
-
Posts
2,731 -
Joined
-
Last visited
-
Days Won
70
Content Type
Profiles
Forums
Events
Gallery
Everything posted by murrayec
-
Kirley Now look at what you started.... I hate dentists, and had nightmares after the 'Marathon Man' Eoin
-
Hi Paul Thanks, oh yes the 'Seagulls' I think we are abandoning that- DCCing was proving problematic!... Eoin
-
Excellent stuff Noel Not many can do and say that.... Eoin
-
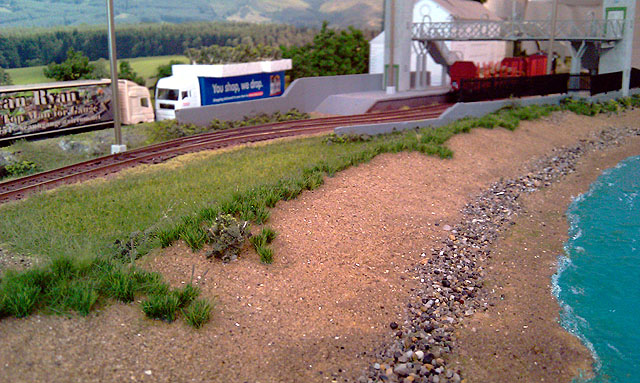
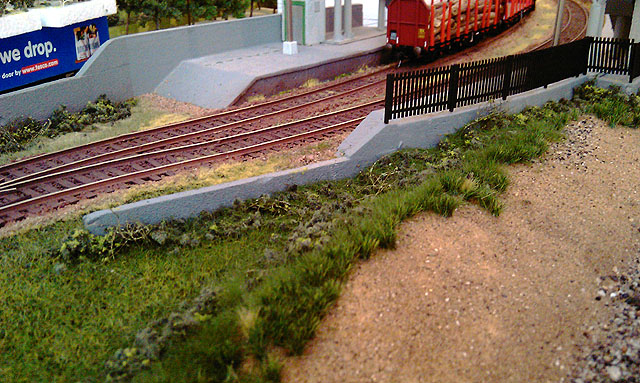
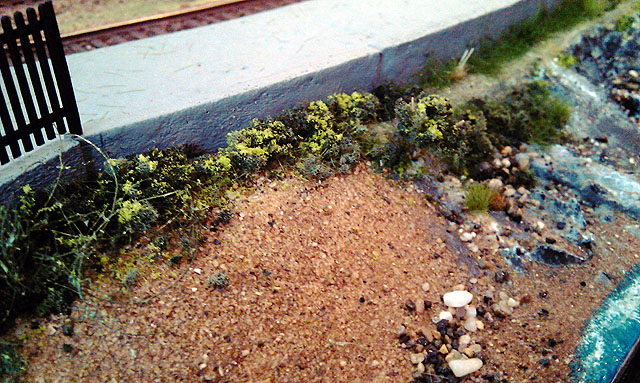
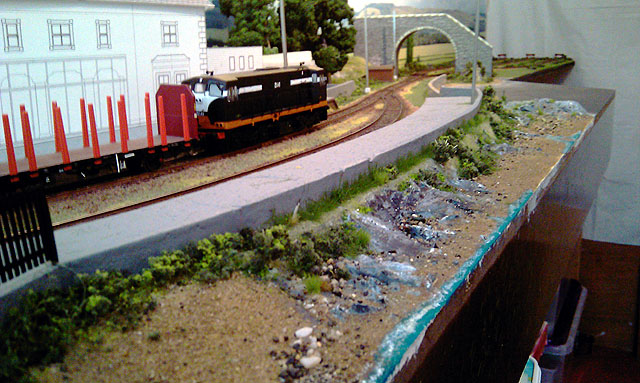
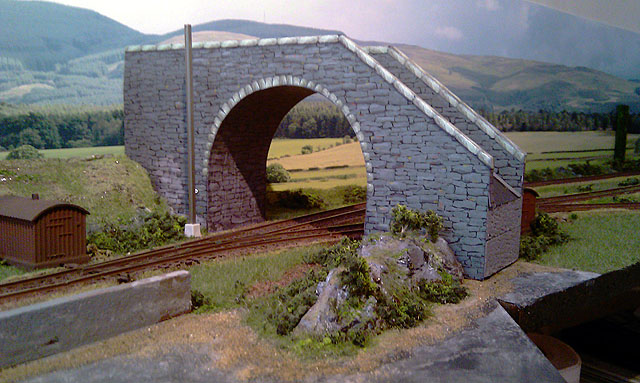
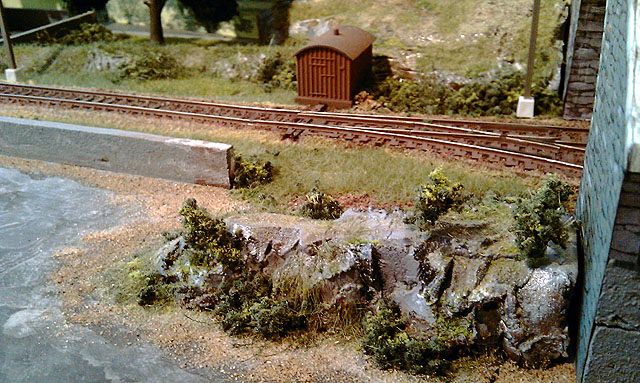
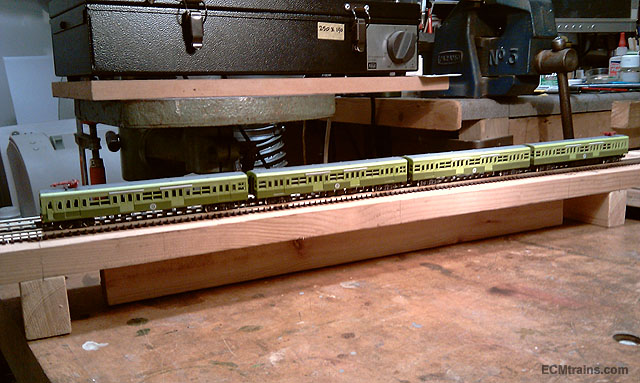
Friday again and back to Greystones..... We got a layer of gorse down, again this was done by coloured liquidised sponge, some laid out free mode and glued down with dilute PVA, and others prepared on small armatures- see the rock at the 'Bray-End-Bridge'. A smattering of fine light Heki flock was added contrasting nicely with the dark green 'sponge', it now needs a bit of bright yellow flock and this layer is finished. We added some sand pathways to the 'Bray-End-Fiddle-Yard' This had not been planned so it went down on top of the static grass so we'll have to wait and see how it looks when the PVA dries, gorse and brambles were added in this area to, and the buffer stops festooned with grass tufts n flock. Eoin & CM

-
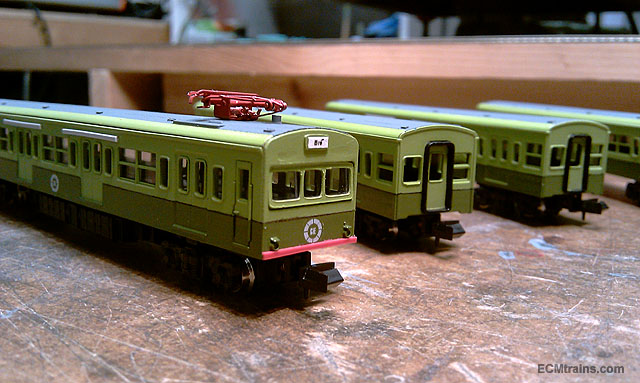
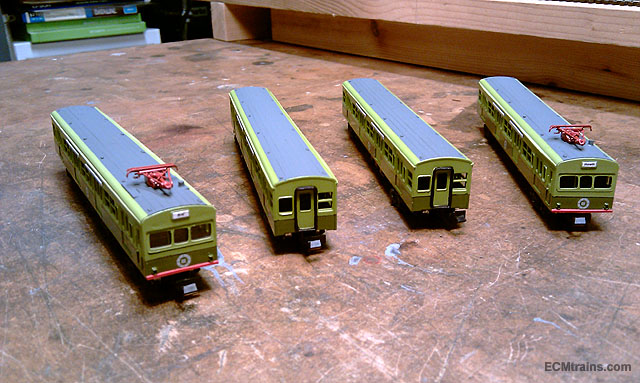
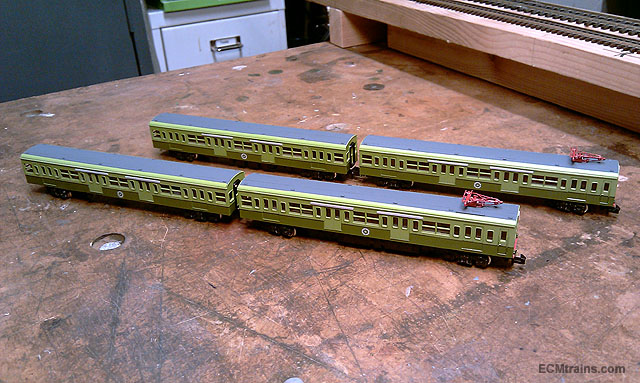
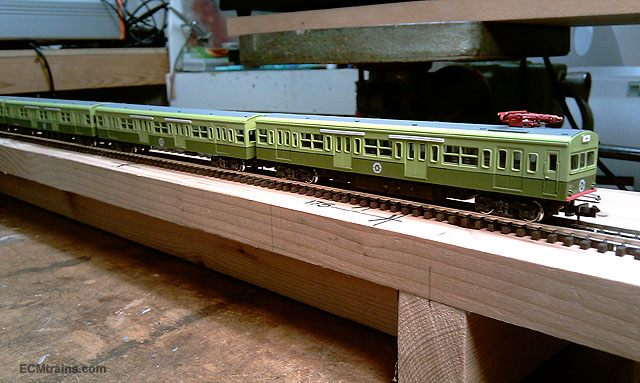
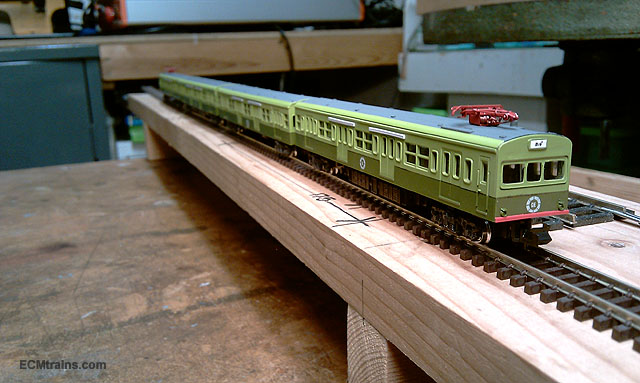
Hi MikeO It was some Japanese EMU, a lot of work done to the roof- removing central vents and filling holes, roof ribbing added, and DART vents added. Existing pantograph removed and two DART like ones added. Major mods to front ends- removing head codes, grills and filling, adding DART head code, window frames and bumpers. Then the painting and decals.....done! Eoin
-

Wexford Model Railway Club Easter Exhibition 2017
murrayec replied to Irishrailwayman's topic in What's On?
Hi It was a great show, lots of layouts and loads of chat, thoroughly enjoyed it Well done to all the Wexford chaps and visitors Eoin -
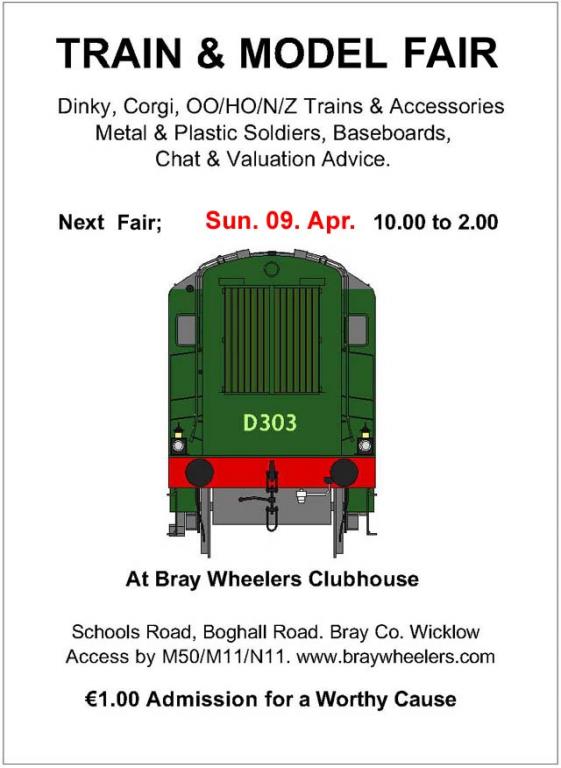
untilAt Bray Wheelers Clubhouse, Schools Road, off Boghall Road. Bray. Please note the revised times - Open at 11.00 until 4.00
-
Here are a few shots of a CIE DART 8100 Class 'Conversion', it will make its début at the Wexford Show this coming weekend. It will also be at the Stillorgan Show and the Train & Model Fair next month. Eoin
-
Hi David Shelf life is critical with these chemicals- if over 6 months old I only use for rough work, anything with smooth faces can be risky, their is the problem with air not venting out, one can end up with a lot of little bubbles on the surface and in arises n on edges! Looking good, again I love the van Eoin
-
Get well Seamus Eoin
-
Thanks all for comments The roof is a hunk of plastic, badly distorted from using an unbelievable amount of cyano glue in the first build of this kit! I cleaned it up and got it back into shape but the open end just wont take the correct curve, reinforcing is required by adding strips of brass with a joggle at ends that will hook onto the cab sides and 'keep the shape!' Eoin
-
Hi PJR If using standard track 14.5 to 14.75mm is what you want. The other options are for fine scale wheels n track, especially item 4 in your list, it will not work on standard track, you have to be using EM fine scale.... Hope that helps Eoin
-
Lovely shots Kirley, it's looking so real, the rail cars are amazing Eoin
-
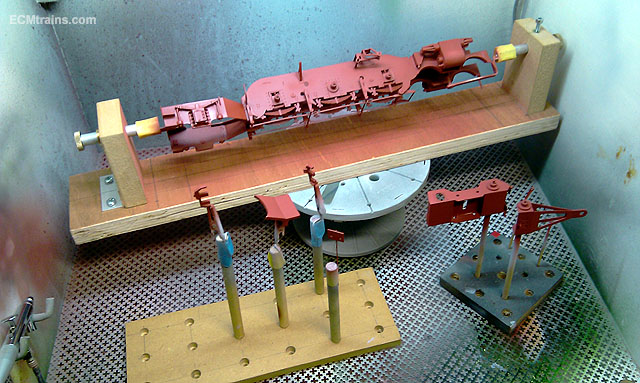
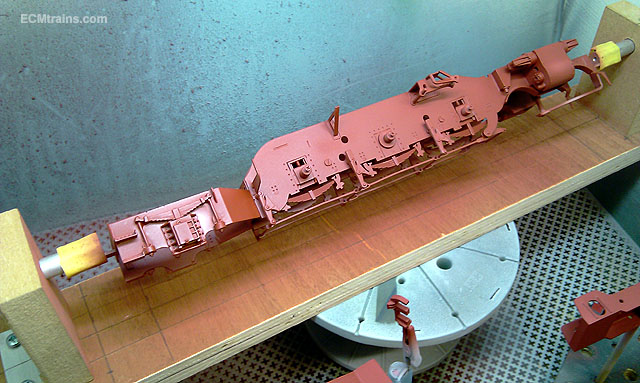
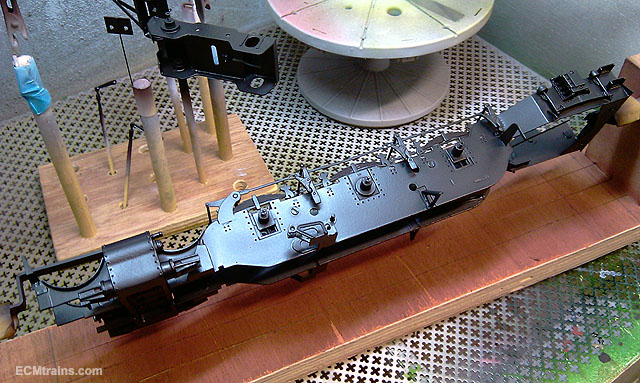
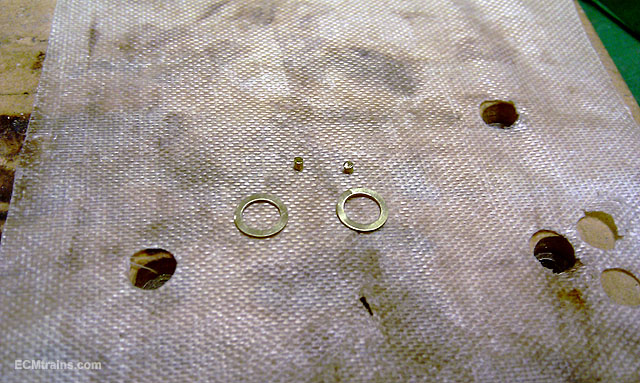
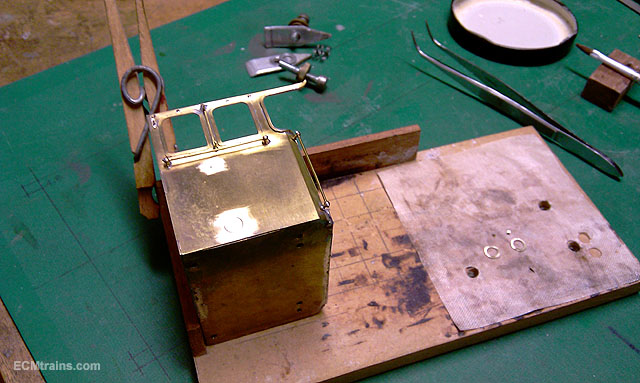
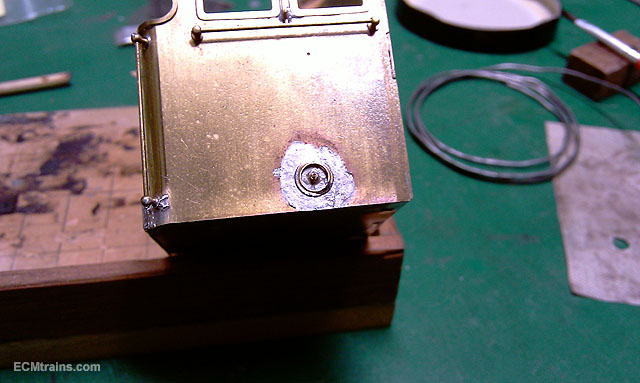
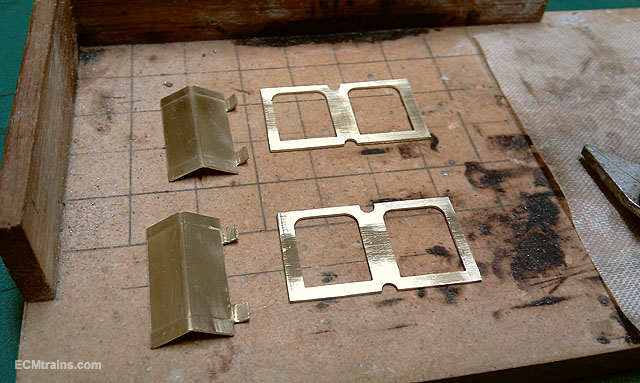
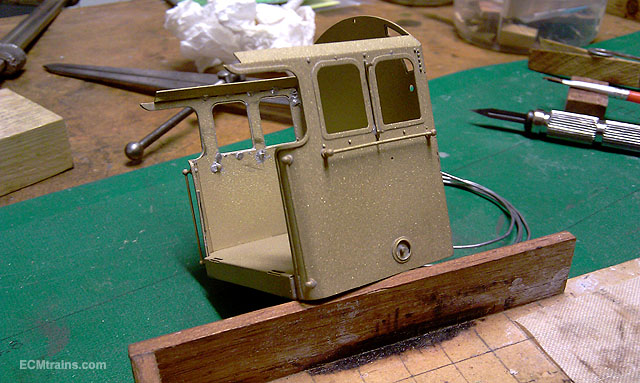
2 days later red under-coat was sprayed, using red to get a deep satin black... 2 days later satin black was sprayed Then it was back to finalising the cab for painting, this required a few more parts soldered on, first the washout plugs on the cab side, these were missing from the kit so a few brass bits were made up from sheet for the surround and .8mm wire for the plugs themselves The sides were cleaned with fibre brush before soldering, I held the plug in place with a cocktail stick and flowed solder in under, it all worked out great. Next the inside window frames and the doors needed soldering on, the window frames required mods to avoid the revet detail around the window opes, the cab insides needed a bit of a clean up to get the frames to sit down flush, so I decided to file down all edges, handrail fittings, the rest, and then gave it a bit of a blast before doing the soldering All done, but the roof aint fitting very well and I cant bring myself to epoxying it on, so some mods are being made up in brass to hook the roof on so that it can be removed to view the inside cab when the backhead is complete in all its glory- that will be next time.... Eoin
-
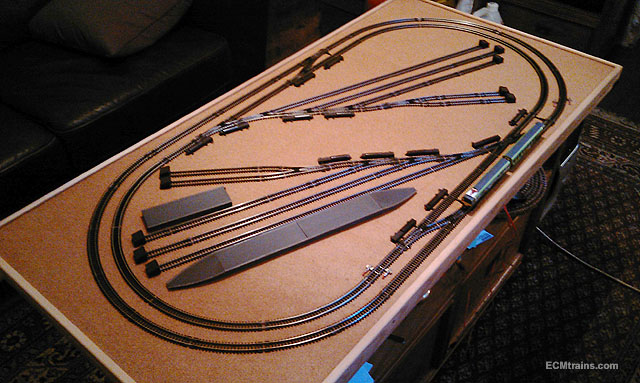
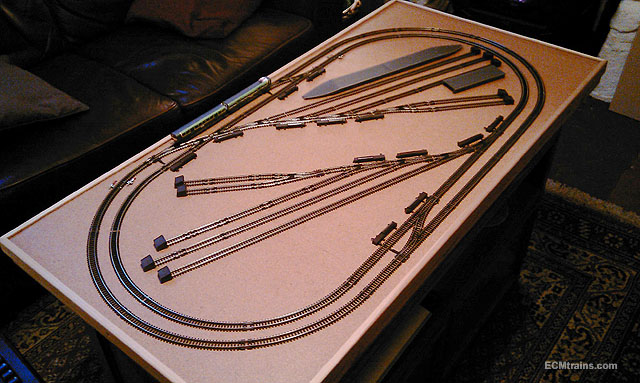
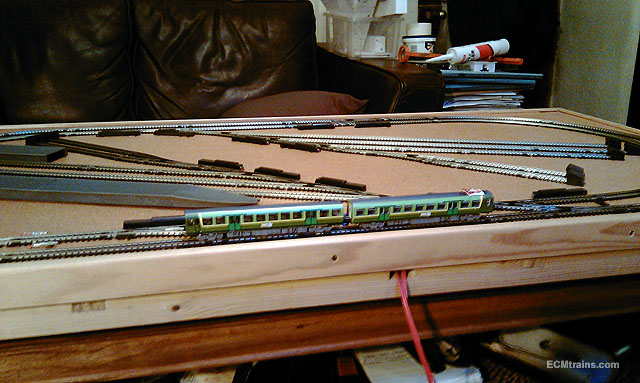
Hi All Just setting up my Gauge N test track to run a ICE 8 coach train very kindly given to me today, and I saw this discussion.... This is a 1200x600mm board which sits nicely on the coffee table, I have 3 of them but this is the only one with track on it. They were built for a bolt together Gauge 00 layout but was a bit ambitious- Borithe, I live in a Gauge N house!, so I decided to change it to 3 N layouts It's a two track system DC or DCC with a station, goods dock, 2 two loco sheds and a bit of a fiddle yard. I do have buildings for it but they are up in the far reaches of the attic.... Here it is with a bit of Irish on it Eoin
-
Hi All The Train & Model Fair is coming up this Sunday....
-
Hi popeye Lovely stuff, very neat work, I love the wiring clips... Eoin
-
Hi Cake, did someone mention cake?...... Well done lads Eoin
-
They found it, its 21 pin! I thought this model was only 8 pin 4 function!! It's OK though, it is wired for 'Stay Alive'
-
Everard junction strips his layout
murrayec replied to burnthebox's topic in British Outline Modelling
Hi Yes it looks like it was an amazing layout, such a pity after all that work In my opinion its not the materials alone that caused this problem, two main points strike me- first is the location, and second is the carpentry;- Location. An non insulated attic is not the place to construct a timber baseboard and model railway layout, the temperature differentials can be extreme, in winter its like been out doors and in summer without huge ventilation, like being in a sauna. Ply, MDF, planed and wroth timber in these sizes will not tolerate these differentials, this will also cause trouble with condensation on the railway layout and the models. Insulation is required to at least control the environment and reduce extreme changes in temperature which causes expansion and contraction in timber, and dampness in models after use and left in the attic to cool down- moisture!! the more insulation the better. Carpentry. Its not the materials, beside the point above, its the method of construction and the 'proof is in the pudding' which is the video- I can see;- no box construction in large span panel, no continuous down stand support under the helix, and some really poor carpentry details. He says it himself that he has learned a thing or two but to blame the materials I believe is not correct. I would recommend the purchase of a good carpentry book and a bit of time studying it. key points I would also recommend are;- to build with box construction, think 'Box' all the time, have no boards with free edges, they have to be supported with down stands preferably deeper than wide and not square, build in sections with expansion joints especially if making fixings between a brick wall and a timber attic structure- the brick is going to stay put, but the roof structure is going to move and that could include the floor! I admire the fact he is recycling Eoin -
BTB Get yourself a copy of 'Irish Broad Gauge Carriages' by Des Coakham, Midland Publishing. Diarmuid had a copy of at the Bray Fair on Sunday last. Its mainly passenger coaches but near the end a fair few wagons come into it Eoin
-
Hi Tony Ah sure you've been busy! Great layout, keep the photos coming, layout posting on the forum is a bit low at the moment and we need our fix... Eoin
-
Hi Noel The cloth is just wrapped around in the opp direction of travel, if one wants to drive in both directions an elastic band is popped on the middle of the wheel, and yes there is a bit of friction as the wheel knurl hits the track and hits the bit of chassis thats pushing it- hence the name 'friction wheel'..... Eoin
-
Hi Dave I got it from Mr Ryan- here is a link to Centreline Products;- https://www.centerline-products.com/ plus do a Google search for 'Centreline track cleaner images' and you'll find a whole lot more Eoin
-
As the DART test track was up and running, 177 was sent out in the twilight to test the Centreline Track Cleaner, a small squirt of SR24 on the cloth and away it went. The cloth got pretty dirty within 2 laps, I left it running for about 10 laps and then changed to a dry cloth I finished off with half as much cloth wrapped around the friction wheel and ran it for 10 laps and then ran a cloth over the track with the finger- some black residue showed up All in all it did a better job than my Dapol cleaner and in less time. I ran the train again this morning with a dry cloth (and a dry track) and it cleaned up beautifully, the finger-cloth test still showed up black mark but NS rails will do this anyway, the track is sparkling.... So I rate this cleaner better than the Dapol system, I also like that the Centerline unit is simple to use and can be disguised as a wagon and run in a train without being obvious Eoin