murrayec
-
Posts
2,719 -
Joined
-
Last visited
-
Days Won
70
Content Type
Profiles
Forums
Events
Gallery
Blogs
Store
Community Map
Everything posted by murrayec
-
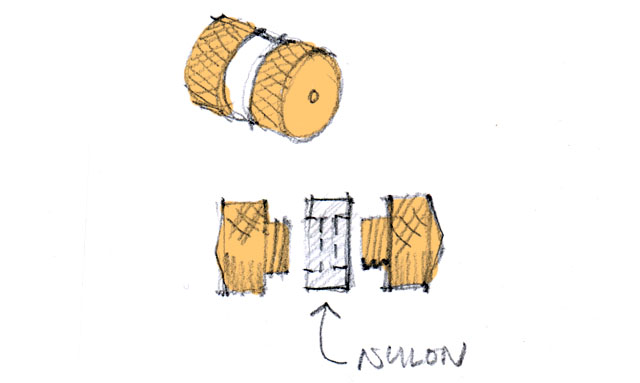
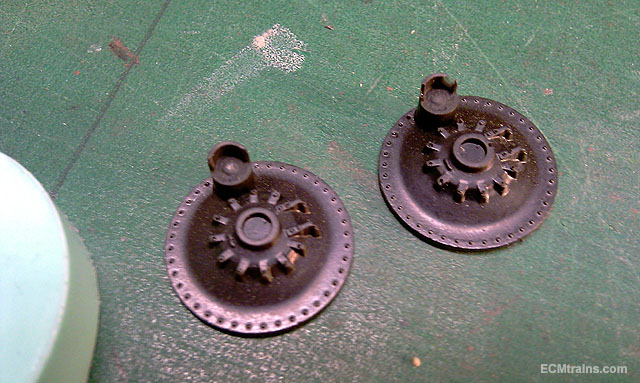
Hi Nelson Good one! Yes I had, but it is a bit more of an involved turning exercise, I thought I do the wheel as supplied first and test it, if I experience shorting problems then turn version 2.... The supplied cloth with the unit wraps 4 times around the friction wheel and as long as the cloth is renewed regularly version 2 may not be required. The cloth is cut strips of J-Cloths and I saw in Lidl today they come in multi colour packs!! Eoin

-
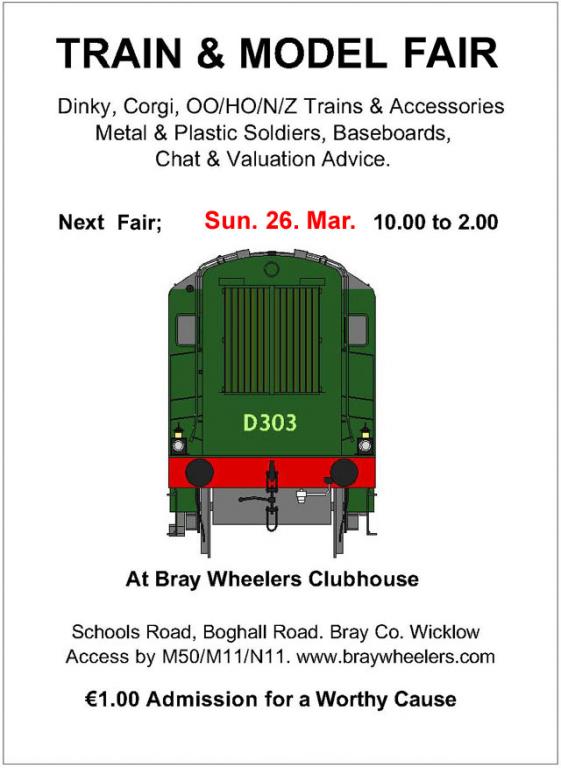
Hi All The next Fair is coming up on Sunday week March 26th....
-
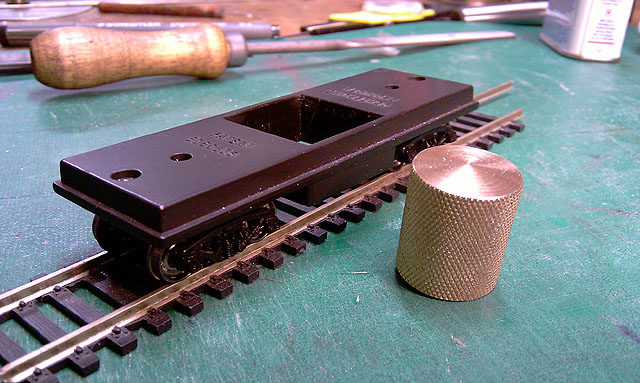
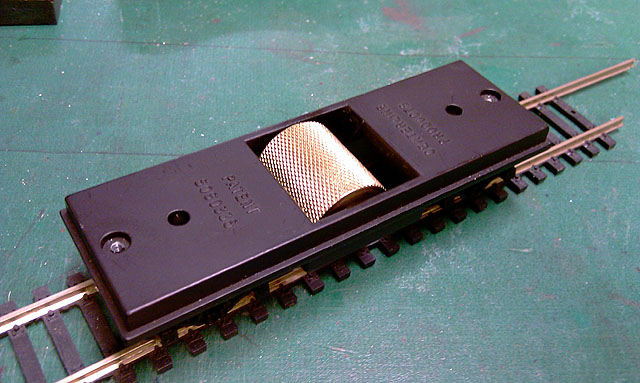
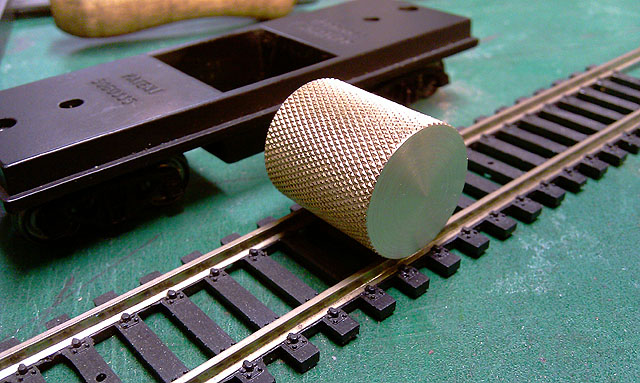
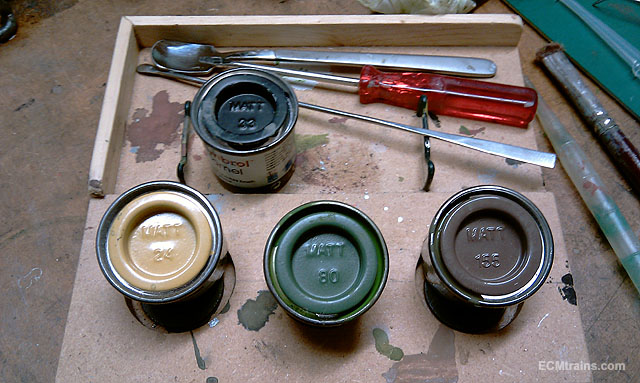
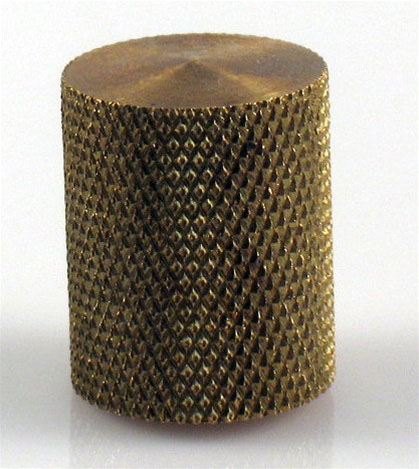
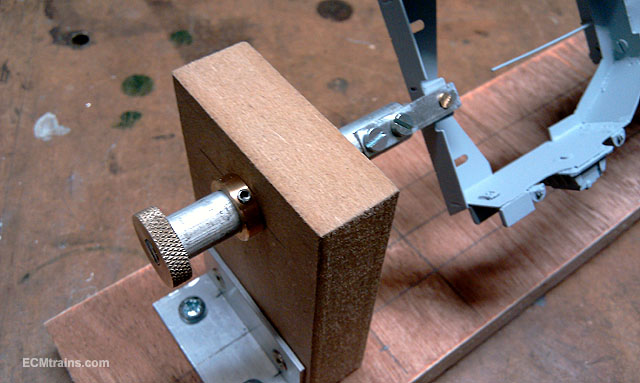
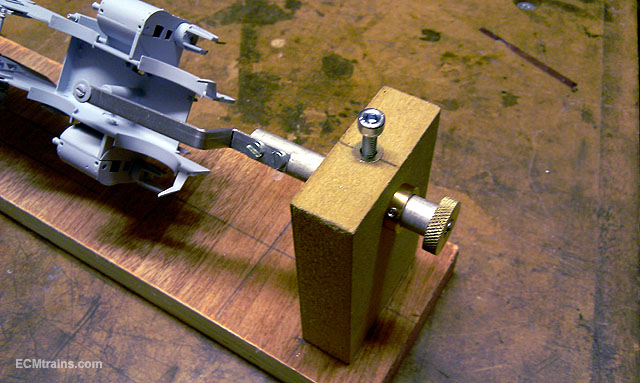
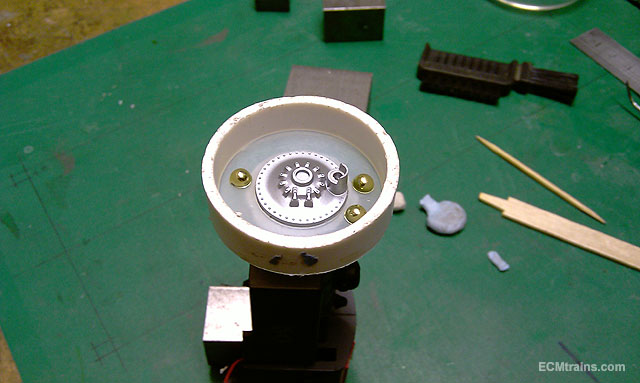
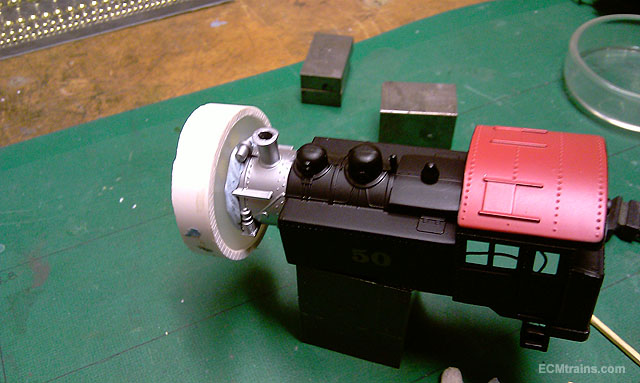
Hi I tuned a lump of brass last night, I worked out the diameter to be 19.5mm by scanning the drawing from the instructions, getting it to scale and tracing it in Autocad to create a drawing. I also worked out that there is a slight chamfer required on the ends as there was marks on the chassis showing that only a centre-point was touching the sides... When pushing the unit along that little bit of track I can feel the knurl hitting the track (the instructions warns against doing this without the cloth) I reckon this is going to work quite well, I will report back when a test is done... Eoin
-
Hi CM Thanks, hey post up some photos I'm dying to see how the gorse dried out? Eoin
-
He did but unfortunately I was out for those six days, sure look at what we got.... Eoin
-
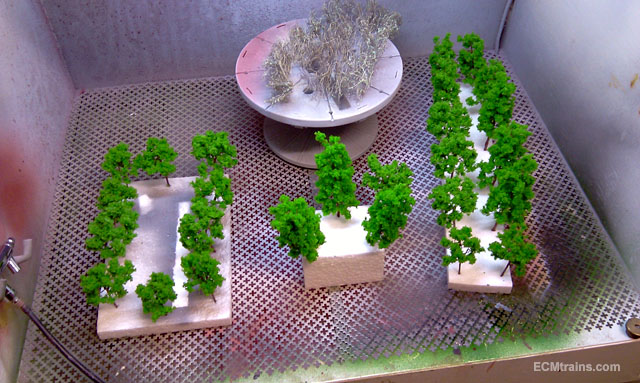
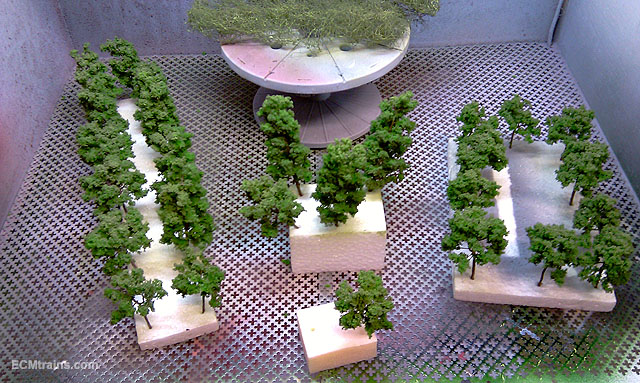
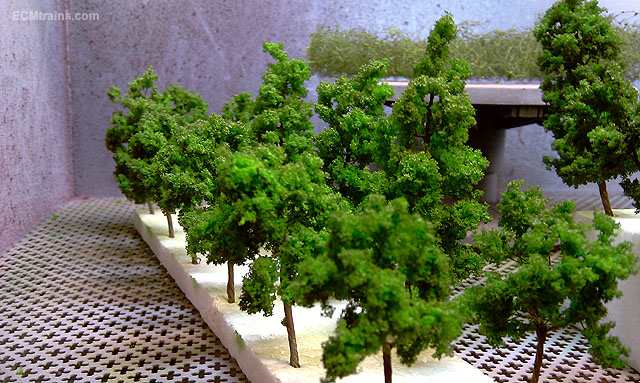
China Trees to Irish These shiny green China trees need a bit of attention for the layout So a bit of spraying was done and this is what I used Green & and a little brown mixed and sprayed overall, black added to the pot and sprayed here n there from underside to give a bit of shadow, and then yellow to give a highlight sprayed random from above... Eoin
-
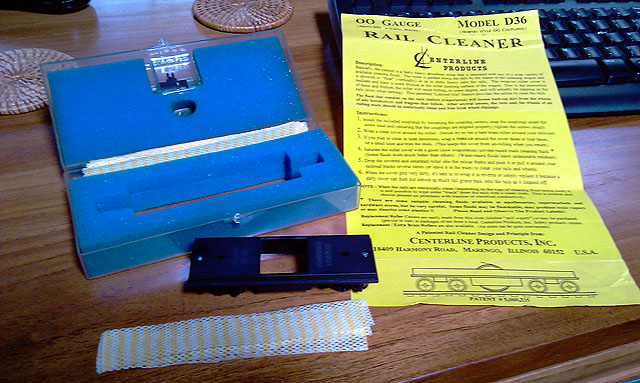
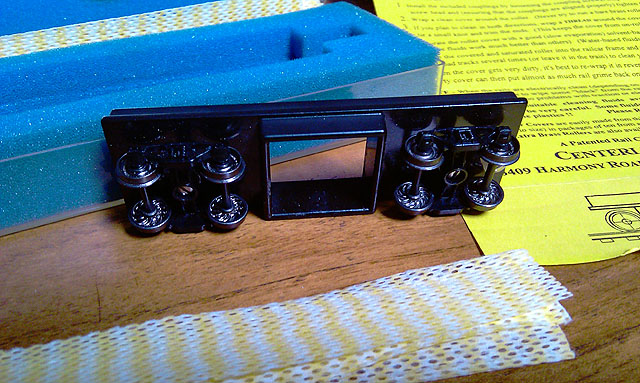
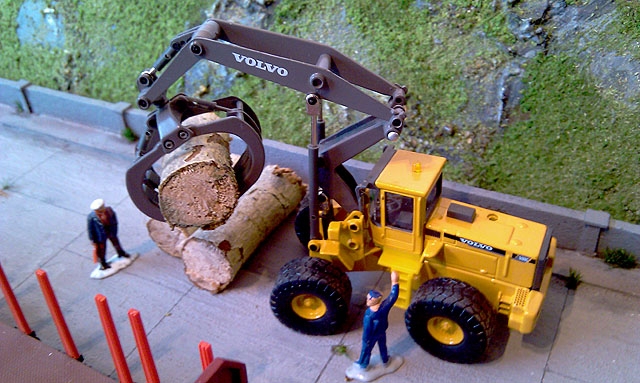
Hi This was given to me yesterday, a Centerline Products Track Cleaner D36, unfortunately it's missing the friction cleaning wheel..... but a lump of brass will be turned to produce this and all will be OK again I've seen pictures of these before and now I get to fix one and try one... Eoin
-
Hi The Ferris shot is a bit dark and hard really to tell, Ciaran's shot on his site, is in good light and it doesn't look like black;- http://eiretrains.com/Photo_Gallery/Irish%20Locomotives/121%20Class/IrishLocomotives.html#126_196106086_0001_CC_JA.jpg and there is this stuff also;- http://irishrailwaymodeller.com/showthread.php/4218-Why-flying-snail?p=63616&viewfull=1#post63616 Eoin
-
Hi This discussion on the 121 livery took place some time back in another thread but I cant find it. In researching the livery for a 121 kit I'm working on(from time to time!) I came to the conclusion that its a gold line! added to the front and rear logo/numbering and not on the side, this lead me to believe it was done for visual reasons, you can see the grey and yellow have poor contrast with each other in the above photo- especially at a distance. If you check out the 121 colour photos in the Huntress book and the Boocock book you'll see its back n front only, especially the Huntress photo of the cab end in the sunshine its not black or white, its kind of brown! Eoin
-
untilTrain & Model Fair at Bray Wheelers Clubhouse, Schools Road, off Boghall Road, from 10.00 to 2.00
-
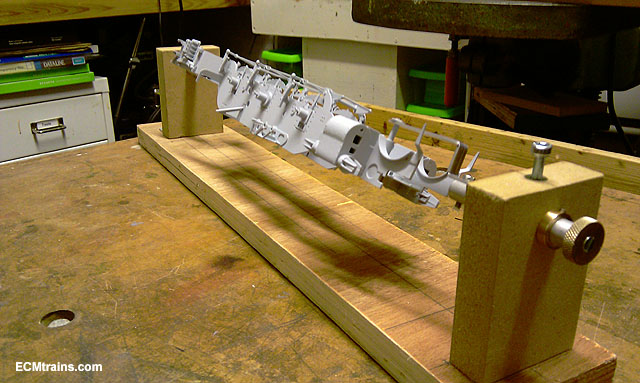
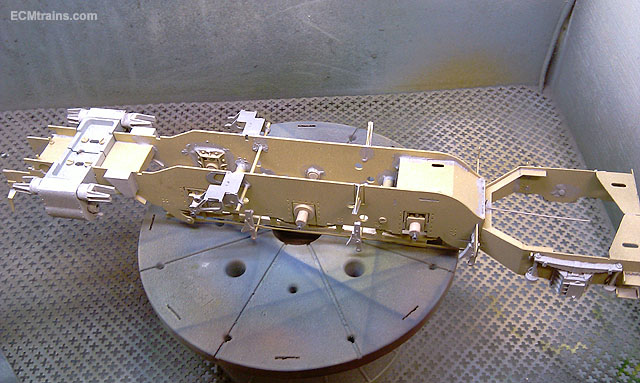
Hi Glenderg I did get paint on it tonight, its excellent, one can manipulate the chassis on the jig or move the whole lot for those hard to reach spots! Even stand it up vertically, should have made one of these ages ago... Eoin
-
Hi All Thanks for the great comments you all, I made a chassis painting jig for this project and more to come... See here for more photos and small description;- Eoin
-
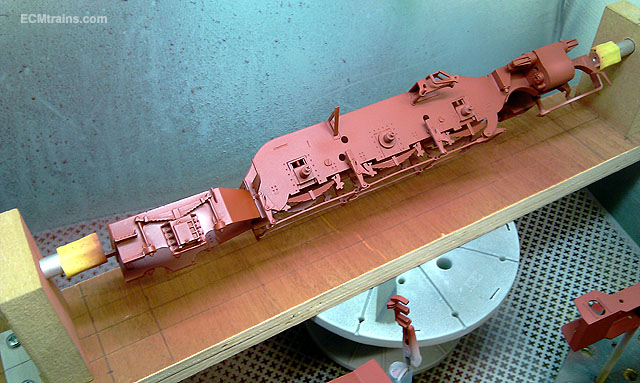
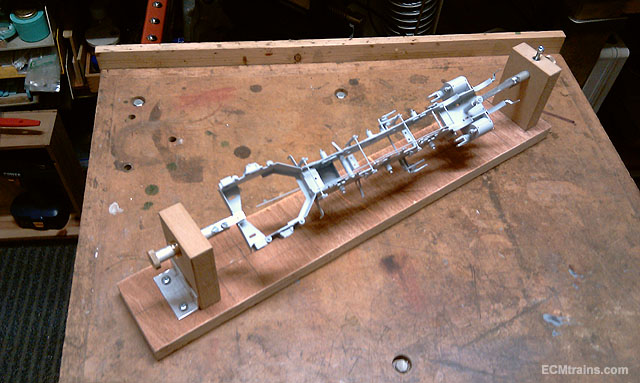
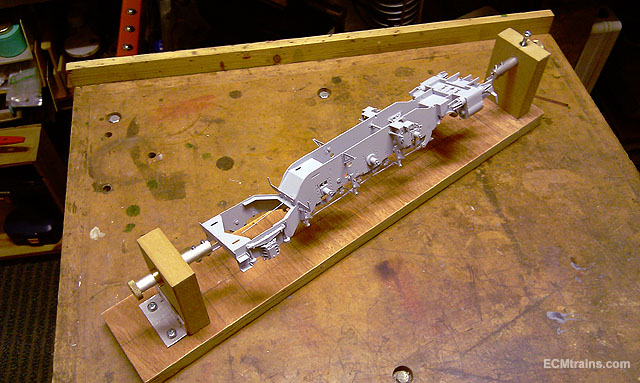
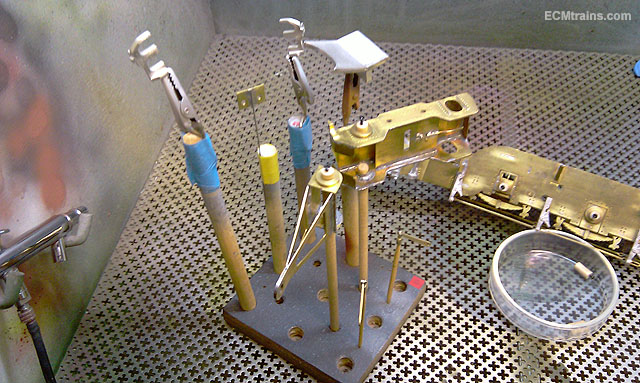
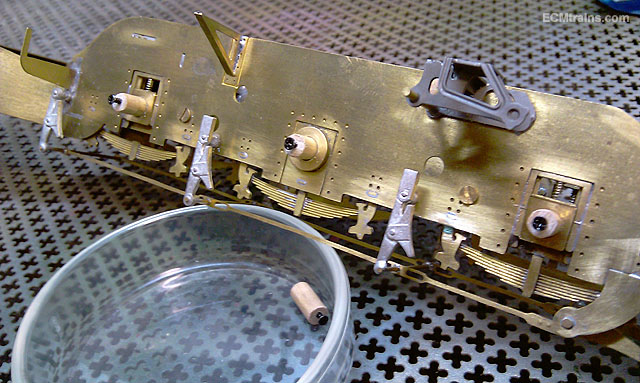
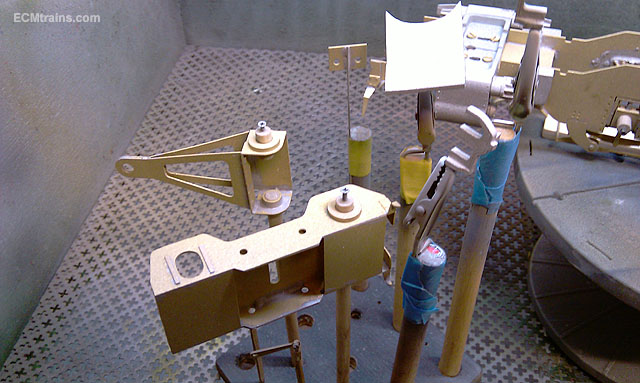
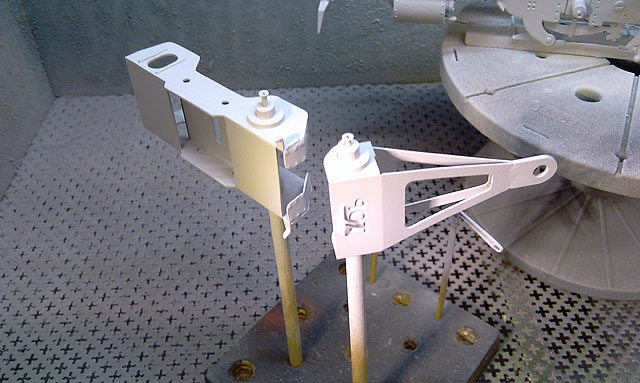
Chassis Painting Jig When painting large chassis the usual option is to paint one side, wait for it to dry, and then turn it over and paint the other. I would like to paint the whole in one go- saves time and gets a better all covering coat in the one go.... So I made this- a chassis mounting & turning jig 19mm plywood base, 19mm MDF uprights- one fixed and the other adjustable, two 10mm dia aluminium rods with threaded holes- for attaching aluminium brackets from the chassis to. The MDF is drilled to a snug fit on the rods and actually holds the chassis in any position, there is a M4 pinch bolt in a threaded insert on one of the MDF uprights if needed. The brass knurled rotating knobs and brass rod stops are not fully required to make it work, but it makes a better jig and finishes it nicely. Eoin
-
-
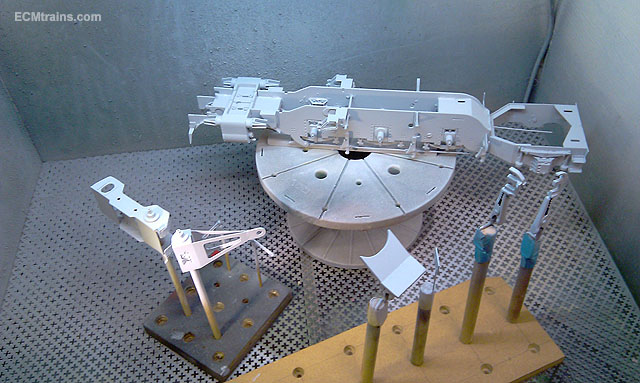
A few shots of the chassis, trucks and bits prepared for blasting and painting. Little wood dowels are fitted into the wheel bearings so that the bearing does not get sandblasted and ruin the running surface, these are also left in place during painting. All blasted, that lovely sparkly surface is the best finish for the etch paint primer. Within 10mins of blasting three light spray coats of primer given with 20mins between each and it now looks like this. Eoin
-
Hi Tony I use a head magnifier nearly all the time now, the advantage is hands free and as you move around it's with you all the time- no reaching around the place and a stand getting in the way! I recommend the best type you can afford- these are the best, ground glass n all;- http://www.vikingopticalcentres.co.uk/product/optivisor-headband-magnifier-package-offer/ or, on an economy budget the Expo type head mafnifier (plastic lenses) can be got online or in your local model shop for less than £20 Do the better one if you can and they have other cheaper options Eoin
-
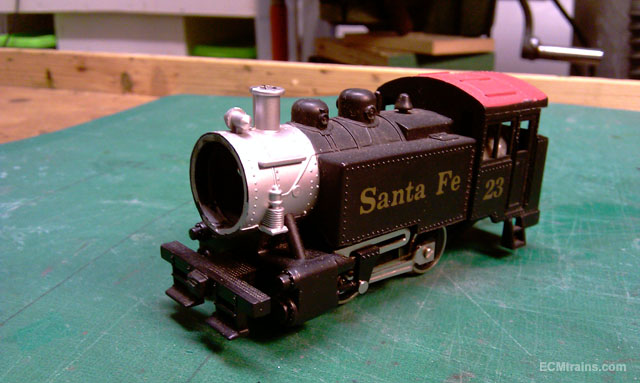
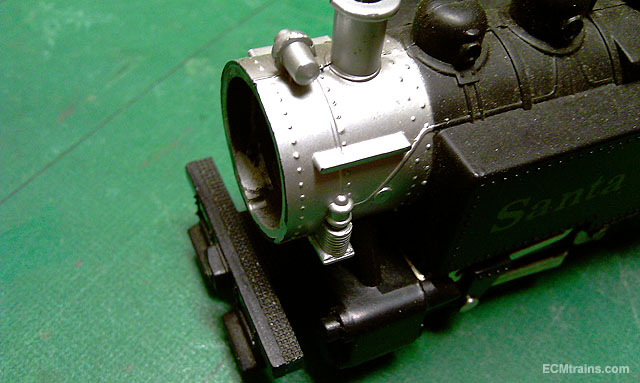
This €2.00 bargain box SanteFe tank loco came to the workshops missing its smokebox door and front hook sheared off. While contemplating what to do American Phil at the Bray Fair had the very thing to make the mould pattern- the same loco for €15.00 So off with the body and I set about making a mould shuttering around the smoke box door. I used plumbing washers n pipes to do this, as one will find these items all fit into one n another, and with a bit of sealing here n there with Stickitall and Blue-Tak I was pouring silicone rubber. The sparkly gold half spheres are there for the second side of the mould if needed- always offset the position of these so that the mould will go together only one way. Yes, they are girly things, found in Hickeys but very handy for this stuff. The moulds complete and some of the plastic cast tests. The hook mould making was not photographed! It was done with the blue moulding putty on the underside of the hook up against the buffer beam with styrene card shuttering all round and carried up well above the hook so the second side of the mould could be poured with silicone on-top of the hook. You can work it out by studying the mould. A bit of trimming is required on the hook and the smokebox door came out grand the third time, you can see air got caught in the lamp shade in the right hand door- this is removed the second time around with a pin swished around in the mould before the plastic set. This project is on the high shelf at the moment, I will post a picture when complete... Eoin Edit;- I forgot to say- I filled the light hole in the smokebox door with plasticine as I did not want the silicone to go down the side of the bulb in the lamp, this could tear the silicone when releasing the mould off the pattern!! This will be drilled out for the bulb.
-
Lovely stuff Kirley great looking train Eoin
-
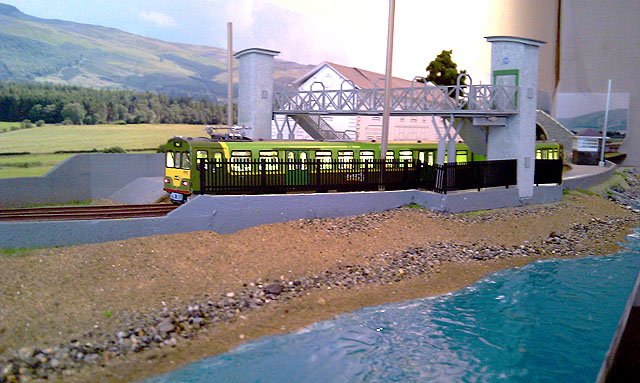
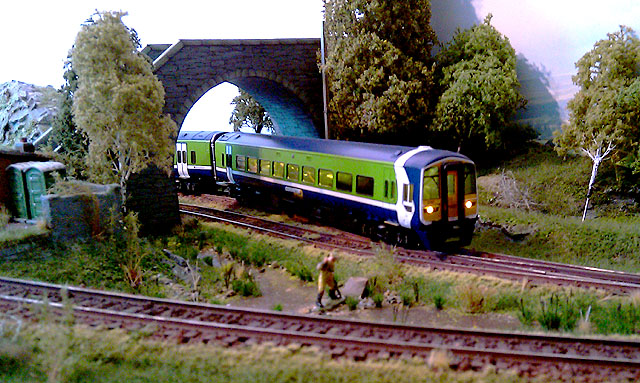
Hi All Thanks for the comments and looking in Today we set up the catenary masts which arrived on site last week, there was a trial run of the switch cabin, and some palisade fencing was erected on the South-Eastern boundary of the station to stop the riff-raff bunking in from the beach.... The support spars for the catenary wires are in manufacture at the moment, but we set up the posts to work out location and heights the masts need to be trimmed to. Oh! there's the 01.00 o'clock Commuter up from Wicklow! better go and meet me Mam for lunch....... Eoin & CM
-
Hi Guys That looks very like the material I use for Dart windows n other stuff- its vacuum forming plastic, perfect for this kind of thing where heat is involved thats what its designed for. Name = 'VIVAK' by Bayer and I get it from http://www.nairnshire-modelling-supplies.co.uk/ Vacuum forming is good fun.... Eoin
-
Noel Kilcroney bridge should be renamed 'Strawfall Bridge' because thats exactly what happens- heading north after the bridge the road side shrubbery is regularly covered with straw!! Eoin
-
If one looks at the bridges on the N11/M11 from Kilmacanogue to Loughlinstown an eagle eye will tell you 3 of the bridges are to low, worst is Kilcroney Bridge outside Bray- I actually saw a log truck with its grabber stretched over its load scrape under at about 60mph, the tyres and suspension just allowed enough leeway to avert a nasty disaster. Large mobile cranes cannot go under this bridge they have to drive up the Bray off ramp and back down the other side, when they are doing this they have to fill the depressed roundabout with sand so the grading is correct to get over the hump. The two north Bray bridges that span over the road have had their pre-cast cladding fascias removed so that trucks do not hit them!!
-

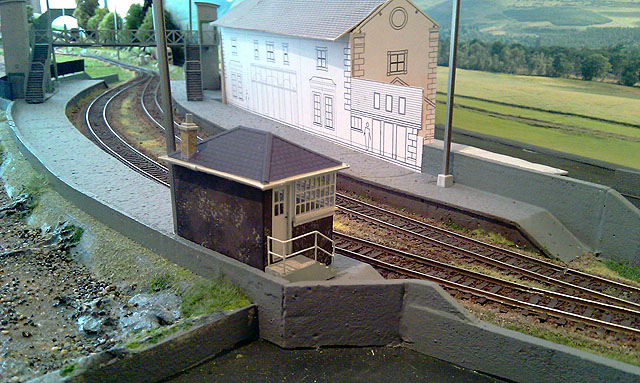
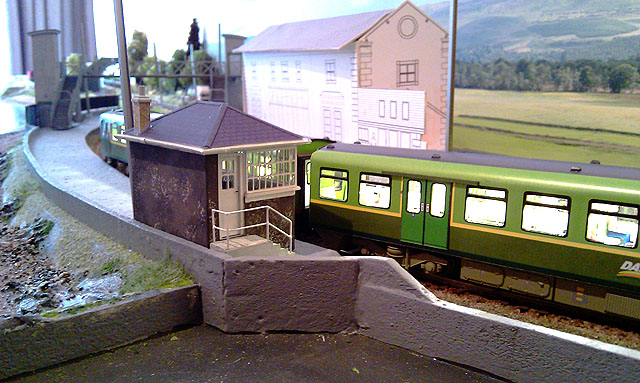
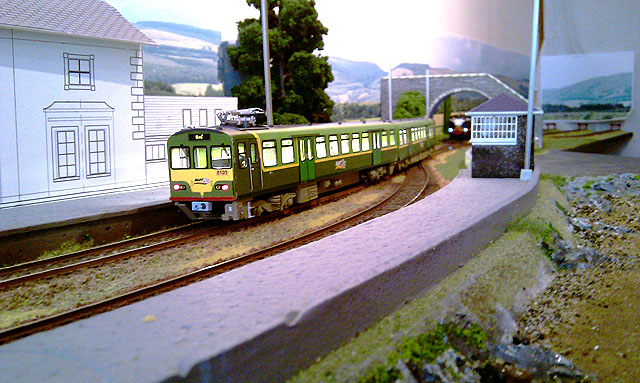
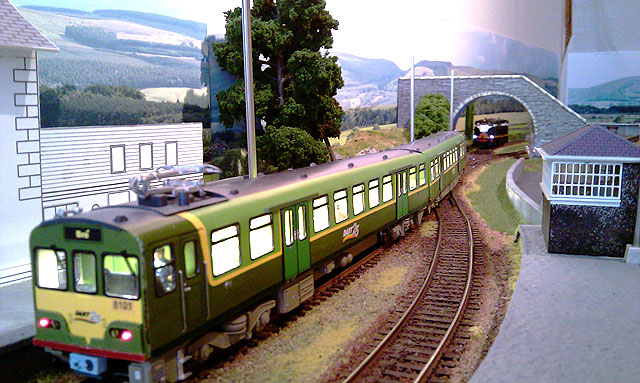
Greystones Switch Cabin - Restored
murrayec replied to murrayec's topic in Buildings and kits of buildings
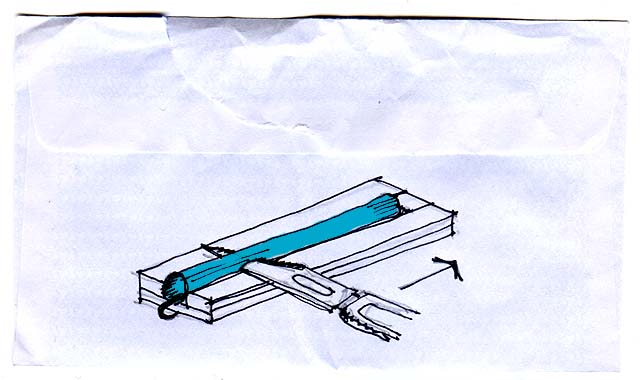
I drwn it on the bak of this velop... Put a hair clip in the free end which helps Yes the red 3M stuff is two strong for this kind of stuff, use the blue 3M stuff its less strong, but there is nothing like a new carrier sheet Eoin
-
Greystones Switch Cabin - Restored
murrayec replied to murrayec's topic in Buildings and kits of buildings
Hi Glenderg Thanks The windows are the Never Tear I use for the Dart body it's less than .2mm, but it's actually the material is getting pulled on the Cameo sticky carrier sheet by the blade, the frames are .4mm and when the second line is cut on that bit of frame it comes free and the whole thing needs constant pushing back down by me while the machine is cutting. I have change the settings as you suggest on another test cut but still experiencing the coming unstuck buzz! The bud shanks are cut with scalpel in a jig pocket half the depth of the shank, sliding the scalpel laterally supported by the jig on both sides of the shank pocket. The shank is held by an end-stop and all made in styrene. It takes a bit of practice but buds are cheep- drop them in white spirit for a min or two and the cotton falls off. Cant find it to photo for you!! Eoin Edit;- Oh and the shank is slightly over scale -
Excellent Kirley, great idea to know Eoin