murrayec
-
Posts
2,730 -
Joined
-
Last visited
-
Days Won
70
Content Type
Profiles
Forums
Events
Gallery
Blogs
Store
Community Map
Everything posted by murrayec
-
isbn 978 1 906578 26 8

-
Hey ....he could be stooped over a live steam loco model doing repairs, with lads in caps admiring the link rods! Eoin
-
Hi David Looking great, you carved the brickwork! thats like laying the bricks to build it... I vote for a motorcycle repair shop, you know the chap with a scruffy lathe and other oily rusty machines lying around, will fix anything including farm machinery!.. Wills do a kit for workshops its got everything in it, and I saw in the Guild Gazette some time back chaps doing brass etched workshop tools Eoin
-
Borithe I do, or should I say I did a set of DART hats- mini DARTs on a baseball caps for chaps going to the Dart Championships at the Point Depo a few years ago.... Eoin
-
jhb Are there any photos you know of showing the brackets? Eoin
-
Hi David Their just standard 12.6mm Hornby replacement coach wheels, having problems finding better wheels in that size! These wheels are used in the spud also... Eoin
-
Hi jhb I have a Worsley 'First Second Centre Lav' kit, it looks the business, I'll be making it up very soon as my own chassis will be made to take this body as I work things out.... The Brassmasters 6 wheel chassis look interesting Eoin
-
Hi Branchlines are here;- http://branchlines.blogspot.ie/ Its an old blog site but it has info and contact information jhb I'm looking at doing a chassis for 6 wheelers for myself but can do them for others- it's slightly on the bench but hopefully will have something to show!! Eoin
-
Hi DC I'm pretty close to all being sorted, I'm tipping away at it while I finish the other things! Then I have six orders to do- these kits have been on the high shelf for about 2 years now!! I also need to work out my pricing Say about 2 months, though I have said that before Eoin
-
Noel That's a case of 'Now' and 'Then' If a new build was to be designed anything is possible, all dependant on the group doing it- lets go authentic! or lets go modern and efficient! Eoin
-
Hi Check out L.D.Porta, he transformed the ould steam engine into a high efficiency, multi fuel burning system in Argentina back in the late 40's. His efforts were stunning but very little accepted by British loco engineers- they never even heard of him. Some of his small locos still run today.... Flash steam boilers are the one, though its not the same as shovelling coal or burning black oil, but very efficient, generating more steam than required to run a loco. These systems are very small would fit in any loco boiler and made of modern stuff. Currently used in modern heating systems for large buildings. They are also portable. On the preservation side of things Alan J Haigh loc engineer and others have designed high efficiency furnace & boiler systems for some of the preserved locos in the UK, one loco they did in North Wales runs it's trip on one bucket of coal where before its modern restoration it required several for the same trip. Eoin
-
Hi Thanks again for the comments Here is the video of the second bogie without the spring under test, the full chassis and model body on;- Eoin
-
Hi All Thanks for great comments Yes Kirley, I'm really having fun- I look forward to working on this when I get the time. Painting the patterns tomorrow night and hopefully moulding will start after Eoin
-
Hi Mike 84C Lovely model, very crisp detail, well done I like the coach to Eoin
-
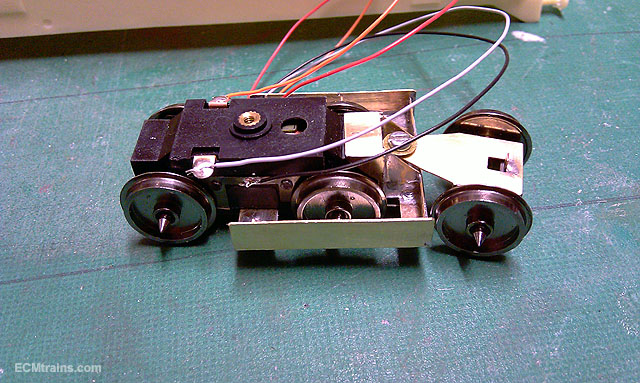
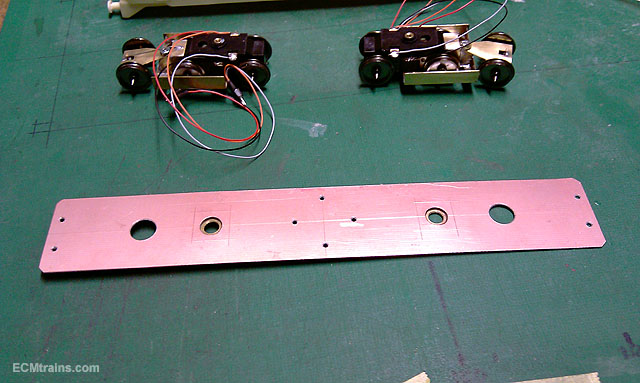
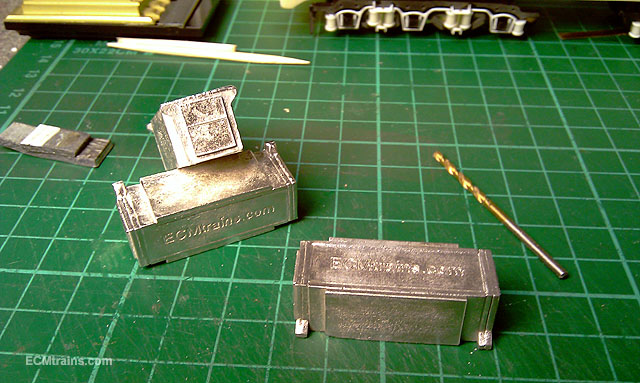
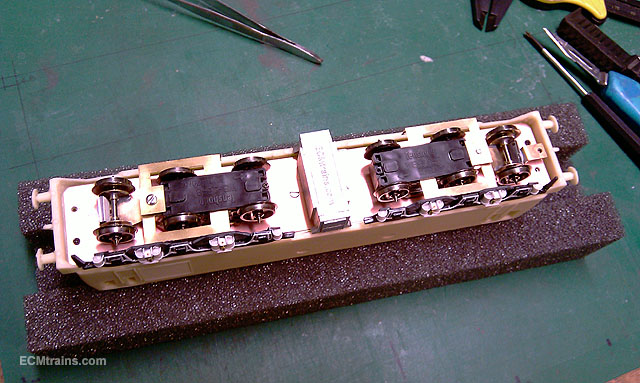
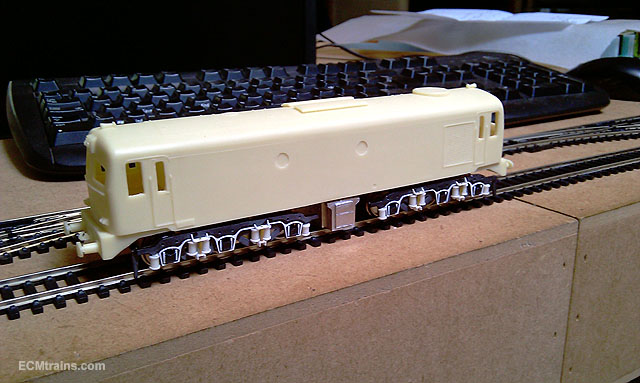
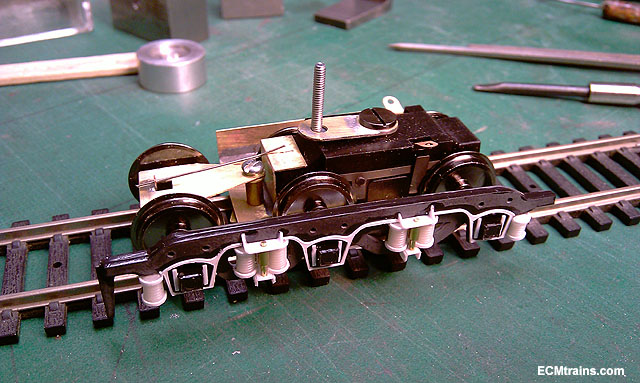
Hi All I got the second bogie made up and ran some tests on it, this one does not have the wire spring for the pony truck and a small bit of lead tucked in under the frame- surprisingly it runs better without the spring! So the chassis plate was stuck together, the fixing brackets to hold it on to body were installed, an internal metal weight bolted down to the chassis plate. I used one of my Class C white metal battery boxes to add weight and detail- the A one is not made yet! and I ran the chassis without the body- it ran brilliantly. Now that I have the whole loco test assembled the bogie side patterns could get their final test fitting. All works fine and no need for adjustments to the patterns. They are now off to the paint shop to finish for making the moulds... Eoin
-
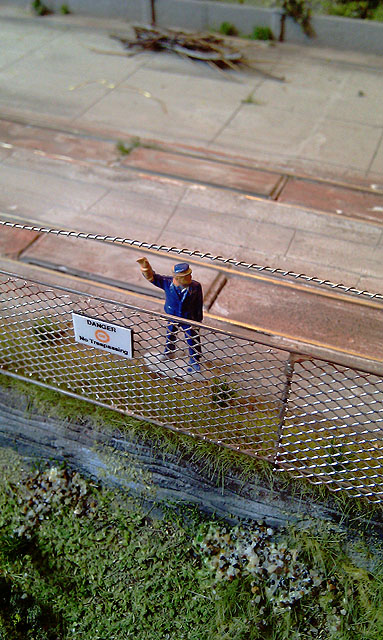
Security notices and barbed wire being installed today.... ....Expect the Witches Knickers pretty shortly Eoin & CM
-
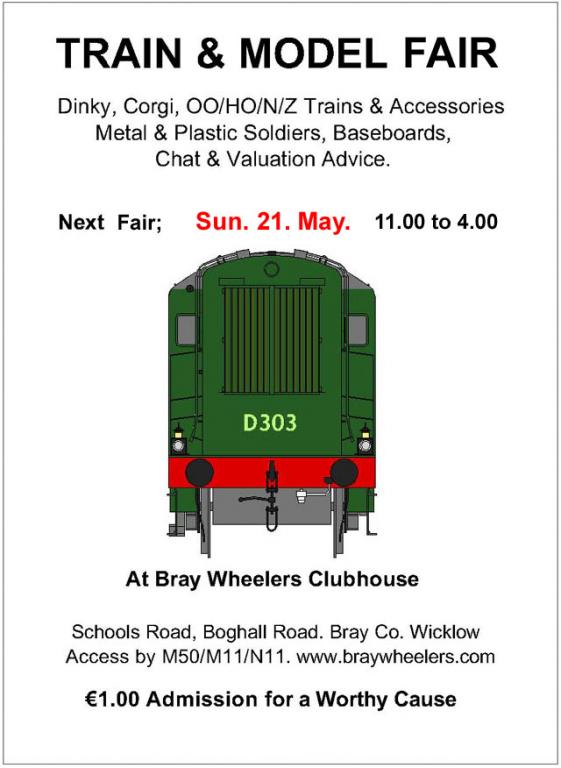
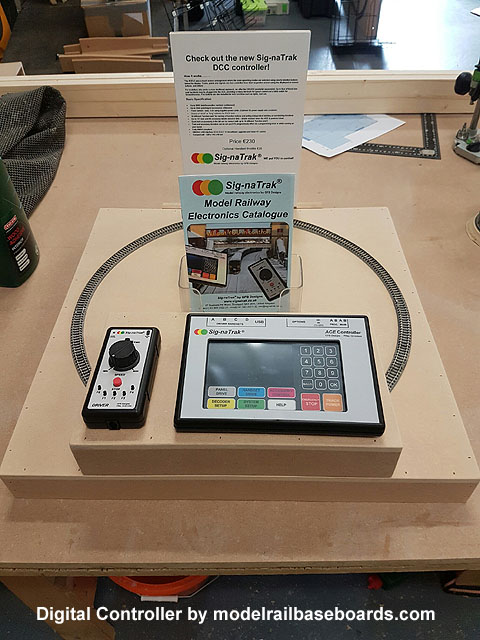
Please note we have new opening times 11.00 till 4.00 Some items that will be at the Fair you just don't want to miss...
-
Hi RichL Yes it will work with 21mm gauge wheelsets if that's what you mean, a little bit of filing for wheel clearance on the frame sides is all thats needed Eoin
-
Hi popeye Yes I have a design for using the sides to hold the third axle, but I prefer to keep the axles and motor as one stand alone unit and bogies as independent units. After my testing of this design you never know I may revert.... Eoin
-
Thanks Noel Its 4 wheel pickup- the spud motor, but there's 2 motors in the chassis so overall the chassis will be 8 wheel pickup Eoin
-
Thanks all for the comments Here is a video taken this evening of the first bogie beefed up and under test, all went well except it trips up on the insulated frog points as its not carrying any weight. The second bogie is nearly done so I can then attach them to the chassis plate with weight on and test again... It does work rather well at speed, I'm going test putting some weight in the truck also Eoin
-
Hi We did a refurb job in Ship Street for the OPW many moons ago, my boss decided to do the stairs the same way! The ladies refused to use the stairs until a carpet was installed- Architectural No No.... Eoin
-
Oh no its not....
-
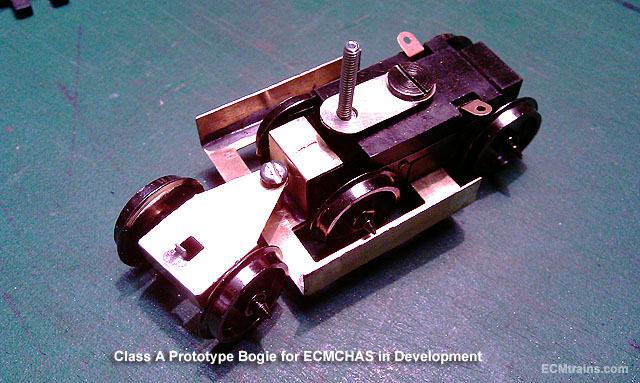
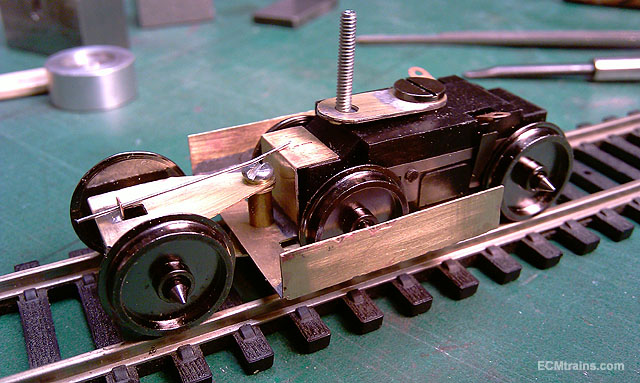
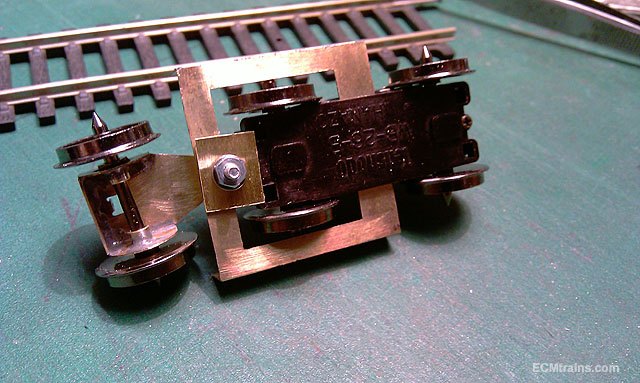
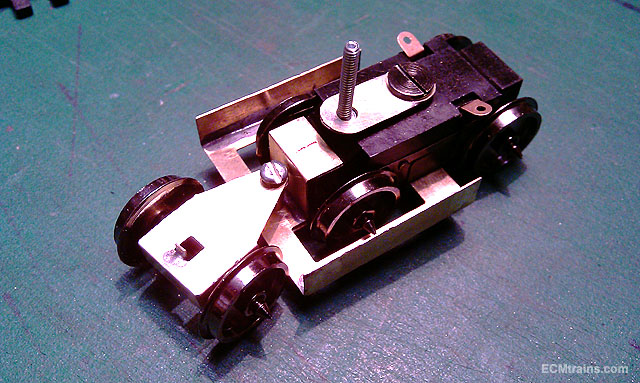
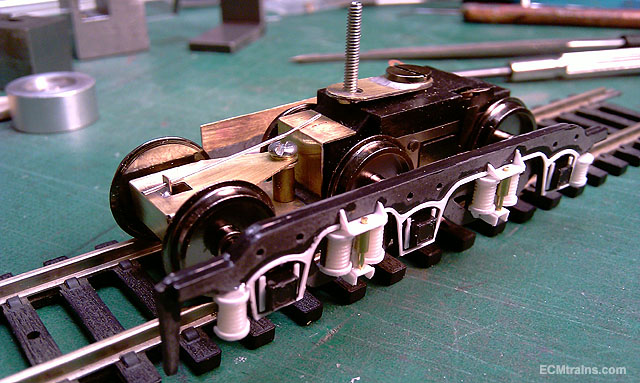
Hi Test assembly was done tonight, all went OK but those gussets mentioned earlier are required, could not face switching on the iron- been soldering DART stuff all day! The front truck pivots on an axle bearing with a bolt down through a brass sleeve to hold the bottom clamping plate, the bolt will be the other way around on final assembly. A NS wire spring will push down on the truck and spring it centrally. This shows the bottom clamping plate which will have a joggle in it to keep it centred on the edge of the Spud. Articulation! And some shots with the bogie side pattern blue-tacked on Cant really run it until its beefed up Eoin
-
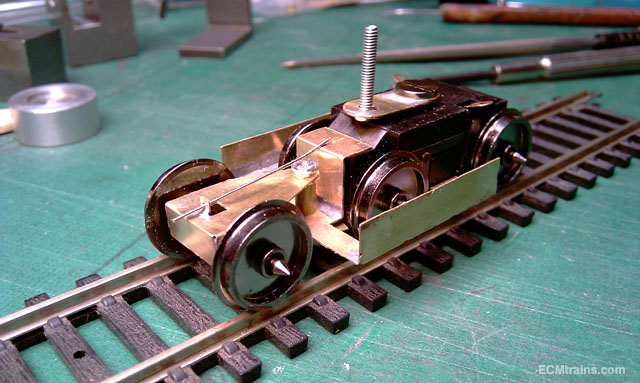
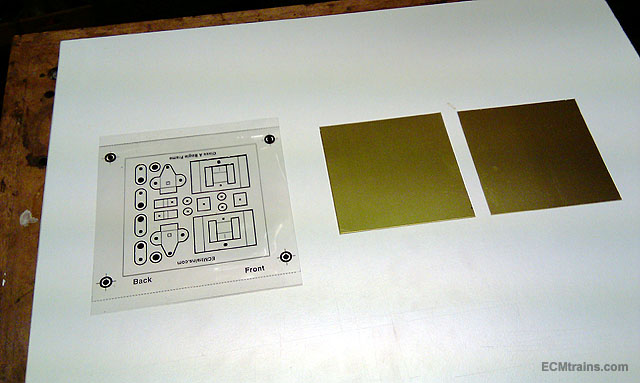
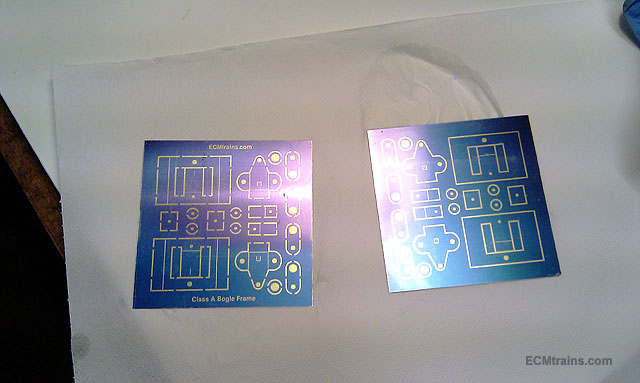
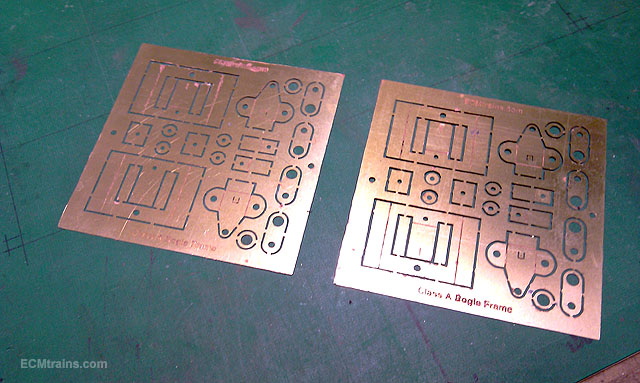
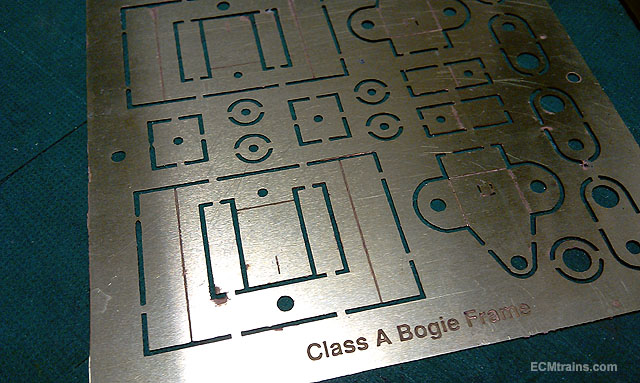
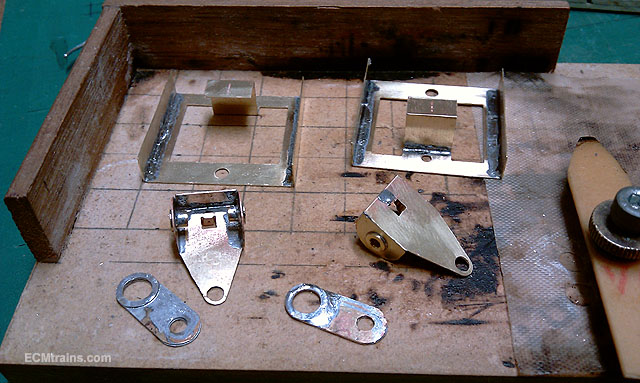
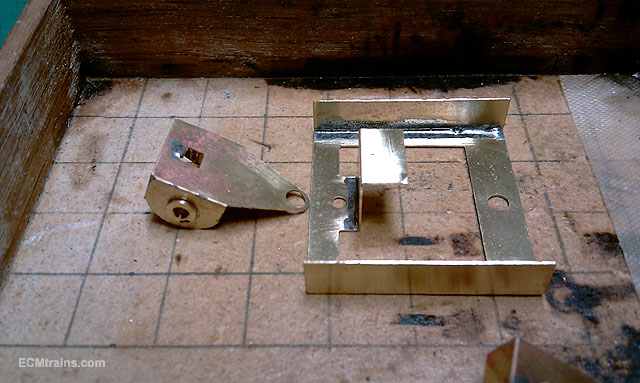
Test etching of the bogie frames and third axle trucks was done today;- Two brass .28mm sheets were prepared and artwork laser printed onto trannies, this caused a few irritations as the cheepo trannie film I have distorts with the heat of the printer, I got over this by printing each side artwork on separate sheets- seems to be less distortion in the middle of the sheet. This is the brass with Puretch processed on, UV'd and developed- worked out pretty well. Puretch is a photoresist that comes in sheet form sandwiched between sheets of mylar, peel one side off and squeegee the exposed side onto the brass with distilled water- in the dark room of course. After UV exposure the second sheet is removed and then pop it in the developer solution. Etching then took about 1 hour in 'Edinburgh Etch' - ferric chloride with a dash of citric acid, I found this idea online to enhance the ferric chloride action and make the ferric last longer. It cuts through fairly OK, a bit of a raggedy line but nothing a file cant clean up, the cusp has to be removed anyway. All filed and cleaned up ready for soldering. All soldered up and ready to pop in a pickle for the night. Some problems have come clear on assembly- might go for thicker brass sheet next time, I will add some gussets to this test to make the assembly more rigid! You can sort of see the lay of the land in the second photo- the spud sits in the frame which is clamped on through the spud, the clamp will be the pivot support and fixing for the truck out front! Looking forward to popping the spud in and giving it a wherrr.... Eoin