murrayec
-
Posts
2,775 -
Joined
-
Last visited
-
Days Won
70
Content Type
Profiles
Forums
Events
Gallery
Blogs
Everything posted by murrayec
-
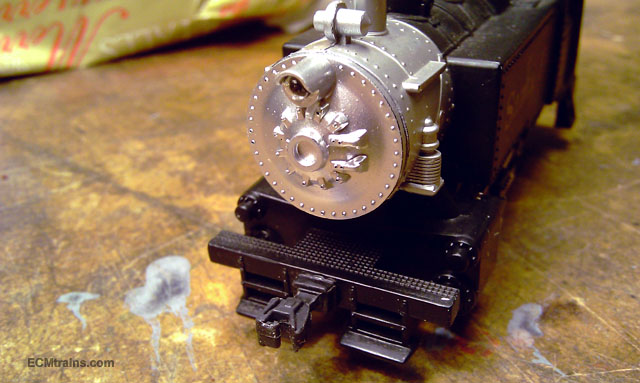
Hi Here is a few photos of the finished loco with its new smoke box door n hook, which I forgot to post up at the time it was finished Eoin

-
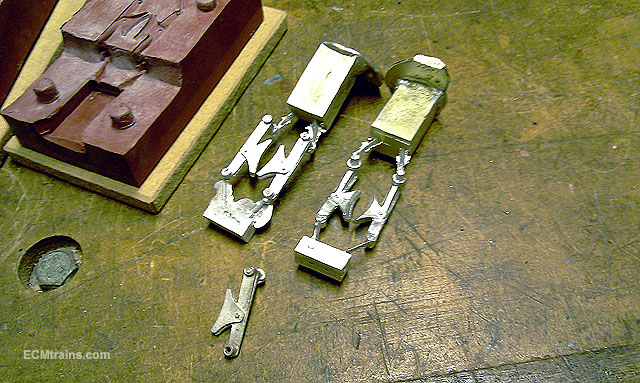
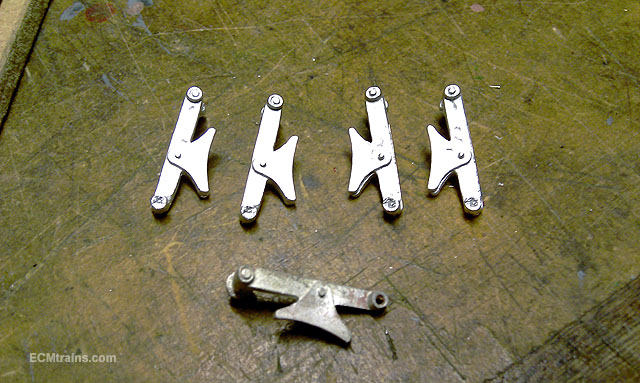
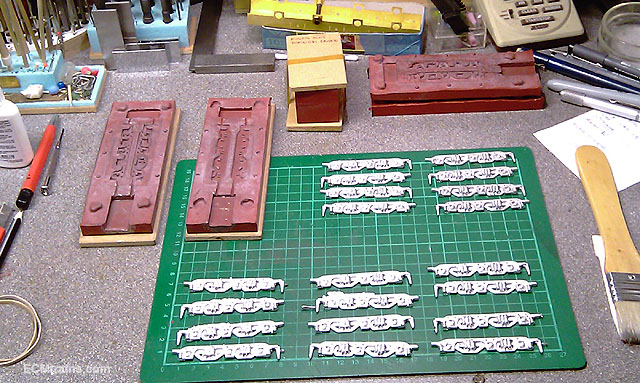
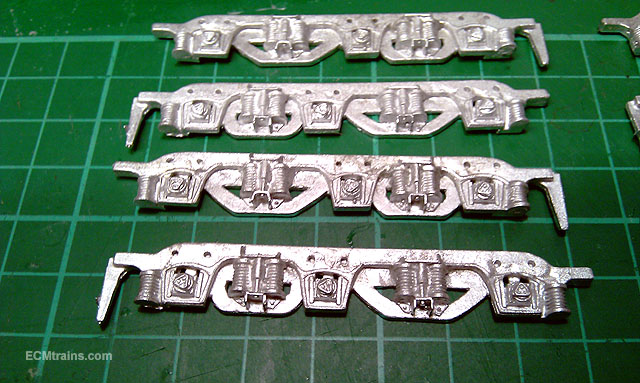
Hi While moulding the Class A bogie sides I made a mould to replace the damaged break shoes, here is a few shots..... This is a photo of the four castings and one of the original parts the mould was made from. Much easier than the A stuff cause its nice thick parts and the metal flows through the mould- even when the mould is cold! Eoin
-
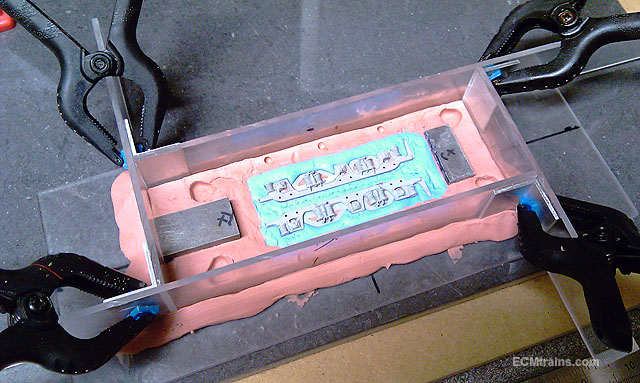
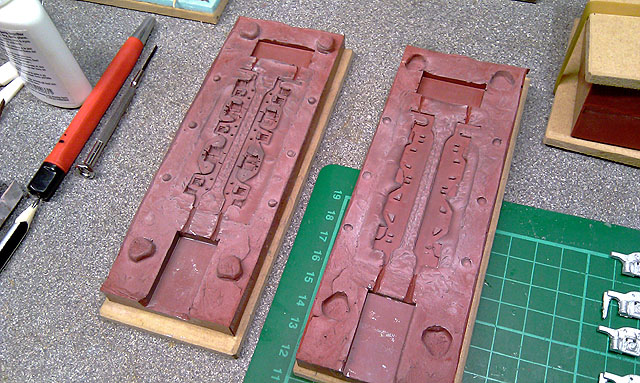
Hi All After a week of mould making and a bit of a compromise on pattern detail the Class A Bogie Sides started to appear, I'm still experiencing venting and chilling problems, but came up with a technique that gave 80% success- some of the detail is to fine for this kind of moulding without a centrifuge... Eoin
-
-
Hi Tony Yes, you have the sequence right, the polythene sheet goes on the inner walls covering the insulation, then the ply goes back on. It does not have to be heavy gauge, most suppliers have a light sheet for vapour barriers. Most important is to ensure the sheet is not damaged and has good overlap between the ceiling and wall sheets. Fixing the ply on can damage the barrier with the fixings so a bead of TEK7 along the studs on top of the polythene staples before offering up the ply will seal the holes of the fixings. Put as much insulation in the roof as you can, more is best Take a look at these images, which may help;- https://www.google.ie/search?q=vapour+barriers&client=firefox-b&dcr=0&source=lnms&tbm=isch&sa=X&ved=0ahUKEwiRuay8qdrWAhWHtBoKHXjSAusQ_AUICigB&biw=1280&bih=892 Eoin
-
oooooh Tony You got to put insulation in the roof! or you will never be able to keep the temperature up- your poor models and layout would suffer, not to mention you in the depths of winter, the roof is 70% of the area that you loose heat thru..... The reason the shed guys put that sheet under the tin roof is to drain away the condensation that forms on the underside of the tin and drips down! It's actually a draining sheet, if you look closely the holes are perforated from inside out which allows the drips to slide away to the sides and not drip on top of you.... Humidity is the bitch! an non insulated shed is about 10% less humid than outside, moisture comes up through the structure and condenses on anything cold like a tin roof and then drips Eoin
-
Hi Tony Did you install the insulation in the roof after the shed was erected? & is the roof insulation below that breathable barrier? If so it's not a vapour barrier and you should install one below the insulation. Study the drawing above Eoin
-
-
Hi Tony Yes, remove the ceiling ply and install the barrier on the inside of the insulation only, it is for stopping condensation from the inside getting into the insulation- damp insulation is no insulation and if you keep breathing it wont dry out! Do at least put it into the roof, walls less important but best to do it... Eoin
-
Hi Tony A vapour barrier and ample ventilation is a must, the barrier is to protect the insulation from condensation from the inside, as Broithe says- breathing and heaters, the barrier is placed inside the insulation to stop condensation going up through the insulation, condensing on the inside of the outer skin and then dripping onto the insulation. Roof and walls should have vapour barriers. Air gaps between the insulation and the structure is a good idea also.... Cross ventilation should be installed in the walls so that air can circulate through, ideally at each end of the structure and ample size. Eoin
-
http://irishrailwaymodeller.com/showthread.php/4928-How-to-add-photos-and-images-to-your-posts-and-threads?p=75399&viewfull=1#post75399
-
I had a Fiat back in the 70's that was 'Guaranteed Irish' all the way from Grand Canal Street! does that count?.... Eoin
-

South Dublin MRC Exhibition Oct 28th - 30th Blackrock College
murrayec replied to Warbonnet's topic in What's On?
Hi Paddy Plenty of parking right on front of the building in the school car park Eoin -
South Dublin MRC Exhibition Oct 28th - 30th Blackrock College
murrayec replied to Warbonnet's topic in What's On?
Hi Paul Really looking forward to the show, and seeing the DARTs on the Dun Laoghaire layout.... Eoin -
Model Railway Exhibition & Collectors Fair, Enniskillen
murrayec replied to GNRi1959's topic in What's On?
Here is a sample;- Here is template-01;- Here is template-02, it has a second field if you want to use your name and user name;- Save the template, add your info in a paint program or print it out and write in your name, then mount it on some hard card and tape on a safety pin at rear and ready to go Nice photo of the show Gerry, great to see Eoin
-
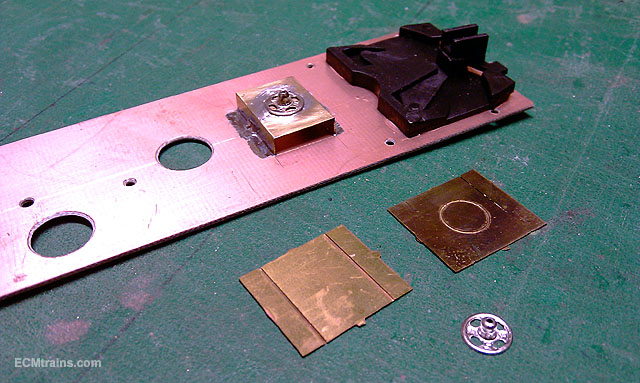
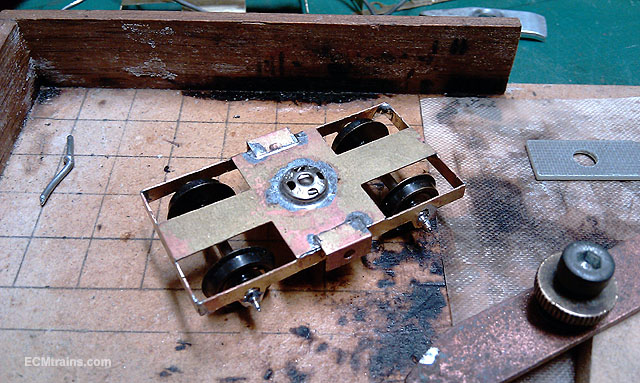
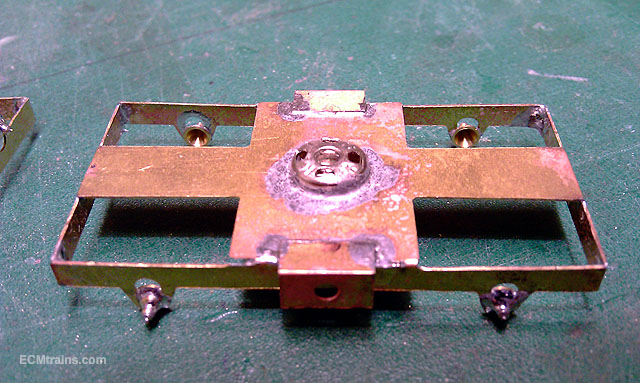
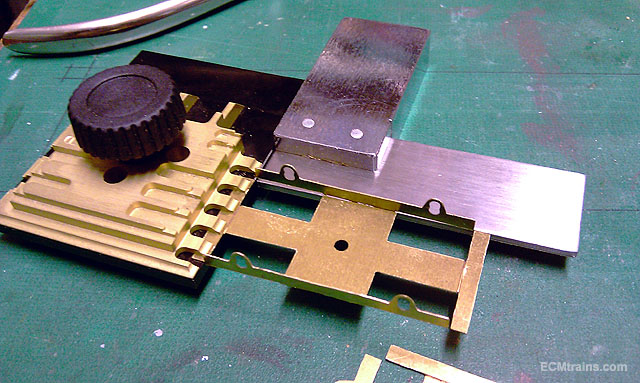
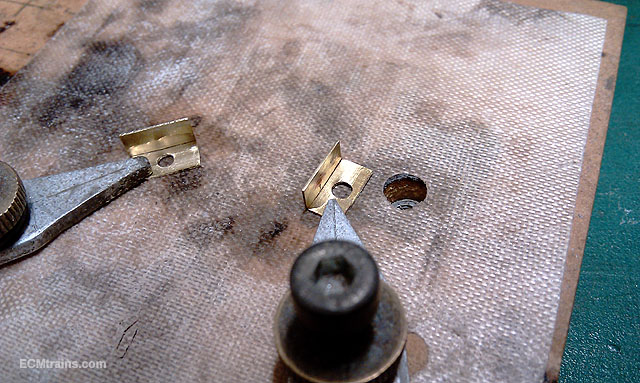
.....and the bit missing from the sequence above;- The connection plate to the chassis, again etched brass folded up and soldered as above, the half etched circle on the plate holds the button on centre while clamped and soldered- then the assembly is clamped and soldered to the chassis Eoin
-
....and a
-
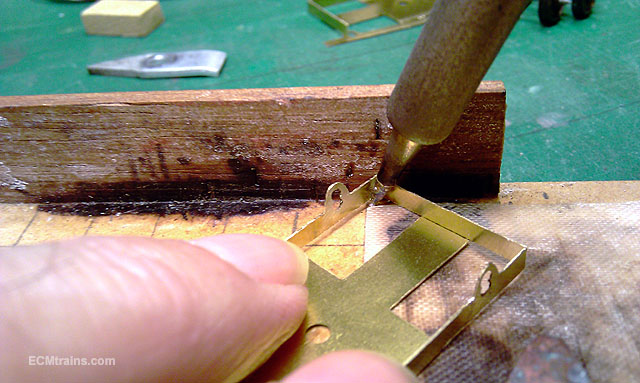
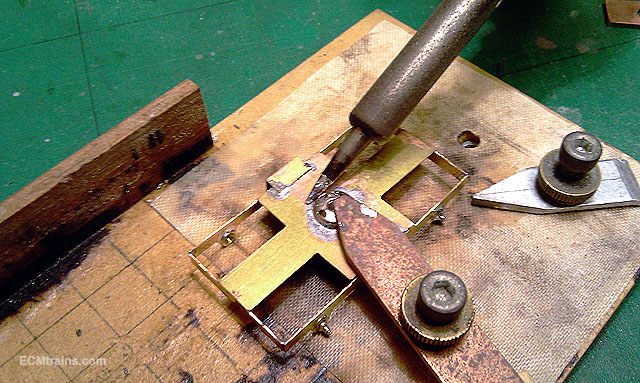
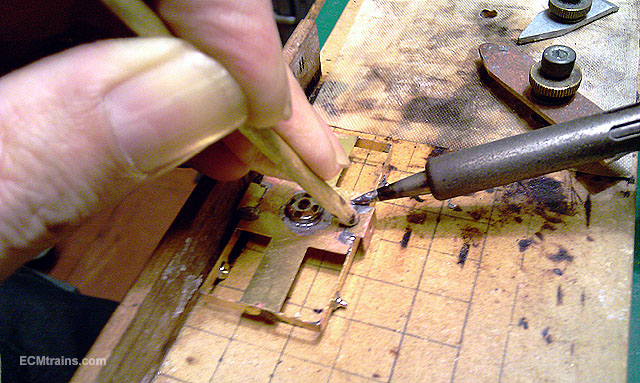
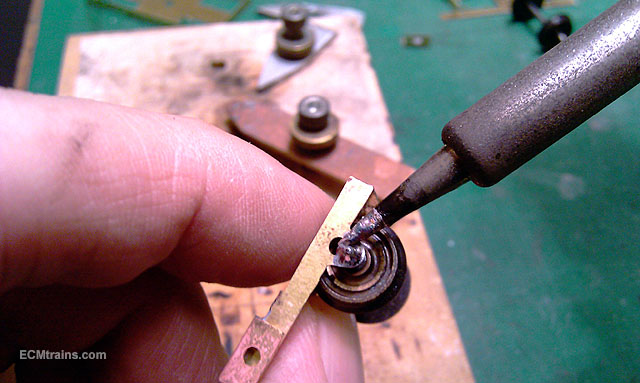
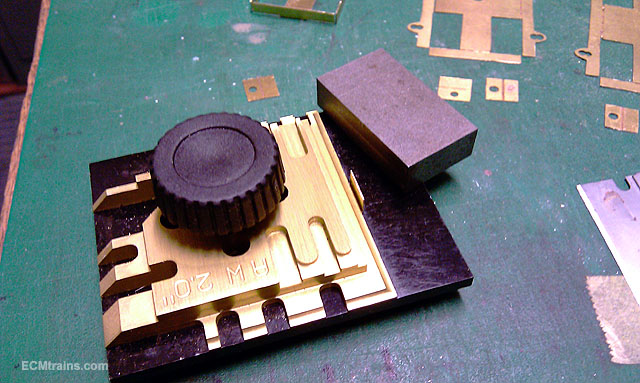
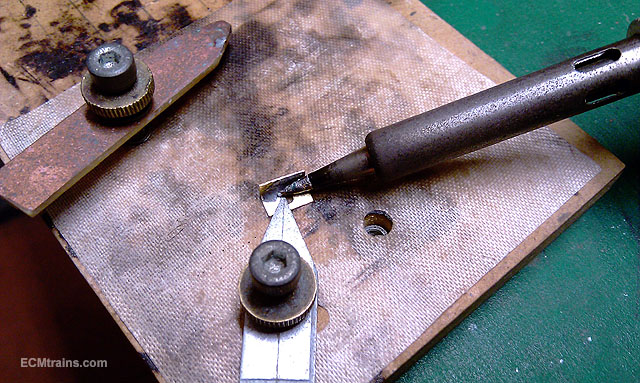
Soldering the corners requires a bit of pressure to keep the brass in place, this is where the board with upstand comes into play, the angle of attack with the iron is still low in relation to the metal- flux the join, a good blob of solder on the iron, stick it in, hiss, flow, hold it there for a few secs ensuring the iron is against both sides of the corner.This join can be problematic, if so I reflux, add a small blob of solder to the iron and go at it again I use press buttons to attach the bogies to the chassis, so this goes on next. The hole may need opening out and I use a broach to do that until the button sits down level on the top of the bogie frame, then it's clamped down and away with the soldering Again plenty of flux, a low angle with the iron touching the brass and the side of the button, hiss, flow, move the tip around the button and the molten solder will follow the heat, I add a bit more solder in this process to the iron tip without removing the iron from the metal. The soldering board is again handy here- that it can be rotated on the bench to finish the join The outriggers going on, held with a stick- there is a limit to what my fingers can take! These are held, fluxed, soldered at one end, then the iron is placed at the other end and the solder flows towards the heat. This has to be done quickly keeping in mind that there is a soldered fillet underneath that I don't want melting and falling off Waisted pin point wheel bearings next, the holes need to be opened out for them to fit and I use the broach again to do this. I use a wheel set to hold the bearings in place for soldering. Flux, blob of solder on the iron, and a quick touch against the bearing and frame, hiss..... and done after a really good clean with water and toothbrush, one done and all done, a set of bogie frames for a DART that need a bit of cleaning up and some blackening Eoin
-
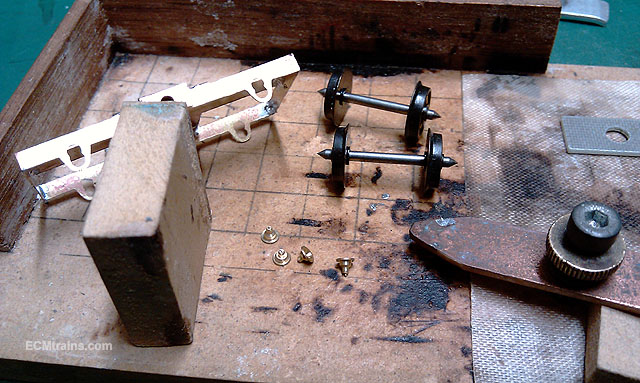
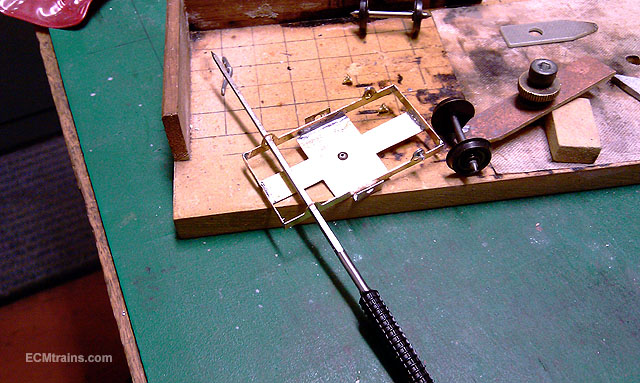
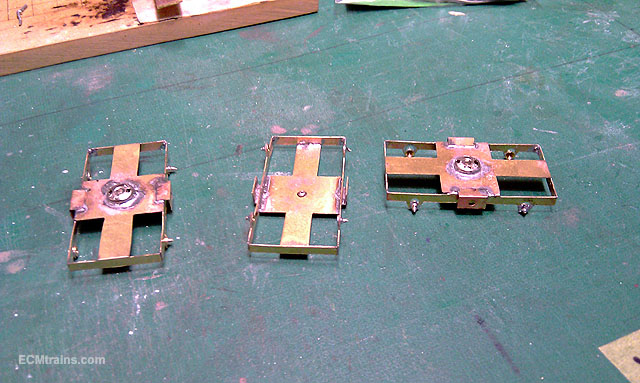
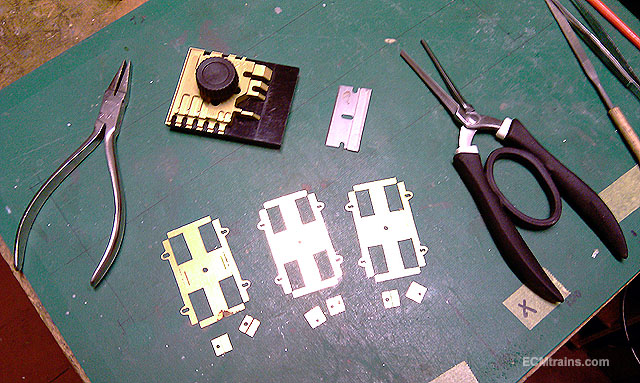
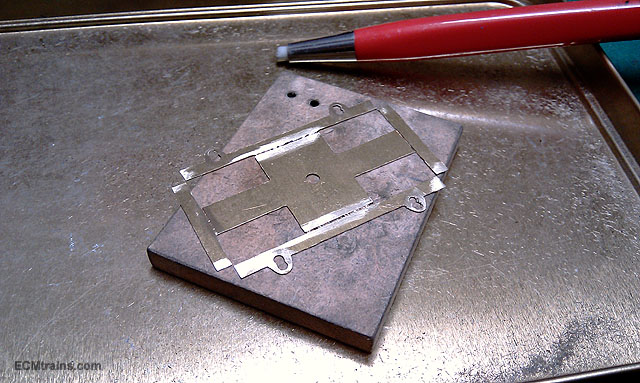
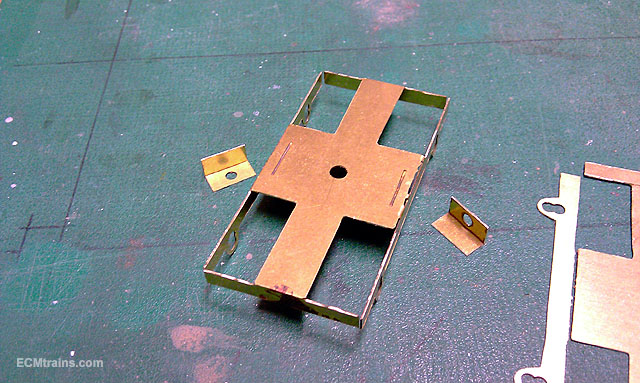
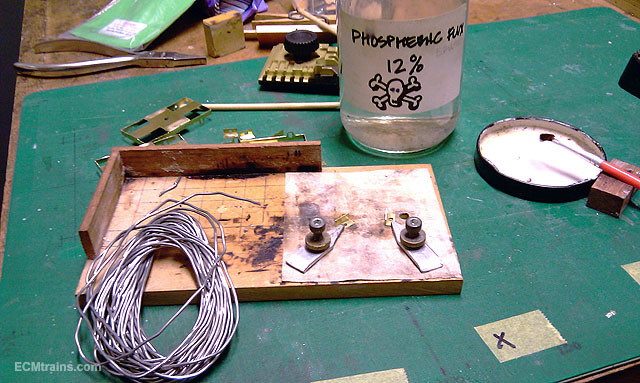
Soldering A 2 Axle Bogie Frame. This is how I solder up a brass 2 axle bogie frame from my home etches for the DART, the same techniques can be applied to most commercially etched bogies and even used for soldering kits! The units are cut from the sheet with a sharp scalpel and the fold lines are cleaned up with a fibre pen. Some of the half etched fold lines are a bit lumpy- a product of home etching, so I clean the lines out with a small triangular file. The cusp from the etch process is also removed from the edges Next the units are folded up, I use Hold n Fold and the like to keep all nice and square. Generally kits are folded with the half etch line to the inside of the fold unless otherwise stated. Use an engineers square and square metal bars to do and check the folds are at 90 deg. All folded and ready for some solder, my soldering board is very handy for this process, I use the 180 deg solder, phorspheric flux, set the solder station to 400deg and use a small tip on the iron. Bogies need to be well soldered, they take a bit of bashing so a good fillet of solder is required on the frame folds, most of the joins are not seen so I lump it on! Always keep in mind- the heat travels through the solder! the solder will flow where the flux is, and keep the iron tip clean all the time These are the bogie side outrigger parts clamped down, a good bit of flux is applied This is the angle of attack- low with a good blob of solder on, lay it into the flux with the iron touching both sides of the angle and hold it there, a mad hiss and spatter and then the solder flows all over, move the iron tip along the join to ensure a nice fillet develops and then remove the tip Nice fillets of solder will reinforce the fold Same approach with the frames, loads of flux, a good blob of solder, low angle of attack, when the solder flows after the big flux hiss move the tip along the fold to ensure the good fillet- the molten solder will follow the heat as long as the tip is not removed
-
A great tribute David, has to be the only one of it's kind It will be great to see diesel period one day.... Eoin
-
IRM 'How to' videos. What would you like to see?
murrayec replied to Warbonnet's topic in Tips & Tricks
Hi Tony Refer here for my soldering tips http://irishrailwaymodeller.com/showthread.php/3869-Soldering-Tips-by-murrayec?p=59978&viewfull=1#post59978 also take a look at my workbench projects- mainly the stuff on the flying scot which has a huge amount of soldering technique shown. Doing a video on soldering would take years!! Eoin -
Hi David Great scenes, those nuns are talking about the length of that colleen's skirt, and she is trying to make it longer- I think one of the nuns was her teacher some time back, and they don't get on! Eoin
-
Wow GS13545, a lovely looking detailed model, look forward to seeing it in October Eoin
-
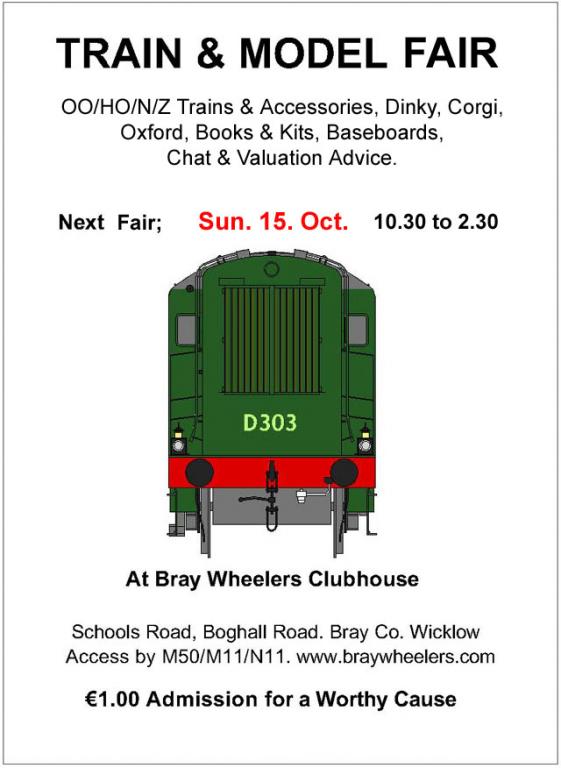
untilAt Bray Wheelers Clubhouse, Schools Road, off Boghall Road. Bray. Co. Wicklow From 10.30 till 2.00
-
Amazing popeye It's really coming together, I love the workshop jacks for the photos, inspired.... Eoin