murrayec
-
Posts
2,775 -
Joined
-
Last visited
-
Days Won
70
Content Type
Profiles
Forums
Events
Gallery
Blogs
Everything posted by murrayec
-
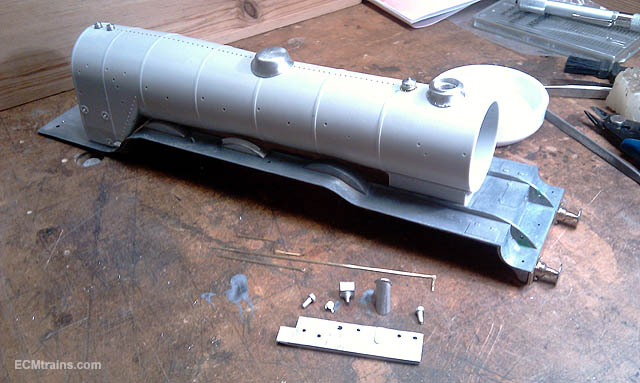
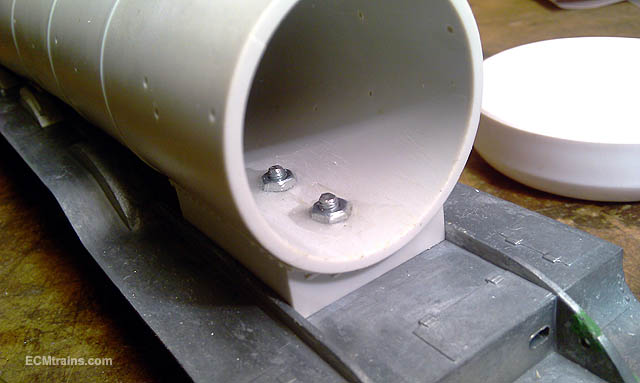
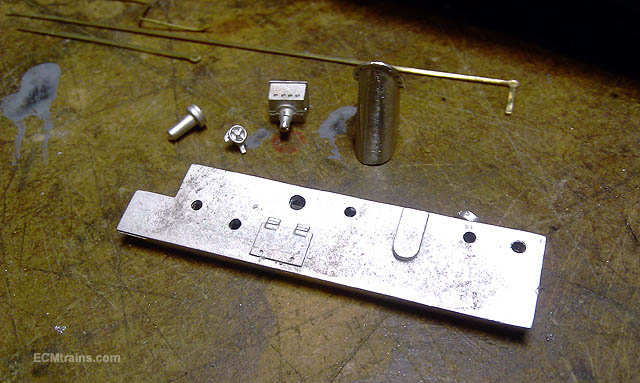
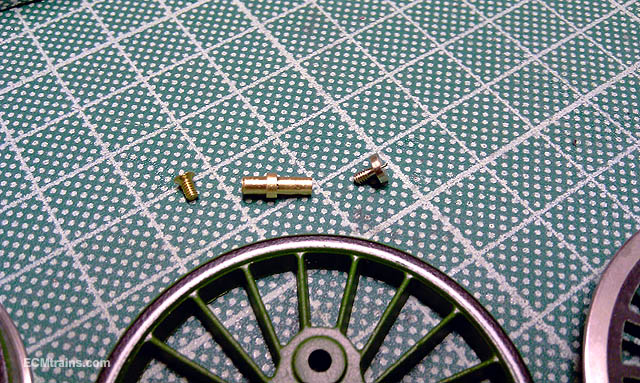
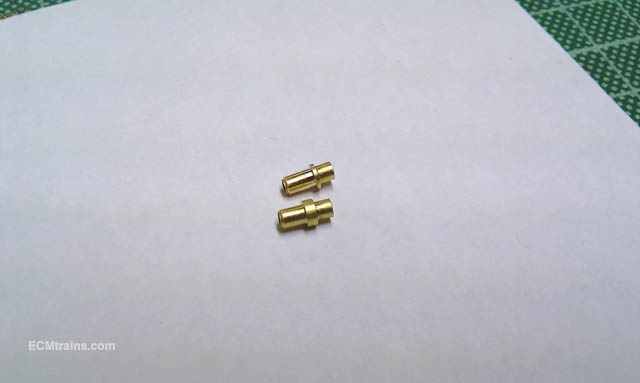
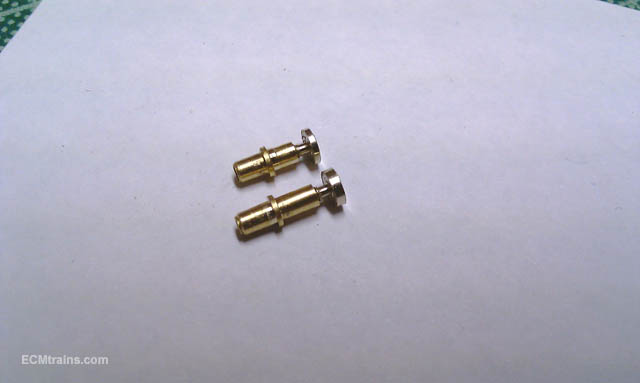
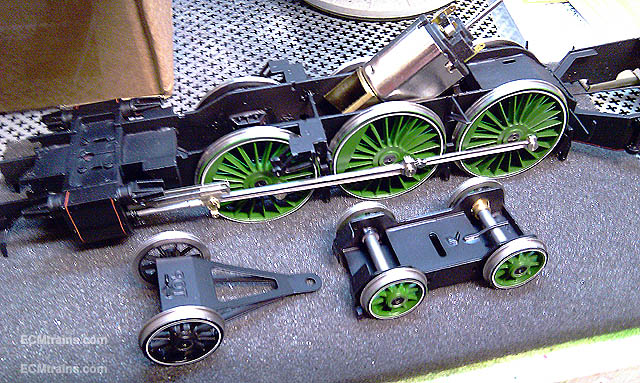
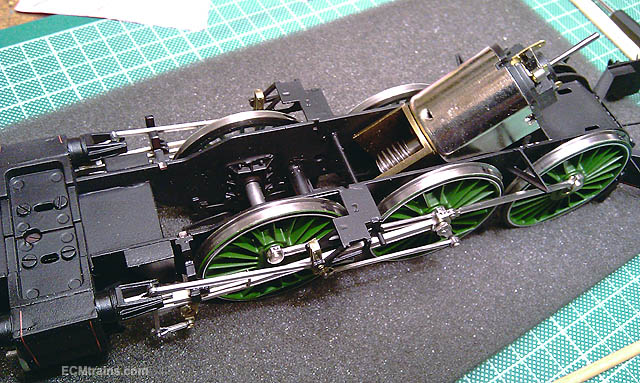
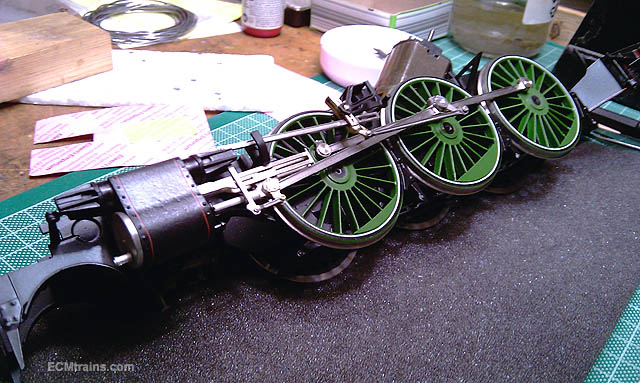
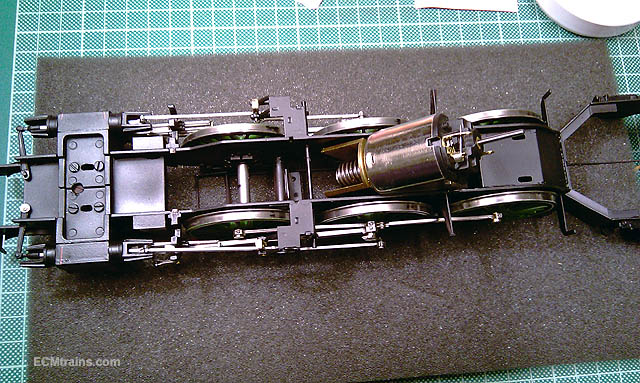
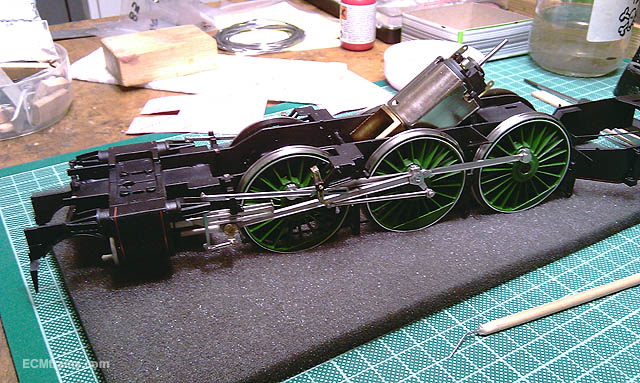
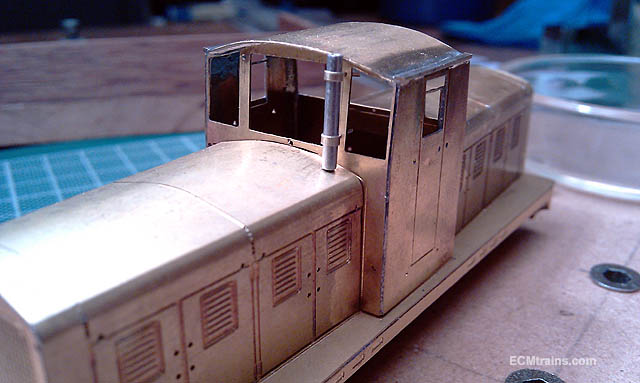
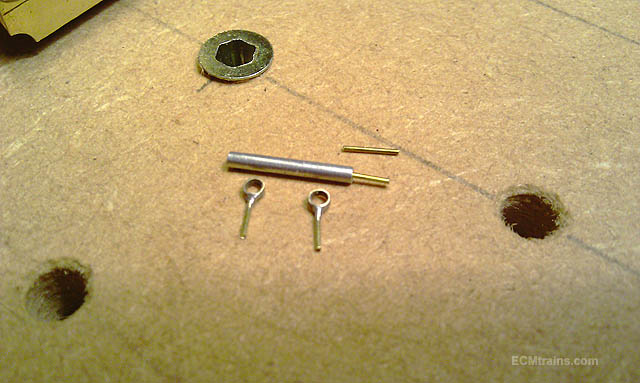
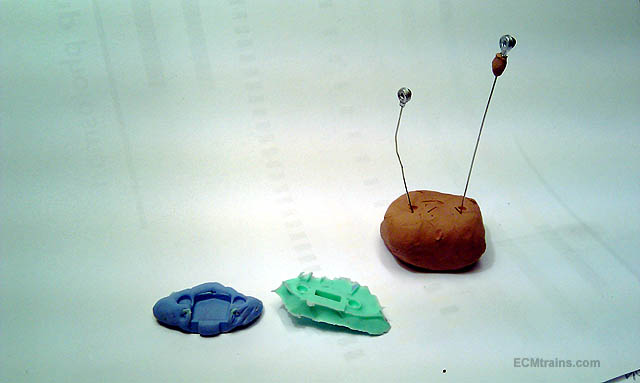
Hi all, Some work has been going on the Scot build;- The boiler and footplate are getting their final components, the boiler is bolt fixed to the footplate so it can be removed from the footplate for painting both and lining the boiler- far easier to do if they come apart. Footplate detail- lubricators, exhaust pipe casing n stuff. The casing required major filling to get it to sit in under the smokebox snuggle in. Thats one side done, the other to go, then all the little pipelines in PB wire. When in place and with the boiler handrails installed I'm ready to start painting...... Wheel crankpin upgrade was decided, Mr Mundy's Heavy Duty Crankpins were acquired, a nice little set of brass pins and round head NS screws out front to finish. The wheels have to be drilled out and the pins are retained by a brass countersunk screw sunk in the back of the wheel. Filling down the crankpins to a smidgen above the rods Test fitting the drive wheels, crankpins, and rods. Bogie truck and pony truck assembled- some problems with the crankpins!! The front wheel crankpin screw was fouling the connecting rod- by the thickness of the screw head, so all apart again I modified the crankpins by turning down the middle collar- I had a feeling it was a bit fat. I also turned down the screw heads for the front wheels to get the max clearance behind the connecting rod. The top ones in each photo are the modified Then assembly again, final assembly this time..... The crankpin mod works- its very tight though Nearly there for a test run....... Eoin

-
Thanks jhb Yes a 141 Gauge N is in the making, and others! here is a link;- Eoin
-

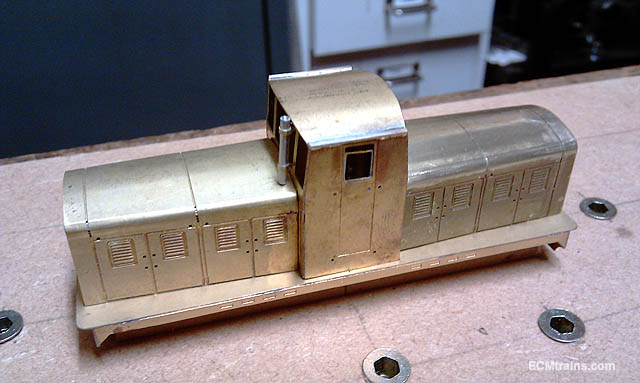
Walker Diesel Class F - ECMbuild in 4mm for OOn3
murrayec replied to murrayec's topic in Irish Models
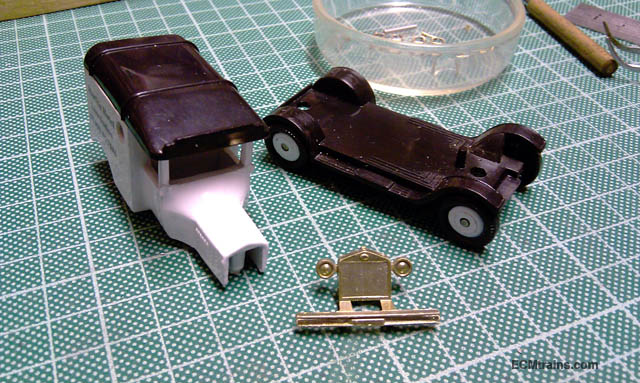
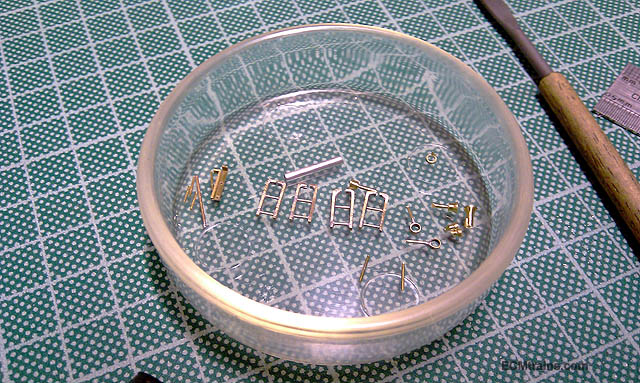
Hi all Well still waiting for the bogie parts, but in the mean time I got the second bonnet up and running and also started on some of the small detail bits Exhaust pipe components- aluminium tube with soldered brass mounting brackets A bit of moulding done to create the bonnet headlamp bodies- the trusty Model T van was used, a nice set of lamps on the front, did not want to wreck the part so I did a mould around the lights still on the radiator grill! it worked two lamp bodies drilled to take little LEDs Ladders, other exhaust n brackets, the horns, and the side bonnet radiator water filler caps- all brass I'm thinking of making up my own motor chassis for this project, but unfortunately I cannot show a sketch, today my workshop PC decided to melt one of its drives and the walker directory was in that sector, fortunately I could back up most of the drive and thankfully I had done a system backup last month, unfortunately the edit to the drawing with the chassis design was only last week and it did not get saved in that backup, and again- fortunately Windows has a secret directory that backups get saved, even incremental! I got almost all the data back from here and it needs a few hours drawing and I'm back to last weeks version...... Backups guys, is very important anyway, brass etched bogie with Mashima motor on top n pulley drive all hung off a PCB chassis plate, I've setup a drawing of the bogie frames to make a mould, this includes connection rods & crank counter weights to be etched in brass- i'll make contact again on supply of these parts and then make a decision..... Eoin
- 136 replies
-
- 3
-

-
- class f
- west clare
- (and 1 more)
-
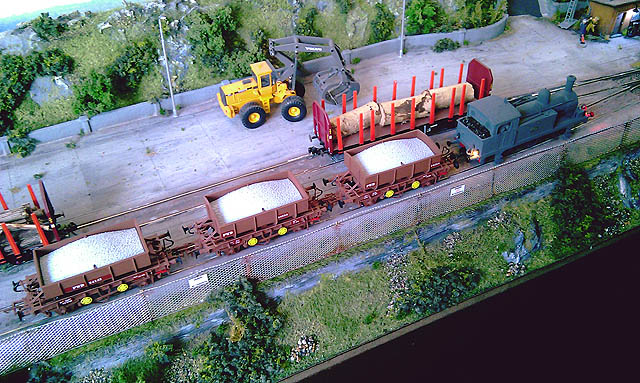
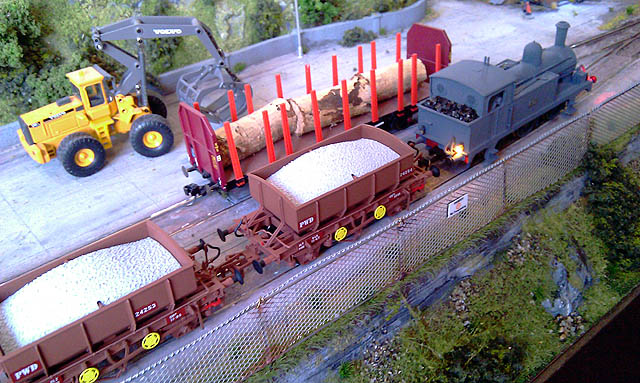
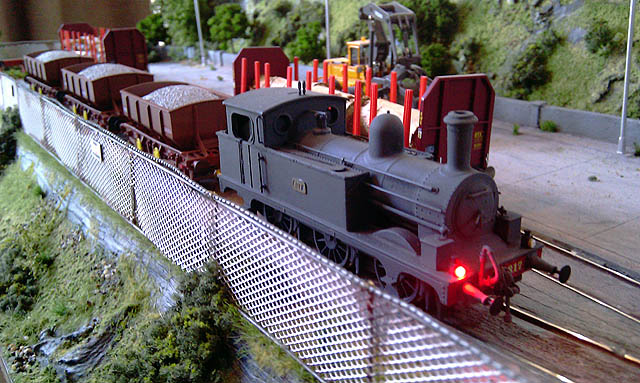
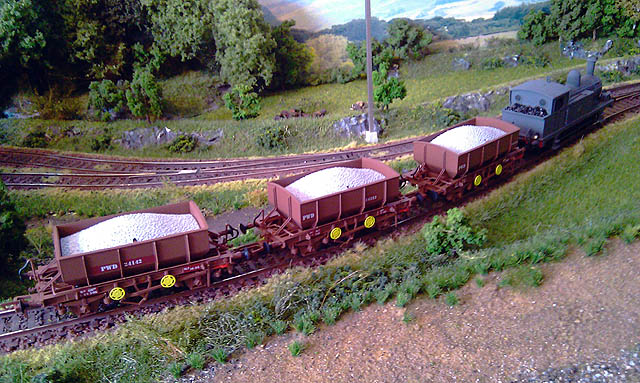
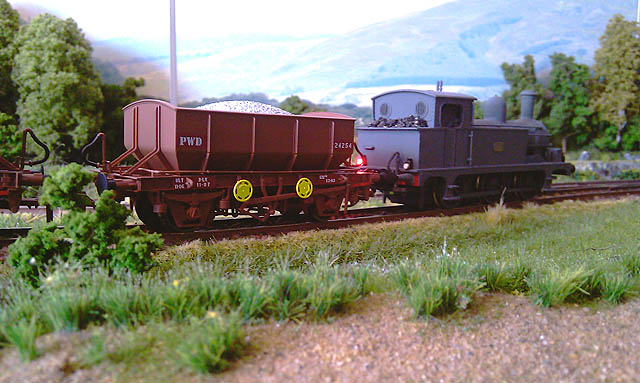
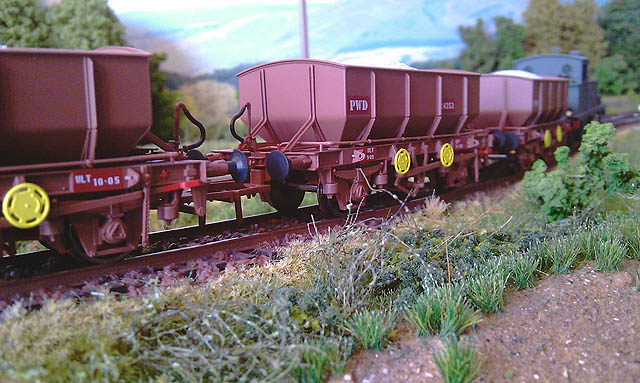
CM sent a few photos;- "Extraordinary event at Greystones. 141 failed while hauling PWD ballast wagons, the nearest available loco was sent to clear single track. This was at Bray. The loco was quickly detached from its train, a Steam Excursion Special, sent around Bray Head and successfully took the wagons to Greystones." 617 backs up into the yard Connected up now and heading off by the Breeches to the main line and off to greystones Nice wagons them..... CM & Eoin
-
Ok, so did a bit of sticking together tonight, defo needs adjustment all over- it's like etching, it needs a magic number added or subtracted to all panels depending on which way the bend goes. So here are a few photos of the attempt- though a lot of info gleaned from this;- It is looking good for the Xerox sheet idea, I'm not going any further with this assembly, I'll wait until I modify the drawing and test print again.... and here is a sketch of the motor bogie idea, the yellow shading is the PCB chassis plate Eoin
- 55 replies
-
- 4
-
-
- 141 gauge n
- 141
- (and 1 more)
-
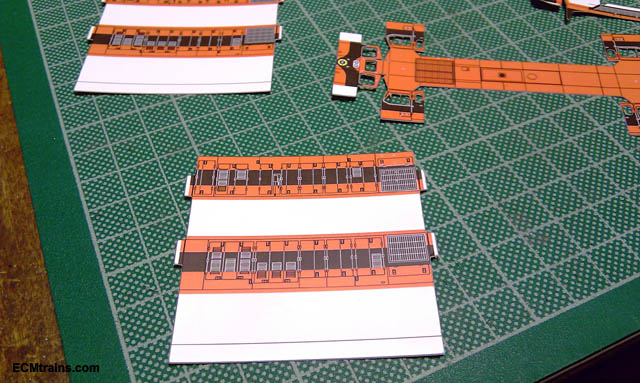
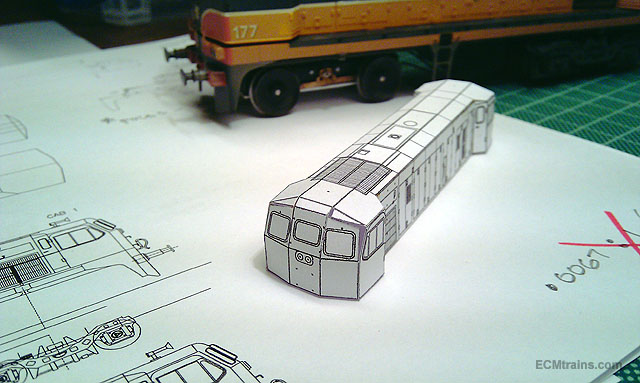
Hi Guys The first test print on the Xerox sheet was in from the printers this evening, the tan colour was way off into the orange area, and the chequer-plate on the footplate way to bright- a few small adjustments required and then another test. Anyway I stuck it into the Silhouette Cameo cutting machine and all went well, lined up first time and I got this out The holes for the lights and handrails are spot on their positions, but a bit on the large size A few adjustments will be required to the cutting line but the only mess is on the ladders and the cab side window mullions. I'll still try and fold this up and see how that works before I go back for the second test print- maybe more adjustments will be needed. On the chassis- I have drawn up a 1015 Mashima motor bogie with flywheel, and belt & pulley drive, with a PCB board chassis plate, this idea is being developed up for the Walker build in 4mm I'm doing, but the idea can be implemented here, I think, I hope A bit of origami is now required...... Eoin
- 55 replies
-
- 4
-
-
- 141 gauge n
- 141
- (and 1 more)
-
Wow JHB I'll go for a refill...... Eoin
-
until
-
Hi All Next Fair;-
-
Hi A know a guy, his Da many moons ago stored a 1:1 Model T in parts, in his attic! Later the house was sub-divided and access to get it out was lost- bar opening up the roof or a ceiling. Don't know if it is still there....... Eoin
-
Defo needed on the DART late at night........ Eoin
- 1 reply
-
- 1
-
-
Hi John I had an SW9/1200 in my fist recently and thought it would work and then promptly forgot about it! Thanks for the reminder Eoin
-
Noel I'm surprised with you 10mm at this scale is the length of a 141 cab! Eoin
-
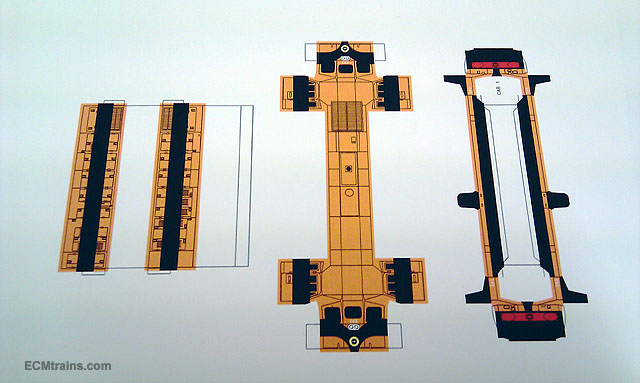
Hi MikeO Thanks for info I have a BR Class 20 chassis I've looked at, the 121 & 141 scale body works out at 82mm so this chassis needs a bit of work, as you say it needs about 10mm taken off it. I'm well capable of modify this, but if I sell the model as a self build kit most would not, that is why I'm investigating the use of a new generic off the shelf Kato or Tomix chassis, though this is proving difficult on getting supply! On the 071 the BR Class 37 looks possible, I have a few, but I'm way behind on the body drawings for this! and will not be able to get at it for some time, I also want to hold off until I prove my ideas on the 141 build- Xerox sheet body or will it be brass and have to paint? The 141 body artwork has gone off to the printers to try the Xerox laser print, for colour test, cut test, and to see if it folds up to an acceptable level! Here is an inkjet test print of the 141 1980's CIE livery;- Eoin
- 55 replies
-
- 1
-
-
- 141 gauge n
- 141
- (and 1 more)
-
weathering powder sets Weathering Powder Sets.
murrayec replied to Rails_of_Belfast's topic in General Chat
no, no! stay away from the Handbag! your modelling may come to an abrupt end Eoin -
Hi Guys Someone some time back posted on here or elsewhere- they used a seed for beets, after in storage they found it went mouldy and made a bit of a mess of the models! I'd try and use something inorganic...... Lovely work, lovely train Eoin
-
Hi Freda The Gorey man is Dermot O'Toole, he should be at Stillorgan show on Feb 11, with others that trade in your stuff, Dermot also does the Train & Model Show in Bray- next one is on Feb 18.... If you pm me your phone number or email I can pass it on to him Eoin
-
Ah MikeO D301 is a fantastic yoke! may have been responsible for the UK's Class 08 Yes the chassis will be a problem with the footplate on the 141 and 071! I think some modification will be required but not got one yet to hack.... Eoin
- 55 replies
-
- 1
-
-
- 141 gauge n
- 141
- (and 1 more)
-
Yes Noel I'm looking forward to it myself- I have a Modular Gauge N layout of Dun Laoghaire station developing up and will be needing a few of these for the DART introduction era section of the layout- does that confuse? The layout is designed to be adaptable, in this era we call it 'Multimedia', the layout will span the main developments of the station from the 1830's to DART introduction in 1980's- more confused? Eoin
- 55 replies
-
- 1
-
-
- 141 gauge n
- 141
- (and 1 more)
-
IRM Future announcements - How would you like them?
murrayec replied to Warbonnet's topic in General Chat
Hi Fran Yes, I agree with the above comments, tell the customers what's happening. I reckon this leads to a better manufacture & customer relationship, leaves less space for Wooohoo Scary People to work in, and of course its interesting to see things develop.... Eoin -
Hi Talking about Gauge N Irish, take a look here;- Eoin
-
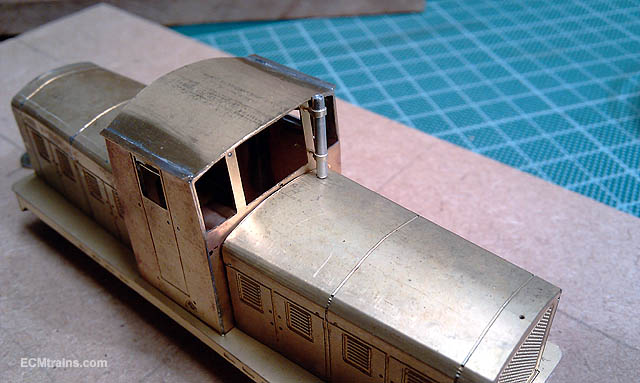
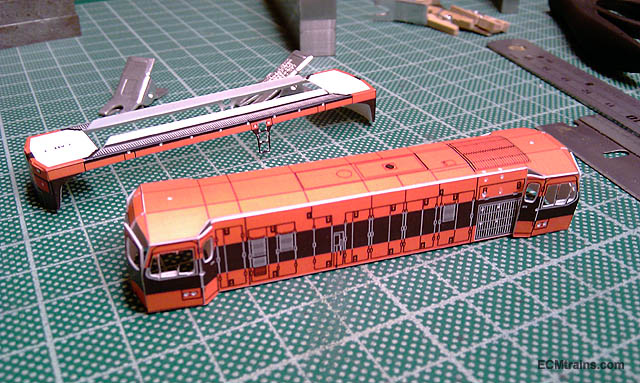
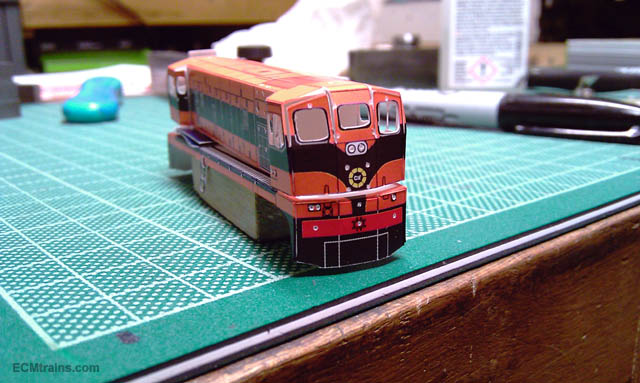
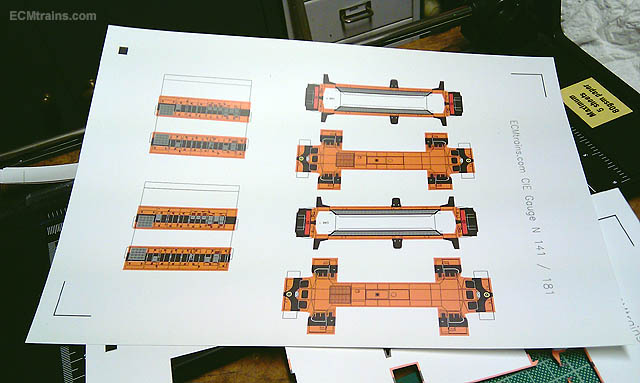
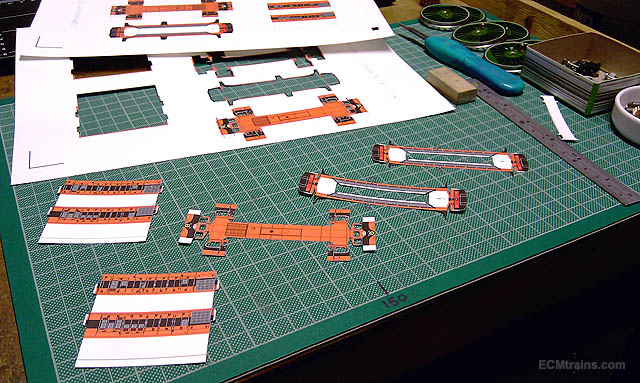
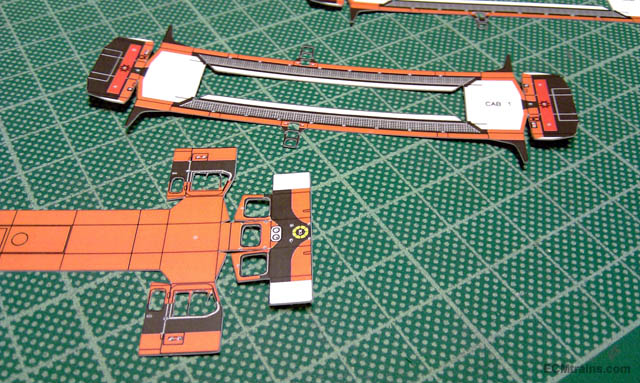
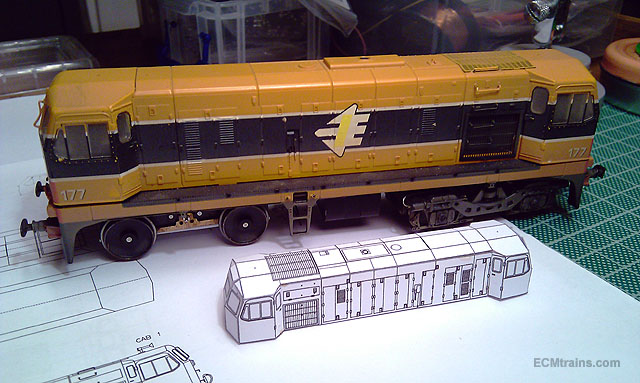
Hi I have set up for building Gauge N 141/181 last year, the drawing work is now complete and a few Cameo paper cuttings have been done to adjust the lines, work out the folds, and prepare for the 3D detail. My options are open to construct the body in etched brass or Xerox Laser Printed sheet (like the DART), the brass will require painting and the Xerox wont- so if I can get the Xerox to work to an acceptable level all liveries will be available! I'm using a Kato generic chassis for this one, but I'm held up waiting for the order to be delivered- 4 months now! Here are a few photos of one of the test Cameo paper cuttings assembled up;- As you can see the front windows & panels required adjustment in the drawing, the next step is to complete the lower section of the body, then cut one out in plastic card and see what I have- not enough hours in the day! These will be available as RTR or as a kit There are a few other Gauge N Irish types getting the same treatment- D301, 071, 121, & J15........ Eoin
- 55 replies
-
- 9
-
-

-
- 141 gauge n
- 141
- (and 1 more)
-
Hi Jhb Snap! My daddy's Mark 1s and my Class 08 were liberally sploshed with Valspar Orange, it's all my pocket money could afford Daddy was not impressed, especially when I did the same to his Green British loco Eoin
-
Still taking the pain killers I see!.......