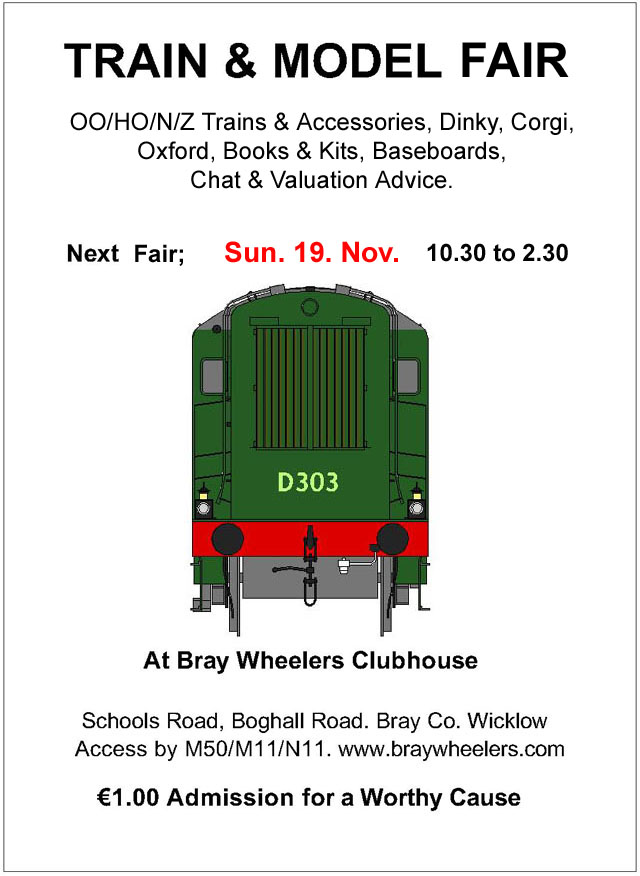
murrayec
-
Posts
2,775 -
Joined
-
Last visited
-
Days Won
70
Content Type
Profiles
Forums
Events
Gallery
Blogs
Everything posted by murrayec
-

-
Hi George The flats look great, I'd say a few steel washers stuck inside the containers would keep them wheels on the track? Great looking train when its all together- with the beer at the end, lovely The buses are cool to Eoin
-
Excellent David Great work Lovely little contraptions, I got to do one of these Eoin
-
OOOH! not for metal - please nobody try metal on one of these;- or ouch time will be had! Eoin
-
Thanks guys There was a bit of traditional in there also Eoin
-
Thanks Rich That's how it all started for me- one of my uncials had a workshop/garage- he'd potter about with the lawn mower, car, and a funny looking machine mounted on a table that hinged down to allow the car in. He made lock mechanisms on this machine- it was a lathe, I found out many years later when it was given to me. He did a lot of pipe smoking, the girls of the house did not allow that indoors, so he was out there all the time. When we used to visit there I watched and listening to him, what he was doing I thought - I would love to have a go.... Eoin
- 45 replies
-
- 1
-

-
- gsr class 551
- j26
- (and 1 more)
-
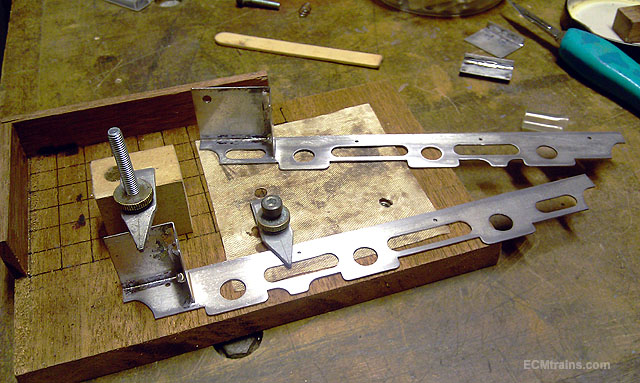
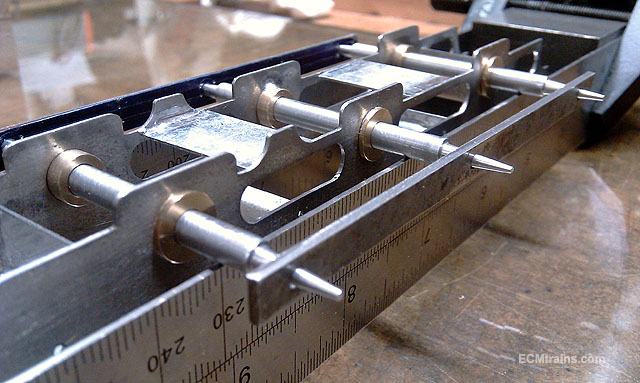
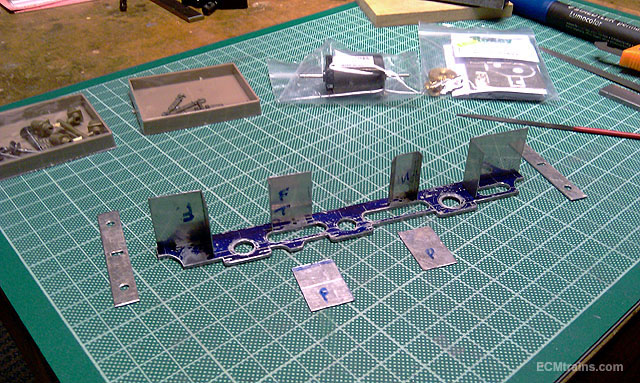
Frames parted and cleaned up with files n emery paper on a stick Axle bearing holes were checked for fit The frame spacers 90 deg folds were treated to a nice fillet of solder and then soldering the frames commenced, working with tacking the spacers to the frames first, checking the angles and then soldered complete, front n rear spacers first with one to each frame All done except the fire grate and grate sides inside the frames- hard to photo on the phone- shiny thing..... Setting up the axle jig to solder the axle bearings in All jigged up with the drive rods installed Sit the jig axles on something straight n level- very tiny rock across the jig diagonally, shall remove that as the bearings are soldered in this set up- jiggery-poke stuff again Have to put it away now- looks cool- I like doing stuff like this, especially if it works Eoin
- 45 replies
-
- 3
-
-
- gsr class 551
- j26
- (and 1 more)
-
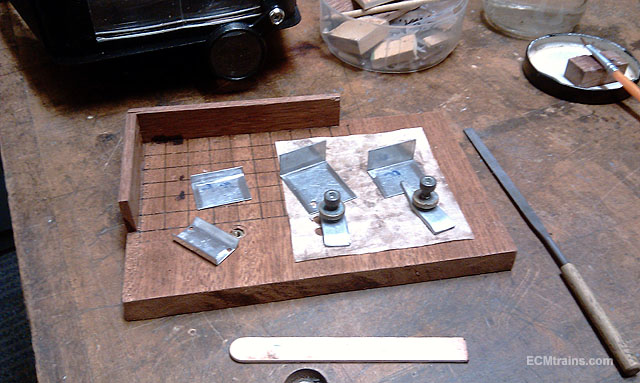
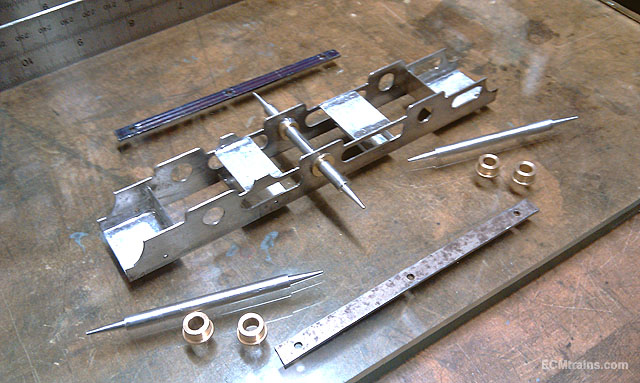
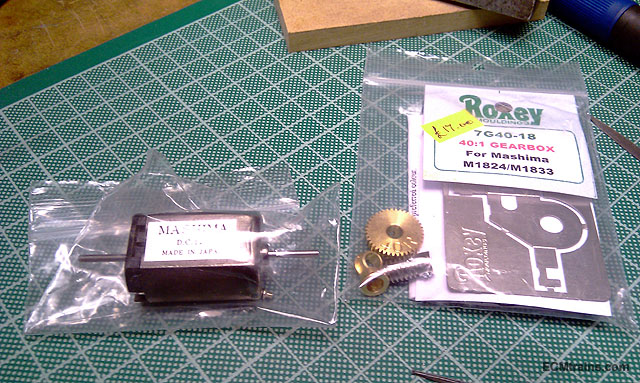
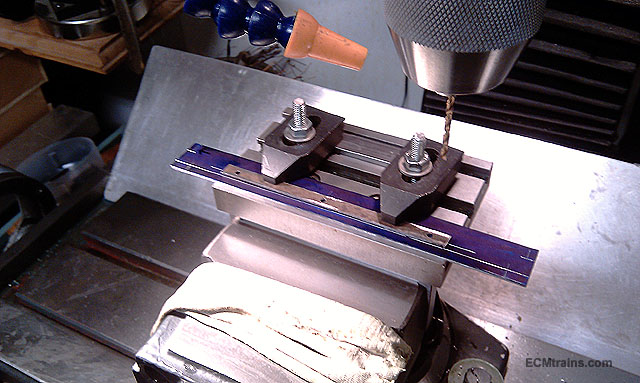
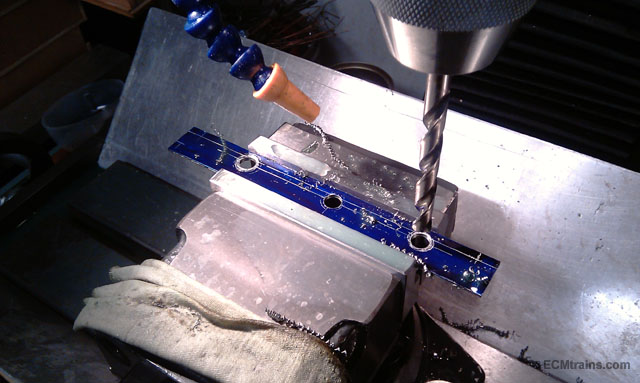
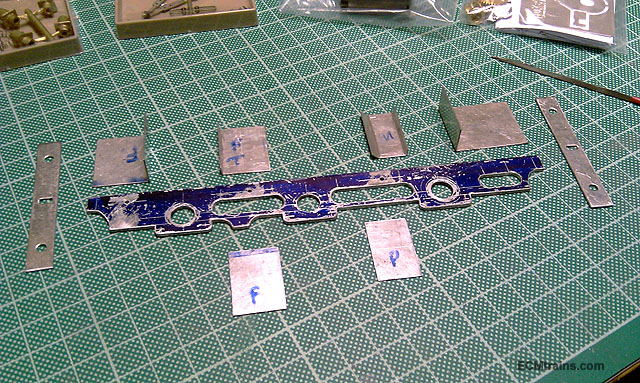
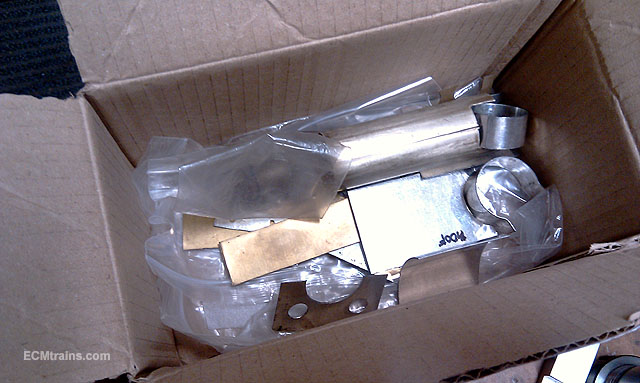
The motor, gearbox and buffers arrived today, so I was able to finalise decisions on the chassis make-up So time to bash some metal, first the chassis frame .8mm tinplate parts were soldered together and sized up in line with my chassis drawing, 145 deg solder for this and just around the edges After marking up the position of the central axle one of the drive rods was set up on the frames to spot the holes through for drilling the frame bearing holes and then drilling the bearing holes After drilling the holes the rest of the marking out was done with reference to these holes, then more drilling, milling, hand cutting, filing, and I ended up with all these parts The frame spacers are cut from .4mm tinplate, scored and folded 90deg for extra strength. The tinplate buffer beams were 10mm deep which is way two large according to the drawing- should be 6mm deep, so I reduced them down to 7mm the same size as the buffer shank plates- not to sure about those buffers their a tad short so may revisit that! A few holes needed to be drilled in the frame spacers, separate the frames and then I'm soldering it up Eoin
- 45 replies
-
- 3
-
-
- gsr class 551
- j26
- (and 1 more)
-
Hi I have a card-index A4 one, it's as you say very handy but they are very expensive, even second hand they are. Lidl, every so often do a metal A4 under office desk unit, with 6 drawers and wheels , its for about €35.00, I've got two of them and I need more! it's a more economical option.... Eoin
-

Walker Diesel Class F - ECMbuild in 4mm for OOn3
murrayec replied to murrayec's topic in Irish Models
Hi Colin R Those photos are excellent, just what the Doctor needed Thanks Eoin- 136 replies
-
- 1
-
-
- class f
- west clare
- (and 1 more)
-
Hi George, if you mean this bit? ....with a piercing saw by hand, with a very fine jewellers blade Eoin
-
-
Hi Pat He was posting stuff up, but not seen anything of recent, get him to post it up Eoin
-
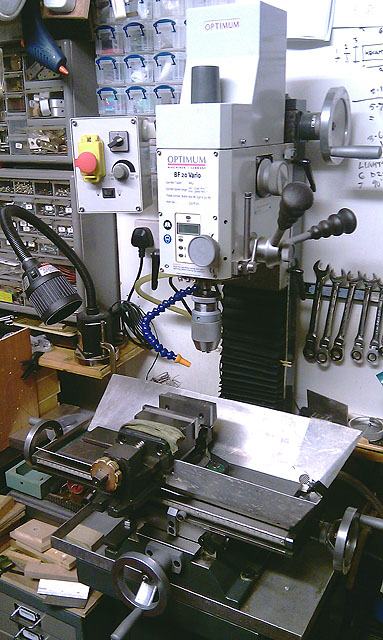
Weshty You got to get one of these, it transforms the workshop capabilities Eoin
- 45 replies
-
- 2
-
-
- gsr class 551
- j26
- (and 1 more)
-
Yes Jhb, I said the same when the bag of bits was given to me Eoin
-
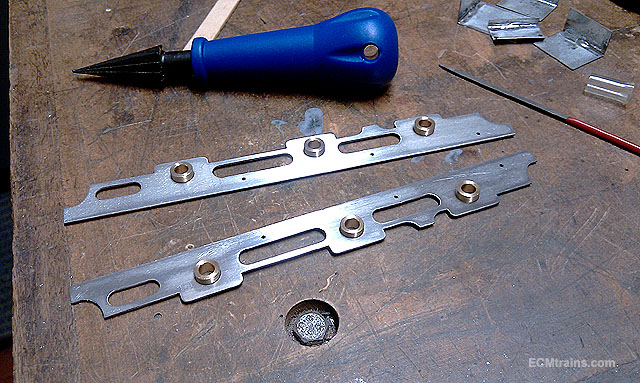
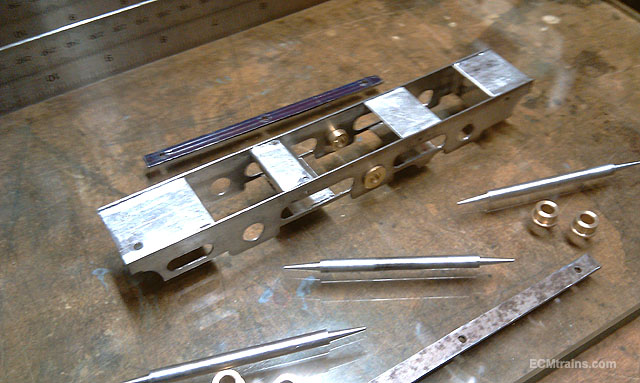
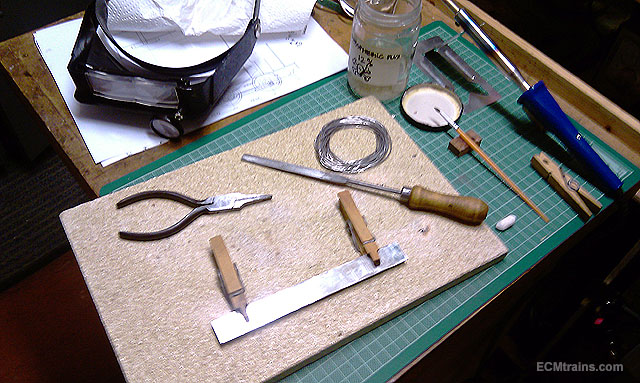
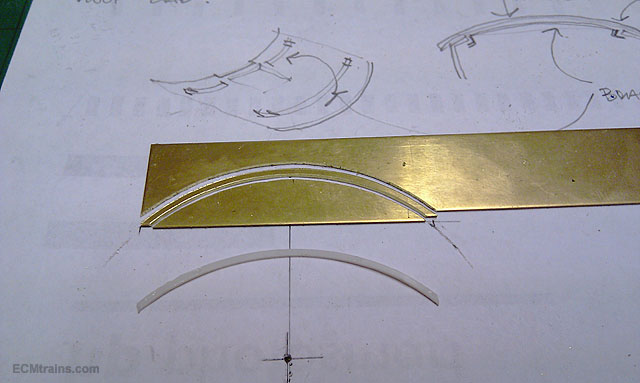
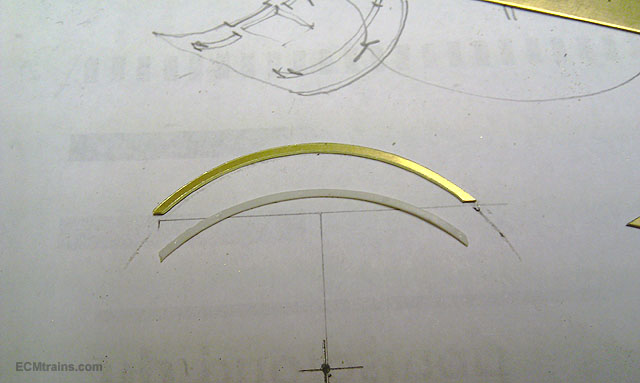
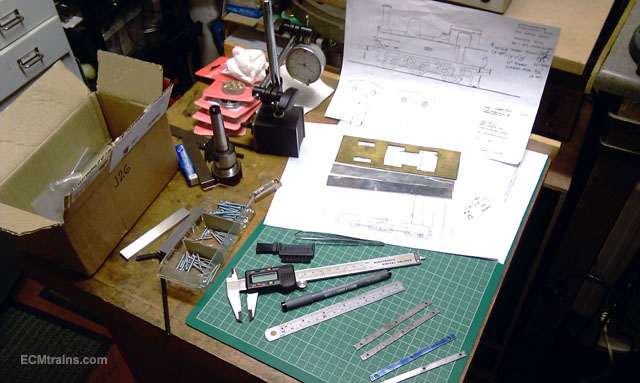
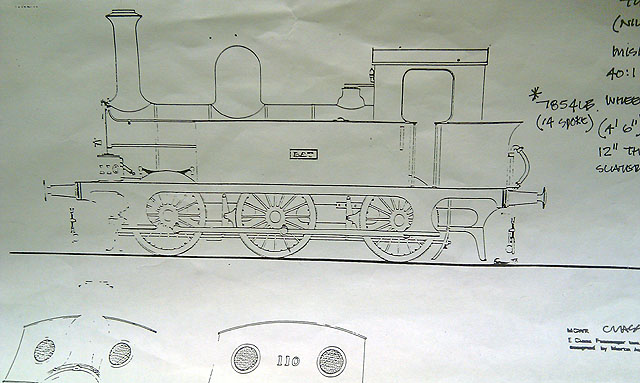
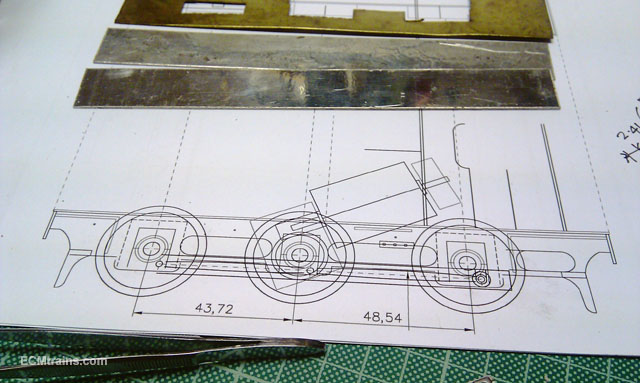
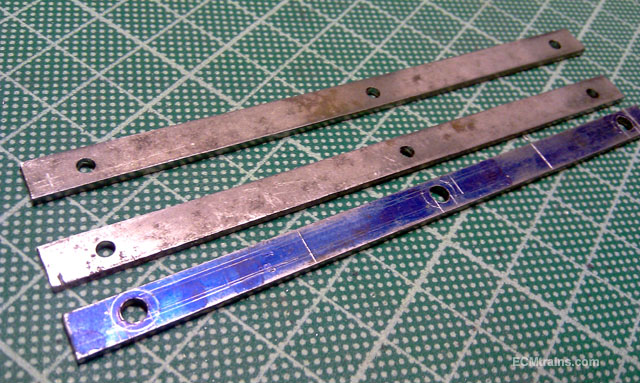
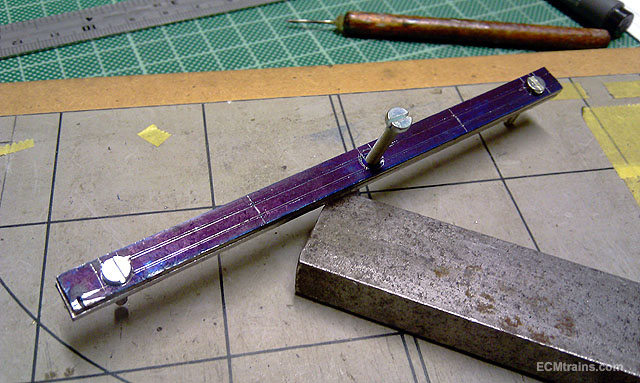
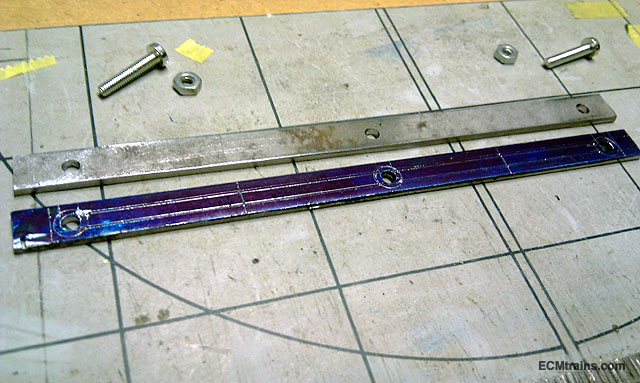
So a very nice man gave me a Leinster Models Gauge O J26 'Bat' kit, its stamped out tinplate and brass kit old style- amazing! I'm eventually building something for me and I want to complete it soon in appreciation to the chap whom gave it to me. Wheels, motor, and chassis fittings were ordered last week, the wheels and bearings arrived yesterday from Slaters- I was a bit limited on choice they only had 14 spoke in 4' 6'', it should be 16 spoke but only option for that was a bigger wheel so I stuck to wheel size. Today I set about preparing the drive rods to use as a jig to set the axle bearing centres in the chassis frames. After working out a chassis drawing I started to mark up the rods for machining , the rods are supplied pre drilled! the blue one in the photo. While marking out I found the drilled holes were way over size for the Slater crank-pin bushes and realised that the hole centres between each rod did not line up! So I bit the bullet and made a new set, drilled to the correct centres and the drilled hole size a nice fit for the bushes - they are the two above the blue one in the photo. So marked out again, the rods have a slight bow shape and I hope to replicate this, its very slight, hence the double lines in the markings. The oil cups will be there also- if that's what their called? All bolted up and ready for a bit of milling to remove the waste and then its down to files to get the shape. Eoin
- 45 replies
-
- 1
-
-
- gsr class 551
- j26
- (and 1 more)
-
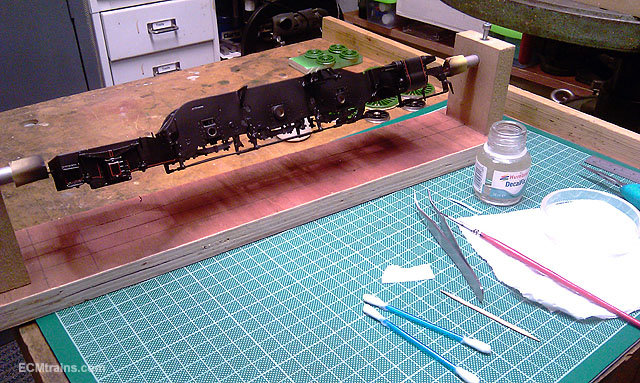
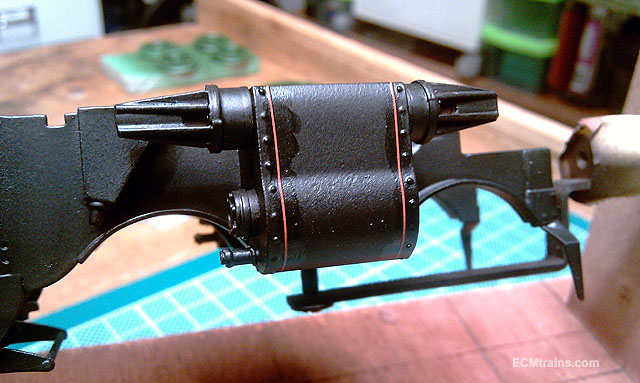
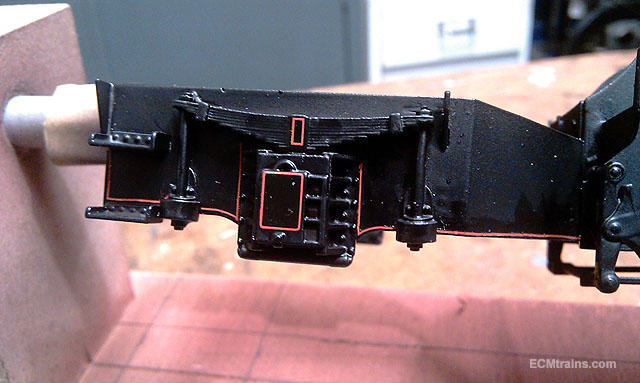
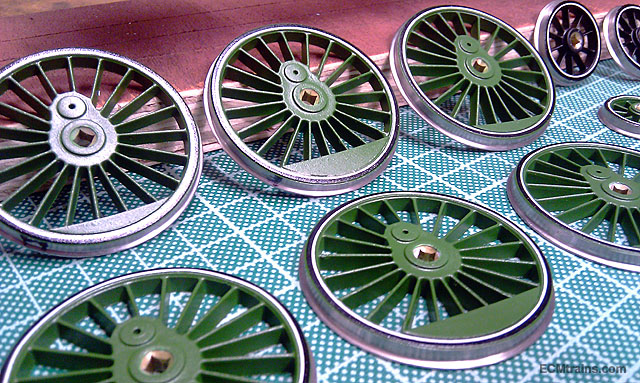
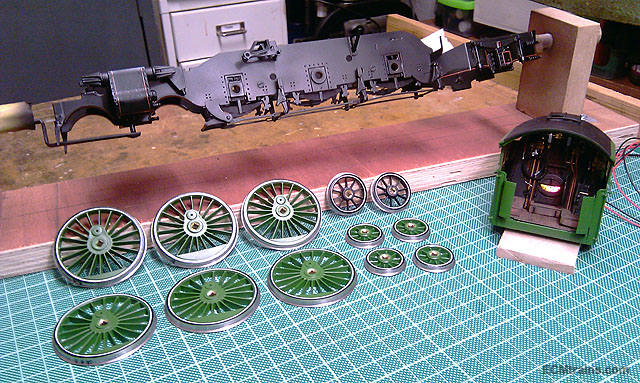
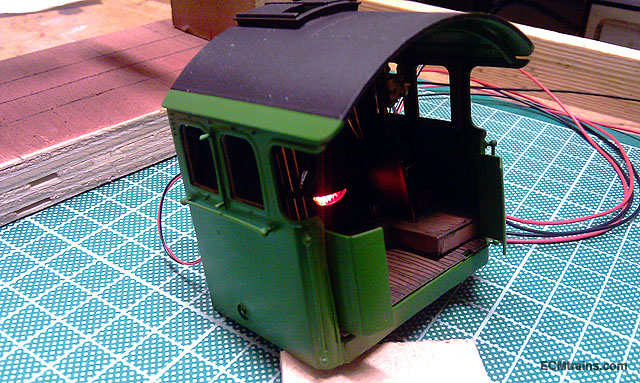
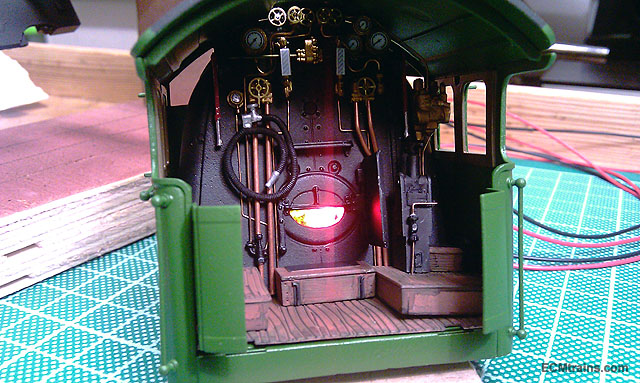
Decals on the chassis and wheels was next, another handy use for the chassis jig- sticking on decals! The red lines were a nightmare, I finally figured it out- cut them up and stick each line on separate, if you try to say stick on those 'L' shapes they twist and stick to themselves and then break as one tries to untie them. Wheels were next, same nightmare and even worse- two of the bogie wheel transfers had been sliced up in the packet by metal parts they were in with, one was in about 10 pieces and they were floating around in the water- 'Decal Fishing' All done, just a coat of satin varnish to hide the decal-fix and seal them, then the chassis is ready to go back together. Is that the cab all test fitted up? Yes it is, first test burn of the boiler! Two flickering LEDs from Baseboard Dave- red n orange, mounted behind the backhead with fire door open and a bit of tracing paper with black marker on as a diffuser and coal look...... Eoin
-
Walker Diesel Class F - ECMbuild in 4mm for OOn3
murrayec replied to murrayec's topic in Irish Models
Thanks Weshty Yes, I know the Hallery motors and it is under consideration Eoin -
Walker Diesel Class F - ECMbuild in 4mm for OOn3
murrayec replied to murrayec's topic in Irish Models
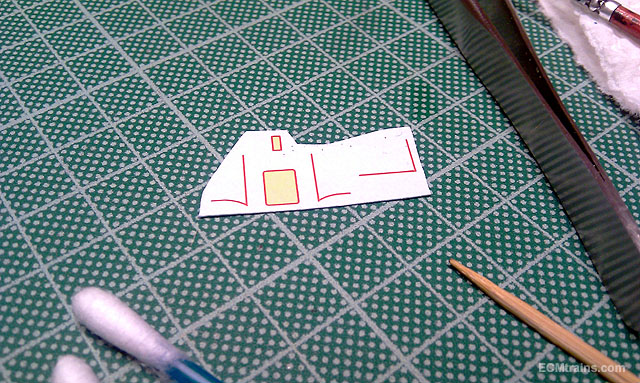
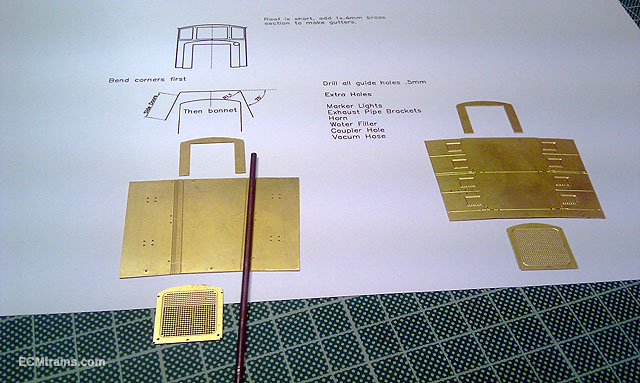
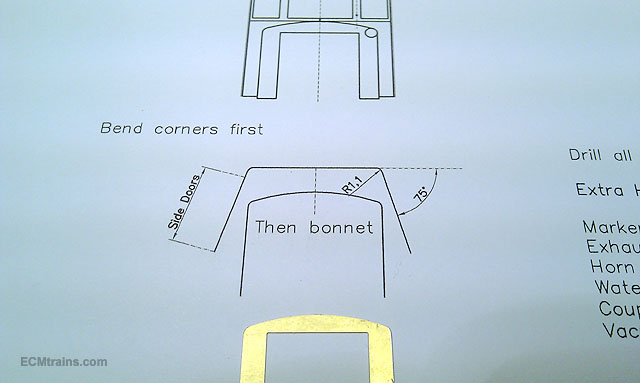
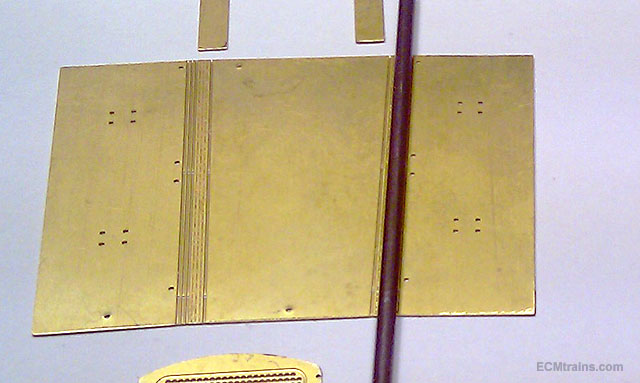
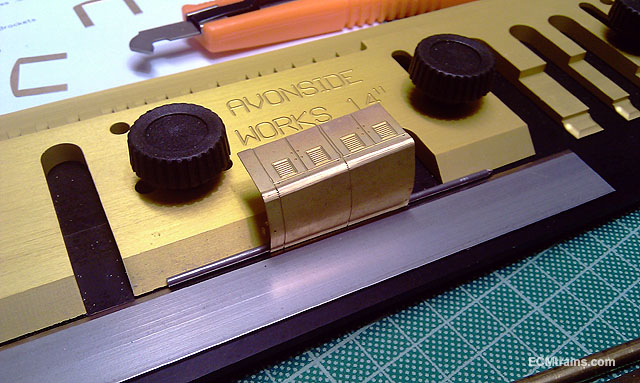
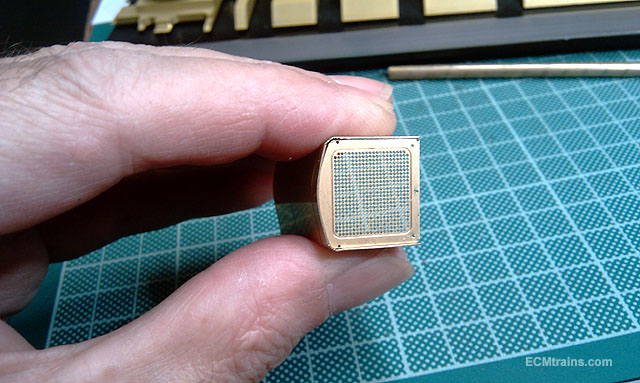
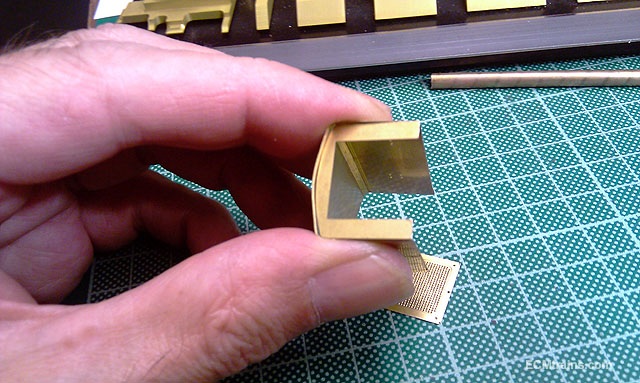
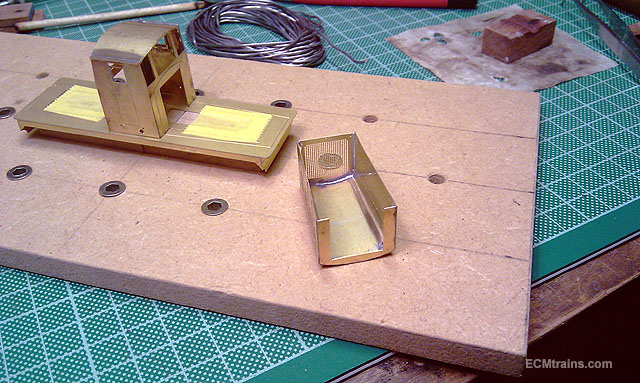
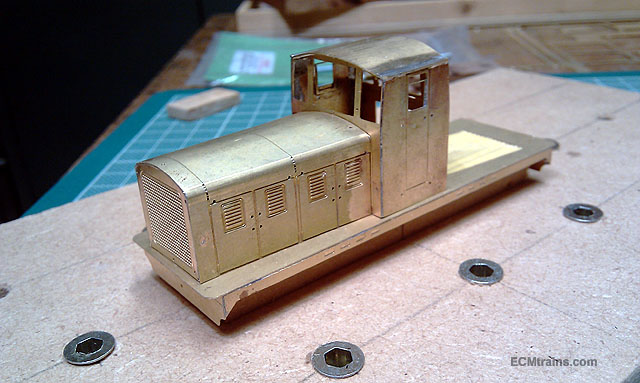
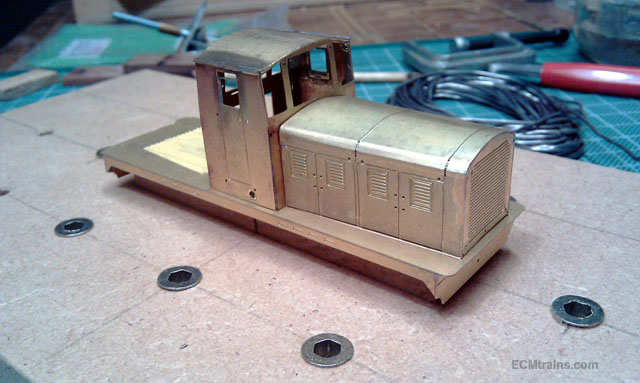
Hi all Thanks for the comments and likes I had a go at one of the bonnets last night and it was a challenge to get things right. After cutting the parts out, removing the cusps and sizing things up I worked out that the half etch lines for folding the bonnet start to early on the sides and the lines are poorly etched- so out with the scrawker to make them deeper. This photo shows the etch lines, the 3 decent looking ones are the early ones, the fold starts above these, the ones above, where we are folding need the scrawker, this shot also shows the 2mm dia steel rod to do the folding around The plan of action, bend the corners first, then the top This photo shows the set up I used for folding the corners in the Hold & Fold, pushing down on the 2mm rod while raising the folding blade. The brass was annealed before attempting this. After a fair bit pushing n shoving the assembly came out pretty close, good enough to tack solder and refine the shape. Ouch time- this is going to be done in the fingers as no real way to clamp this! lolly pop sticks help here between the fingers and the heat All soldered up and in shape, it will need the half etched lines filled with solder and a touch of a file on the outside to hide the fold line impression that comes through the brass- thats for later! Test fitting Starting to look like a Walker Diesel I think Eoin
- 136 replies
-
- 4
-
-
- class f
- west clare
- (and 1 more)
-
heirflick Humbrol 27 for the grey & I'd say you couldn't go wrong with a few 6 wheelers at a guess..... and don't forget the tool box. Eoin
-
Walker Diesel Class F - ECMbuild in 4mm for OOn3
murrayec replied to murrayec's topic in Irish Models
Hi Colin R I found pictures of the Chinery Bogies on the other site! and also info on Mike Savage- thanks for the above contact info While doing the Google search, it lead me back to the Bullant bogies, I developed a bogie for the DART model like a Bullant which I don't use any more, but I did buy gears and shafts from Branchlines to motorise them back at the time! I may revisit for this project... It needs a bit of working out but I have the parts and it could be fun. Still interested in seeing the bits, especially if you have bogie sides..... Eoin- 136 replies
-
- 1
-
-
- class f
- west clare
- (and 1 more)
-
Walker Diesel Class F - ECMbuild in 4mm for OOn3
murrayec replied to murrayec's topic in Irish Models
Oooch!- 136 replies
-
- 1
-

-
- class f
- west clare
- (and 1 more)
-
Walker Diesel Class F - ECMbuild in 4mm for OOn3
murrayec replied to murrayec's topic in Irish Models
Hi Andy Any chance you could post up or pm me a few photos of the bogie sides? even better if you could post a picture of Mike Chinery's complete bogies? and does Mike still make these? Thanks Eoin -
Walker Diesel Class F - ECMbuild in 4mm for OOn3
murrayec replied to murrayec's topic in Irish Models
Hi Colin R The jig is a sheet of 9mm MDF with two screw holes on the centre line to hold, from the underside, different blocks of MDF to mount the chassis on- all depending on the job. Then there are a number of 4mm threaded inserts fixed into the base dispersed around the work area to take M4 threaded rods to clamp down the model parts with lolly-pop sticks supported with off cut bits of timber to the rear of the sticks to allow clamping. M4 threaded bar is impossible to buy so I used bolts with the heads cut off and made up a few brass threaded sleeves to join two rods together. When setting up the clamps the support timber to the rear should be higher than the part being clamped, and as far away from the threaded rod as can be so the main down force is on the part, holes in the LP stick should be 4.5 - 5mm to allow the stick to be angled. The clamping force required on the nut is small, just enough to pinch it. New holes can be drilled in all this stuff for other jobs...... The second clamp seen above is a new soldering jig I made out of hardwood, my old one made with MDF started to bloat with the flux and heat so while making the kit jig I made a new one. It's featured here, the old one that is;- You mention bogies in your post, are they for the Walker? if so can you post up a few pictures to give us a look at them, thanks Eoin- 136 replies
-
- 3
-

-
-
- class f
- west clare
- (and 1 more)
-
Walker Diesel Class F - ECMbuild in 4mm for OOn3
murrayec replied to murrayec's topic in Irish Models
heirflick Where did you get that kit! I'd like to stick one of them together Thanks Eoin- 136 replies
-
- 3
-
-
-
- class f
- west clare
- (and 1 more)