murrayec
-
Posts
2,775 -
Joined
-
Last visited
-
Days Won
70
Content Type
Profiles
Forums
Events
Gallery
Blogs
Everything posted by murrayec
-
Hi John The plan is a transition scenic area at module connections, within the individuals modules the scenic can be to their choice but it would be nice to keep the same vibe through the whole layout! The modules can be stand alone dioramas or integrated into a home layout and unbolted out for the modular thing- this was discussed back in the thread.... Good luck at the show up North, we'll be in Cork at a show that weekend Eoin
-
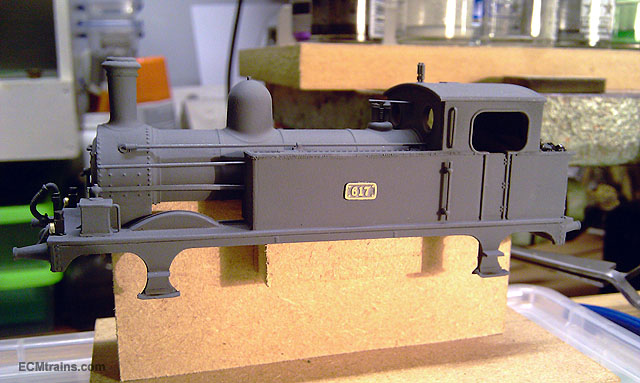
Hi The number plate erecting ceremony was this evening, all went well and now its numbered... I had the same Humbrol Clear Matt problem on the plates- dried out white! It's still a bit dull so I'm tempted to use a Gloss to make it clear again... Eoin

-
Hi Slavek If you mean 'where is it stored' it's at baseboard Dave's workshop in Edenderry, see his Facebook link above- setup and awaiting some attention. If you mean 'where is it based on' Seapoint is adjacent Dun Laoghaire a suburb of Dublin. When my workload frees up I will be going down there to add some stuff I've been working on for it, if you are able to travel there at that time we would be happy to meet... I'll let you know when I'm going. Eoin
-
Hi Paul I believe it doesn't really matter the size of the resistor used with a DCC chip, the chip is throwing out 12volt and the resistor is limiting it to less! Actually I'm going to install another on the power out of the chip as the lights are a bit to bright! Eoin
-
Hi Slavek Don't mind Kinvara-Train! he's from the West:) If you go back in this thread to earlier posts you will find that this system is designed with NMRA & Freemo spec in mind, we found the NMRA spec to be sound but Freemo seems to change with each different group setting up! You will also notice that some of the items you have brought up are discussed back there also.... The drawing I prepared is for discussion and demonstration of the idea, Seapoint Modular Layout is a real live demo of the system and viewing it one can see how it can be adapted to fit other systems that are NMRA compatible- also it's not fixed, it's a design process open to all who wants to contribute Eoin
-
Hi Slavek Single track boards can be incorporated, they need a transition board at each end to come back to 2 track and agreement as to which track of the two to connect to.... Eoin
-
Hi Colin R See here;- http://irishrailwaymodeller.com/showthread.php/2465-Modular-OO-Layouts?p=37185&viewfull=1#post37185 Eoin
-
Hi Slavek Our idea for this system is your boards can be any size within reason, all you have to comply with is the connection detail, two track through, format and landscaping at connection (when agreed). We planned that this system can connect to other modular systems- with agreement connection plates can be made to integrate the two systems.... Eoin
-
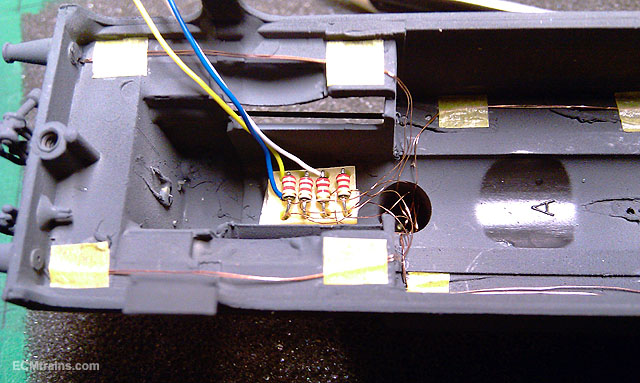
Thanks Guys Yes Noel it is as you say, fiddly stuff to work with, you have to make sure you scrape off the resin as I had two leads not working after soldering it up- had to undo, scrape again, and re-solder!! Eoin
-
Hi jhb Yes I agree, I think your referring to the Gauge N Modular outandabout? Our plan with the large boards was that people would develop 3 or more boards like Seapoint and then a large layout would come together fairly quickly- somewhere back in this thread we do mention setting a landscape standard to try and keep continuity between the different layouts- these are things we hoped to develop up as more people got involved.... Eoin
-
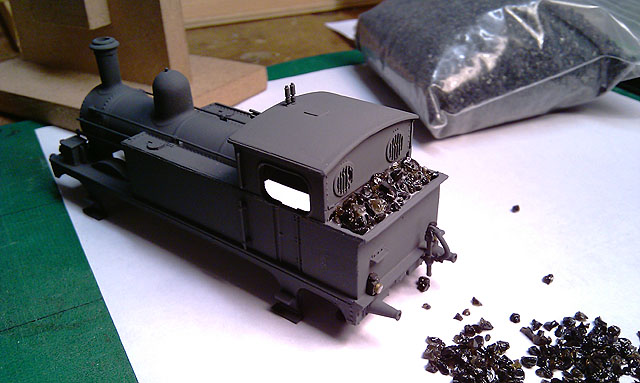
Thanks popeye No its Noch SteinKohle! I thought is was real but when I opened the packet it turned out to be some kind of glass stuff, it still looks OK, some of it is a bit light in colour but I like the size and it looks good- though the glue is not dry Yet! Eoin
-
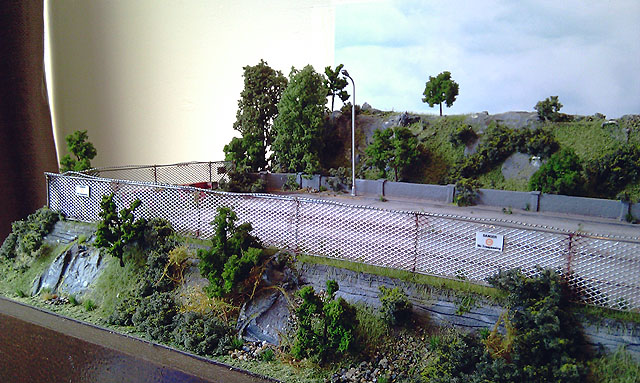
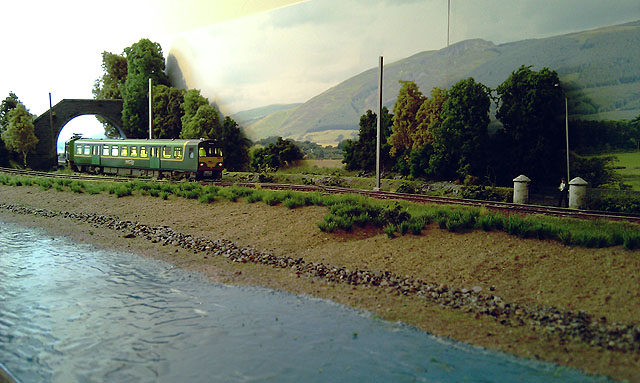
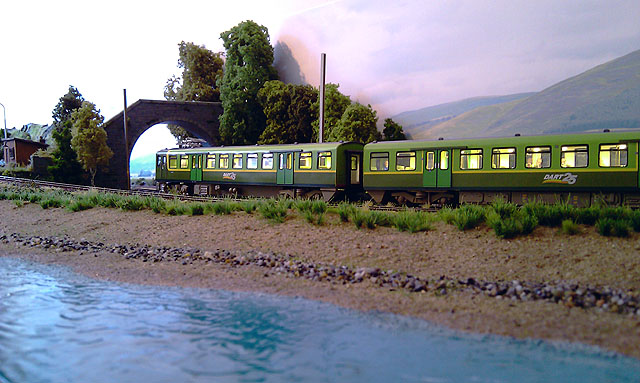
Hi The landscapers were in on Friday morning to do a bit of tree planting, drink coffee, and eat cake... Everything going fine but we do need a bit of undergrowth between those trees at the bridge to hide the backscene. Then the DART came up from Wicklow and the lads scarpered for lunch..... Oh yes! the specialist was in to do the under-board curtain which is under fabrication and should be erected very soon Eoin & CM
-
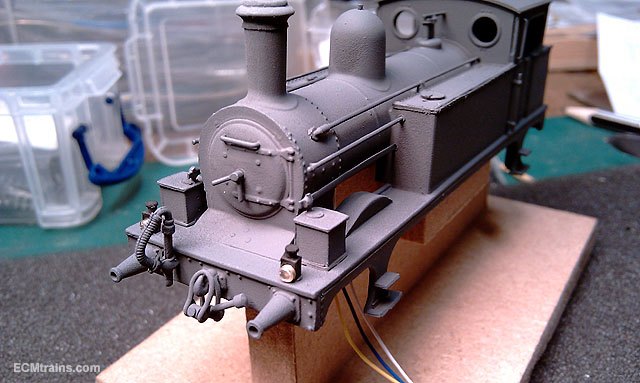
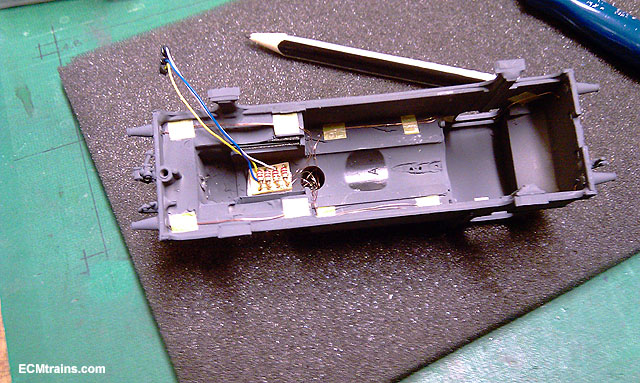
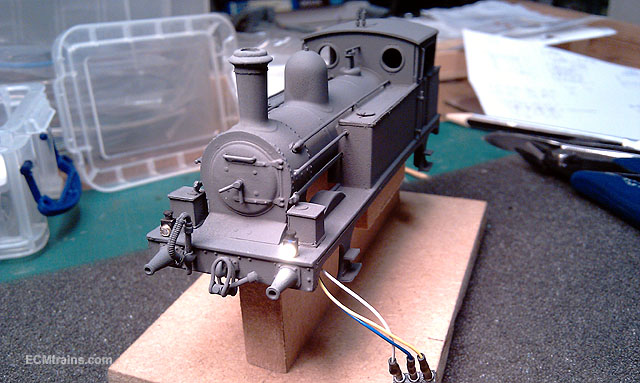
Hi A bit of light work this evening Directional lights were installed, they are made from small bits of 2mm sq and round styrene with a 1.5mm brass tube to make the lens housing, with transparent styrene disk over the miniature LEDs. After painting the bodies and sticking on the brass n cover I sealed the brass with Humbrol Clear Matt and the whole thing turned white when dry- bloody nightmare! Lots of washing with water and it cleaned up- don't use that stuff! A little board was made for the LED resistors and the DCC control wires- another nightmare soldering those little wires. But pretty cool when I plugged in the power to give them a test. Then loaded it up with a bit of coal...... Eoin
-
Hi Slavek Welcome to the forum, and great to see someone post here in ages This modular system started off with great enthusiasm but with time the steam ran out, and at the moment not much is happening. We are still working on our Seapoint Modular layout, but workload has slowed us up, another chap is working on a 1200mm board- but that's how thing stand at the moment. Interest is low and I hope in the future with more free time we can finish Seapoint and get it out to promote the idea again.... The track we have used is ready built, but that doesn't mean you cant use self build, it just has to connect and be compatible with ready built. Also keep in mind this system is not fully Fremo compatible and not finally designed, as we tried to keep things relatively simple and not have multi type boards, a persons module can do anything within that module, it just has to be compatible to join the system and have the two track through.... Do keep watching here, hopefully more will show interest when we get Seapoint finished Eoin
-
untilAt Camden Fort Meagher, Crosshaven, Cork Harbour- 12pm to 5pm
-
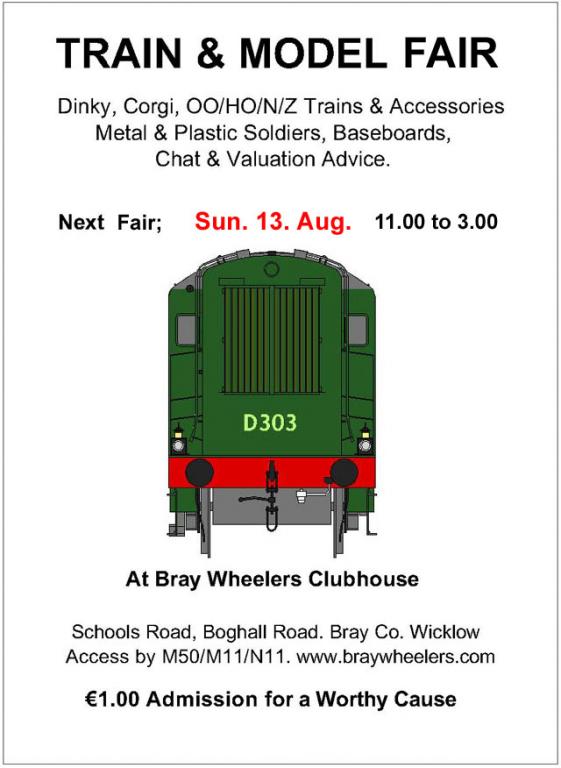
Hi All Bray Train & Model Fair coming up this Sunday, take a break from your holiday and drop in....
-
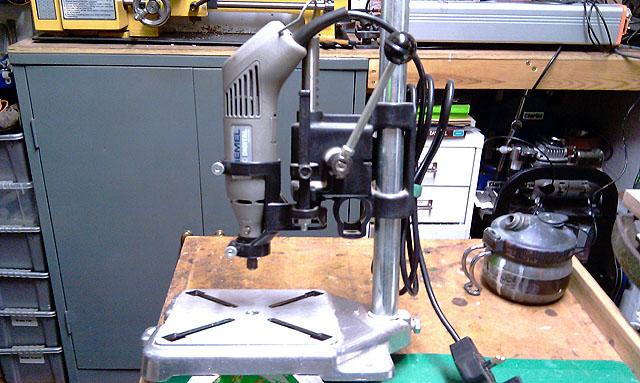
This and a Dremel, a Proxxon mini drill even better, and your on the way to a nice expandable bit of kit.... Eoin
-
I use this for general work, but for accurate stuff I use the Mill/Drill The stand is useful if you don't expect two much from it, it looks good has a nice gear n stuff but the body is plastic and it bends! Eoin
-
Hi Eamonn A Dremel is a good solution, they are well made and worth the money, but for drilling less than 1mm- say .45mm one needs the mini drill in a drill press and Dremel's one is crap- I use one and have to remember when you pull down on the arm that drill goes off to one side and cannot drill straight! Proxxon is the best solution for drilling, they have a good range of very nice mini drills and some great accessories- drill press, x,y tables, vice and consumables... I have their Mill/drill stand unit BFB 2000 on my shopping list £158.00, it can also take a Dremel!- a bit pricey but I think I paid about €60 something for the Dremel stand and it.... well see above Eoin
-
Hi David It looks great, I hope you enjoy the weekend Eoin
-
Thanks jhb I'll hold off until you return Eoin
-
Hi Guys Great to get some input, thanks I've done some searching and can only find stuff on British Lamp Codes, they discuss and display in diagrams the arrangement of lamps on the front of locos to signify types of trains, the goods they carry, and even if empty!- all white. But no mention of red lamps! I found on a forum thread the same question being asked about red lamps on a station pilot, a lengthy discussion ensued but no one could inform the asker as to which side, all that was confirmed was a loco should display a red lamp on the rear. I'm going for the right hand side facing the direction of travel.... Eoin
-
Hi Wrennie I've not played with those CVs up in the 300 n 400, so cant give you advise on them. I have tried to program a 4 function chip with JMRI, following instructions from a DCC book to alter the lights- but had no luck. I came to the conclusion that the instructions were for a specific chip and would not work on the one I was trying to program! This may also be the case using the CV settings thumper posted up? My best advise for now is 'Stay warm and drink plenty of liquids' for thumper may be along soon.... The Doctor
-
Hi wrennie I bit more info required? You say the head light is not working 'properly'? Does that mean it come on and something weird is happening, or is it not coming on at all? Are you using the yellow and white wires to run the headlight? these are directional. Or are you using the green or purple wires?- as they are not directional and require 'push on button' The Doctor
-
Hi All, Here's the question- On a steam loco was there a rule in CIE as to which side a red light was displayed front and back over the buffer beams? Eoin