Mol_PMB
-
Posts
2,163 -
Joined
-
Last visited
-
Days Won
112
Content Type
Profiles
Forums
Events
Gallery
Blogs
Store
Community Map
Everything posted by Mol_PMB
-
I must confess I'm in danger of falling out with the MGWR. They seem to have had a separate number series for each type of carriage, so there were a dozen different vehicles numbered 1. And the GSR didn't help when they absorbed the MGWR stock, simply ending up with a dozen different carriages numbered 1M. Despite withdrawals over the years, there were still several vehicles with duplicate numbers in 1961. It doesn't help that the MGWR seems to have had an obsession with modifying carriages between firsts, thirds, compos, brakes etc, renumbering each time in the appropriate series. The GSR continued modifying them and the number series just becomes a very confusing mess. Foxtrot Foxtrot Sierra!
-
Thanks all. I will gradually work through adding links to photos of as many coaches as I can find. They will also help to illustrate the body, underframe and bogie styles and the changes over time. Of course, people photographed the unusual more than the familiar, so I've had no trouble finding photos of ALL the ambulance cars and many of the diners, but the ordinary seconds and compos are harder! Please - if you spot a mistake, let me know. I'm sure I've made some errors in transcribing the data, or in interpreting inconsistent or incomplete info.
-
I think it is time to release the first draft into the community. CIE_Carriage_Stock_Register_Draft1_19-09-2025.xlsx I hope this is of use. Any comments, corrections or additional information would be most welcome. Areas already identified for improvement, but awaiting more time and/or data, are as follows: Hyperlinks to connect the entries where vehicles have been rebuilt/renumbered More links or references to published photos of each carriage More information on inherited GNR carriages (weight, body, underframe, bogies and withdrawal dates) Review of consistency where vehicles have been reclassified without being renumbered More detail on the list of references Paul
- 41 replies
-
- 11
-

-

-

-
"Voiding the Warranty" - Mol's experiments in 21mm gauge
Mol_PMB replied to Mol_PMB's topic in Irish Models
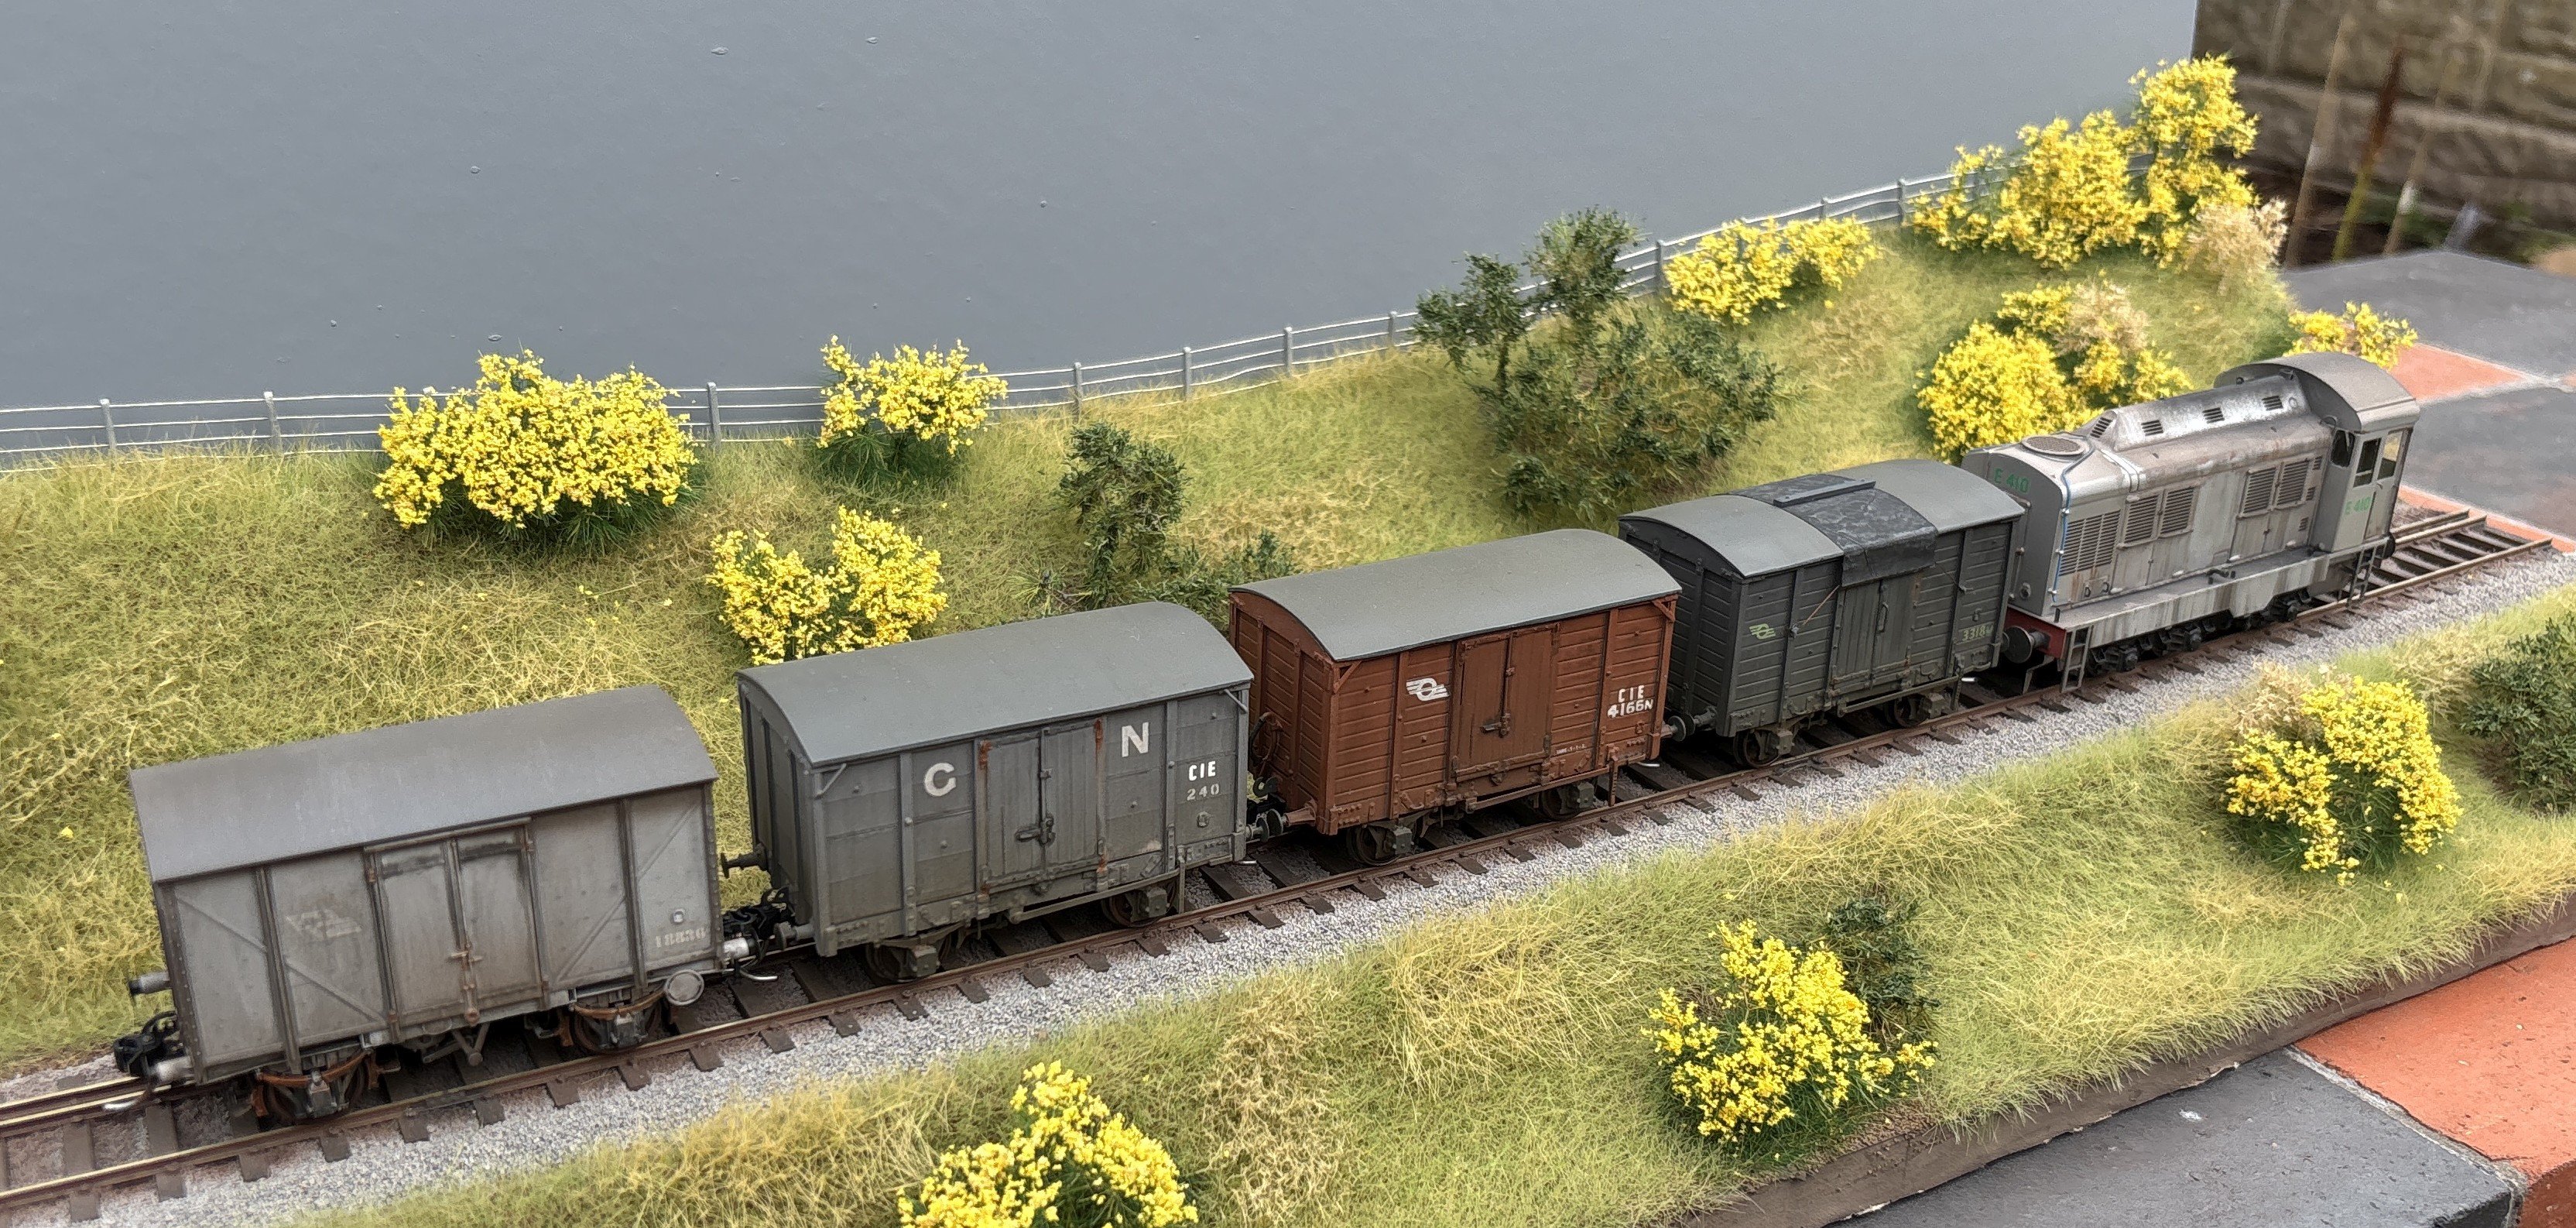
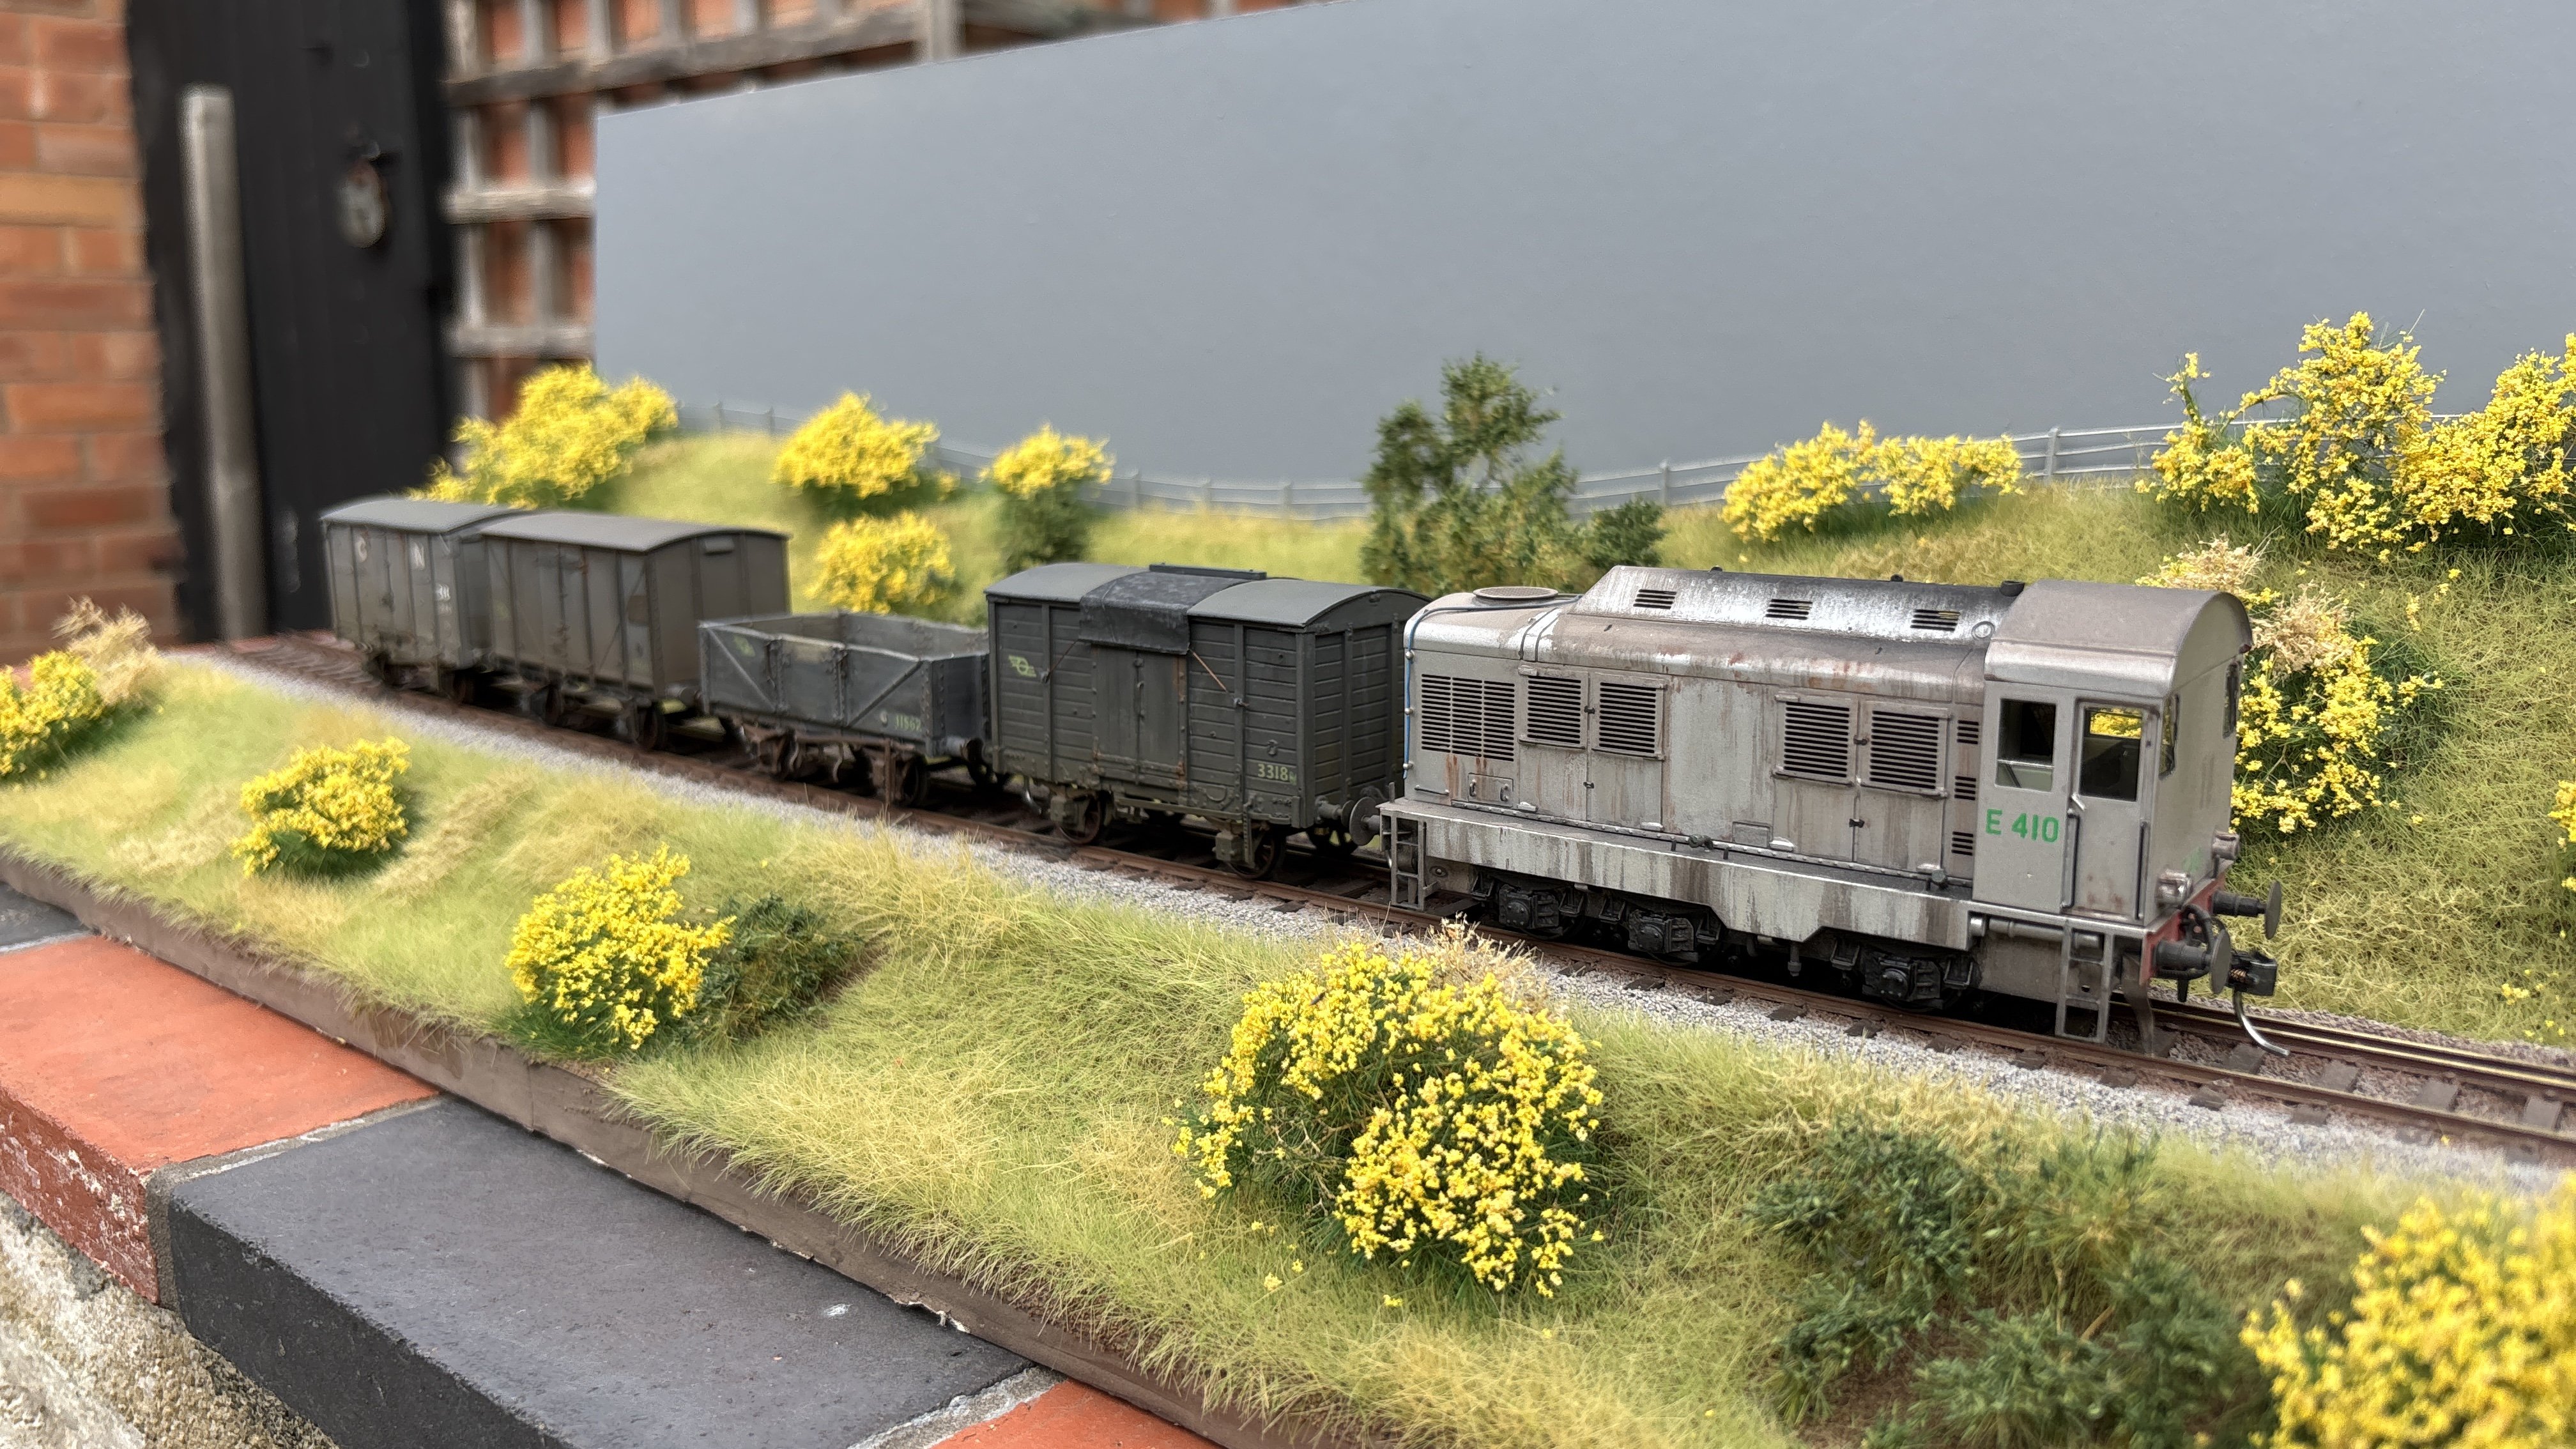
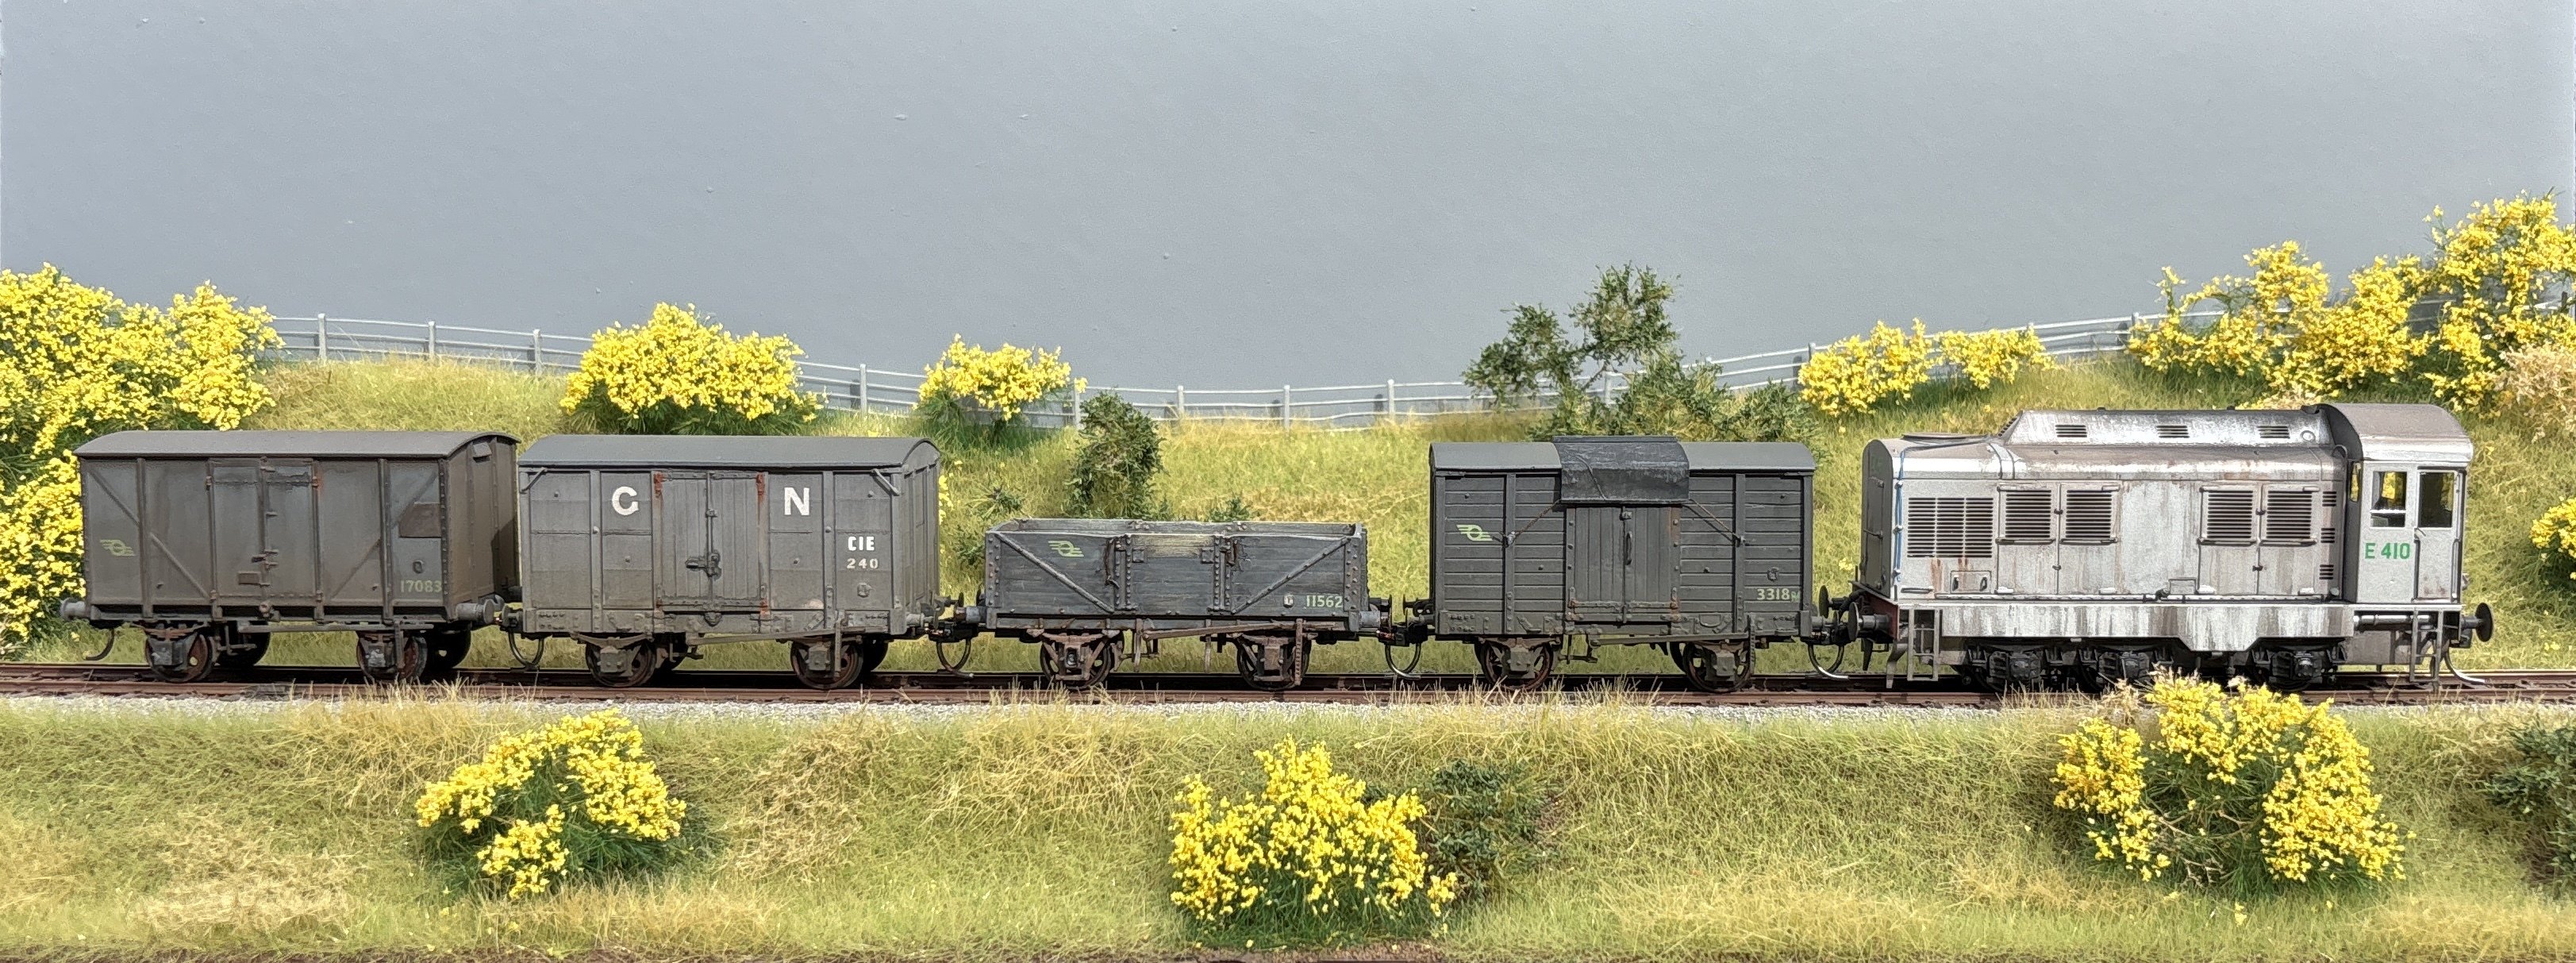
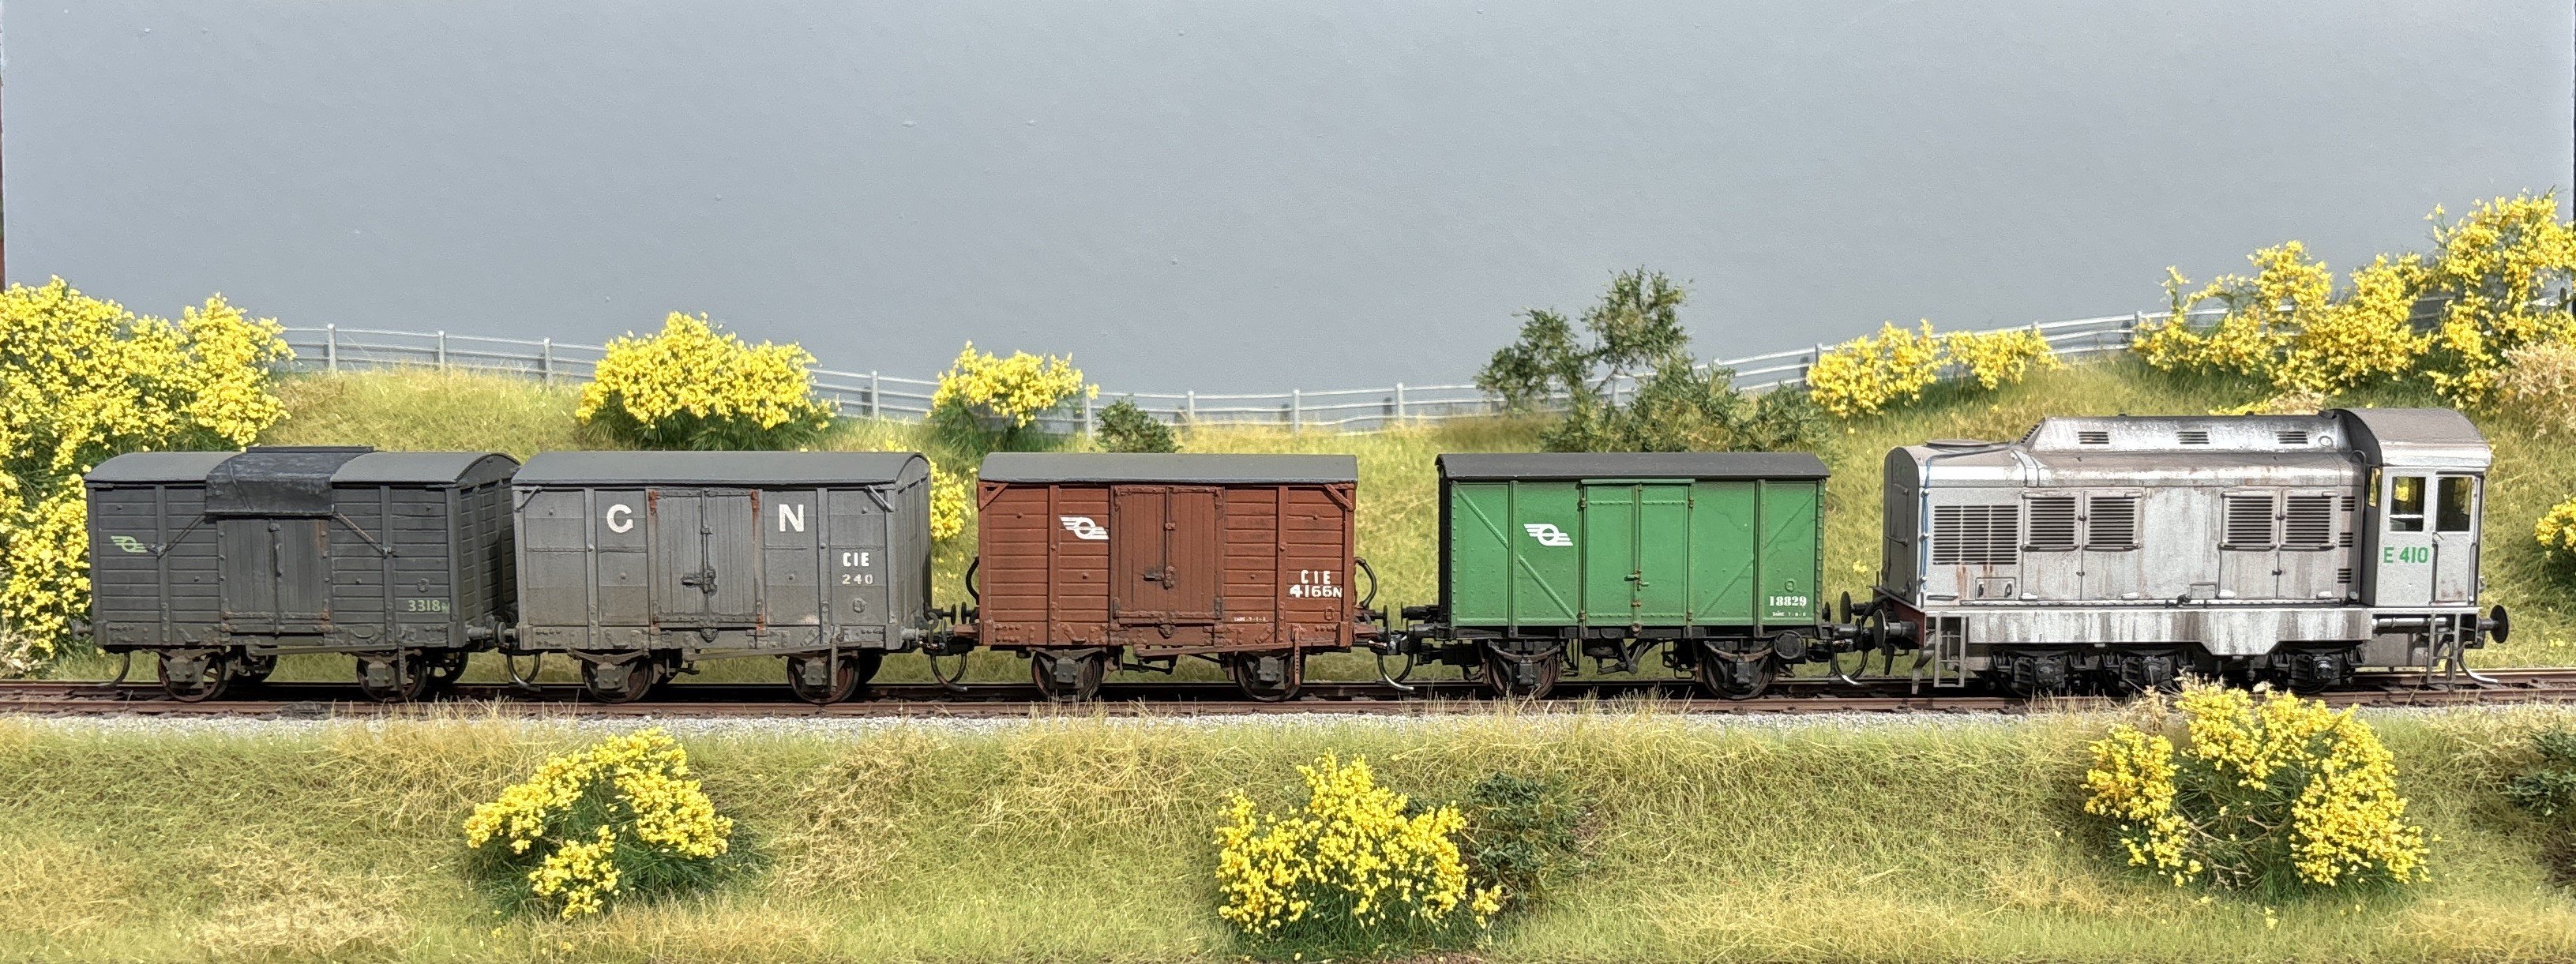
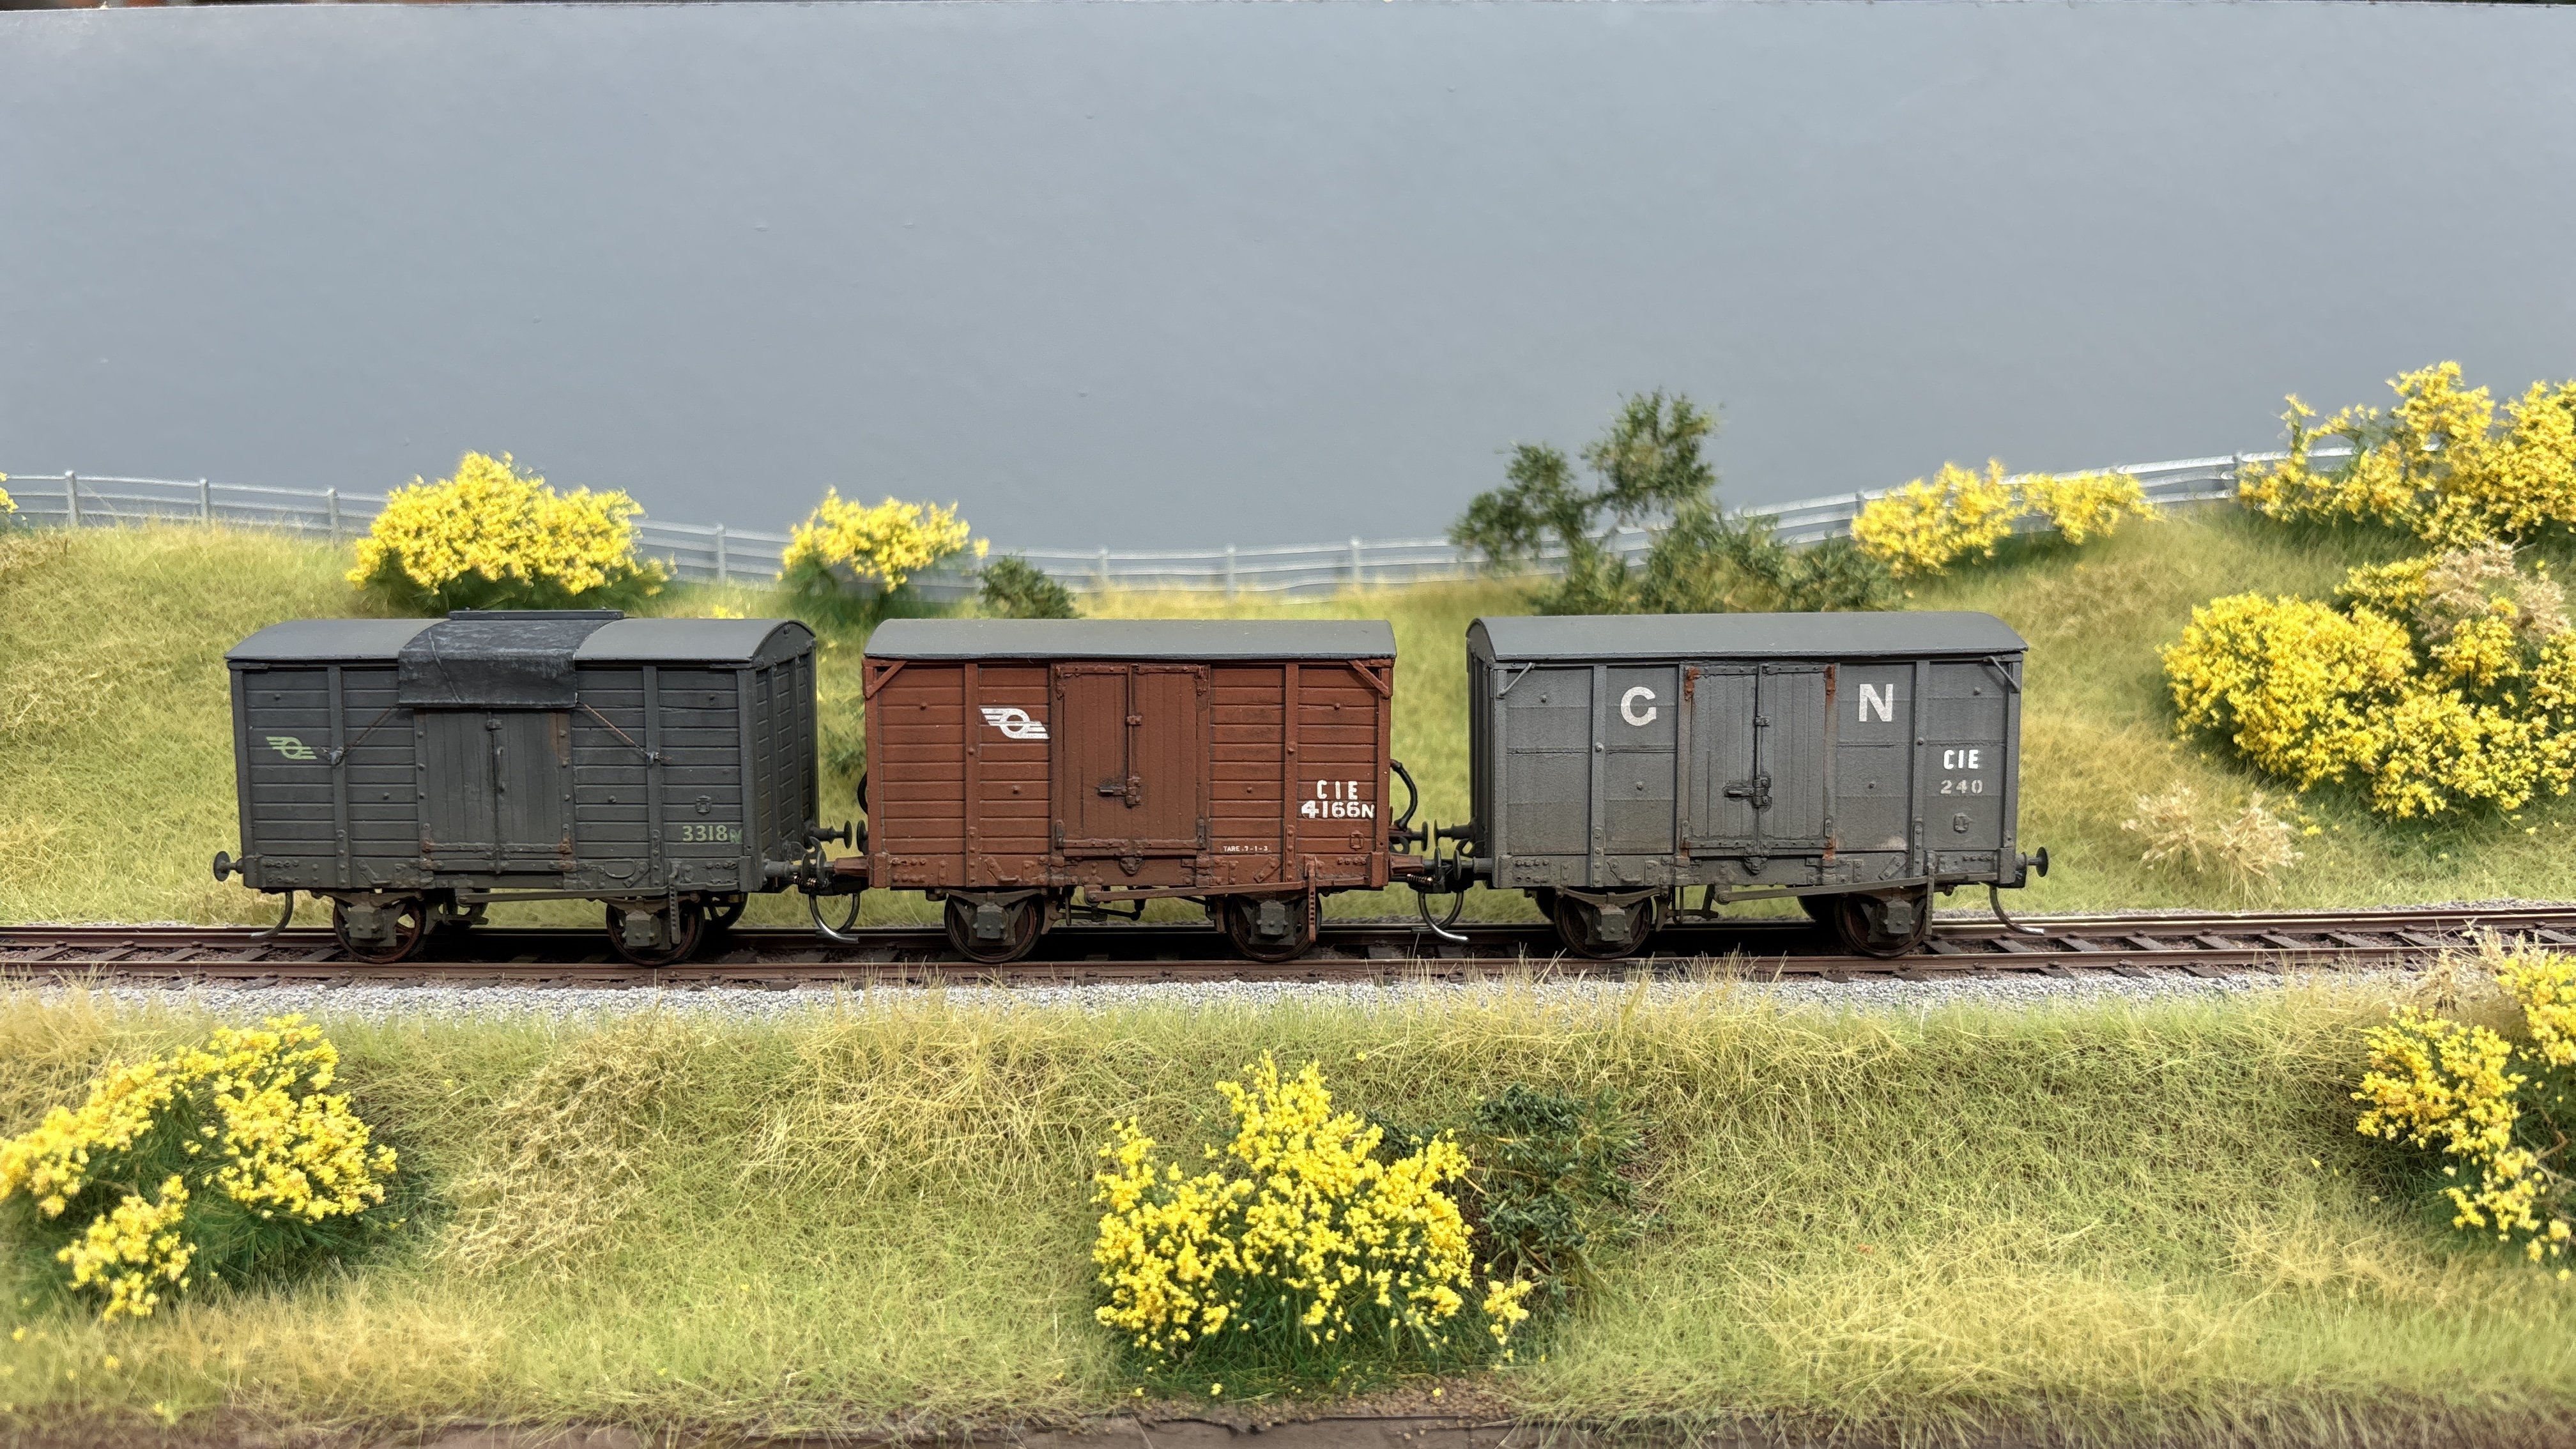
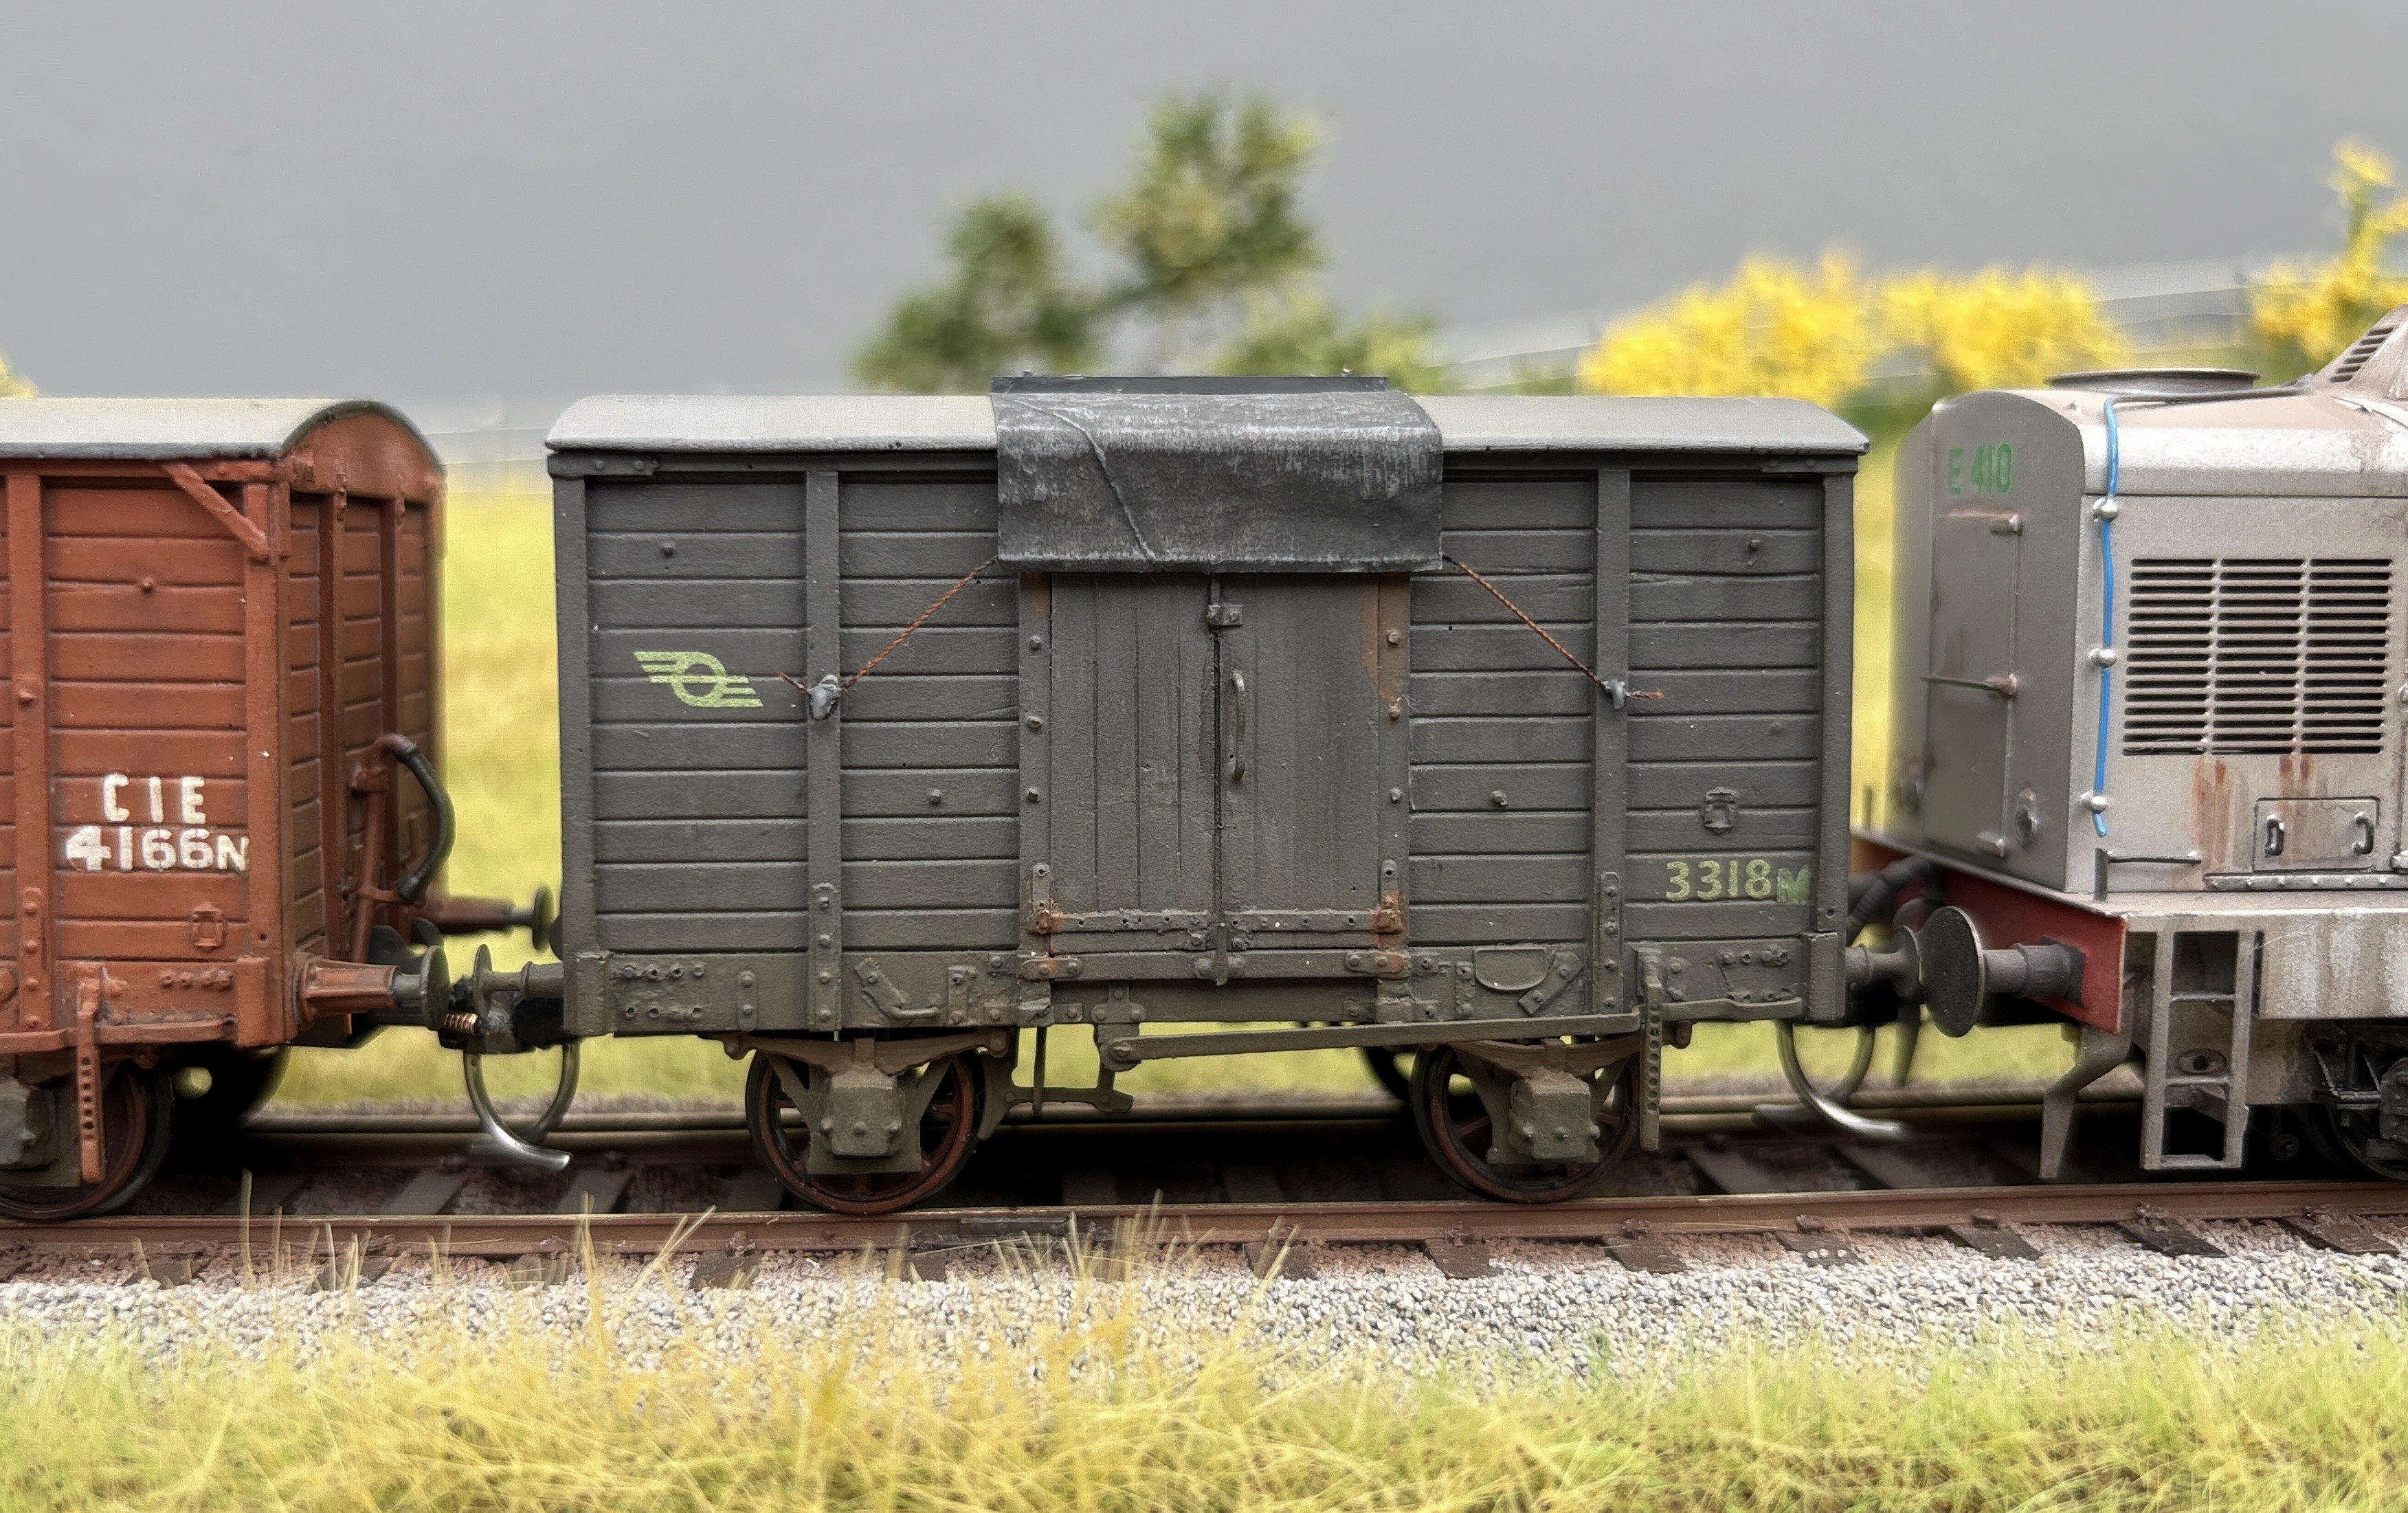
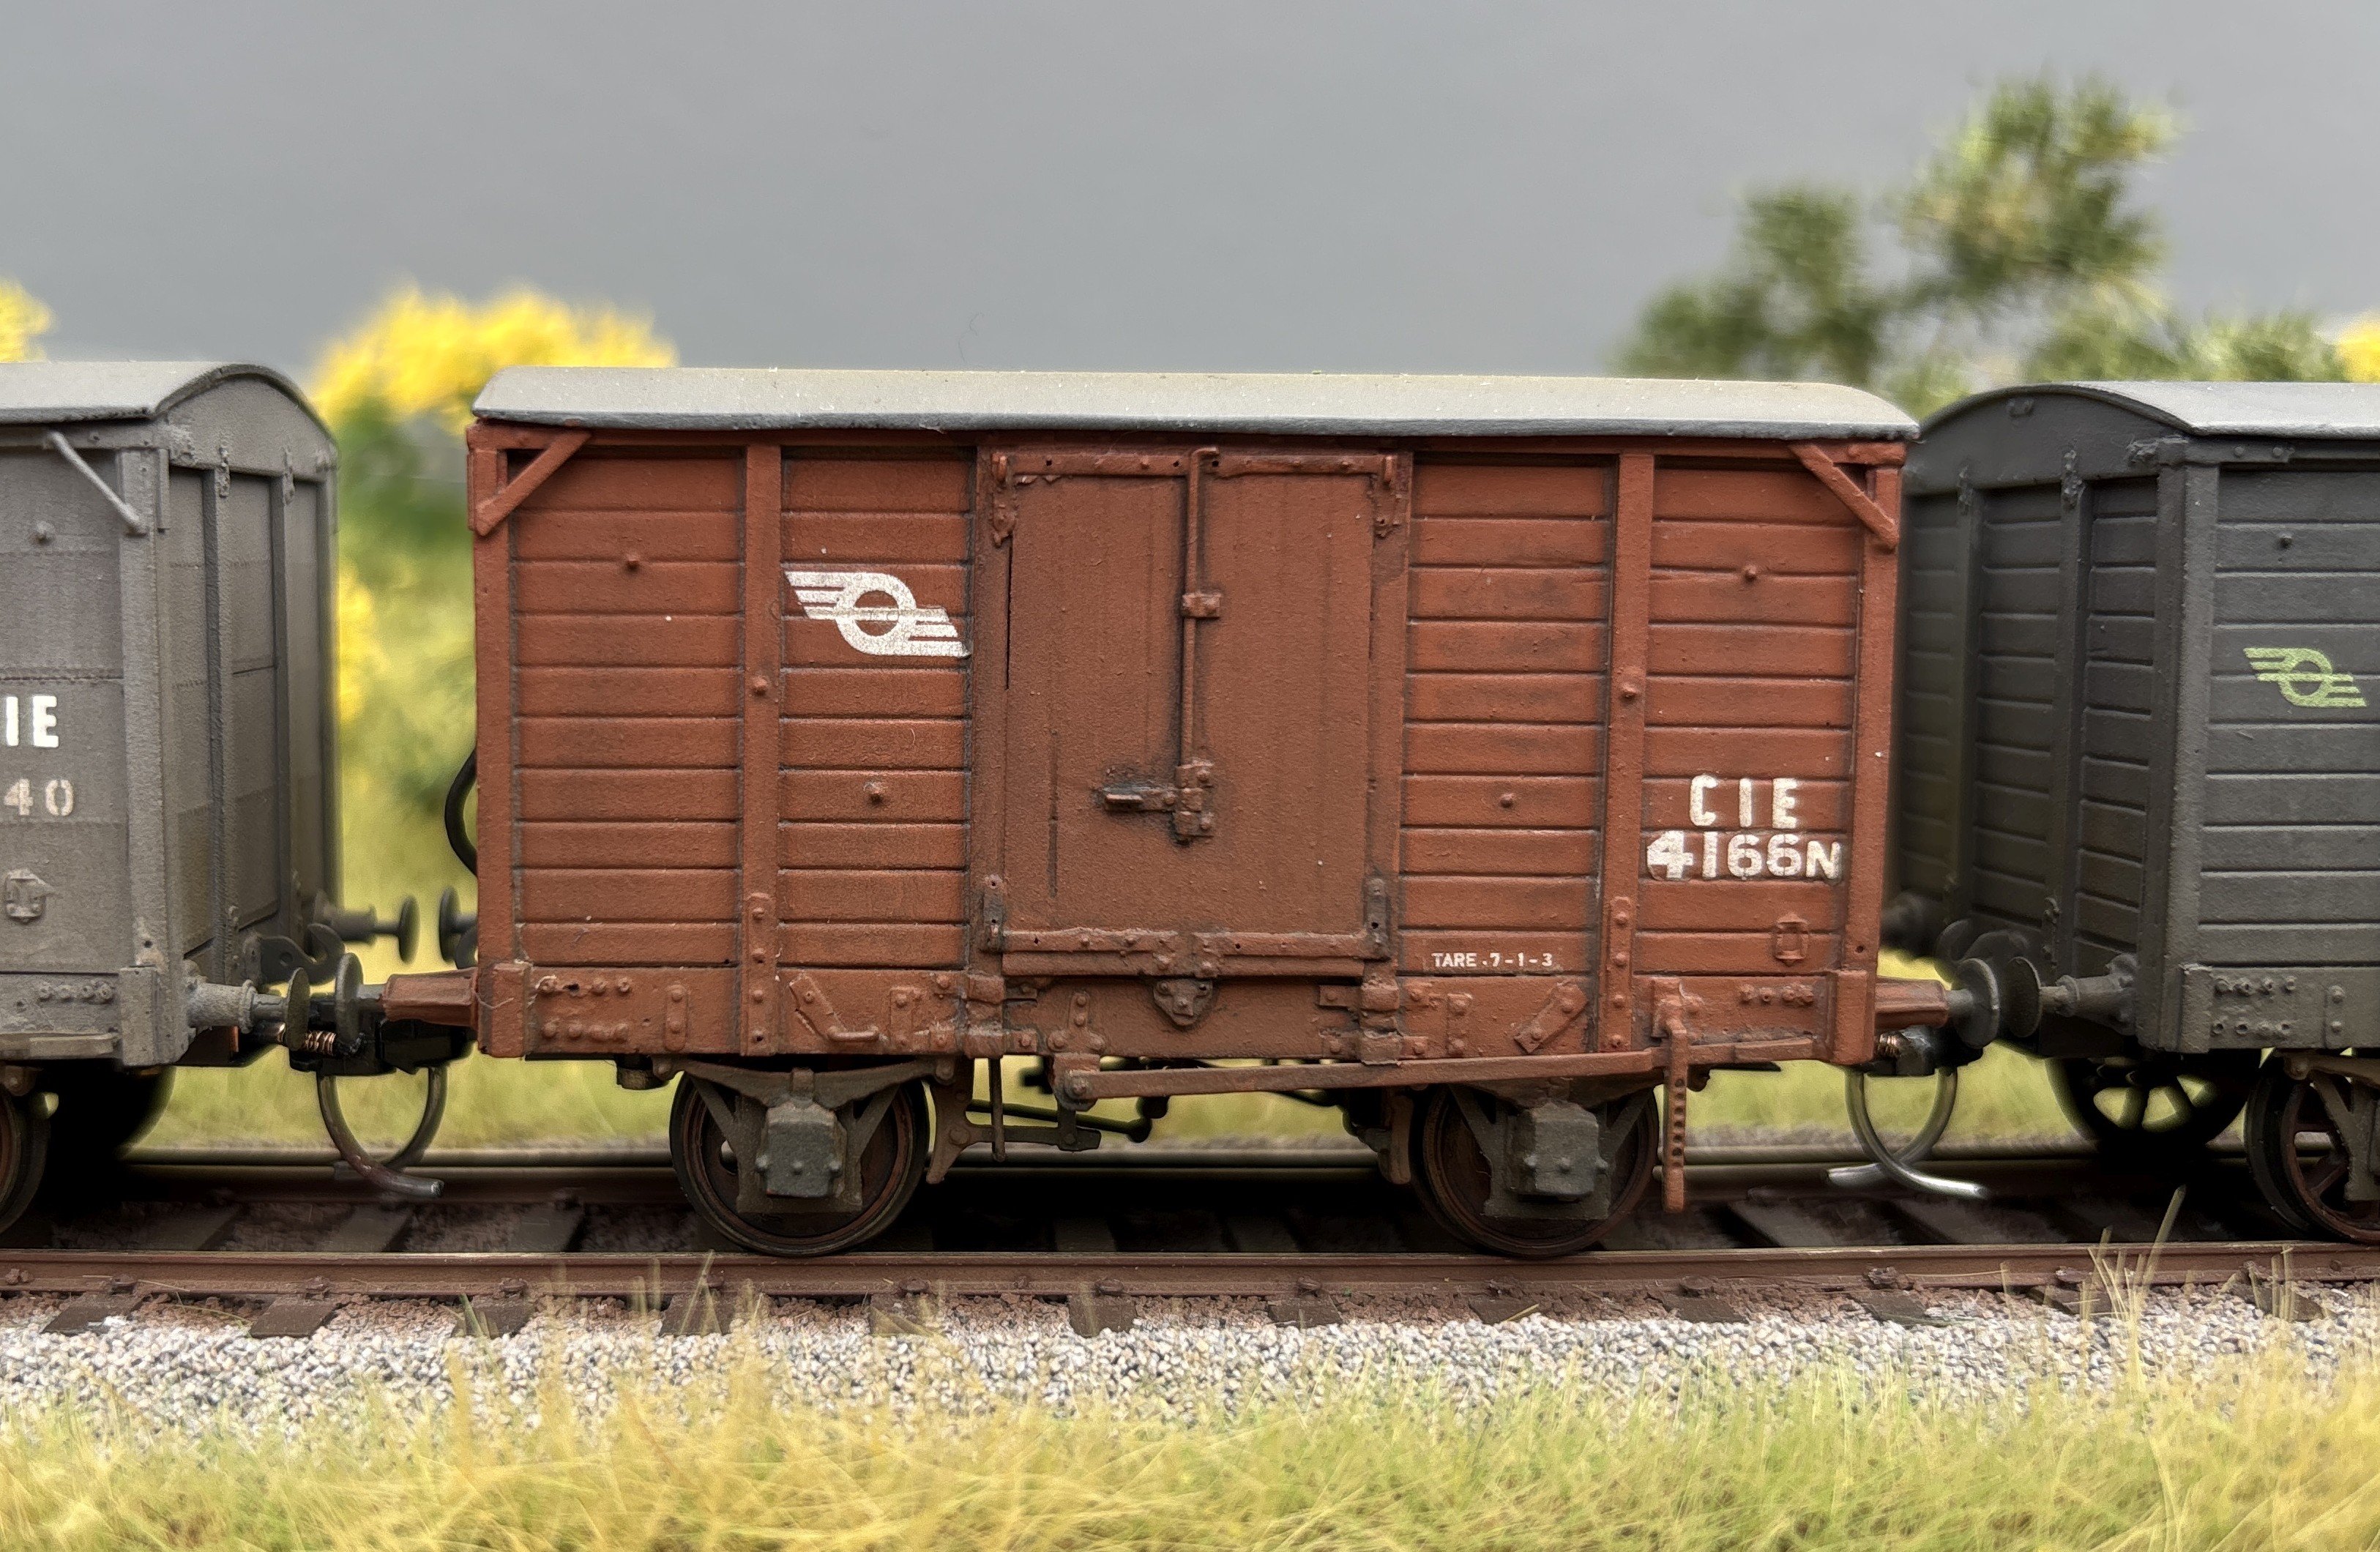
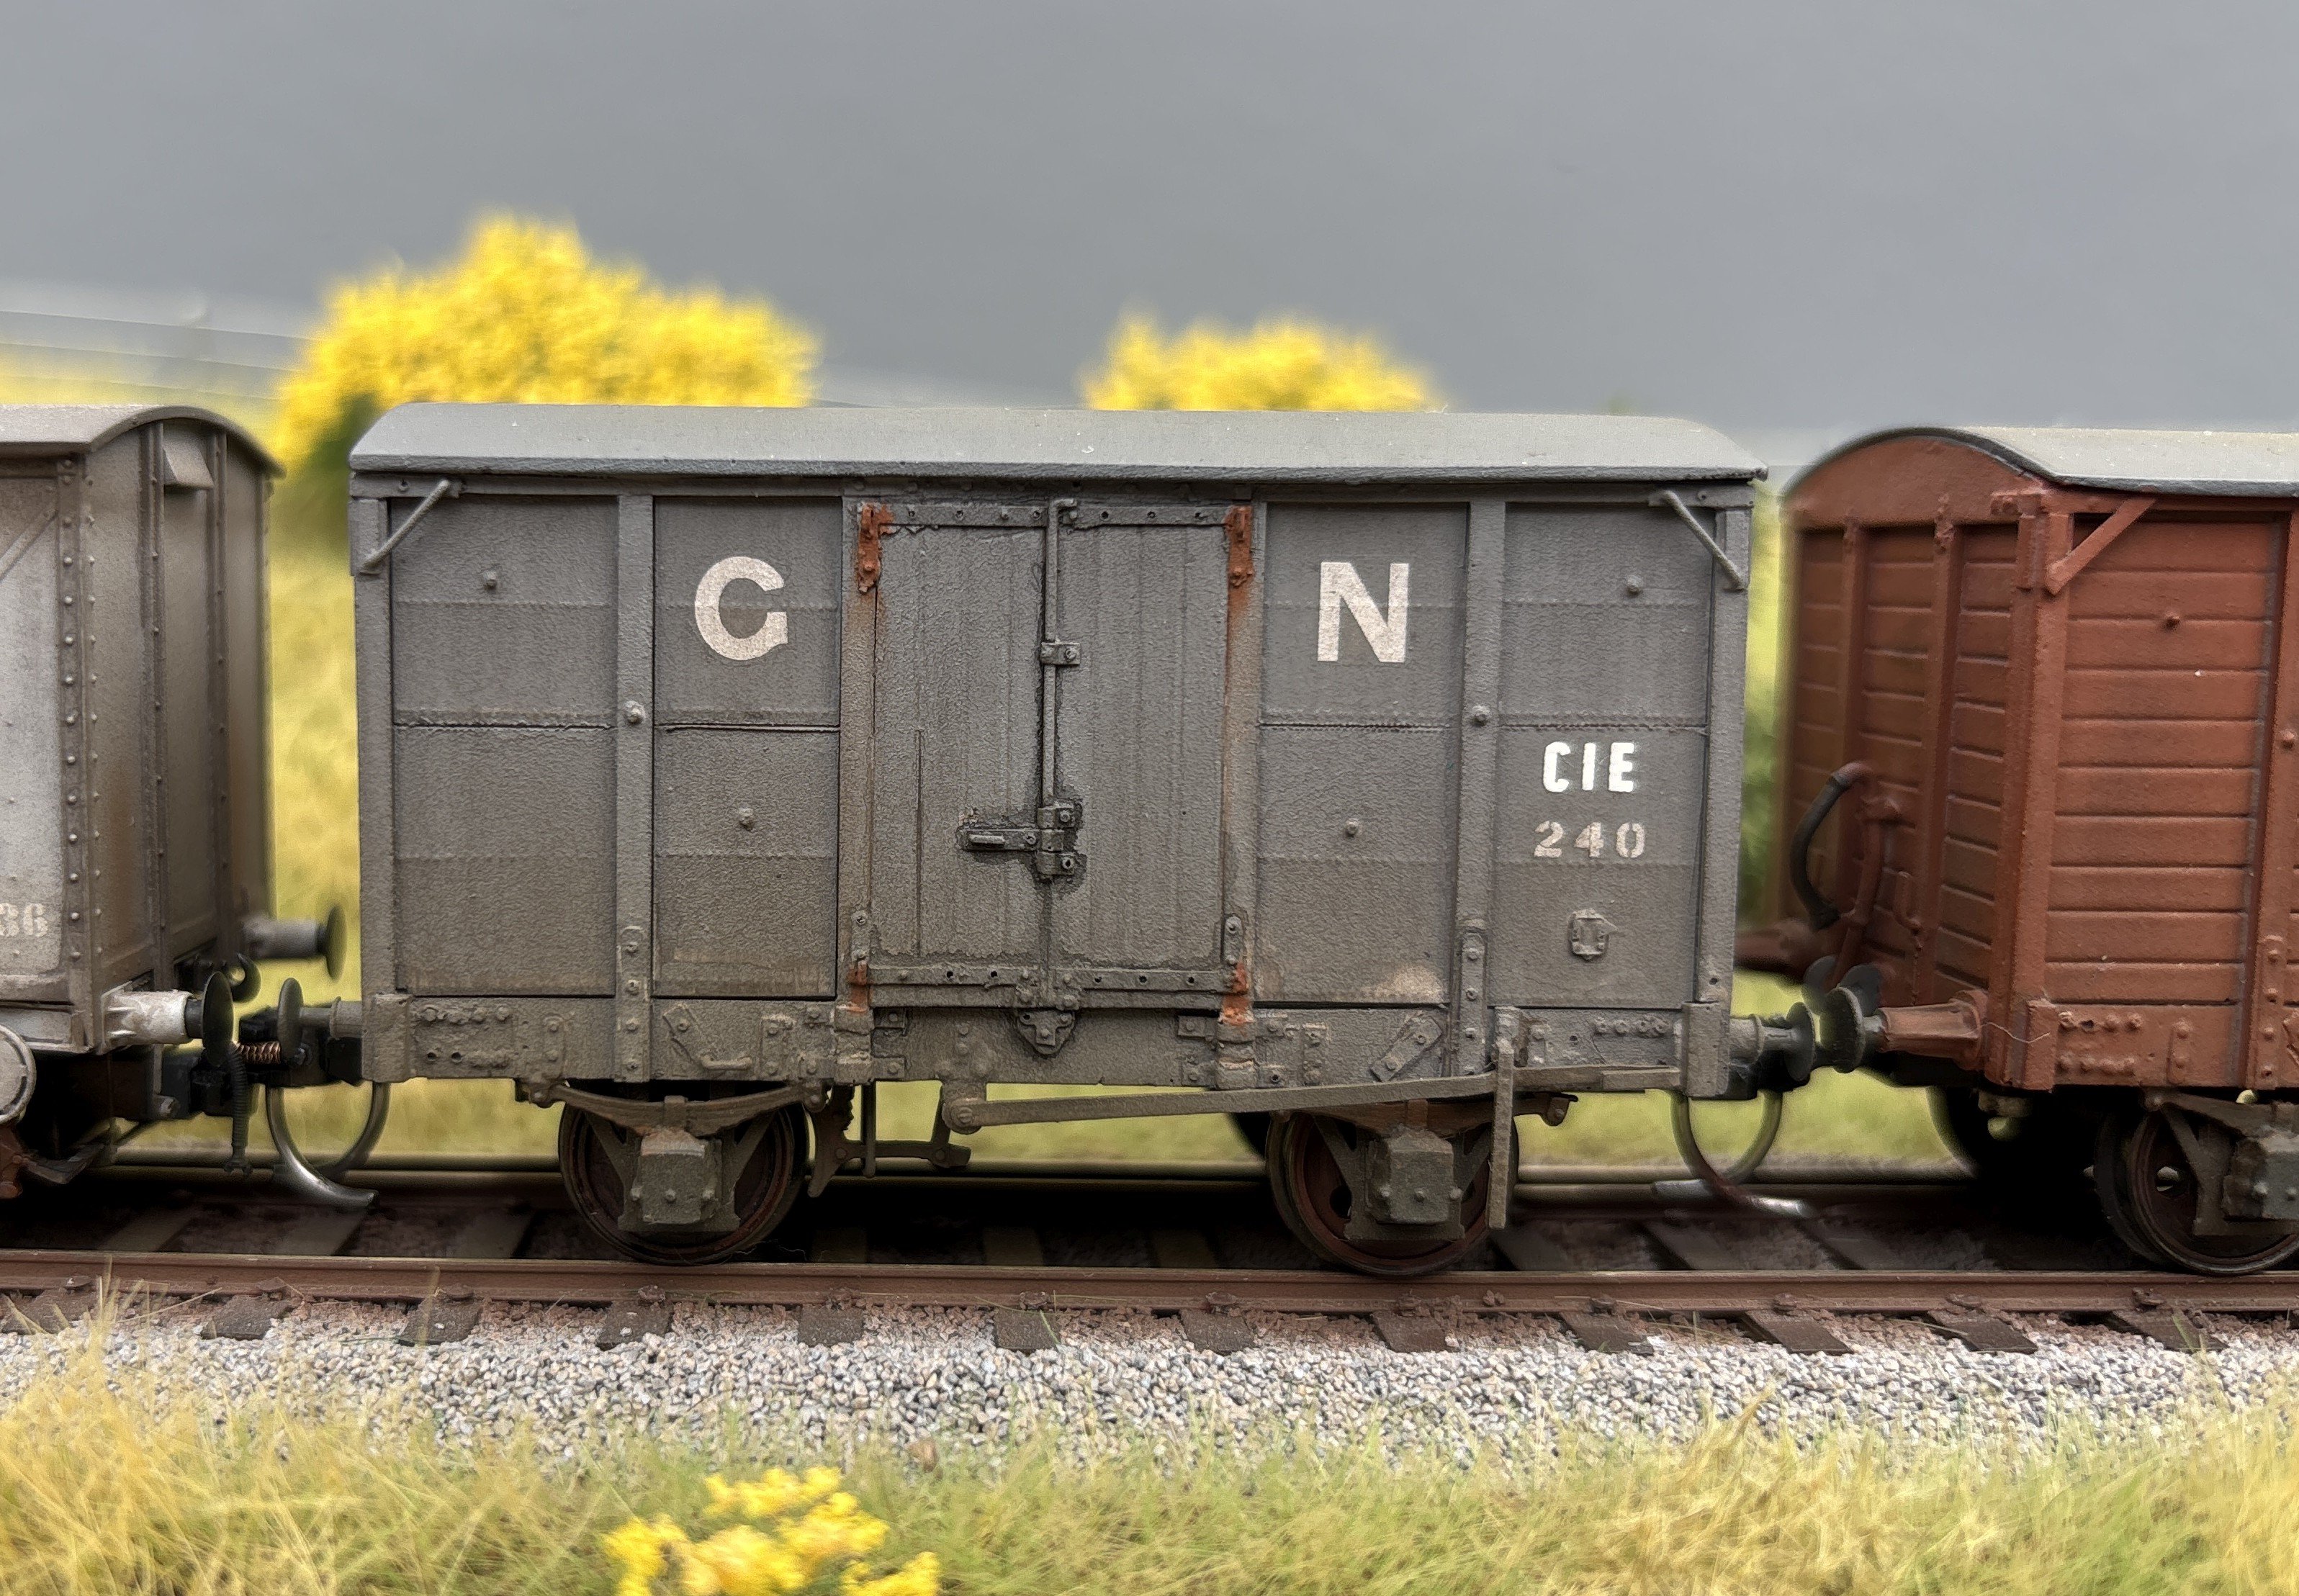
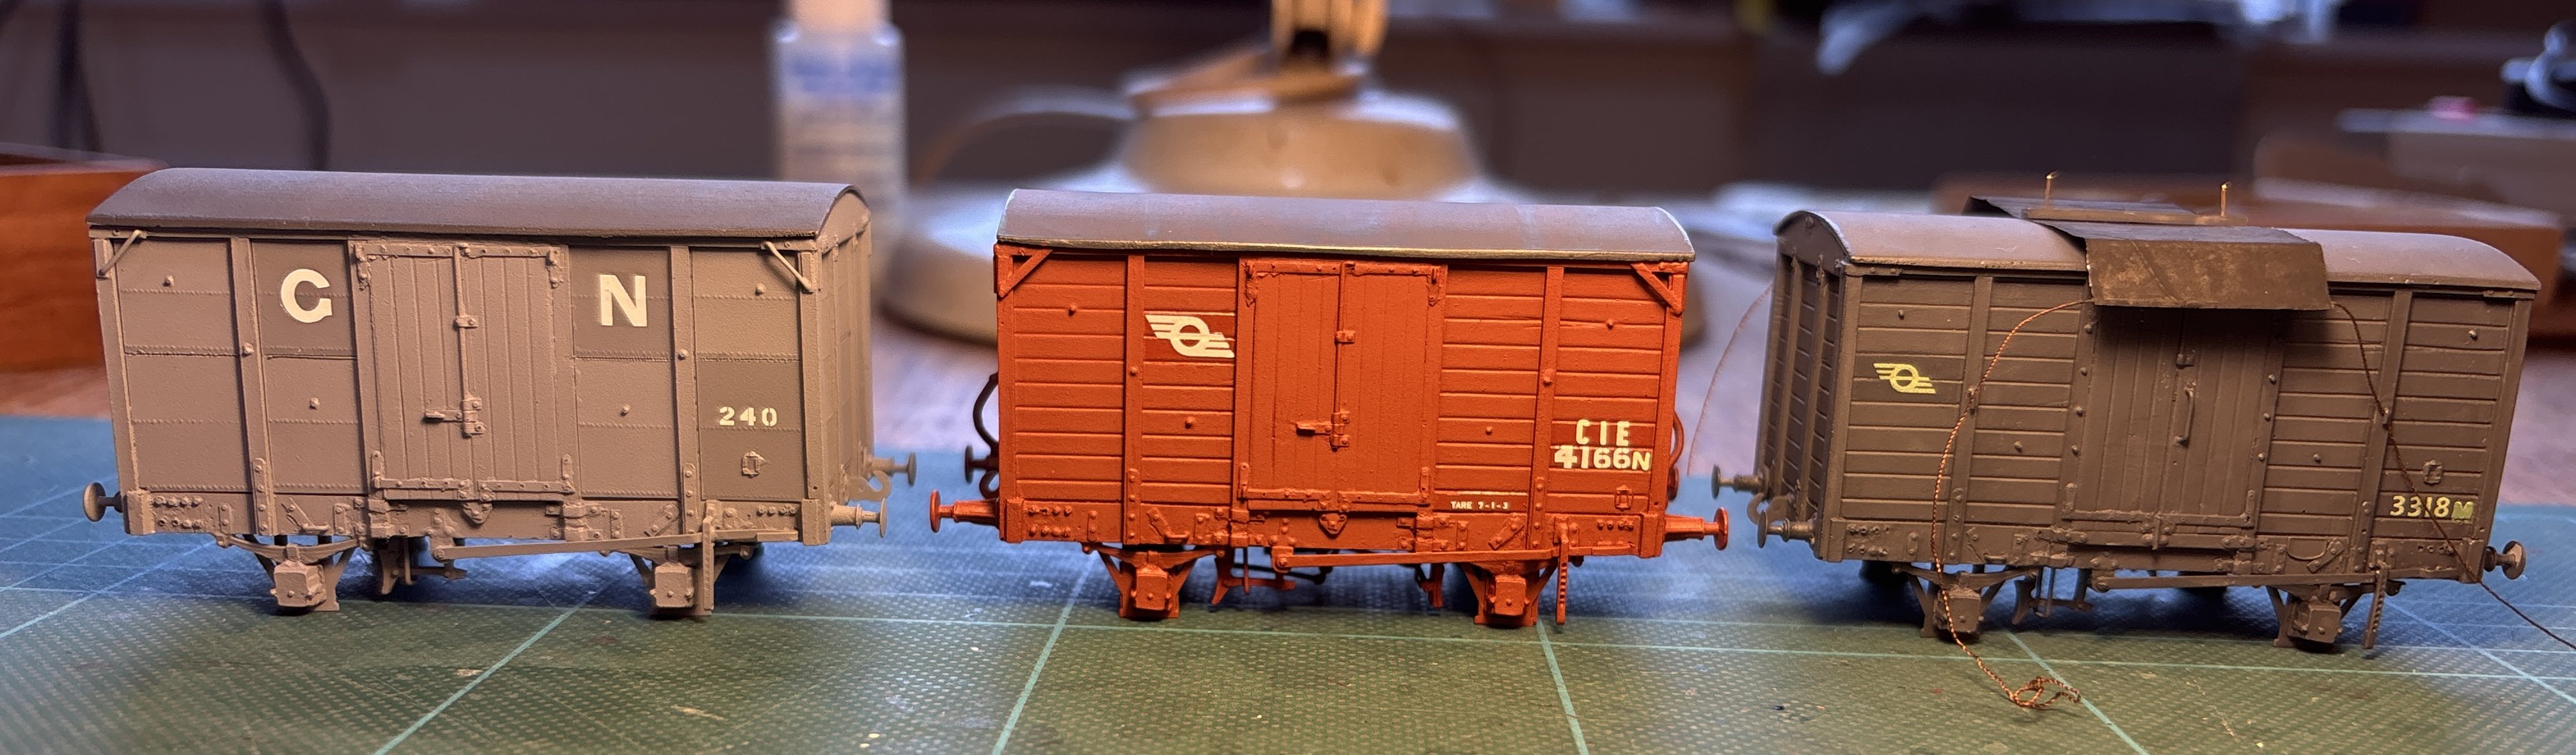
The trio of IRCH vans are now complete, here they are: Roof view, with an IRM H van and the E class for context: A selection of wagons in older liveries (early CIE with eau-de-nil snail and numbers, and inherited GNR freshly rebranded): Here including a comparison with a CIE 'green van' alongside the older GNR goods van fitted for working in passenger trains:
- 320 replies
-
- 15
-
-
I think these are now ready for the display cabinet, and eventually to run on a layout:
-
This photo by Jonathan Allen on Flickr shows 2172 (built 1961) in March 1975. It has the body panelling style of a conventional skin rather than a laminate one. I'm aware that many laminate coaches were re-panelled in the late 1970s, but this one was only 14 years old at the time of the photo, and just a few months after this photo was taken it was rebuilt into brake standard 1931. So I was wondering whether these composites were ever true laminates? They seem to have been quite camera-shy. Note also the first class branding on the windows - placed to ruin the view for those paying a premium!
-
I was wondering if you could use some DeLorean flux capacitor technology to get your 80 Class to travel back in time. But first you would have to get the 80 Class up to the critical speed of 88mph and I don’t think there’s a railway in Ireland long enough for the sloth-like acceleration of an 80 to reach that speed before it ran out of rails.
-
"Voiding the Warranty" - Mol's experiments in 21mm gauge
Mol_PMB replied to Mol_PMB's topic in Irish Models
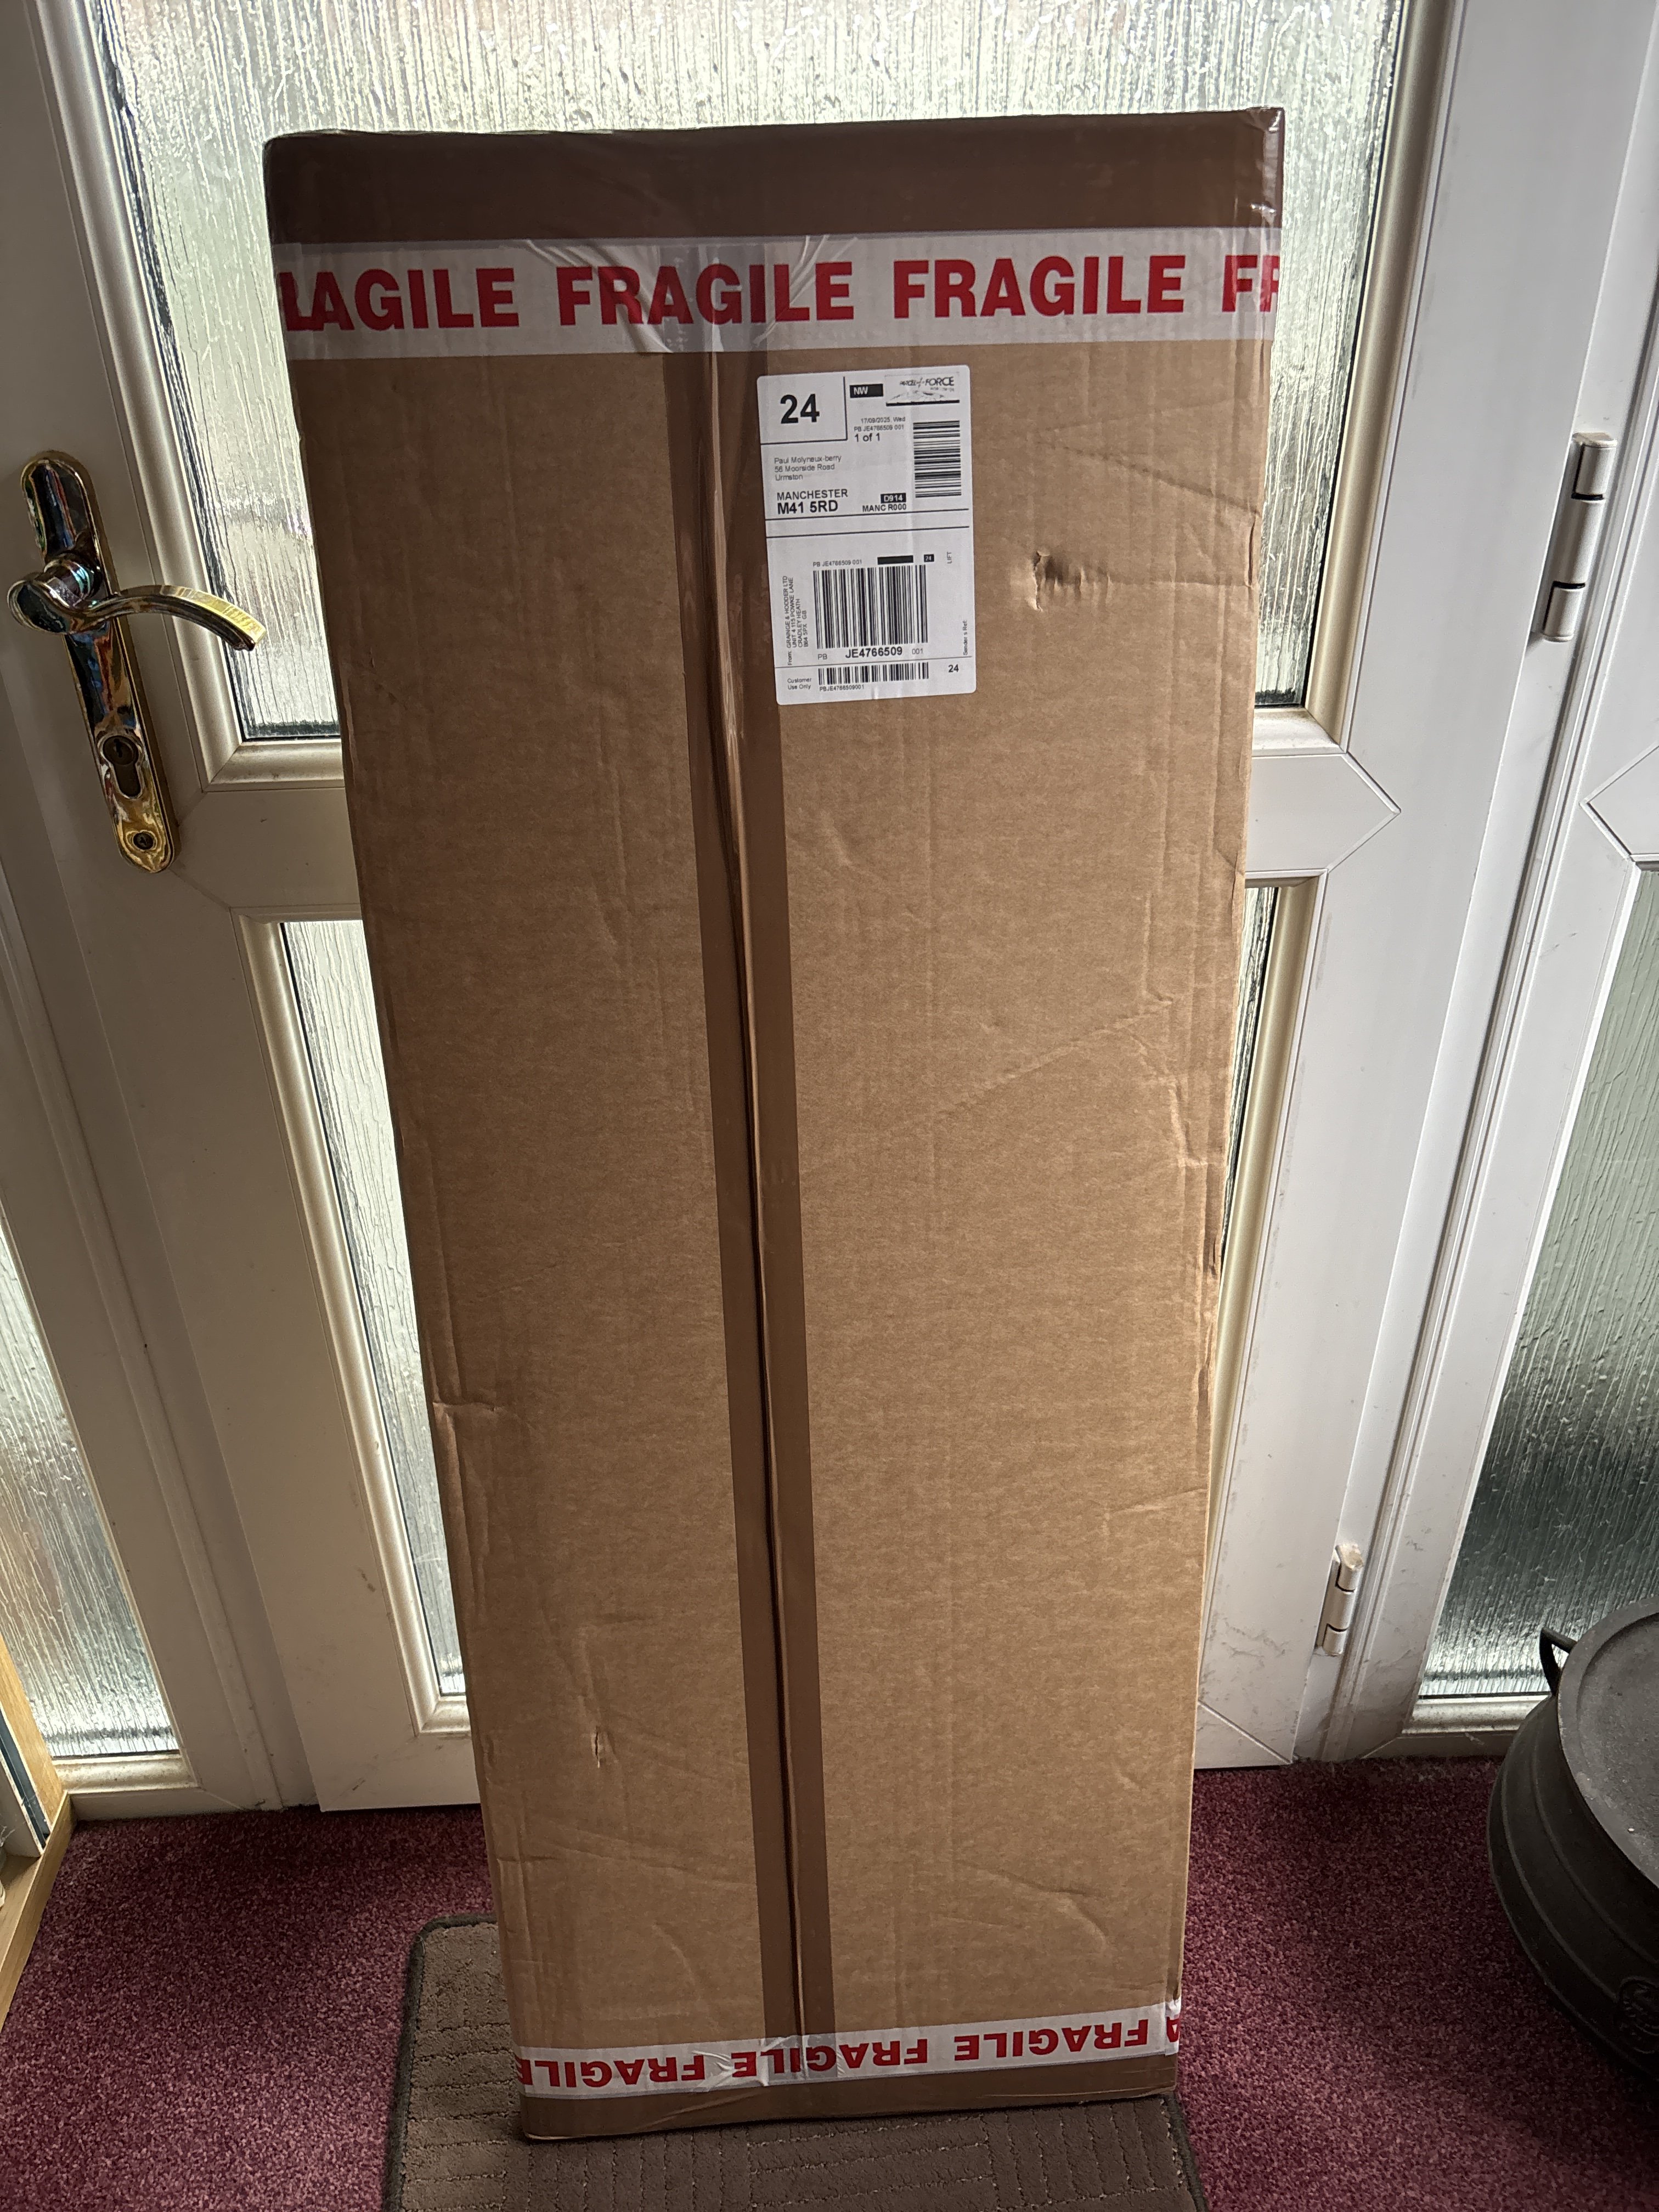
My normal practice is to make my own baseboards, but I thought I would try a kit this time. I placed an order a few weeks ago, and this afternoon the postie delivered this from Grainge & Hodder. Another thing to add to my list of jobs! These boards are intended for the Quartertown Mill plan I came up with last month. The IRCH goods vans are in their final stages now so I’ll get them finished before opening the woodwork.
-
I do rather like the look of Black Lion, which is very diminutive for a 4-4-0. It's almost dwarfed by the open wagon behind it. This image on the Transports of Delight website has a human for scale.
-
It's plane that this thread is starting to runway off topic.
-
The GSWR carriage diagrams book (Transport Research Associates) contains a list of the GSWR carriages which were renumbered in the A series, with numbers before and after. Obviously that only covers the GSWR vehicles, but I have incorporated data from this list into my spreadsheet. I agree there is confusion about withdrawal / scrapping dates, and I doubt I'll be able to resolve this completely. Many publications consider them to be equivalent, but there are plenty of examples where a coach was withdrawn from public service but then repurposed as an engineers' vehicle, being scrapped much later or not at all. The RPSI's 12-wheeler 861 is another example. The IRRS journals can be useful for contemporary reports of vehicles consigned to Sallins or Mullingar, but even then some vehicles escaped and in some cases the next issue of the journal has a note that a carriage is back in service after it had been reported as withdrawn. My spreadsheet is never going to be perfect - there are inconsistencies in the source data, and CIE itself was inconsistent in the way they classified and renumbered some vehicles. Plus there are opportunities for errors to creep in at every stage. But I hope it will be useful and I've certainly learnt a lot in compiling it. Another two questions for the carriage experts. 1. The small group of carriages that CIE built themselves in the early 1960s, almost alongside the Cravens, were: Firsts 1145-1146 Standards 1497-1503 Composites 2172-2179 Catering cars 2402-2403 Like the laminates that preceded them in the mid-late 1950s, these early 1960s coaches had triangulated underframes and commonwealth bogies, but their body profile had vertical sides. So my question relates to the body construction of these early 1960s coaches. Were they: True 'laminate' (i.e. laminated wood hoop and rib structure with aluminium-faced ply skin) Traditional wood-framed, steel-skinned construction as used in the early 1950s? Or some combination of the two? 2. What metal was used for the body structure and skin of the Park Royals? Steel Aluminium
-
La la la la la (fingers in ears, trying to ignore the wonderful toy train!) If I get a chance this weekend I'll do the regauging and sound fitment on the green A class I bought myself instead of an anteater.
-
Just a quick update. I am not far off completing my first draft of the combined CIE carriage register spreadsheet which I will upload here in the next few days. The scope I have set myself is to include all steam-heated, vacuum-braked carriages in service with CIE from 1961 until the final withdrawal of the Cravens in 2006. It's been a lot of work to collate and cross-reference data from about 50 different sources including two editions of the CIE carriage register and many entries in journals and books. Some entries are simple, some are complicated where carriages were rebuilt, renumbered and reclassified several times during their life. Already I have ideas of how to improve it, such as adding hyperlinks to connect the entries where vehicles have been rebuilt/renumbered, and links or references to published photos of each carriage. That will take even longer, so I'm planning to publish the simple version in the meantime. An area I am presently weak on is the carriages inherited from the GNR, and to a lesser extent the MGWR and the DSER. The listing would definitely benefit from the knowledge of a GNR carriage expert. I hope this will prove a useful reference. Cheers, Paul
-
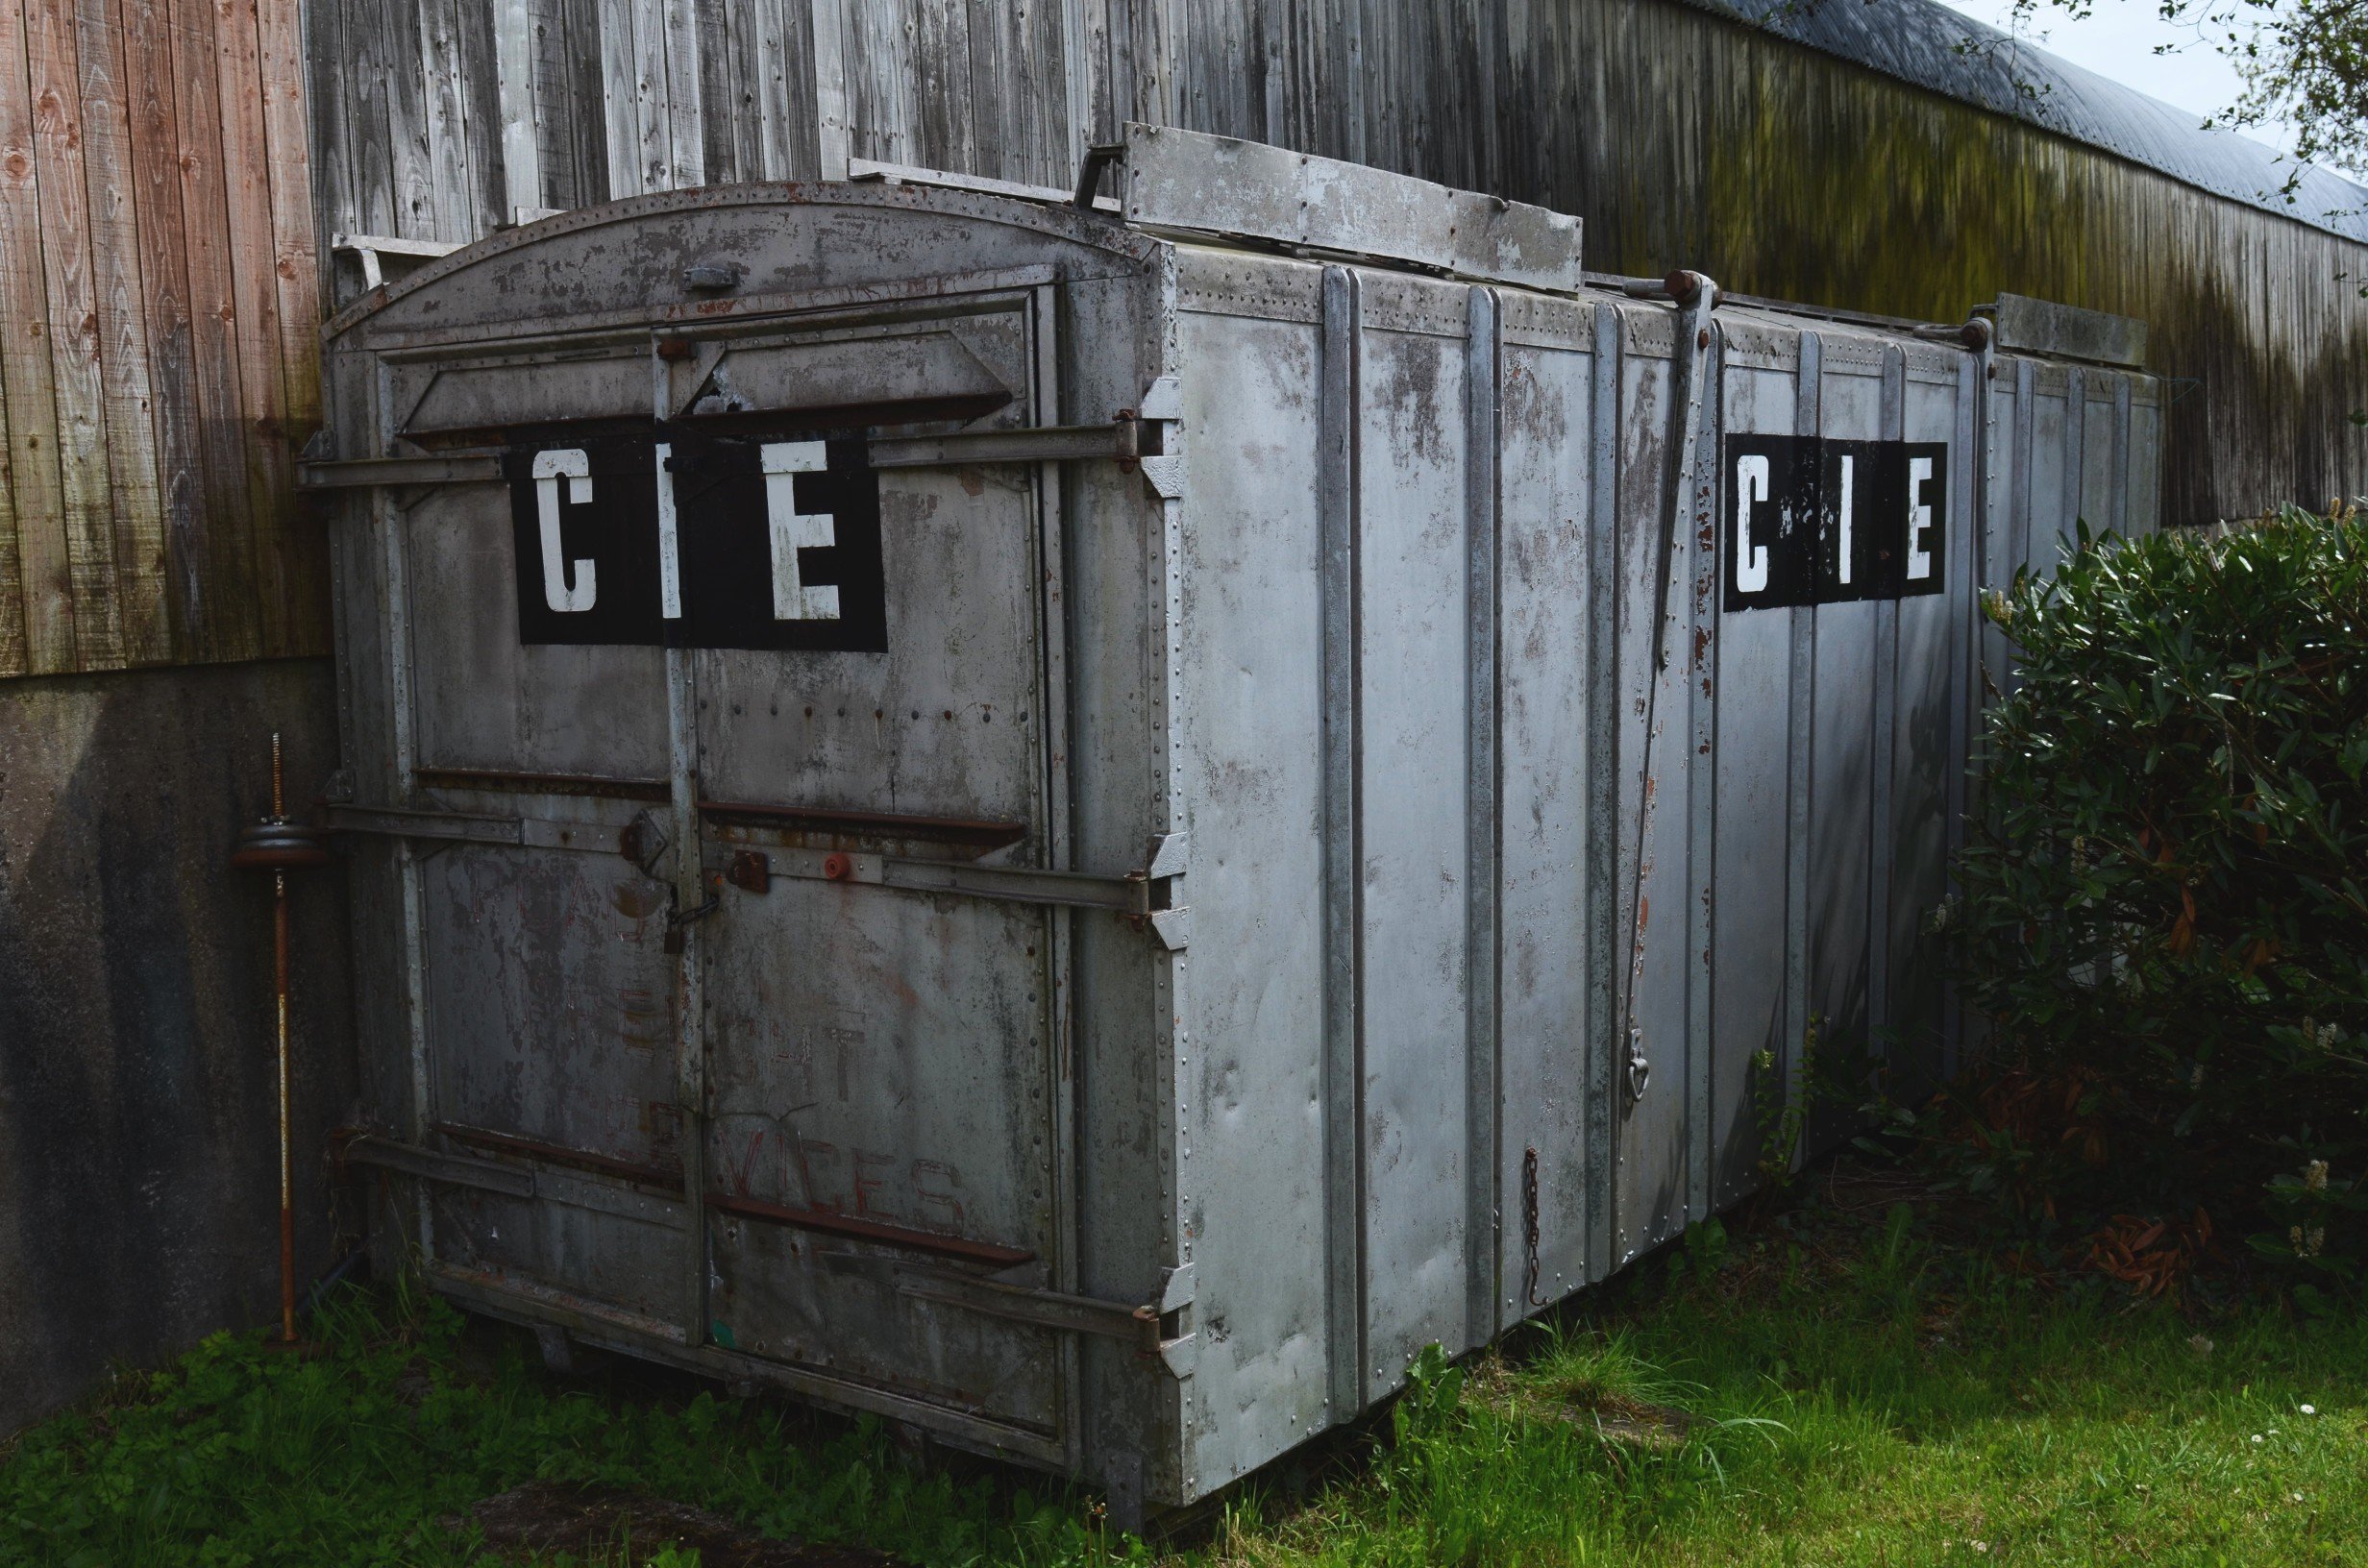
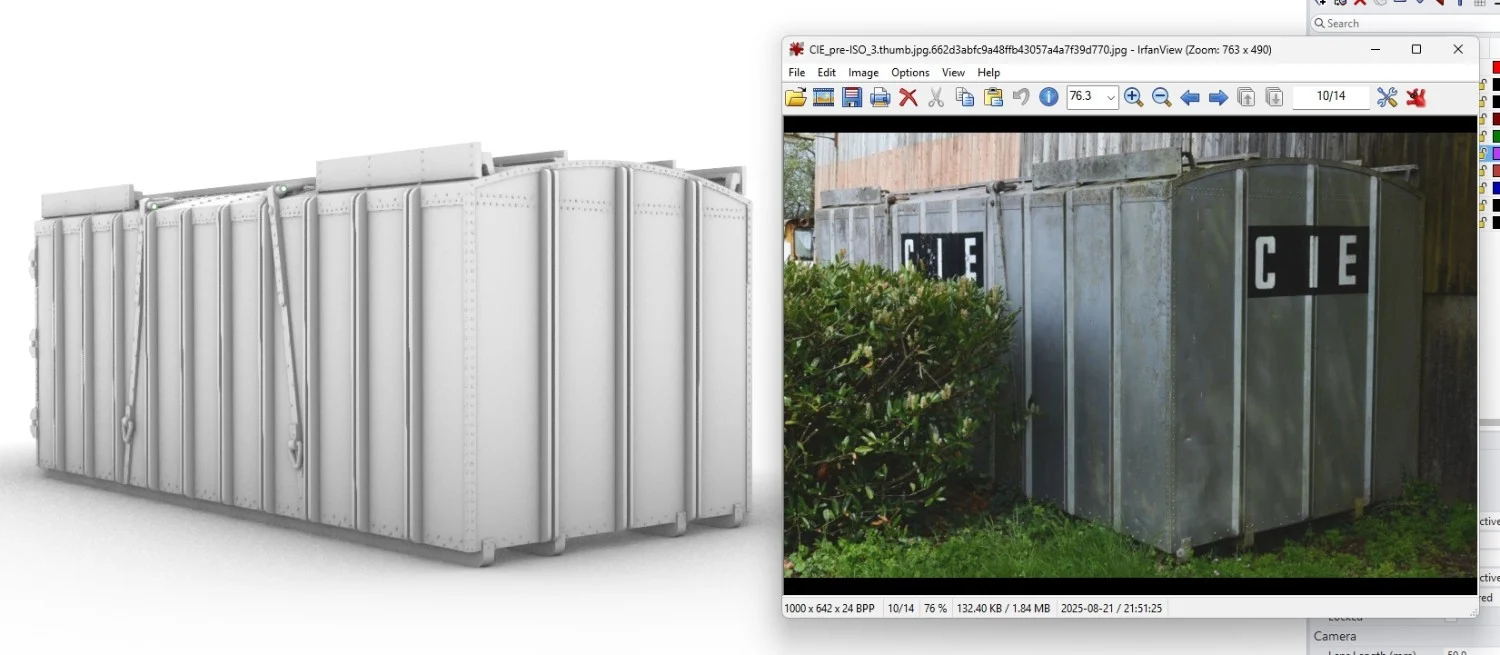
Is there anyone on the forum who lives close to Dromod? Or knows the people at the C&L museum there? We would really like to confirm a couple of dimensions on this container, to ensure that the 3D printed model ends up the right size. At the moment we're not sure the proportions are quite right. I'd be happy to make a donation to the C&L museum in return for 4 basic measurements. Cheers, Paul
-
Many thanks. That looks very good for the British Railways containers, which were common in Ireland. Some of the CIE ones were similar, others were rather different. I haven't yet found anyone with a copy of a CIE container diagram book that is old enough to show their pre-ISO containers. That may be because many of them were owned by the road freight division of CIE, rather than the railway. I think we can infer the dimensions of the traditional wooden types from the BR diagrams. The 1960s alloy containers were definitely bigger. Happily my plea for a diagram of the 25201 series flat wagon also produced an excellent result.
-
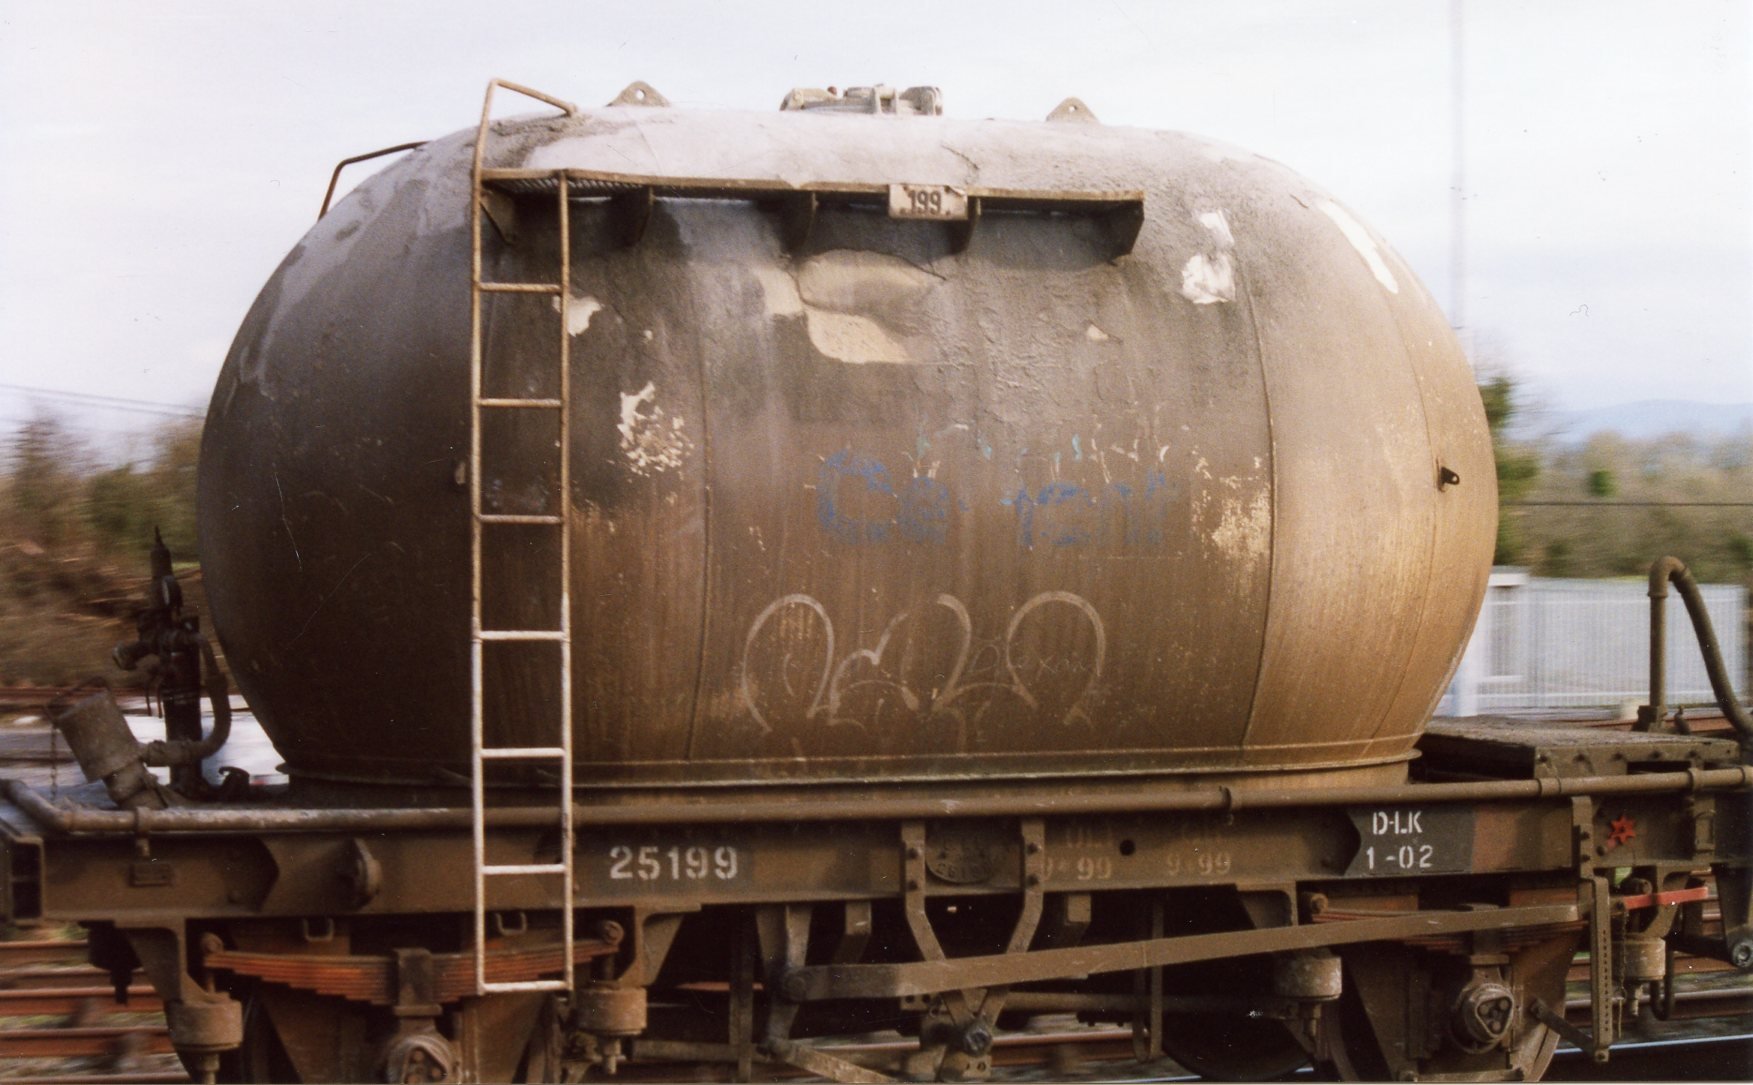
The latest IRRS Flickr upload includes some images of the later bubbles under construction at Inchicore. Here are the tanks, you can just see that there are stencilled and chalked markings on them: https://www.flickr.com/photos/irishrailwayarchive/54778606819 https://www.flickr.com/photos/irishrailwayarchive/54778614773 Not so obvious, but I think there is a row of tankless bubble underframes to the left of the D class here: https://www.flickr.com/photos/irishrailwayarchive/54777521647 https://www.flickr.com/photos/irishrailwayarchive/54777524317 From an earlier IRRS upload and the penultimate batch of bubbles, here's 25129 with the tank and underframe assembled, but not yet fully painted: https://www.flickr.com/photos/irishrailwayarchive/53570447106 Note the shipping instructions including 'Dublin' stencilled on the side of the tank, and 'Sanguity' chalked on. She was in the Everard fleet:
-
Definitely an odd one. It looks more like a shunt dolly, elevated for better visibility. Note also the track circuit diamond on the post. Would be interesting to work out where exactly this was, and what move this signal was for. Could it be signal 13 on this diagram? https://www.flickr.com/photos/irishrailwayarchive/49761789231
-
I've put some money in the pot too - these wagons are central to my memories of Irish railways. Just out of interest, which wagon number is it?
-
Frustrating indeed. I normally build my own boards but to give me a running start for my mini Irish layout I have ordered some laser-cut baseboard kits. Hopefully they will arrive complete, but there’s still the lead time of 6+ weeks to deal with. I hope your missing parts arrive soon as I’m looking forward to seeing this develop.
-
The Loch is quite unusual for a 4-4-0 in being outside cylinder, not many of those in Ireland except much bigger blue locos. Though I suppose you wouldn’t have to use the cylinders and connecting rods. The D40 has proportions and shape visually similar to MGWR A class (original) but I haven’t checked the dimensions. There may be some options to convert to 2-4-0 tender loco types too? But as noted above they are relatively expensive as a donor chassis and very tricky to regauge if required.
-
Some work is under way to produce a 3D printable version of the CIE alloy container of 1961/62, like the surviving example at Dromod: It is being developed by the same team who did these; I have provided prototype photos, dimensions etc: https://www.rmweb.co.uk/forums/topic/182716-big-4-pre-nationalization-container-diagrams/?do=findComment&comment=5345870 I will update this thread when more information is available. These containers are too long for traditional unfitted flat or open wagons, and need to ride on 25201 or 25436 series flat wagons. The 25436 series are quite well-known but the 25201 series less so - some photos and details here: https://irishrailwaymodeller.com/topic/17496-cie-ballast-wagons-late-1960s-to-1980s-not-hoppers-or-flats/#findComment-250654 It's a long shot, but does anyone have a diagram or drawing for the 25201 series flats? If not, I can probably work it out well enough from photos and known dimensions. Also, does anyone have any diagrams of CIE containers of this pre-ISO era? The 1965-built side door type shown in this RPSI photo would be of particular interest: Many thanks, Paul
-
That's looking great. It's a tight fit in the room - but good use of space as long as you can still get to those shelves somehow! I look forward to seeing this develop.
-
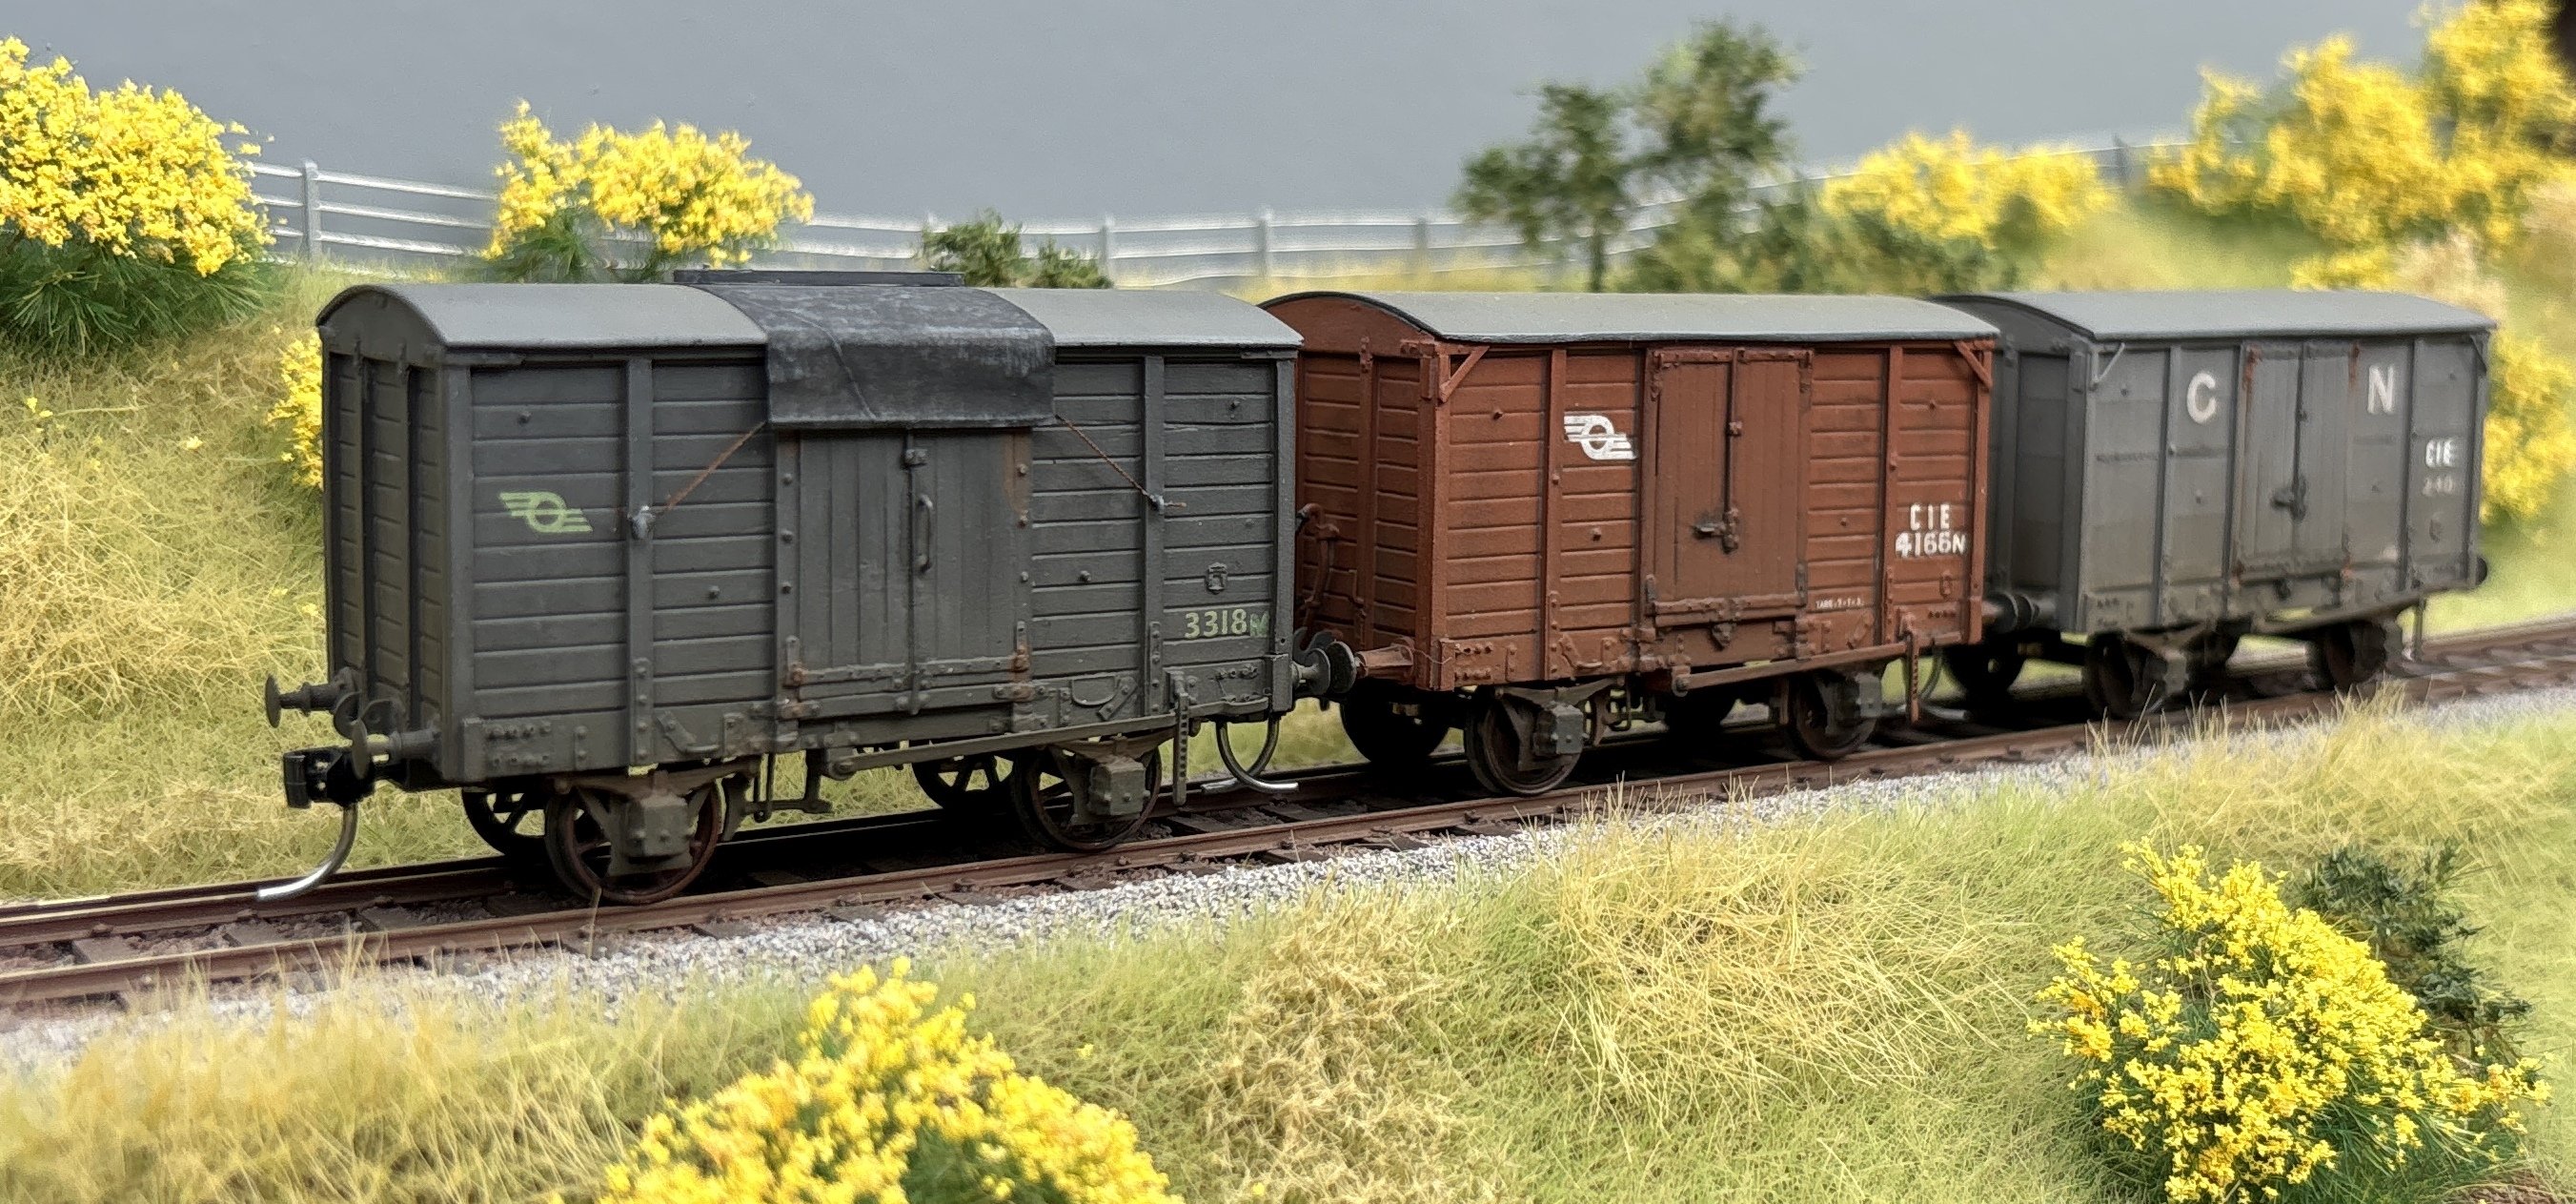
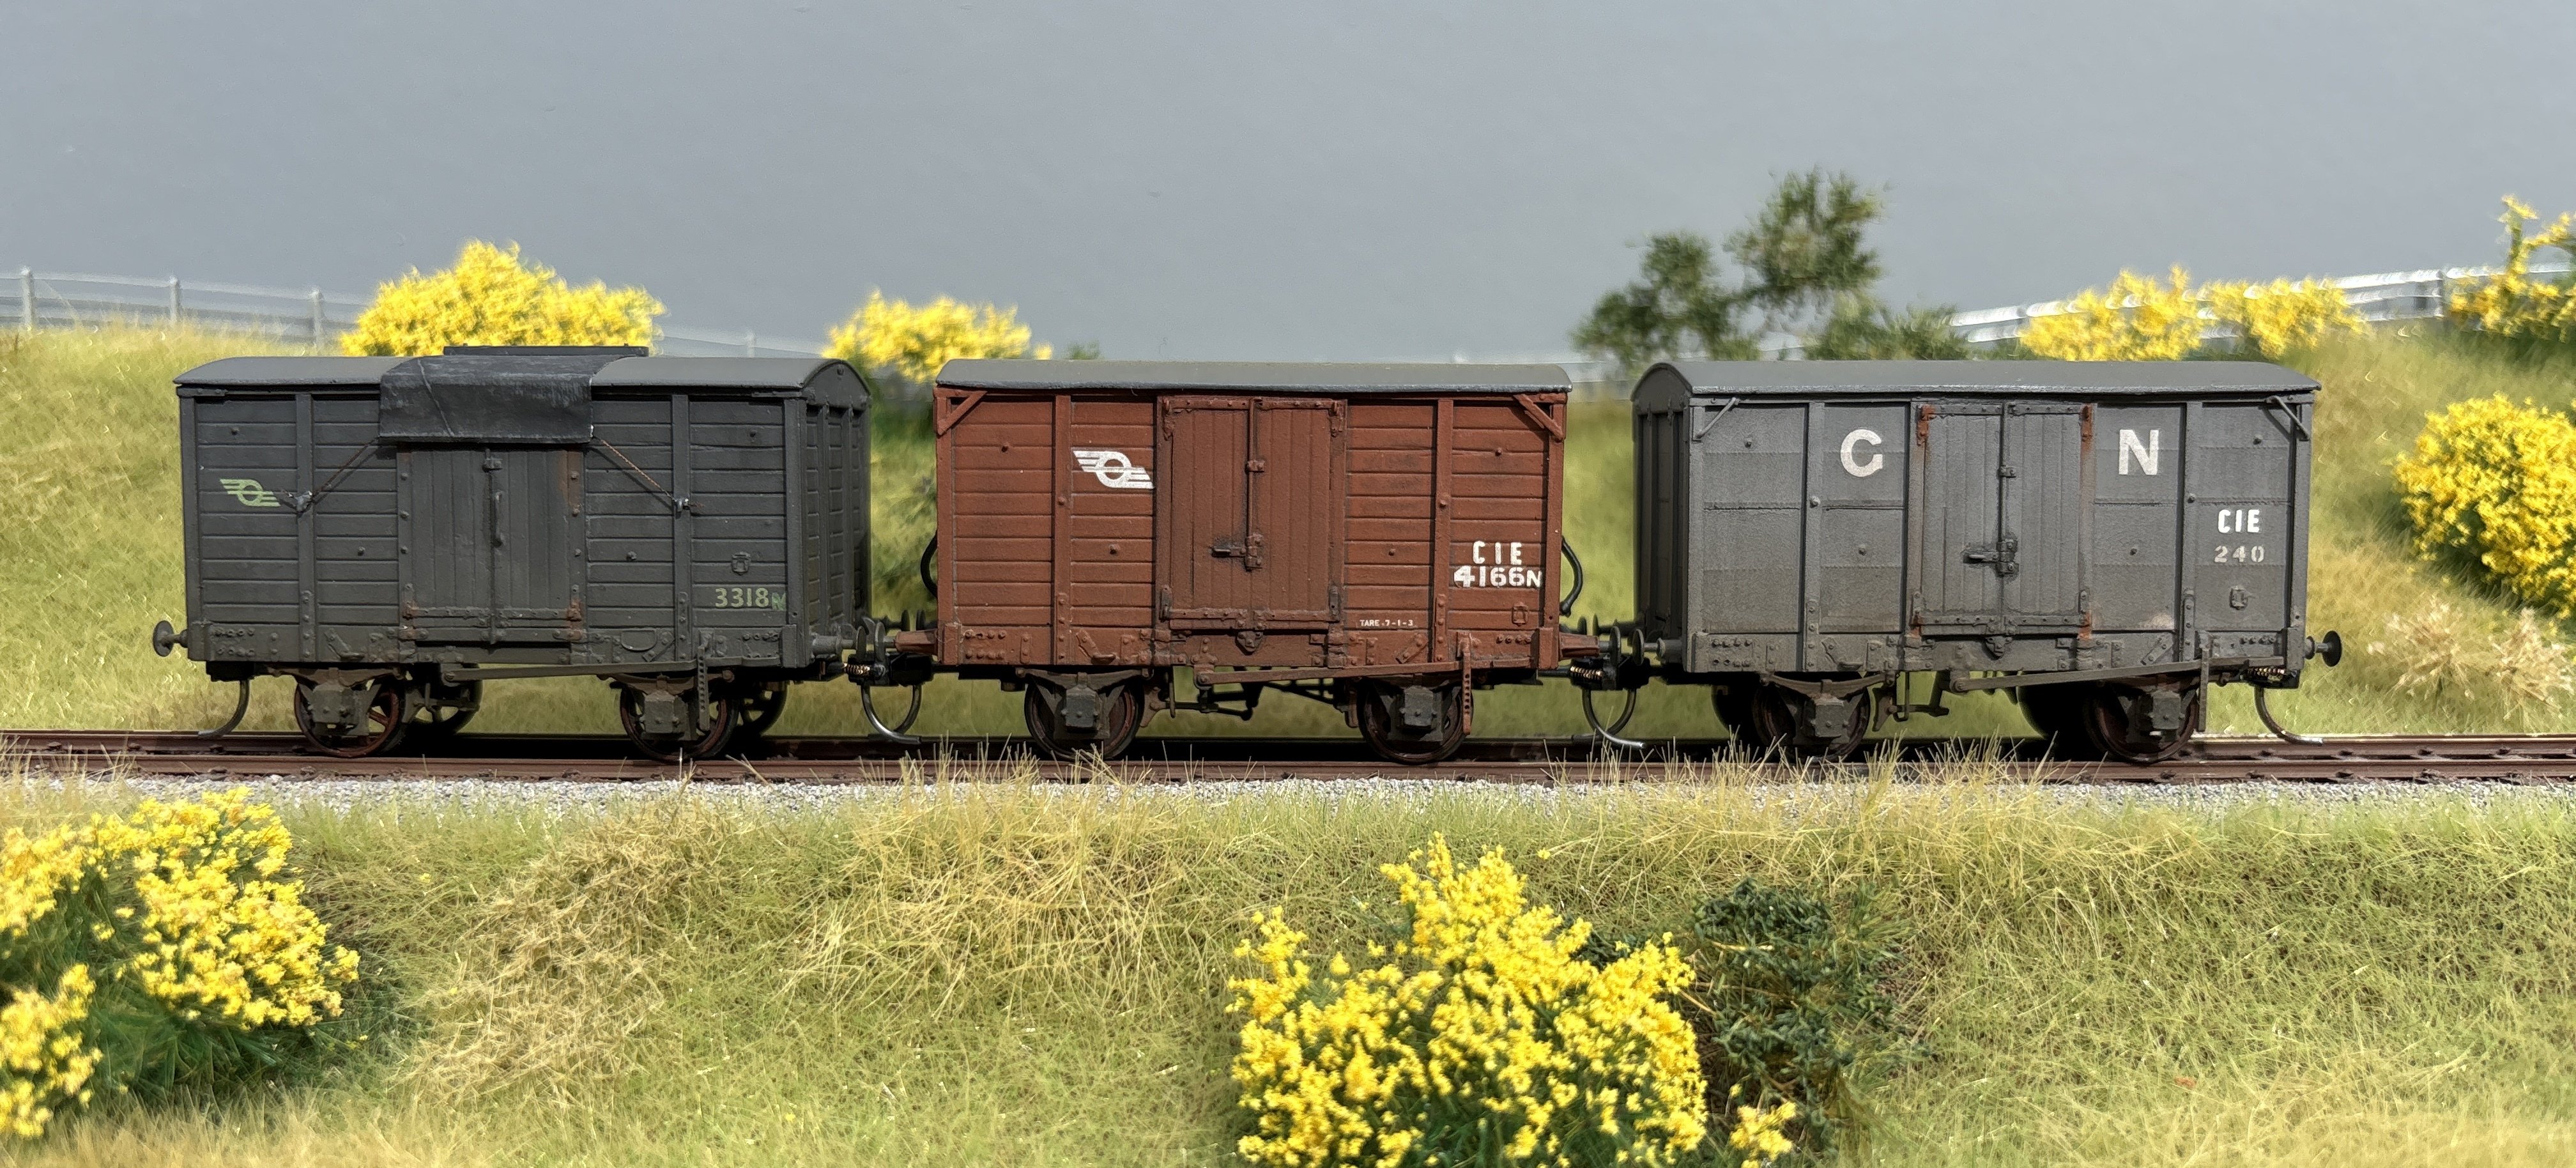
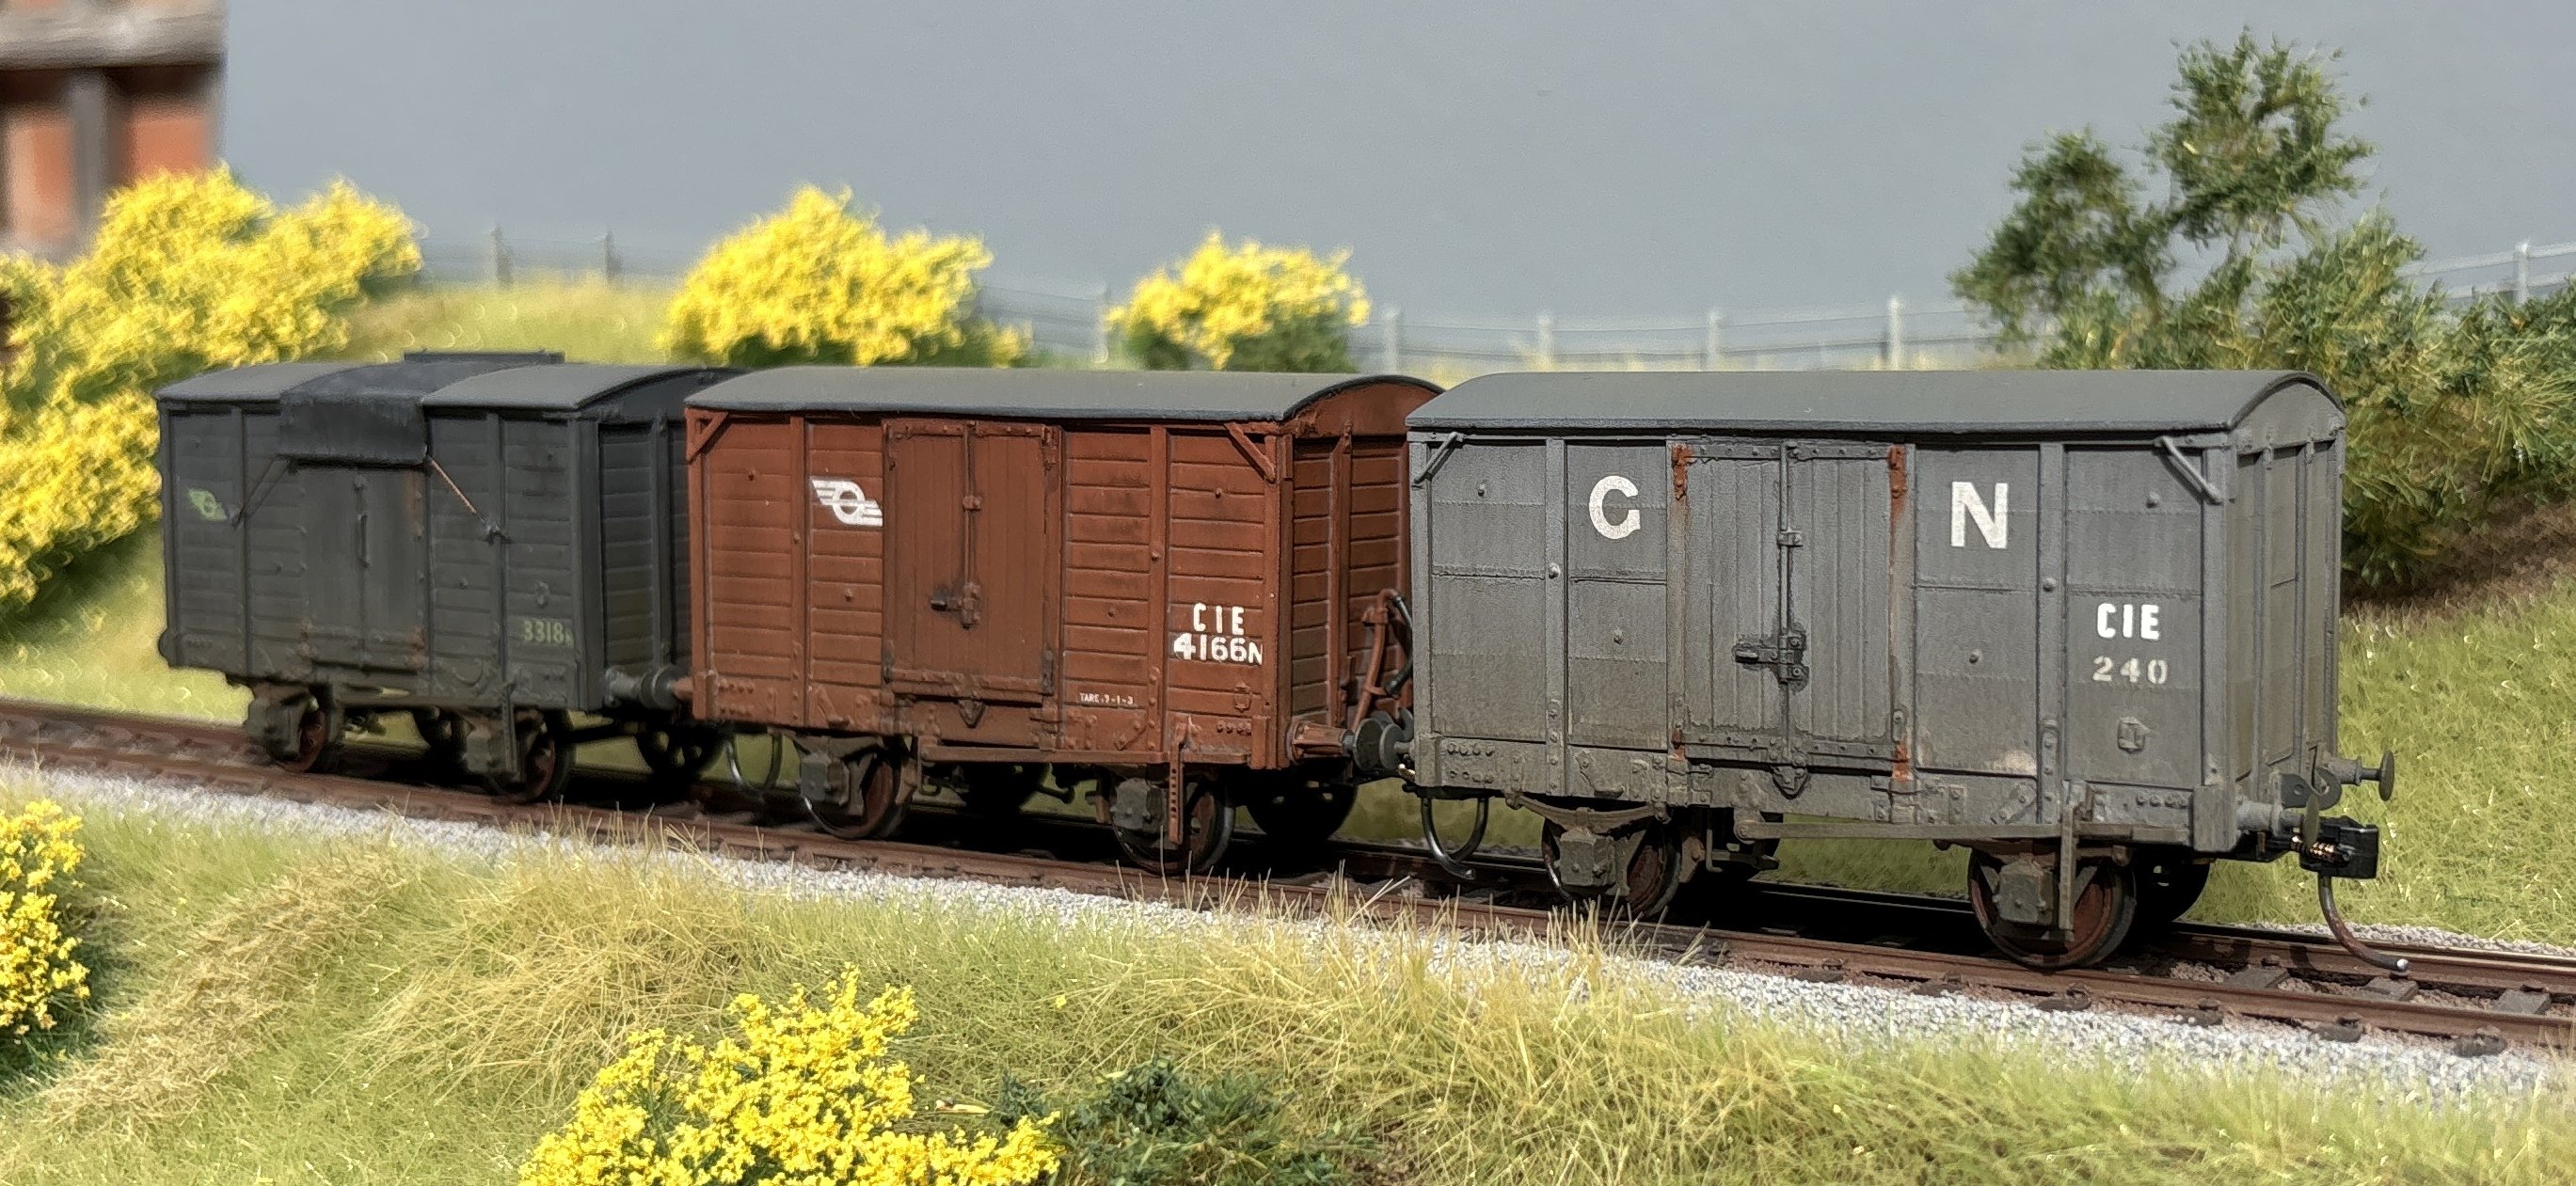
Some progress on painting and lettering the IRCH vans. These are intended to represent the period around 1960. The one lettered GN will have CIE stencils applied as well, but after I have done a bit of weathering so that they look fresher than the original lettering. All these have been lettered with a complete mish-mash of decals from different sources, but hopefully a bit of weathering will make them look a bit more consistent! Before anyone says I can't put a snail on a red-brown van, I have seen photos showing both 4166N and 2057N in this scheme in the early 1960s. Perhaps they were overhauled at Dundalk and came out in GN colours with CIE logos?
- 41 replies
-
- 12
-
-
-
Well, happily, you can now be sure they did. The photos linked above show both the later sets in the simpler green livery with a single waist line with '2' class digits on the doors, no snails. Some of the images are in colour, and they are parked next to an older coach in the older darker green livery with complex lining. You need to be an IRRS member to see their Flickr archive of nearly 30,000 Irish railway photos - highly recommended. Wonderful - that is very clear and detailed, resolves my questions and confirms the repaint in simpler livery. I shall update my carriage register spreadsheet accordingly.