Colonel
-
Posts
260 -
Joined
-
Last visited
-
Days Won
2
Content Type
Profiles
Forums
Events
Gallery
Blogs
Everything posted by Colonel
-
On our first trip to Ireland we were driving back from Limerick towards Dublin and found ourselves following a loaded cattle lorry. It was springtime and the beasts had obviously been feasting on the fresh, new grass - so much so that a steady stream of wet, brown slurry was coming from the back of the lorry. I stayed a prudent distance behind and nobody tried to overtake me... When we got to the next town, it was clearly market day and a small traffic jam had built up. Pity therefore the two ladies, who had just finished sweeping and cleaning their front steps only to watch in horror as a sizeable small pond of slurry formed, right outside their houses...
-
Love the Gaelic spelling and unlike some words, you have to wonder why the four letter version was ever needed.
-
"Voiding the Warranty" - Mol's experiments in 21mm gauge
Colonel replied to Mol_PMB's topic in Irish Models
Half a mil out - shocking! Looks great to me and a fine range of liveries and weathering too. -
Lovely stuff - just need another 20 or so to make up a full train! Finding enough cattle to go in a train is no joke. When I did my rake of five, options were limited and as well as being heavy, Slater's whitemetal ones worked out at £3-4 each. Then you'd need a dcc chip for sound effects, not to say something smelly under the layout as well...
-
The final whistle celebrations even made it to Radio 4 this morning! The curse is broken at last.
-
Very true Alan! It can be hard to rationalise why anyone would dismantle their layout, bounce it over potholed roads to an alien environment, reassembled it and then run it in public for seven hours or more only to then reverse the process and take it home again. We do though, probably because underneath it all, there is a quiet satisfaction in creating something that others might want to admire. Talking with people at shows is always enjoyable, from how you make things to trying to explain scale/gauge combinations and all points in between. You learn a lot too. For anyone considering getting into exhibiting, I would suggest joining a club or group and then volunteering to help at a show. That way, you learn about all the preparation that goes on beforehand and well as stuff like operating in public - which is very different to doing it at home. I think many exhibitors are closet thespians at heart because you are very much putting on a performance, one where you even build your own theatre before setting a scene and telling story. And when the muse takes us luvvies, the show has to go on!
-
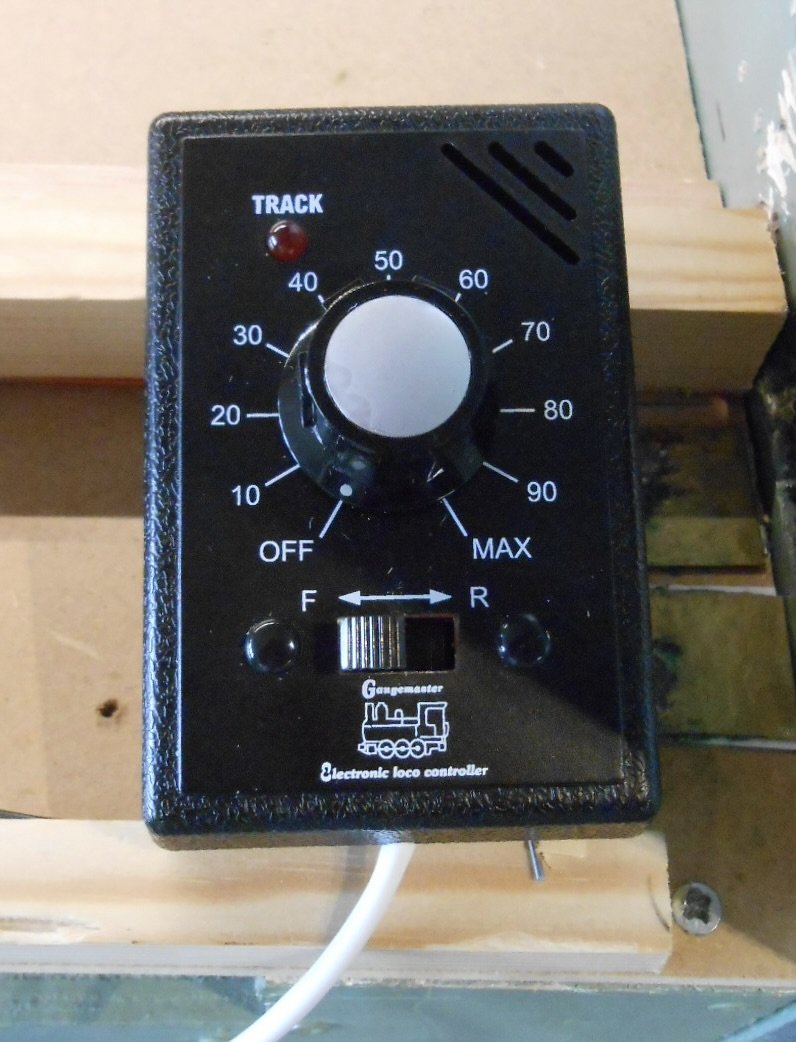
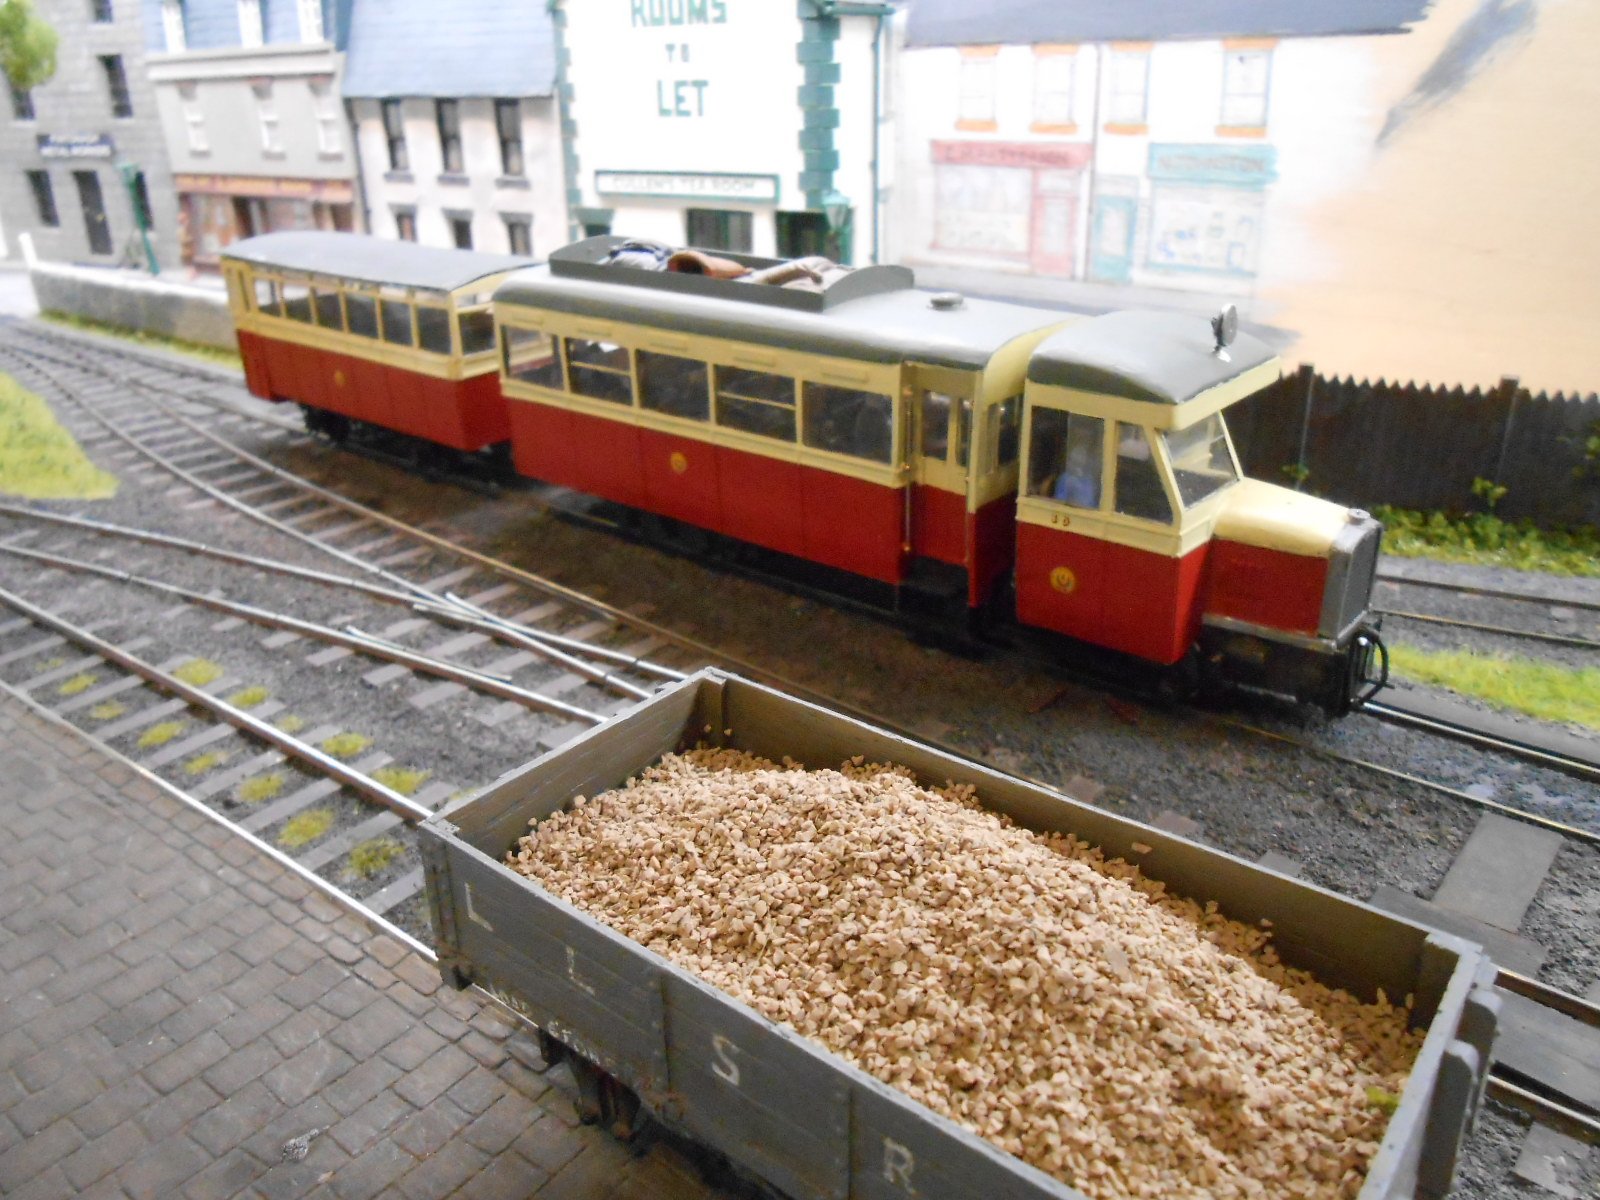
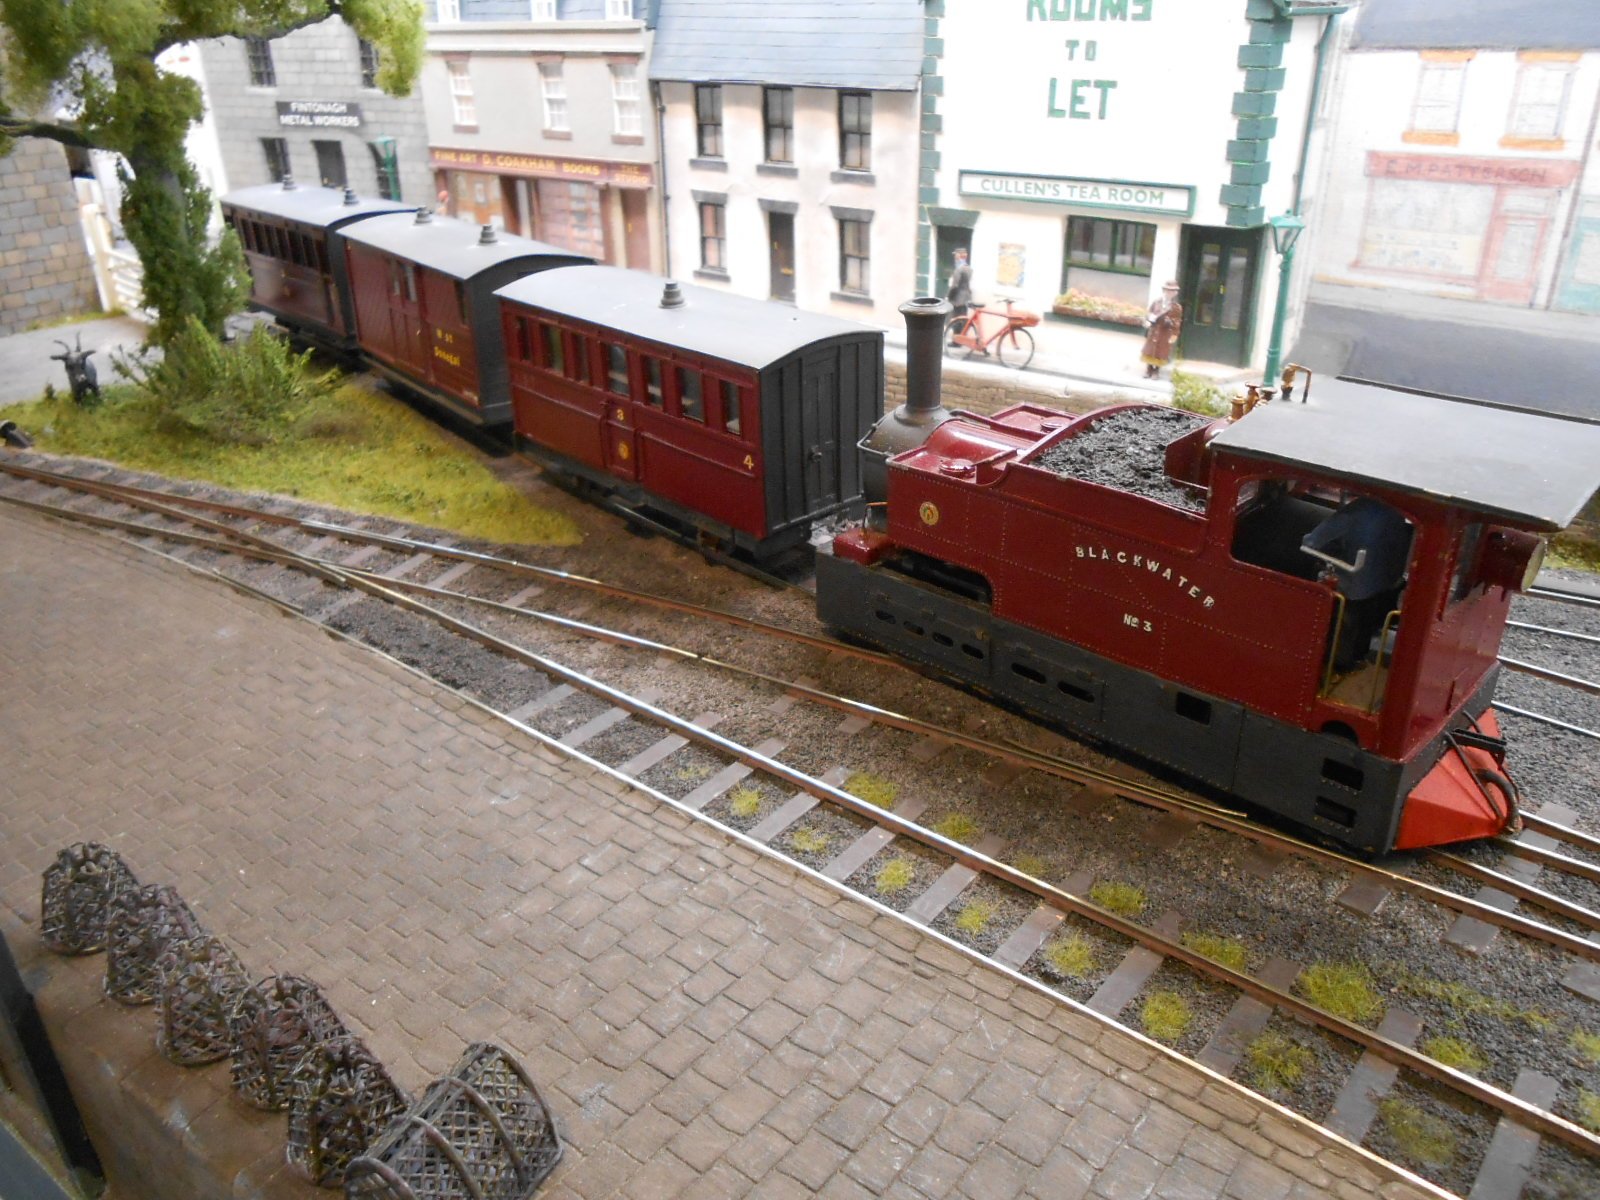
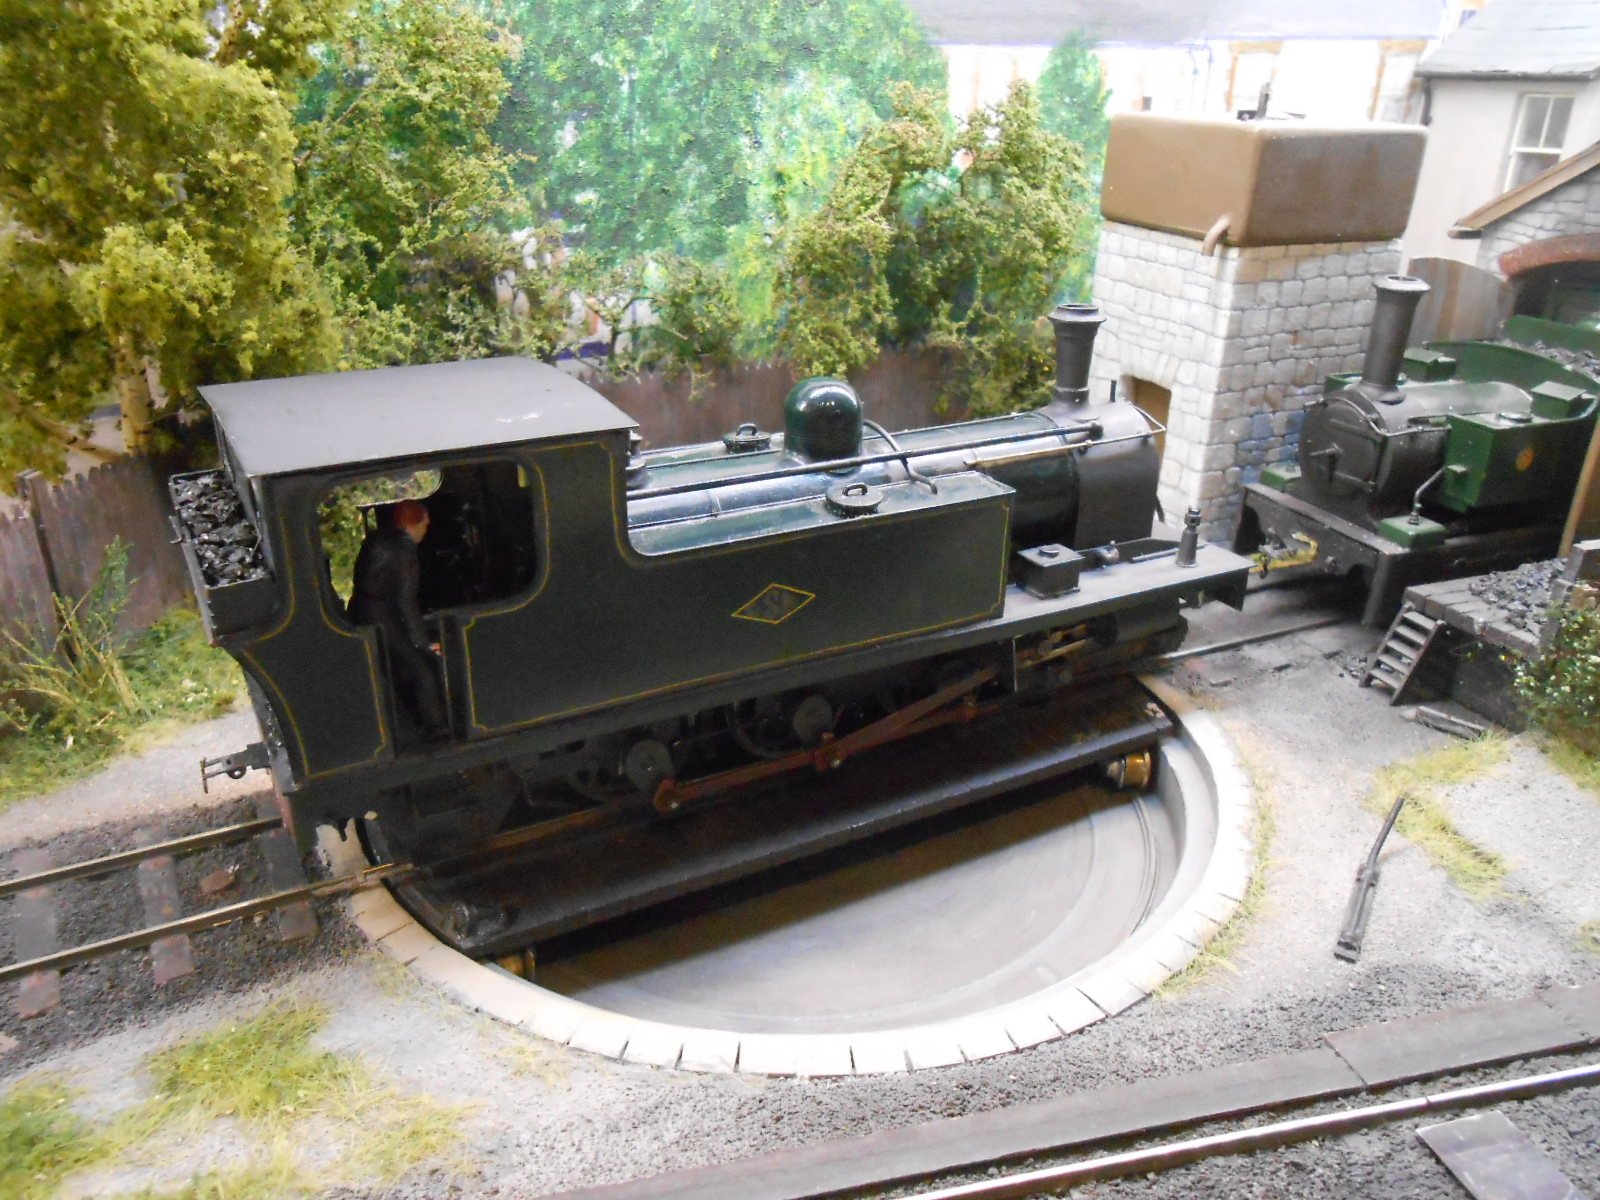
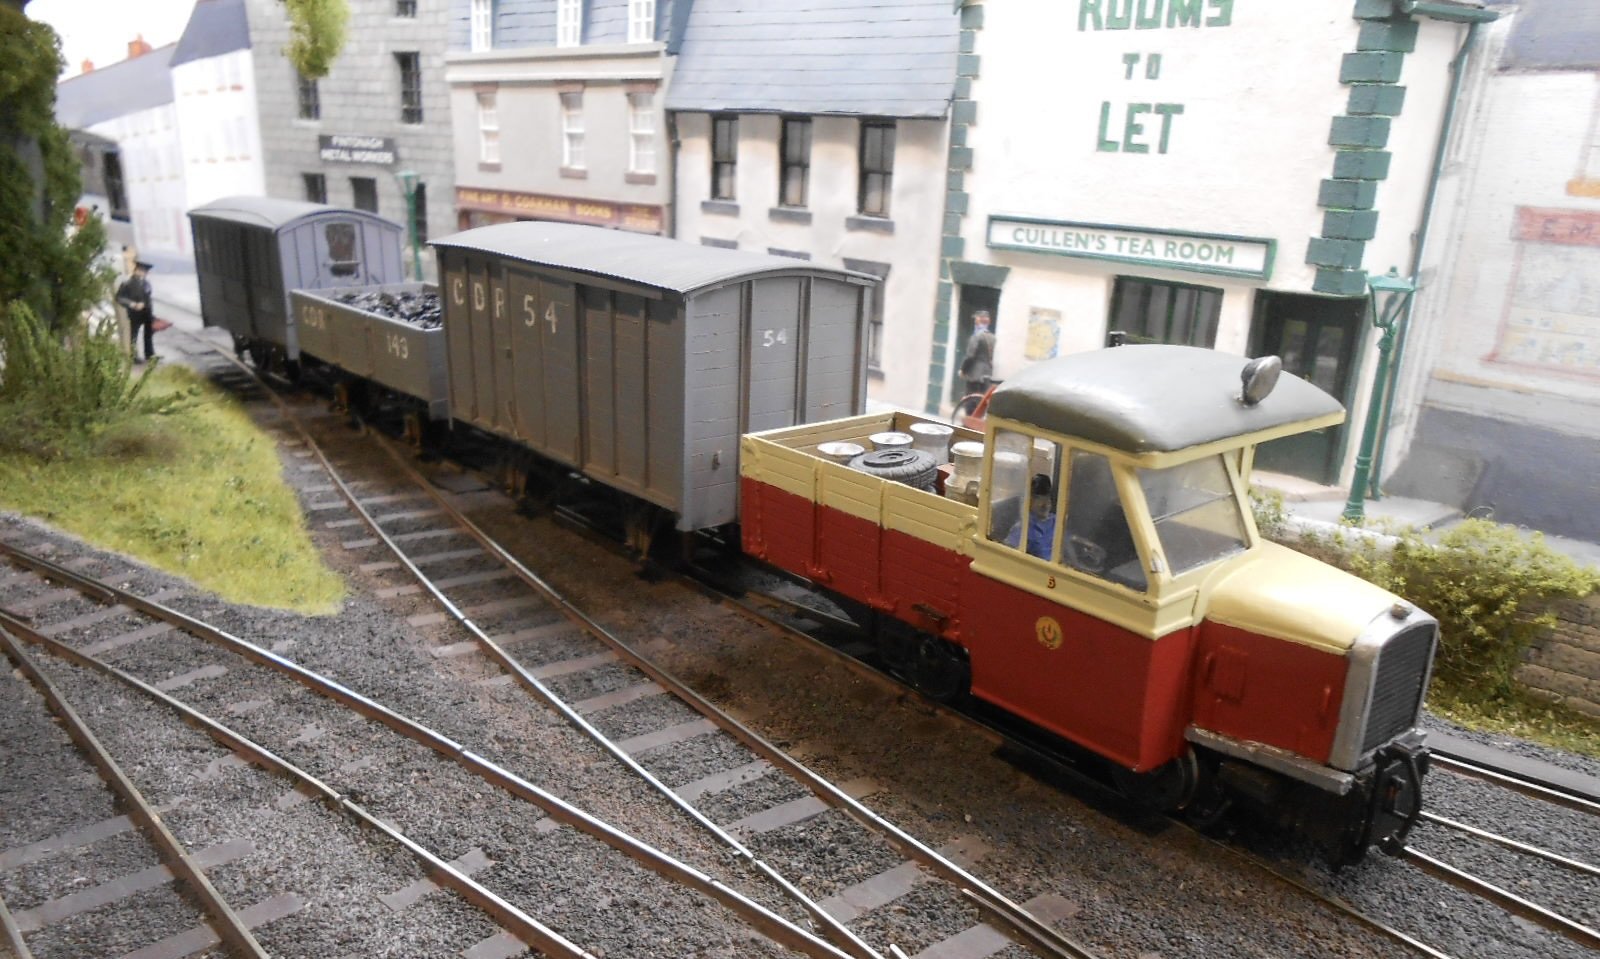
It will come as no surprise to anyone who exhibits regularly that after the horror show at Chatham, the layout is now running nicely again. However that only tells a fraction of the story, of which key components are: A new Gaugemaster HH controller: for Swillybegs, the difference is transformational. All the locos with open frame motors run sweetly again, likewise the turntable - which is quieter too, compared to with the W Railcar 10: was decidedly hesitant at times and even with the new HH all was not well. However, back on the workbench, I quickly traced to problem to not one, but two pickups not acting on their wheels. A bit of tweaking and with 8 wheel pickup, it now run beautifully again. West Donegal Tram: the red Sharp Stewart 0-4-2T was also unhappy and on the bench, this was also traced to pickup, also in this case it was TWO driving wheels had come loose on their axles. The coaches meanwhile, while still needing a bit more weight, run better after I discovered one of the tension lock couplings in the middle of the rake had become twisted - or maybe I just didn't fit it properly in the first place... Swilly 4-6-2T: this failed completely on Sunday morning. Soon traced it to a loose wire on the motor, but though I managed to re-attach it, the loco still wasn't & happy and guess what? Yes, pickups again on both rear drivers! It works so much better on six pick ups than four... Swilly 4-6-0T: actually came through the show relatively unscathed, but is certainly a lot happier with the HH. Donegal Goods: unused at the show, because shunting was pretty much impossible. With the HH, shunting is [almost!] a pleasure again because you can easily find the magnets and ease back to open the couplings. Which just leaves Phoenix. I didn't use it much, due to the shunting problem, but back home, it was derailing on the points! The cause was soon found to be a loose wheel - hence out of gauge. A Chinese curse is 'may you live in interesting times', so can only think I must have annoyed a far Eastern gentleman or lady & if so, I apologise! Overall though, you really can't make it up. One or two issues over a two day show [14 hours running in all], but not six out of seven. Add in a few broken couplings through needing to run at higher speed and it makes you wonder. However, the Chatham Show itself looks like it was a success, with over 2700 paying visitors, up 500 on last year, which is certainly good news for club finances and a tribute to all the hard work that went in by our organisers and helpers over the weekend.

- 71 replies
-
- 10
-

-
Terrific work Mike and at 4'gauge not far off correct!
-
Treated myself to the reprinted, expanded version of Iain Rice's Cameo Layouts at the weekend and well worthwhile it is too. Initially leafing through, soon found myself reading the section on controllers, which immediately reminded me of why I set up my layouts this way in the first place: The Gaugemaster HH is simple. Just a speed knob and direction switch. No keypad, no screen, no dialling up locos Slow running is excellent but will be following Iain's advice to buy a second one, as they can get warm after a while. I find a speed knob much better than arrow keys and you don't need to look at the HH to work it - important when spotting over uncoupling magnets Wireless operation isn't necessary on a layout only 2m long and the HH can be unplugged and used on my other layouts The W, meanwhile will only be used as backup and on Railcar 8. Must remember to stick to open frame motors in future - not difficult when I build all my own stuff. On a small shunting layout, I really don't need anything else - especially at shows where there is the constant distraction of trying to talk to people while operating. Other people will have different needs, but this works for me.
-
Thanks folks! I have a Gaugemaster Prodigy DCC, but don't really like it for various reasons, including those outlined above. Things like the extra cost of chips, pain of fitting and tuning them and the need for careful insulation in metal bodies locos. Plus all my layouts are 'one engine in steam' and I'm not fond of sound or lighting, so really have little use for what dcc offers... All my locos, broad, narrow and standard gauge work well with the Gaugemaster HH feedback unit (including Richard Chown's Shannon, which has an RG4 motor) and slow running is noticeably better than the W unit. So, all was fine until I built Donegal Railcar 8, which has a small cordless motor which really doesn't like feedback and hence the change to a W. Shame I needed three goes before finding one that worked! Have read up all I can find on the Infinity analogue controller and, for me, can't find it does anything to justify its £360 price tag. That is not to say it is not ideal for others. Scouring the Web, there is a new version of the Pentroller, called the Pictroller, which is able to recognise cordless motors and adapt. At £85, the cost seems reasonable, but is currently out of stock... The fates seem to be pointing me back to the HH and buying a new backup is feeling like the way to go, except it is also showing out of stock at the moment! If only that wire on the HH hadn't come loose, I would have been spared a lot of grief over the weekend and looks like I need to resign myself to either swapping controllers when running Railcar 8, or find a new motorbogie for it with a non-coreless motor.
-
A fellow club member provided a third Gaugemaster W on Sunday, which worked without problems all day, so am hoping there are no hidden issues in the wiring. Perhaps the lurking of my 40 year old H&M Clipper as the the final option prevented further mischief!I Nevertheless, getting through five different controllers over a two day show is a worry and reflecting on the experience makes you realise that options are fairly limited for an analogue layout, especially if you want a handheld one. Gaugemaster do the two I've already got, while Morley do a hand held one to go with their cased units. However, there is just not enough fine control in the latter for a small shunting layout and though better, the W also lacks the finesse of the feedback unit. The much missed Pentroller is only available second hand and even then is rare, because it is probably the best and folk rightly hang on to them. The only alternatives seem to be DCC (been there, tried it, not for me) or maybe the latest analogue versions of that like the Gaugemaster Infinity. However, at over £360, not something to be taken lightly. Thoughts anyone?
-
The feedback and W are both old and it is a loose wire inside the former that is the problem. Seems Ws are prone to the issue I have, but you don't expect it on a new one.. Another option possible for today, but if not I hope we can muddle through.
-
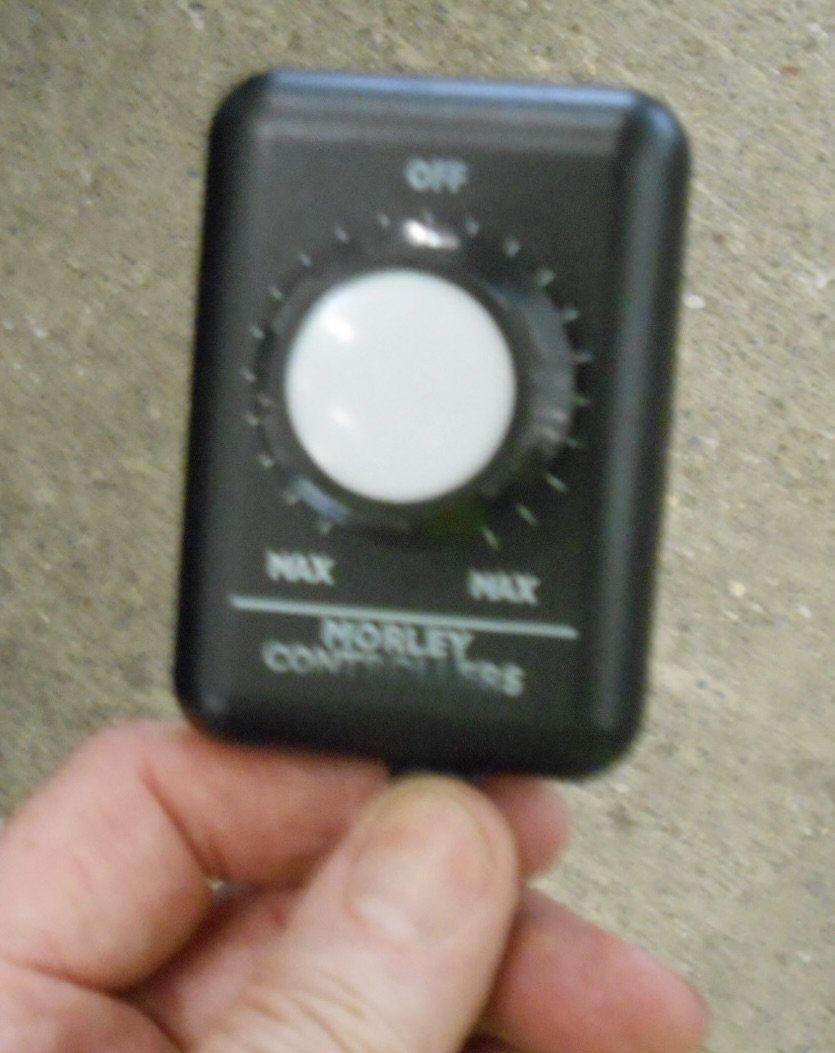
It gets worse, Alan. The Morely controller just isn't up to the fine control needed on a small layout. As a result, it was impossible to do any shunting because I couldn't run trains slowly enough to stop over the uncoupling magnets. So the two railcars had to do the bulk of the work, with the two Swilly tanks just about managing their trains, but having to run much too quickly for my liking. Spent the second half of the day trying to work out what combinations might work best for Sunday, while also had to bring home several wagons and coaches to repair the DG couplings. I've done well over 100 shows and today was by some distance the most challenging and disappointing I've ever experienced. :-( :-( :-[
-
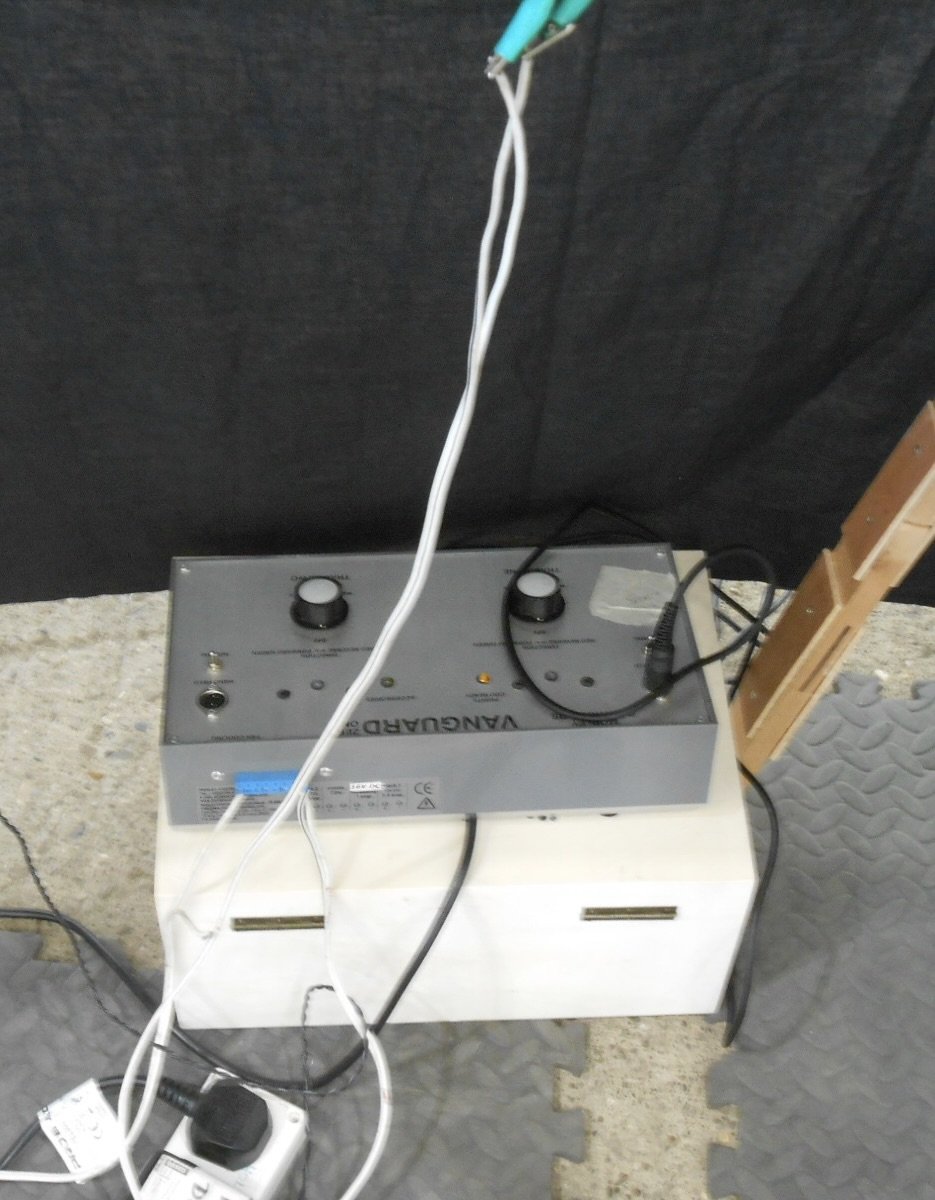
Can't quite believe I'm writing this, but when setting up Swillybegs at the Chatham Show today, found that all three of my controllers are now useless! The two Ws as previously reported, but now the Feedback unit has a problem with a loose wire, inside the casing, which I can't access. So, what to do? Then I remembered the Morely controller we use on the Club 0 gauge layout. So, cut the two 12v wires from the back of the Gaugemaster socket and joined them to the !2v output from the Morely. This unit has the provision for a handheld unit and this is what I'm now using over the weekend. It has no feedback feature, so works well with all motors. Fingers crossed. Wish me luck - there will be a bit of rewiring needed before the layout goes out again in August...
-
Alphagraphix do three of the four wheel coaches in a single pack of their card kits. At either three of four quid, 7mm scale, a real bargain and you could easily reduce them to 4mm on a copier.
-
No 4-8-0, or indeed 4-8-4T David. They will neither fit the headshunt, nor the turntable. The new W controller has proved disappointing though, as it has the same issues as the old one: VERY slow up to notch 8, then full speed after that. Given I use a Gaugemaster transformer, no idea what the problem might be, but they will have to go back after the show.
-
Interesting and indeed a bit sad reading these comments when on this side of the water we have so much. Without consulting a map, I think there are at least ten preserved railways (standard and narrow gauge) within an hour's drive of where I live and am guessing the same must apply to much of the country. Indeed, sometimes wonder if there are too many, but thus far, they are managing, albeit in increasingly challenging times.
- 89 replies
-
- 2
-
-

-
- west clare
- narrow gauge
- (and 2 more)
-
That second photo is so dramatic - just look at the gradient!
-
Oops! July it is. The weekend after next in fact....
-
A bit far for those of you on the other side of the water, but our latest Model Railway exhibition takes p!ace on 18/19 August in the Historic Dockyard Museum, Chatham. Well over 100 stands, including 30+ layouts and many of the major traders and manufacturers. If that wasn't enough, you can do "Driver for a Tenner" on one of the museum's diesel locos and even have a go at working one of the steam cranes.
-
You can only admire such tales of resourcefulness!
-
My new Model W arrived today and seems to have solved the problem, so guess that will be my 'go to' controller from now on - at least for Swillybegs. The feedback unit works well enough with my Northport Quay stock. The W is still needed for the mobile crane and as back up for the broad gauge of course.
-
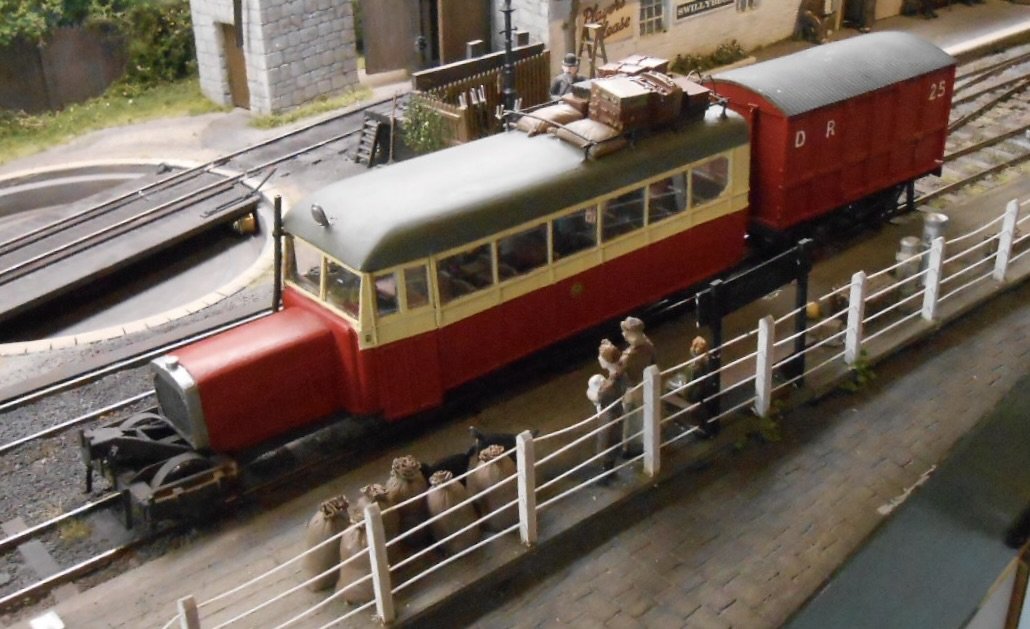
It's been a while, but Swillybegs is back in the frame over the next few weeks, with a late invite to the Chatham Show in under two weeks time, then Hornby/Margate on 15/15 August, the latter alongside their full size collection. So, have recently been working on the layout and stock to get things ready. Fingers crossed, everything seems ok, but note my last entry, back at the end of January! Otherwise, it has mostly about integrating the newest item of stock, Donegal Railcar 8, into proceedings. Turned out to be a tale of two controllers at the moment. My go to has always been a Gaugemaster hand held, feedback model [the black one], with the Model W as standby. However, some motors, especially coreless ones, don't like the feedback model. The result is what might best be described as 'cogging' - hesitant running, almost as if there's a pick up astray somewhere. The Model W, being simpler, doesn't give such problems, but the payback is not such fine control. Anyway, whatever motor is in Railcar 8's bogie, it certainly doesn't like the feedback controller and though things are smoother with the W, they are very 'two speed'. The model crawls along up to about 'notch 5', then suddenly bursts into life. I must have had the W for 30 years, so I've ordered a new one. Yes, I know they come with a lifetime guarantee, but time is tight. The alternative is to run Railcar 8 in reverse, where, for whatever reason, the cogging effect is less. So, shades of Skibbereen, where trains arrived in the headhunt, before reversing into the platform, then likewise reversing out after turning. Have also added a bit of detailing to No8 in the form of luggage, both on the roof and inside - the latter being white metal to give a bit more weight over the motor bogie. The train is deemed to be running on the North Donegal Tramway & hence uses the front platform, so at the moment, the two ex Clogher tanks will act as spare engines.
- 71 replies
-
- 15
-
-
Article in Railway Magazine confirms Ryder Cup services
-
Yep - everything hangs together really well.