.png.c363cdf5c3fb7955cd92a55eb6dbbae0.png)


Colonel
-
Posts
300 -
Joined
-
Last visited
-
Days Won
3
Content Type
Profiles
Forums
Events
Gallery
Blogs
Everything posted by Colonel
-
Quite a saga - rare to get such a range of faults in pretty much all the working parts, especially when they all came from different manufacturers. More than entitled to feel a bit vexed!
-
Wibble - and beam me up Scotty. We need that J26 back...
-
Waterford & Tramore Railway Digital Layout + Documentary in Progress!
Colonel replied to Bullet_Wanderer's topic in Workbench
If this type of thing develops, it could, with the addition of virtual head sets, be almost the equivalent of a time machine. -
Presumably these are home layouts? As an exhibiter, I've long used 6mm ply for lightness. Top and frames, though 12mm for ends, to take baseboard joiners. Keeping baseboard size below 4' x 2' also helps with weight. 6mm birch ply is lovely stuff, but a lot of it came from Russia, so less easy to get hold of now, for obvious reasons.
-
An internet search showed a variety of resin castings kits from about £40 upwards in the UK. They tend to include things like rubber gloves, paper cups, lolly sticks and so on for mixing. Fine for a first attempt, but cheaper just to buy the material. One thing to note is that the silica mould may only last a few months once opened. After that, it doesn't set. The two part resin lasts longer.
-
Gauge 3 (1:22.5 / 1:24) Railways
Colonel replied to DJ Dangerous's topic in British Outline Modelling
We had Gauge 3 at the Chatham Show last year - all 20+ metres of it. You could build an N gauge branch terminus in the same space a bogie coach occupies. Lovely stuff. -
East Lynn is one of the all time greats. Looks wonderful and a delight to operate, something I was twice privileged to do. Railex is a fine show anyway, but the S scale contingent idea the cake.
-
Add Gordon Gravett and Barry Norman to the list, David.
-
A fine looking beast and absolutely iceberg like in what lurks beneath the sutace!
-
Presumably if, say sides and ends were printed, as per my castings, then being more 2d than 3d, would be quicker to CAD?
-
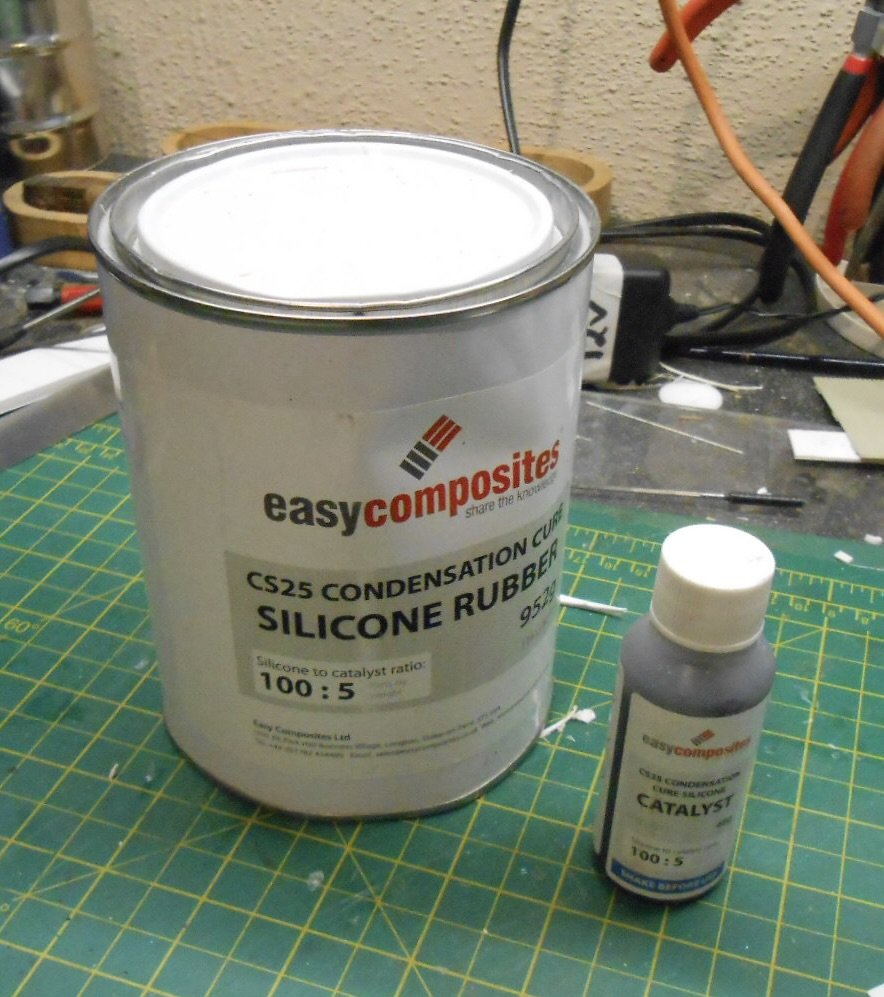
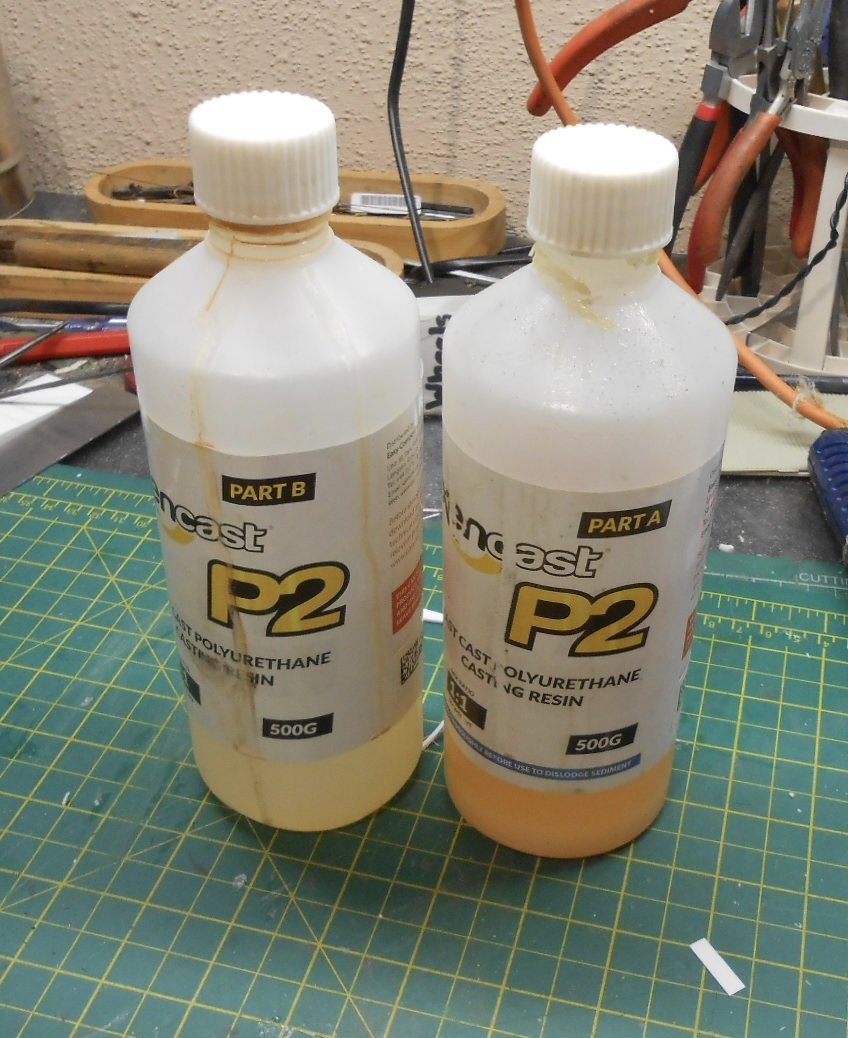
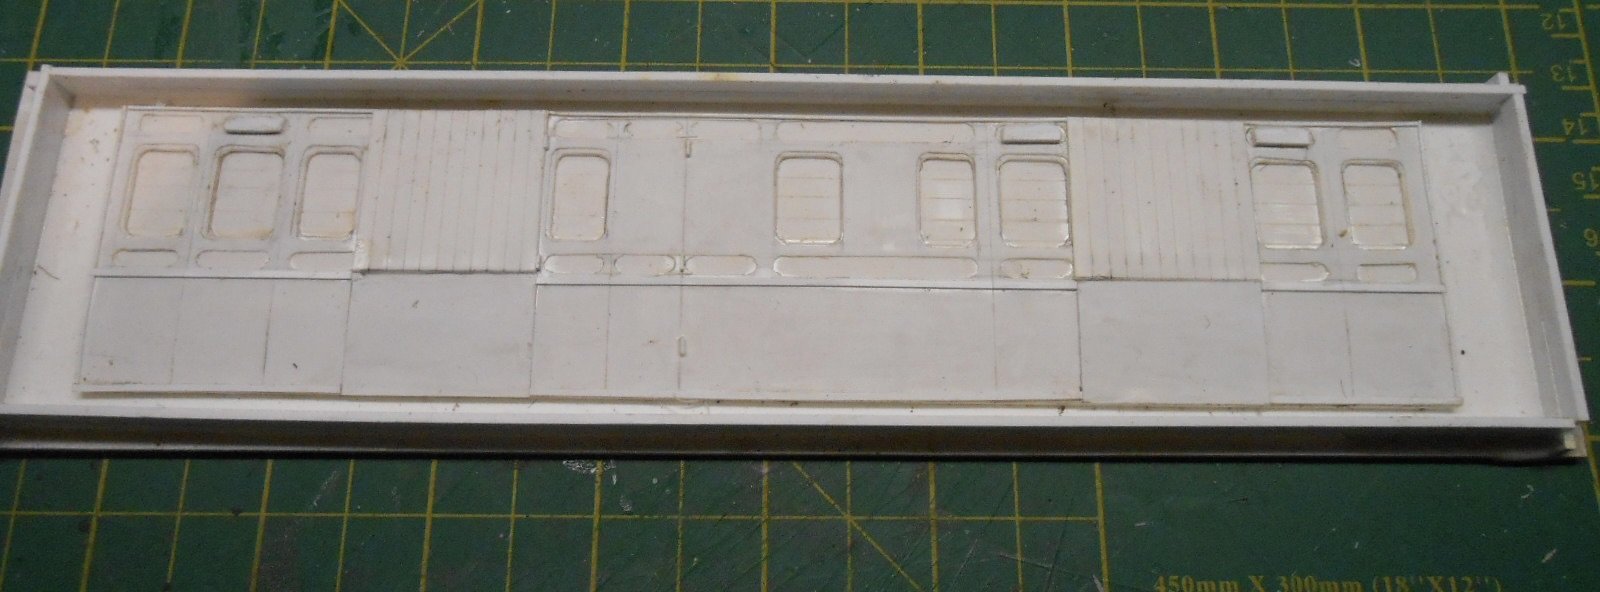
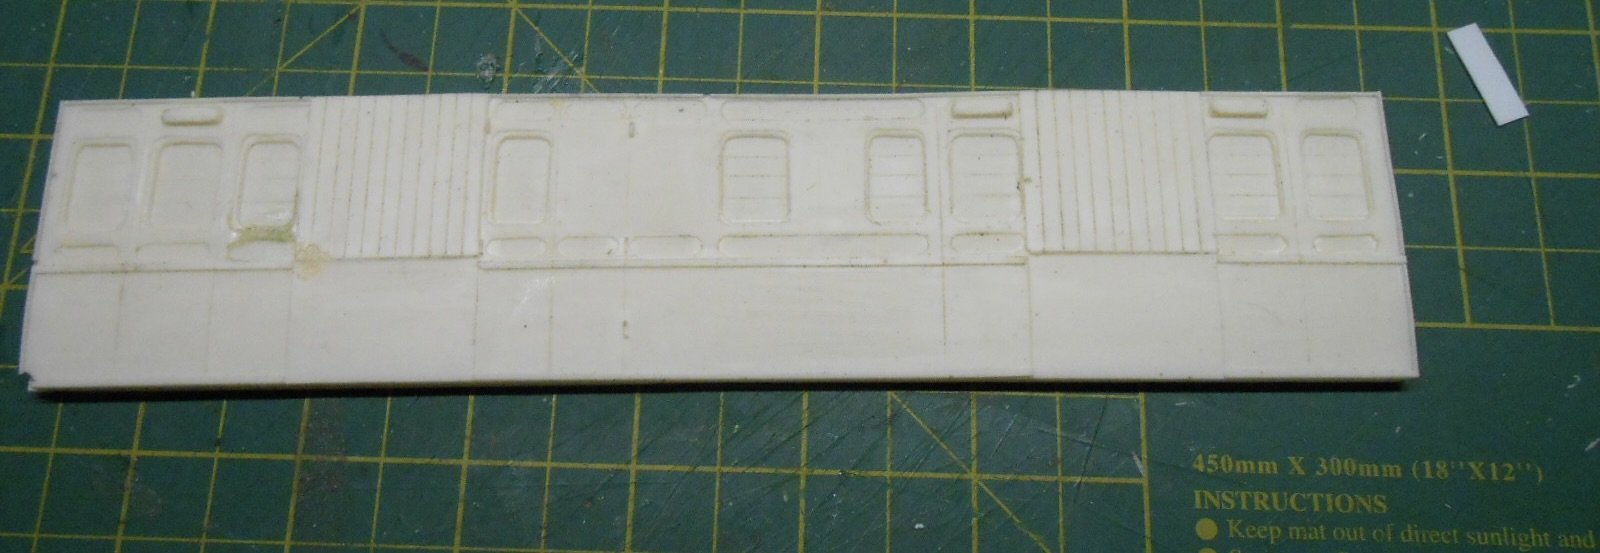
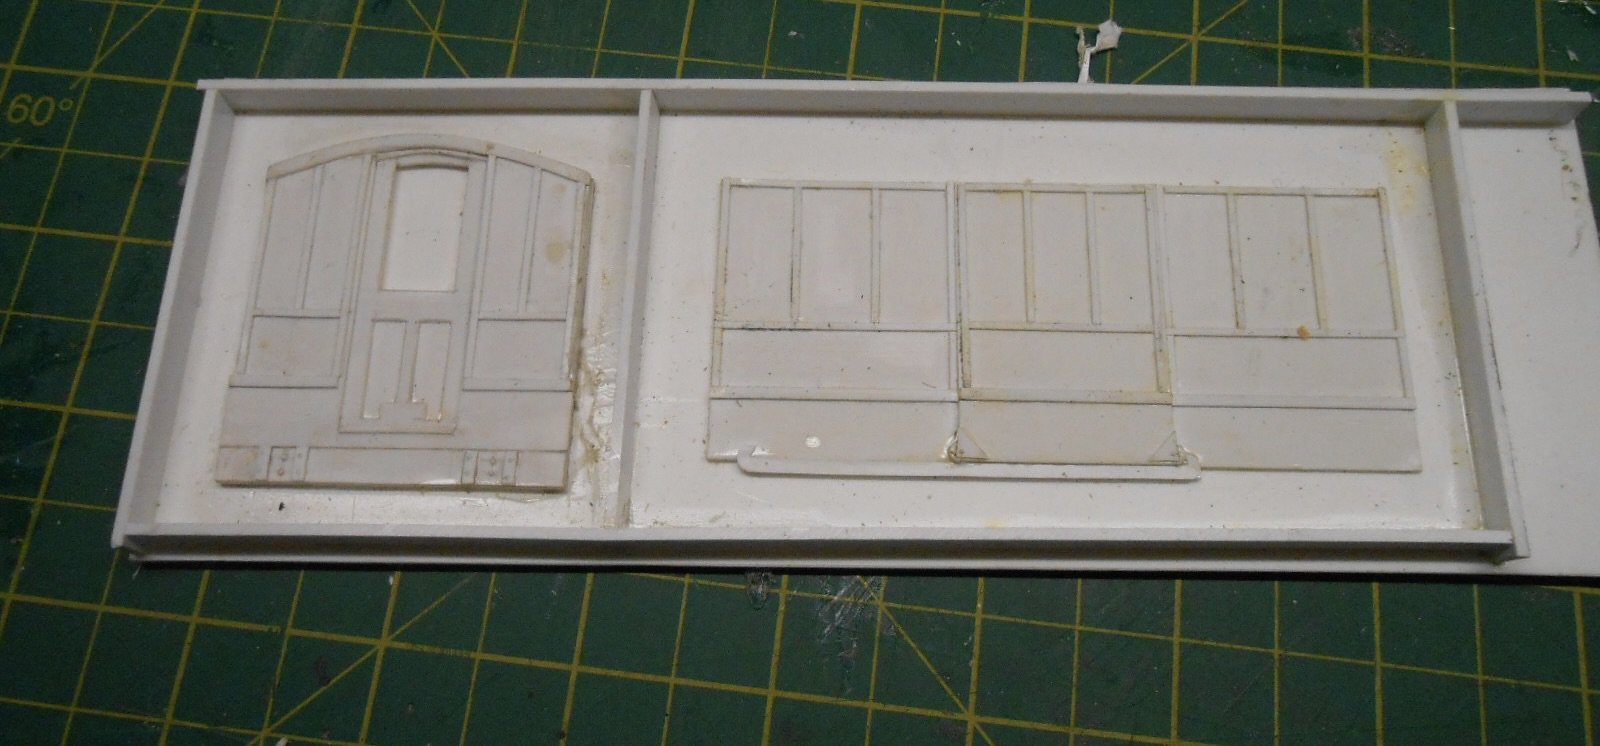
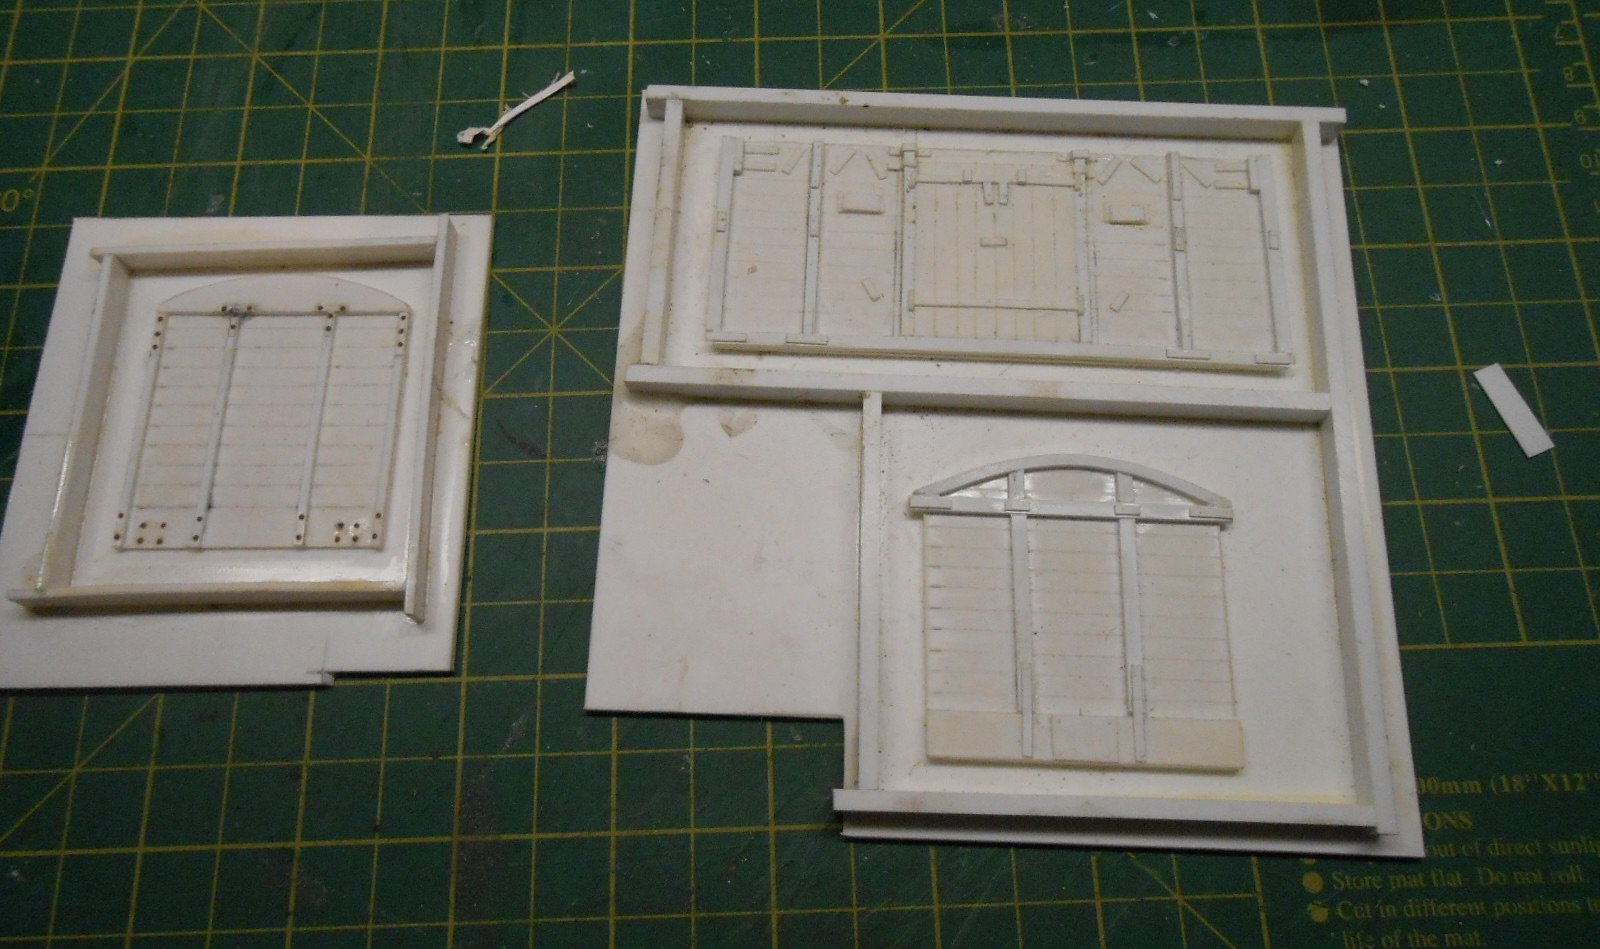
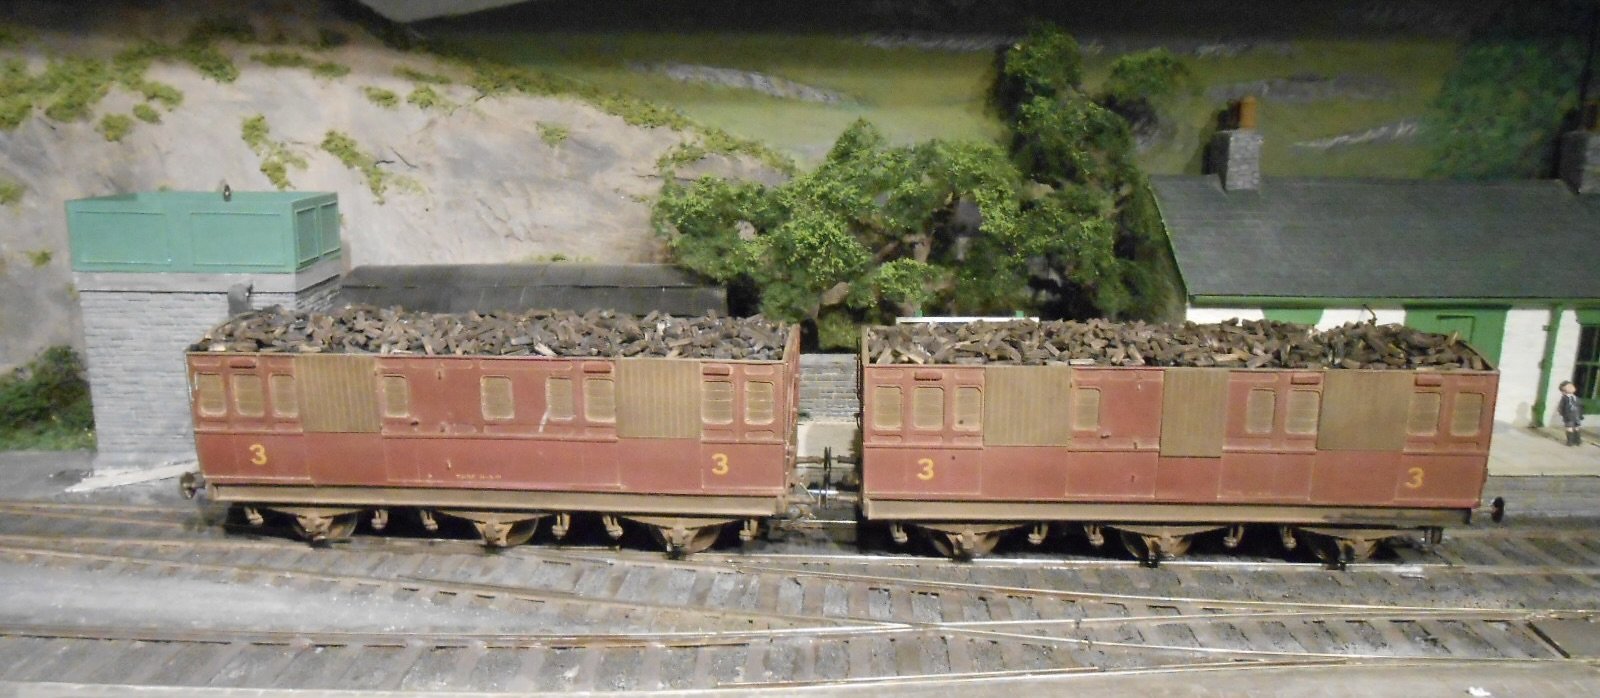
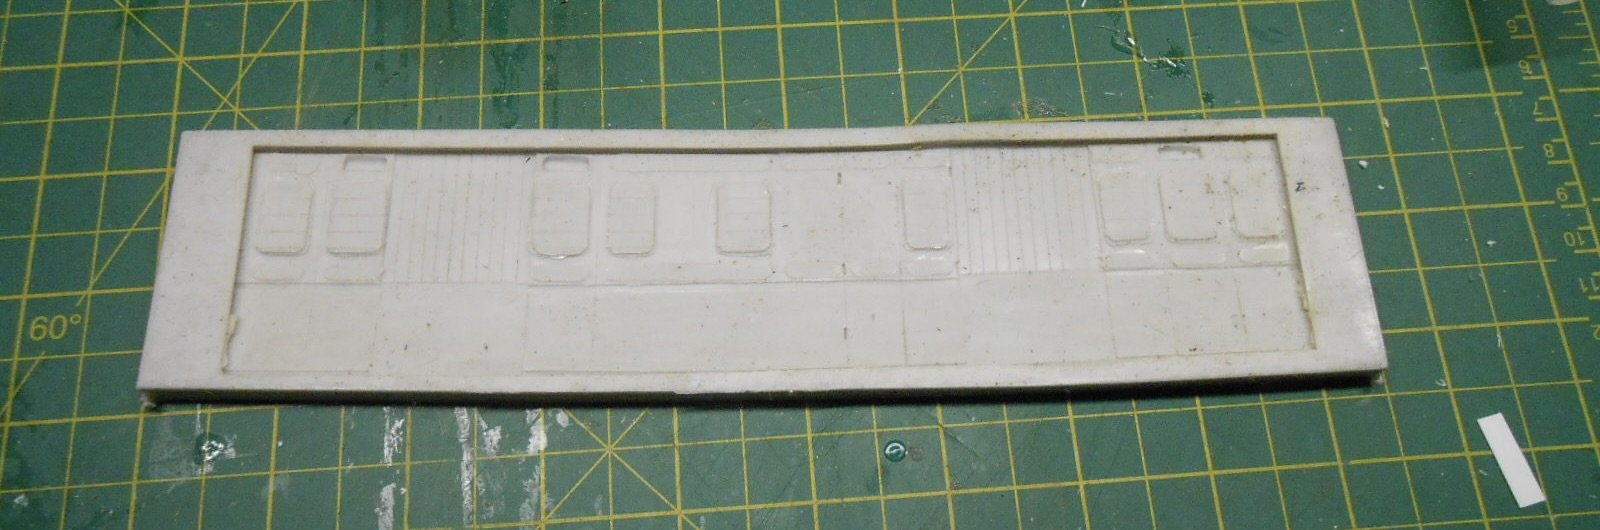
Further to this morning's post, here are some photos of the basics of resin casting. First the 'stuff': below is what you need to make the mould - a tin of 'goo' and the setting agent/catalyst. One part of the latter to 20 parts of the former. Mix and wait 24 hours for it to set. The other stuff is the resin - two parts mixed equally, which take well under an hour to set, so you can cast multiple copies in an afternoon. Above is the master for one side of an ex WL&WR six wheel coach which was converted to carry turf during the Emergency [aka WW2]. Made from plasticard sheet & strip, it was quite a few hours work, but worth it in terms of then being able to make multiple copies. When finished, it was mounted in a low walled box [more plasticard] to take the moulding material. Here's said mould, ready to take the resin and below is one cast side. Another side, two ends and a floor, assembled with cyan, and you have the coach body, which then had an Alphagraphix etched brass chassis attached as shown with the completed models below. Have done all sorts of other models, mainly wagons, for both broad and narrow gauge, as per more masters below. If you are not ready for 3D printing yet, would say resin casting is definitely worth a try.

- 100 replies
-
- 11
-

-

-

-

-
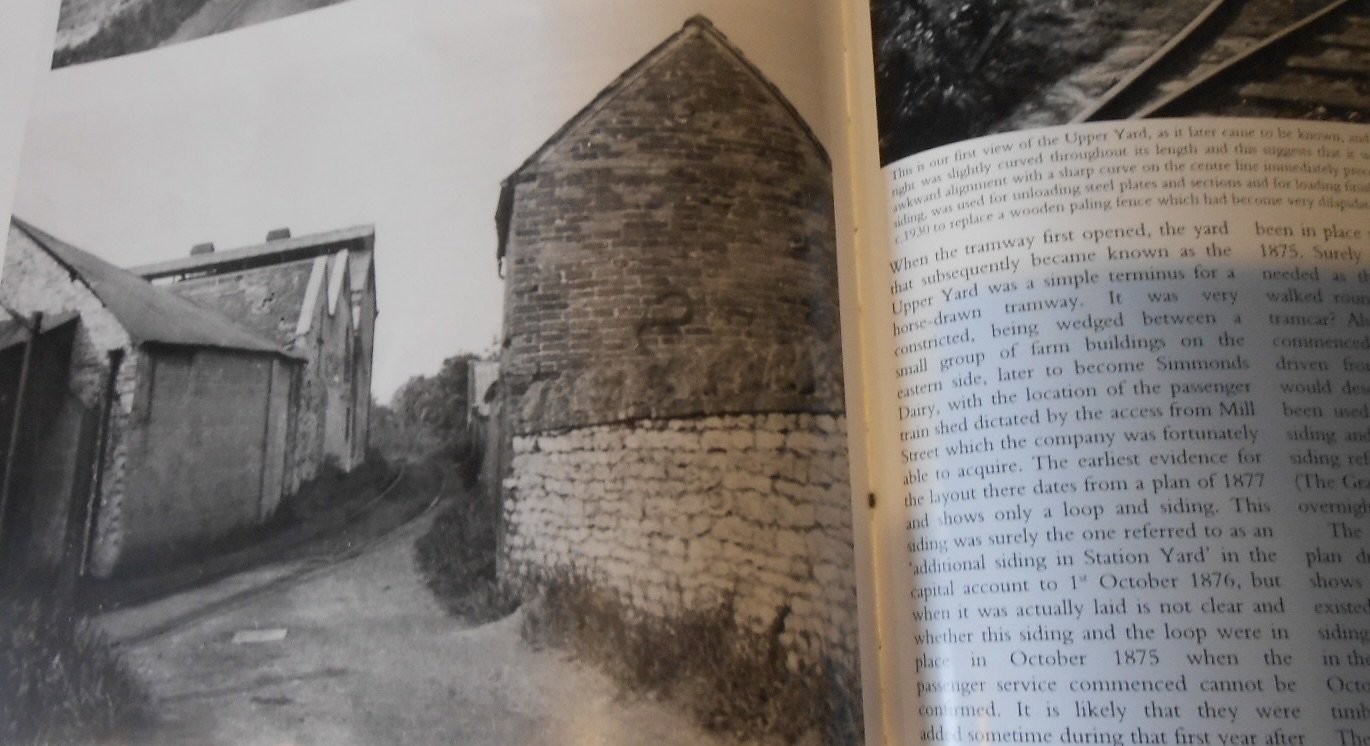
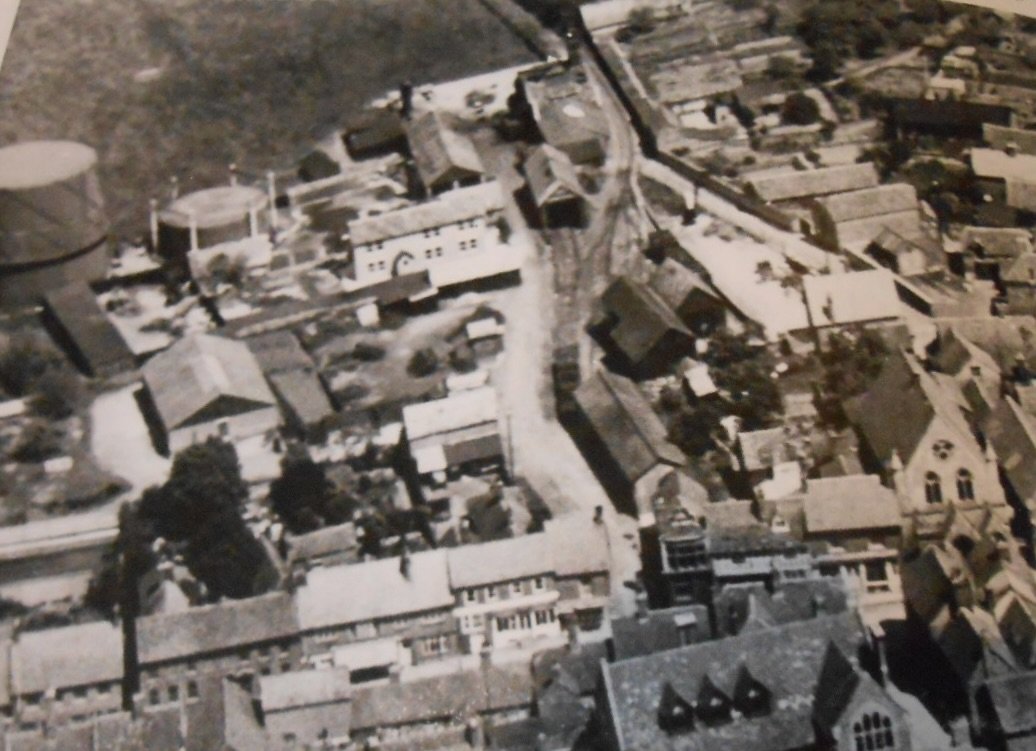
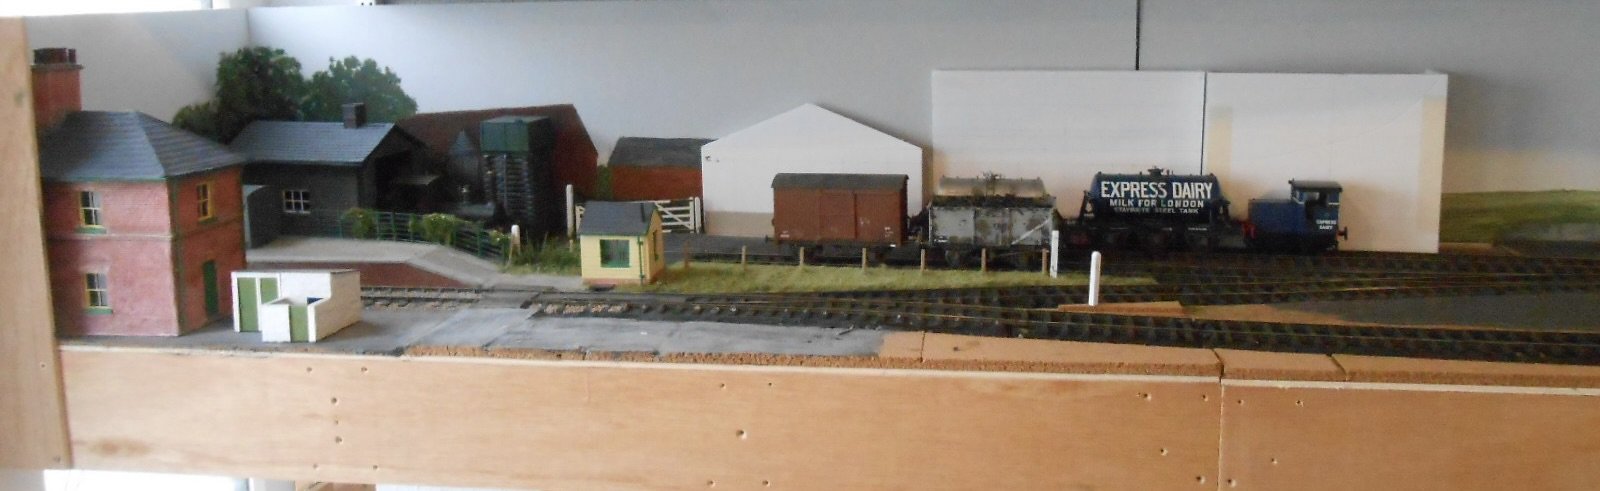
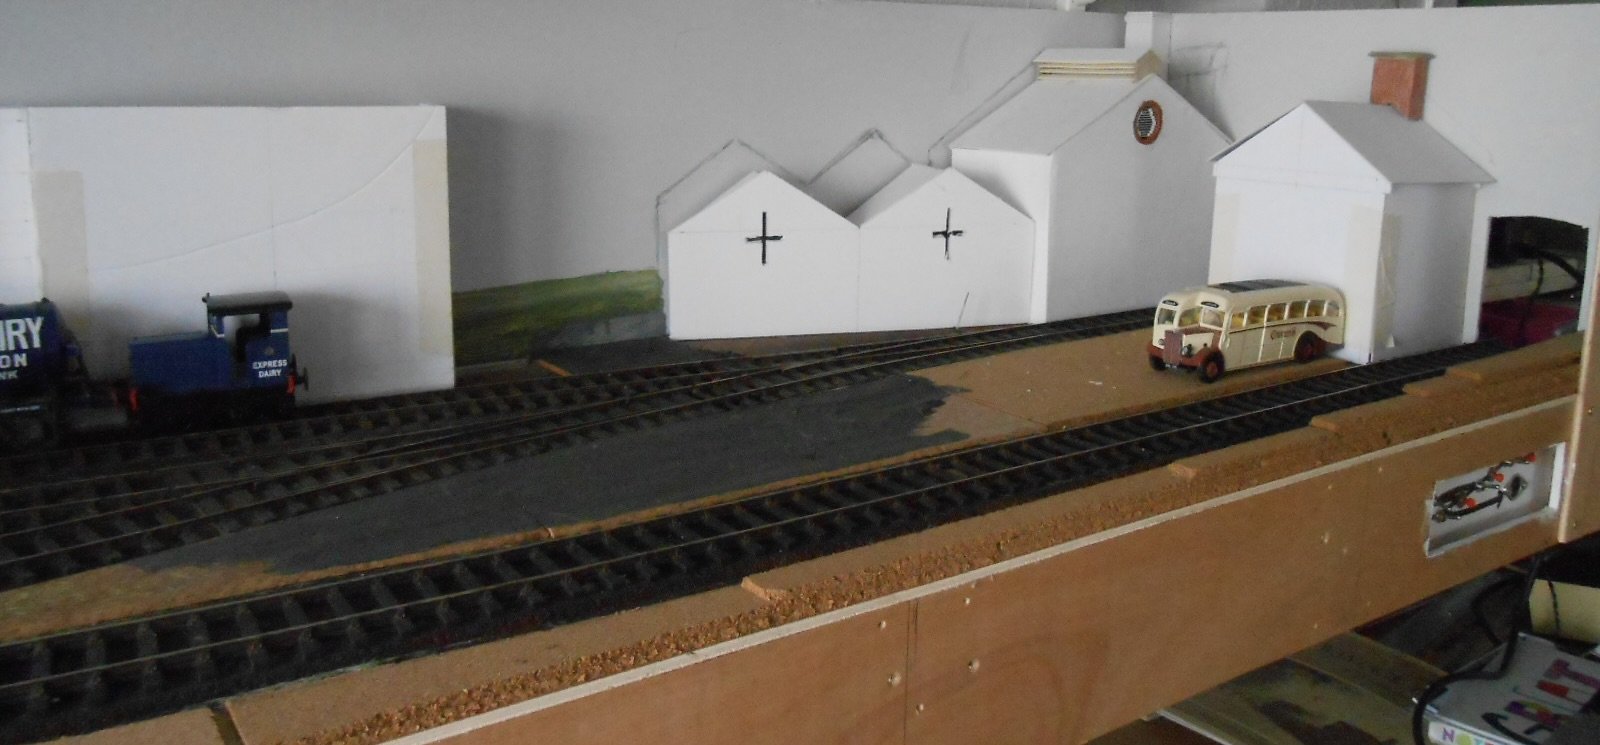
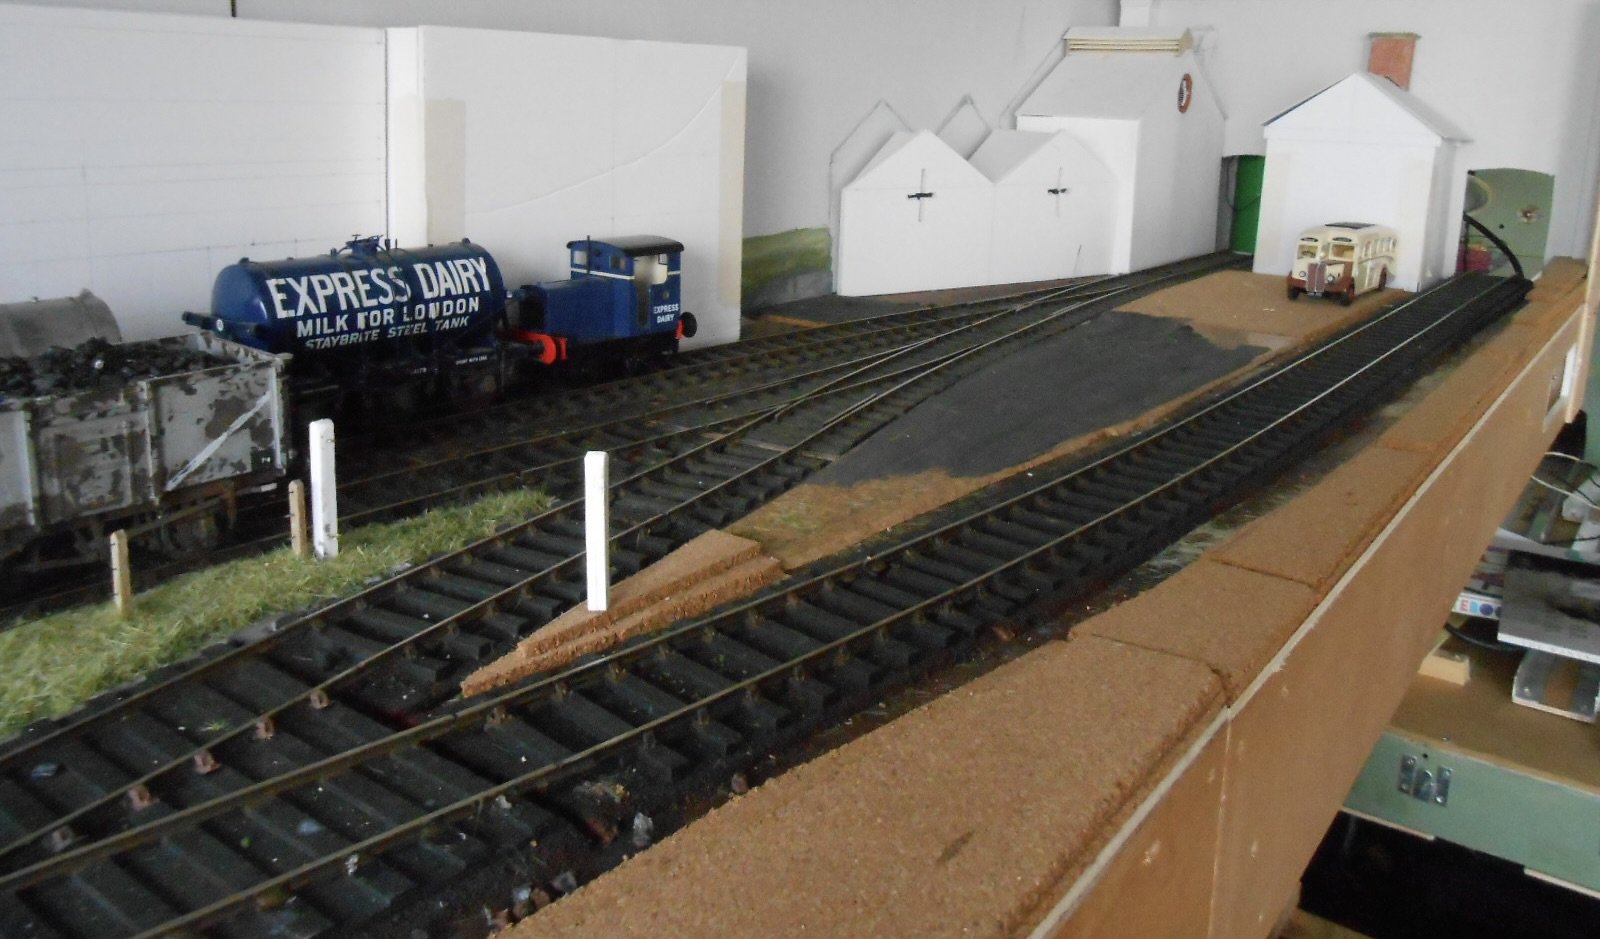
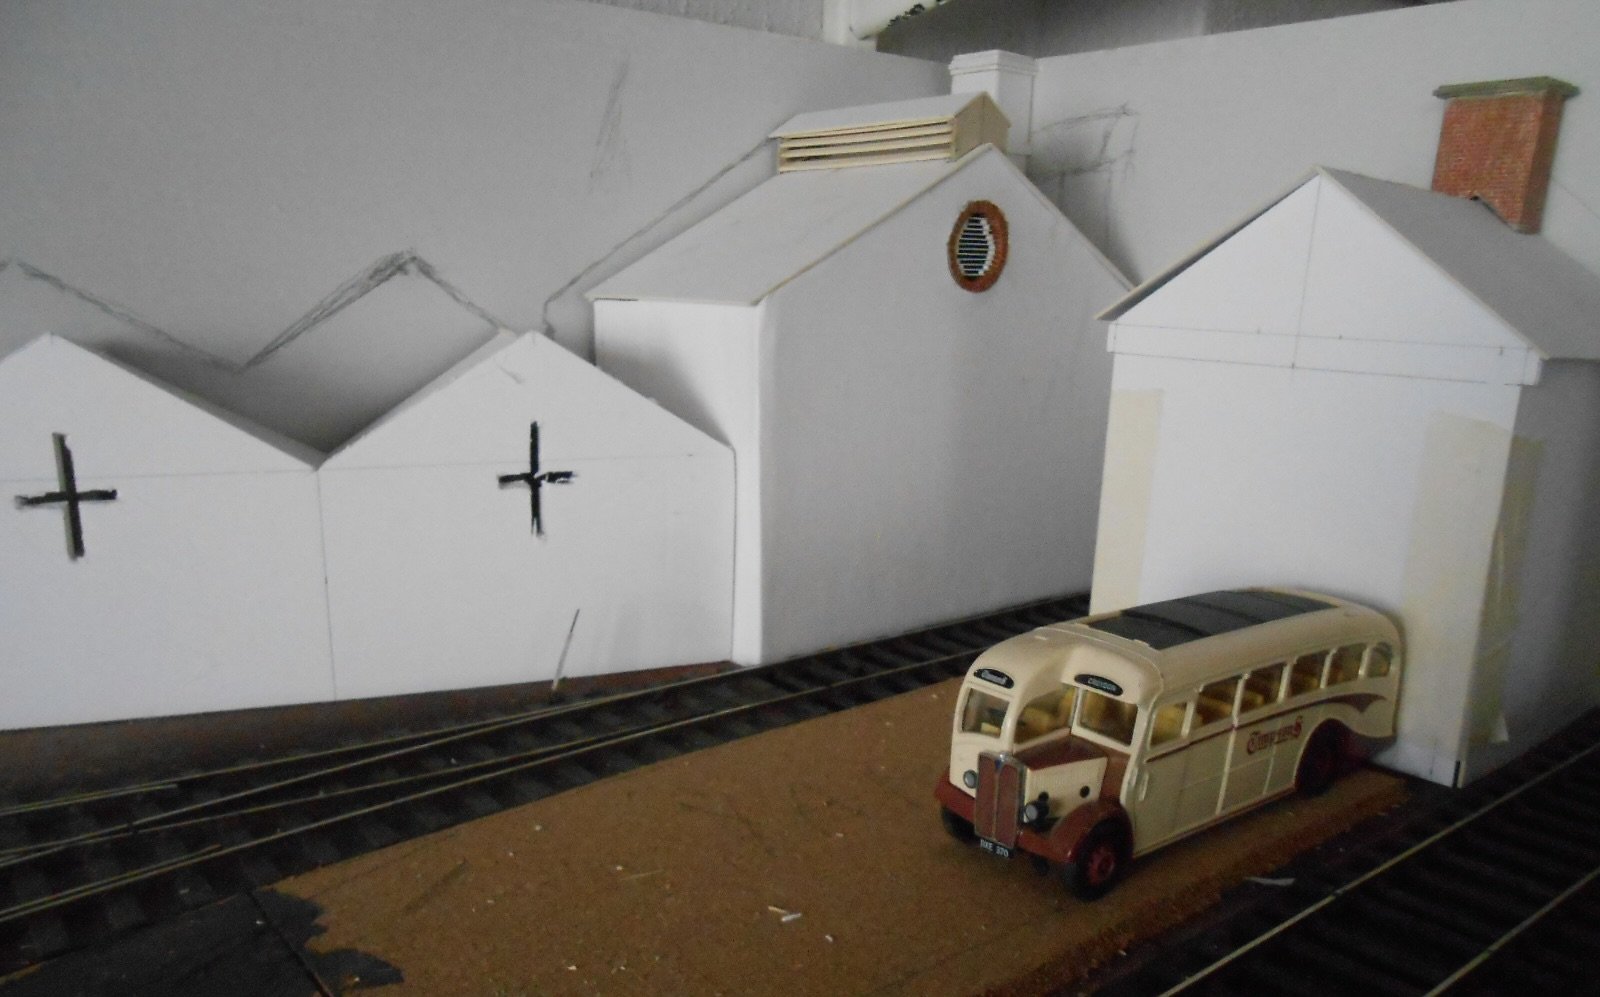
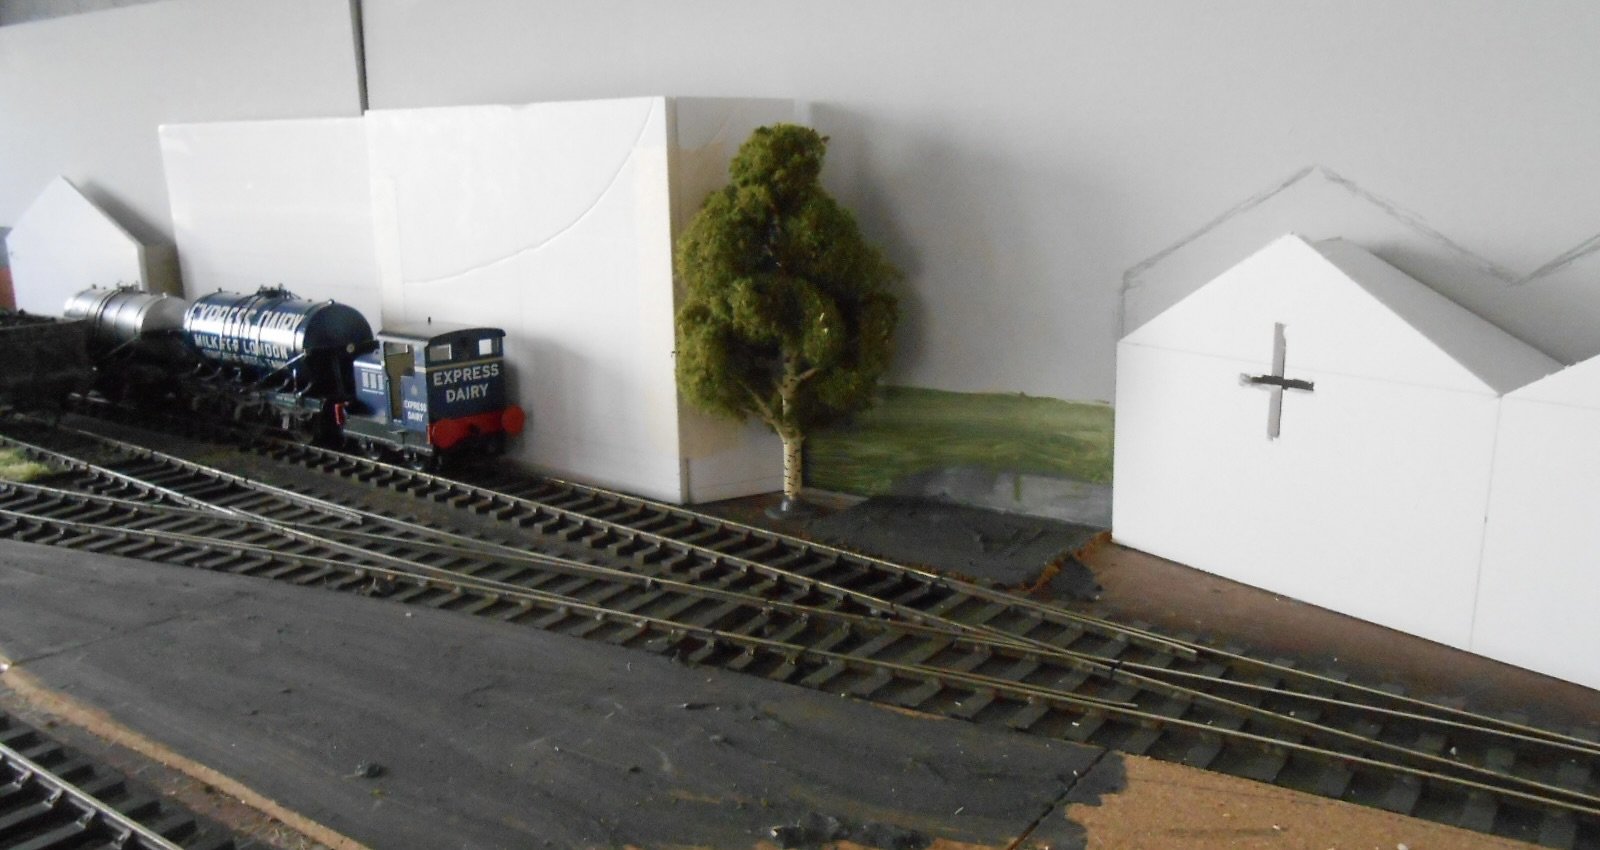
It's been a while, but as you know, I've been busy on other stuff. However, with other projects [mostly] out of the way, it seems a good time to get back to my British outline stuff. The layout is the first thing I see when I go into the workshop, so it has never been far from my thoughts & indeed the general rationale has been something I've thought about a lot. The middle section was hoped to be next, but with the reprint of Milk on the Rails not due to come out until the autumn, the focus has changed from the dairy to the right hand side & what may, or may not be a gas works. Inspiration here comes from the Wantage Tramway, where the line from the town terminus sneaked out past said affair. The furthest building is the retort house, though not sure what the nearer ones are, while the aerial view , below, gives the general picture. My concern is, would a dairy be set up quite so close to such a smelly establishment? If not, then the buildings might just as easily be repurposed as an engineering firm, though I think my time period of late 50s/early 60s might be a bit early for the change from coal to natural gas. The next picture shows the left hand half of the layout, with the one above showing where I'm going on the right side. The retort house, with its low chimney occupies the corner. It is a fairly simple building, made from foam board and card, the only slightly awkward bits being the louvred circular window and louvred roof section. As with the other buildings, Howard Scenics embossed card is used for the brickwork. Not sure what the building next to it was used for, but I rather like the unusual cruciform openings in the walls. At the moment, the important thing about these buildings is how they hide the exit to the fiddle yard AND blend into the back scene. I've long had an aversion to flat buildings, that only look good from one angle. Hence, this second building is angled into the back scene to try and hide the left edge. When the dairy gets built, its right end with be hidden by a tree, not the Woodlands specimen shown below, but hopefully you get the idea. Still not sure about the building on the right yet, but the bus might be an option - either a small, private, bus depot, or a local haulier./garage/whatever. All give the excuse to display some of my road vehicles, so why not? The back scene itself clearly needs work, but this was only crudely blocked in, so that is probably the next step, before I finish the two new buildings.
-
"Voiding the Warranty" - Mol's experiments in 21mm gauge
Colonel replied to Mol_PMB's topic in Irish Models
Amen to the above. A chimney or dome slightly out of alignment potentially spoils the whole model. Epoxy gives a nice amount of time to ensure all is in place, while still offering decent strength. -
Interesting - though following Mayner's post, don't think I'll be chasing a 3D printer any time soon. Very much admire the pioneering work going on, but if anyone is interested in a halfway house towards small scale mass production, resin castings can be very good. Have made numerous wagons, coaches and coach seats this way. First you make a master, from plasticard - usually a side and end of the wagon/coach. Next you make a mould of that. This takes 24 hours to cure, but after that, using 2 part casting resin, each part only takes 45 minutes to set. Different skills, but overall found I could create the parts for 3-6 wagons in far less time than it sounds like doing the art work, de-bugging and printing would take.
-
I think he's converted to 7mm scale and not told anyone. Or maybe it's Gauge 1 - that is a garden paving slab the model is sat on, surely? Great work, Alan.
-
Interesting, so great idea to start this thread. A few of us will need to learn some new terms like PETG, but that's all part of something new. The photos certainly show some issues, with what seems like a lot of bits to remove. All those rivets would be a pain to do in etched brass, though how you'd keep them while cleaning up the print lines is another matter - all part of the testing I guess. While there's very little I've seen so far (louvres excepted), that I can't do via traditional methods, that doesn't mean I'm not interested because it is how the hobby will develop, so keep it coming. Indeed, with some traditional fittings formerly done via whitemetal casting, such as axle boxes, chimneys, domes, valves and so on, this is certainly where printing can take over. Years ago, remember Dick Bolland, of Shedmaster Models, telling Laurie Griffin that such castings were where there was money to be made, rather than whole kits. Laurie eventually took on Dick's stuff when he started Laurie Griffin Miniatures, so there must still be some truth in the story today.
-
For me, the faint print lines are a good representation of wood grain. As for the missing buffer holes, nothing a drill won't fix - likewise door handles. Anyone who needs the buffer holes in place will like as not struggle with fitting a chassis, while spacing of said buffer holes might be an issue anyway: 16.5 or 21mm gauge/32 v 36.75 etc. In other words, nothing wrong with leaving a few bits for the kit builders to do!
-
Fabulous, with so much to take in. Enniscorthy very much a scene worth modelling and what about the two section roof on the coach at Foyle Road? Lovely stuff!
-
Looks fantastic, so well done that man who did the artwork. However, as it seems with all 3D printing, the issue is time, so if we all want Rob to do a few, I suspect there might be a long wait. On the other hand, how much is a 3D printer and if the process of home printing is becoming a realistic proposition, are we about to cross a Rubicon in modelling where what we do in future is not buy kits to make models that are unlikely to be mass produced, but buy files to print them ourselves? The issue will then be how popular a model might be, because the more it is, the more a larger manufacturer might step on the toes of the file artist, leading to legal issues about rights of production. Nevertheless, when prints can look as good as this AND be readily adaptable to other scales, then exciting times are ahead.
-
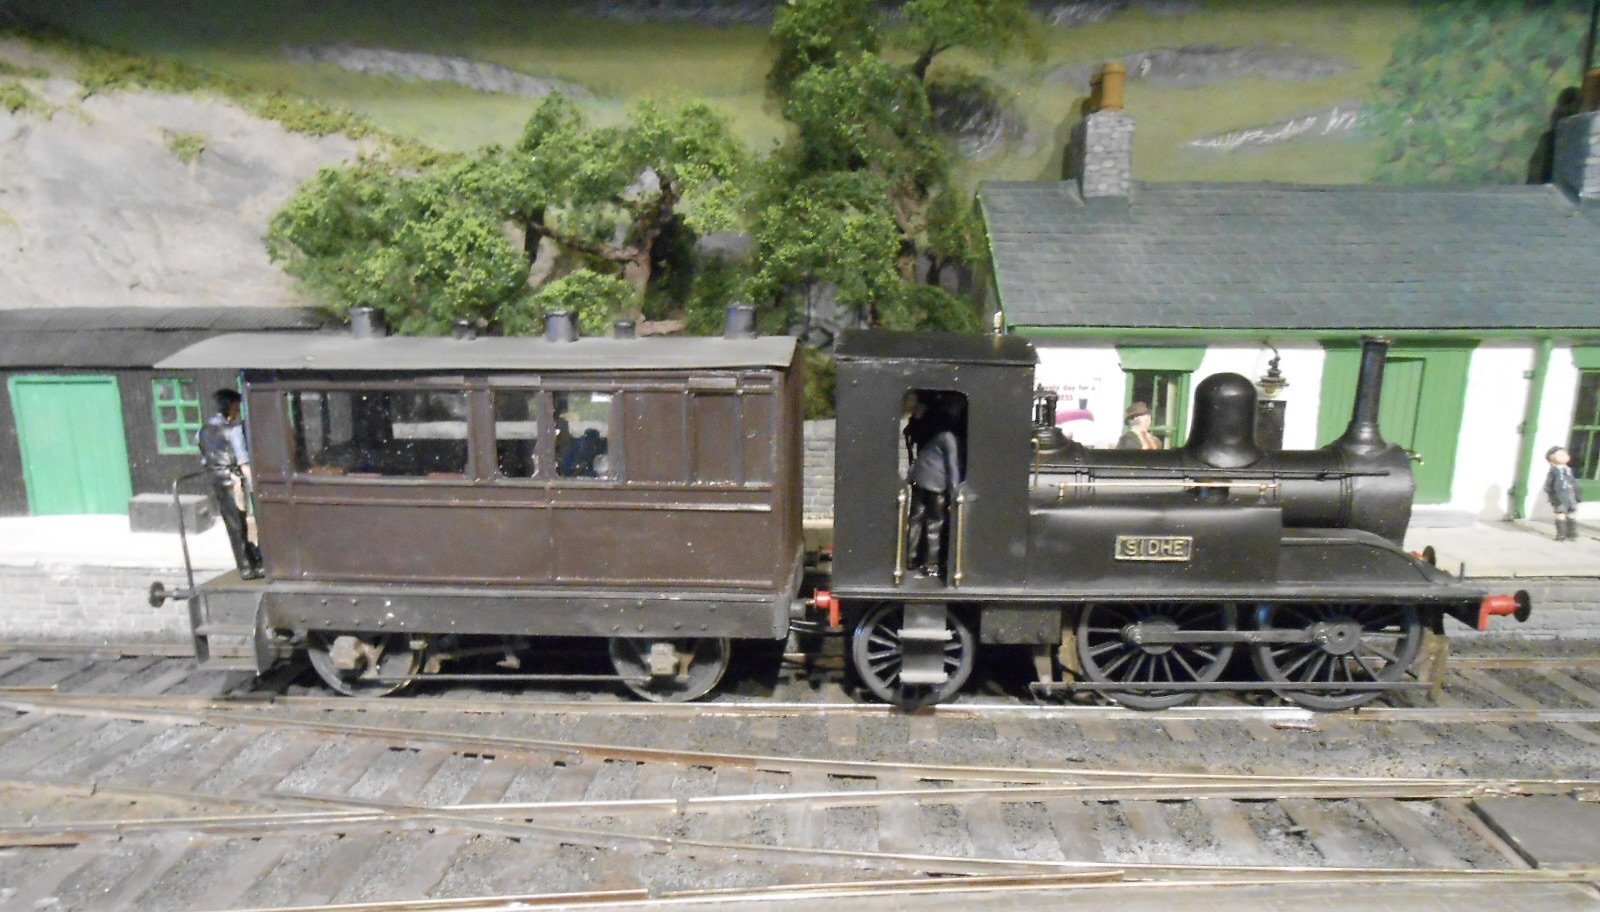
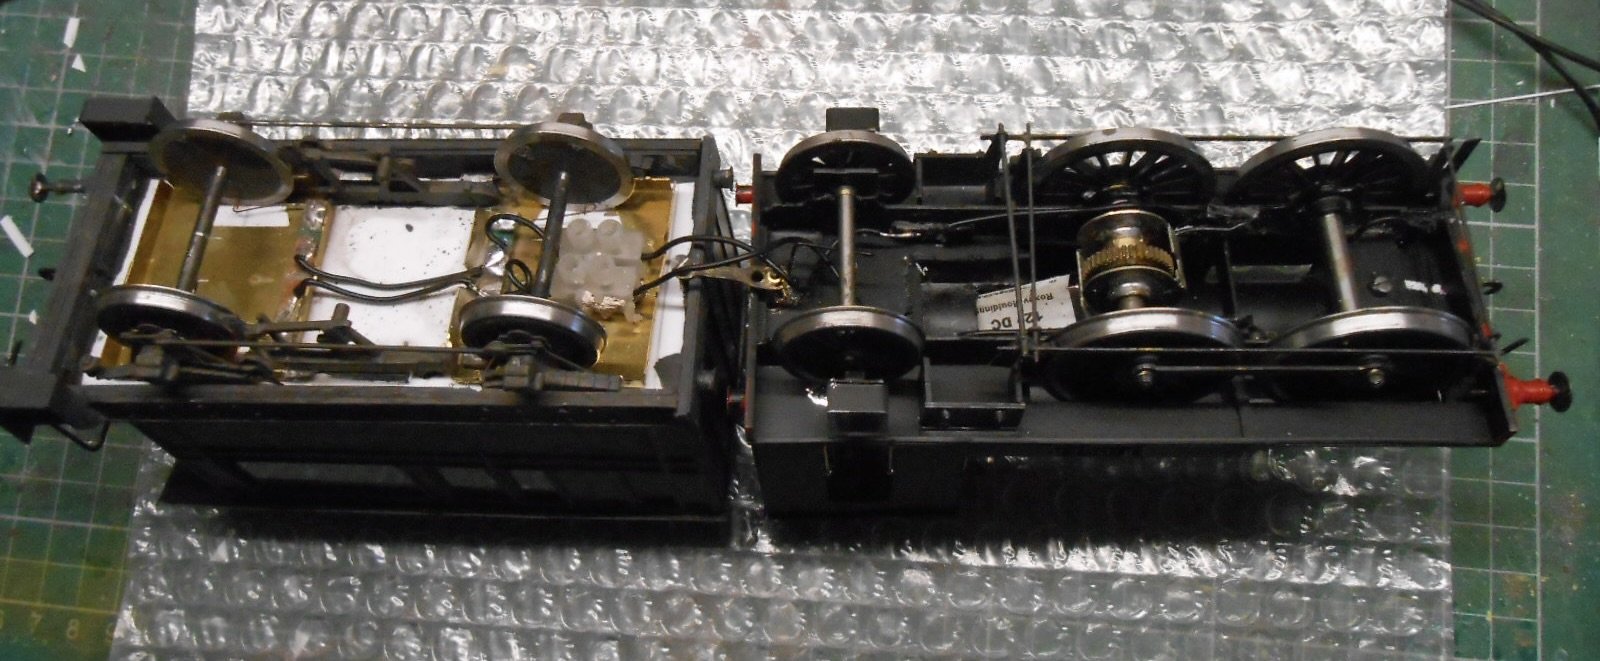
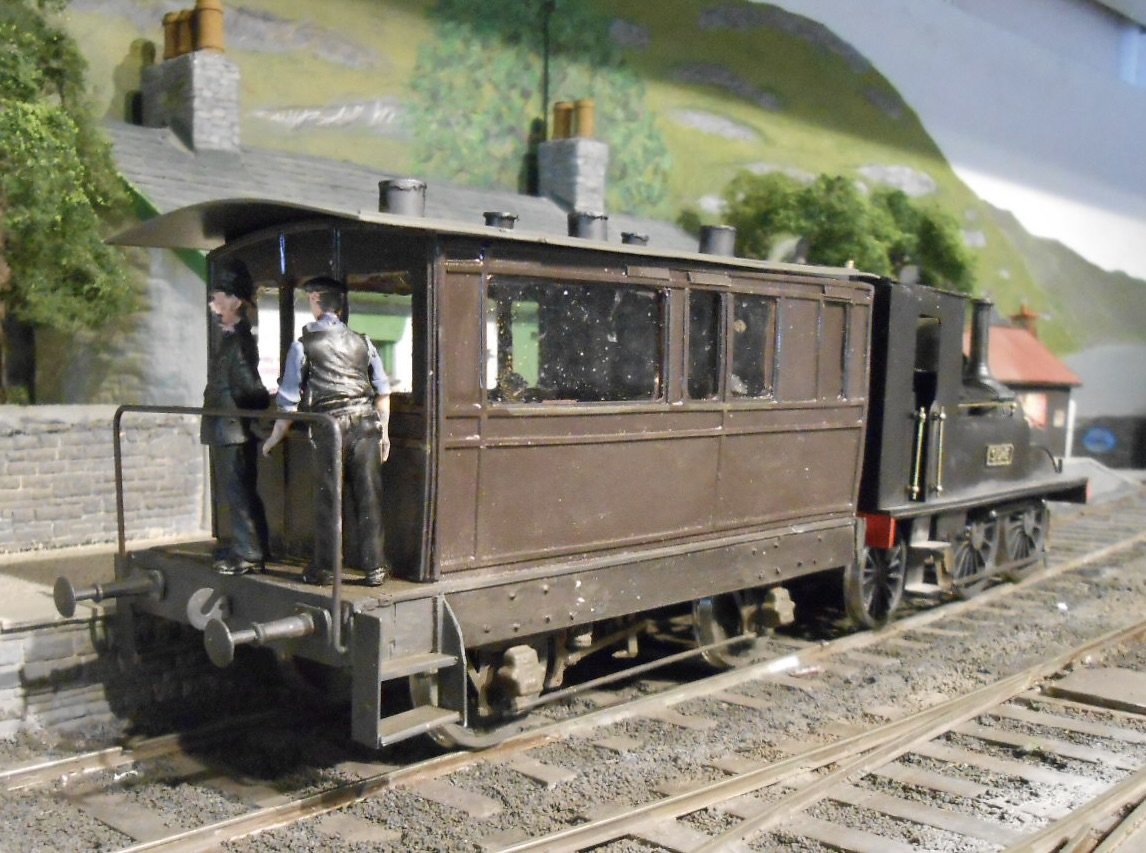
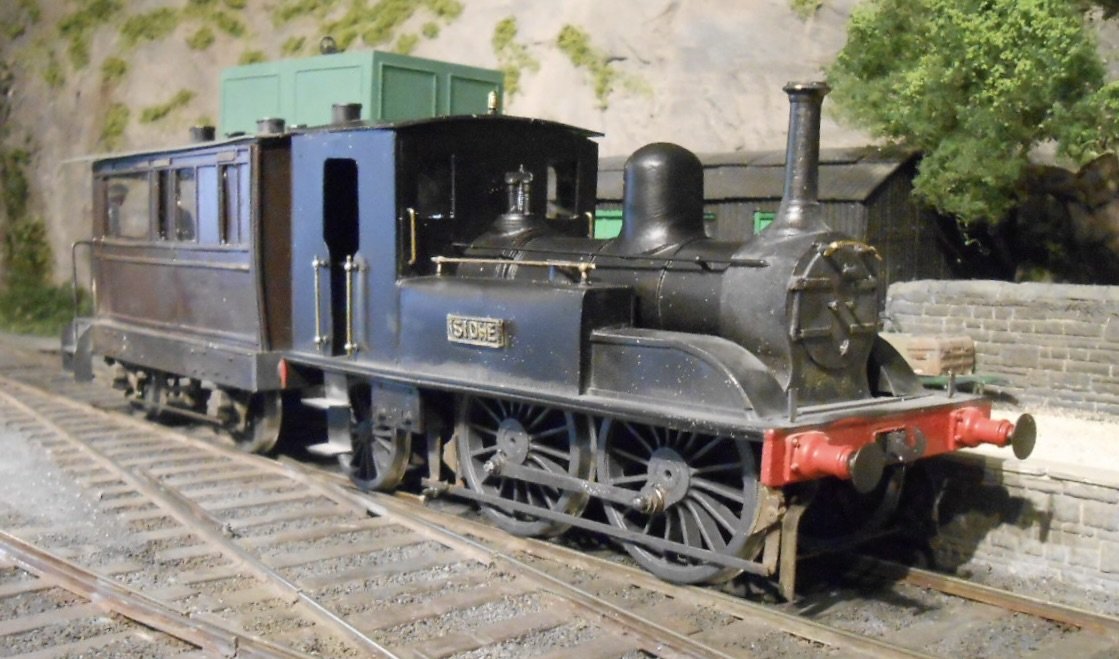
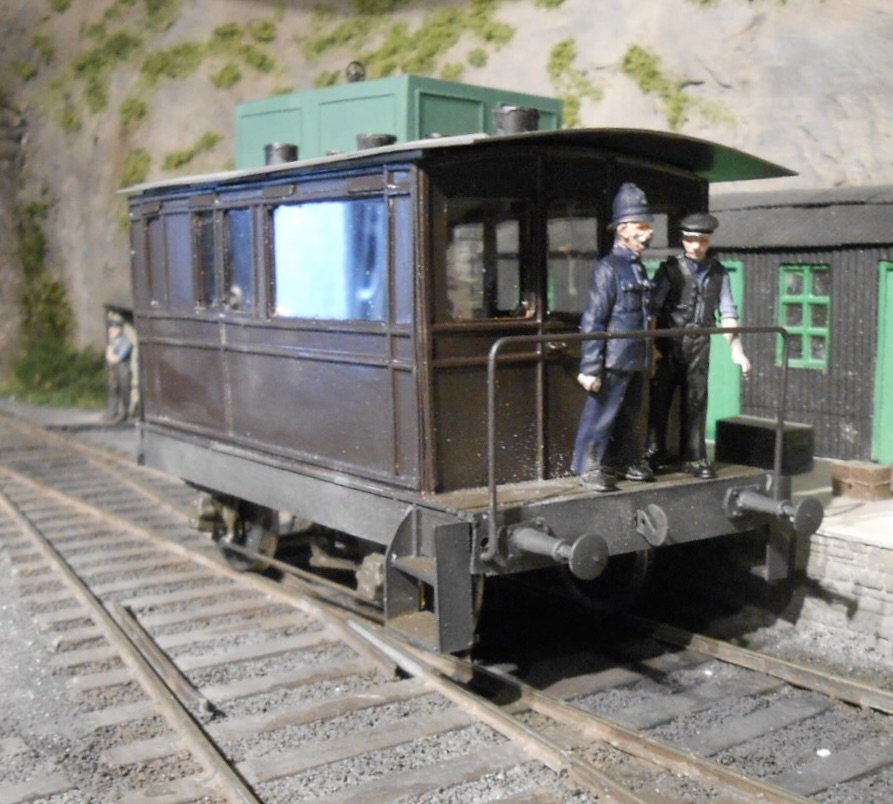
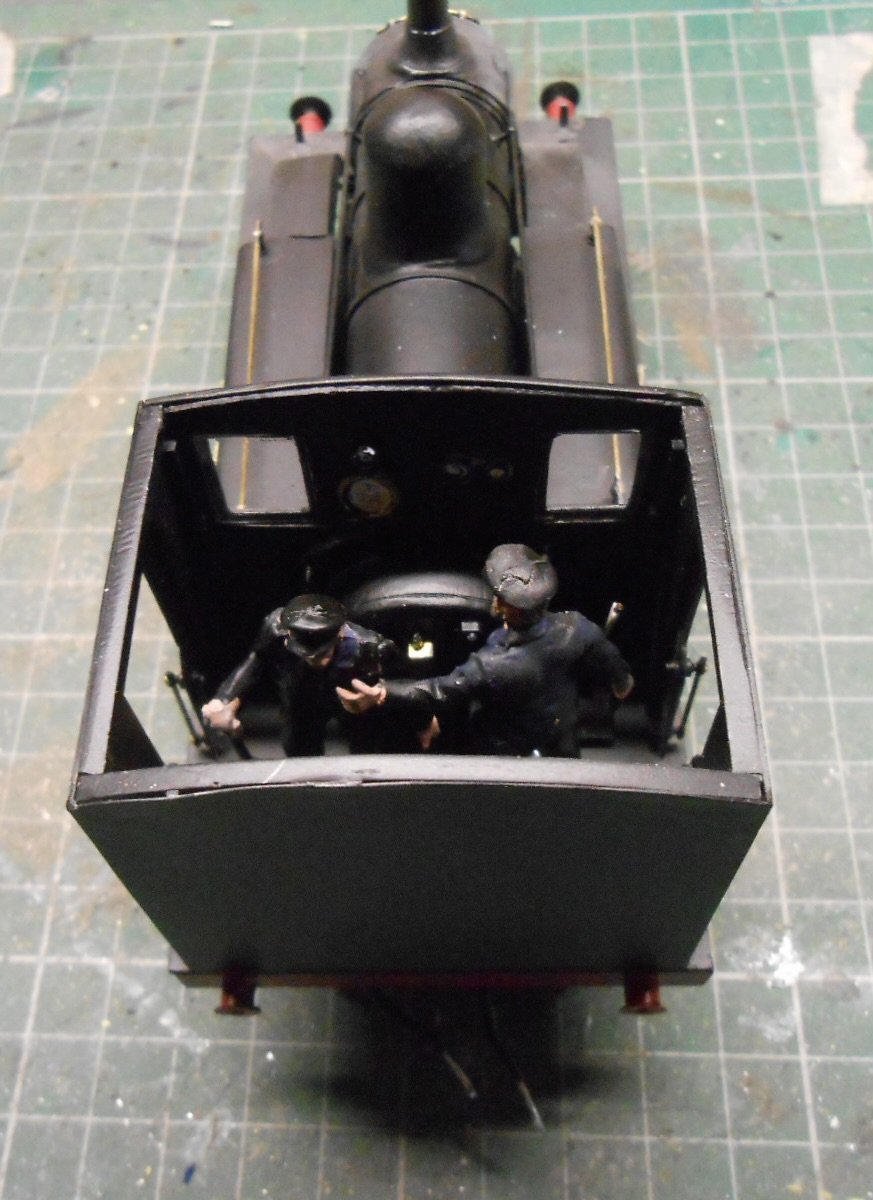
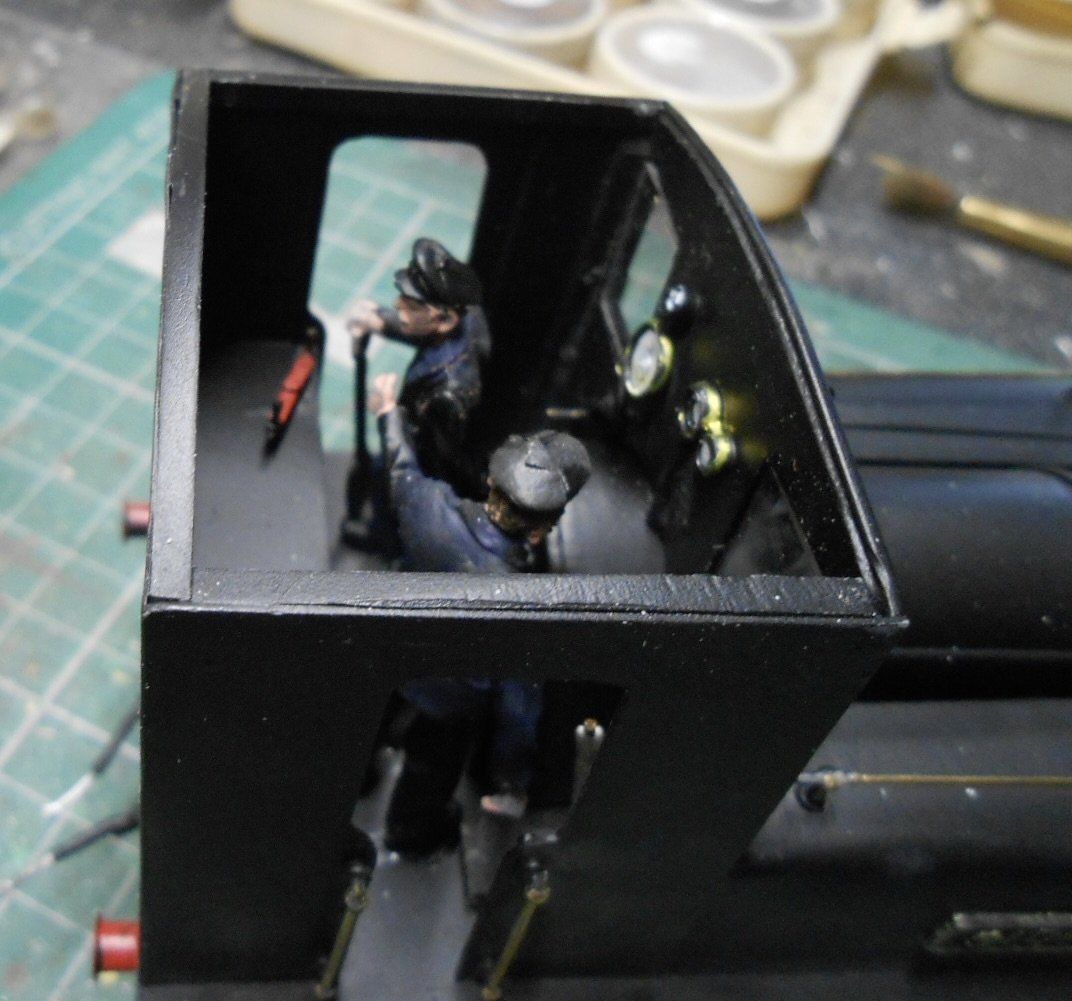
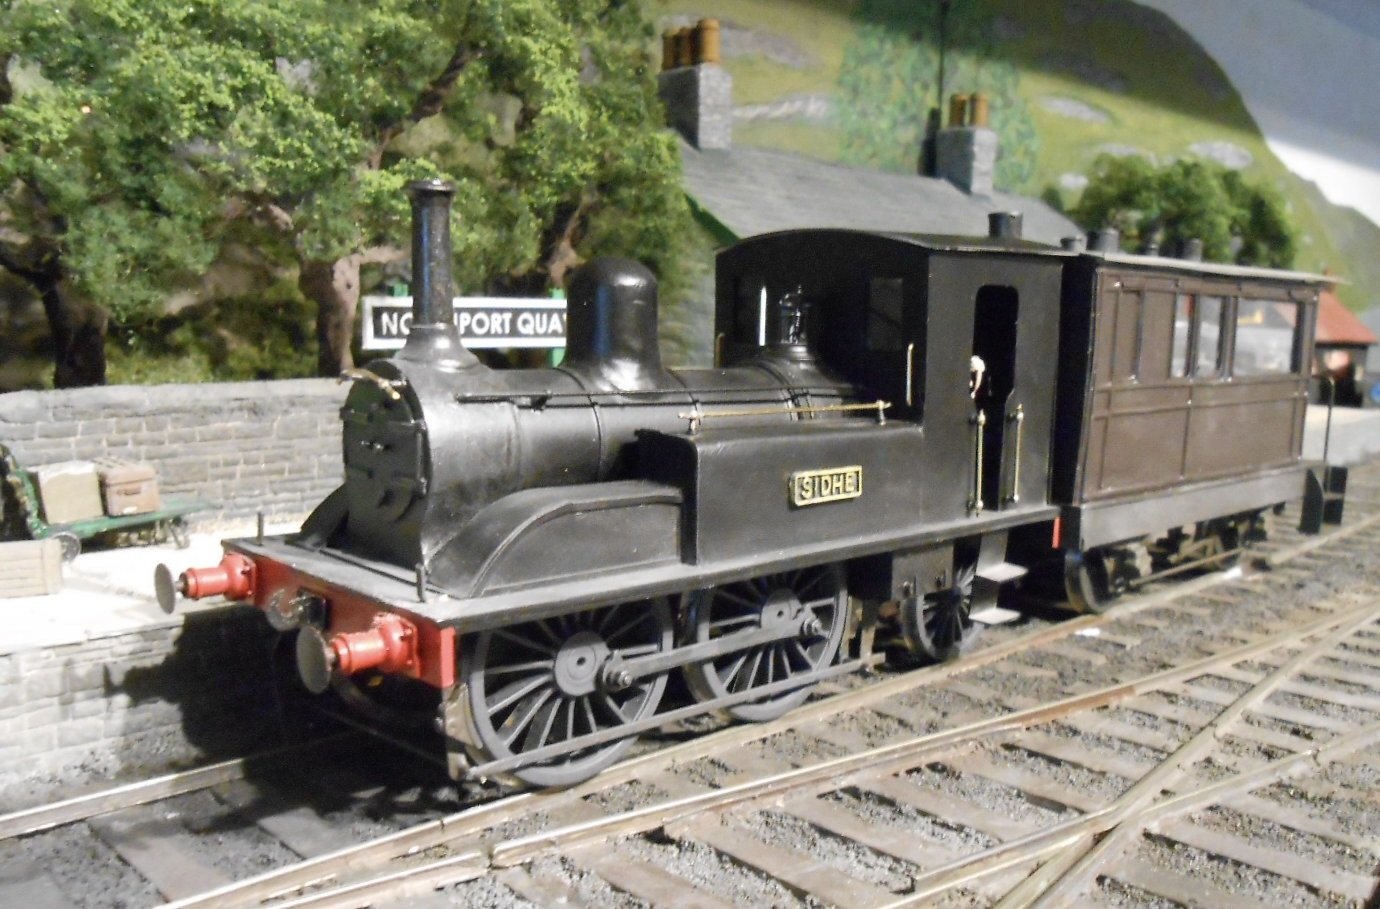
While I will probably tinker a bit more with the pay train [the carriage windows need cleaning for one], have taken it as far as I want for now. The policeman has a dark green uniform, the loco has a new cab roof, while the rest of the work has been around wheel cleaning and testing. The latter involved a bit of fiddling - the pickups needed adjustment and the wheels were pretty paint splattered, but mostly I needed to find a way to connect the loco and coach electrically, to ensure a good length of track pick up. In the end used a chocolate block connector, epoxied to the underside of the coach, so I could run two wires from the motor to it, while still being able to separate for maintenance. Initially, running was a bit hesitant, but soon traced this to the trailing wheels on the loco being far too tight and the leading carriage wheels not touching the rails [!]. Eased the former and undid the nut on the draw bar a few turns for the latter and, fingers crossed, all is well. The combo runs nicely into Northport Quay's platform, though if I ever want to run it into the loop, it will need a longer drawbar. For now though I'm happy with it as it is. So, there we are. I'm going back to my 0 gauge cameo for my next projects, having a go at some buildings and scenery for a change. Speaking of 0 gauge, took the Battle of Britain pacific down the club last week and it seems mostly happy on the the main circuit, though It may be that the springing on the front bogie still needs attention. For now though I'm looking forward to doing some modelling that doesn't involve motive power!
-
Thanks Paul - have always seen it as a bit of fun, so keep telling myself not to get too precious and there are plenty of other projects in the pipeline. Equally, one of the many joys of this forum is how endlessly helpful folk are. Advice and info are always appreciated and every bit as much as kind comments.
-
Indeed - since been looking up the history (ok, Wiki). Seems they were armed to the teeth and almost paramilitary in nature - perhaps unsurprising given that things got volatile at times, long before the Easter Rising. The pay trains would have been quite a tempting target, so am guessing my coach 'strong room' may have contained a small arsenal, as well as the cash! Fairly sure Henry Forbes of County Donegal fame chased off would be attackers of one of his trains - armed with a pistol, I believe.
-
Yet another little job then, but thanks for the info - I just looked up Edwardian policemen, reasoning that uniforms would be the same, given Ireland was still part of the 'empire' then. Every day's a school day!
-
A tad more progress with the pay train, but still keep finding stuff to do. Loco crew and a policeman arrived promptly from S&D Models, so they have been painted and positioned on the loco and coach balcony. However, made a bit of a horlicks with the loco cab roof, while the transfer rivets haven't turned out as well as I would have liked either. So, new roof and a sand down of the loco buffer beam and coach sole bars needed, so I can apply individual plasticard cubes to better represent the rivets. Meanwhile, also realised I'd missed out the the water tank filler caps... Ho hum! Have decided I won't apply lining, as judicious use of weathering powders has taken away the overall blackness which I've never liked. More weathering to do on the chassis though. At times I wonder if a model is ever finished.
-
All power to you, Commerlad!