.png.c363cdf5c3fb7955cd92a55eb6dbbae0.png)


Colonel
-
Posts
300 -
Joined
-
Last visited
-
Days Won
3
Content Type
Profiles
Forums
Events
Gallery
Blogs
Everything posted by Colonel
-
The Big question appears to be: How Much? How much would it cost to buy the rights to use the art work How much time would be required to manage the art work - liaising with potential customers, the etchers, running a website and so on How much time would be required to manage sales Always had the impression that Allen was a one man band, while you don't have to be a genius to work out nobody gets rich from running niche operations like this. Am guessing that with WW already starting to fragment, the best we can hope for is someone to take on the Irish elements - if only to ensure the artwork isn't simply lost. Trouble is who? Maybe if the cost of acquisition was known, it might tempt a group or individuals to put their hands up? I think there are other factors to consider as well. In particular, going forwards, how popular will etched kits be compared to the ever increasing use of 3D printing? From what I see on this forum, I think the latter could well be overtaking the former and as home printers get ever more affordable and the files themselves ever more accessible, will etched kits simply start to disappear for lack of interest? There is cost too - the new Finny7 kit for an 0 gauge LNER B1 looks superb (and the cab detail is jaw dropping), but it will set you back £1000 and is by no means the only one that has crossed this rubicon. Remember, this is a kit, not a finished model. Ideally, whoever takes on WW - and indeed other cherished brands as their owners give up, need to be young enough to ensure their survival going forwards - otherwise I can see scratch and kit building disappearing, simply for want of the components to do so. Incidentally, how easy might it be to convert 2D drawings for etches into 3D ones for printing? Is it an AI thing???
-
Looking great and compared to mid April, all the charm of a J26 is coming out now.
-
As others have said, that is a huge space and filling it with model railway will likely come at huge cost - in both time and money. Whatever you do, consider essentials like work bench space and likewise storage for materials and tools. Sounds like you are interested in a multi track circuit, with a junction to a terminus station? If so, will be an Irish theme, or will it be a generic one, to run trains of all kinds? If the former, a space like that gives to opportunity for an American style point to point layout, often built to include a hidden continuous run. Check out Model Railroaded Magazine for ideas. The key to this sort of layout is you operate each train as it travels around the various scenes, dropping off and picking up freight from various line side industries and stations on the way. Very prototypical. Like JHB says, you could model much of the Achill branch, or indeed Clifden, Valentia or indeed Derry or Burma roads to name but a few. Very specific though and not easy to get the right stock for either. Whatever you do, near in mind that filling a space like this will take years - five or more as a minimum, so think of it as a journey, not a destination and enjoy every step of it.
-
Fascinating - thanks David! I can't imagine Fairy or Sprite could do 85mph, but comparative dimensions between them and The Bug are interesting, Bug first in each case: Boiler pressure: 175 v 150 Cylinders: 11x18 v 8x15 or 9x15 Driving wheels: 5'7 v 5' or 5'2 Heating surfaces: 550 sq ft v 273/362 Water capacity 1000 gallons v 500 Coal: 1 ton both Bug was clearly much more powerful and the larger drivers would certainly give a greater top speed, but the pay trains had longer lives and covered much greater distances. The Green Bibles giving the 1901 WTT as as a two week cycle: Tuesday: Inchicore - Tullow - Kildare - Limerick Wed: Limerick - Ennis - Sligo Thurs: Sligo - Limerick Fri: Limerick- Roscrea - Maryborough - Waterford - Bagenalstown Sat: back to Inchicore via Carlow The second week took in Cork, Mallow, Tralee, Foynes and so on. No wonder Sprite is recorded as covering nearly one and a quarter million miles in its 37 year career!
-
Indeed! Lovely details in all these pictures.
-
Great project - very well done.
-
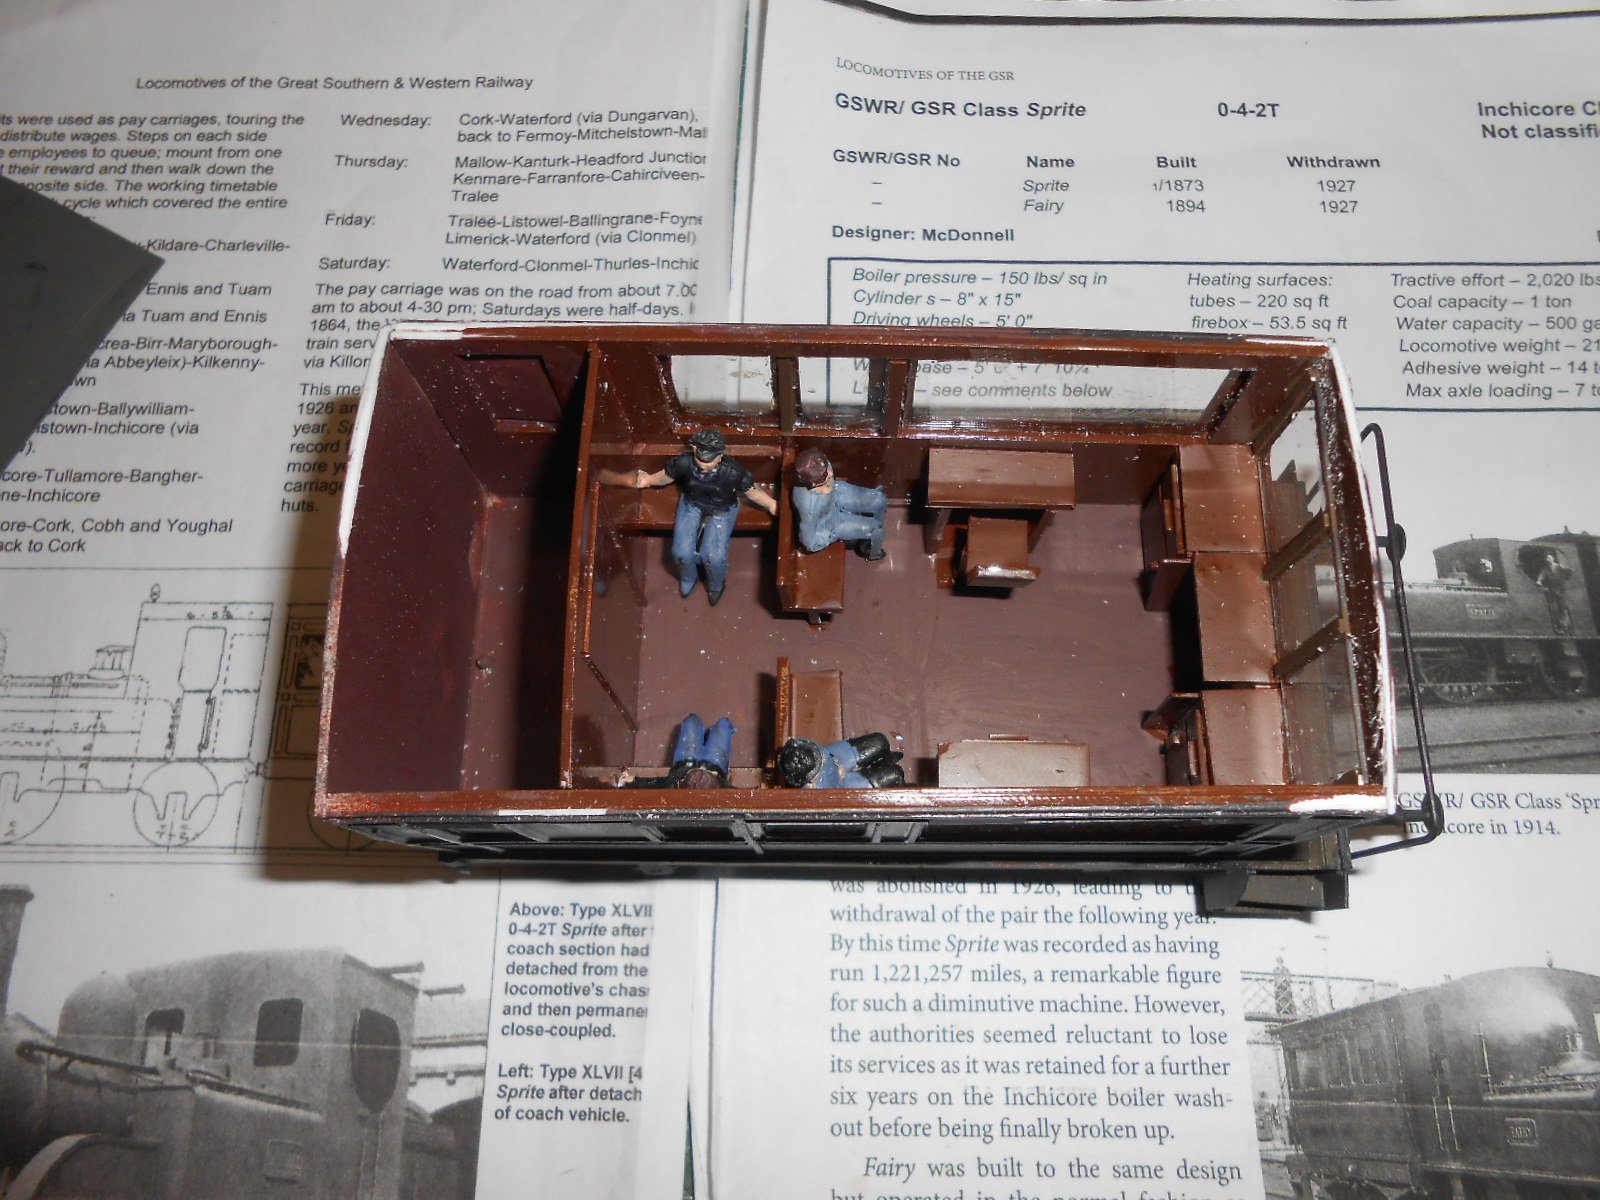
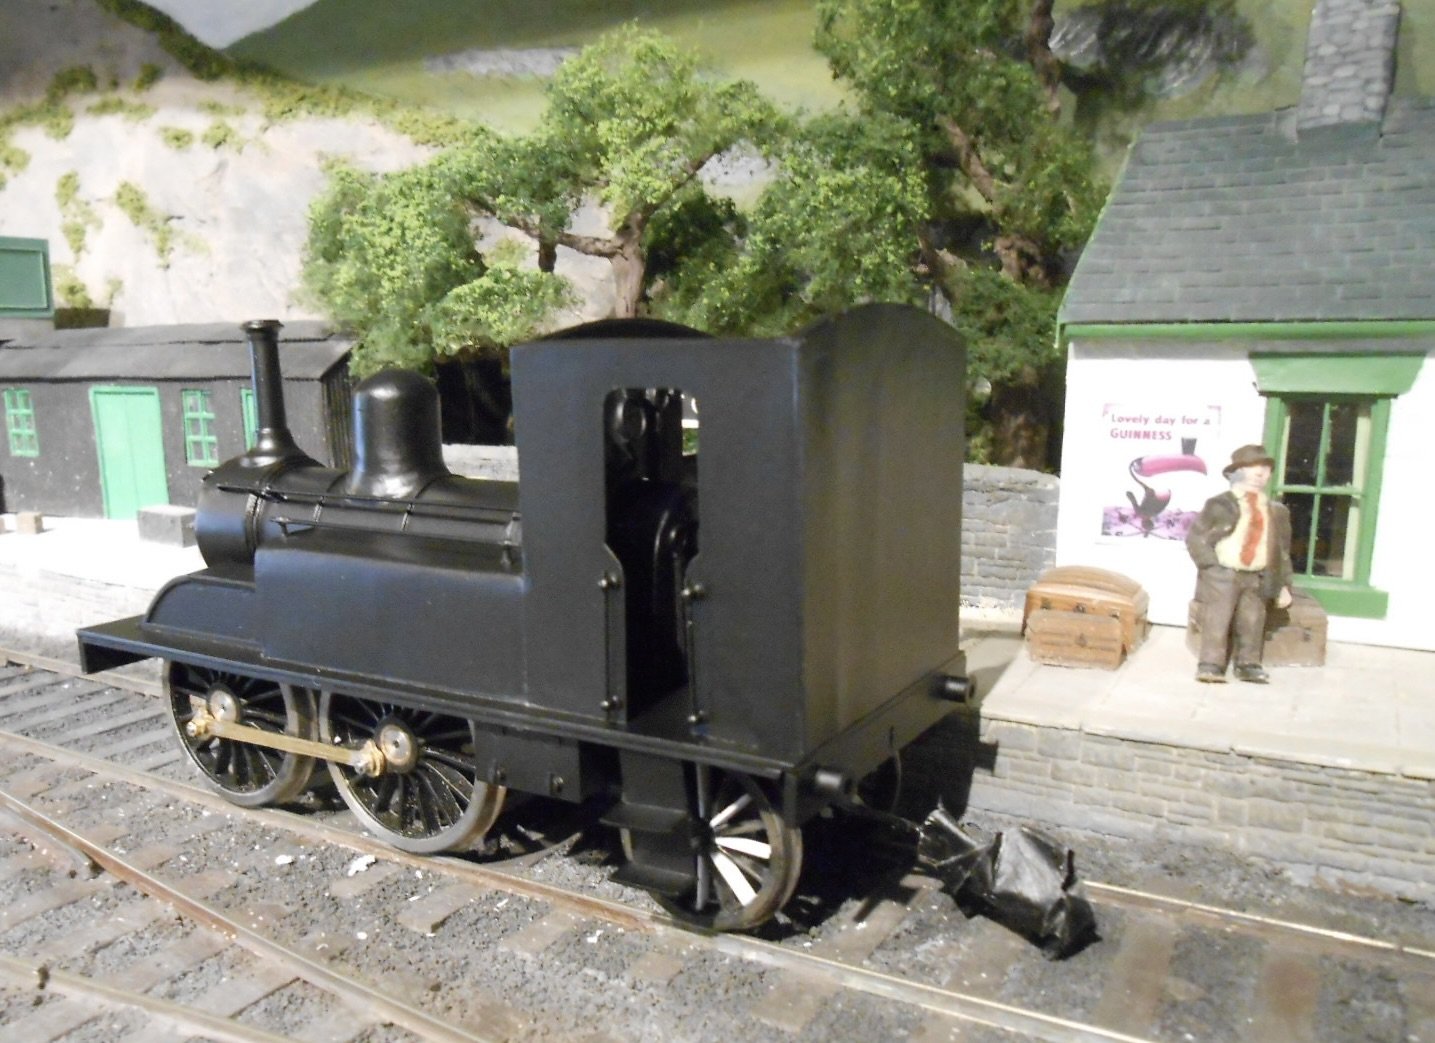
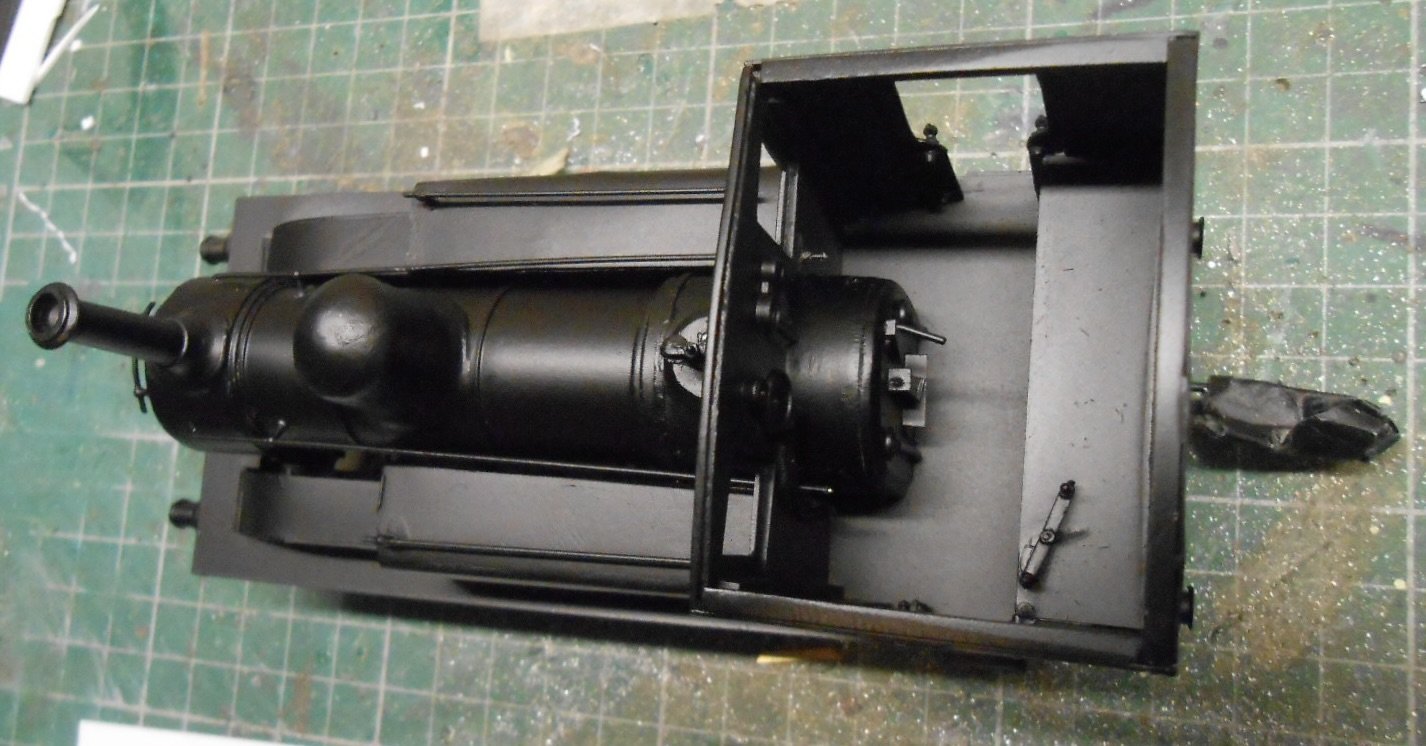
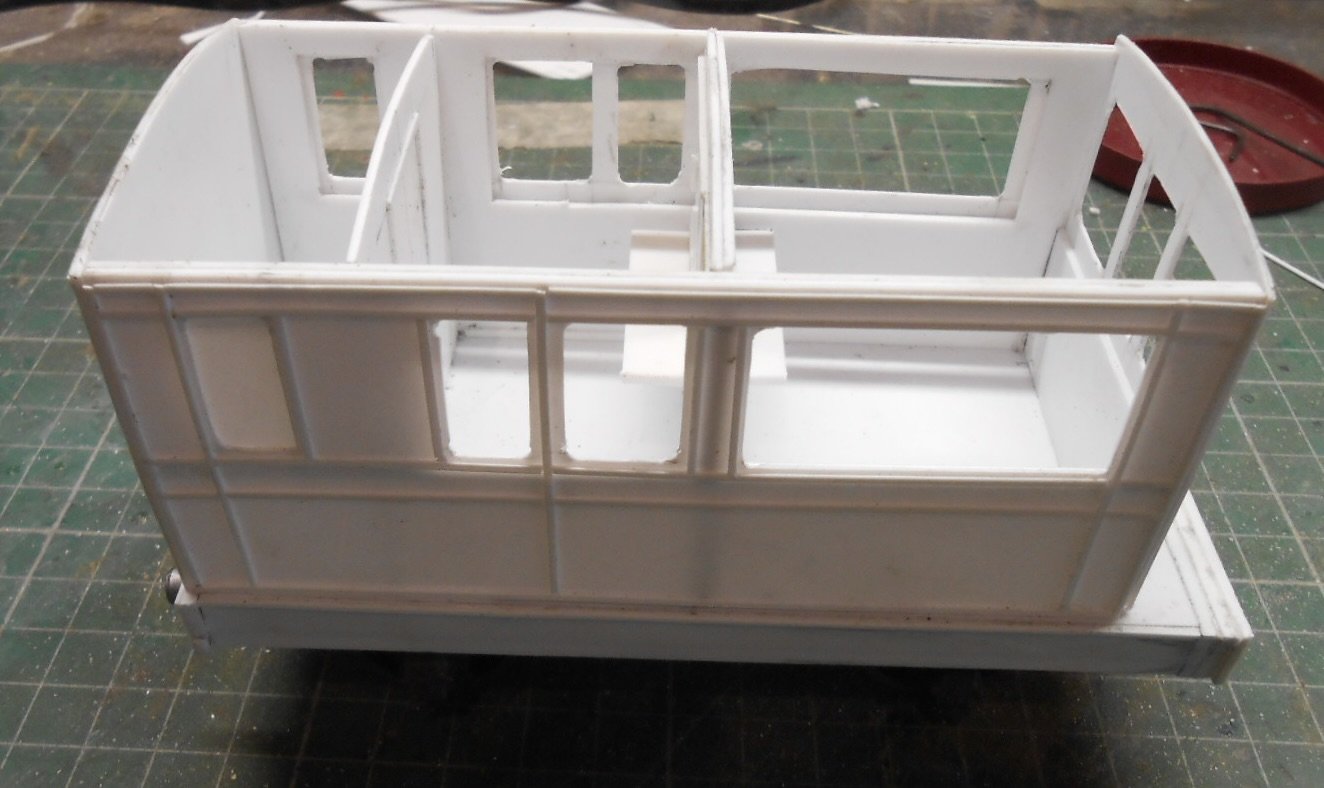
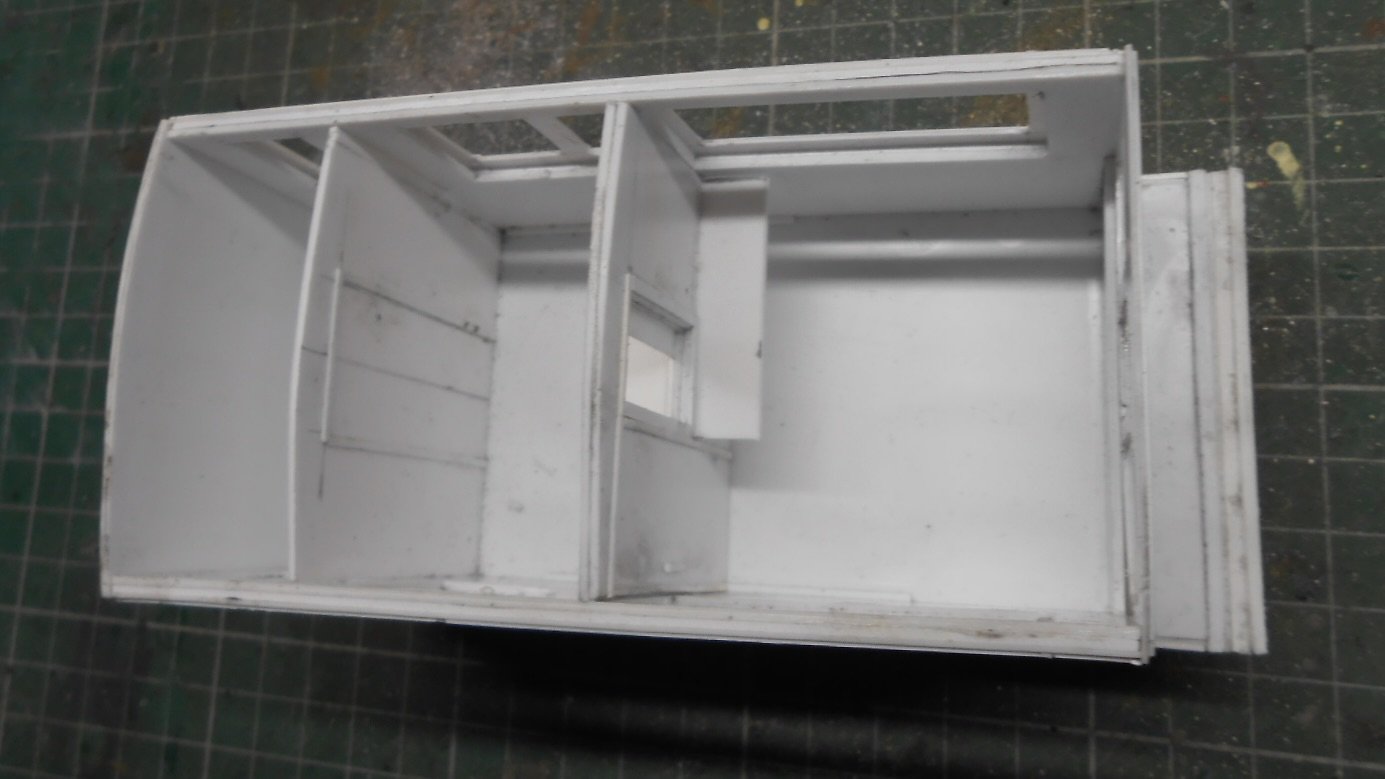
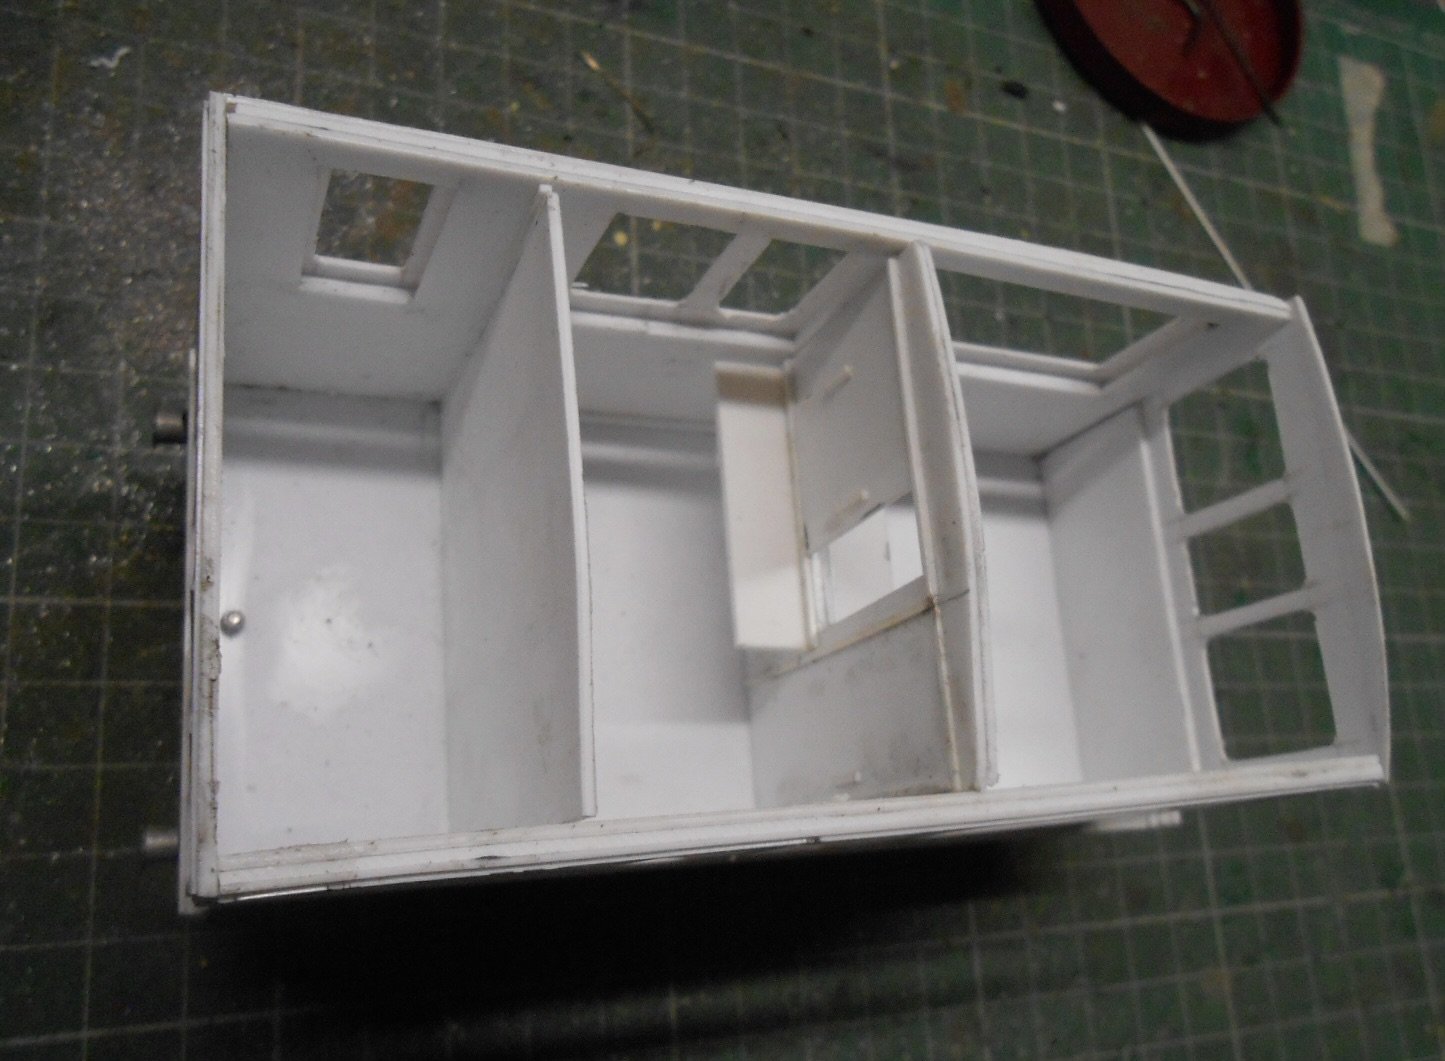
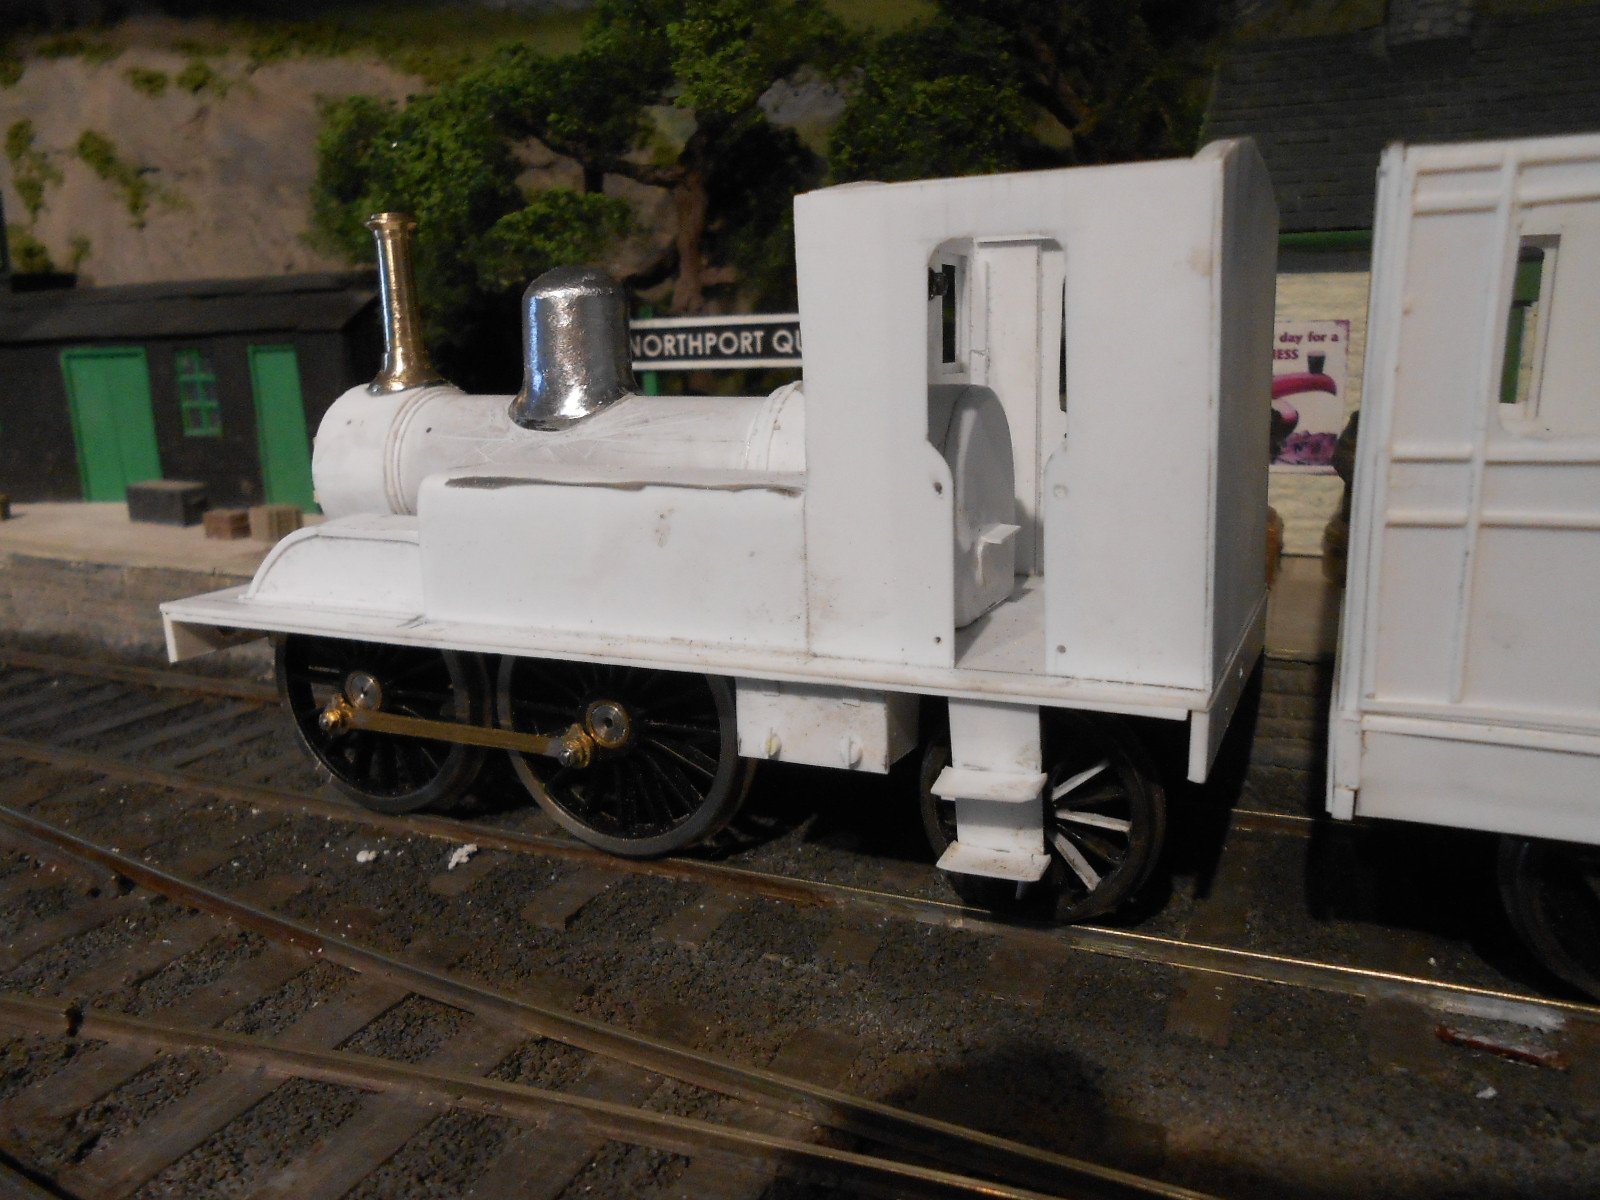
Maybe it's me, but it seems that the nearer I think I'm getting to finishing a model, the more things there are that still need doing. Certainly it is the case with Pay Train - although as you can see, it is getting there. Neither the loco, nor carriage roofs are fixed yet, while I'm waiting for some figures to arrive. I'm also trying to decide whether to add some lining to both vehicles. The carriage could be easily done, as I have in the past, with gel pen on top of the waist beading. However, not sure if the curved tops to the loco side tanks, nor the somewhat ugly cab sides lend themselves to GSWR red & white lining - maybe just lining the boiler bands, splashers and perhaps the valances would just lift things a little? Photos of Fairy and Sprite don't show any embellishments, but I can't help thinking thinking my model would benefit with a few. As you can see, I've named the model "Sidhe" [pronounced Shee, as in Banshee]. The name plates are made from 20thou plastic sheet, with 40x20 edging strip and Slater's letters. The brass finish has been done with a gold gel pen. The other work done recently on the loco has been in some basic detailing in the cab - though have just this minute noticed that it is still lacking a reversing lever. What was I saying earlier...? However, most of the recent efforts have been with the coach - in particular its interior. As it seems likely that employees would not have been allowed inside the carriage, but collected their wages from the balcony, I rearranged the interior a little, though kept the 'strong room' nearest the loco. There is seating for 6-8 staff [am assuming one or two of these would have been policemen], with cupboard & desk space in the middle and likewise across the end, with a lifting flap/counter across the door. Glazing, hand rails and so on complete the picture so far. I'm waiting for a couple of standing figures and will need to make another chair, I think. Also need to add a bit of desk clutter, though most of the latter would probably have been put away while the train was on the move. Would there have been a toilet on board? Given the frequent stops, perhaps this is unlikely. A similar question arises over whether there might have been a basic gas stove, to boil water for tea? What I have included are oil lamp tops and ventilators on the roof. Still to be added are some rivet transfers to detail the loco buffer beam and carriage sole-bars, plus a bit of weathering too. Add in wheel cleaning and test running and it is by no means finished yet - albeit starting to look the part.

-
That one would be a challenge to model, given it is not articulated. Guess you'd have to make the coach wheels as a bogie, otherwise it would be very hard to get it to go round curves and even then those floorboards would get in the way. Another one not on my Northport Quay list! Shame, as it is a nice little combo.
-
Lovely stuff Ernie and so much detail to peruse too. Is there another loco behind 182, or does it really have two whistles, I wonder?
-
Likewise the bare metal looking good, though if you expand the photos, it makes you realise how etched brass moved things on - avoiding the chunky edges in particular. No need for extra ballast though! Indeed, wonder if the weight has contributed to the cranks fracturing?
-
"Voiding the Warranty" - Mol's experiments in 21mm gauge
Colonel replied to Mol_PMB's topic in Irish Models
Clever stuff, Paul and interesting to read about Loctite 290 too. Seems there's a cyano for everything. Since having to find 4mm scale drivers for my 7mm narrow gauge locos, it made me realise how valuable Slater's wheels are and wonder why the likes of Gibson and Ultrascale can't follow the Romford practice of square ended axles? It's not just the ready made quartering they offer either. It may be me, but I find building, fettling and painting a loco chassis requires multiple fitting and refitting of wheels, which Gibson's in particular do not like - a couple of removals and they are soon loose on their axles. Very neat solution to ensuring the axles will quarter correctly too, by the way. -
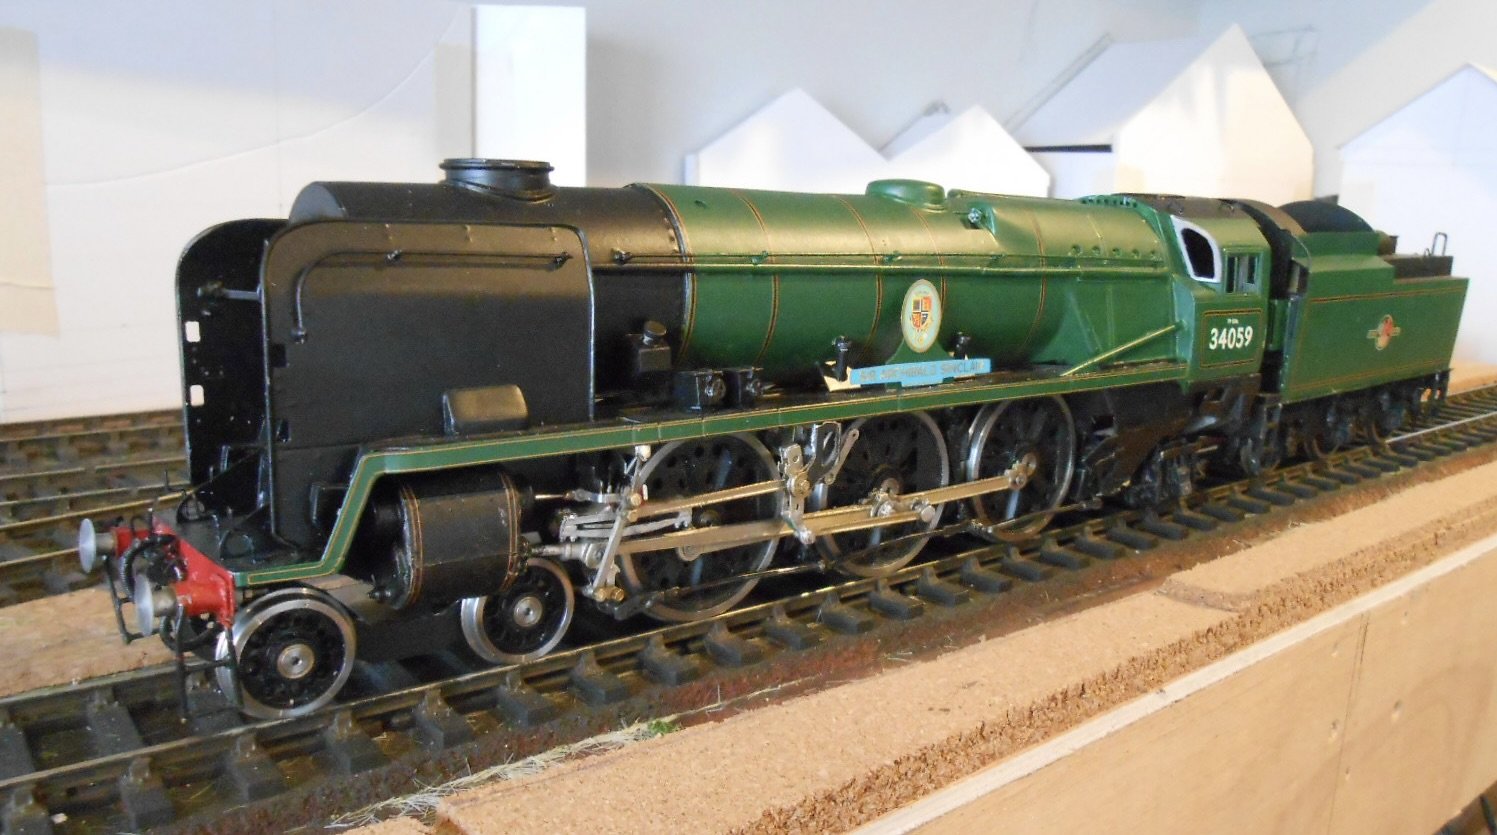
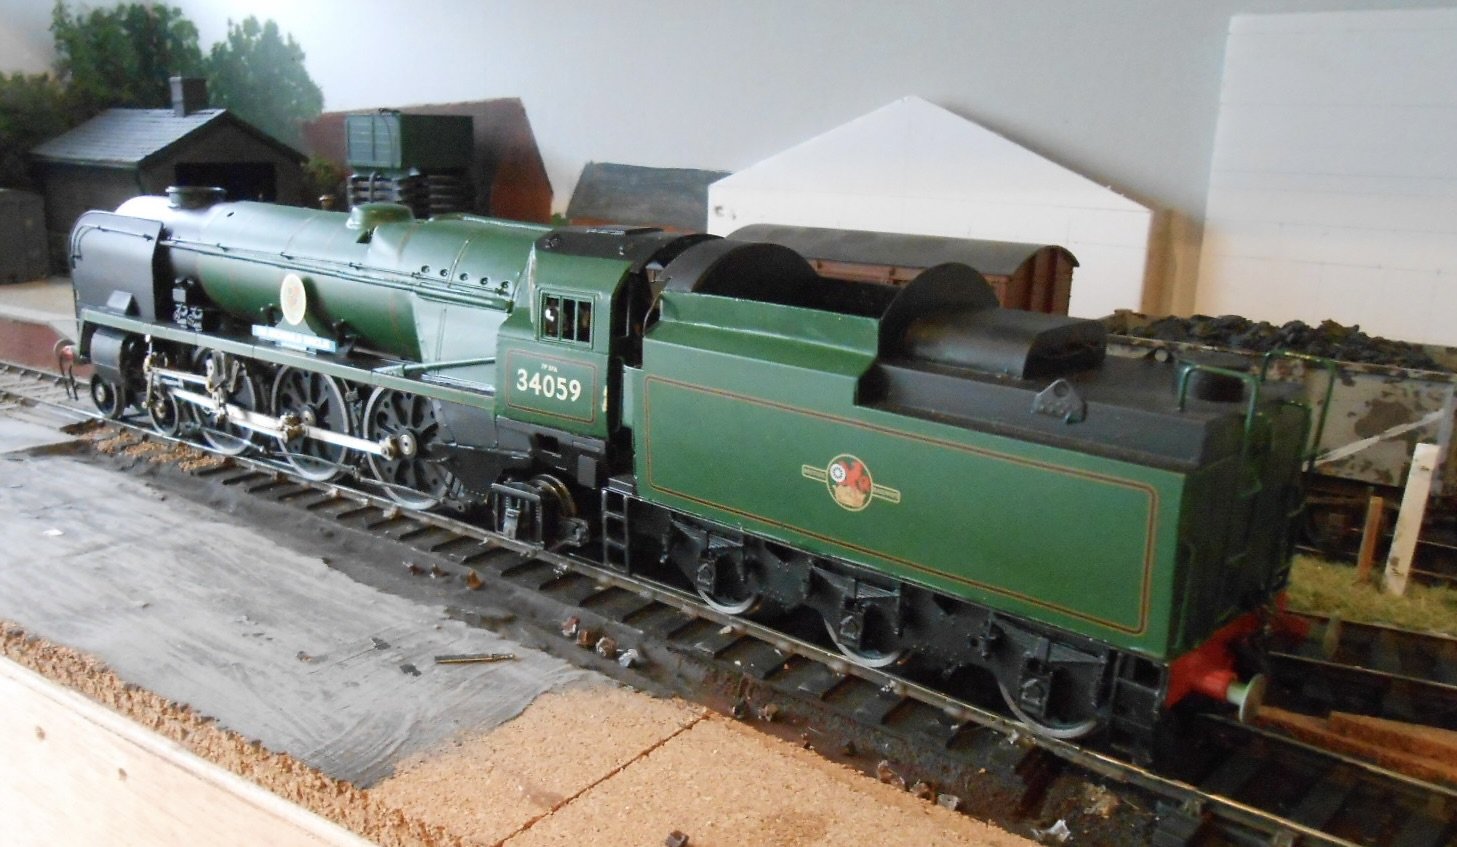
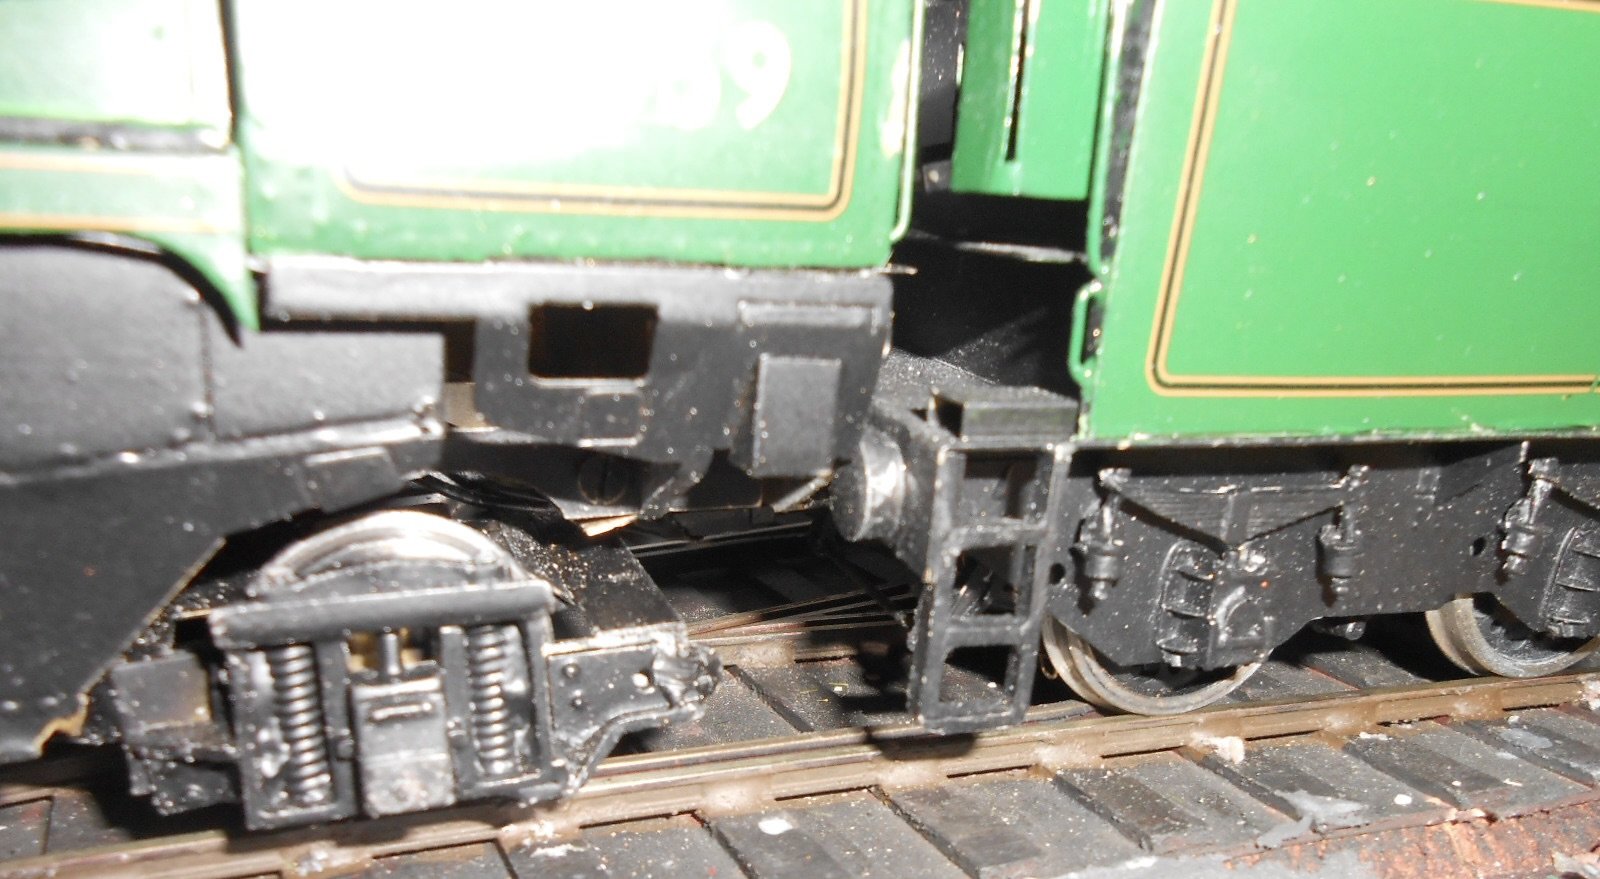
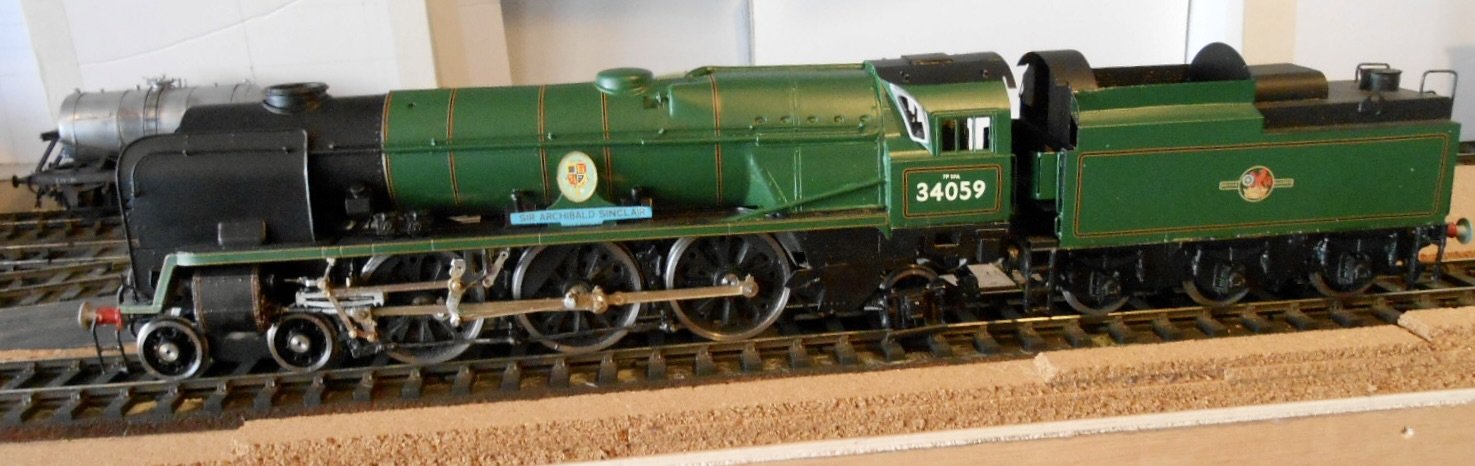
Crossing everything, am hoping to give back the Bulleid Pacific next week. The photos don't show much, but a lot of fettling has still been going on - most of it around the interface between loco & tender. At first, it was the tender hand brake stand rubbing on the loco fallplate - more than enough to cause derailment of the tender at one end and the bogie at the front! Got that sorted, but still had to made a slightly longer drawbar, as well grinding a bit off the fall plate too. However, something was still causing a derailment on a 6ft radius point, until I saw that some sort of plate thing was catching on the rear pony truck, so that required trimming too. Speaking of the pony truck, that has also taken several goes to get the ride height correct, while the loco brake gear has also tested my patience. It is all white metal and therefore rather fragile. I'm tempted to replace the lot with brass strip, but it seems to be holding together for now... Finally, this afternoon, managed to find a couple of sub-miniature connectors, so the tender pick ups are now wired through to the loco and the ensemble is now able to negotiate the whole of my 0 gauge cameo layout, I really do want to get back to the Pay Train tomorrow - the missus is on a girls day out, so a bit of me time in the workshop beckons.
-
So, potential for a steam railcar on Northport Quay then... Like Mol, ain't happening anytime soon though - for one thing, I'd have to start a whole new period of modelling and three separate lots of stock seems a bit extreme for a small layout.
-
Good stuff and nice to see a bit of hybrid/mixed media modelling.
-
Interesting - thanks John. I've applied modern expectations, when 19th century ones were probably far more basic: keep the proletariat at arm's length! Might need to have a rethink about the interior, giving it all over to pay staff? Still could be three sections perhaps, with secure store as now at the loco end, pay desk/office at the other and staff seating in the middle. With so much money to account for, am guessing there might have been at least four to six staff involved: a person in charge, a couple of clerks and someone with a big stick acting as security?!
-
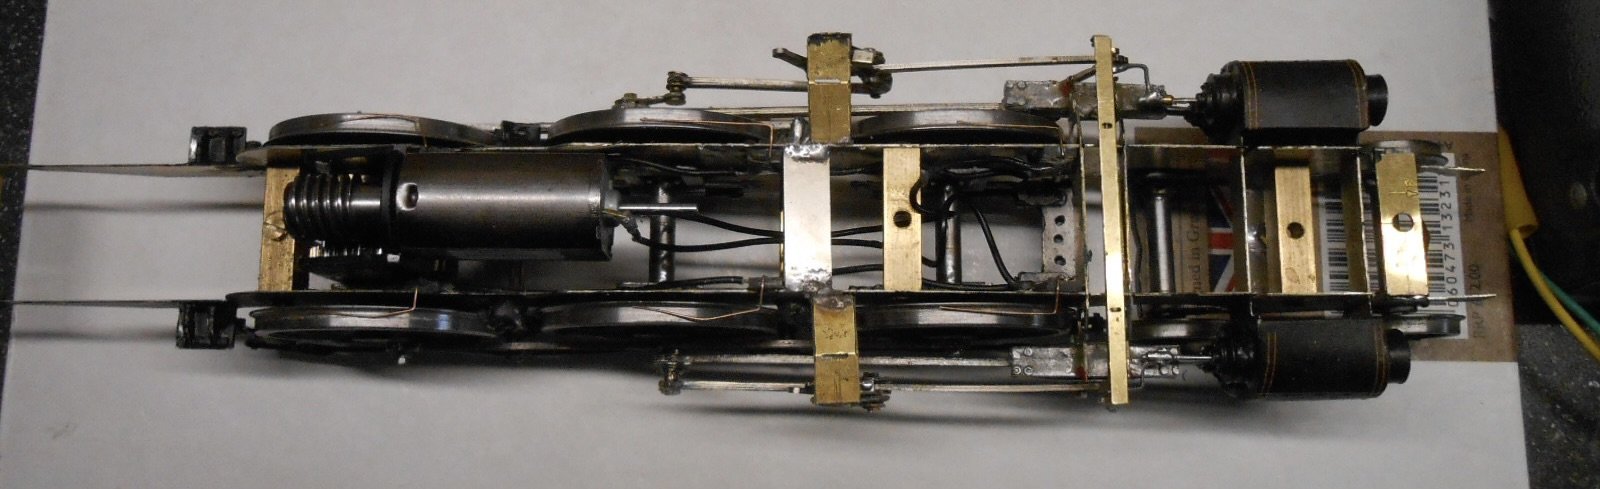
The visit to the Club last night did not go well. In my defence, all I can say is that the pacific's chassis works nicely enough on the bench, but it certainly did not perform well on the track. However, the advantage of sharing a model with fellow members means there is more than one pair of eyes to help. The culprits are shown below: At the top is the rear pony truck, where the axles boxes were actually fouling the track. Turns out the builder had installed them upside down!!! Below these are the springs and dummy axle boxes for the rear drivers, which effectively reduced side play to nil, meaning the loco would not negotiate 6ft radius points. Both have been removed. The pony truck axles boxes need to eventually go back the right way round [they add useful weight to the pony truck too], but am tempted to leave the other parts off as they are pretty much invisible being hidden behind the drivers. The tender is connected to the loco by a fairly crude hook and bar. This also needs replacing as it too prevents the loco moving in anything other than a straight line. If you are only building a model as a static exhibit, these things don't matter I suppose - but they certainly haven't helped me... Another thing I found was that the motor gear box needed tethering as it was moving about 120 degrees about the driven axle, causing the main gear wheel to catch on the rear frame spacer. All in all, a pain in the primary orifice! At least the Pay Train continues to make progress and in the case of the loco, has now been through the paint shop, following the addition of various hand rails, pipes, rear buffers and basic cab detail. Way too black at the moment, but getting there. Work has now progressed to the coach, though here what I'm doing is pure conjecture. Each Pay Train worked a two week tour: one around the north of the GS&WR system, the other around the south. One can only assume that, at the beginning of each tour, the coach must have contained a fair amount of cash. Whether this was paid out to staff on the way [form an orderly queue at each station & depot], or maybe just paid to station masters, managers, etc for onward distribution, I have no idea. Indeed, maybe it would have been a bit of both? Either way, I can only presume that part of the coach would have been a secure compartment with, in addition, some sort of barrier/counter between the Pay Train staff and those coming to get their wages. Am also assuming that with multiple stops each day, there would have been no need for a toilet in the coach, but maybe a gas stove and a couple of cupboards for food and drink might have been useful, while comfy seats for long journeys would be valid too. The Pay Trains ran well over a million miles in service - remarkable for such a tiny loco. So, as you can see below, I'm splitting the interior of the coach into three, with the secure section nearest the loco, the pay 'office' in the middle and the public bit at the balcony end. Would probably be further on with this, were it not for that troublesome pacific, that is where we are for now.
-
Beautifully written, Kevin.
-
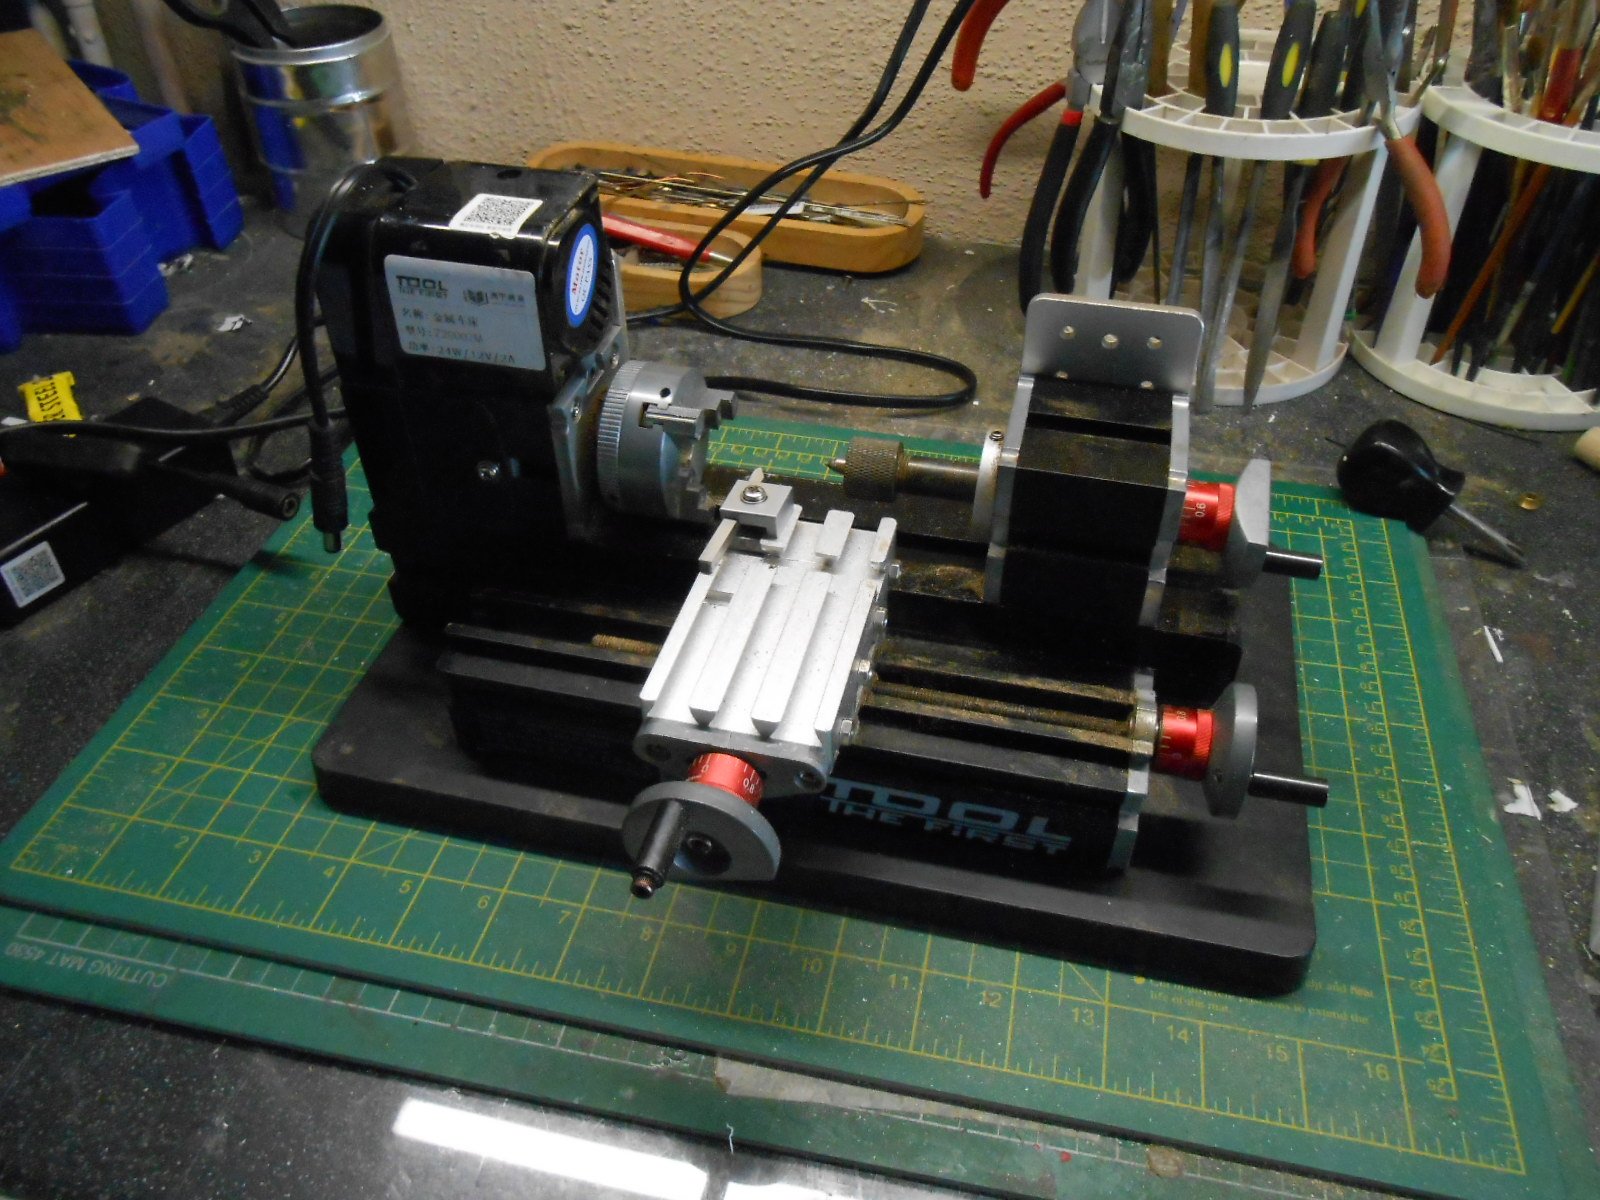
Got the micro lathe from Amazon. It was under £200, though something similar is more now. As far as I can tell, the next step up is a Proxxon at well over £500, after which you are quickly heading towards four figures and more. These days, unless you are seriously into workshop practice, can't help wondering if a 3D printer might get more use, especially for small fittings and the like.
-
I've taken the Bulleid Pacific as far as I can at the moment. Now need to take it down the Club on Tuesday, to see how it performs on the two 0 gauge layouts. One is an Inglenook type, the other is our tail chaser , North Circular, so it will be interesting to see how it copes with Peco 6' radius points and the outer circle of the same radius on the main layout. So, back to the Pay Train, for a bit of light relief and have spent the weekend producing the main boiler fittings: chimney, dome and safety valves. This meant getting out my 'micro lathe'. Very much a halfway house between using a drill chuck and files to turn up basic components, compared to even a basic lathe, it has nevertheless helped me produce quite a few things - though I shudder to think what true model engineers would say! Here is said machine: there's a three jaw chuck on the left, with just a pointy thing on the right [am sure it has a proper name], so you need to find the centre of the brass rod [or other material], to set it all up. The micro lathe came with this plastic gizmo which helps scribe multiple centre lines. Not terribly accurate, but have found if you do lots of them, even if the lines don't meet up in the centre, you can still mark a centre point as shown below. You then drill a fairly deep hole for the pointy end to go into. Locking this into the brass rod obviously stops things flying off when turning takes place. The lathe isn't very powerful, so how found it is a case of many passes with the cutting tool, doing about a quarter of a millimetre at a time, so as not to stress the motor, finishing things off with files. Tedious, but effective. I keep thinking about buying something better, but for the limited amount of turning I do, it is probably not worth it. The chimney turned out ok, but the dome [above] turned out too small. Bear in mind I'm working from basic, small scale plans and grainy photos, but it didn't look right, on the loco. Waste not, want not, I cut off the base and used this to mount a white metal casting of a pair of safety valves. Luckily, found a white metal dome in my spares box. It was too tall, but about the right diameter, so I filed it down and hopefully, it looks the part. So, the little loco is starting to look the part at last, albeit still a way to go.
-
Add brake rigging to the list of pains when chassis building! The use of fine tubing to set things up is definitely one I'll be using.
-
"Voiding the Warranty" - Mol's experiments in 21mm gauge
Colonel replied to Mol_PMB's topic in Irish Models
Starting to come to life. Sure you are not working in Gauge 1? -
Fairly sure numbers on wagons were hand painted. When you compare pictures there can be quite a few subtle variations. For other stock, have a look at the Fox Transfers website. They may well have something close and remember seeing a BR Mark 1 coach being restored on the Kent & East Sussex at Tenterden and they were using Fox Transfers too!
-
Mine arrived yesterday and it is a fine thing for which the authors should feel very proud of.
-
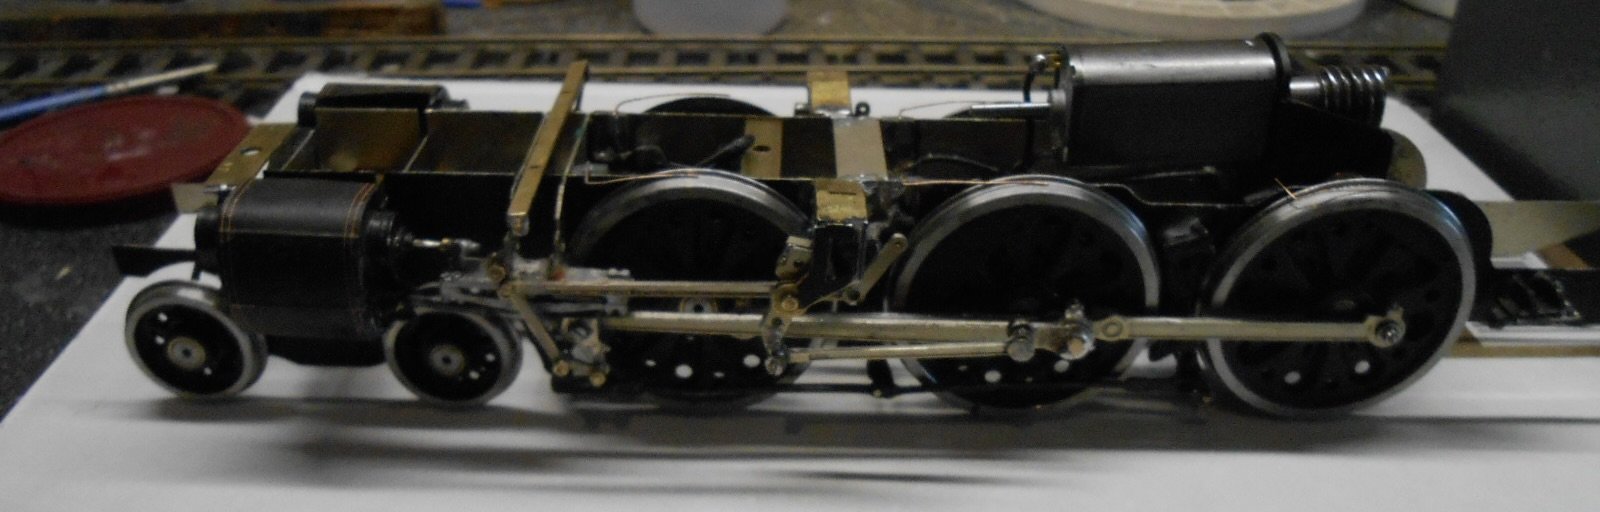
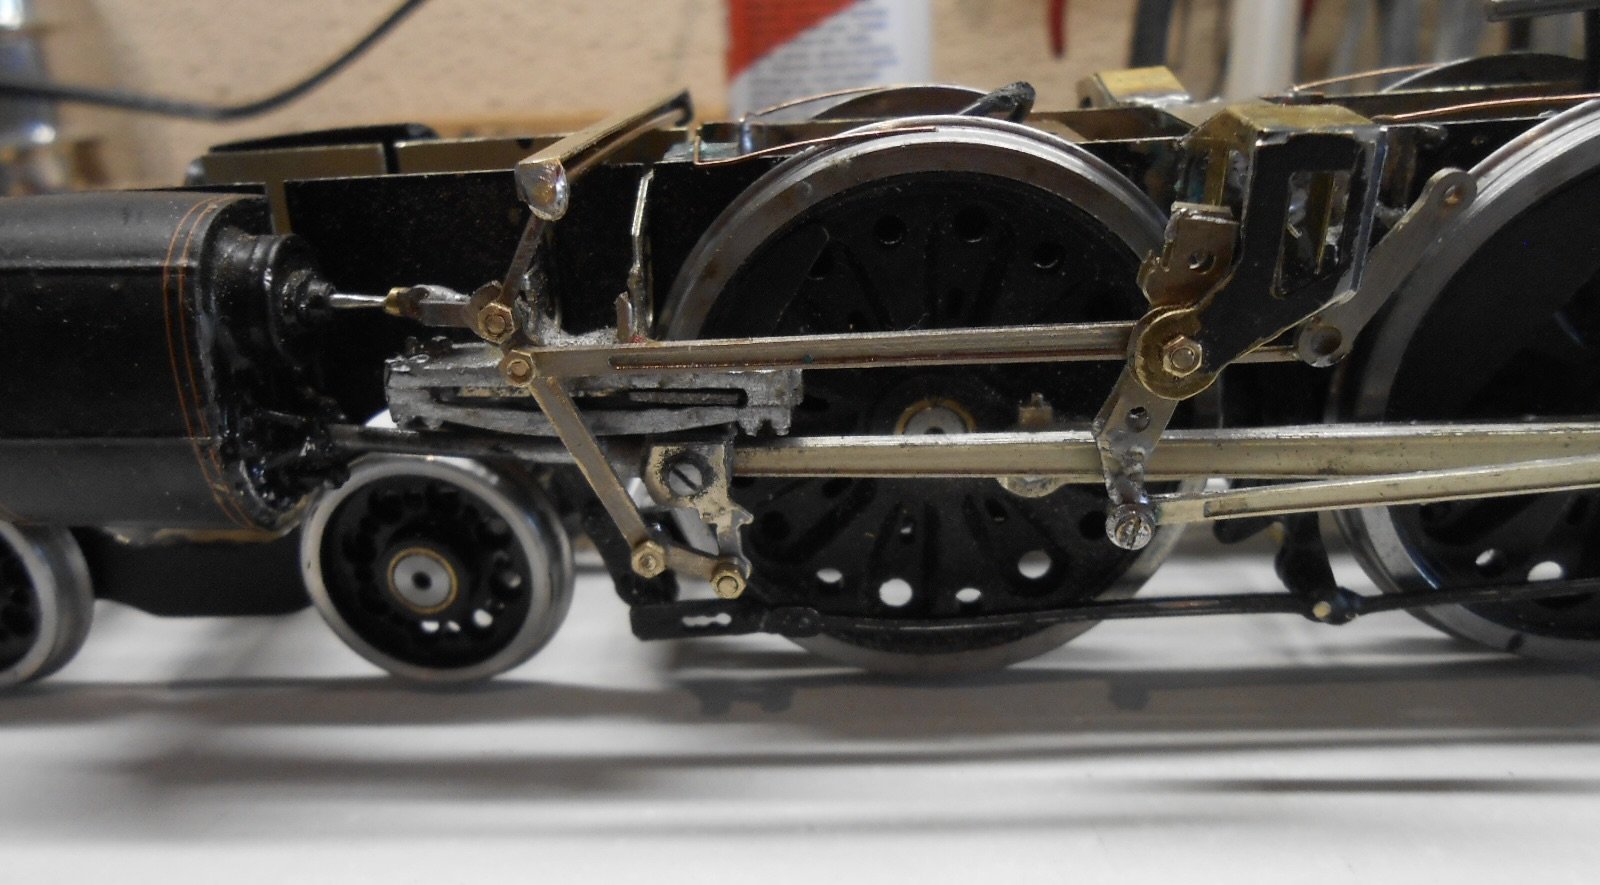
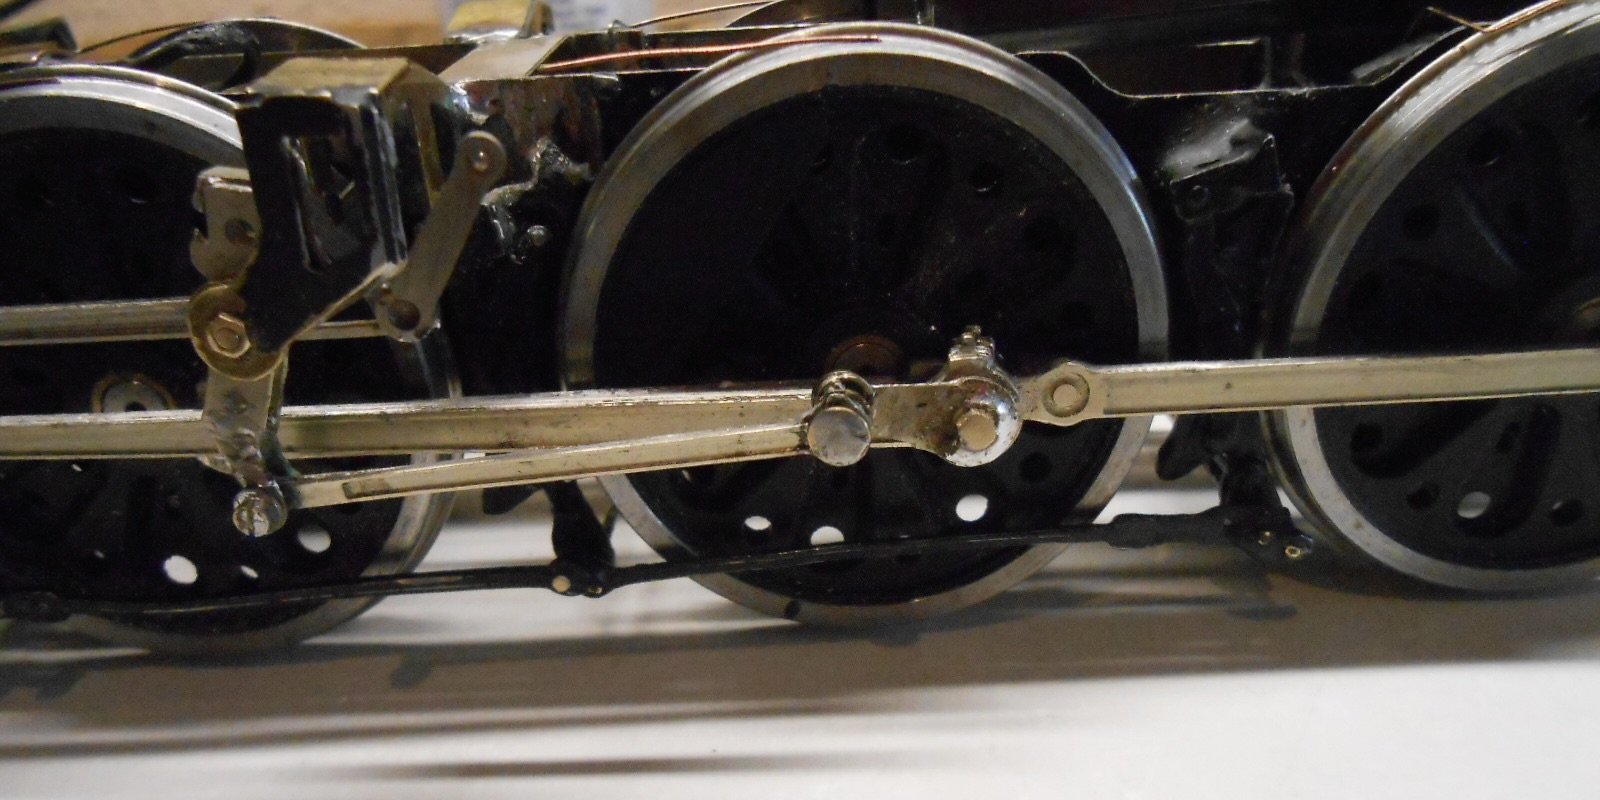
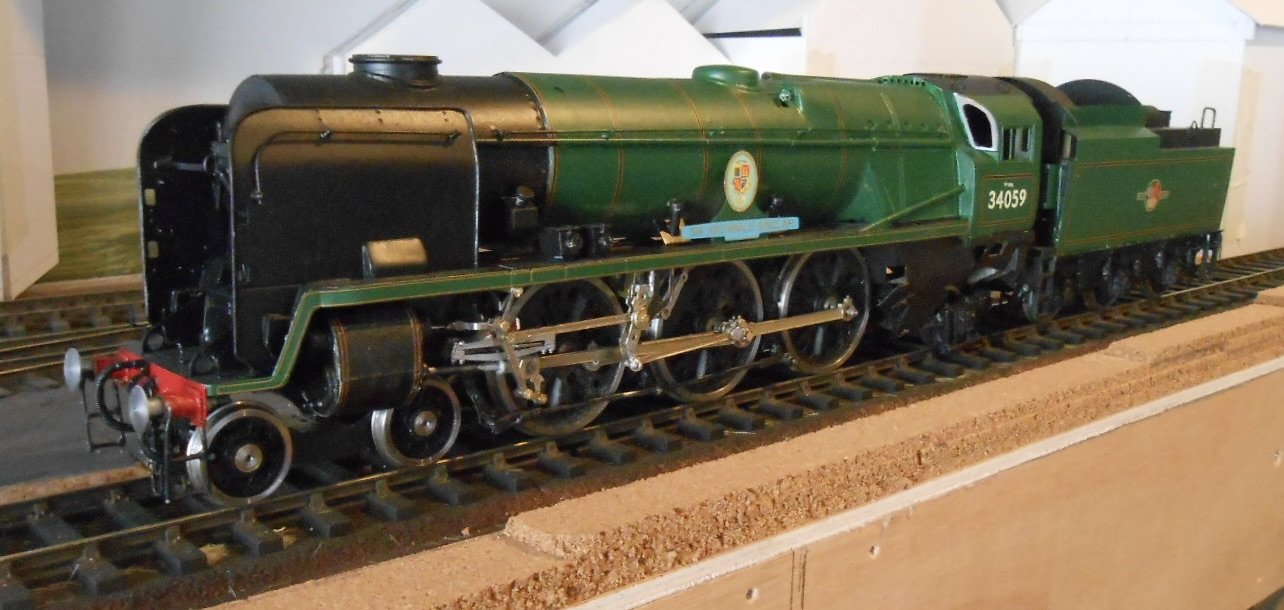
A few days off recently, as I accompanied my wife, who is a member of Rochester Choral Society, on a tour of the Barcelona area, singing in a number of cathedrals and basilica - culminating in an International Mass in the Sagrada Família, no less. Nice weather, excellent singing [none of it by me], along with good food and wine too. Starbucks and others take note: a coffee in Barcelona is only about two euros, a glass of wine four, AND they fill it up too. Anyway, since getting back have been doing battle with the Bulleid pacific. Assembling the valve gear is fairly straightforward, checking it will run smoothly is another matter, simply because with so many parts, there are so many variables: things to catch on something else, fixings to come loose, etc etc. Above, you can see the chassis hooked up to my ancient [over 40 years old] H&M Clipper. When testing locos and chassis, it is very much my first choice, being a very basic controller: if the model runs well with it, chances are it will work even better with something more sophisticated. Have mostly used 12ba nuts and bolts to hold the gear together. Ensuring they don't catch on other parts of the motion is obviously important - likewise not coming undone either! Still some tidying up to do, while [below], the eccentric cranks on the centre driver are proving troublesome as I can't find a reliable way to hold them in the correct positions. Mostly they are ok and I've had the chassis running on the bench for a couple of hours in total, including at full speed in either direction. Nothing has fallen off, which is encouraging and were this my own loco, I'd probably put up with it, because I'd know what to do, but this is someone else's model, so it needs to be both right and robust. 'Tis certainly a handsome beast though and also the largest loco I've ever worked on too.
-
"Voiding the Warranty" - Mol's experiments in 21mm gauge
Colonel replied to Mol_PMB's topic in Irish Models
Even more room in 7mm scale/36.75mm gauge!