Glenderg
-
Posts
3,490 -
Joined
-
Last visited
-
Days Won
11
Content Type
Profiles
Forums
Events
Gallery
Blogs
Store
Community Map
Everything posted by Glenderg
-
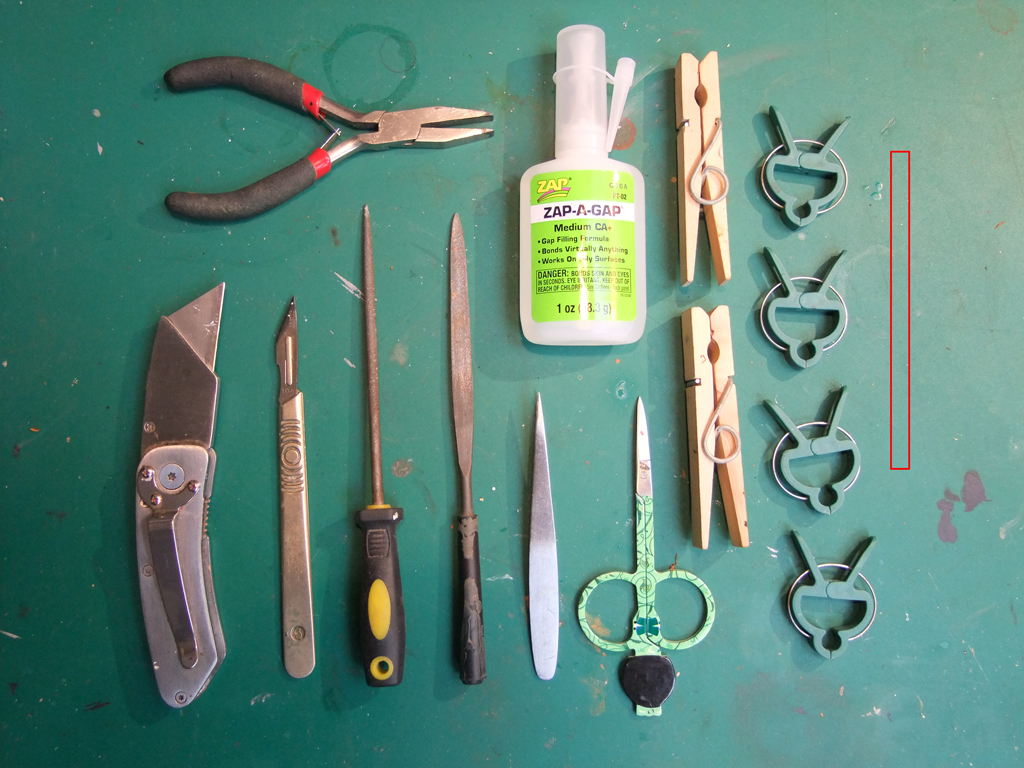
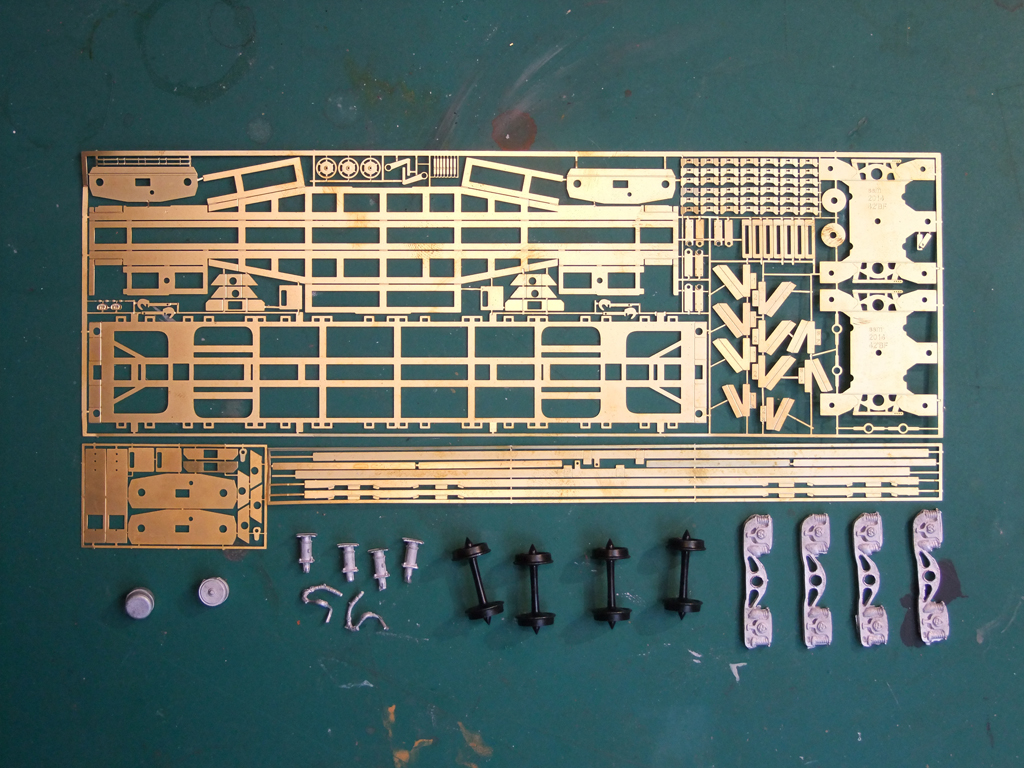
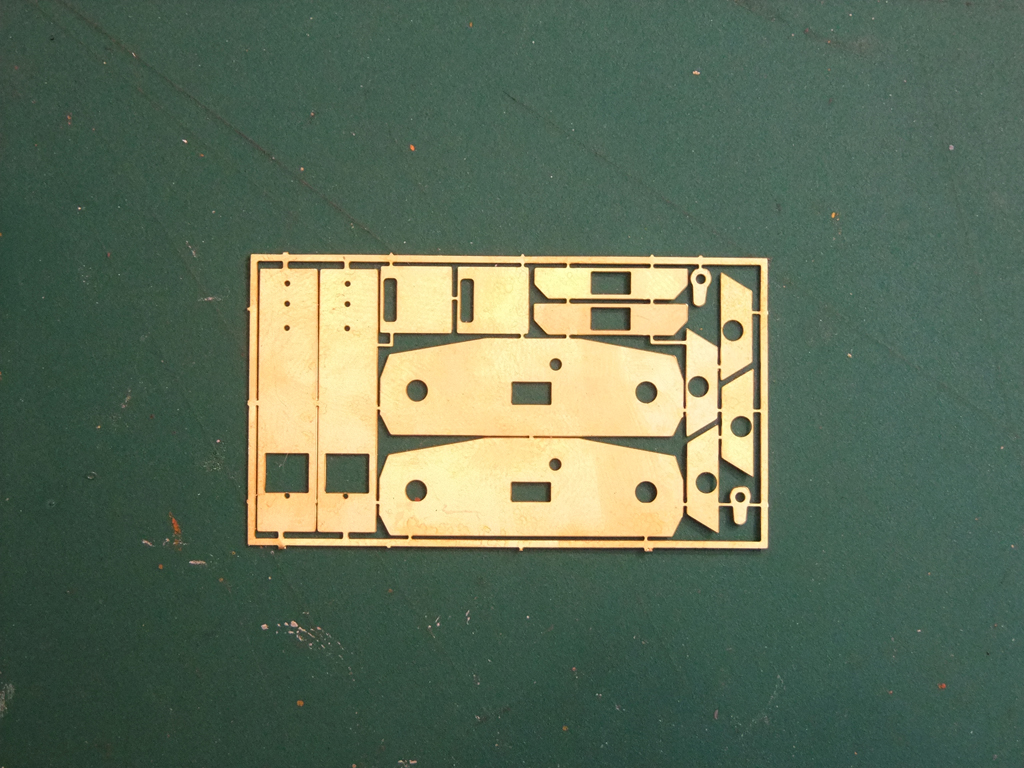
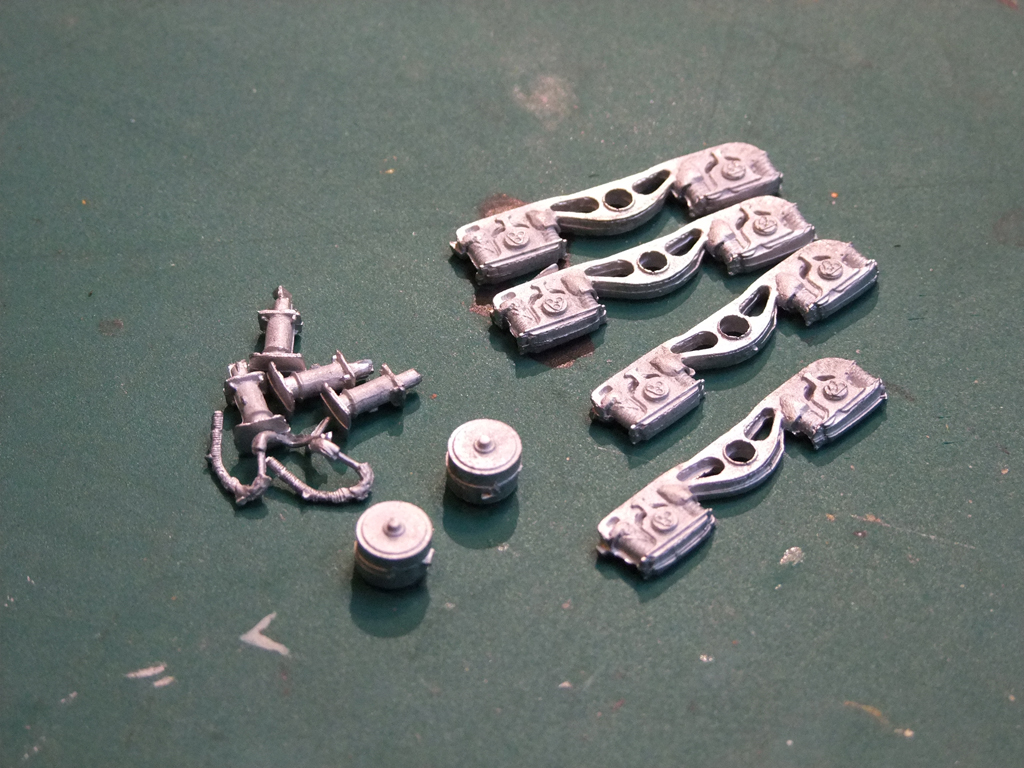
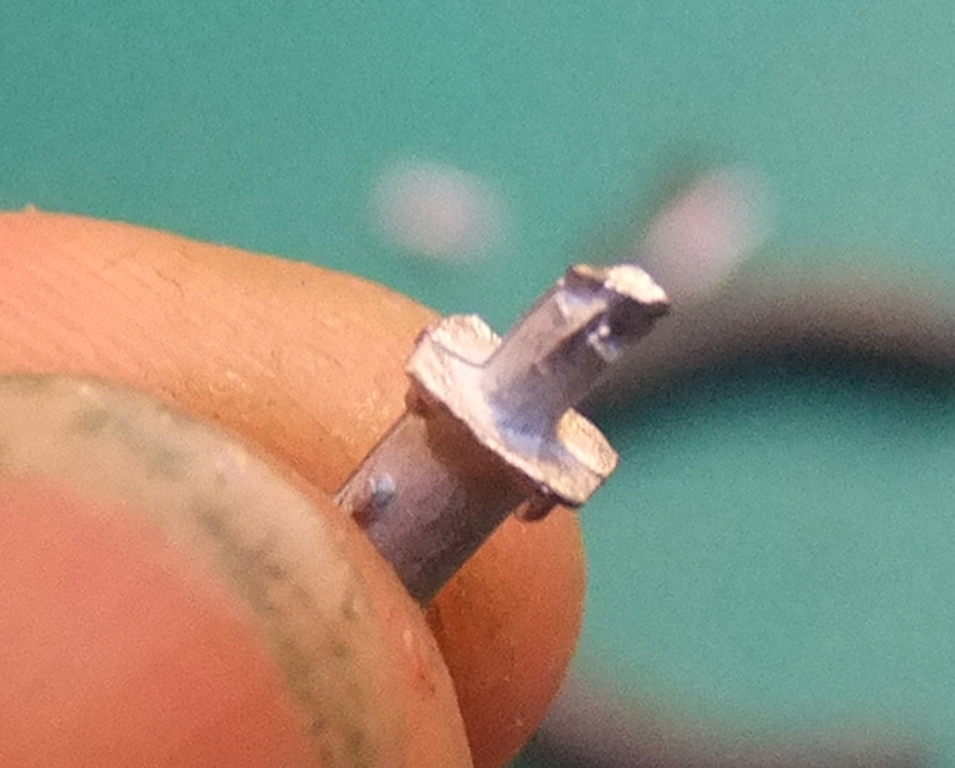
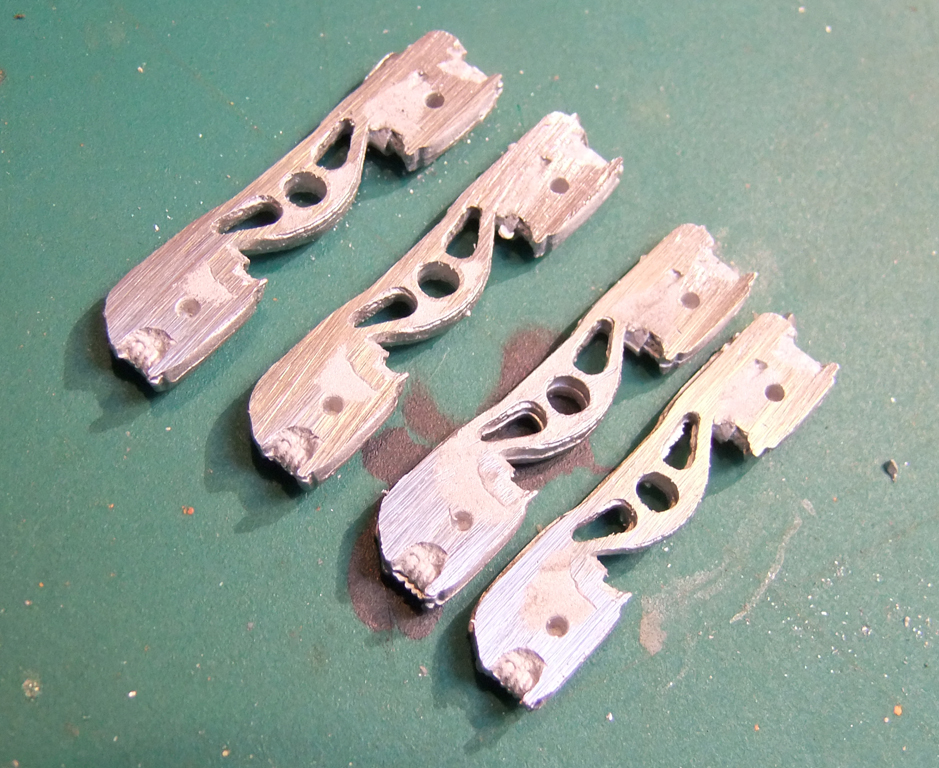
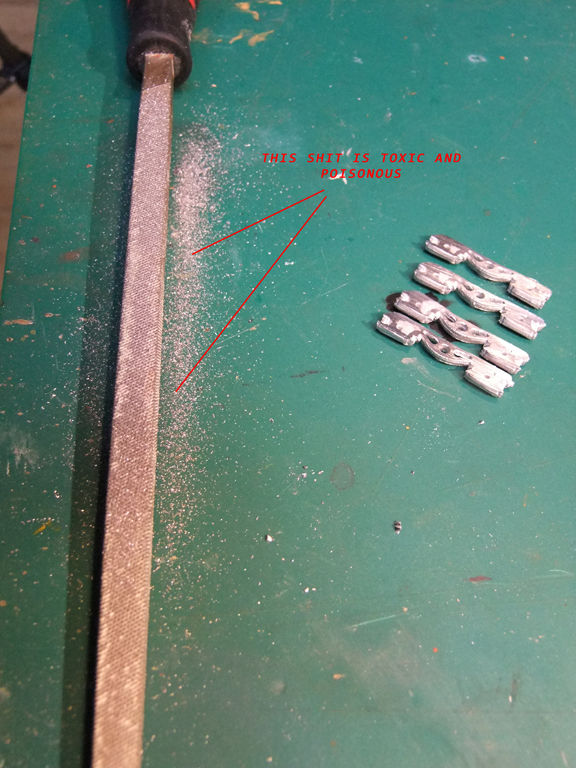
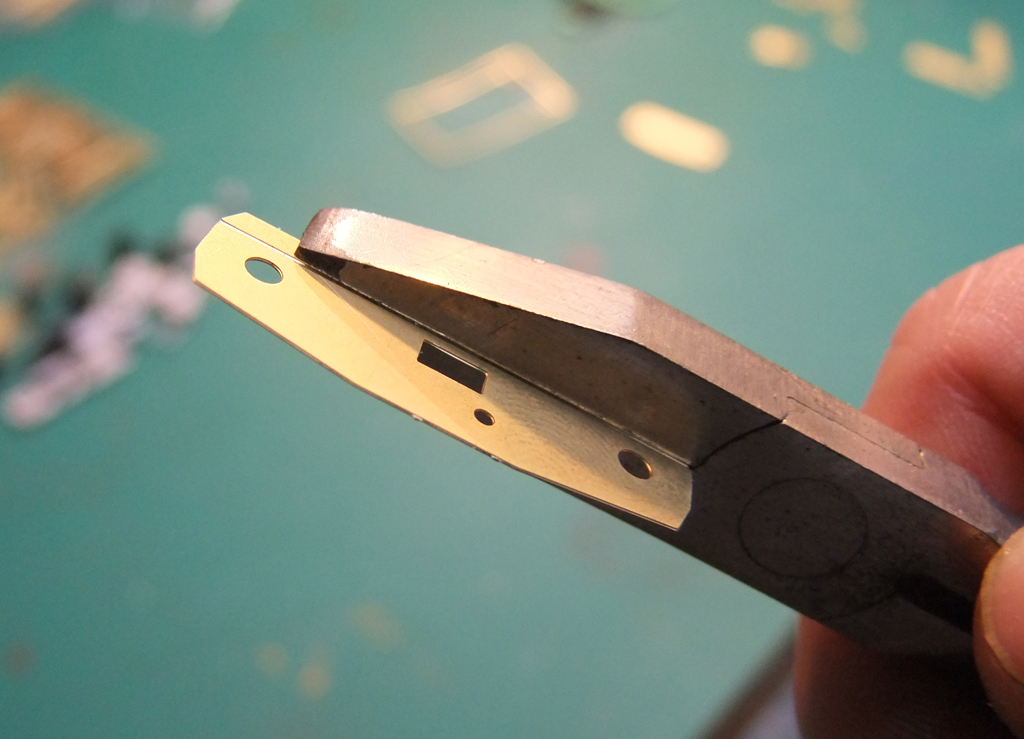
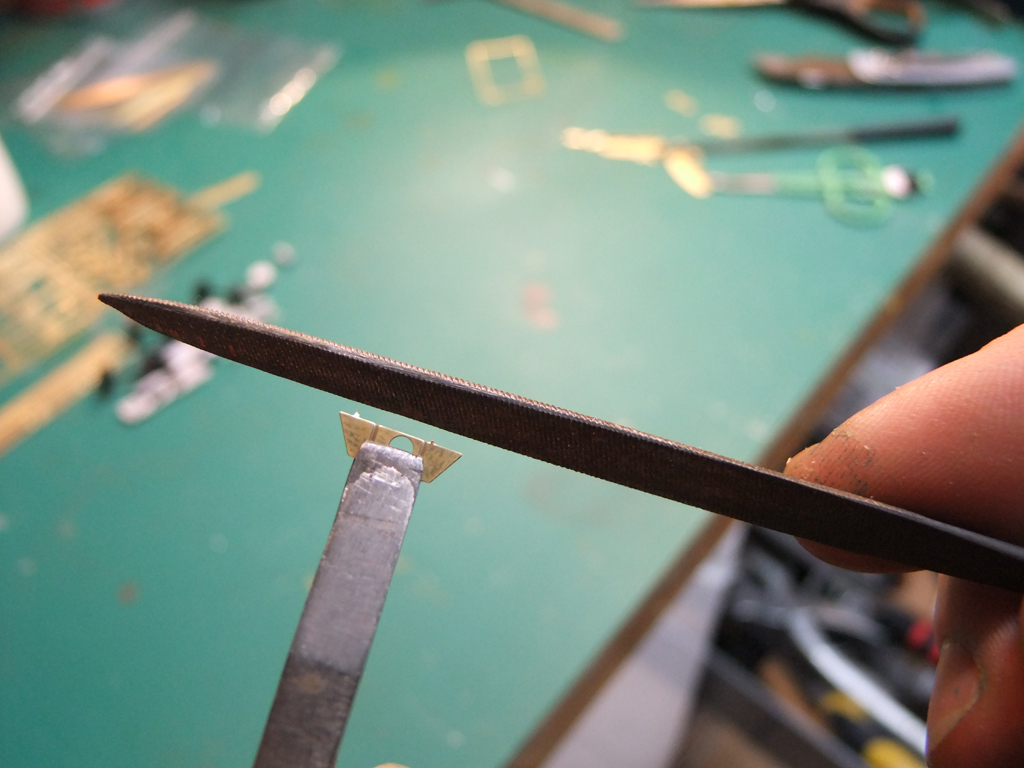
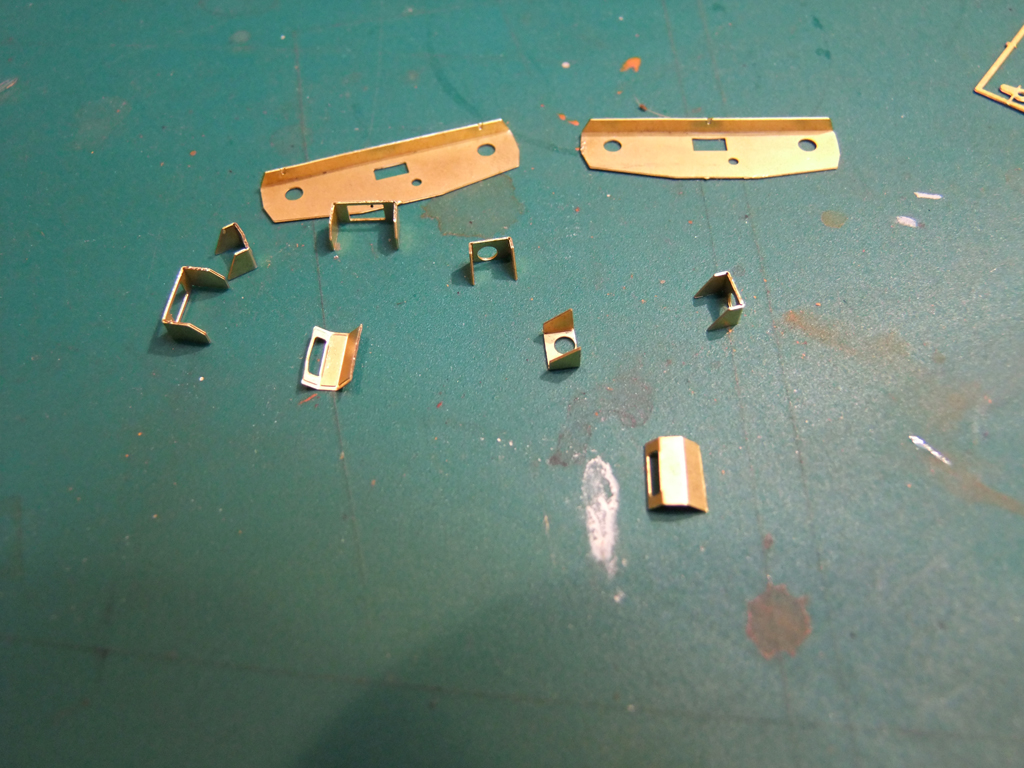
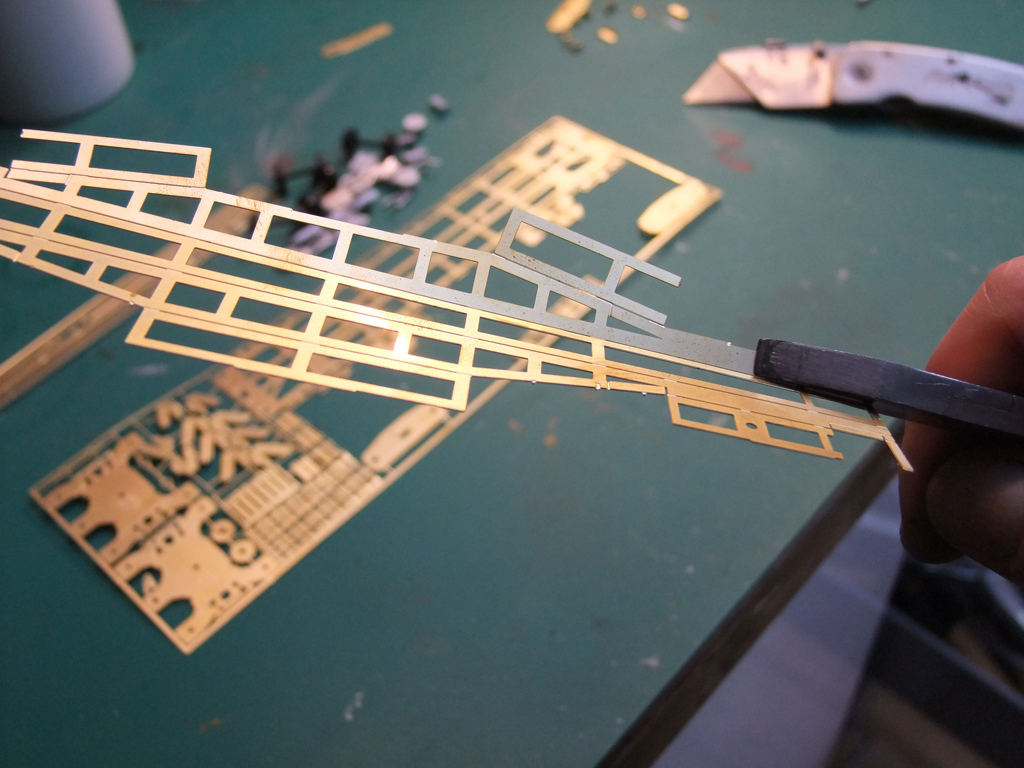
I've done a few, so here's the alternative to weshty's instructions - it's useful if you have more that one to do. Here goes.... What you'll need.. A stanley knife you're willing to have its blade ruined, a scalpel, a flat file, a tweezers, a nail scissors, ZAP glue ( it sticks brass )a cocktail stick (shown in red..ahem), and mini clamps - gardening clamps or clothes pegs. These are the main parts of the kit, and though scary at first, it's not at all - so shall we get going? When you buy an airfix kit, they force you to do the cockpit first, hardest bloody bit, so that everything afterward is easy. Same logic here. Let's tidy up the whitemetal parts first. There are a few lumps and bumps from the manufacturing process that need to be removed. Whitemetal dust is poisonous, so only file it in a way that won't lead to your death please. (don't lick the dust) File the buffer plates to remove this seam. Using a stanley knife, lob off the excess, leaving about 2mm of a shank sticking out. Use a file to remove any burrs. But don't lick the dust. Grab the bogie sides and run them against a flat file to get a smooth face. This will help them adhere to the bogie sides... 'nuff said. Now clean your bench with domestos, and wipe it dry. Find the replacement etch as shown below. Remove the parts with the Stanley, and set aside the two rectangular pieces on the left hand side. Always fold the brass parts toward the seam so you end up with parts like so. - file down any burrs you find. Grab the buffer plate as shown. Force the brass into a 90 degree shape as shown. There is a triple etched piece which houses the coupling - bend it like this. As you cut out the pieces with the nail scissors, there will be brass dangleberries which need to be removed. That's how ^ Once these parts are assembled, it's time to proceed. Remove the large piece as shown and file off the edges. Grab the central part as shown and using your fingers, bend the brass slowly...

-
Cheers lads - I've never used etching primer Rich, it's noxious and expensive, but I'm sure some of the brass maestro's here would swear by it. I'm all for alternatives that work
-
Indeed Alan, I'm working on a few of them at the moment and trying to get photos as I go to put up an alternative instructions thread later, so that even the most "cackhanded" can make up the kit in a simple way. Sorry Aclass - missed your post - One method is to varnish the brass (airbrush) either water based or enamel and let it harden for 24 hours - then spray away and weather as normal. Another is to prime it with etching primer. I'm running a few trials on methods at the minute and I should have a reliable and cheap solution to go with the above tutorial over the weekend. R.
-
http://support.photobucket.com/hc/en-us/articles/201892970-Downloading-Albums
-
So far so good. First airbrush expo thing to take place next friday afternoon 7th november. Fully booked - If all goes well, i'll do more :-) richie.
-
One of the stories i heard was that the most important thing they carried was pillows........
-

Clear your closets! Wanted: Scenecraft Irish Outline
Glenderg replied to DiveController's topic in For Sale or Wanted
I swear wills plastic sheet is a product of the divil himself - never ever again! Kevin, what station are you trying to recreate? DSER on the east coast are probably the easiest to scratchbuild....R -
If anybody is Dublin based, and want's to take a trip to the Dark Side, they're more than welcome to come over and I'll go through everything airbrush, paints, maintenance, primers, pressure, technique, what-not-to-do etc. No cost, BYOB, but if you are around between 9 - 4 Monday to Friday and have an hour to spare, I can accommodate a free lesson. Drop me a PM if interested - max 4 people at a time though and universal access friendly-ish (no downstairs jacks though)! R.
-
Liver, give alison a call here - she supplies the best "cheap" airbushes on these islands. Can't speak highly enough of her products. http://www.bartsharp.co.uk/home/ Richie
-
Shur i try my best! Nice to meet you noel. Met with baseboard dave and dart eoin, the ultimate cheech and chong partnership. Great stuff going on with the modular stuff, and the DART is just a thing to behold. Handed over a bit of stock to weshty, got some 42' flat parts, and bought even more decals, and a bit of a chat at the chris and dave show dominating the main room sales area. Still giddy about paddy murphy fondling my rpsi craven (most recent livery) and trying to wrangle it off big dave.... the poor wife even got to do the whole "poor wives club" with a lady from raheen. Gave her a good laugh while she was waiting for me. All in all, great show albeit more airconditioning needed. Some don't even do the Old Spice. R.
-
Dang, my thoughts also! I always thought it was Dept. Limerick for D-LK? Snapper would be the man to ask :-)
-
Not your normal update :)
Glenderg replied to thewanderer's topic in Photos & Videos of the Prototype
Lovely shots of the show. Not sure if the ebola themed thing in the tunnel had the production values i'd hoped for. Was it advertised? -
Sweet Rich, lovin it.
-
Bloody superb. If i had a hat, i'd tip it. Hard to think how small the busses are!
-
Now George, I'm sure you'd kick my ass if you put one together, and i'd happily bow down in admiration.
-
Red, just have so say that they are similar to an airfix spitfire - there are simple bits and complicated bits. I've had people ask me to assemble these kits, but i'd recommend they put them together themselves - they really are unscrewupable, no matter brass skill, eyesight levels, or confidence. I get nothing out of this kit, and while i've suffered immensely with the gestation of the kit, it's a cracker. Anyone - no matter your experience -should be able to put it together. I'm going to do a photo by instruction to match des' instructions next thursday so that no one is confused about the nomenclature or assembly method. Be in no doubt lads, SSM has done something akin to PM here...
-
Bloody superb as always, but i think you can push the weathering even further!
-
MK3's to the West Clare Railway
Glenderg replied to thewanderer's topic in Photos & Videos of the Prototype
Mk3's were borderline structurally sound for 4'8". They were in the danger zone once engineers realised that an additional 5" were added to their width, without the calcs being done. Whilst i love them, they were unsound. And that comes from an outside IE consultant engineer, who i'd swear my life on. -
No but haggling is highly encouraged. If you ask Chris Dyers Assistant, he'll pleasantly explain the offers...... R
-
Converting coaches to enterprise stock
Glenderg replied to Liverbird81's question in Questions & Answers
From what I've seen, there's no like for like donor coach, the MK3 body with vestibule windows blanked and MK4 bogies underneath is about as close as you could come, but even that's a fair distance from D&M's offering. -
Converting coaches to enterprise stock
Glenderg replied to Liverbird81's question in Questions & Answers
What era/livery? It's a bit of a vague request, it's been about for 60 odd years! R. -
ITG 25th Anniversary Diesel Gala
Glenderg replied to thewanderer's topic in Photos & Videos of the Prototype
Ye didn't even offer a lift to those without vehicles....hmmmph... -
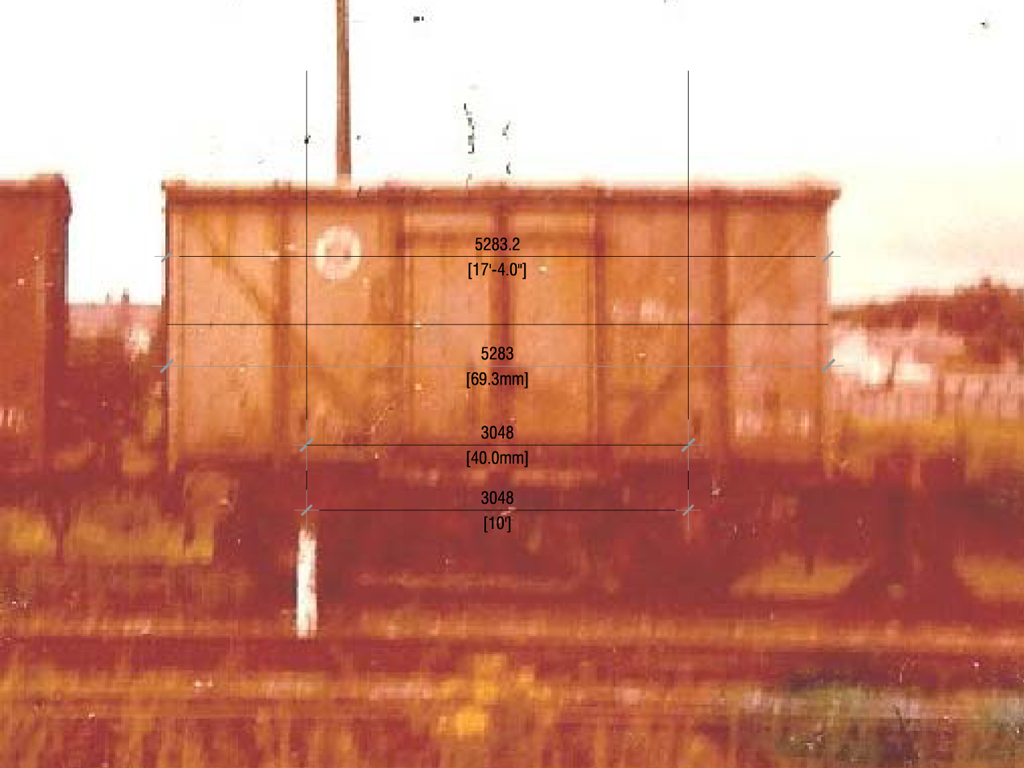
Mayner of this parish posted this photo some time ago, and it works out as 17'4" over headstocks and a 10' Wheelbase. Richie.
-
sometimes i despair at the clobber that comes up on this forum, these "paddy murphy wishlist" dangleberries clinging on to a thread about a perfectly fabulous model. (Bar some minor decorating issues that even the most cack handed modeller could fix) For a bit of perspective, lets have some figures. Laser scanning of a prototype costs around 35k, the cad work to turn the data into cadcam costs a further 40, and turning a die is about 10k a run. Pouring the plastic and printing the model is the relatively inexpensive bit. You're in the drink for about 90k. PM probably sells them at a price to breakeven to the model shops, so a if he makes €100 ea on a run of 1000 locos means after 2 years he'll make a few bob, but nothing spectacular. So, the sooner you buy the stuff that's out there, the sooner he has enough in his warchest to kick of the process for a 121, A class or Turfburner. Rant over. R.
-
Needs a bit more red in it all right. Bit of dirt will hide it