irishthump
-
Posts
1,890 -
Joined
-
Last visited
-
Days Won
9
Content Type
Profiles
Forums
Events
Gallery
Blogs
Everything posted by irishthump
-
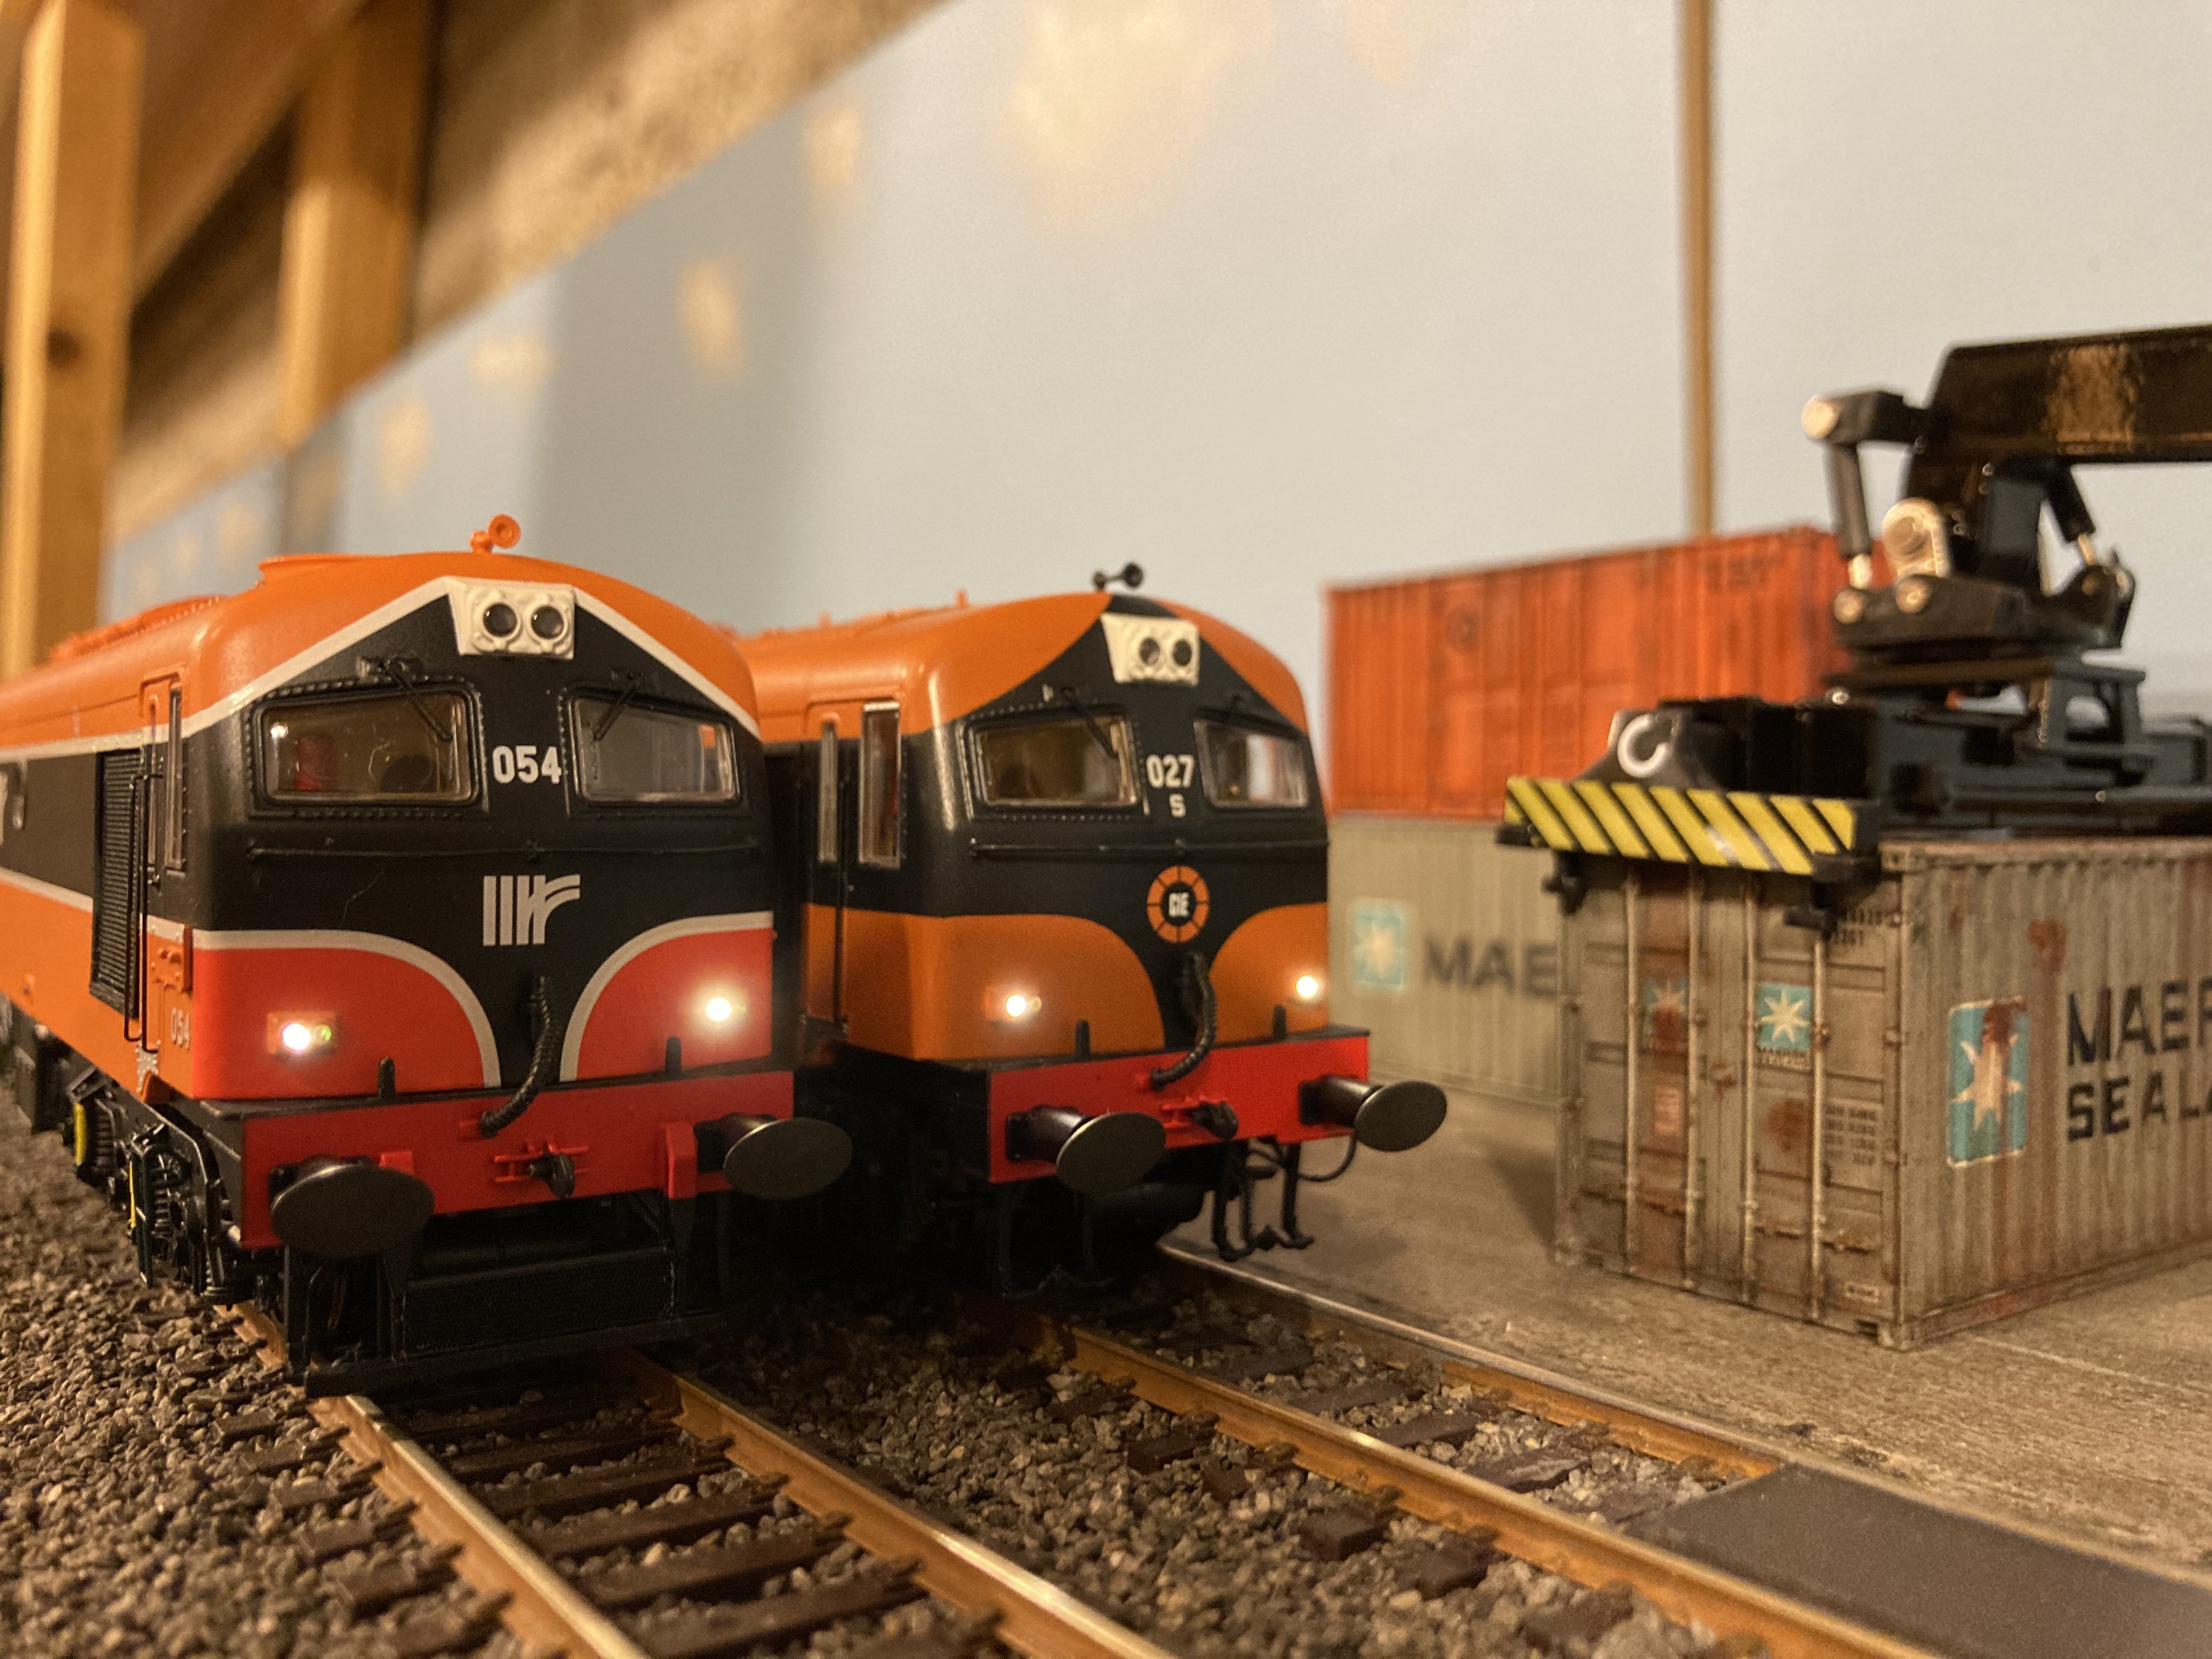
Picked up my two A’s today! They are absolutely stunning. Sadly I only had time to pop the decoders in and give them a bit of run, but first impressions are fantastic. One thing that struck me is the quality of the sound from the speaker set up. The lads at IRM have outdone themselves.

-
Bloody stunning! I ordered the Supertrain myself, can't wait to get my hands on it!
-
Sent. Cheers!
-
Just a quick question for the IRM lads…. My own A Class order doesn’t show up in the “my orders” section of my account on the IRM website. Is this normal? I’m thinking maybe it’s because the order was made so long back….
-
I think that if you fully paid before the items arrived in stock then you’re as entitled to them as quickly as anyone who payed in full at time of order. So dispatch the items in whatever way seems fit. In this case order date is perfectly fine.
-
Have to agree with you! Although I'm one to talk, I requested to collect mine coz' I did'nt fancy waiting on the post! Are you suggesting that people who simply paid in full at the time of ordering should get there's before those who ordered earlier but waited til the last minute to pay?
-
Here’s your update. It’s 6pm. That’s pretty much the end of the day. Stay tuned for further updates….
-
Touche!
-
An A class with a rake of maroon MK1's?!!! You need to have word with them Hornby lads.......
-
Hats off to the lads at IRM, these look phenomenal! Honestly though, these are probably outside my sphere of Irish modelling but I may be tempted to go for the BR ones, finances permitting! I really hope the other model companies are taking notes here. You’ve really pushed the envelope with the design and features of these coaches.
-
I’ll be doing this myself as I plan to remap the functions to different keys so the A Class locos match the rest of my fleet. Nice to have this done and dusted before the locos arrive. Means less faffing about when they get here.
-
Will there be an option to collect our orders when they are in stock? Or will Covid restrictions still prevent this?
-
Wow I got one too and I barely react at all!
-
Perfect! Cheers Fran.
-
Not all! As I kid the A Class was always my favourite, but at the time the GM's were much more common on the southside (at least it seemed like it anyway!). Onna seperate note, when will the sound chips for the A's be available?
-
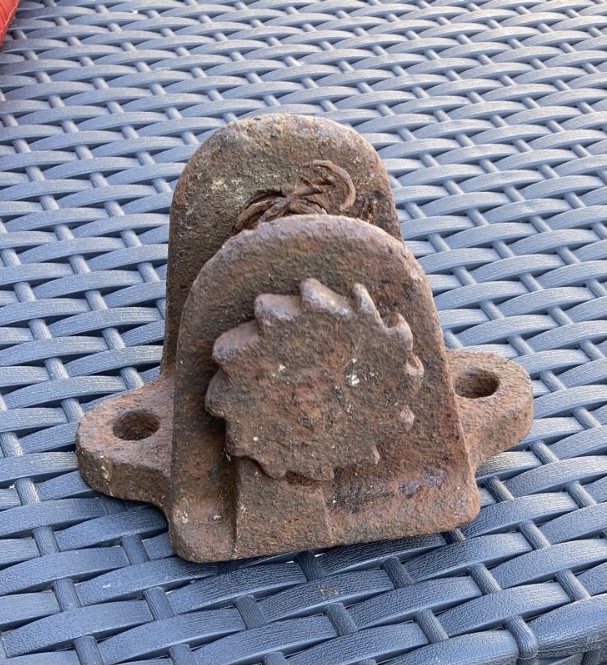
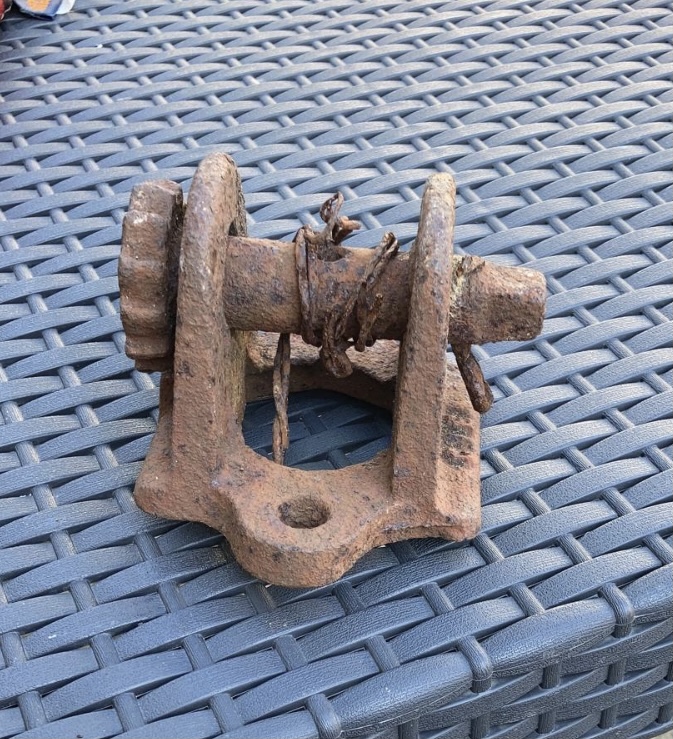
Anyone able to identify this item?
irishthump replied to irishthump's question in Questions & Answers
Thanks for the pic, mayber he'll believe me now! -
Anyone able to identify this item?
irishthump replied to irishthump's question in Questions & Answers
Yeah that would make sense as there's no release mechanism for the ratchet. My friend is just fixated on the CIE prining on the side. Although I'm not sure that's what it is! Don't worry it's just curiosity, he's not trying to flog it! -
Anyone able to identify this item?
irishthump replied to irishthump's question in Questions & Answers
Cheers Noel. I was thinking that myself. Is that CIE cast on the side? What would this be used for? -
Folks, A friend of mine unearthed this thing and is convinced it has CIE cast into the side. Obviously it’s a form of ratchet. Just wondering if anyone can tell me what it is/was used for and if that’s really a CIE stamp on the side of it. Pics below...
-
Jayzus. How much are they charging for that job?
-
In fairness it’s from a known ripoff artist!
-
Apparently all this stuff is up for grabs..... Lambert Smith Hampton | Assets of Llangollen Railway Plc (bidspotter.co.uk)
-
No. That poxy Sam's Trains guy!
-
Oh sweet jesus no! That man really pisses me off to no end!
-
Nonsense! Your work is as good as any (and better than alot) of the work that I have seen in the those magazines.
- 490 replies
-
- 5
-

-

-
- ballyercall
- layout
- (and 1 more)