irishthump
-
Posts
1,812 -
Joined
-
Last visited
-
Days Won
7
Content Type
Profiles
Forums
Resource Library
Events
Gallery
Blogs
Store
Community Map
Everything posted by irishthump
-
Sorry to hijack... For how long after the introduction of the supertrain livery did you still have the black and tan livery on locos? And when did the first Supertrain MK3's appear?
-
Making the best of a space...suggestions ?
irishthump replied to aramand's topic in Irish Model Layouts
I knew I had seen a trap door section somewhere on this forum! I would have to agree with Anto about keeping to a simple 2 track mainline. -
Making the best of a space...suggestions ?
irishthump replied to aramand's topic in Irish Model Layouts
That sounds great, Glenderg. That's basically the essence of what I was trying describe but you fleshed it out a lot better! -
Making the best of a space...suggestions ?
irishthump replied to aramand's topic in Irish Model Layouts
Ah, sorry! I assumed the door would be in the middle of the wall, my mistake! It's still not as hard as you might think to build a removable section in the corner. -
Making the best of a space...suggestions ?
irishthump replied to aramand's topic in Irish Model Layouts
Have agree with Robert on this one, that second plan looks very "train-set!" My priority would be to make the double loop as long as possible. So providing the room is just for your layout, I would build the loop around the outside of walls. If you did this you could make each basboard up to 2 feet wide if you wanted to and still have a large operating well in the middle. You can build in a lift-up or removable section for the door to open, or alter the door to open outwards.If you can get away with it you could even remove the door altogether! (don't laugh) -
Graham's layout - Monkhill and Saltstown.
irishthump replied to irishthump's topic in Irish Model Layouts
Just normal mounting card from my local Art and Hobby shop, the kind with the smooth, hot pressed finish. Not sure which thickness. I just got as near as I could to the thickness of the sleepers, layed one layer level with the sleepers between the track then layed the second layer right up against the track edge. -
Graham's layout - Monkhill and Saltstown.
irishthump replied to irishthump's topic in Irish Model Layouts
Yeah its card, and to give it some texture I mixed plaster with grey emulsion from a woodies tester pot. -
Graham's layout - Monkhill and Saltstown.
irishthump replied to irishthump's topic in Irish Model Layouts
A few shots of some motive power loitering around the engine shed... -
Well that loco is frigged and no mistake! Looking at the slow-mo, it seems that the cable just gave way...
-
Rubbish?!! Have you looked at your own photos?!! Seriously, it looks great. It's complete and sets a wonderful little scene, more pics I say!
-
Stunning work, Anto. Did you perform the same surgery as on the 141's for fitting the Kadees?
-
Graham's layout - Monkhill and Saltstown.
irishthump replied to irishthump's topic in Irish Model Layouts
Ha! I wish! My problem is when I finally do get to go near my layout I end up "watching trains go by"! -
Graham's layout - Monkhill and Saltstown.
irishthump replied to irishthump's topic in Irish Model Layouts
No not Scalescenes, that pattern is a free download from here http://www.newrailwaymodellers.co.uk/Scenery/Buildings.htm. It looks quite good when weathered. As for my "speed", this is stuff I've been doing over the last few weeks that I just have'nt had the time to post. So don't expect another update for another month! -
Graham's layout - Monkhill and Saltstown.
irishthump replied to irishthump's topic in Irish Model Layouts
I also built a retaining wall for the depot section of the layout. A close up view... -
Ah, so I was'nt going colour blind! Thanks for the info, David.
-
On the subject of painting the gangways, looking at photos of the prototype the colour seems to vary. I don't kniow whether to use the same orange as on the body or to use a luminous orange. Anybody know what colour was actually used?
-
Graham's layout - Monkhill and Saltstown.
irishthump replied to irishthump's topic in Irish Model Layouts
Woodland Scenics Medium Grey. It's a little light in colour but it was the only one I could get enough of! The wash tones it down nicely though. -
Graham's layout - Monkhill and Saltstown.
irishthump replied to irishthump's topic in Irish Model Layouts
Yes normal plaster, the horrible pink coloured kind! I'm think of using myself for a hard standing, a great tip I learned was to add in some PVA when mixing the plaster which gives it flexability and stops it cracking. -
Graham's layout - Monkhill and Saltstown.
irishthump replied to irishthump's topic in Irish Model Layouts
Added some more detailing and toned down the ballast with a dark wash applied with an airbrush. -
Graham's layout - Monkhill and Saltstown.
irishthump replied to irishthump's topic in Irish Model Layouts
A little more scenic work; a couple of sidings in the corner of the layout! A layer of ordinary plaster which I covered with a coat of cheap brown poster paint. Stuck down some basket liner and added some extra flock for variety, then ballasted the track. Those cheeap Hornby buffer stops look a bit plain so I added a couple of offcuts of rail to try to improve them. It still needed some more detailing but I could'nt resist parking some stock on the sidings! -
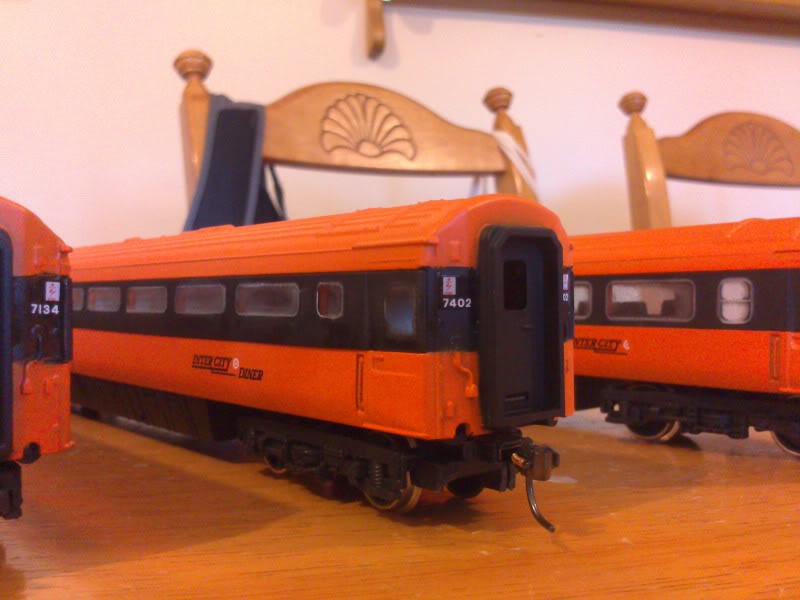
Well the MK3's are almost finished. Applied the transfers (from Railtec) all that's left is to paint the gangways, which to be honest I had forgotten! Oh yes, and fit replacement buffers!!!

-
The body can be a bugger to remove as you have to be able to exert enough pressure on the sides of the body. The best way to do this is to remove the handrails which I found to be a nightmare! An easier method for me was to turn the loco over and if you turn the bogies out of the way you can pop the tabs on the body with a small screwdriver.
-
Nice neat painting job there. Conor. You could add some detailing to make it even closer to real thing. It looks pretty much identical except for the roof vents and side grills. Can I ask what make is the baggage car?
-
Believe me, no fun at all in a confined attic space! Can I ask, in that first picture are you scratchbuilding the point levers and ground frames?
-
Aboslutely no offence intended but I have to agree.... I had a quick look at the model when I was at the show and while I think fair play for having a go, it would need to be improved an awful lot for it to have a chance of selling well.