Tullygrainey
-
Posts
958 -
Joined
-
Last visited
-
Days Won
56
Content Type
Profiles
Forums
Events
Gallery
Everything posted by Tullygrainey
-
A quiet social life as well as nothing much on TV of an evening
-
That's just perfect!
-
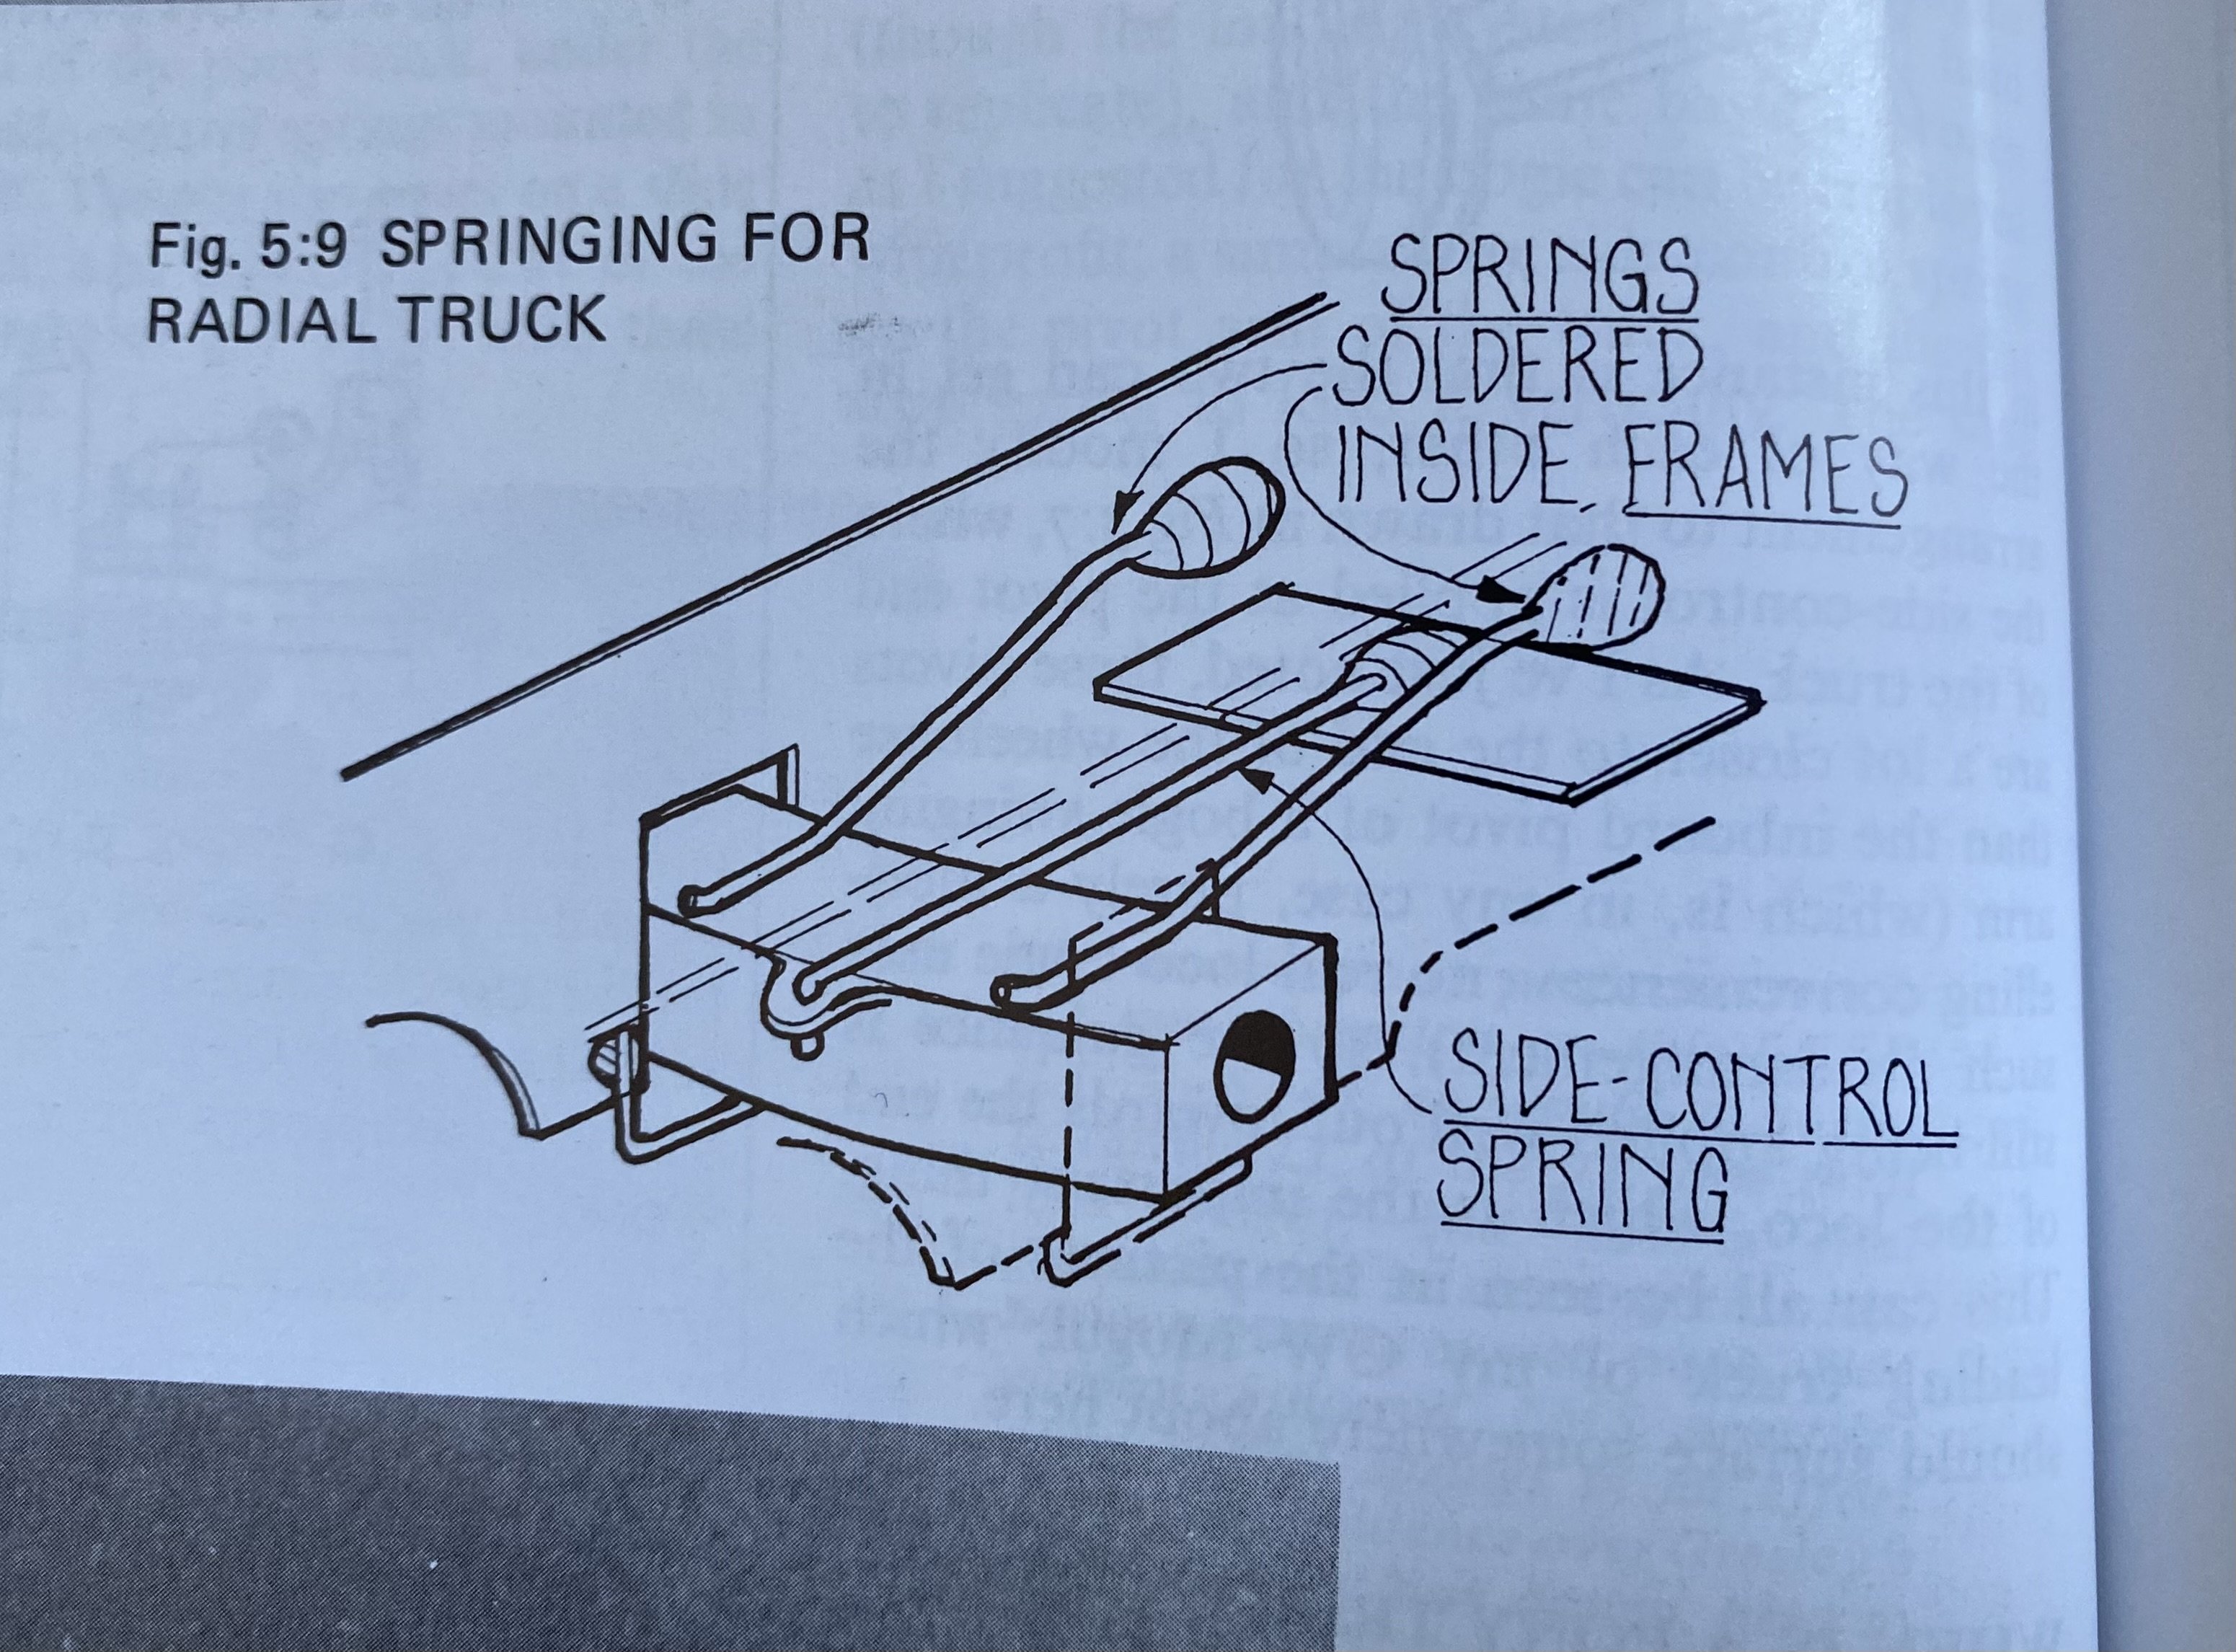
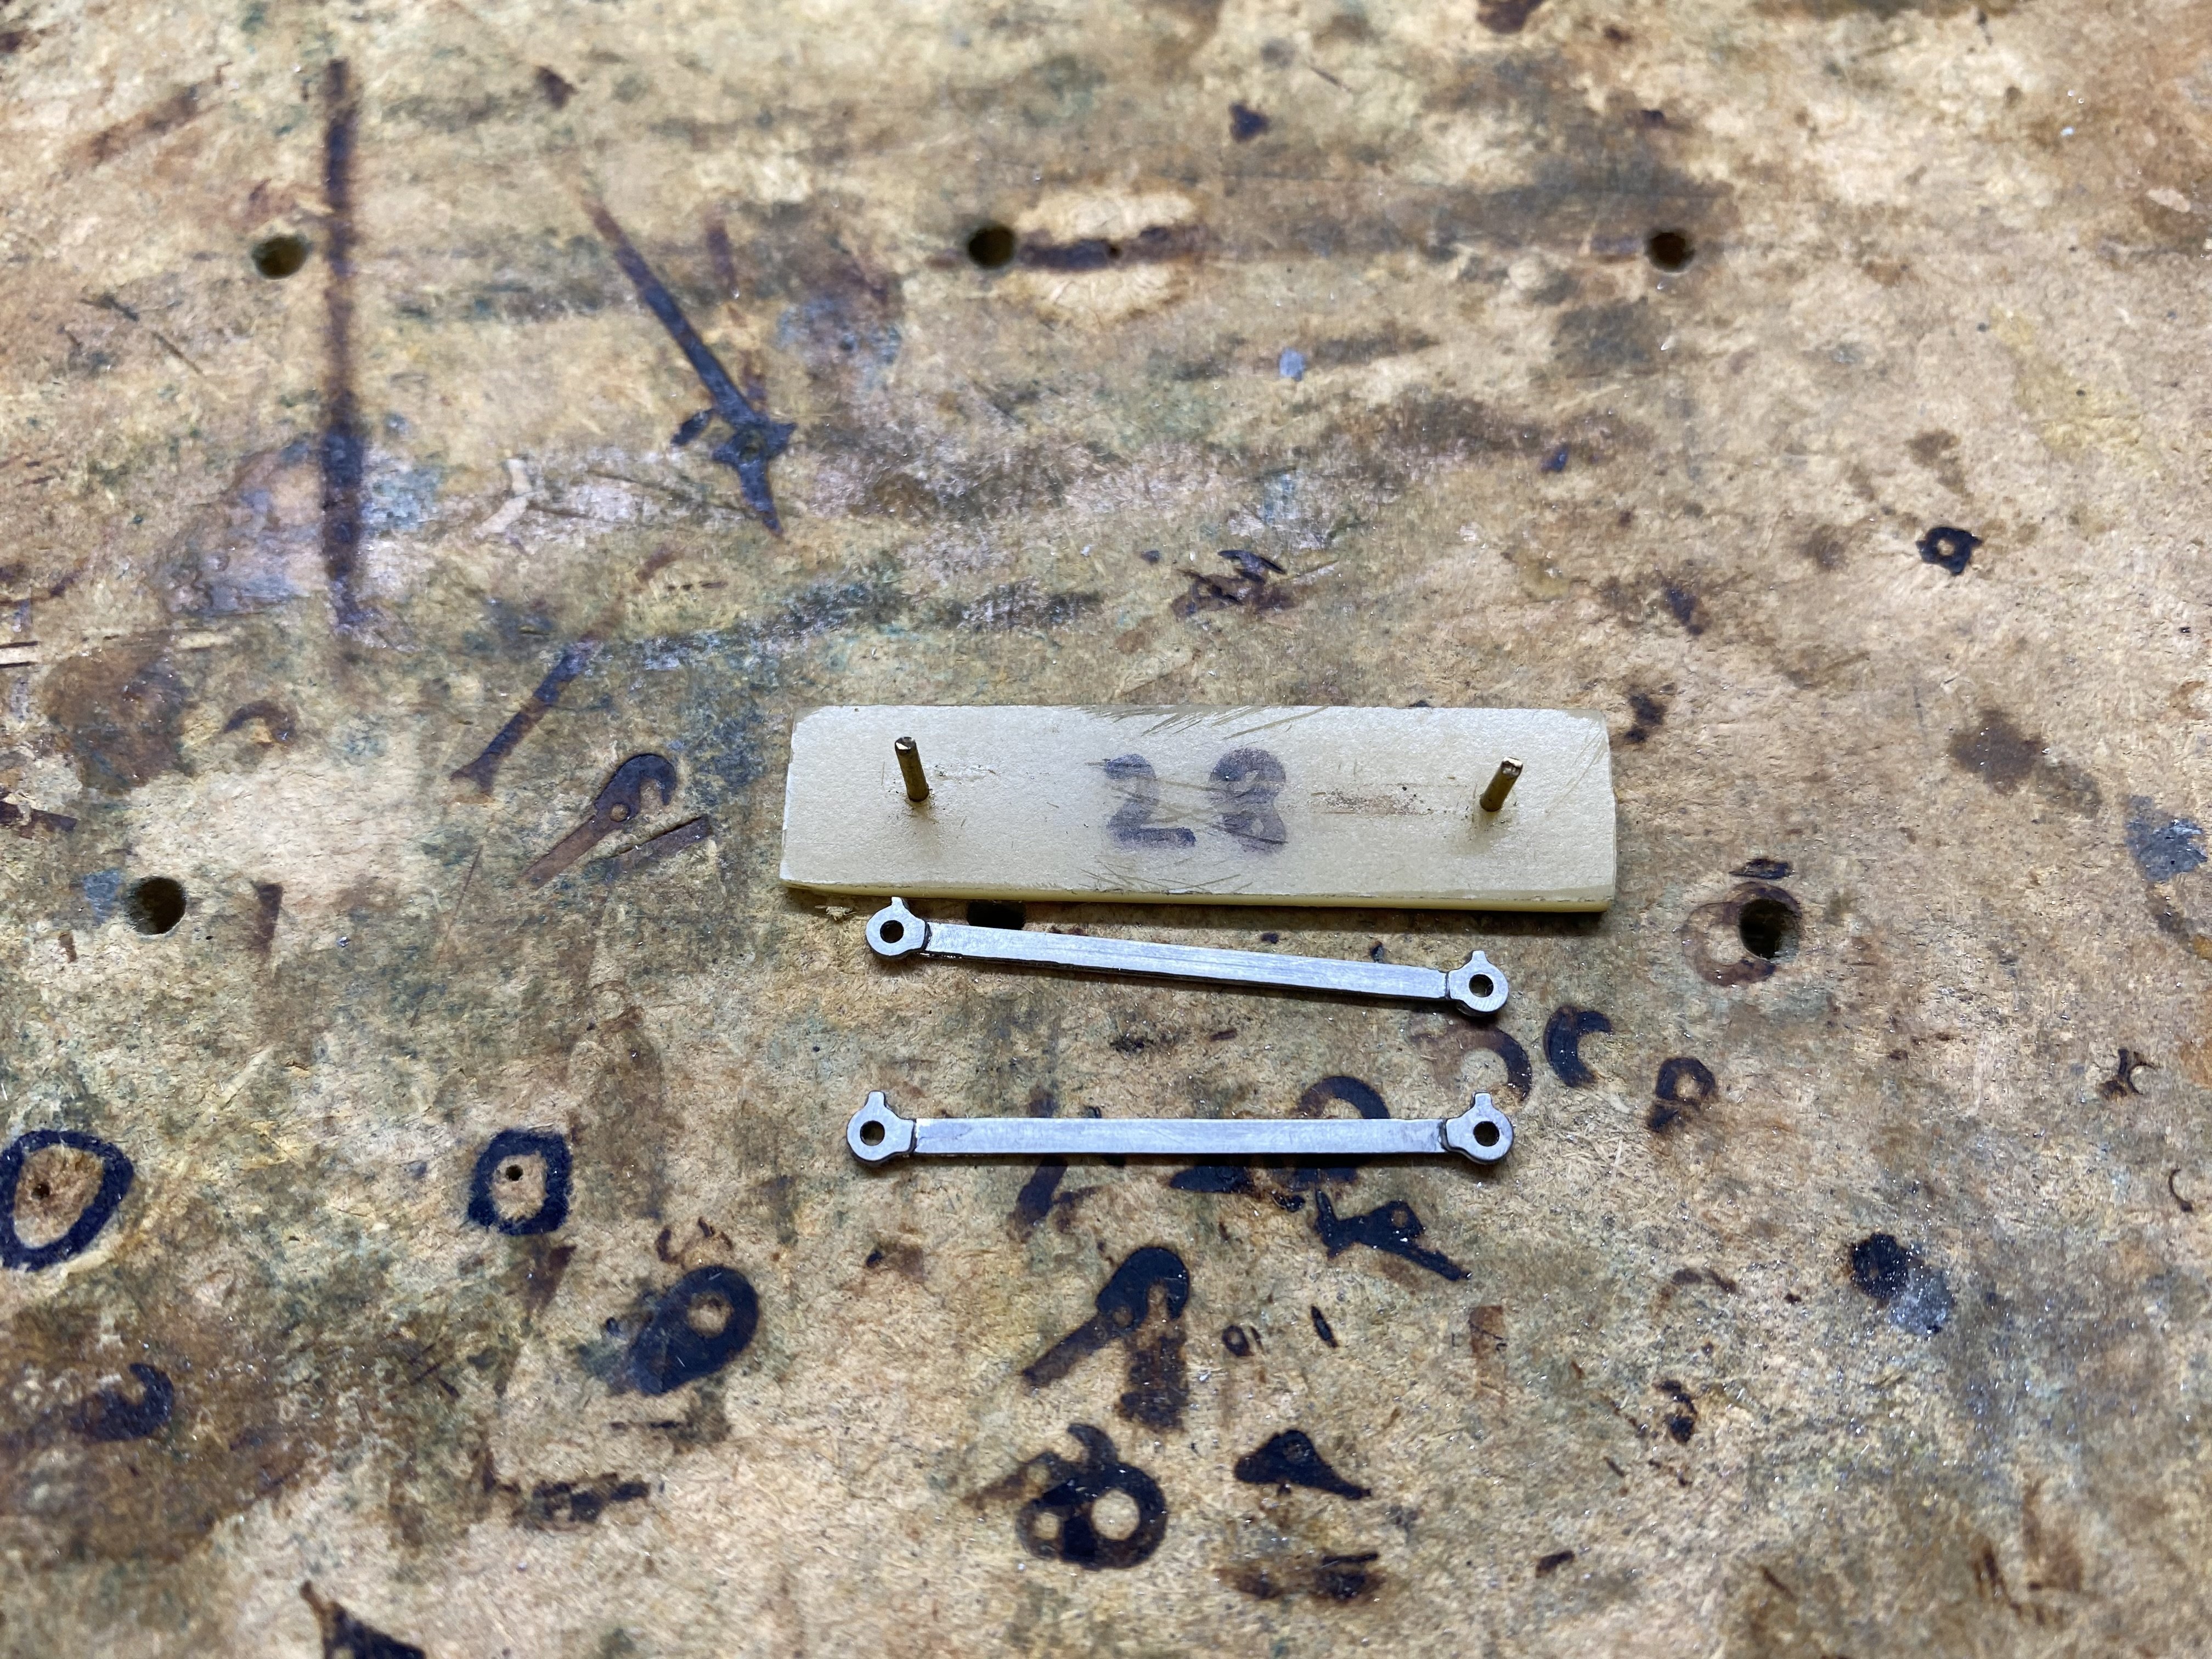
Thanks for these David. The London Road radial trucks seem to follow a similar principle but implemented differently. They're intended to have a central wire which encourages them to self-centre but they may need optional spring wires either side to provide downward pressure and stop them tilting. This is Iain Rice's take on it. Fiddly and a tight squeeze in 4mm. Image: Copyright Wild Swan Publications Ltd.

-
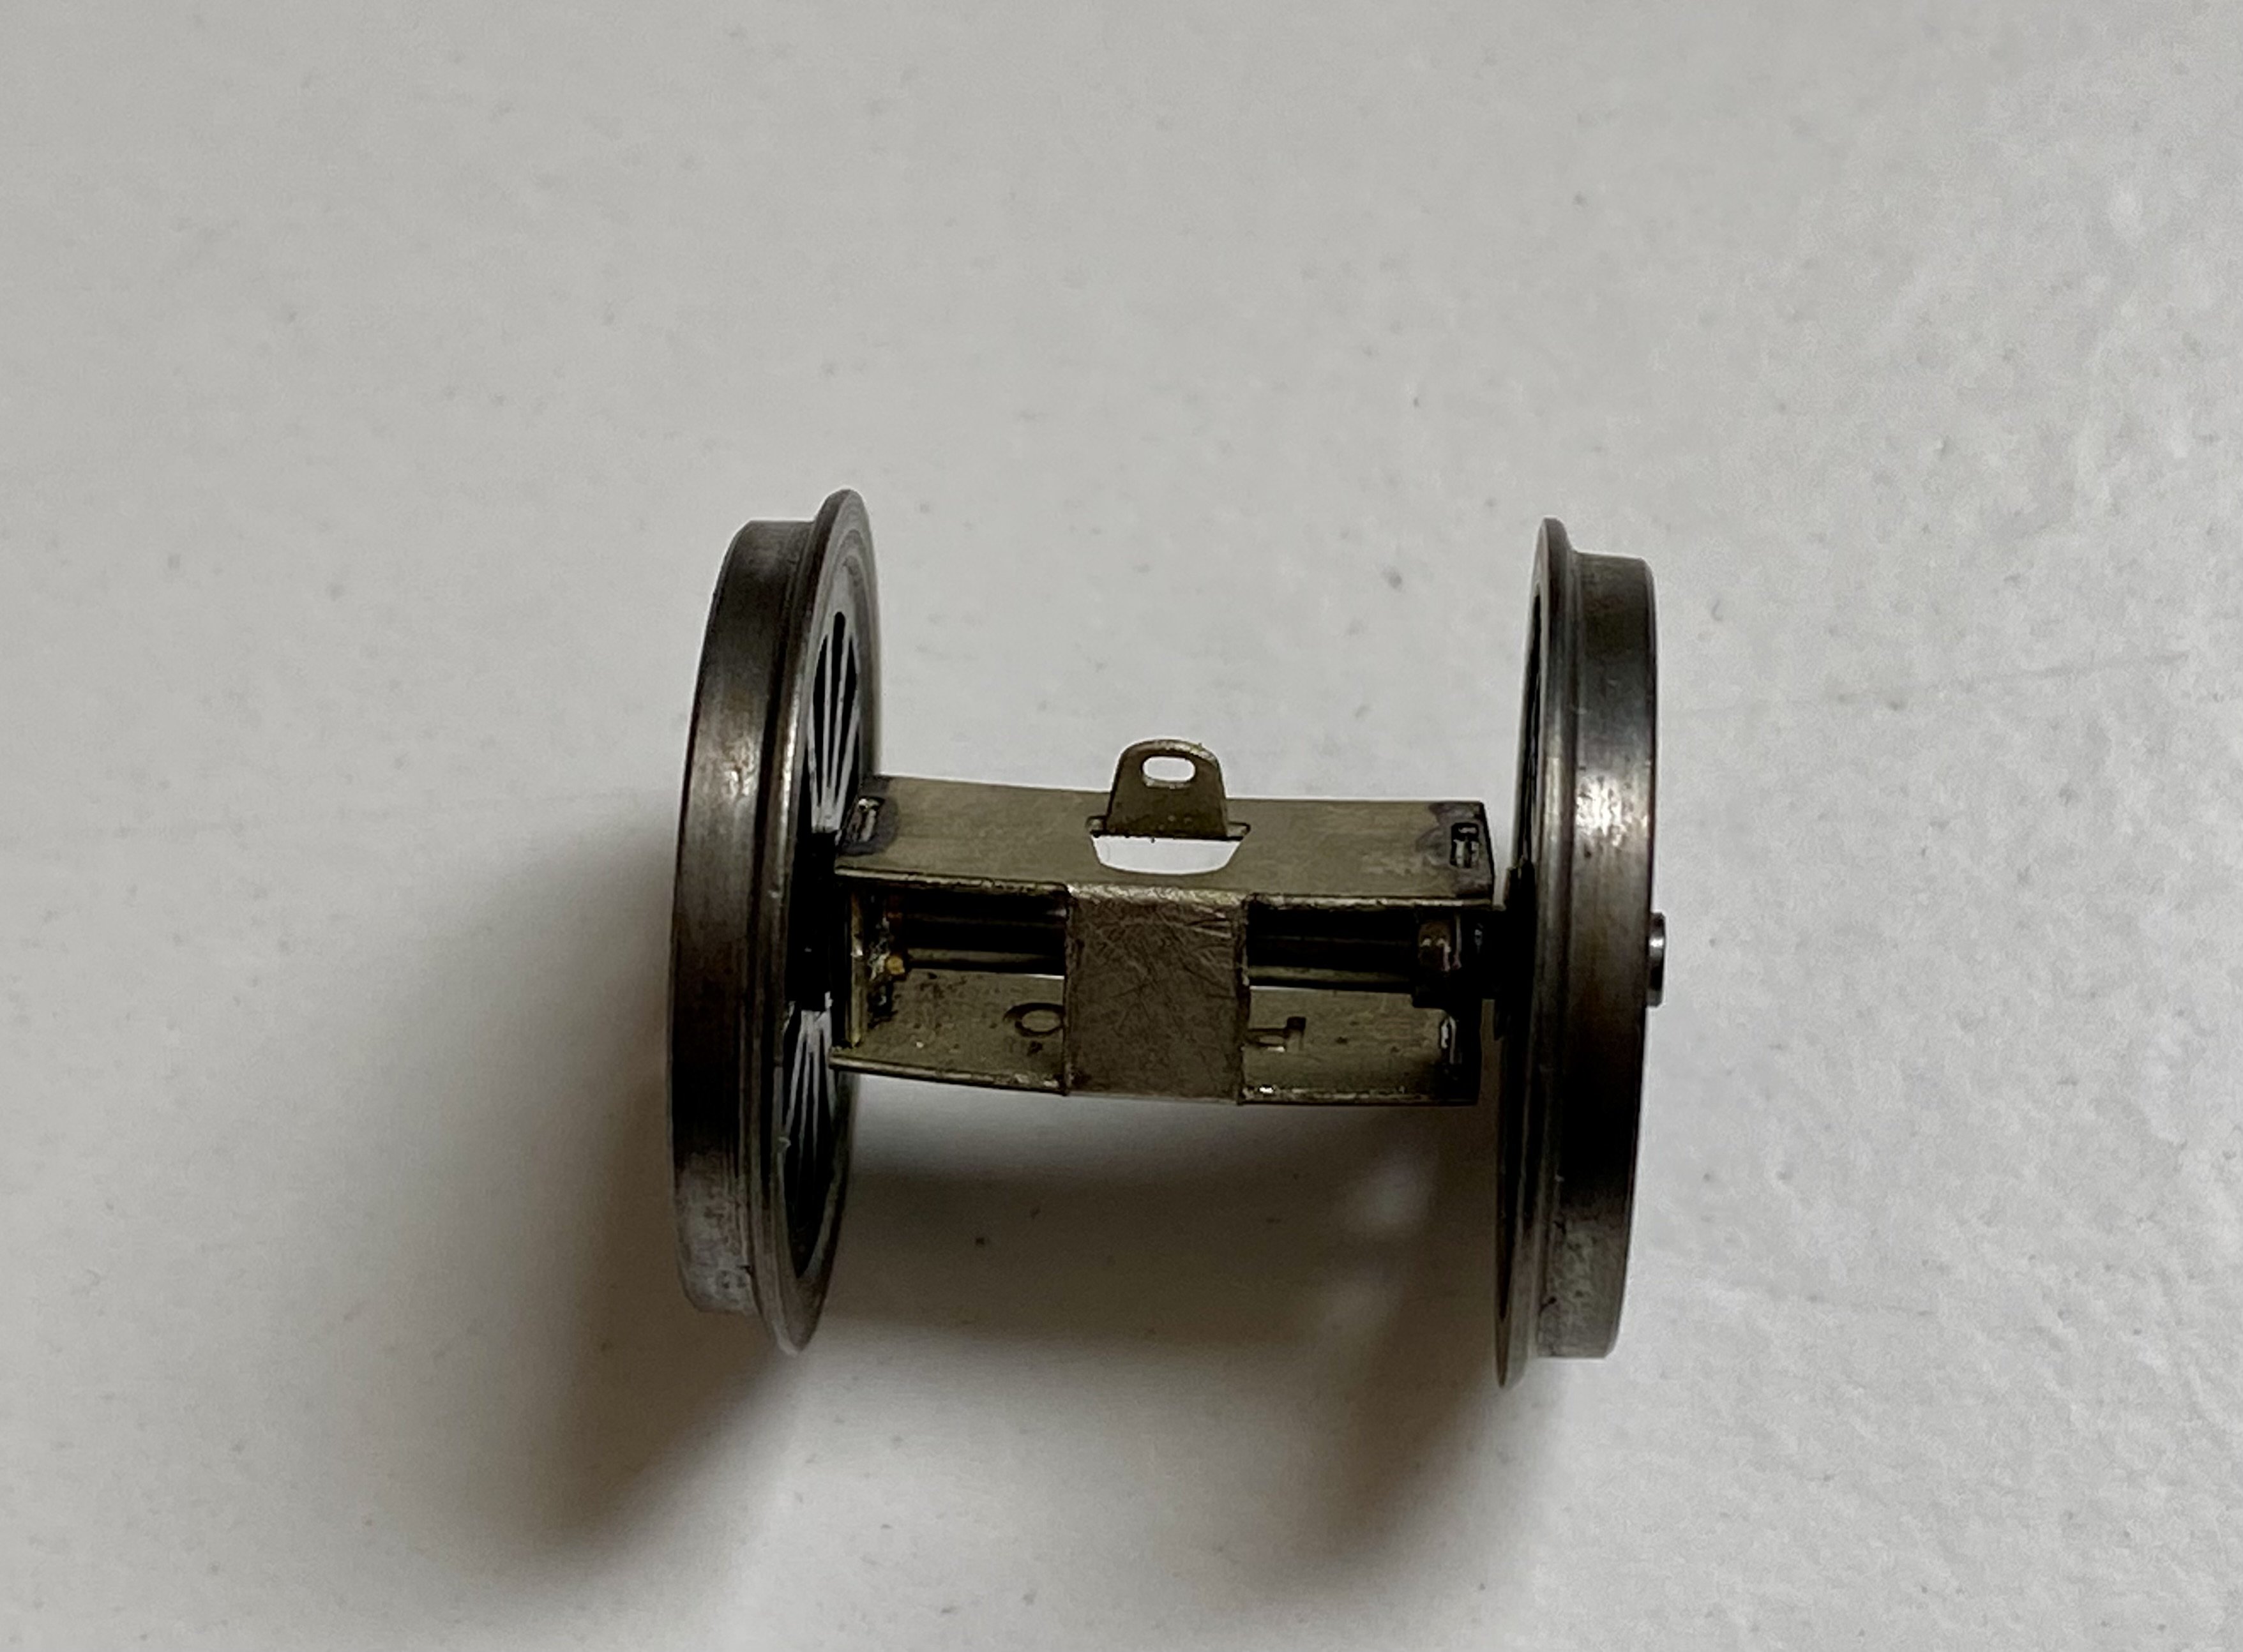
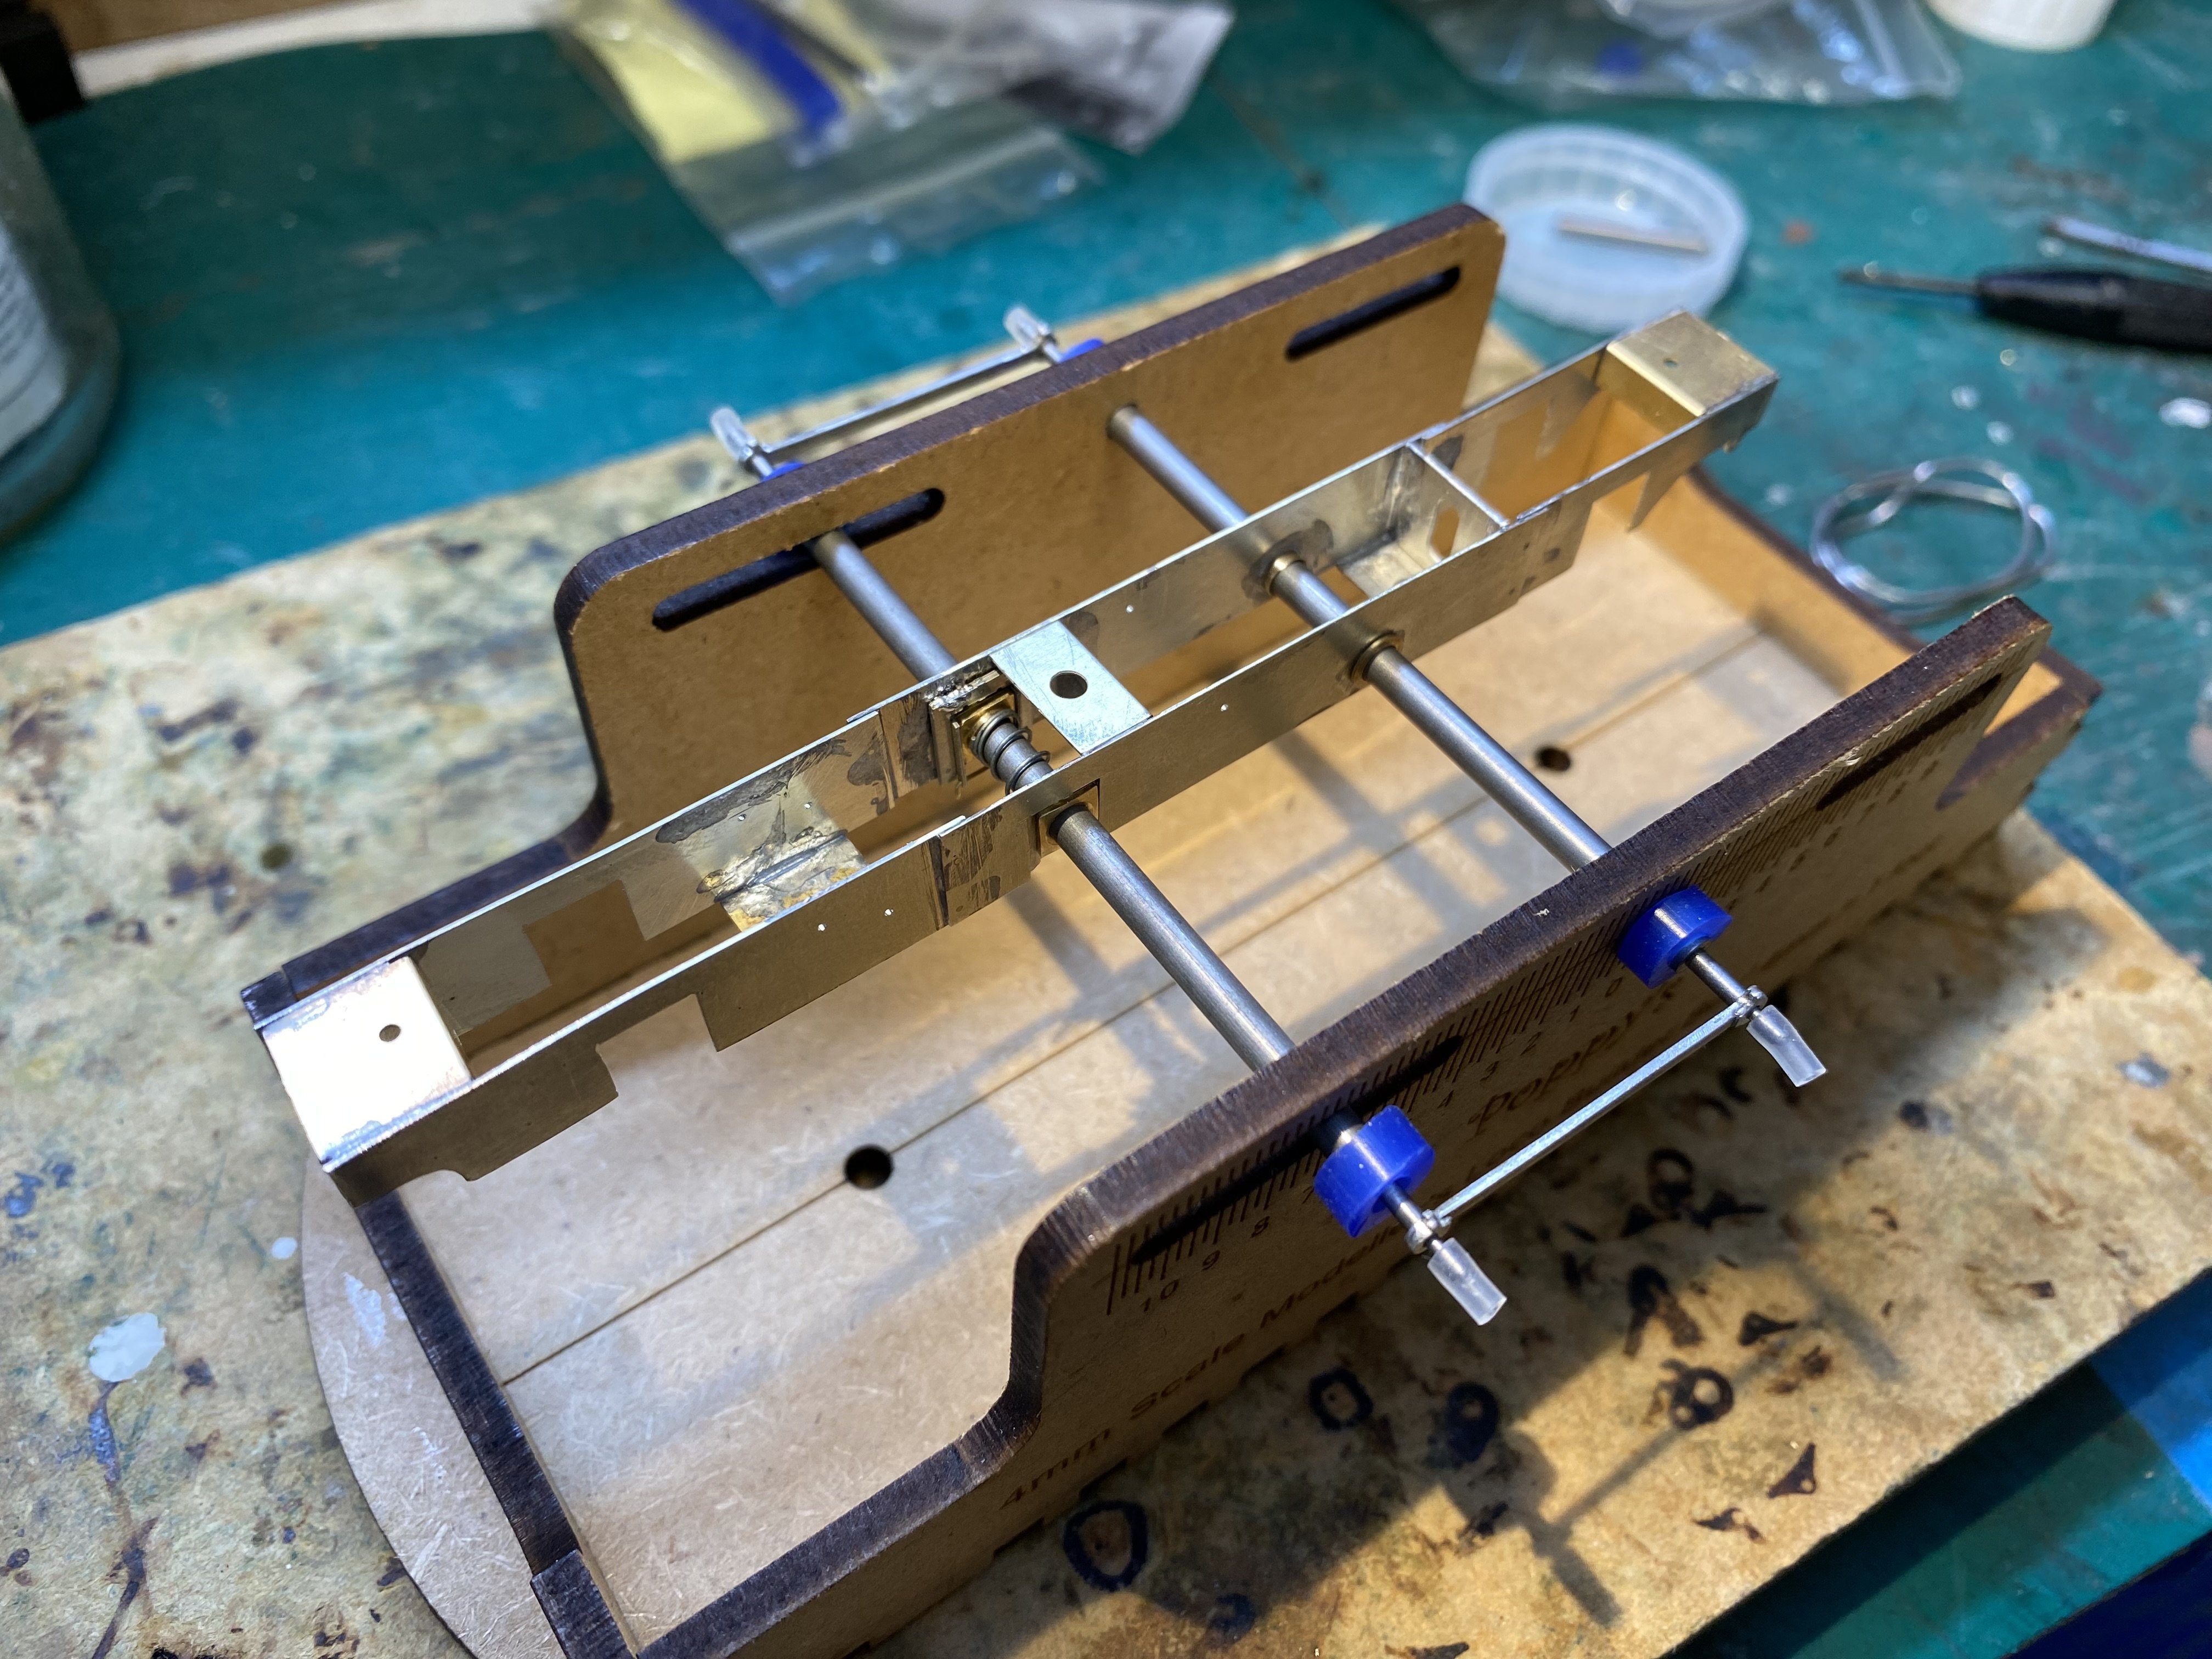
Well, this bit works at least, despite the video making it appear as if the wheels are turning in the opposite direction from the rods! Trick of the tech. no7.MOV Had the usual trouble getting the crankpins in straight. I think they must all be at the same 'not quite straight' angle because the chassis rolled smoothly under finger power right from the off. The chassis got a coat of Halfords etch primer followed by matt black before the wheels went on. Wheels were a very tight fit on the axles - so tight the wheel press couldn't push them on first time and they had to be gently reamed. The radial trucks next. They'll be a bigger challenge I think. Four wheels on my wagon Alan
-
Absolutely. It can be very satisfying when you do. Go for it John!
-
Yep, that works better than an all-red cab. Plan C for me too then!
-
I would certainly buy 4mm etches for the BCDR 2-4-0 No 6. Am also tempted by the J26 and the GNR(I) JT class. And if we could stretch a point include the BCDR 6 wheel state coach, I'd have one of those for sure! Alan
-
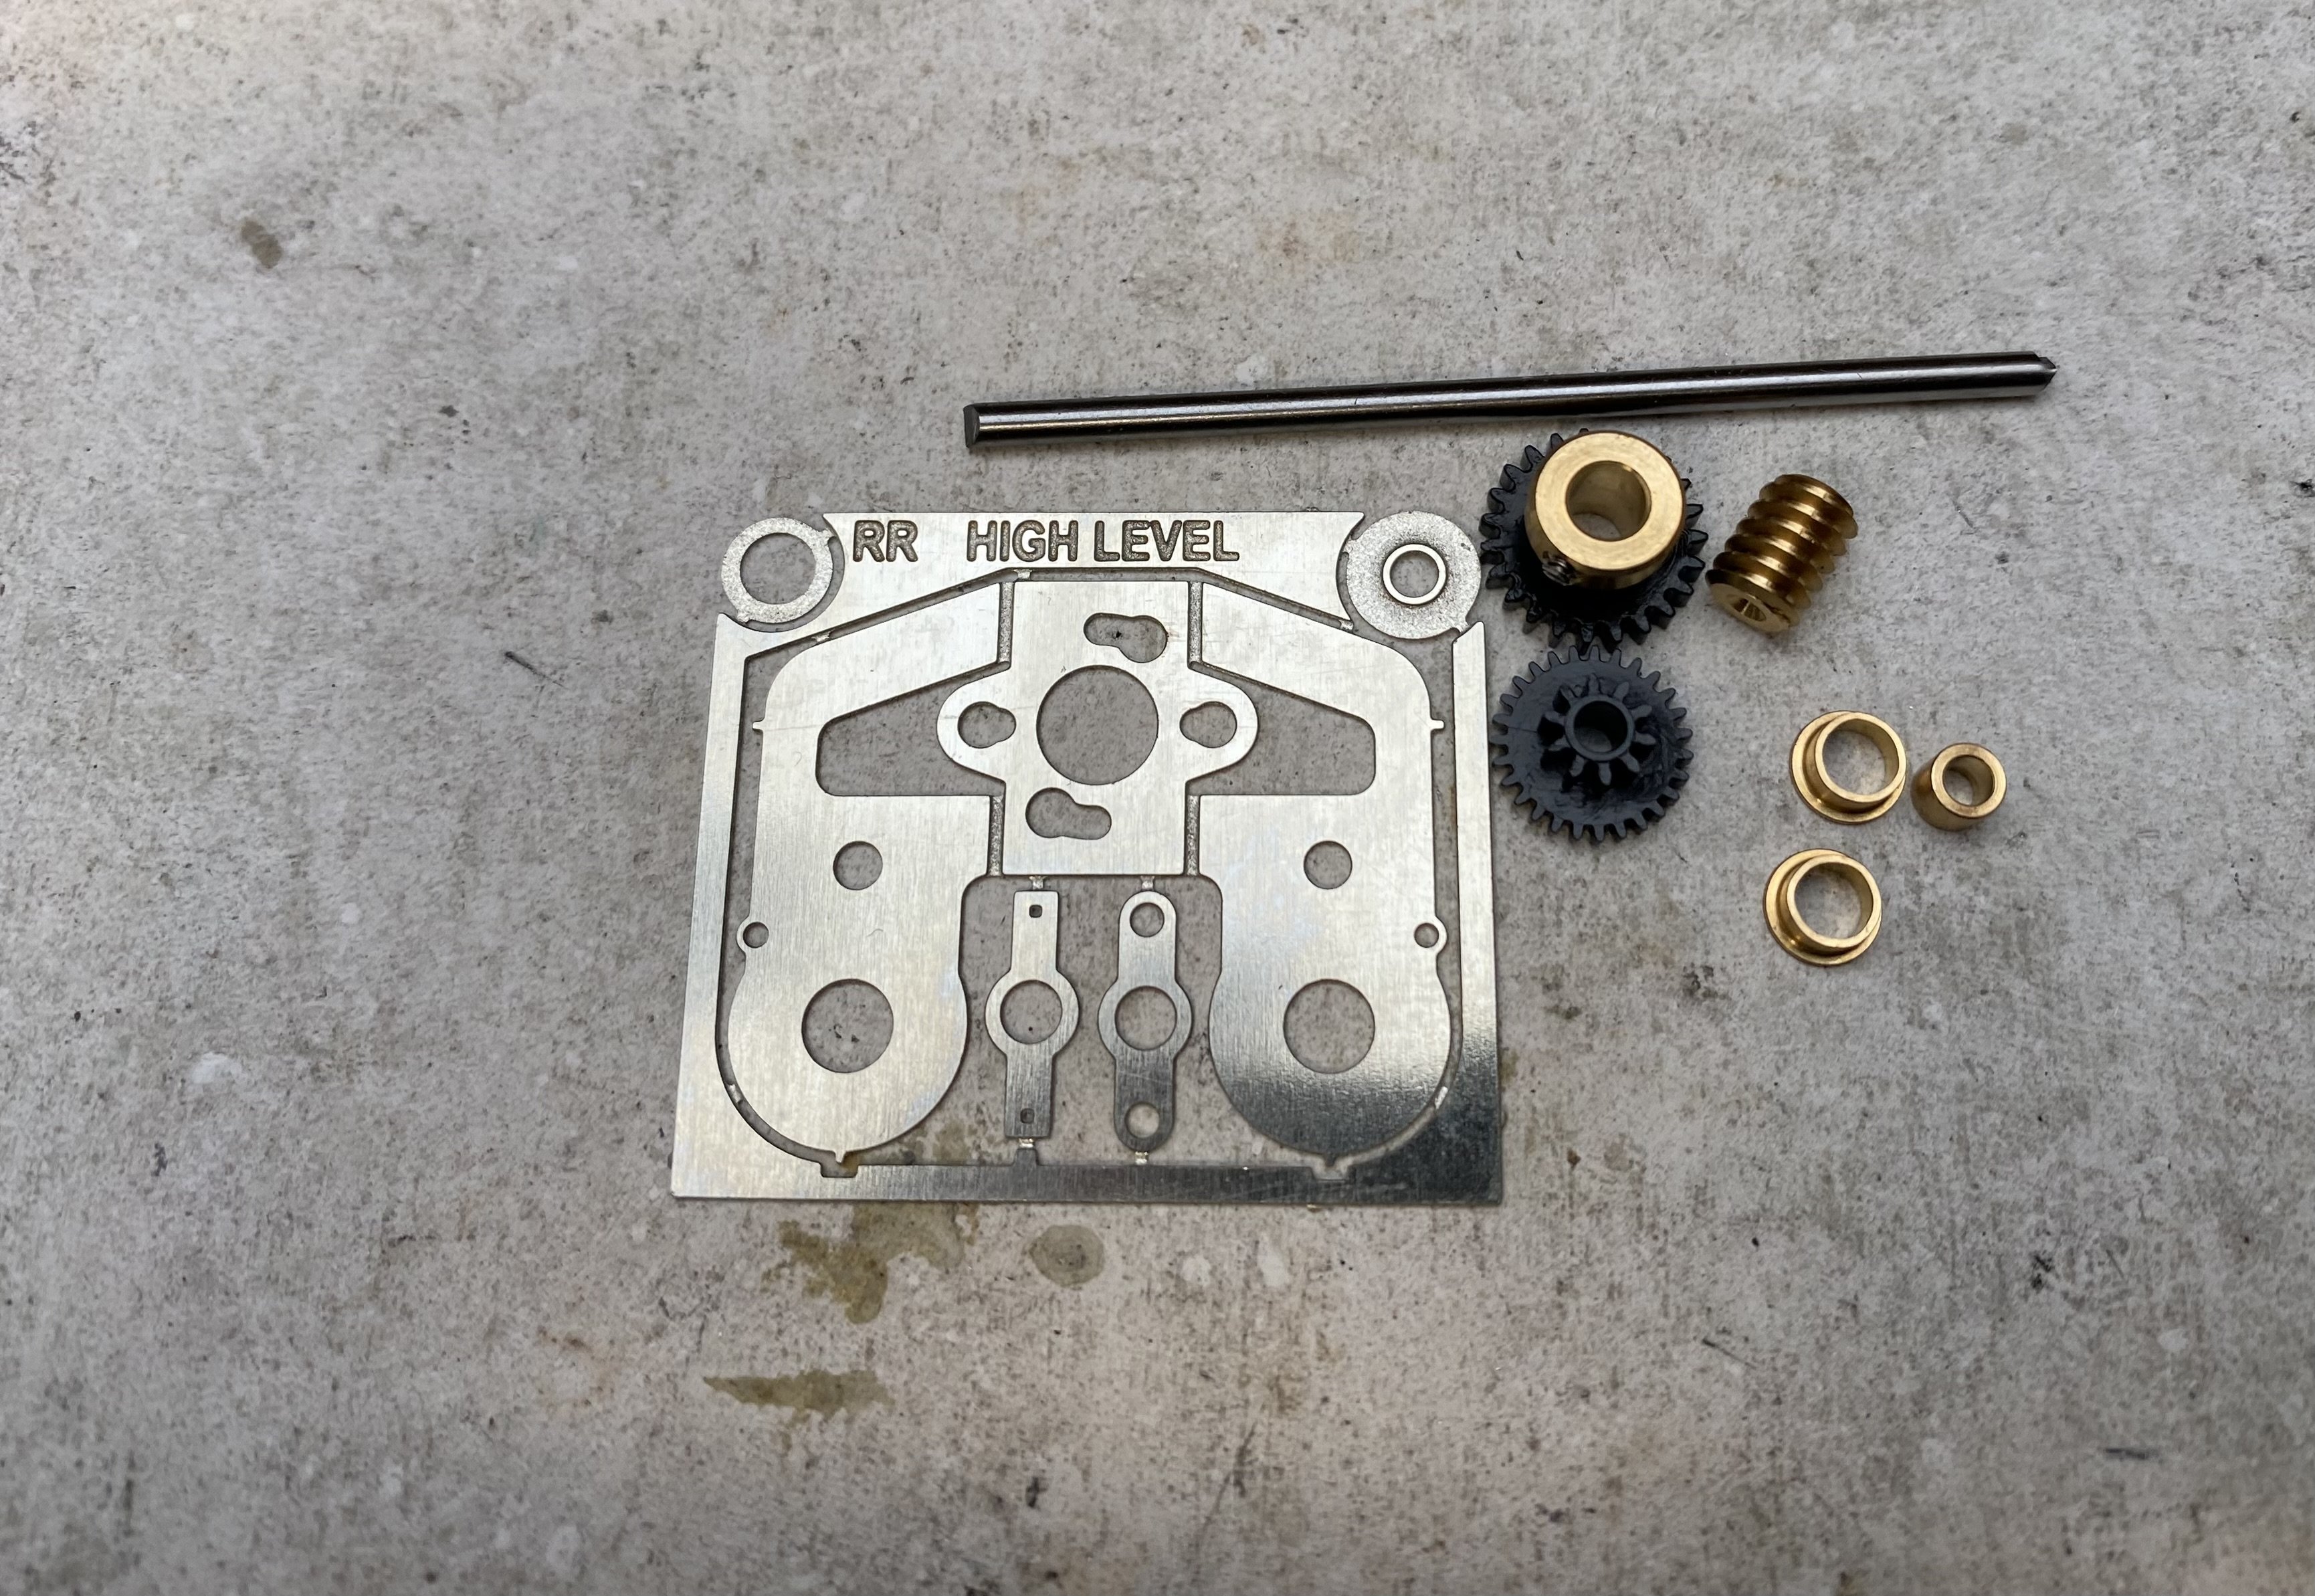
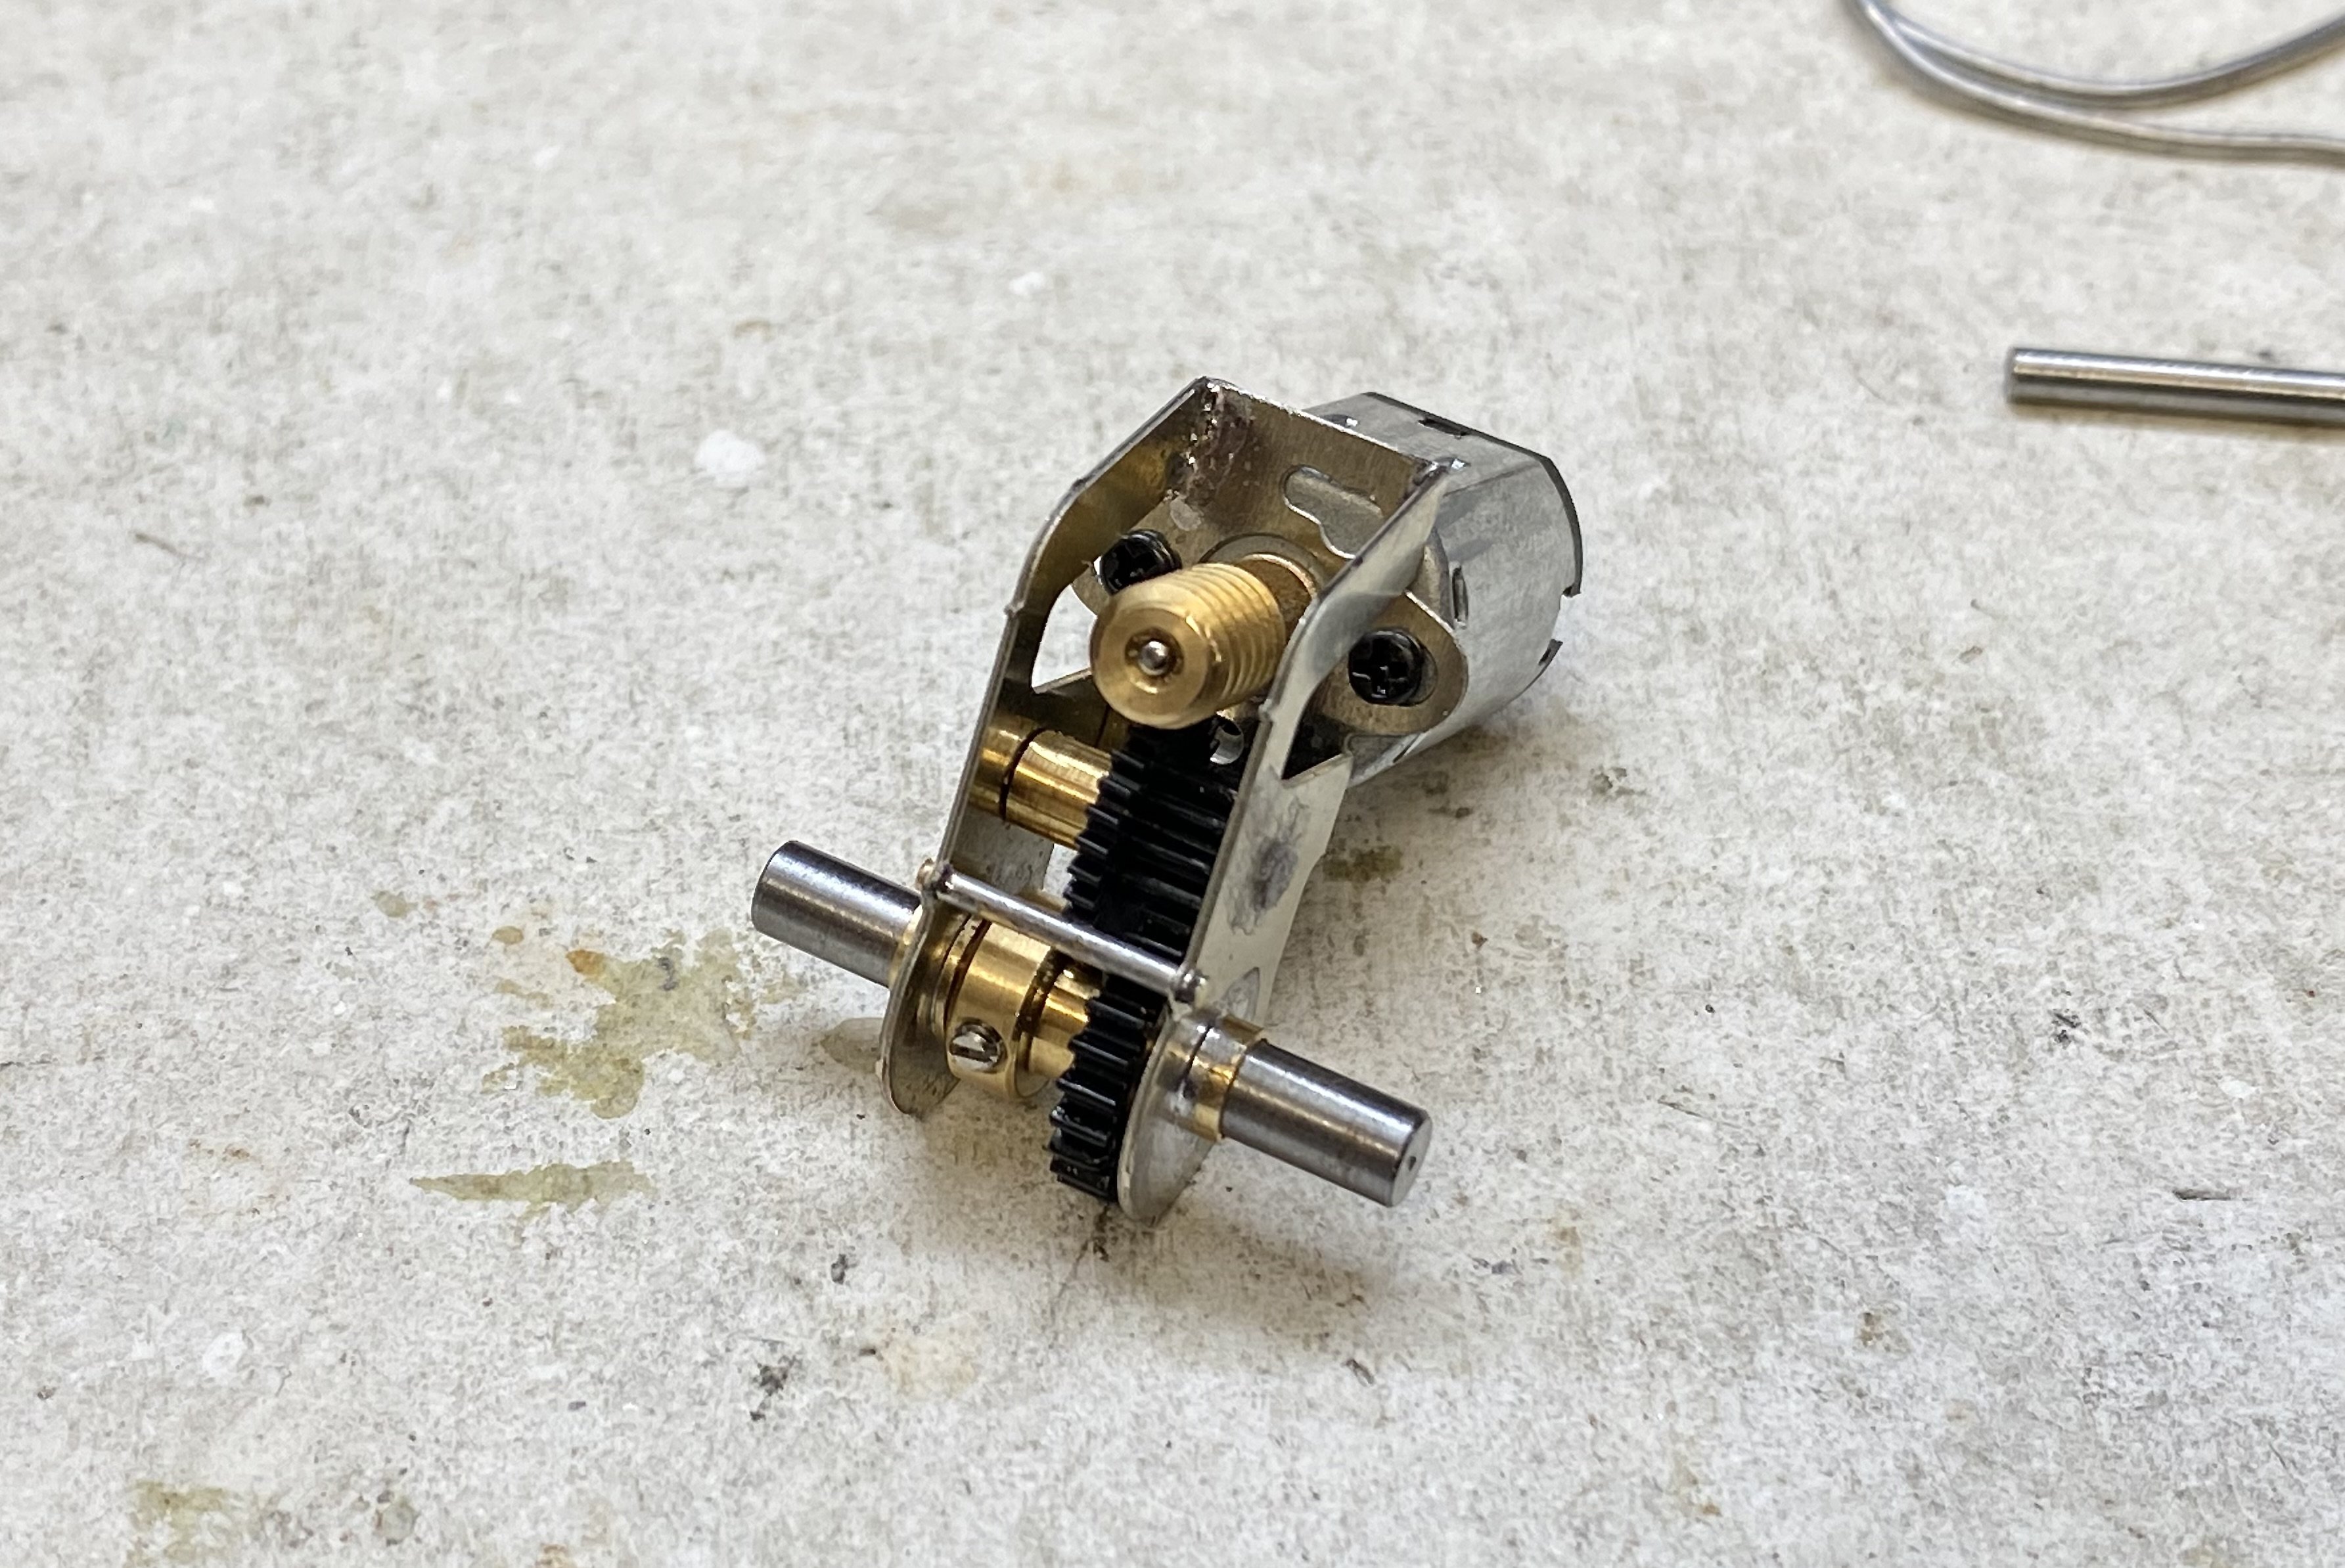
Another little jewel from the High Level stable. This is a RoadRunner 60:1
-
You've made a fine job of that David. A terrific might-have-been. I remember reading your posts on the original build and being mightily impressed. I wanted one, even though I hadn't anything to run it on. The red and cream livery blends it nicely with the railcars but if we're taking a vote, I think I might favour an all red cab.
-
only by coincidence I suspect. It’s what was left in the paint-shop after a certain Hawthorn Leslie 0-4-0ST was outshopped.
-
Probably one of the longer lived ones Patrick - No 7 which apparently came to grief in an accident at Queen's Quay in 1949 or No 27 which was scrapped around 1951. Livery options include: a) Vauxhall Burgundy Red, because I've got the paint b) GNR(I) unlined black, so it can sneak in undetected at Brookhall Mill c) Some variation of BCDR lined green Probably c)
-
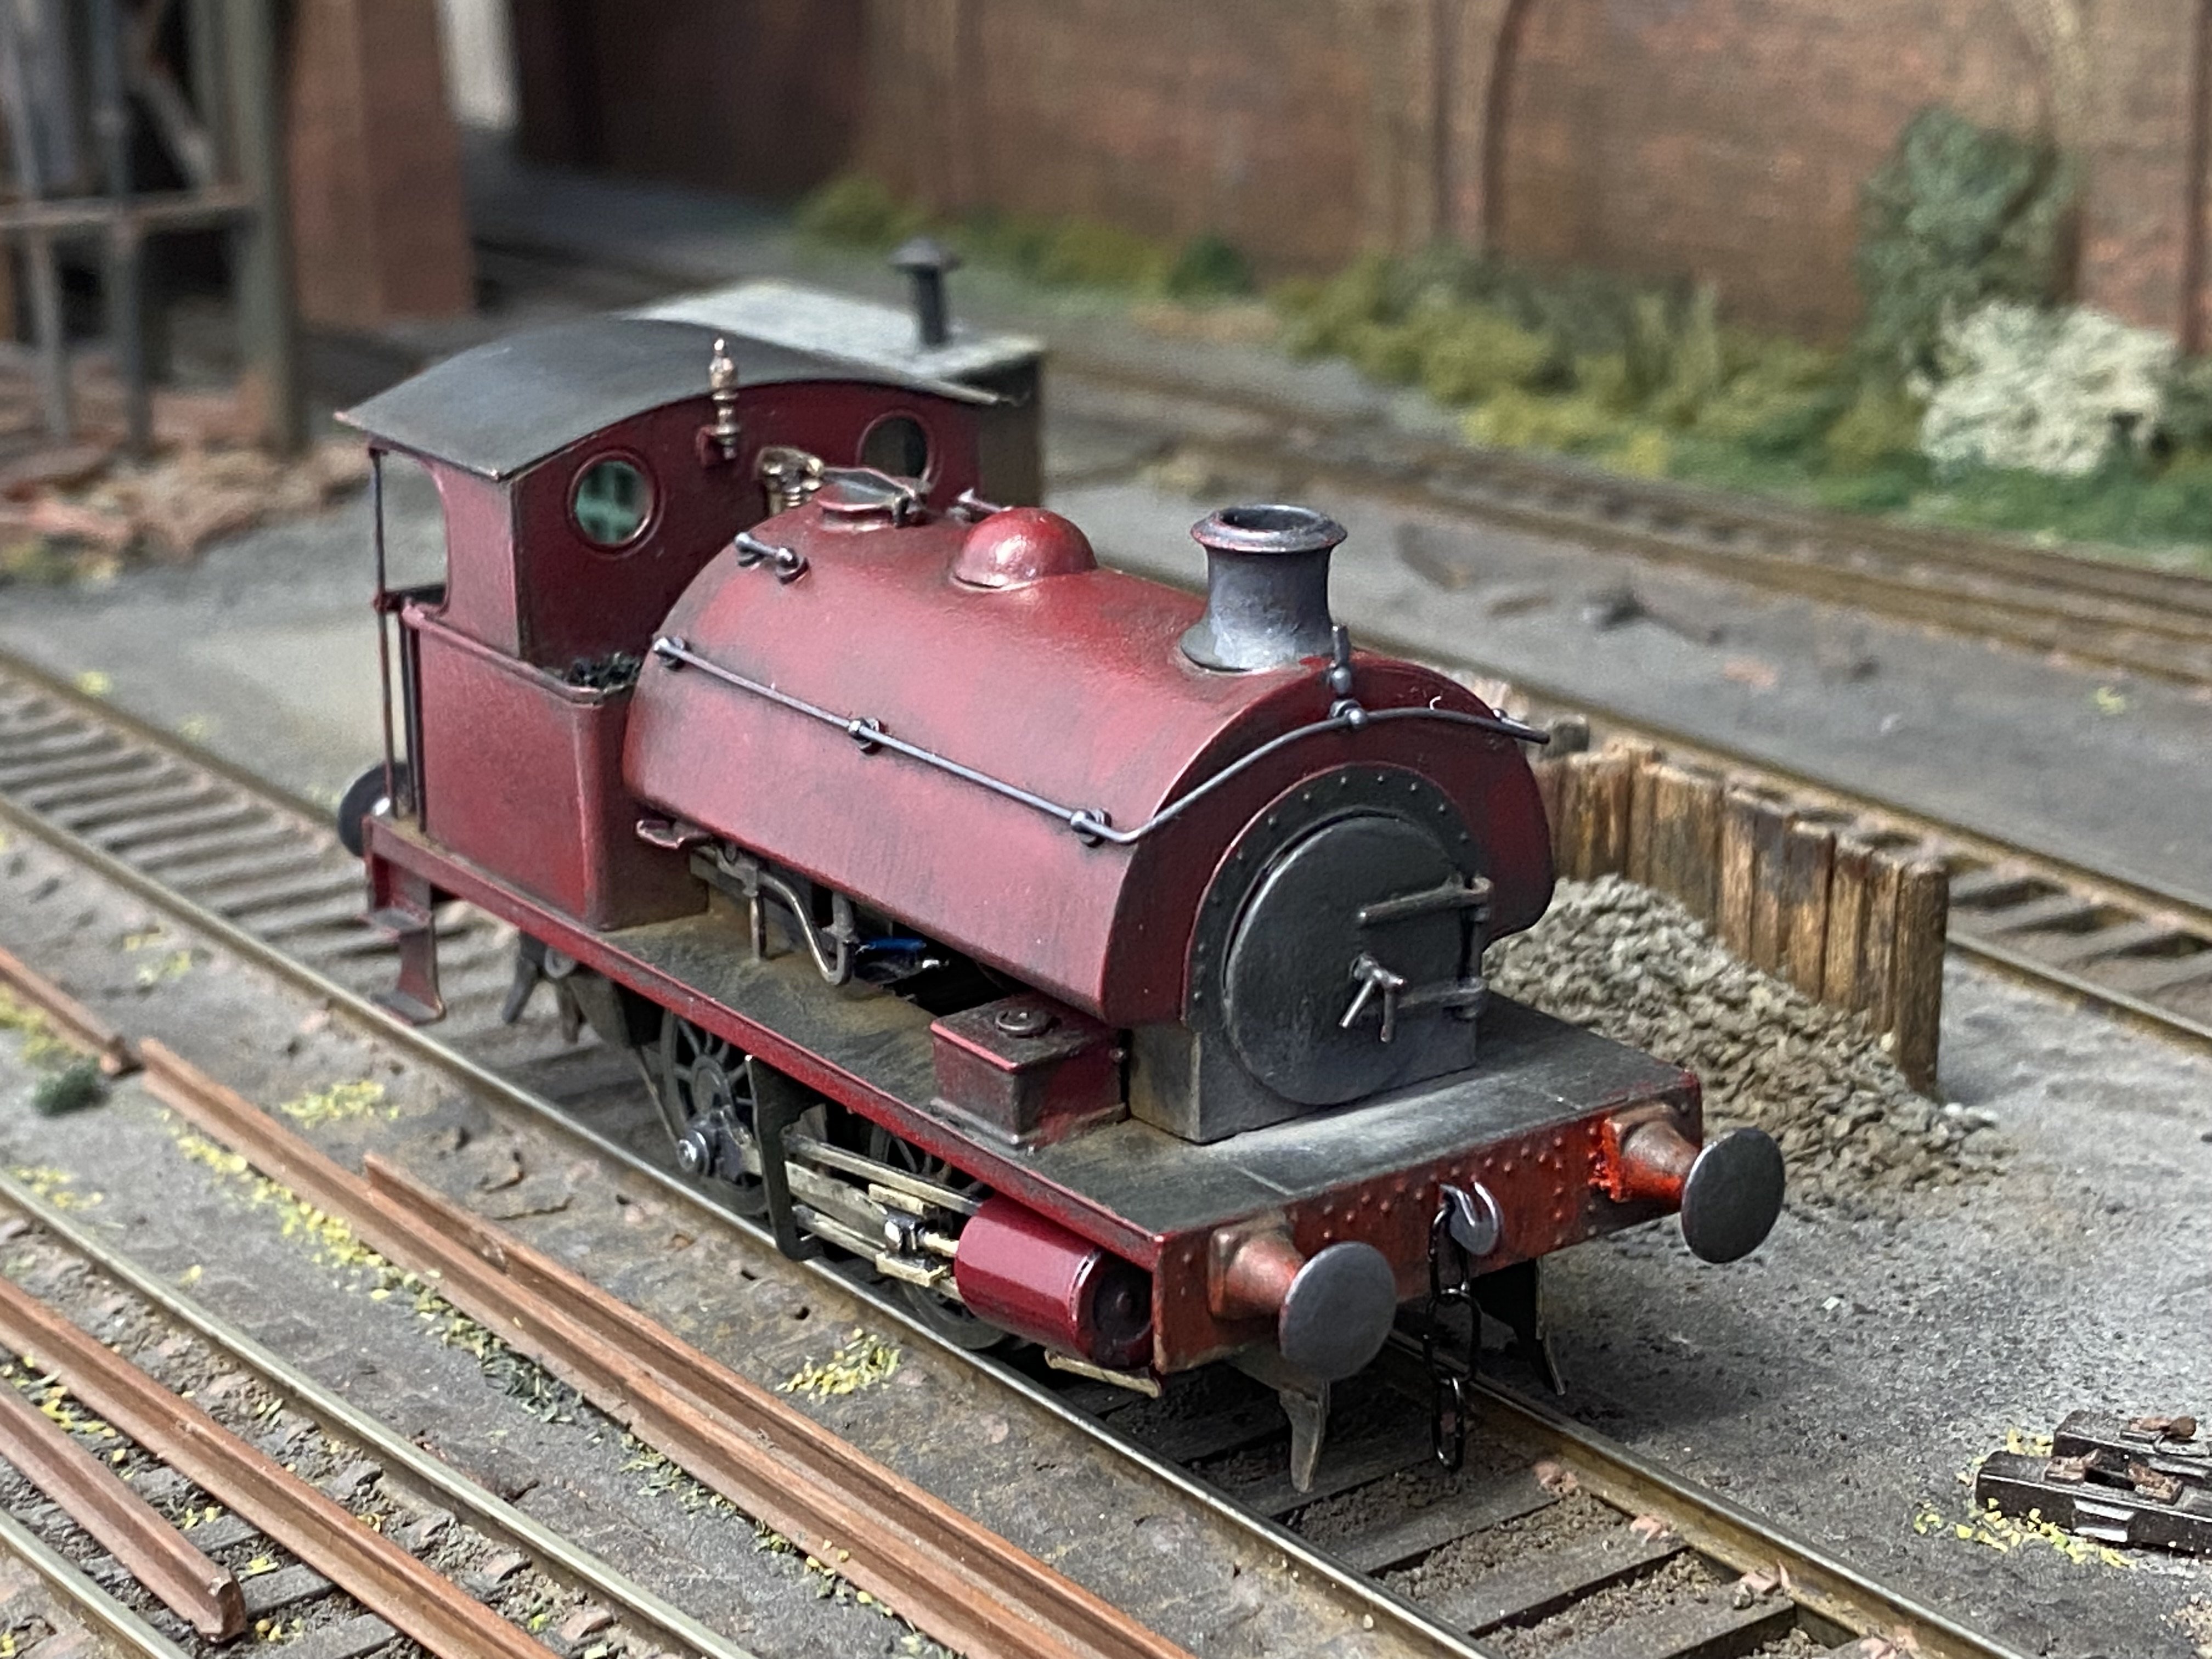
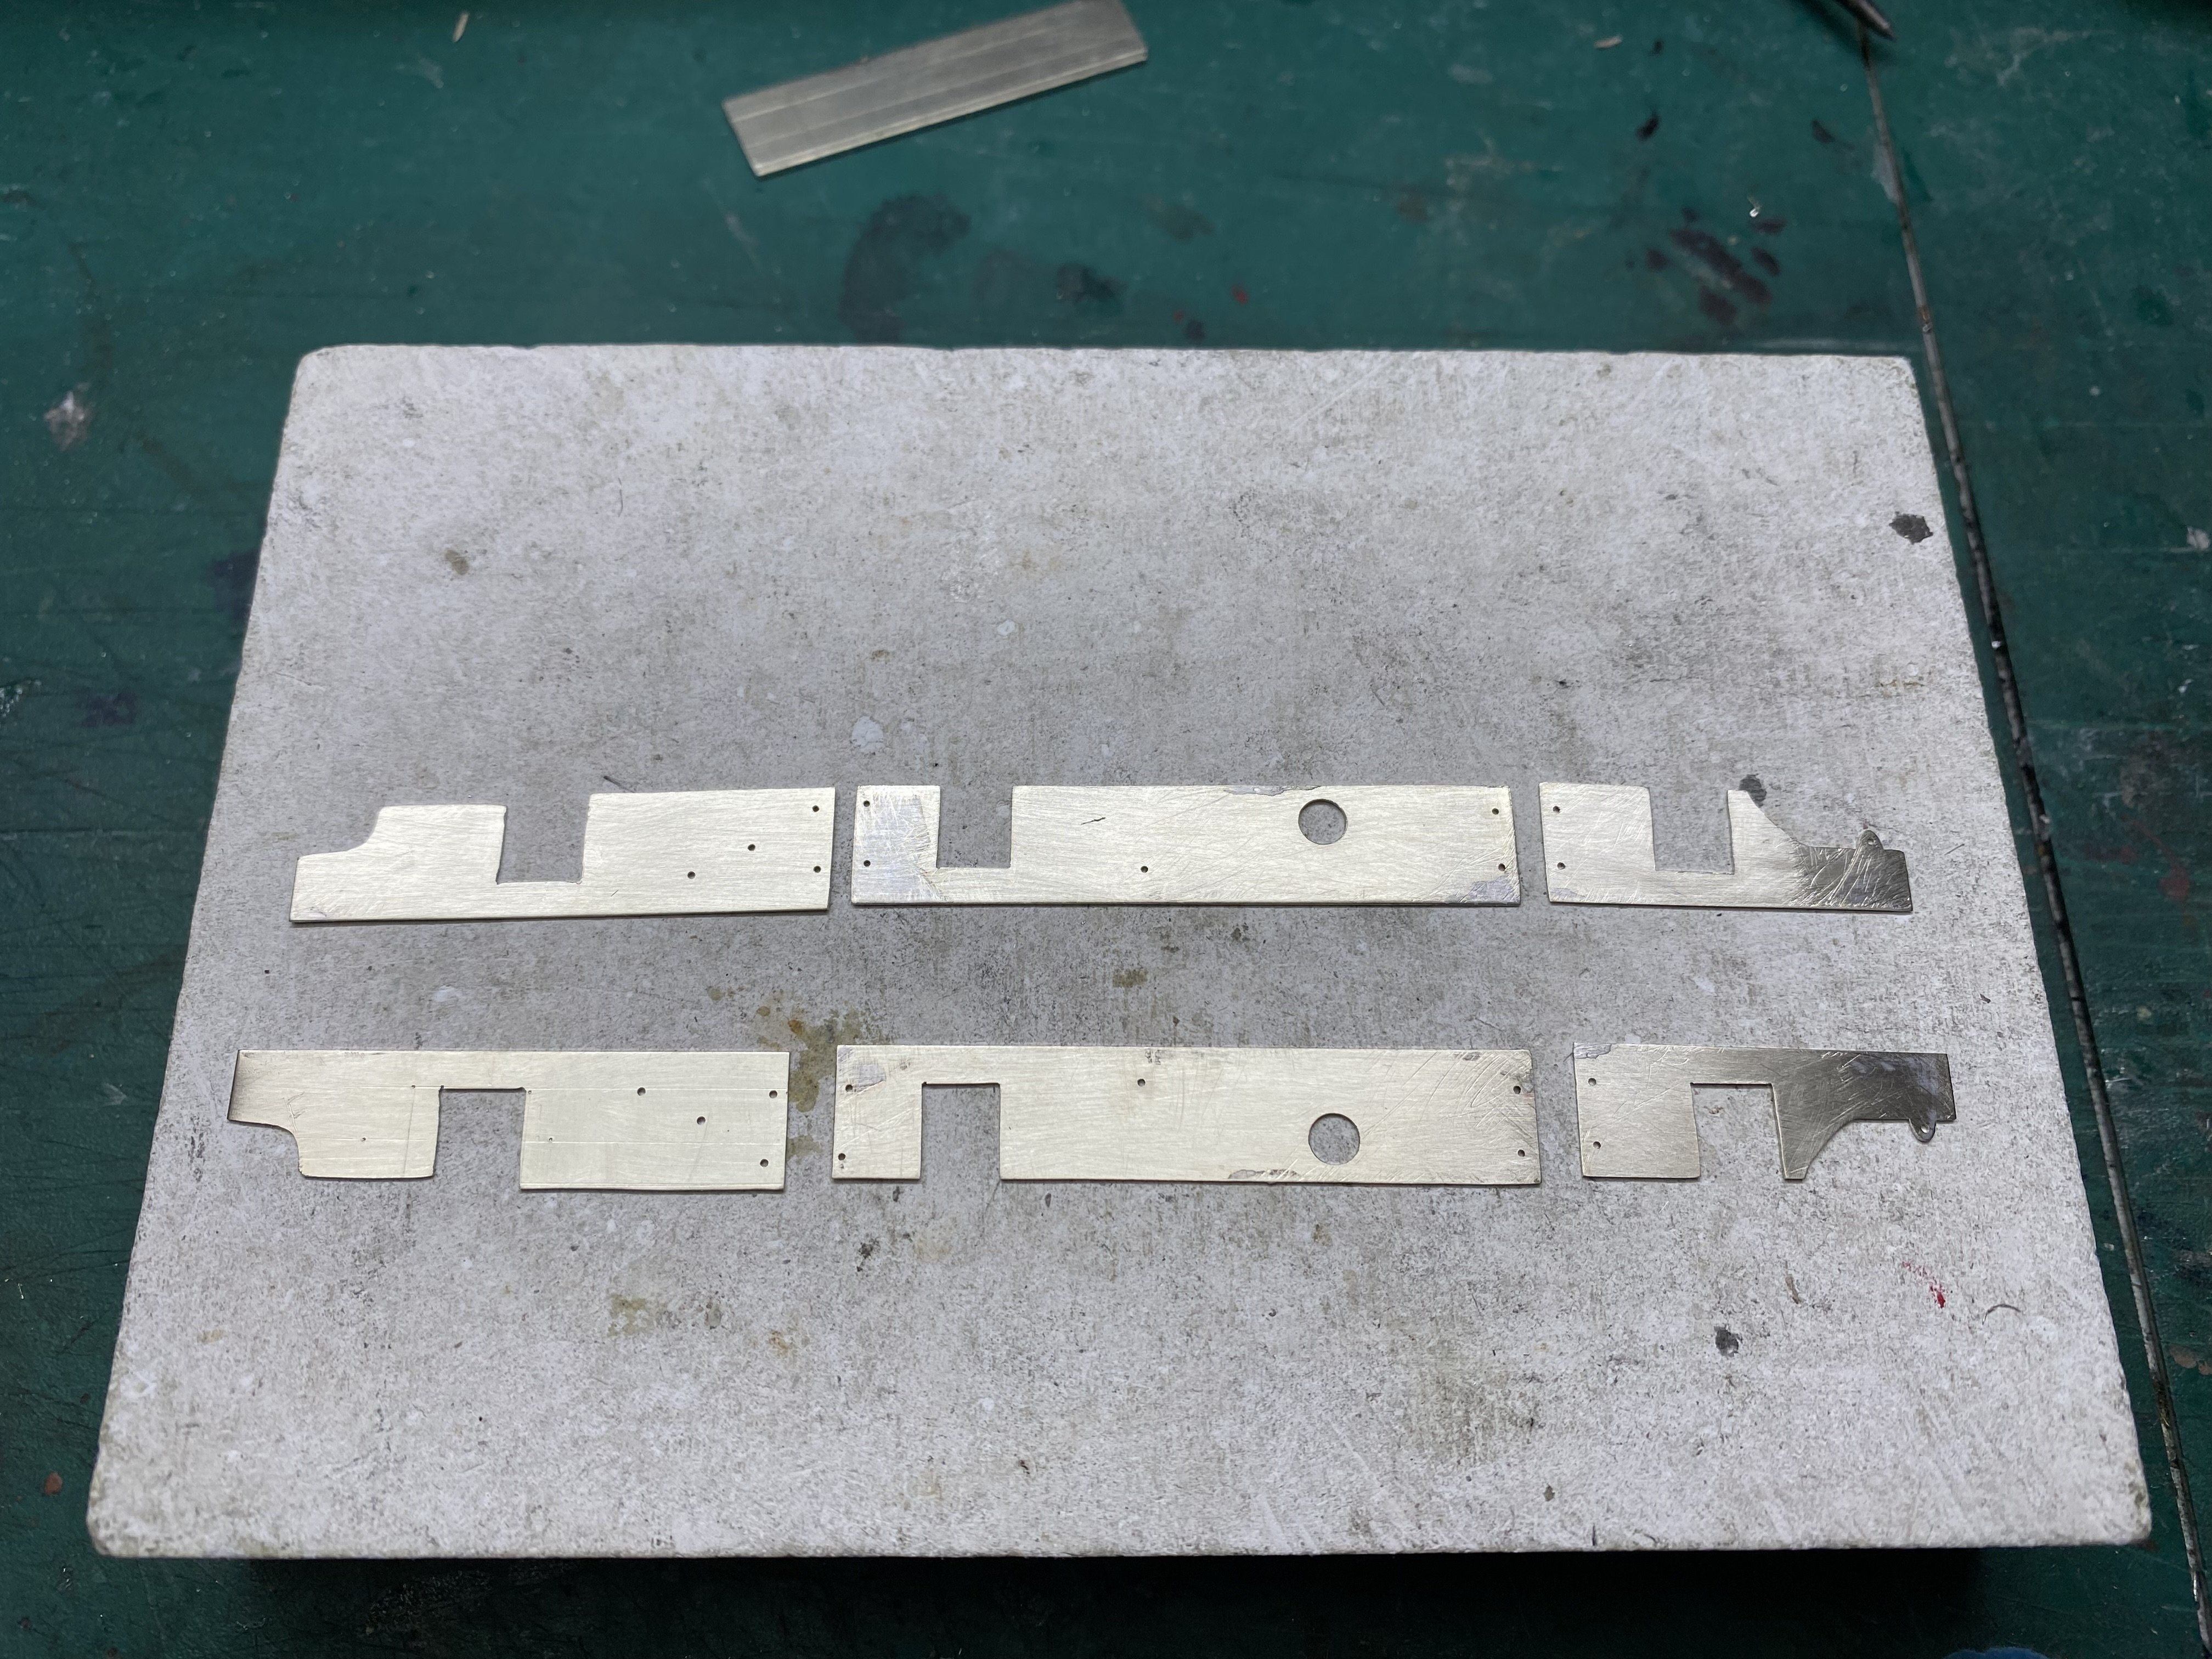
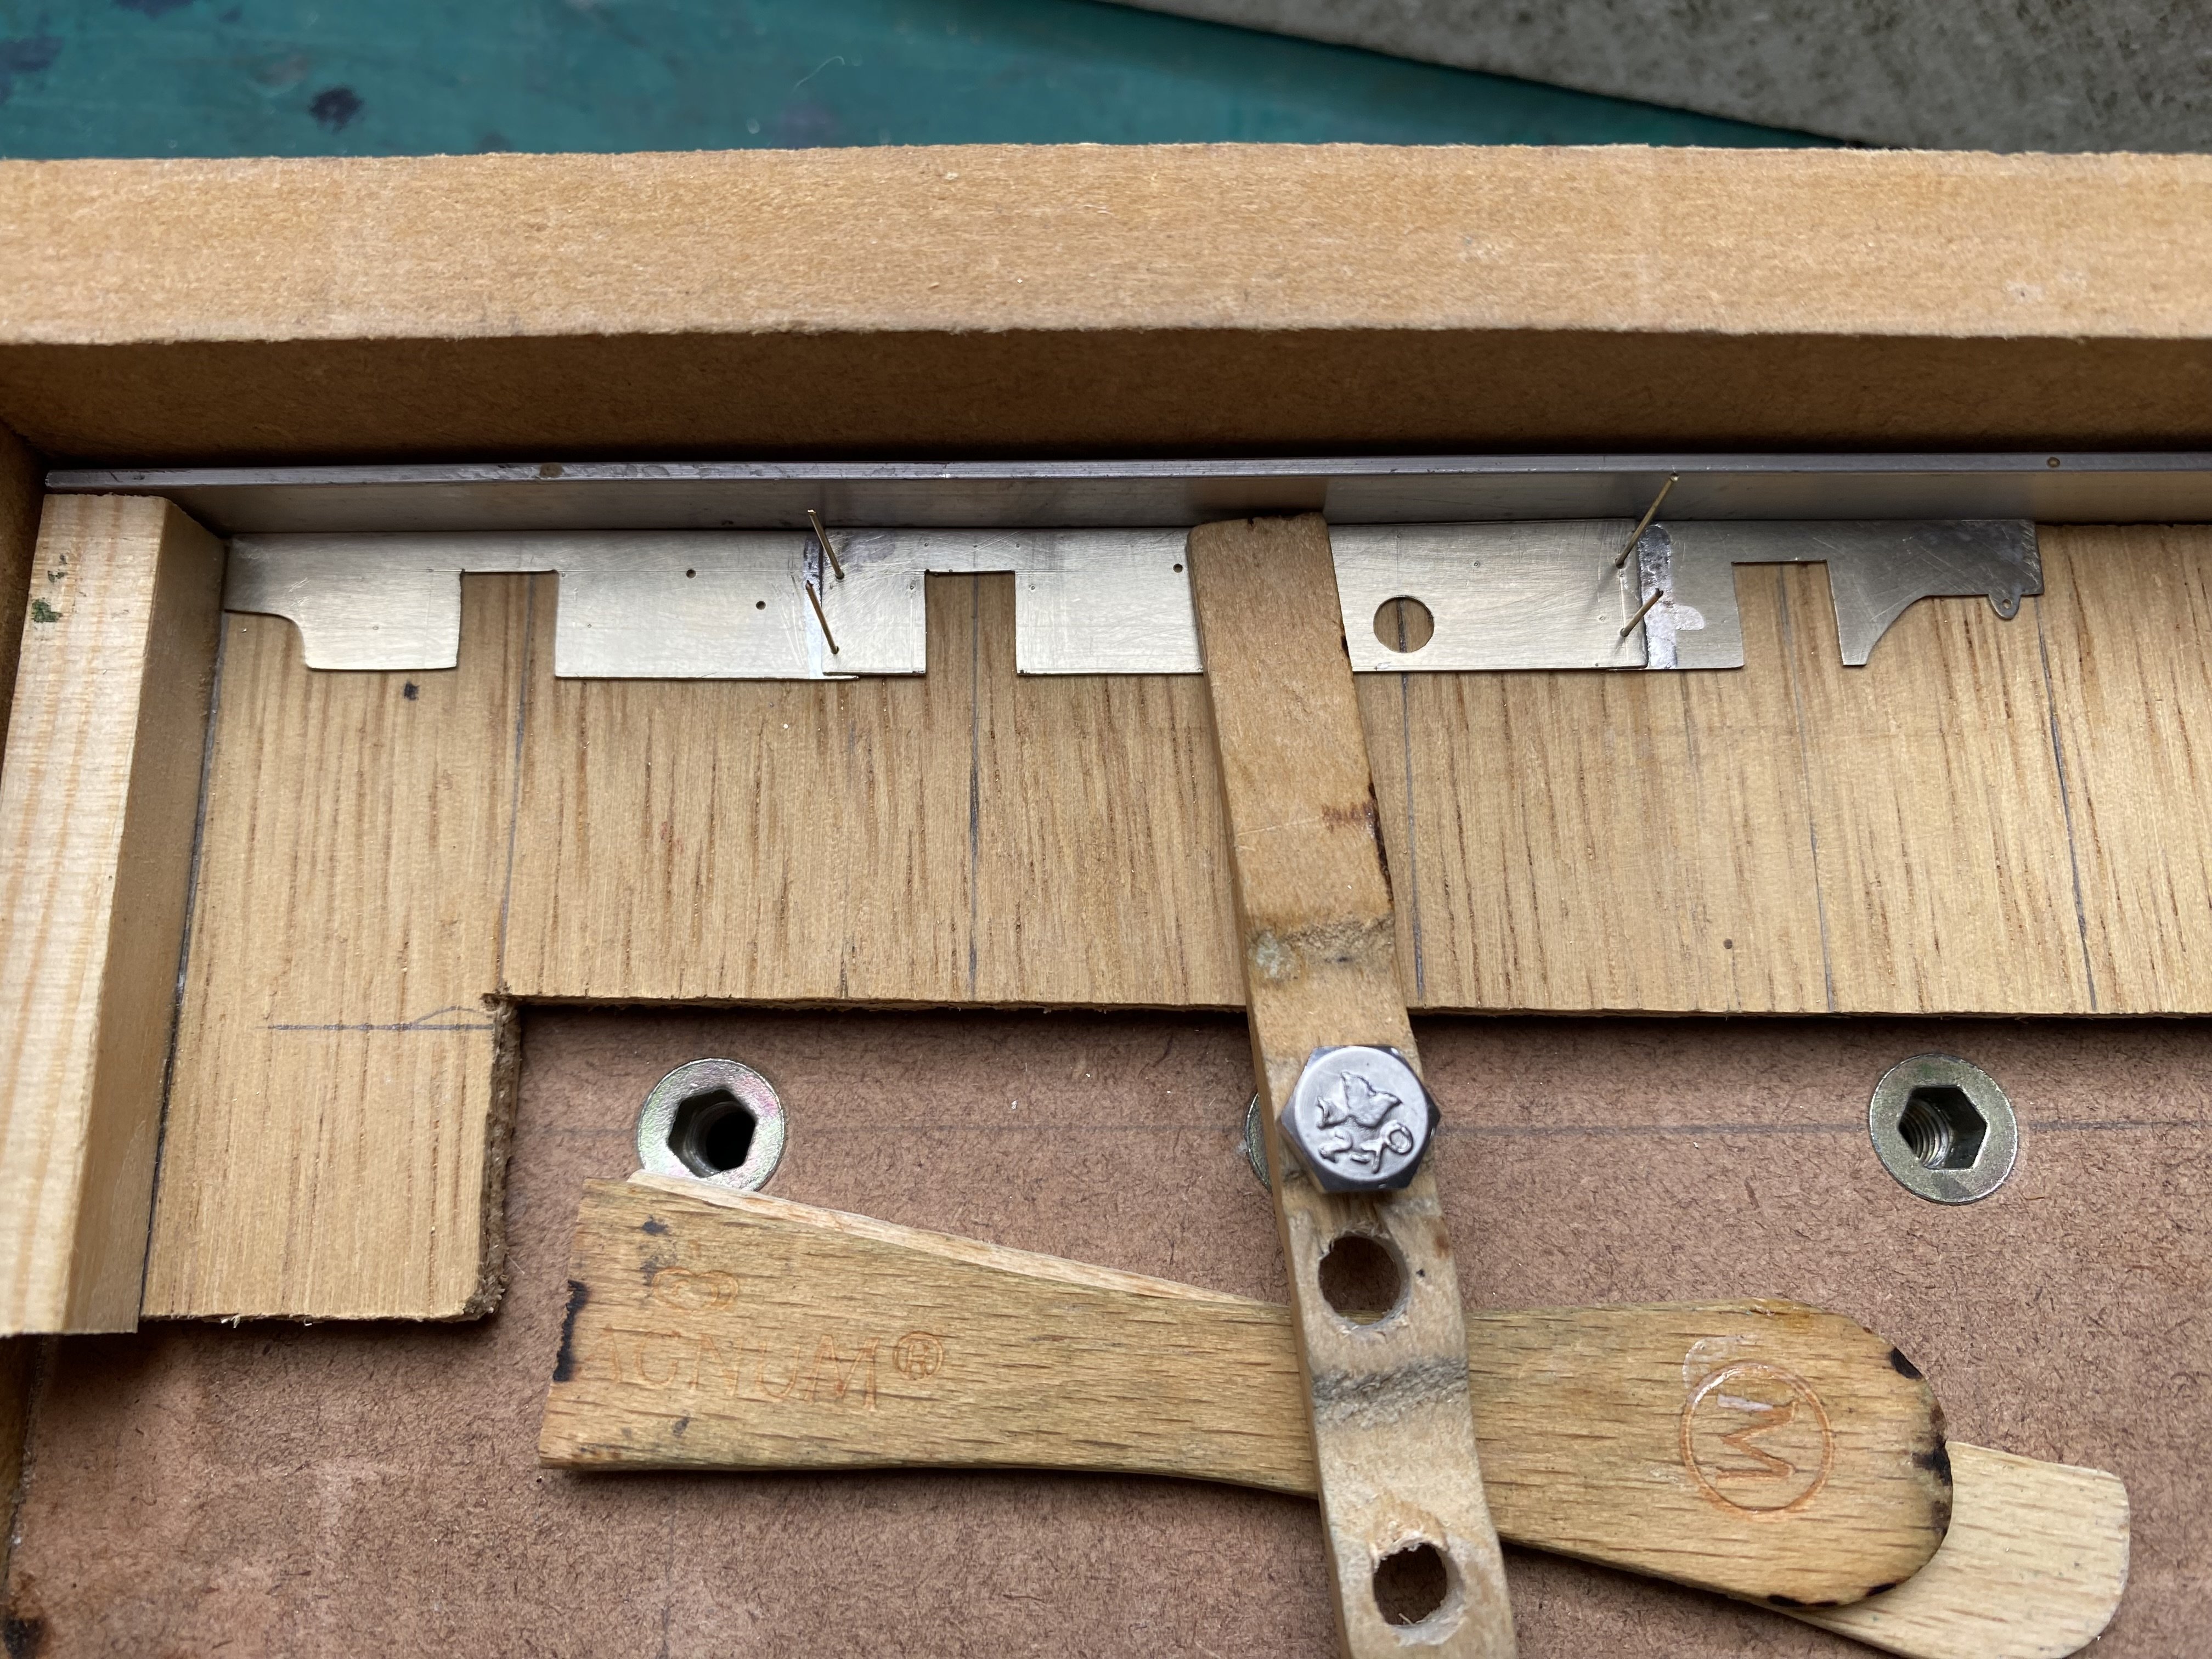
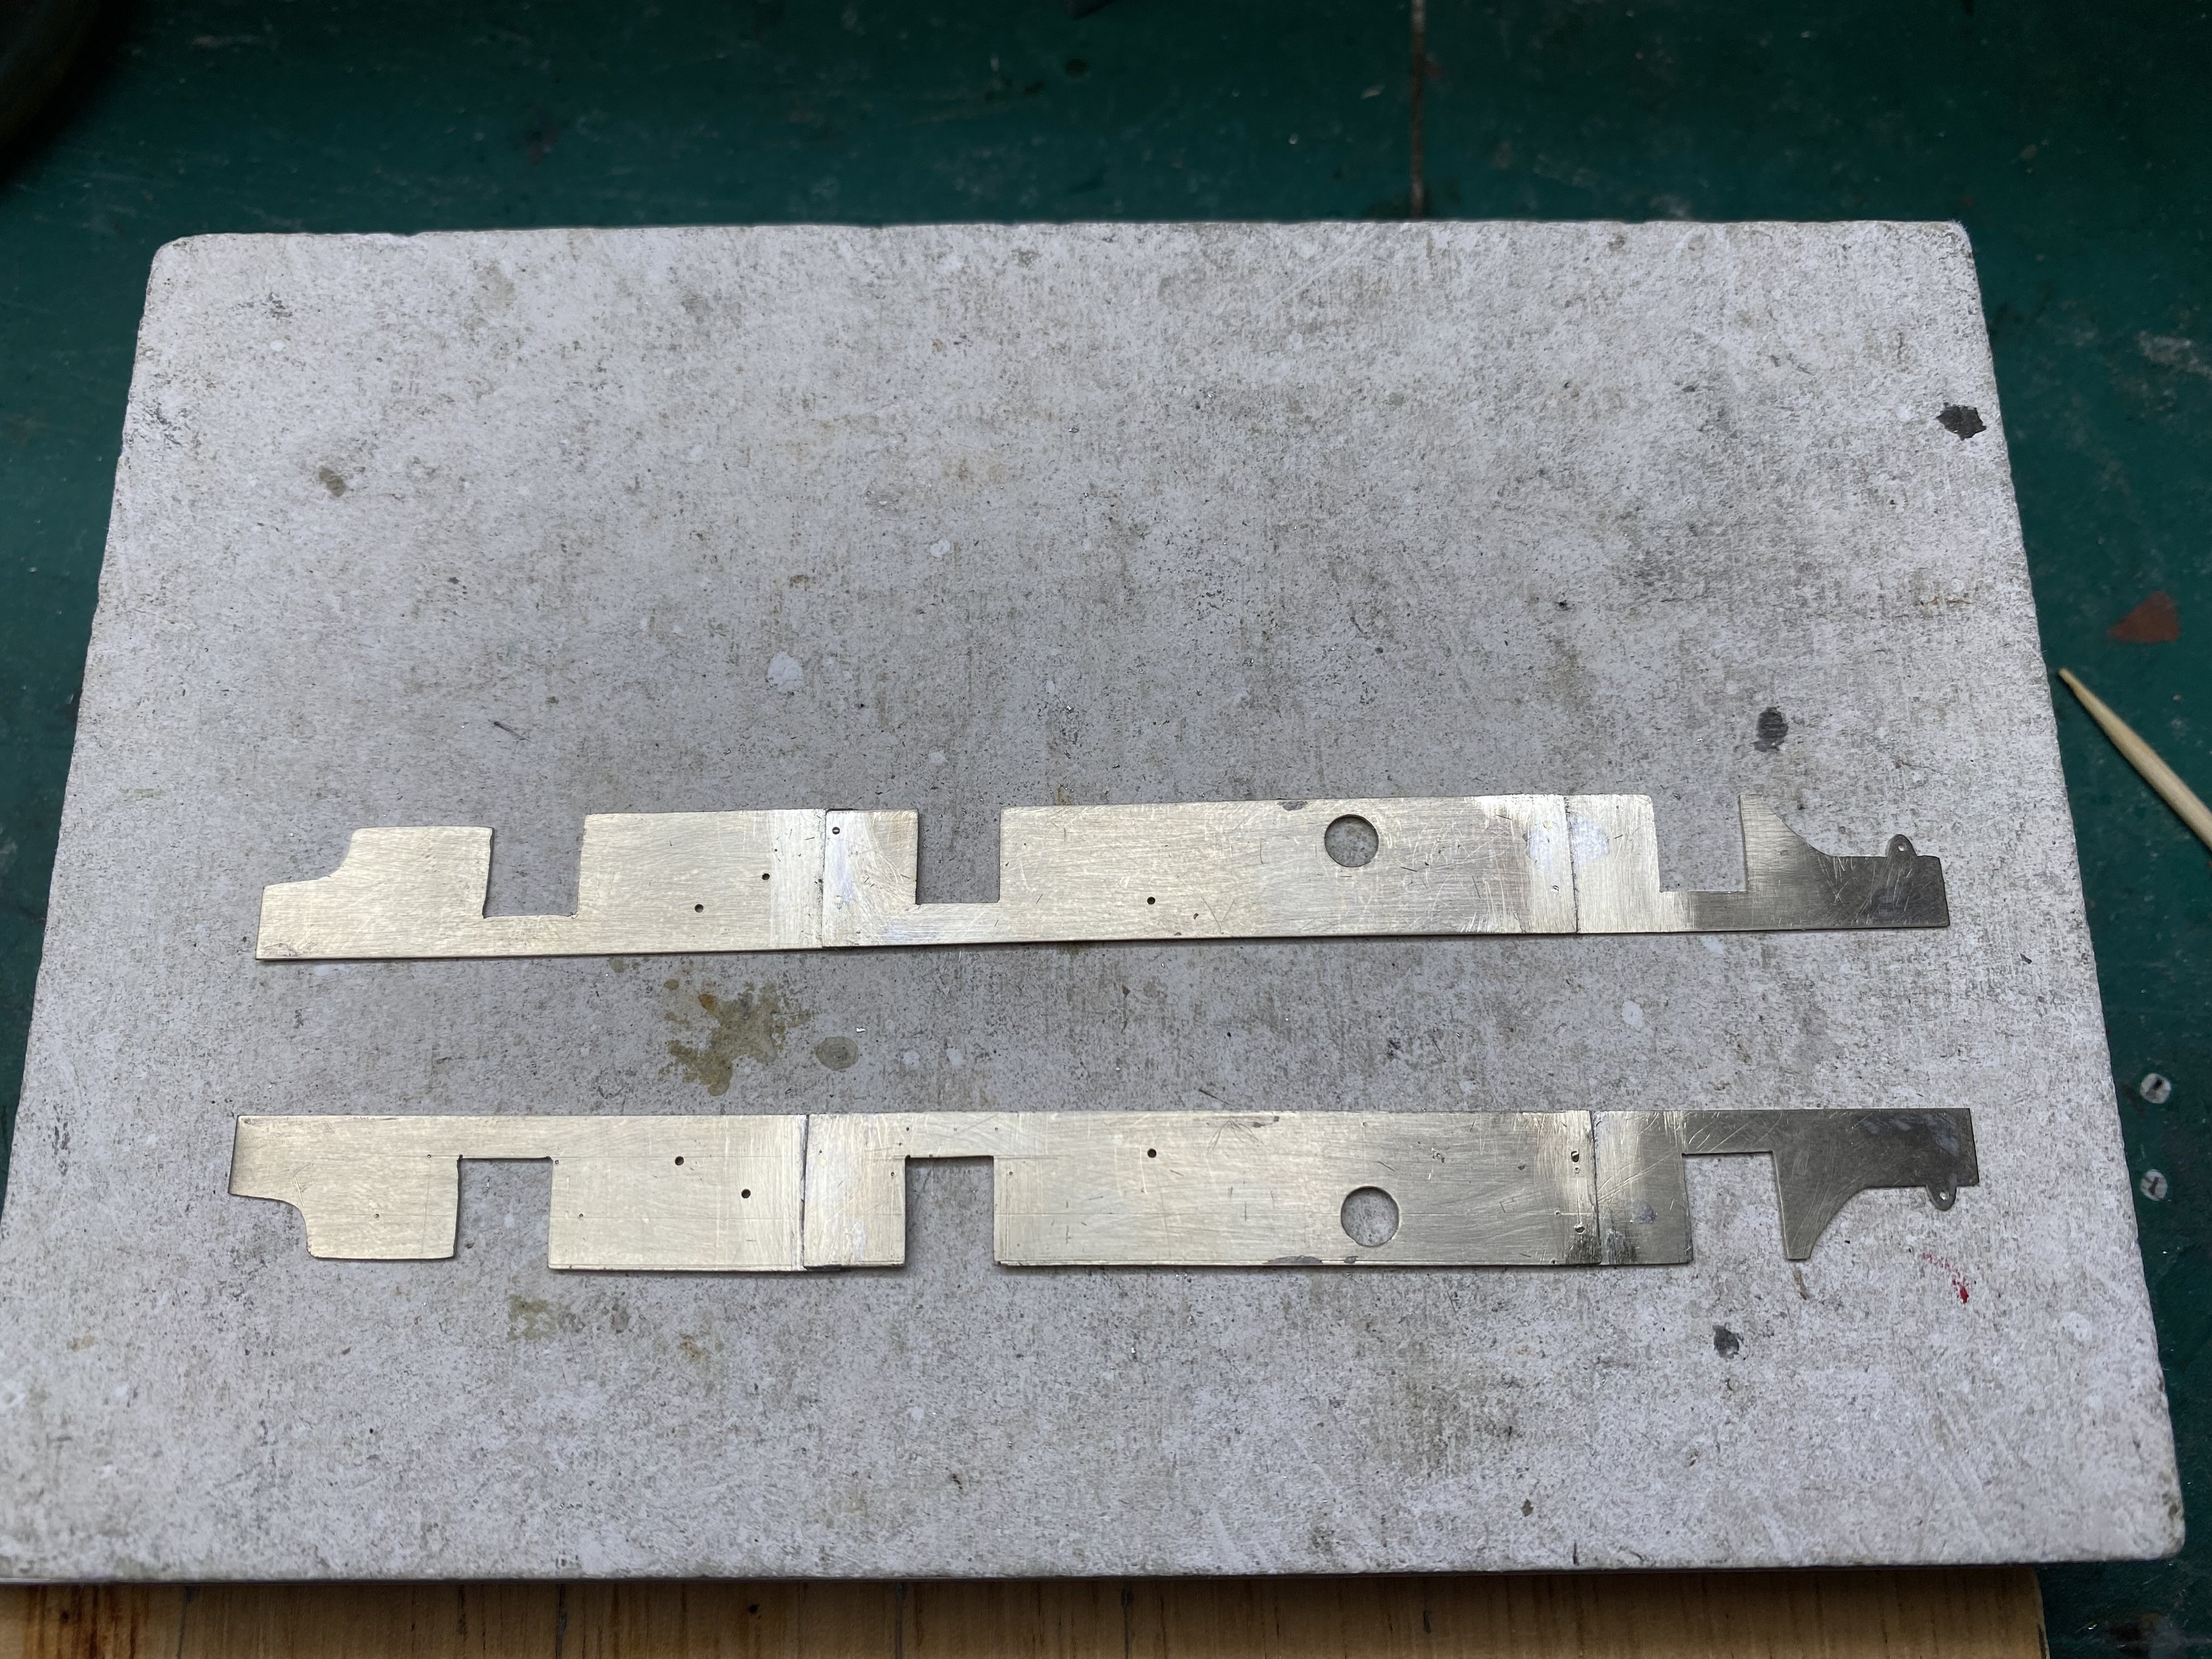
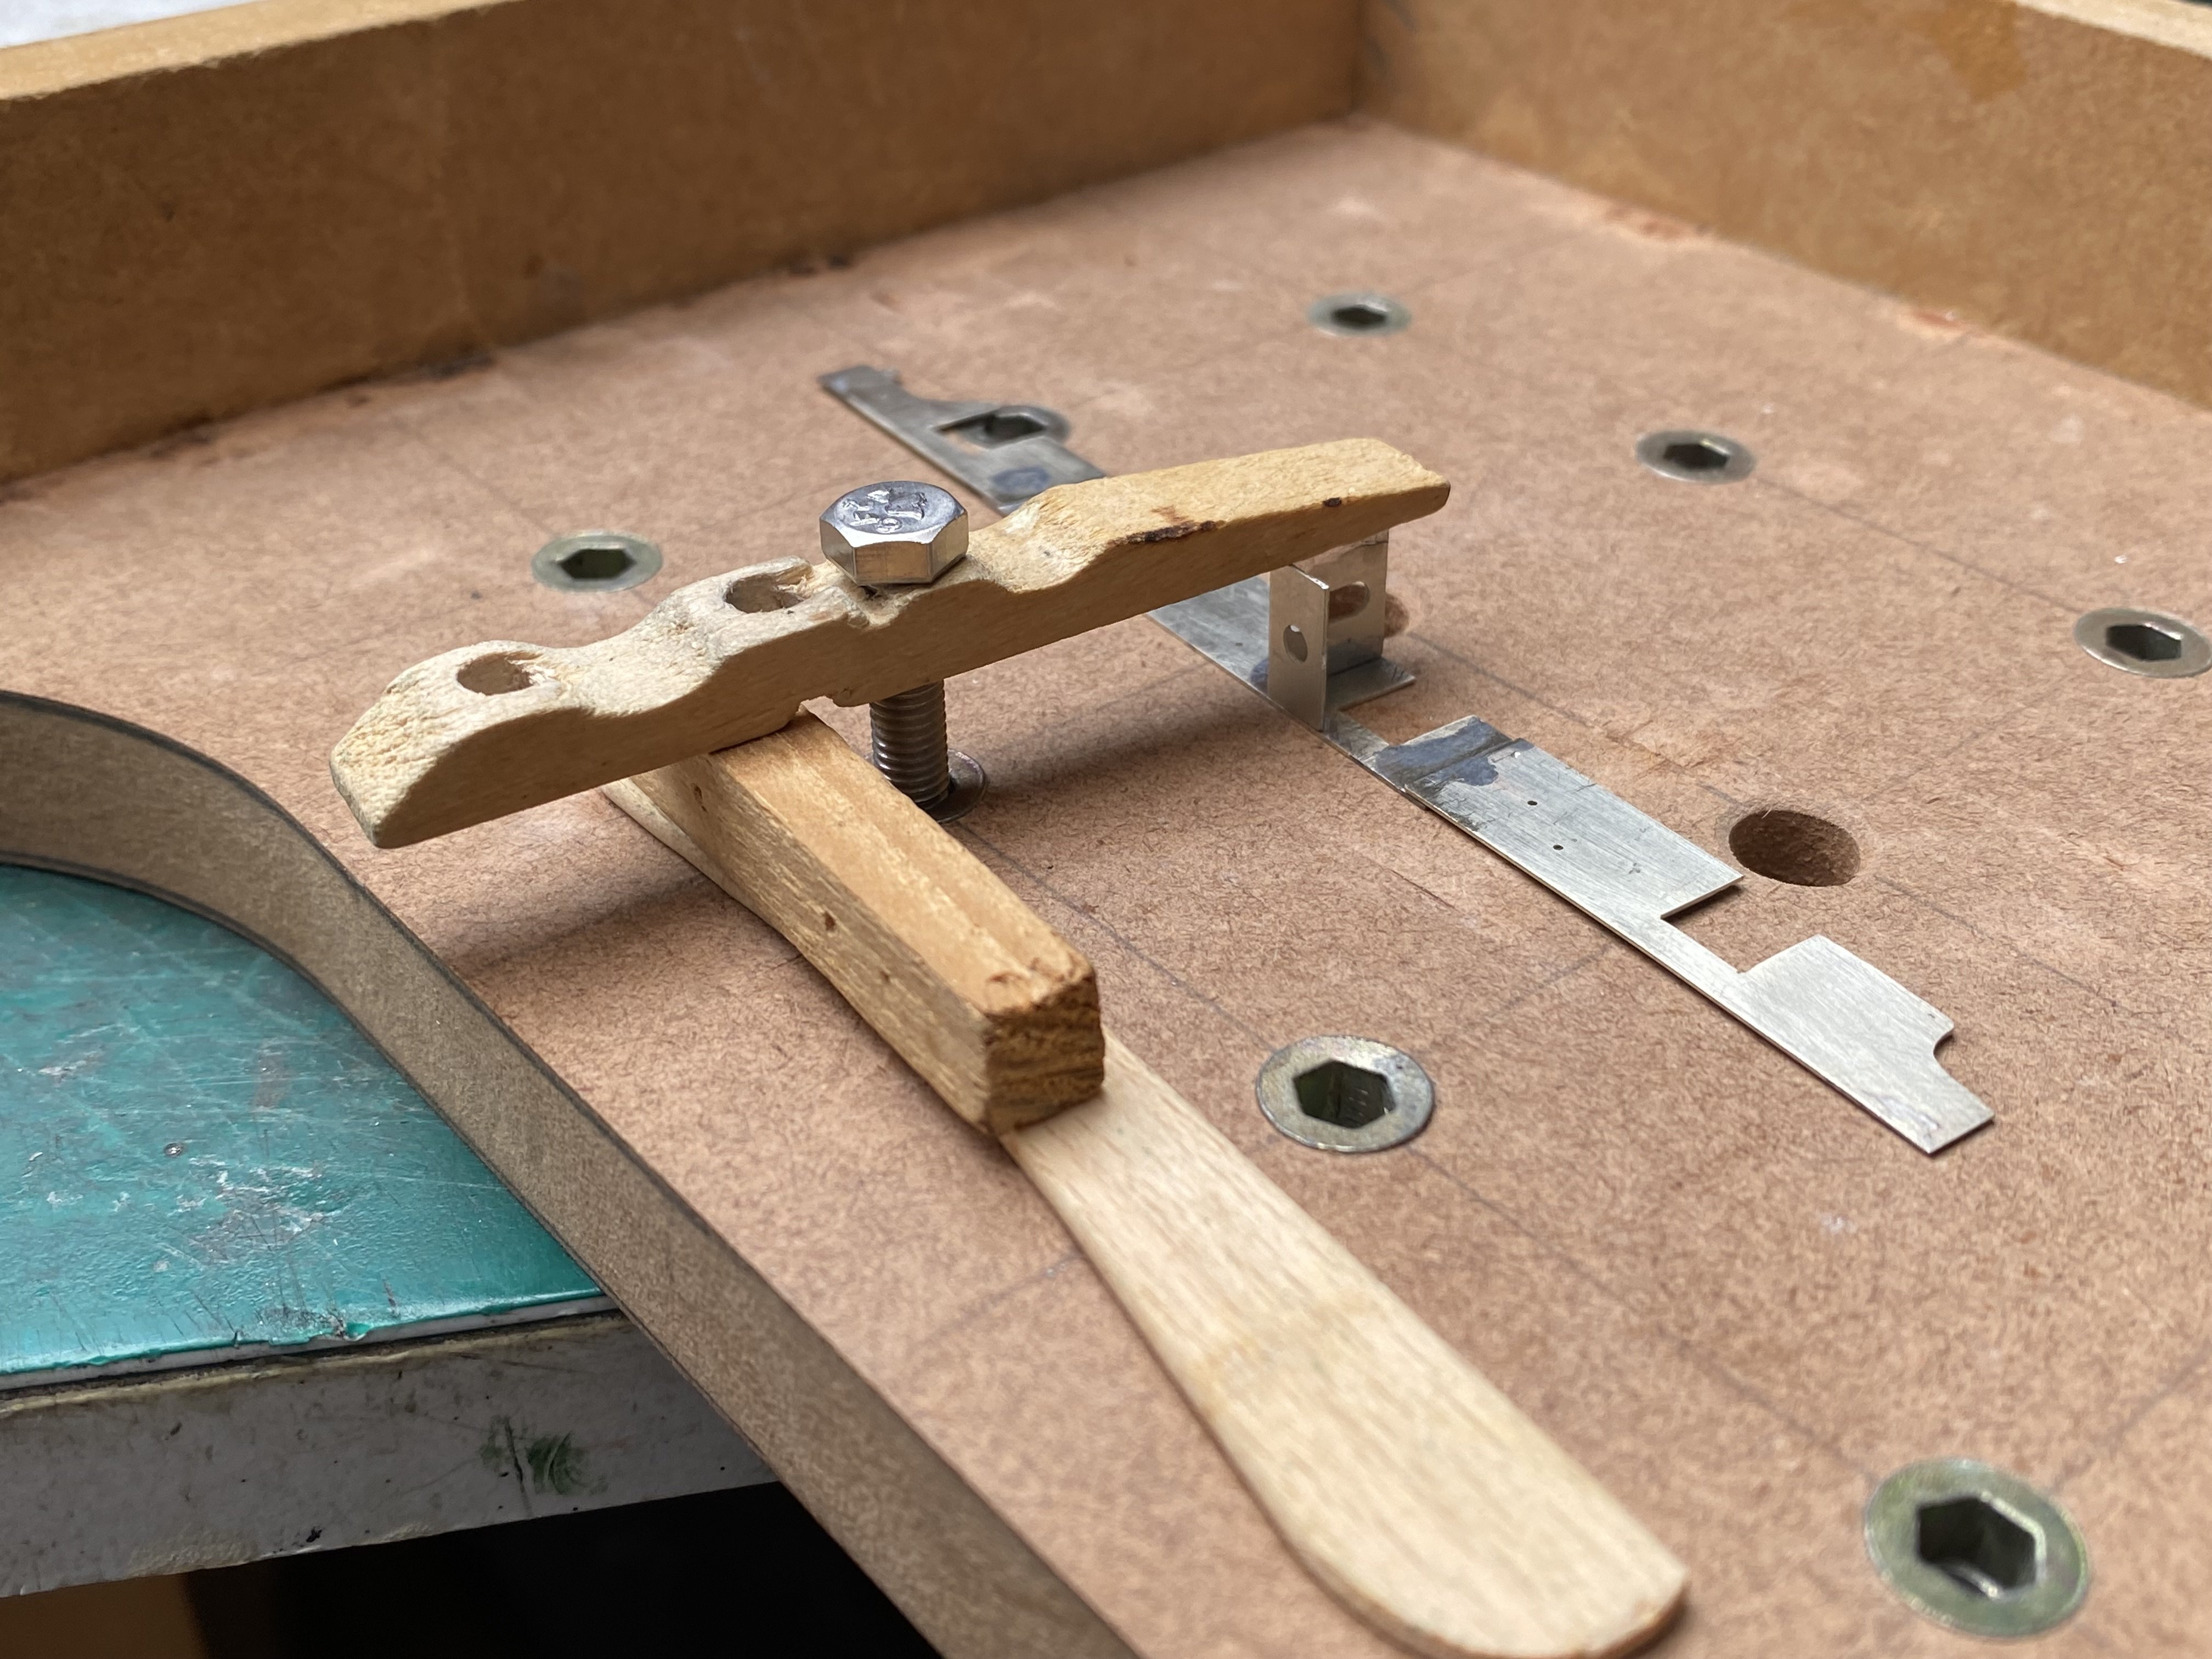
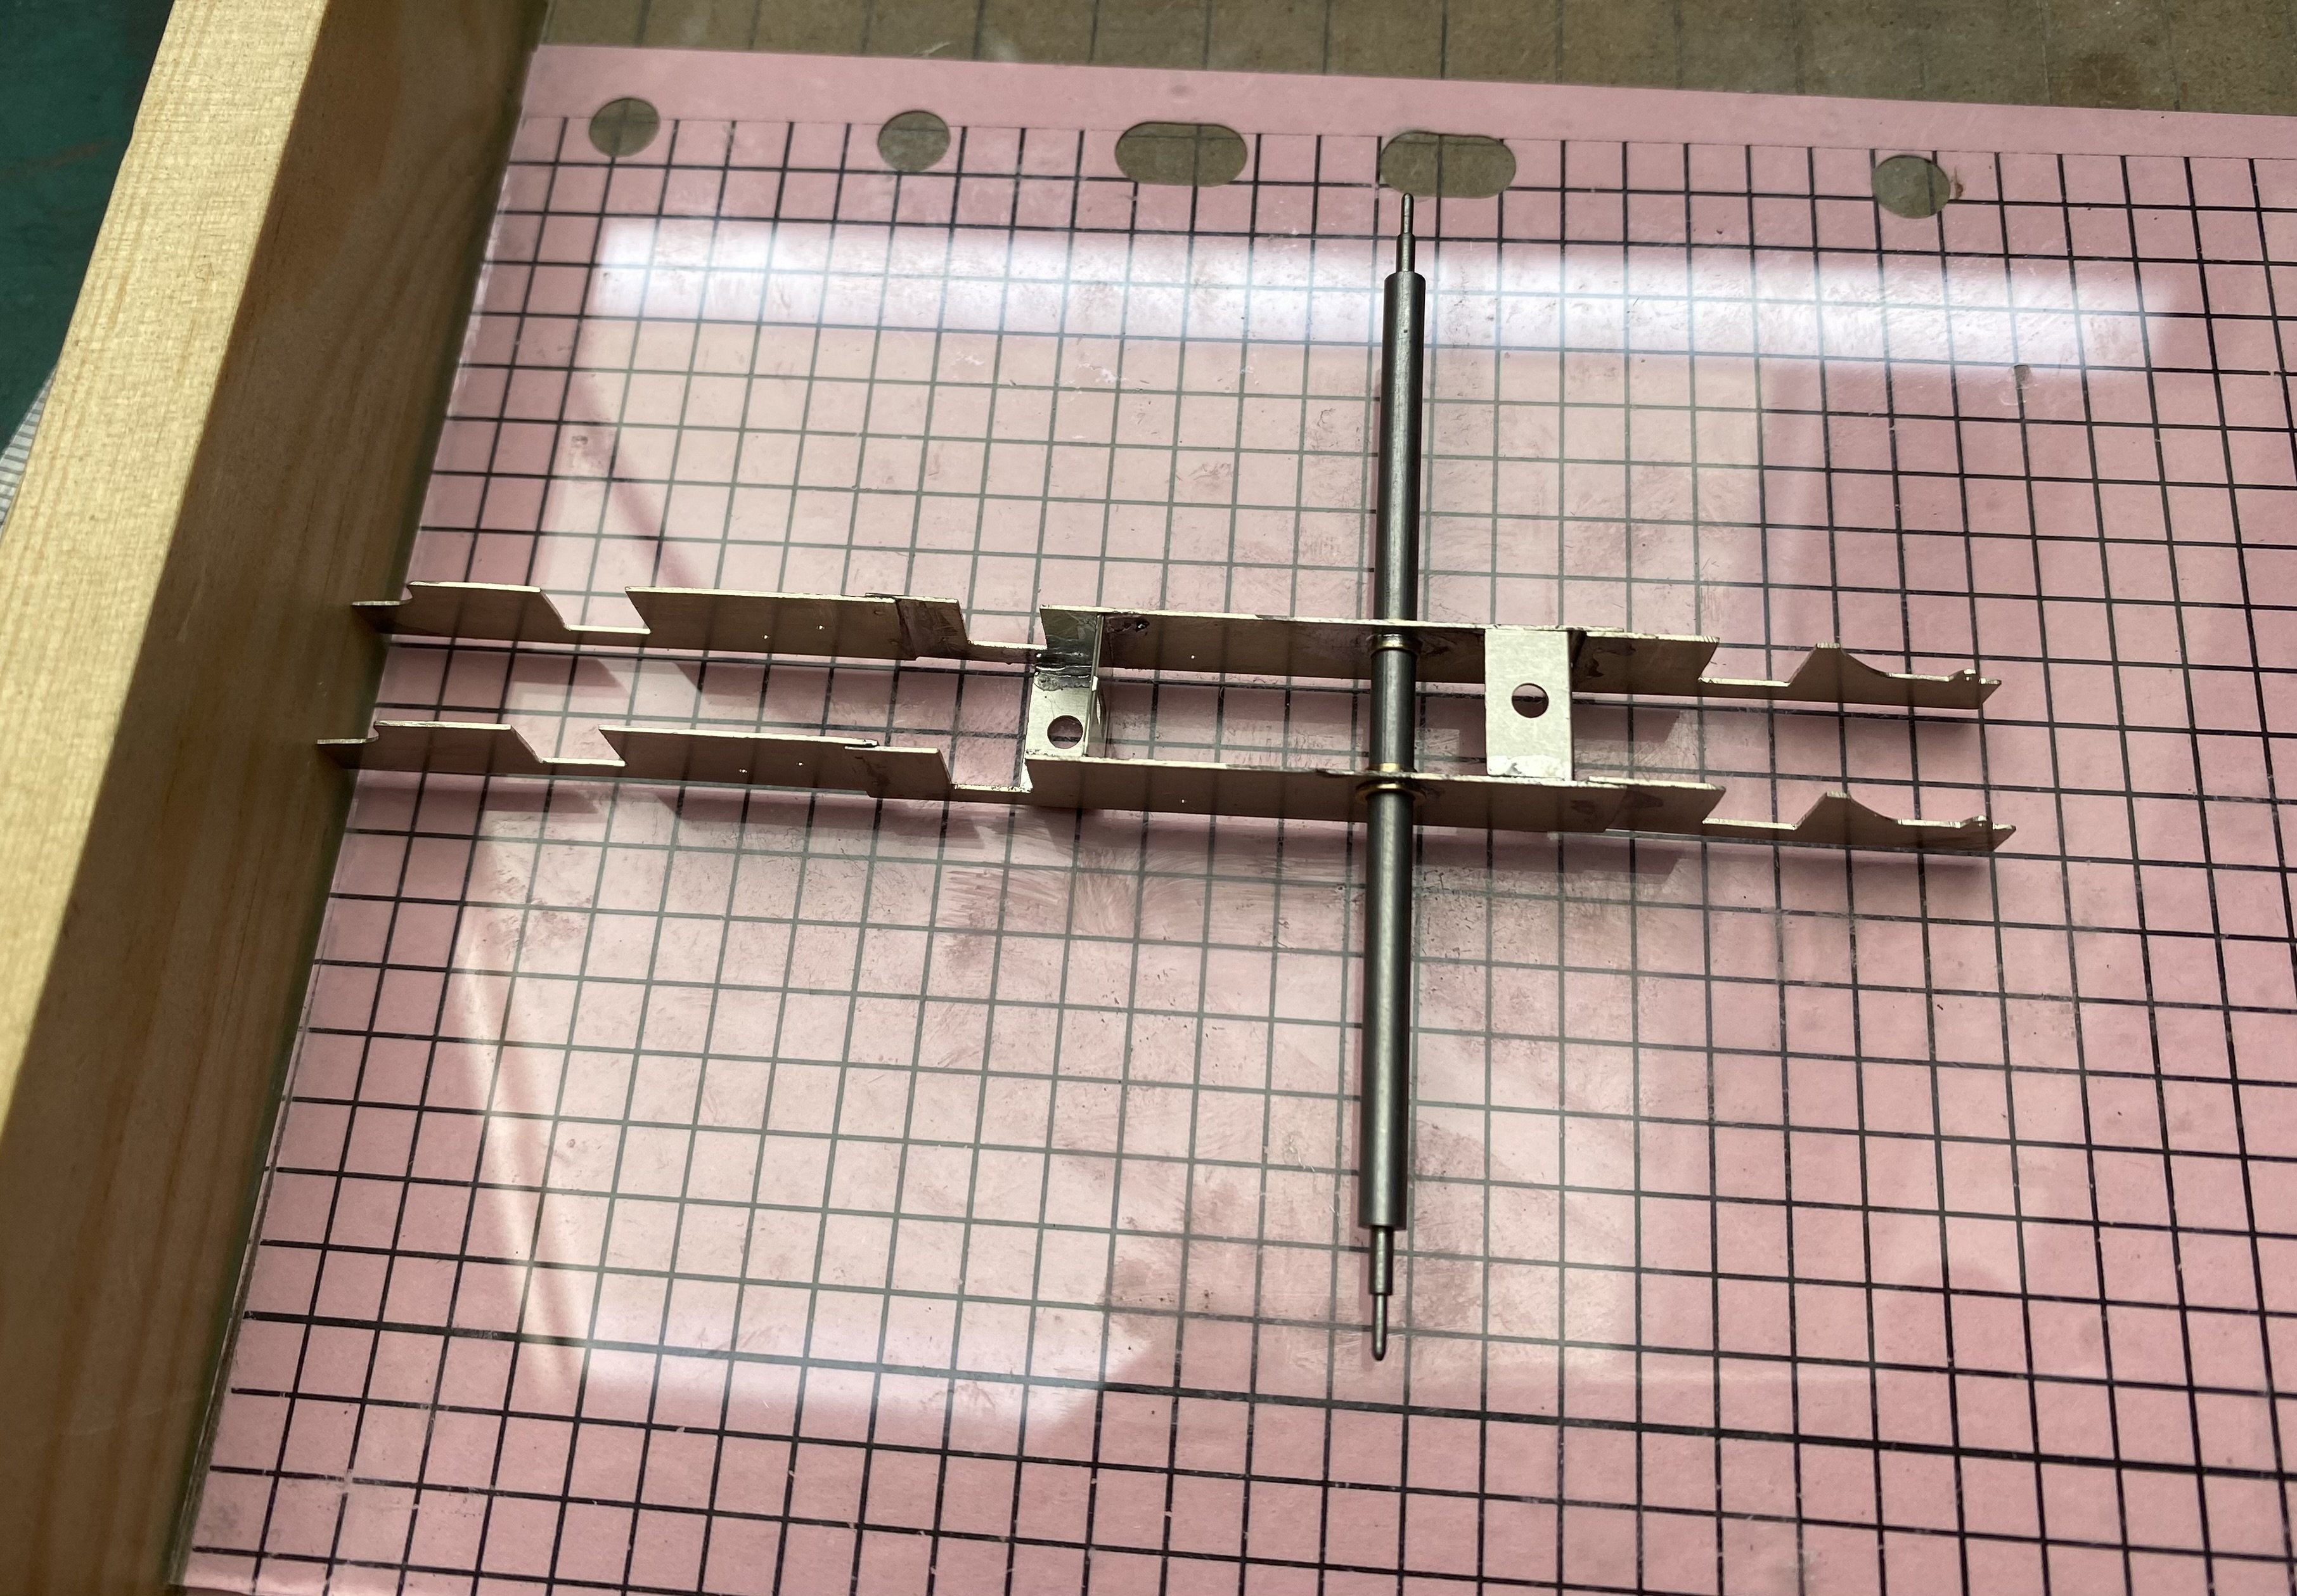
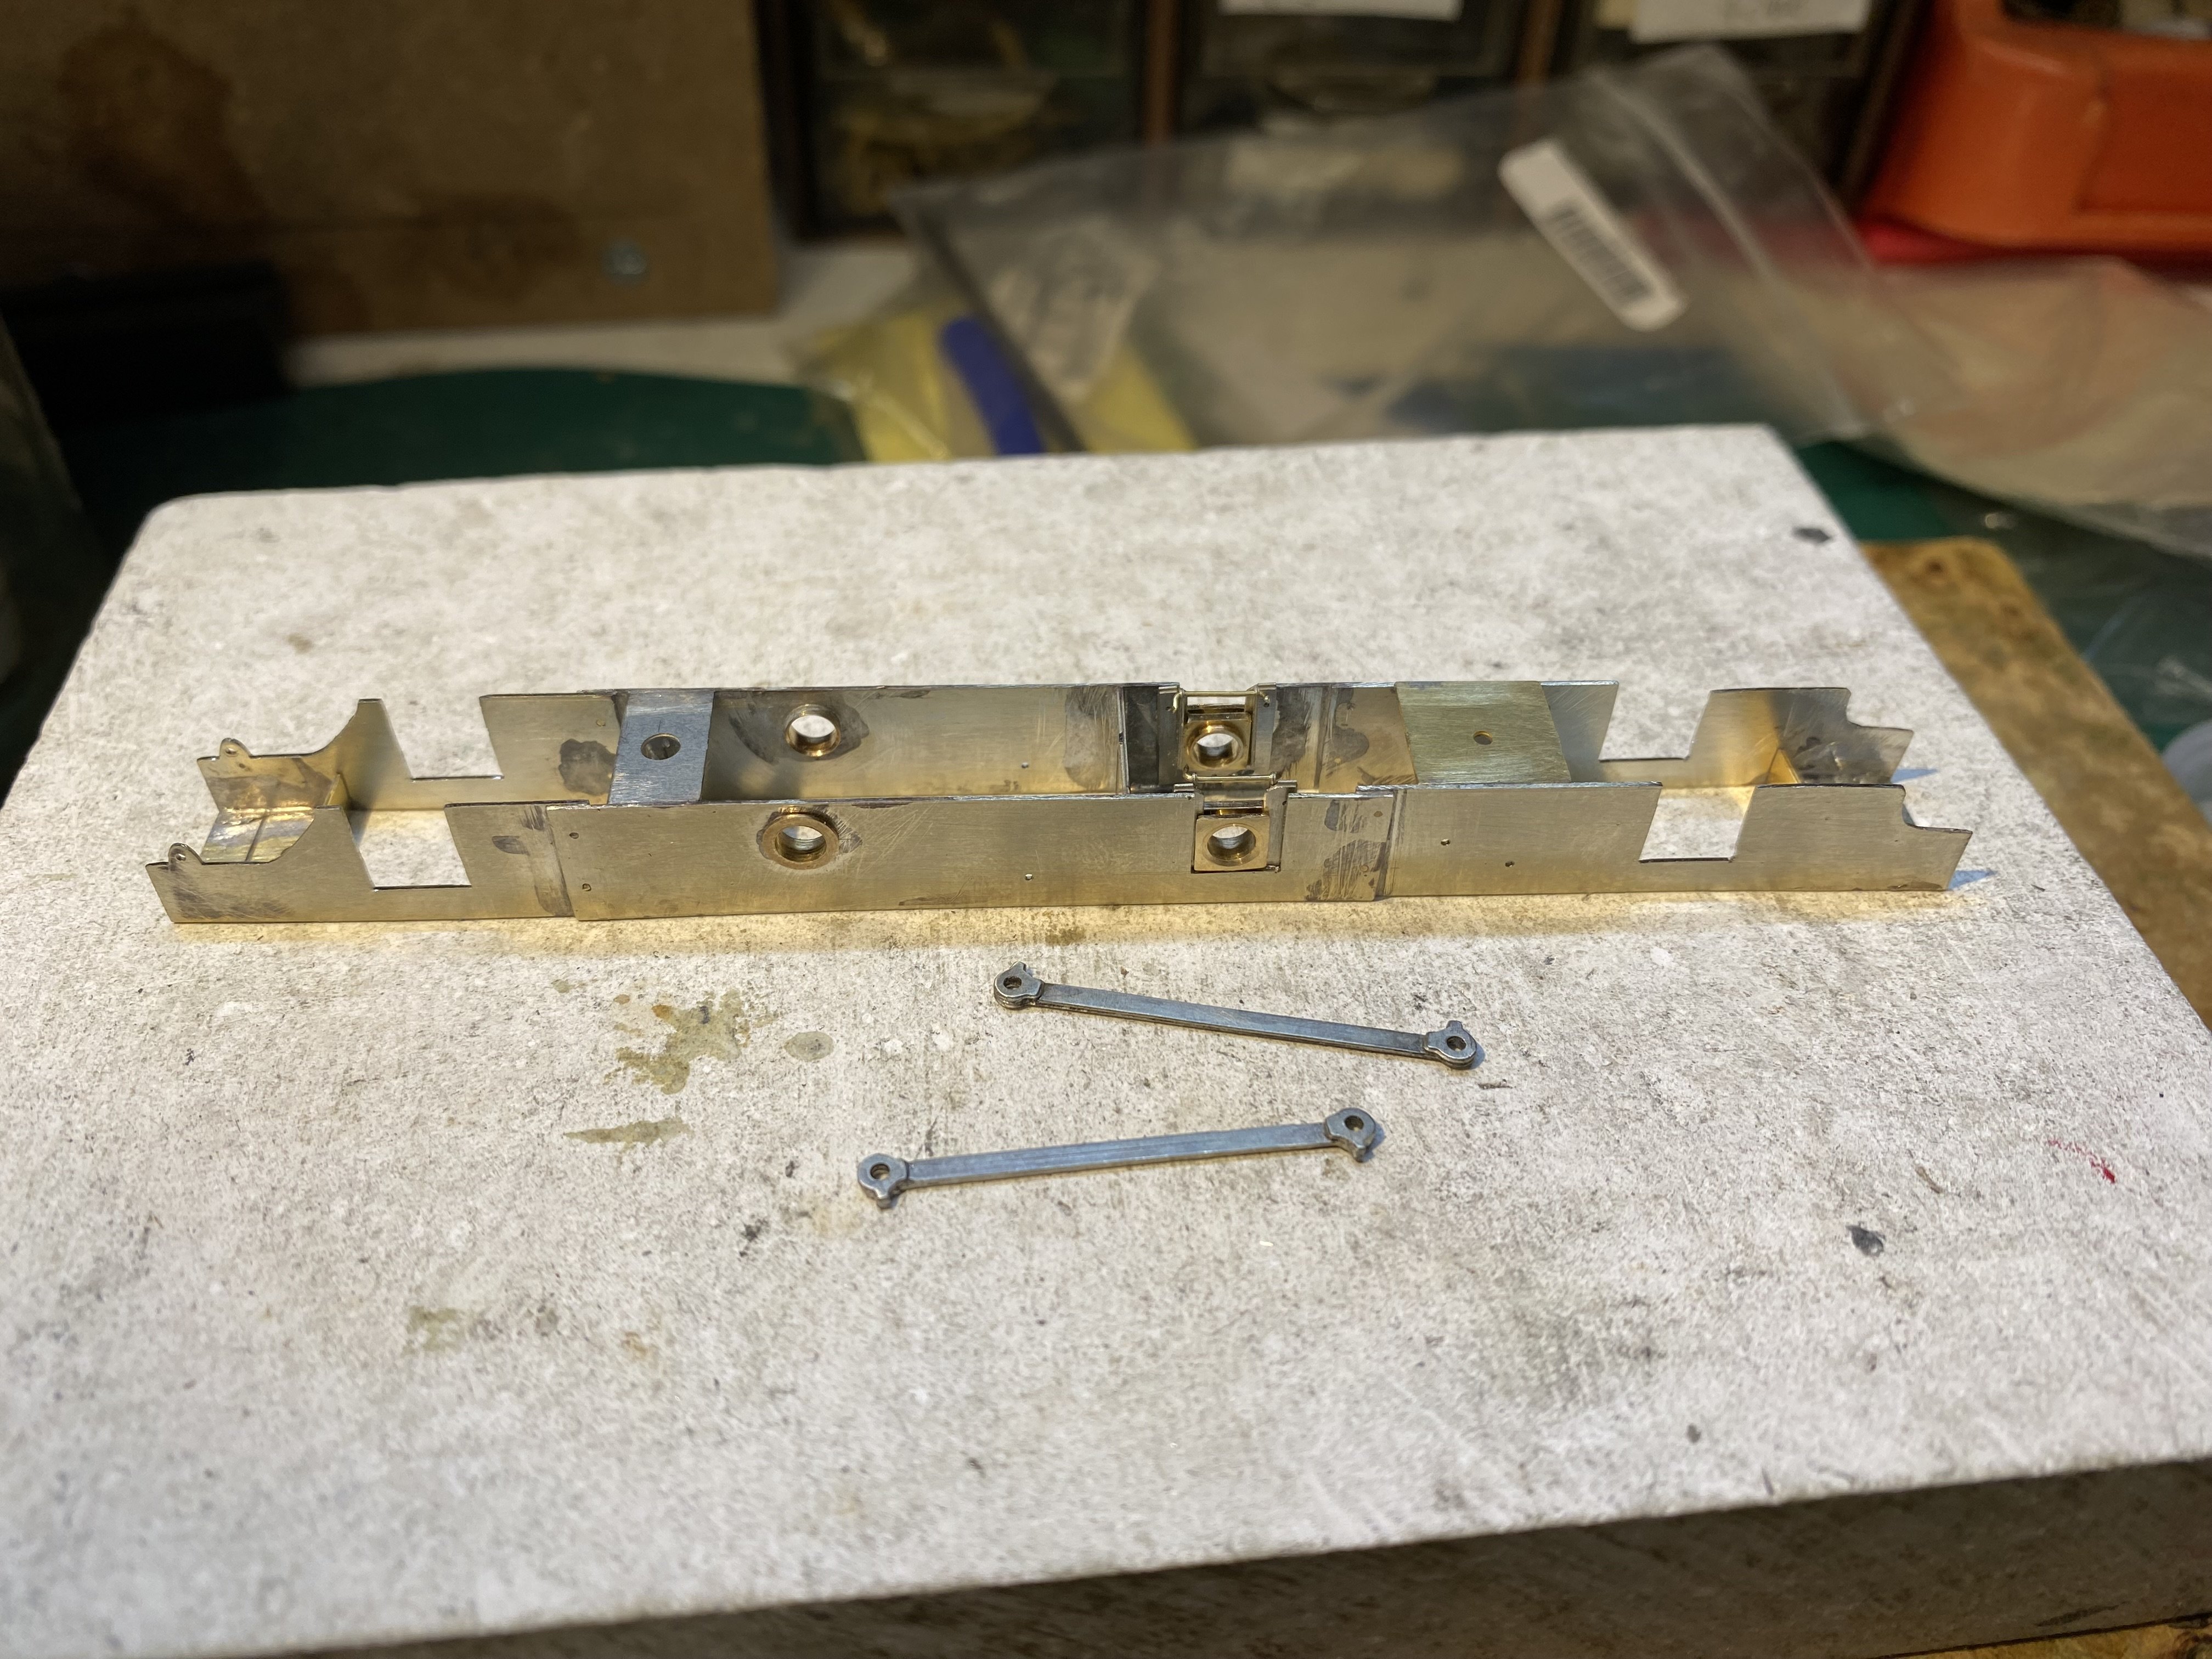
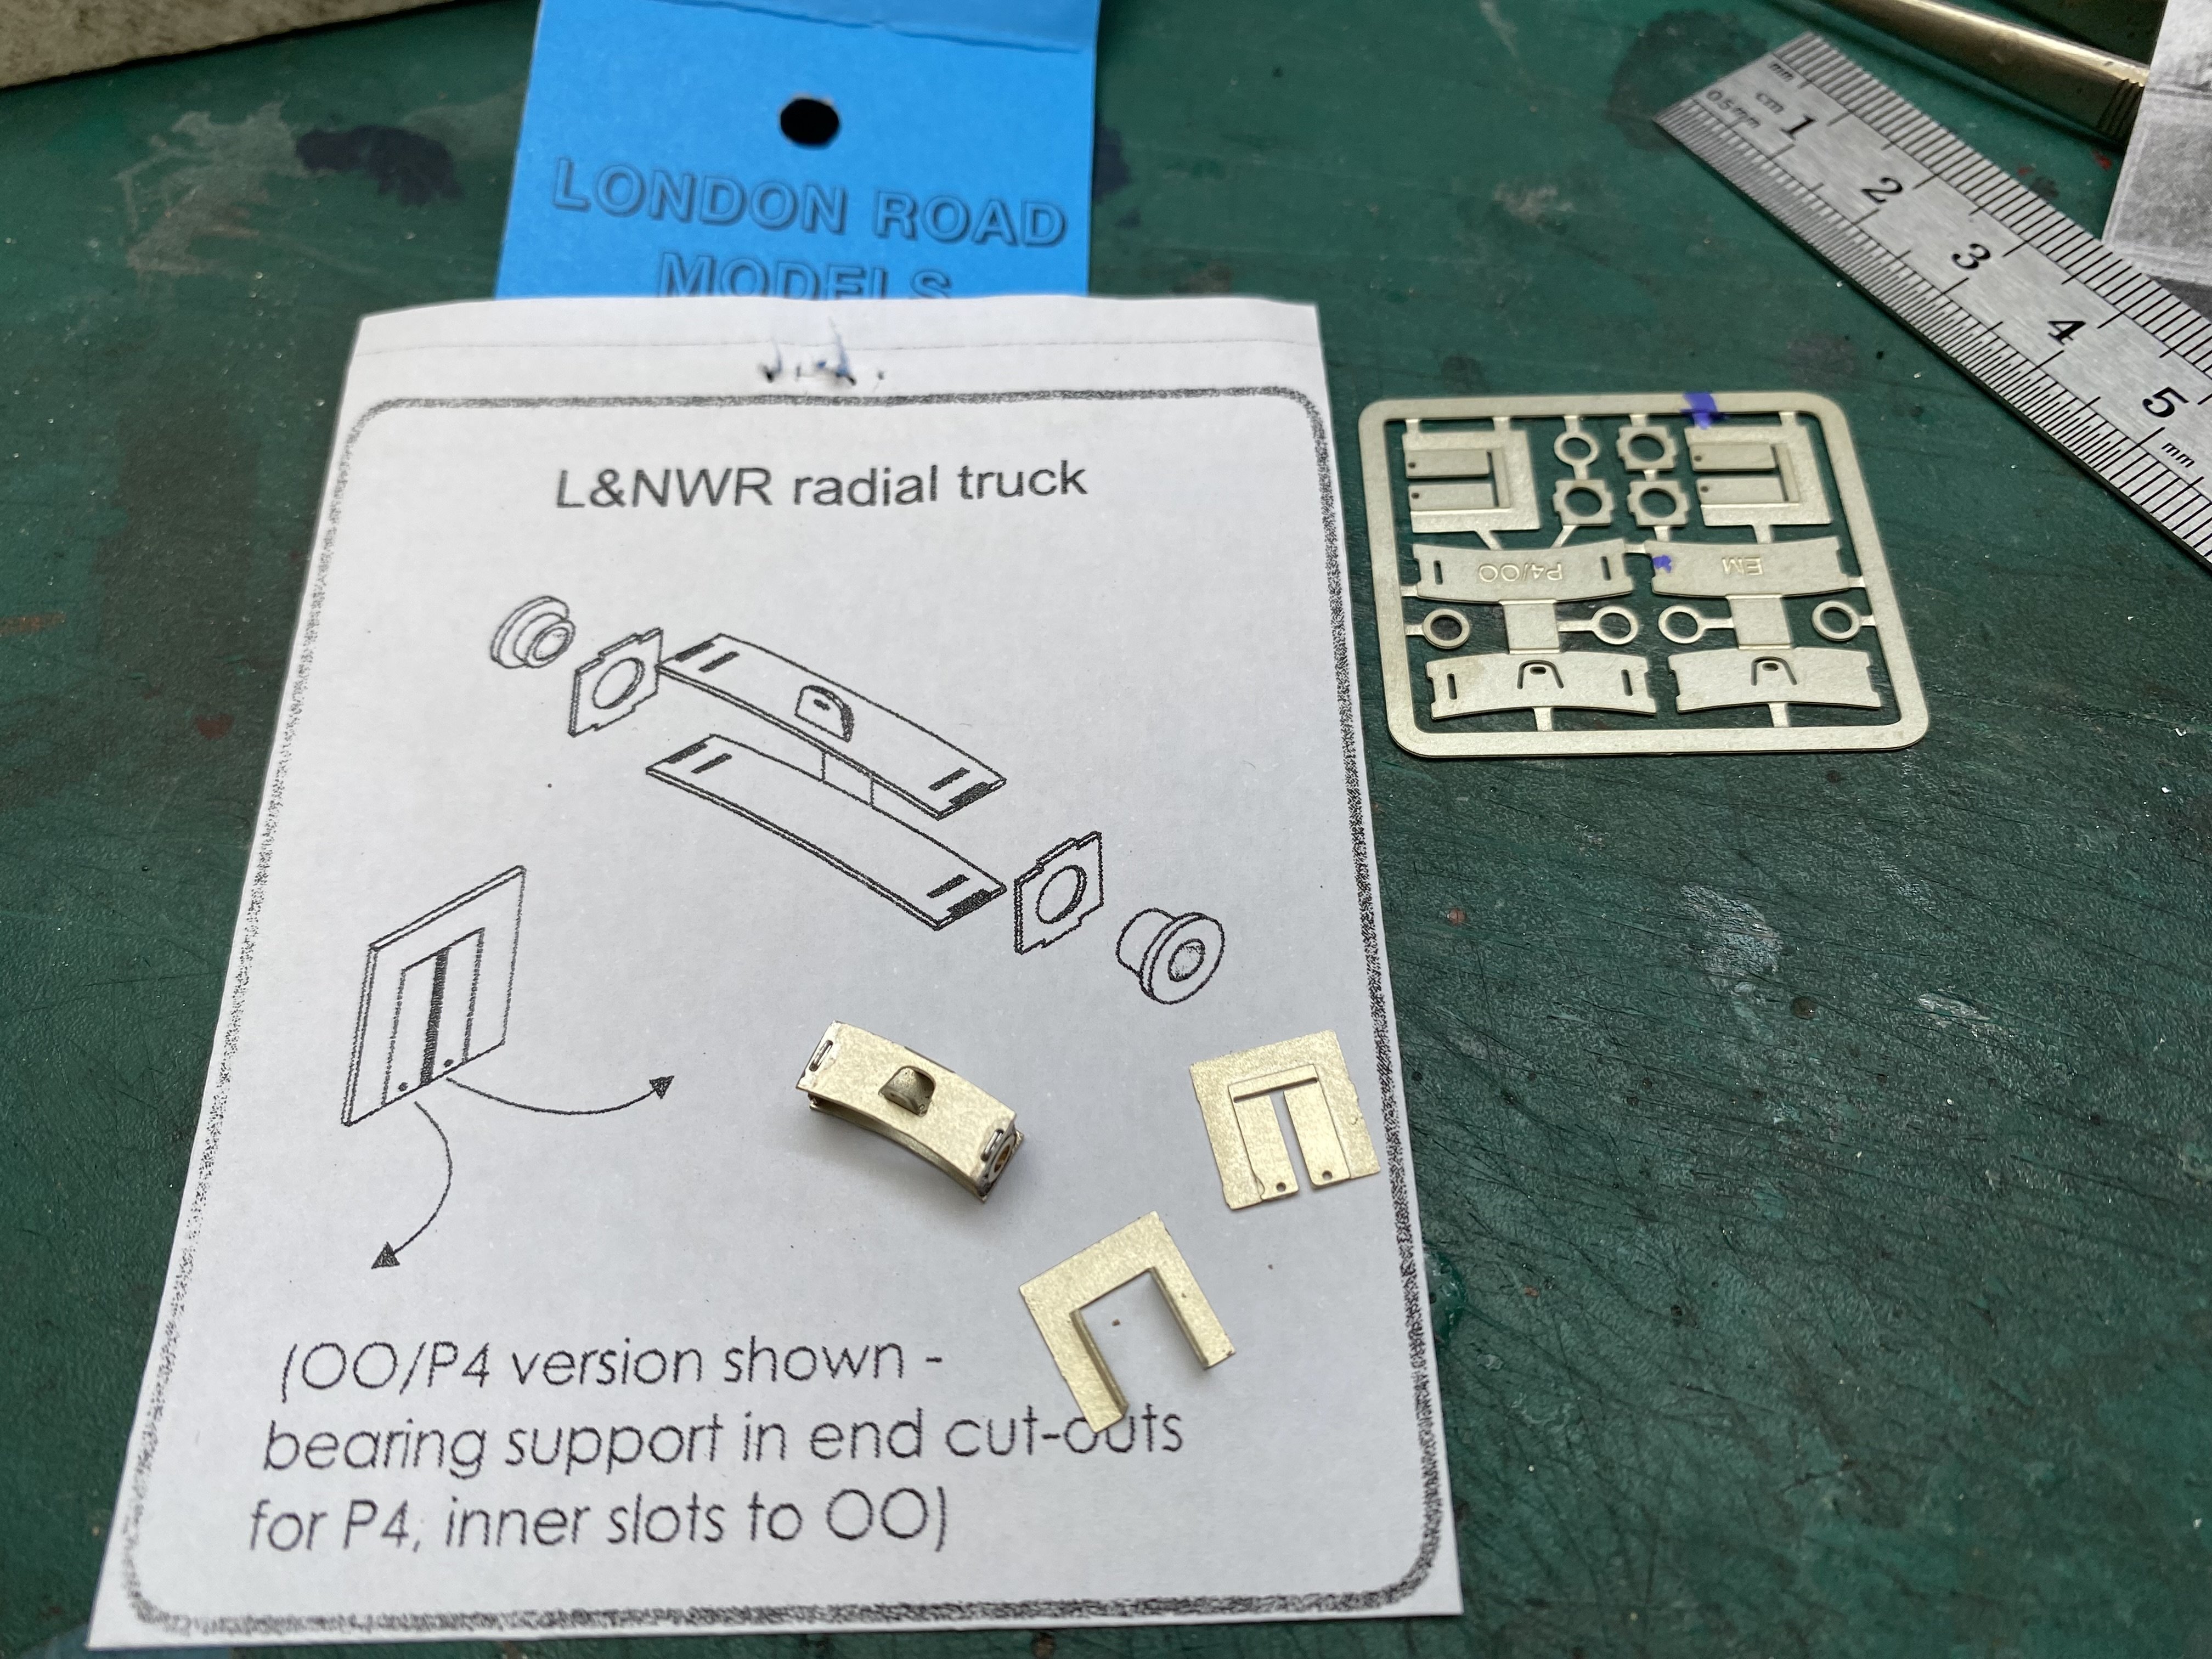
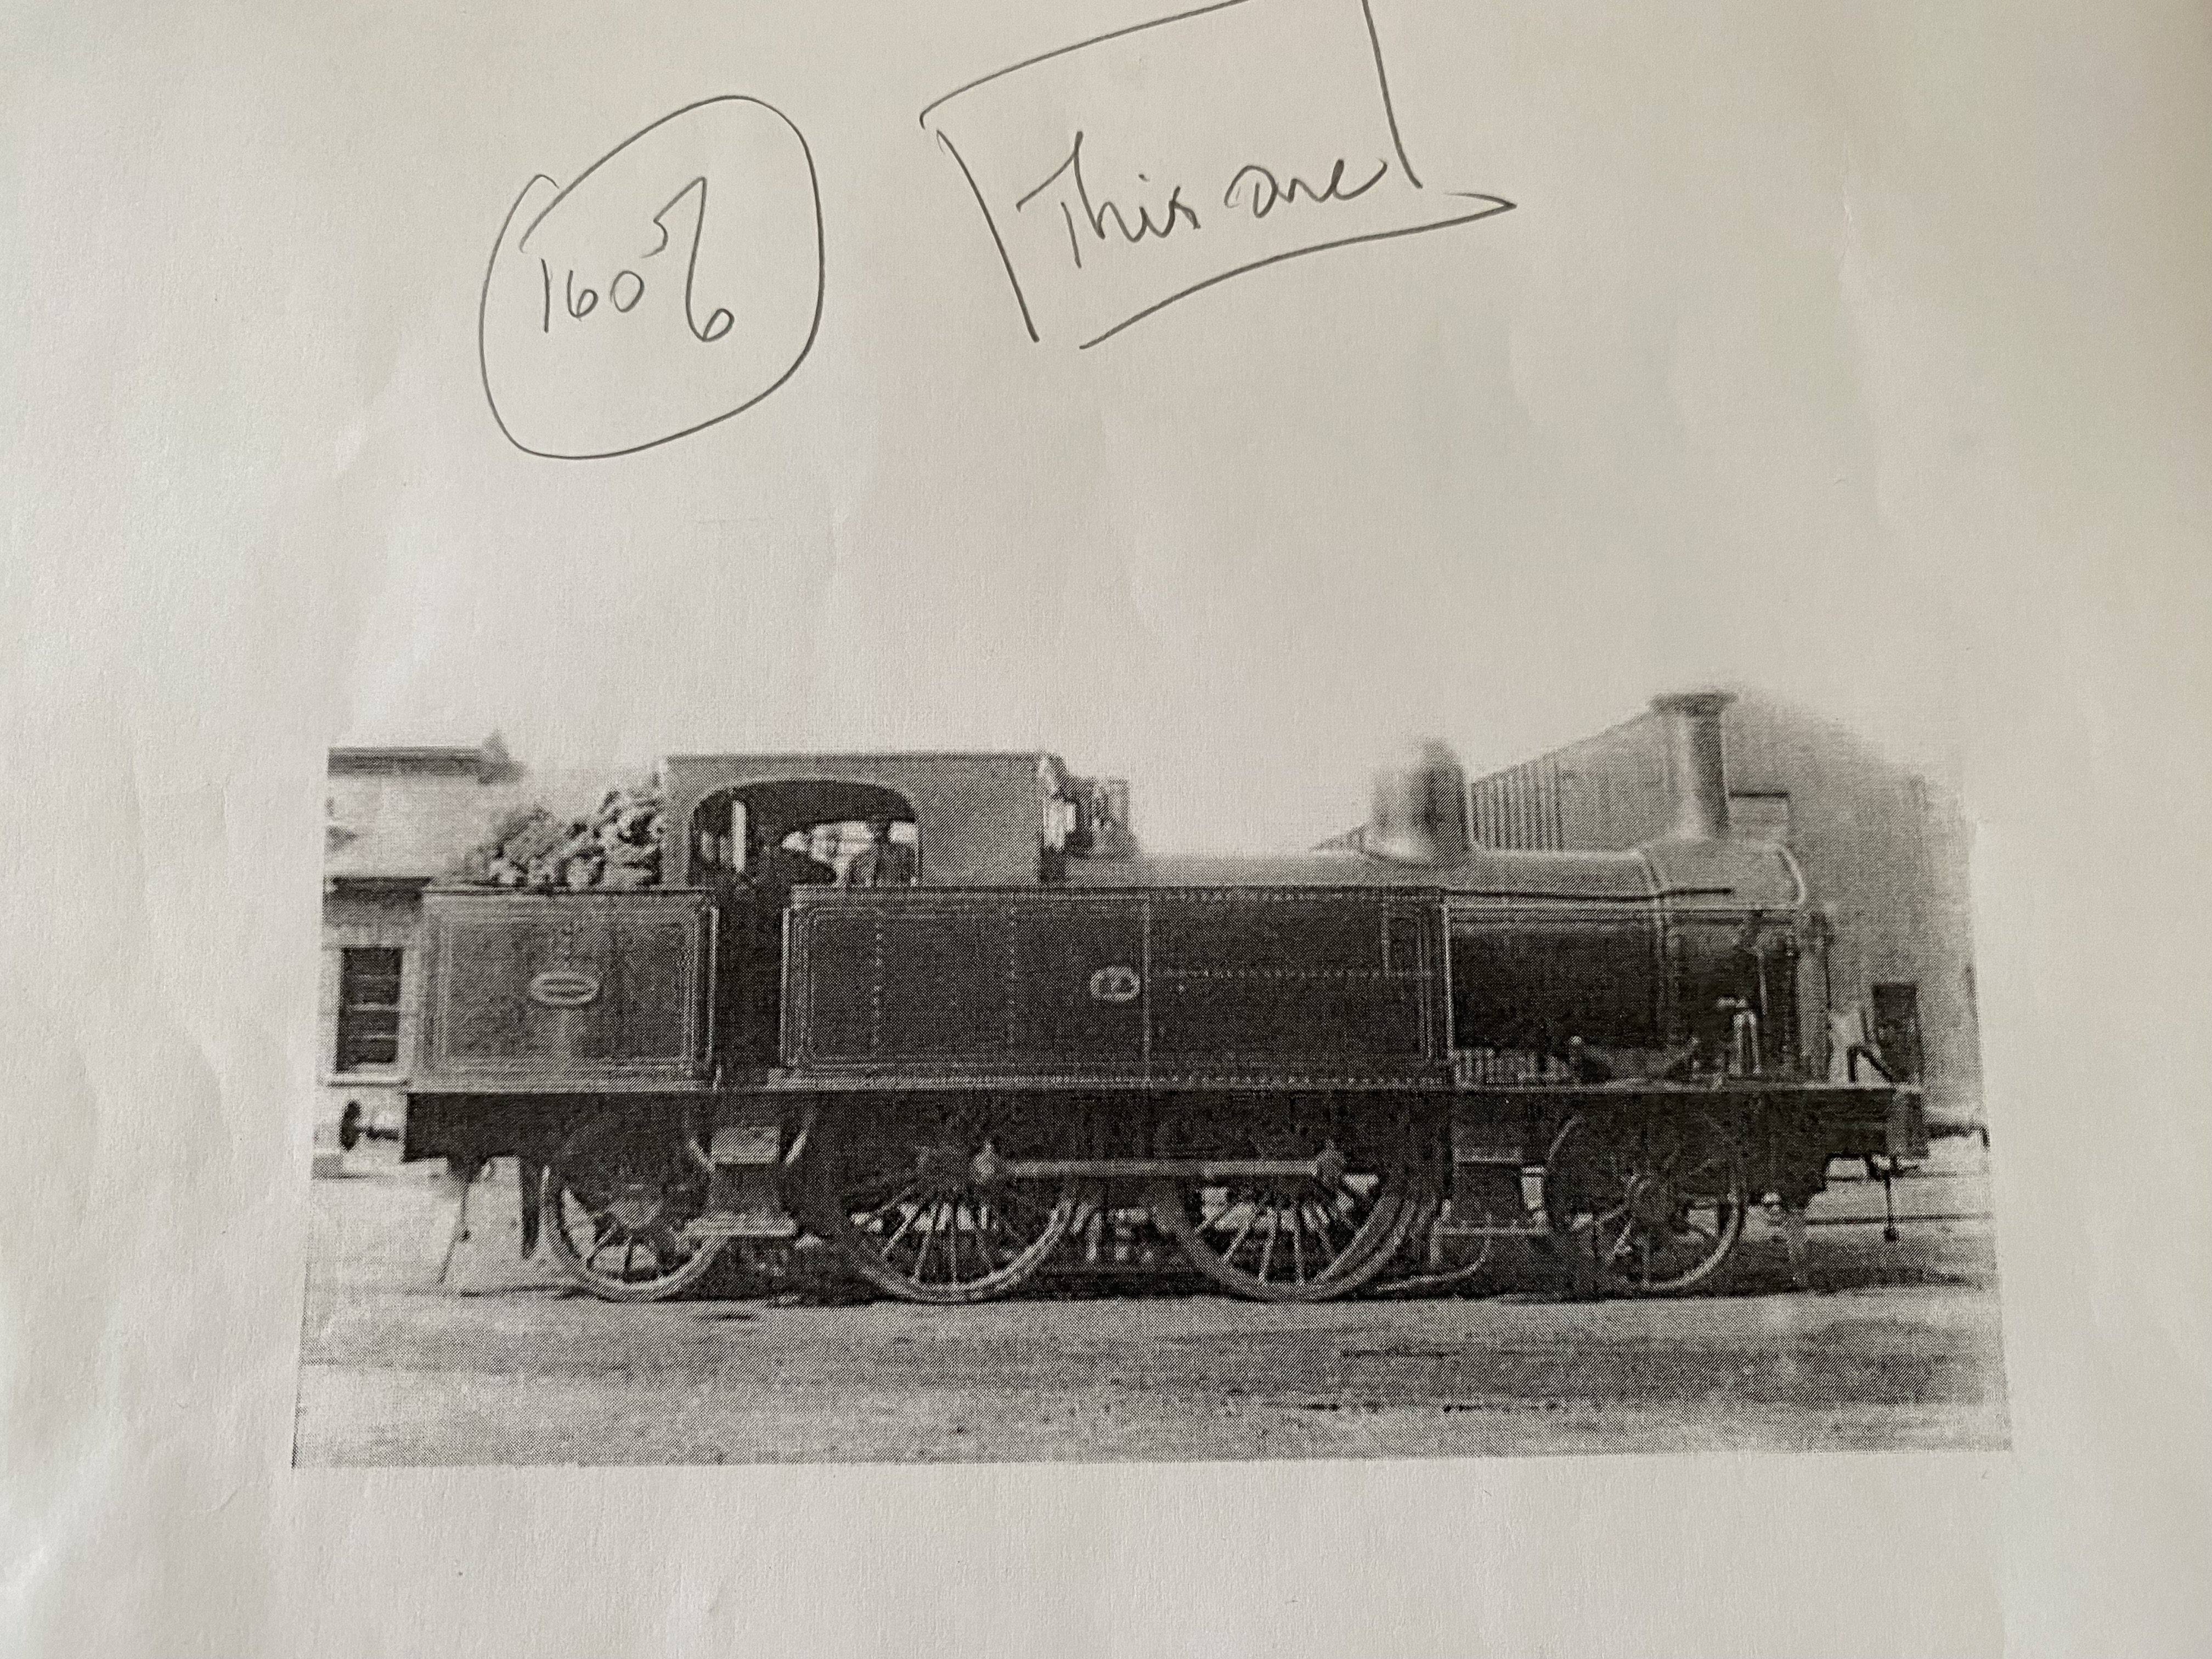
After the distractions of industrial railways, both standard and narrow gauge, it’s back to the County Down. After much pondering, I’m going to have a go at one of the BCDR’s 2-4-2T tank locomotives. Beyer Peacock supplied two of these in 1896 and 4 more in 1897. Before long they were edged out by the more common and more successful 4-4-2T bogie tanks. The first one was scrapped in 1924 but some were still working in 1949. Deciding how best to build a 2-4-2 chassis, I rummaged through my collection of guru advice. In Mike Sharman’s little booklet “Flexichas”, there is an elegant design with a floating gearbox cradle and compensated pony trucks each end. Elegant but complicated. I closed the book and tiptoed quietly away. Iain Rice’s “Locomotive Kit Chassis Construction” has a photo (page 48) of a 2-4-2 chassis with radial trucks at each end. That might be do-able and it might steer better than simple axles with sideways movement at each end. So here we go. As usual, I started with the rods. I used an Alan Gibson universal rods etch (4M92) and a little jig made from PCB and brass rod to make sure both rods were the same length. (If they’re not, game over) I’m going to try these radial truck etches from London Road Models. Received wisdom suggests that the chassis needs to be narrowed at each end to allow the trucks to do their thing. This usually means joggling the frames. On a kit with nice half-etched lines for folding, maybe. On a scratch build and in my hands, I could see disaster looming with the likelihood of chassis frames bent in all sorts of unhelpful directions. My solution is frames made up in 3 flat parts with the end sections overlapping and fastened inside the centre section. Even this was difficult enough to build straight. More jigs. OO chassis spacers for the centre section and narrower 10mm ones for the end sections. For the coupled wheels, one fixed axle and one with hornblocks. Poppy Woodtech chassis jig pulling its weight again. Remains to be seen if I can make this work. But nice to be back on the County Down Alan
- 646 replies
-
- 11
-

-

-
Kadee couplings proved their worth over the weekend, allowing hands-free delayed uncoupling. Kadees.mov
-
Next time Patrick
-
Thanks David. There were a number of fine layouts at the show. Also, there's a distinct family atmosphere at 1st Bangor's shows and it was great to see so many children exhibiting their work. Very good for the future of the hobby.
-
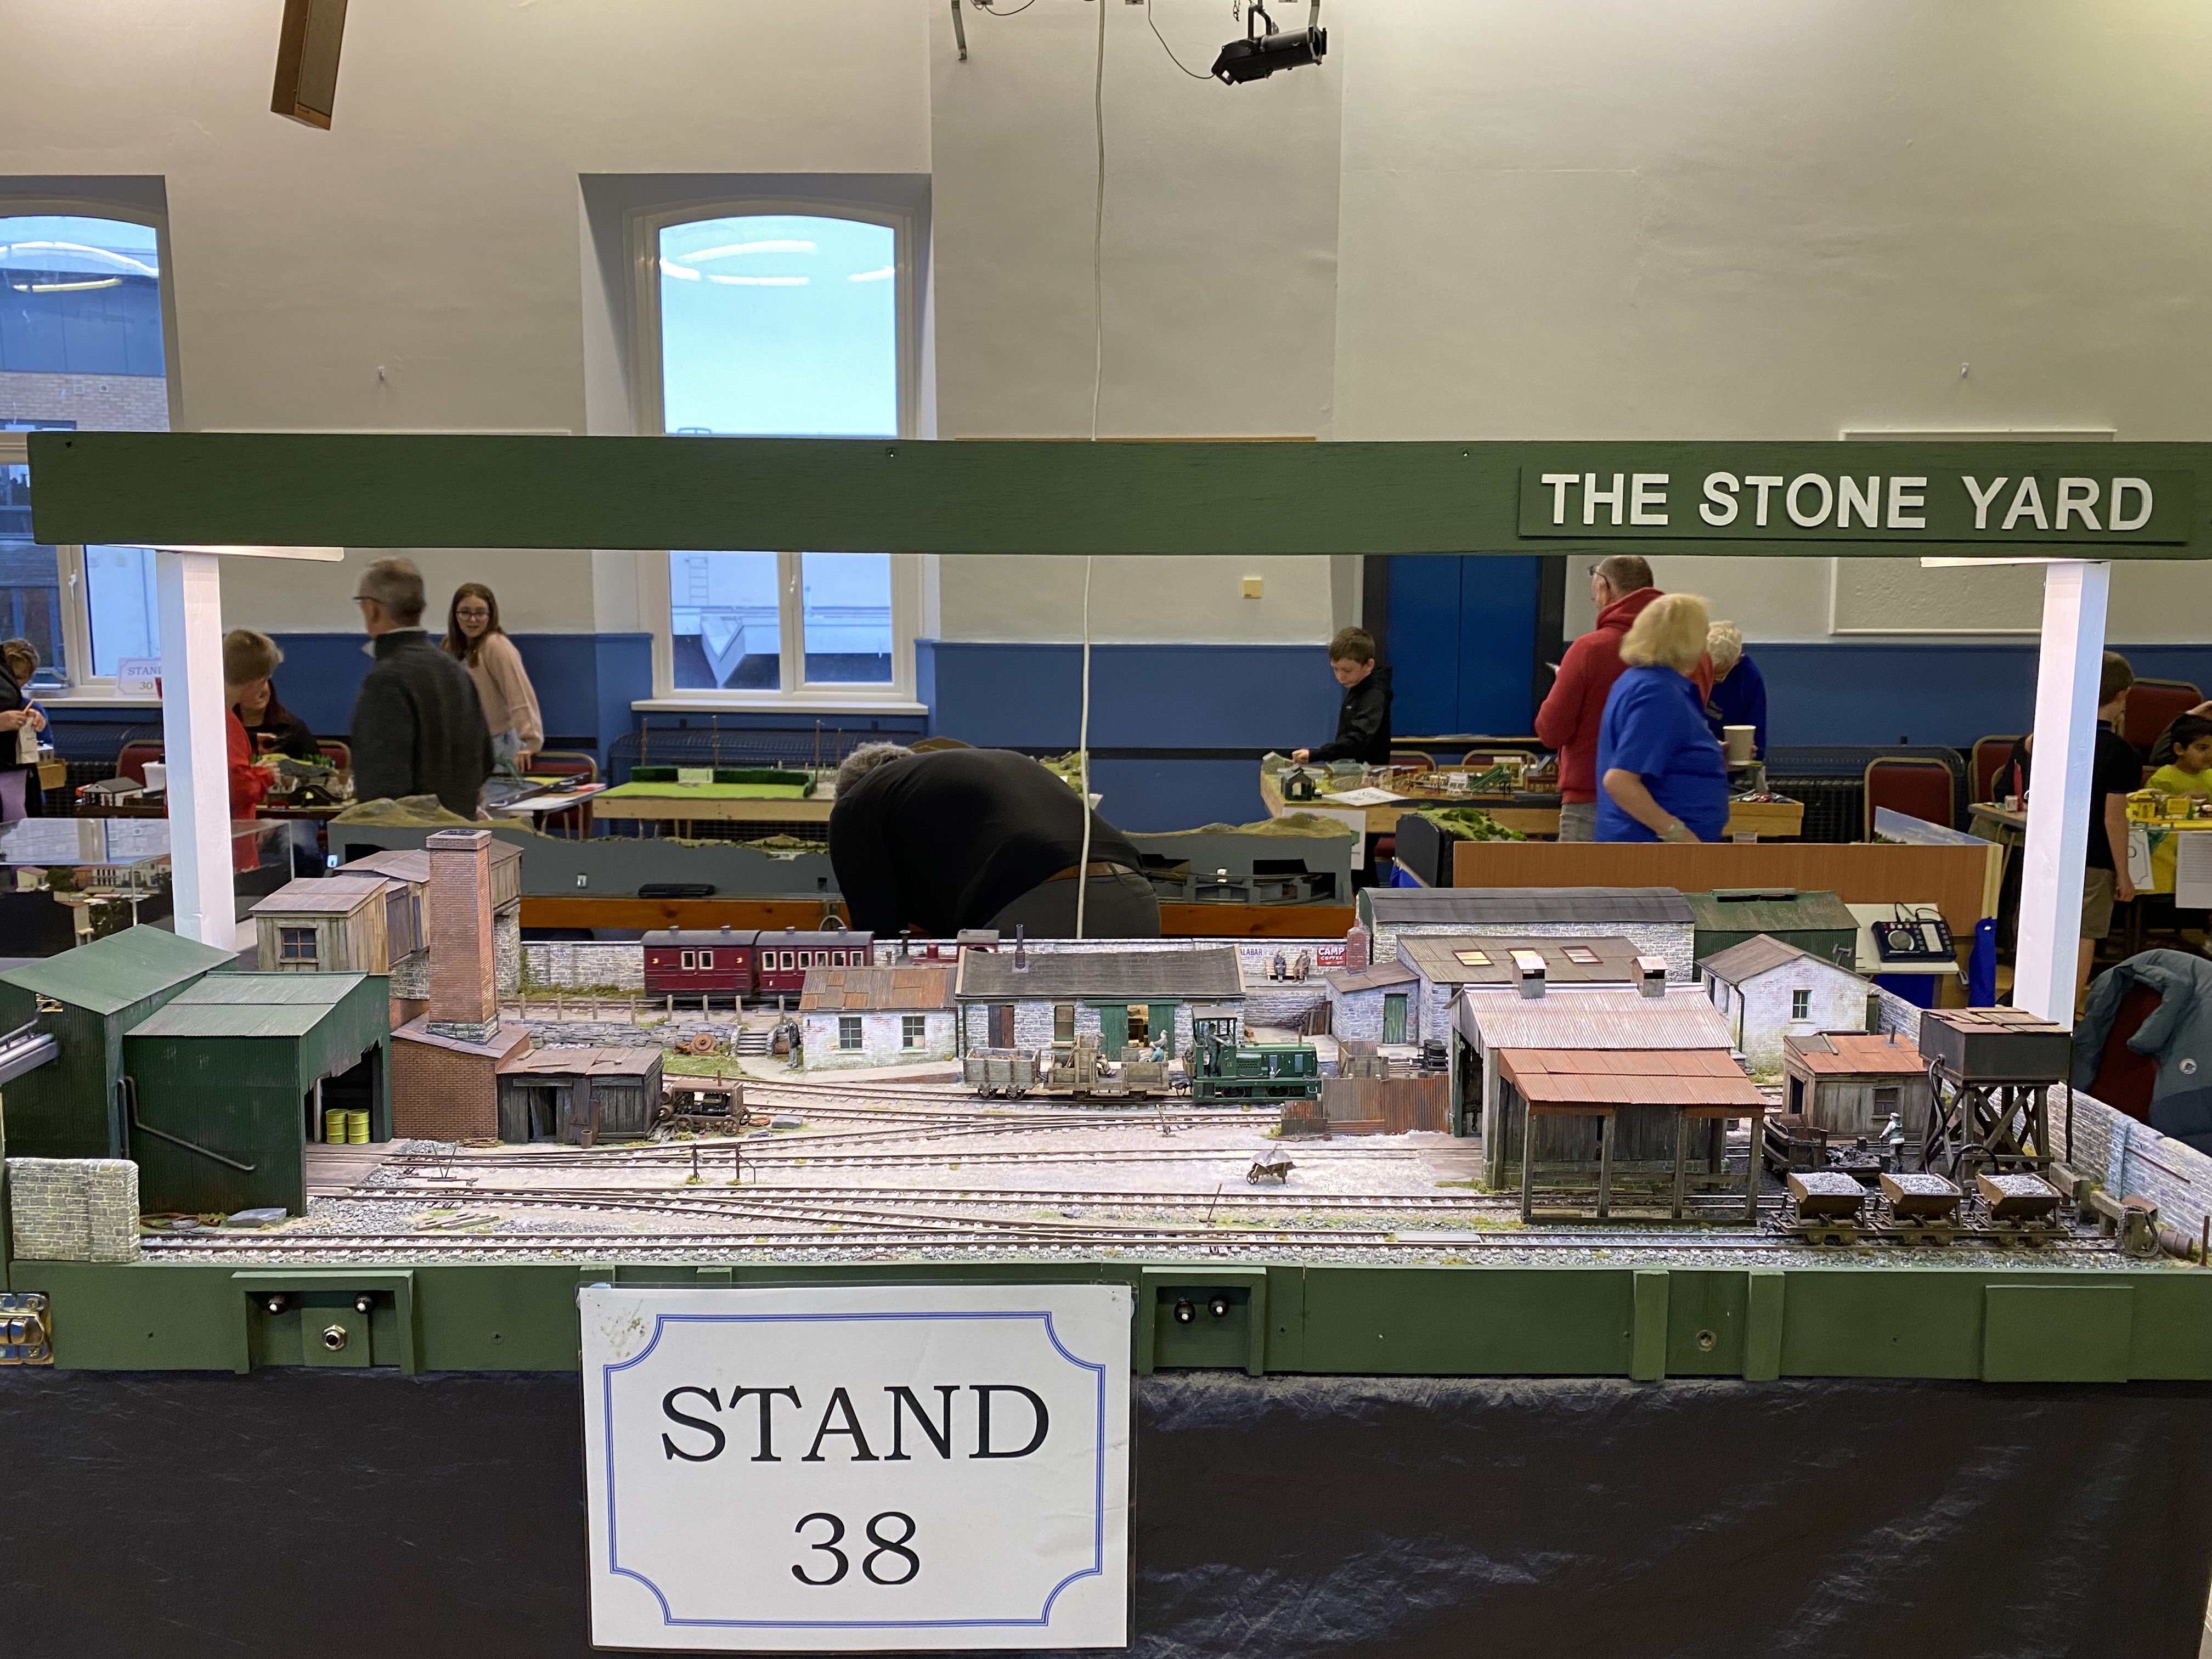
The Stone Yard had its first public outing on 24 & 25 May at First Bangor Model Railway Club's exhibition. The layout has acquired trestles to sit on and a lighting rig to show off under. It survived being packed into the back of the car and performed impeccably throughout the 2 days. Phew! Many thanks to 1st Bangor MRC for their hospitality and for the opportunity to be part of a great show. Alan
- 113 replies
-
- 10
-
-

-

N Scale Ballywillan, Co Longford.
Tullygrainey replied to Kevin Sweeney's topic in Irish Model Layouts
A masterpiece. Just wonderful! -
As far away from the controller as possible
-
Such a pointless act. Can only begin to imagine how the layout builders are feeling.
-
So very sorry to hear this. I never had an opportunity to meet Ken and knew him only through this forum but I always looked forward to reading his contributions and never failed to be inspired by his skill and the quality of his work. I will miss that. My sincere condolences to Ken's family. Alan
-
Thanks for sharing these pics Patrick. I was too preoccupied to notice you taking them, largely because, true to form, the moment a visitor showed up, the whole layout stopped working! (Later traced to a broken wire in the DCC track feed due to some pretty shoddy soldering. The culprit has been identified and spoken to. He blames the solder)
-
Clogherhead - A GNR(I) Seaside Terminus
Tullygrainey replied to Patrick Davey's topic in Irish Model Layouts
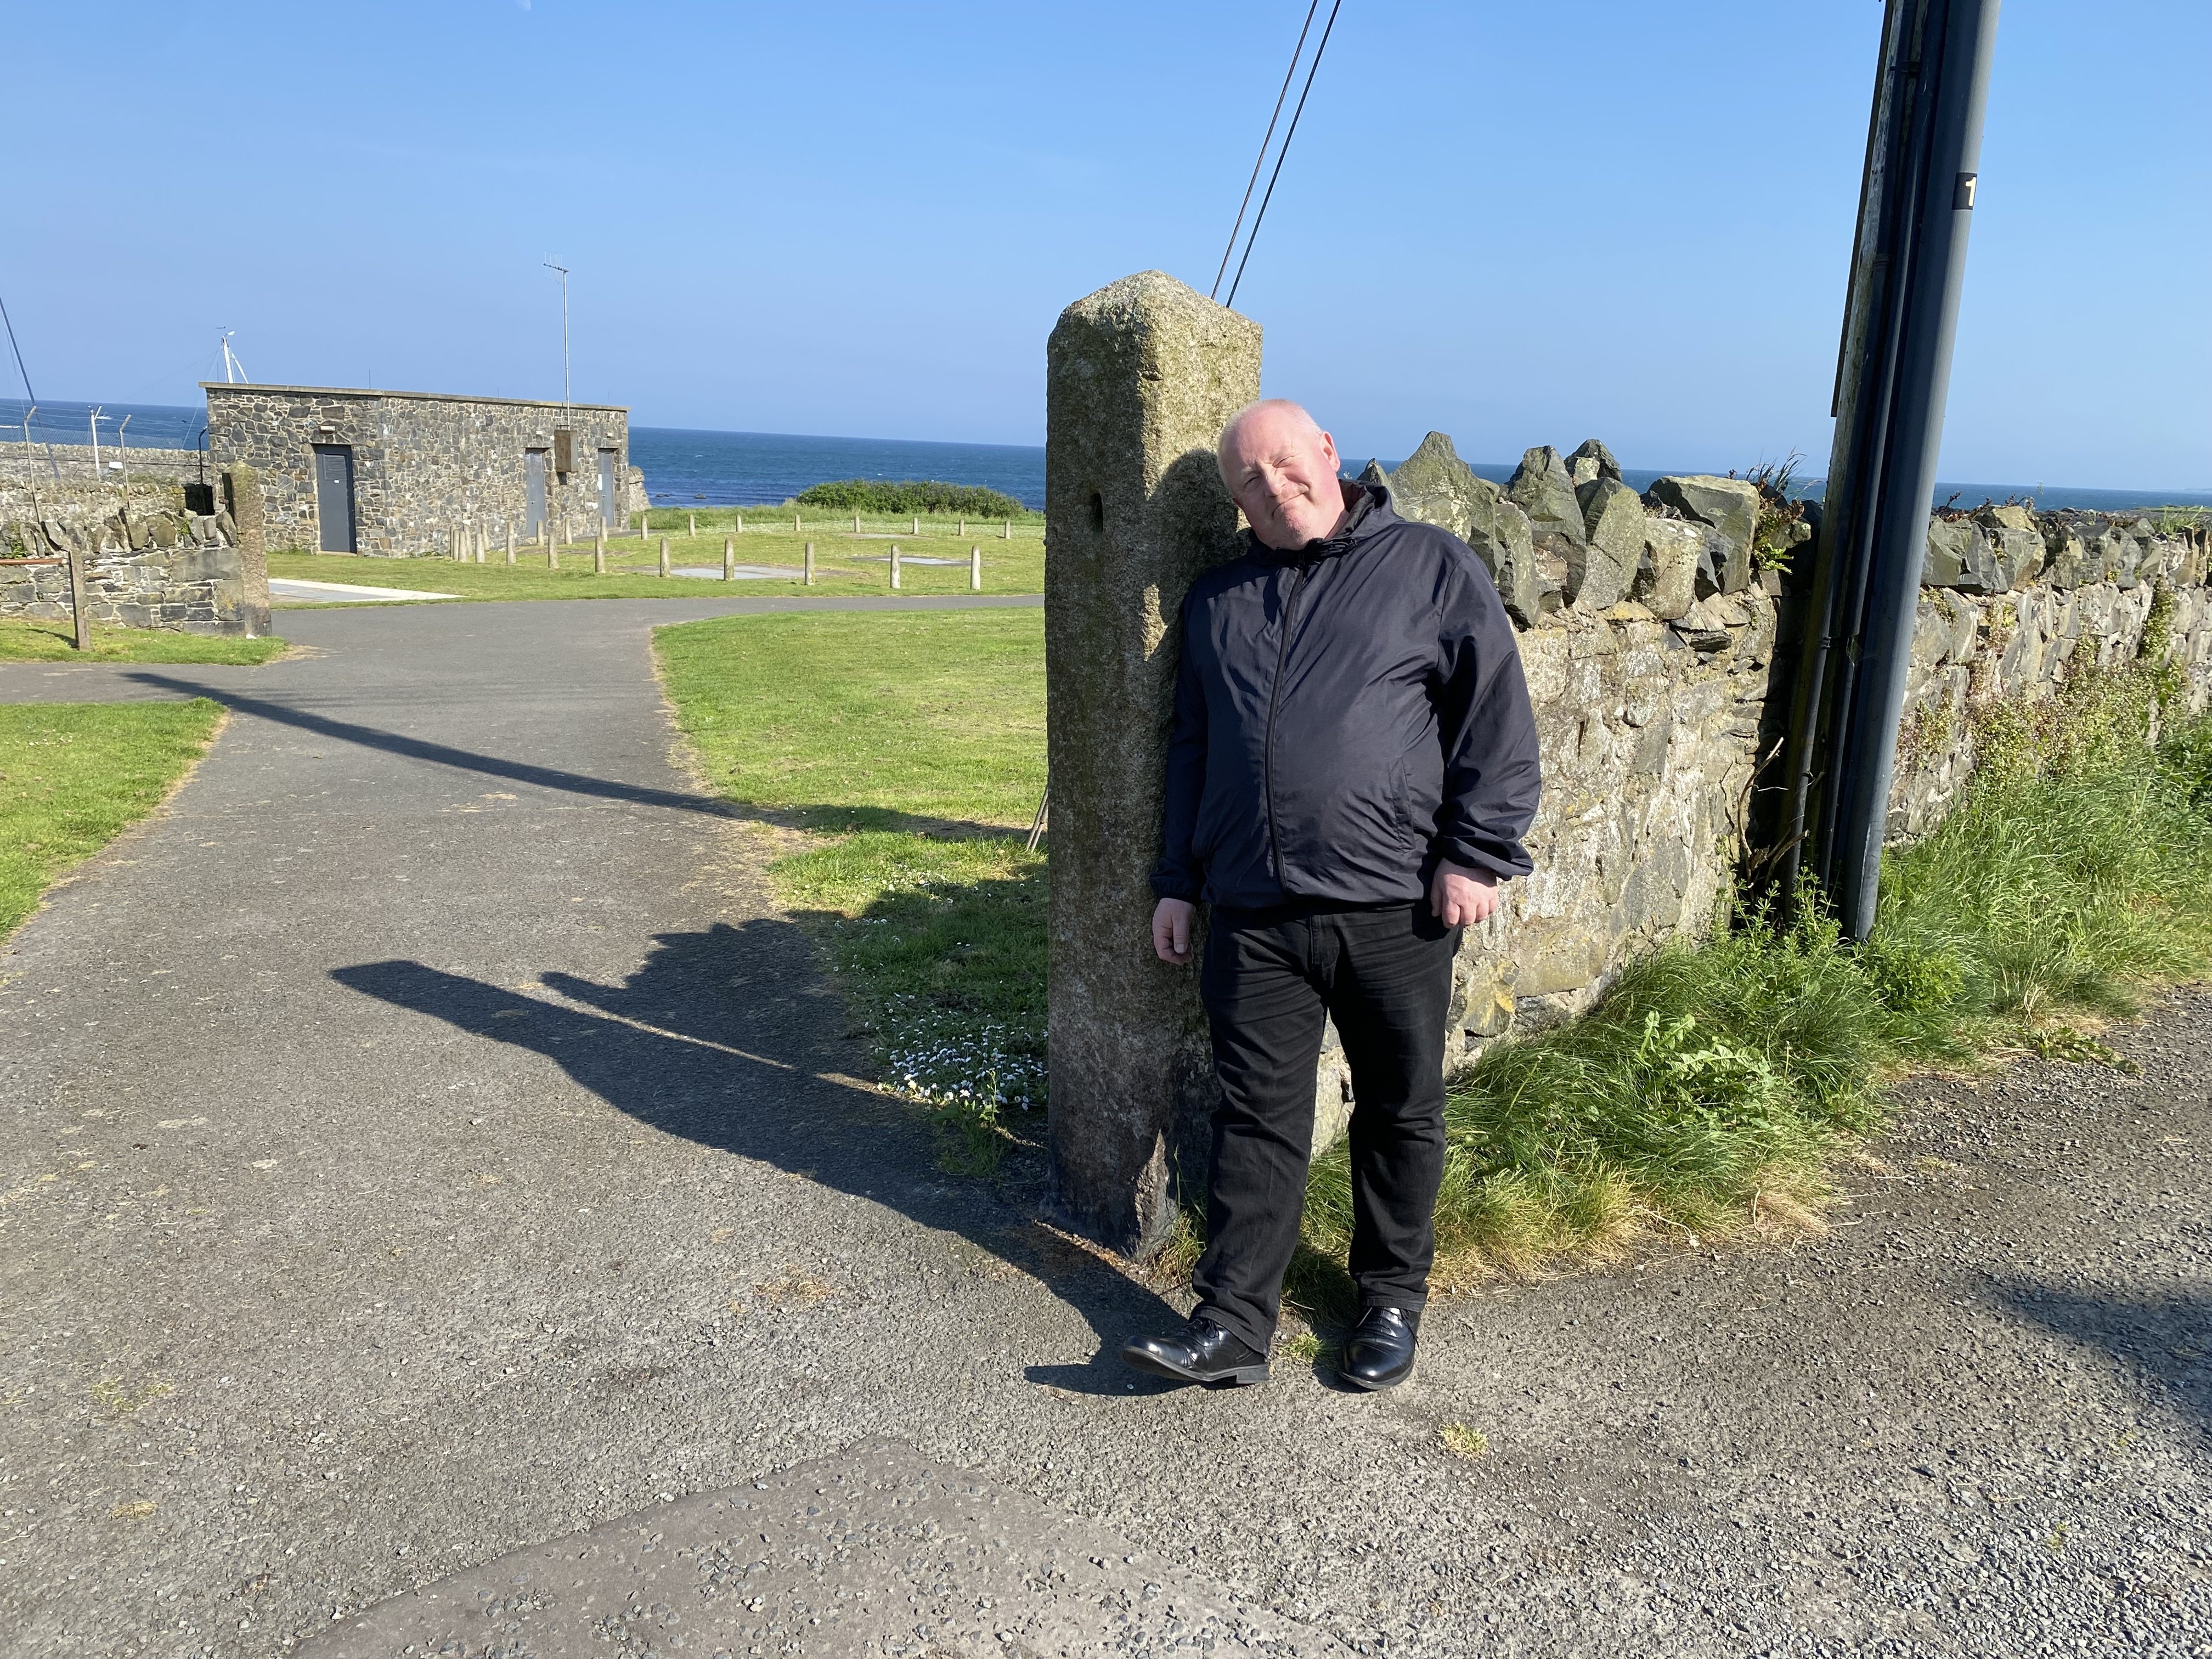
The Clogherhead stationmaster/traffic controller on a rare visit to Donaghadee station. Seen here propping up (being propped up by?) a fine Mourne granite pillar, one of three surviving which once supported the gates of the accommodation crossing at the old station throat.
-
Clogherhead - A GNR(I) Seaside Terminus
Tullygrainey replied to Patrick Davey's topic in Irish Model Layouts
A grand day out. Thanks Patrick -
Clogherhead - A GNR(I) Seaside Terminus
Tullygrainey replied to Patrick Davey's topic in Irish Model Layouts
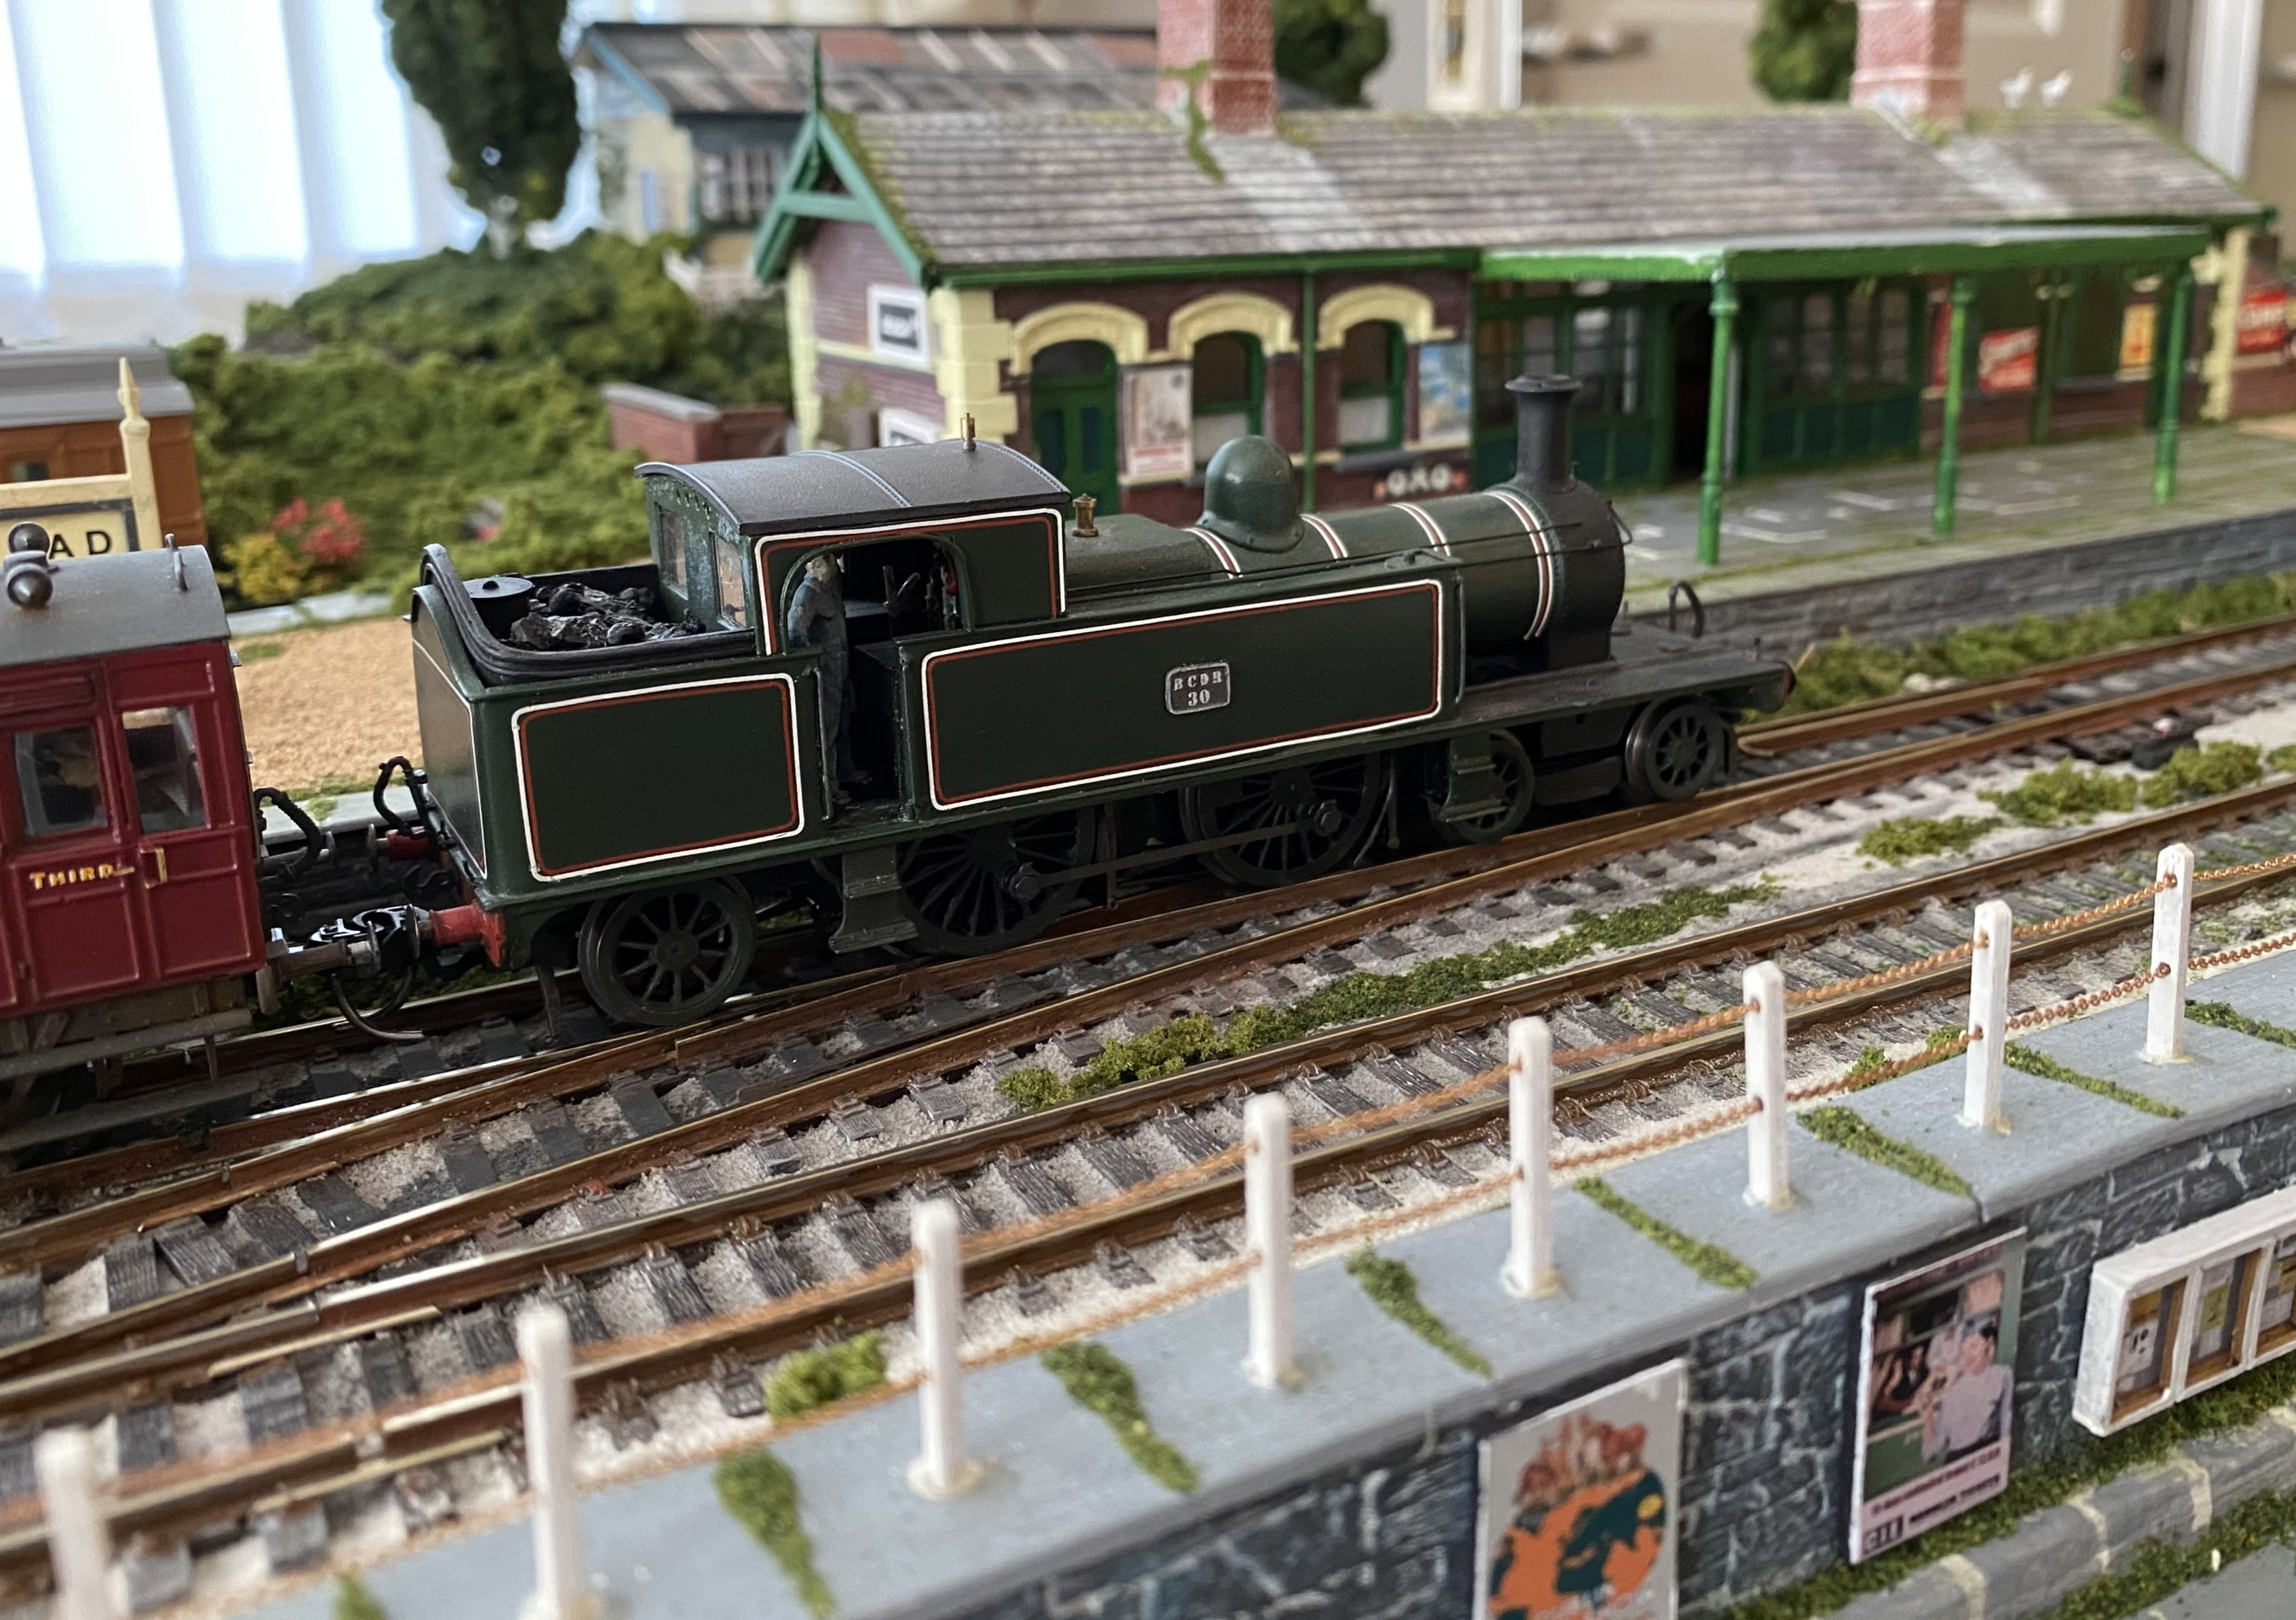
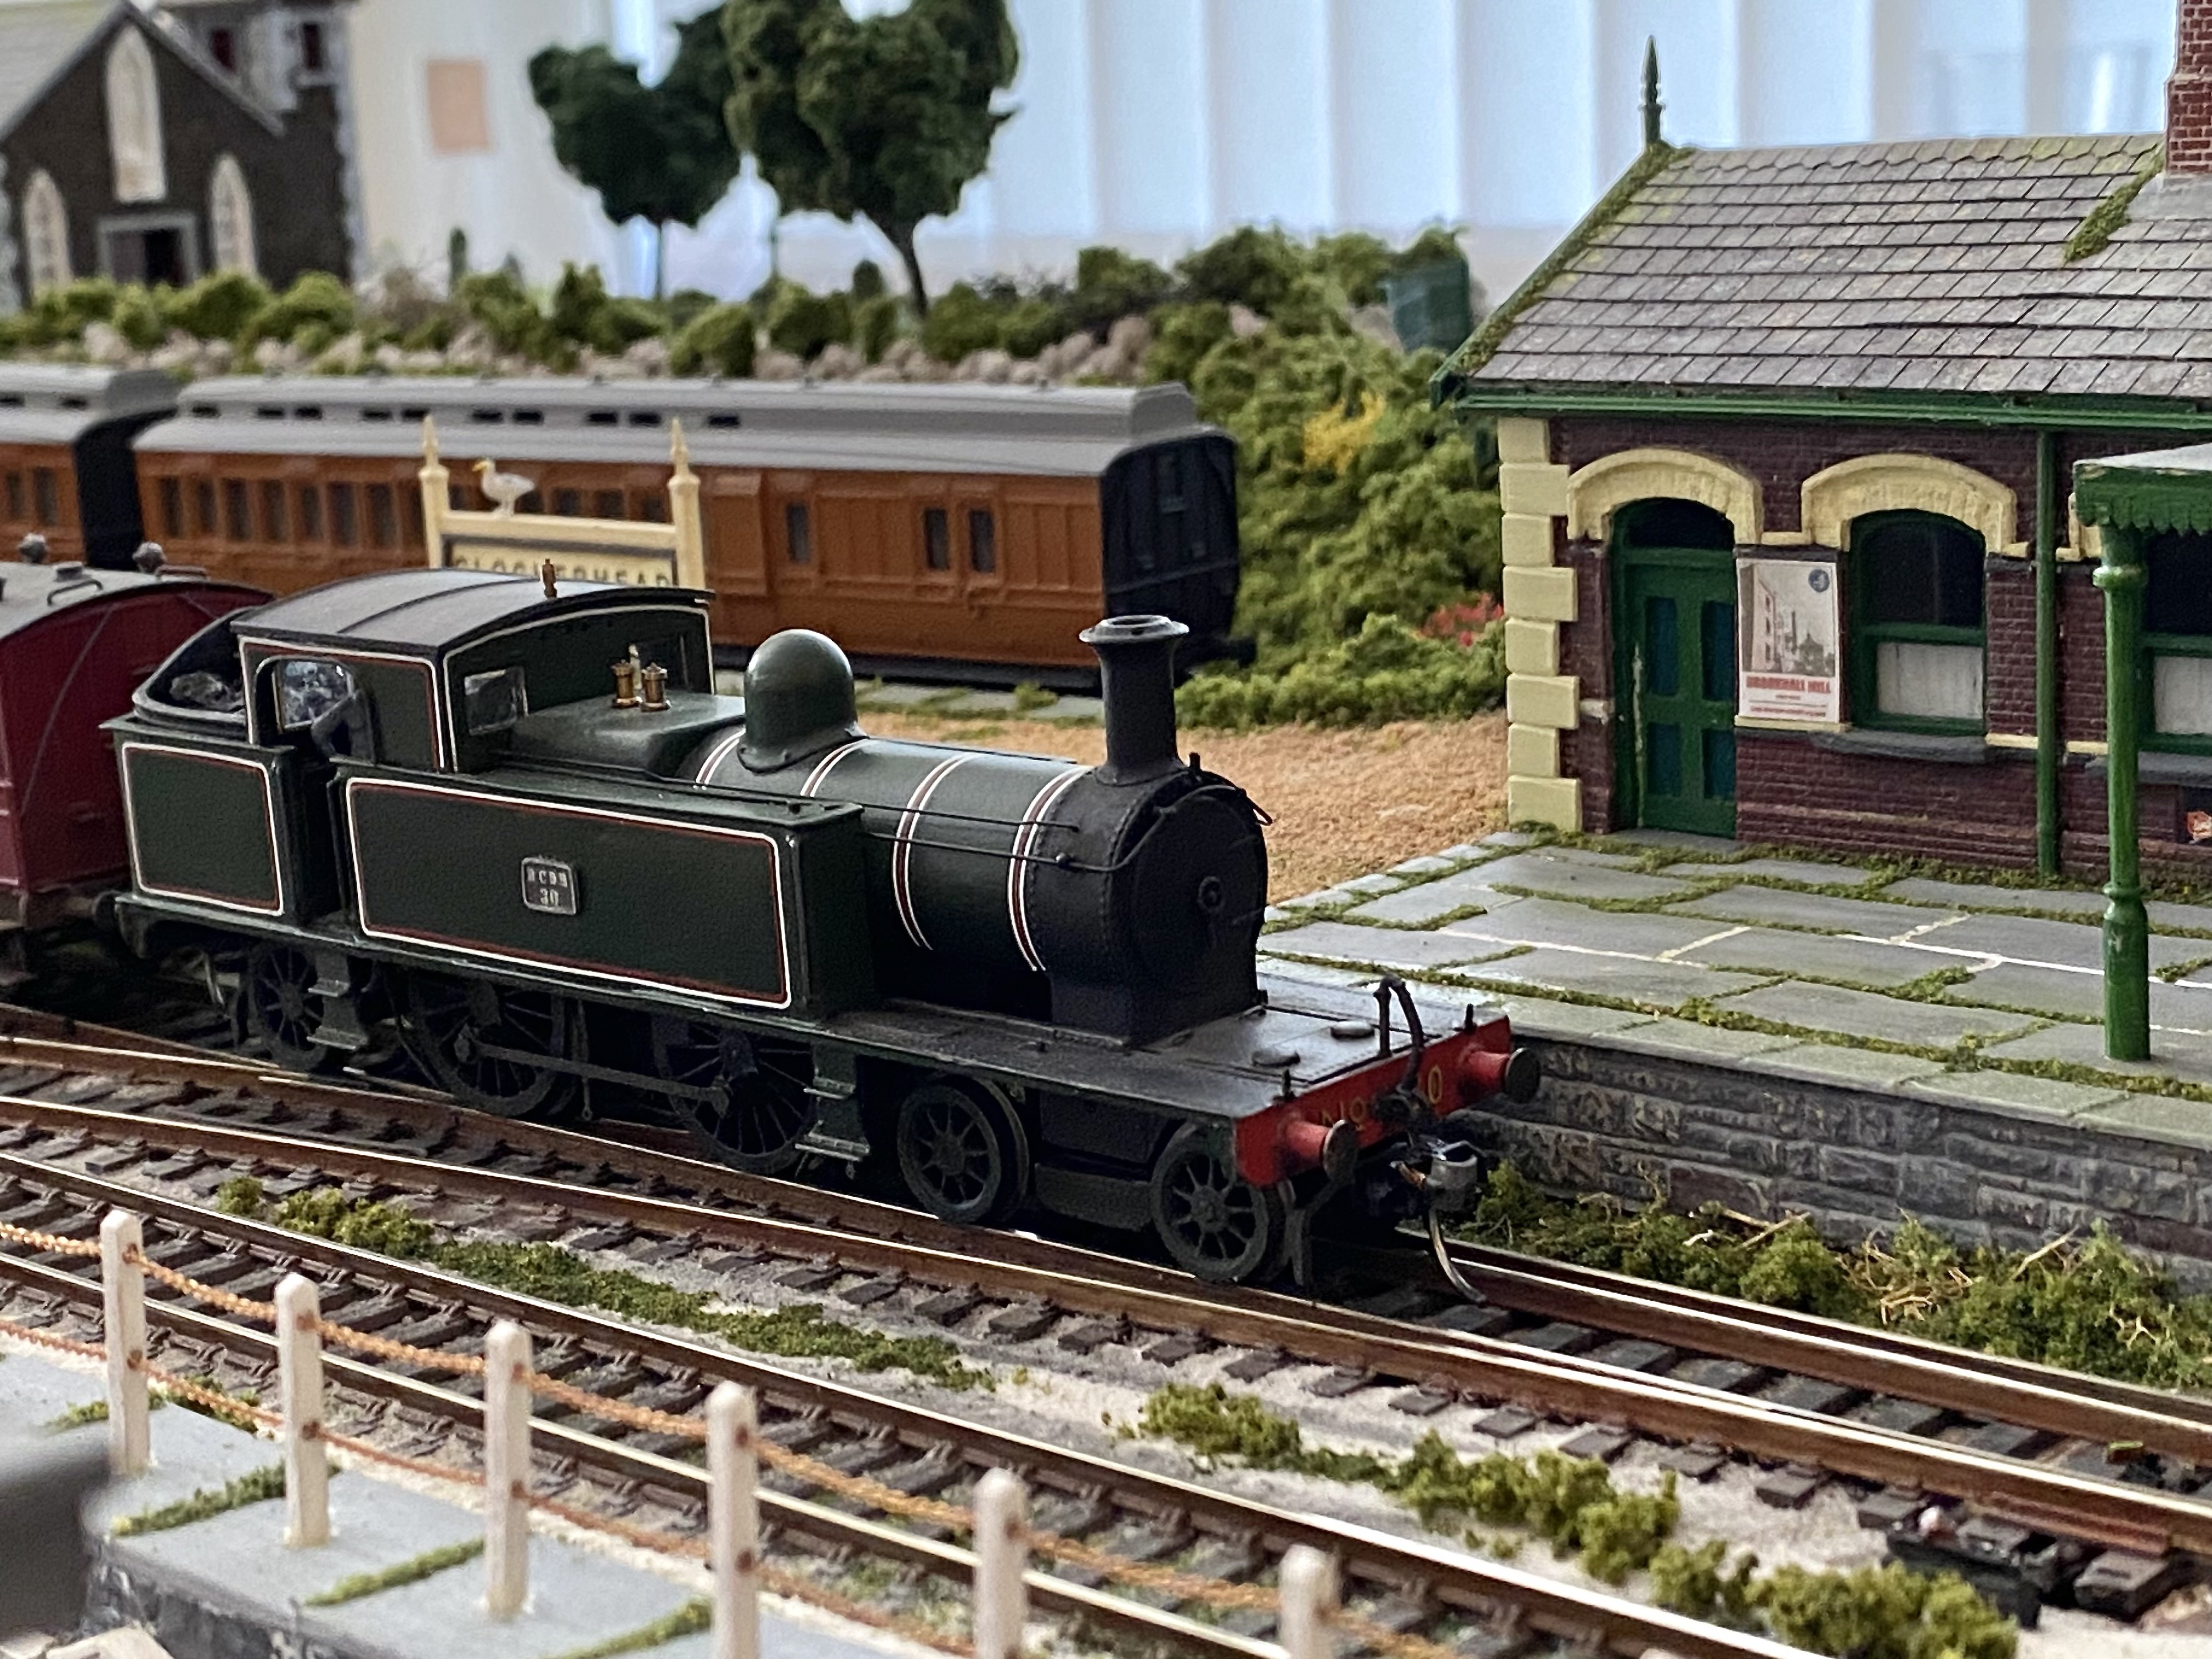
Unexpected arrival at Clogherhead earlier today. Patrick will explain imminently
-
The ex CSE (Carlow) Ruston at RPSI Whitehead, August 2020