Tullygrainey
-
Posts
934 -
Joined
-
Last visited
-
Days Won
55
Content Type
Profiles
Forums
Events
Gallery
Blogs
Store
Community Map
Everything posted by Tullygrainey
-
Some delicate surgery there. Great work.
-
On what grounds did they make that assumption?
-
Thank you David. I got a lot of satisfaction out of building it and it's quite enjoyable to operate too. At the risk of putting a jinx on it, it's turned out to be fairly robust as well, having survived 4 outings this year without the need for any serious surgery. 'The Stone Yard' was just a fall-back title. It should probably be called Costa Sheds, given the quantities of re-purposed timber it contains
-
There's a claus in my contract that says no puns
-
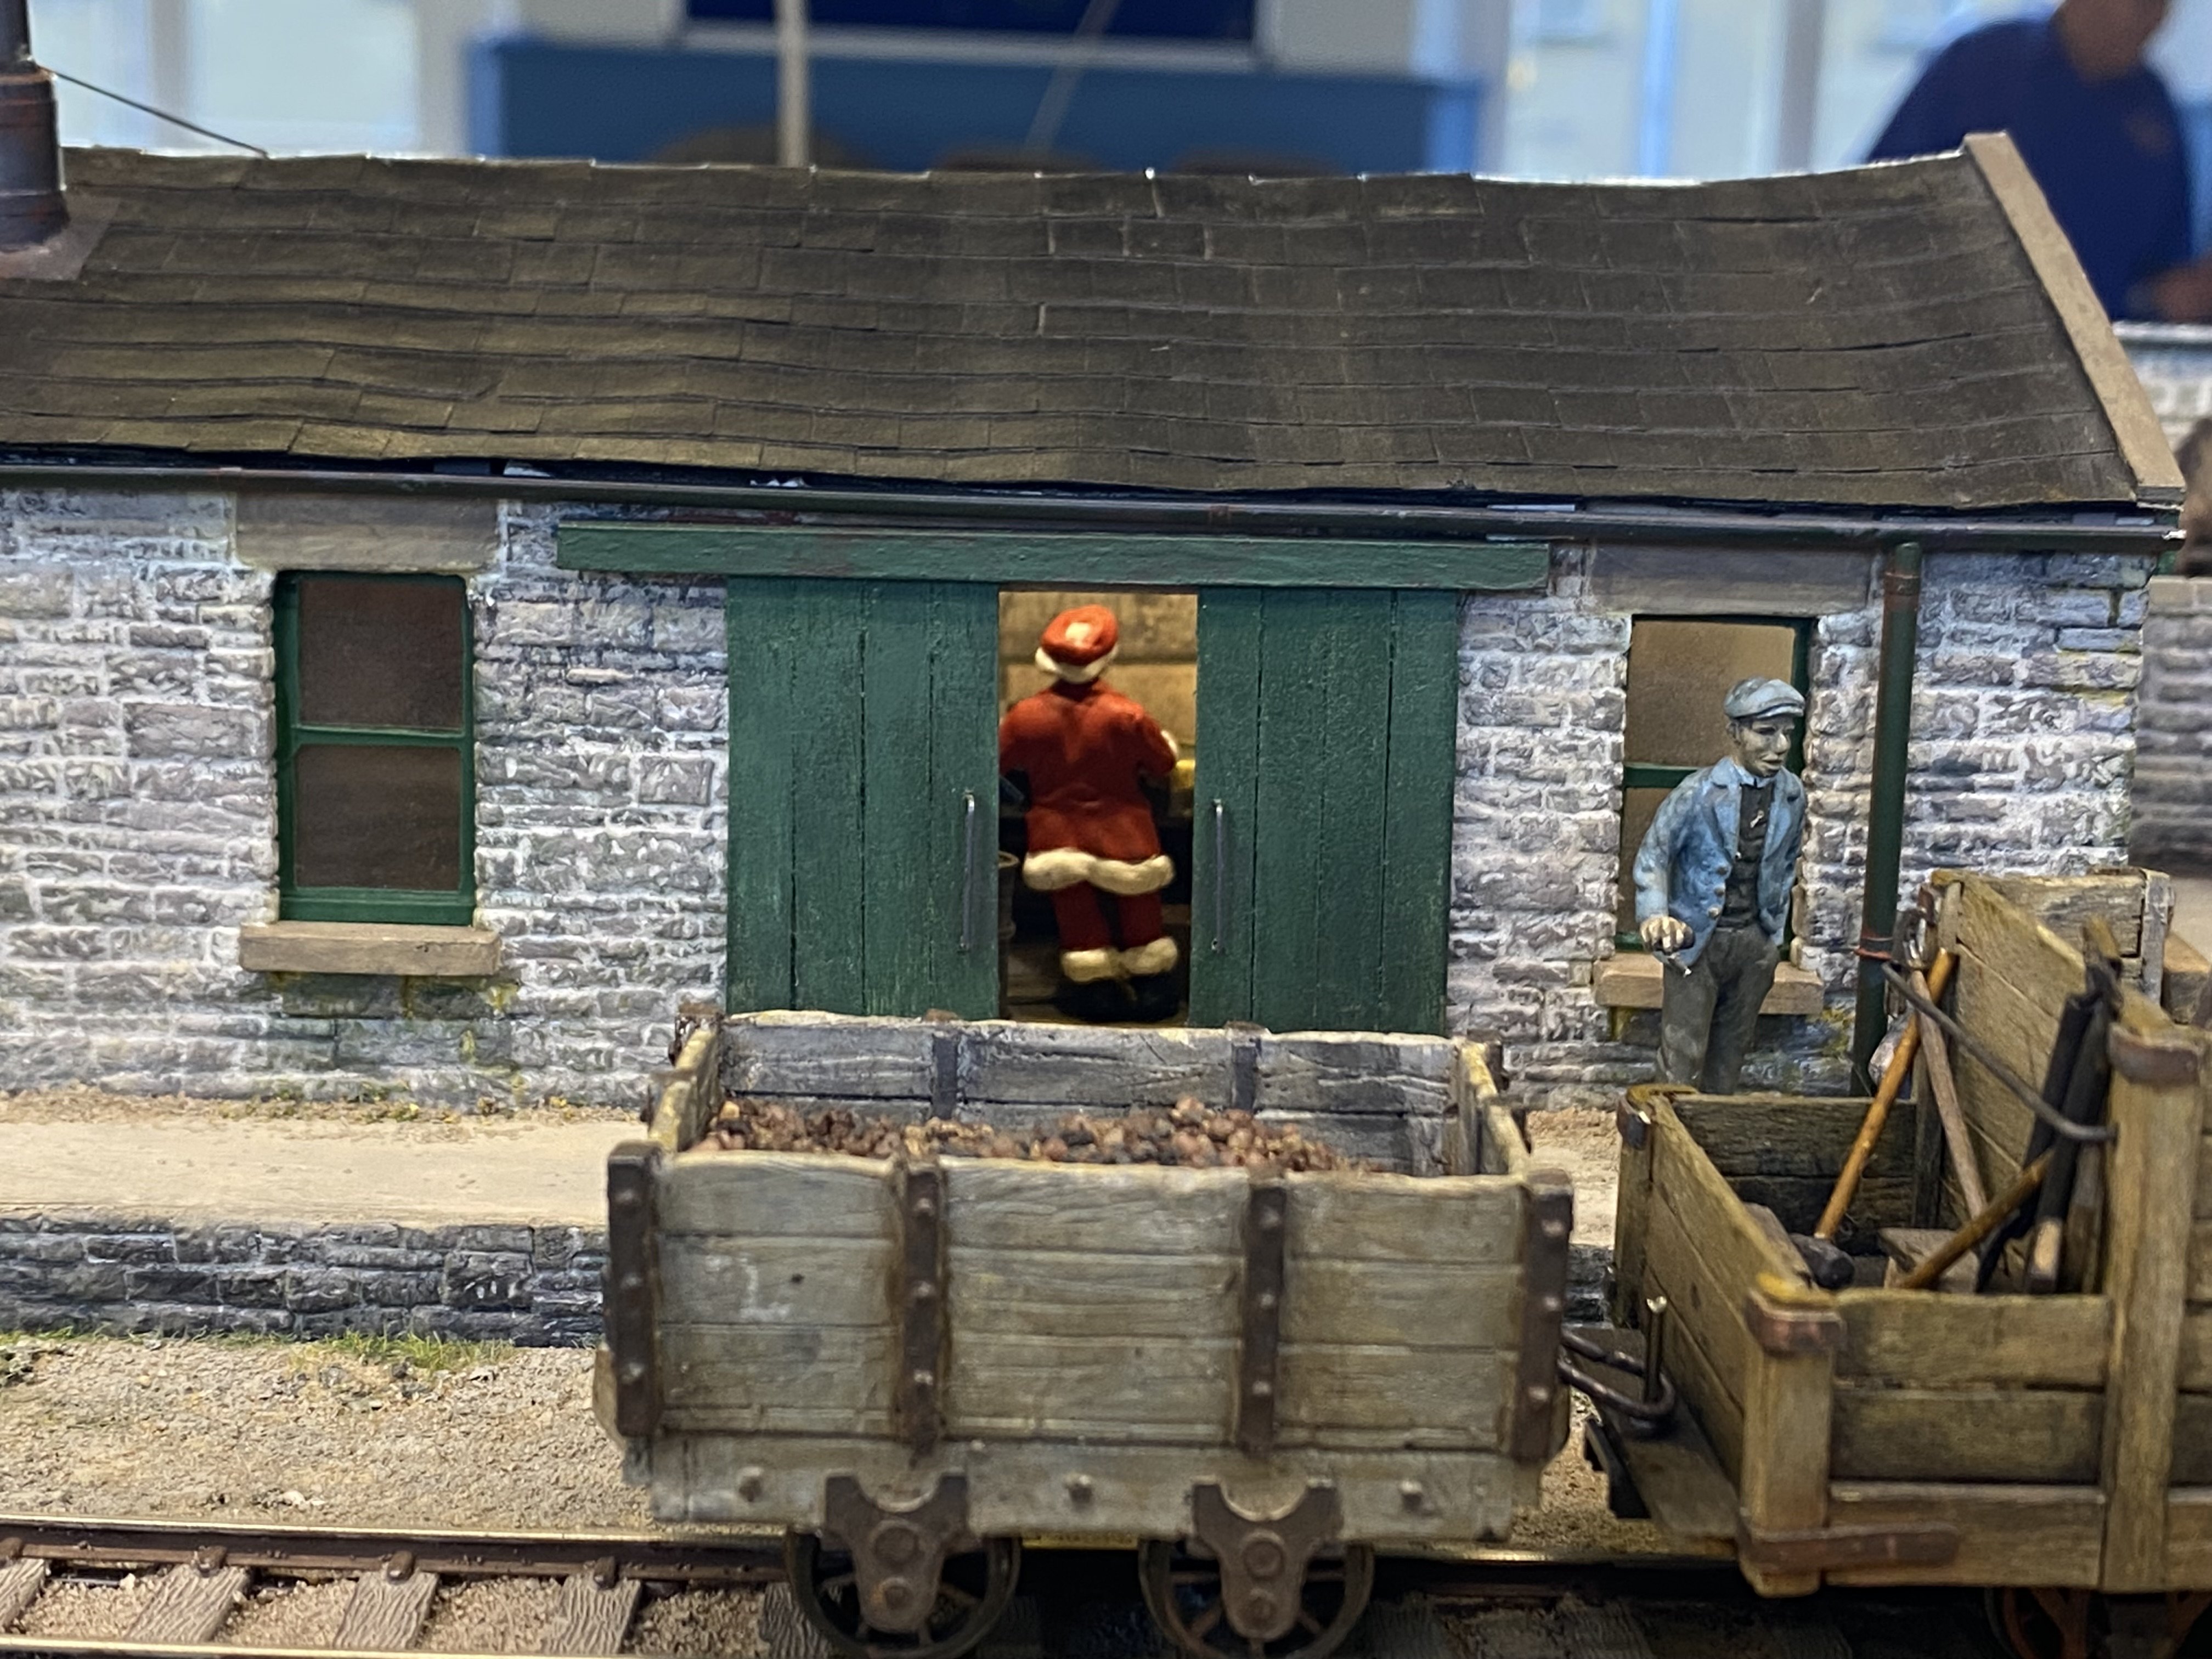
The Stone Yard had an outing to 1st Bangor MRC's exhibition on 30 November. Lovely show with a great atmosphere. Grand day out. Thank you to 1st Bangor Club for the chance to be part of it. Thanks also to Kieran Lagan for helping keep it all on the rails. The Stone Yard.MOV Alan

- 113 replies
-
- 17
-

-

-
Thanks David. You won’t regret buying the Vallorbes. I’ve been gradually collecting them for a while now and wouldn’t be without them.
-
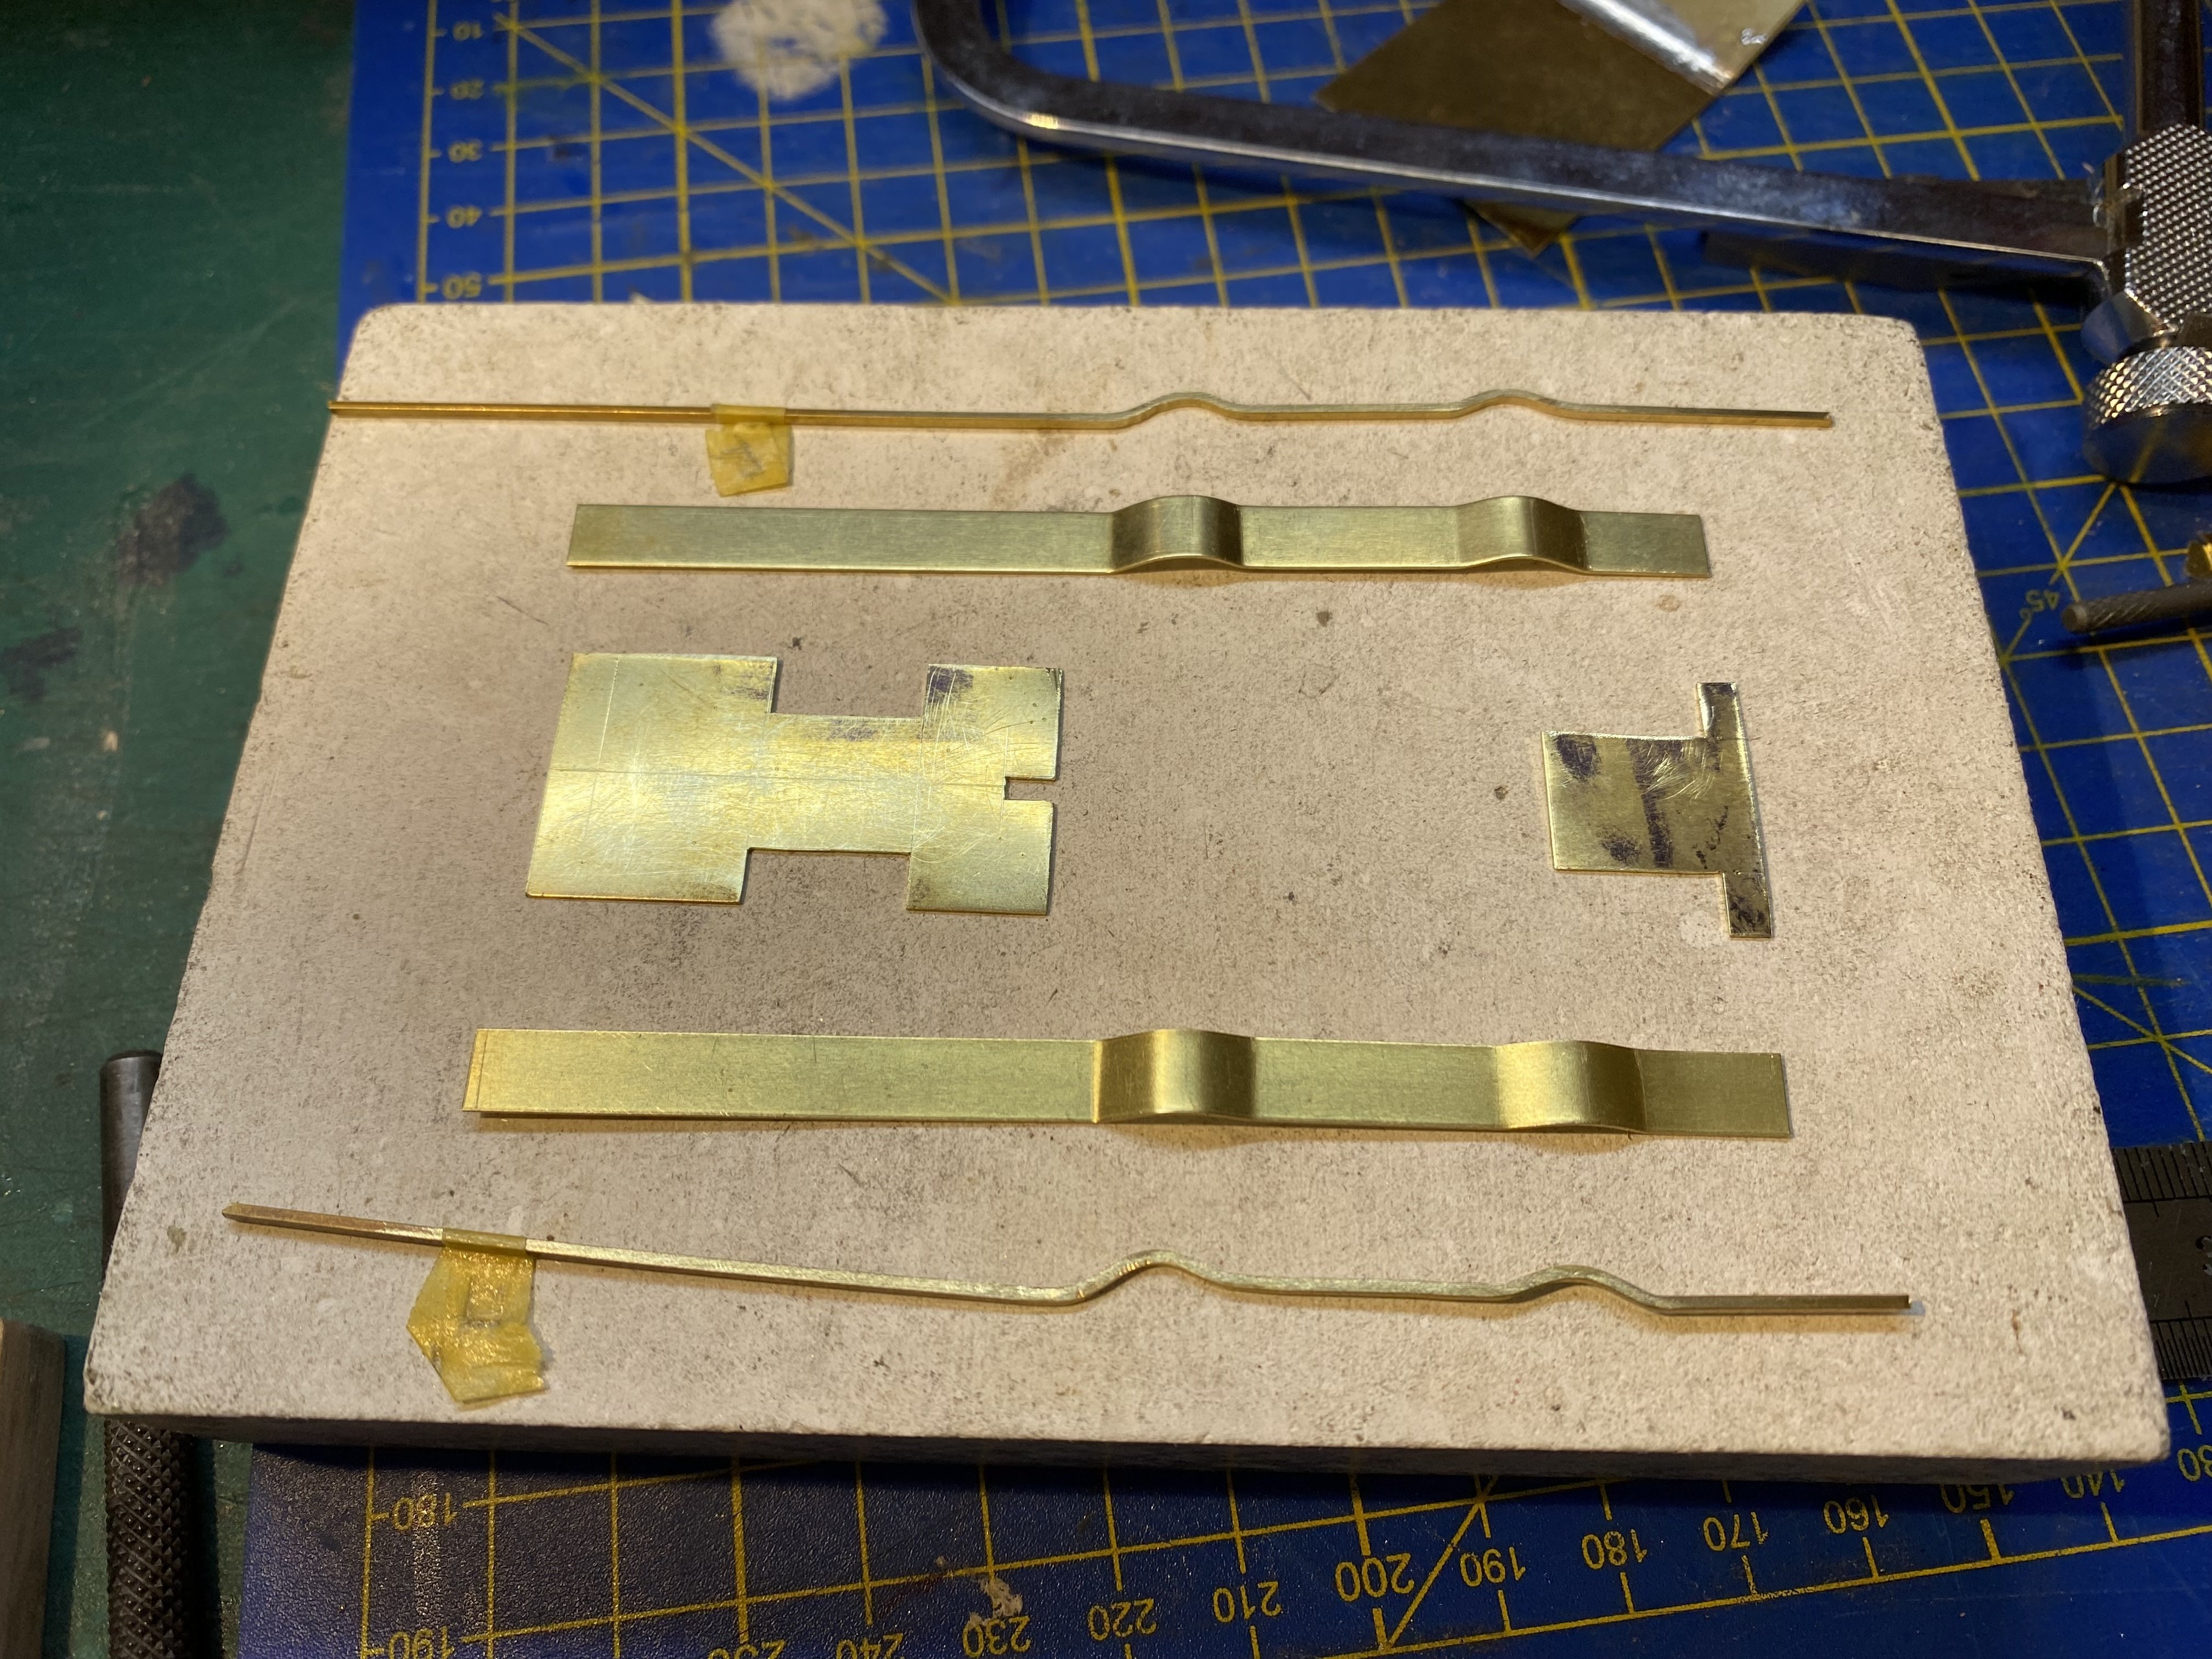
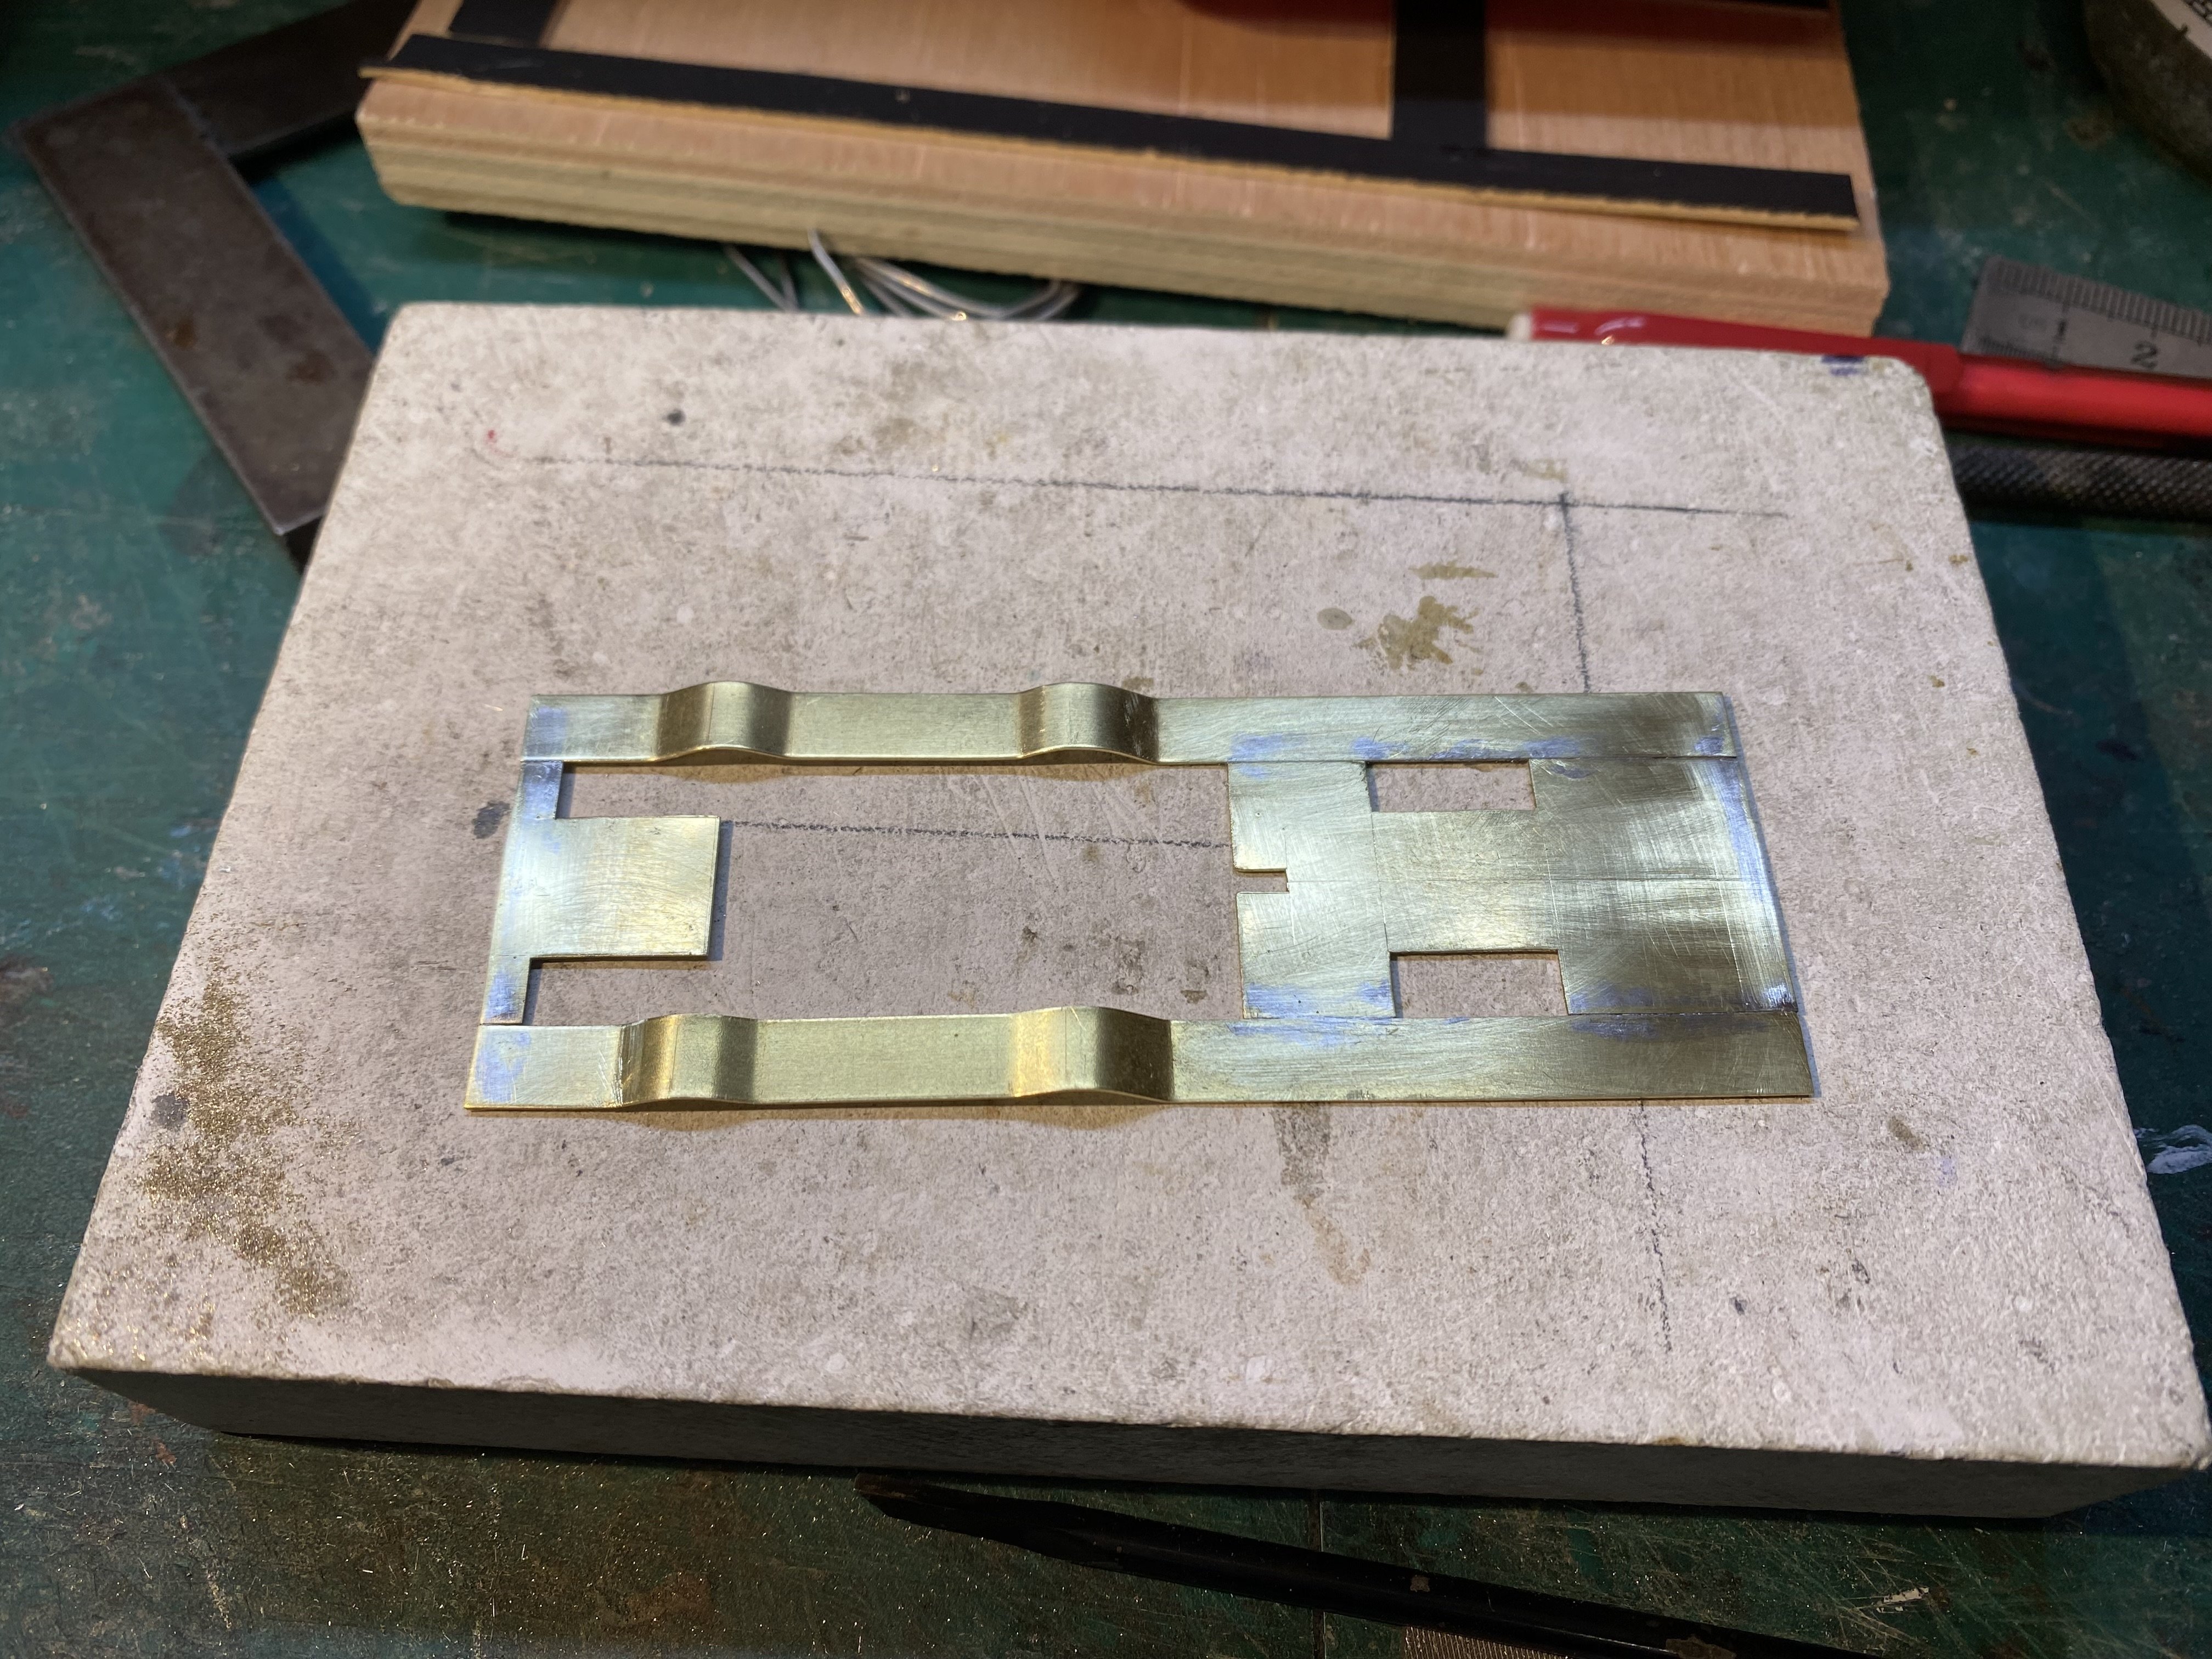
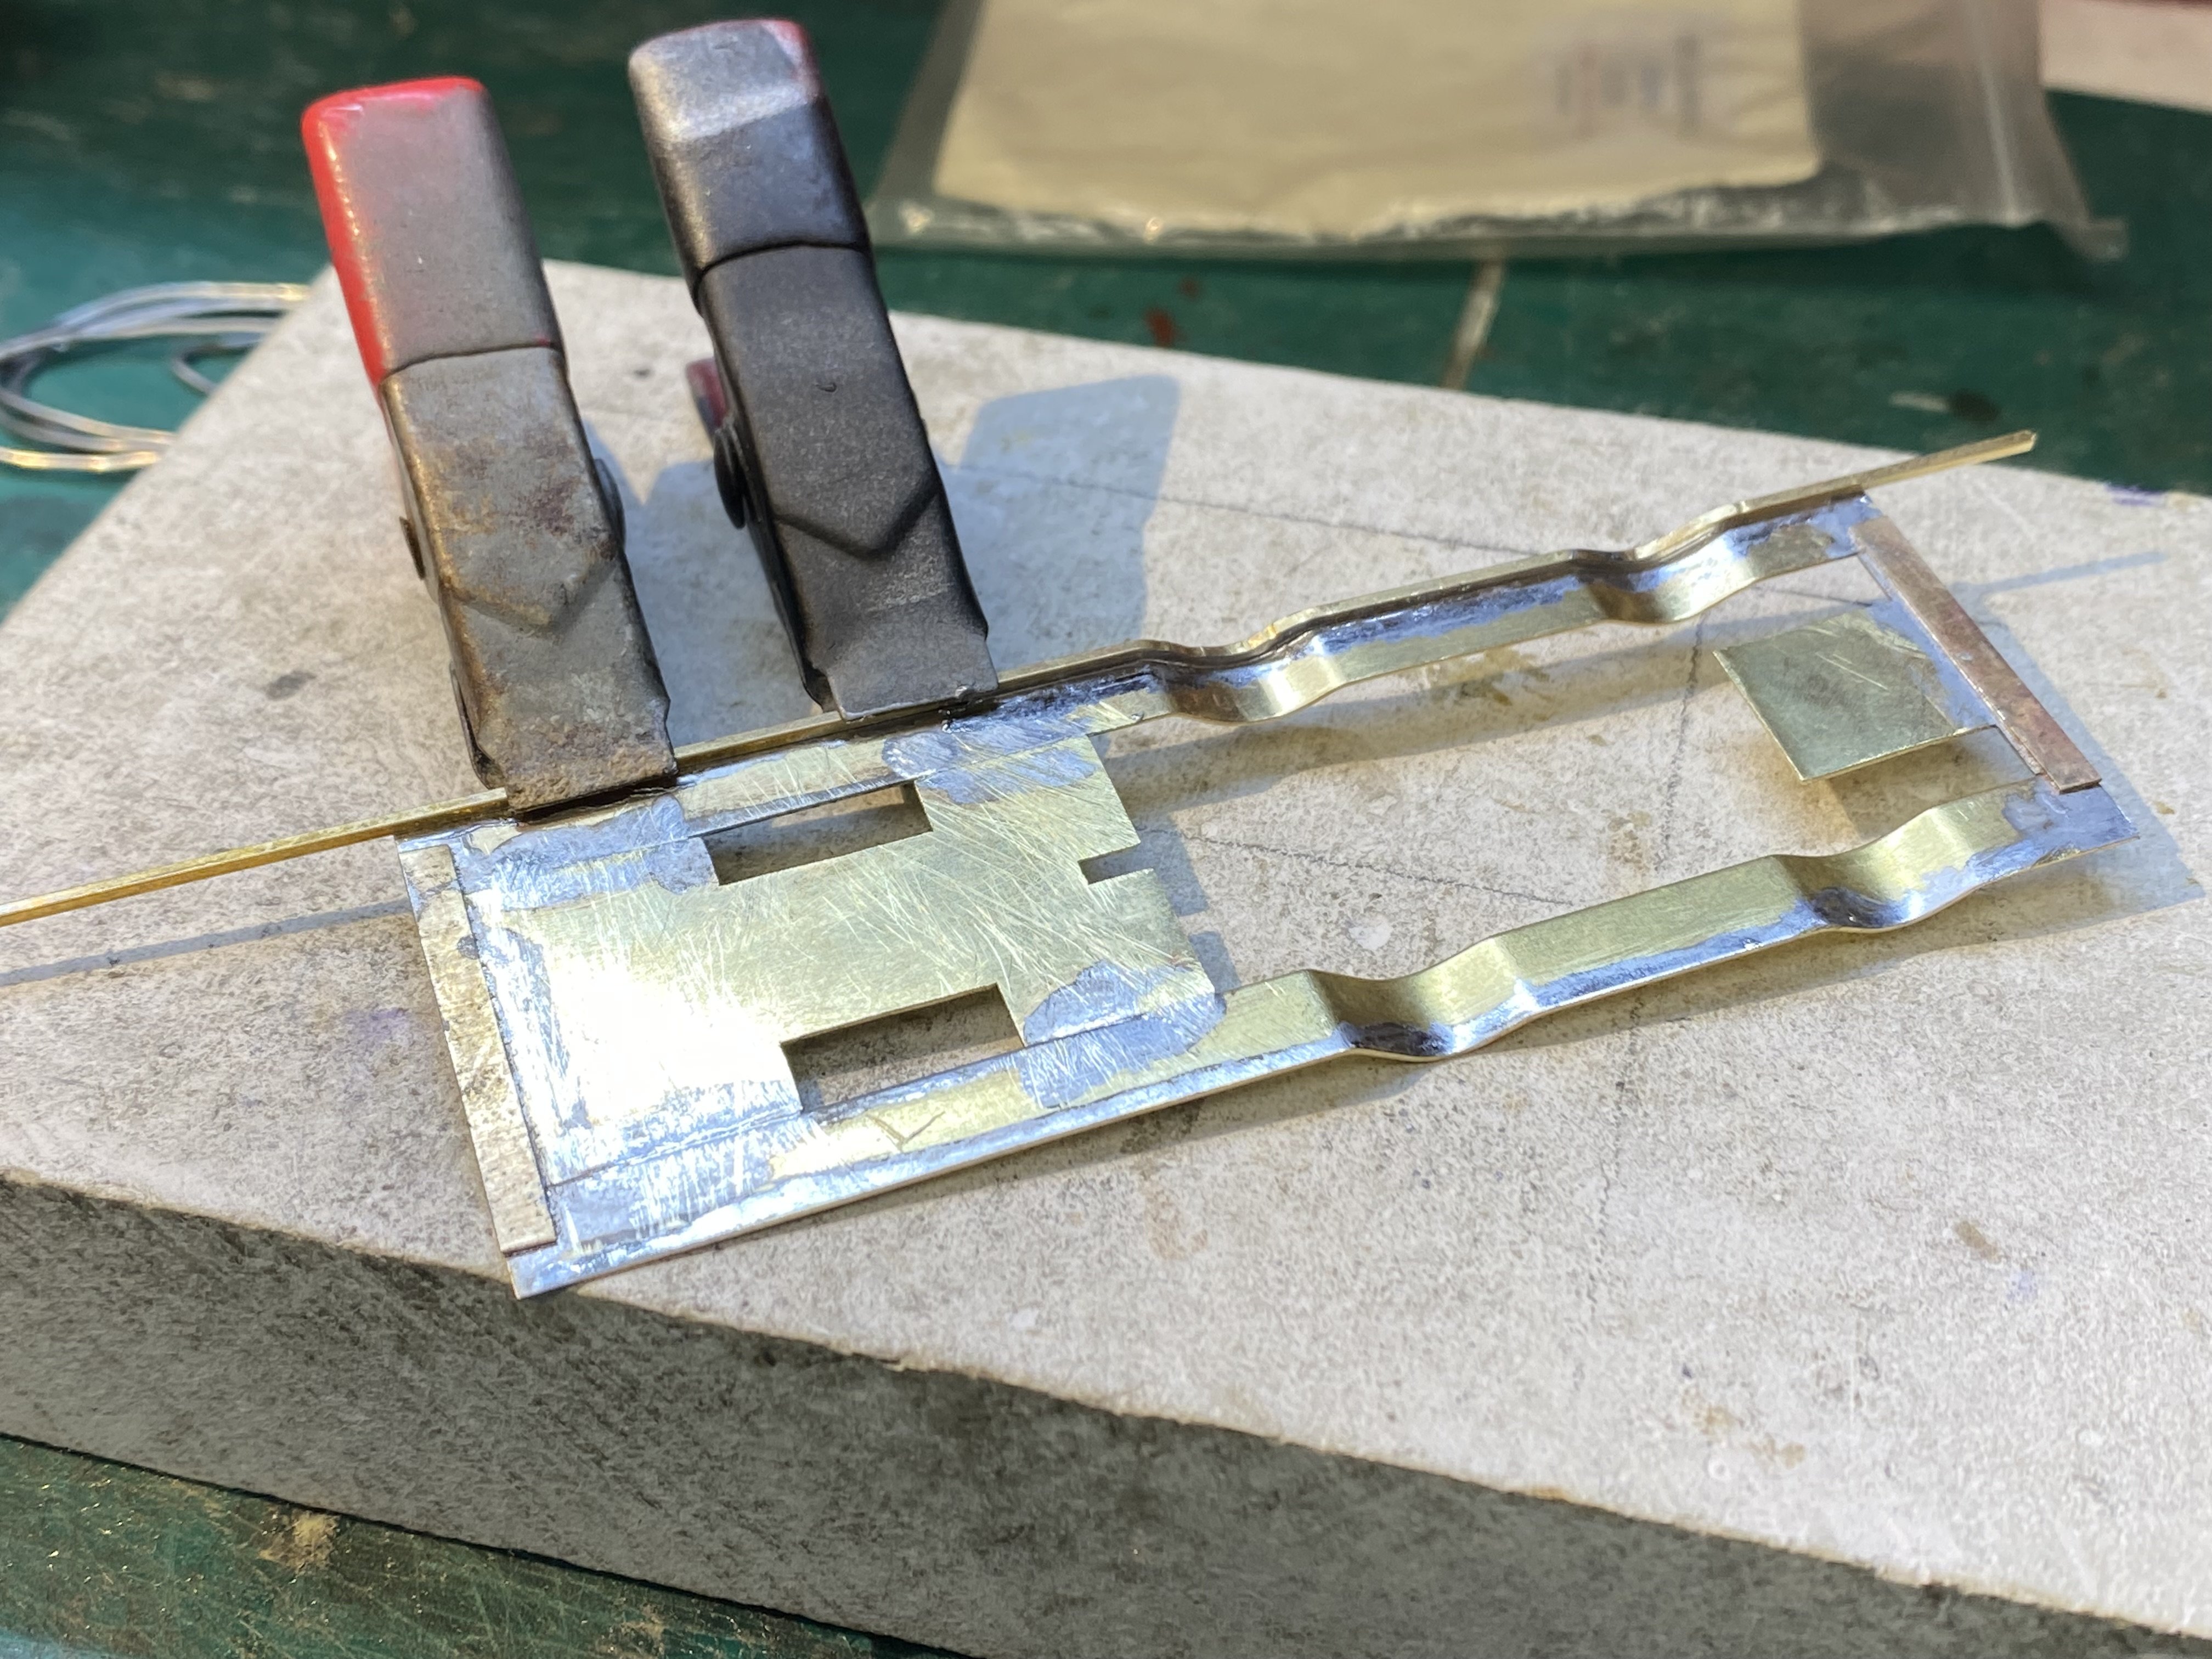
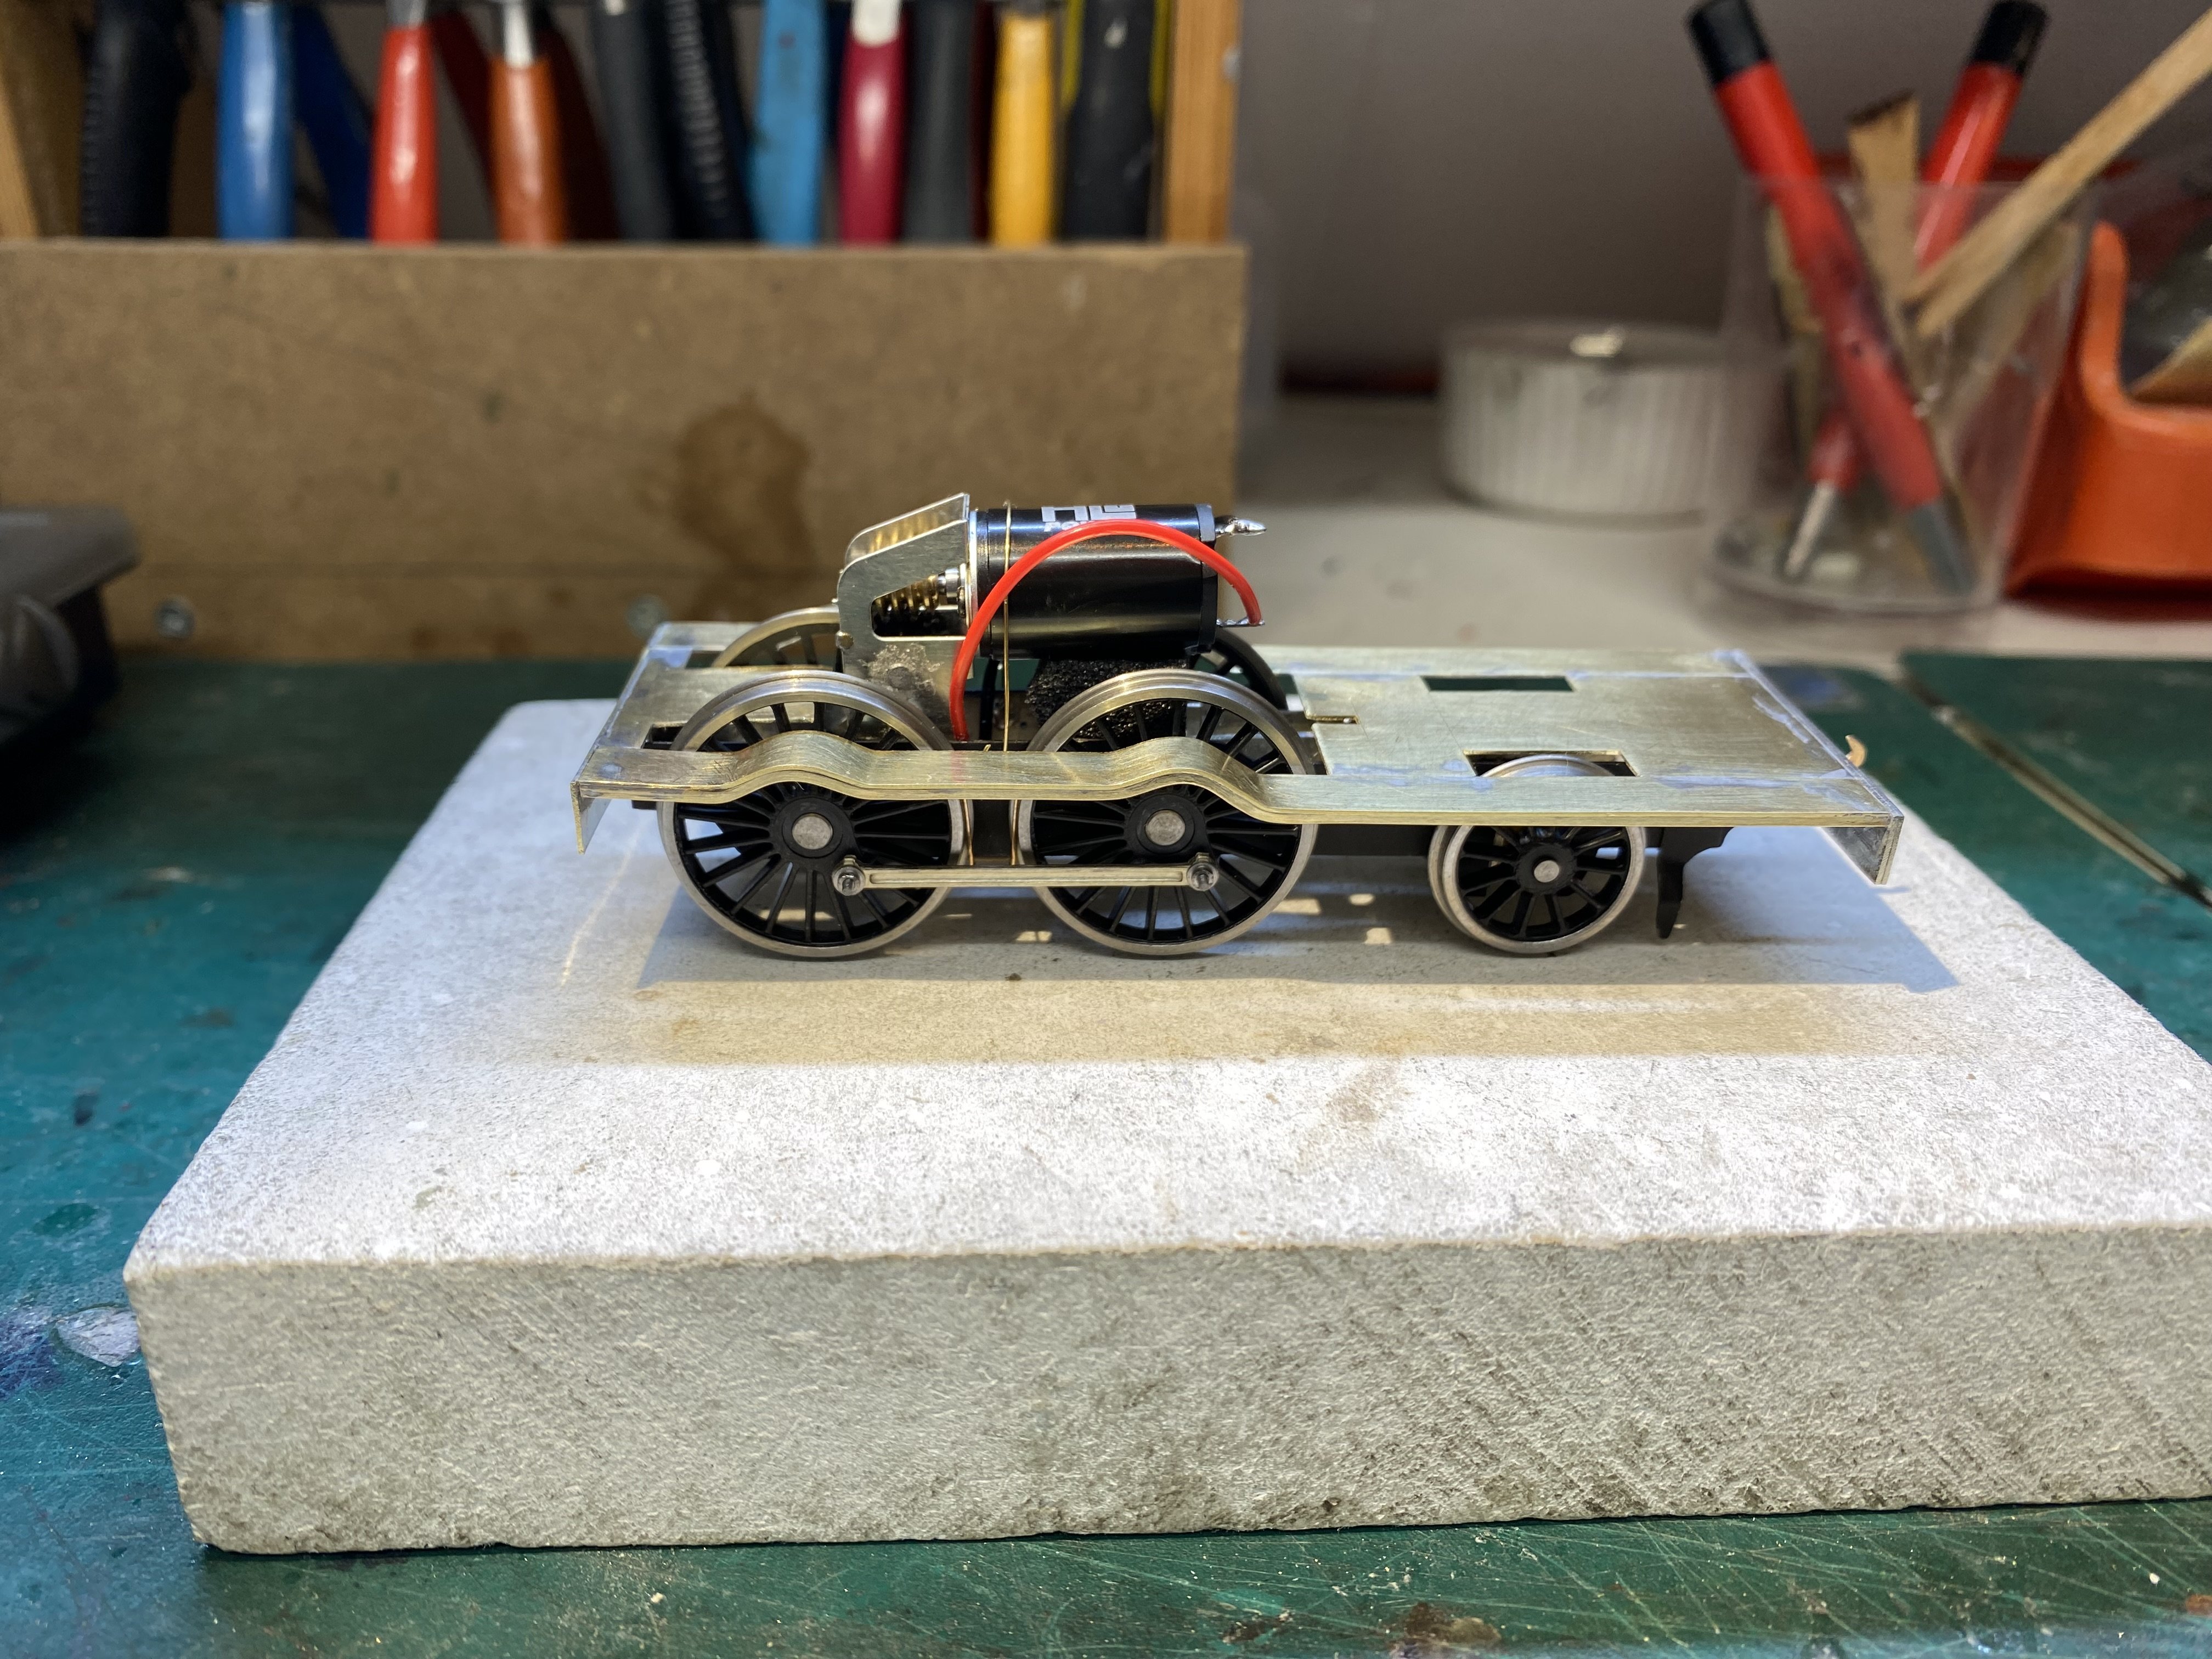
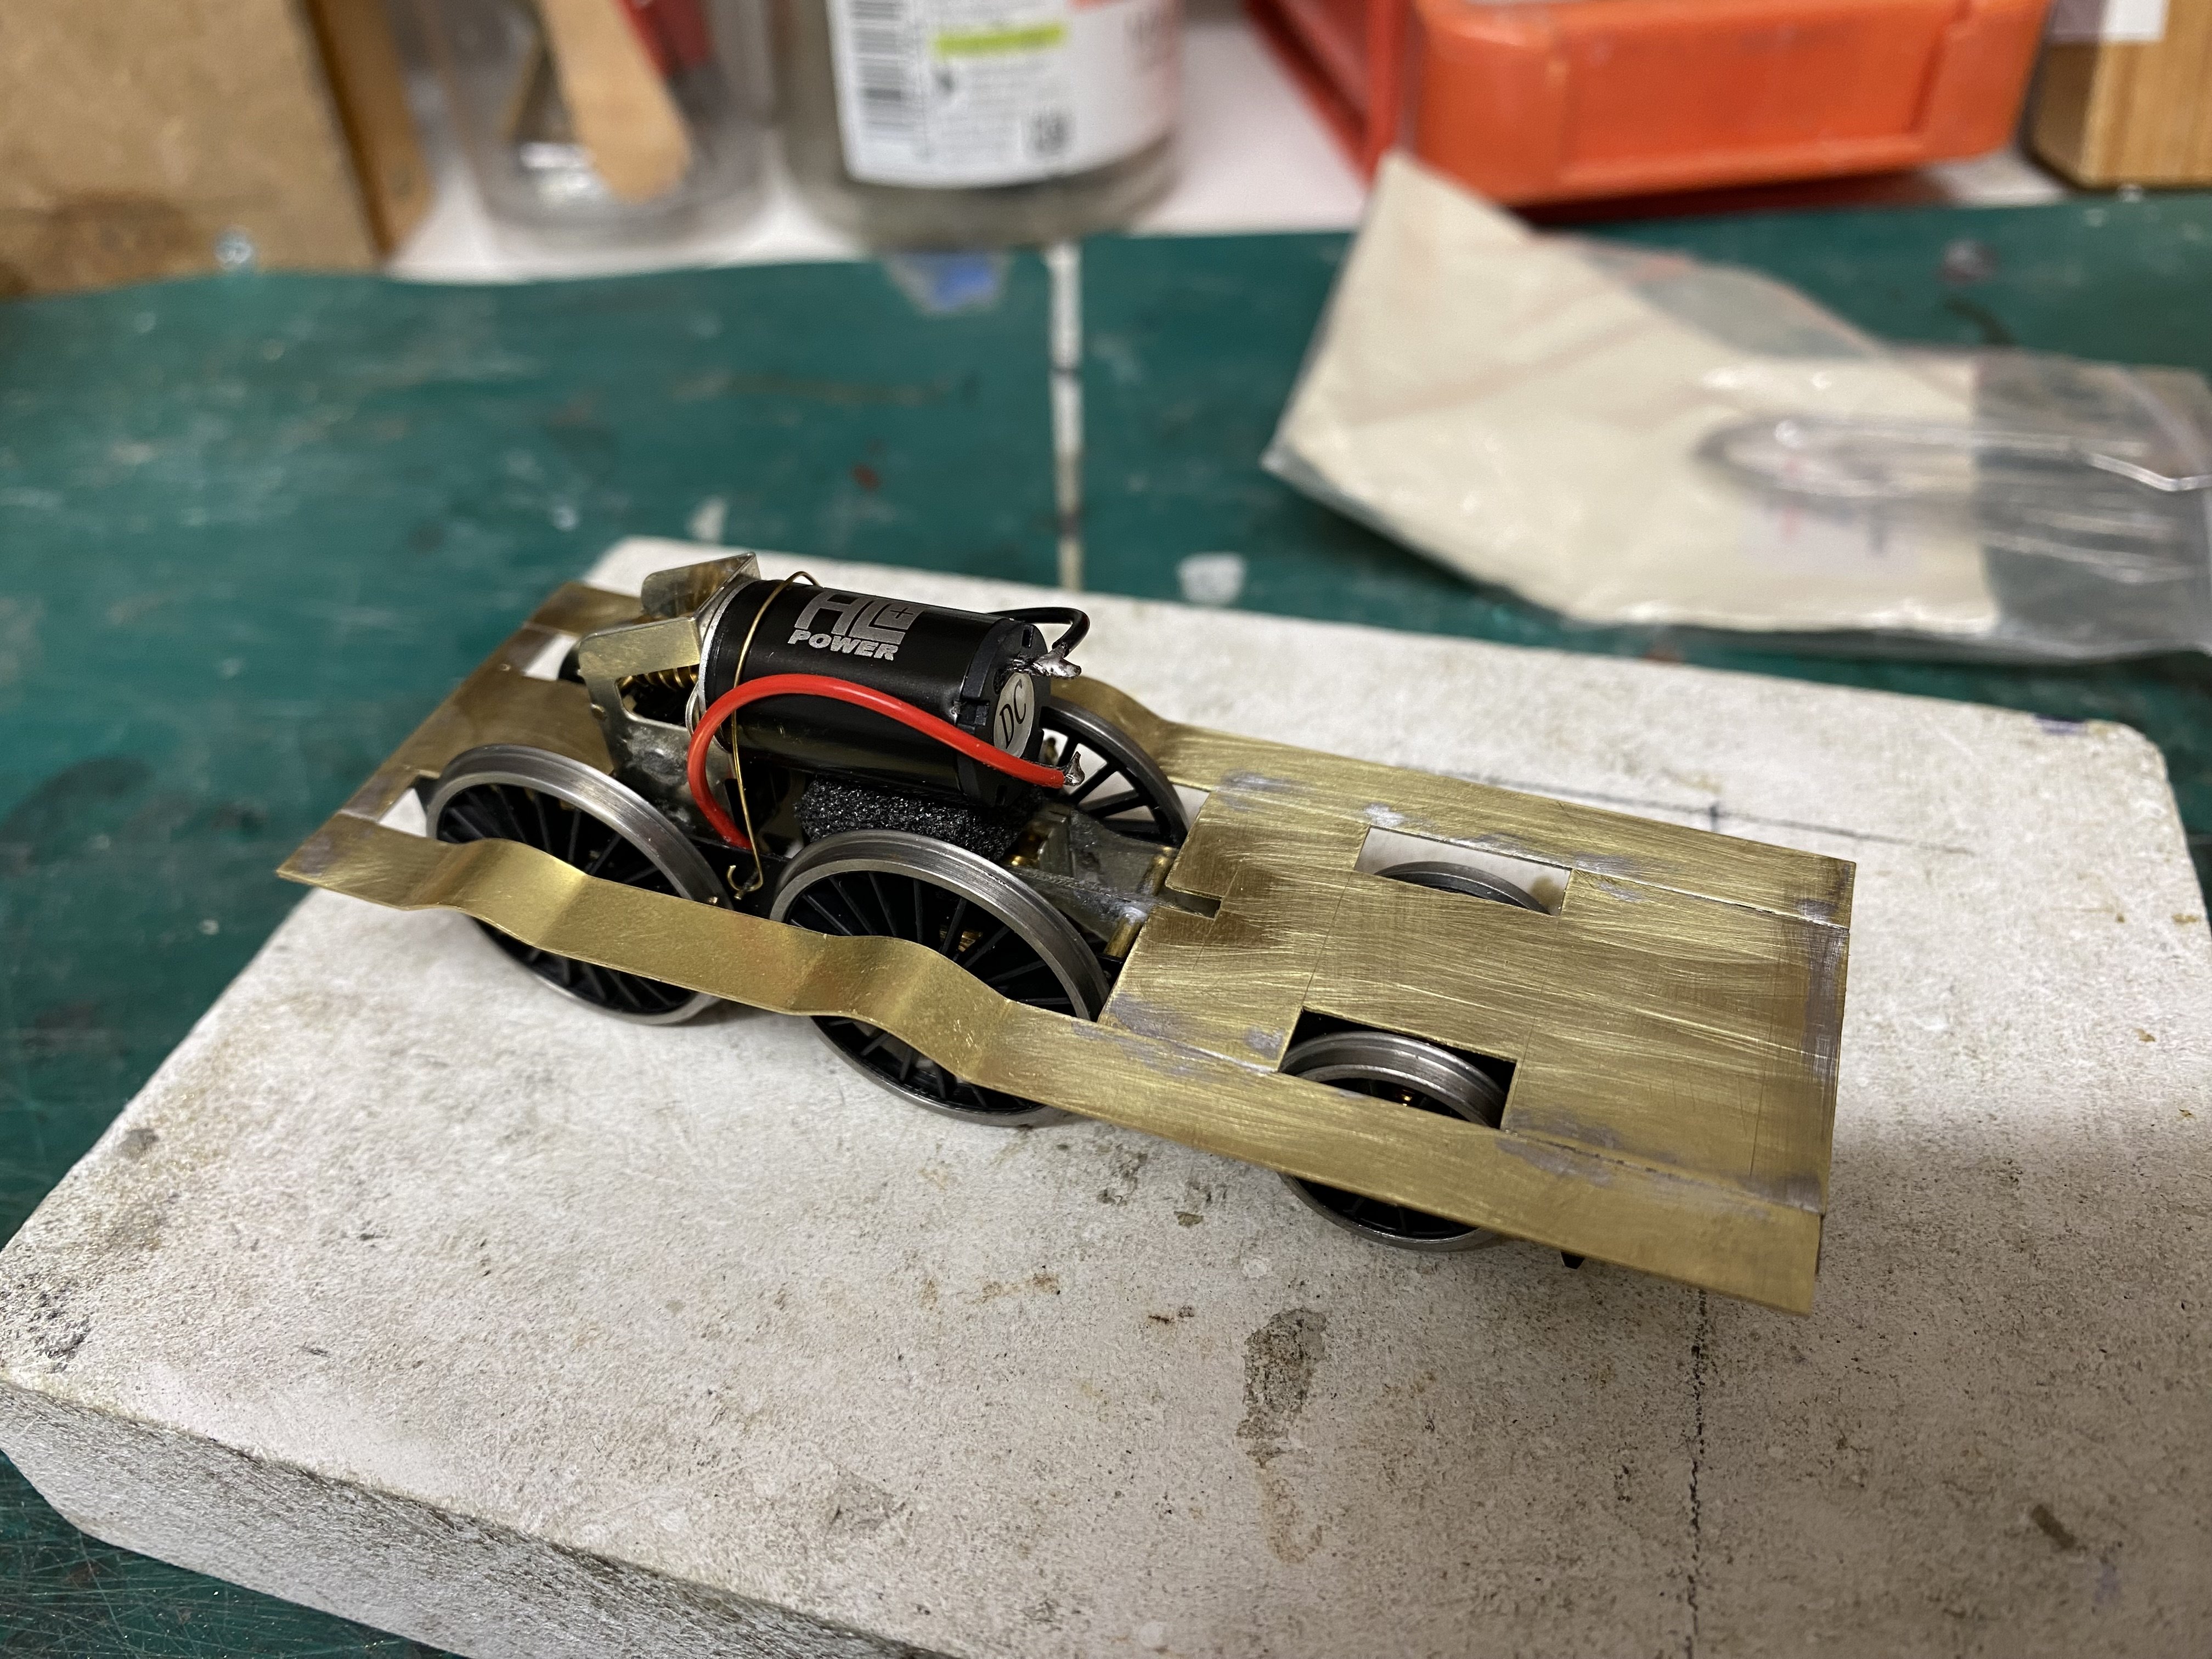
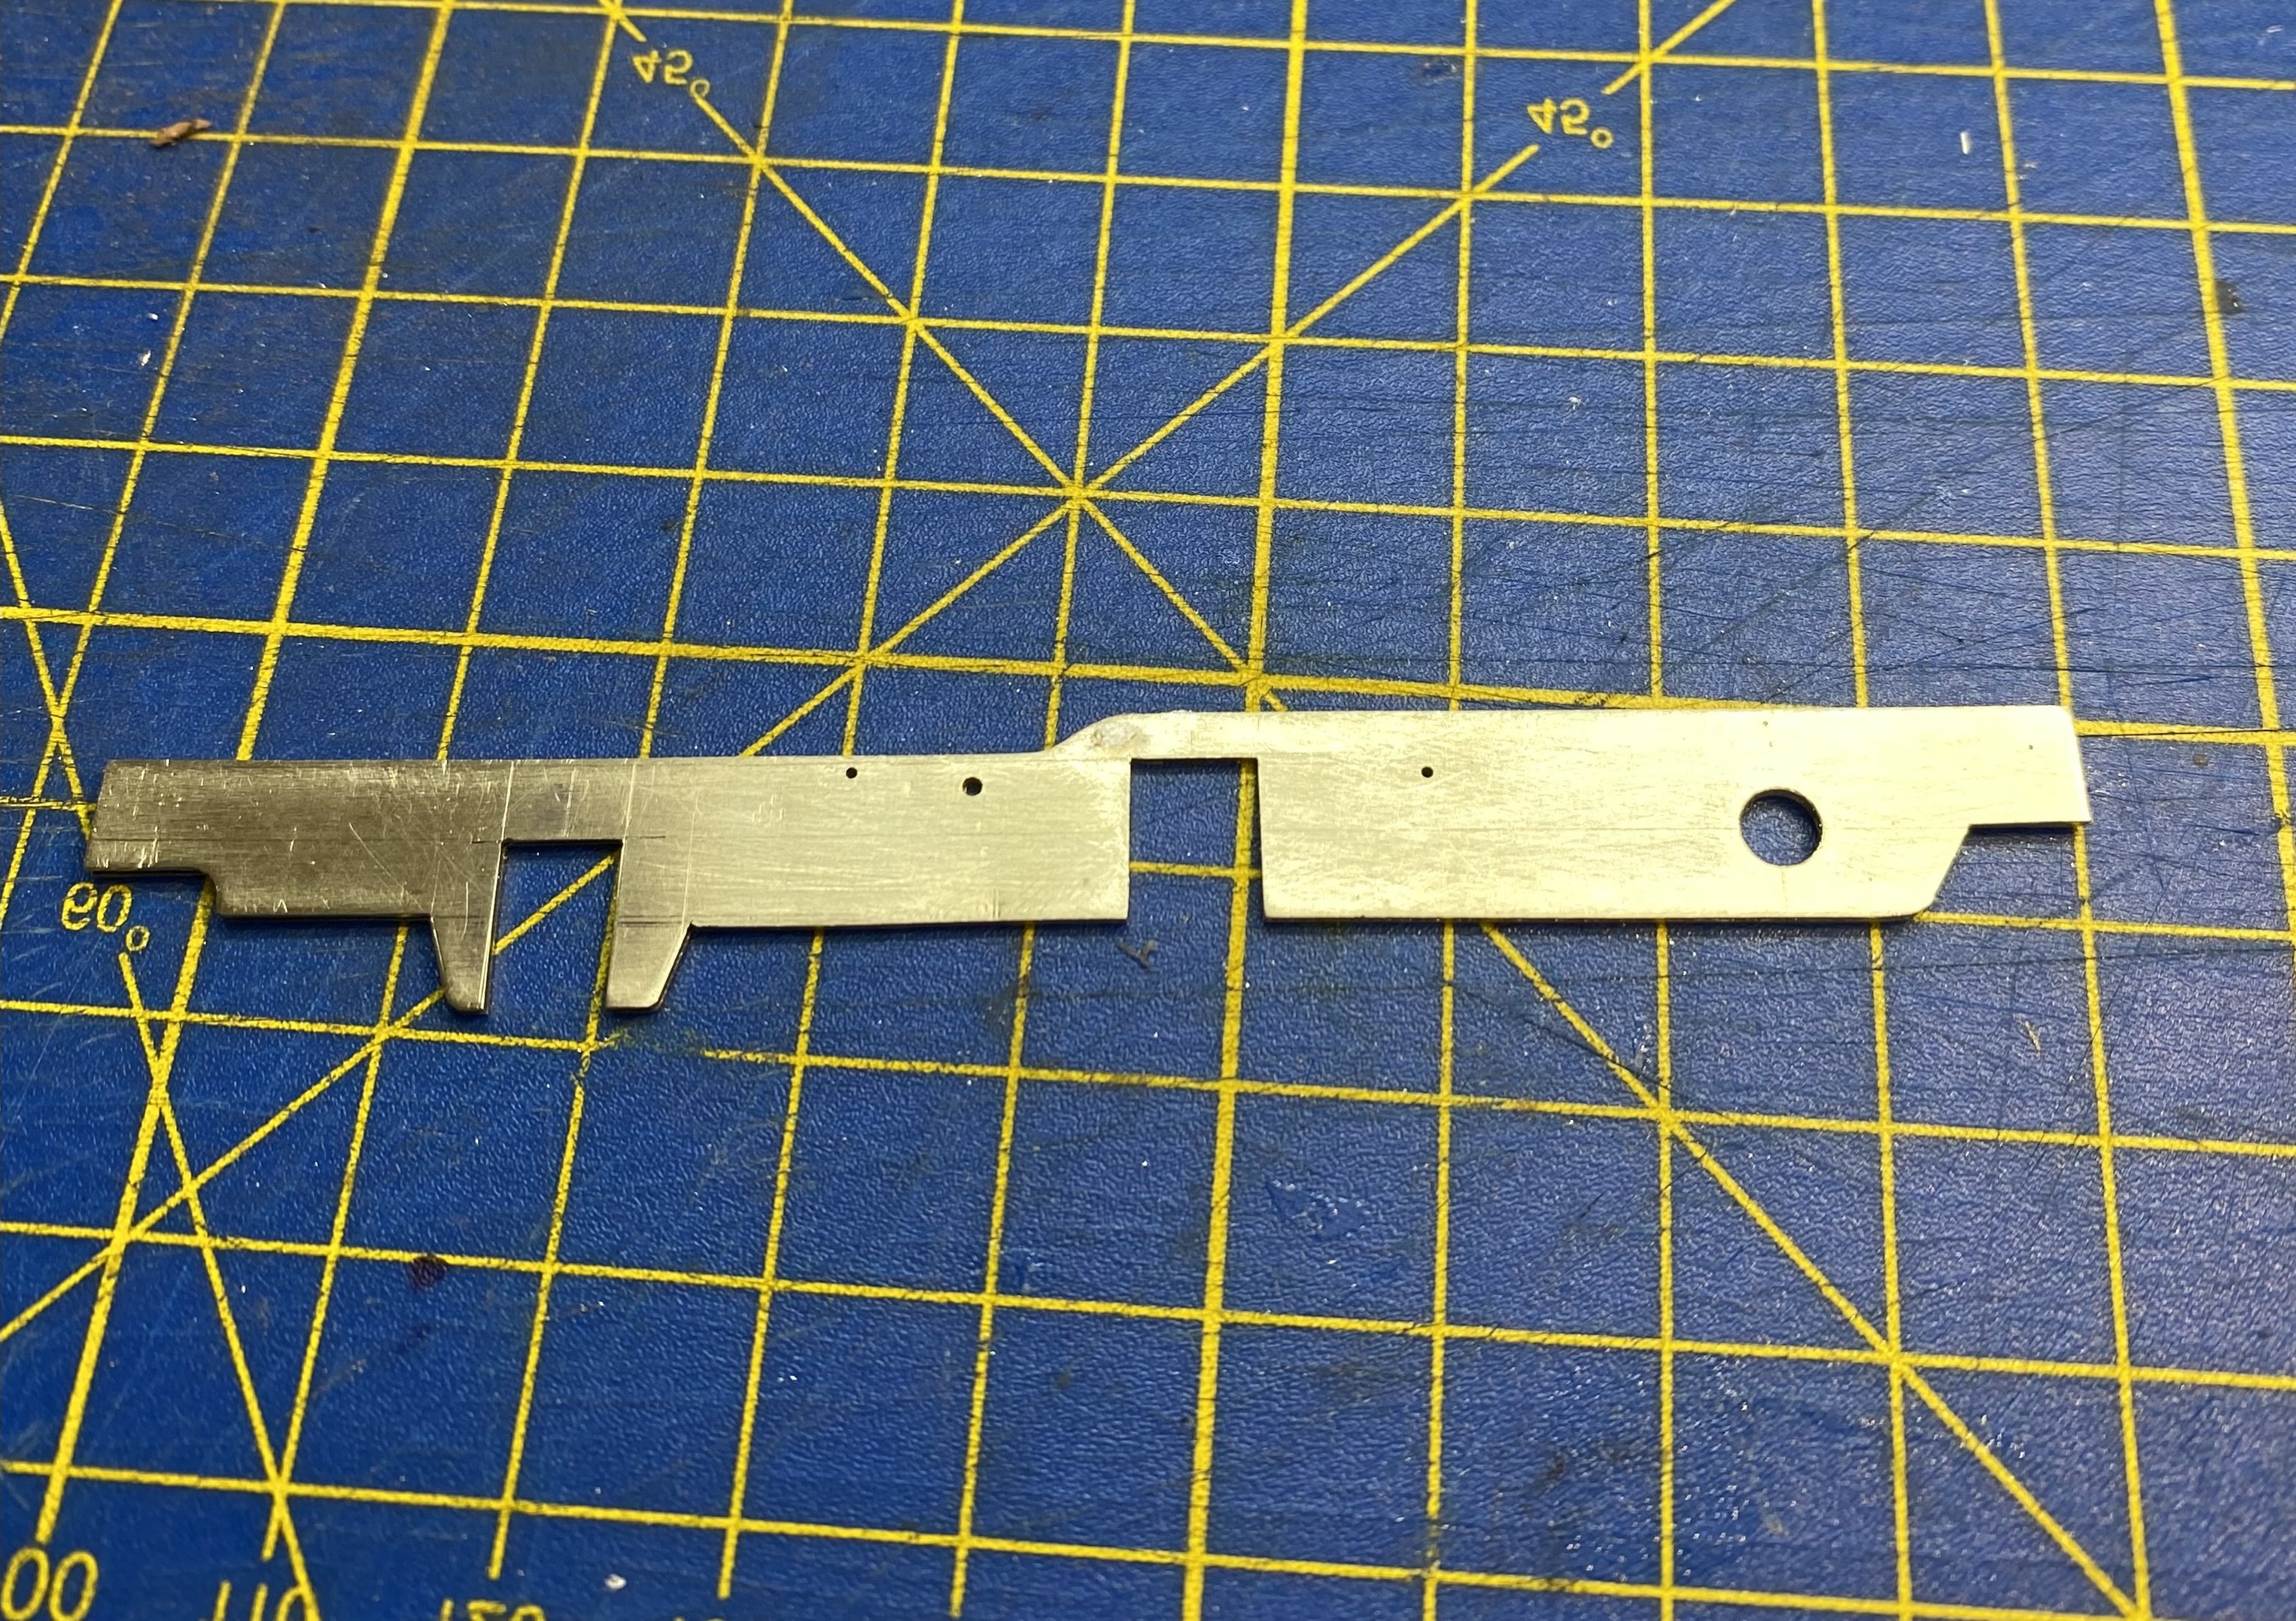
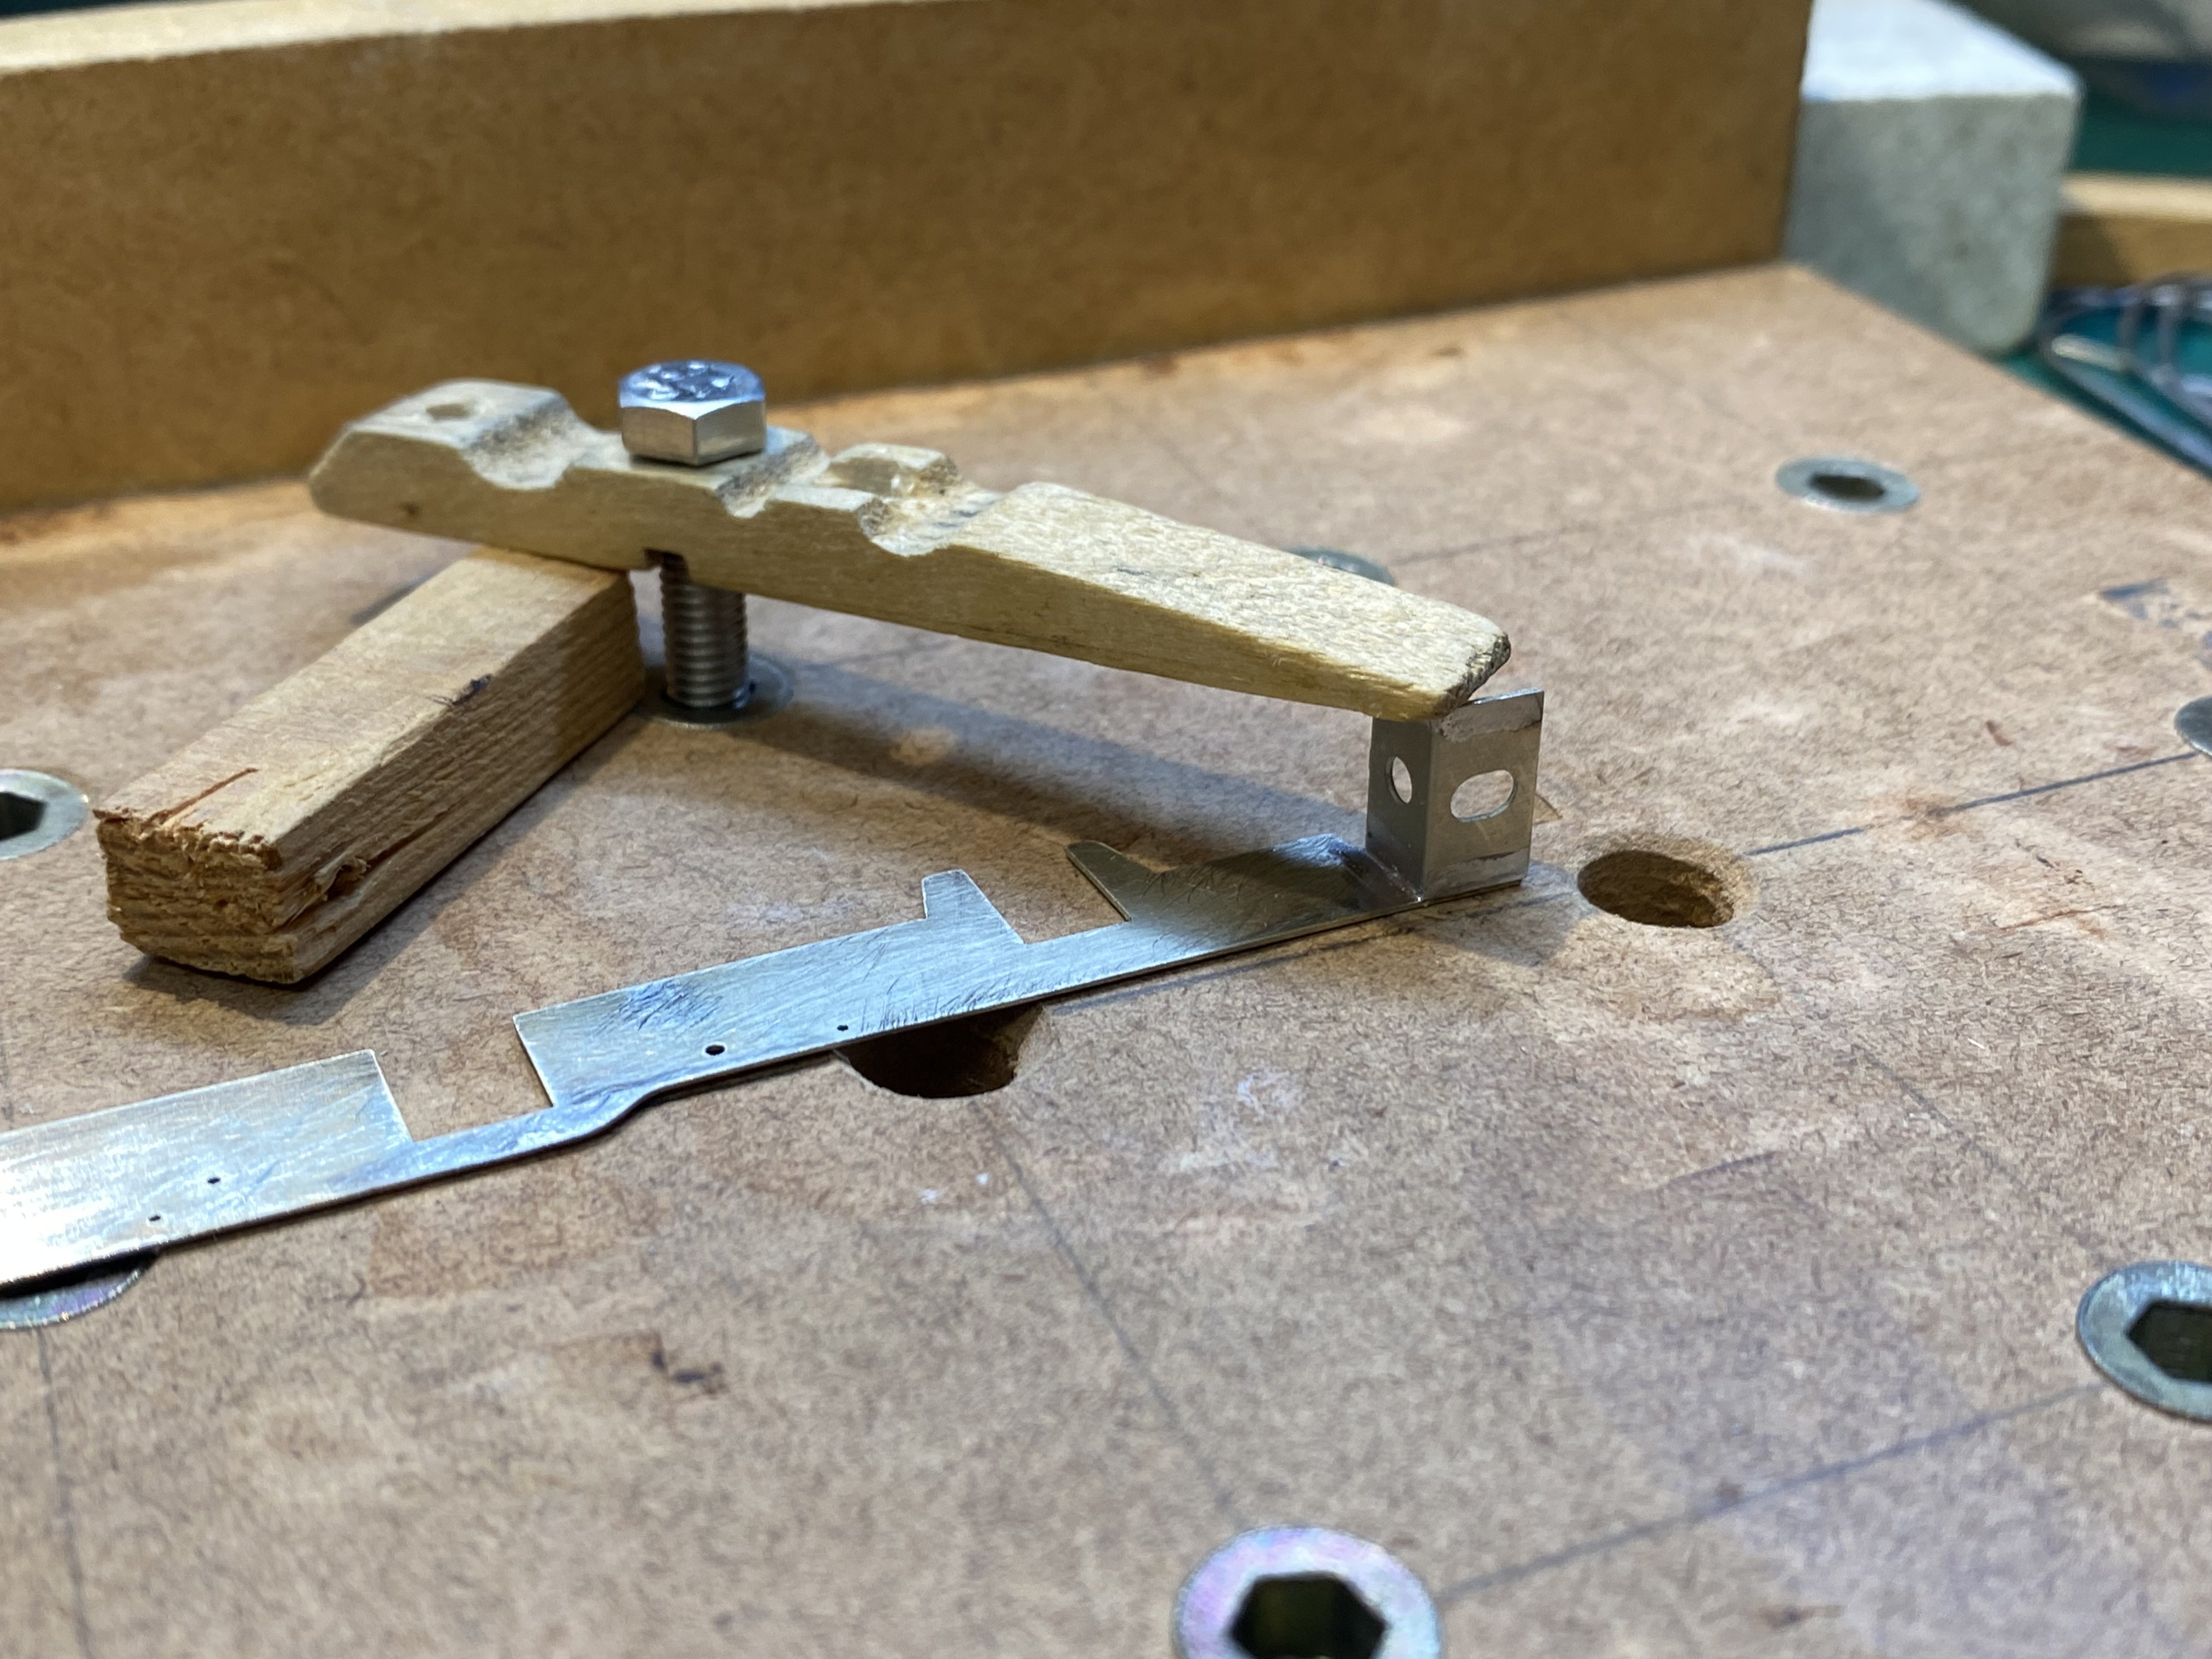
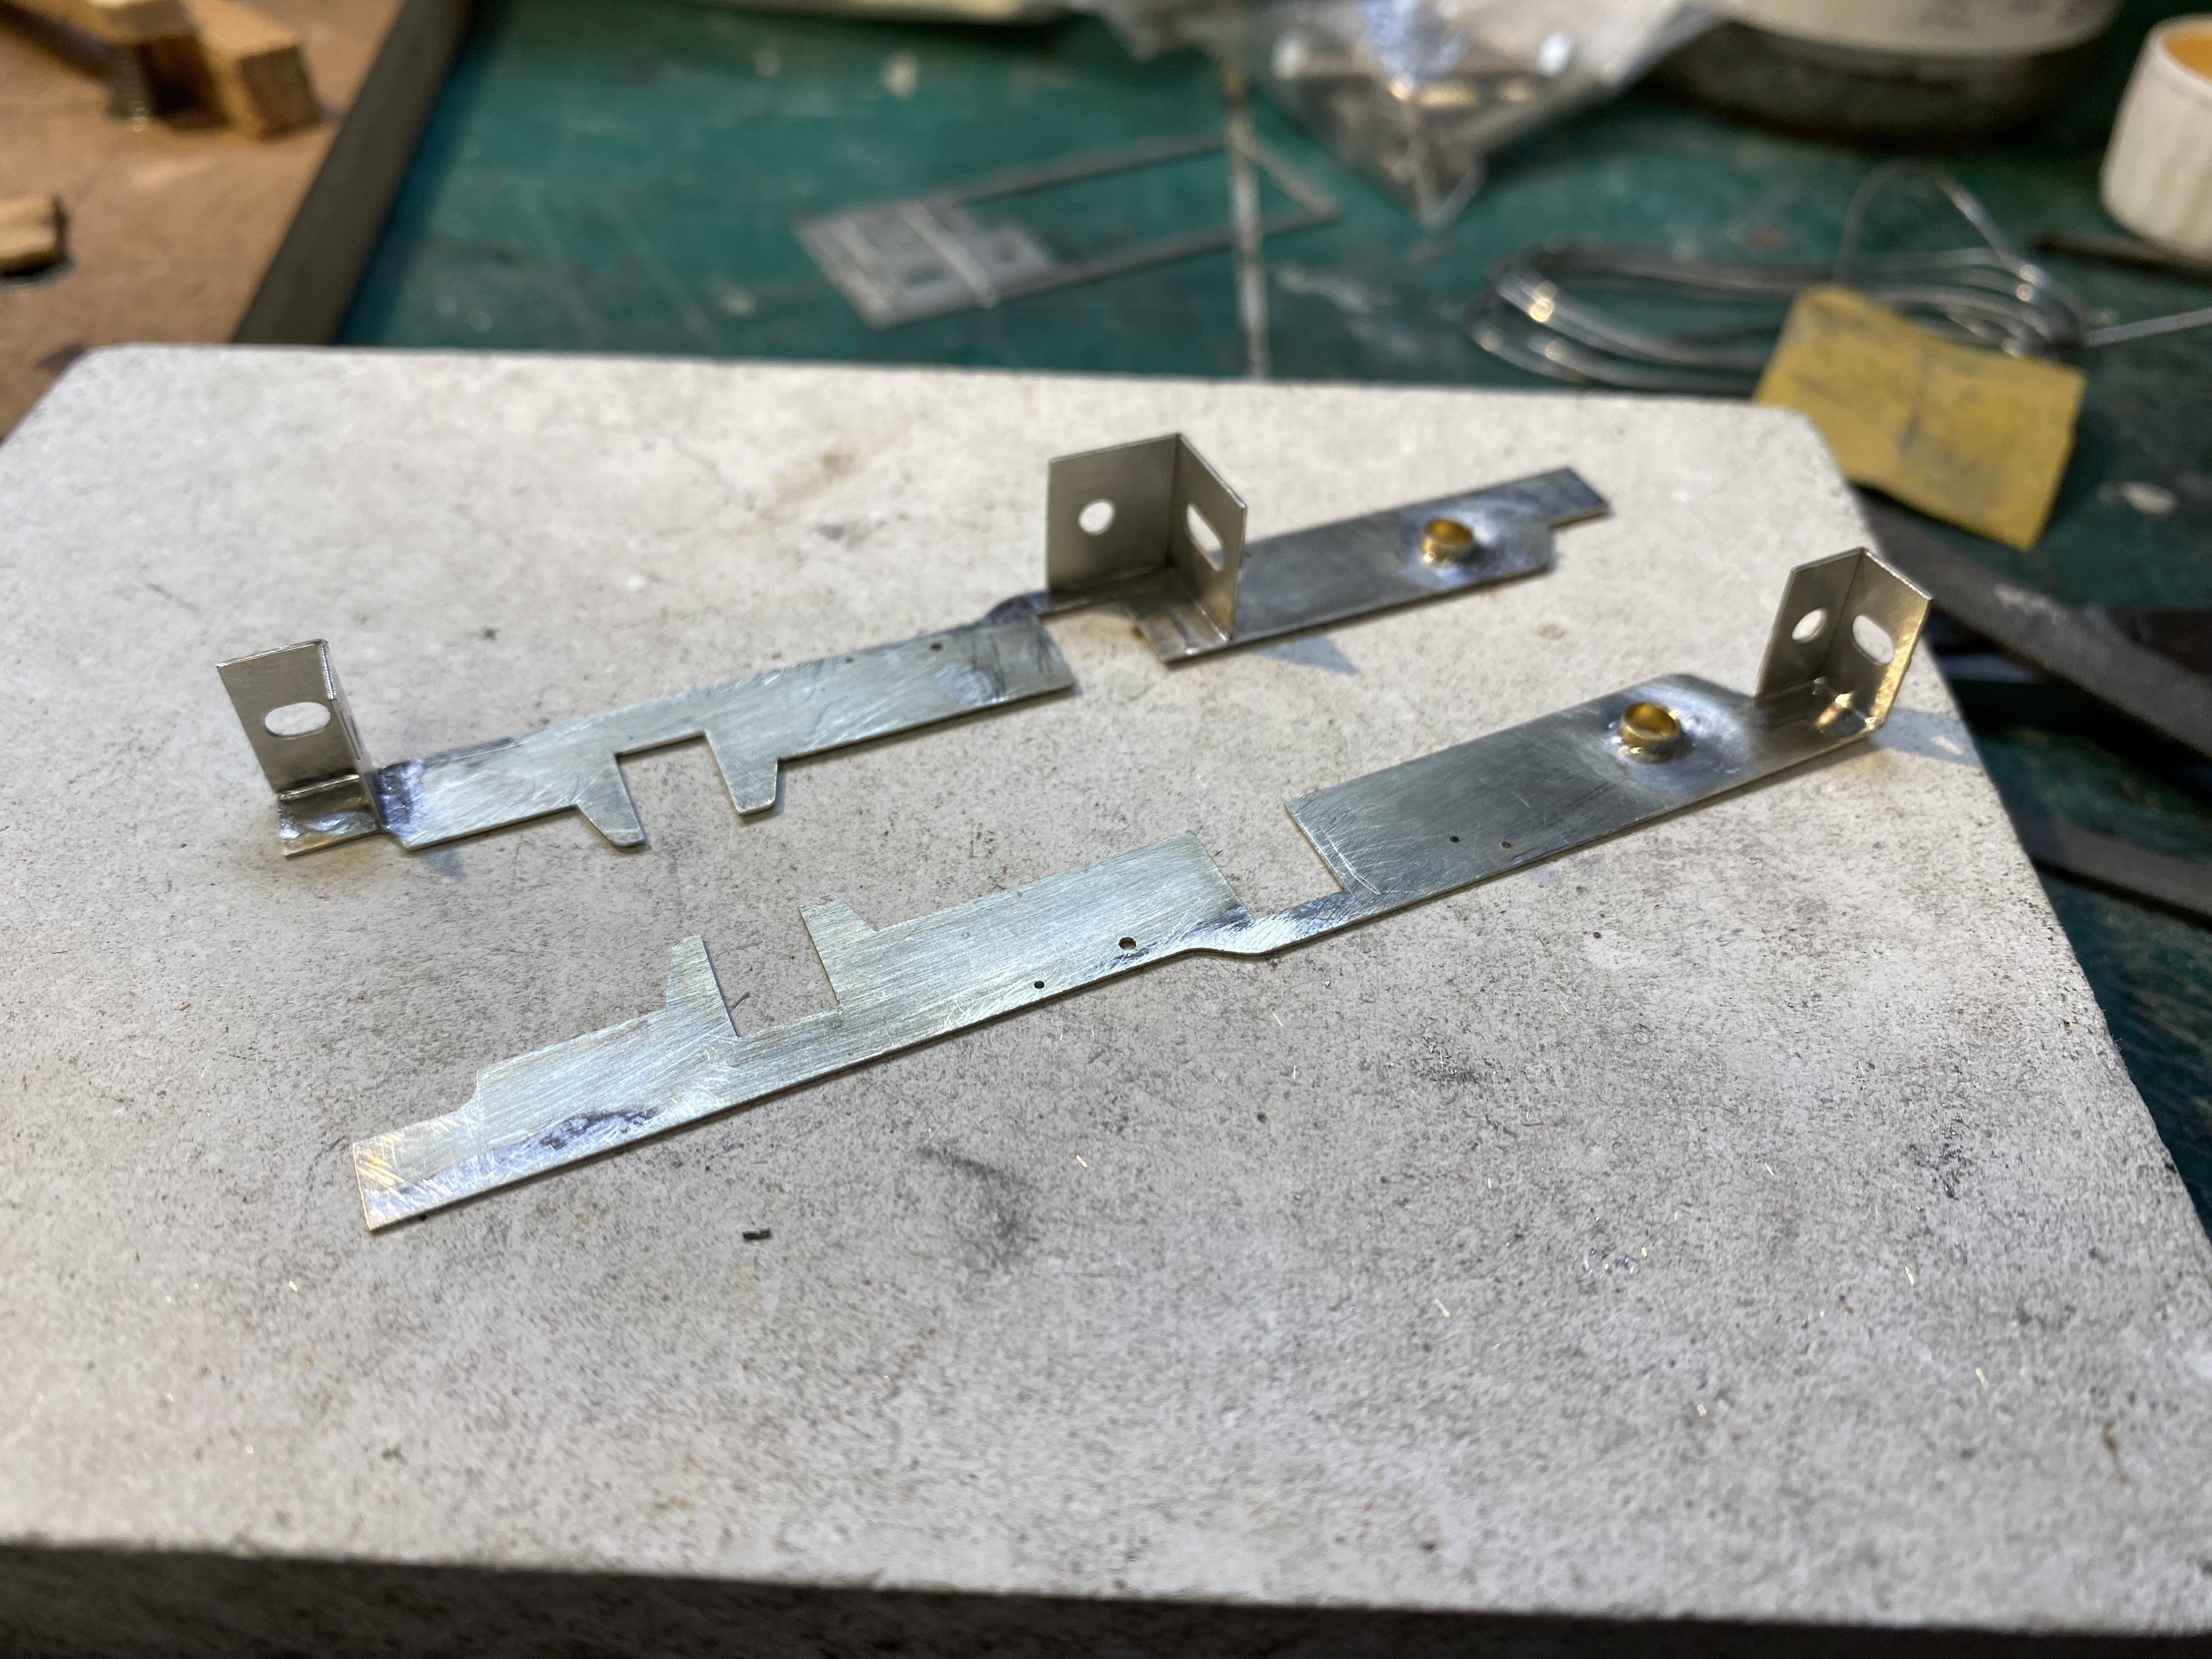
A running plate for No.6. More often than not, I would make a running plate from a plain rectangle of brass or nickel silver with a hole cut in the middle to clear the motor and gearbox. No. 6 is a bit trickier than that. Its running plate has profiled sections to clear the crankpins and a change of level just ahead of the front driving axle. Photo: Coakham, D., The Belfast & County Down Railway, Colourpoint, 2010 Making this required a different approach and It took me a while to come up with a solution. Effectively, rather than starting with a rectangle and cutting a hole in it, I started with the hole and assembled separate bits round it. The profiled sections were made from 6mm wide brass strip shaped by hand round tubing of an appropriate diameter. These were the first things I made, a while ago now, to make sure I could do it, otherwise I wouldn't have gone any further with this one. The valances are 1mm square brass rod, annealed and shaped to fit the running plate. Other bits are cut from 15 thou brass sheet. Everything got soldered together using clamps and guidelines on the heatproof block. Against all the odds, it finished up pretty straight. Superstructure next. No.6's appearance changed often throughout its long career and it ended up looking quite different from the photo above. Among other things the cab roof was lengthened, a tender weatherboard came and went and it was finally given a Belpaire firebox, new boiler and reshaped cab in 1943. There were changes to the tender too. I haven't decided yet which version to model - probably the easiest one Alan
-
Respect, David. Track building is the last great hurdle for me (leaving aside the black arts of CAD and 3D printing). I've looked at what's involved many times and tiptoed quietly away on every occasion. Someday...
-
Some very fine scratch building there David. There's a lot of time-consuming detail work in all that panelling. Nice subtle weathering too.
-
Quite possible David. I find it takes me a while to get a good balance with just enough pressure on the wheels to make sure of good contact but not so much as to cause drag. It's very difficult to establish if lumpy running is due to intermittent contact or too much pressure causing tight spots. Hope you can pin it down on your JT.
-
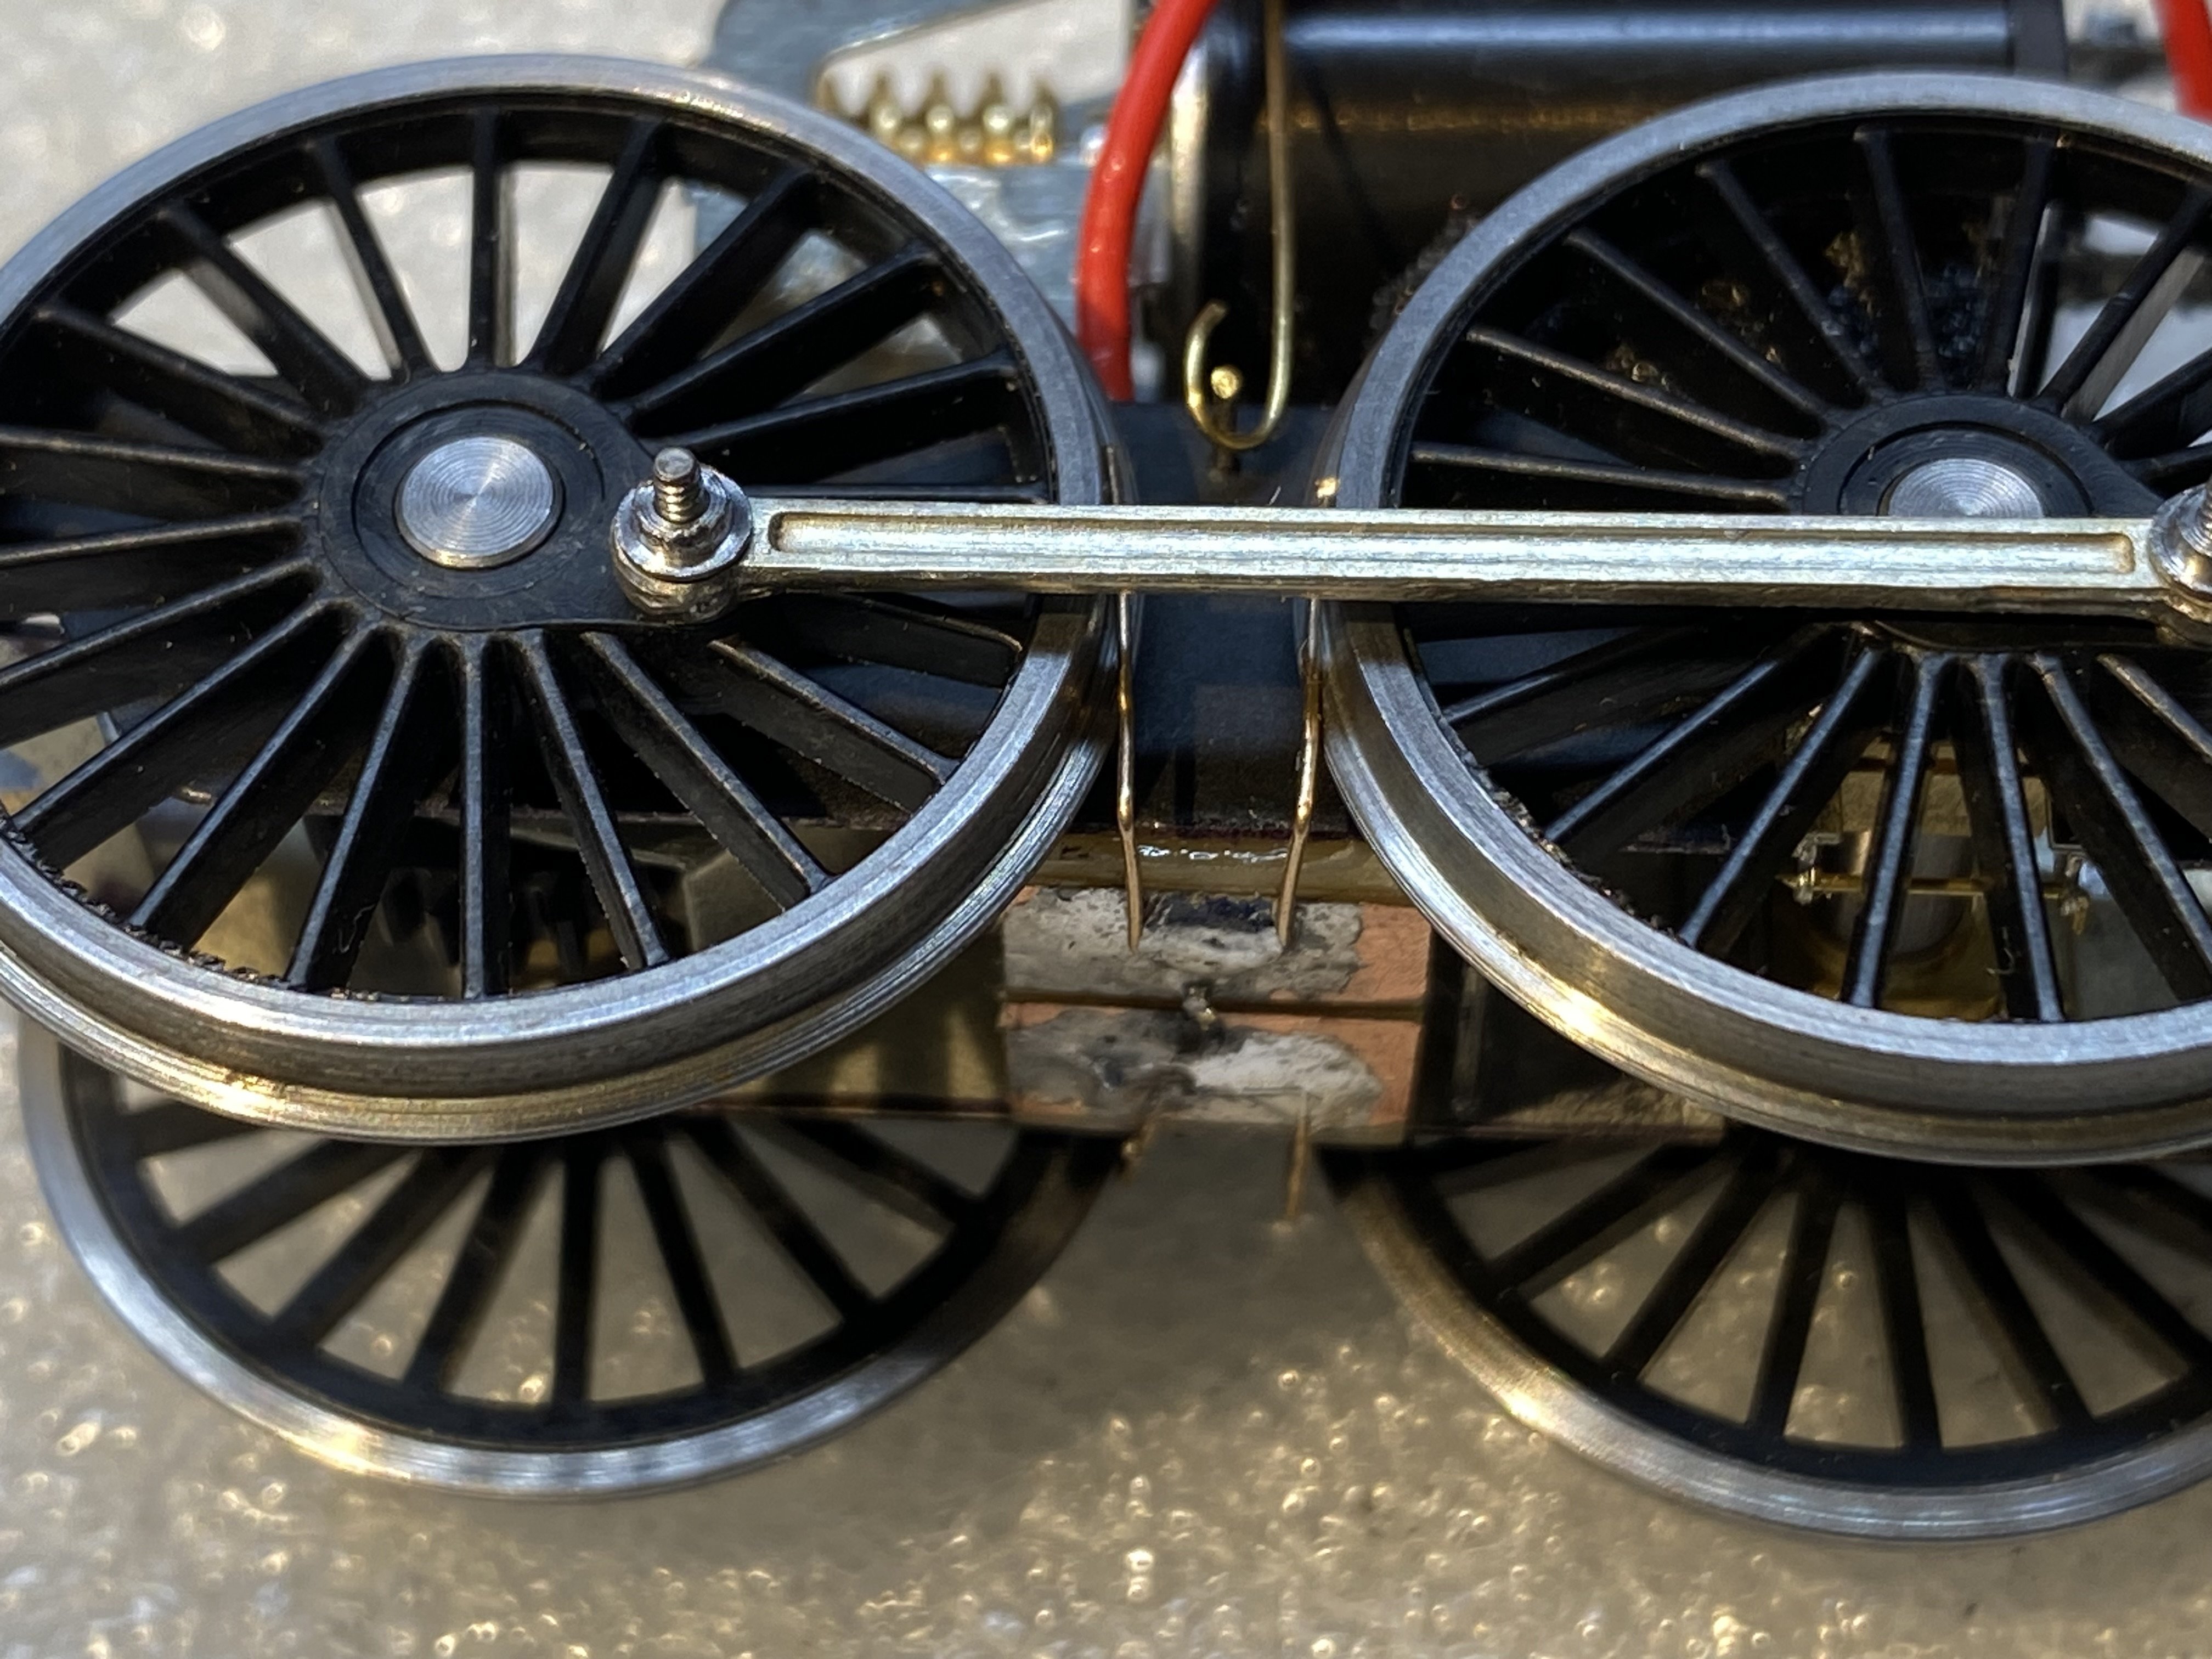
First attempt at pickups failed. Phosphor bronze wires bearing on the wheel flanges at right angles were too short and stiff. They caused a bout of stuttering and hiccups and also interfered with the action of the hornblocks. Take two, with the wires a bit longer and bearing on the wheel treads worked much better. There'll be just enough room to fit a (plastic) brake lever in there too. First run under its own steam. OK... electricity. My Movie 1.mov
-
Thank you David. It's a tricky little beast, this one which is of course why I've avoided it up till now. The running plate is on two levels and has curves in between to clear the crankpins. This also meant the frames had to have a step in the top edge, all of which made it harder to get the thing straight. Still, so far so good. Nothing ventured...
-
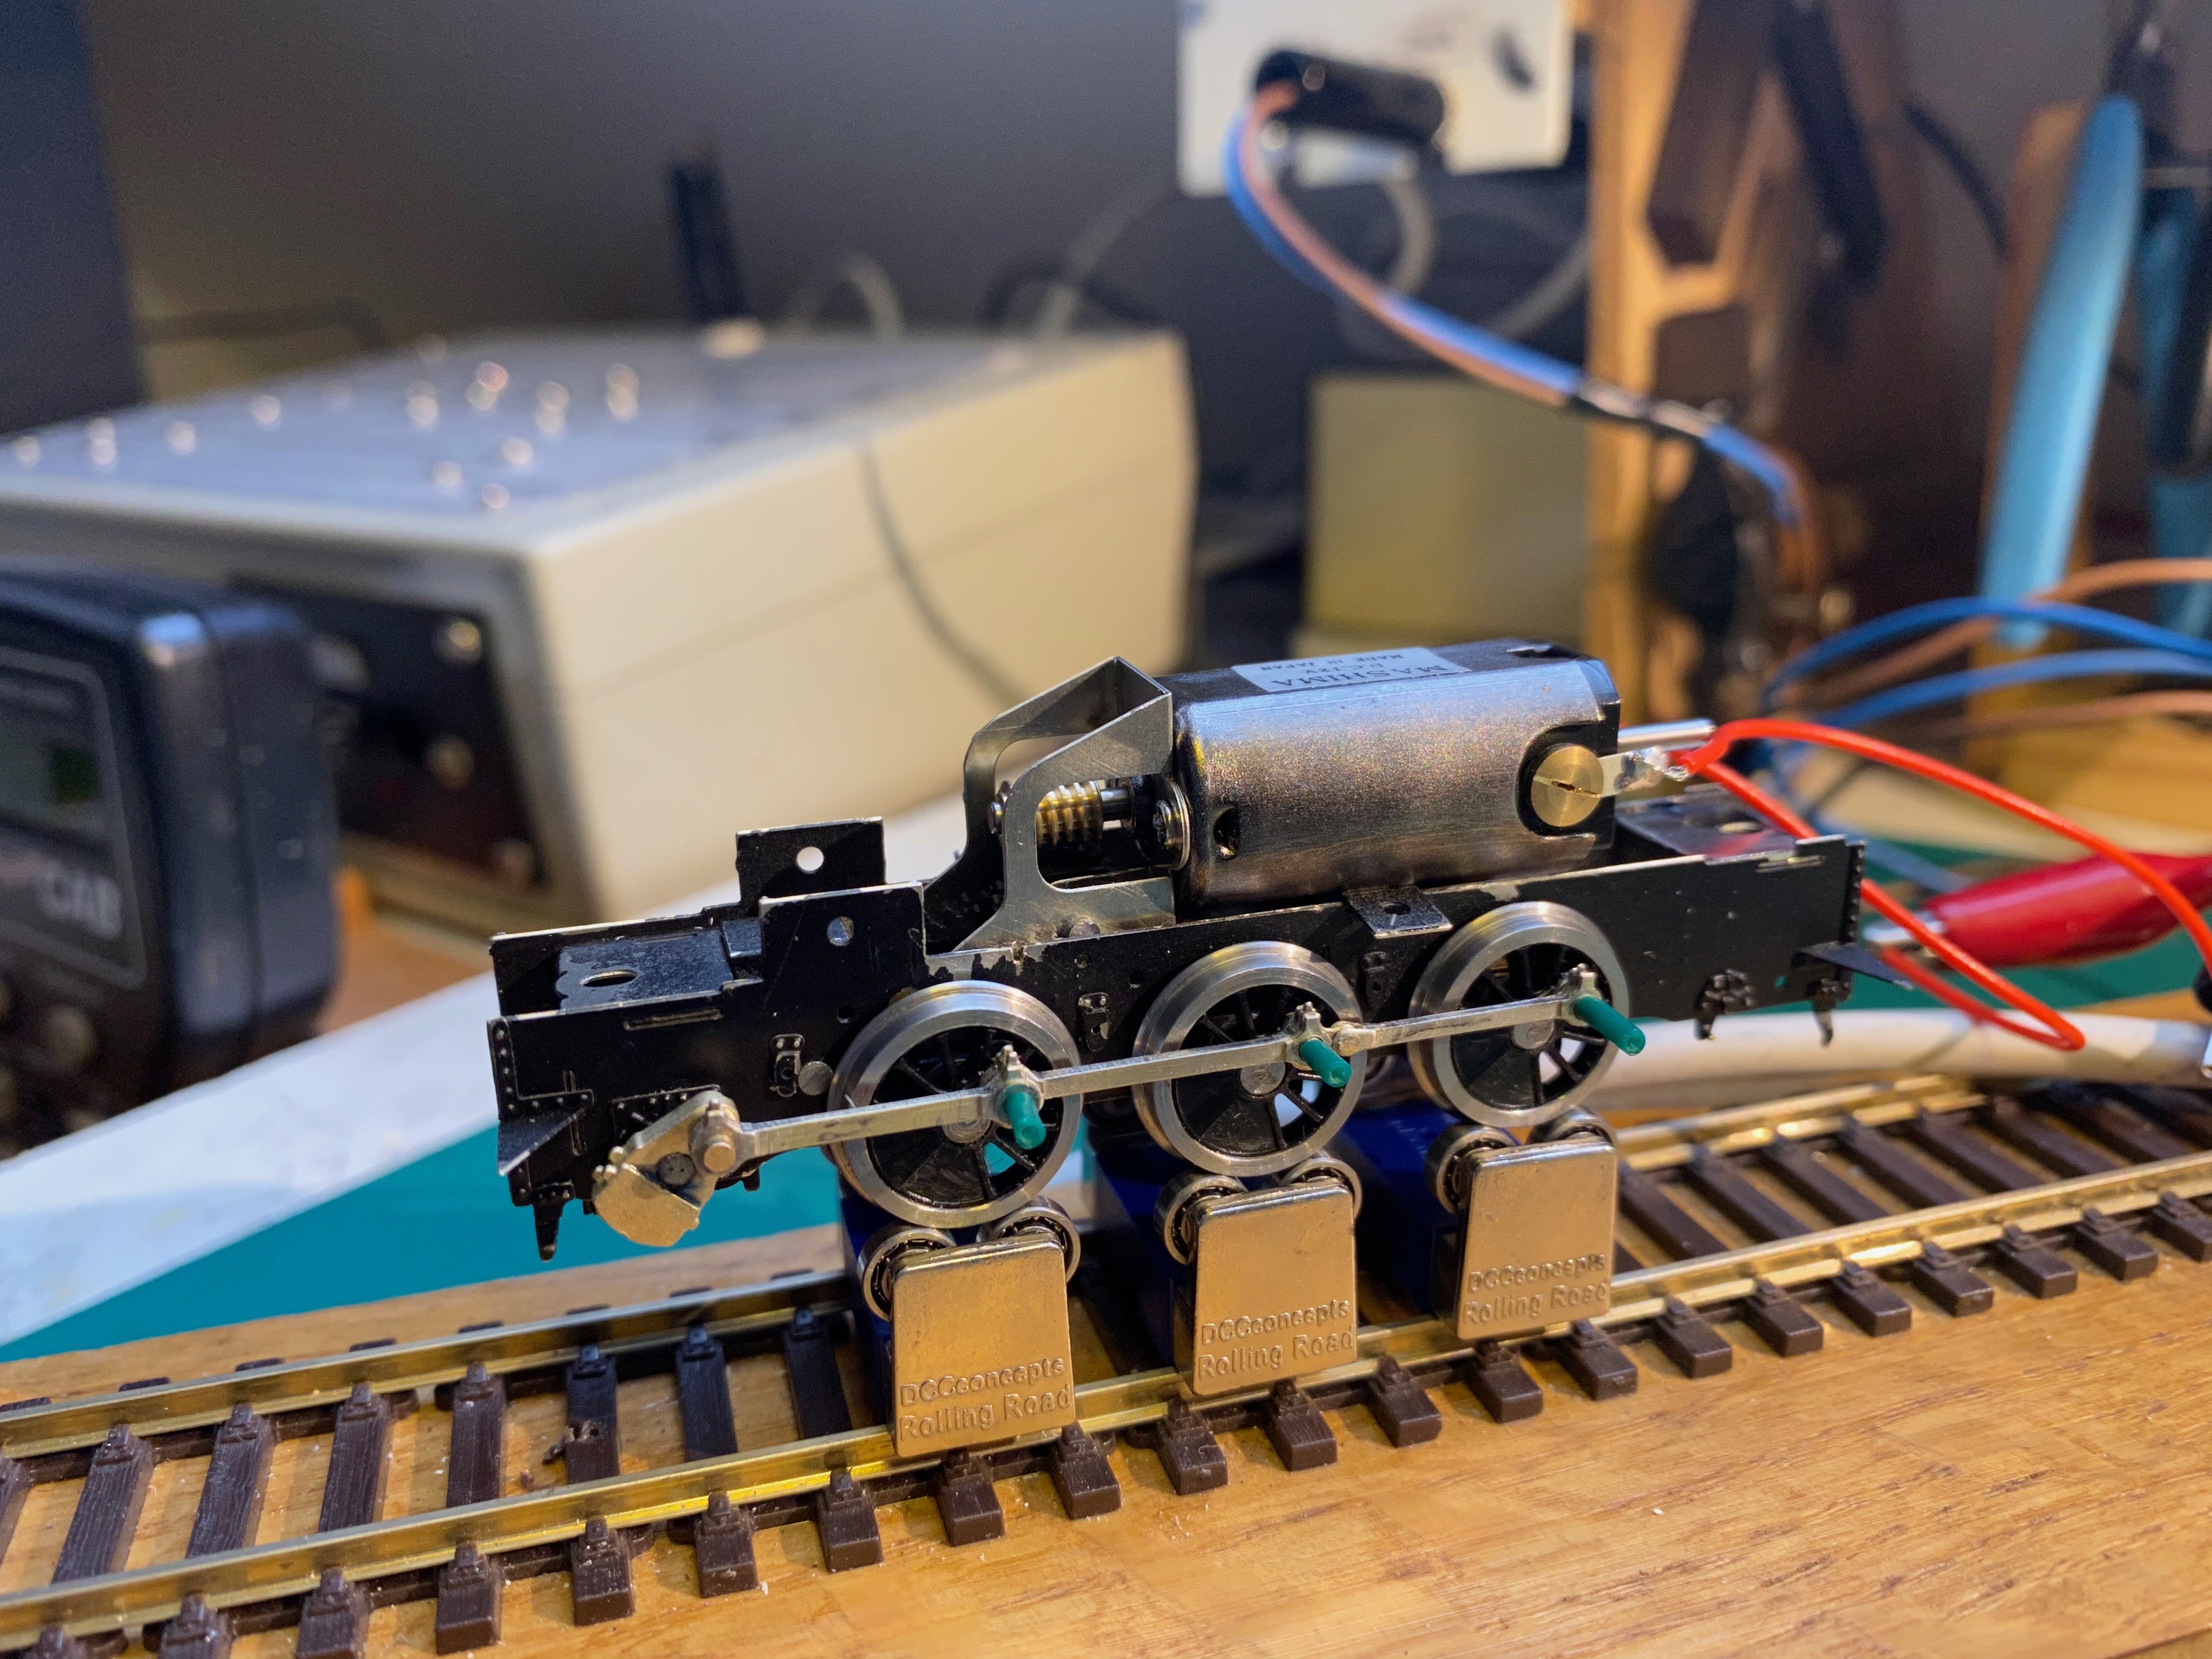
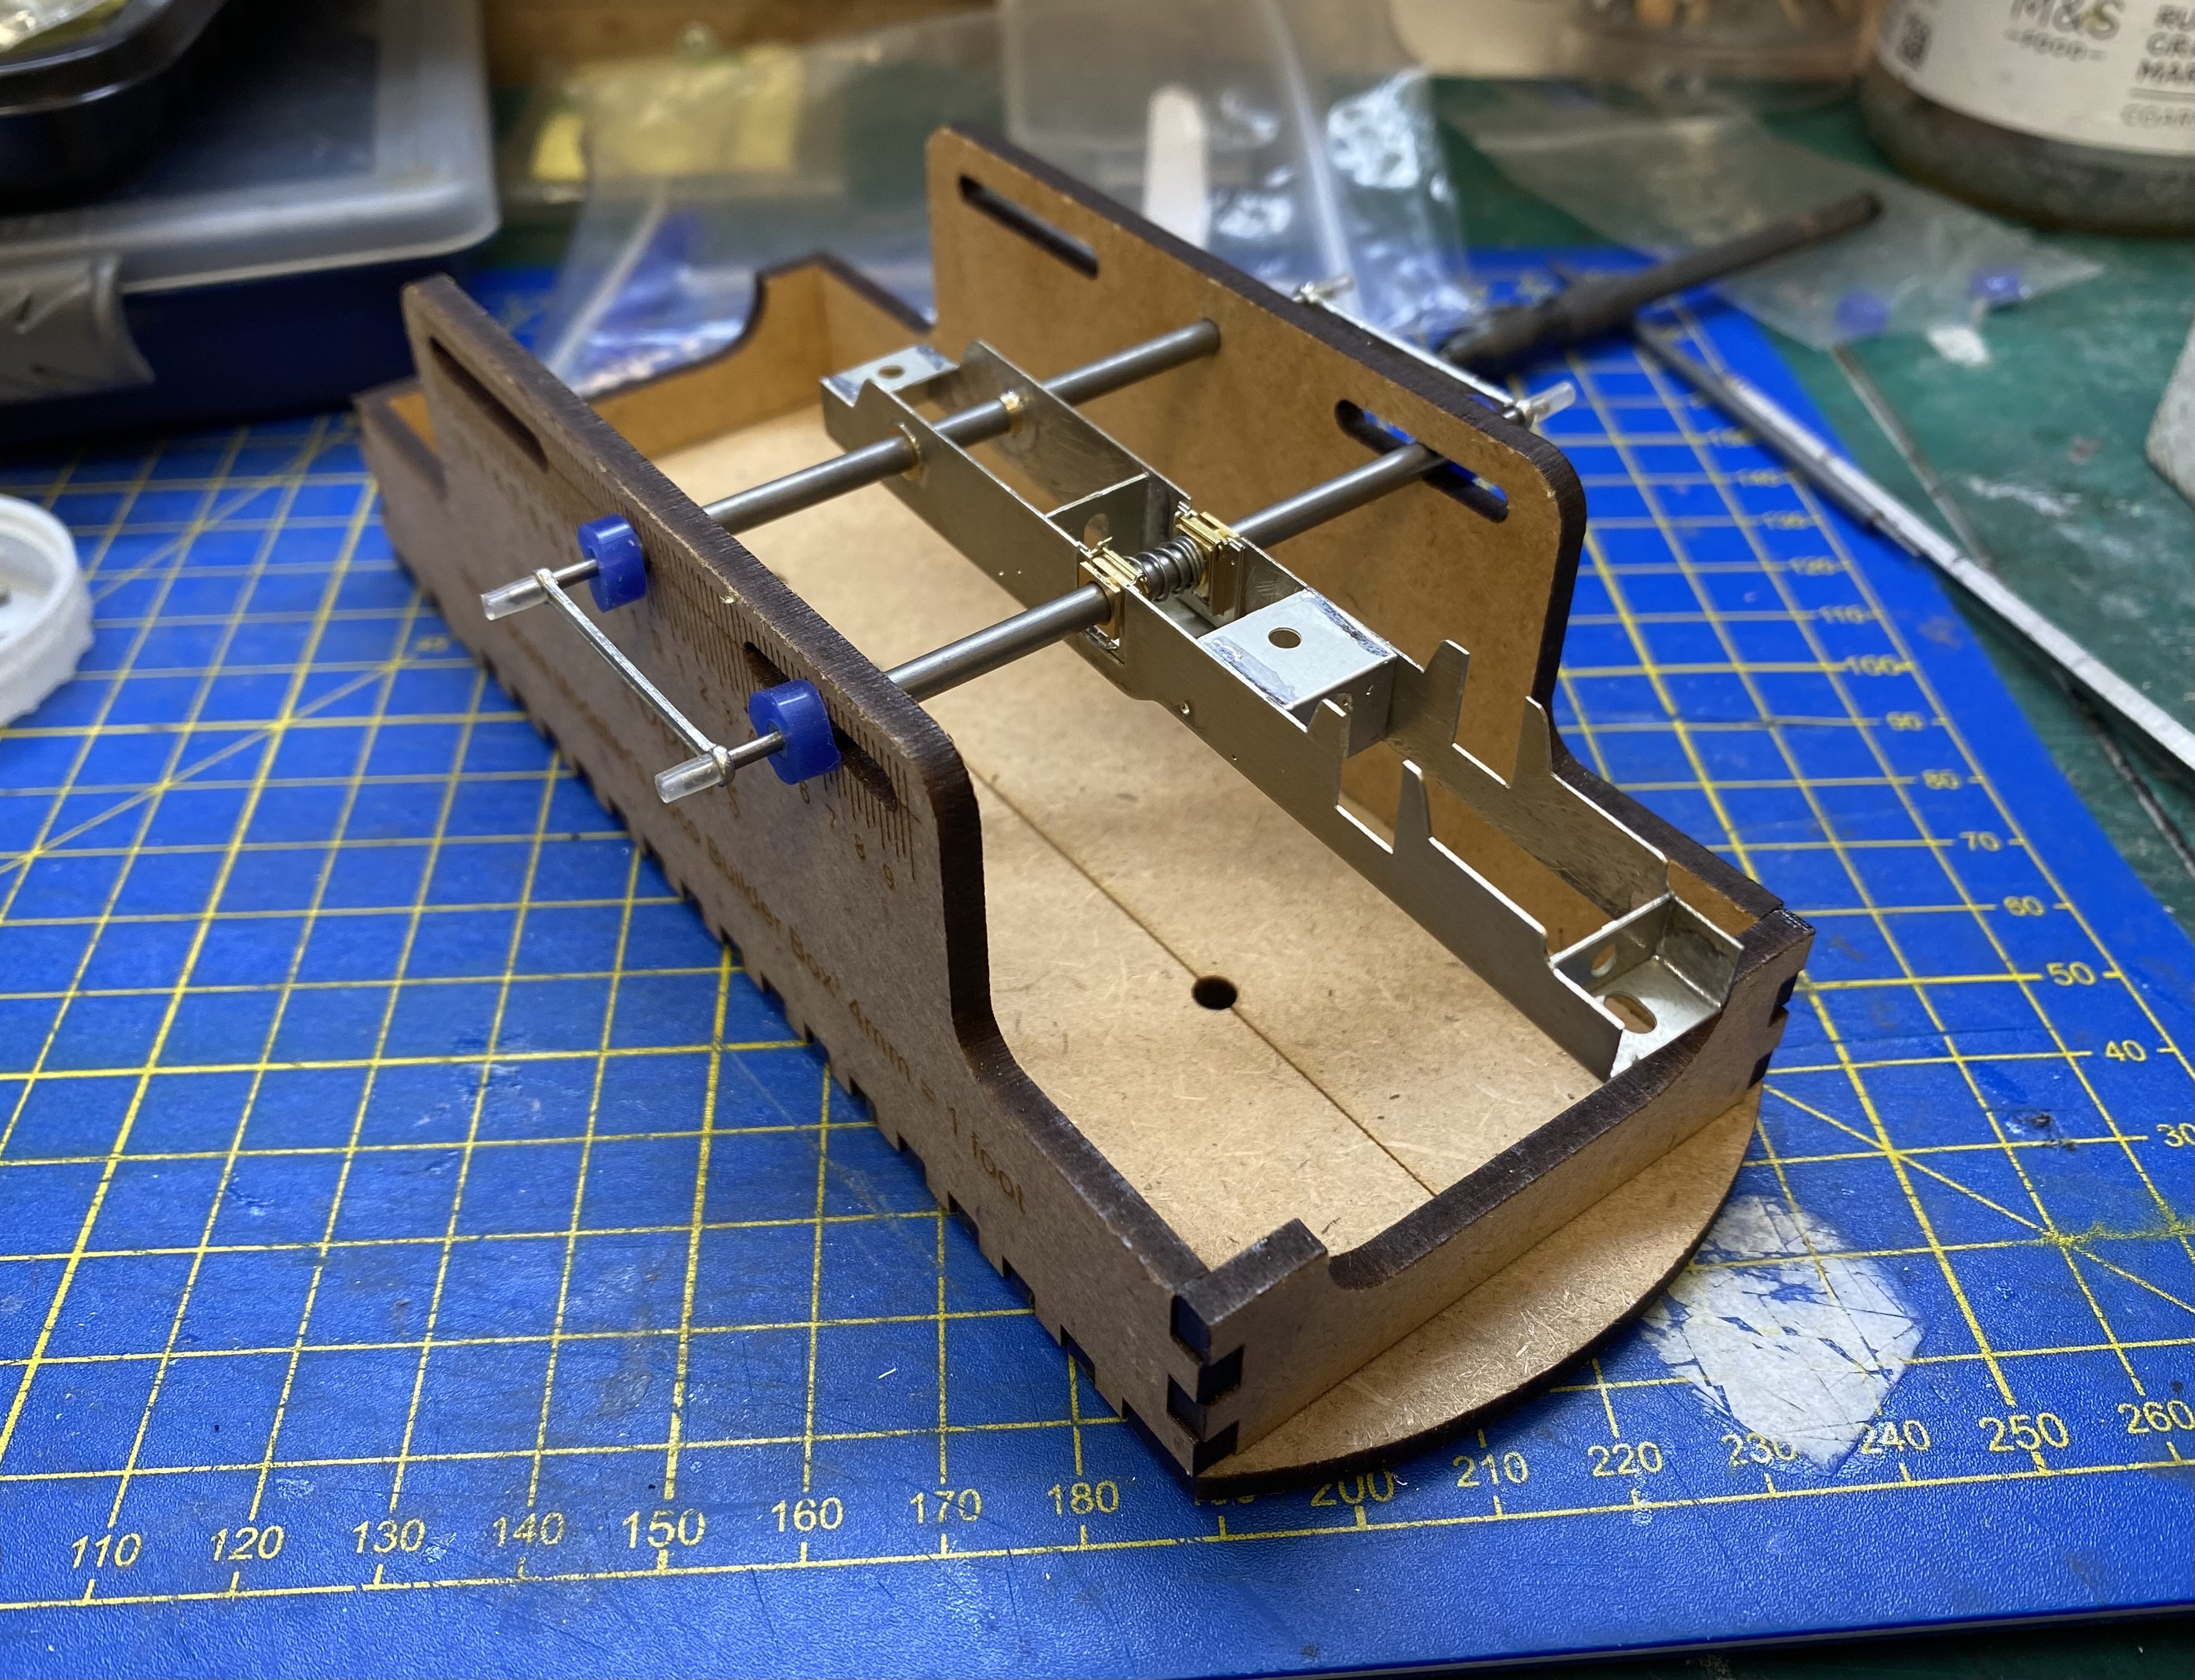
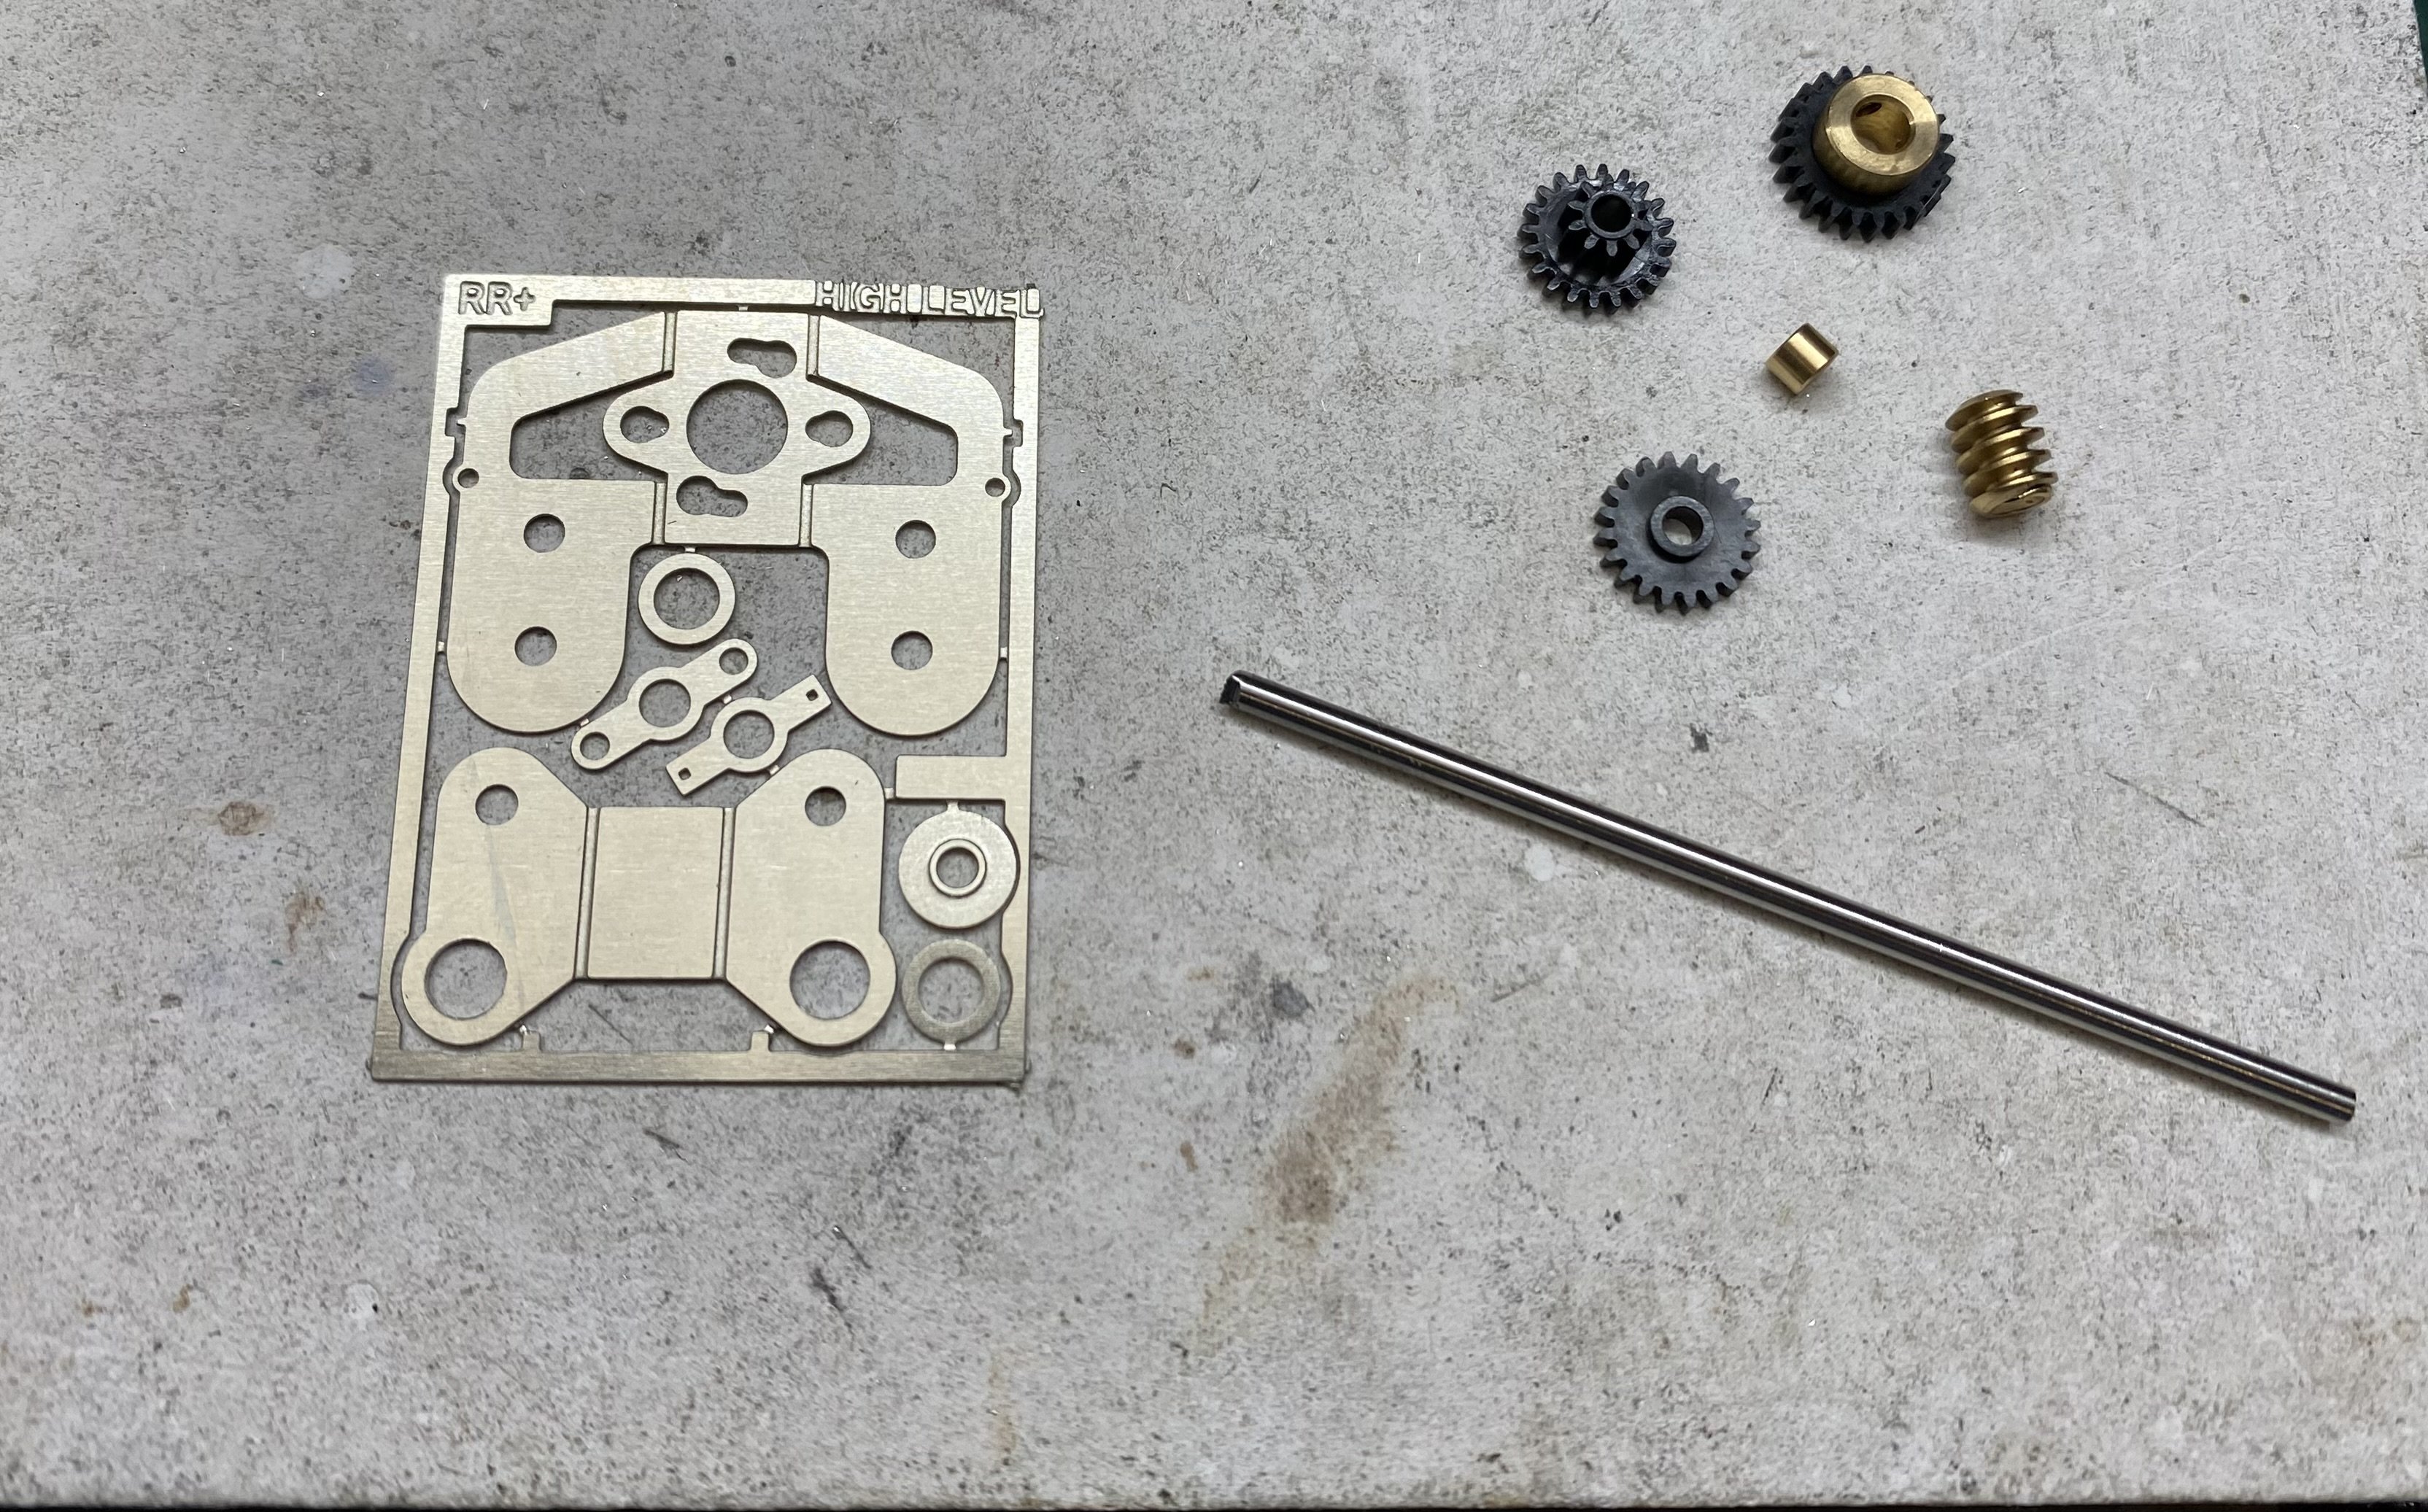
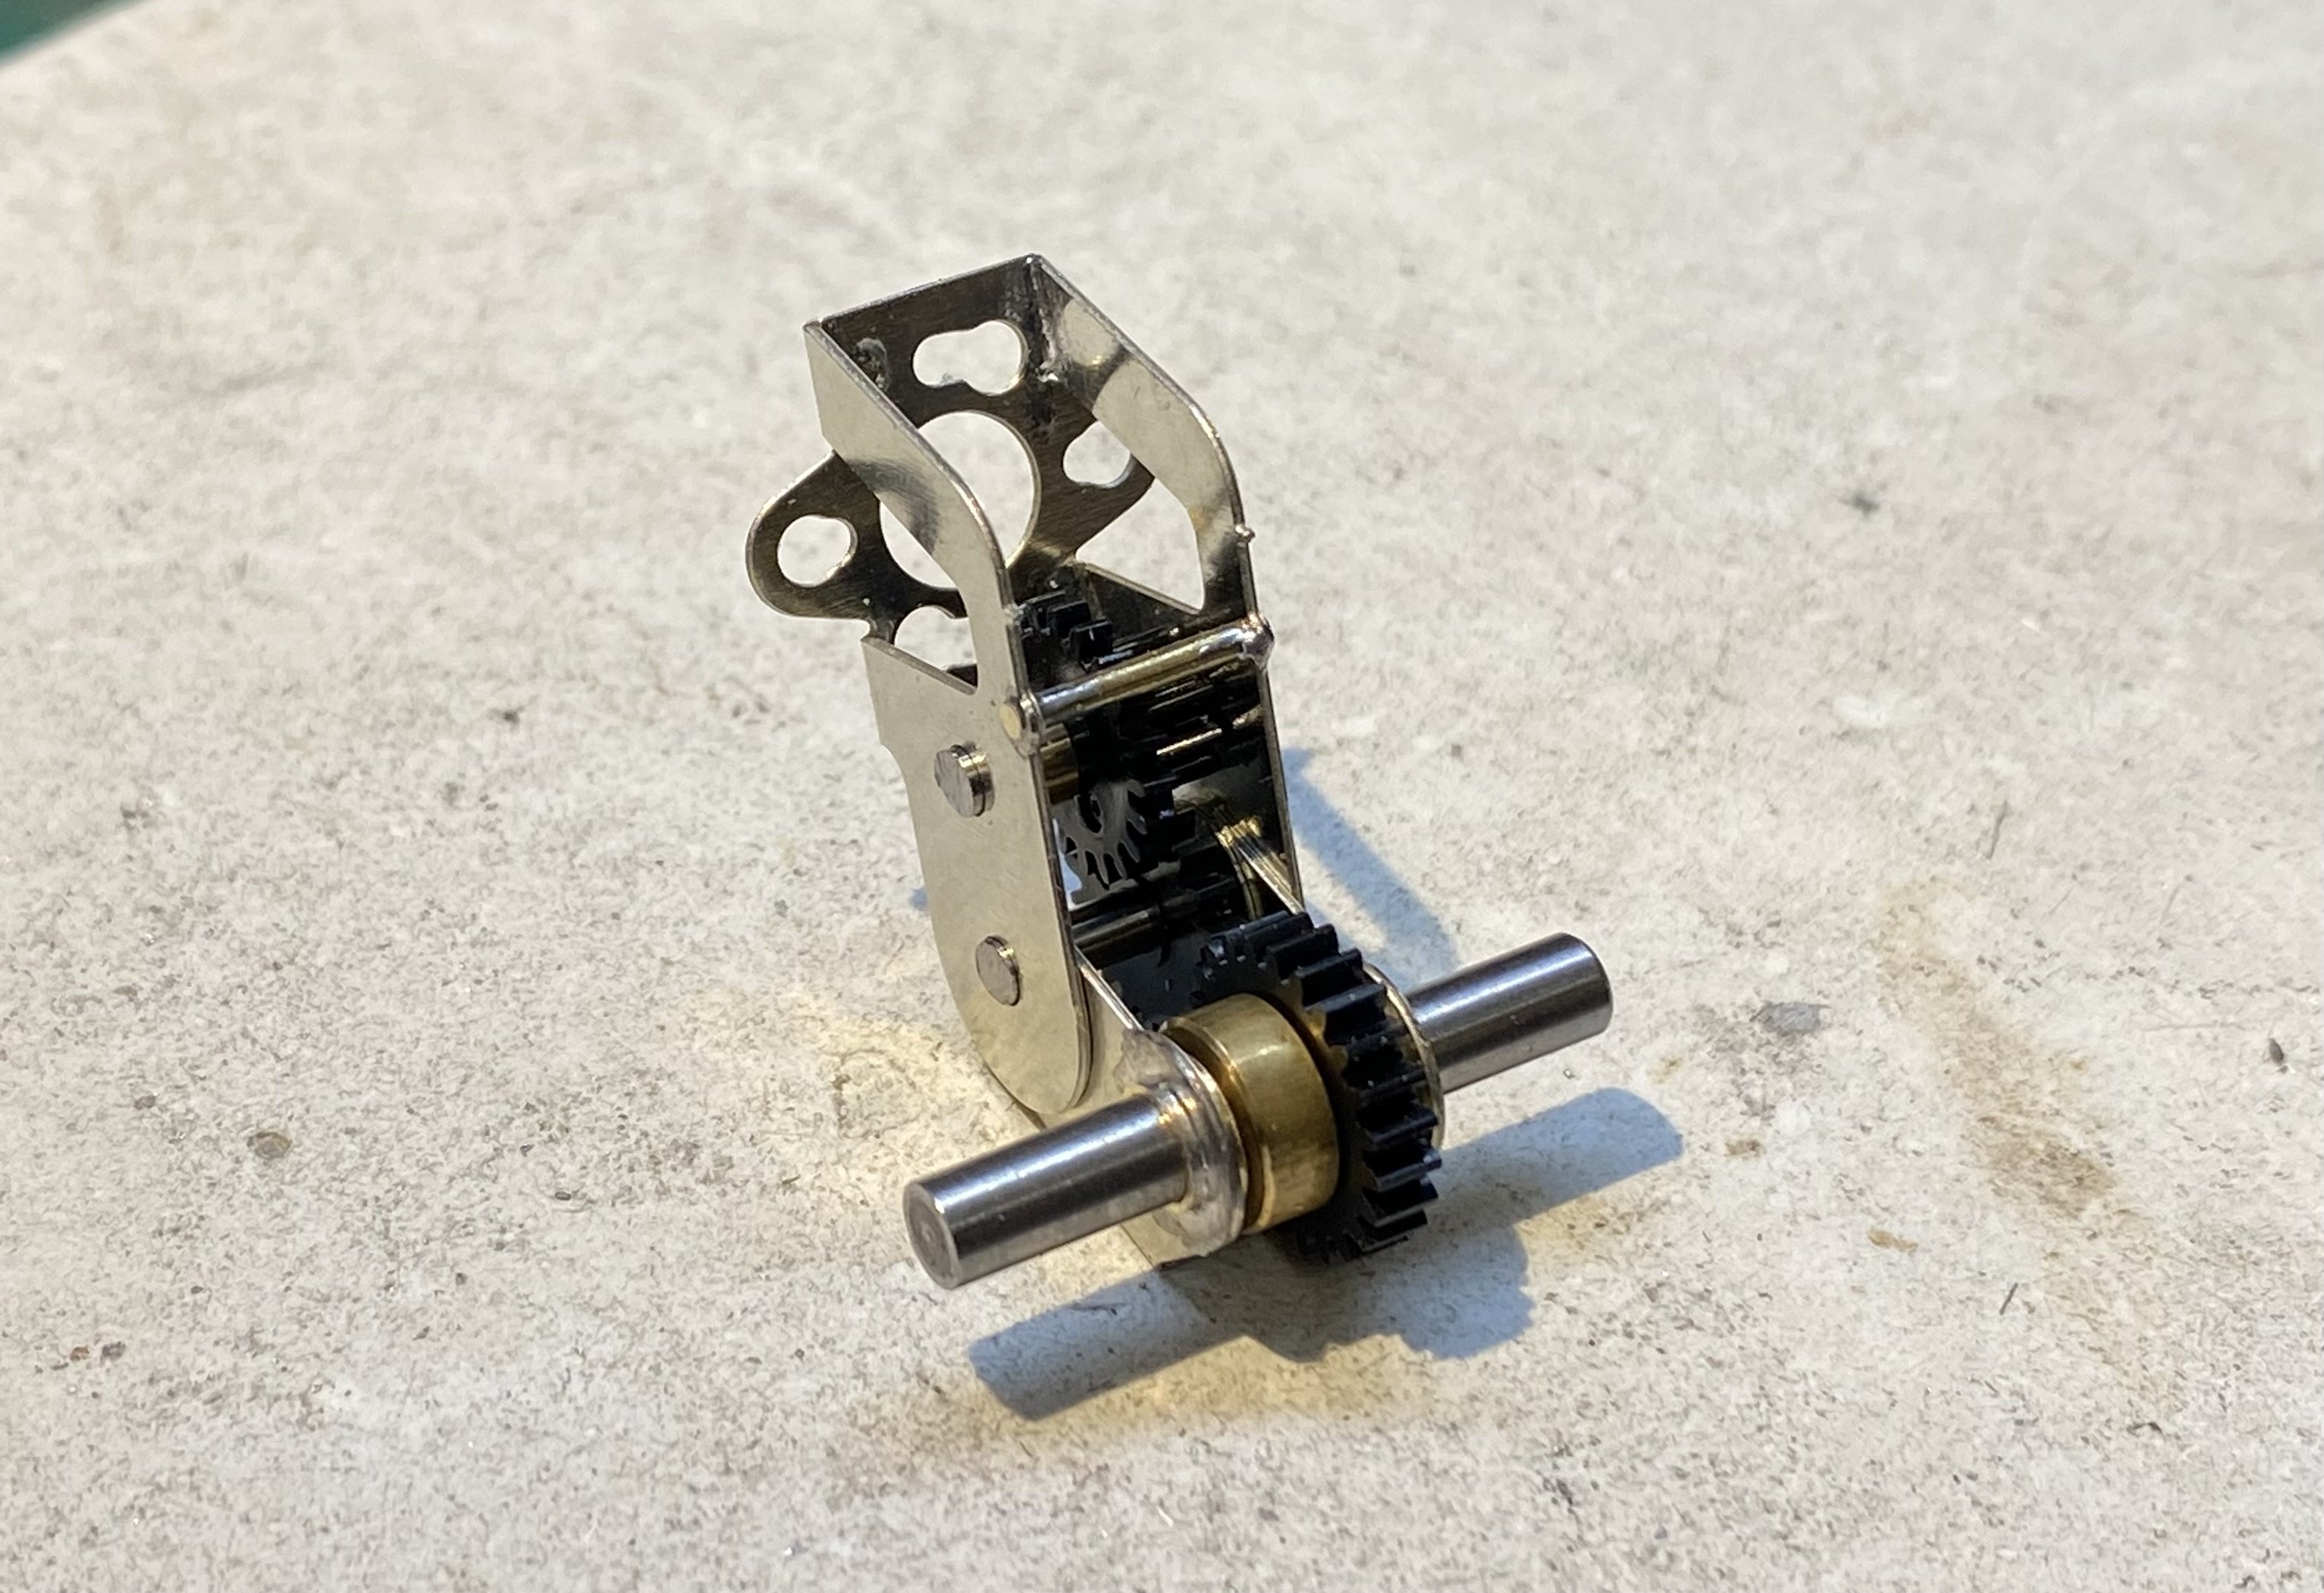
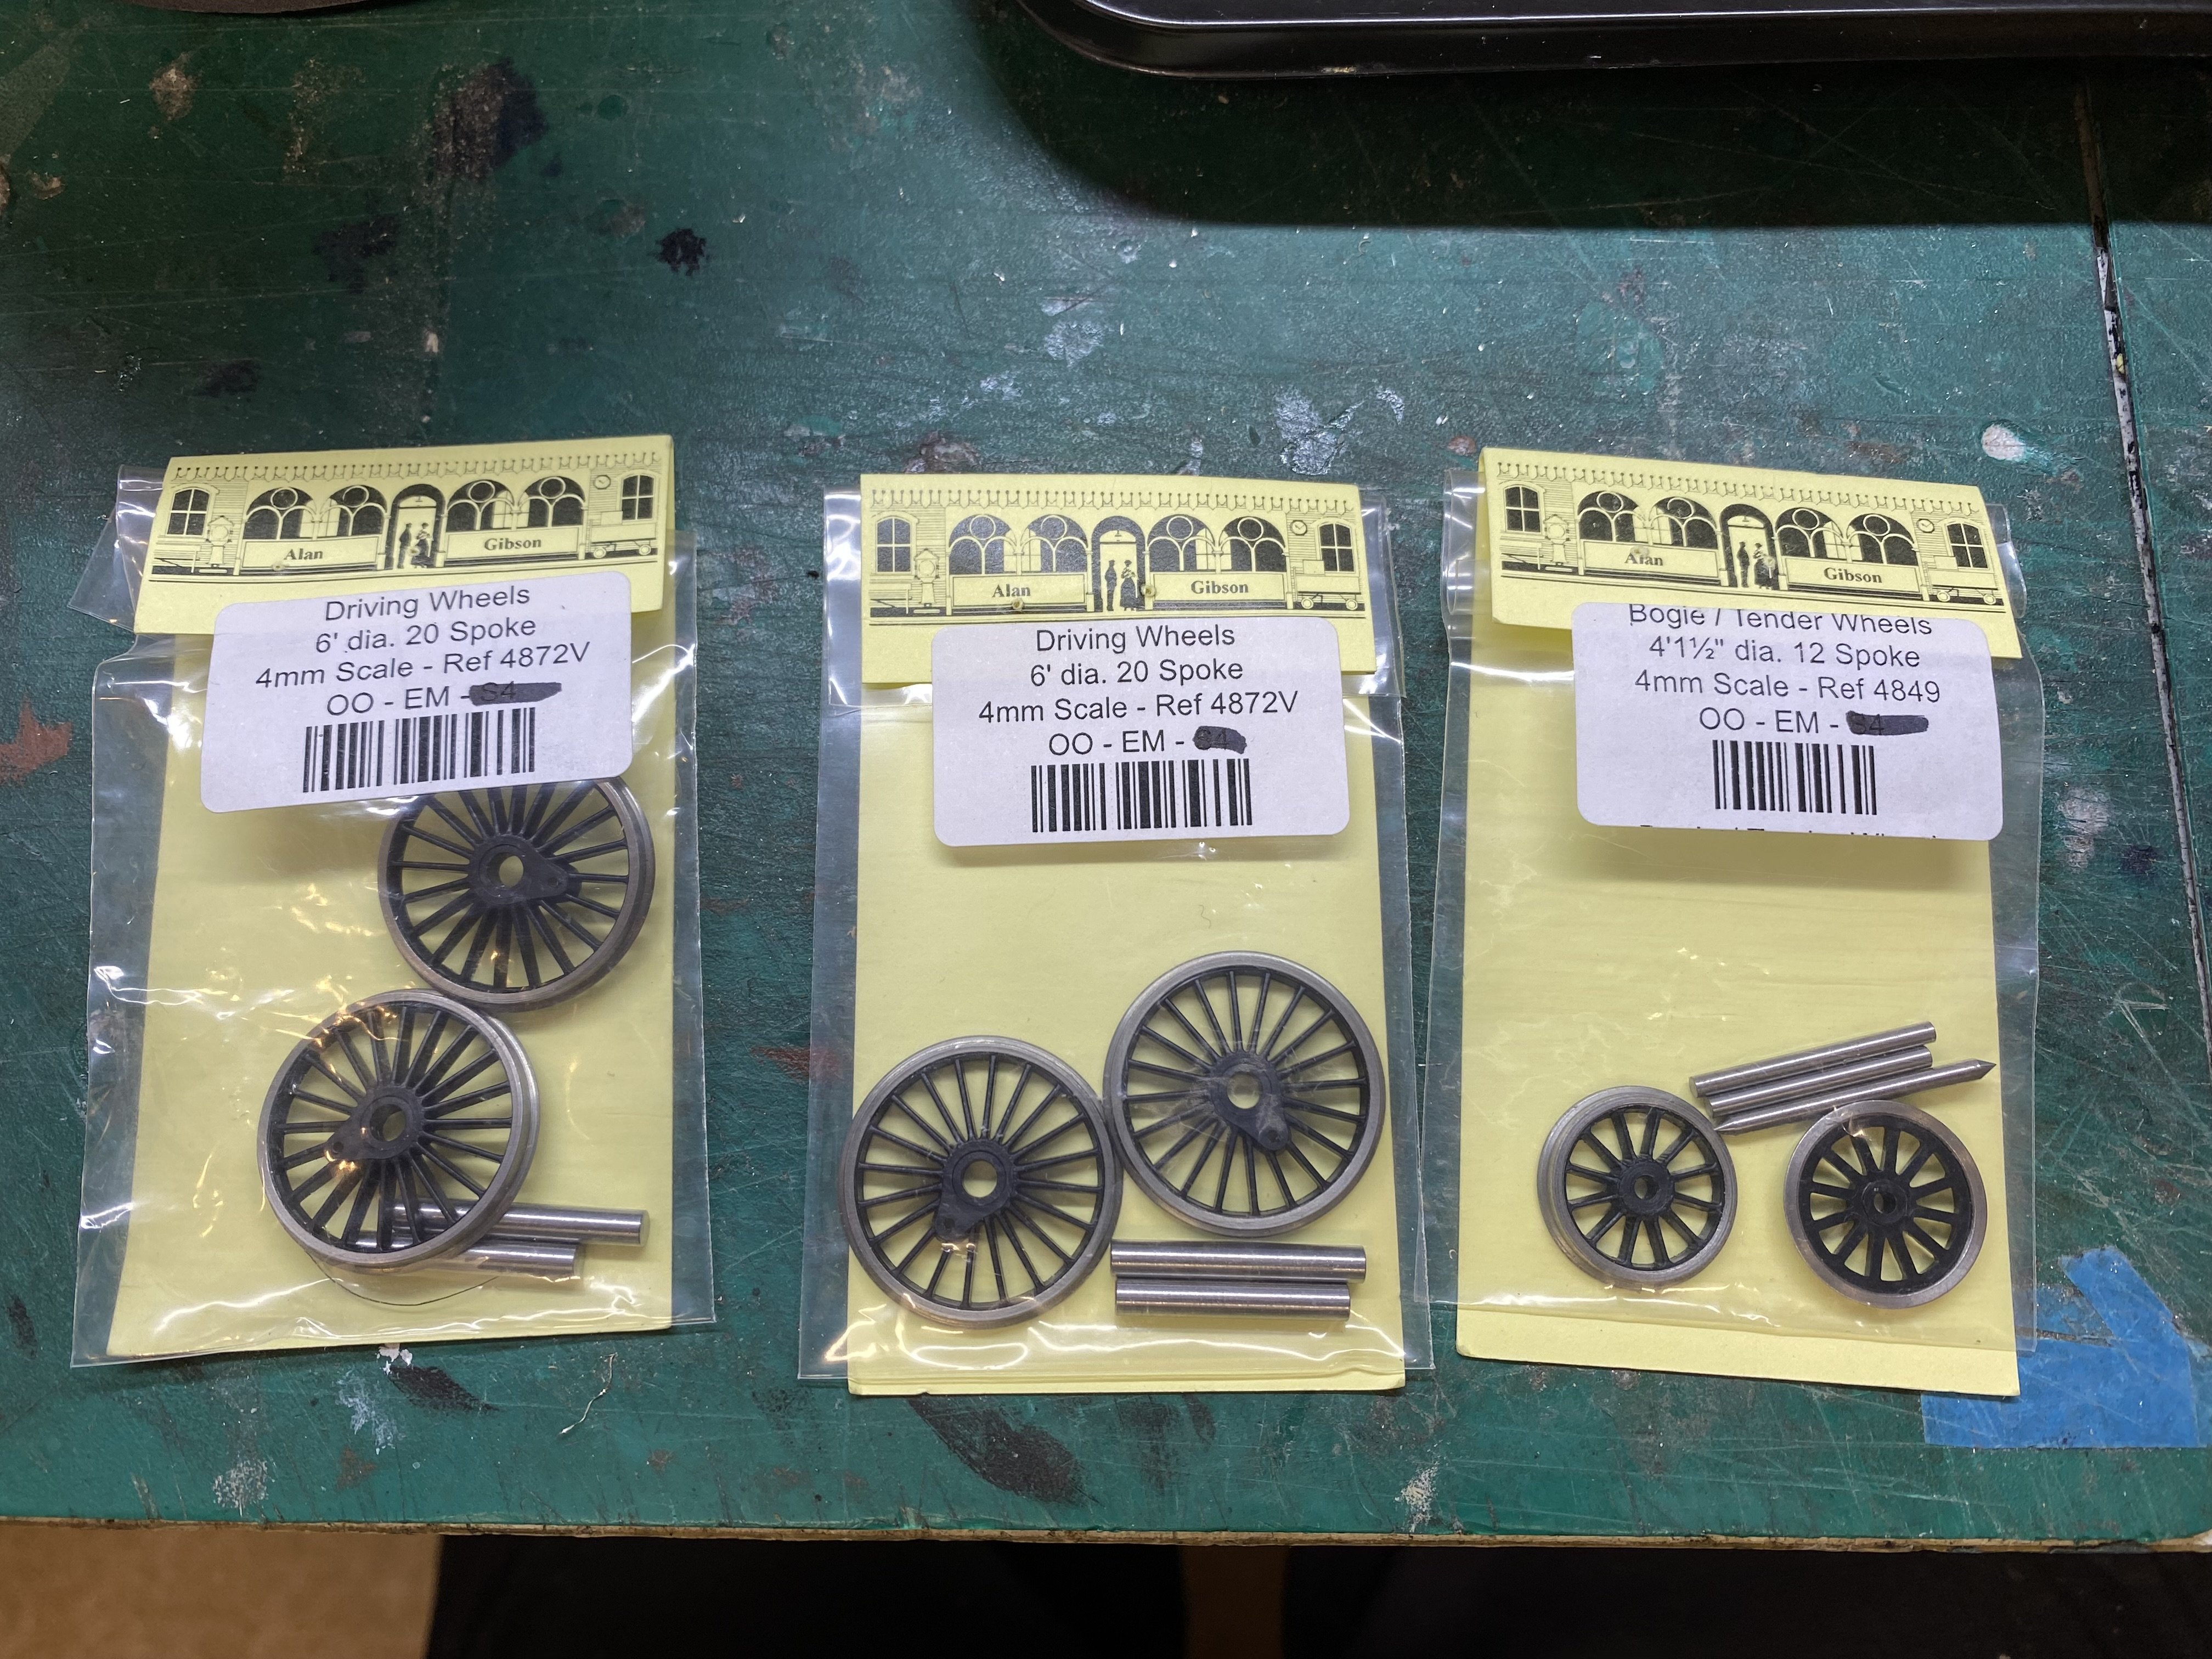
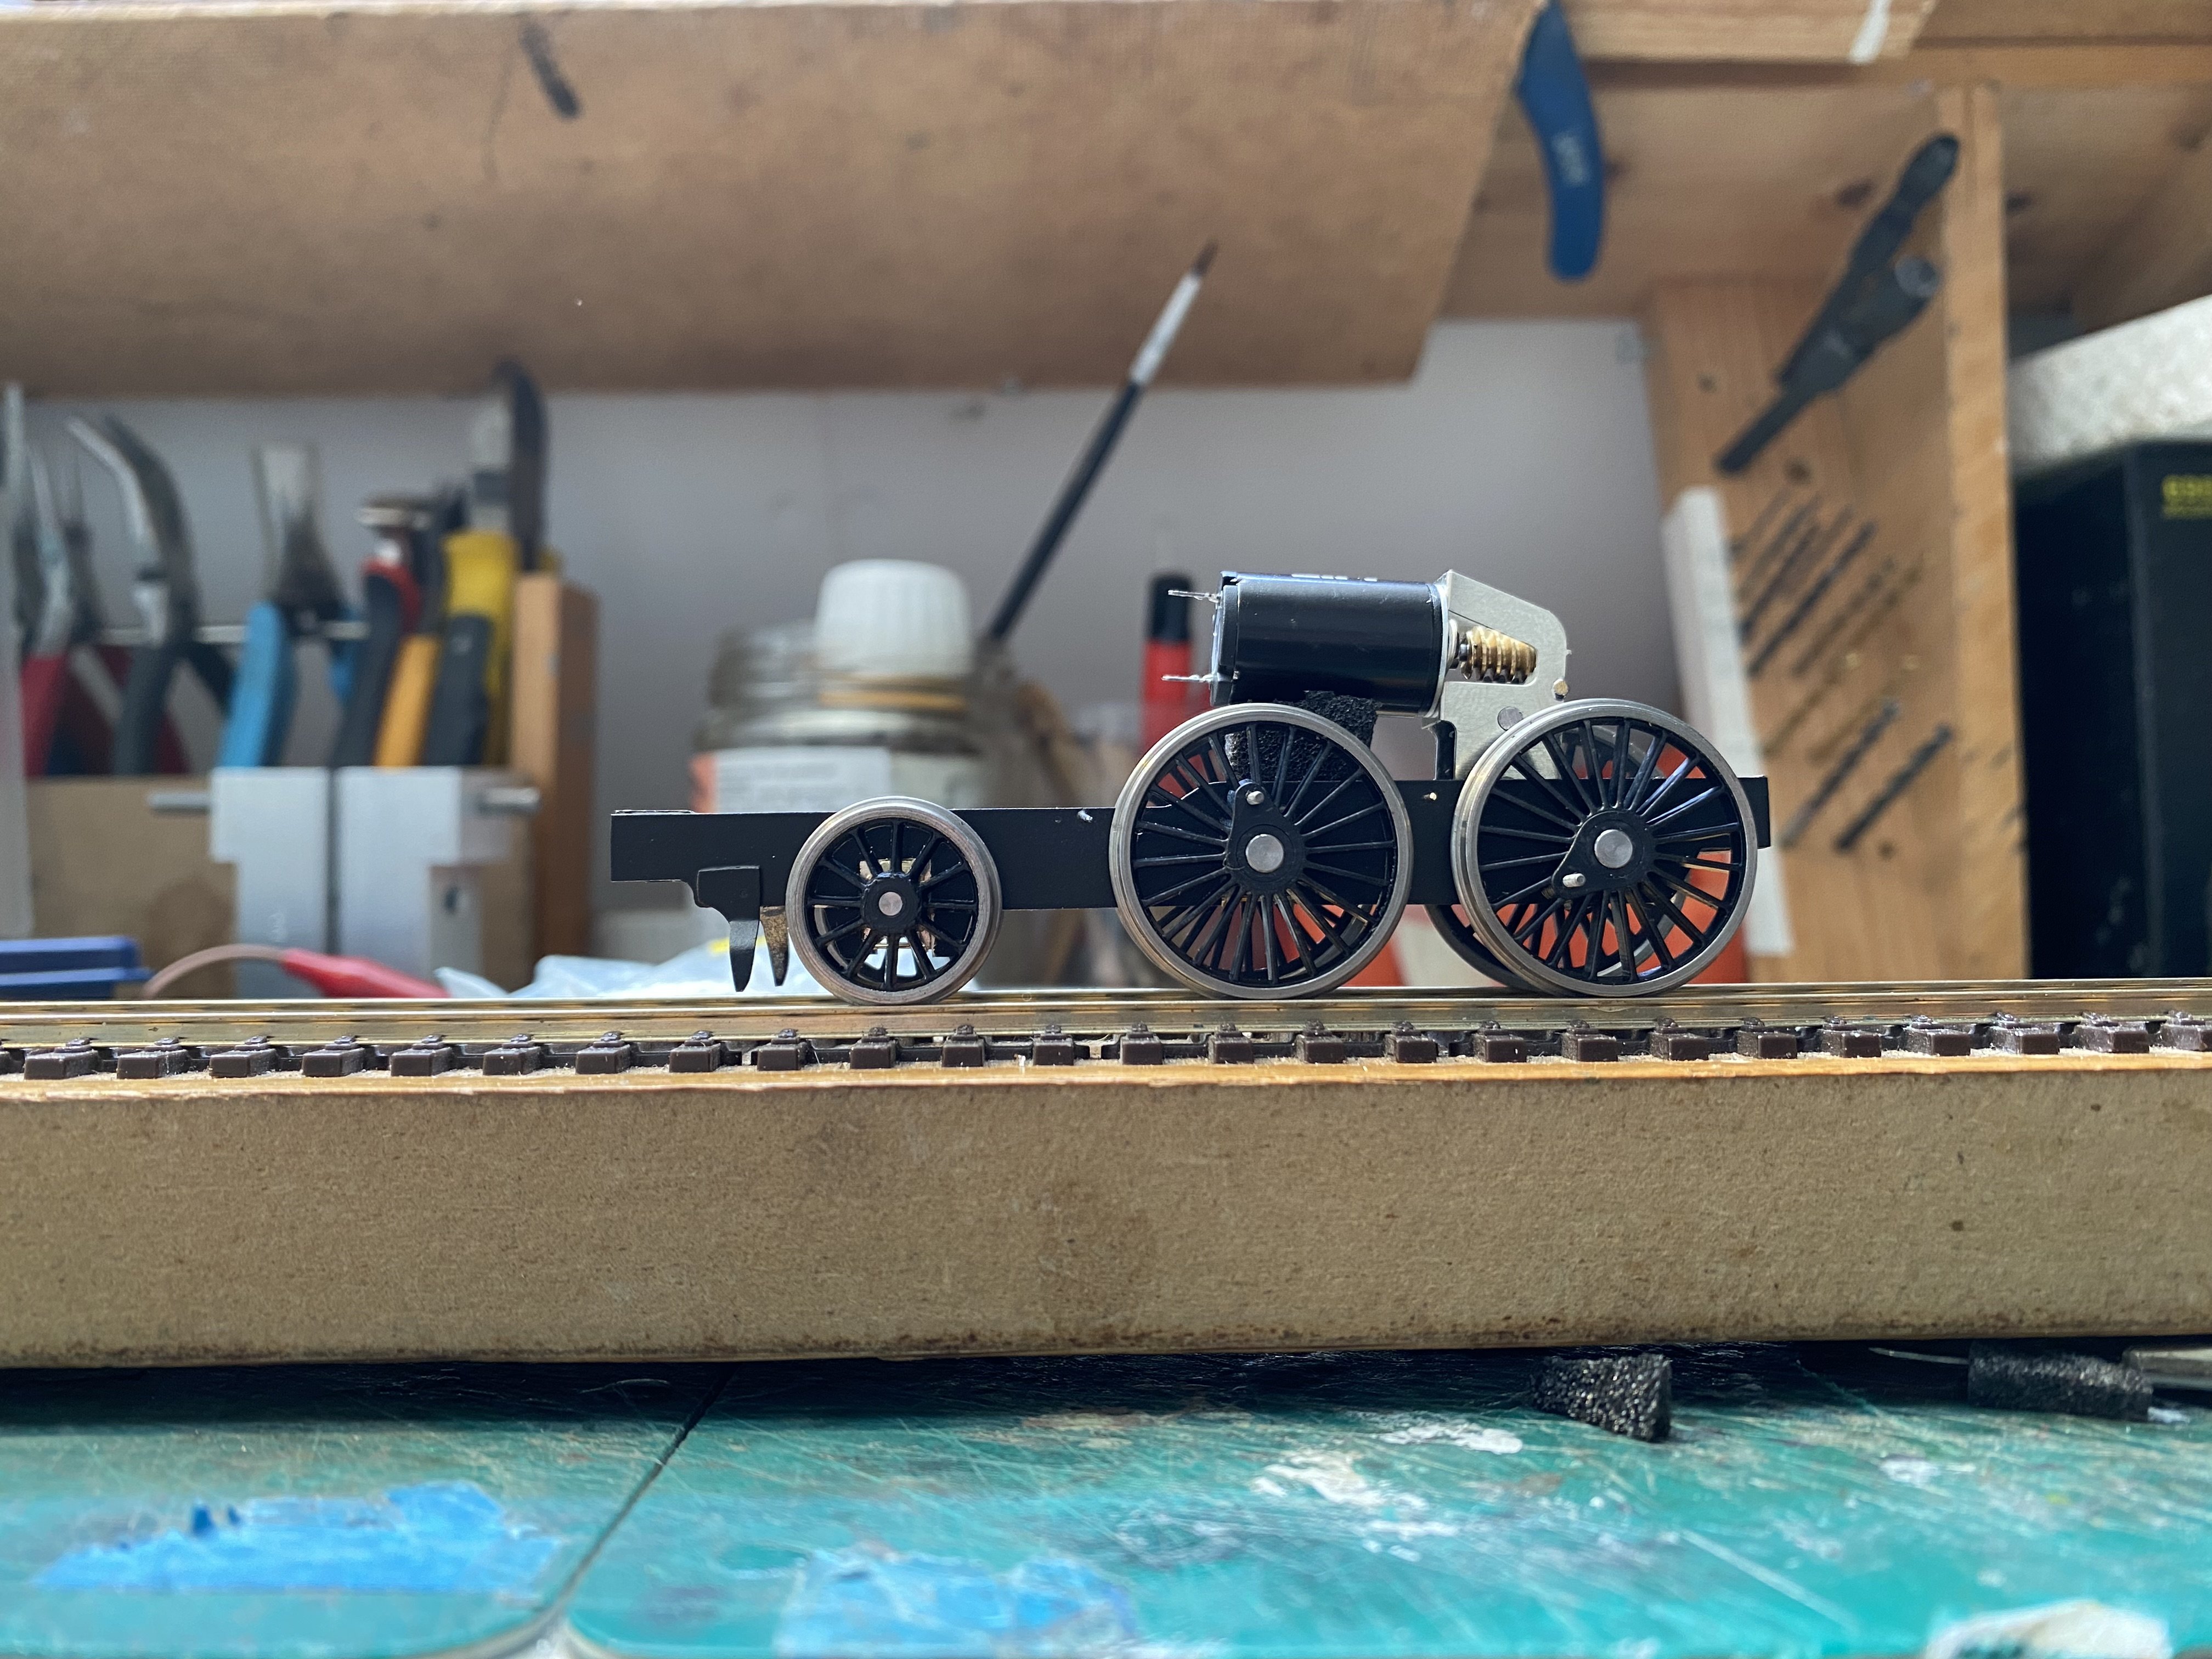
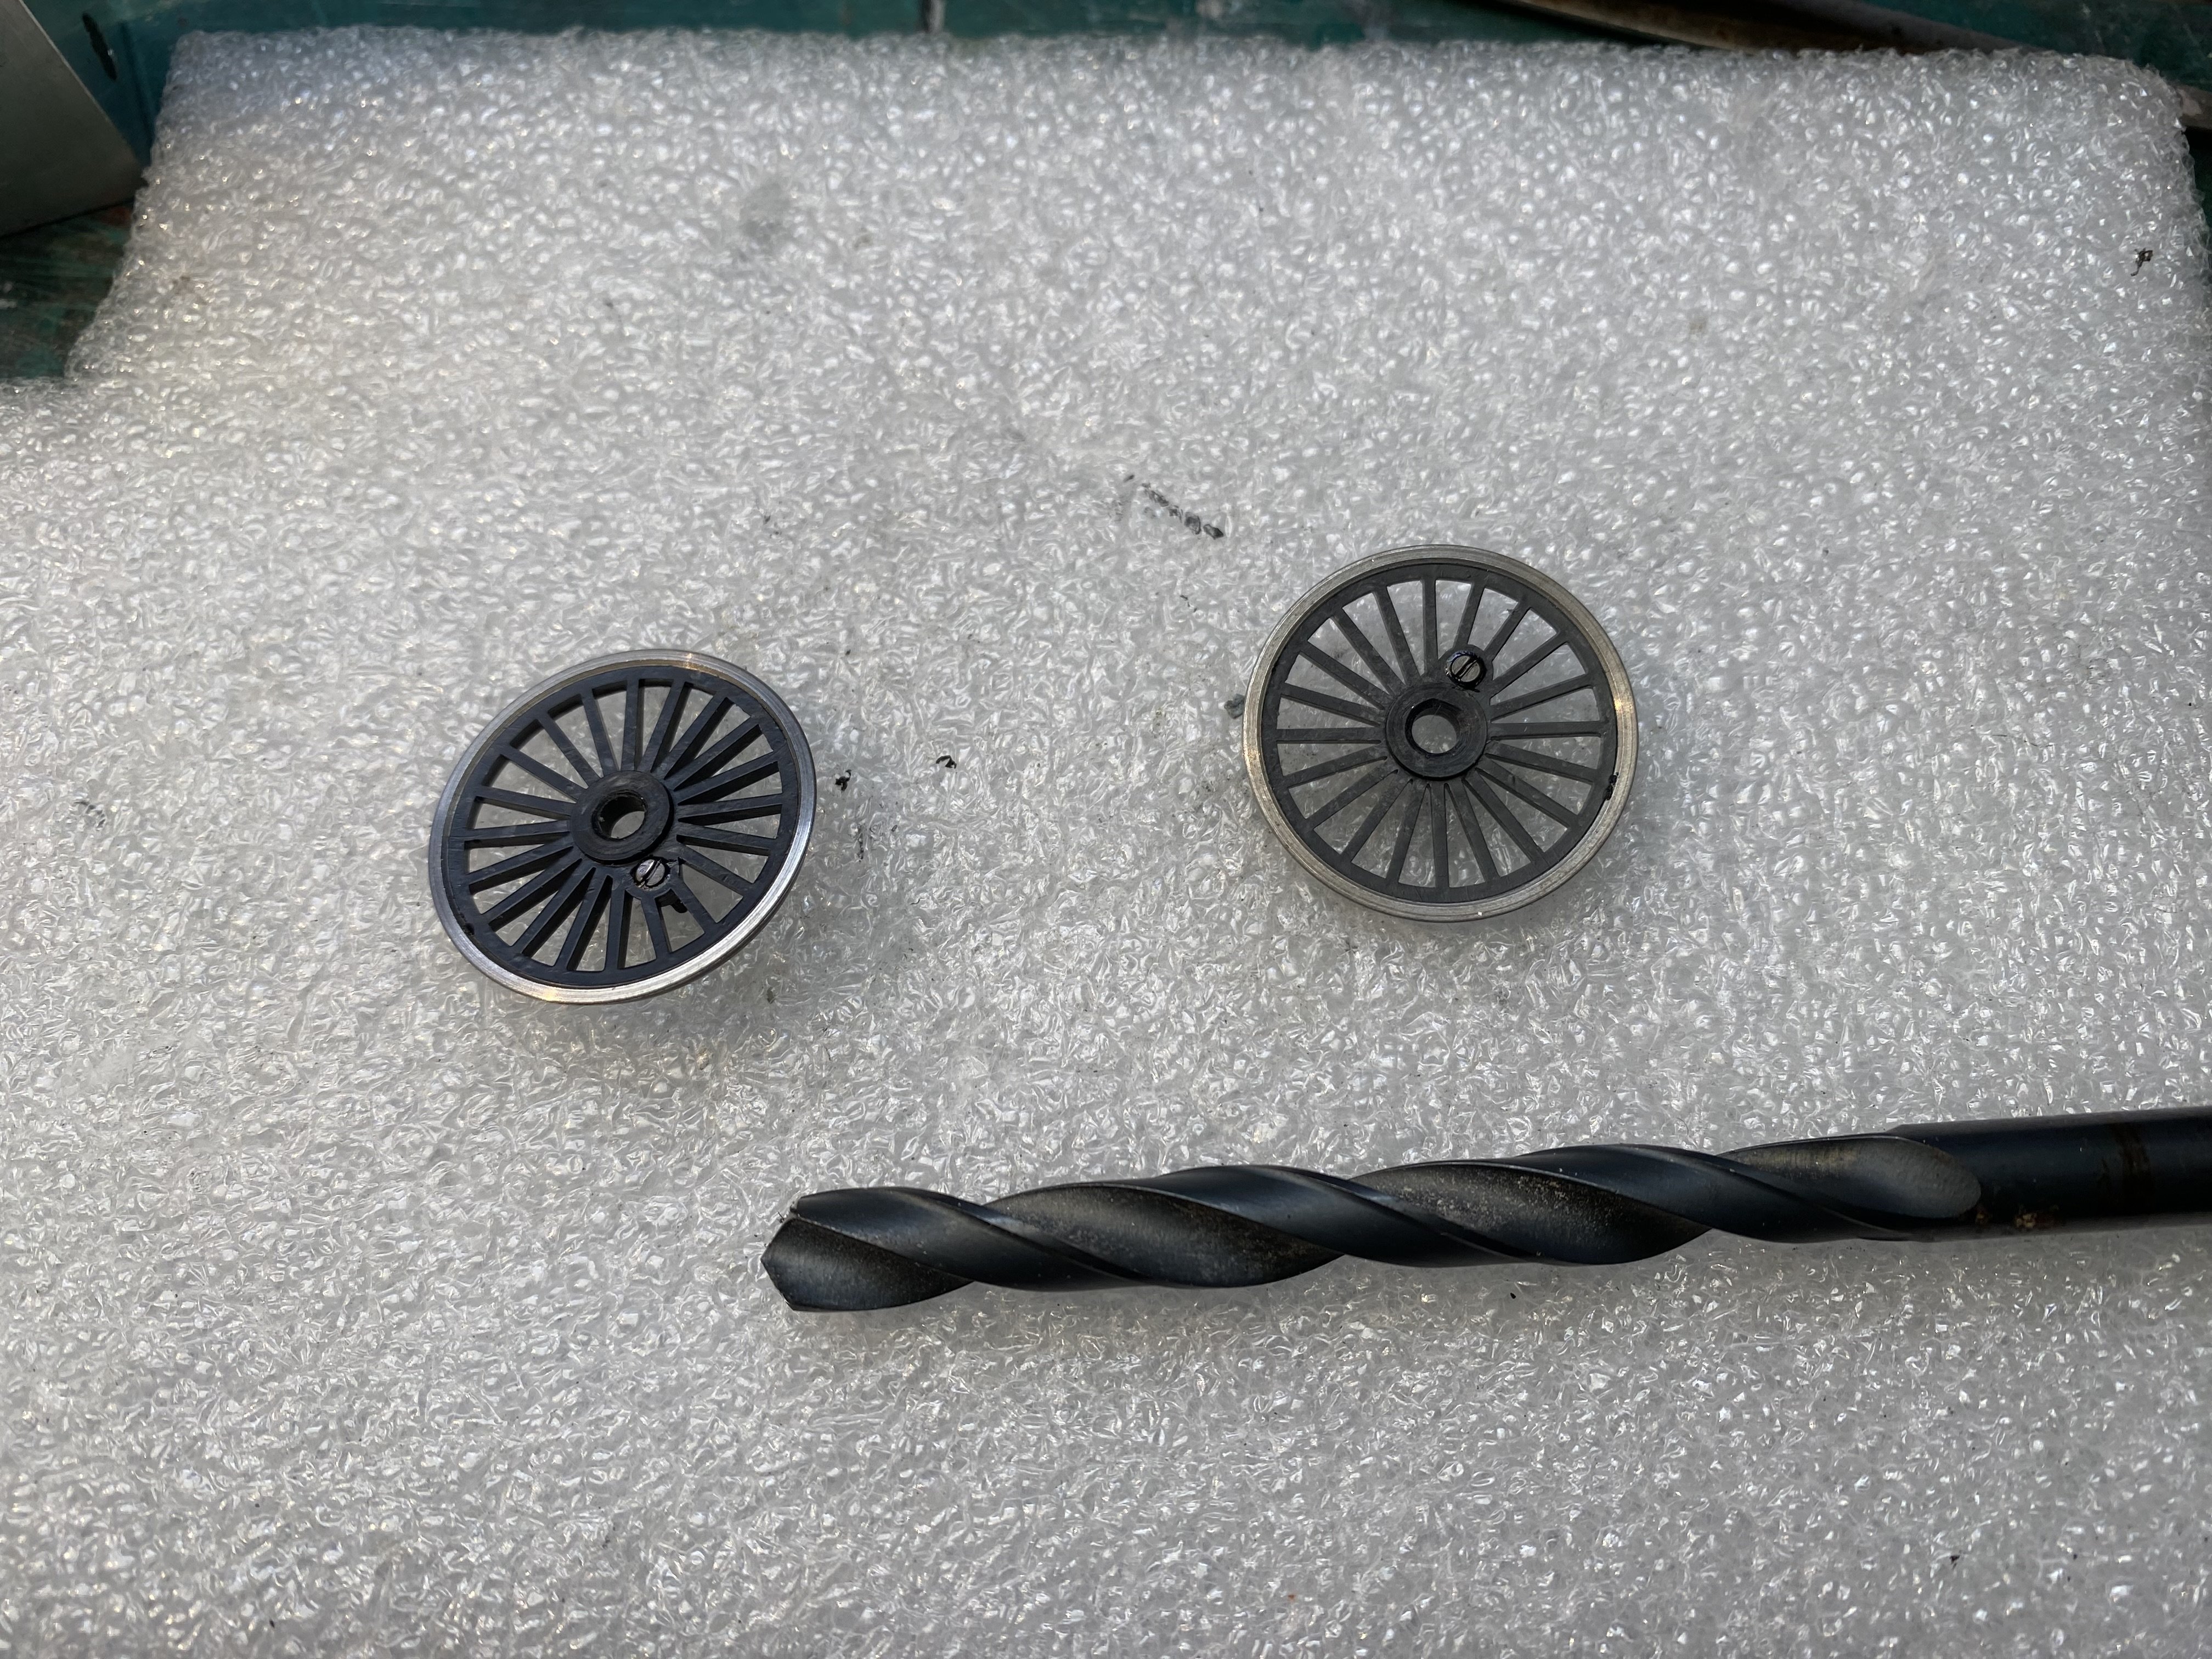
Time to fit the hornblocks. These ones are from High Level - a pair of 1/8" Standards for the driving axle and 2mm SpaceSavers for the carrying axle. The coupling rods earned their keep as jigs again, this time with the Poppy Woodtech chassis jig, to get the hornblocks for the front drivers into the right position. The holes in the rods were reamed out to be a tight fit on the ends of the jig axles (around 1mm diameter). The hornblocks for the front carrying axle have no rods to position them so they went in by eye using an axle as a guide. Compensation beam in. Also some guard irons and brake hangers. As always, a High Level gearbox and motor are the driving force. A RoadRunner Plus this time, 45:1 ratio. Unbeatable at this scale. Wheels are from Alan Gibson. These can often be a very tight fit on the axle. Chamfering the hole at the back helps ease them on. Crankpins screw in from the back and cut their own thread as they go. Threadlock helps keep them in place. Before the wheels went on, the chassis got a dusting of Halfords etch primer and a topcoat of Matt Black. My trusty GW Models wheel press took care of getting the wheels on straight and quartering them. Chassis sits level so the compensation beam is doing its job. Phew! Rods next. The holes need further reaming to fit the Gibson crankpin bushes. ... and we have the bones of a working chassis. Phew again! IMG_1326.MOV Looking at the complexities of the running plate and superstructure, I think this might've been the easy bit. Much metal-bashing and blistered fingers in prospect. Alan
- 613 replies
-
- 11
-
-
-

Irish Footbridge - Expression of Interest
Tullygrainey replied to RobertRoche's topic in Irish Models
Troubled waters at IRM? -
Many thanks for the kind words everyone. No pressure then
-
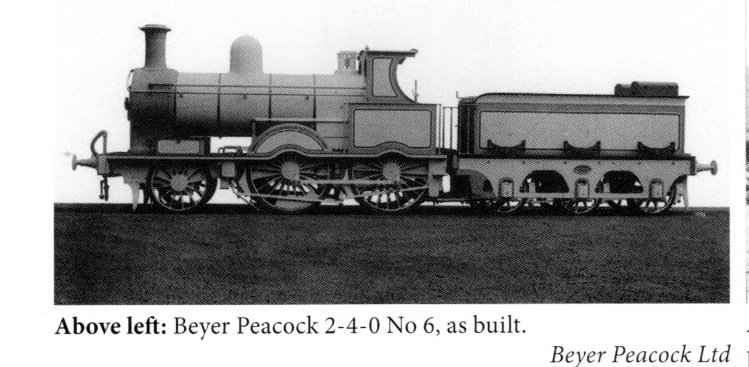
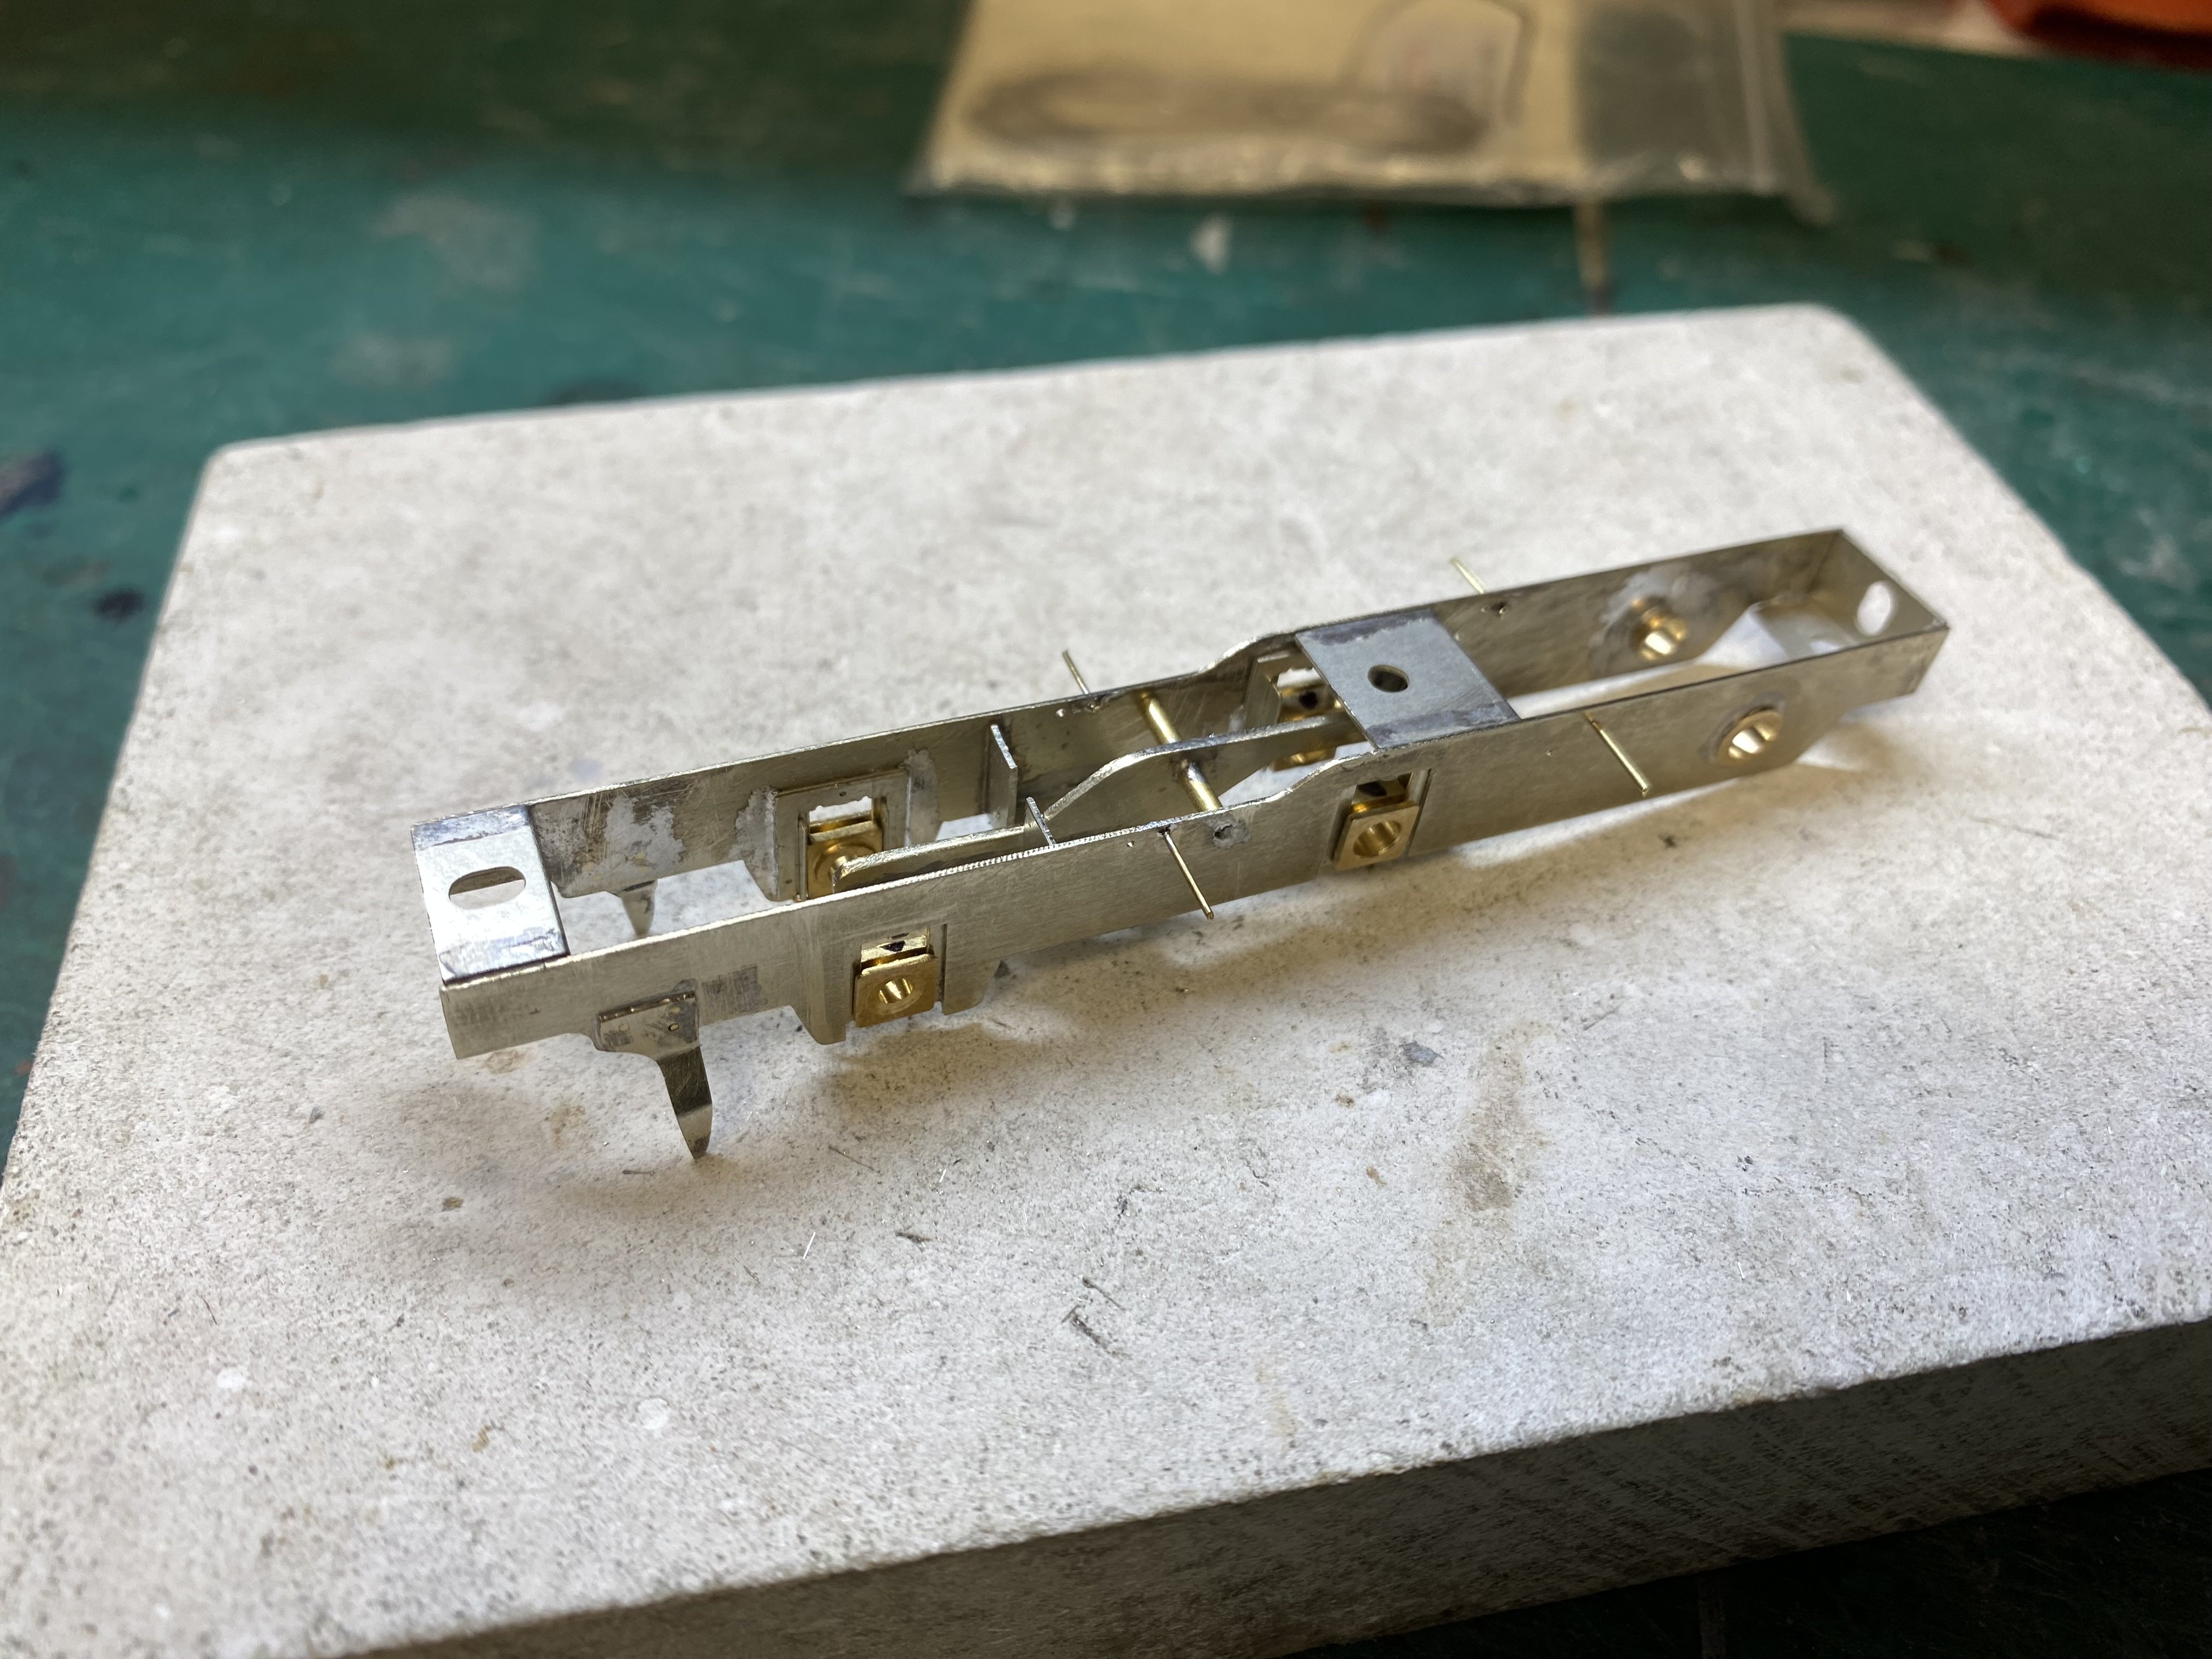
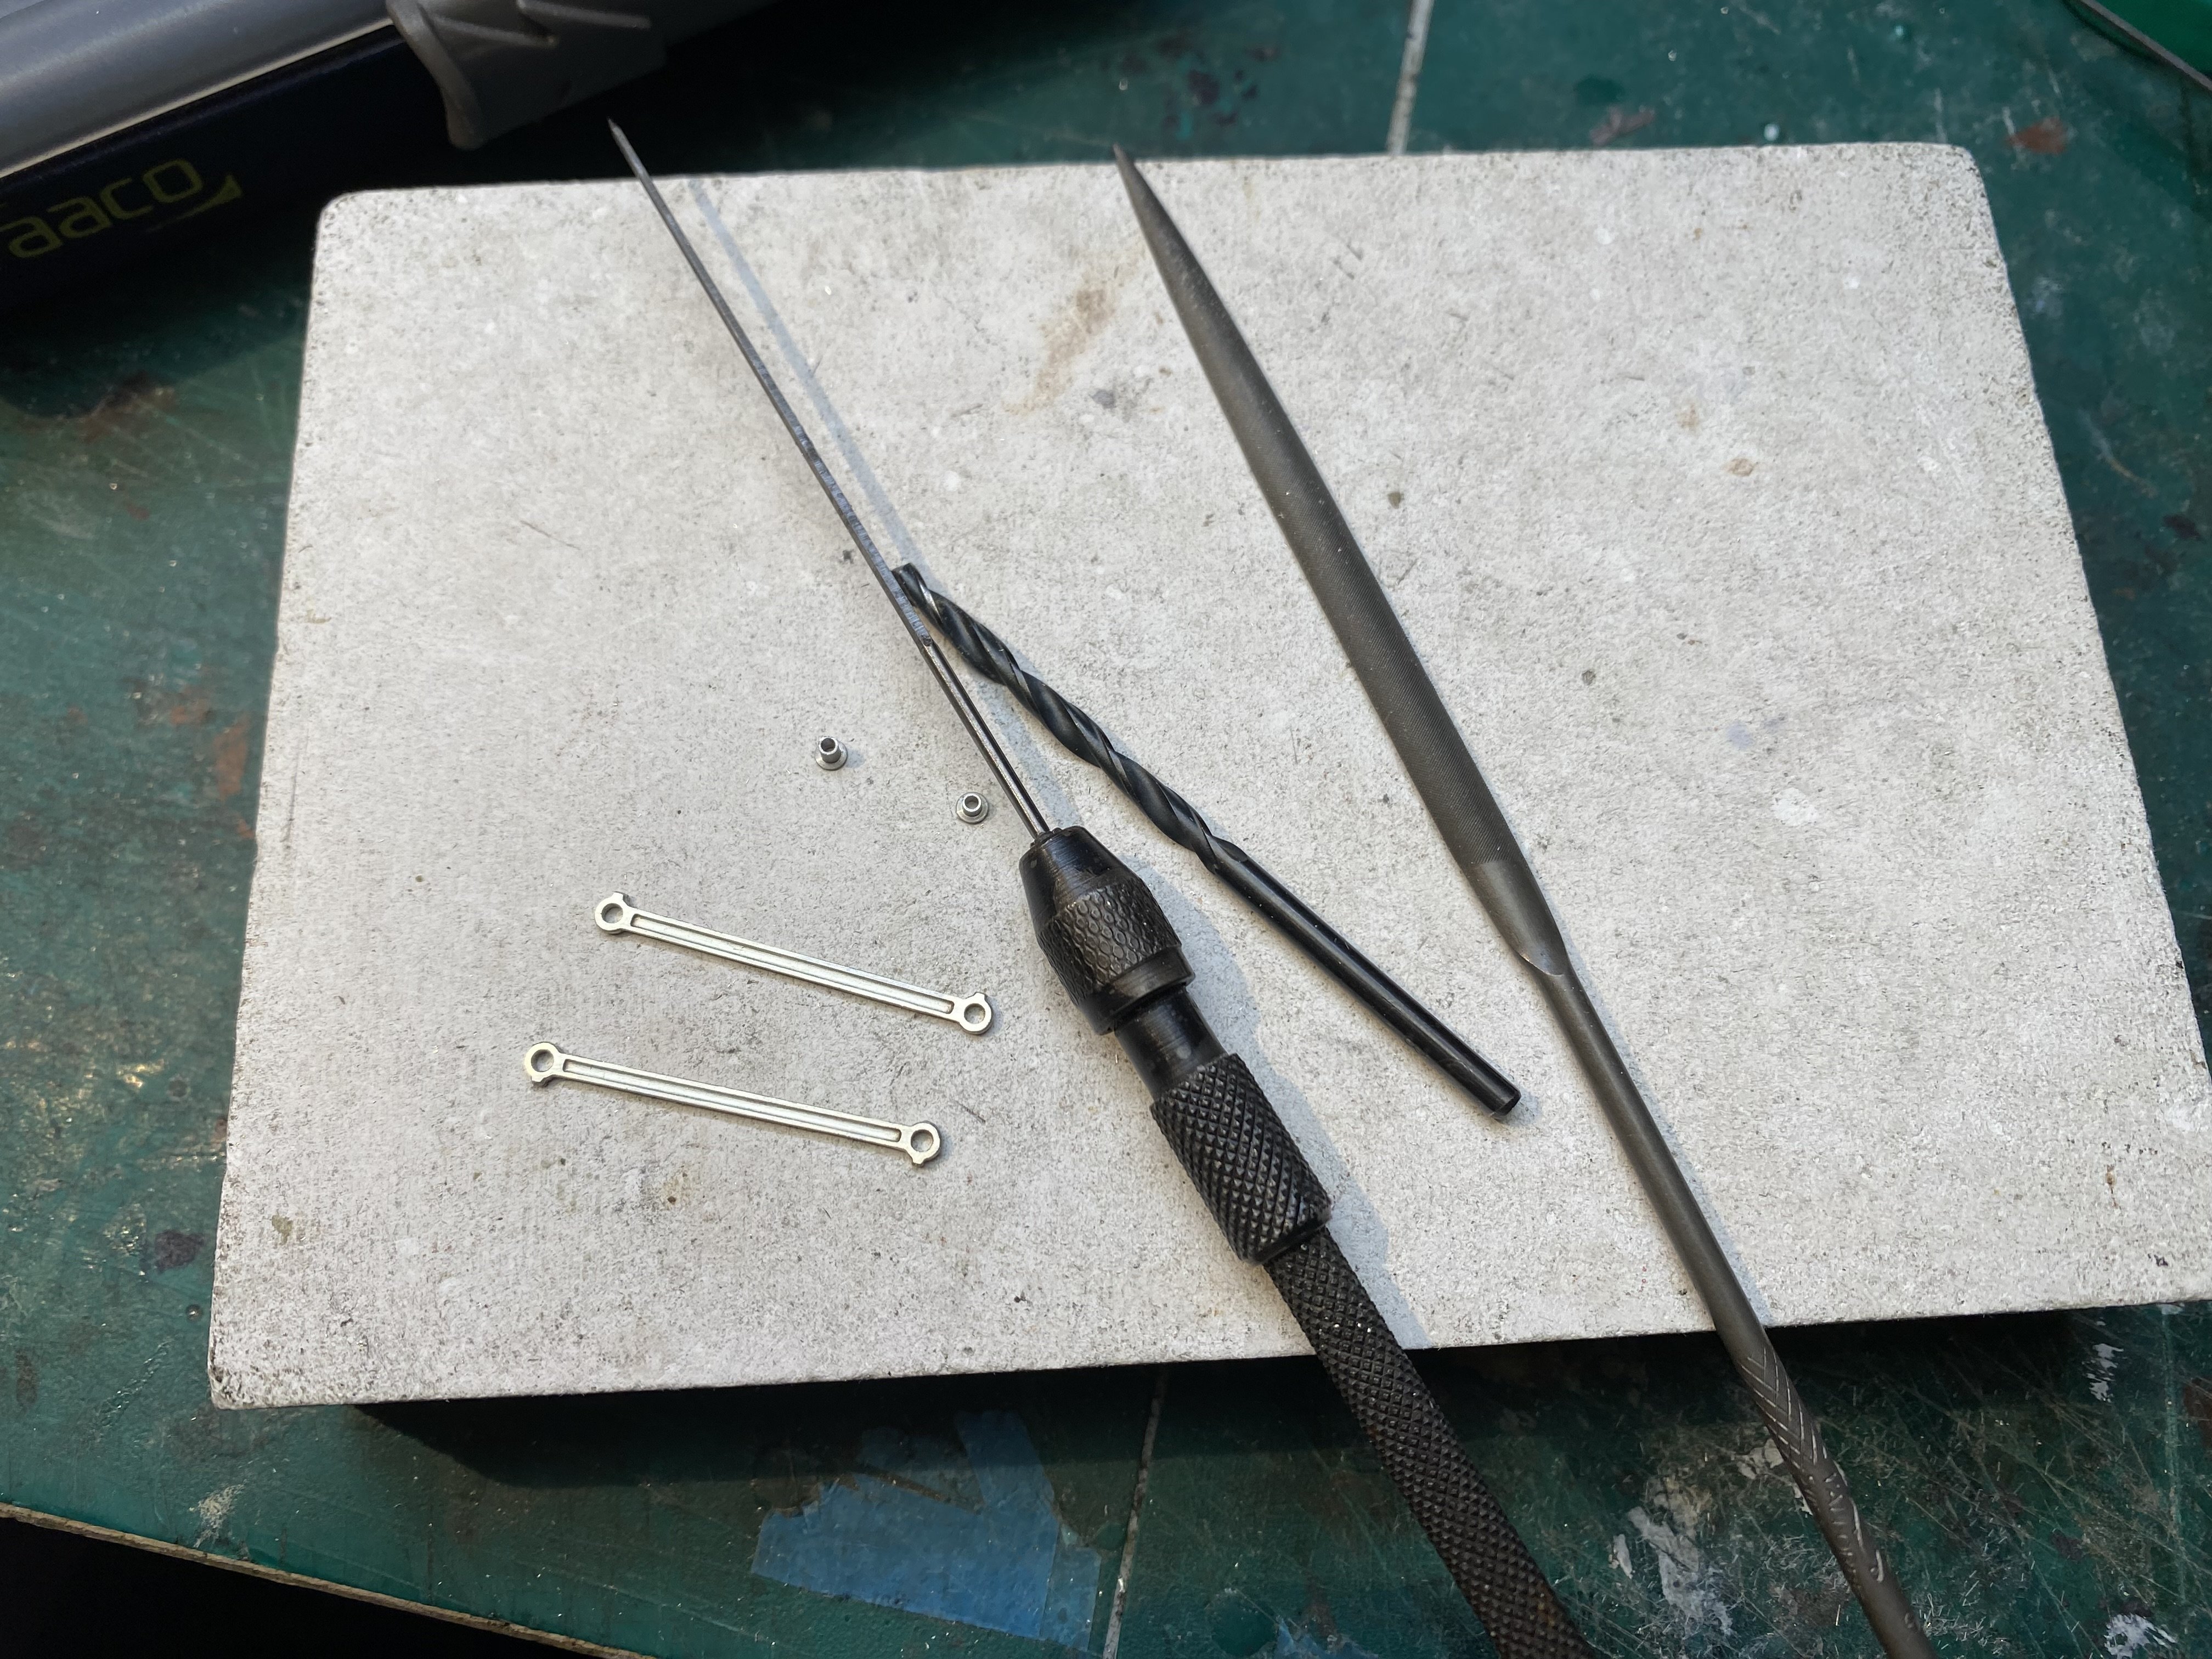
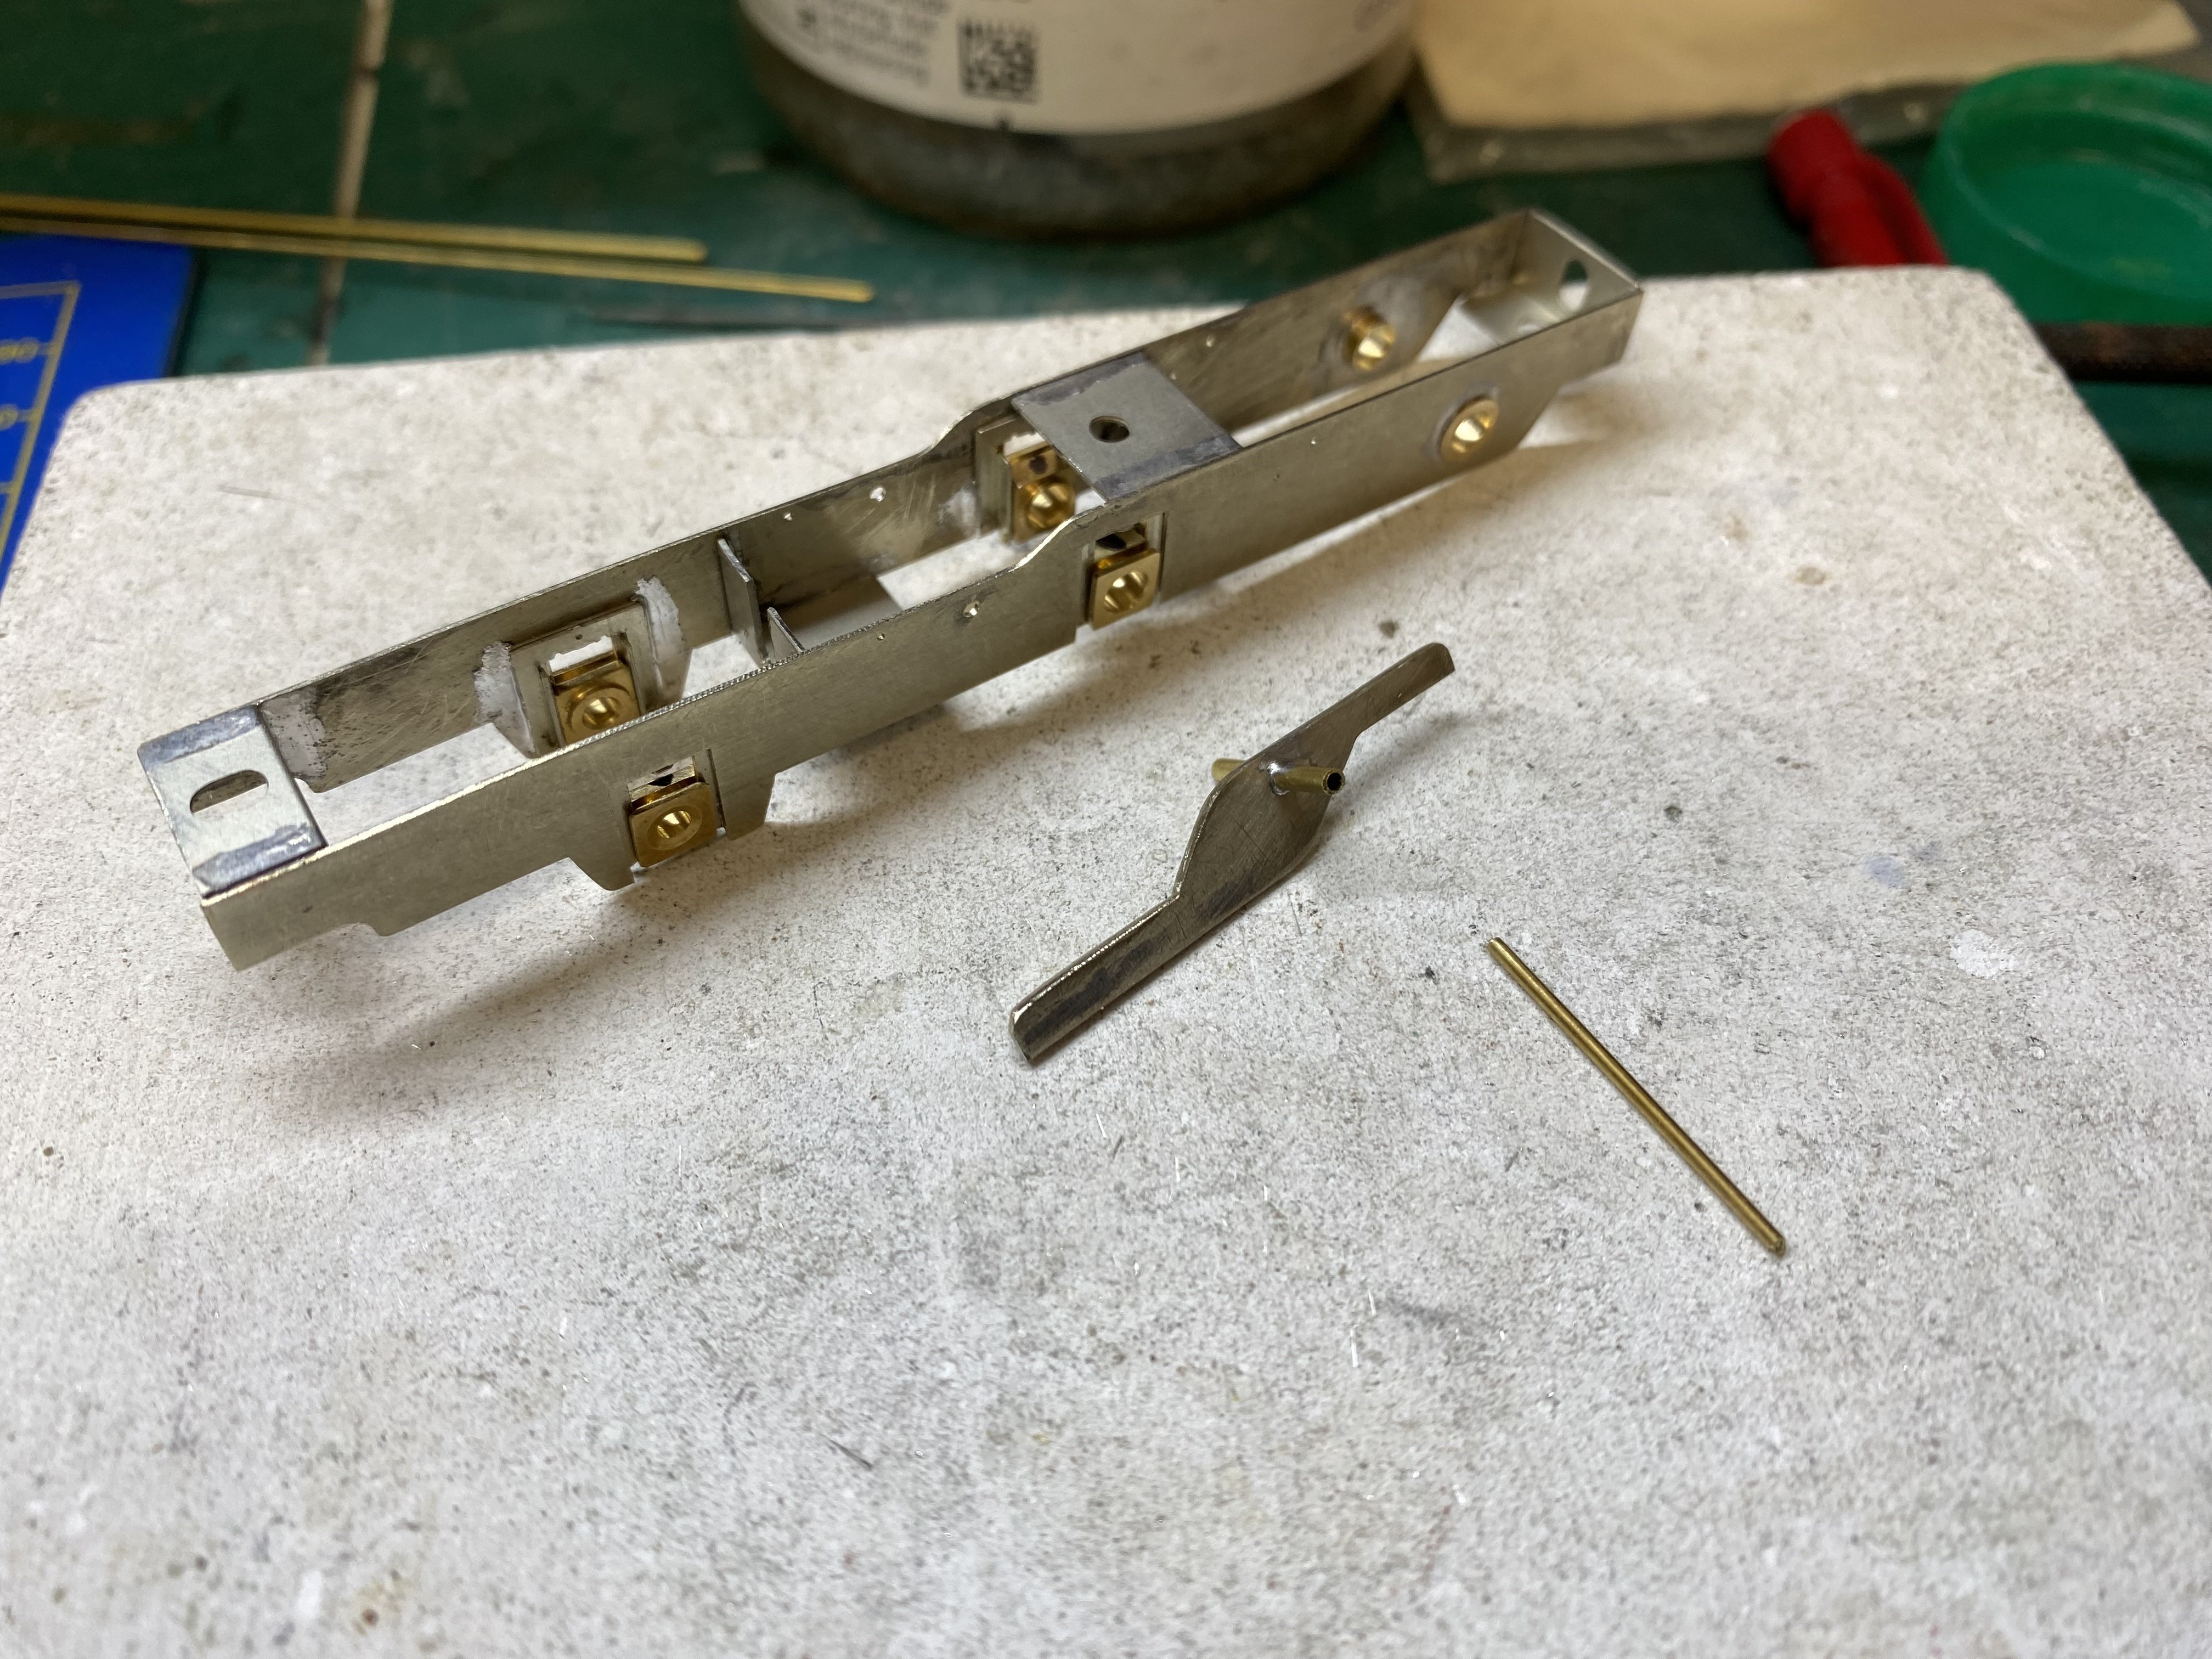
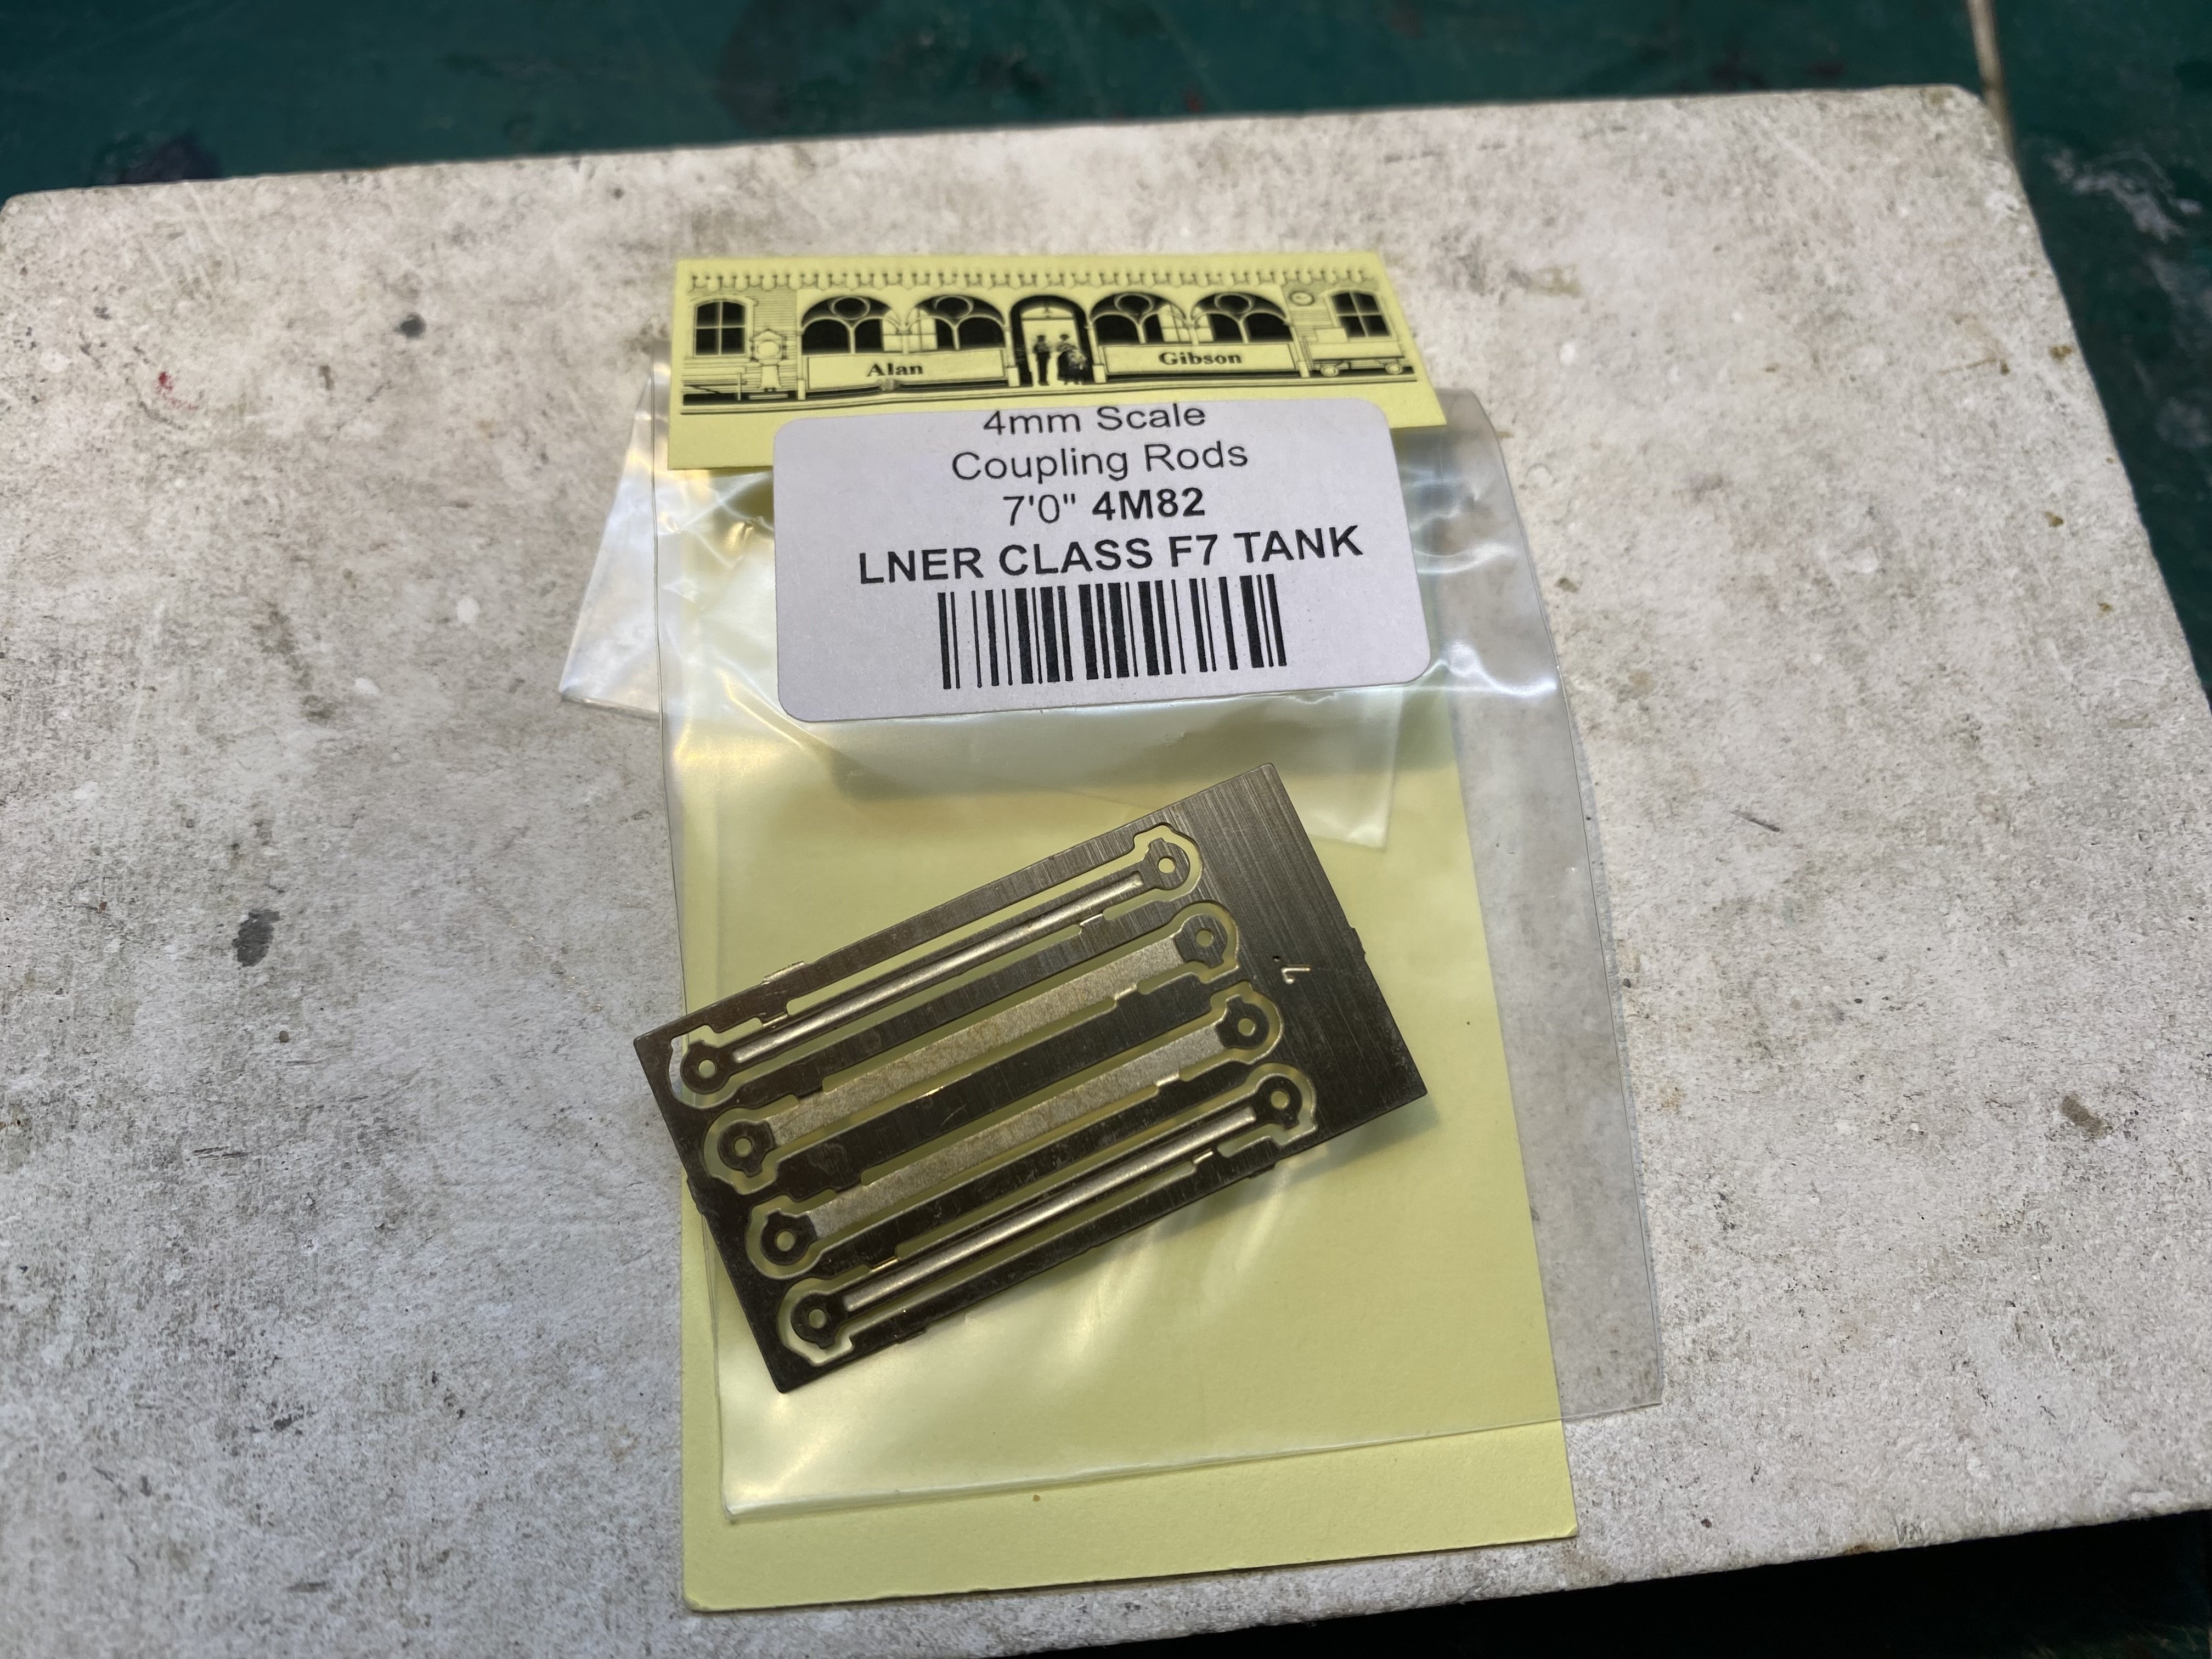
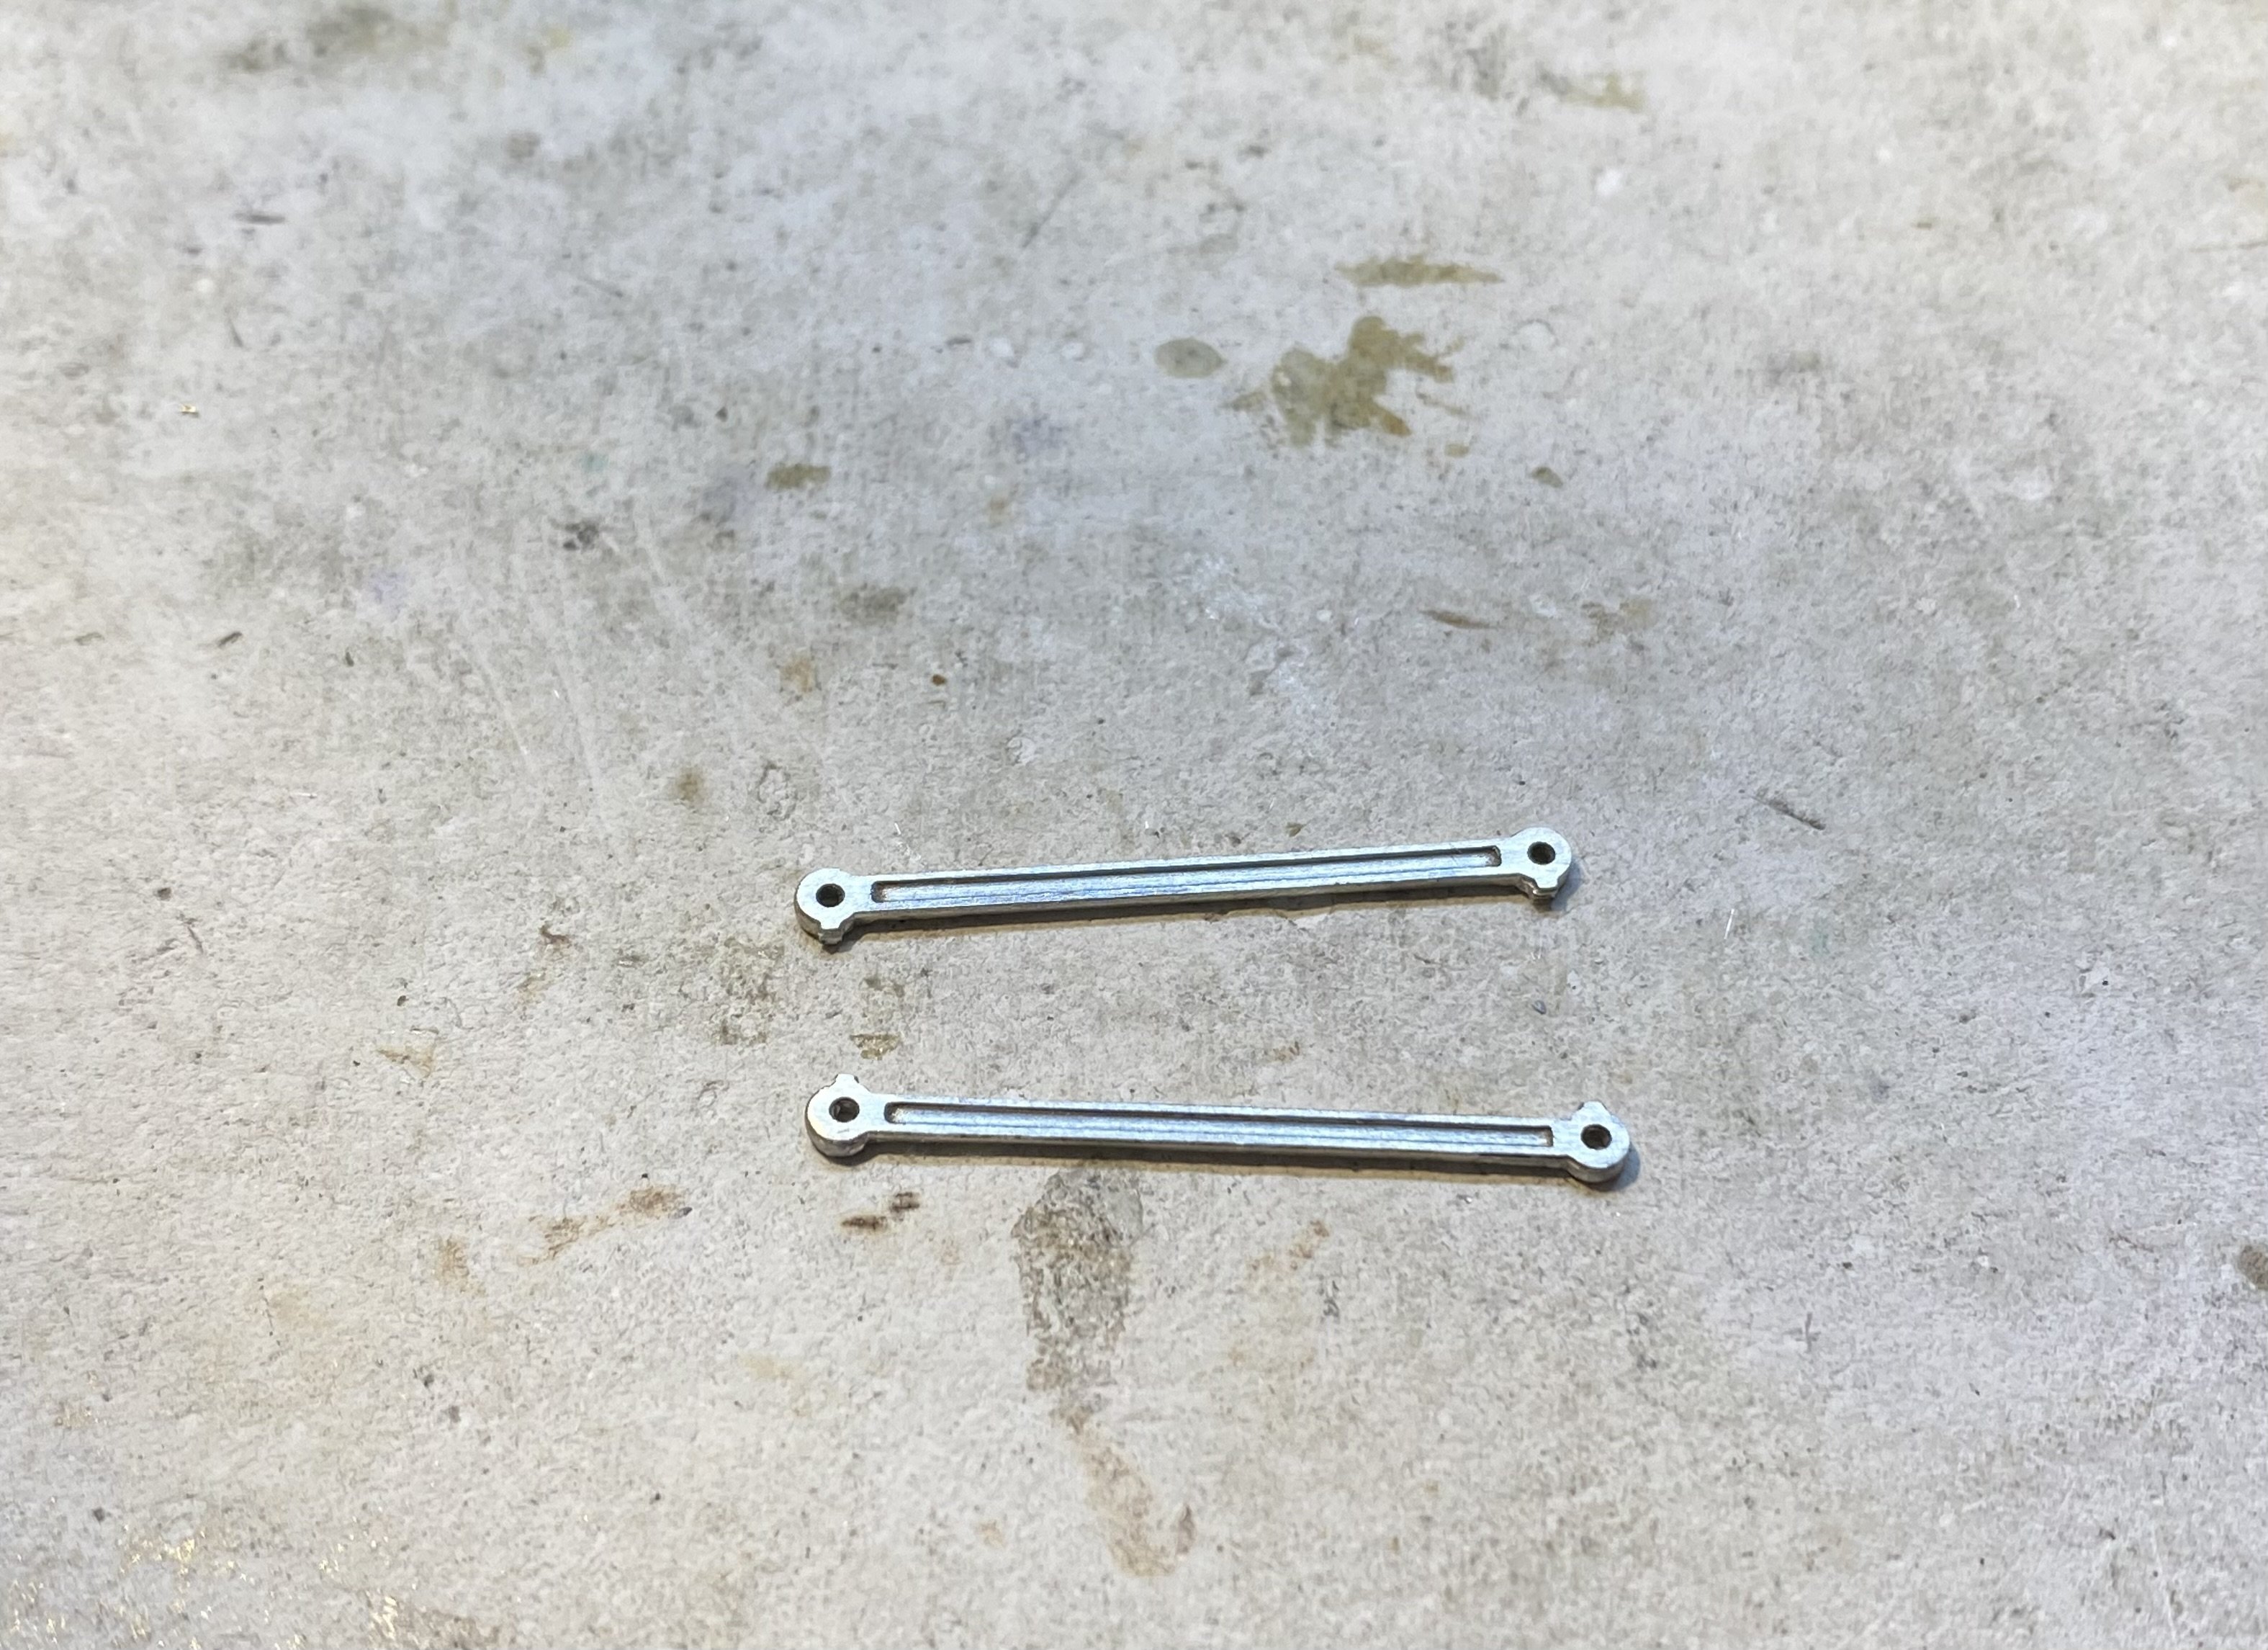
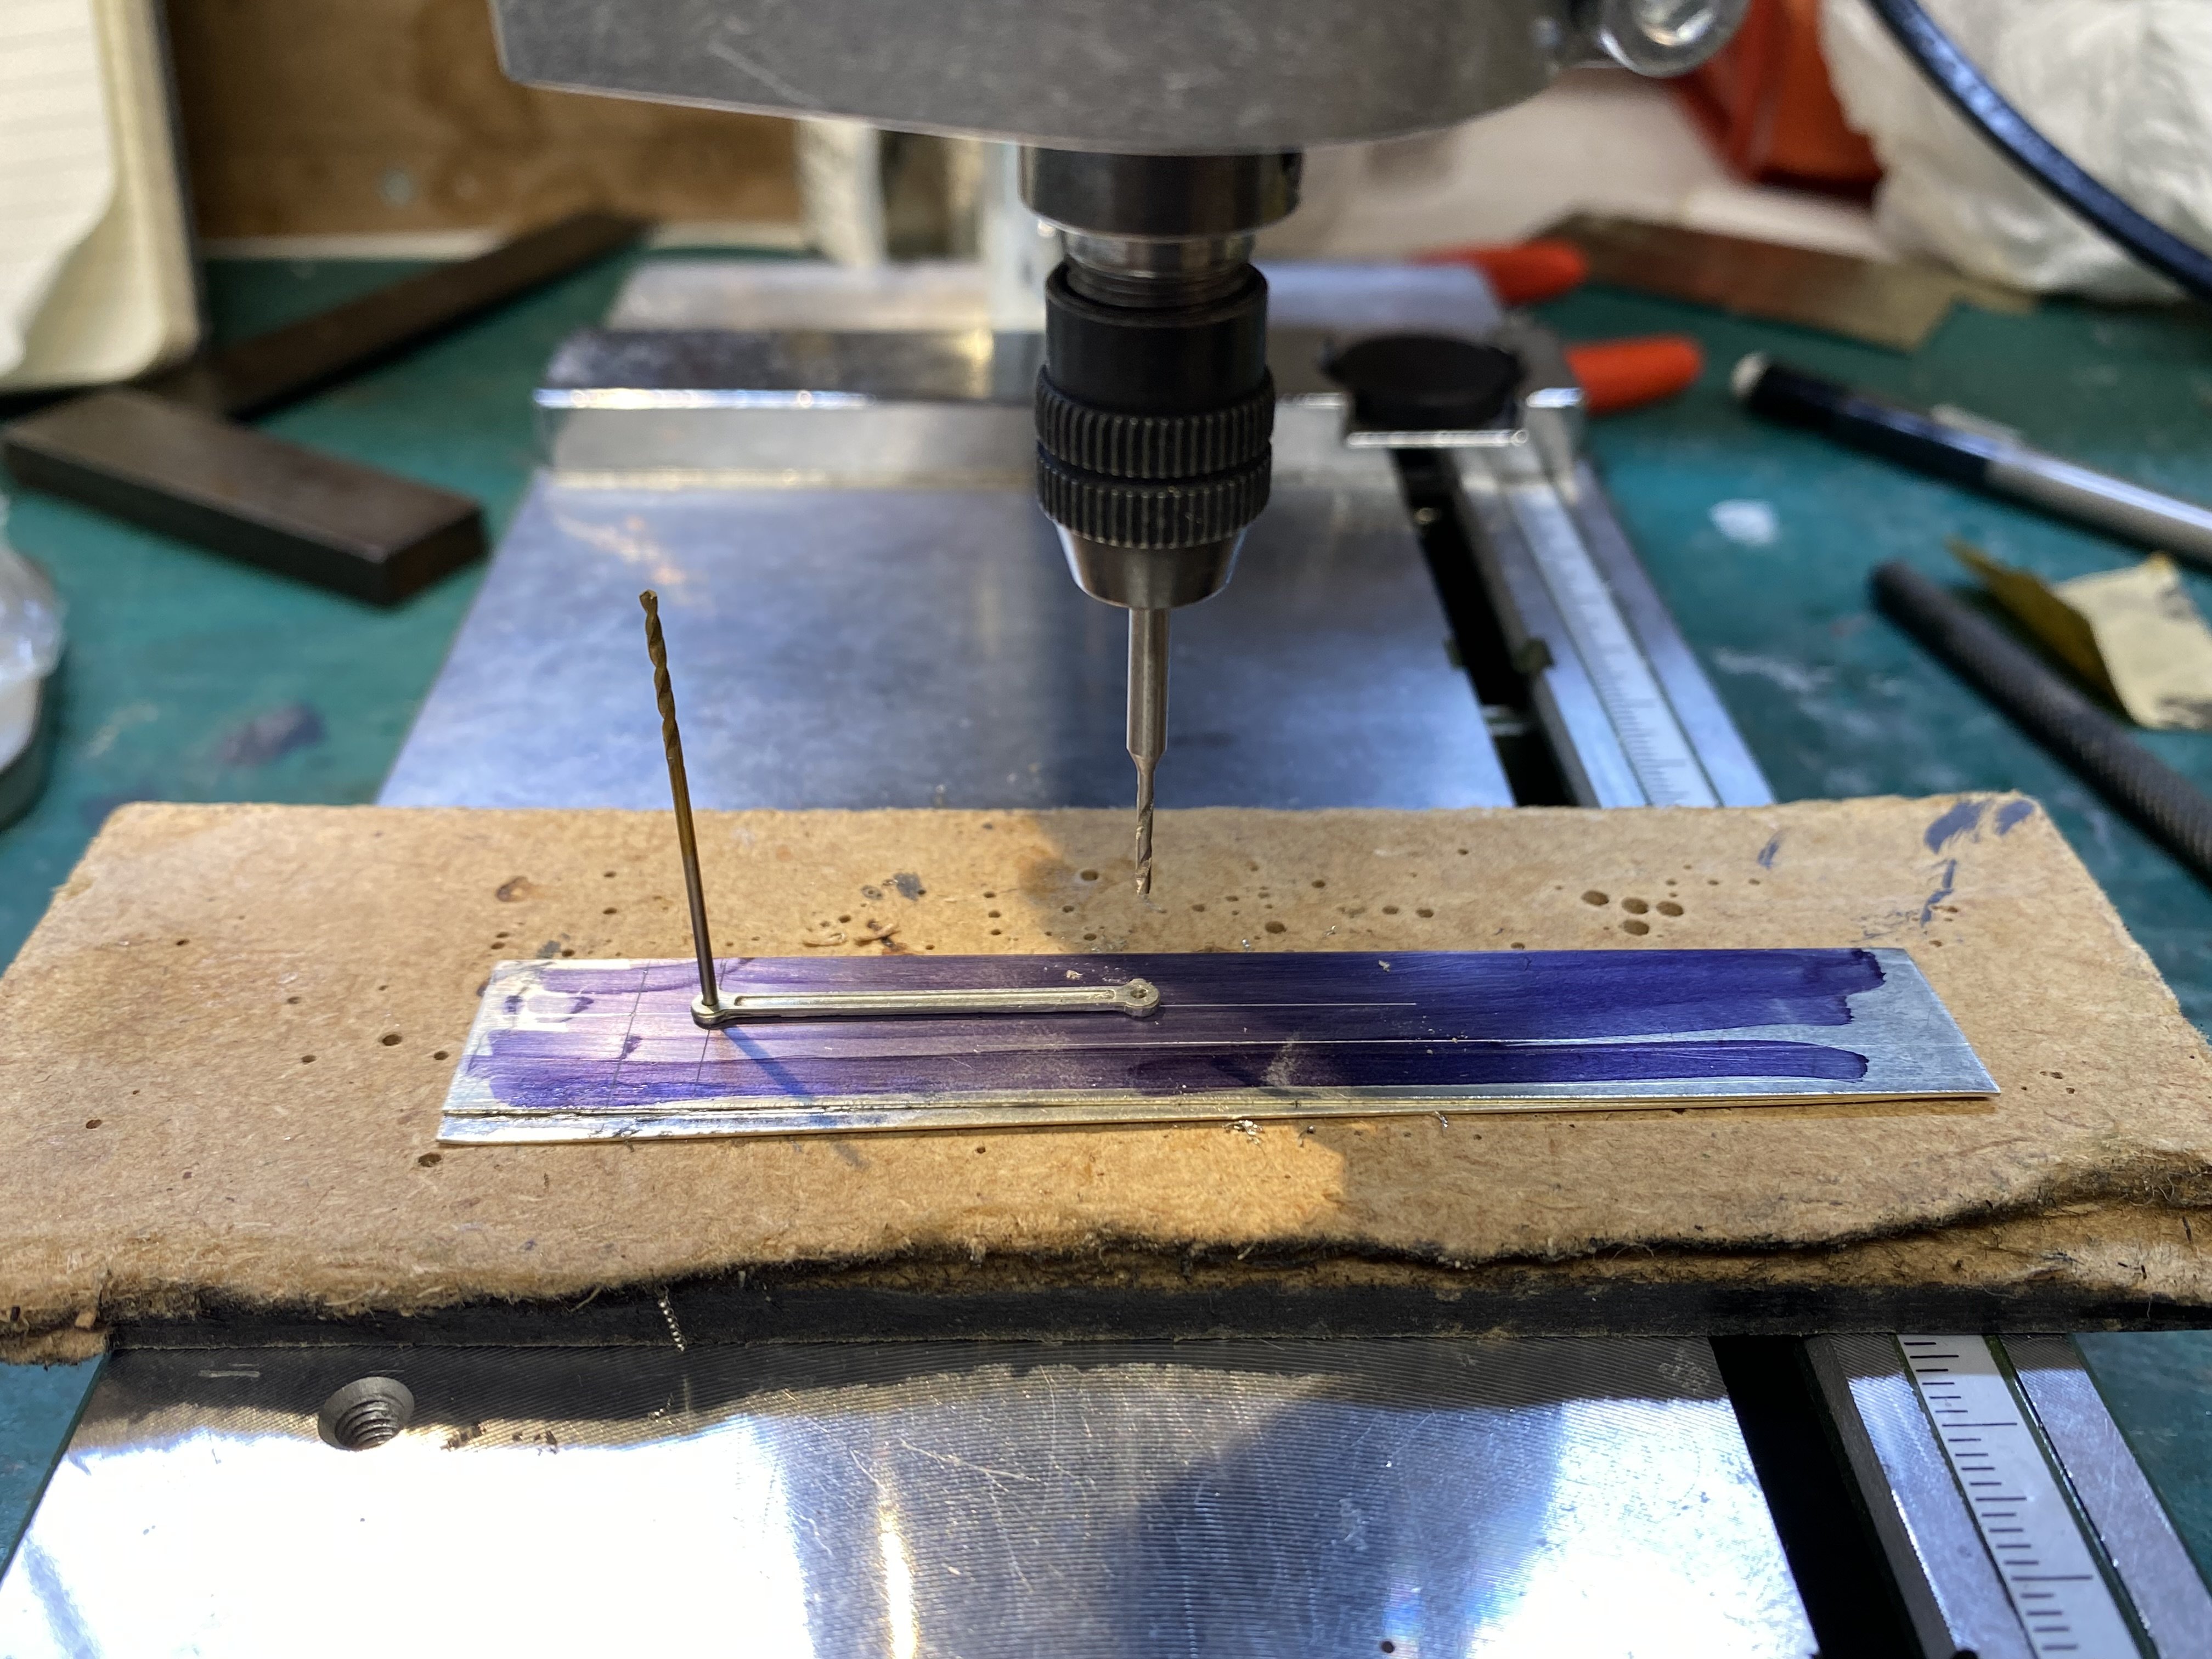
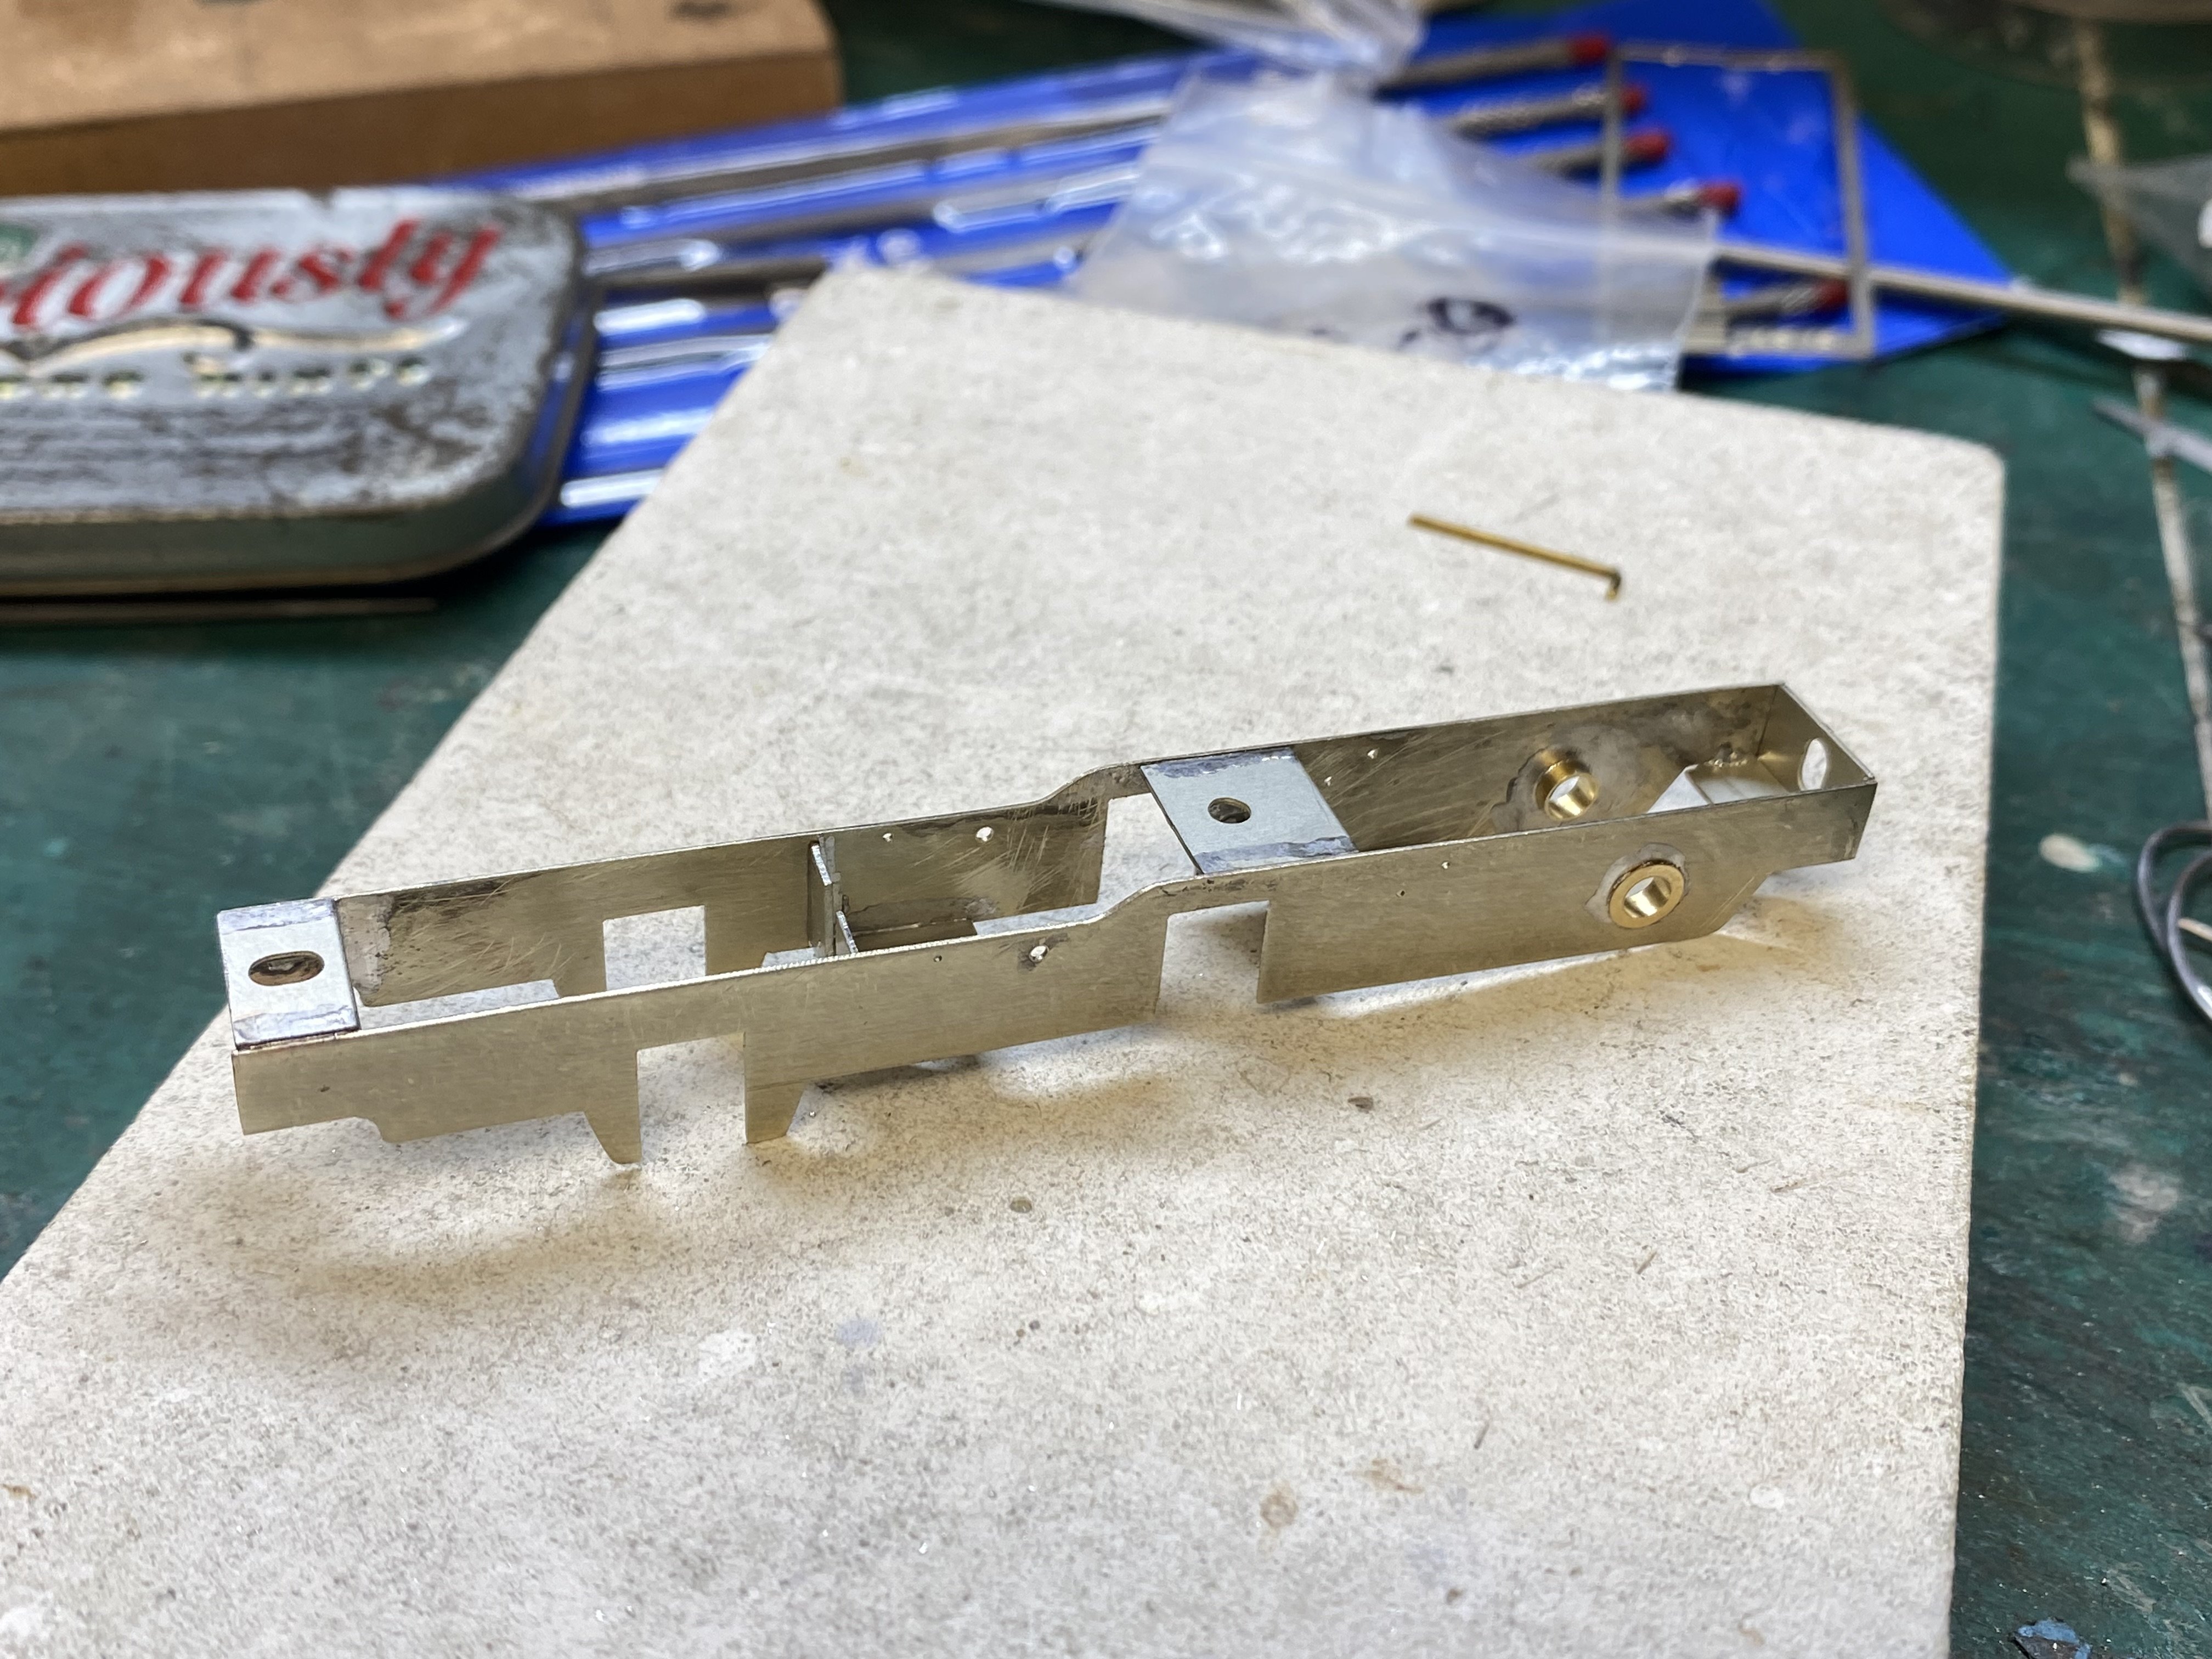
Most of my modelling recently has been on a proposed BCDR country station layout but the loco-building gene is agitating again. A nice shiny sheet of 15 thou nickel silver has been calling to me from the drawer and a photo of a certain BCDR locomotive has been quietly whispering “build me, build me”. This one.... Image: Copyright, Ernie's Railway Archive Belfast and County Down Railways 2-4-0 tender loco “The Famous Number 6” was delivered by Beyer Peacock in 1894. Reportedly the fastest engine on the BCDR, it outlived the railway it was built for, finally being scrapped in 1956 after a long and varied career, significant re-building and, apparently, a recorded mileage of 1,545,510. (Source: D. Coakham) As a modelling project, No.6 has now elbowed its way centre stage after lurking in the wings for a while. I’ve been avoiding it for good reasons. I can see a number of problems which I may or may not be able to solve but I suppose the best way to find out is to give it a go. The gene is very insistent. As usual, the starting point is a set of coupling rods which can then be used as jigs to mark axle positions on the chassis frames. An LNER etch from Alan Gibson fitted the bill, being the correct wheelbase (28mm) for this engine. Two blanks of 15 thou nickel silver are tack-soldered together and pilot holes (1mm) are drilled for axle positions. It can be tricky to get models with 2-4-0 or 4-4-0 wheel configurations to run well. There’s a tendency to tip forward and lose traction. Using the weight of the tender to exert downwards pressure on the loco’s driving wheels is one solution. Having read up and also consulted more experienced loco builders (thank you Tony), another solution is to treat a 2-4-0 as an 0-6-0 which is how I’ve approached this one. The rear driving axle, with gearbox attached, will run in fixed bearings. The front driving axle and the front carrying axle will run in hornblocks with a compensating beam between them. Pivot point for the compensation beam being drilled in the frame blanks. The beam is cranked to accommodate two axles at different levels in the frames whilst keeping the chassis level. Frames shaped as a pair, then separated and erected into a chassis. Comet spacers from Wizard Models. The rectangular cutouts are for the hornblocks. More soon, Alan
- 613 replies
-
- 16
-
-
-
Like the river Derek. That water is very convincing.
-
T H A N K S P A T R I C K
-
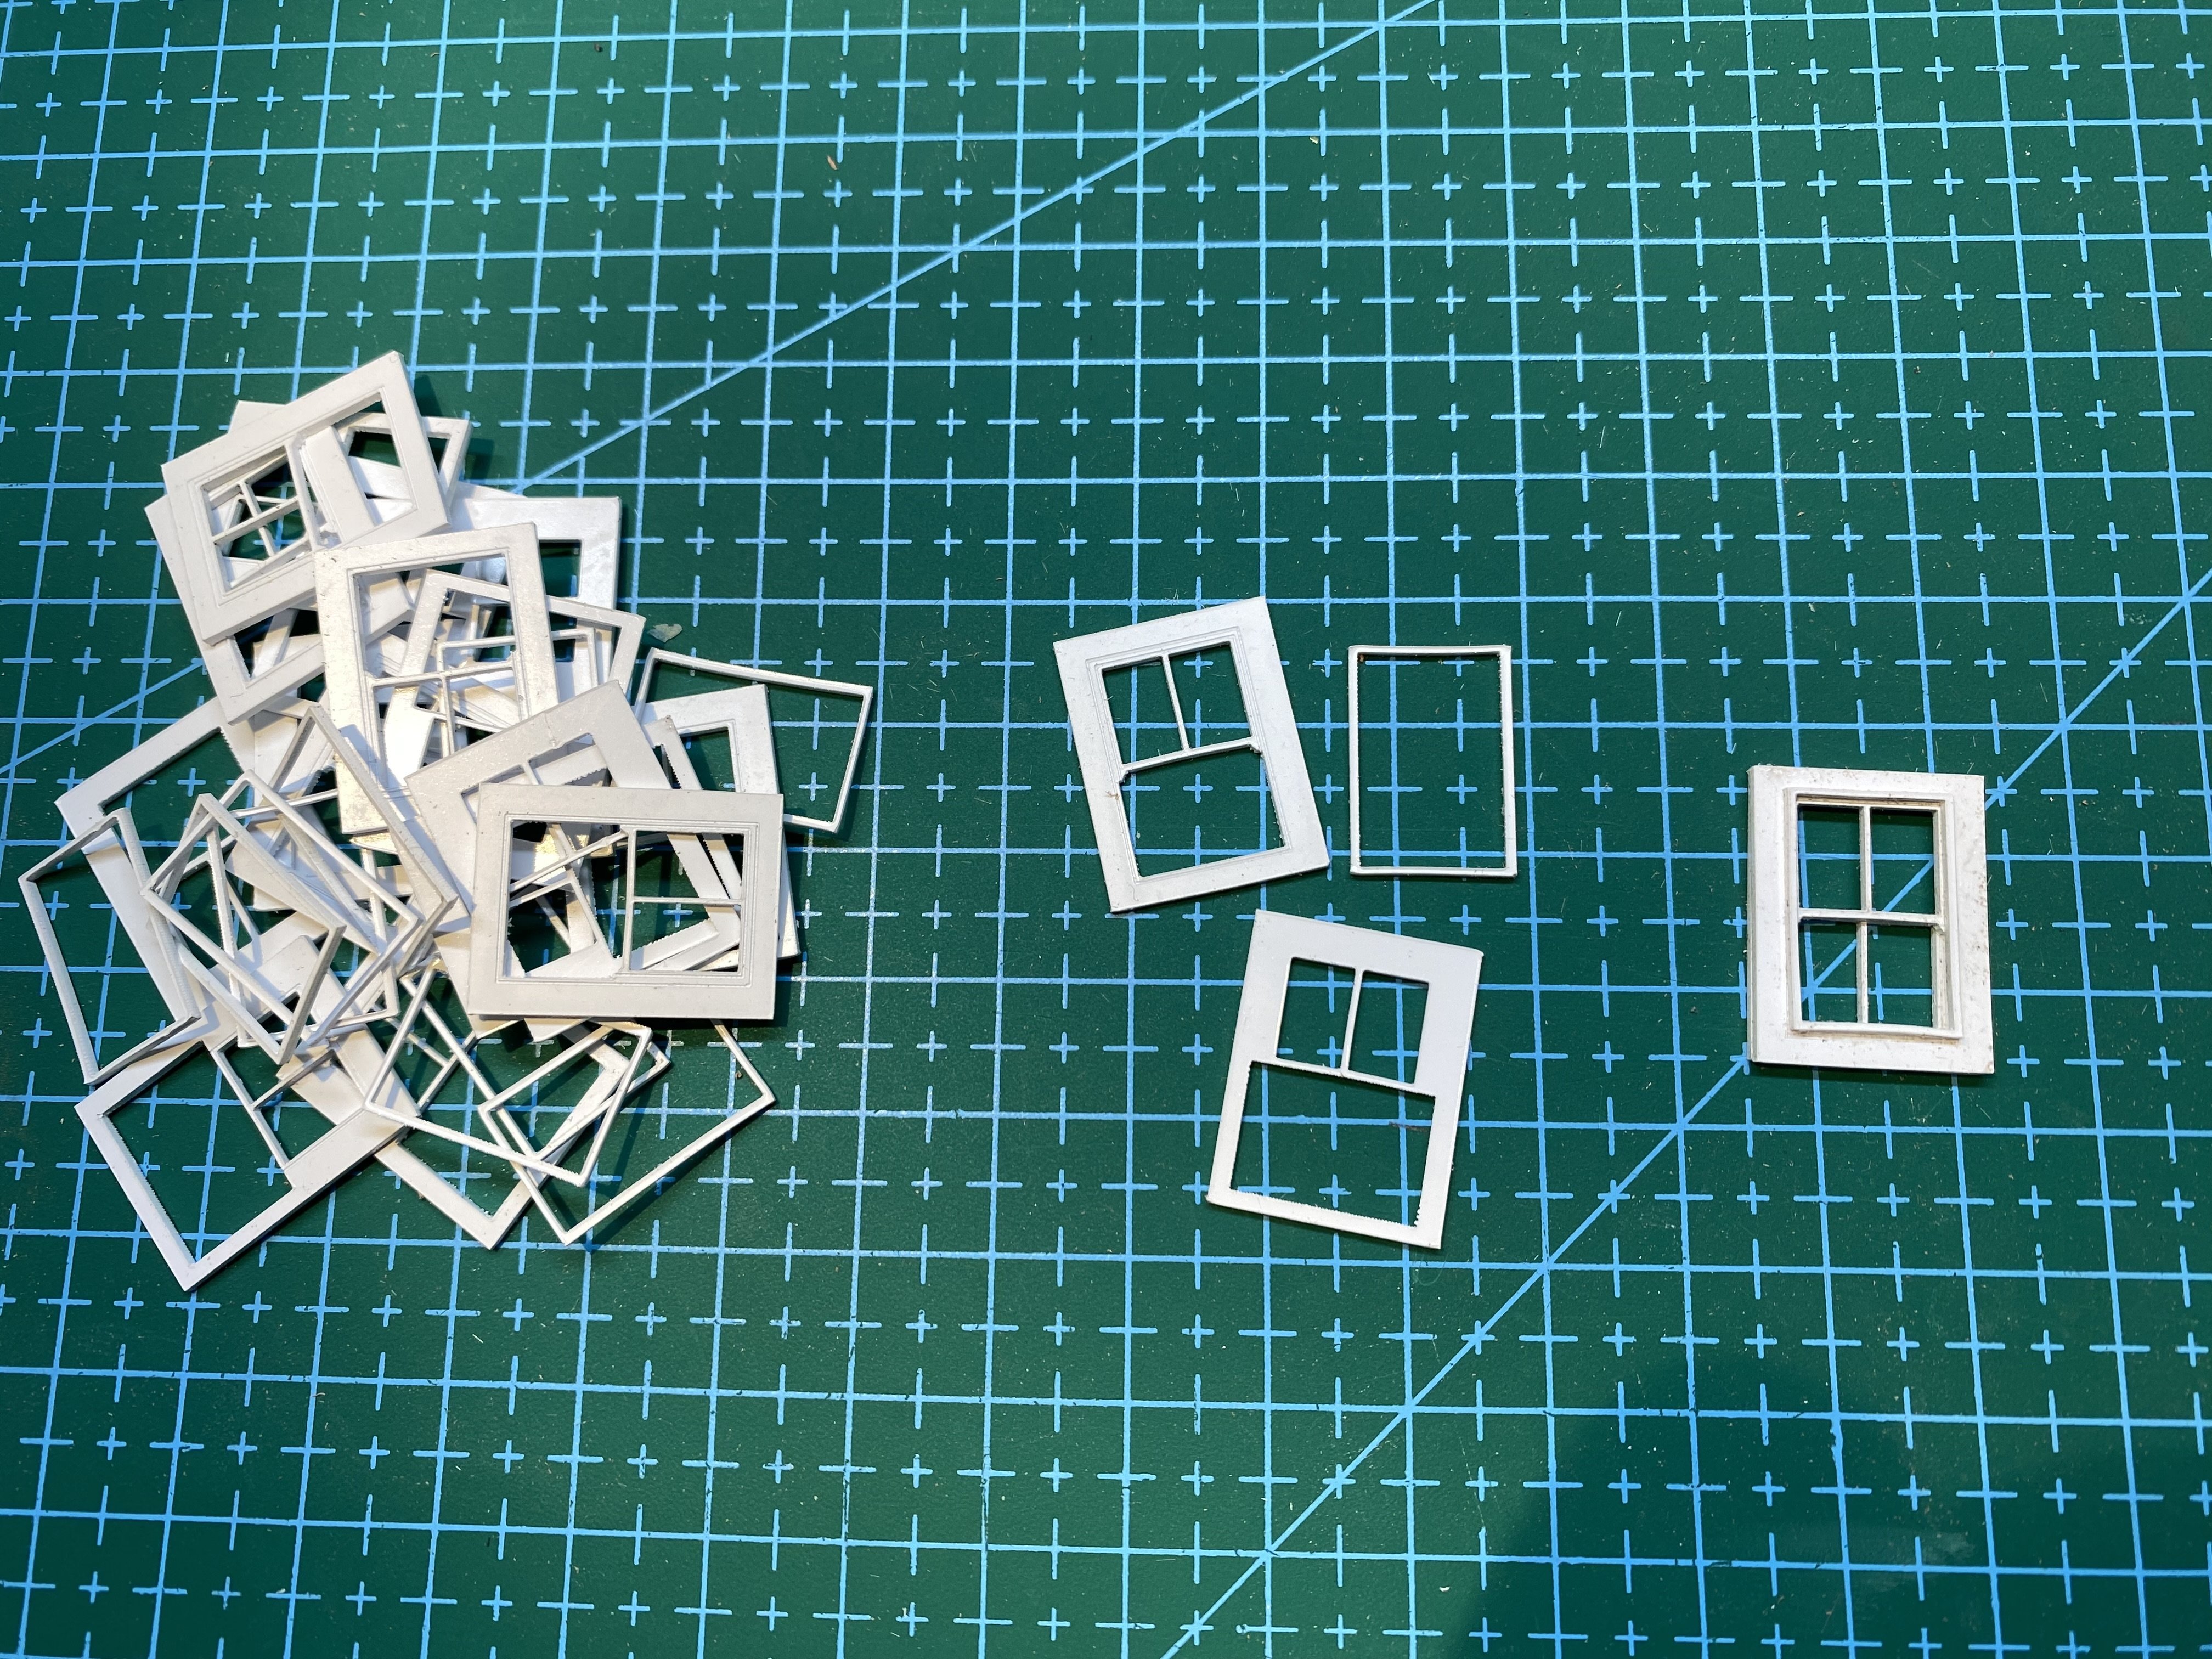
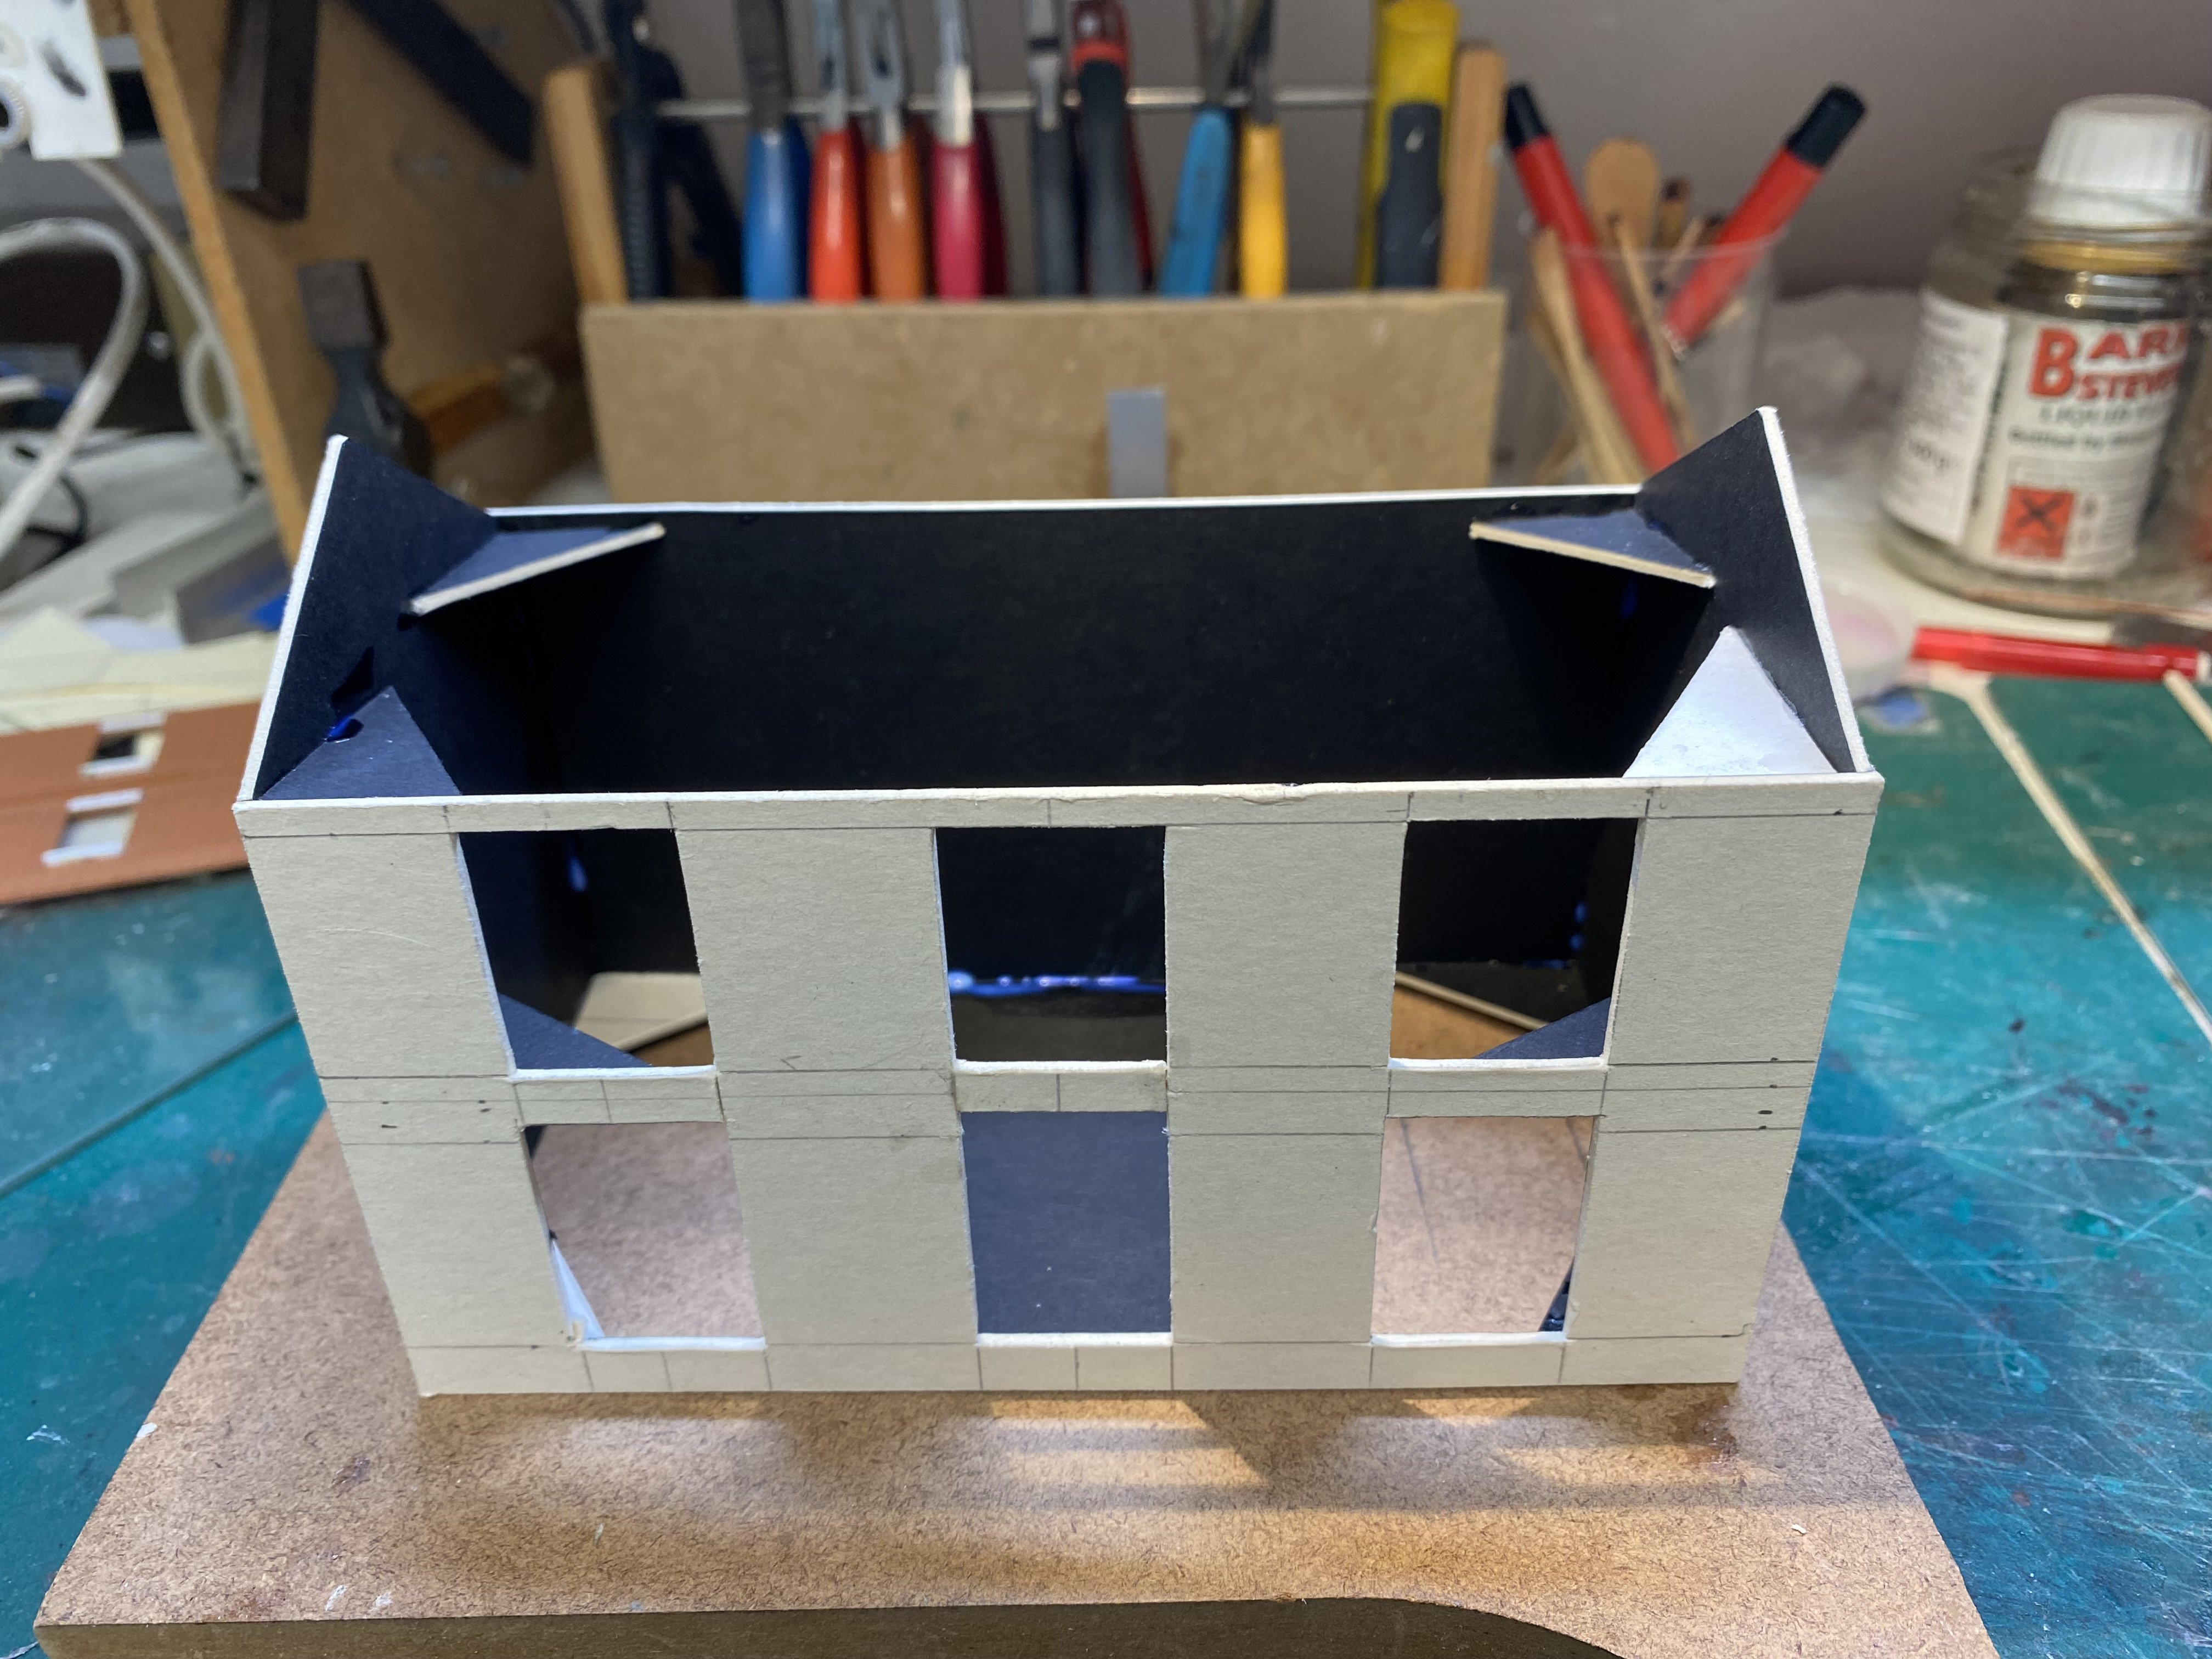
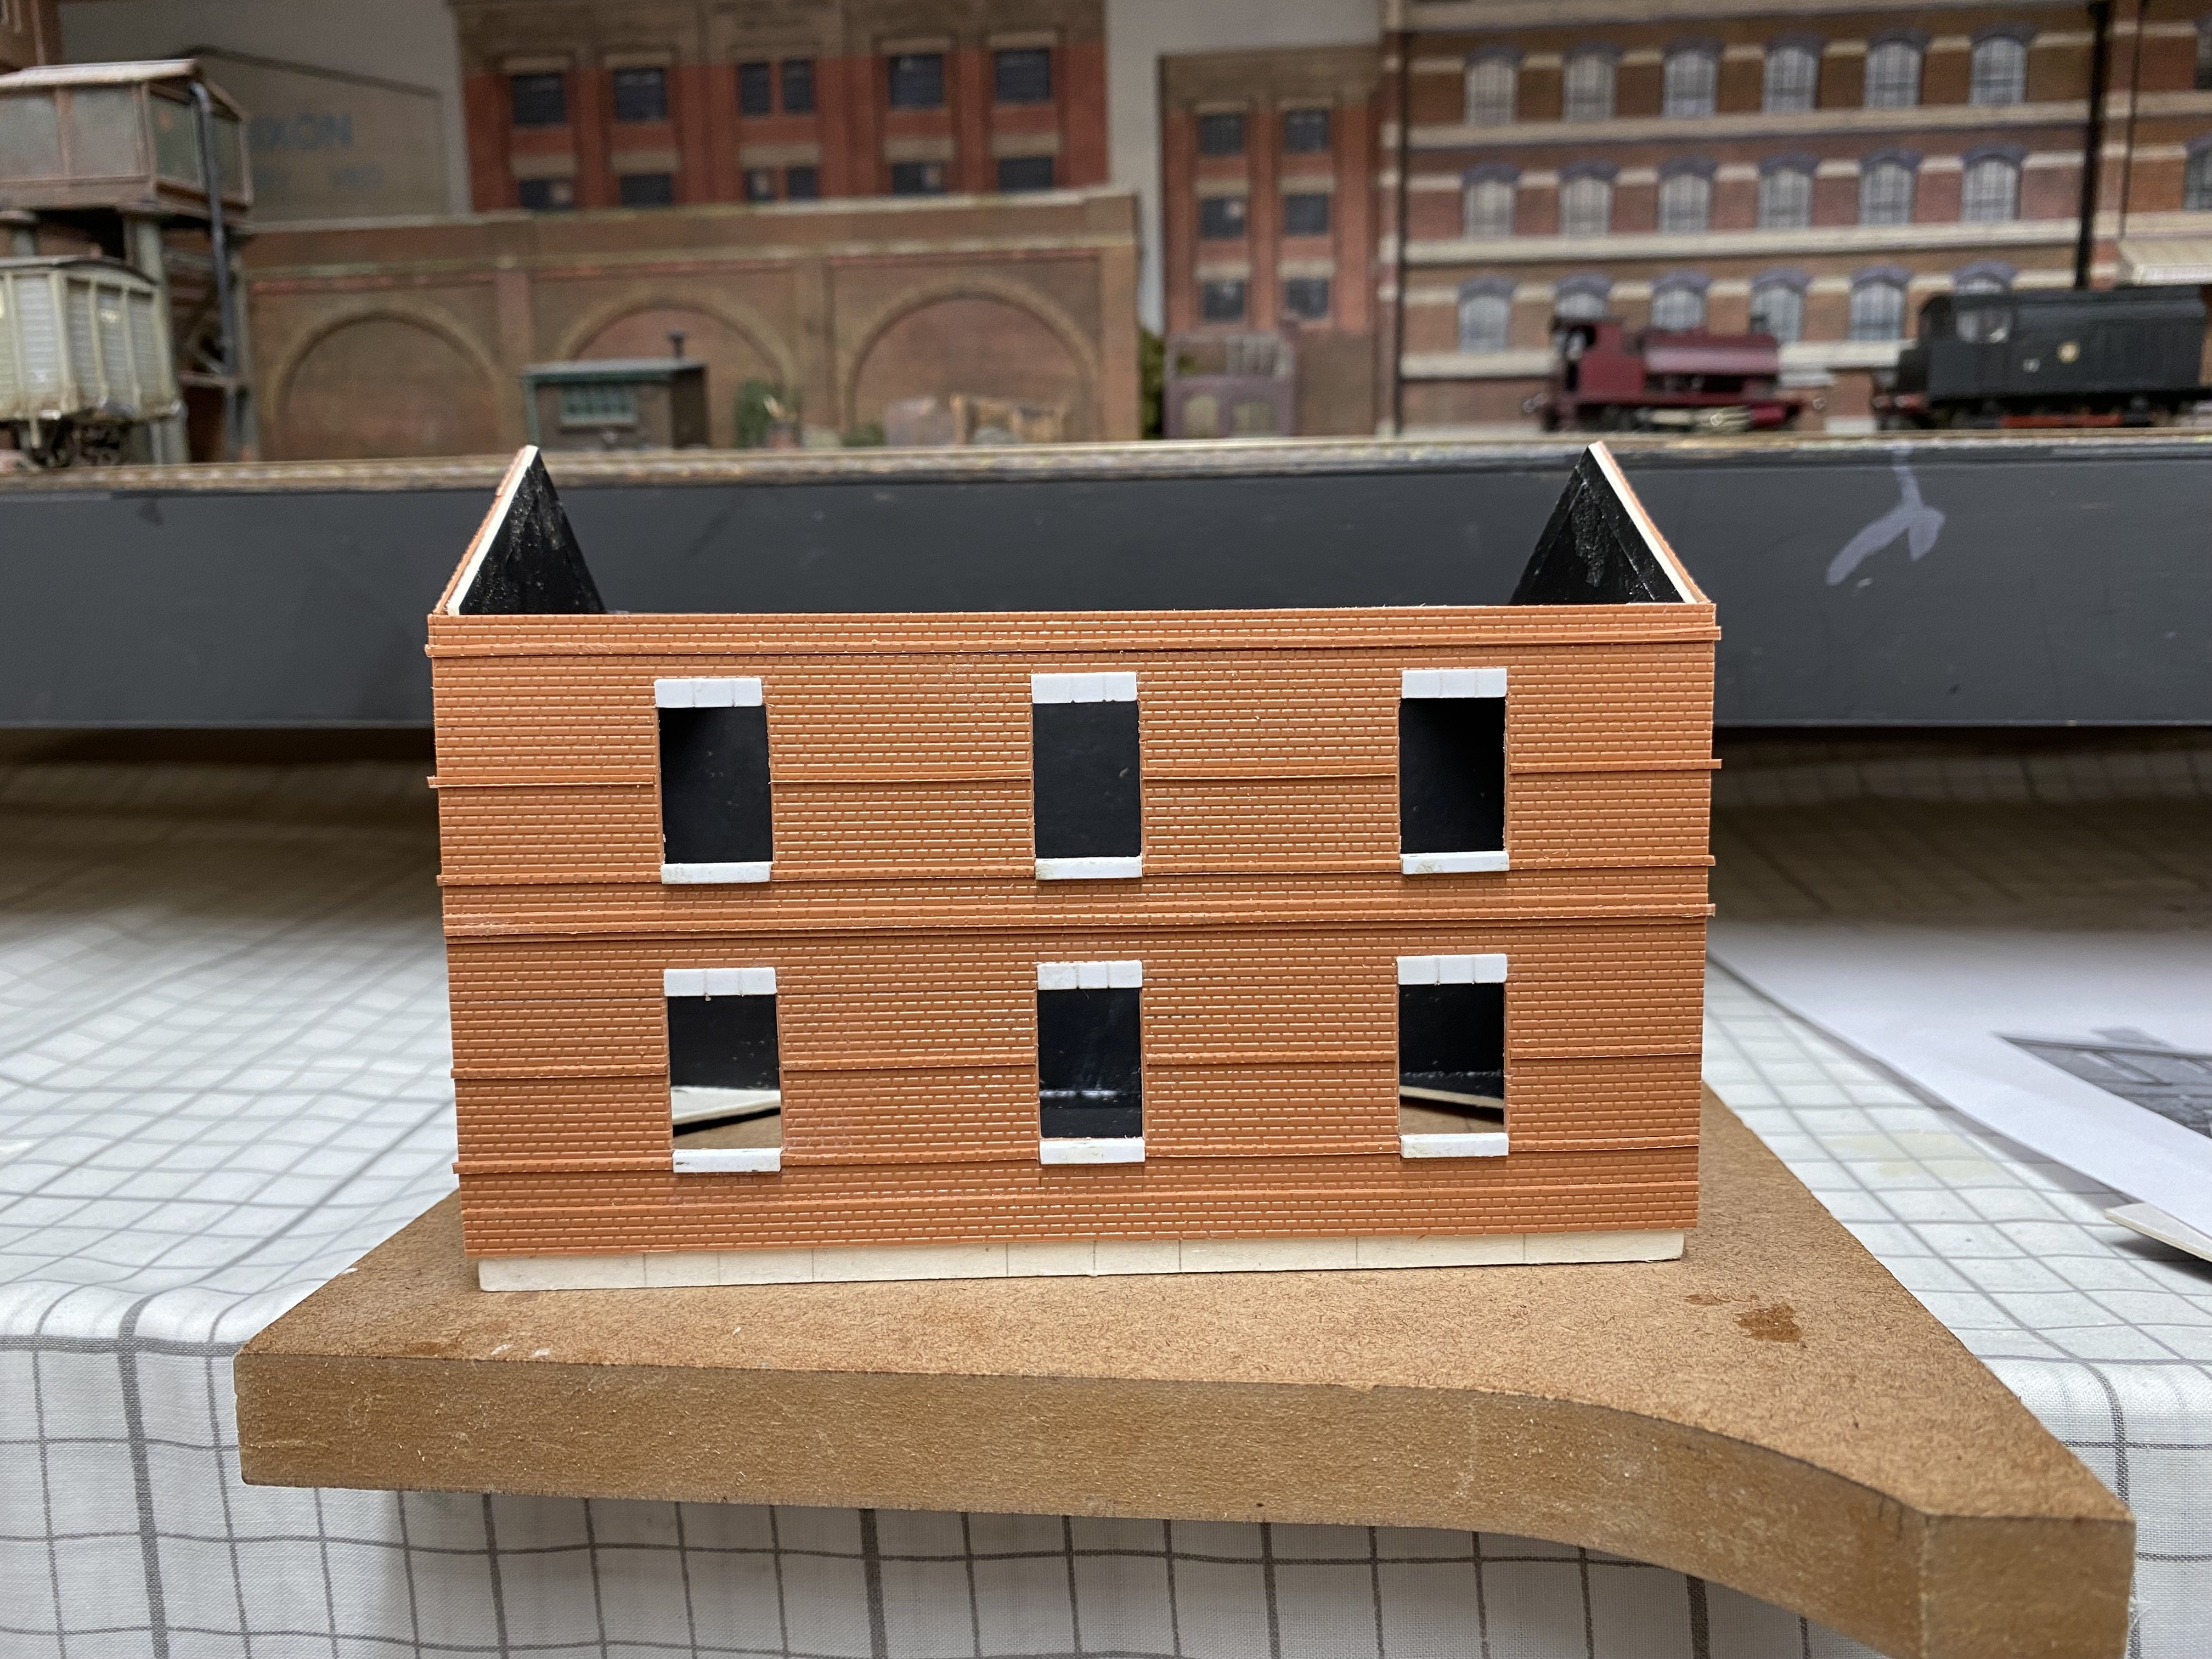
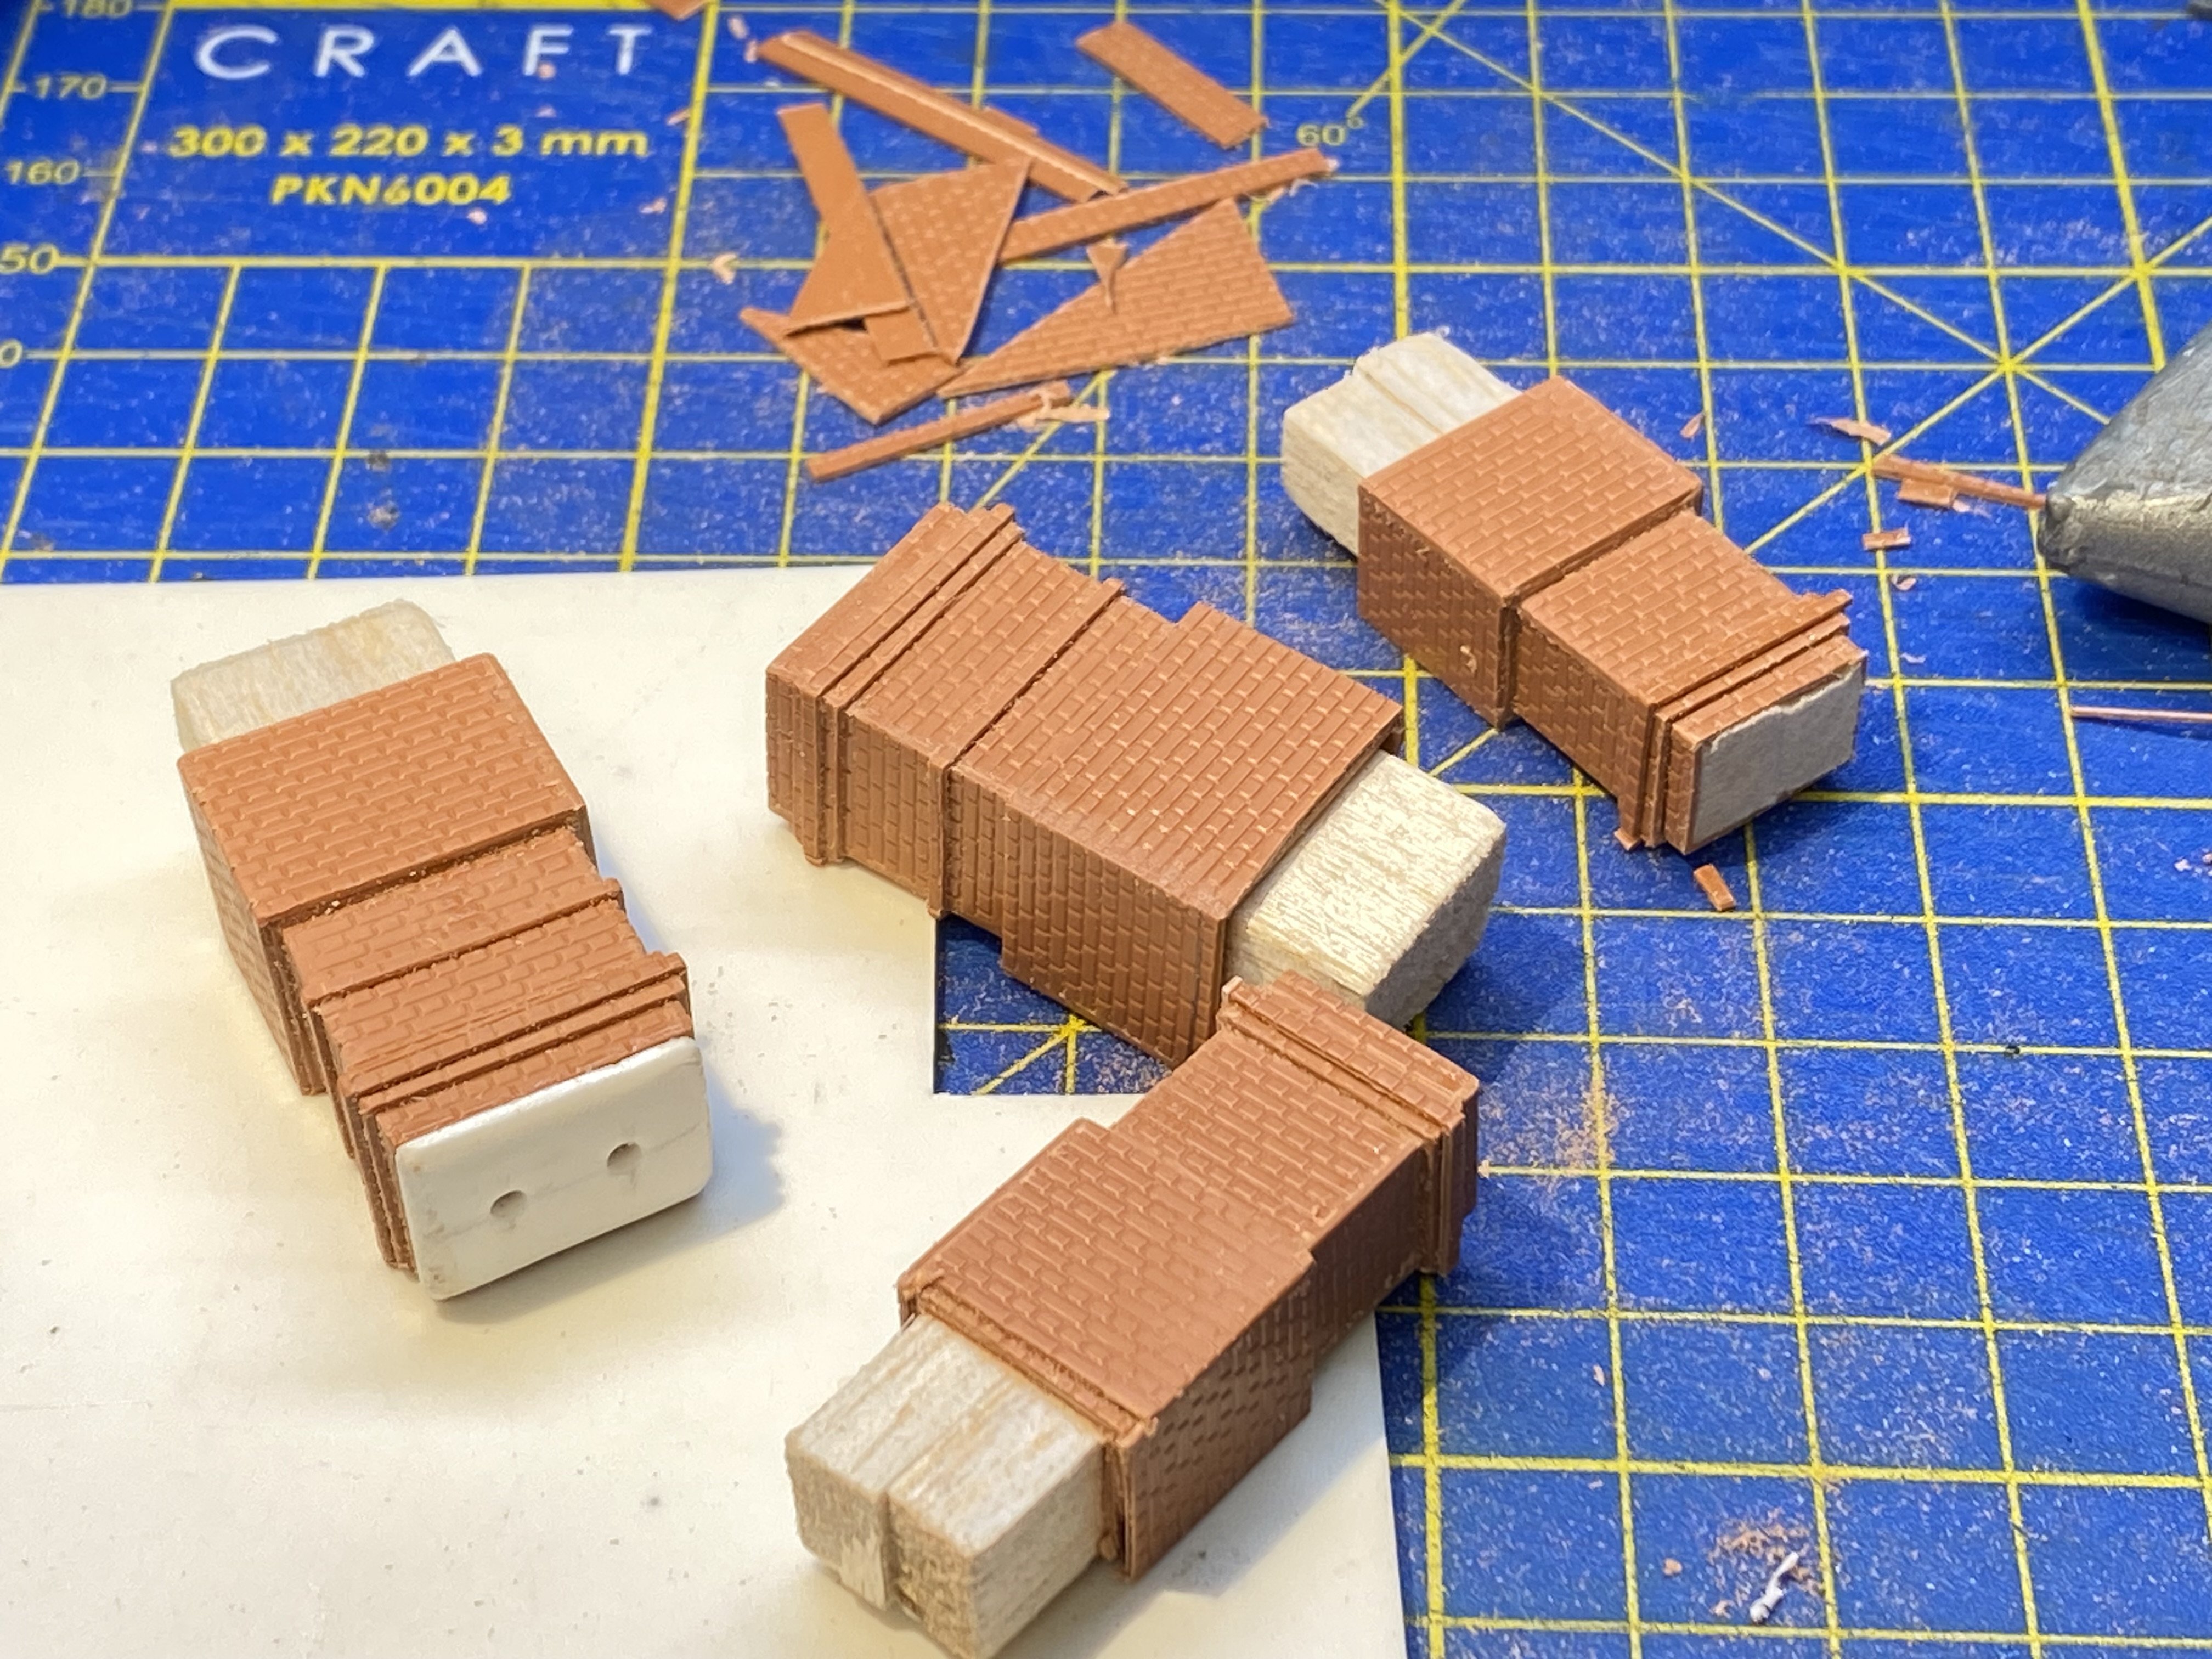
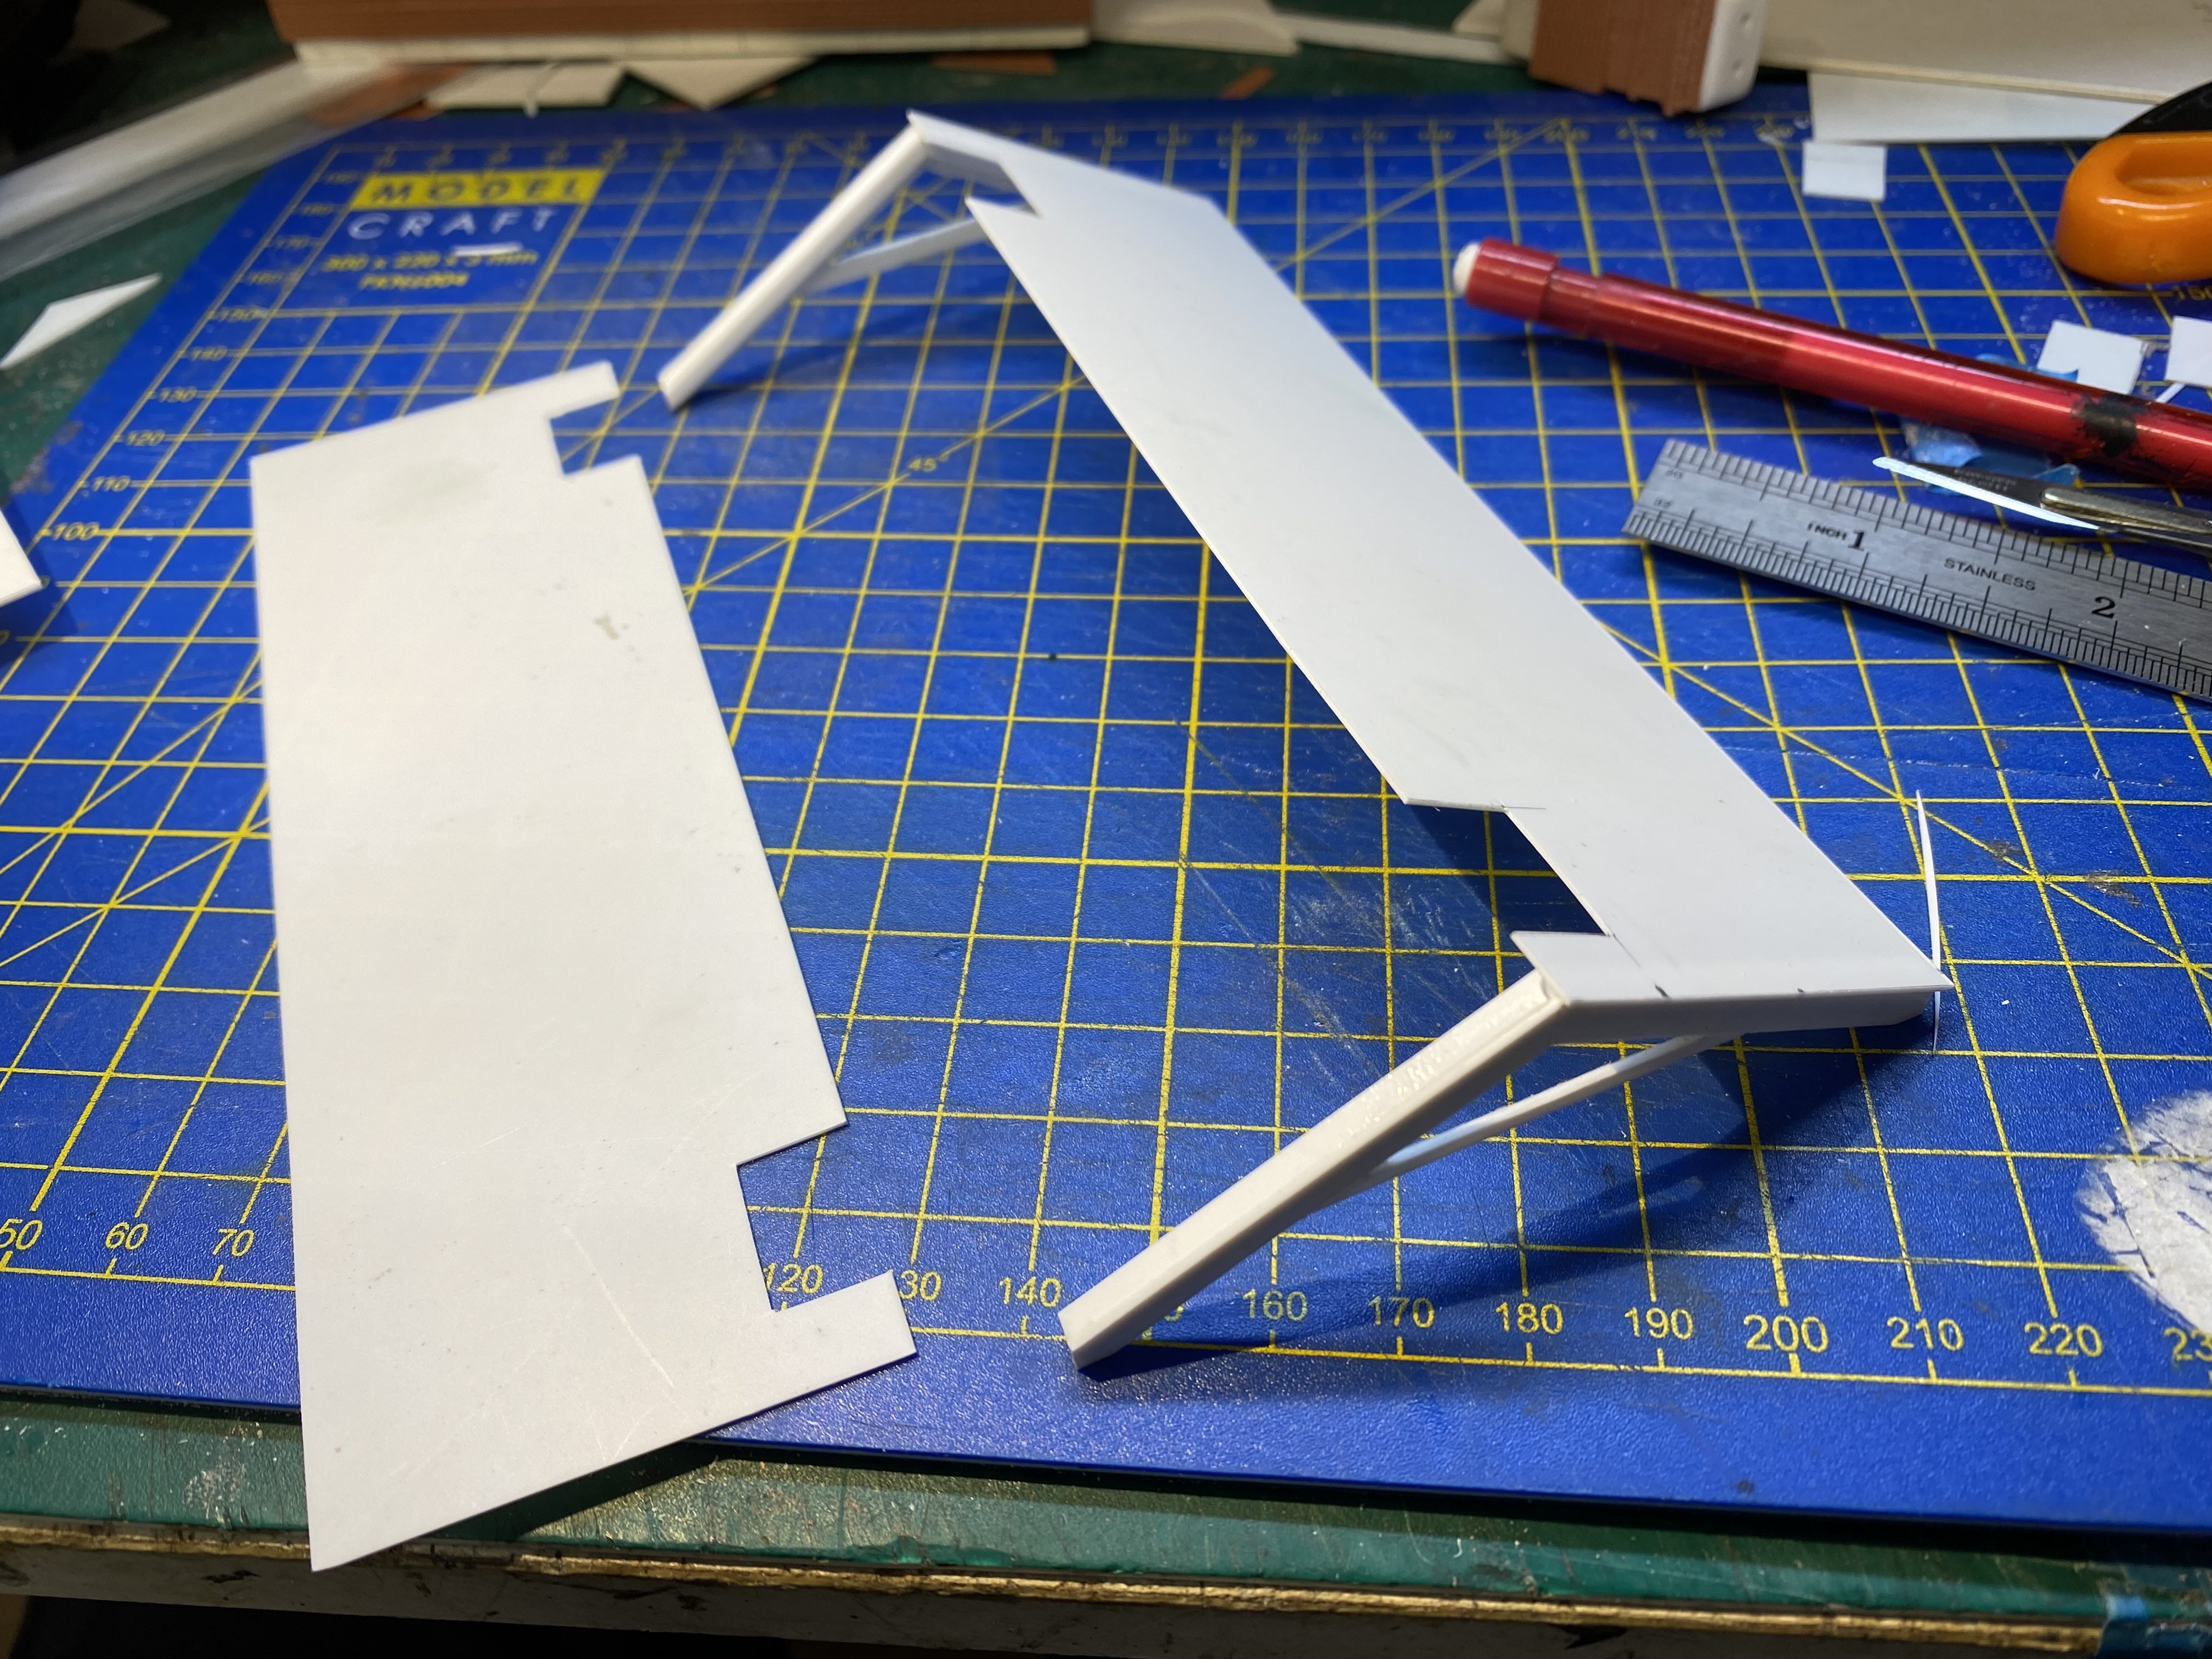
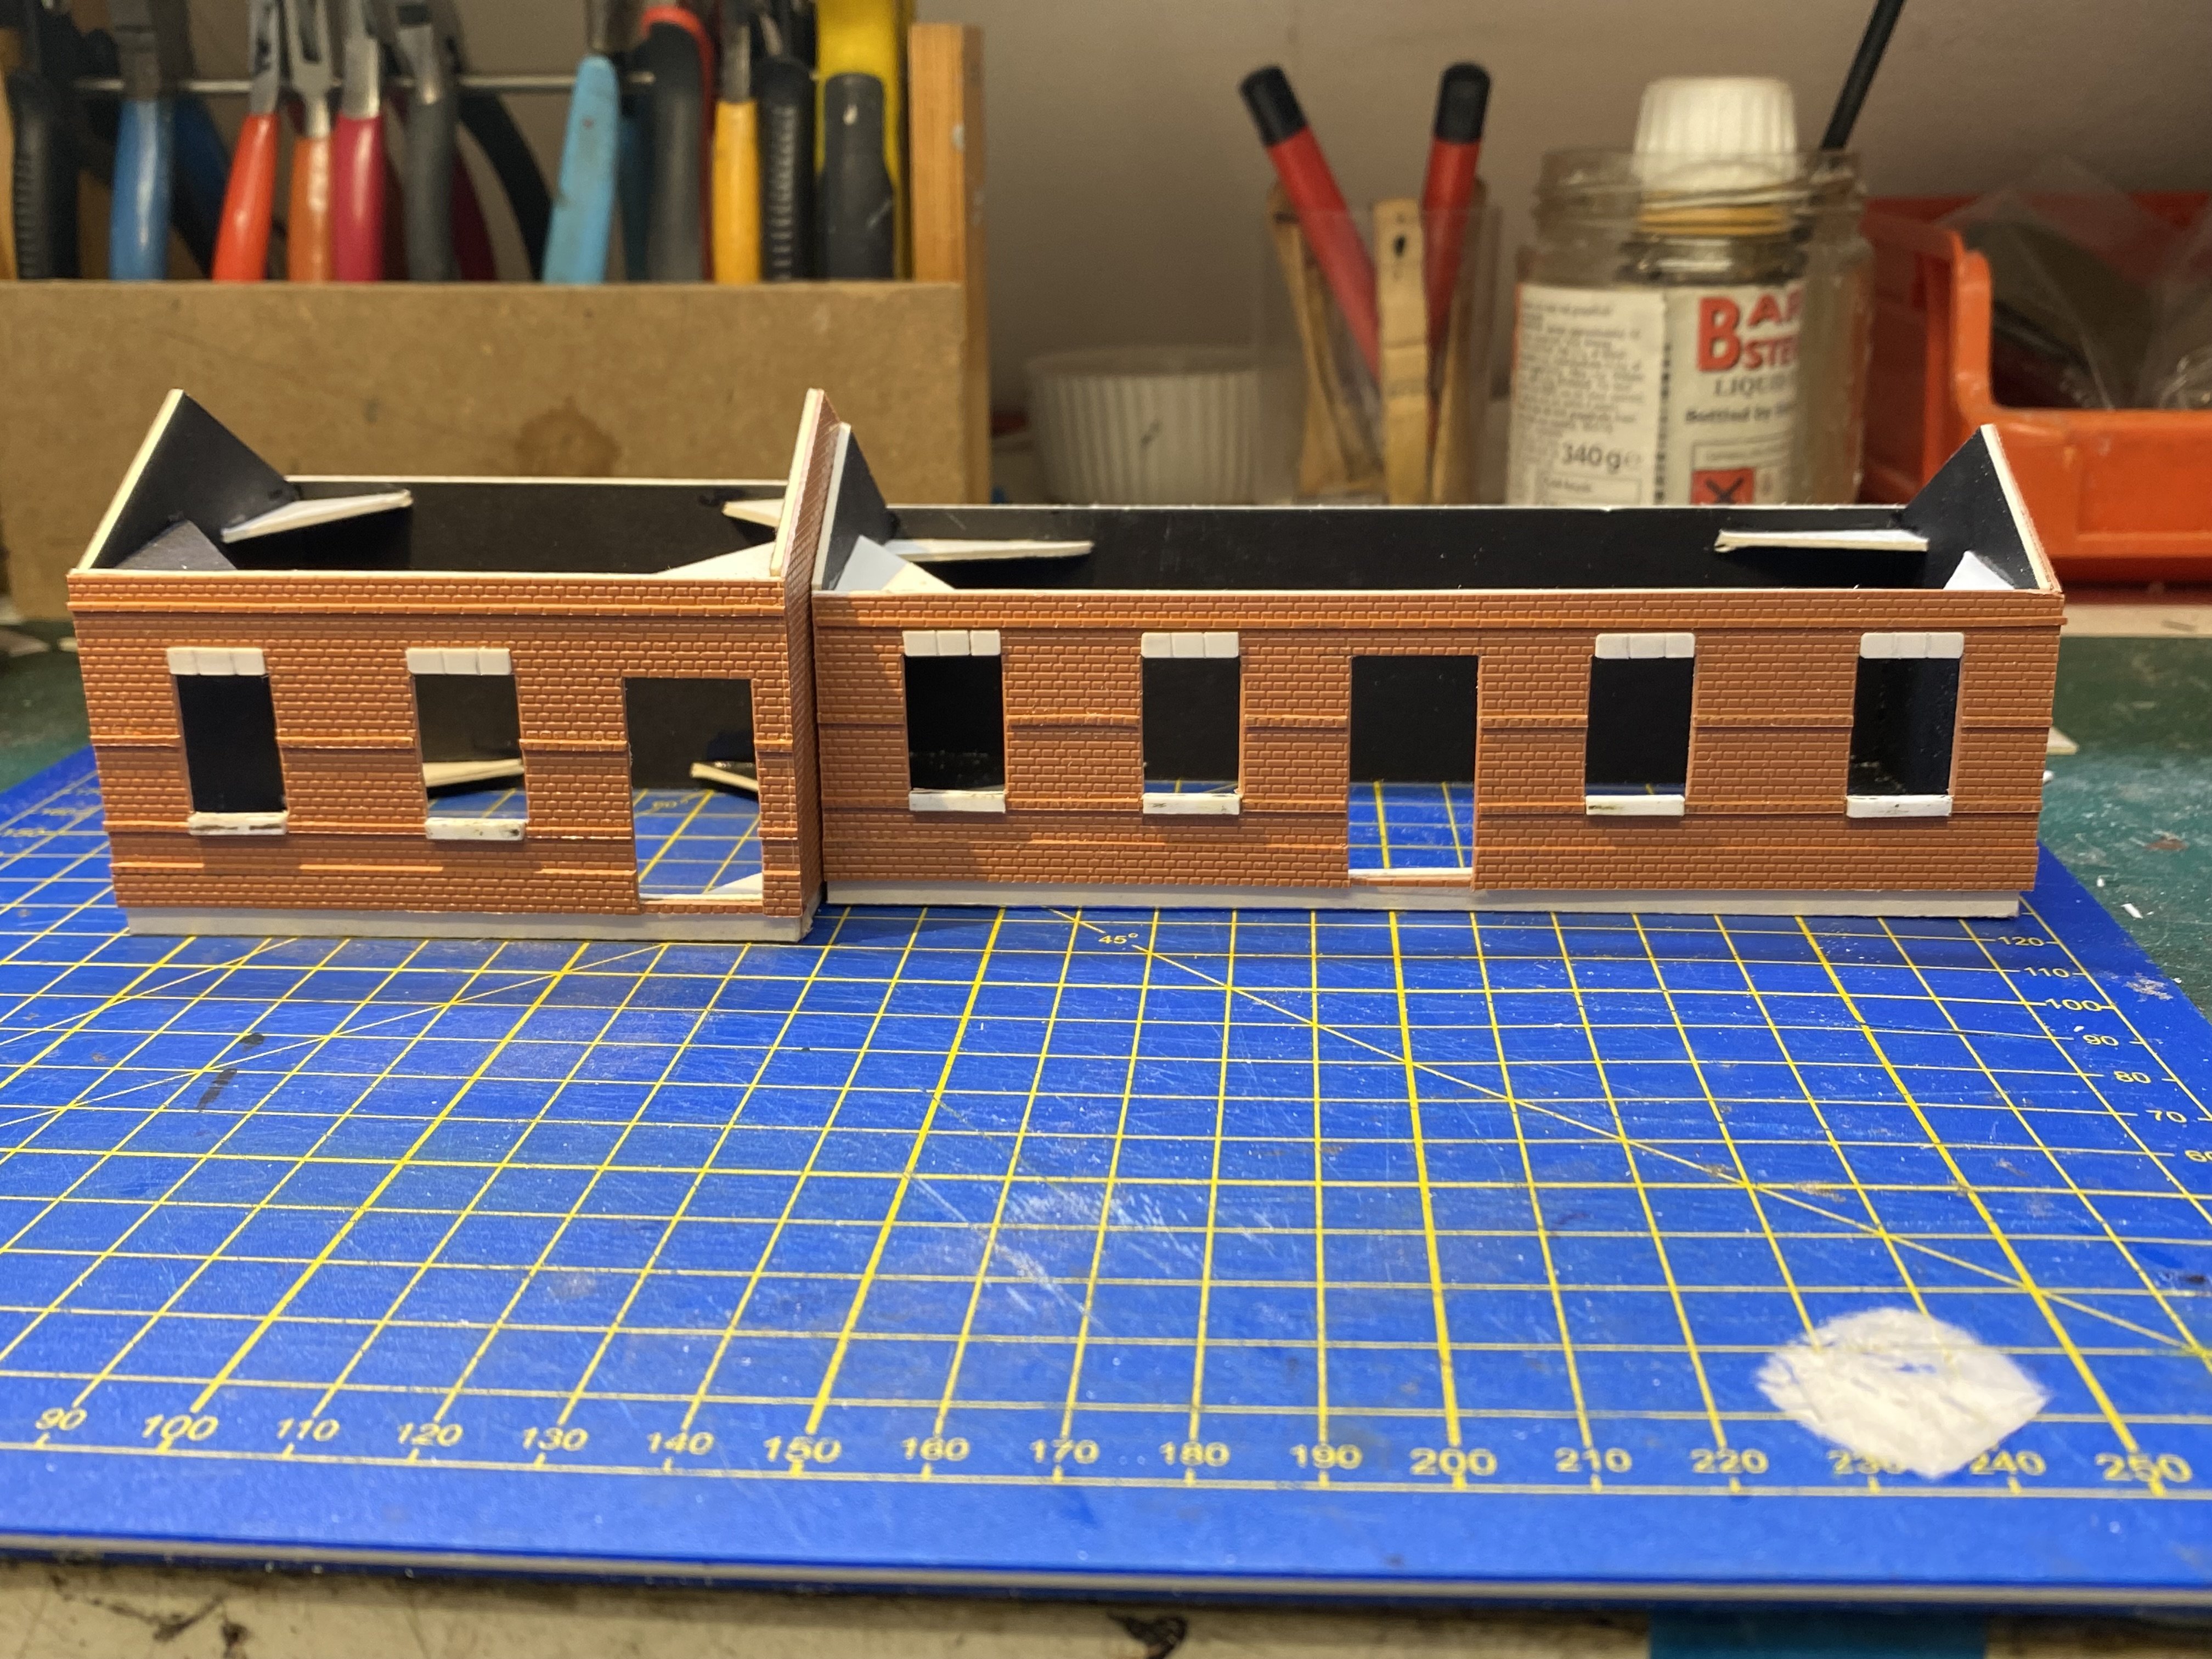
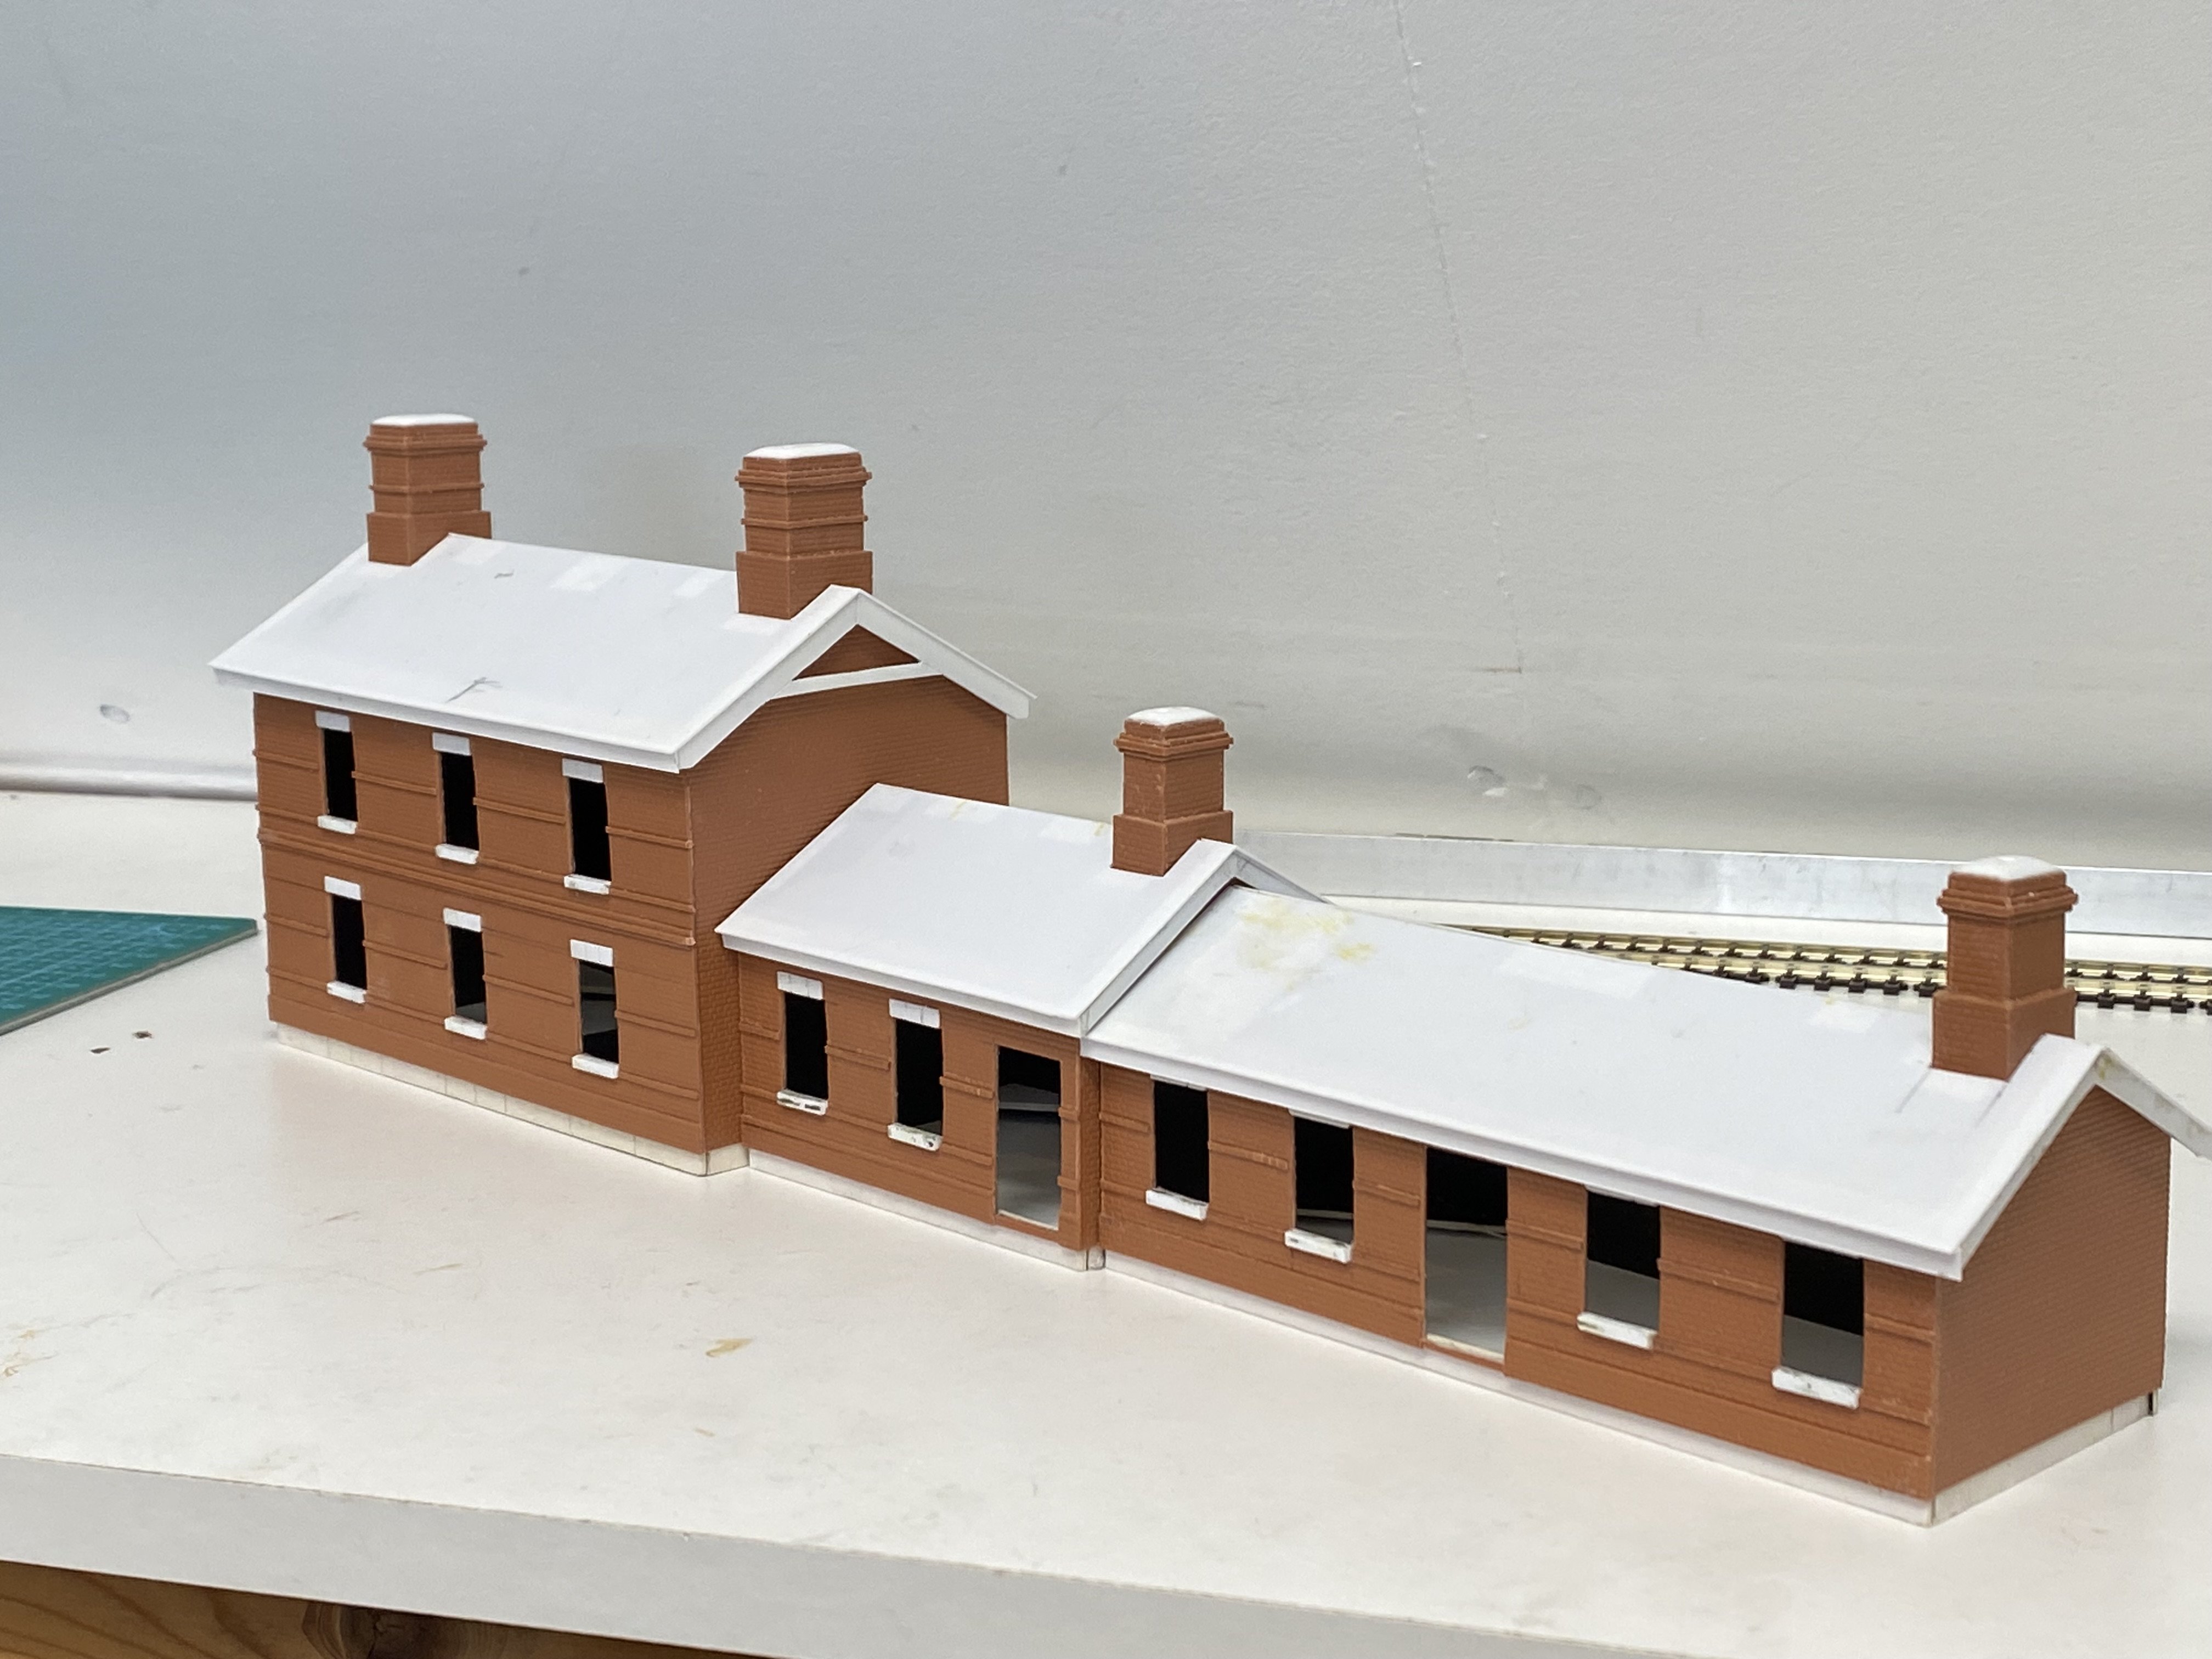
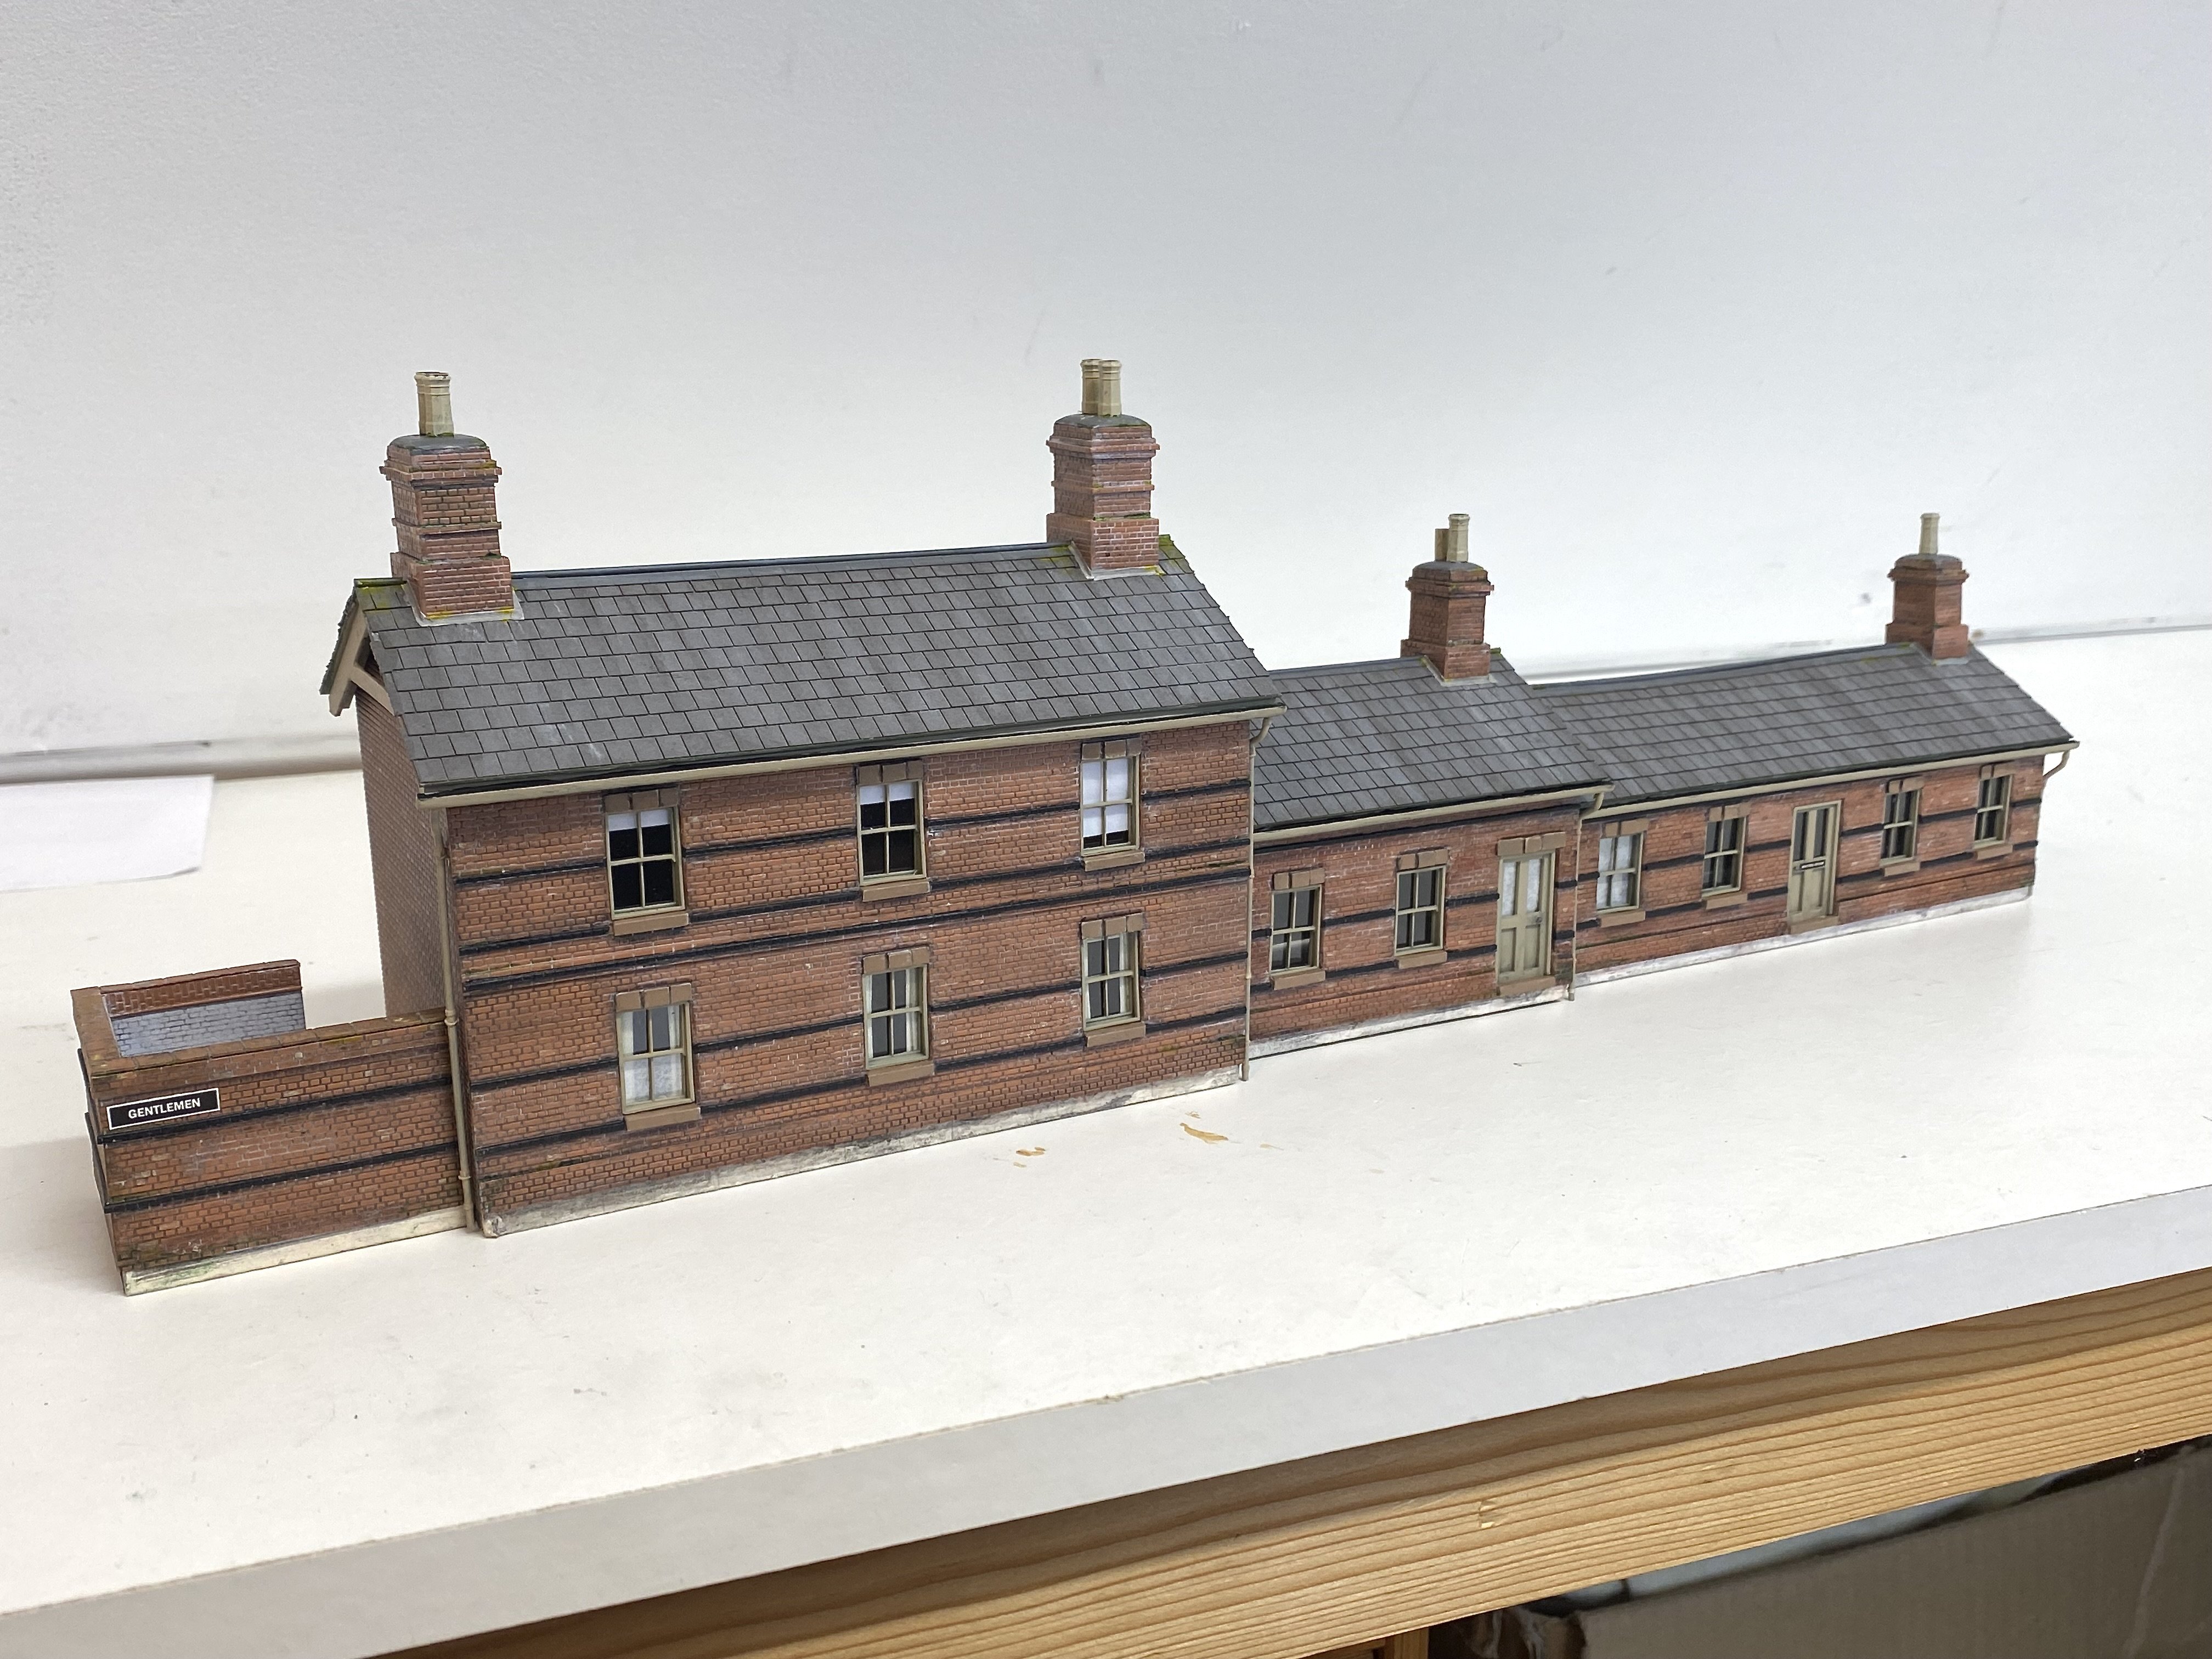
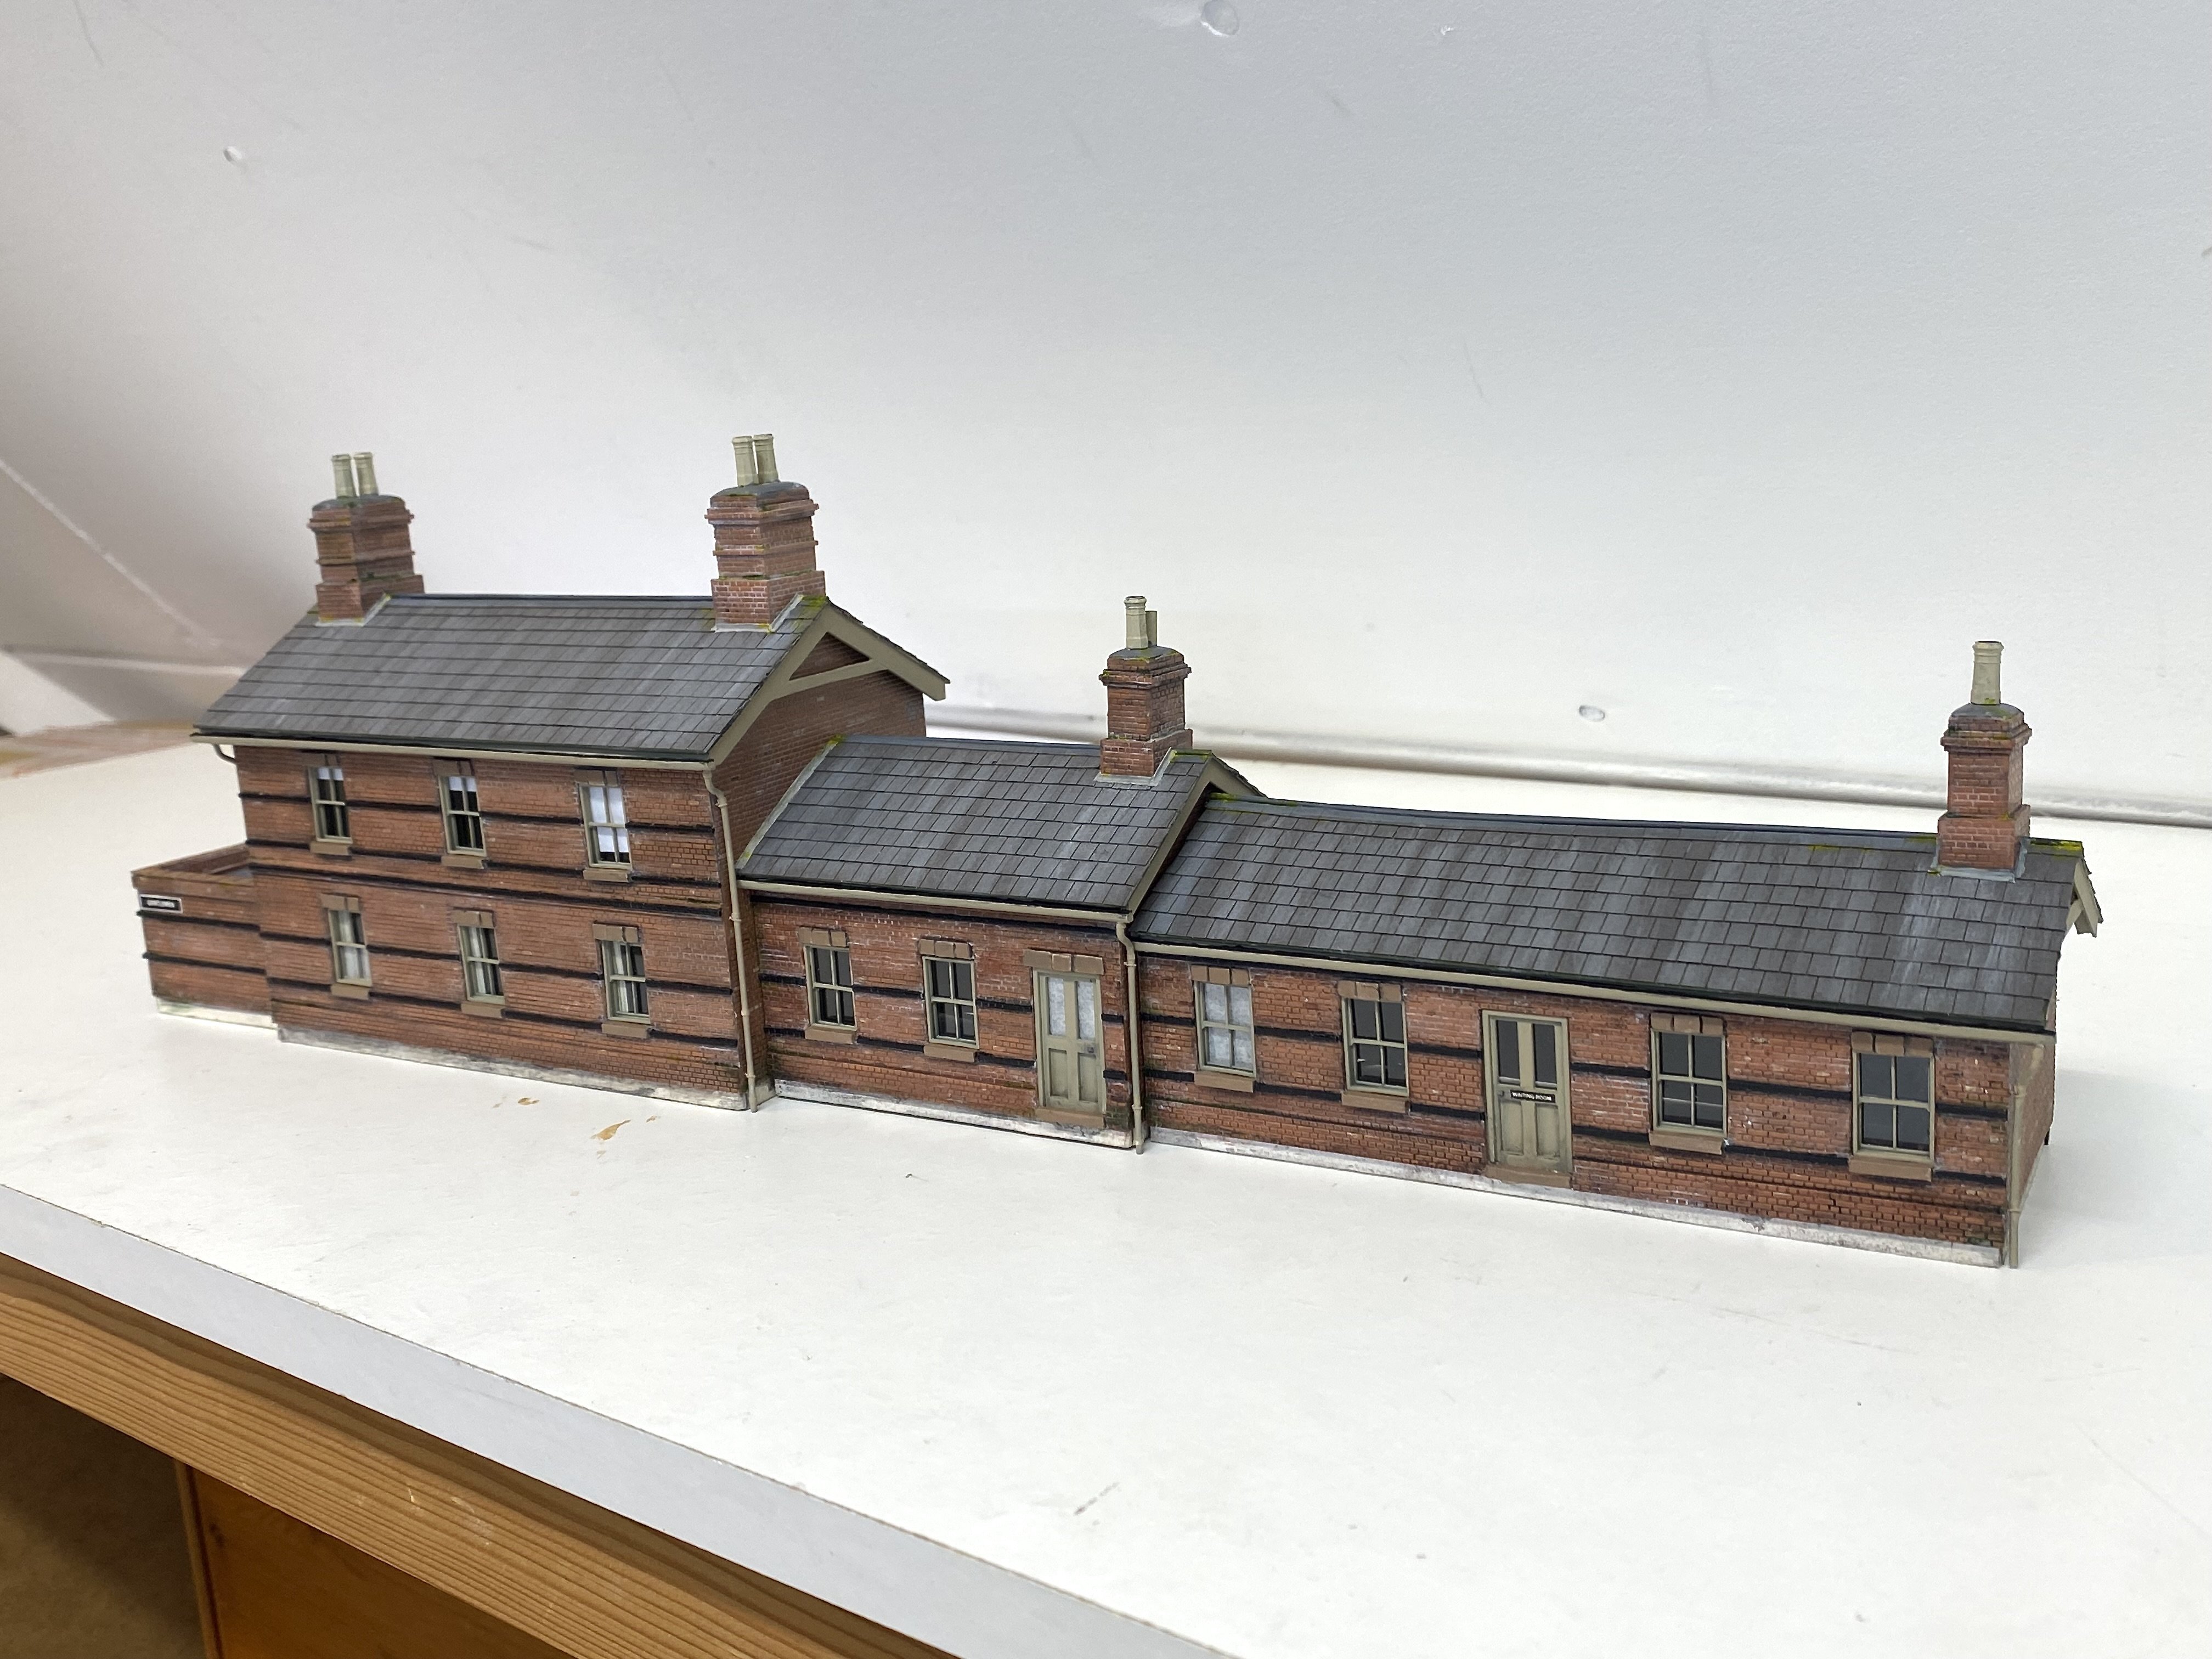
I used Neill’s Hill, just over 2 miles out from Queen’s Quay on the BCDR main line through East Belfast, as the basis for a model of a country station building for this layout. The original building is long since demolished though a number of photographs exist. It had a fairly typical BCDR look but with less of the special brickwork on station buildings like Cultra or Carnalea which make them trickier to model well. It's not a slavish copy of Neill's Hill, more a nod in that direction. The pics are self-explanatory I hope. Brickwork is Slater’s English Bond plasticard, windows, doors and roof tiles came from York Modelmaking and the chimney pots are 3D prints from ModelU. Paint was applied, removed and re-applied so many times in the course of trying to get the effect I wanted that I reckon the brickwork genuinely is weathered.
- 112 replies
-
- 28
-
-
-
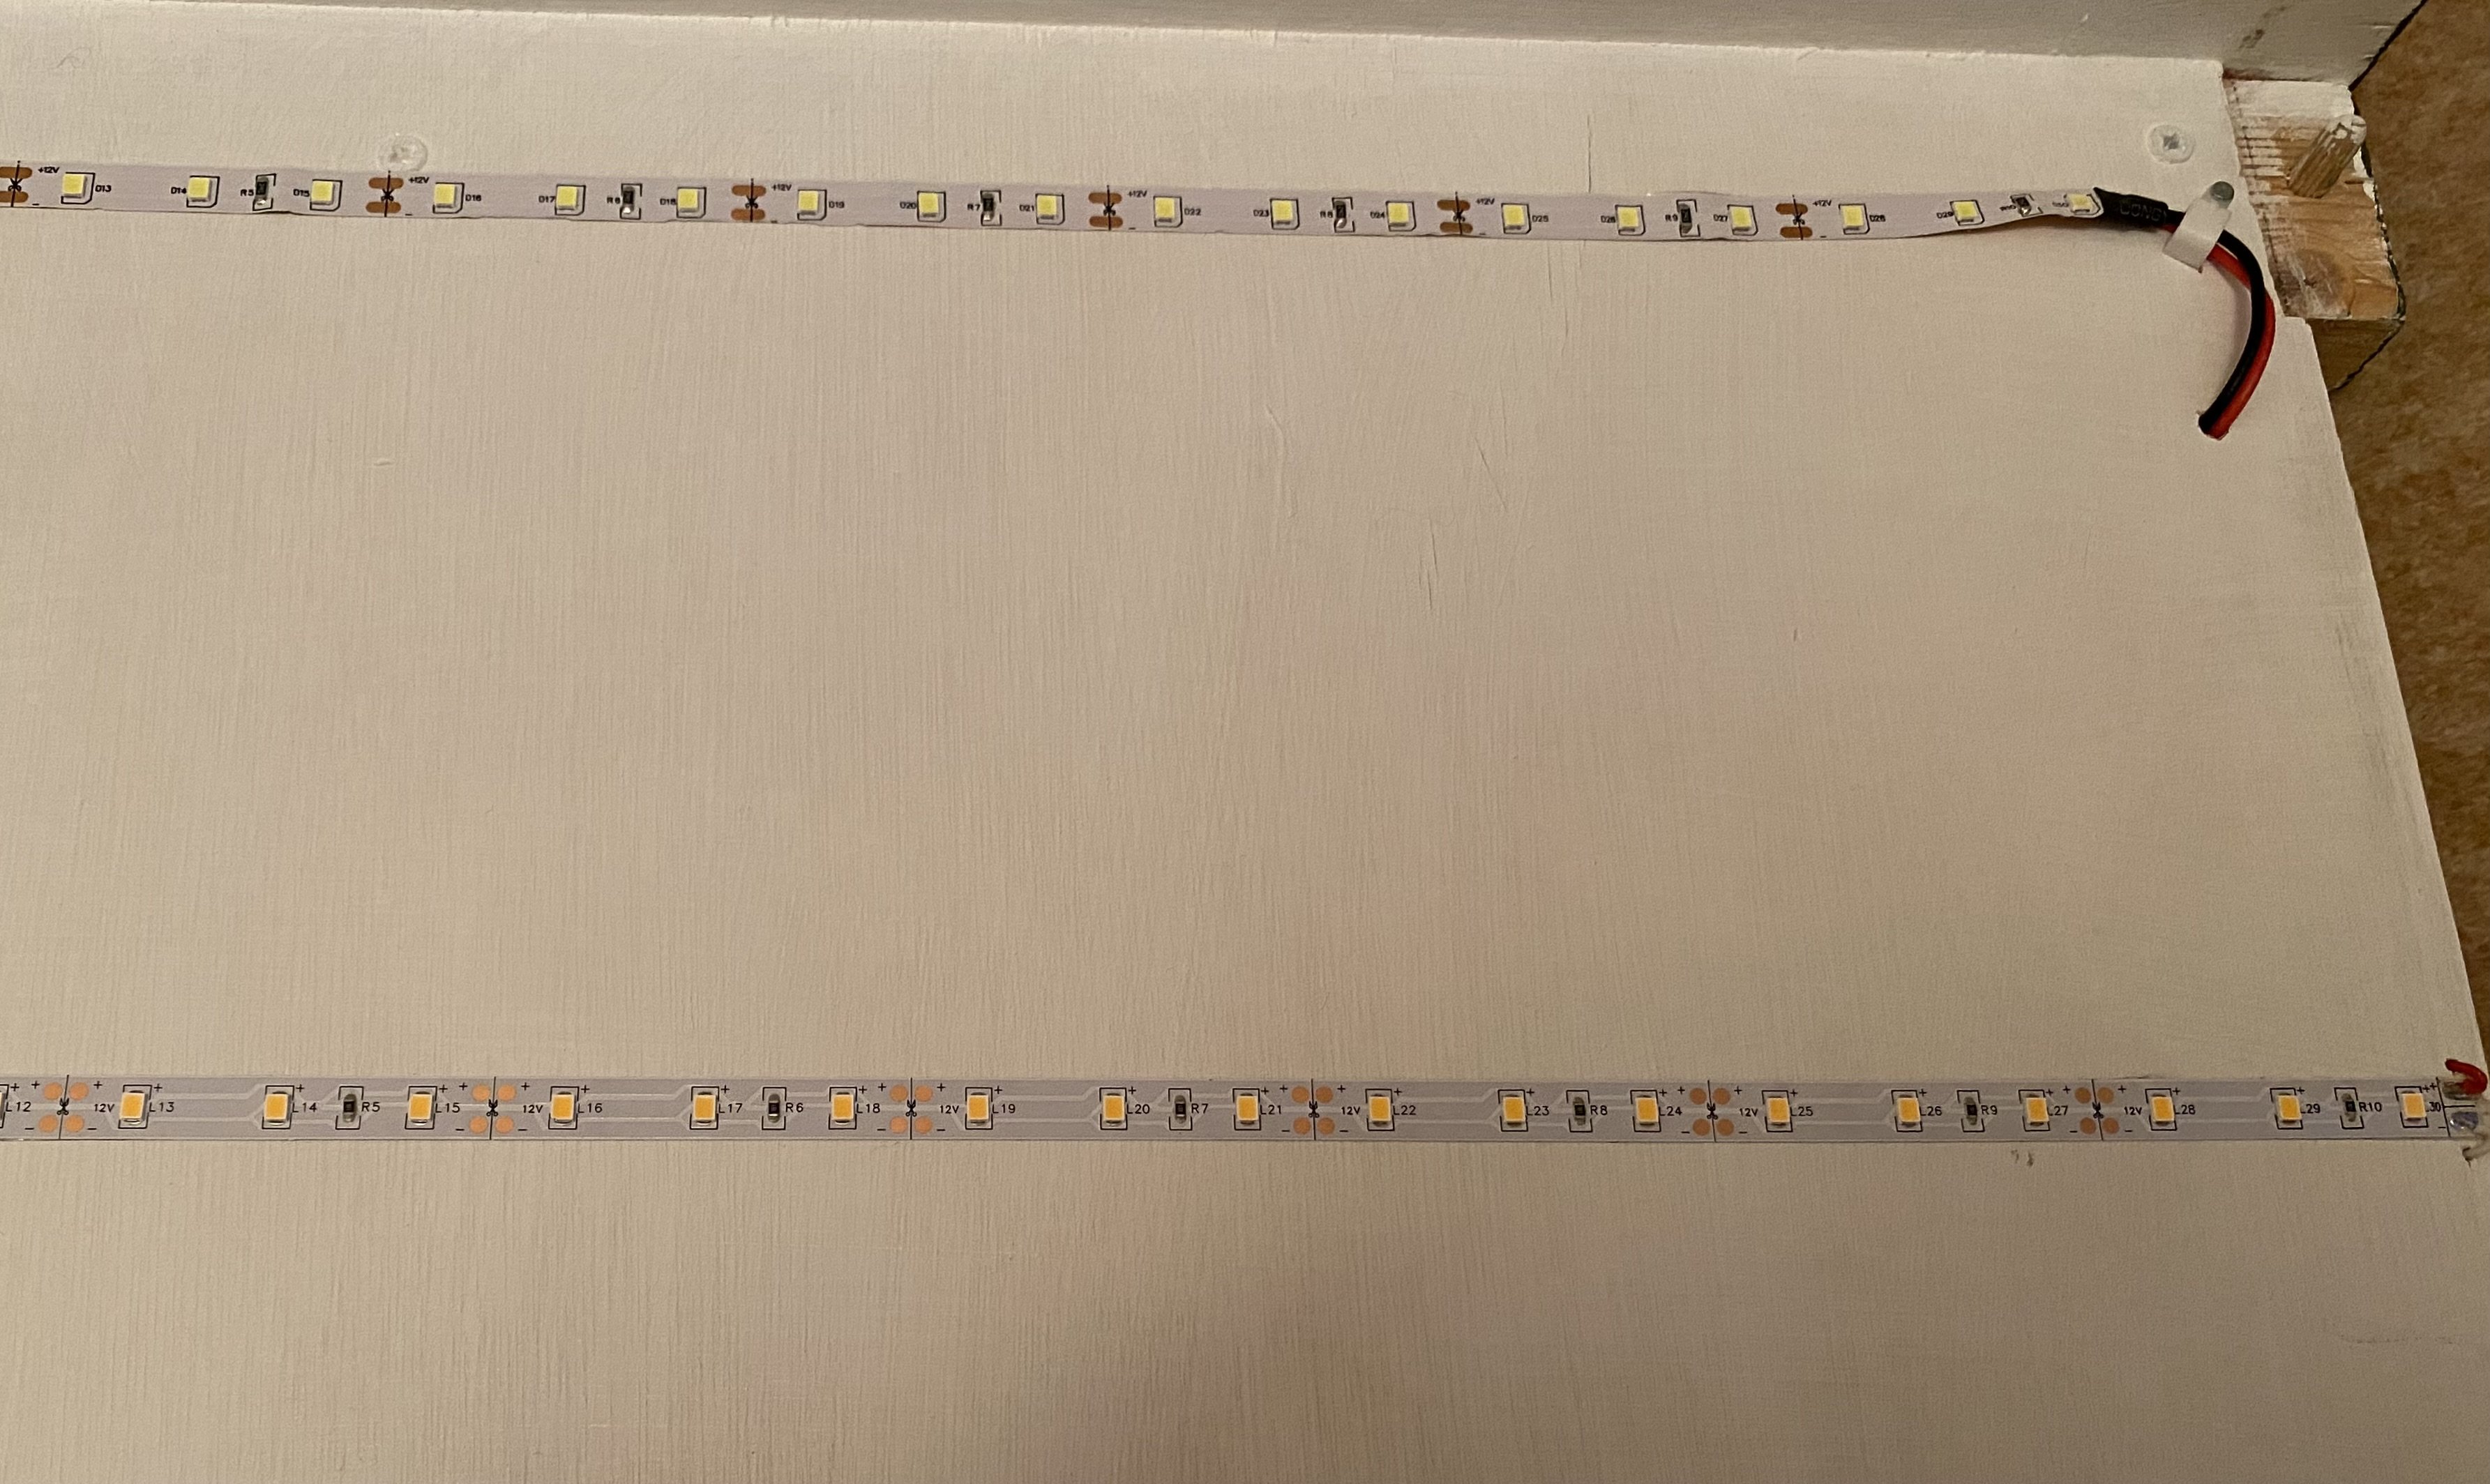
Re: LED lighting strips. This is sort of thing I've used. It comes on a reel and can be cut to length.
-
Welcome Adam. You'll find a friendly atmosphere and plenty of support here. No matter what the question, someone will have the answer. If you're planning to take your layout out to exhibitions, it might be wise to consider some form of lighting for it. Some locations can be a bit dark and won't show your work off to best effect. Even a simple wooden batten supported at each end a couple of feet above the layout with some LED strips glued to it will make all the difference. LED strips of the sort intended for under-cupboard worktop lighting in kitchens can be had fairly cheaply on-line and they usually come with a power supply. Go for 'warm white'. Best wishes Alan
-
Wonderful!
-
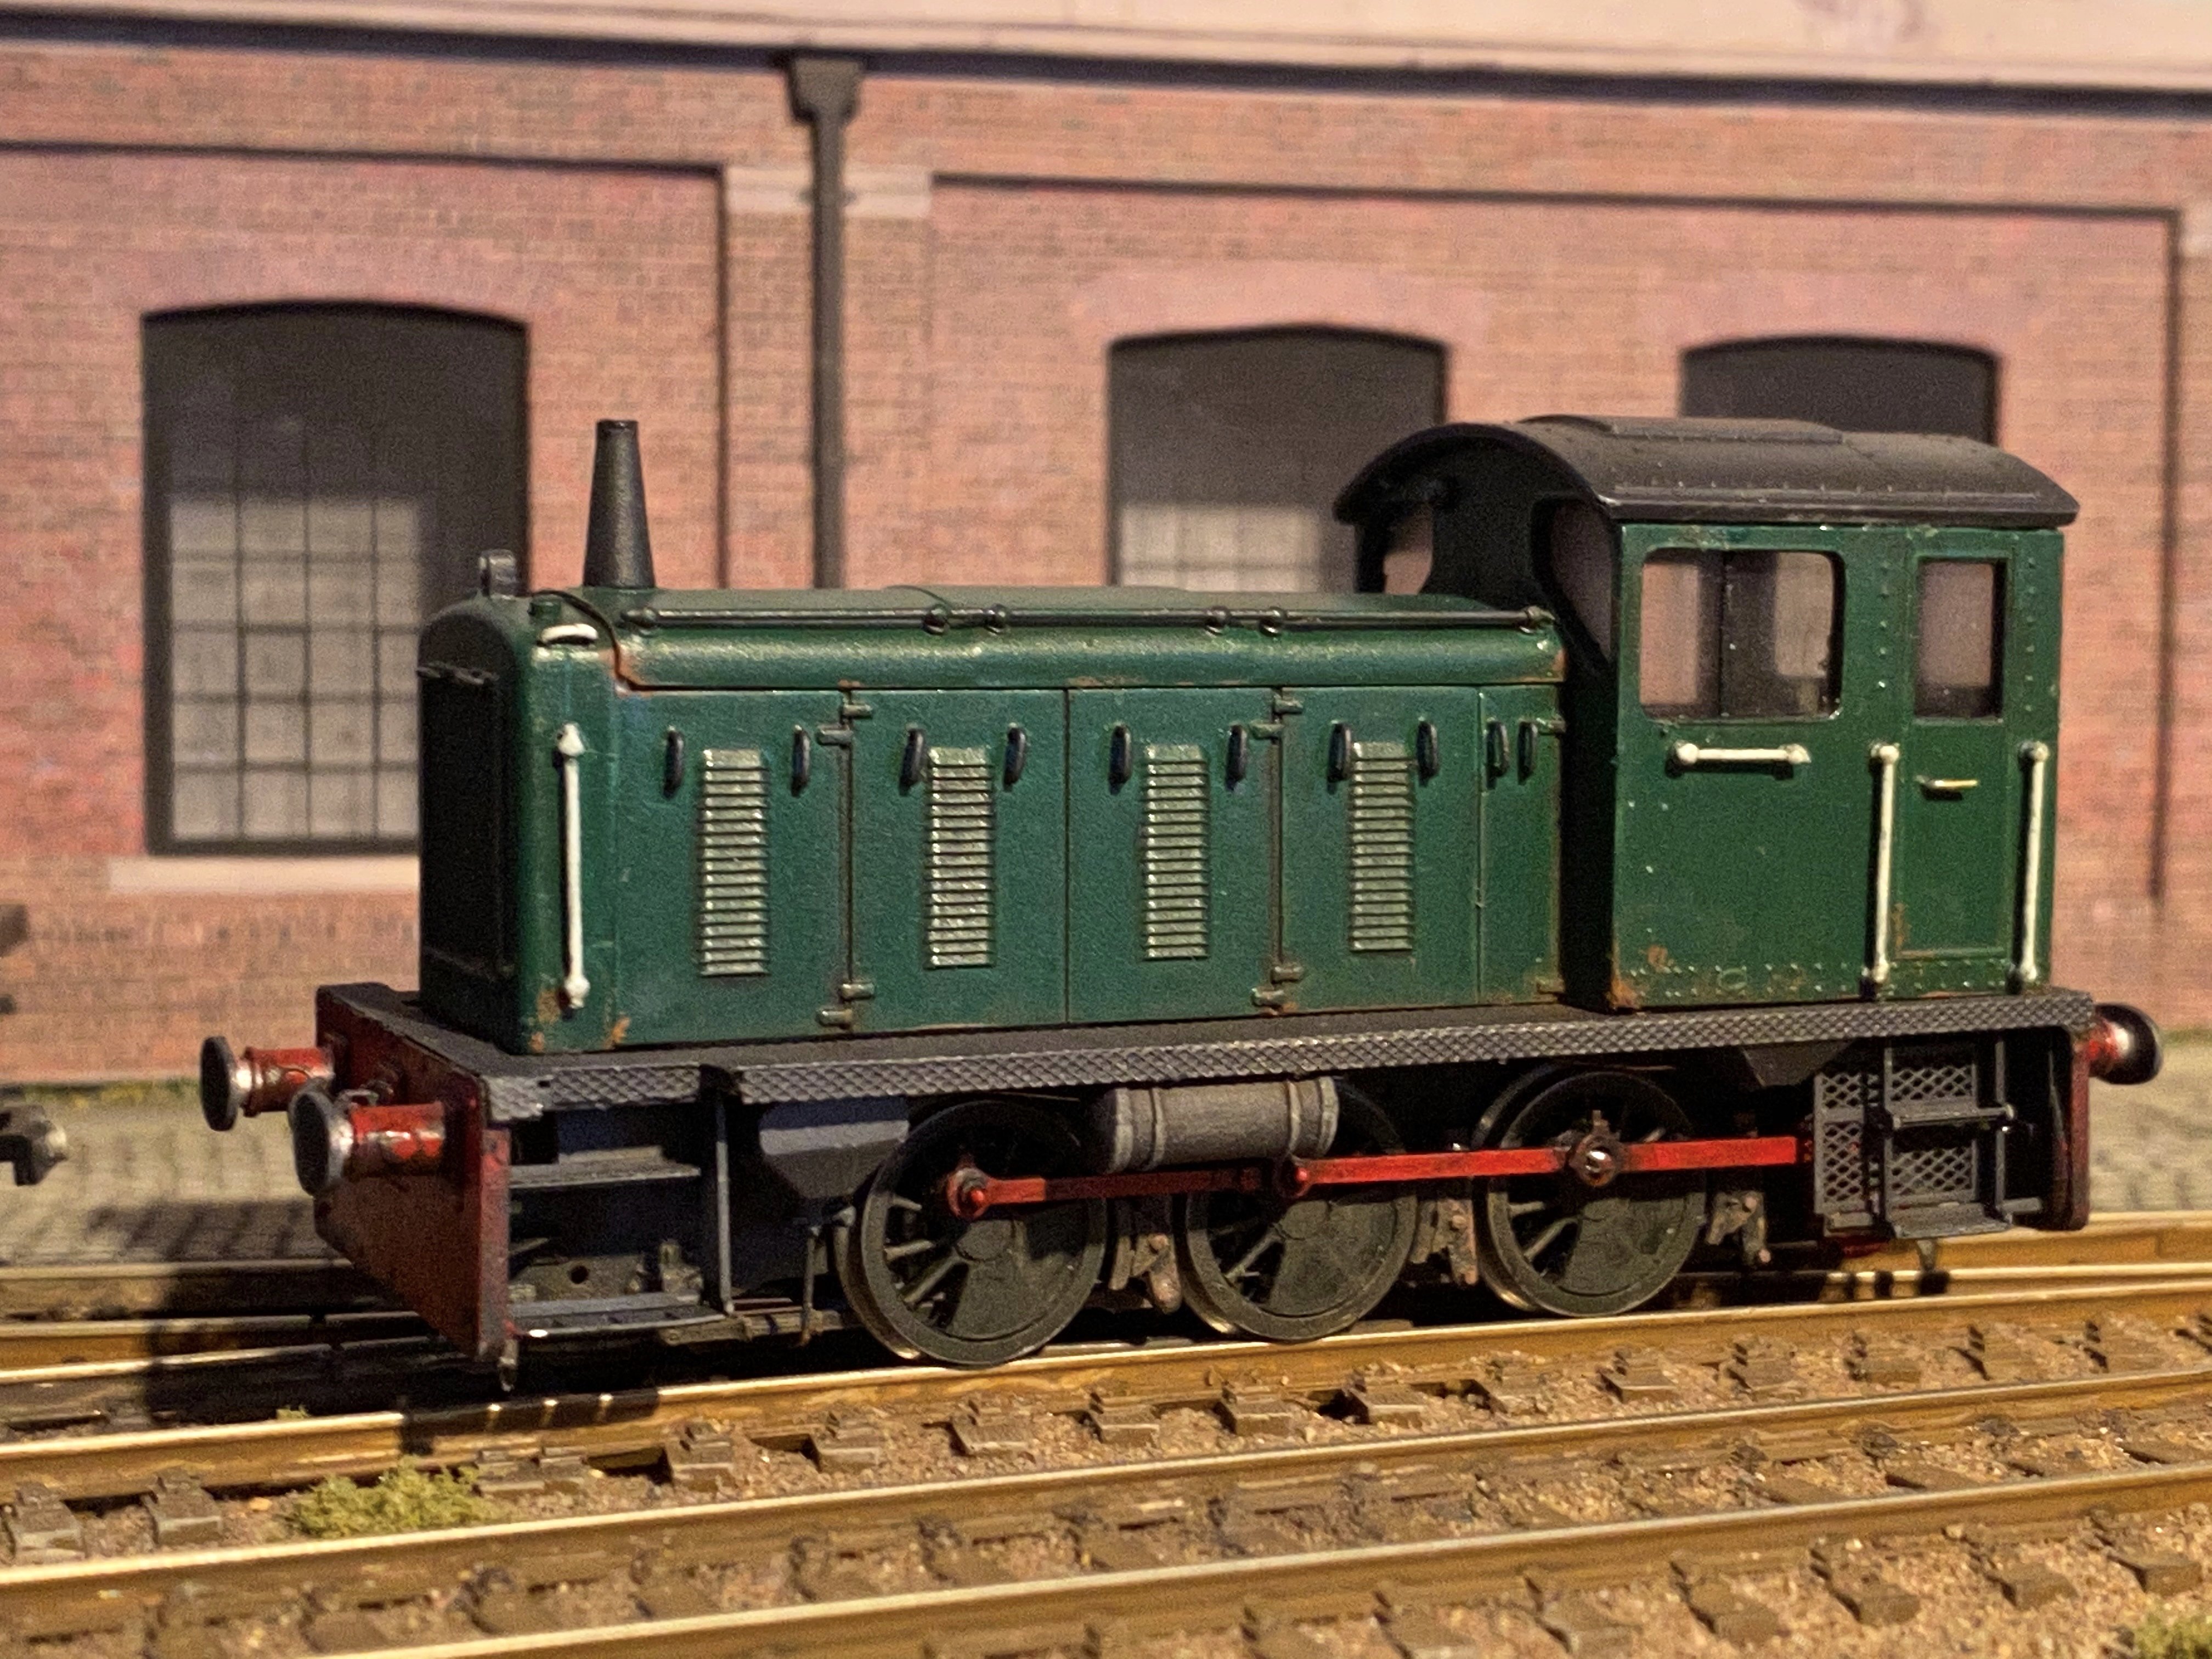
High Level Kits sell a very nice etched chassis kit for the Class 03, designed to go under the Bachmann rtr model. https://www.highlevelkits.co.uk/product-page/br-class-03dm I built one a while back and clad it with the body from a Dapol ex-Airfix plastic kit. It runs beautifully thanks to its typically sweet High Level gearbox and a clever arrangement called "Illusodrive" that gets round the usual difficulty of getting the jackshaft to play ball with the coupling rods. A High Level chassis kit coupled with a scratch built/kit bashed body ought to be viable. I think I've just acquired another project The sharp-eyed will notice that in the pic above, the rear crankpin is missing its nut! Alan
-
Thanks Derek. Believe me though, I’m not joking. I never feel in control of weathering. I mostly get there in the end but usually by the scenic route, having been round the houses a fair few times.
-
Very fine modelling Mol! Love the CVR models. I'm guessing the railcar and loco are scratch builds. Tell us a bit more about how they were made please. Alan


.png.d192e5c3d9804011948d2e06d3df3760.png)