Tullygrainey
-
Posts
963 -
Joined
-
Last visited
-
Days Won
56
Content Type
Profiles
Forums
Events
Gallery
Blogs
Community Map
Everything posted by Tullygrainey
-
Wonderful!
-
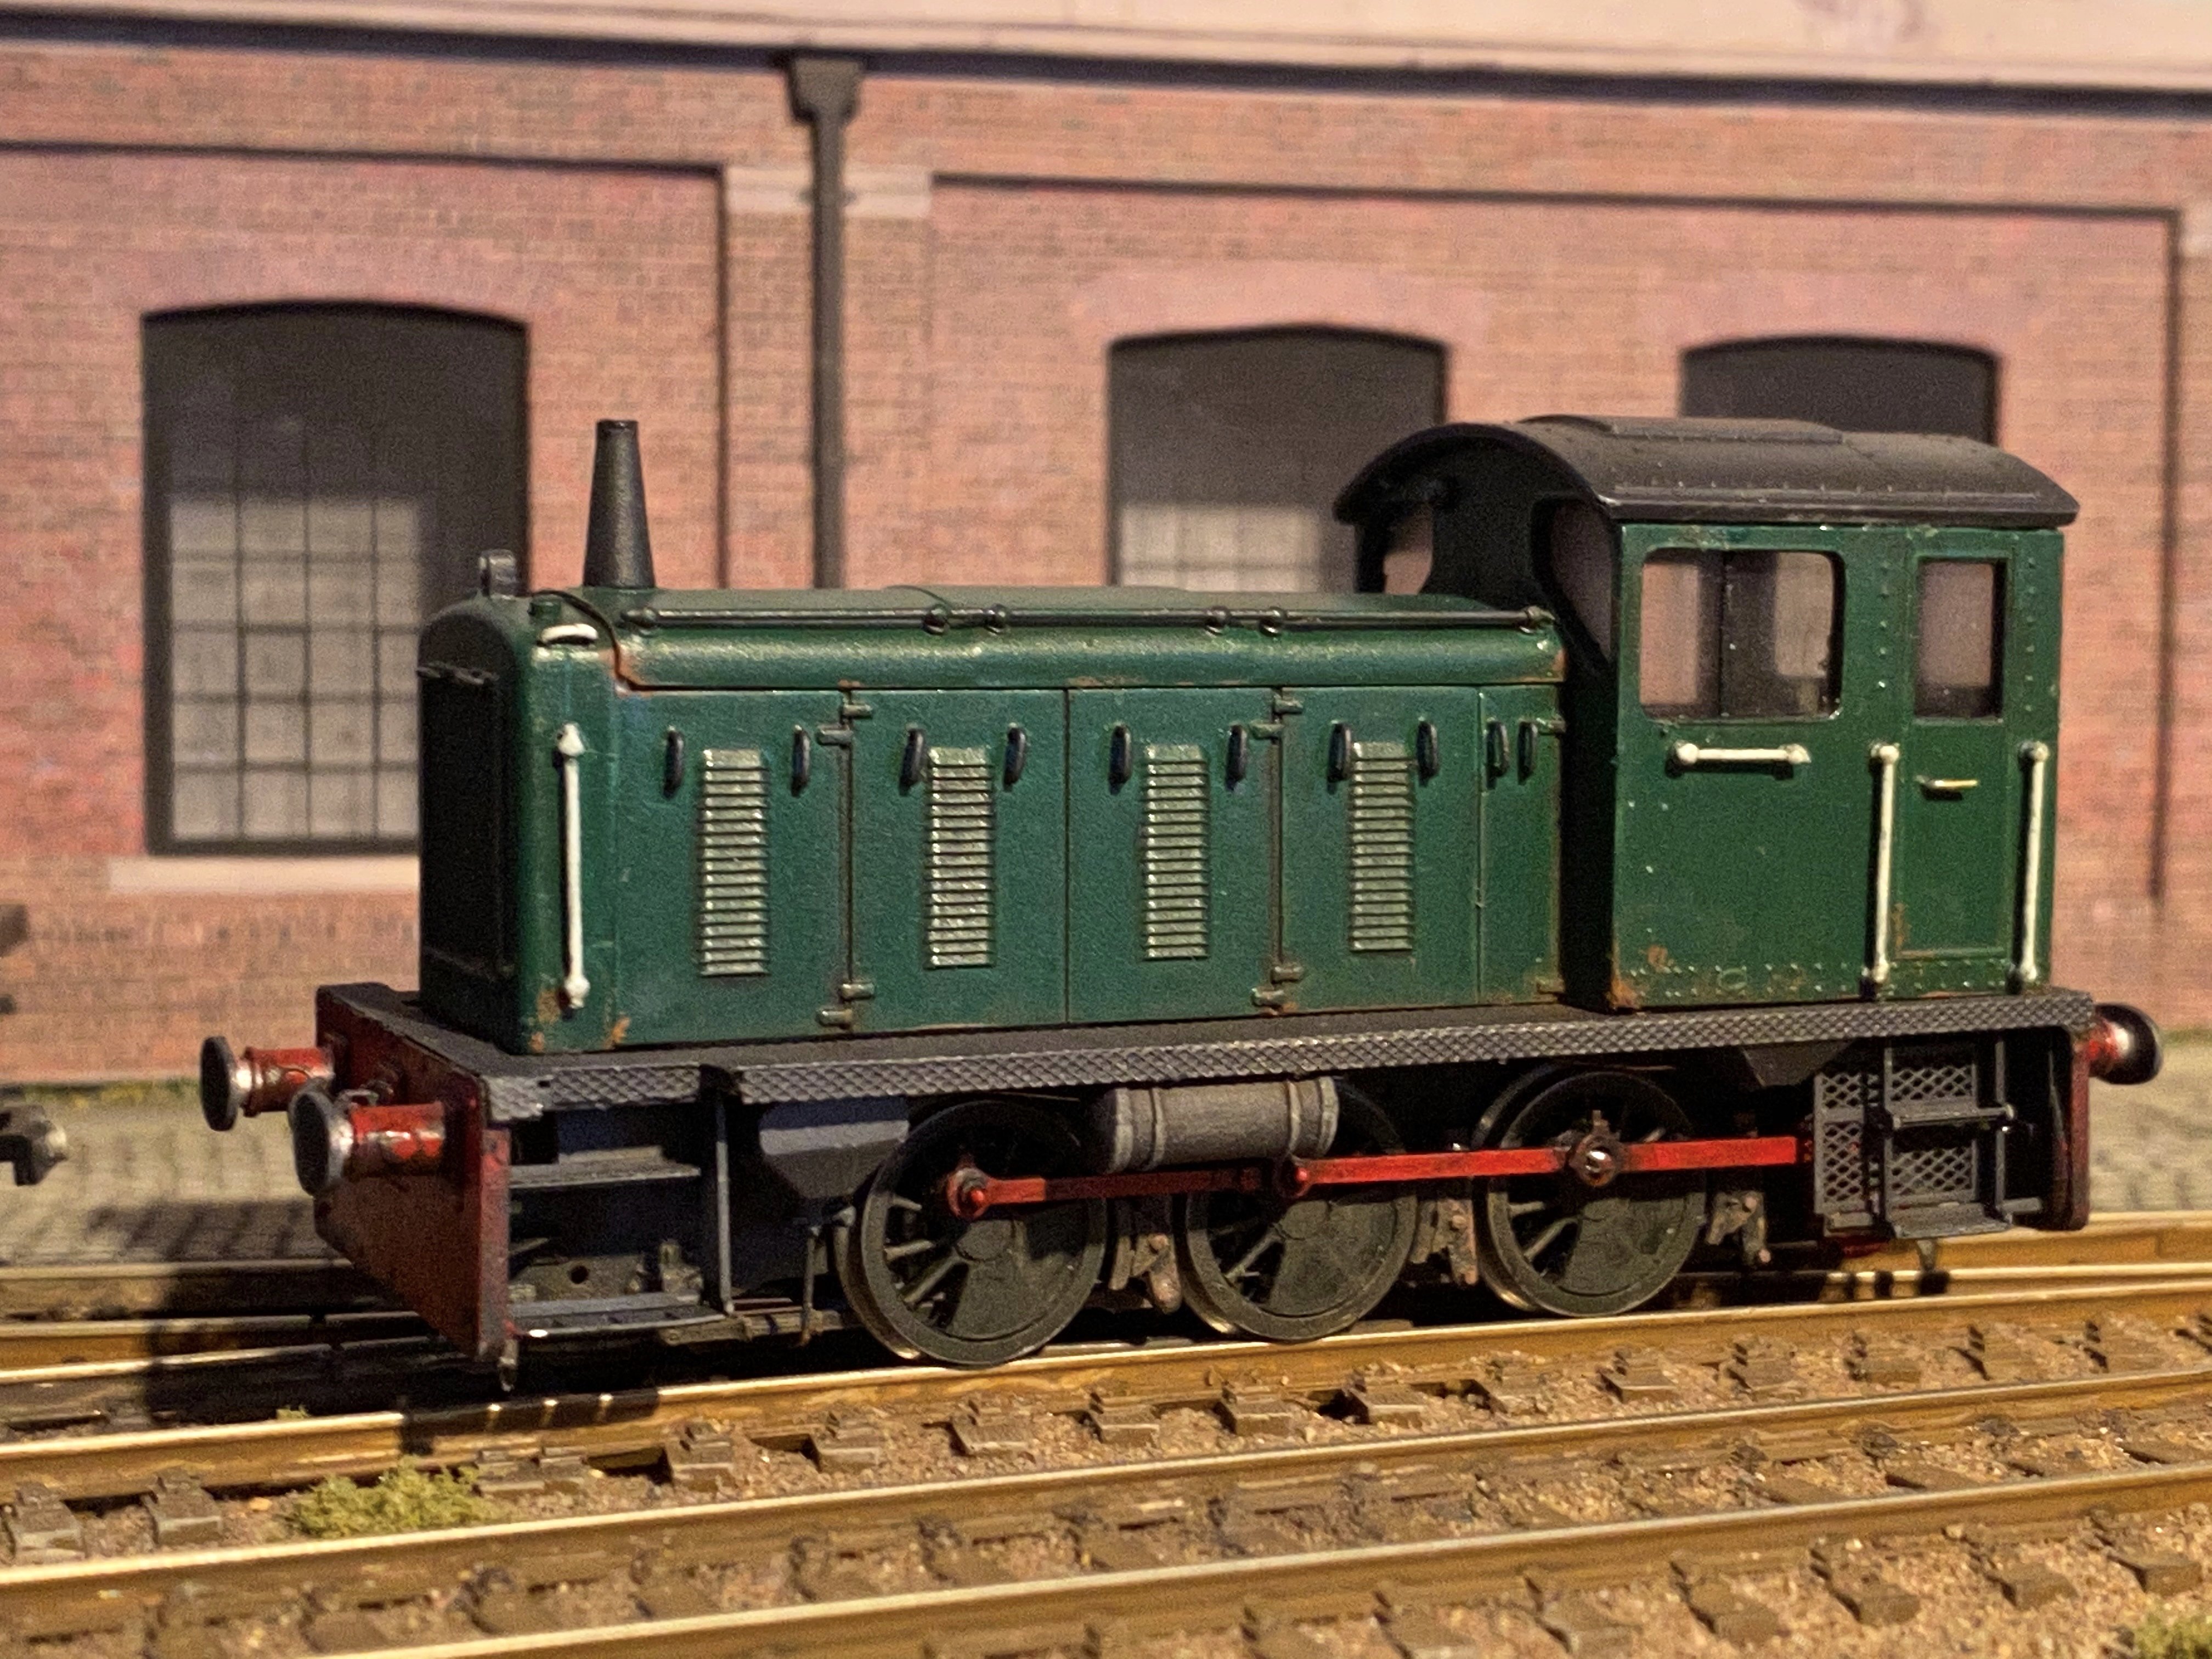
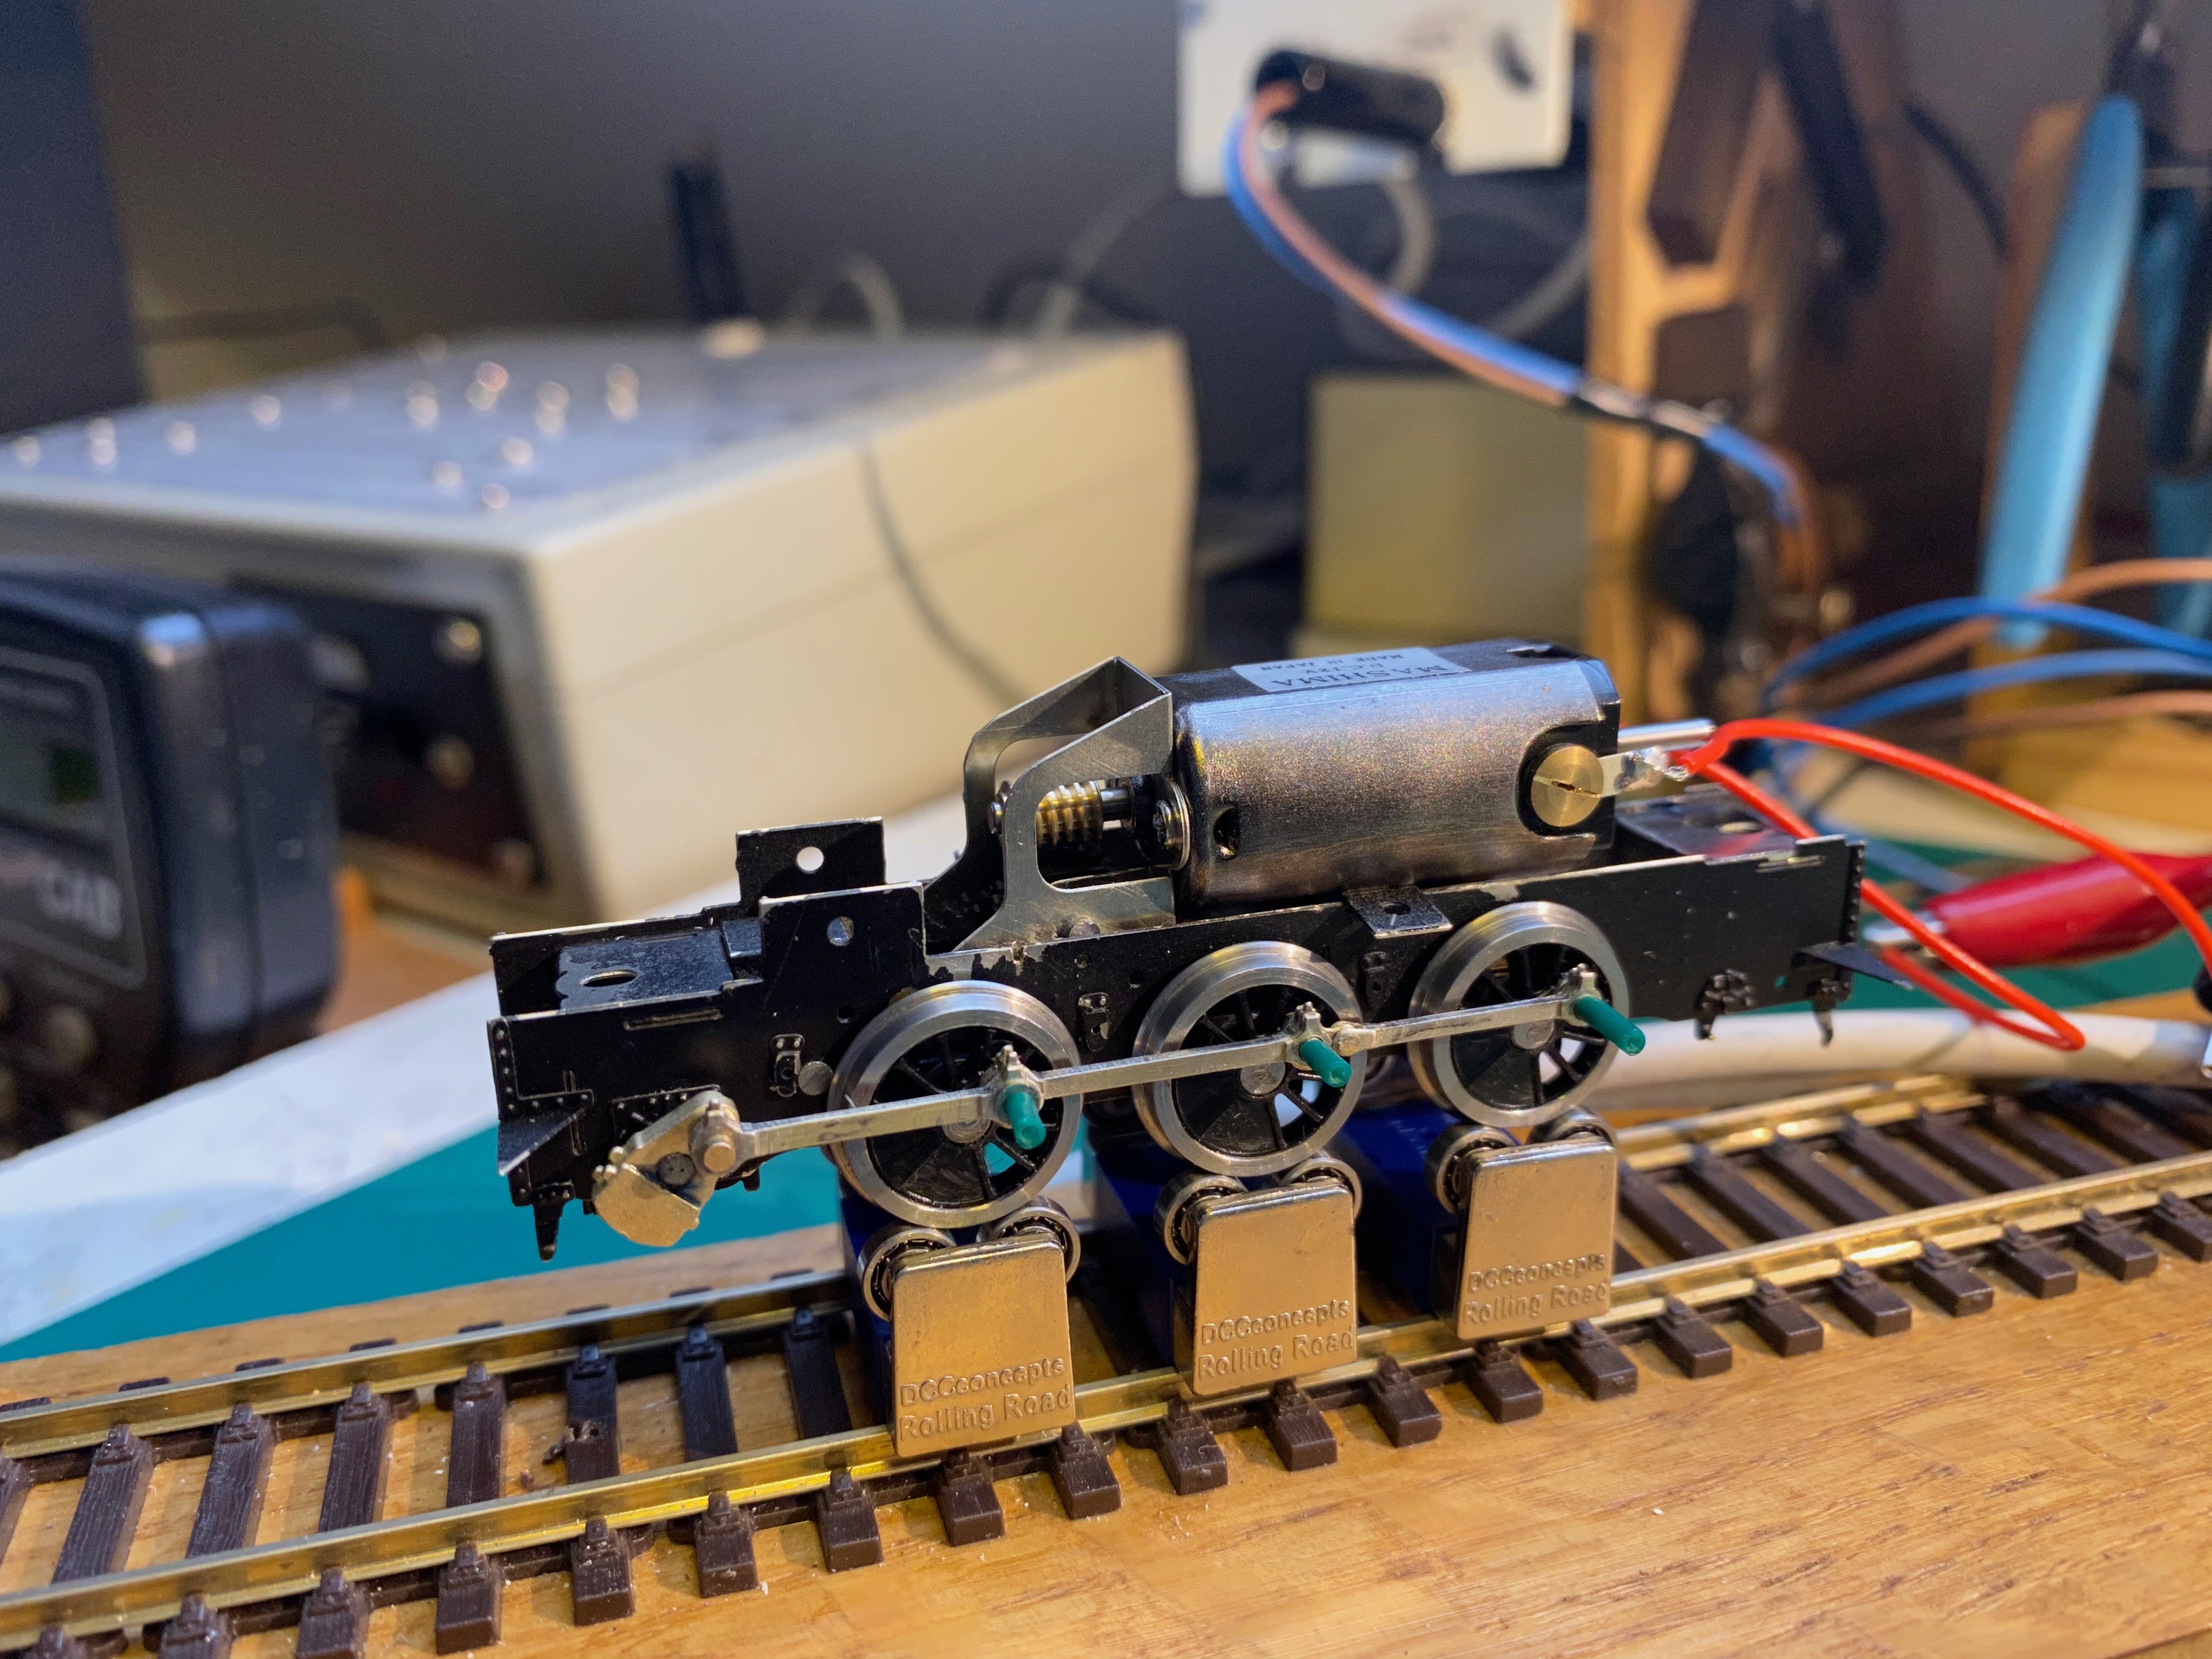
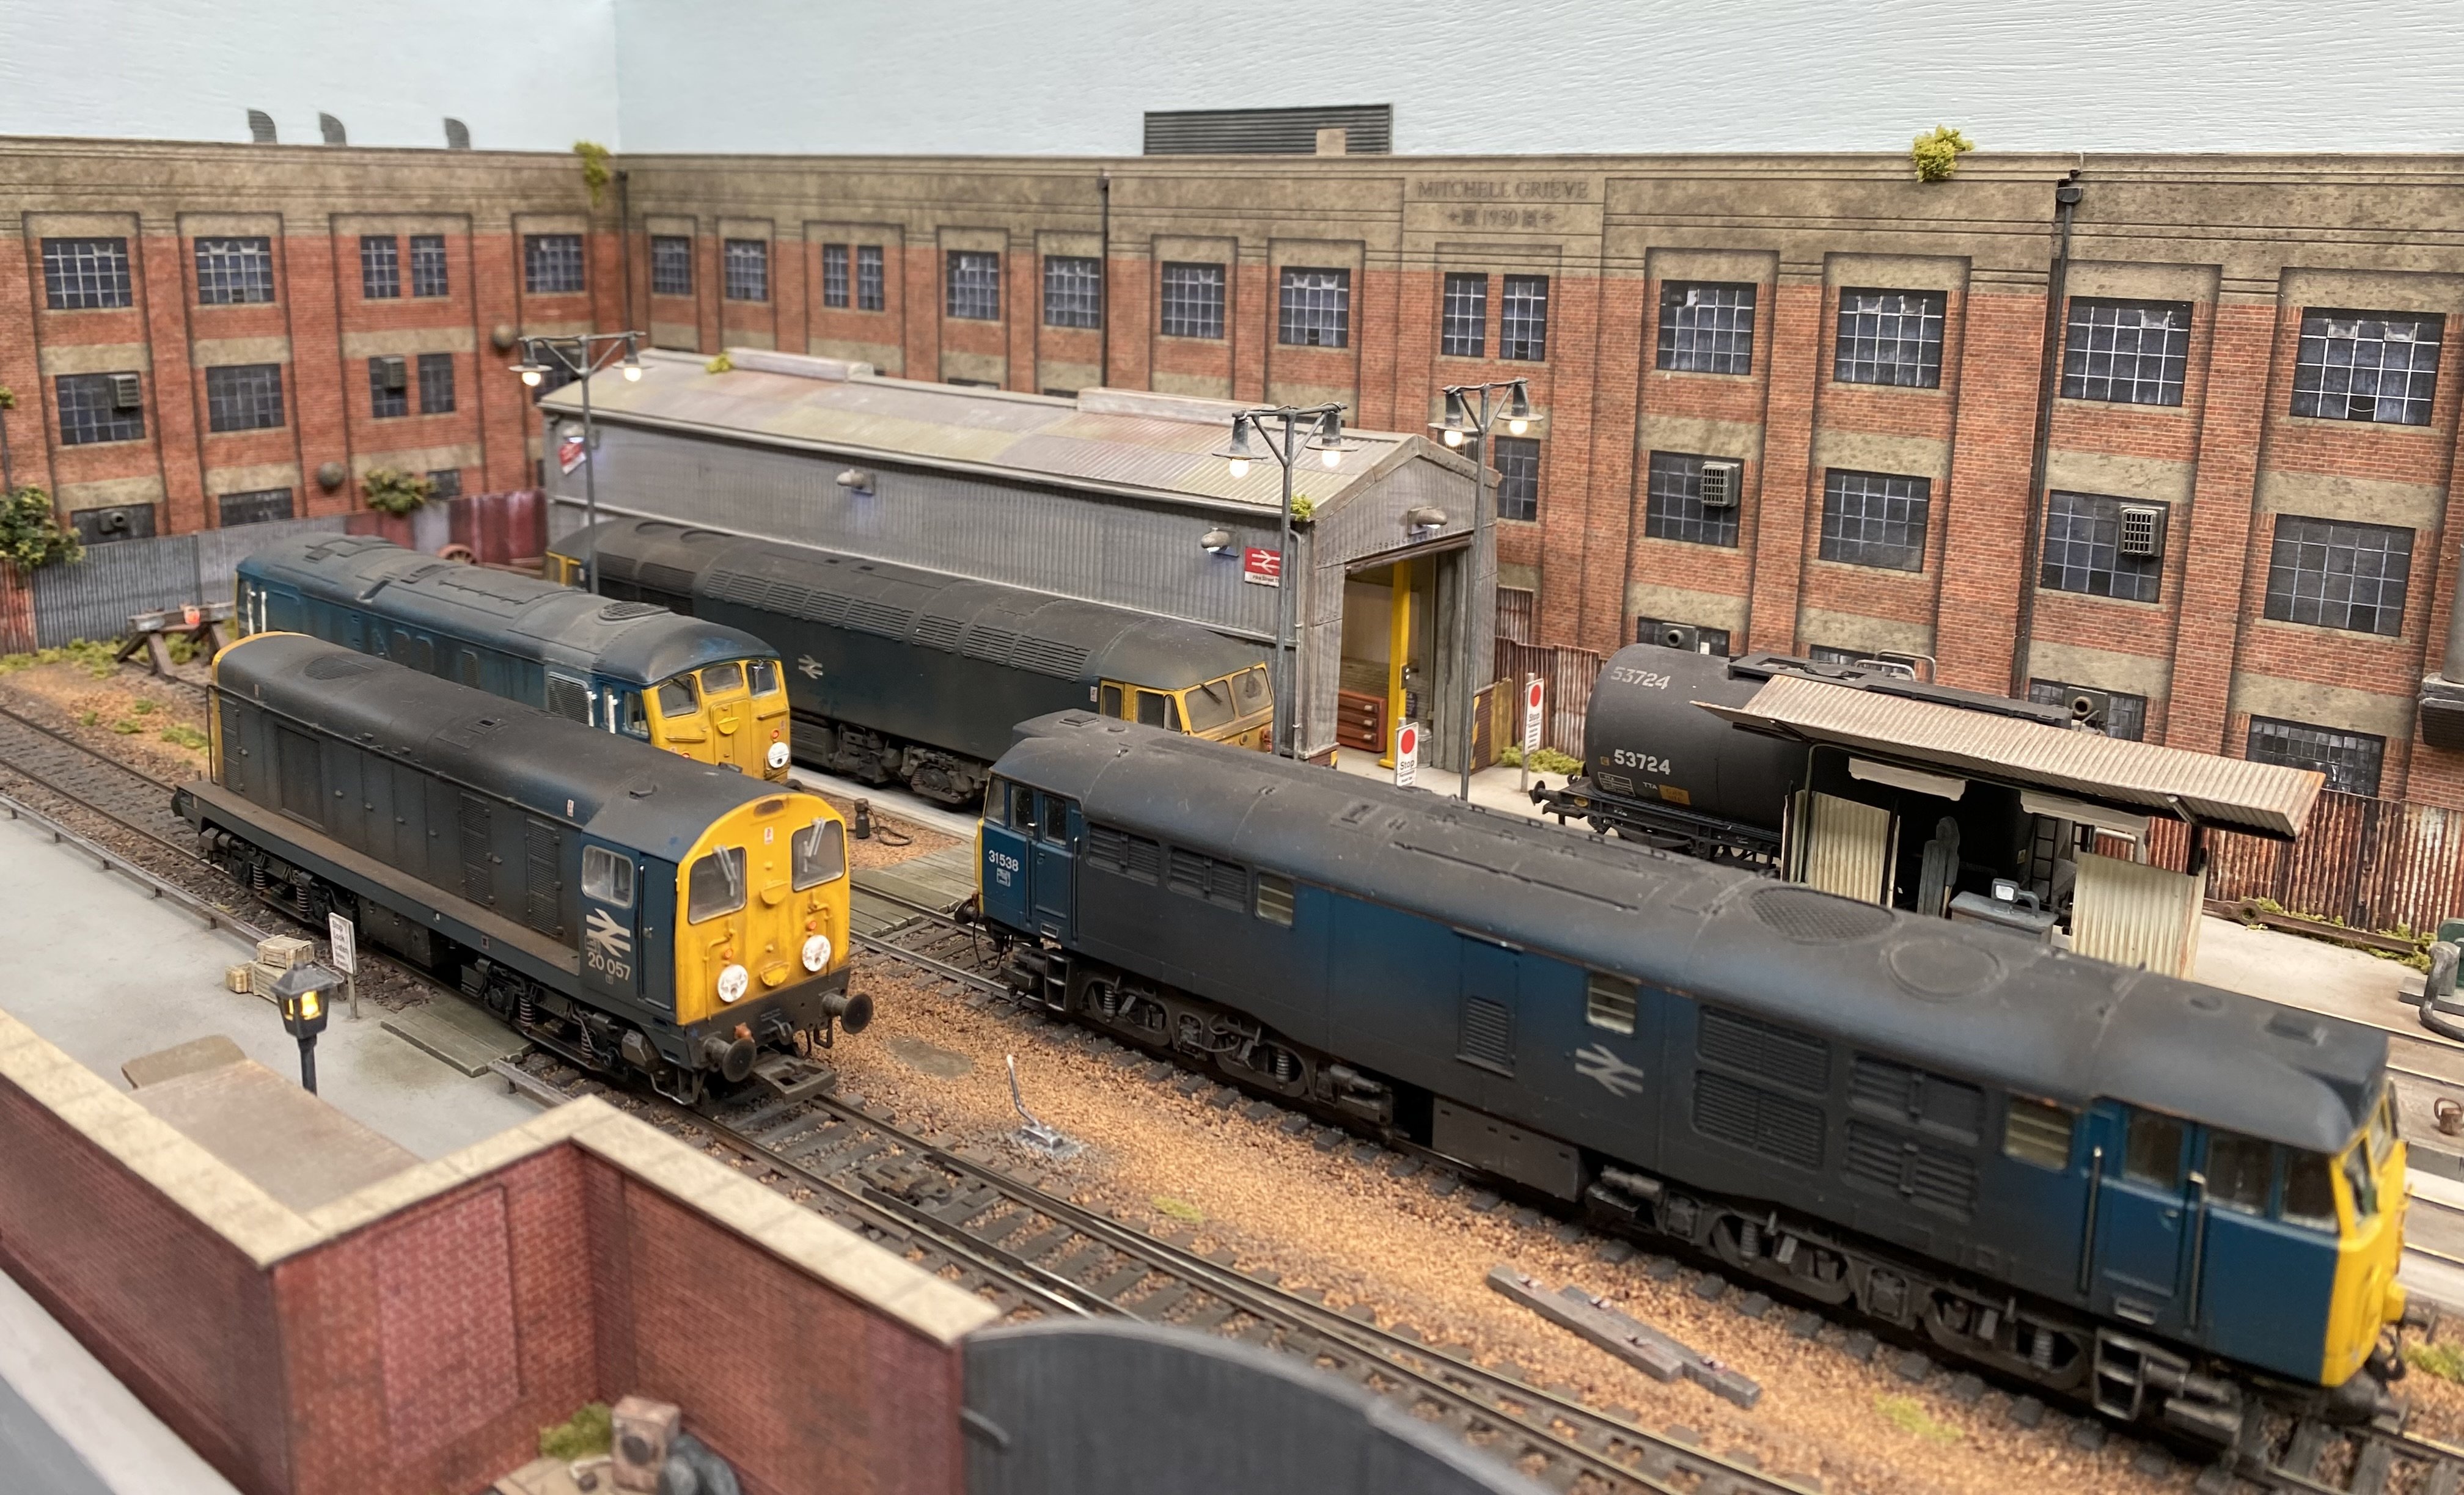
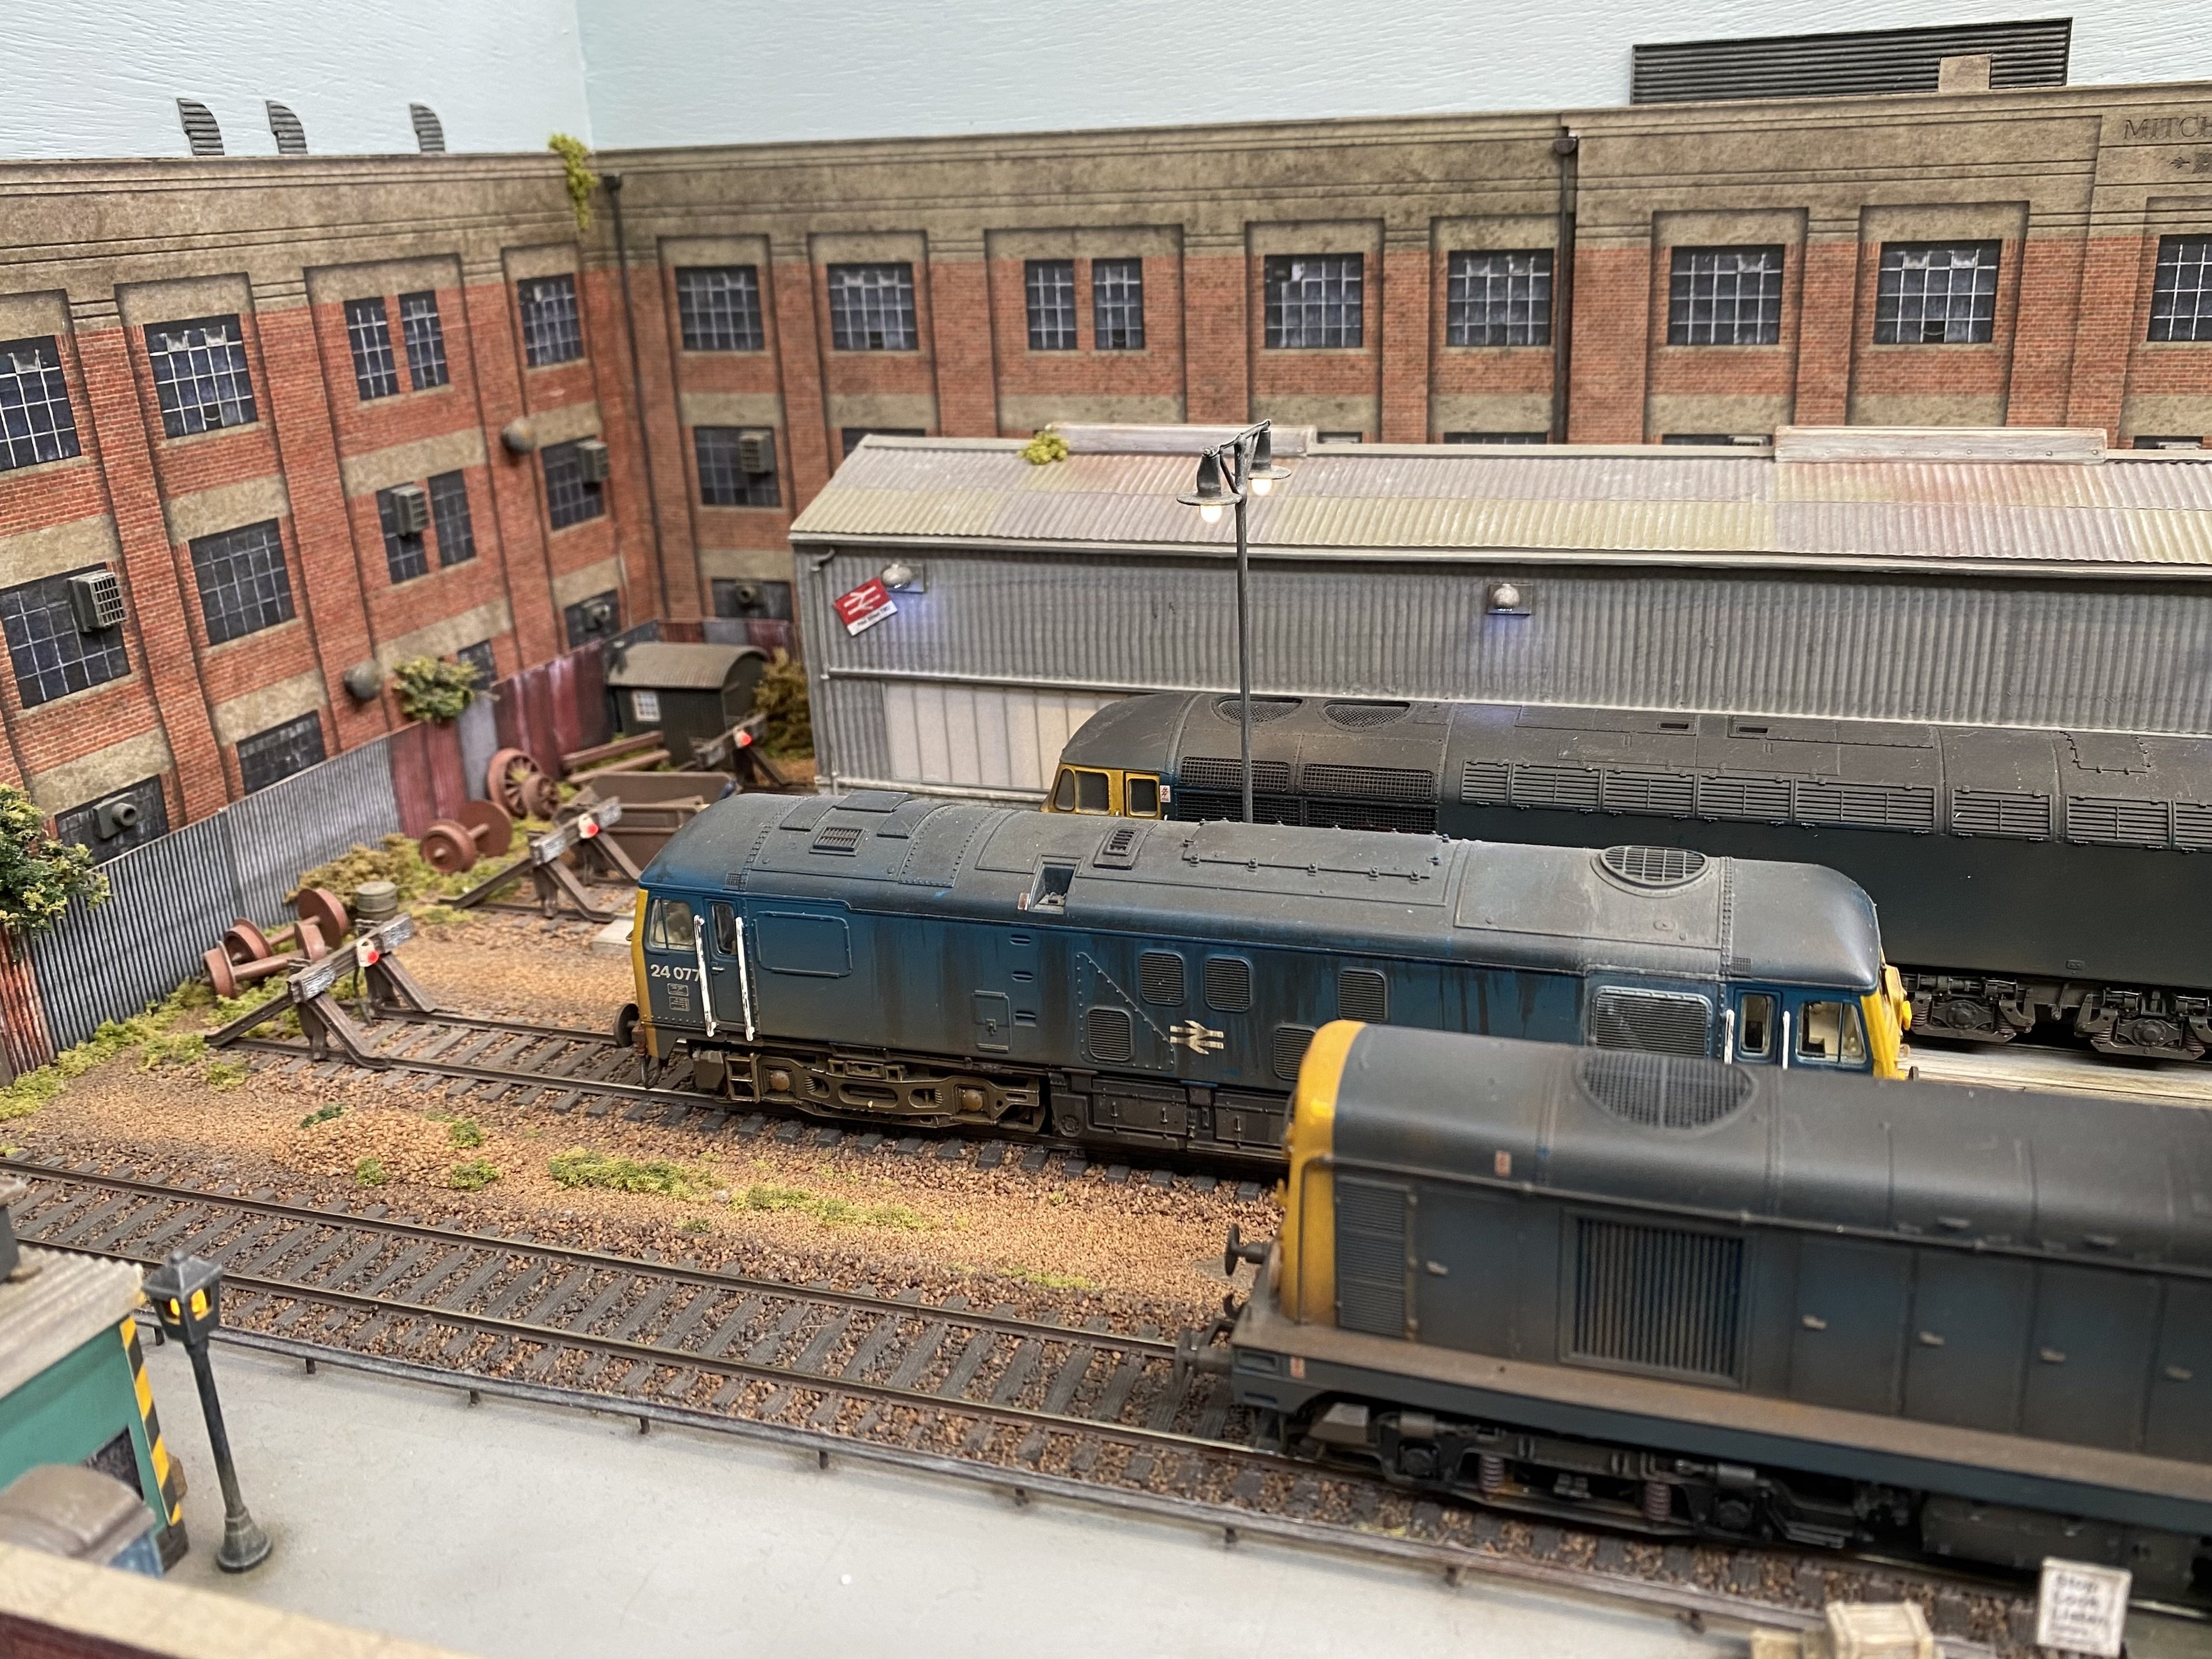
High Level Kits sell a very nice etched chassis kit for the Class 03, designed to go under the Bachmann rtr model. https://www.highlevelkits.co.uk/product-page/br-class-03dm I built one a while back and clad it with the body from a Dapol ex-Airfix plastic kit. It runs beautifully thanks to its typically sweet High Level gearbox and a clever arrangement called "Illusodrive" that gets round the usual difficulty of getting the jackshaft to play ball with the coupling rods. A High Level chassis kit coupled with a scratch built/kit bashed body ought to be viable. I think I've just acquired another project The sharp-eyed will notice that in the pic above, the rear crankpin is missing its nut! Alan

-
Thanks Derek. Believe me though, I’m not joking. I never feel in control of weathering. I mostly get there in the end but usually by the scenic route, having been round the houses a fair few times.
-
Very fine modelling Mol! Love the CVR models. I'm guessing the railcar and loco are scratch builds. Tell us a bit more about how they were made please. Alan
-
Beautiful finish. Looks really well.
-
Yes Apologies for causing confusion by calling it by every name but the right one! John is right. I used Wills SSMP200 'Coarse Stone'. I always thought the 'Random Stone' sheets looked a bit odd. I understand why now.
-
Thank you David. I find the Wills random stone very versatile stuff which can be made to look very different depending on what you do to it. It also seems to be equally useful in 4mm and 7mm. I used the filler trick quite a bit on The Stone Yard. It's a pity it comes in such small sheets!
-
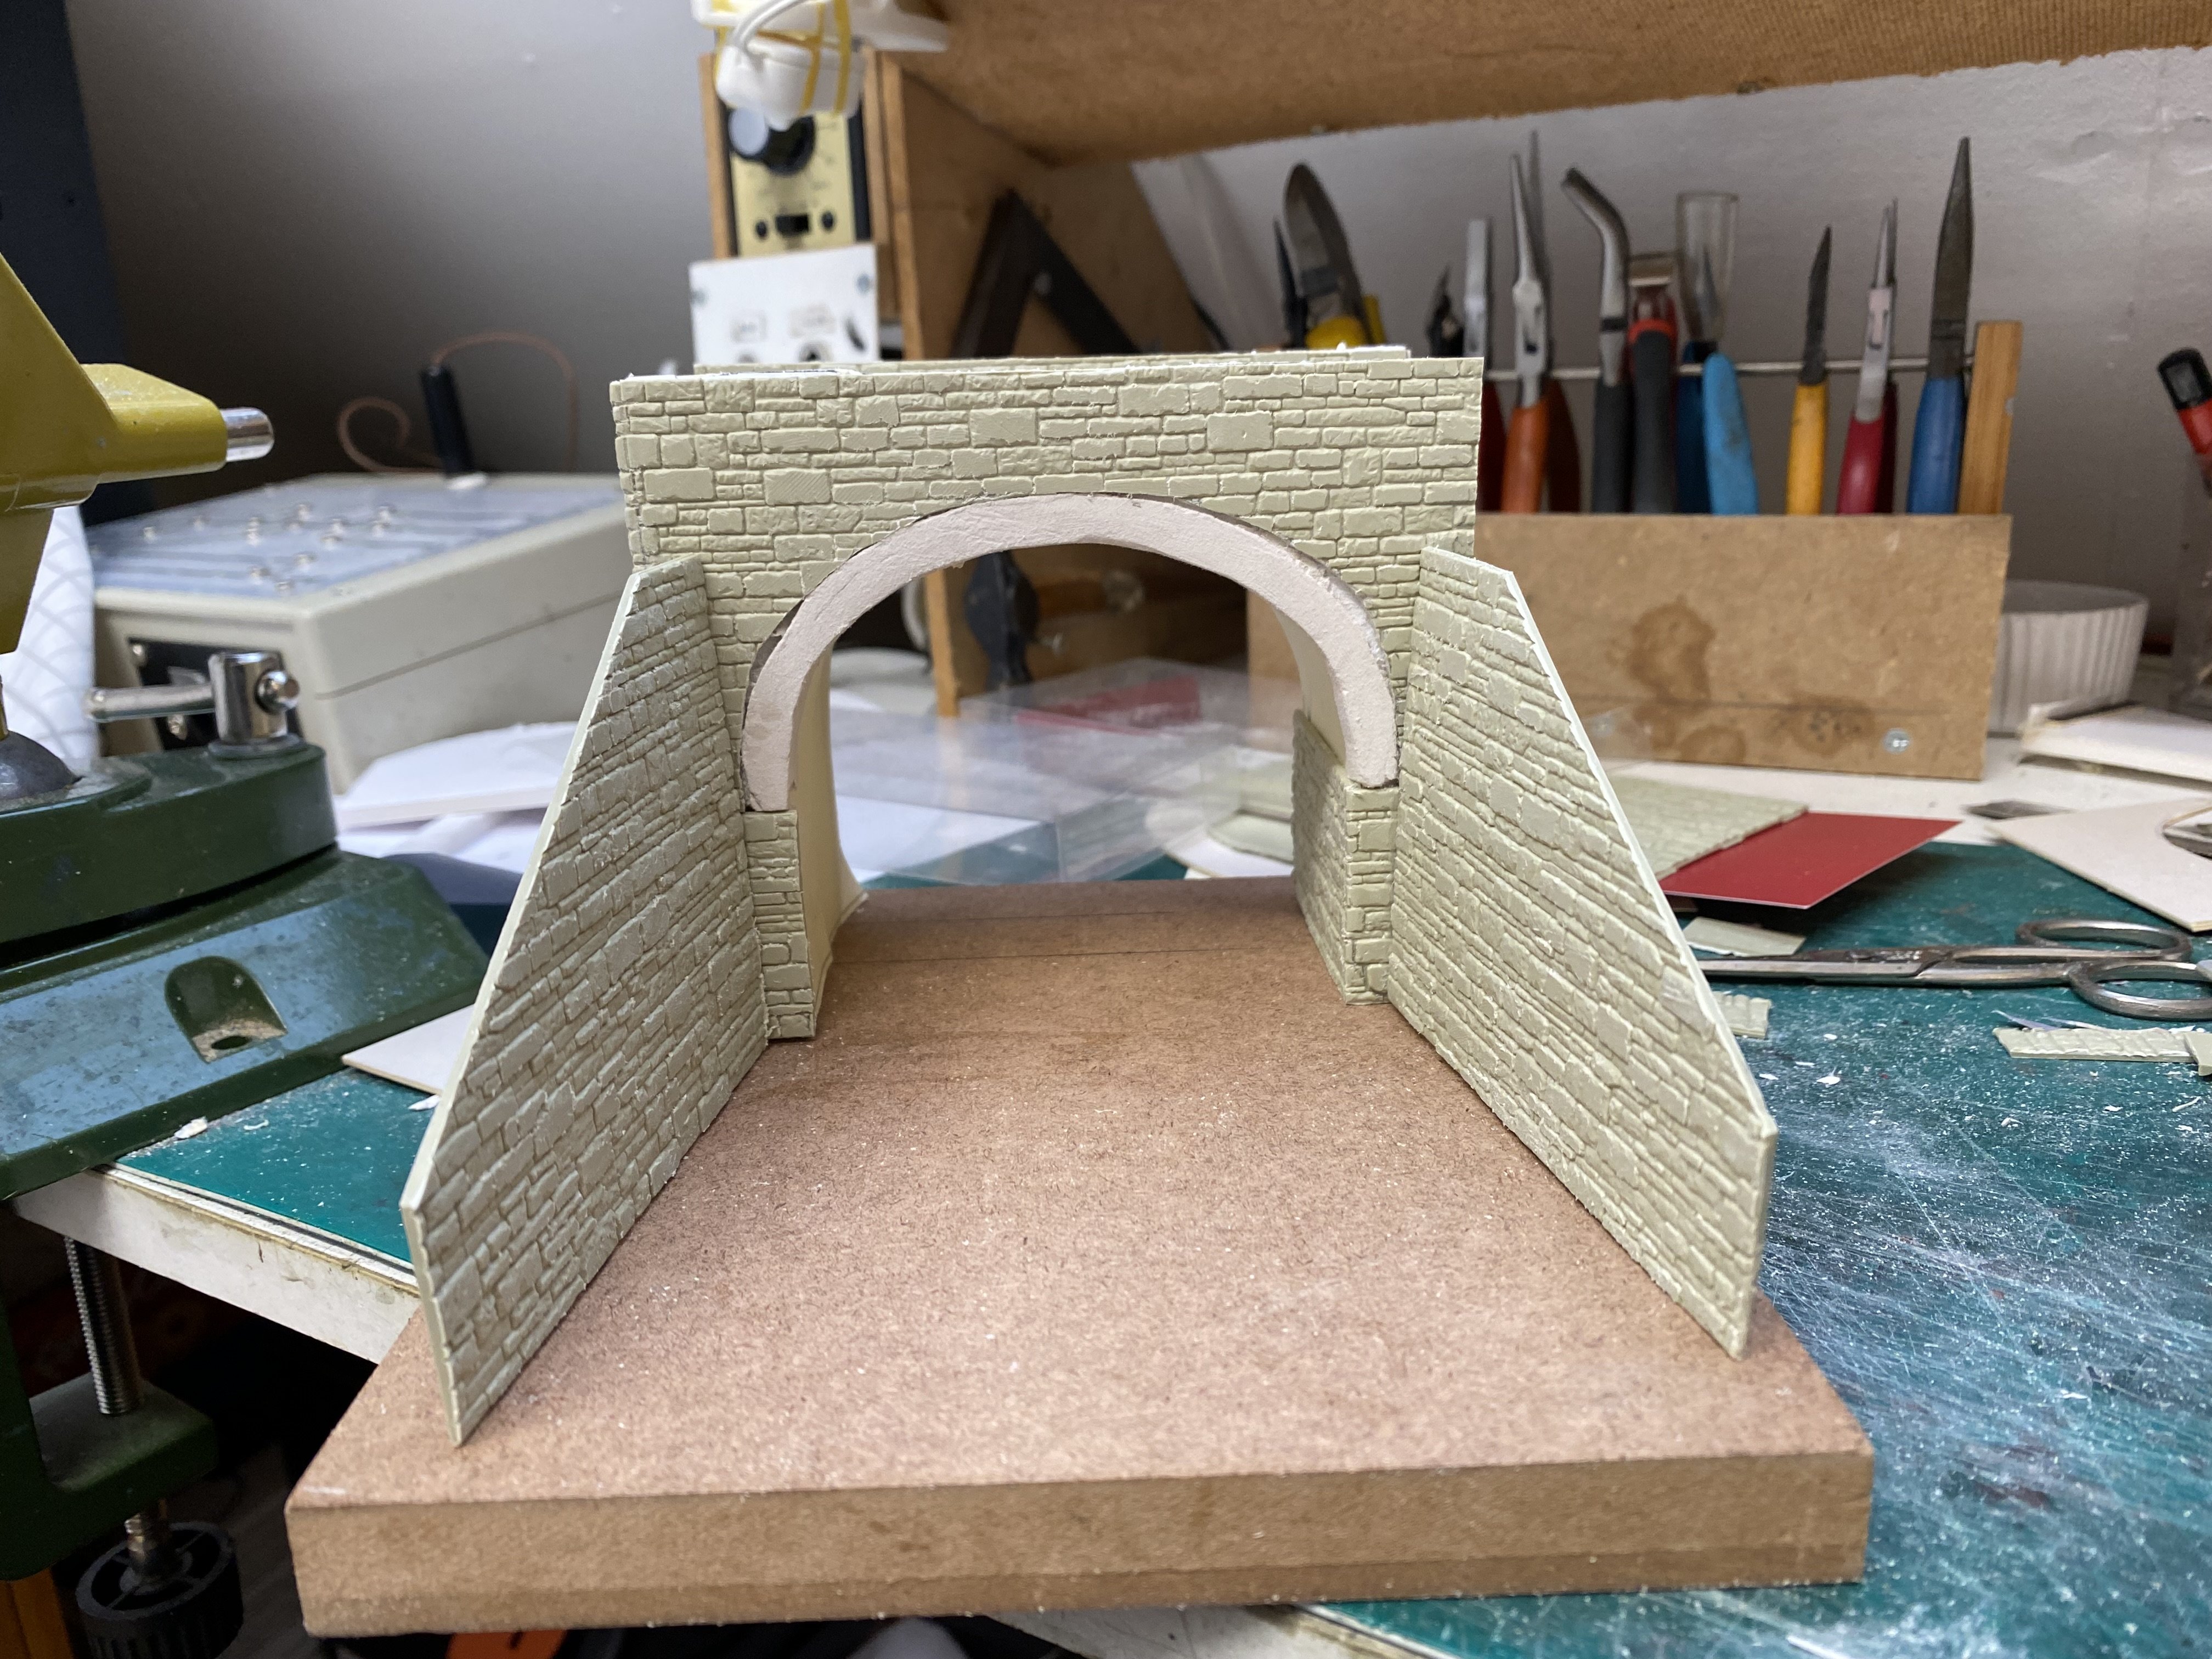
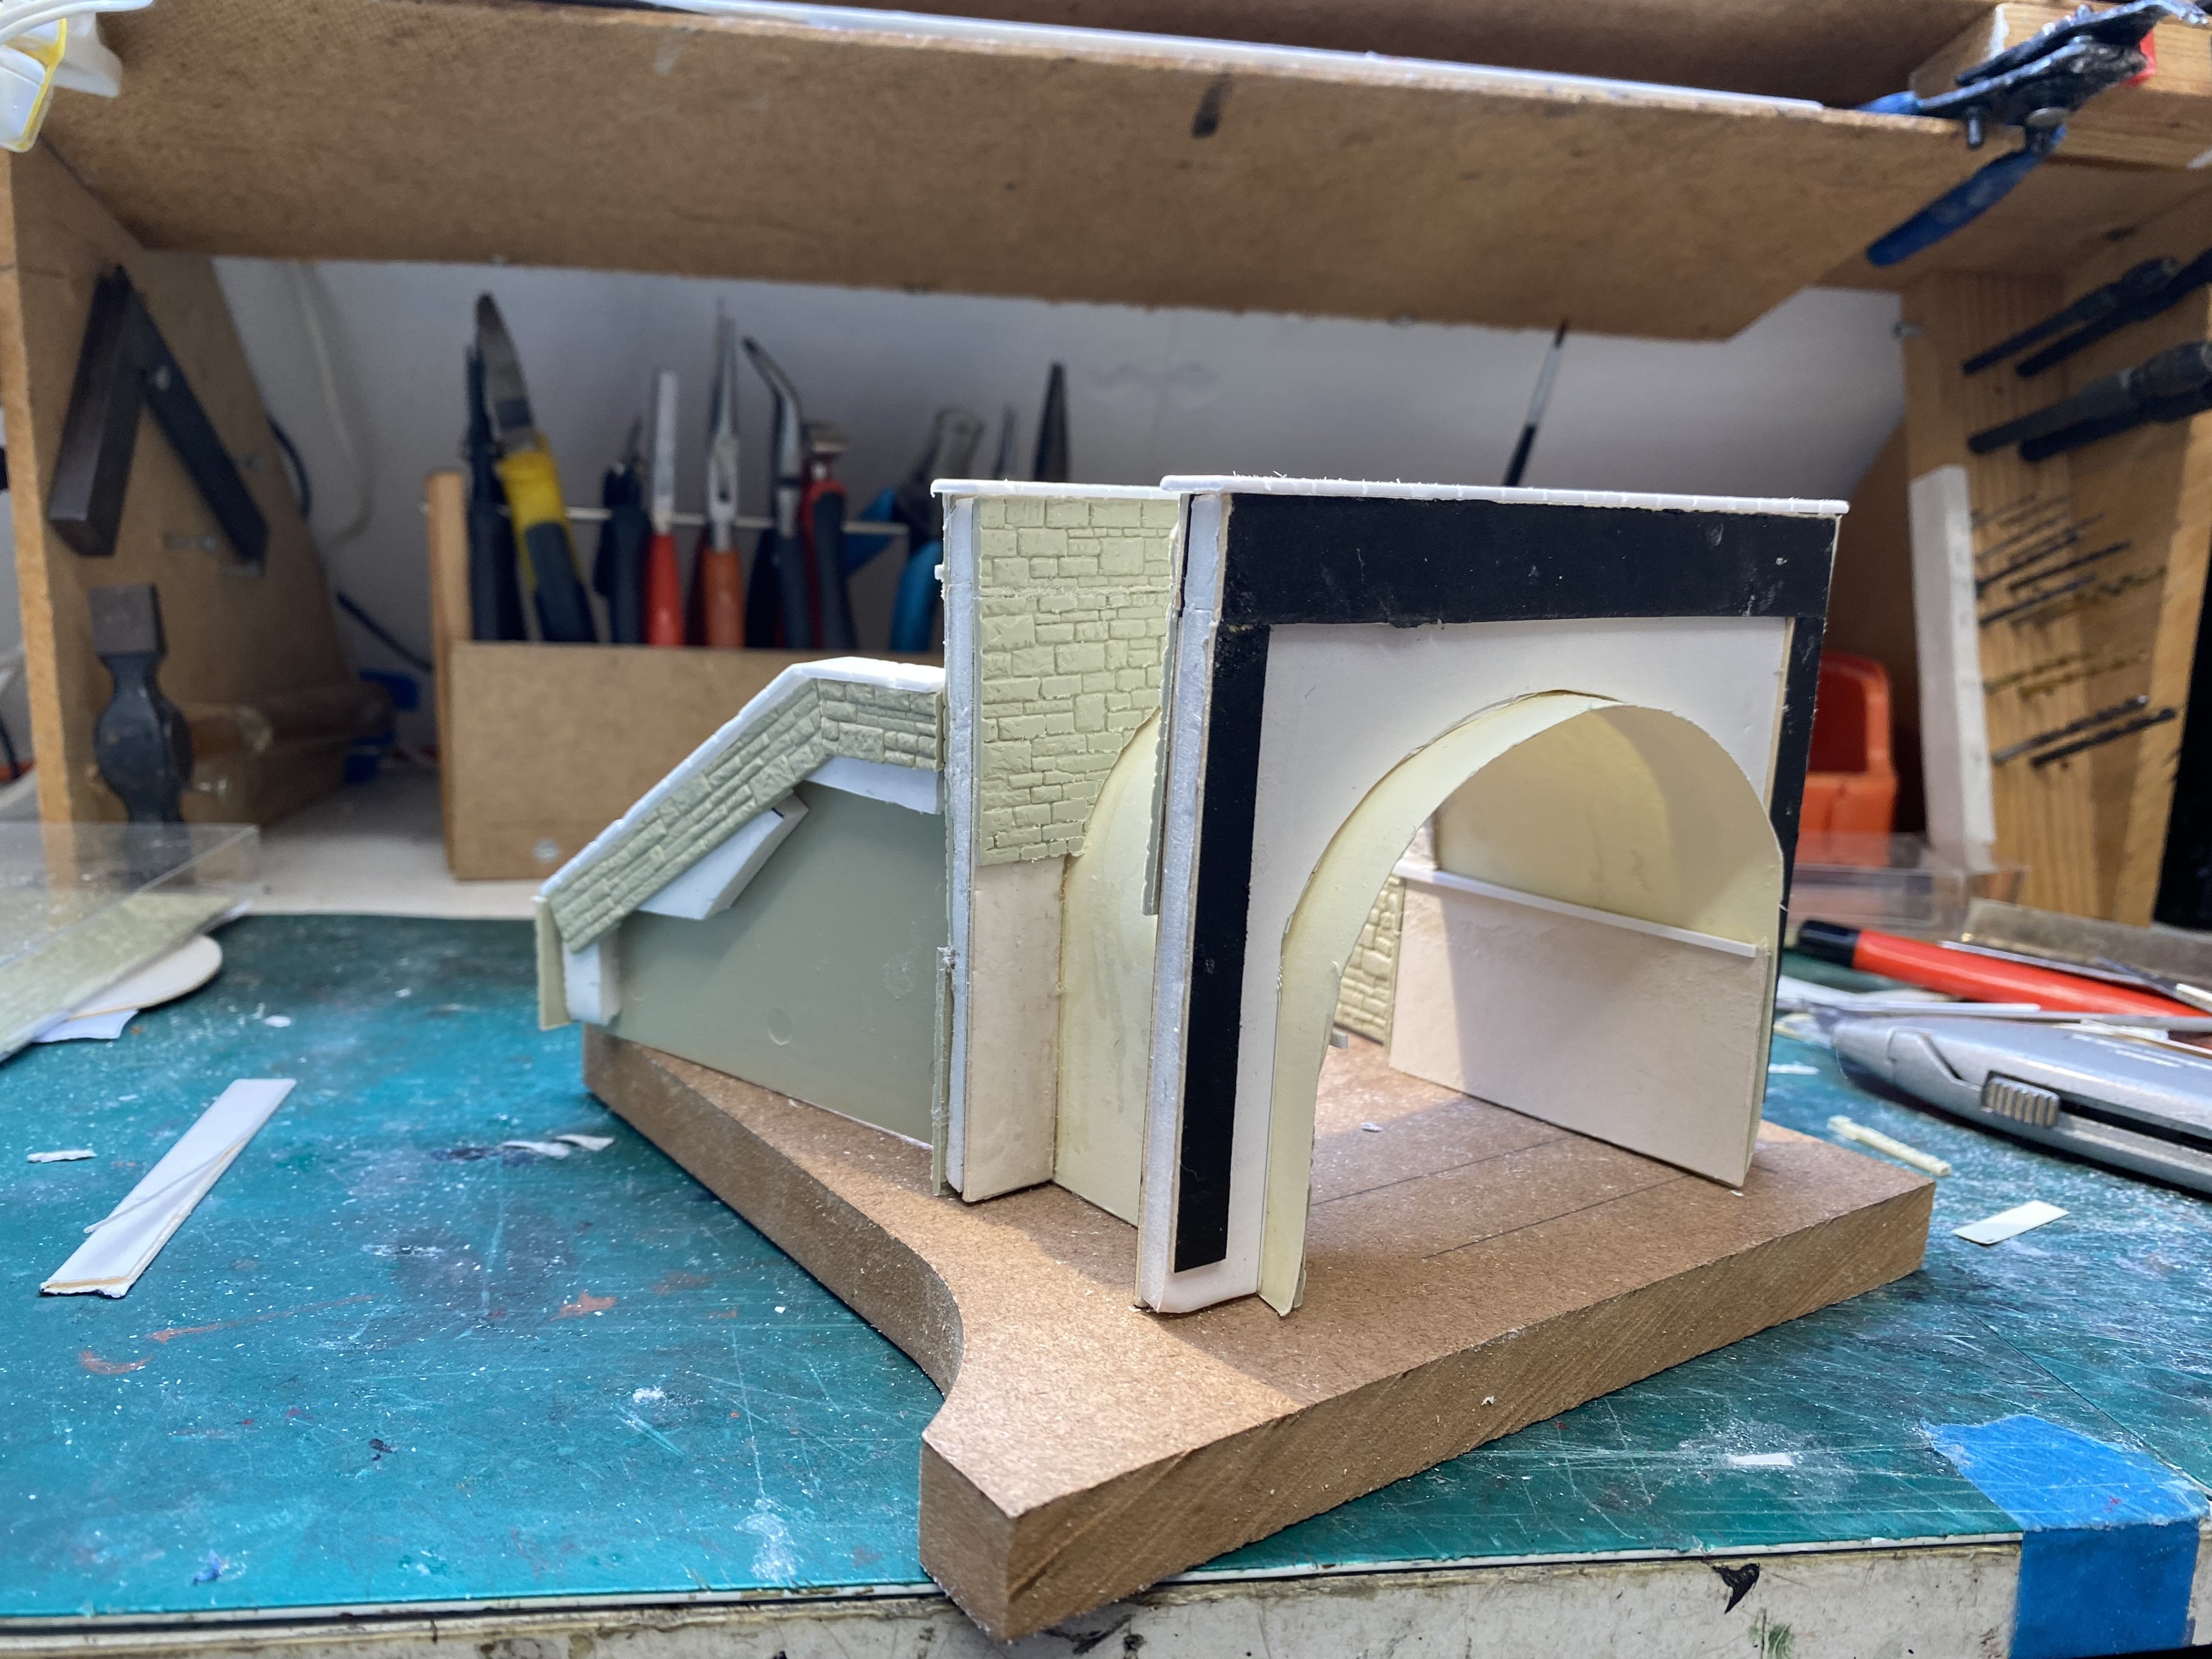
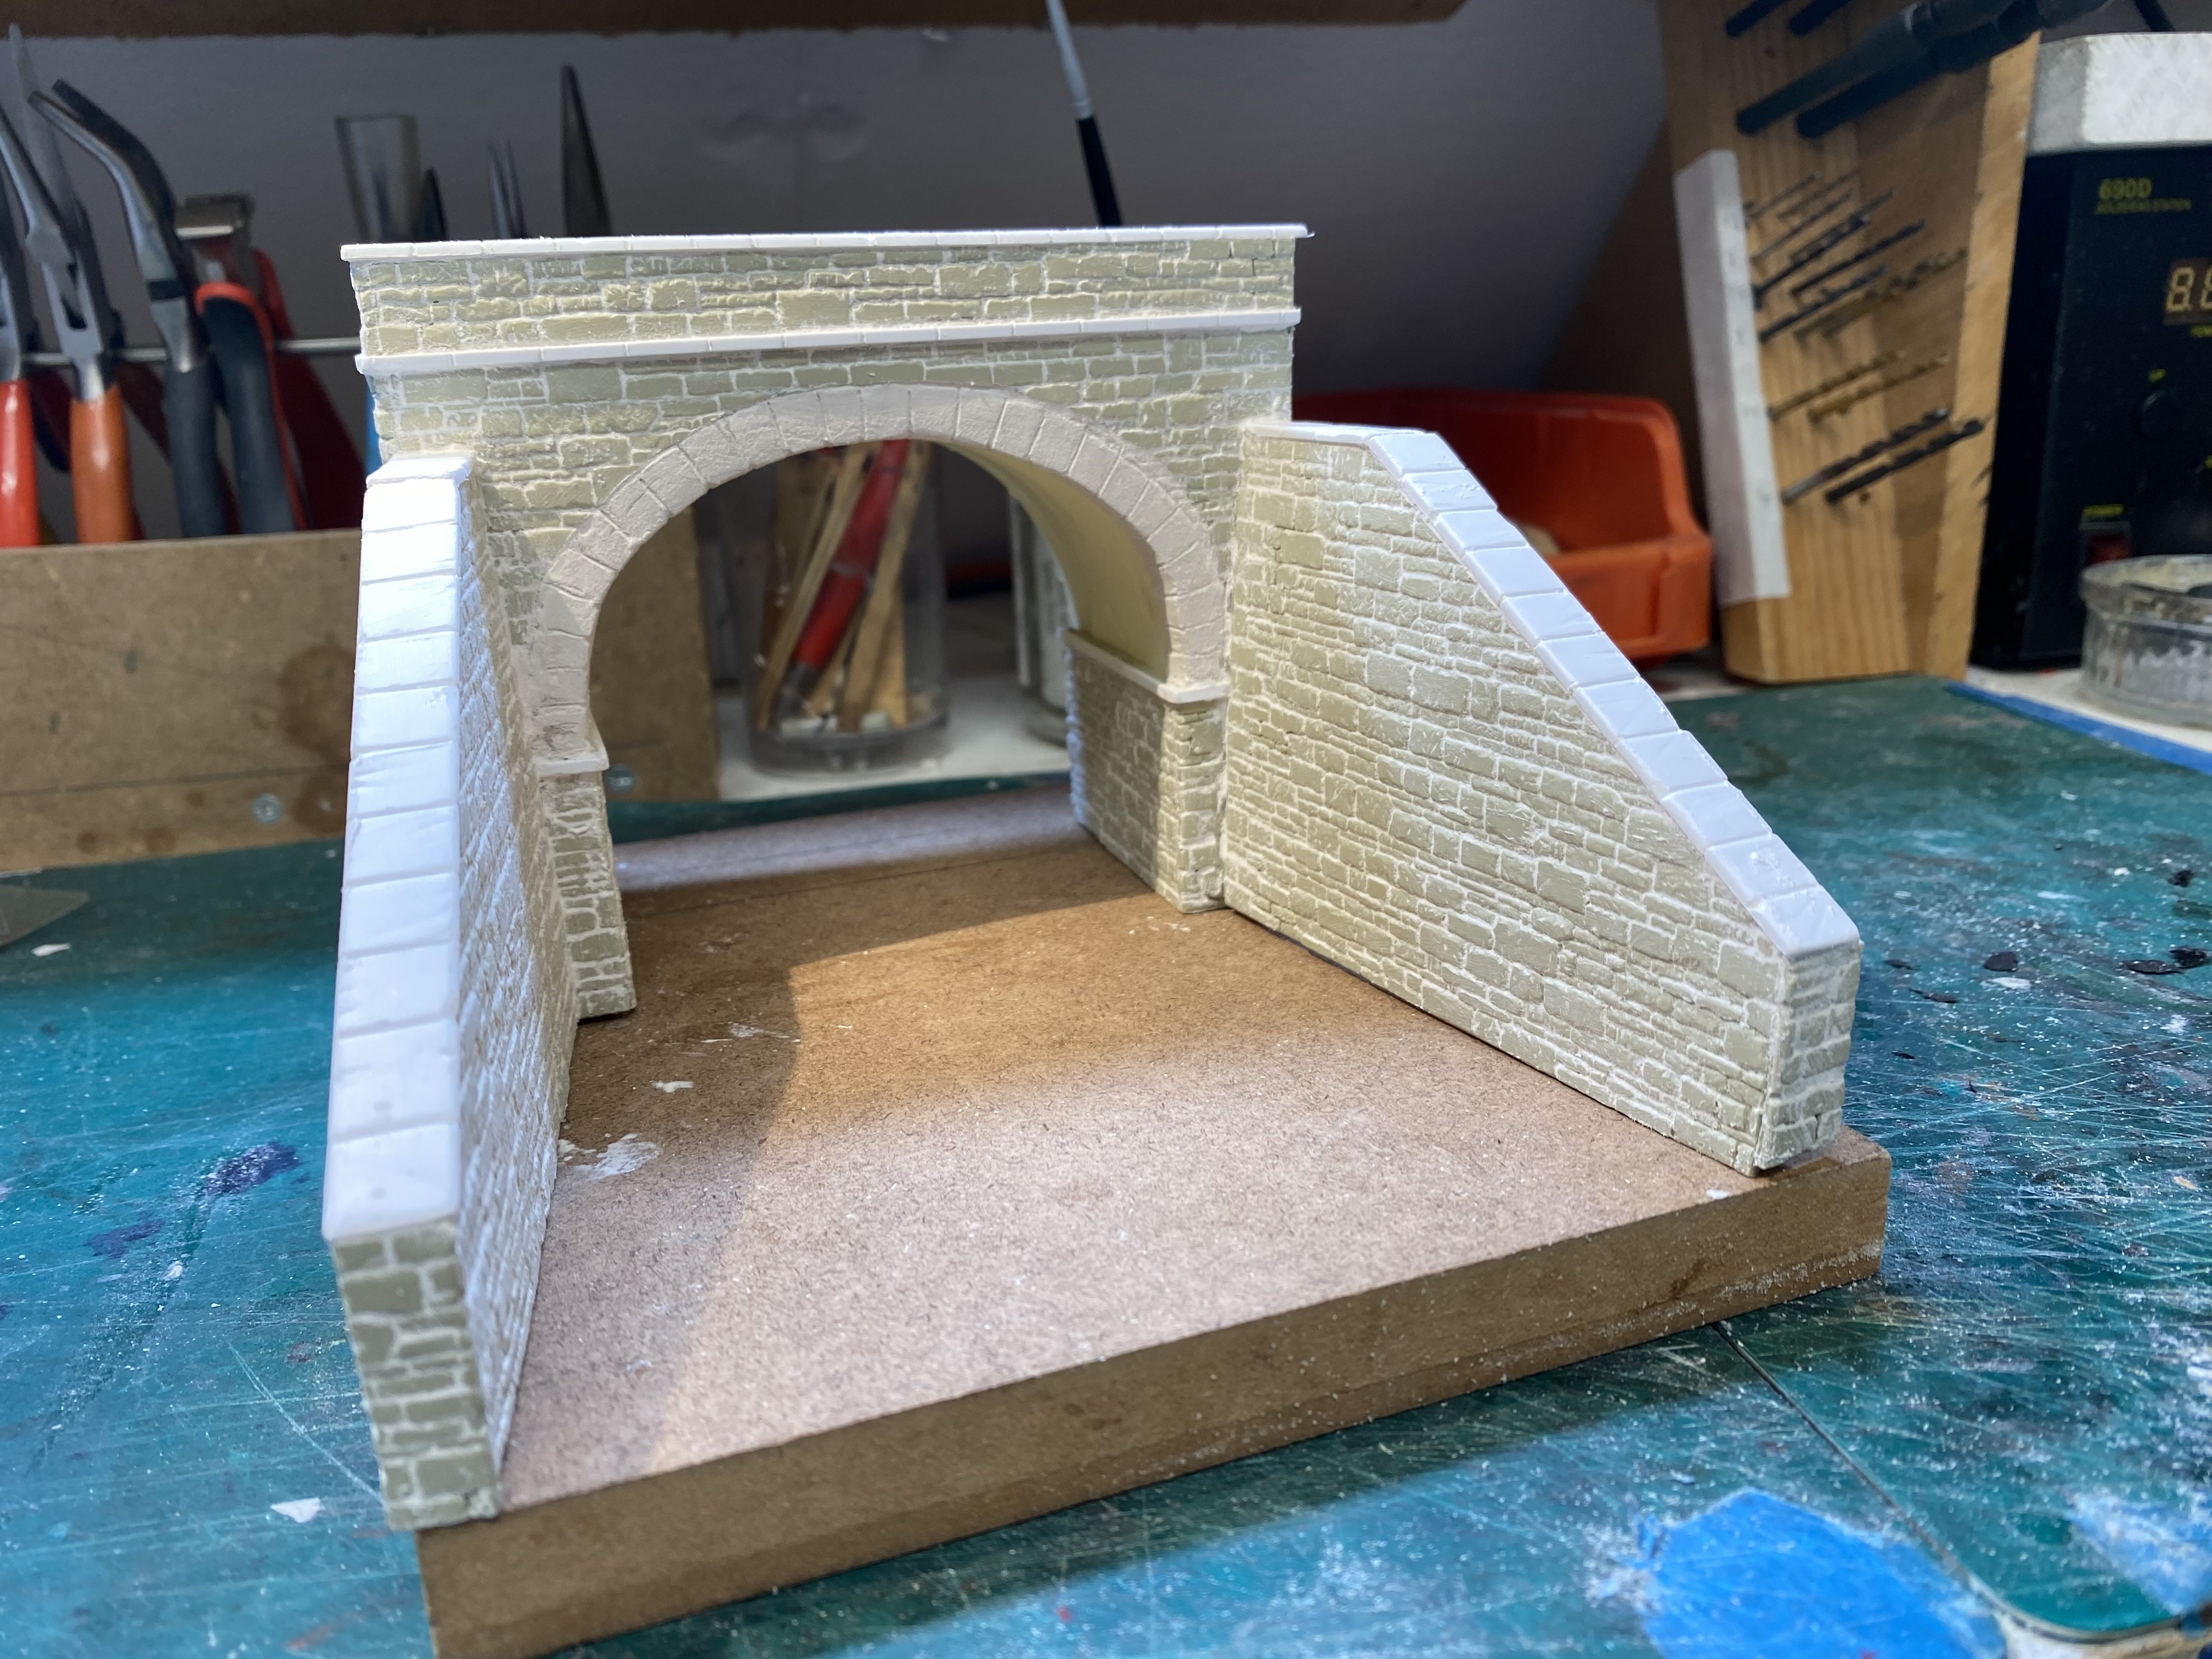
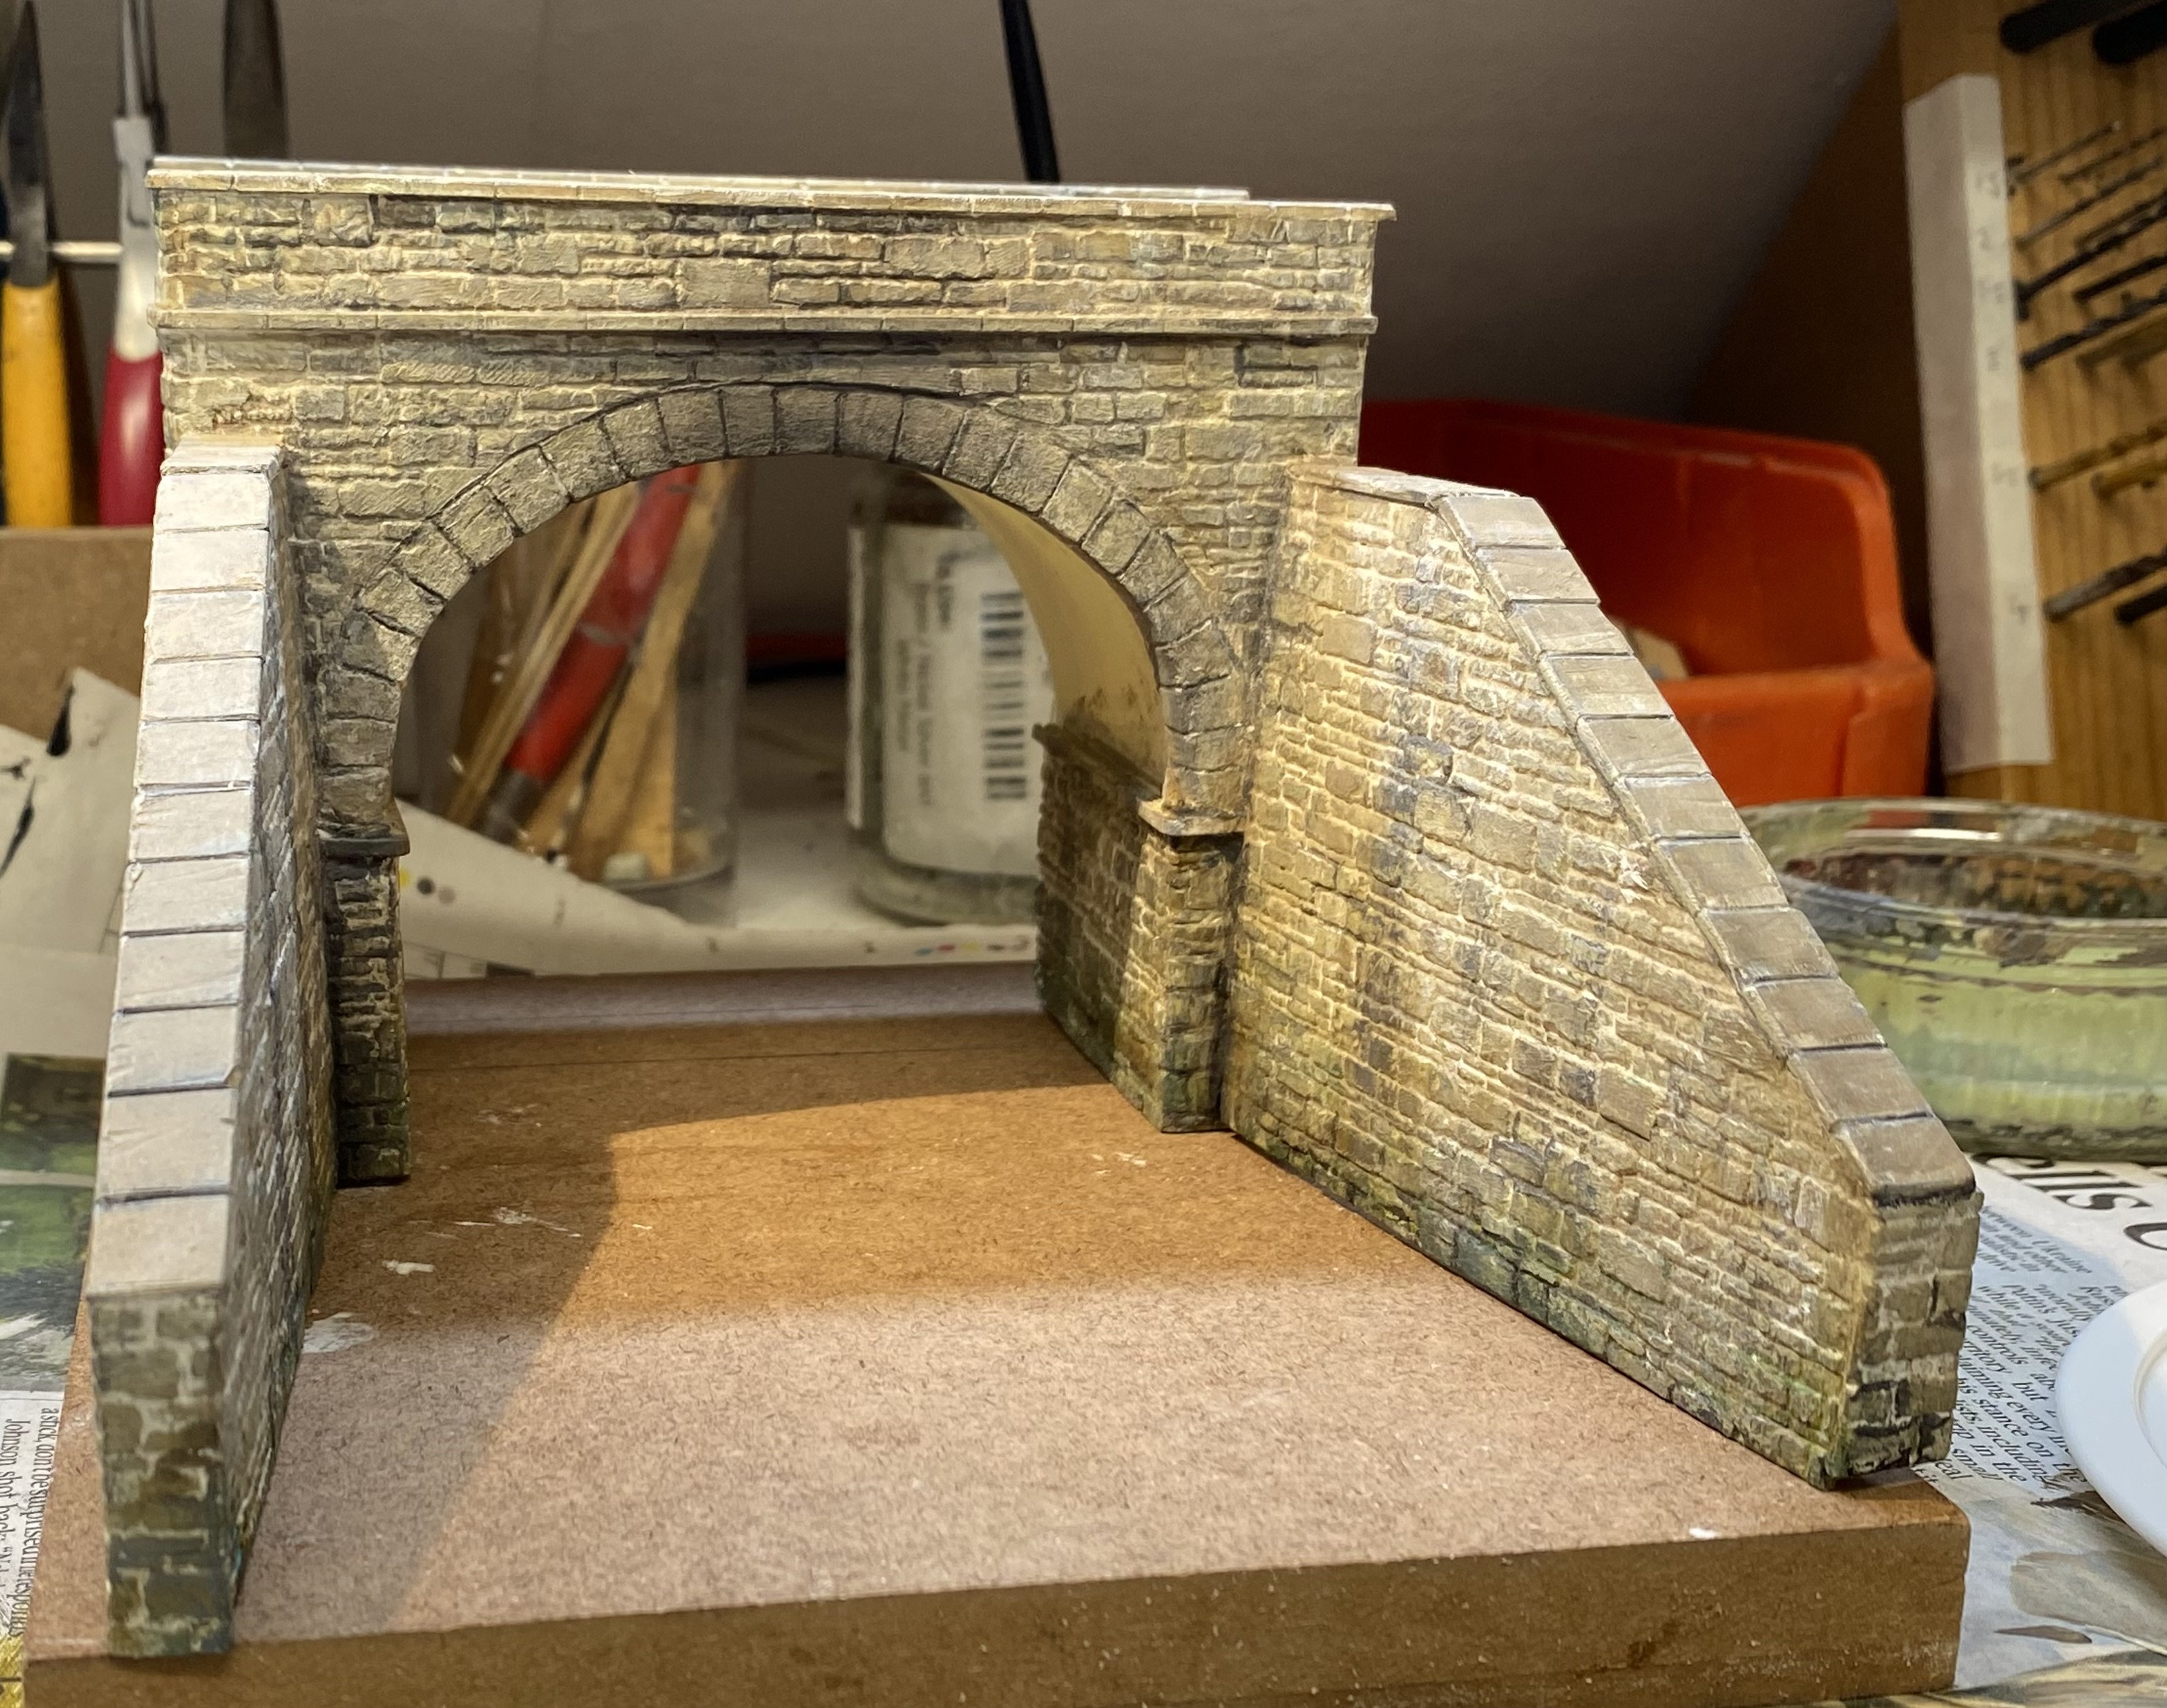
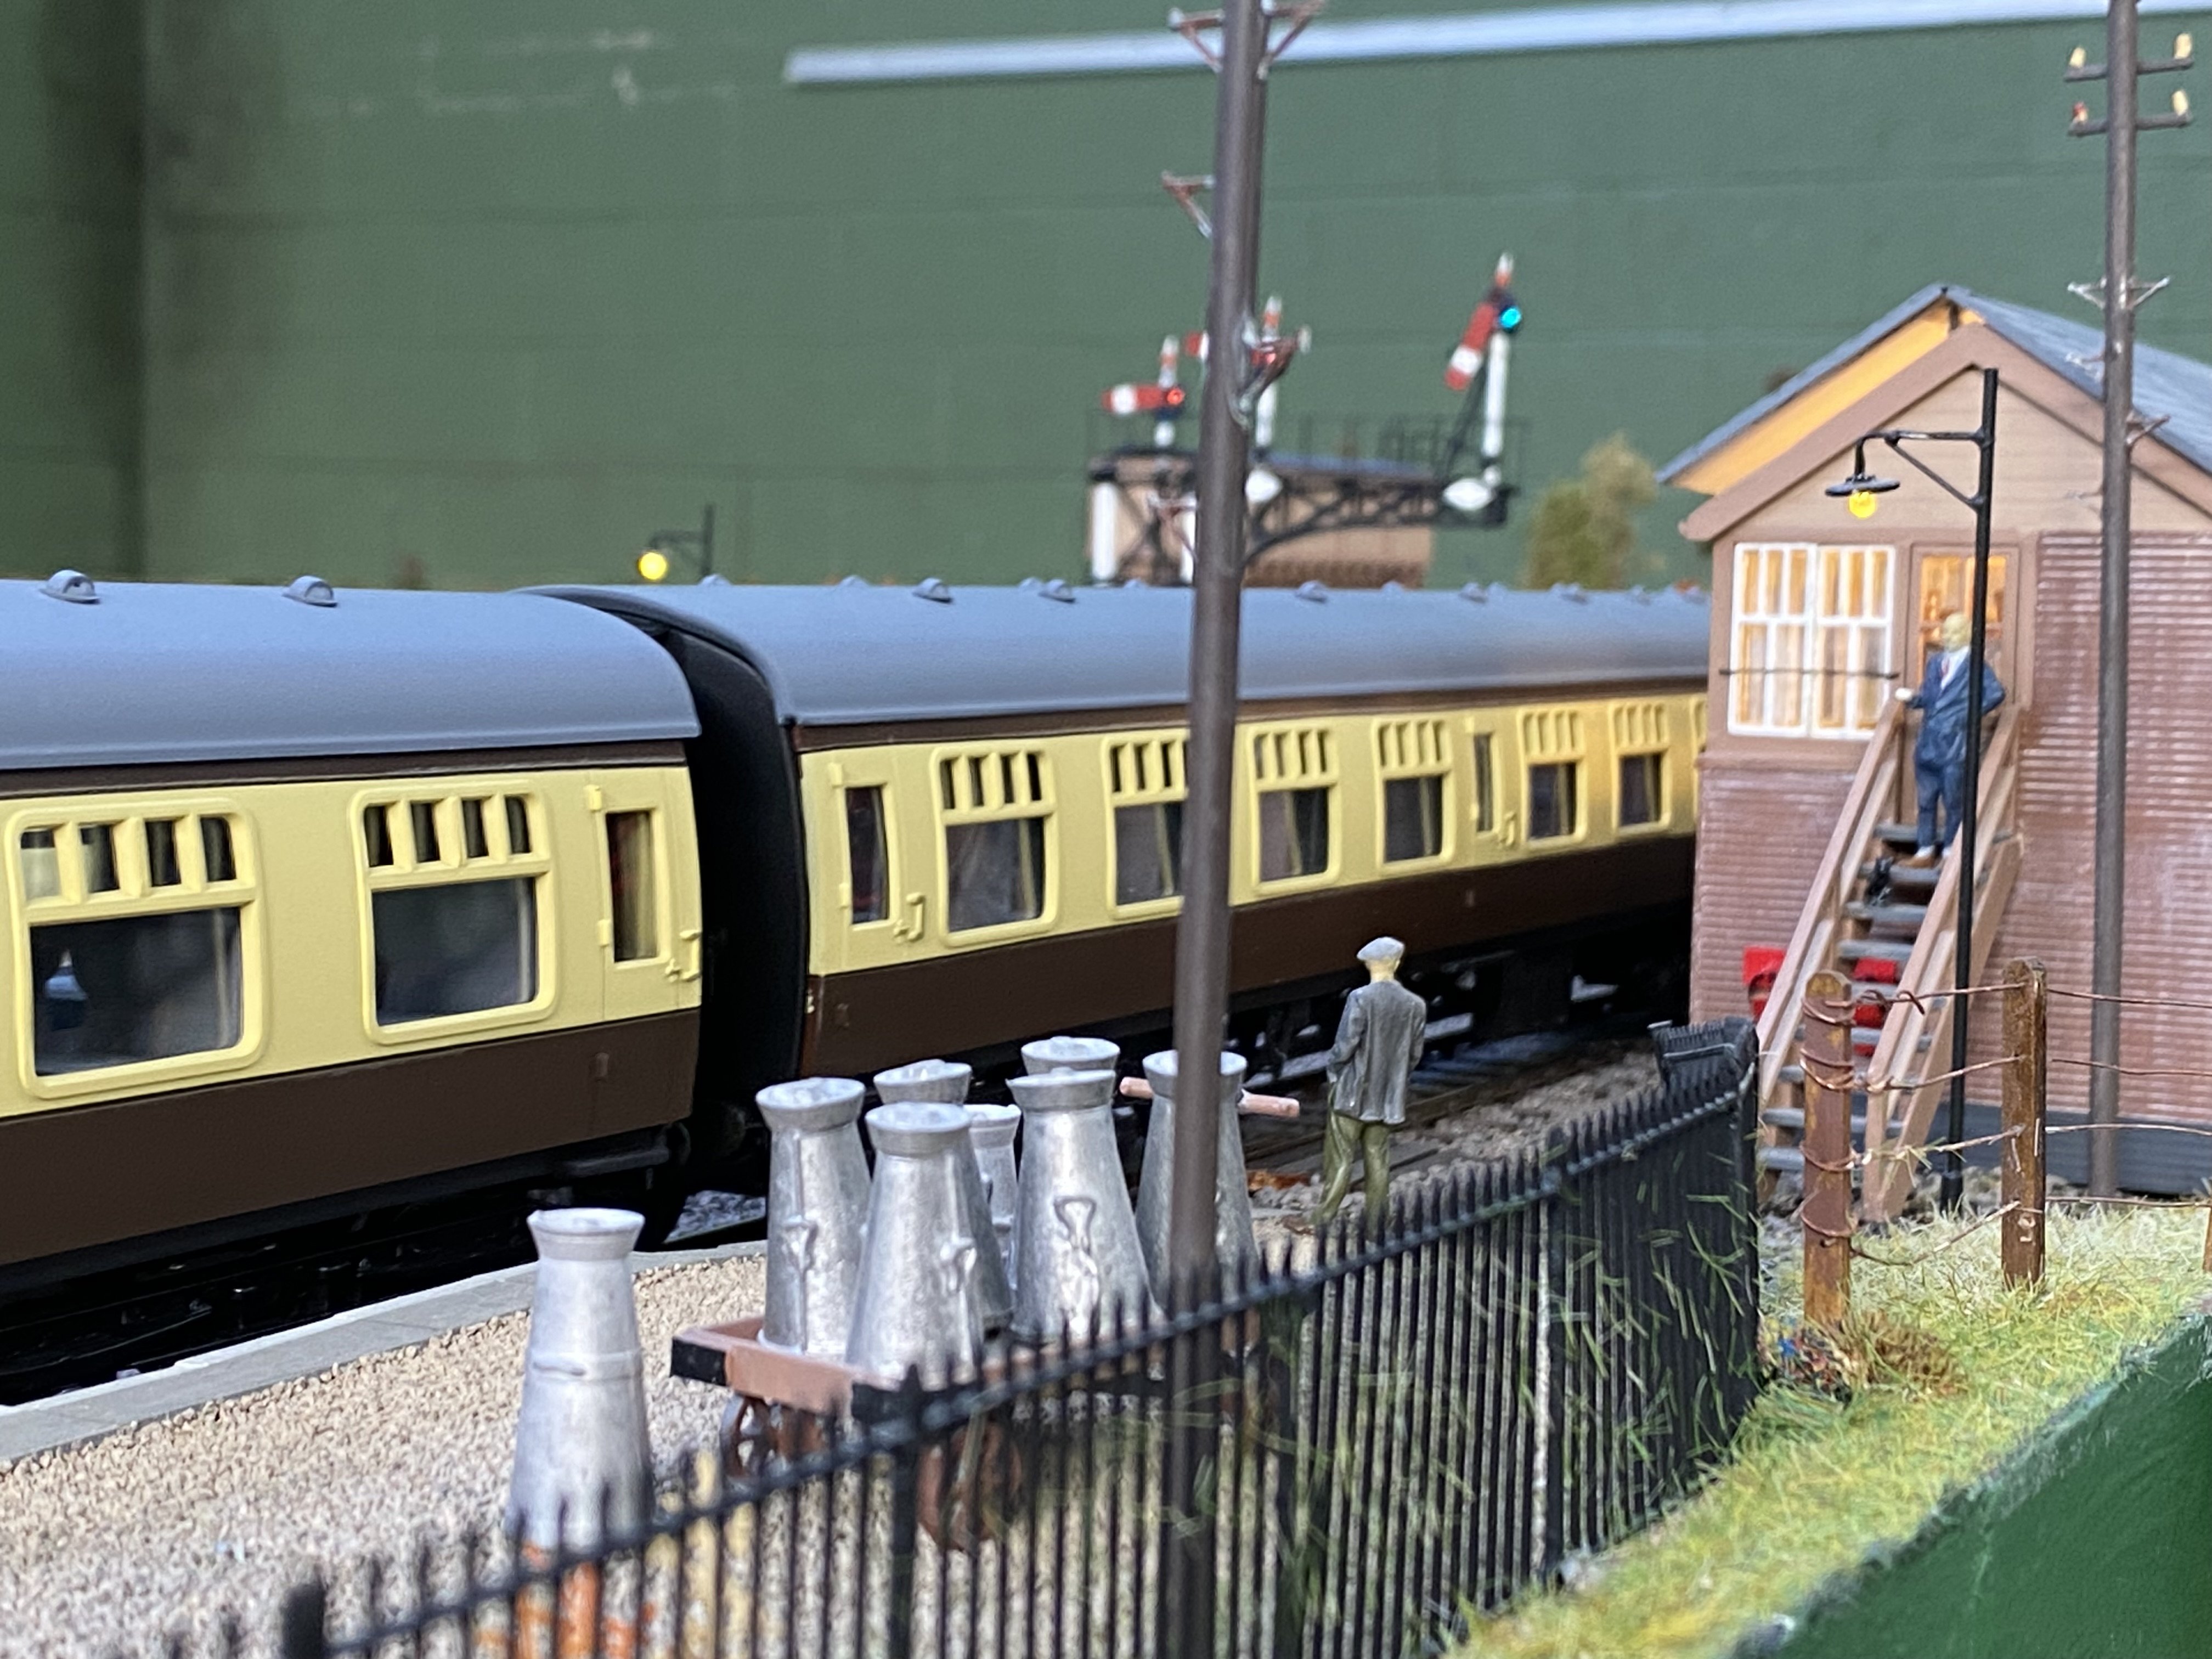
First structure, a bridge. As far as I can see, BCDR bridges varied in style and construction but there is a bit of a house style and they do share one quality - they're indestructible. Witness the number which still stand beside realigned roads, in the middle of fields, in people's gardens or on country roads where they're still in use 70+ years after the railway closed. They never fall down. This one might be a bit less robust being made from foamboard, card, plastic and DAS clay. The Wills rough stone sheets were sanded and filed back to flatten the stonework a bit then coated in filler and wiped with kitchen roll to reduce the depth of the mortar lines. I haven't modelled round the back. This will be buried in the landscape. Paint does the rest. The brick lining the inside the arch has been added since the photo was taken. The bridge will form the scenic break at the left hand end with a country lane over it. Station building is underway. It's been a challenge with a fair bit of back and forward mainly because I struggle with weathering. More pics as soon as it's fit for human consumption. Alan
- 121 replies
-
- 21
-

-

-
Thanks David. Yes, Iain Rice has been and continues to be a huge influence.
-
-
It's the .heic format that causing the problem. You'll need to convert your pics to .jpg format
-
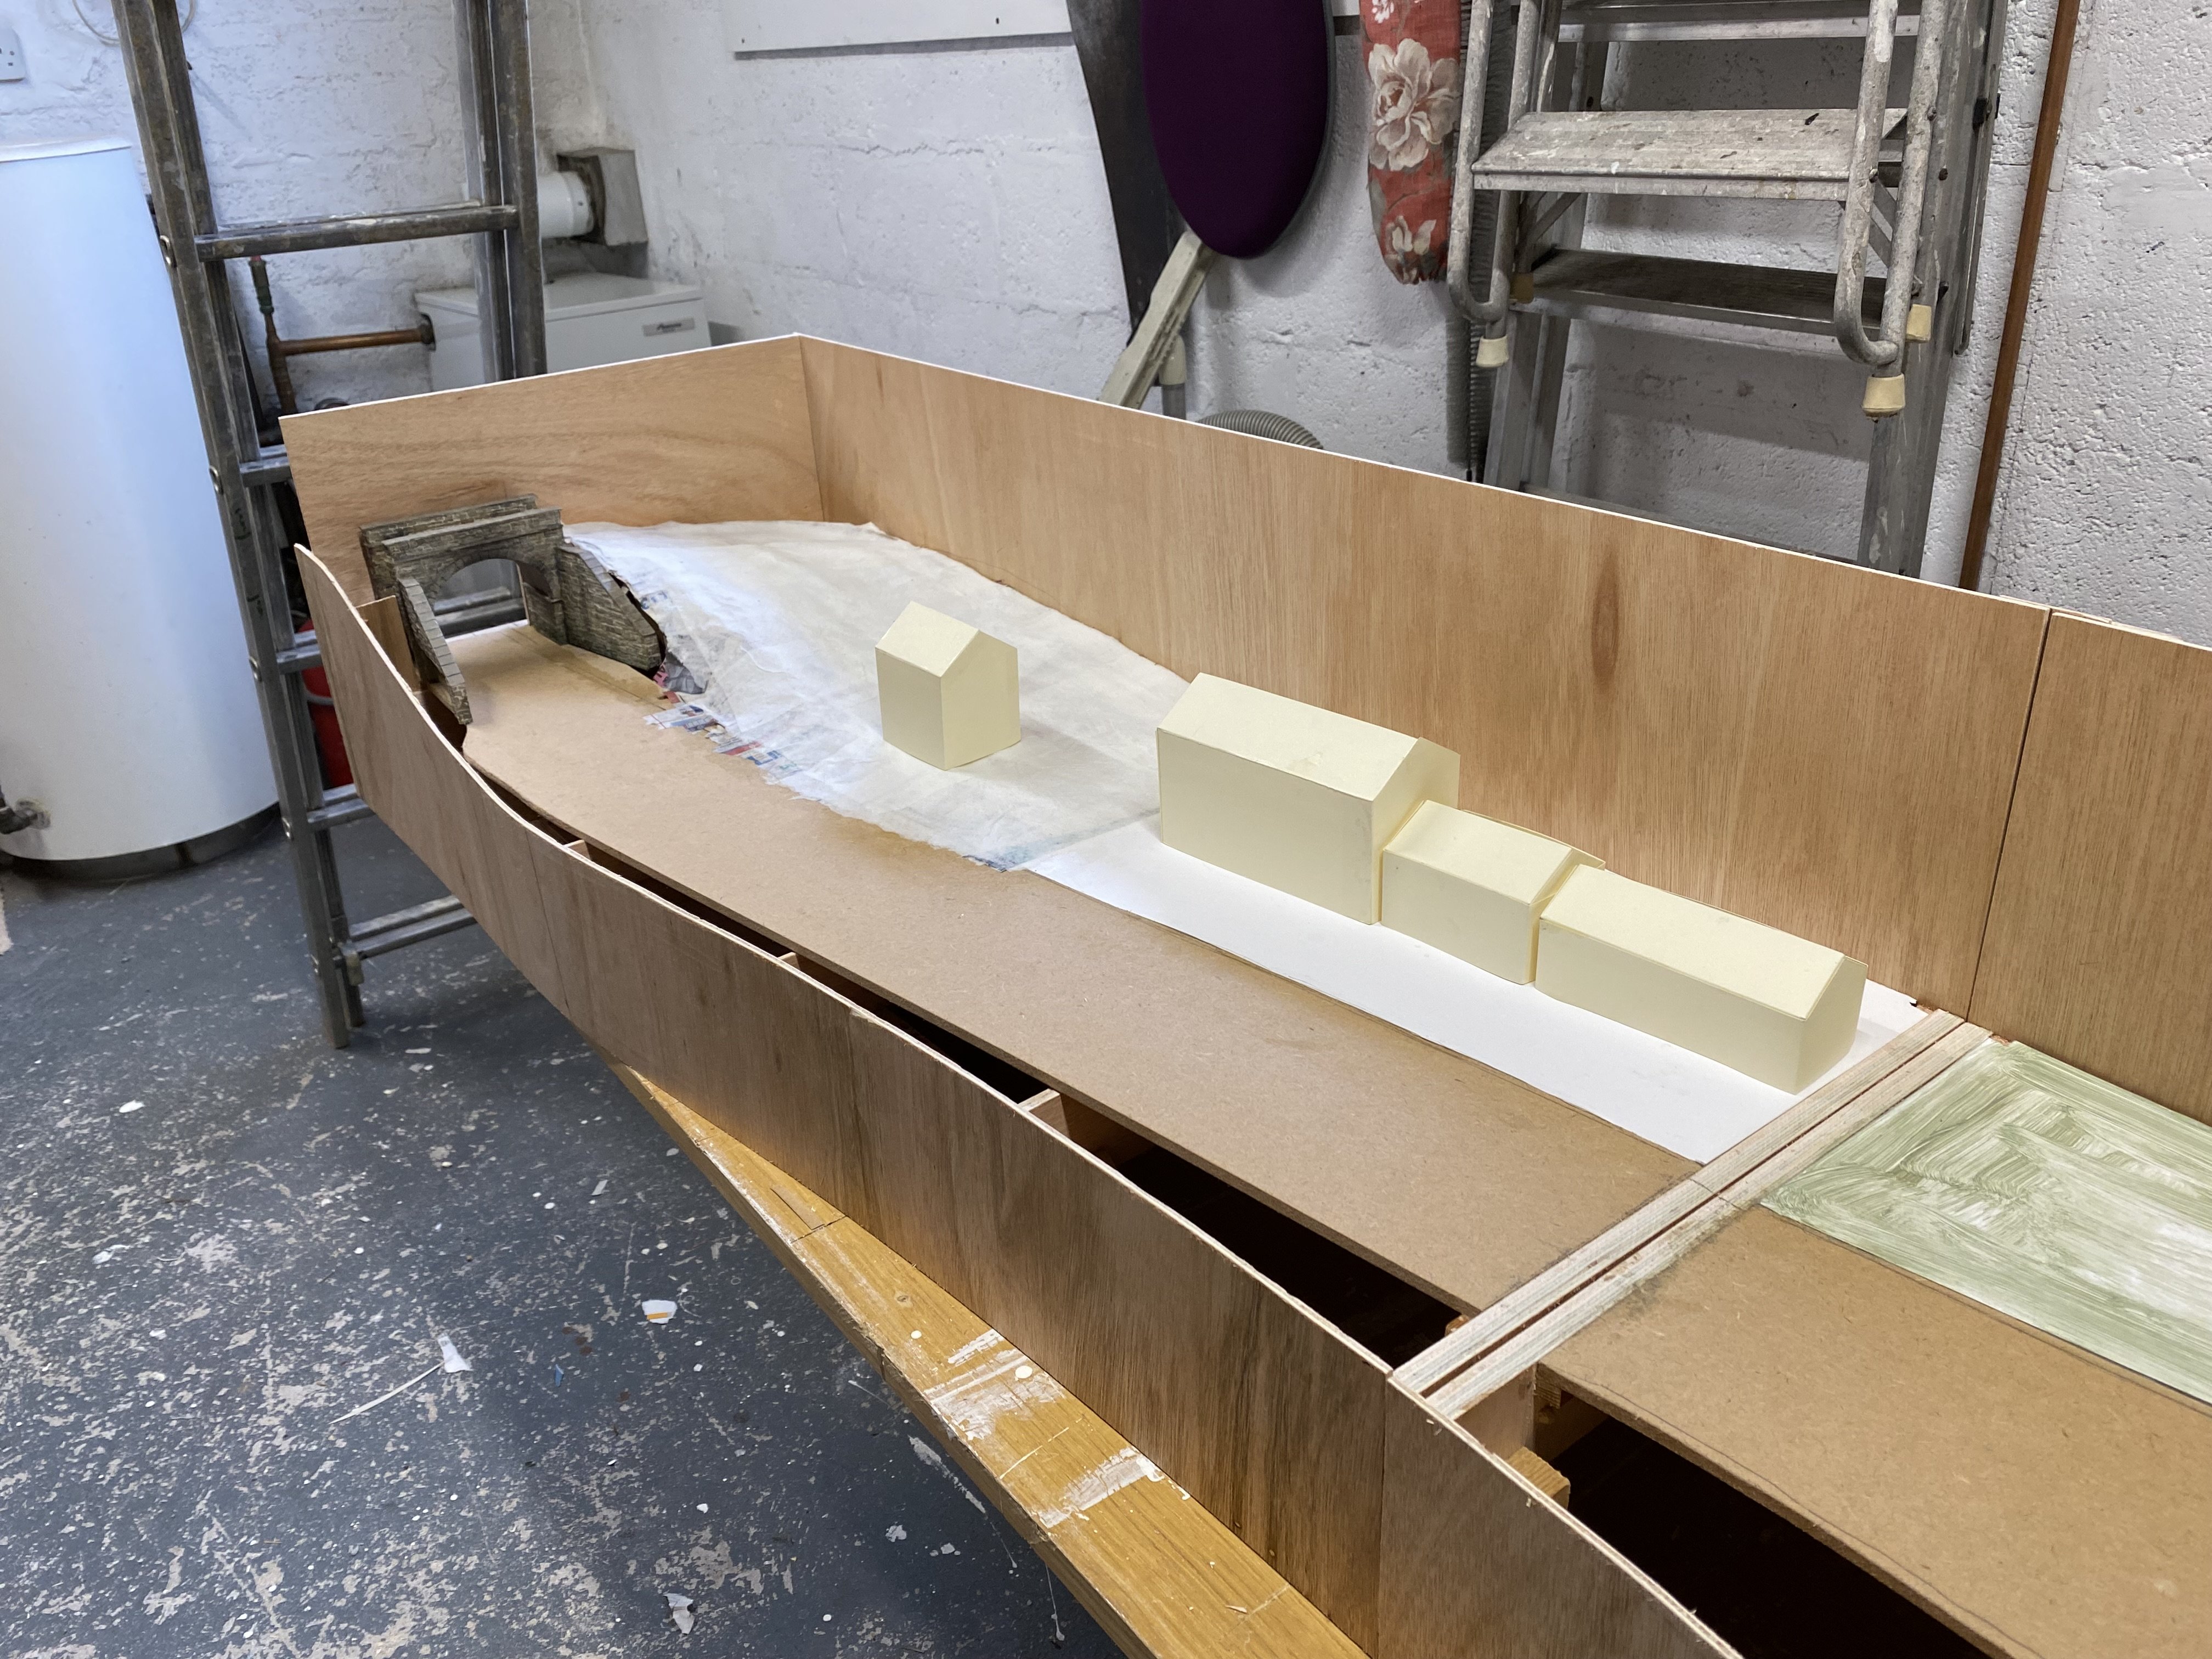
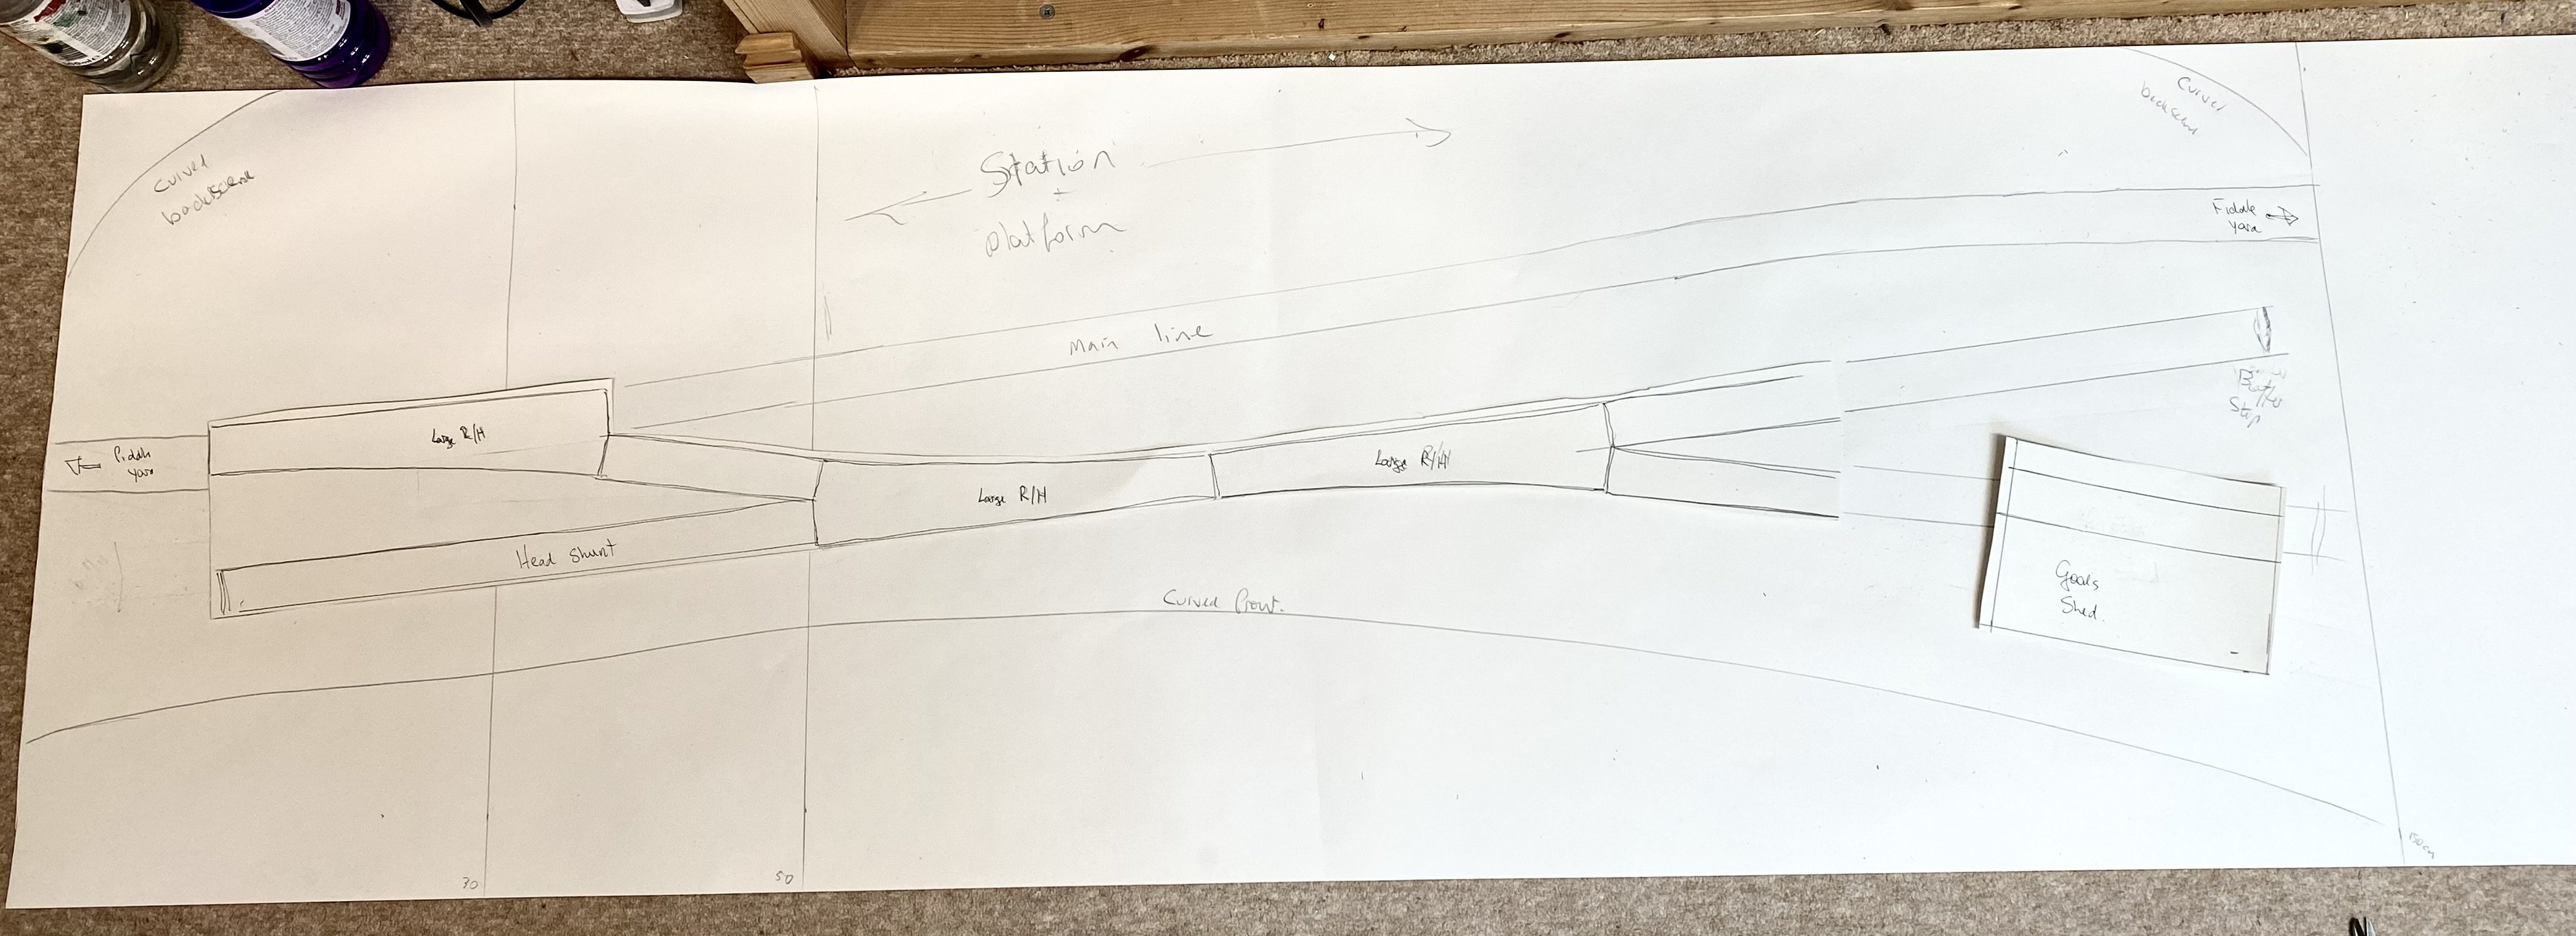
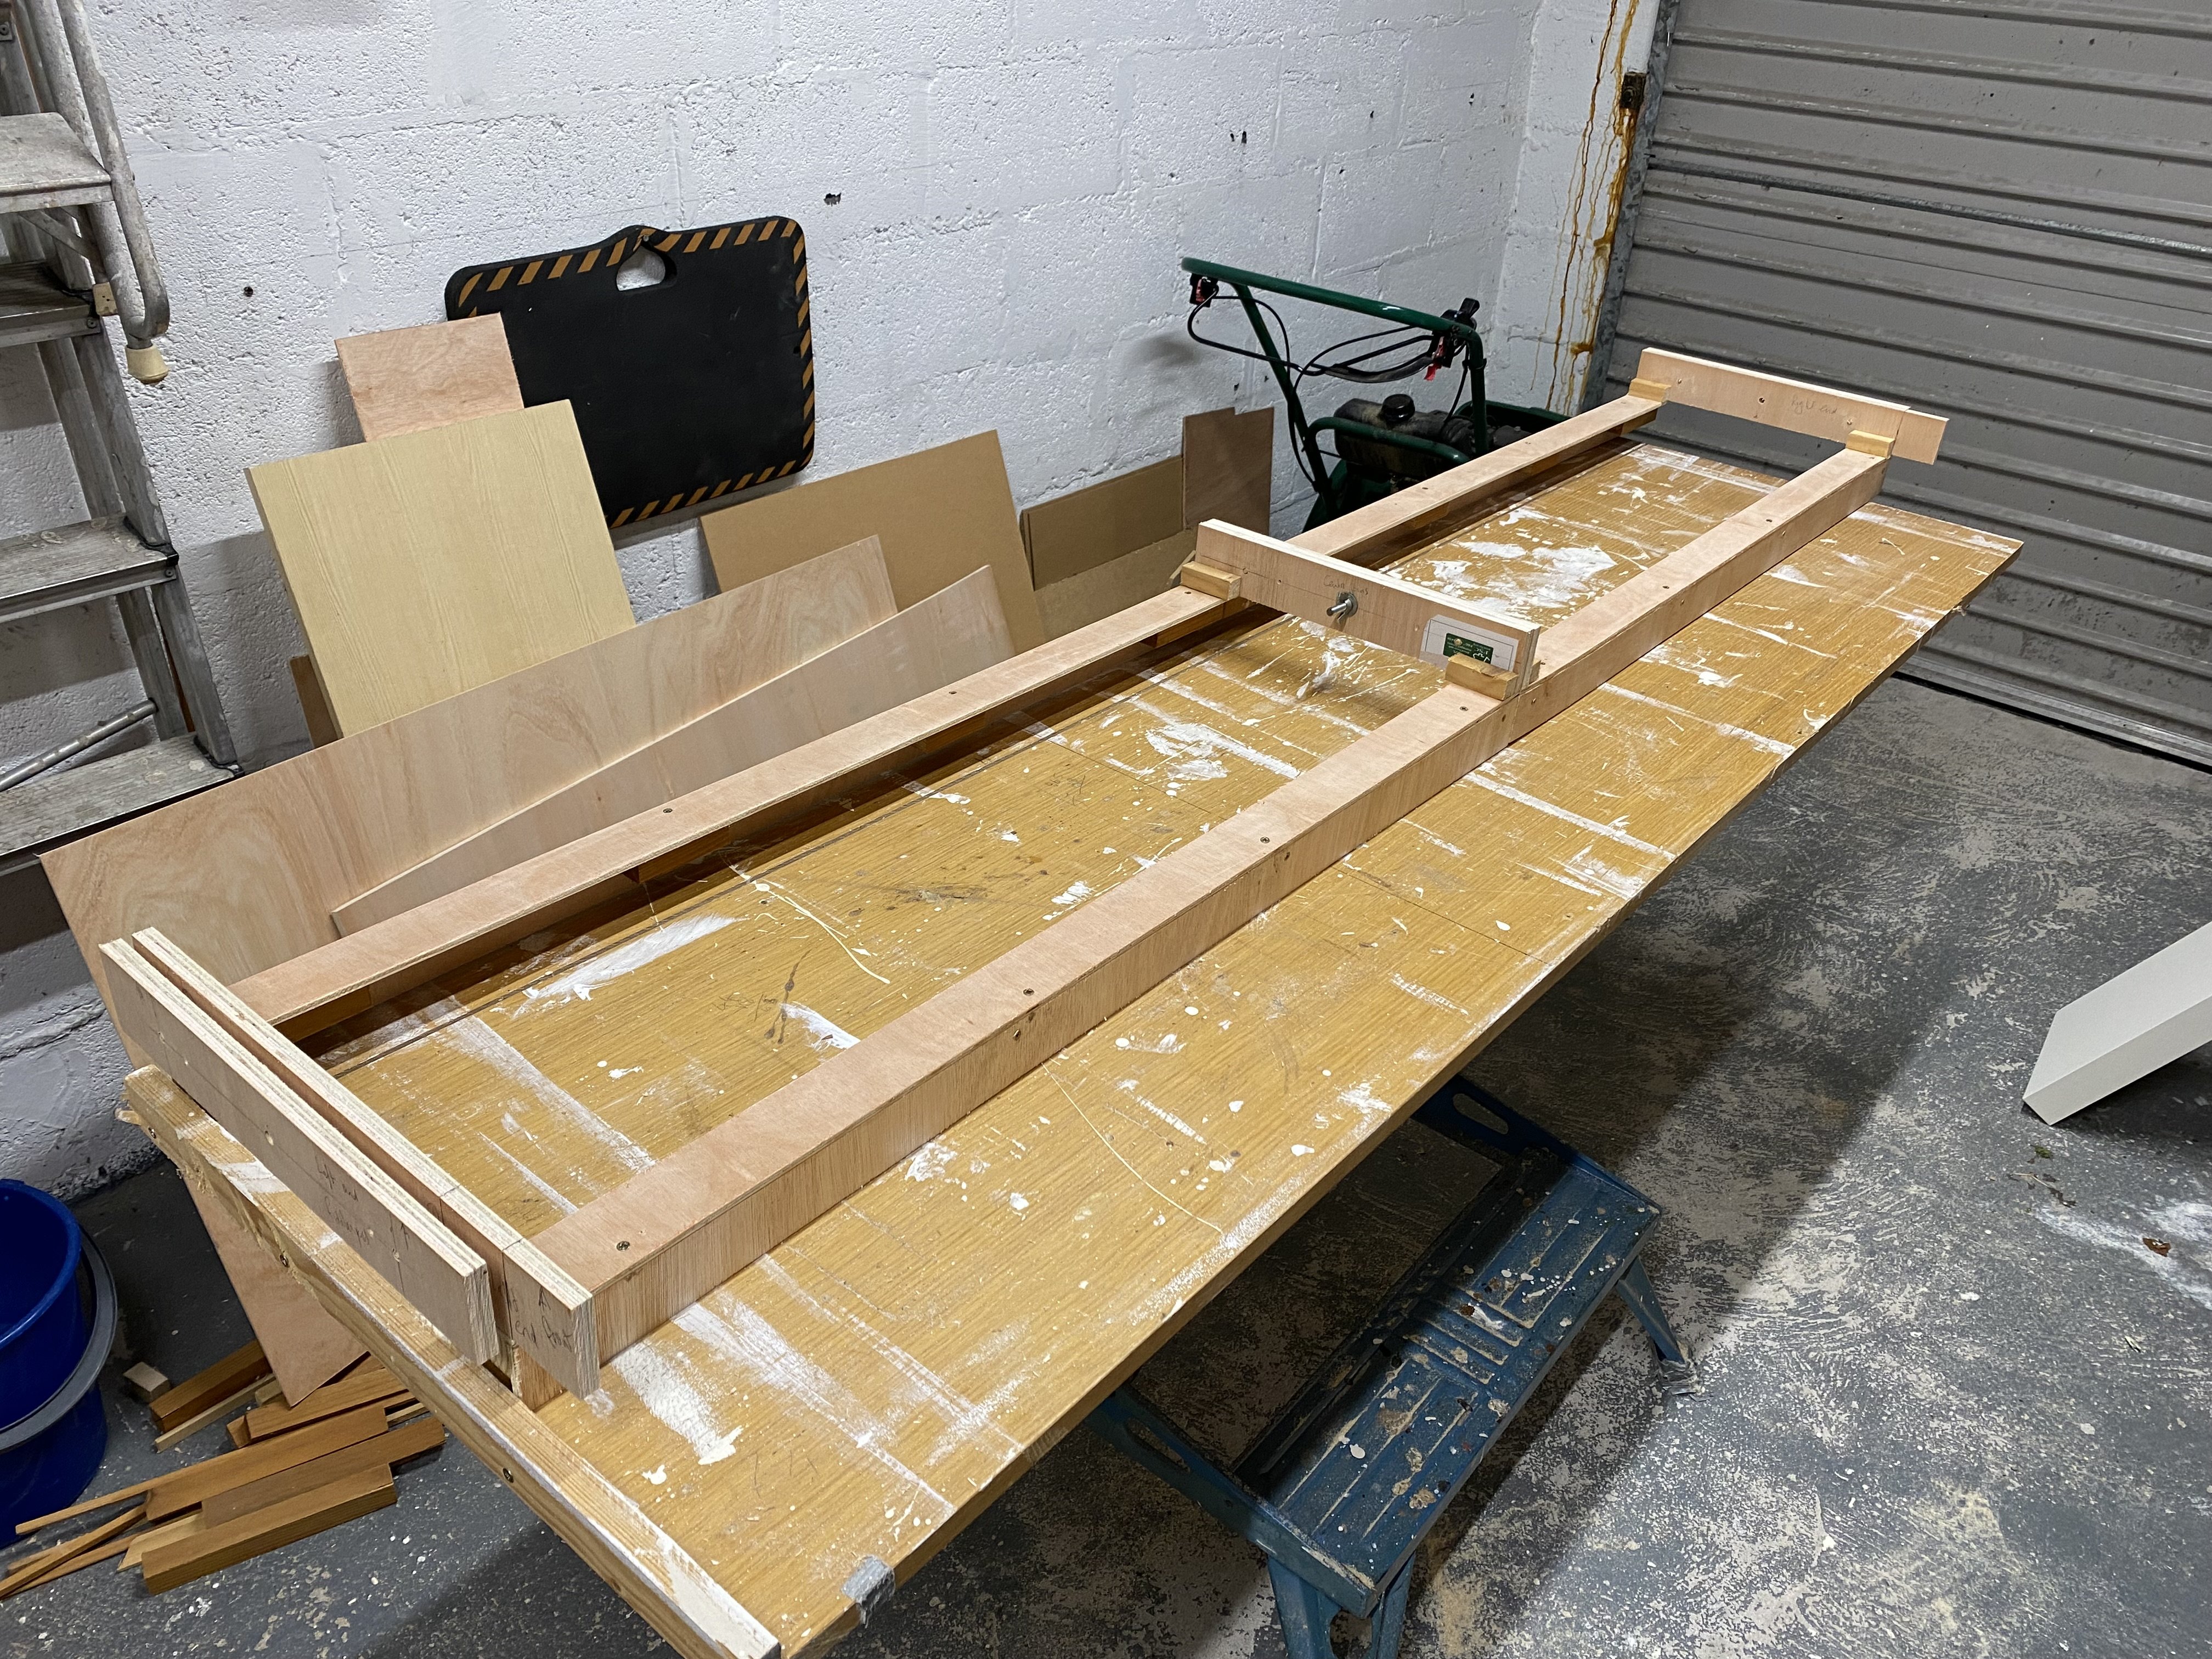
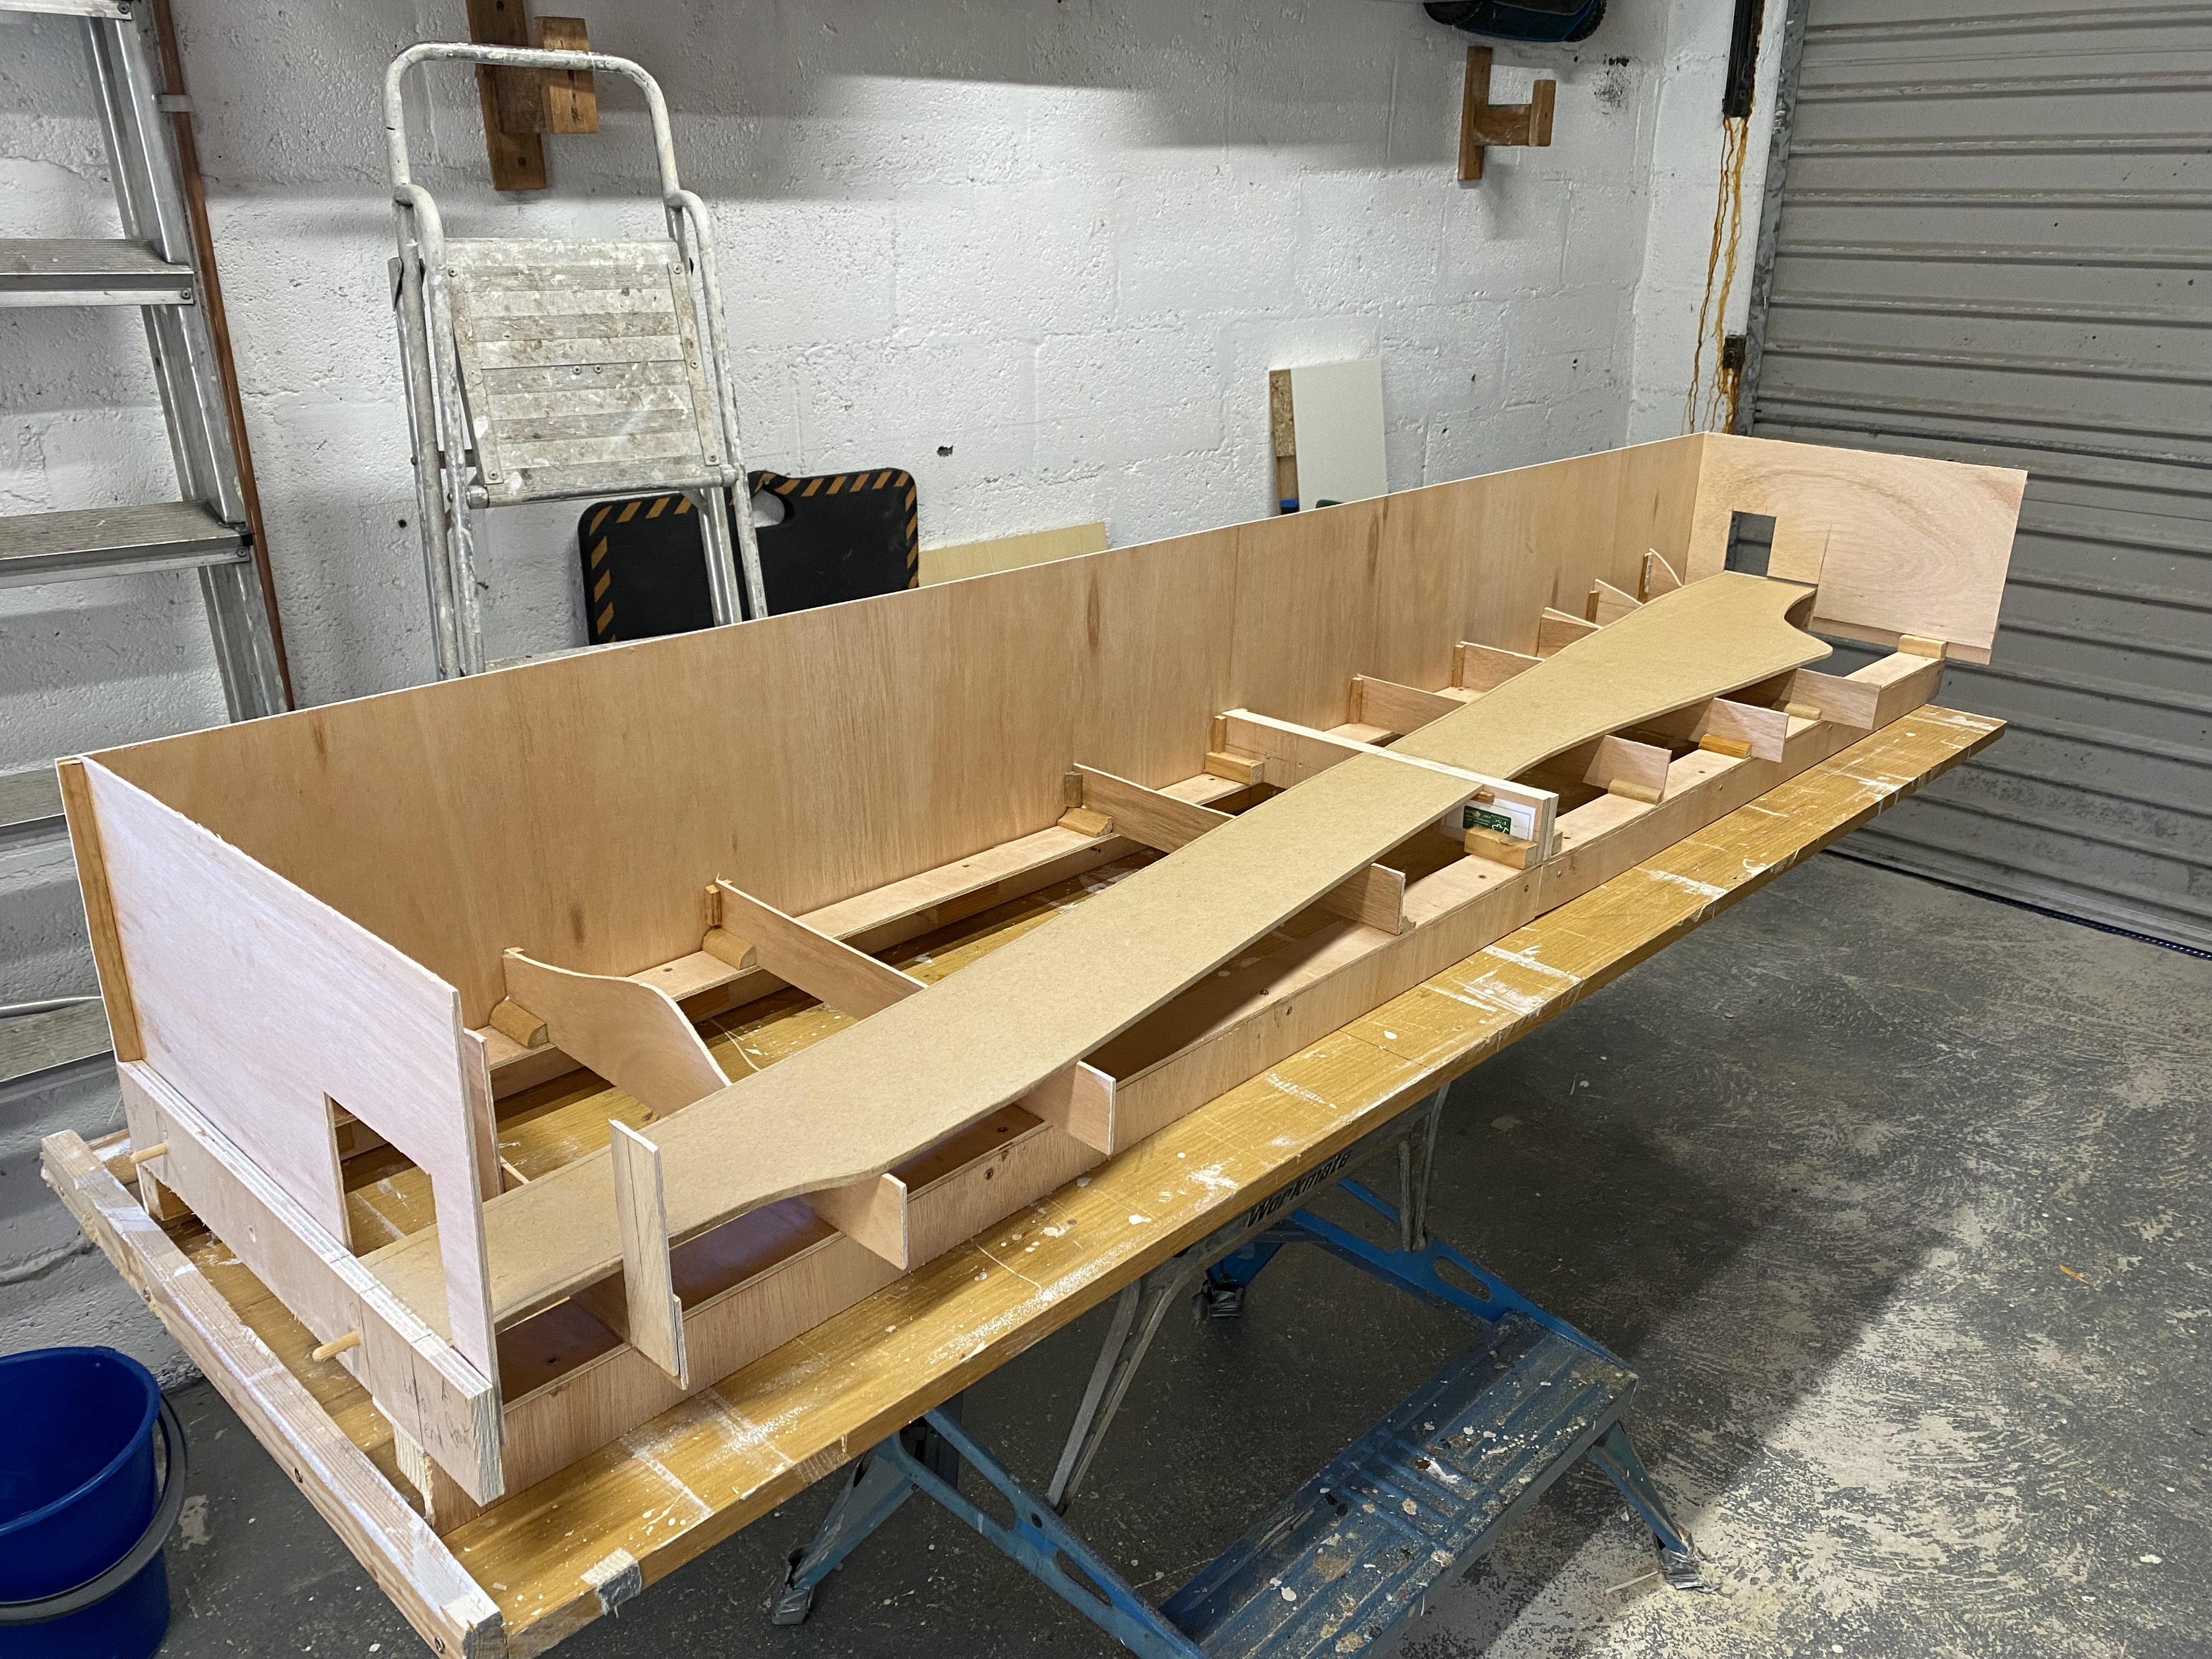
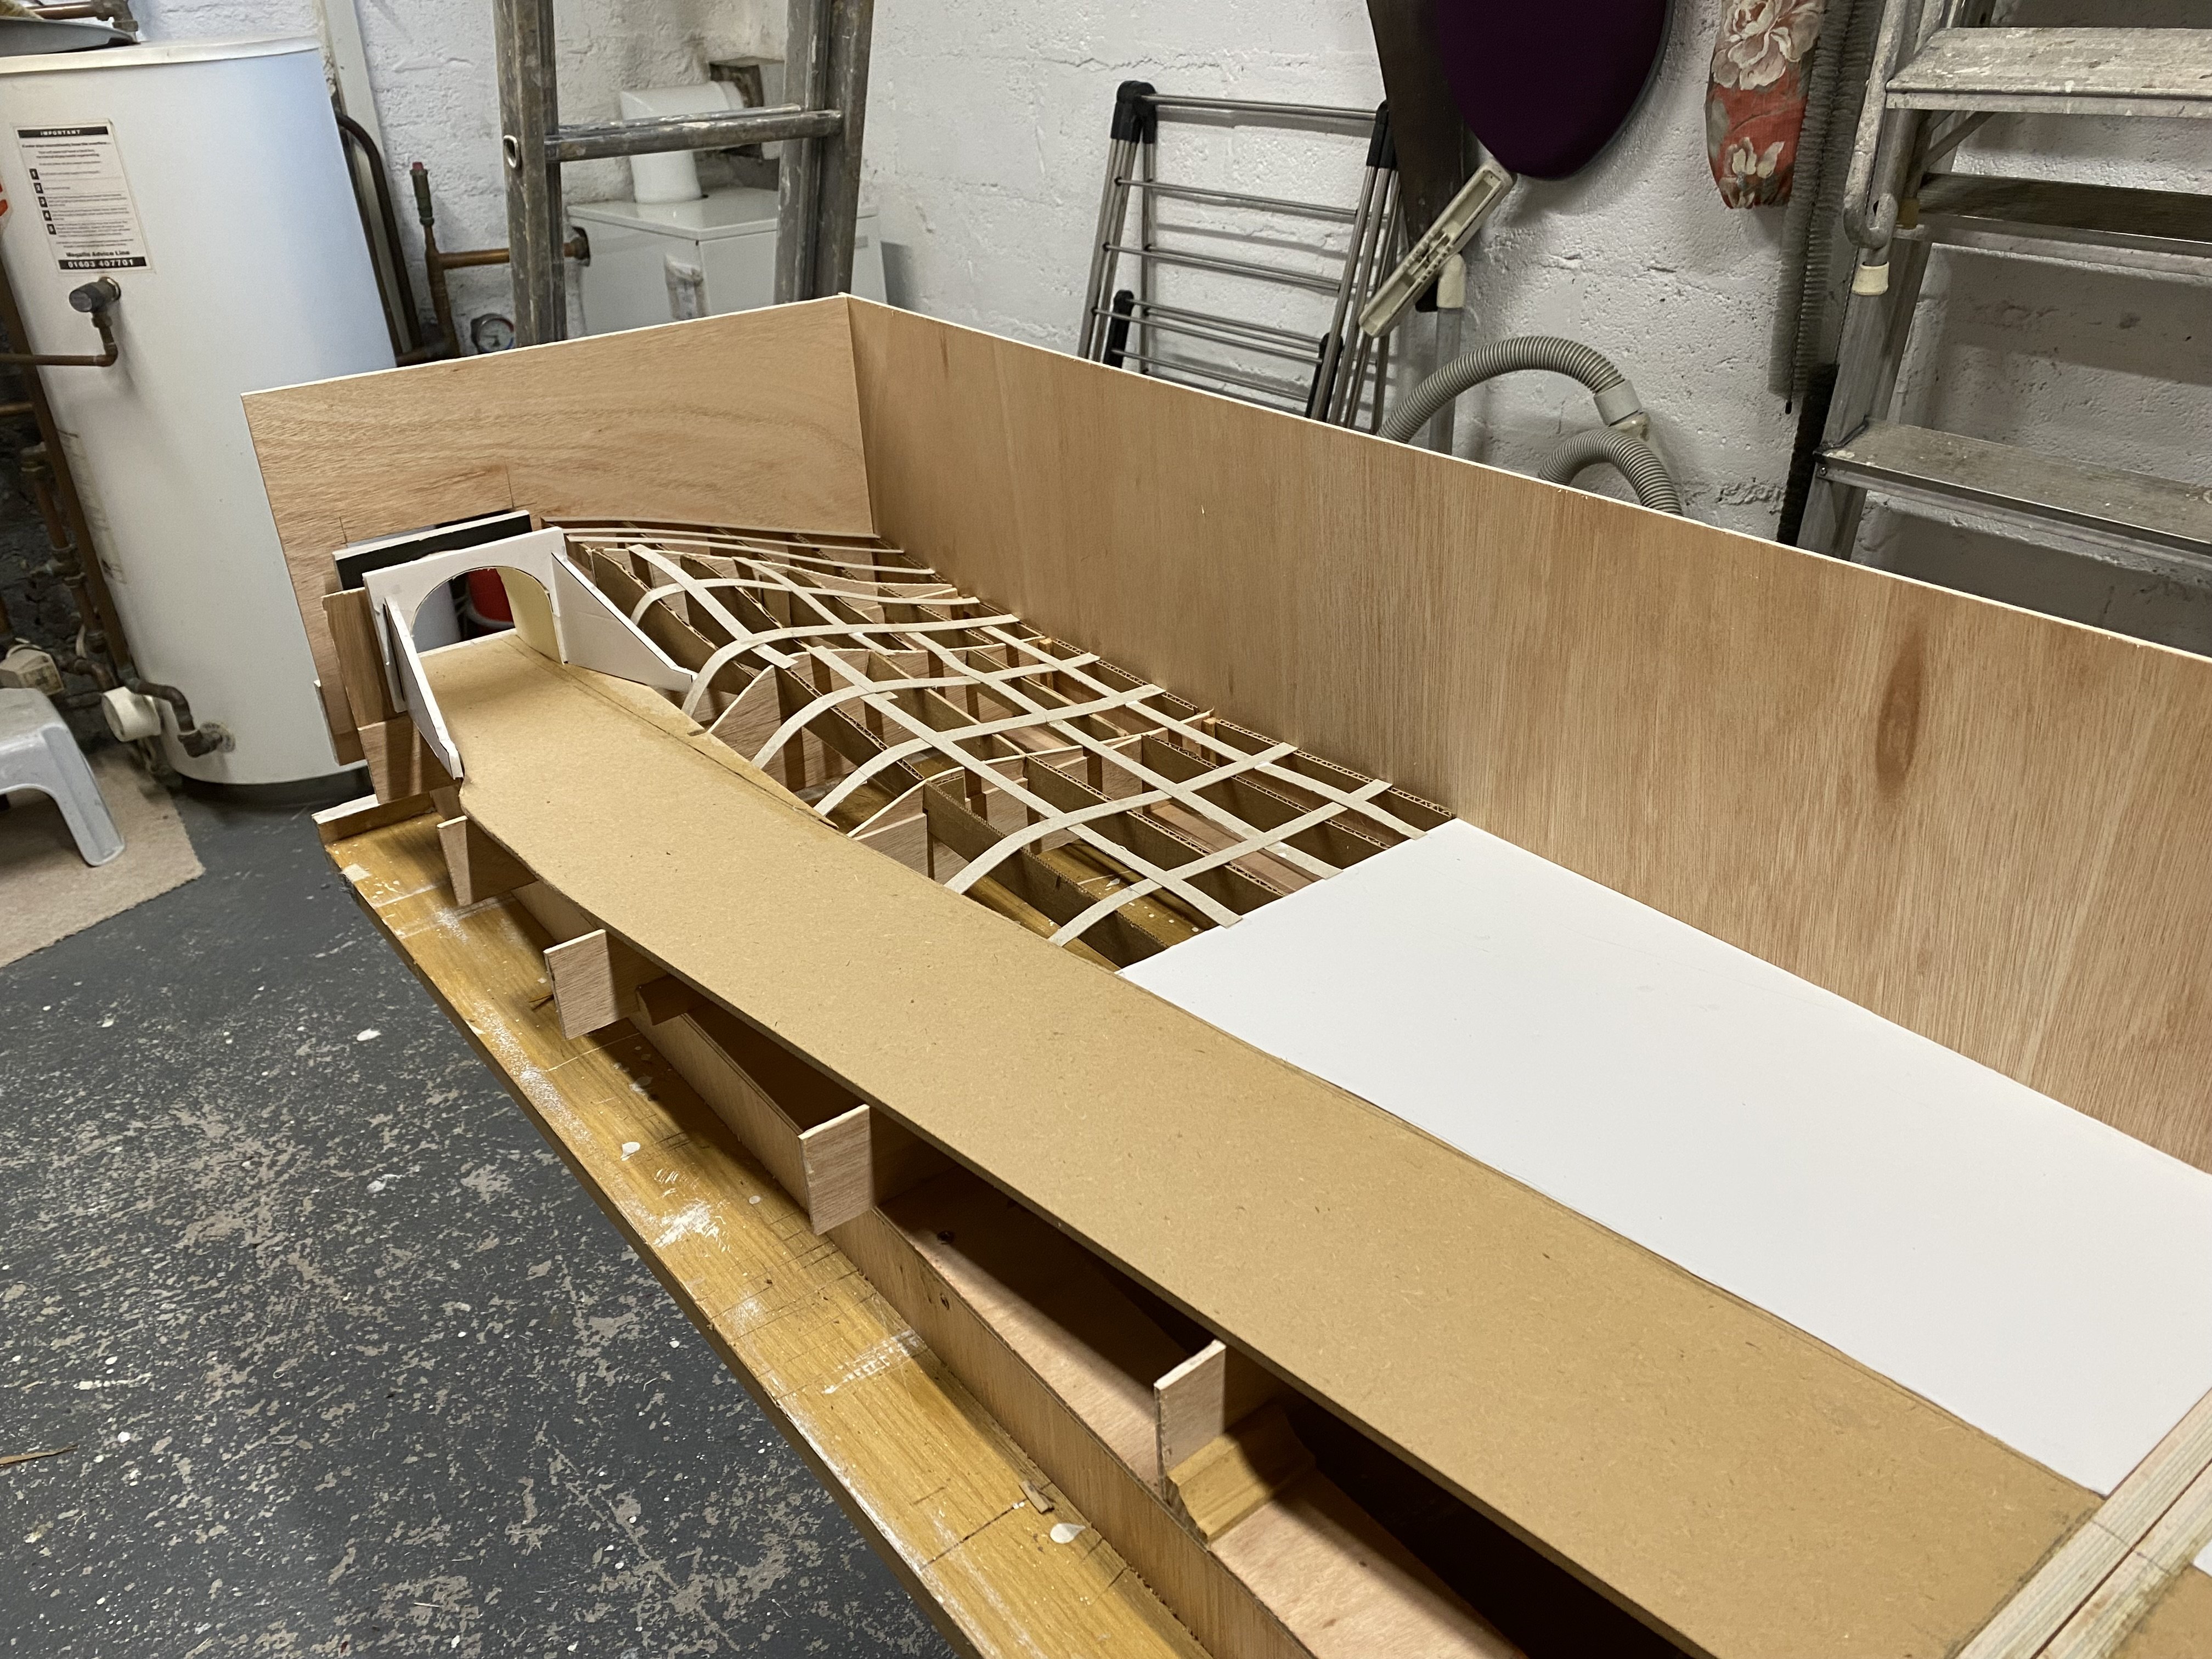
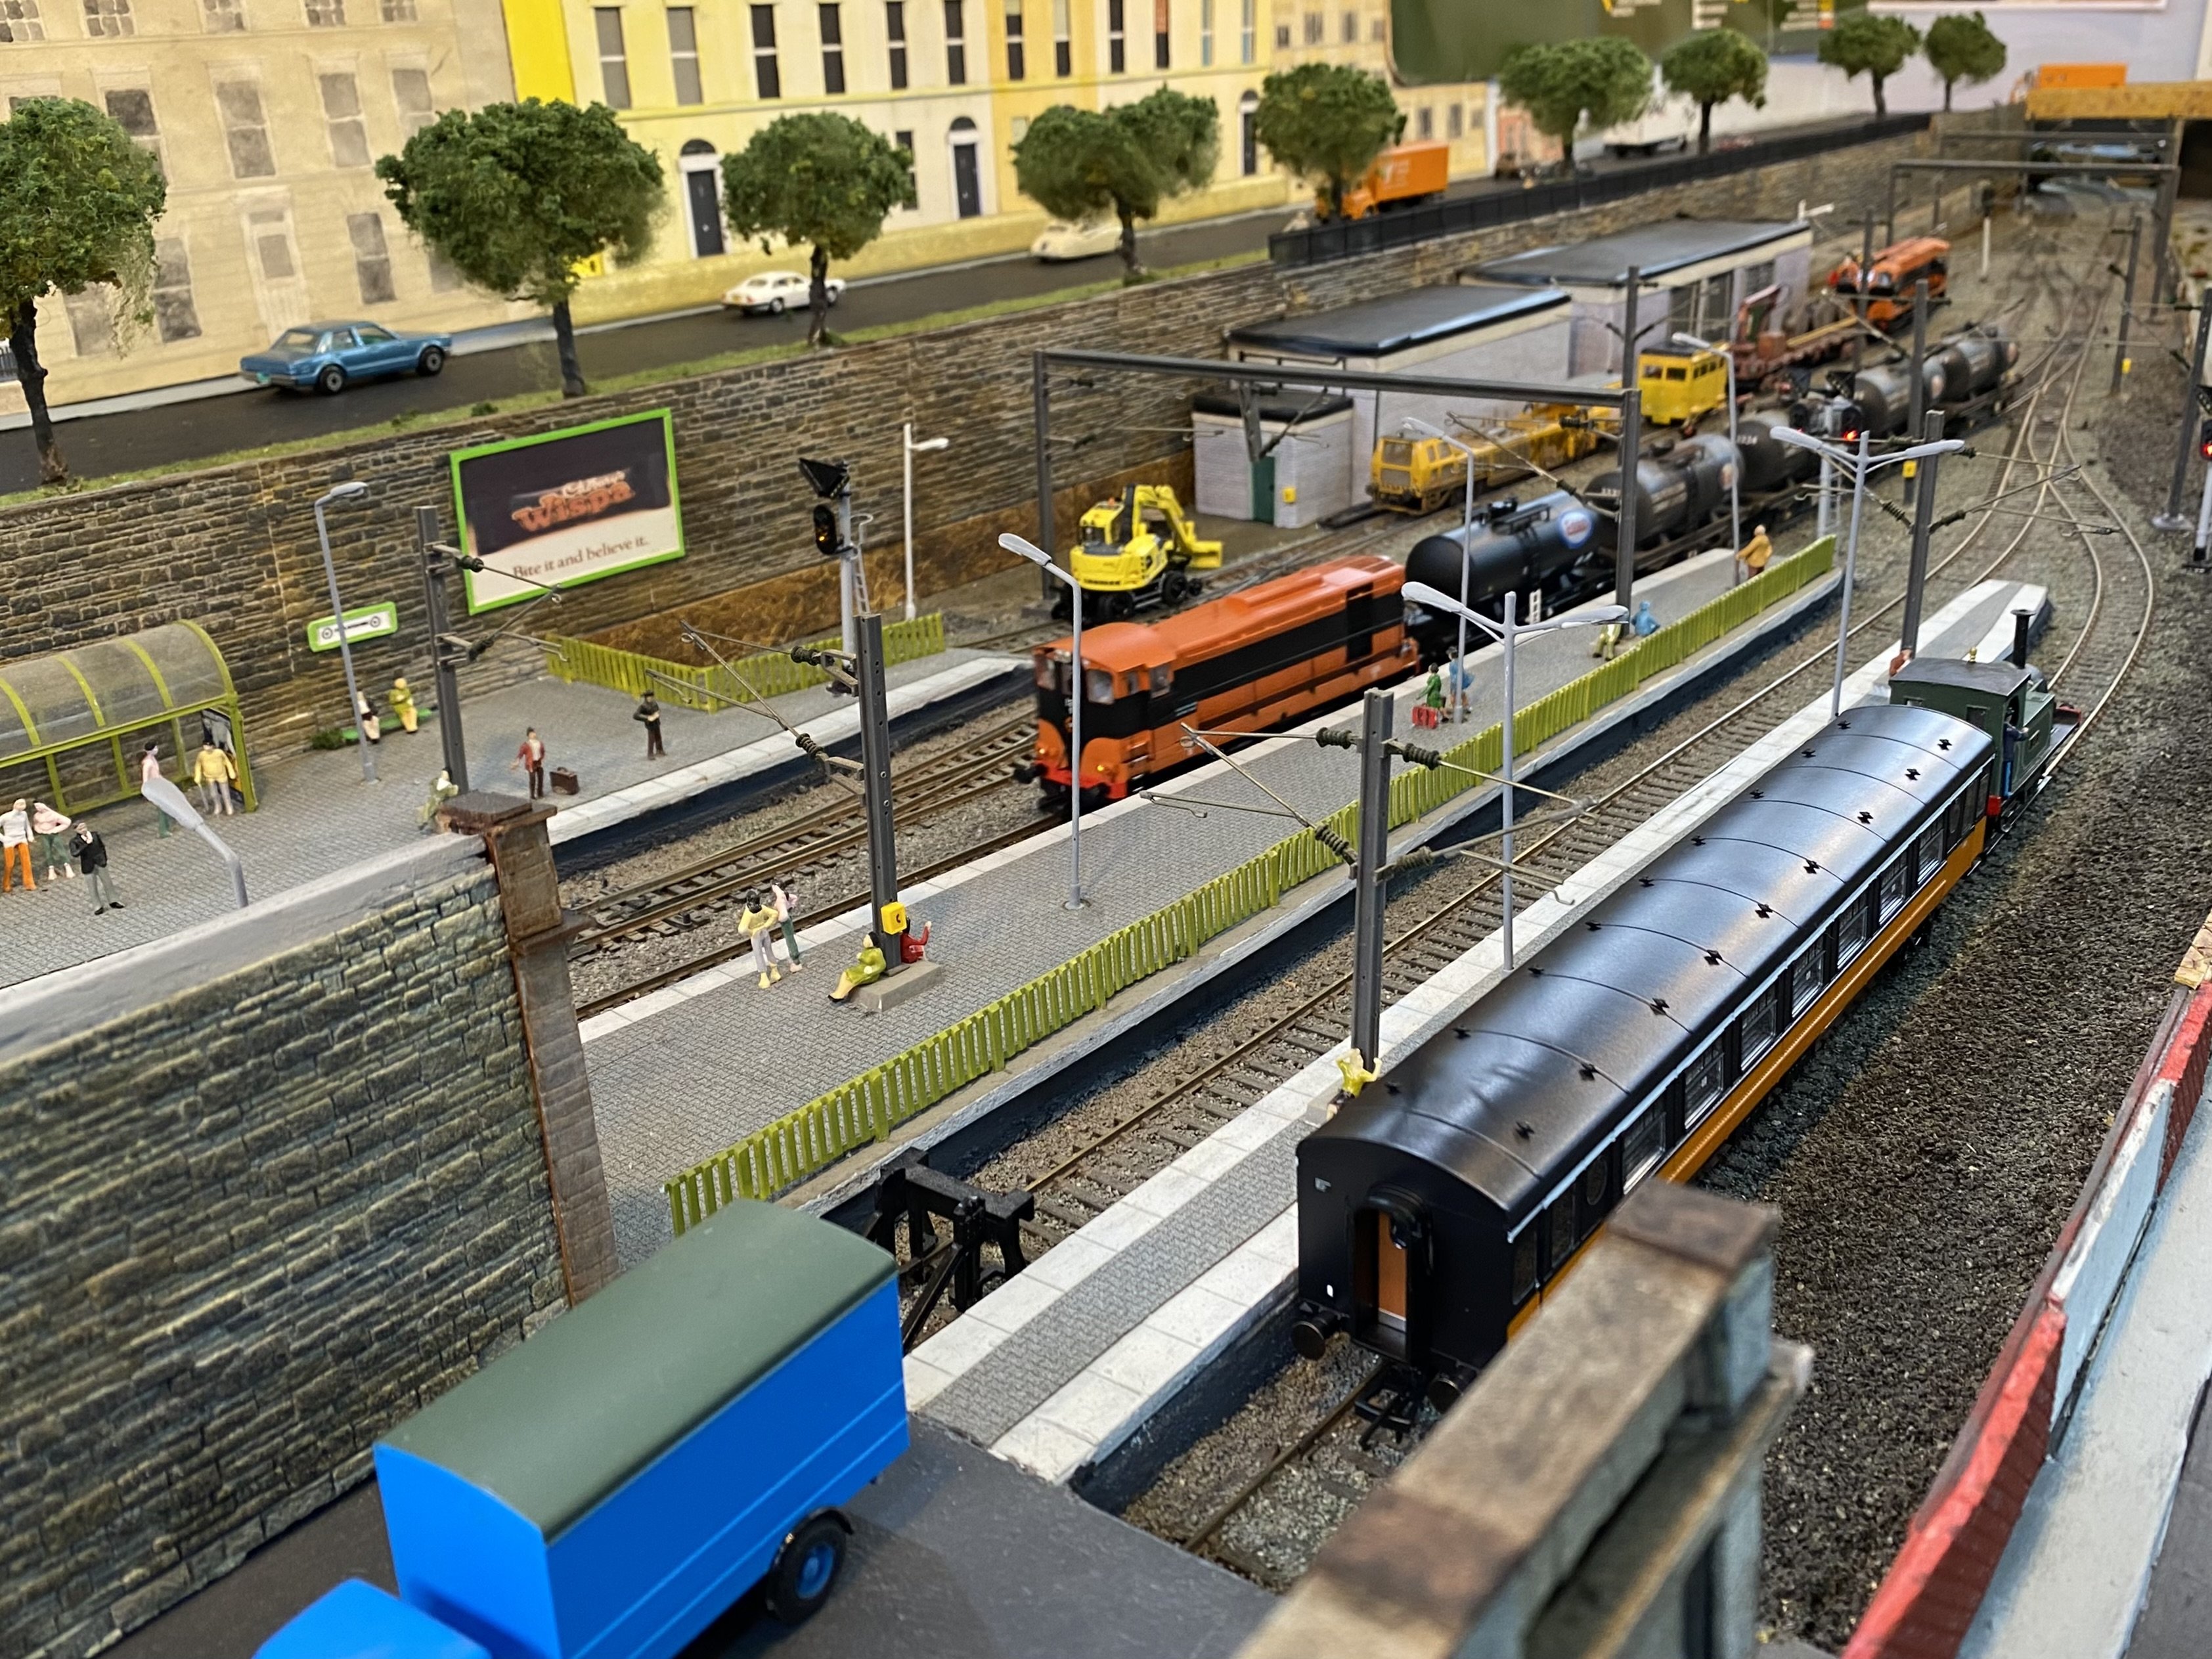
My Belfast and County Down stable has been quietly growing to the extent that it’s getting a bit crowded at Loughan Quay. I’ve been toying with the idea for a while now of building a small layout for this stuff to run on, something fairly simple that could conceivably be taken out to exhibitions. What I have in mind is a typical BCDR country through station with a goods siding. I don’t plan to model an actual location - that’s too constraining (actually too difficult if I’m honest) but places like Tullymurry, Ballygowan and Ballygrainey are the sources of inspiration. The intention would be to select features from various places and bring them together in one layout. Here’s a rough sketch of the likely track plan. Templot it ain’t but it’s fairly simple. I wanted the scenic area to be a single board but the minimum length needed for the track plan ended up 15 cm too long to fit in the car so it’s now two boards and that being the case, I’ve taken the opportunity to stretch it out to 2 metres. I’ve made a start on the boards, aiming to make them as light as possible, using plywood in various thicknesses (3.6mm, 5.5mm & 12mm) and MDF for the track bed, all largely assembled with wood glue. The strength of the design lies in the twin longitudinal L-beams on which everything is mounted. As far as I can gather, this approach to construction is fairly common but it’s the first time I’ve tried it. The end product is probably lighter than a traditional flat top with whitewood framing and it’s also considerably more rigid. We’ll see how well it stands up to handling. Landscape profiling from cardboard and cereal packet. I've parked work on the boards now to concentrate on some of the building and structures. I'm still trying to get an overview of how this thing will look and whether it will work. More soon Alan
- 121 replies
-
- 24
-
-
-

MRSI Dublin Show 2024 - All New Venue - All in One Hall
Tullygrainey replied to Blaine's topic in What's On?
-
Fine job David. You’re right about the weathering and No92 looks convincingly work-worn.
-
Sticking with 4mm but focusing on the BCDR works too!
-
Nice one Patrick. You did well to get onto the first train. Thanks for the pics of the occasion. Some of us trailed in a bit later
-
Welcome back J-Mo
-
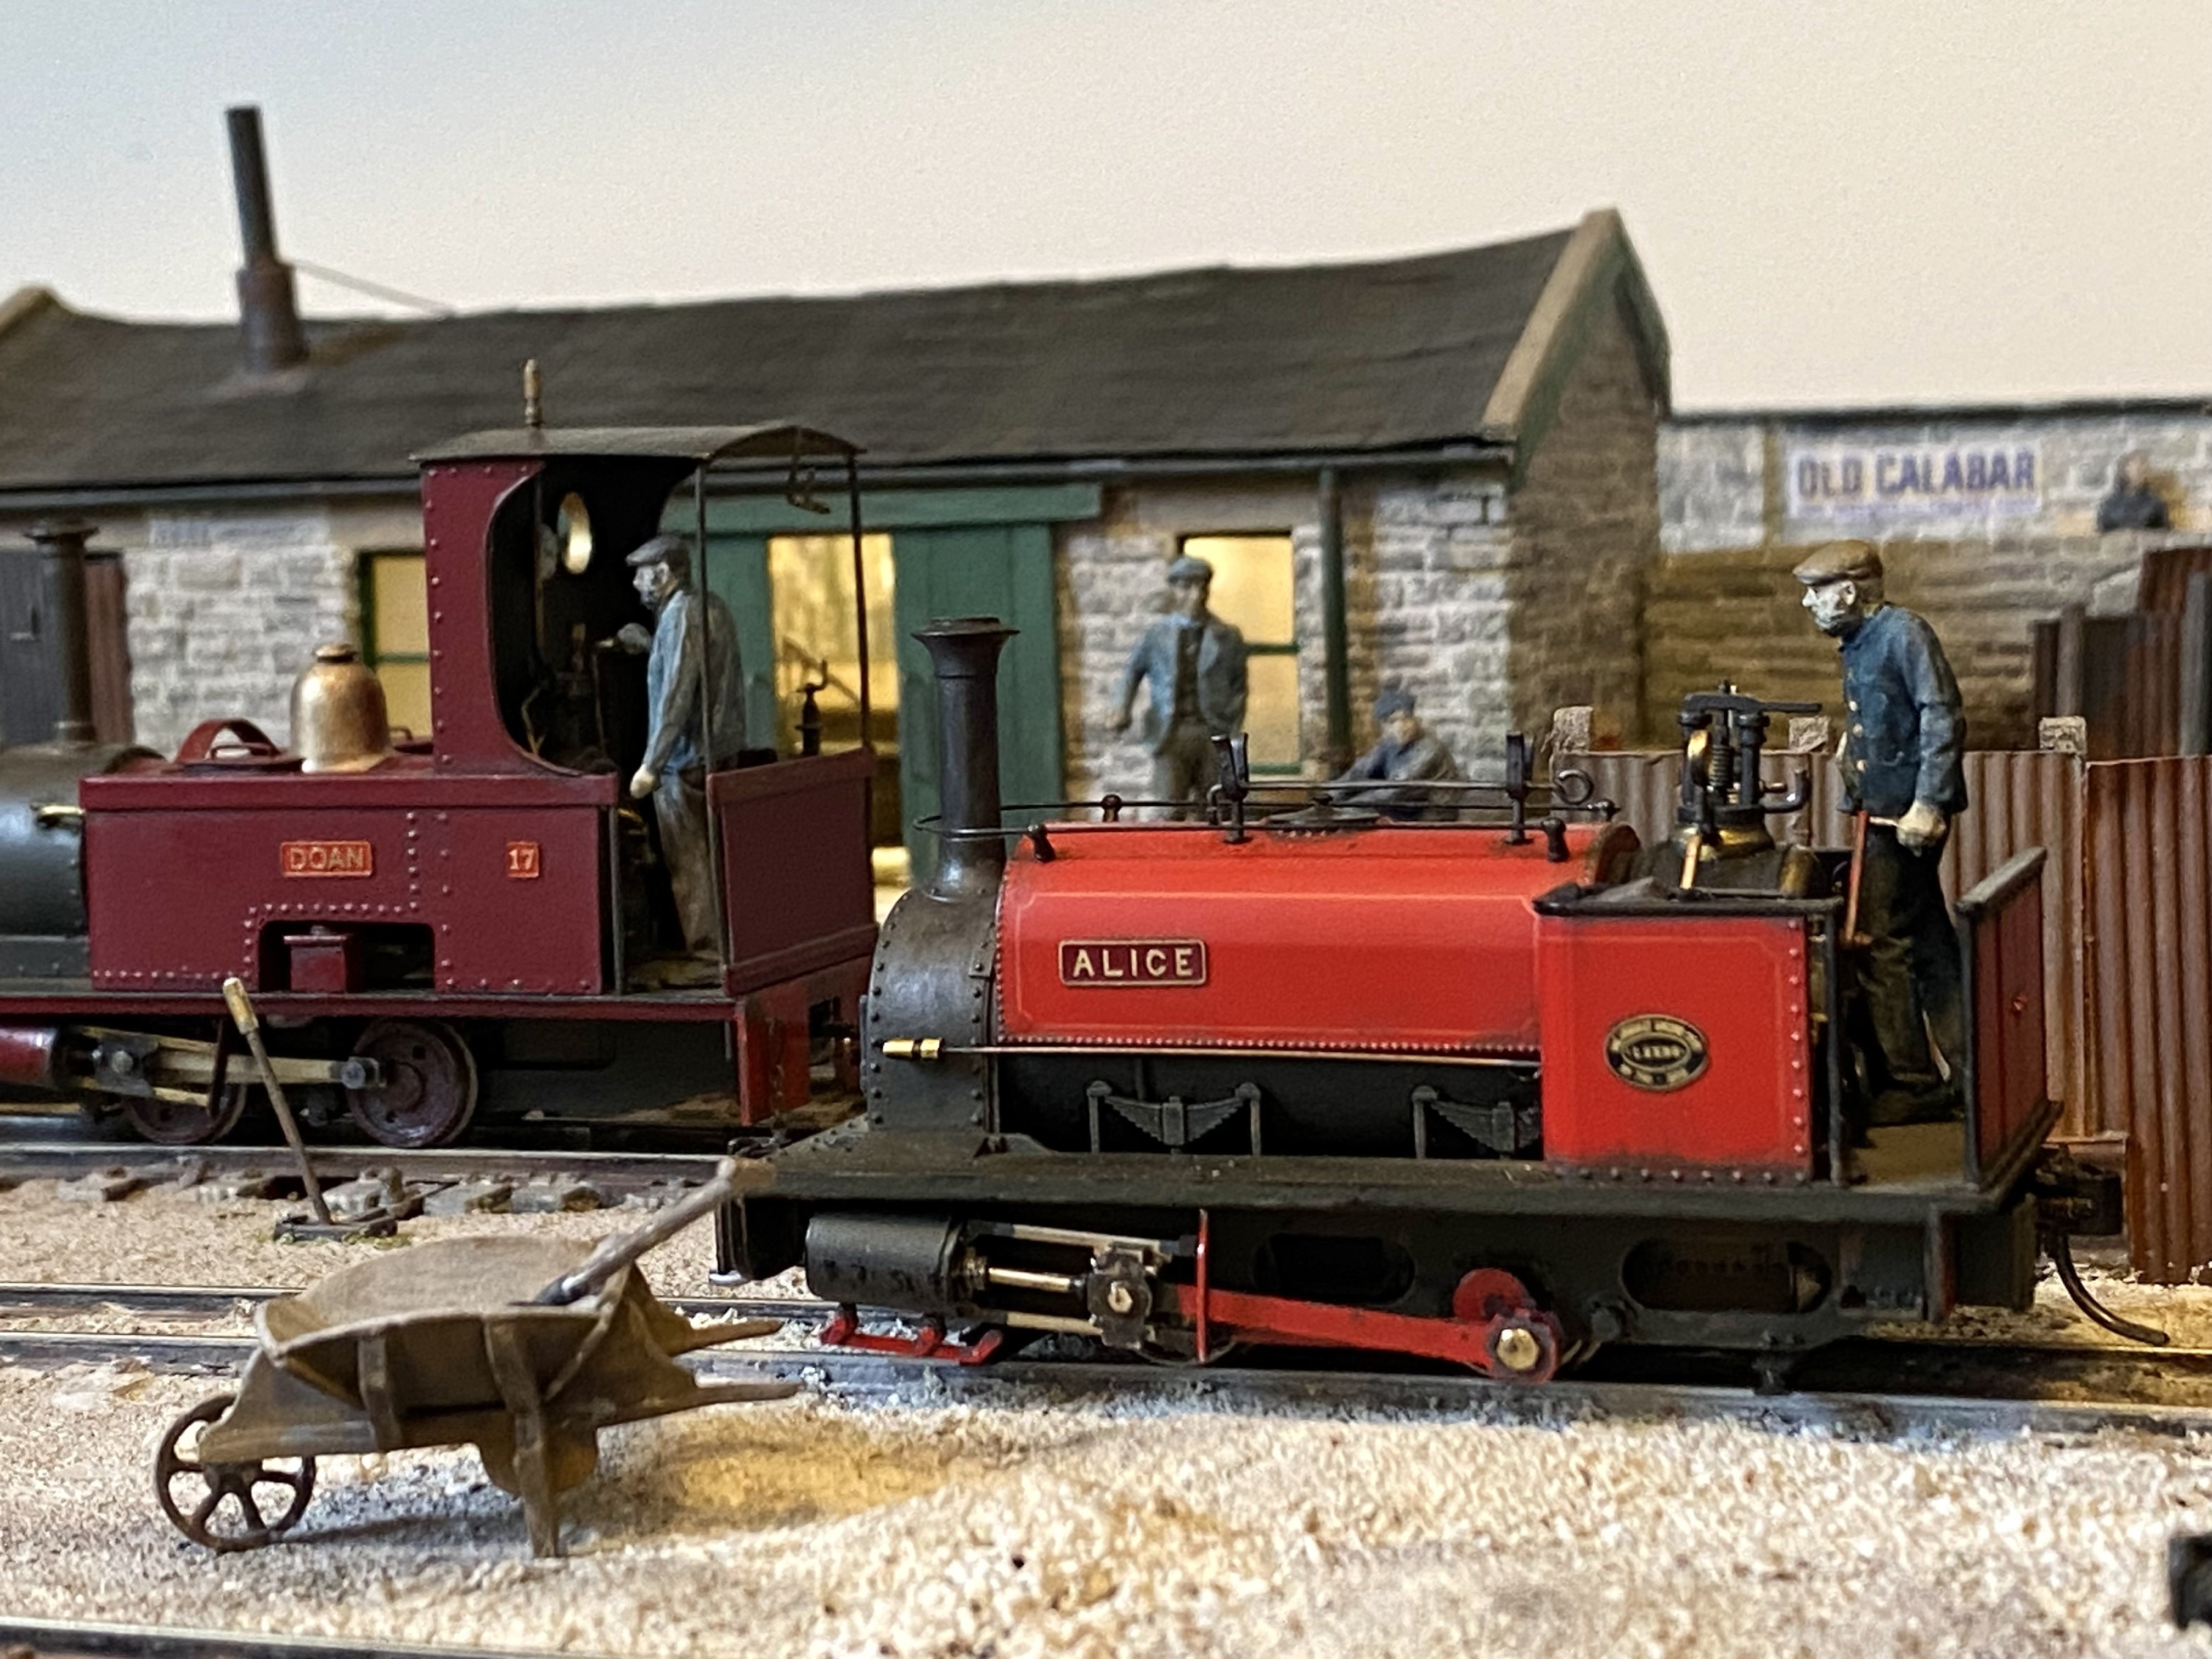
Hi Gerry and Jenna, Many thanks for this link to Bala Lake and Alice's history. I knew a little bit about her story but this was a fascinating read. What a survivor! And what a tale of determination and dedication! Alice is the only loco with sound at the Stone Yard. So far It was a pleasure to talk to you both at Enniskillen. Regards, Alan
-
The Stone Yard had an outing to Fermanagh for the Erne Model Railway Club's annual exhibition in Enniskillen on 21st September. Many thanks to the Erne club for a very enjoyable day and to everyone for their help and hospitality over the weekend. There's been a recent addition to the loco roster at the Stone Yard. It's a little documented fact (ok, a history re-write) that Quarry Hunslett 'Alice" was hired from Dinorwic Quarry in Wales to lend a hand here for a while. Pete the Peckett Pilot's twin brother Harry handles the Hunslett and heartily enjoys it. IMG_0907.MOV The model is one of Bachmann's recently launched 'NG7' range of narrow gauge locomotives, modelled at 7mm/ft and designed to run on 16.5mm gauge track.
-
At last, reward for all your effort David. That is a brilliant model. Totally convincing rendition of a hard working engine. The weathering is perfectly judged and thank you for the details of how you did it.
-
Plenty of sound advice here and I would agree with all of it. It's very easy to get disheartened when you can't see an obvious way forward and I would say we've all had that feeling at some stage, probably more than once. It's an inescapable part of practising a creative hobby. Don't despair. Something will break the log jam and the feeling will pass. You've probably acquired more skills than you realise along the way so it will come good. Also, as others have said, don't let the lack of an overall plan for every detail of the finished product deter you. For my own part, some of my efforts have ended up very far from the original concept (which was probably flawed and over-ambitious anyway) and are all the better for it. I would say that many, if not most, layouts evolve as the work progresses. One step at a time, one element at a time. Best of luck with whatever you decide to do but don't give up.
-
From time to time, visitors from other parts pass through Loughan Quay. Most recent arrival was this SLNCR Lough Class 0-6-4T 'Lough Erne', here for some attention to her drivetrain from the fitters hereabouts. IMG_0815.MOV Model built by Kieran Lagan from an etch designed and made by Tony Ragg. Some retro-fitted hornblocks and a compensation beam have improved her tracking a bit.
-
Had the great pleasure this week of letting some of my County Down locos loose at Kirley Junction, Kieran Lagan's wonderful and extensive layout. They're normally constrained within Loughan Quay's 6ft by 2ft universe so it was great to see them stretch out a bit. There were a few glitches with renegade couplings and buffer lock, which is why none are pulling more than one item, but all in all they behaved themselves. If you watch closely, you'll also catch a glimpse of Kieran's Baltic tank steaming through. A very enjoyable afternoon. Thank you Kieran. BCDR at Kirley Junction.mp4
-
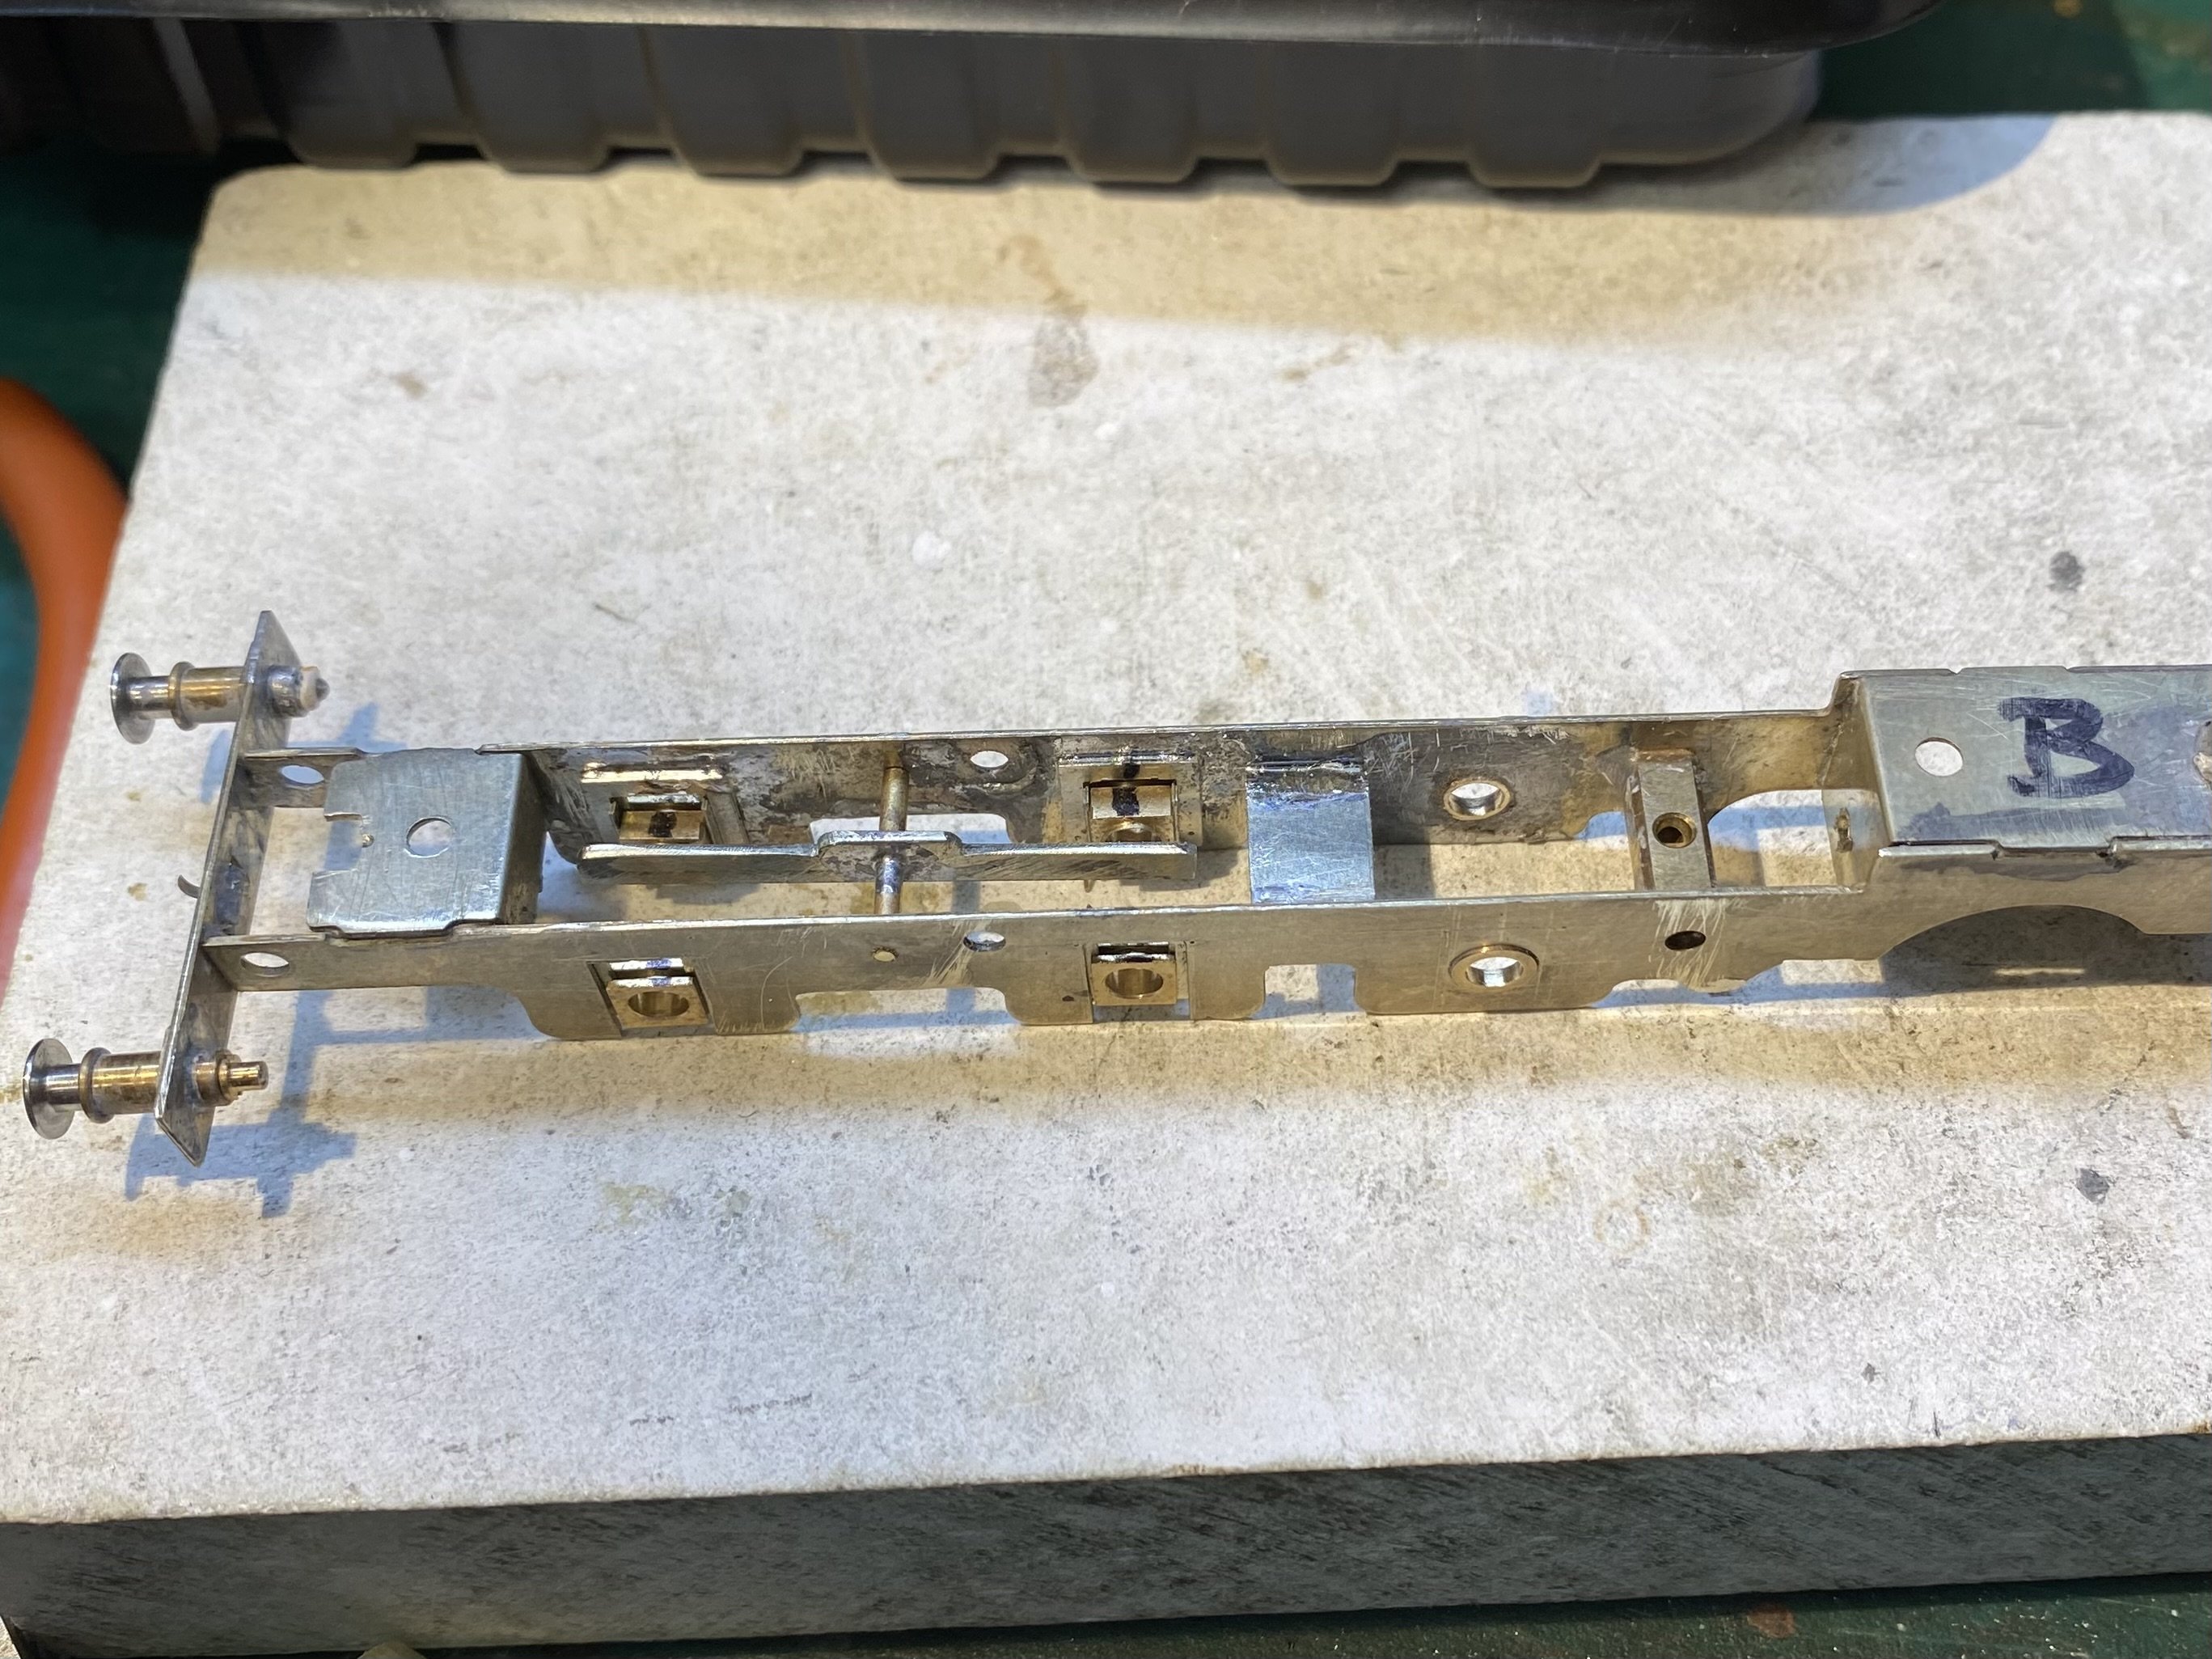
Ingenious solution David. And proof that round pins in square holes can be made to work! Excellent stuff!
-
No space for nuns?