Tullygrainey
-
Posts
957 -
Joined
-
Last visited
-
Days Won
56
Content Type
Profiles
Forums
Events
Gallery
Everything posted by Tullygrainey
-
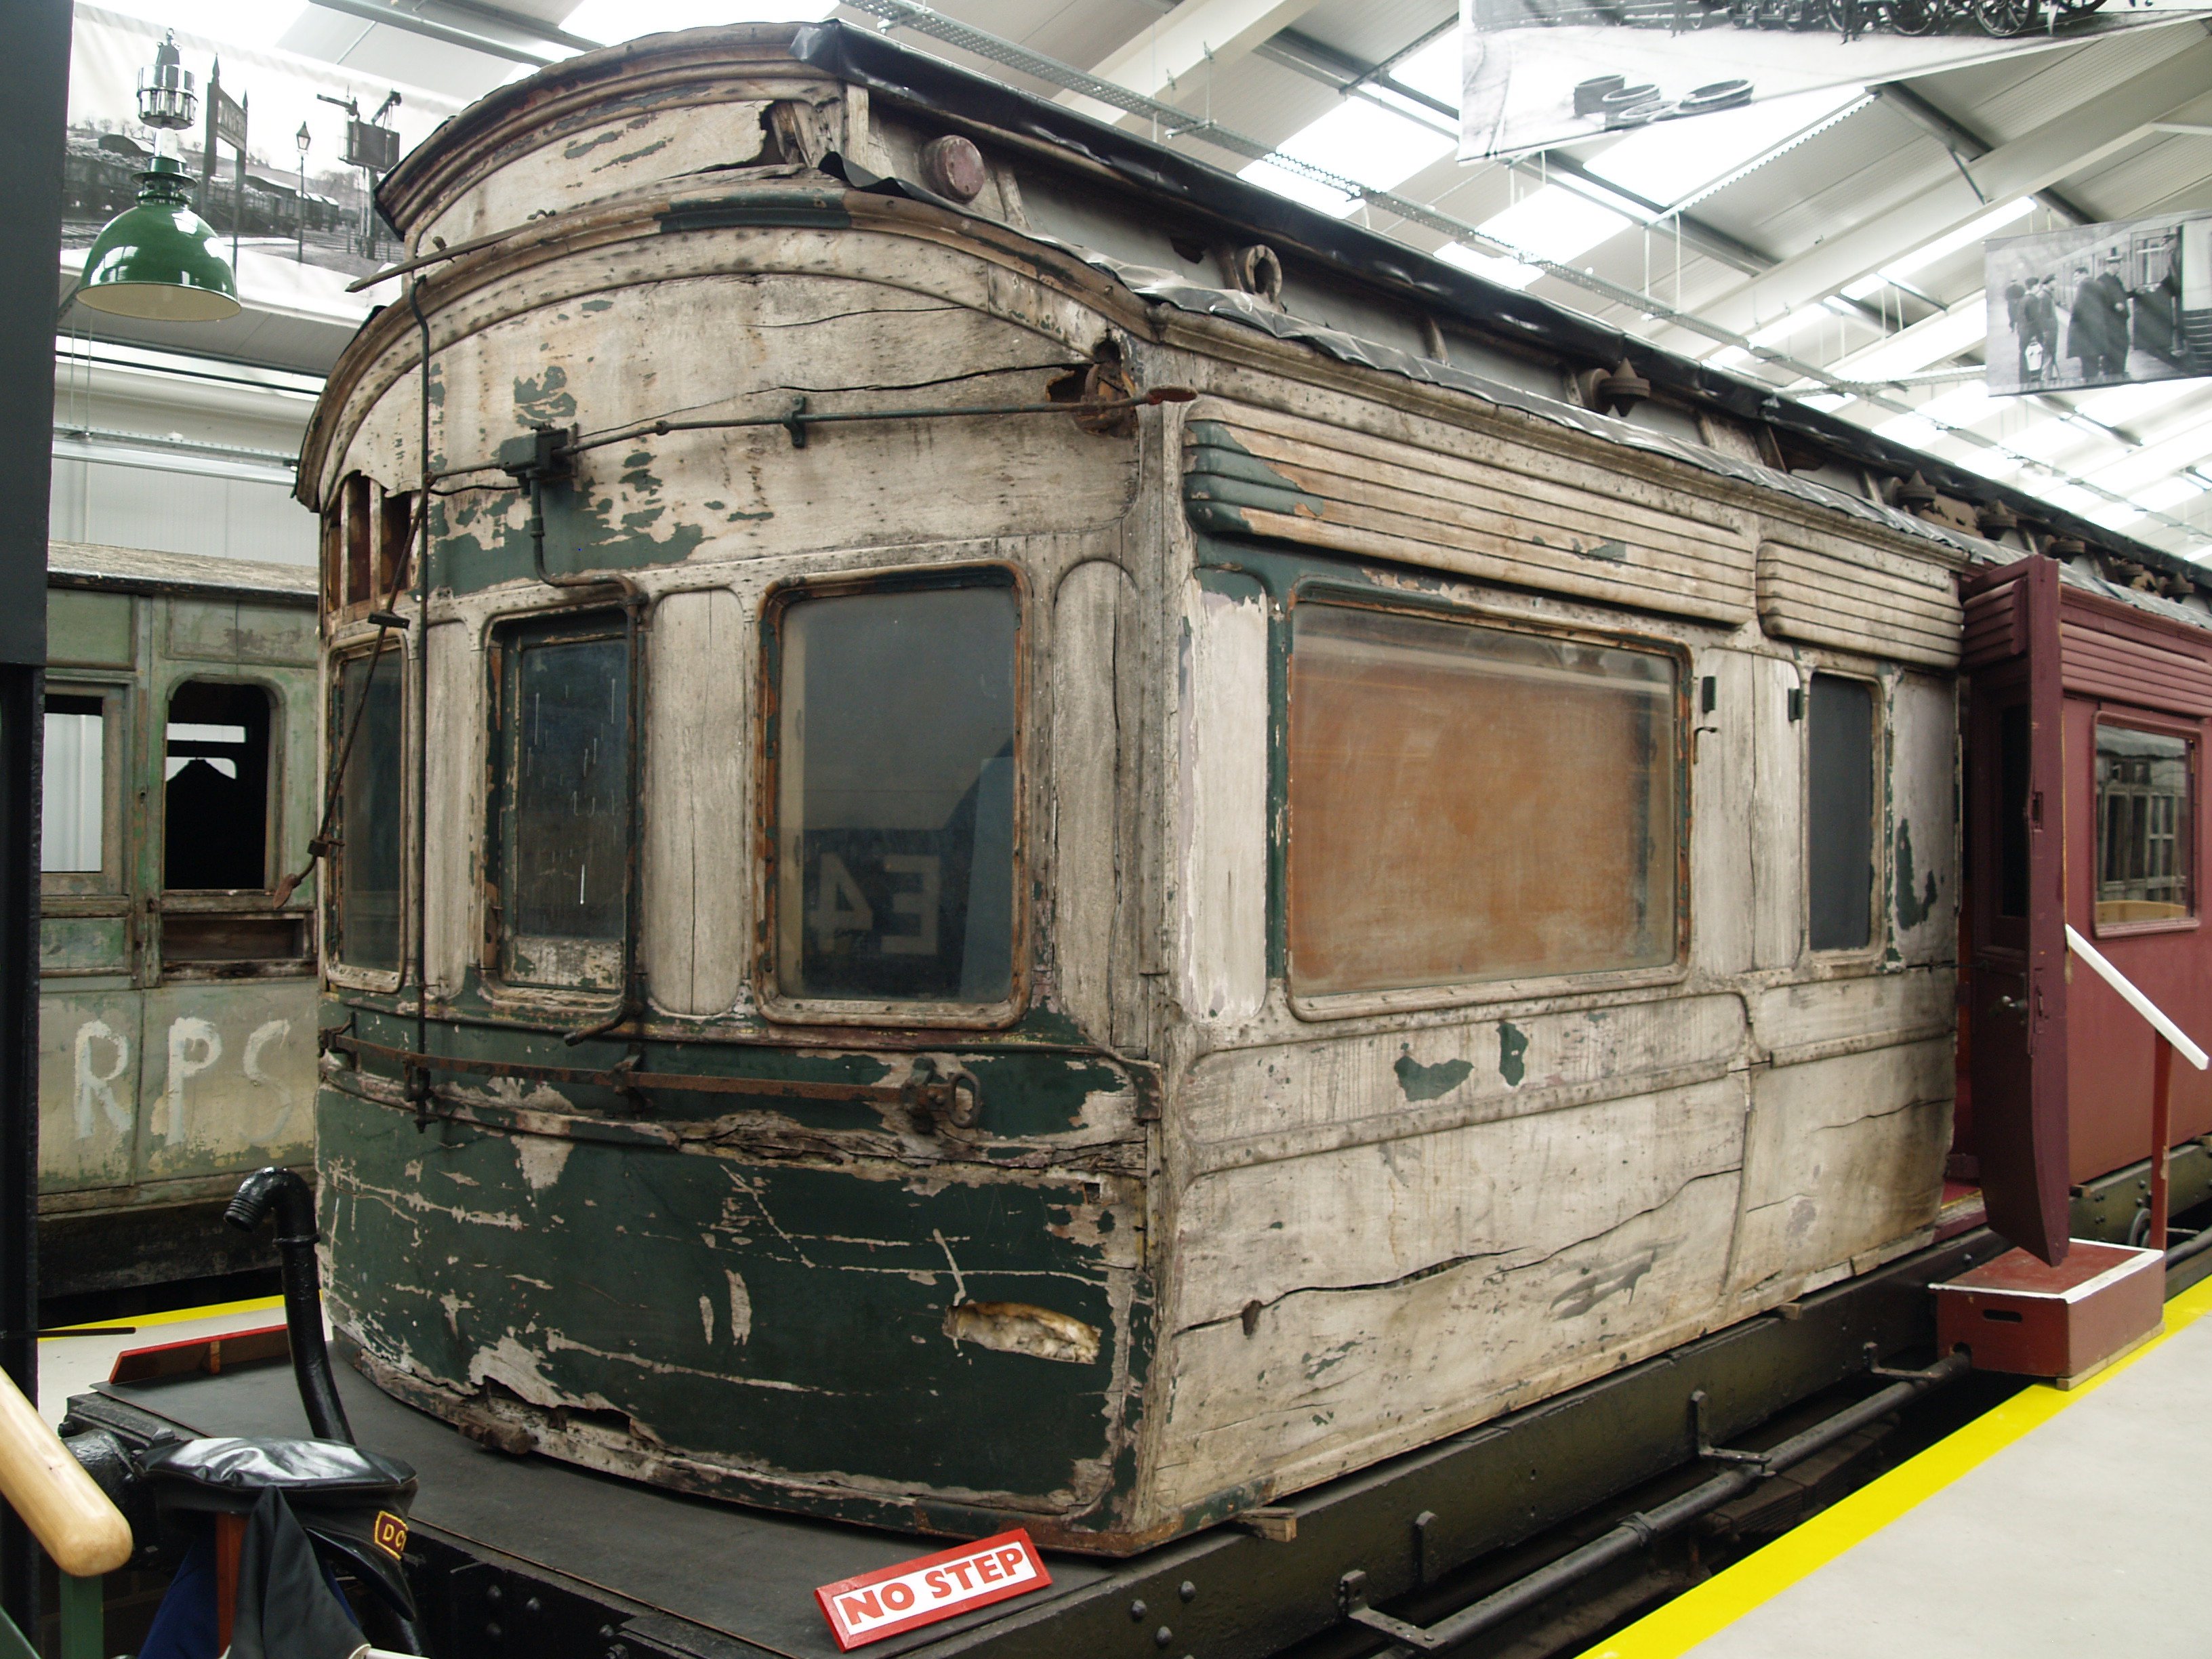
That is truly magnificent. Thanks for sharing it Leslie.
-
That might explain how it ended up in a back garden in Holywood. I gather the company also ran steamship services across the Irish Sea.
-
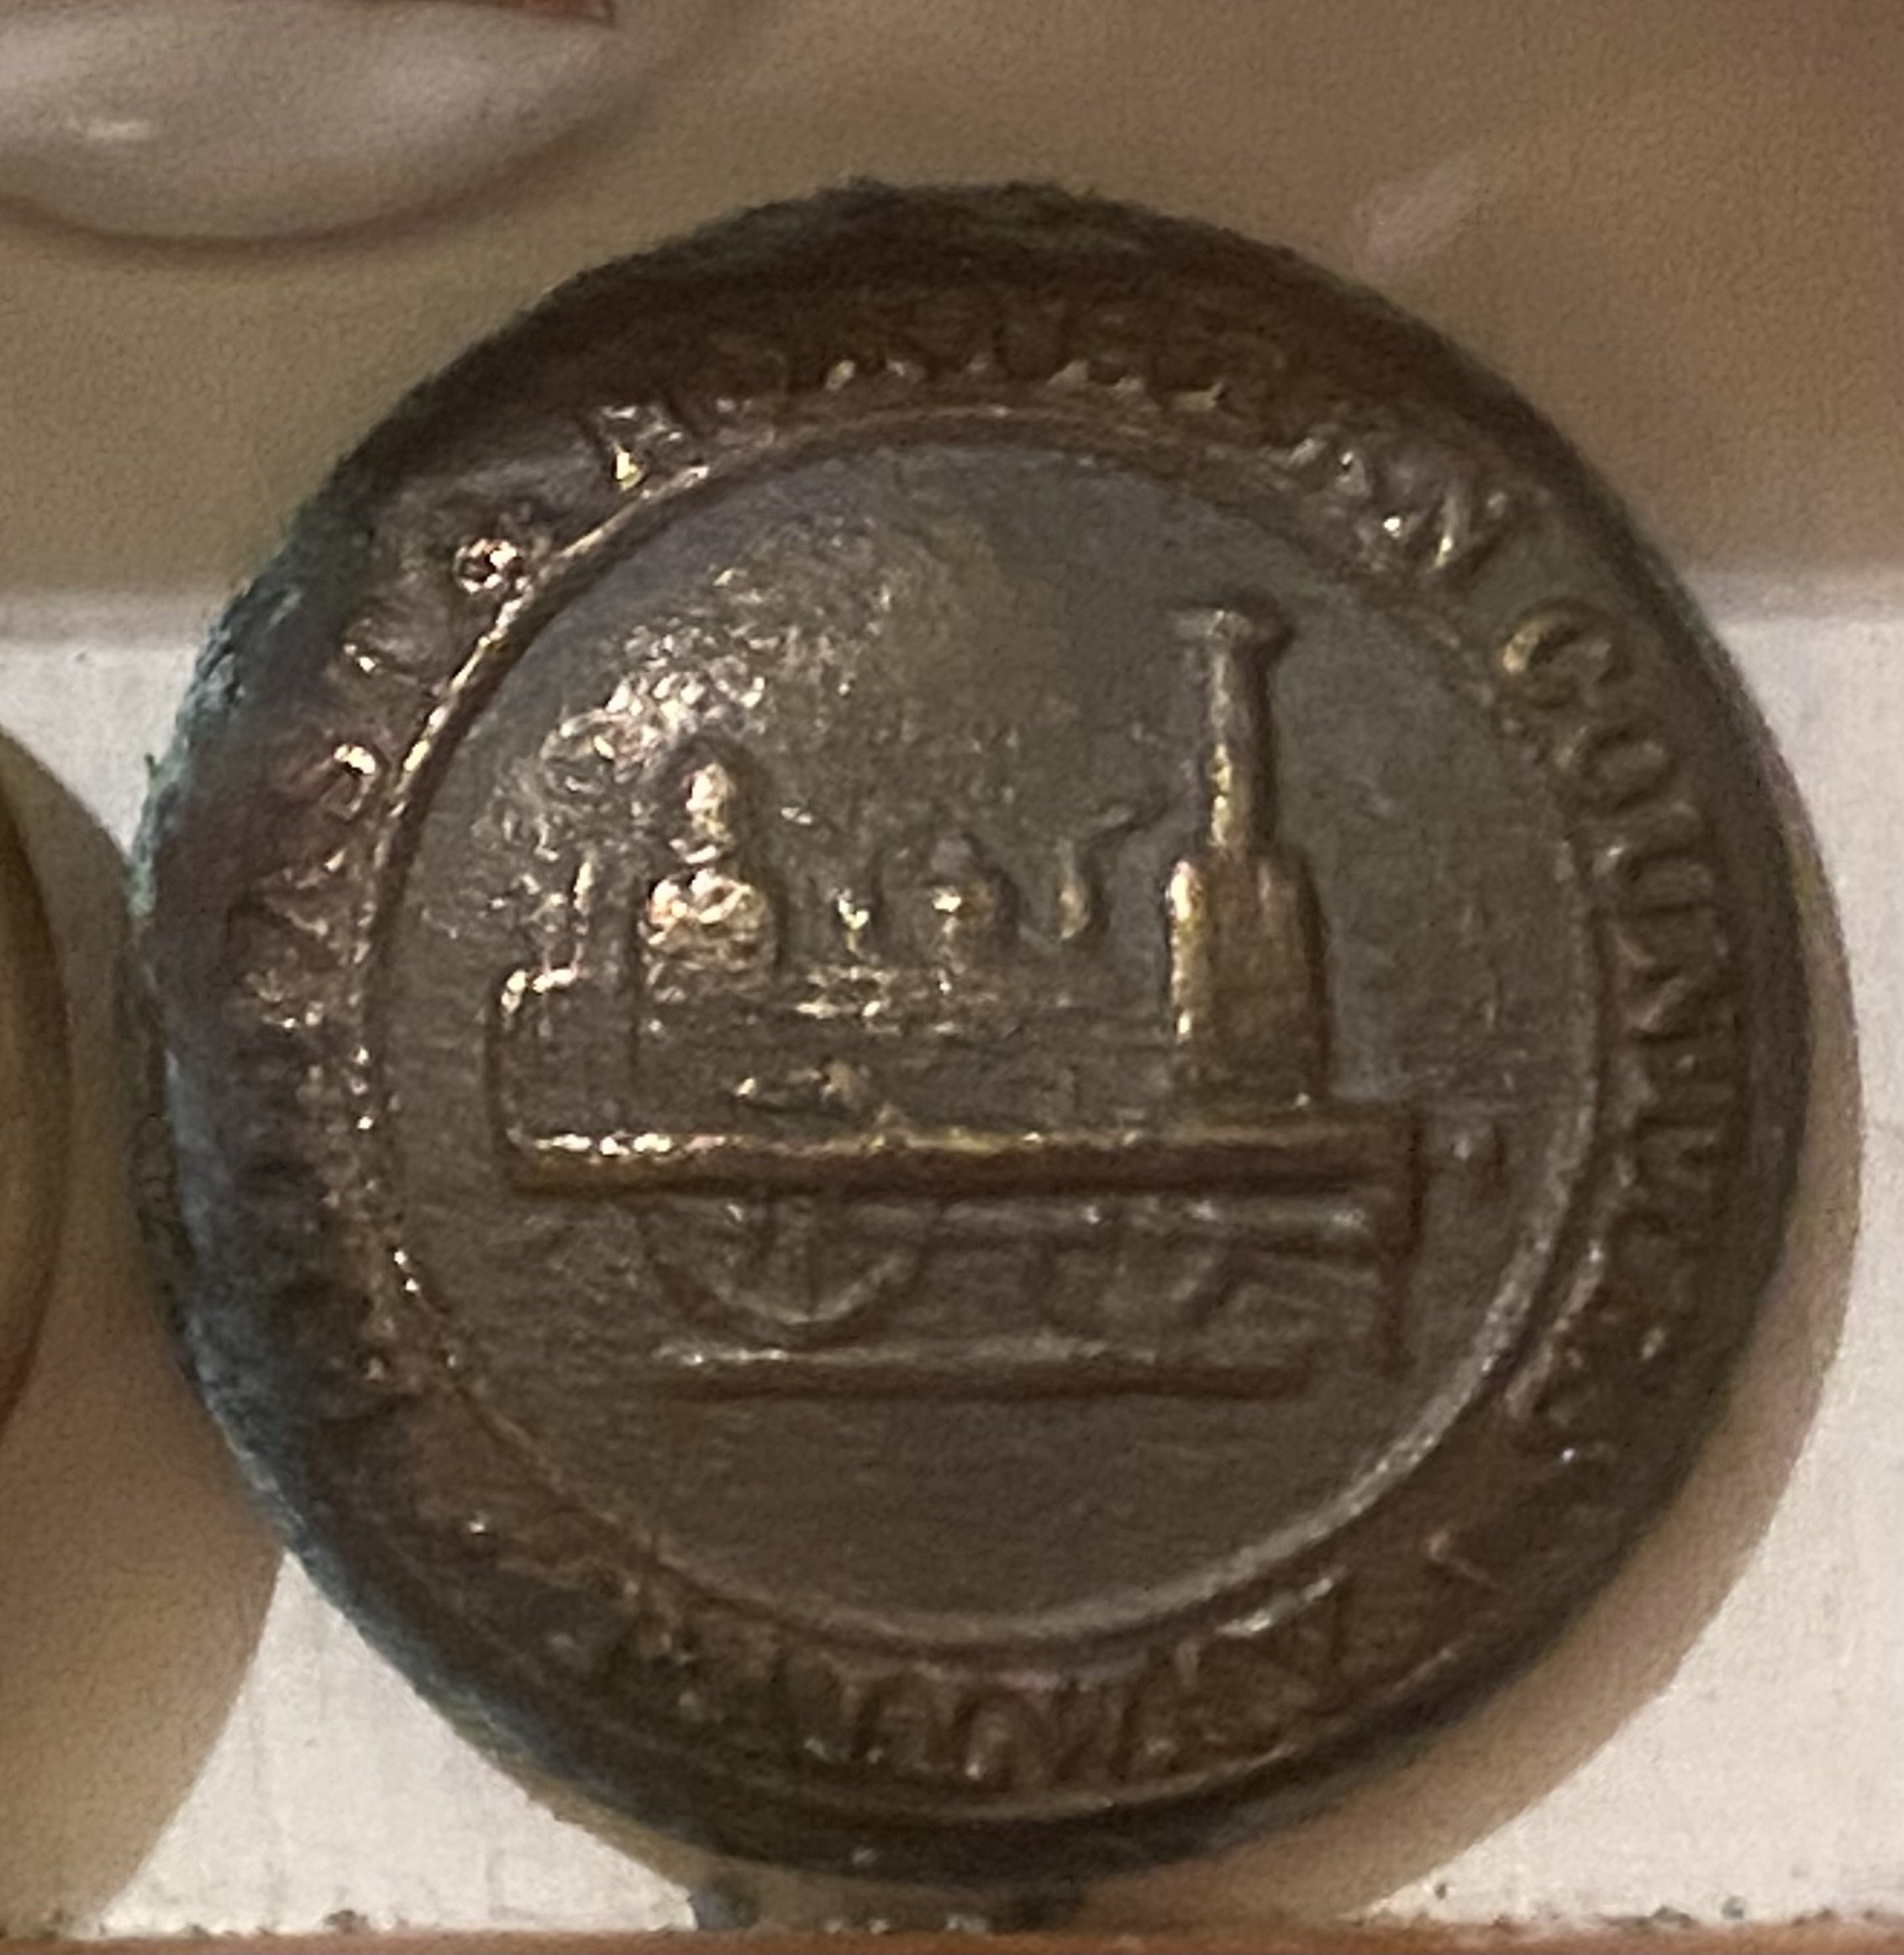
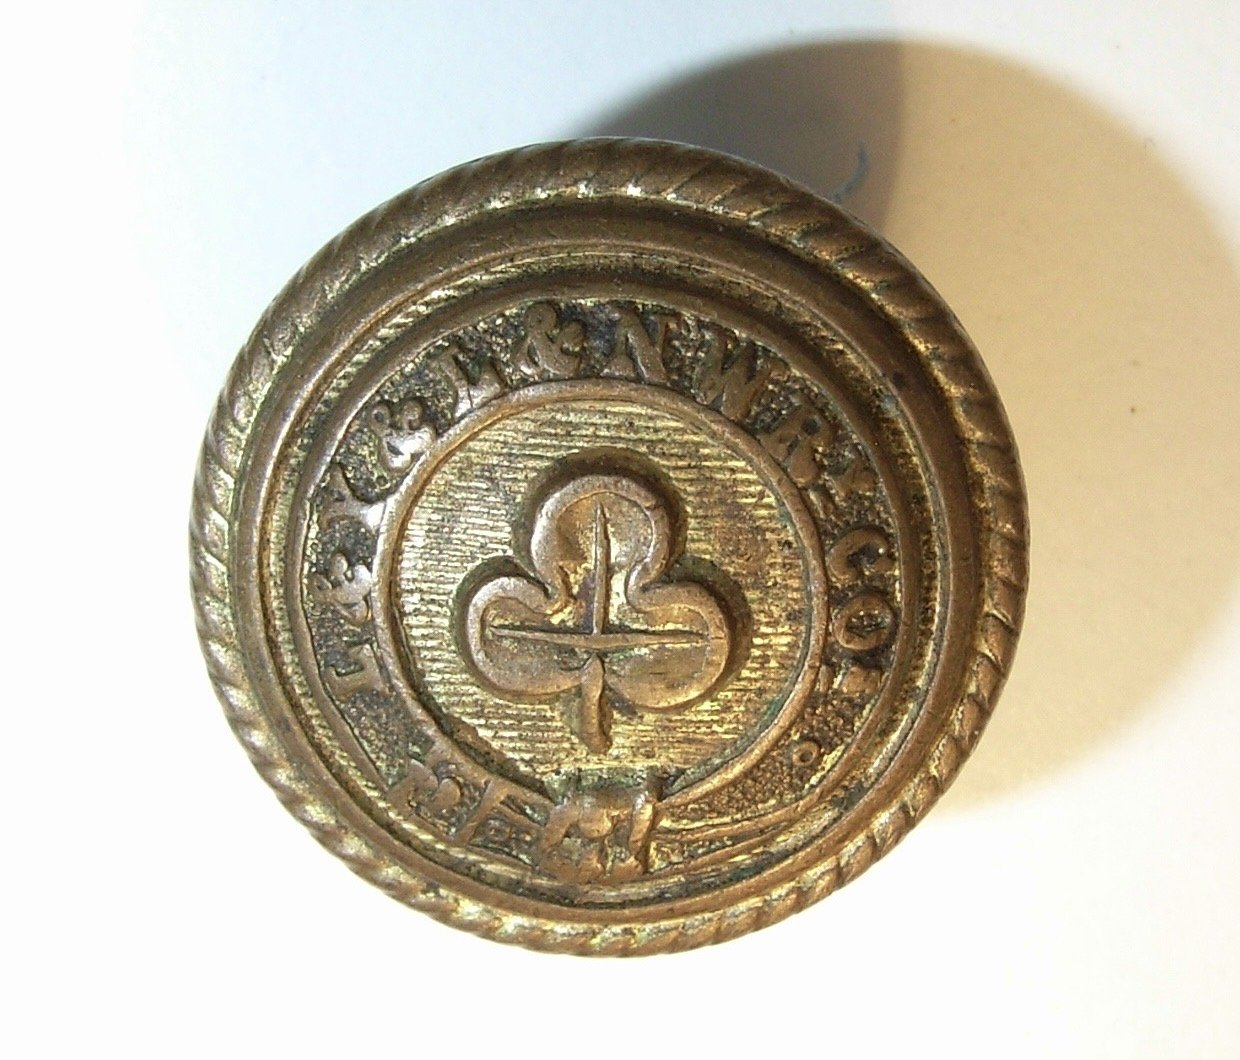
As an aside to this topic, during the 1980s I lived in a Victorian terrace house backing almost onto the Belfast-Bangor railway line (the former BCDR line) very close to Holywood station. Digging in the back garden often turned up interesting objects, including 2 railway uniform buttons. Neither of them were BCDR. Belfast and Northern Counties Railway (absorbed by the Midland Railway in 1903) Lancashire & Yorkshire and London & North Western Railways (they amalgamated in 1922)

-
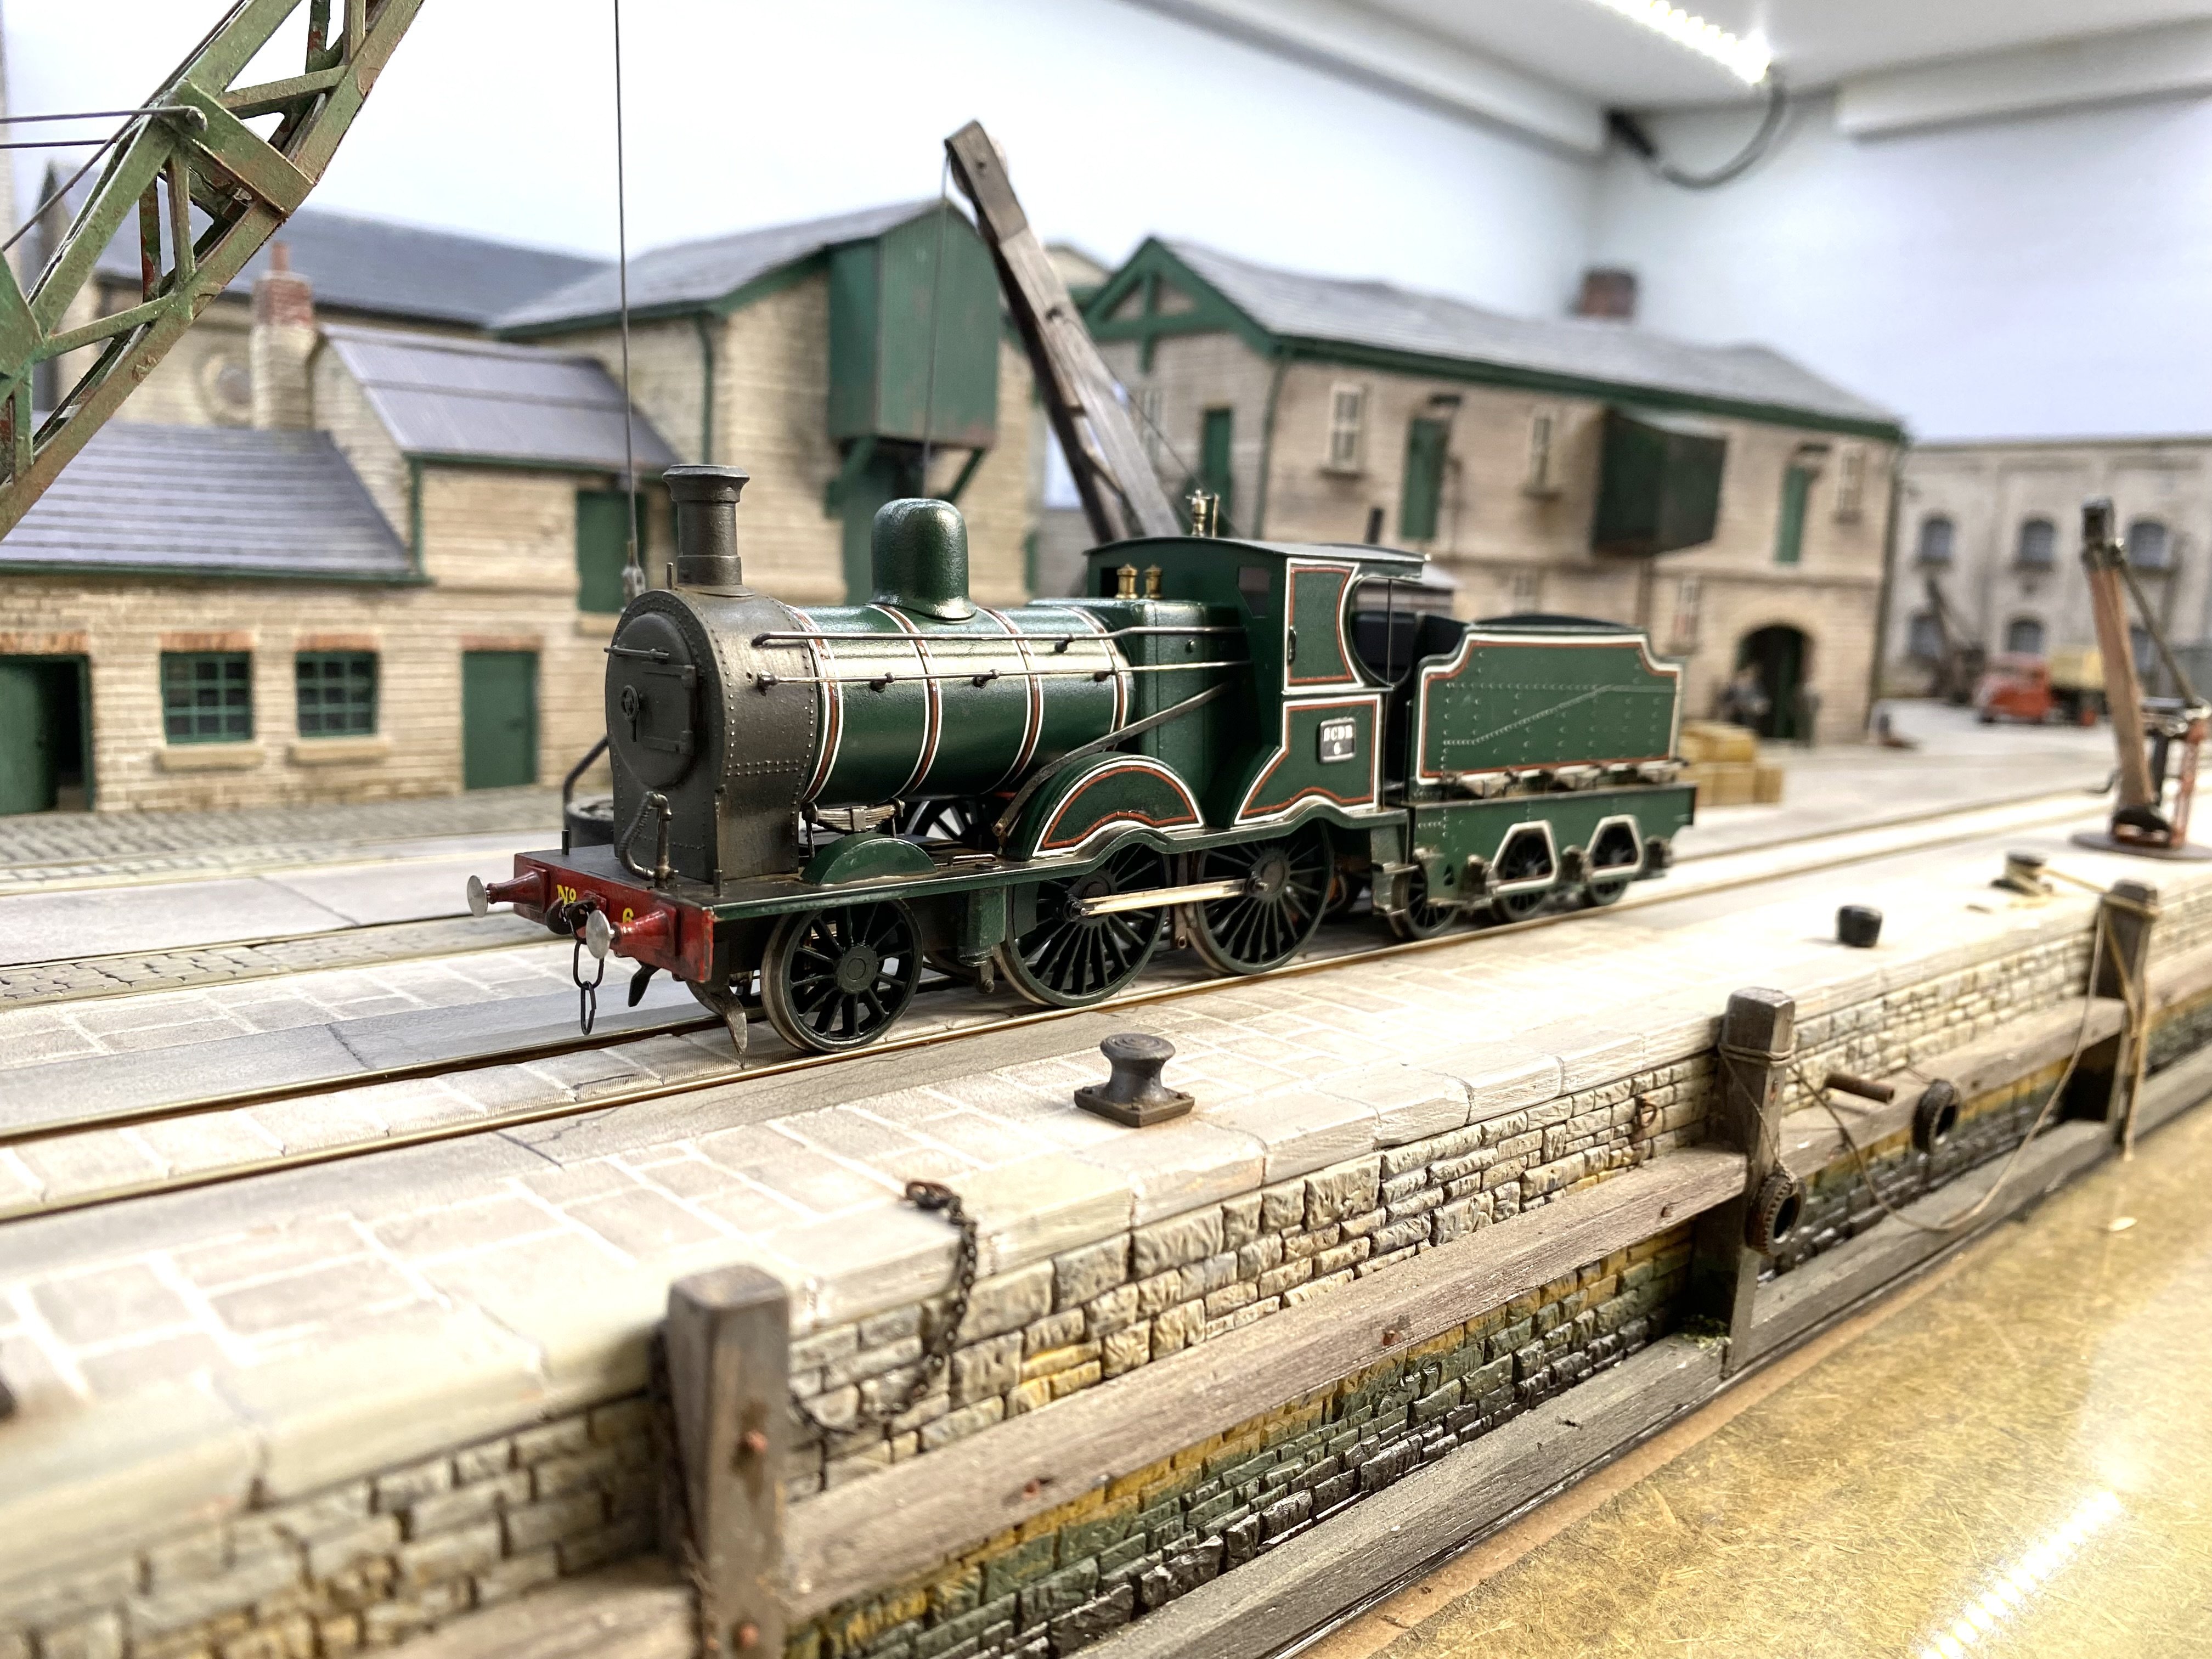
Belfast and County Down Railways 2-4-0 Number 6 was recently spotted in the vicinity of Kirley Junction, on the scenic route to Queen's Quay with a passenger working and demonstrating its reputation as the BCDR's fastest locomotive. The Station Master and Principal Traffic Controller at Kirley Junction very kindly cleared the line for this unscheduled working and permitting line side photography of the event. Many thanks Kieran. No6 at Kirley.mp4
-
It's those tedious little details that take the time and tax the patience! And there's always that moment when you think "Why am I doing this? Isn't there something decent on the TV I could be watching instead?" But then there's the great sense of achievement when it comes good and you remember why you do it. Great work David. The stiff drink and the lie down both well earned!
-
I remember talking to you there and being mightily impressed by Arigna Town. I took these photos on the day. 2016 I think.
-
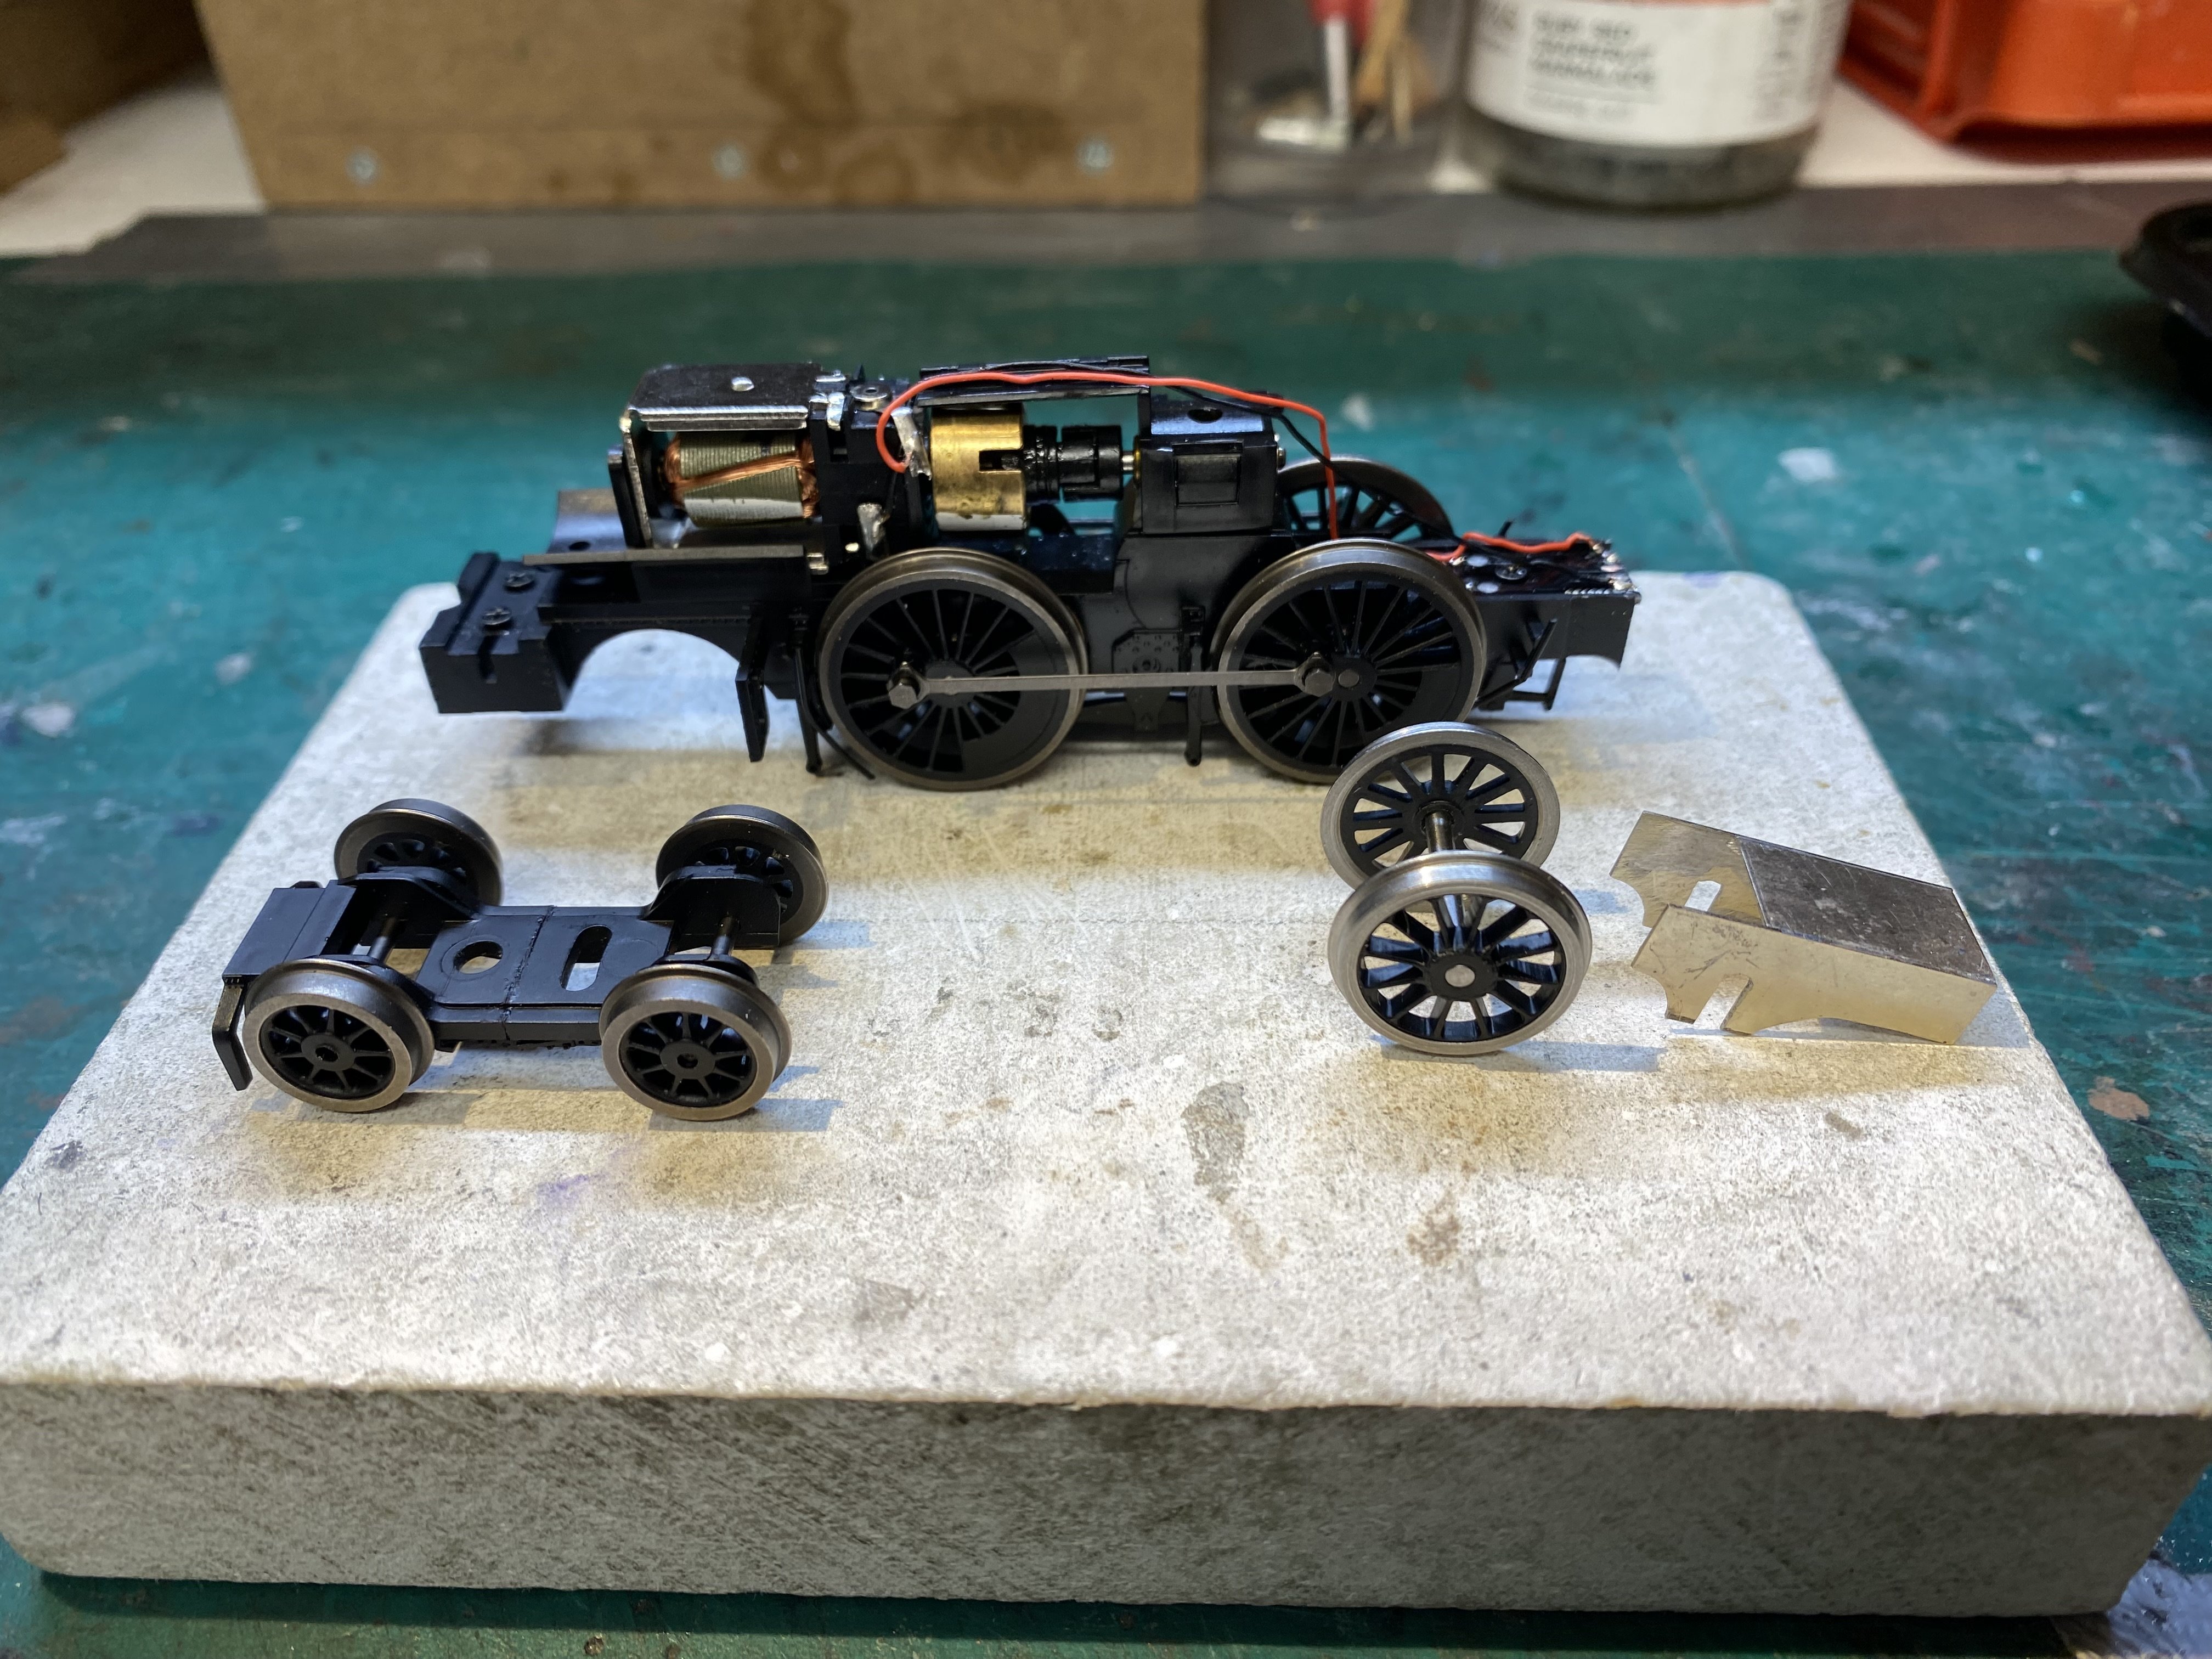
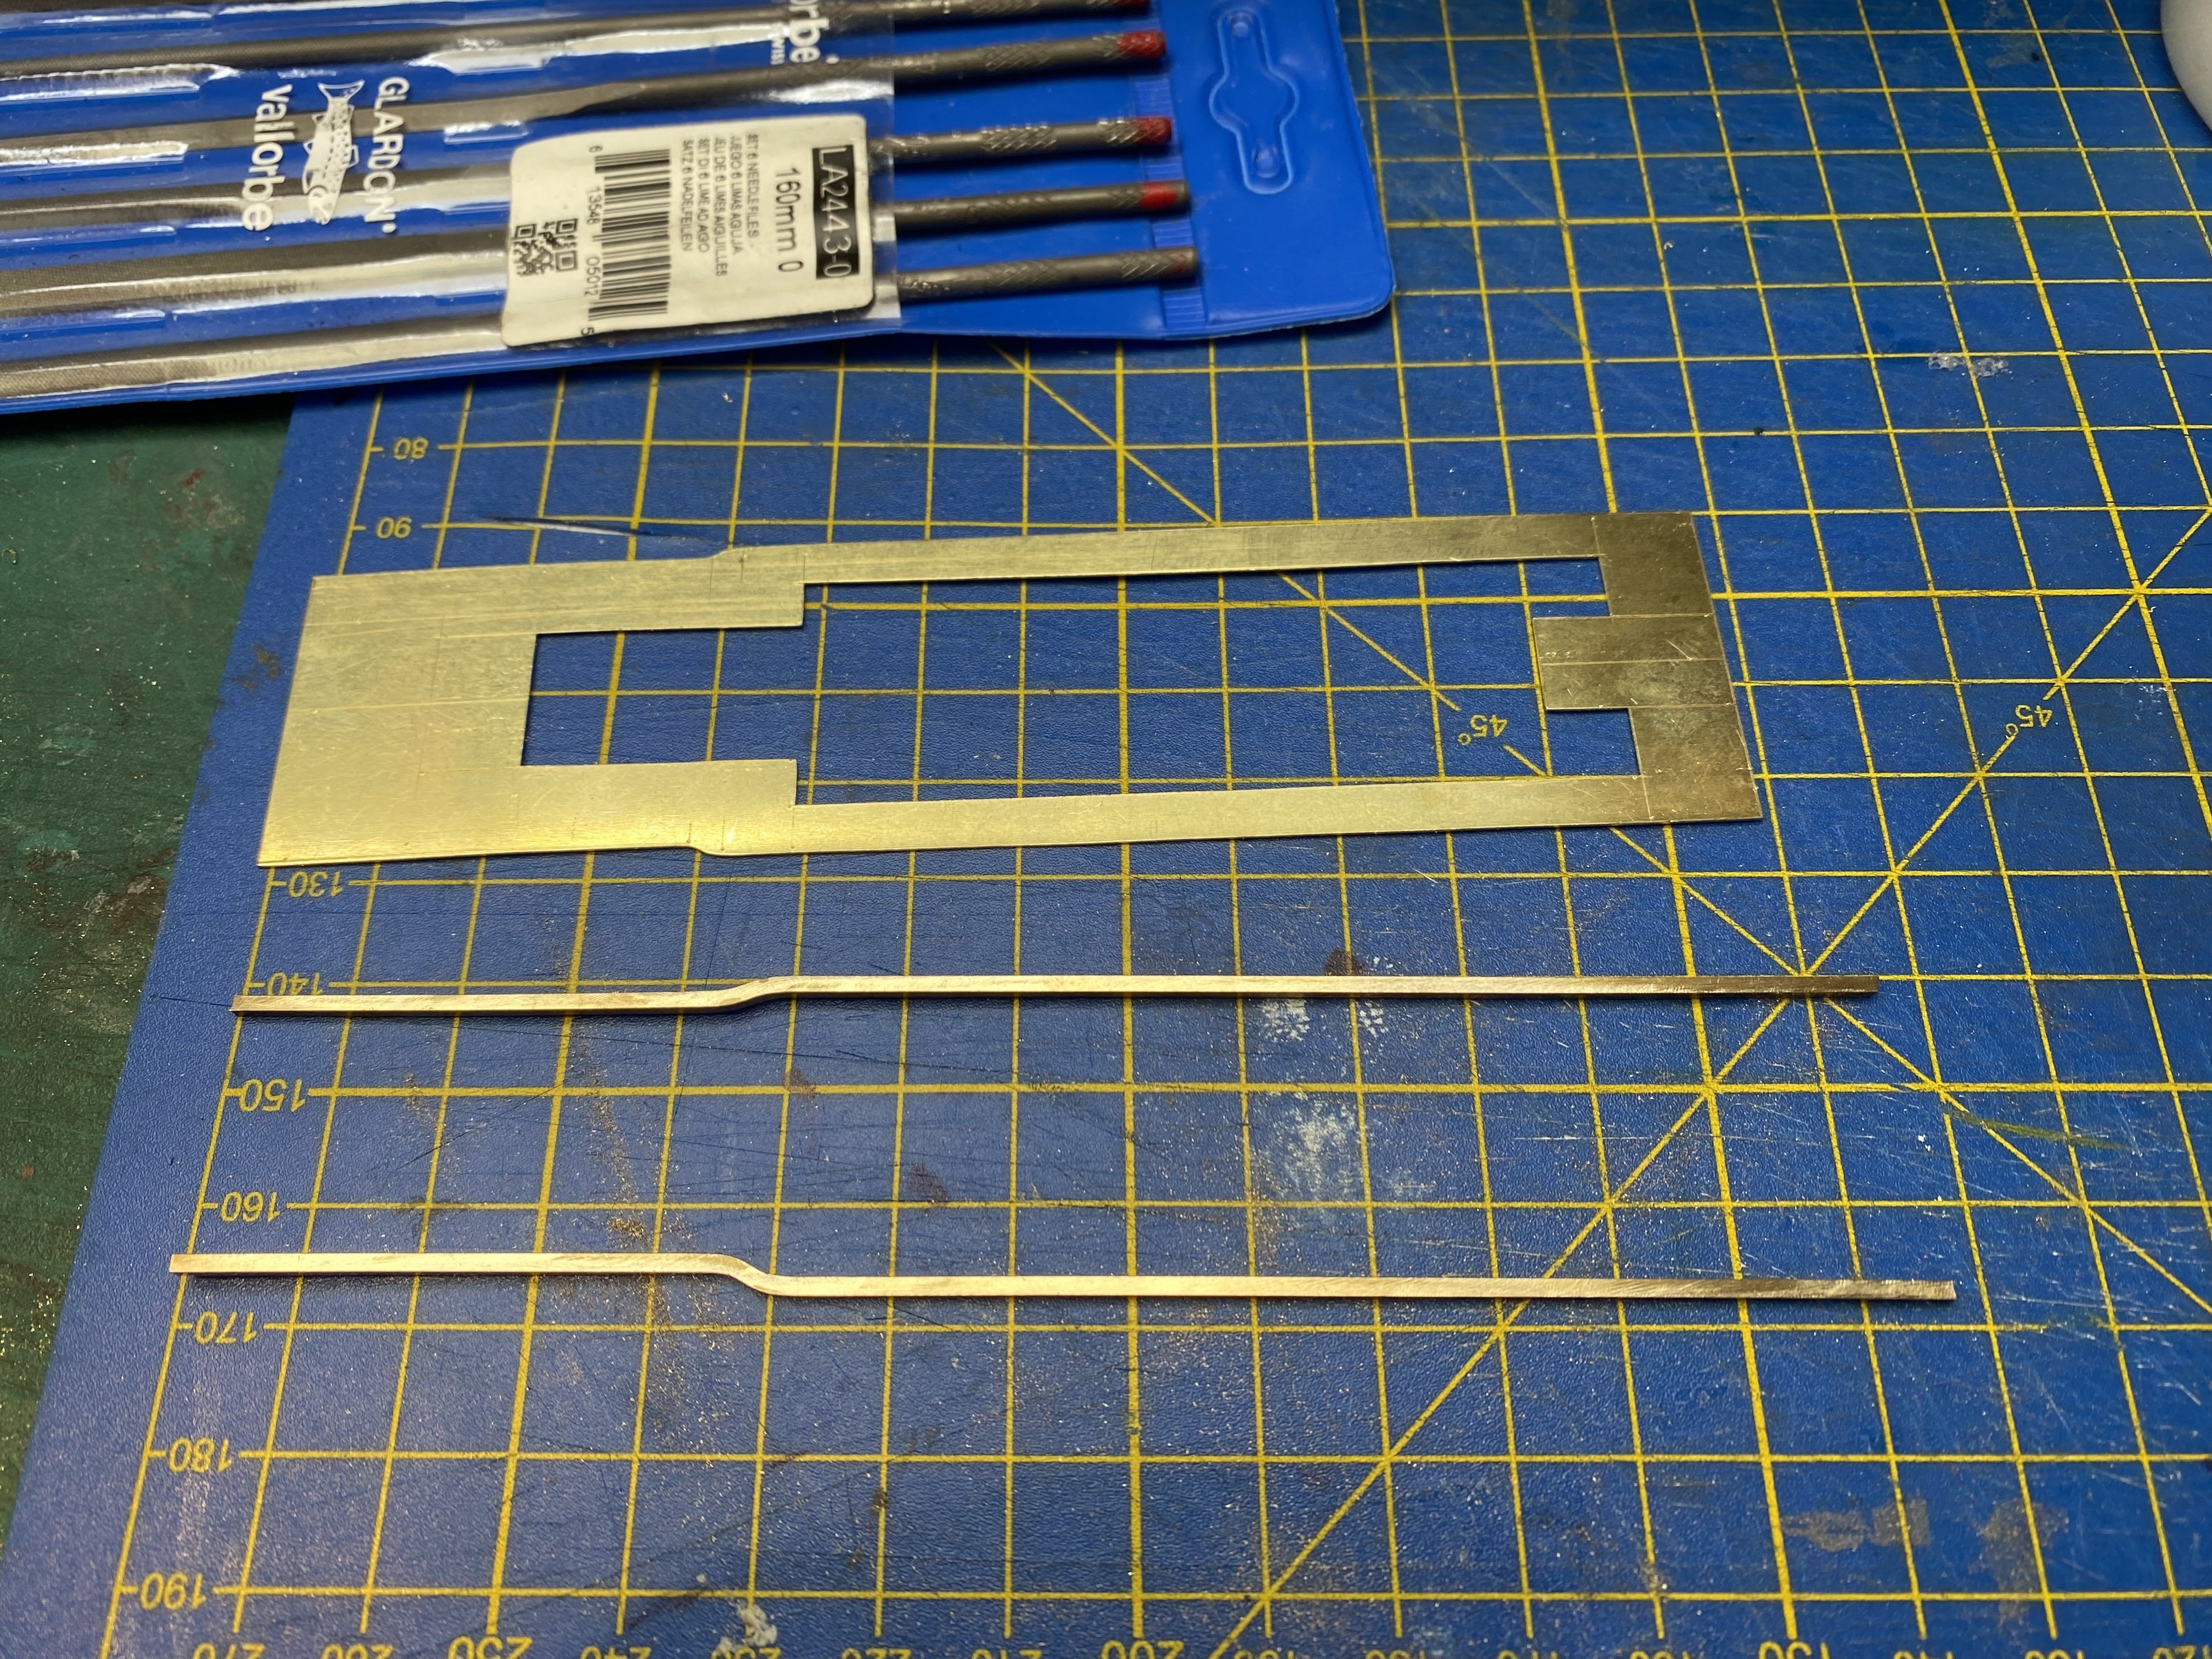
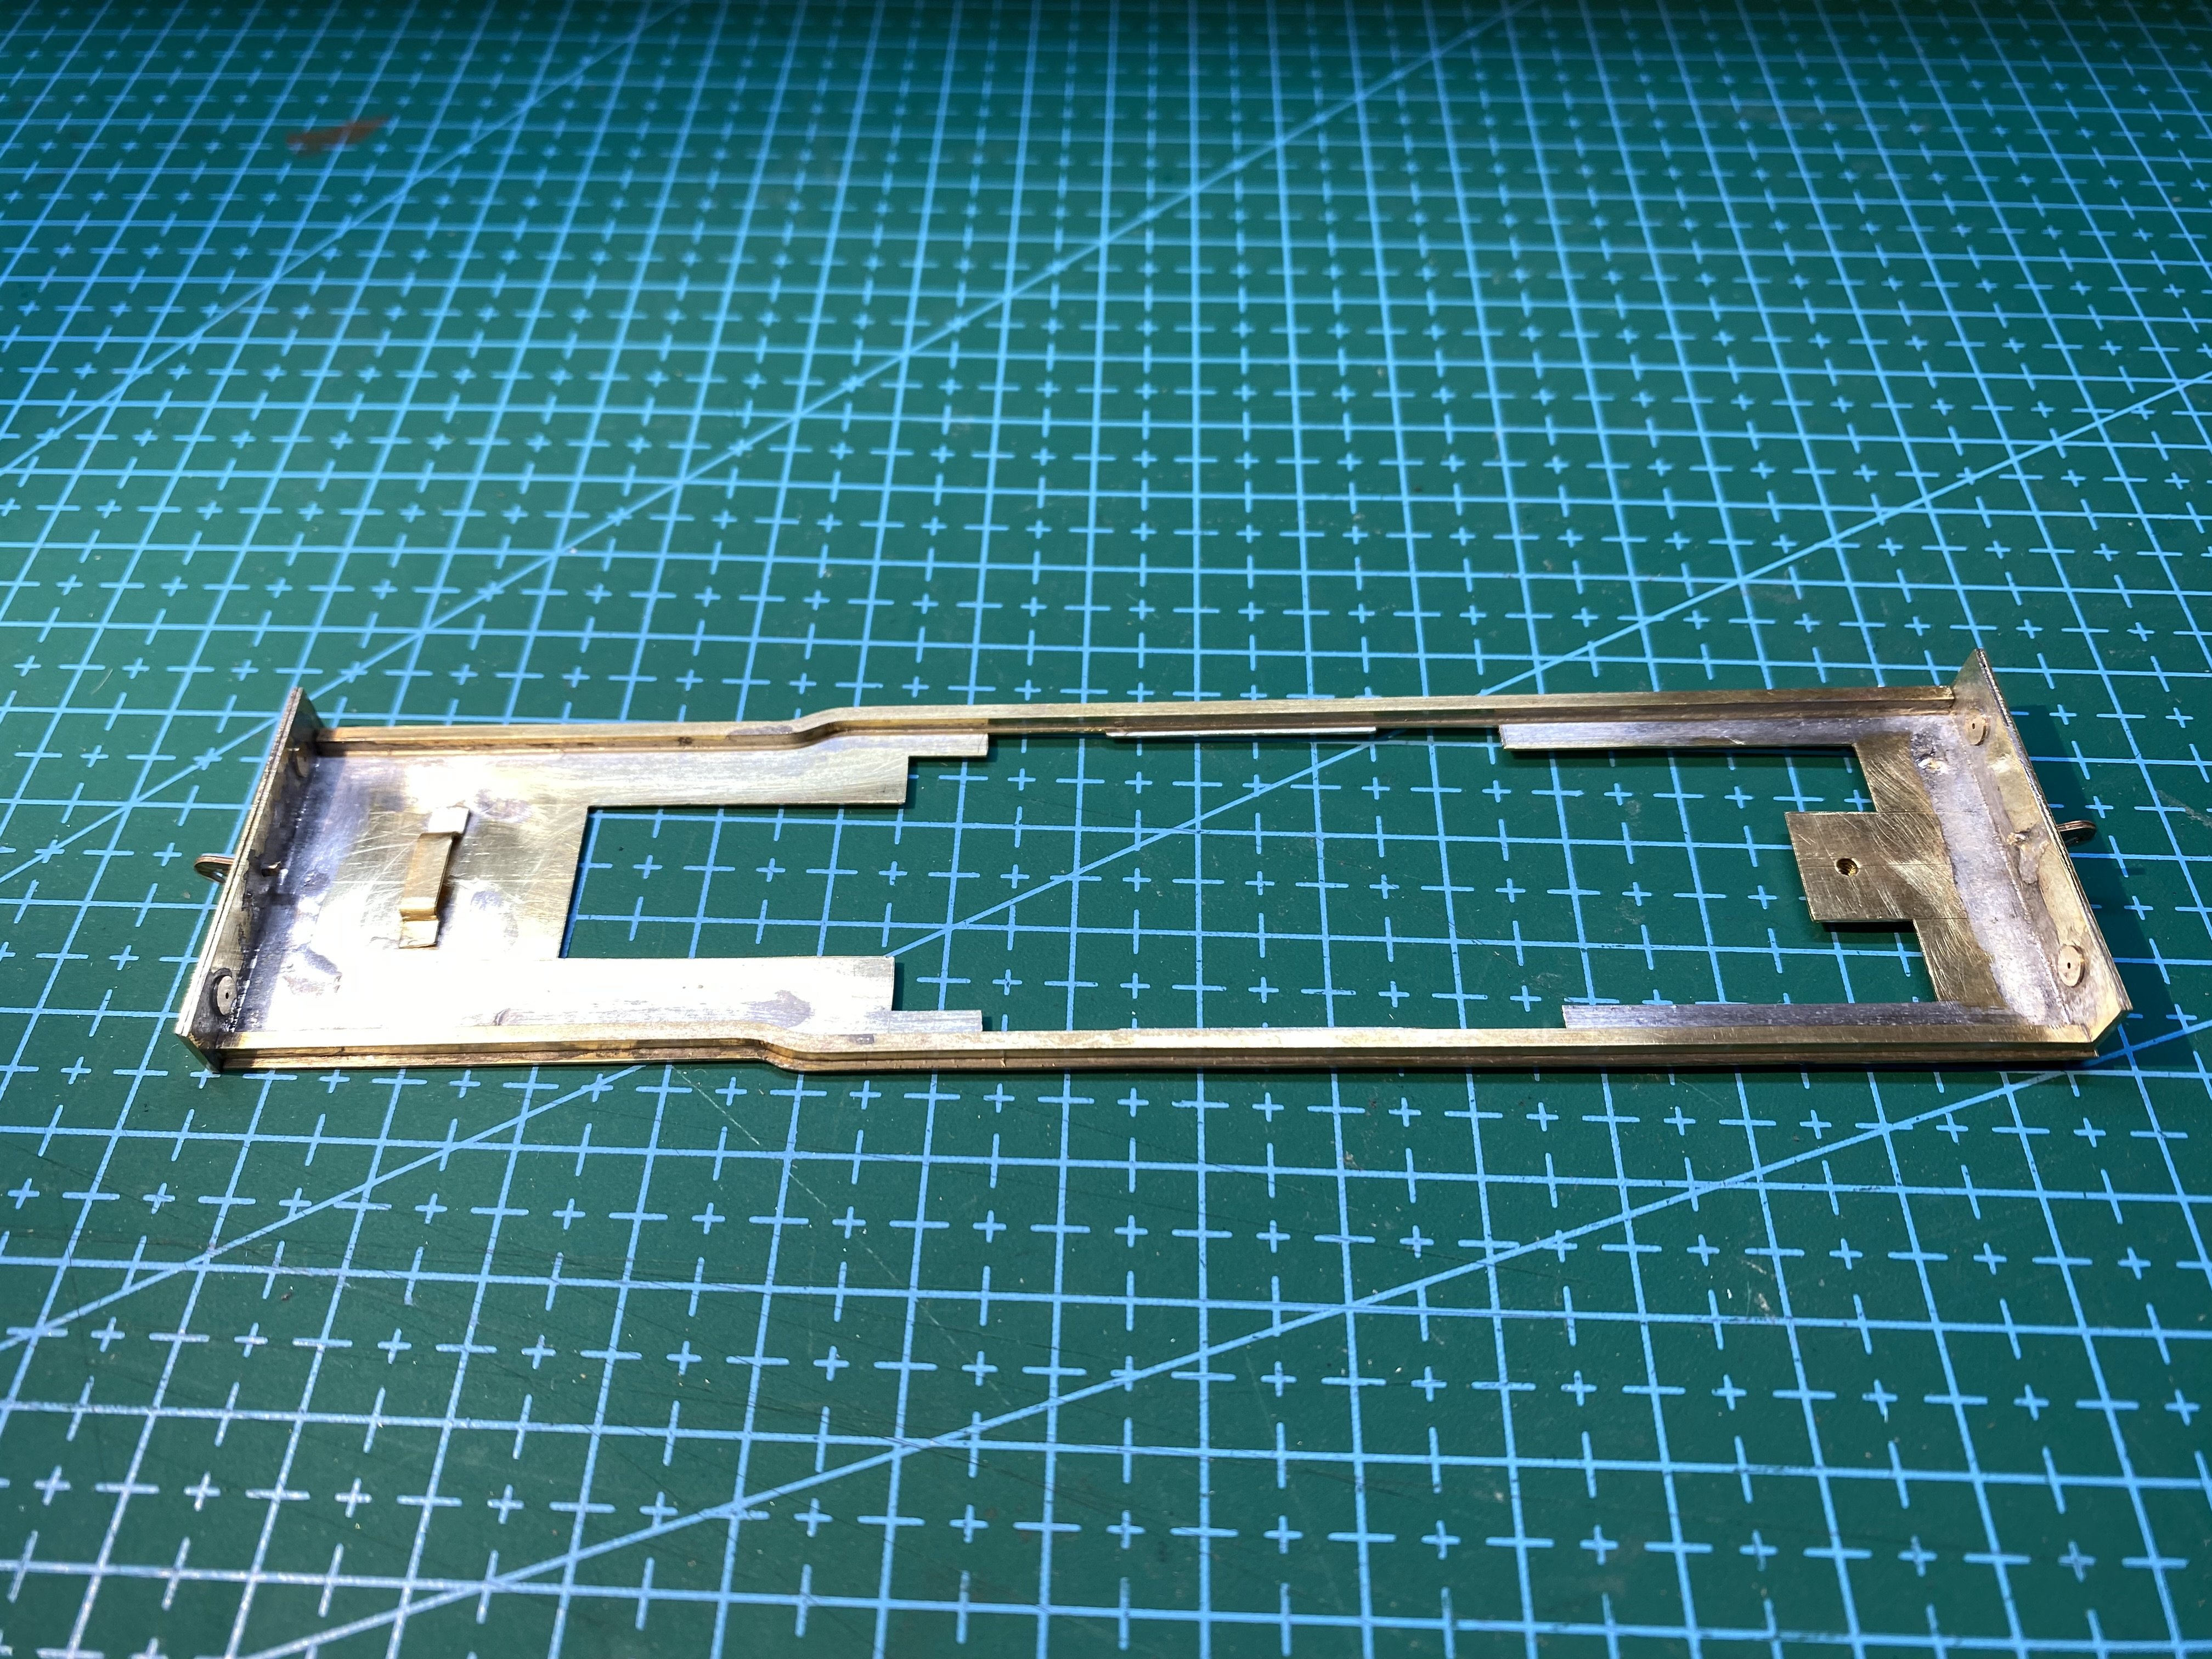
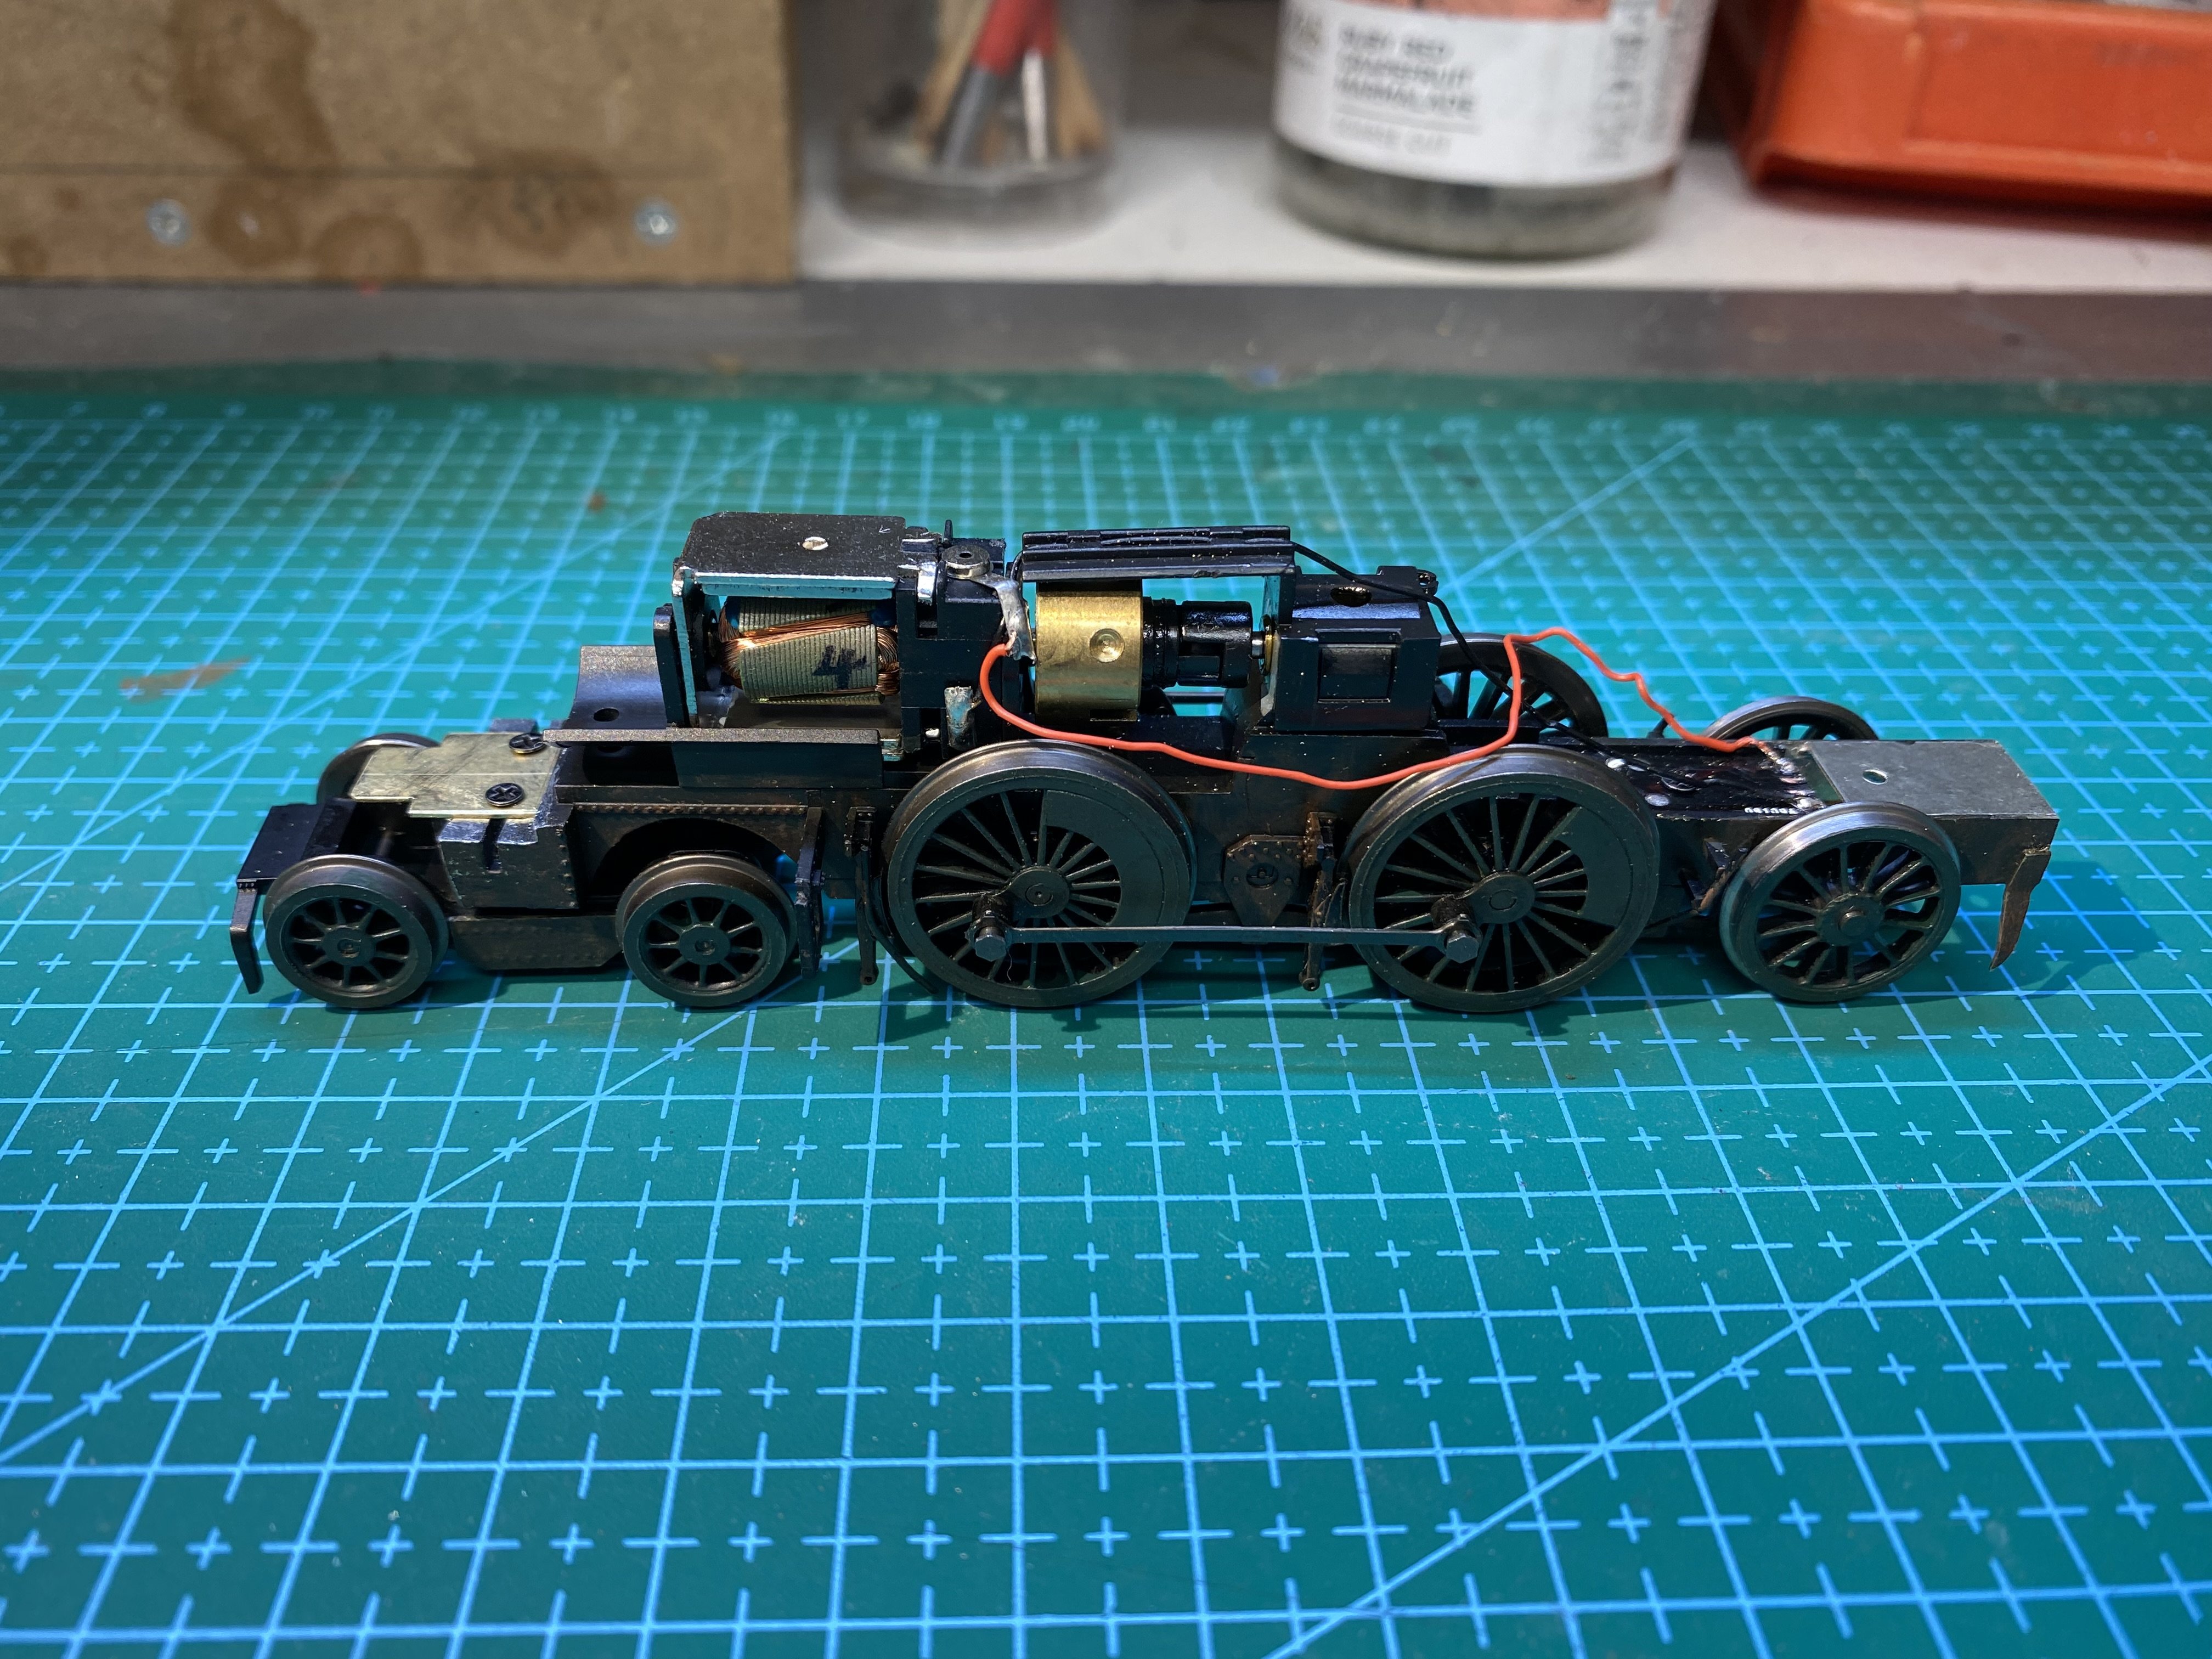
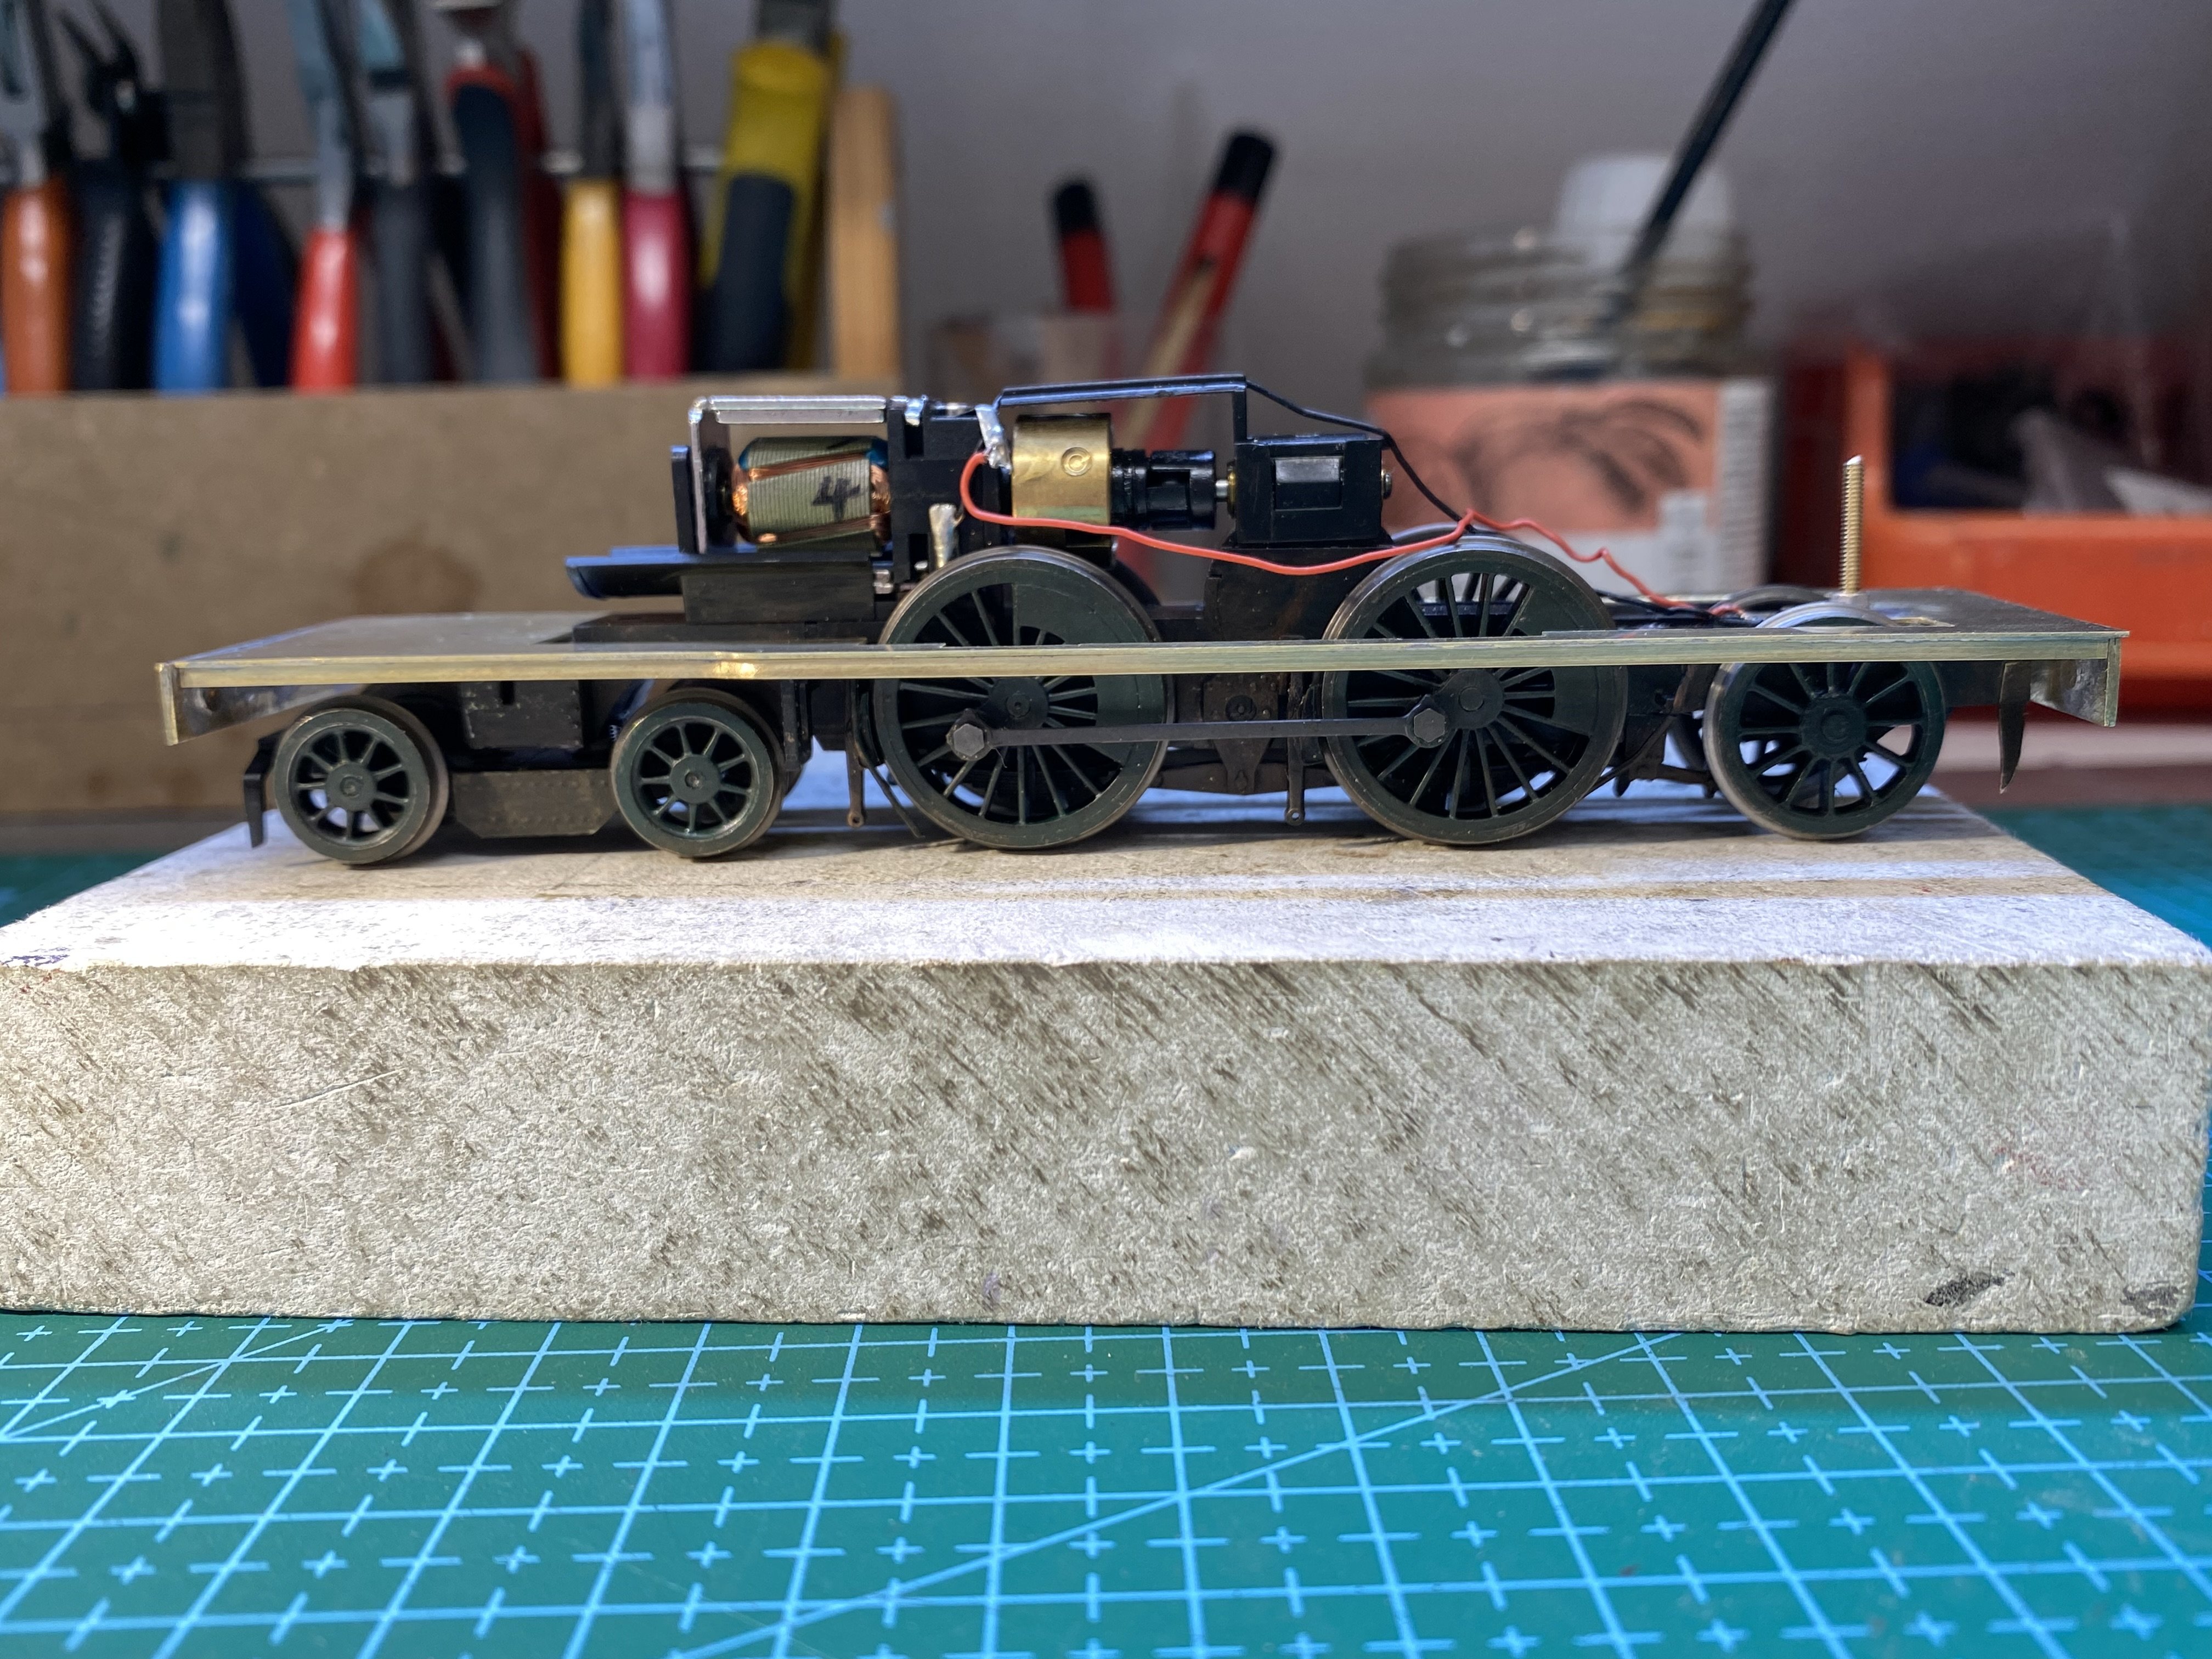
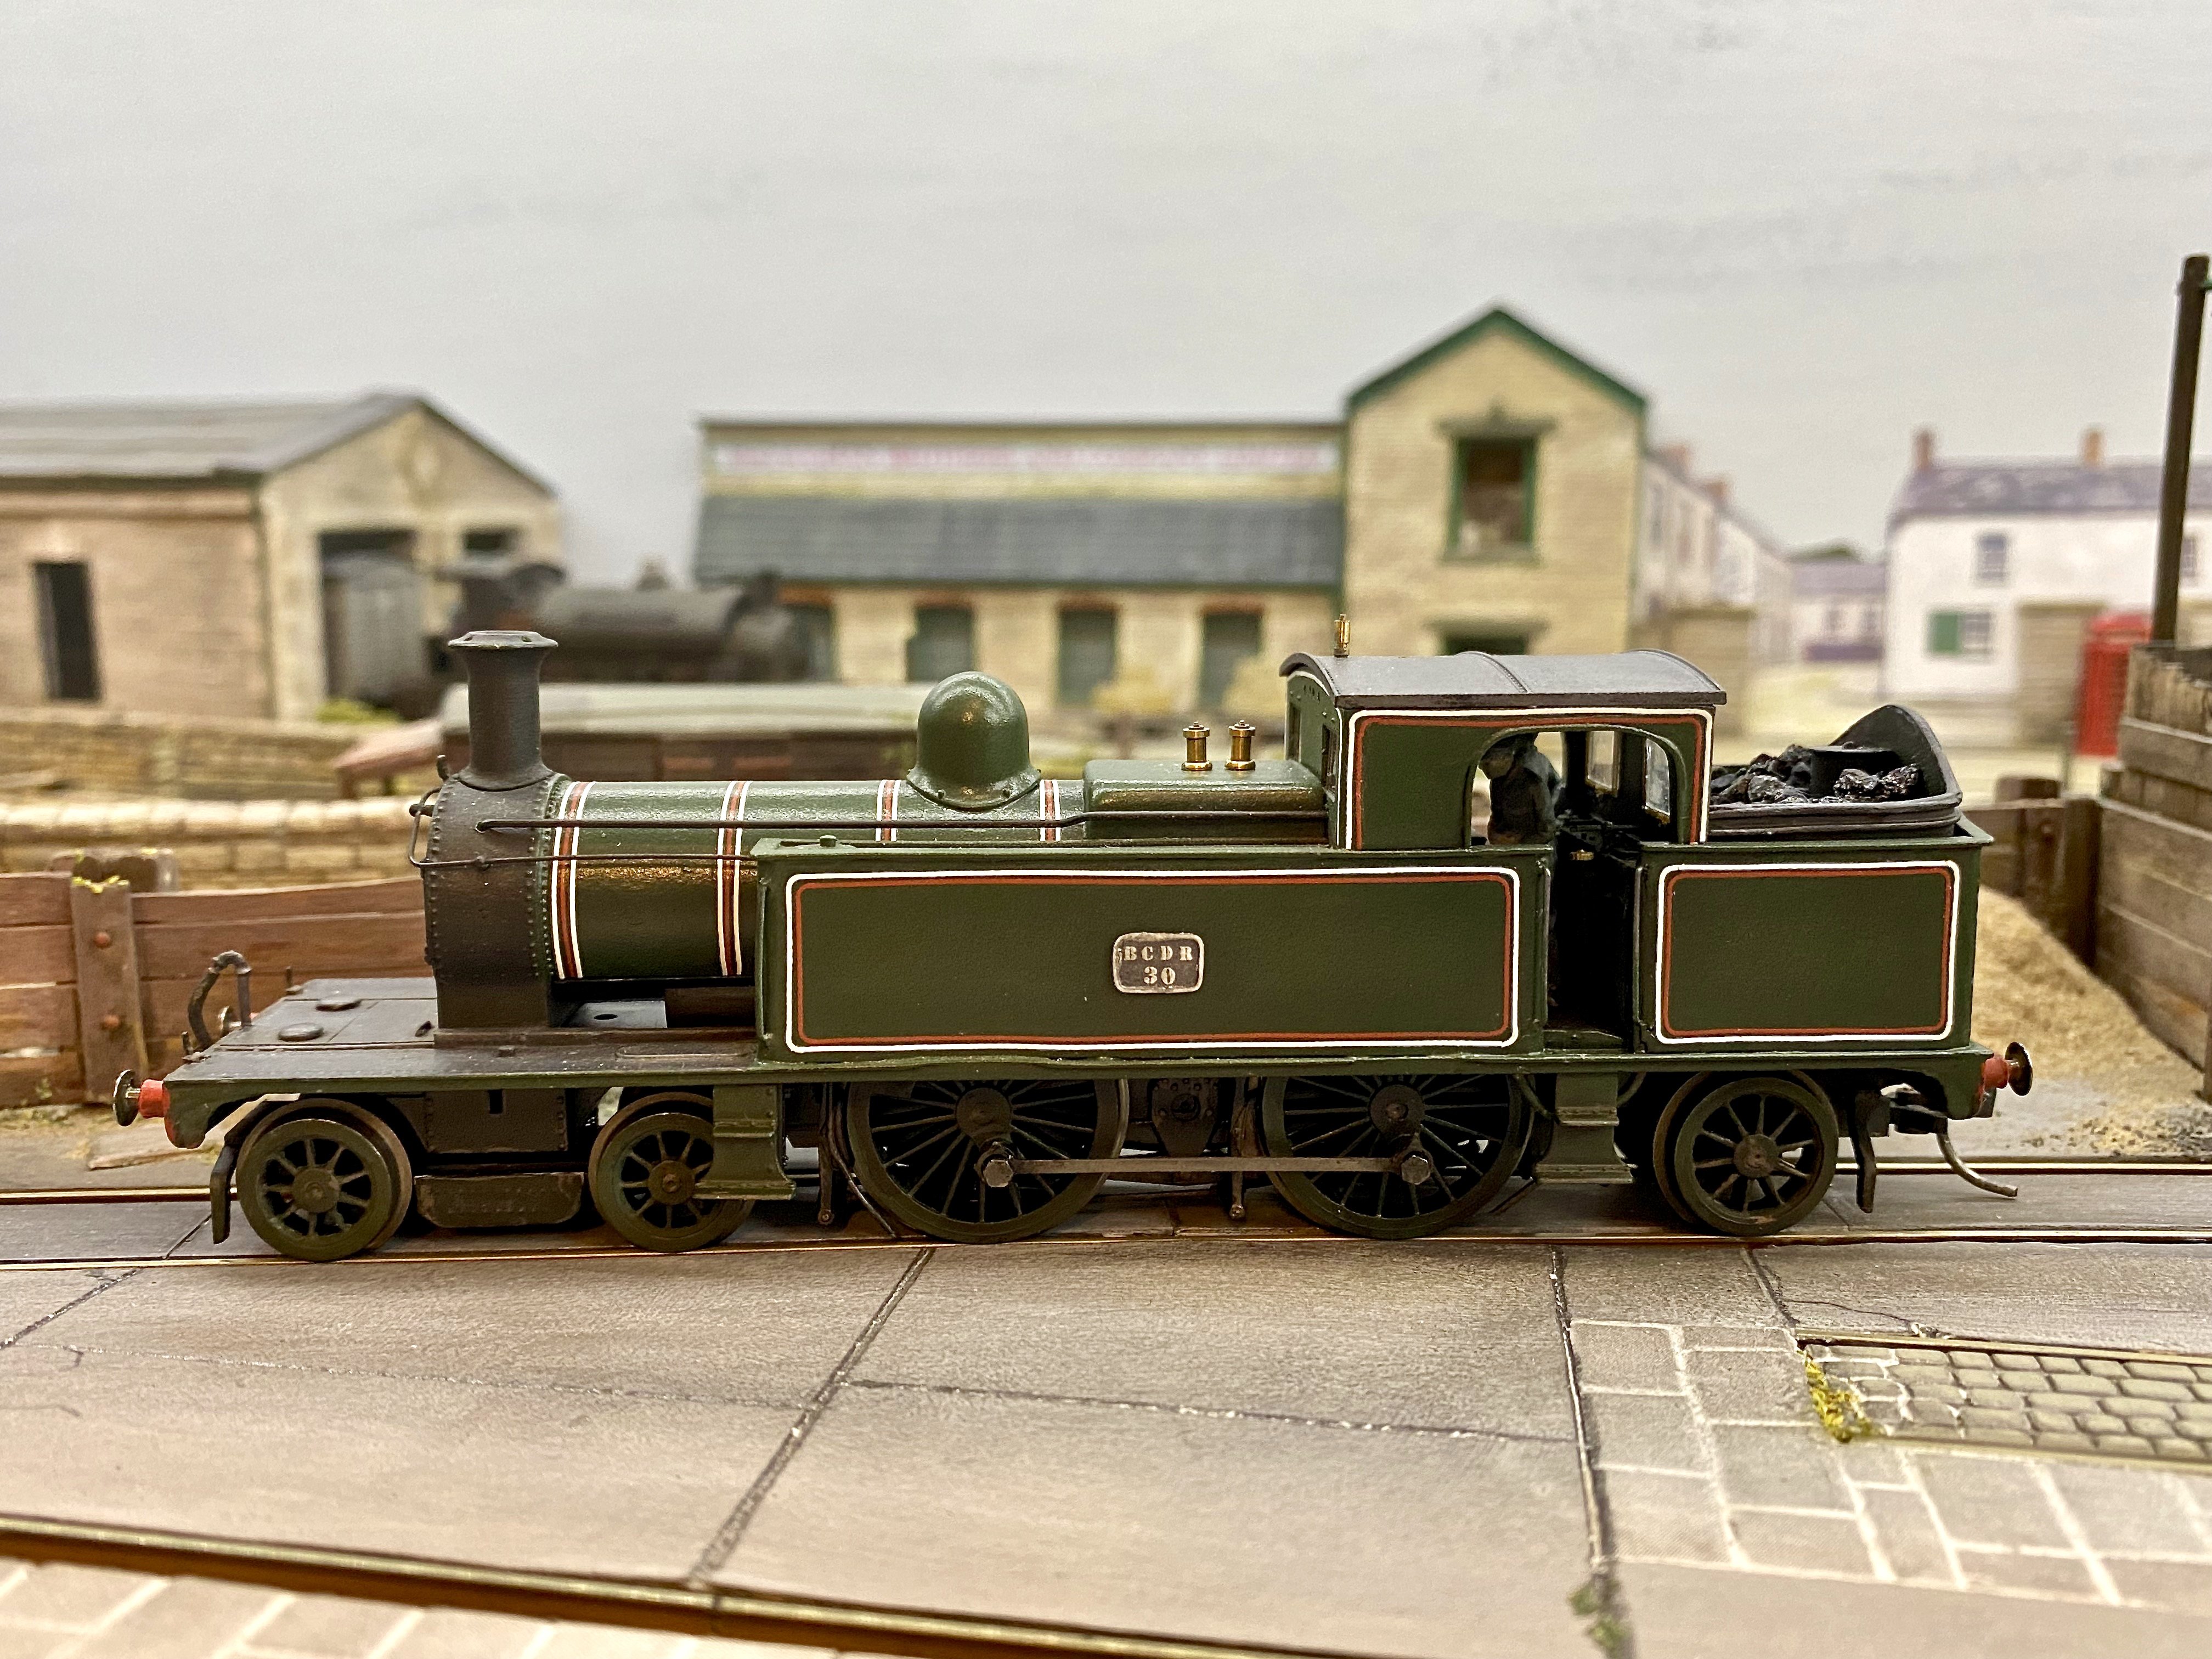
Something slightly different. My first attempt at a Belfast and County Down locomotive a few years back was a model of 4-4-2T bogie tank No. 30 (the one preserved at Cultra) using an Oxford Rail Adams Radial as the basis. Apart from removing the outside cylinders, the chassis was left as was. The superstructure was remodelled in plasticard. I was reasonably happy with it and it's a nice runner but in truth it strains the limits of the 2 foot rule. The proportions aren’t right. At the time I bought a second Adams Radial with the intention of doing another one and it’s lain in a drawer until now. Time to have another go. Comparing the Adams chassis with a BCDR bogie tank, we can say that: the driving wheel diameter and wheelbase are fairly close. Best left alone. May as well scratch-build a new chassis as tackle that, which defeats the object of this exercise. the leading bogie is too long and its leading axle too far ahead of the leading drivers. the trailing truck is too far behind the rear drivers and the wheels are too small. These things ought to be remediable. Starting with the front bogie, it was cut in two across the middle, 2 mm removed from the centre and the two halves glued back together. Being plastic, it was fairly easy to do. The front of the chassis block needed cut back to allow clearance for the front bogie axle. The rear of the chassis block was cut off and discarded about 10mm aft of the rear drivers and replaced with a new section made up in nickel silver to bring the axle line forward. This is glued and pinned to the chassis block. The Oxford bogie wheels were replaced with larger 17mm 12 spoke wheels (Alan Gibson 4851). The new axle is sprung with 0.33mm brass wire. Sawing through the chassis block destroyed the printed circuitry attached to it so the chassis is no longer ‘DCC ready’ but that’s not the end of the world. The intention is to discard the Adams bodywork and scratch-build a body in brass & nickel silver. A running plate in 16 thou brass with valances made from 1.5mm square brass rod is as far as I’ve got. We’ll see how it works out. Alan
- 645 replies
-
- 12
-

-
Neat! That's coming along very nicely David. I like your jig for lining up the square tubing on the axles. Simple but effective. I'm going to wait till you've solved all the problems of building chassis with outside frames and cranks before I tackle one! That High Level gearbox looks minuscule in there - I'm used to them taking up half the space in the boiler.
-
David, Alan Gibson still lists 4mm hornblocks, both for 1/8" (4M60 or 4M60A) and 2mm (4M61 or 4M61A) axles. I have a set though I've never used them. They have integral springing. London Road Models also list their version, also for both sizes of axle.
-

Worsley Works Cork Blackrock & Passage tanks
Tullygrainey replied to Pete00018's topic in Irish Models
That is exceptionally good. Beautifully made and perfectly finished. -
That is very fine indeed! Lovely job David
-
I've come to the computer to get a better look at these on a bigger screen. Great coach work as always, David. Crisp and with lovely attention to detail in the panelling and metalwork. These look the business even in grey primer.
-
Making an ‘E’ – the Maybach Diesel Model Assembly thread
Tullygrainey replied to Mol_PMB's topic in Irish Models
I've been following this one with interest Mol. You're making great (and rapid) progress. The most flexible approach to offering a chassis for OO builders might be to adopt the common method of fully etching axle bearing holes for all axles but also providing half-etched guides for horn block cutouts. That way, builders can choose how best to motorise. If you also included brackets for the Fleischmann chassis, you've covered all the bases. Alan -
I’ve no experience of building in 7mm apart from one diminutive narrow gauge scratch-build and a few O:16.5 conversions using proprietary OO chassis but I’ve recently had a chance to look quite closely at a variety of standard gauge 7mm locomotives, both kit-built and scratch-built. What I’ve seen suggests to me that while 4mm work can be described as model making, some of the work that I’ve seen in 7mm approaches miniature engineering, especially when it comes to things like suspension systems, gearboxes and working inside motion. Respect! Alan
-
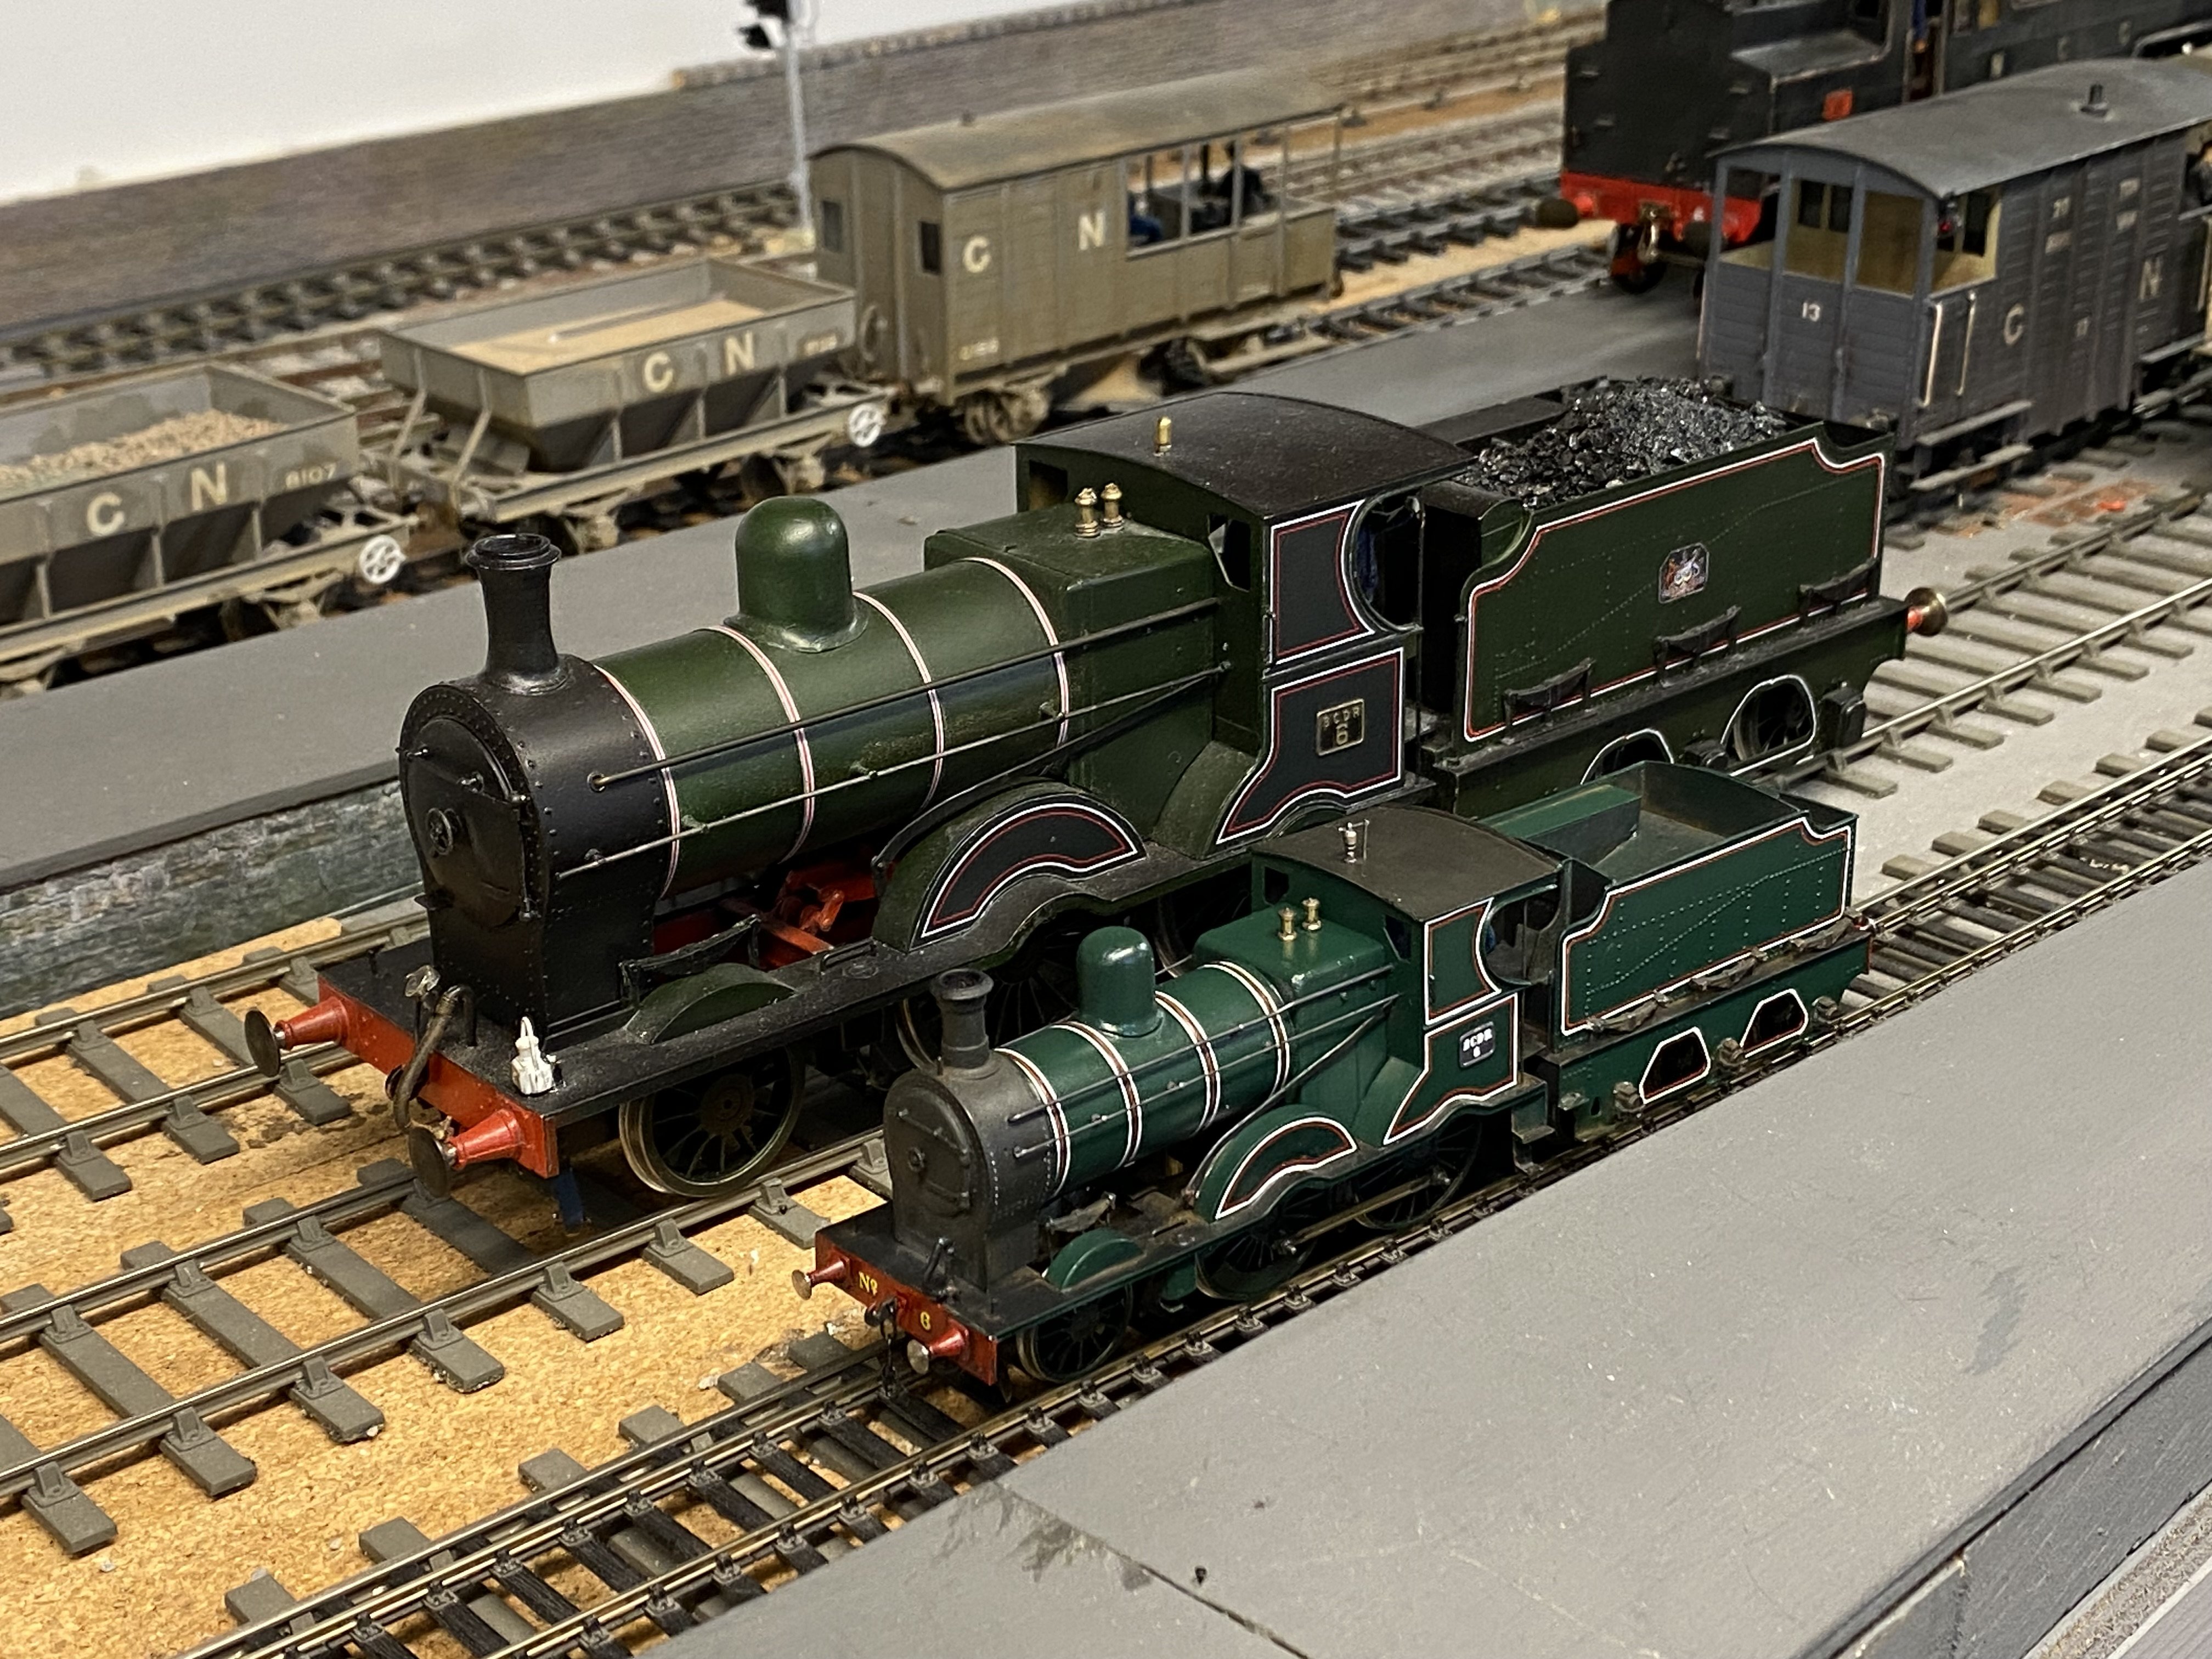
The long and the short of it. One of the inspirations for the building of No.6 in 4mm and a source of many clues and references was this 7mm version built by Tony Ragg using the Alphagraphix kit as the basis. Contrasting interpretations of BCDR green!
- 645 replies
-
- 13
-
-

-
The joys of a garden railway! Challenges that we indoor modellers never have to deal with. Our vegetation never grows any bigger and the weather hardly ever changes. Impressive stuff and that photograph of the electronic circuitry compartment with your 4mm loco projects in the background gives some indication of just how big these 1:20.3 models are. A whole different experience! Alan
-
Thanks for a great day Patrick. And who knew we could get sound out of No6 on DC! Really chuffed
-
I must admit I tend to wrap the chip in masking tape and cover all joints with heatshrink sleeving but it’s all too easy to trap a wire and break through the insulation when bolting everything together.
-
Thank you John. I wonder what caused your chips to fry. That sounds like very bad luck.
-
Ha Ha, thanks Leslie. Yes, I knew I was winging it with this one but came to the same conclusion. For the time being, number 6 is impersonating a LSWR Beattie Well Tank. Have you been talking to @Patrick Davey? He's lined me up to build the BCDR ex-Royal Saloon next. He'll be packing me off to Downpatrick with a tape measure any day
-
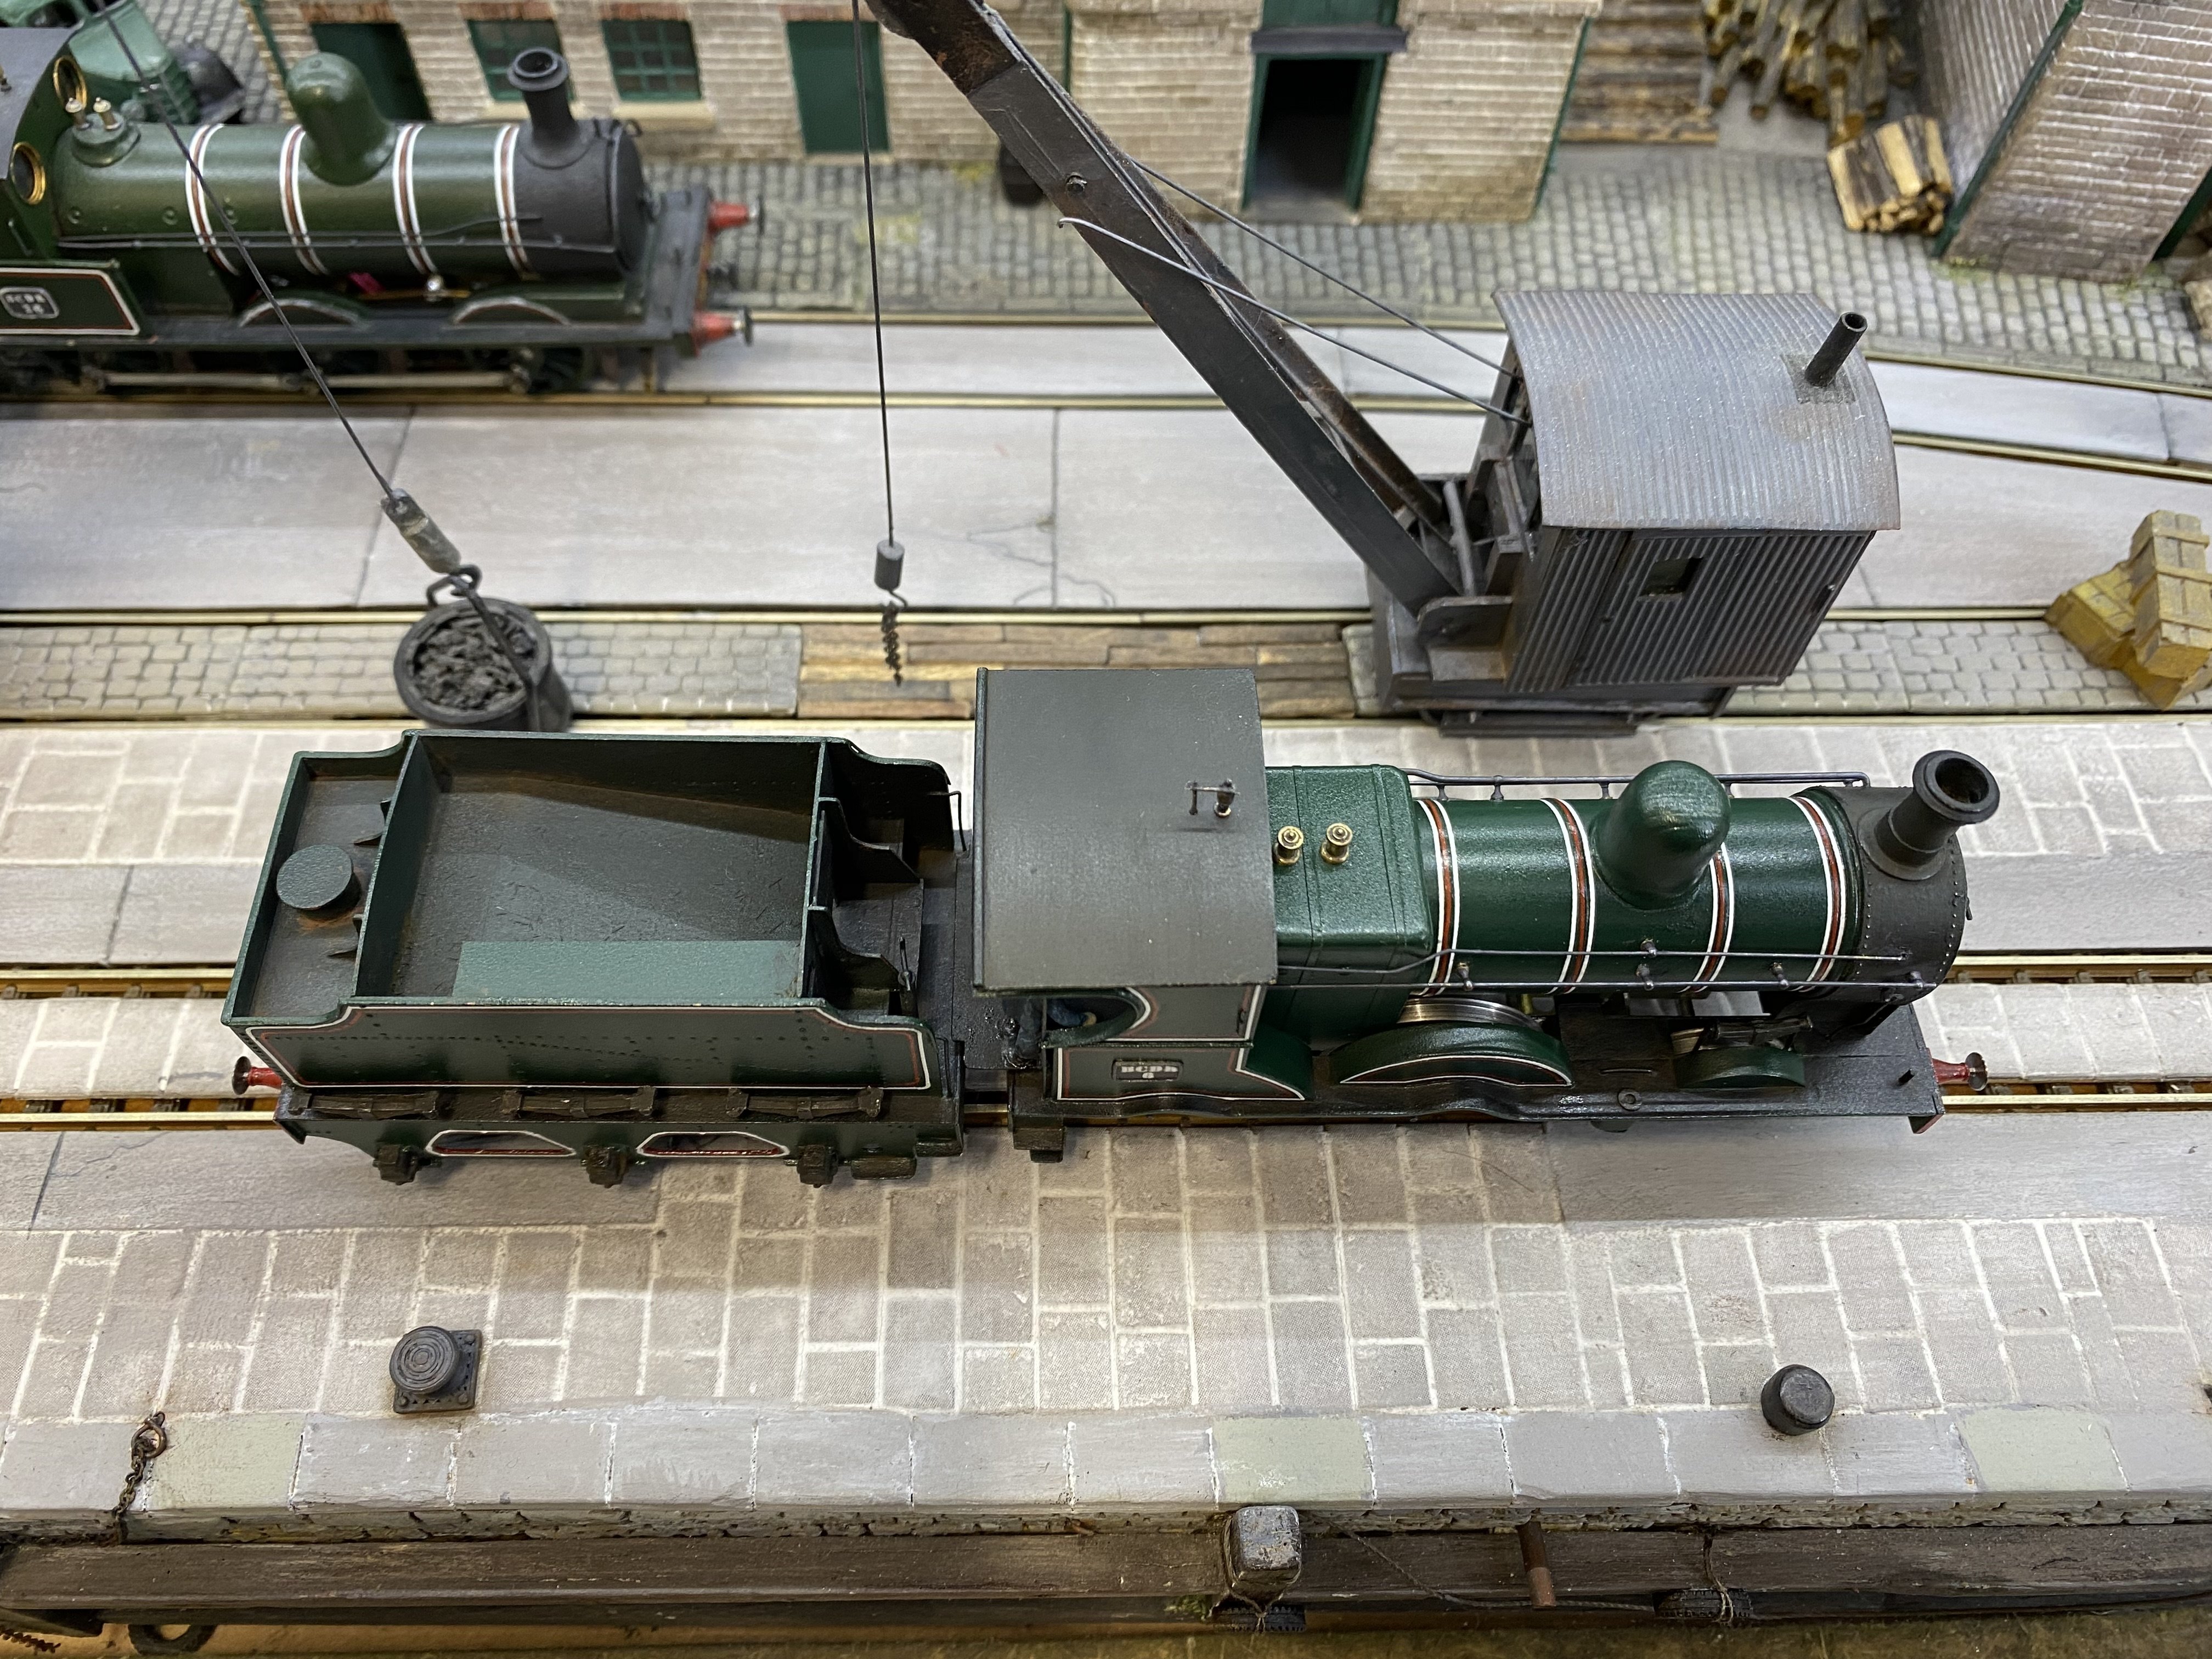
I'm still trying to work out whether the two items in the centre of the picture are oil cans, teapots or mugs.
-
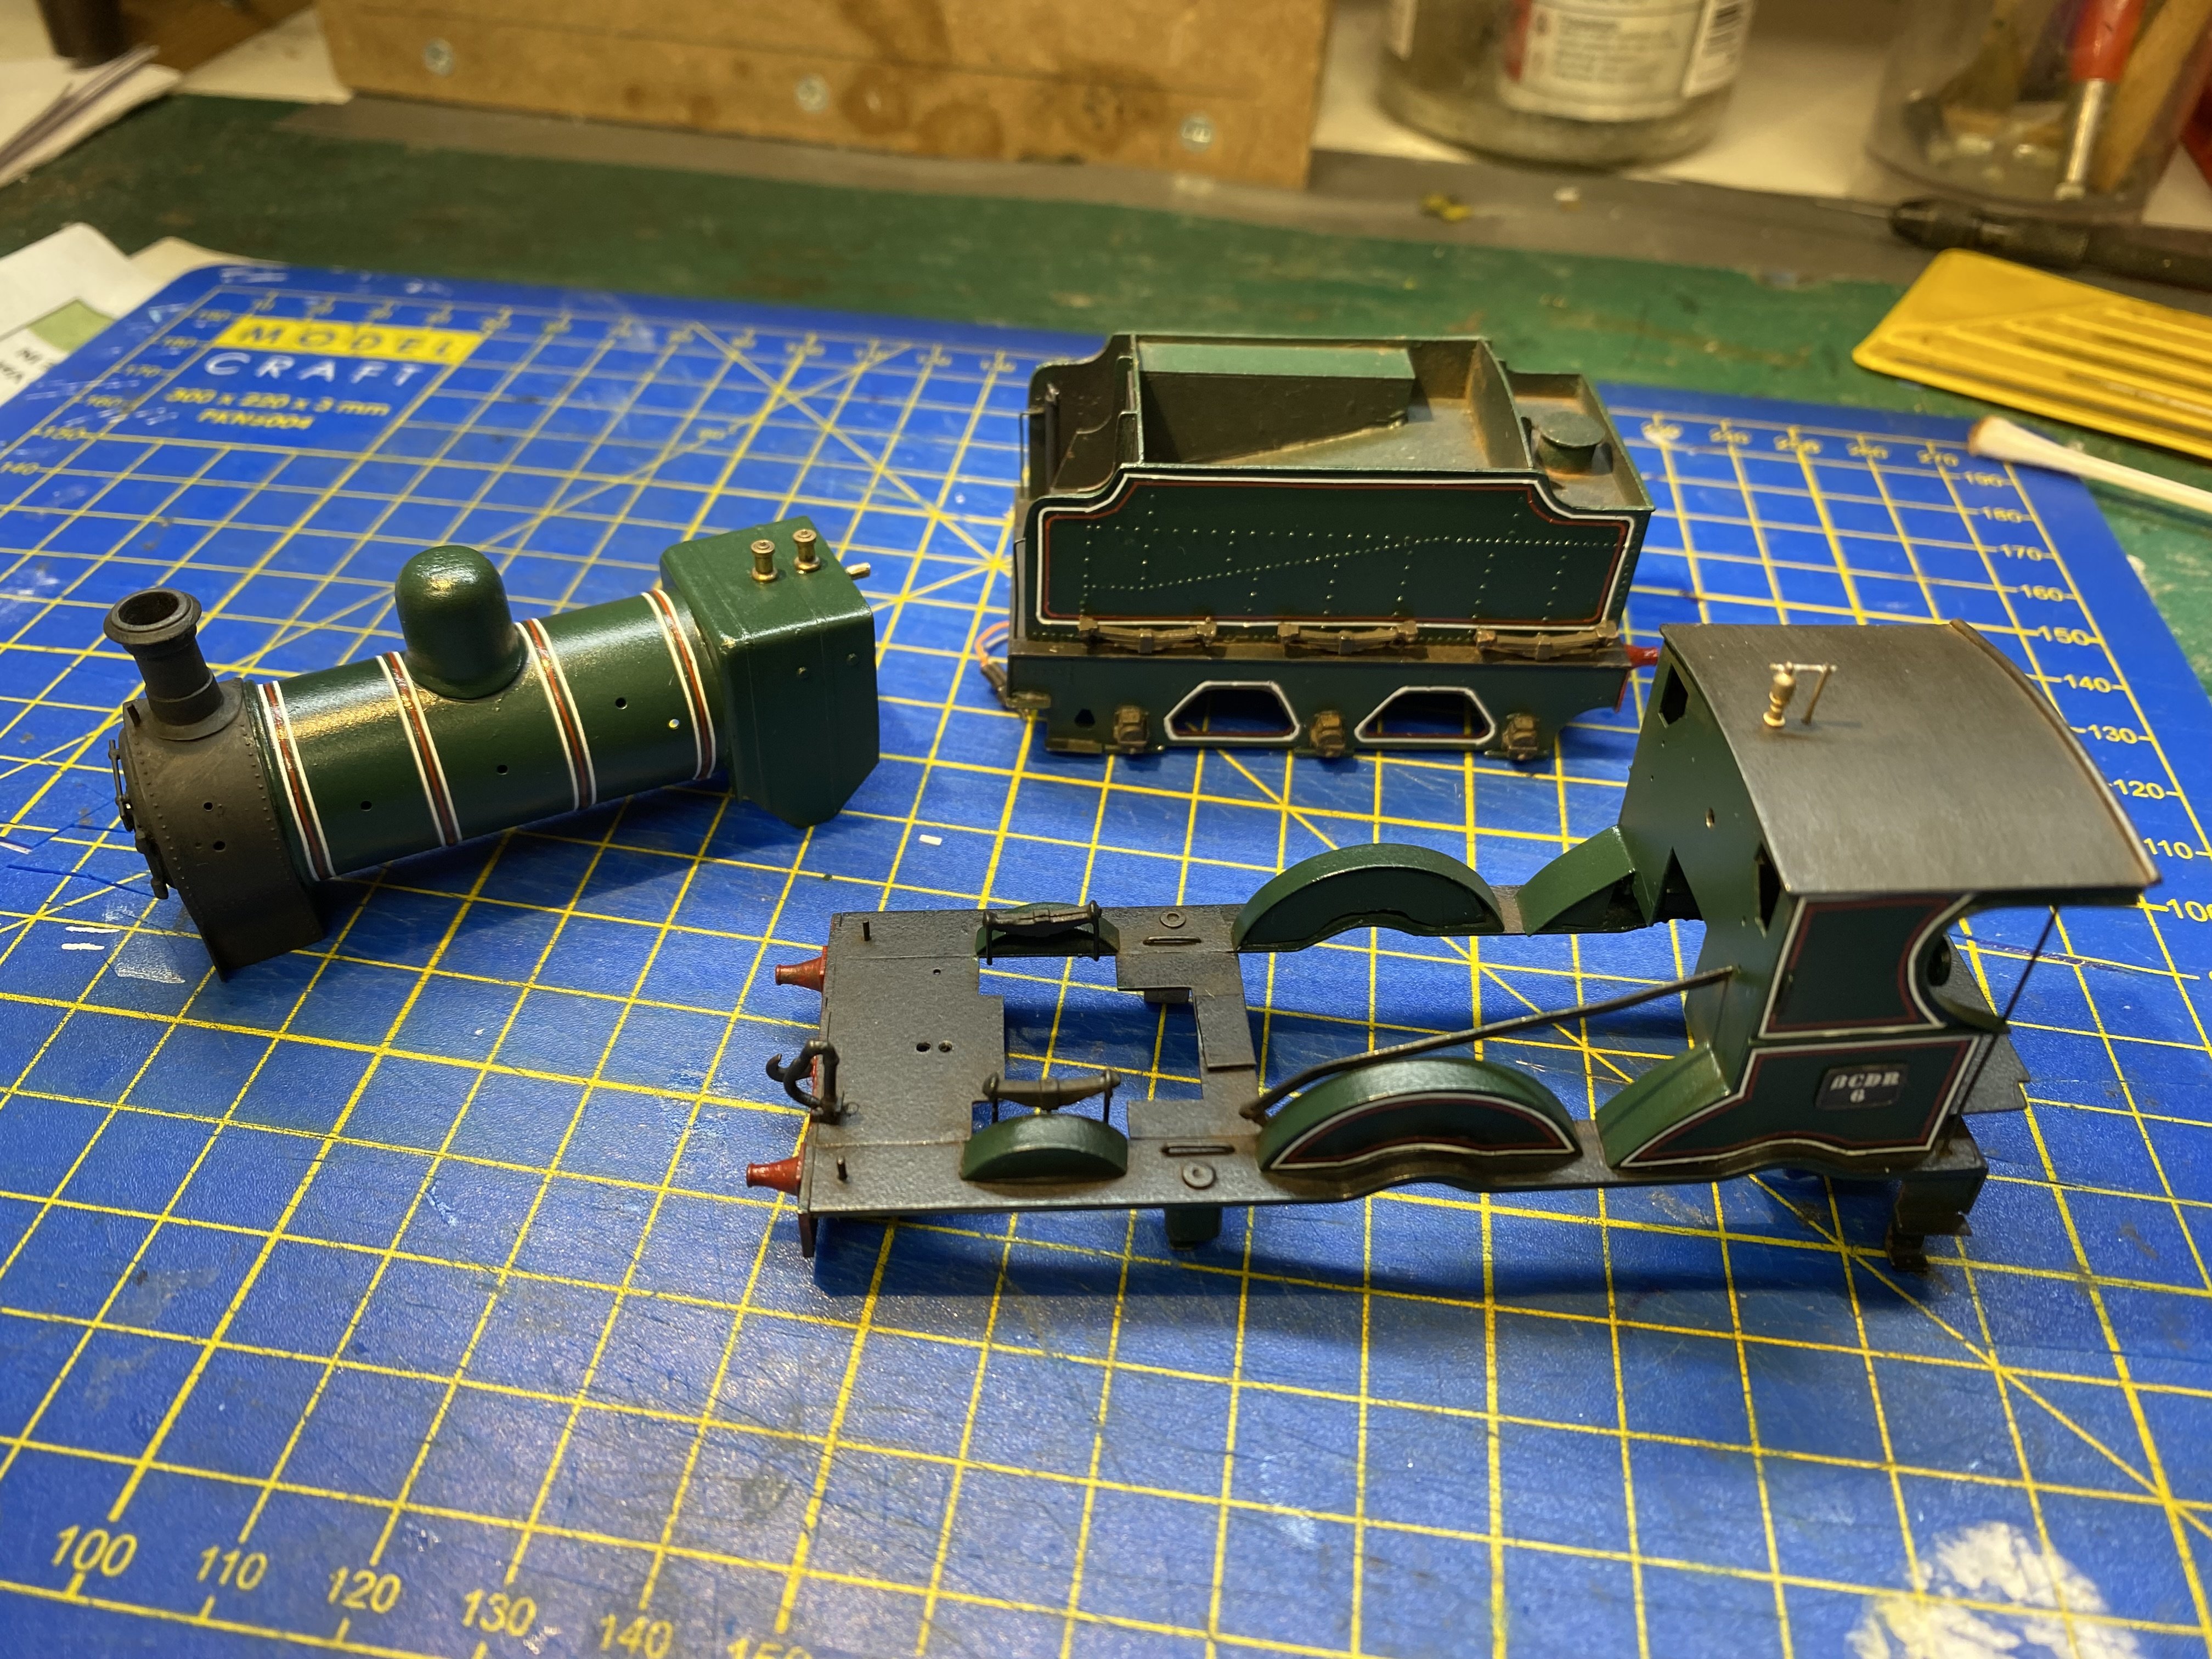
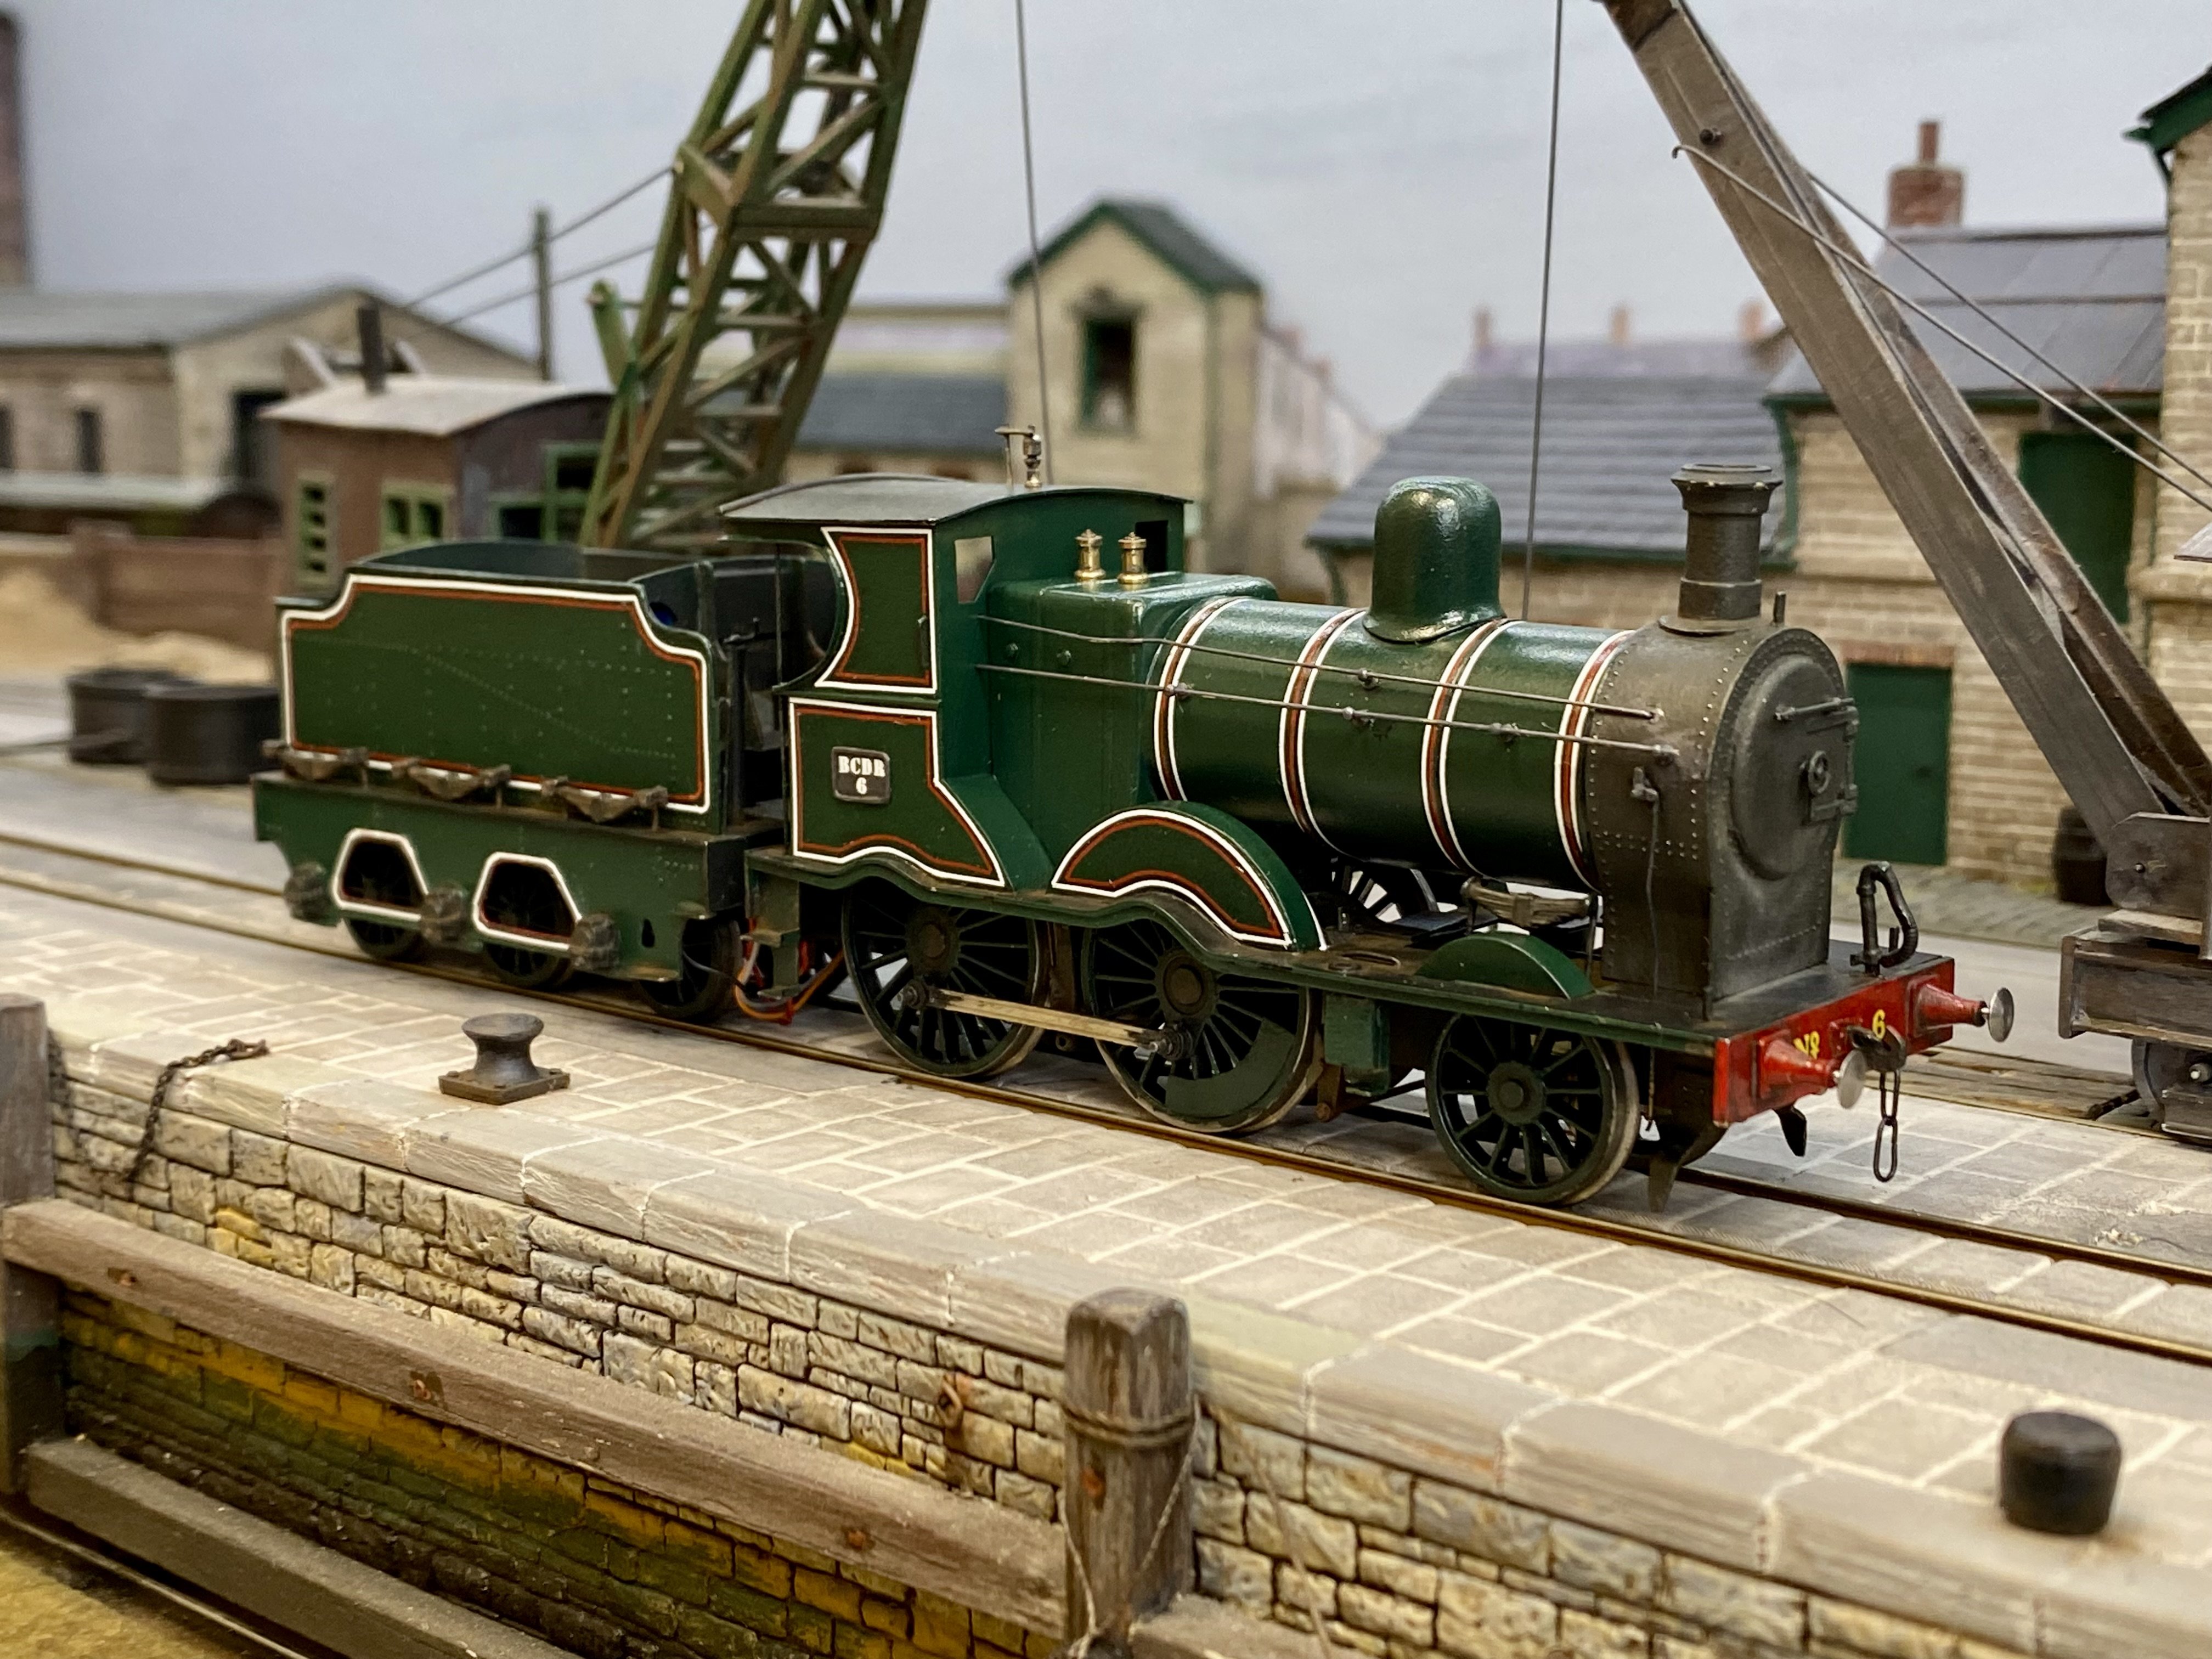
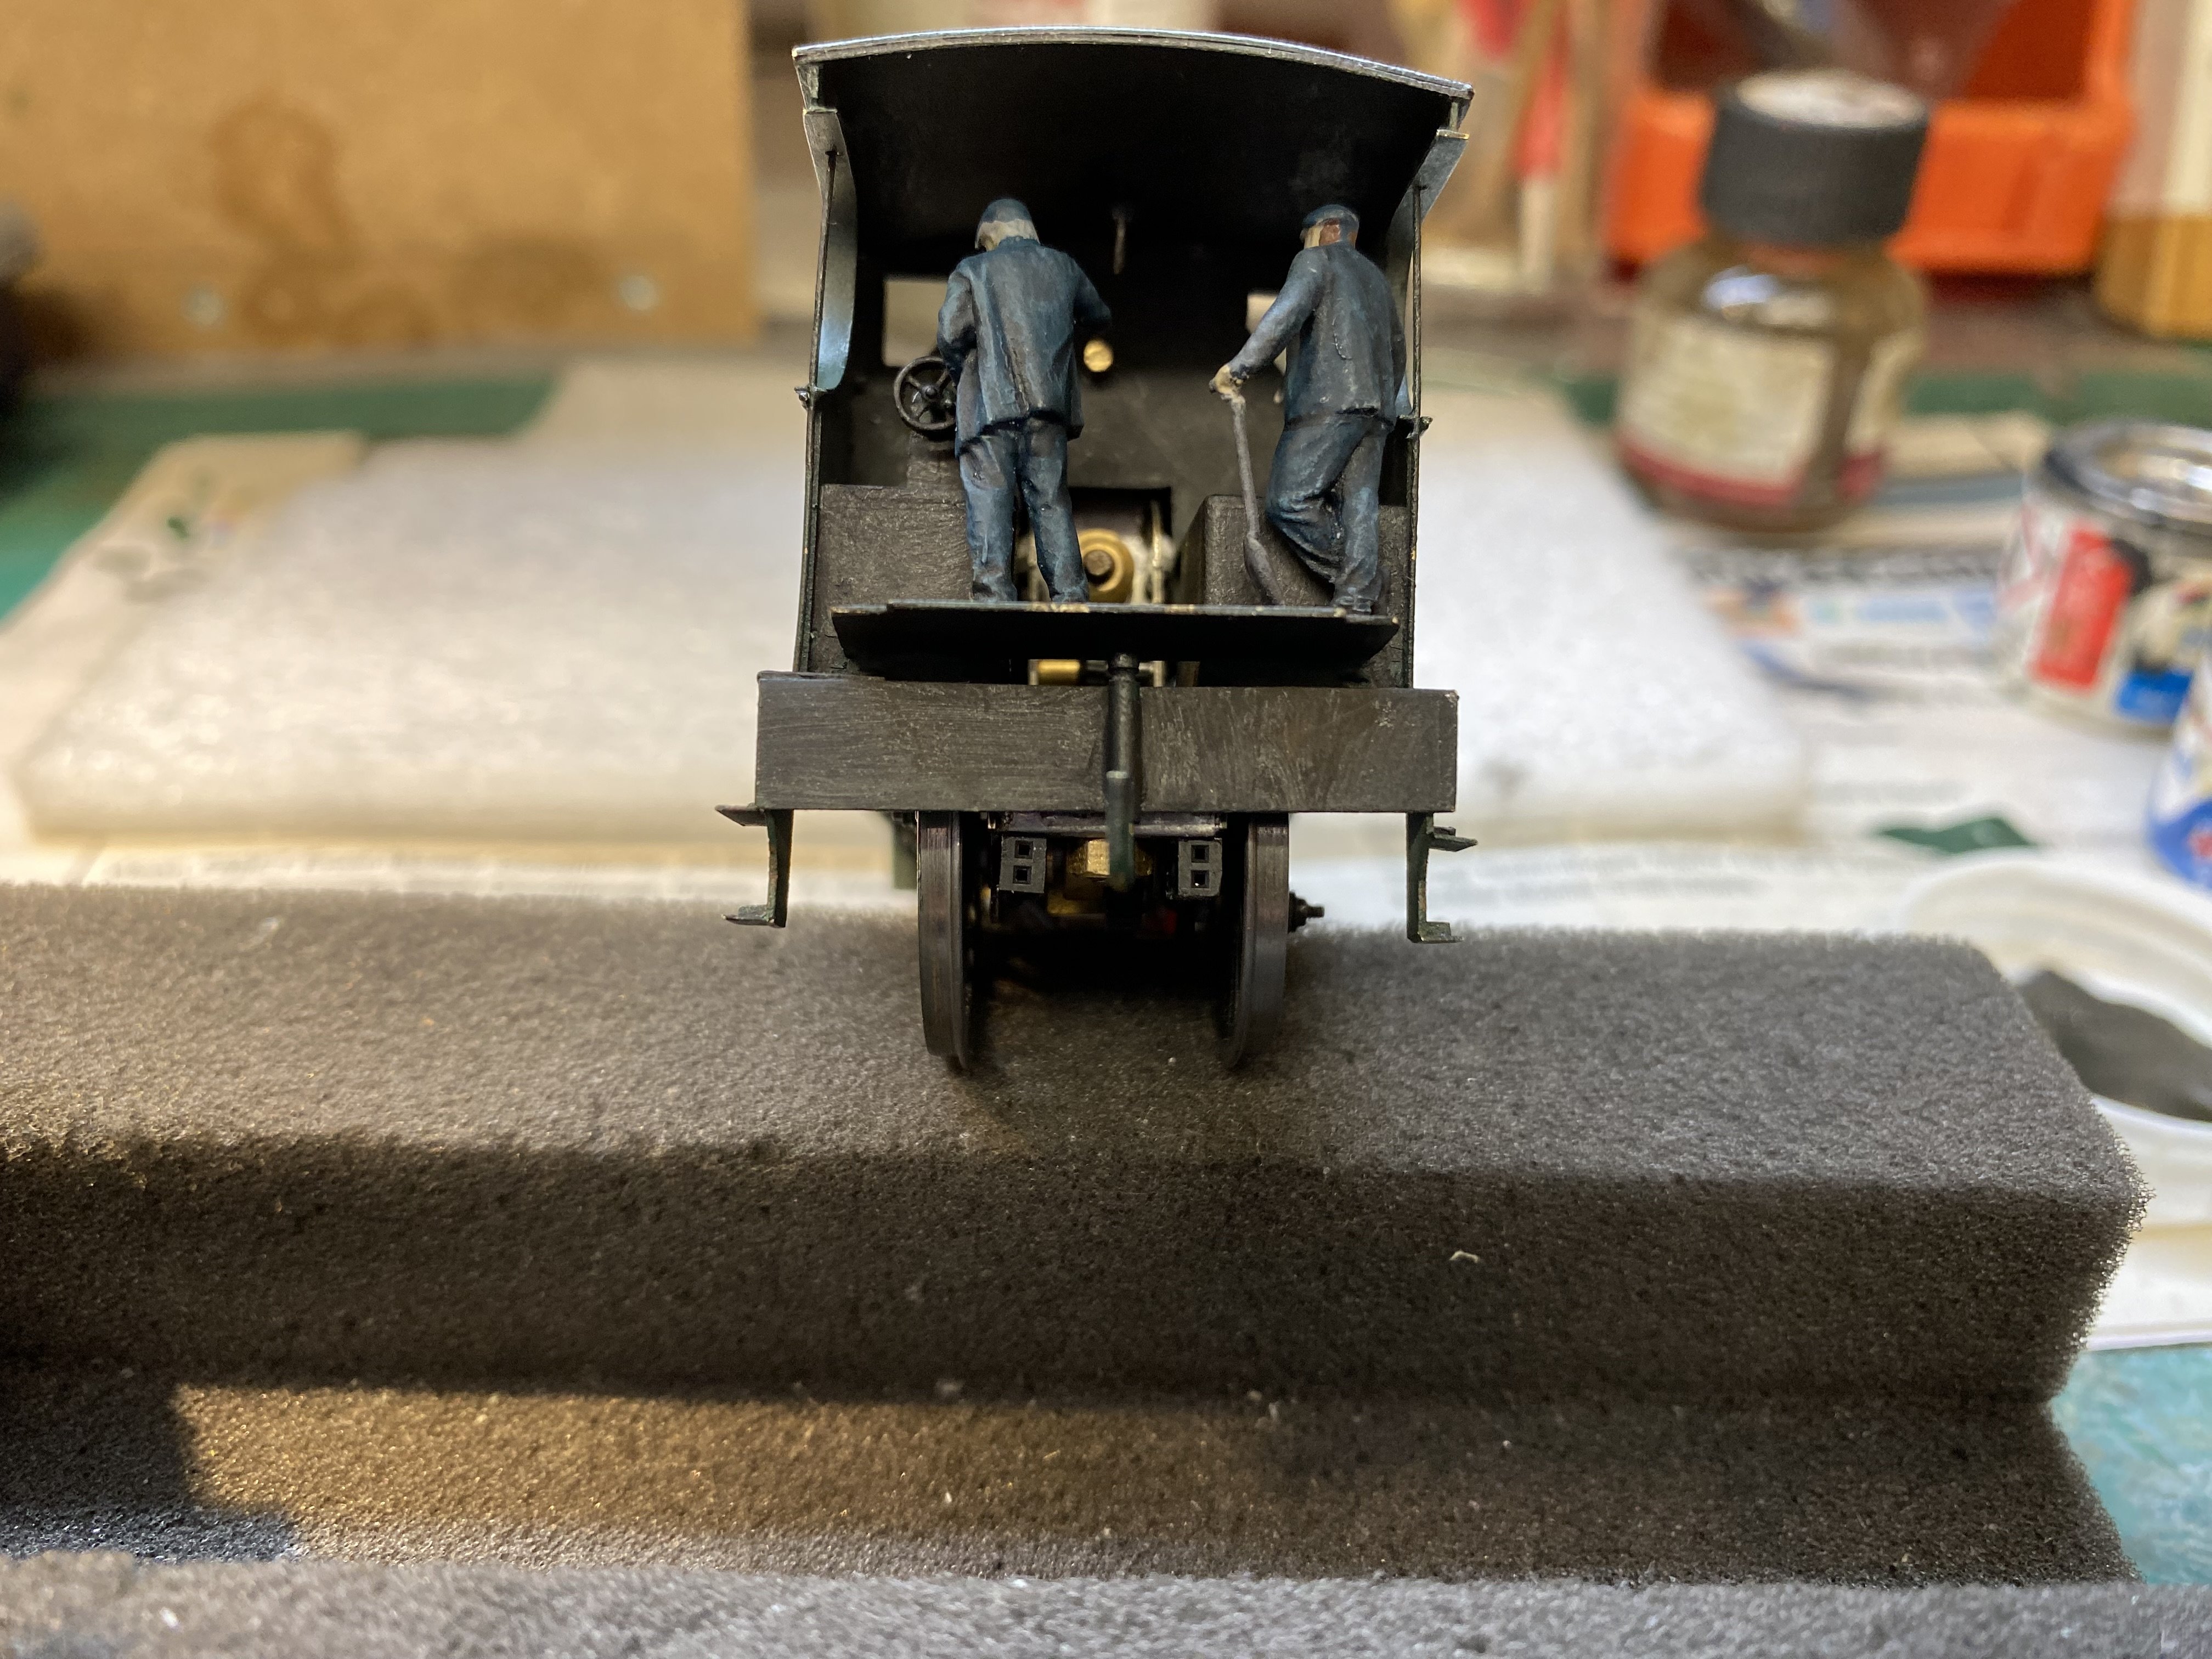
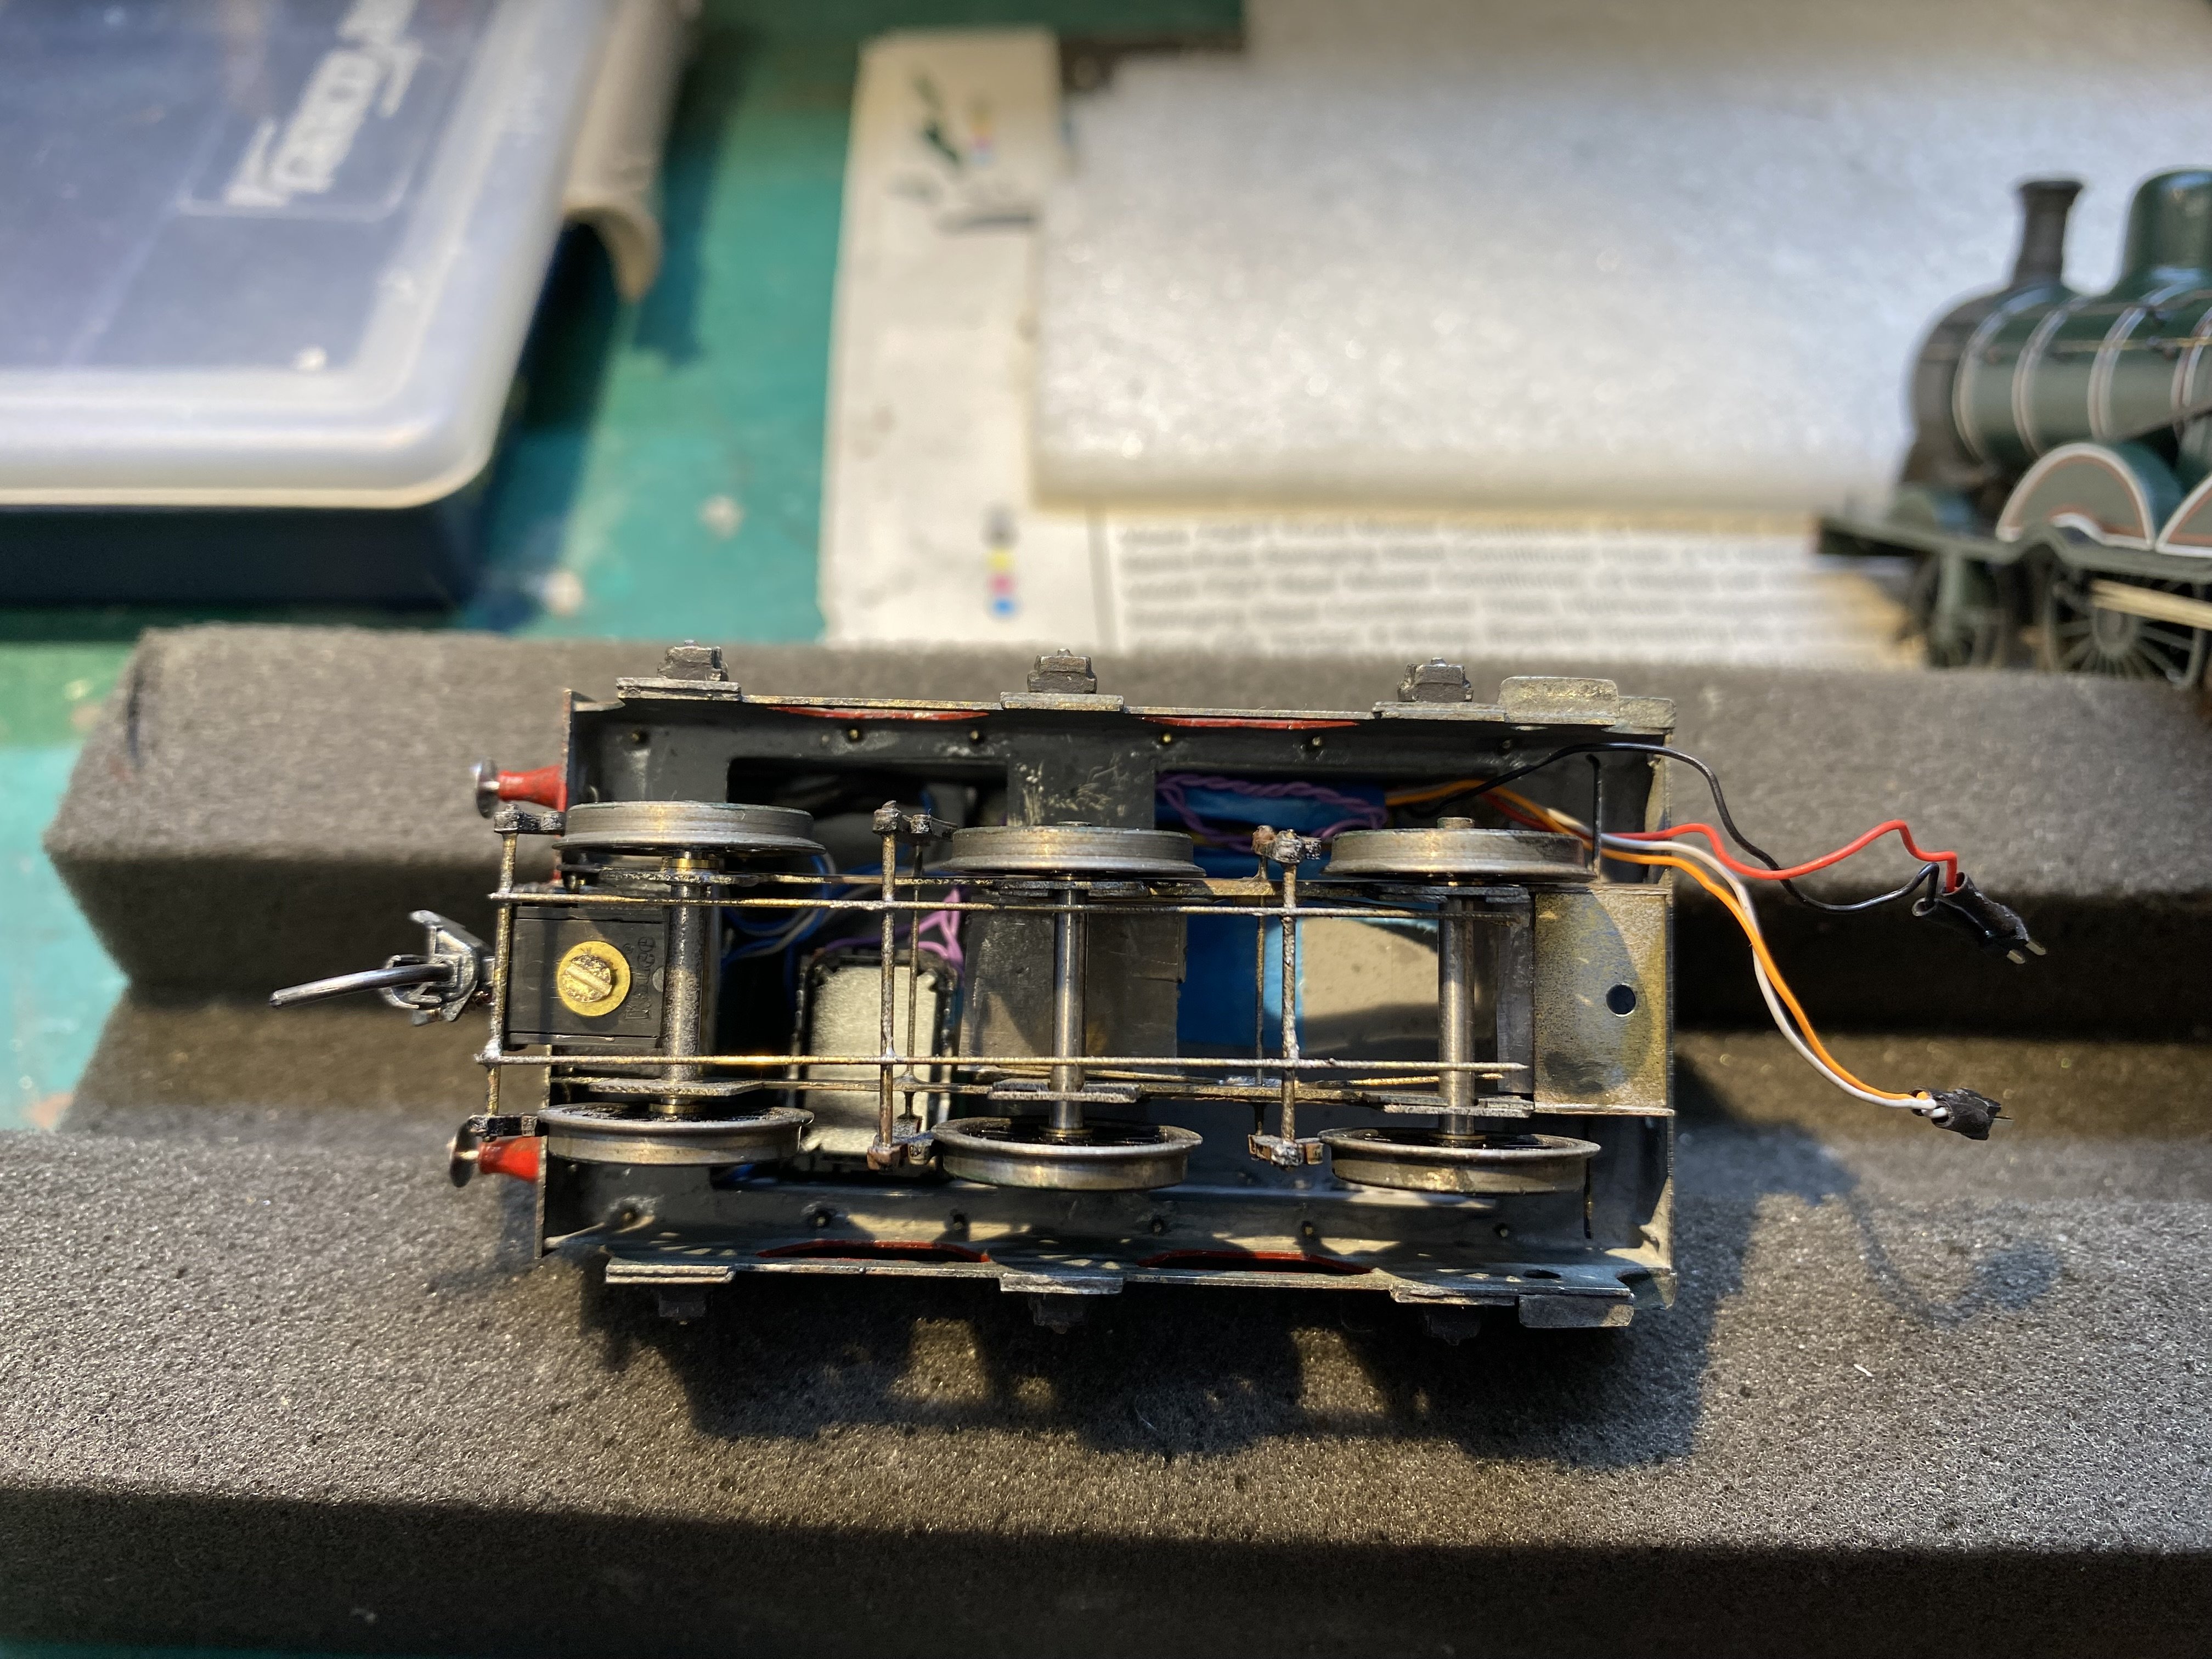
Finally got to the end of lining out No.6 (breathes huge sigh of relief). Some small details have also been added - whistle, safety valves, tender springs - and a bit of light weathering done. Compared to the BCDR tank locos where the large tanks could be filled with lead, there is a lot less space in this one to stow extra weight. However, putting the DCC gubbins in the tender freed up the boiler for this. Arranging things this way means having 4 wires running between loco and tender - 2 for the pickups and 2 for the motor. If the wires are too stiff as they were in my first attempts, they tend to interfere with the reliable tracking of the ensemble. Fine wire of the sort usually connected to DCC chips does the job ok. A pair micro sockets, one connected to the motor and one to the pickups are glued under the loco chassis at the back and flying leads from the tender plug into these. The lack of backhead detail is very evident in the above view. My excuse is that I wasn't sure what it should look like so as usual, the crew have the extra task of hiding the evidence, or lack of it. Also very evident is how ridiculously out of scale 16.5mm gauge is. I'm going to have to give up on OO one of these days. Even with extra weight inside the tender, there was still a wealth of free space so I decided to try a sound chip for this one. The chip, speaker and stay-alive capacitor are all secreted in the tender. It still needs some detailing and a coal load in the tender. That left side number plate needs straightened too but all in all I think it's just about done. A run at Loughan Quay. No 6.mov
- 645 replies
-
- 13
-
-
-
Interesting idea David. I suspect the challenge would be making the shaft connection between loco and tender flexible enough to allow the combination to track properly. With my current project, the BCDR 2-4-0, I've placed the DCC chip in the tender so as to allow more room for weight in the loco. This requires 4 wires between loco and tender (2 x pickups, 2 x motor). In my first attempt, the wires were too stiff and interfered with the tracking of the tender - front wheels were clear of the rails on occasion. Finer wire solved the problem. The old method employed by Hornby - motor in the tender driving the tender wheels with a passive loco simply along for the ride - might be easier to do. Having said that though, in my experience, putting hornblocks on the front carriers and the front drivers and a compensation beam between them - effectively treating the 2-4-0 as an 0-6-0 - seems to address any issues of balance pretty effectively. A bit harder to do with a 4-4-0 where a bogie is involved but not impossible.
-
Another of the occasional visitors that turn up at Loughan Quay from time to time, this is UTA, ex-NCC, U2 4-4-0 No. 80 "Dunseverick Castle" rebuilt at some point in its career by CME Colm Flanagan. Last seen at Knockloughrim on the Derry Central line during a recent cold spell, it's not clear how it got here but we gave the crew a cup of tea, oiled the axle boxes while they were drinking it and sent them on their way. IMG_1732.MOV
-
Aye! Ye can't trust them oul synthetic fabrics. That acrylic stuff isn't a patch on a good wool worsted. Yer man was sold a pup when he bought thon suit. I suppose they told him it was linen.