Tullygrainey
-
Posts
1,139 -
Joined
-
Last visited
-
Days Won
60
Content Type
Profiles
Forums
Events
Gallery
Blogs
Everything posted by Tullygrainey
-
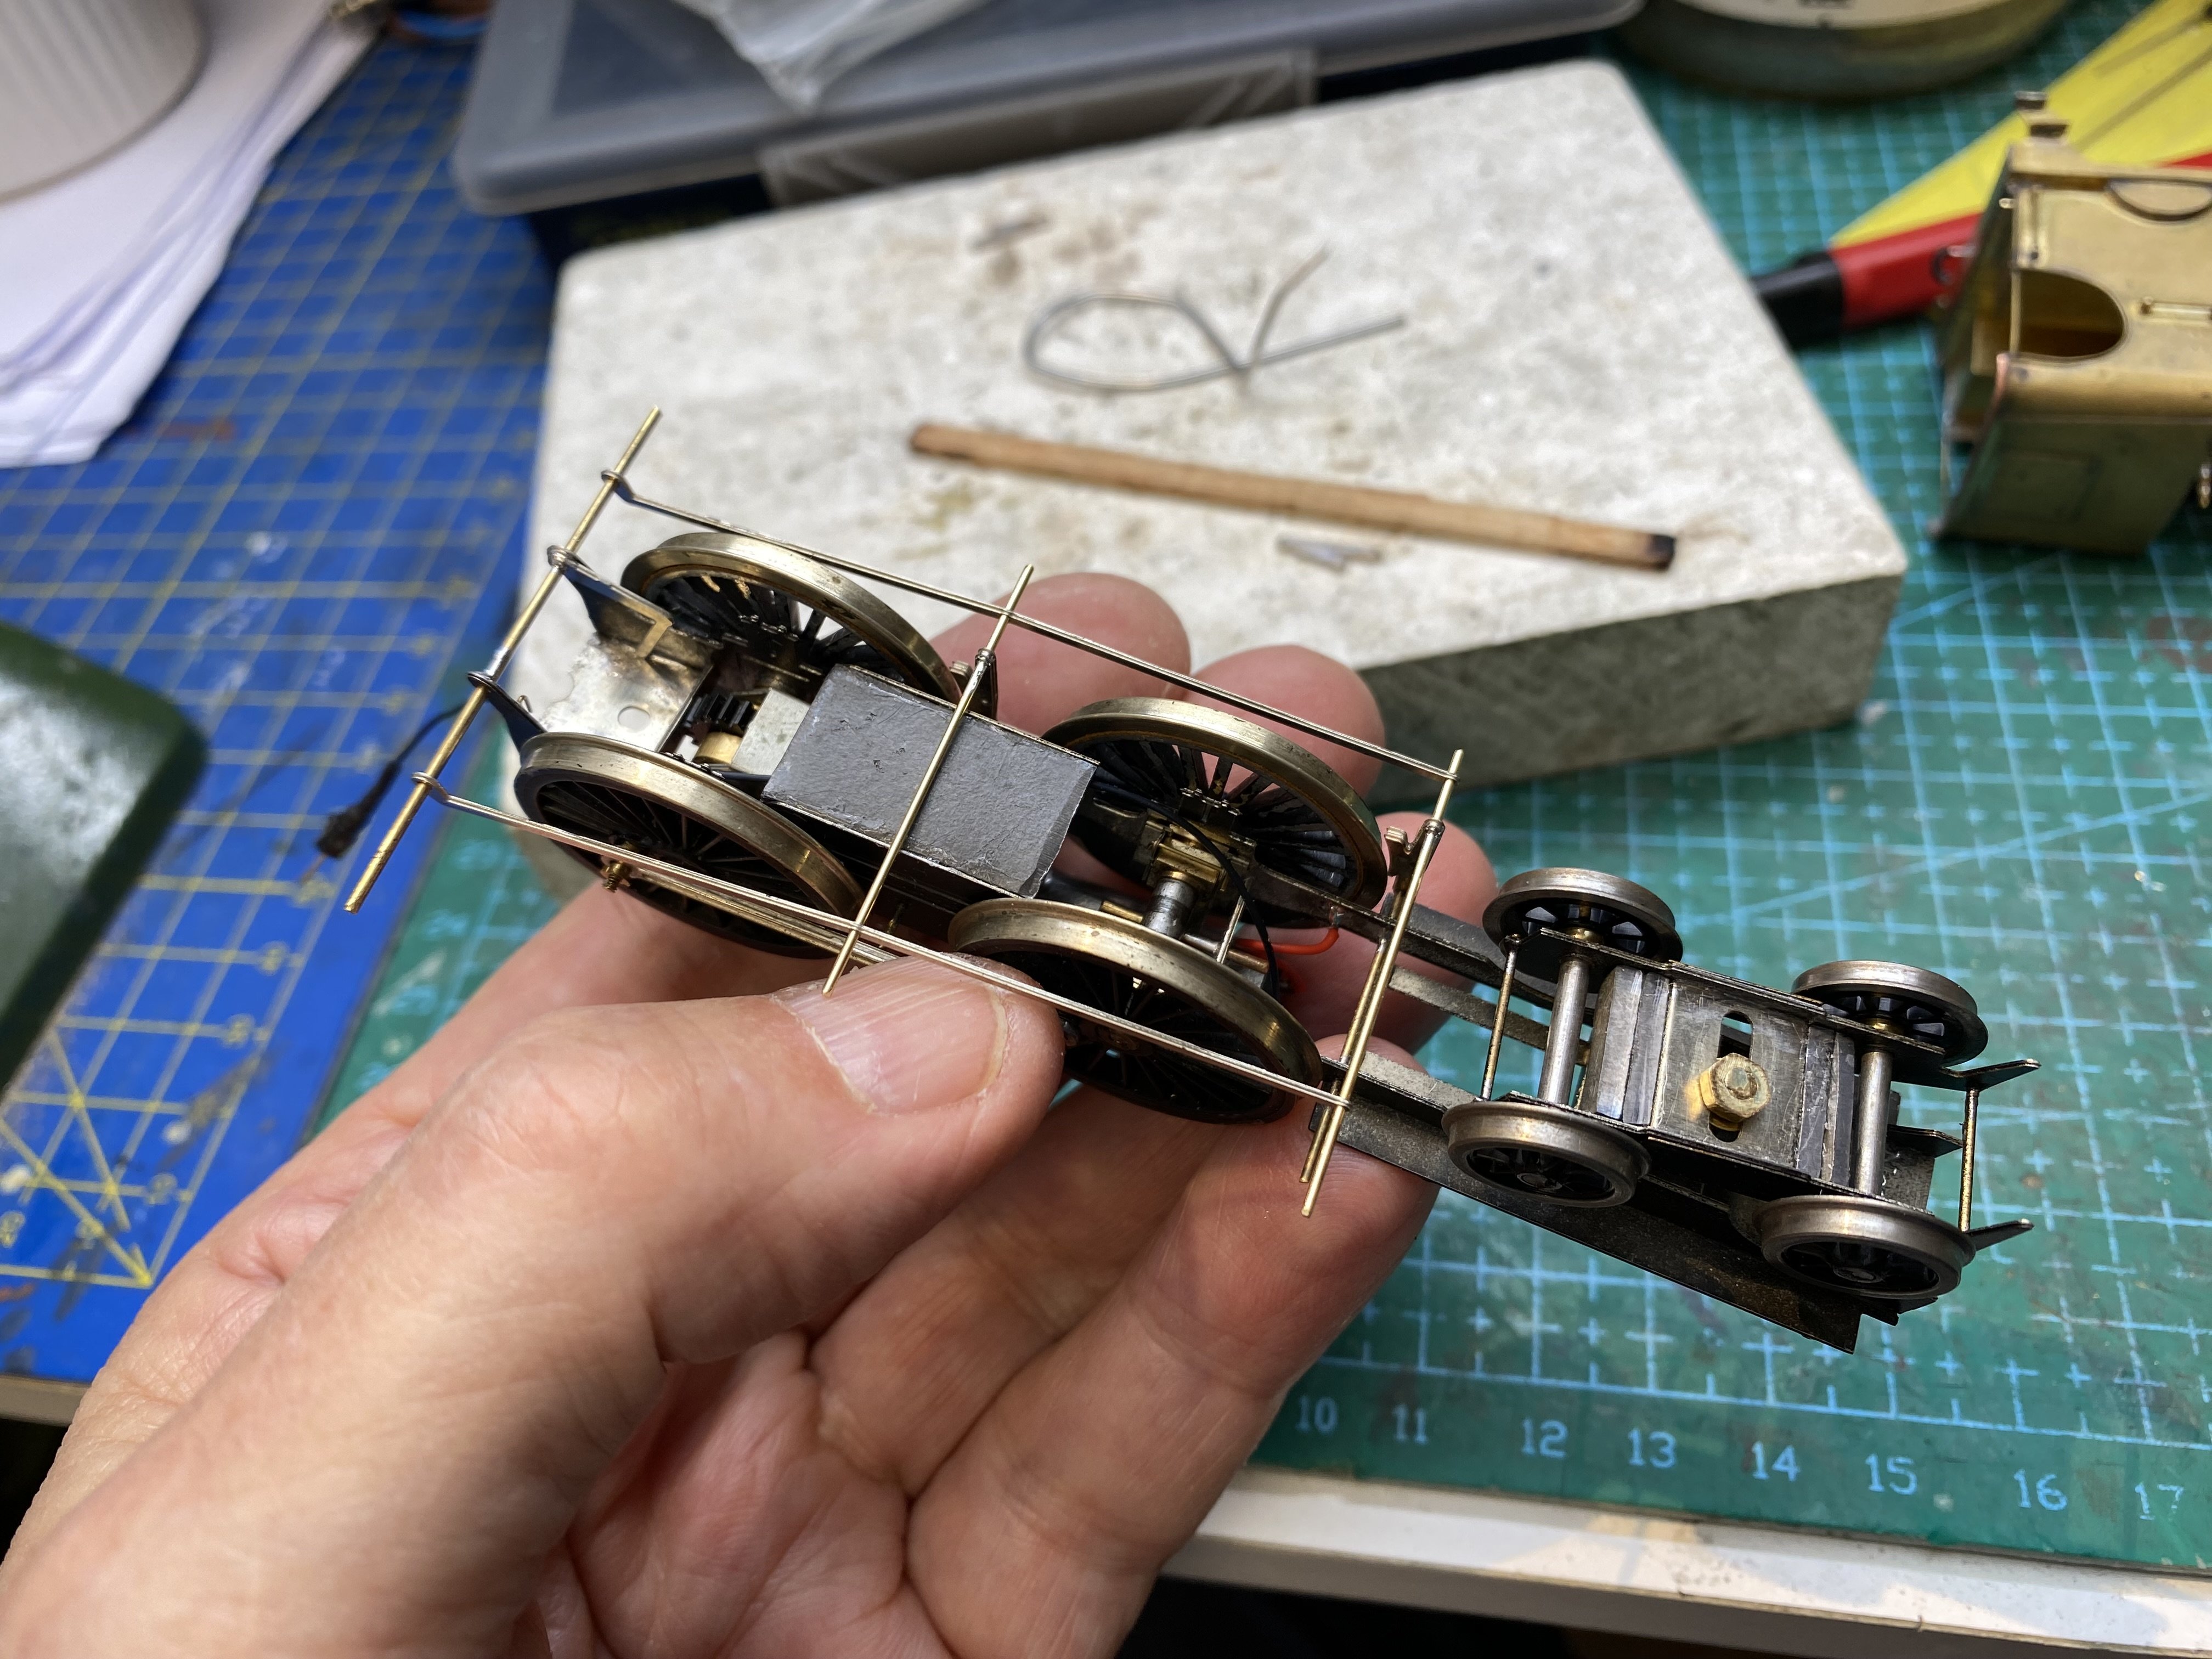
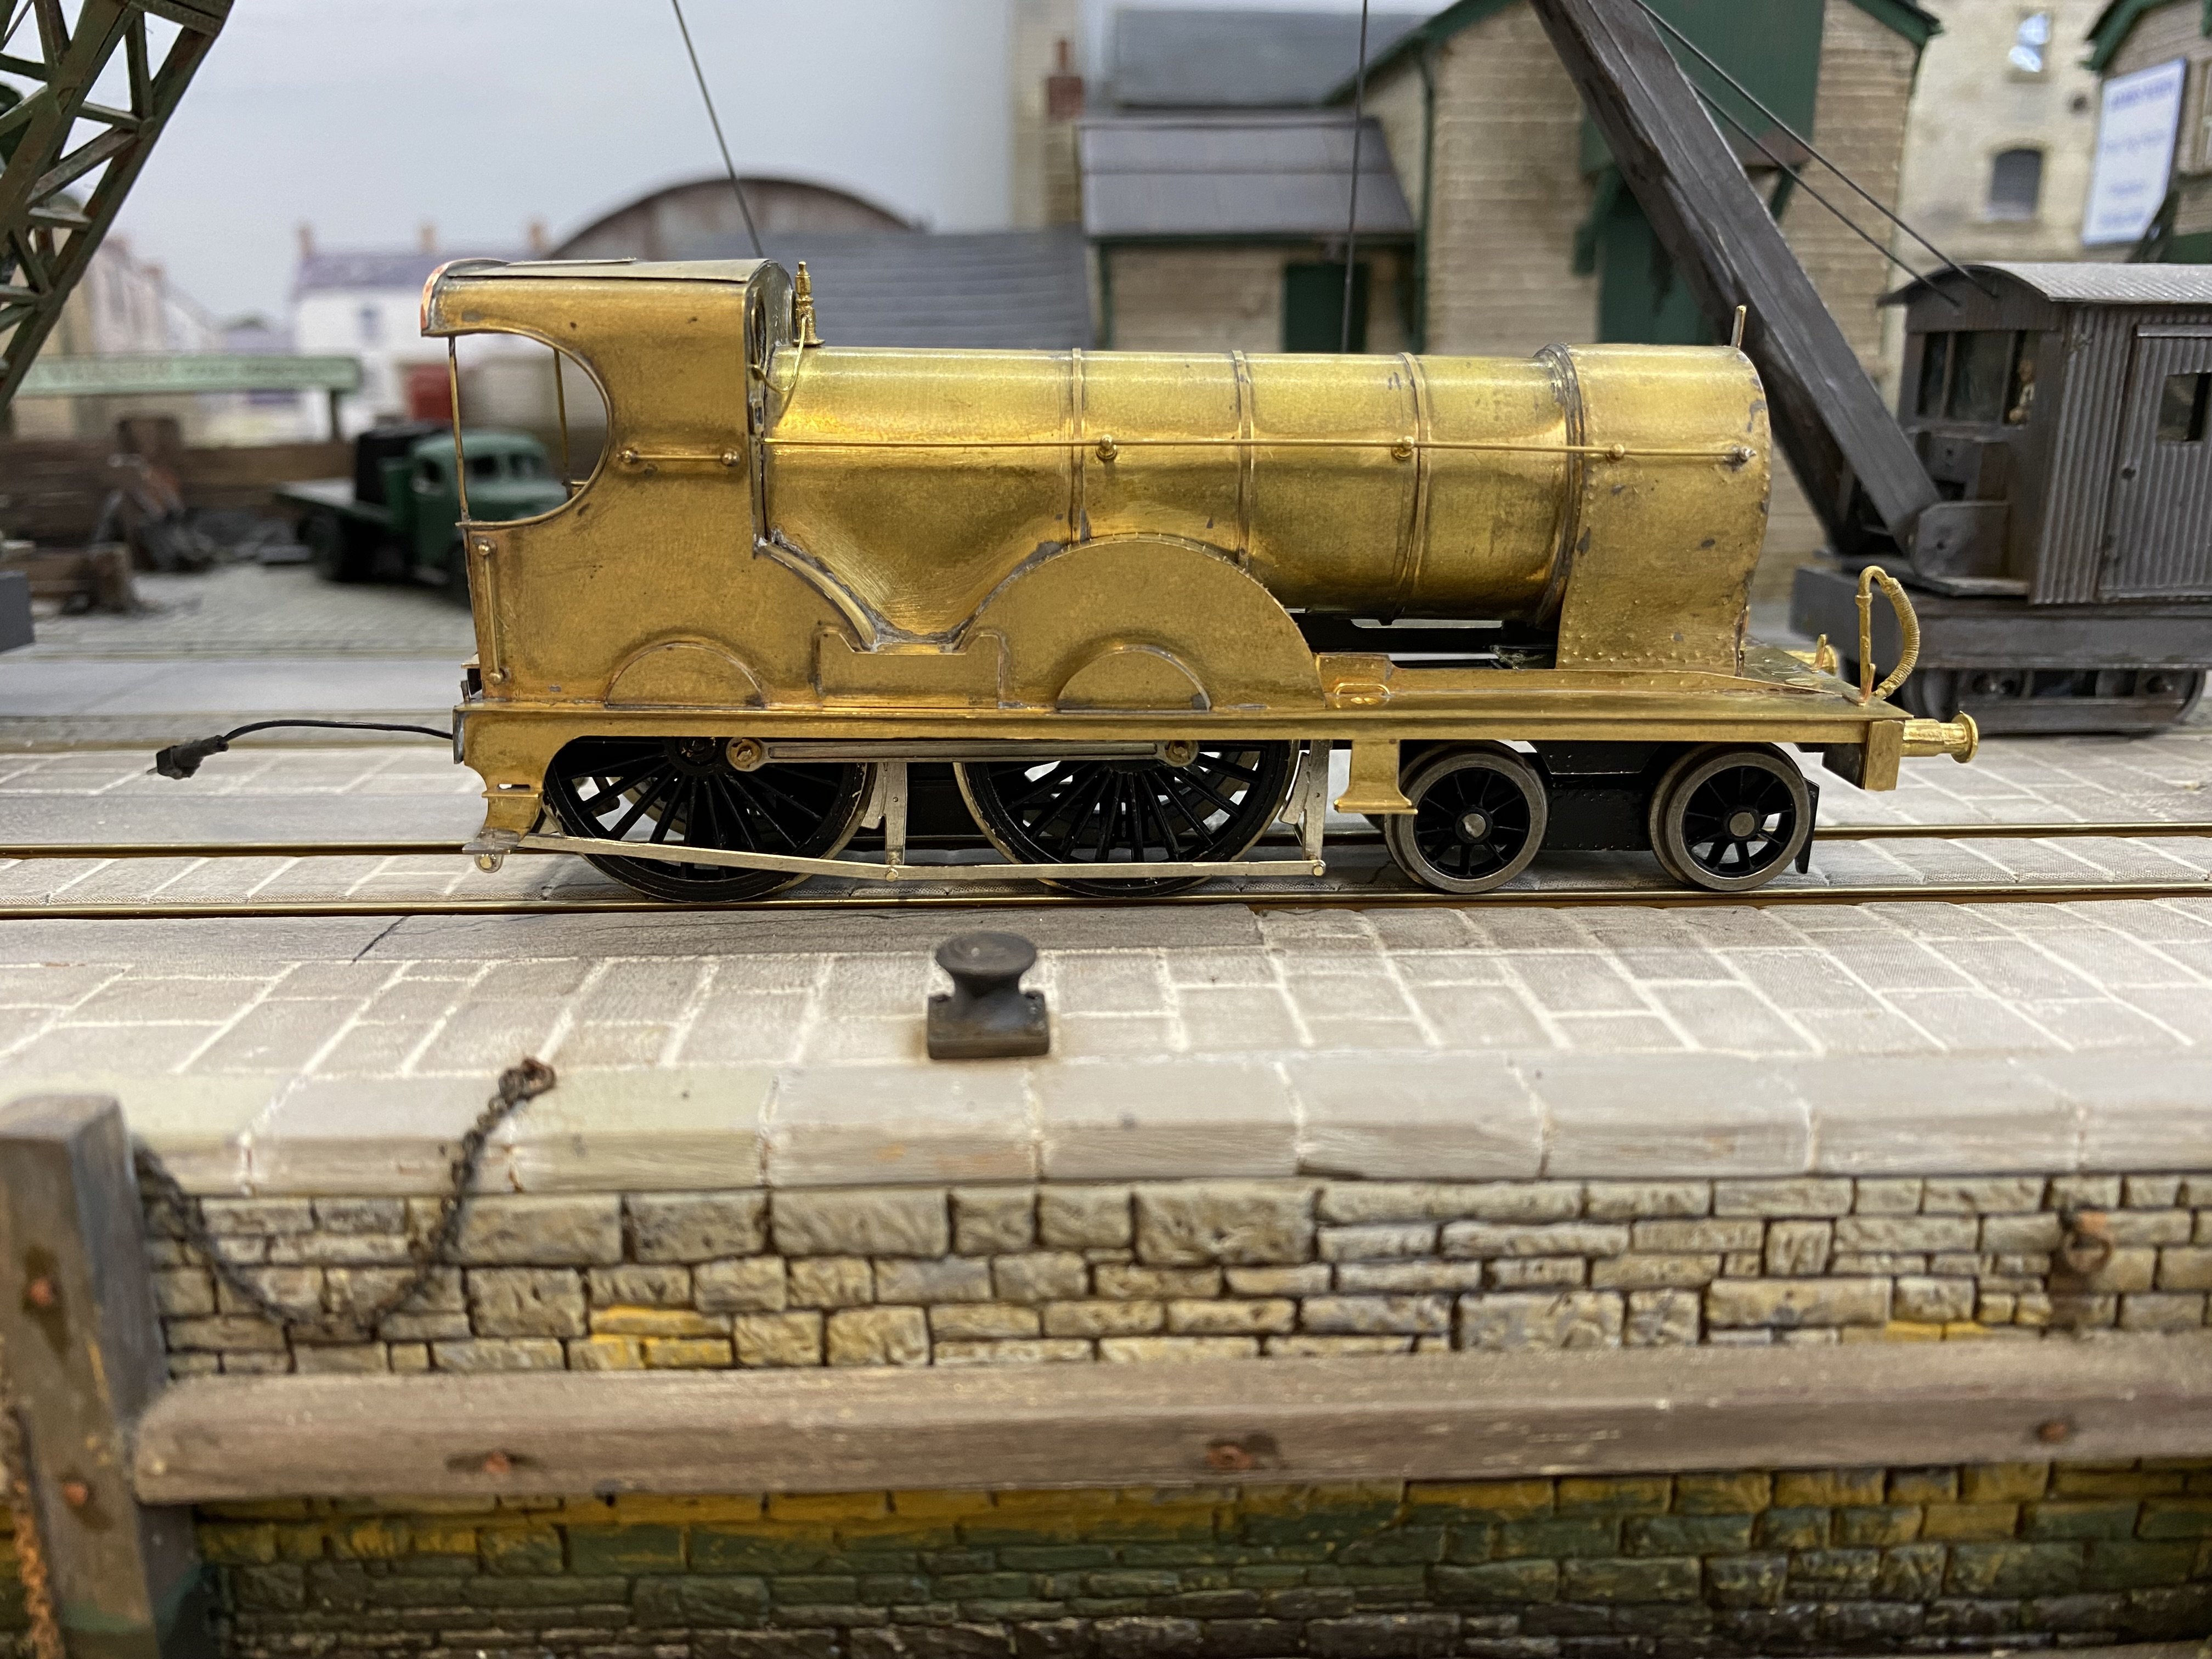
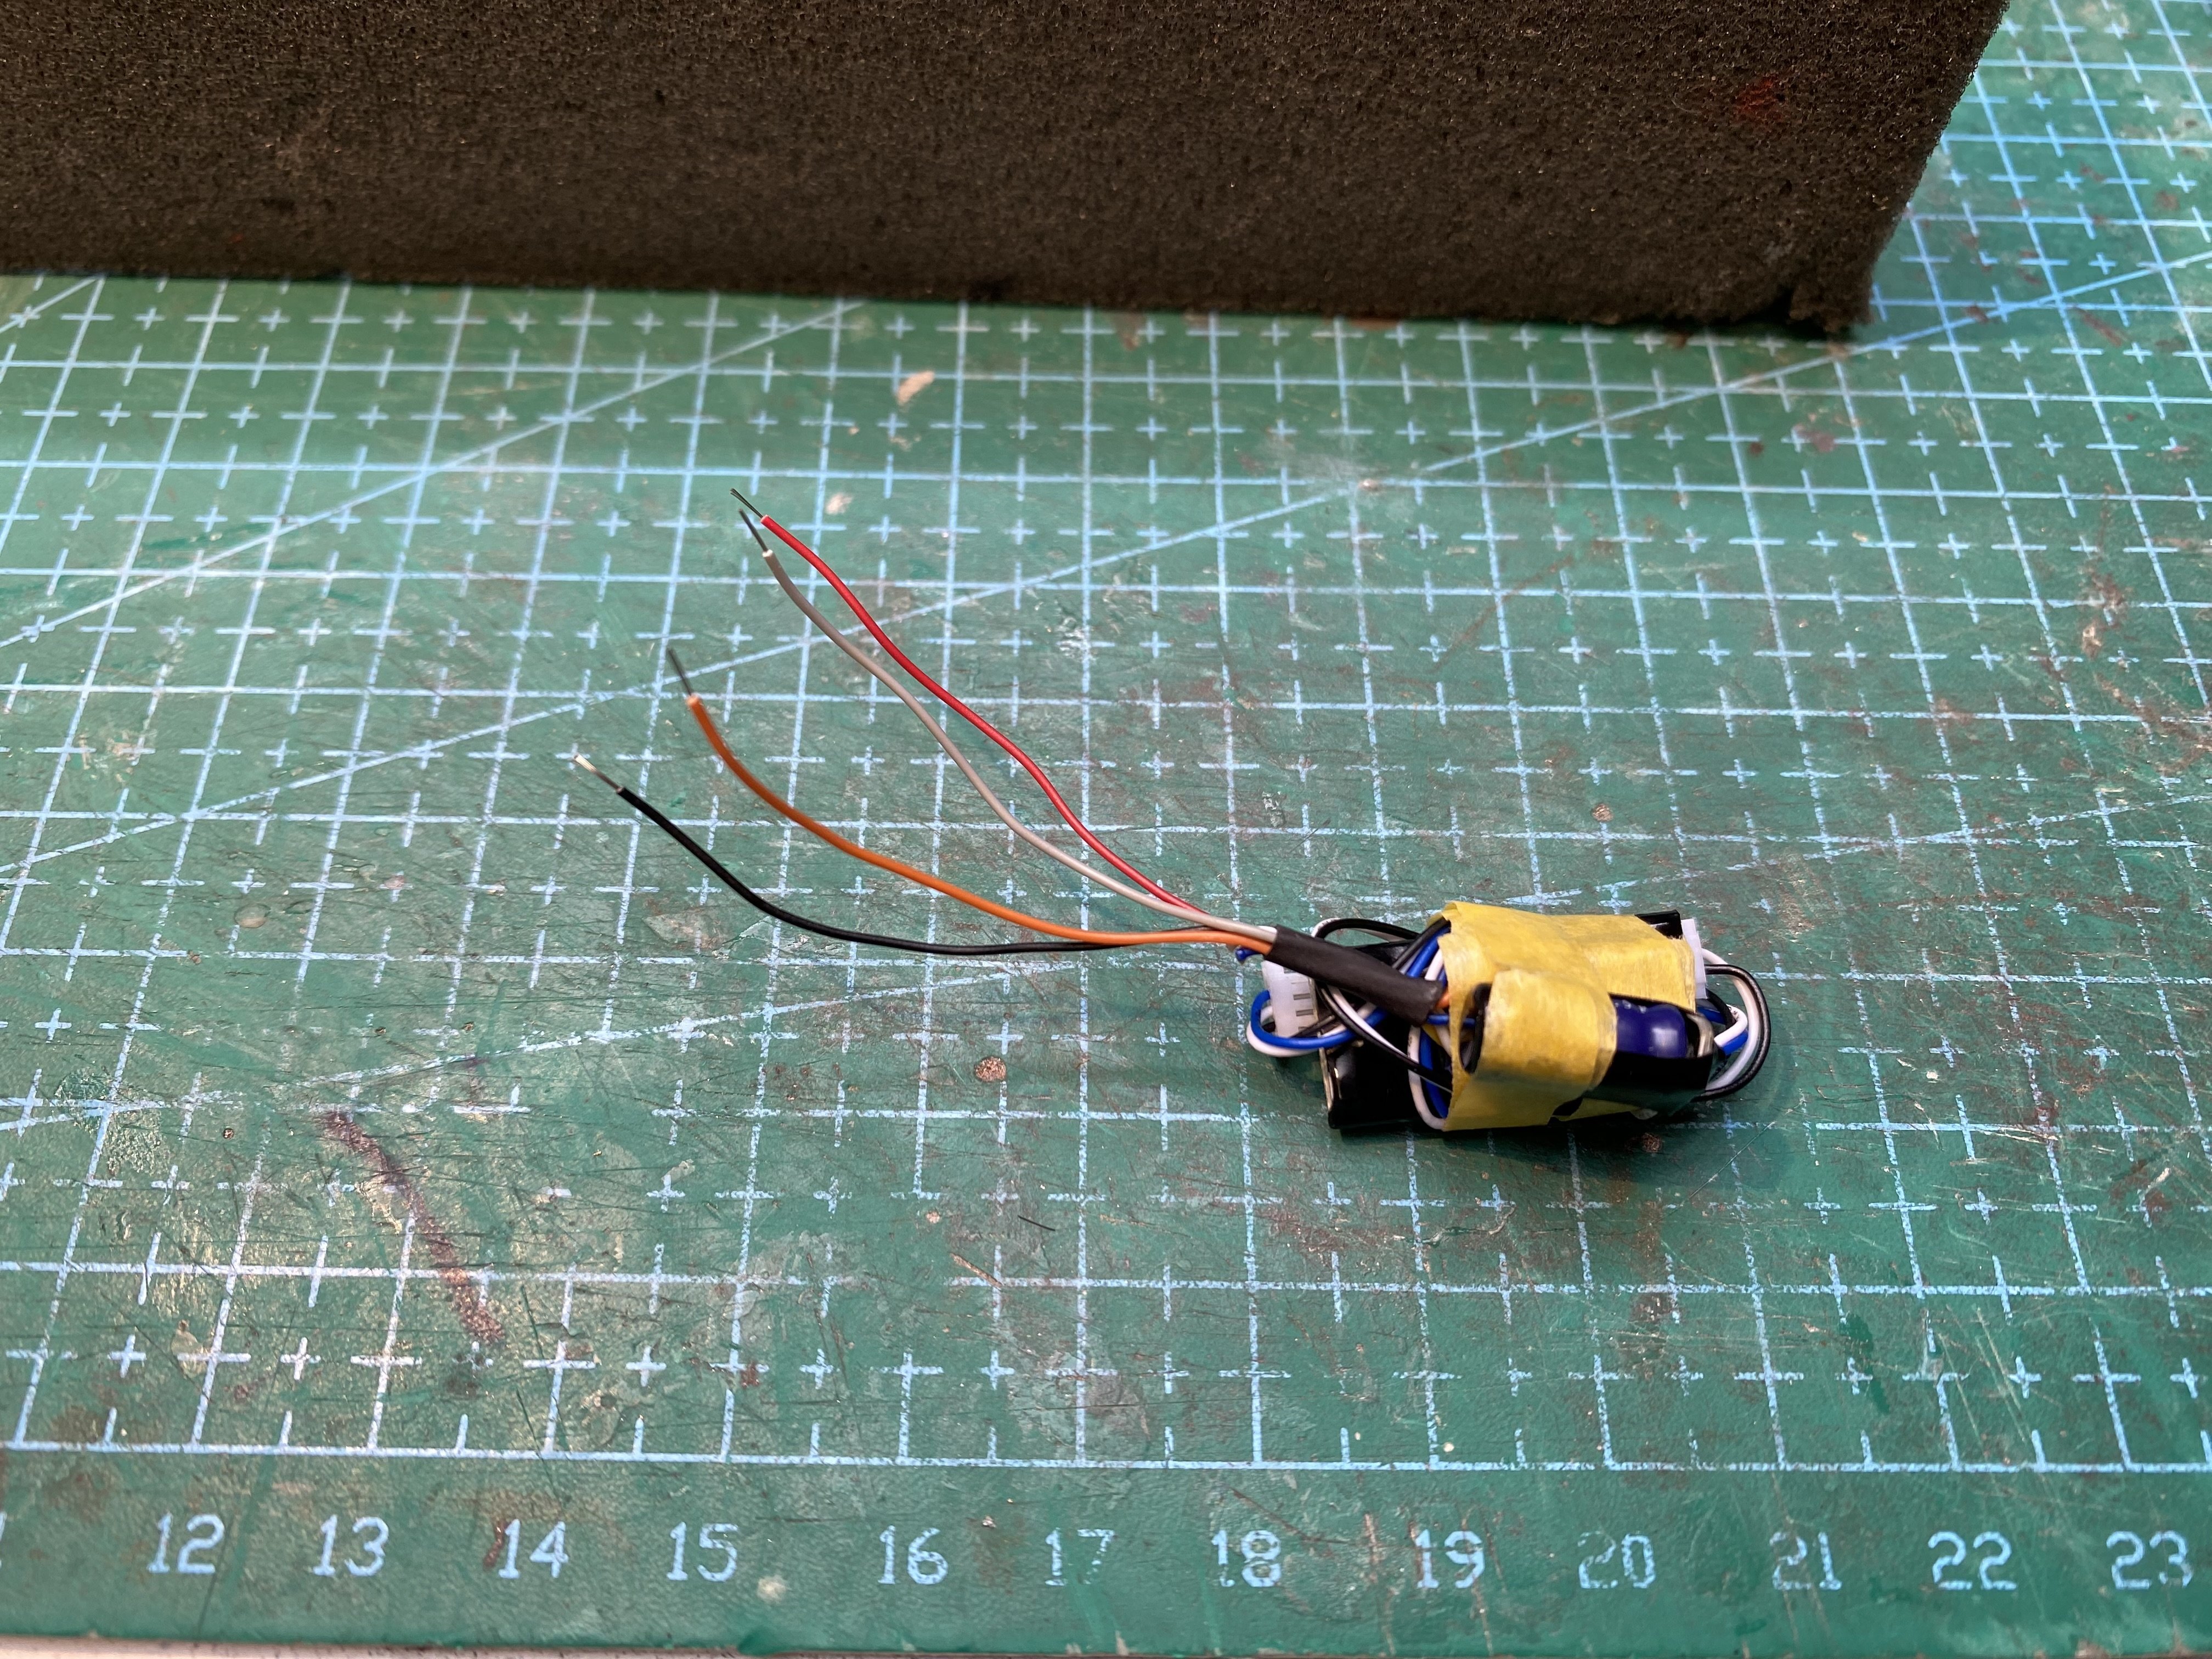
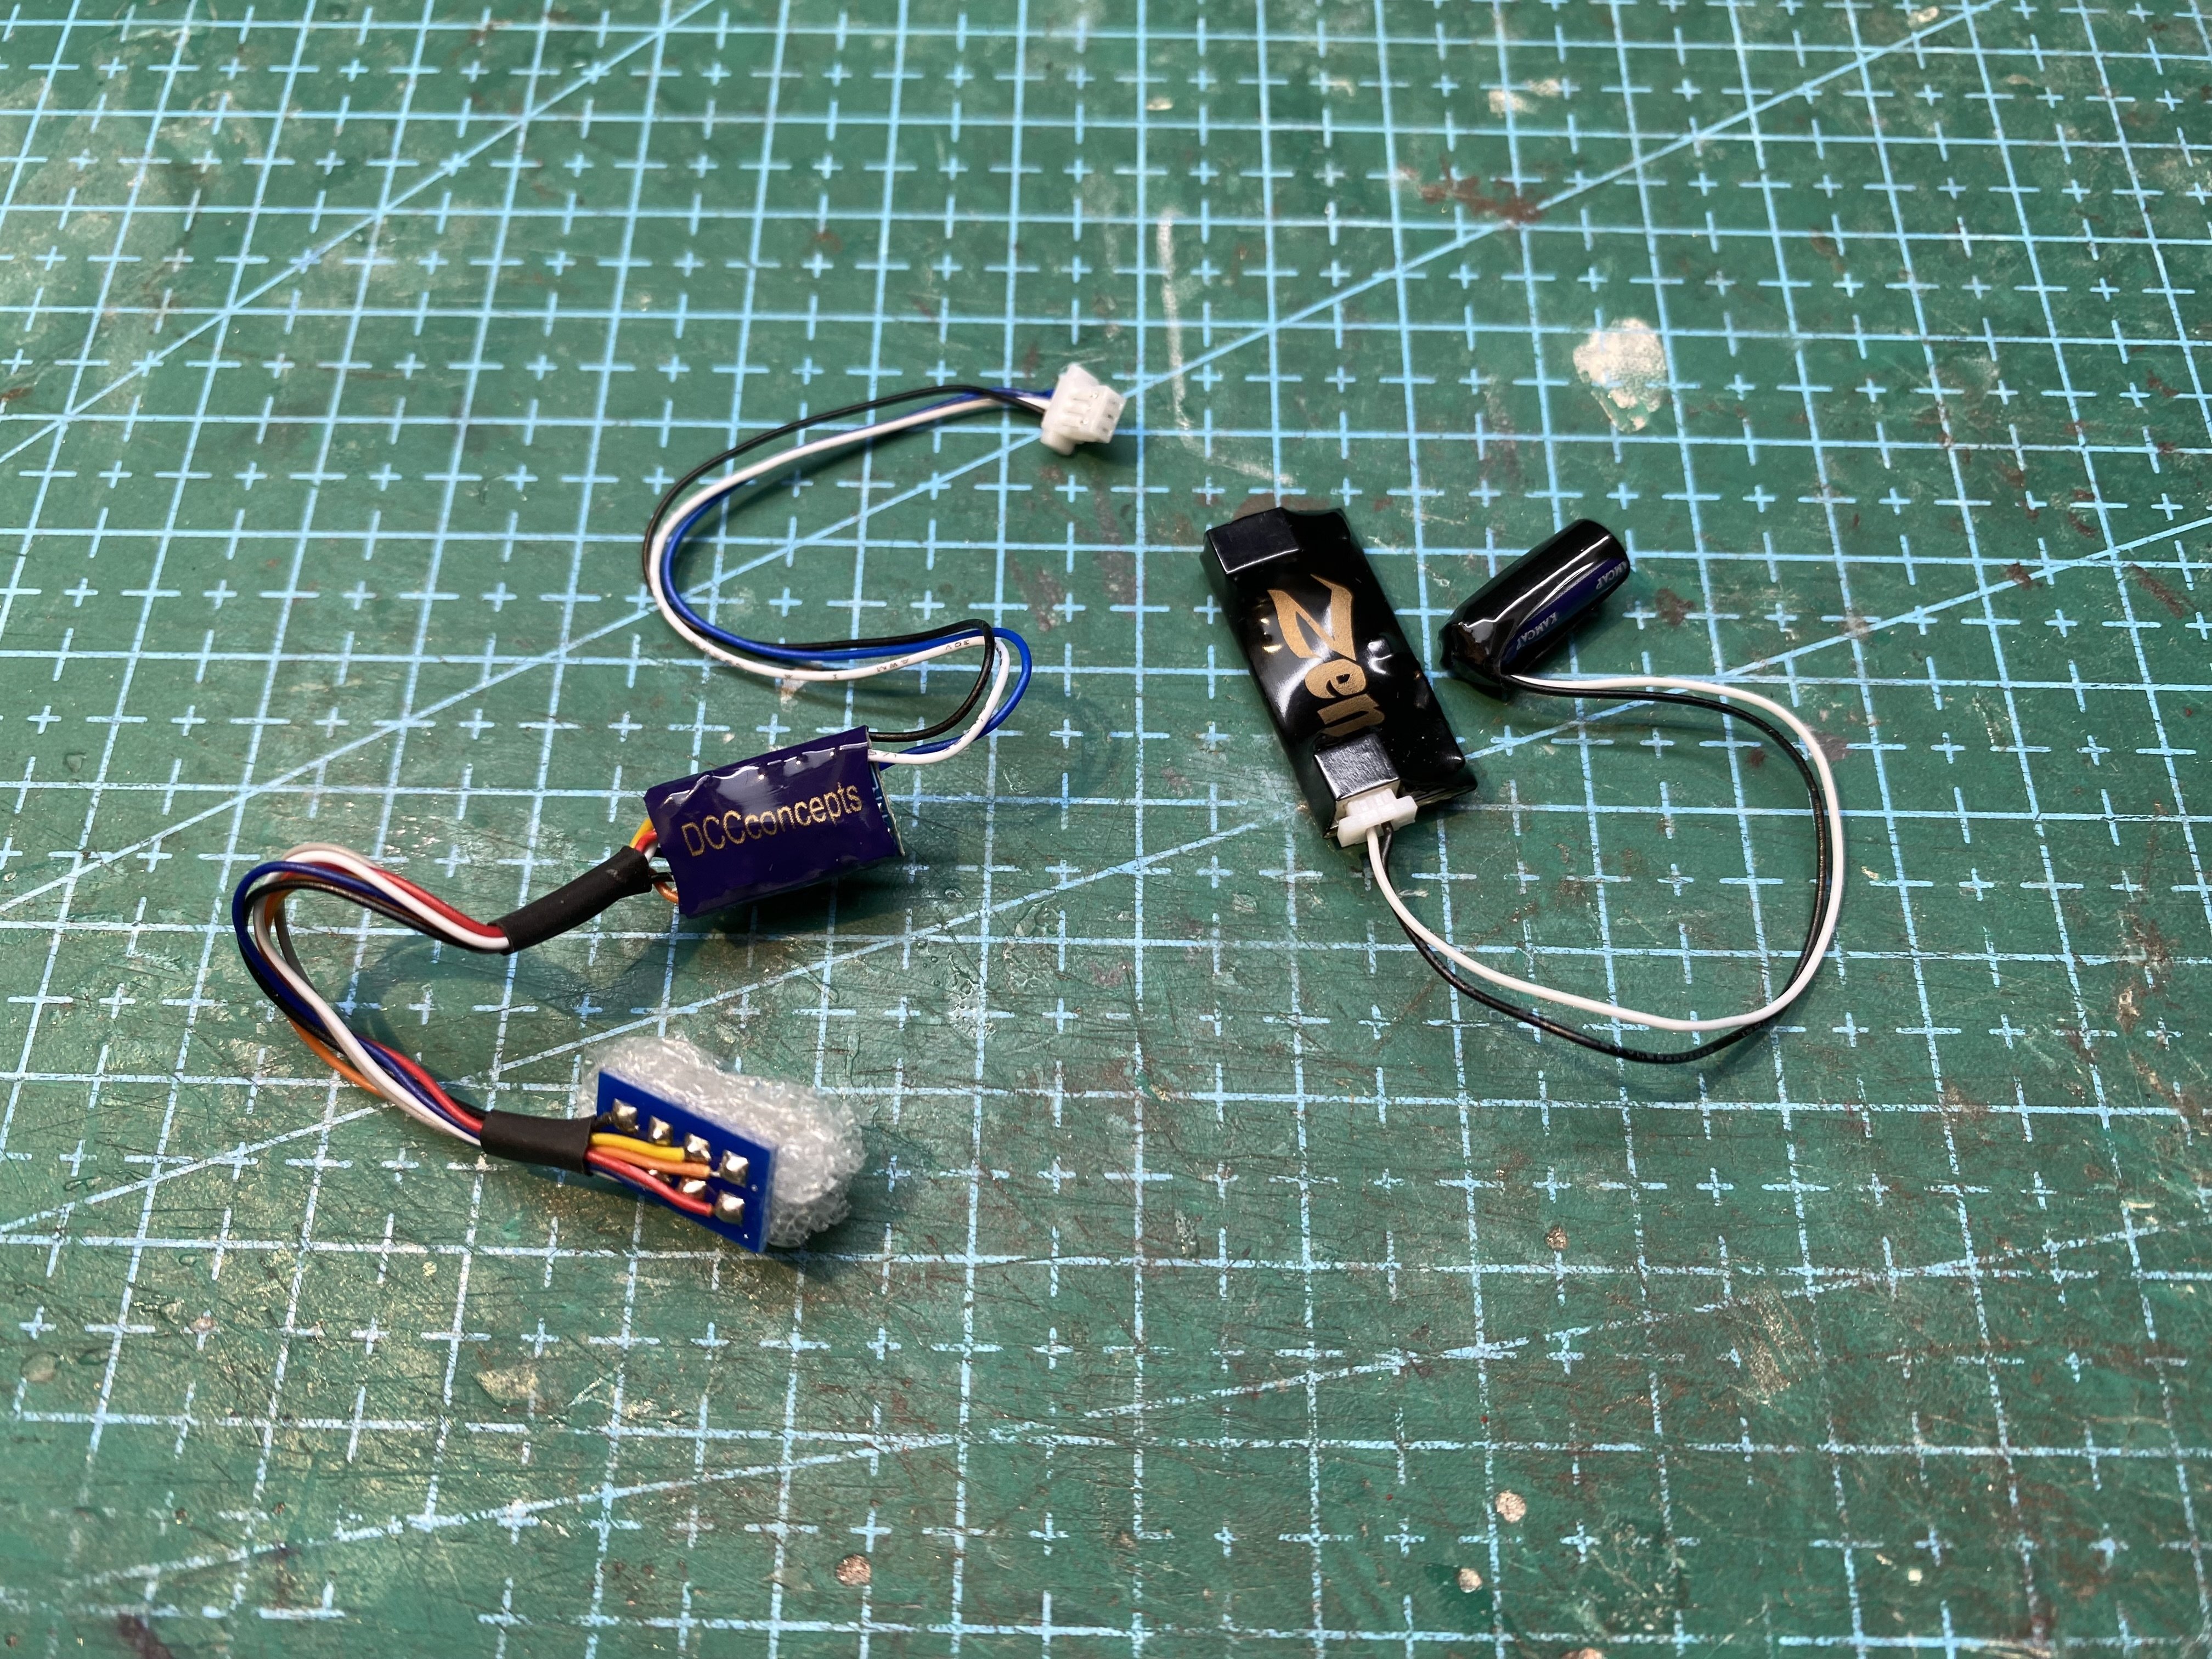
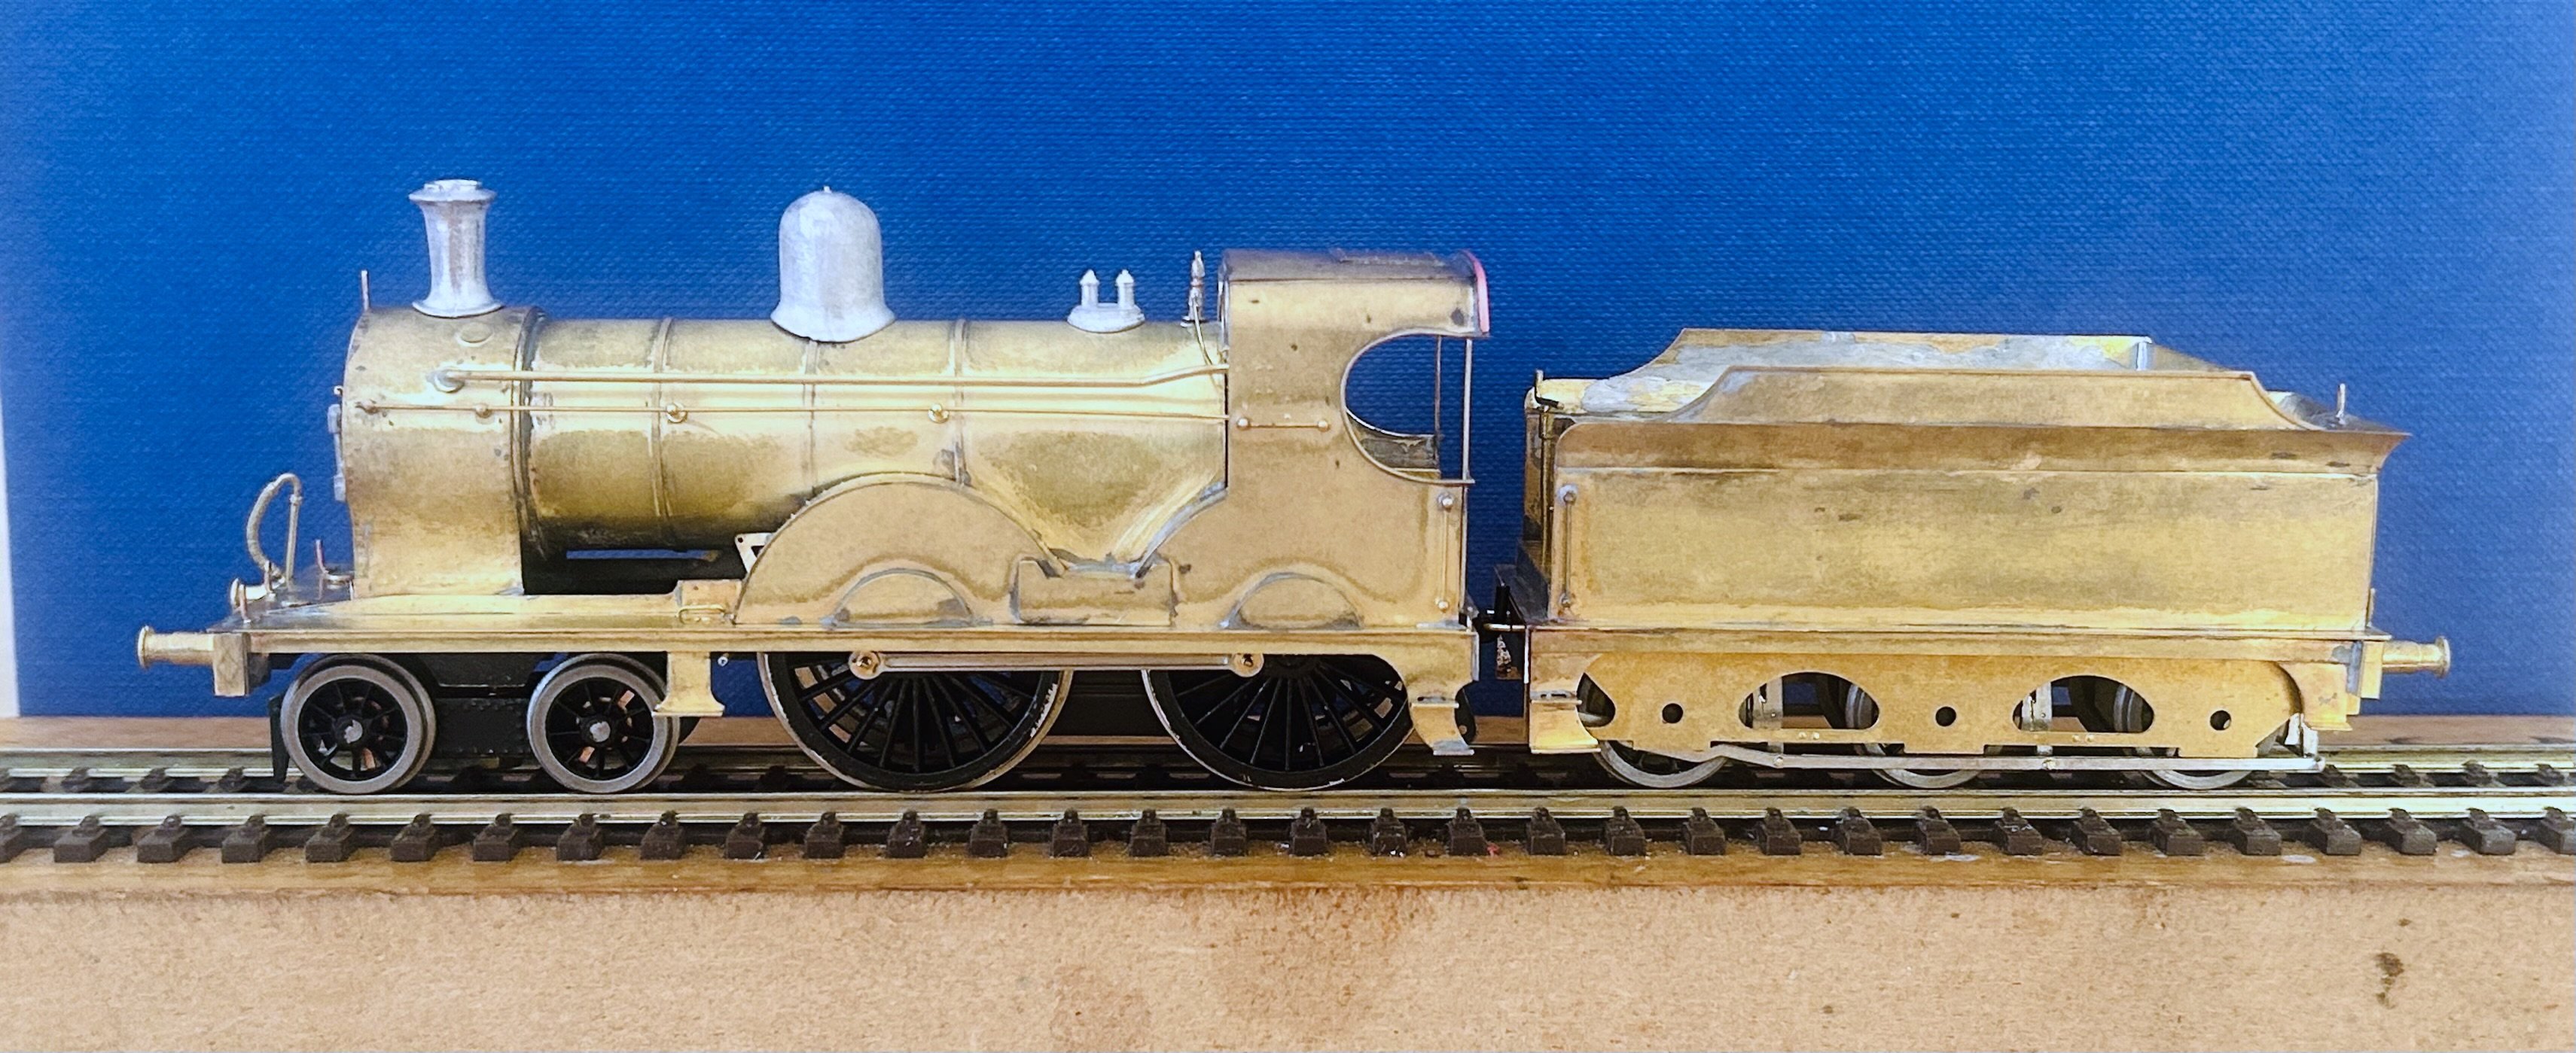
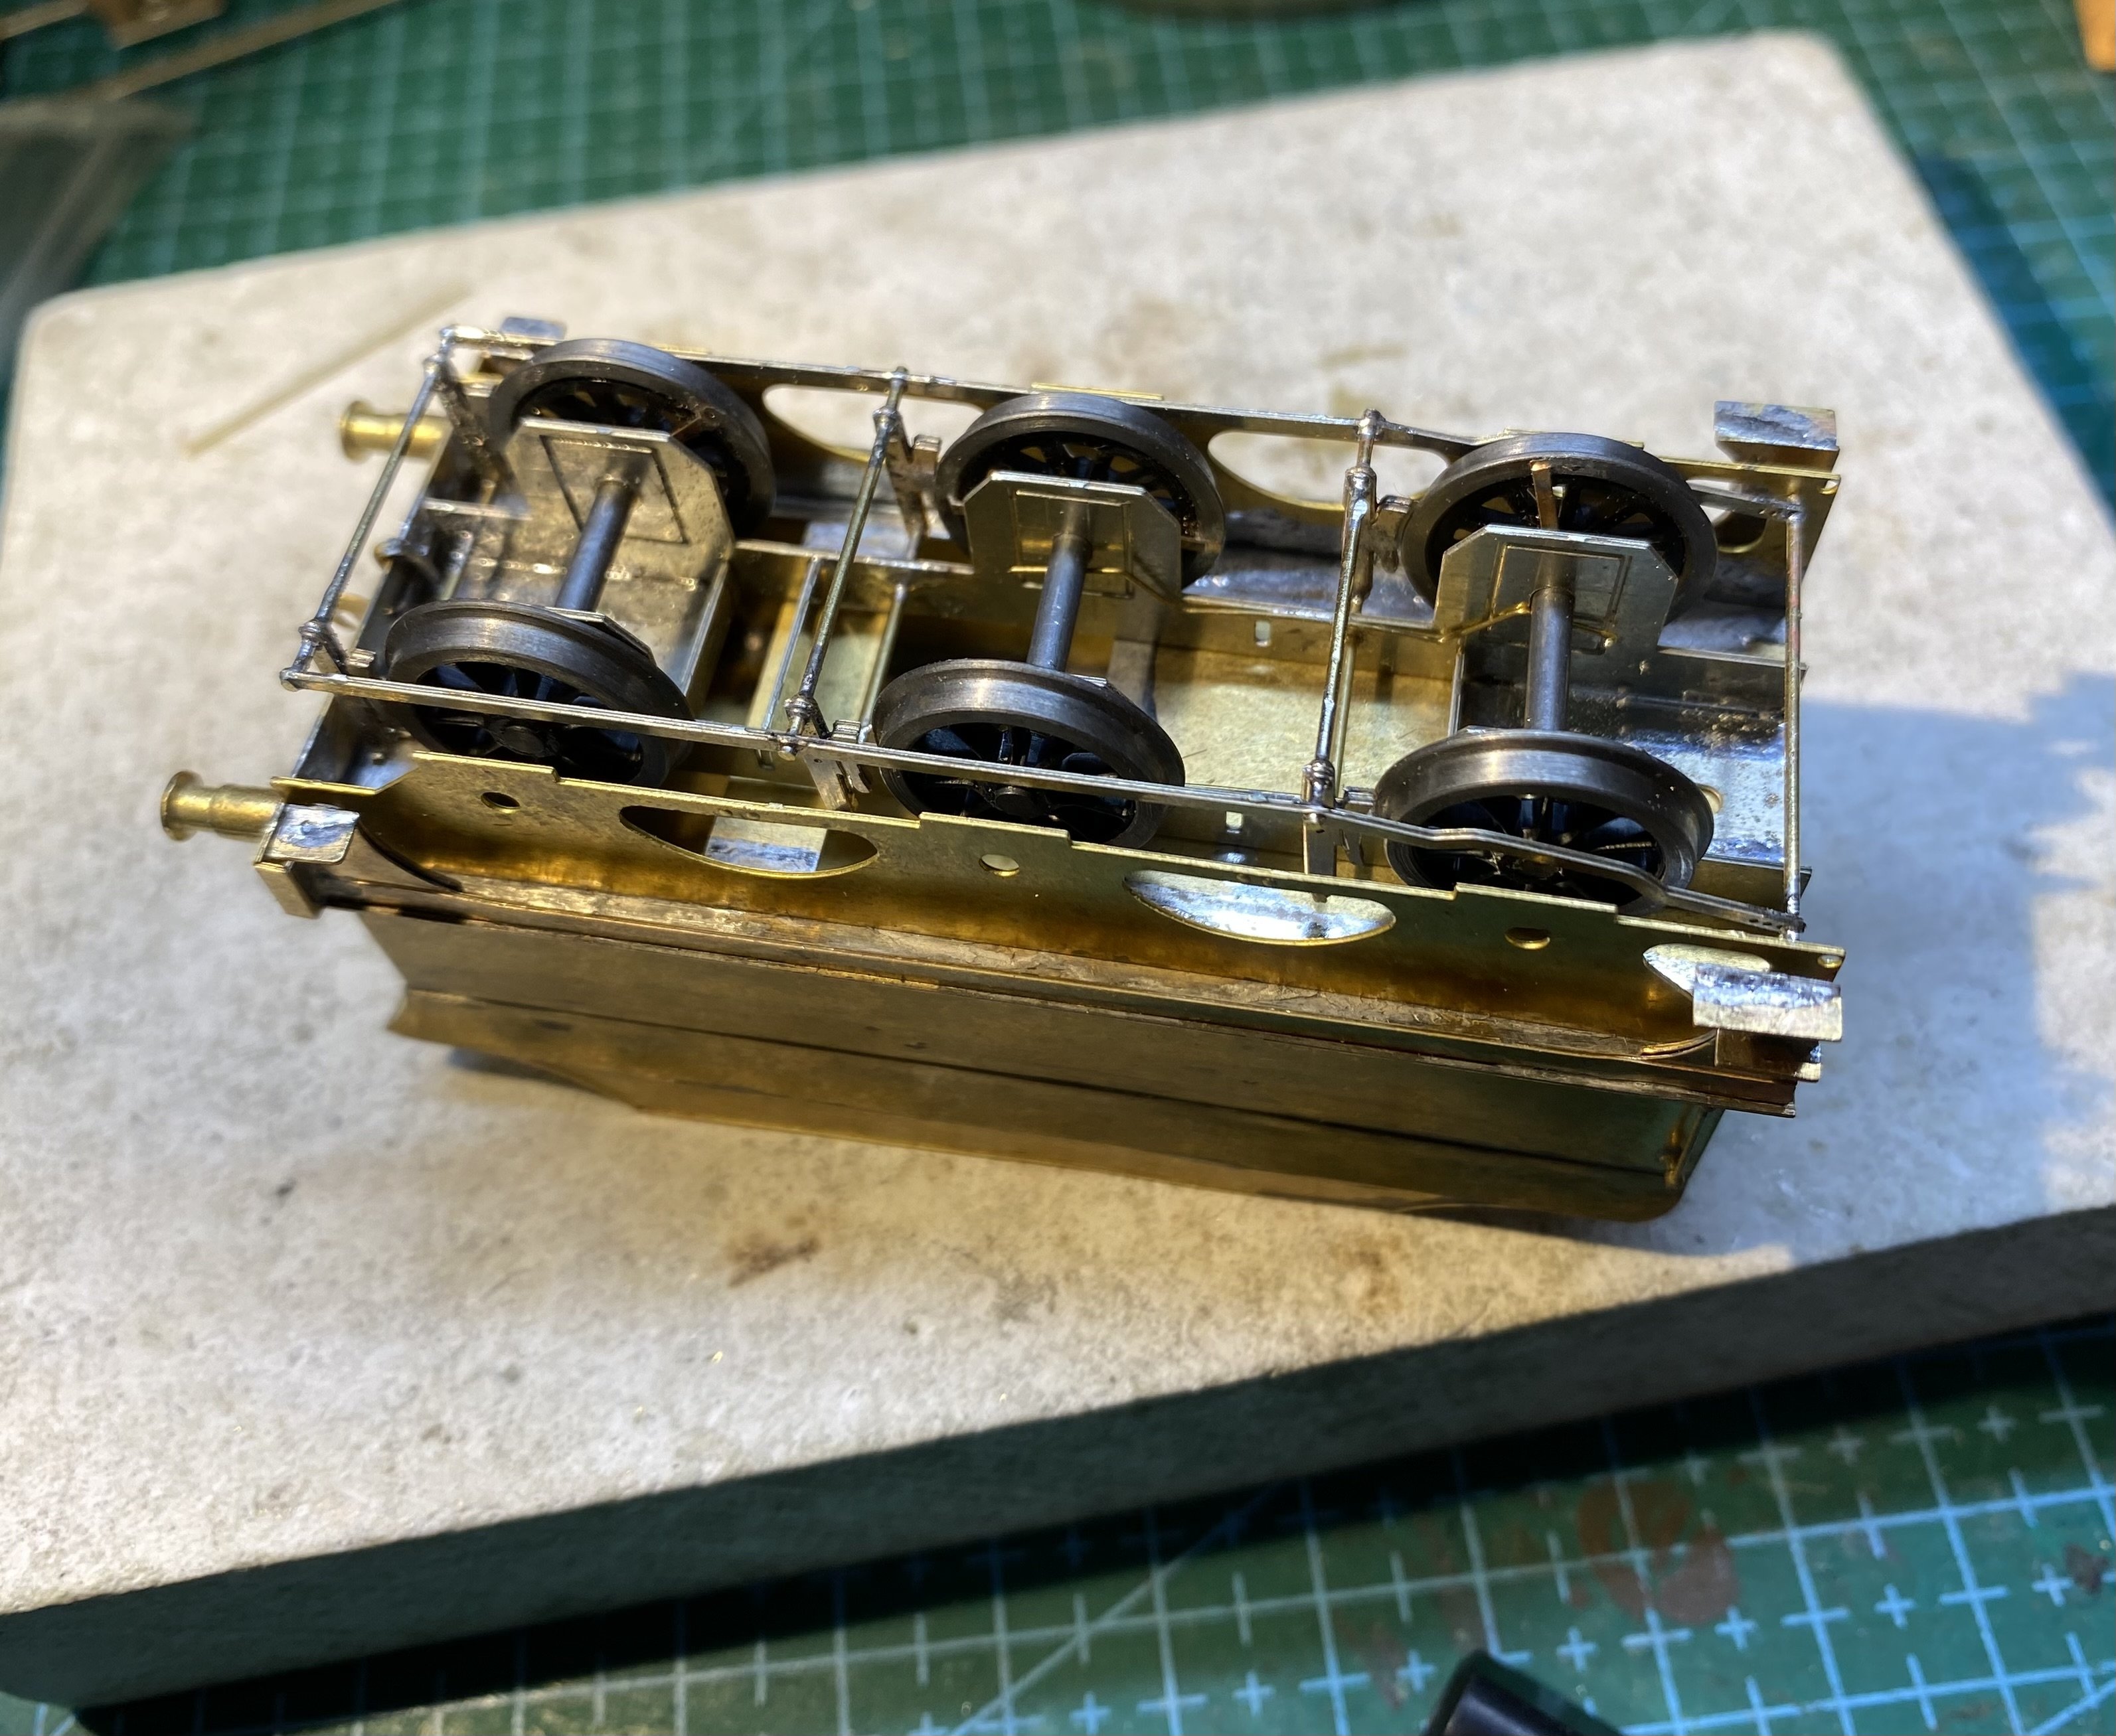
ThreePee now has some loco brake rigging. Strictly speaking loco and tender should have matching pull rods behind the wheels as well as on the outside but the space between frame and wheel back is tight and with sideways movement and tilting on the loco's leading driving axle, it seemed like a recipe for trouble with a high risk of short circuits so I left them off. A view of the underside where I store my spare solder. There's not much space in the loco for additional weight but I managed to squeeze some into the boiler above the driving wheels and there's a bit between the chassis frames too. The bogie also has added weight. The tender has lead in body and chassis. Because this is a live chassis build, loco and tender need to be isolated from one another. After experimenting with hook and loop, I ended up with this paxolin bar (a bit of pcb with the copper filed off) with a hole at each end fitting over 12BA bolts soldered to the respective chassis. Then it was time for the DCC installation. Chip and stay-alive are from Layout Concepts (formerly DCC Concepts with the bits still branded with the former's name). The big black thing labelled Zen in the middle is a control board linking chip to stay alive. It avoids the need for soldering and makes it easier to change the stay-alive for one with a different capacity but it's another, quite bulky item that has to be stowed somewhere. Swings and roundabouts. In ThreePee's case, it's all going into the boiler. The 8 pin plug was dispensed with and the unused wires trimmed back. Everything was wrapped up into a tight if untidy bundle and the relevant connections soldered. Trials on the rolling road looked promising. Patrick @Patrick Davey intends this one to be No. 74 so the chip was configured accordingly. IMG_5145.MOV Slow running is looking good - a tribute to that High Level gearbox/motor, a good chassis design and those nice big Markits wheels. ThreePee Chipped.mov Time for the whitemetal castings now. Alan

-
That's spot on David! A great build and a perfect weathering job. Every inch a hard-working, well used engine. And a good runner into the bargain! Ticks all the boxes. I know what you mean about inspiration. It's so easy to lose heart, and interest, when things don't work out so I'm glad this one has come good. I hope you're planning the next one. Onward and upward.
-

Clogherhead - A GNR(I) Seaside Terminus
Tullygrainey replied to Patrick Davey's topic in Irish Model Layouts
It's time they were forced to show their mettle. -
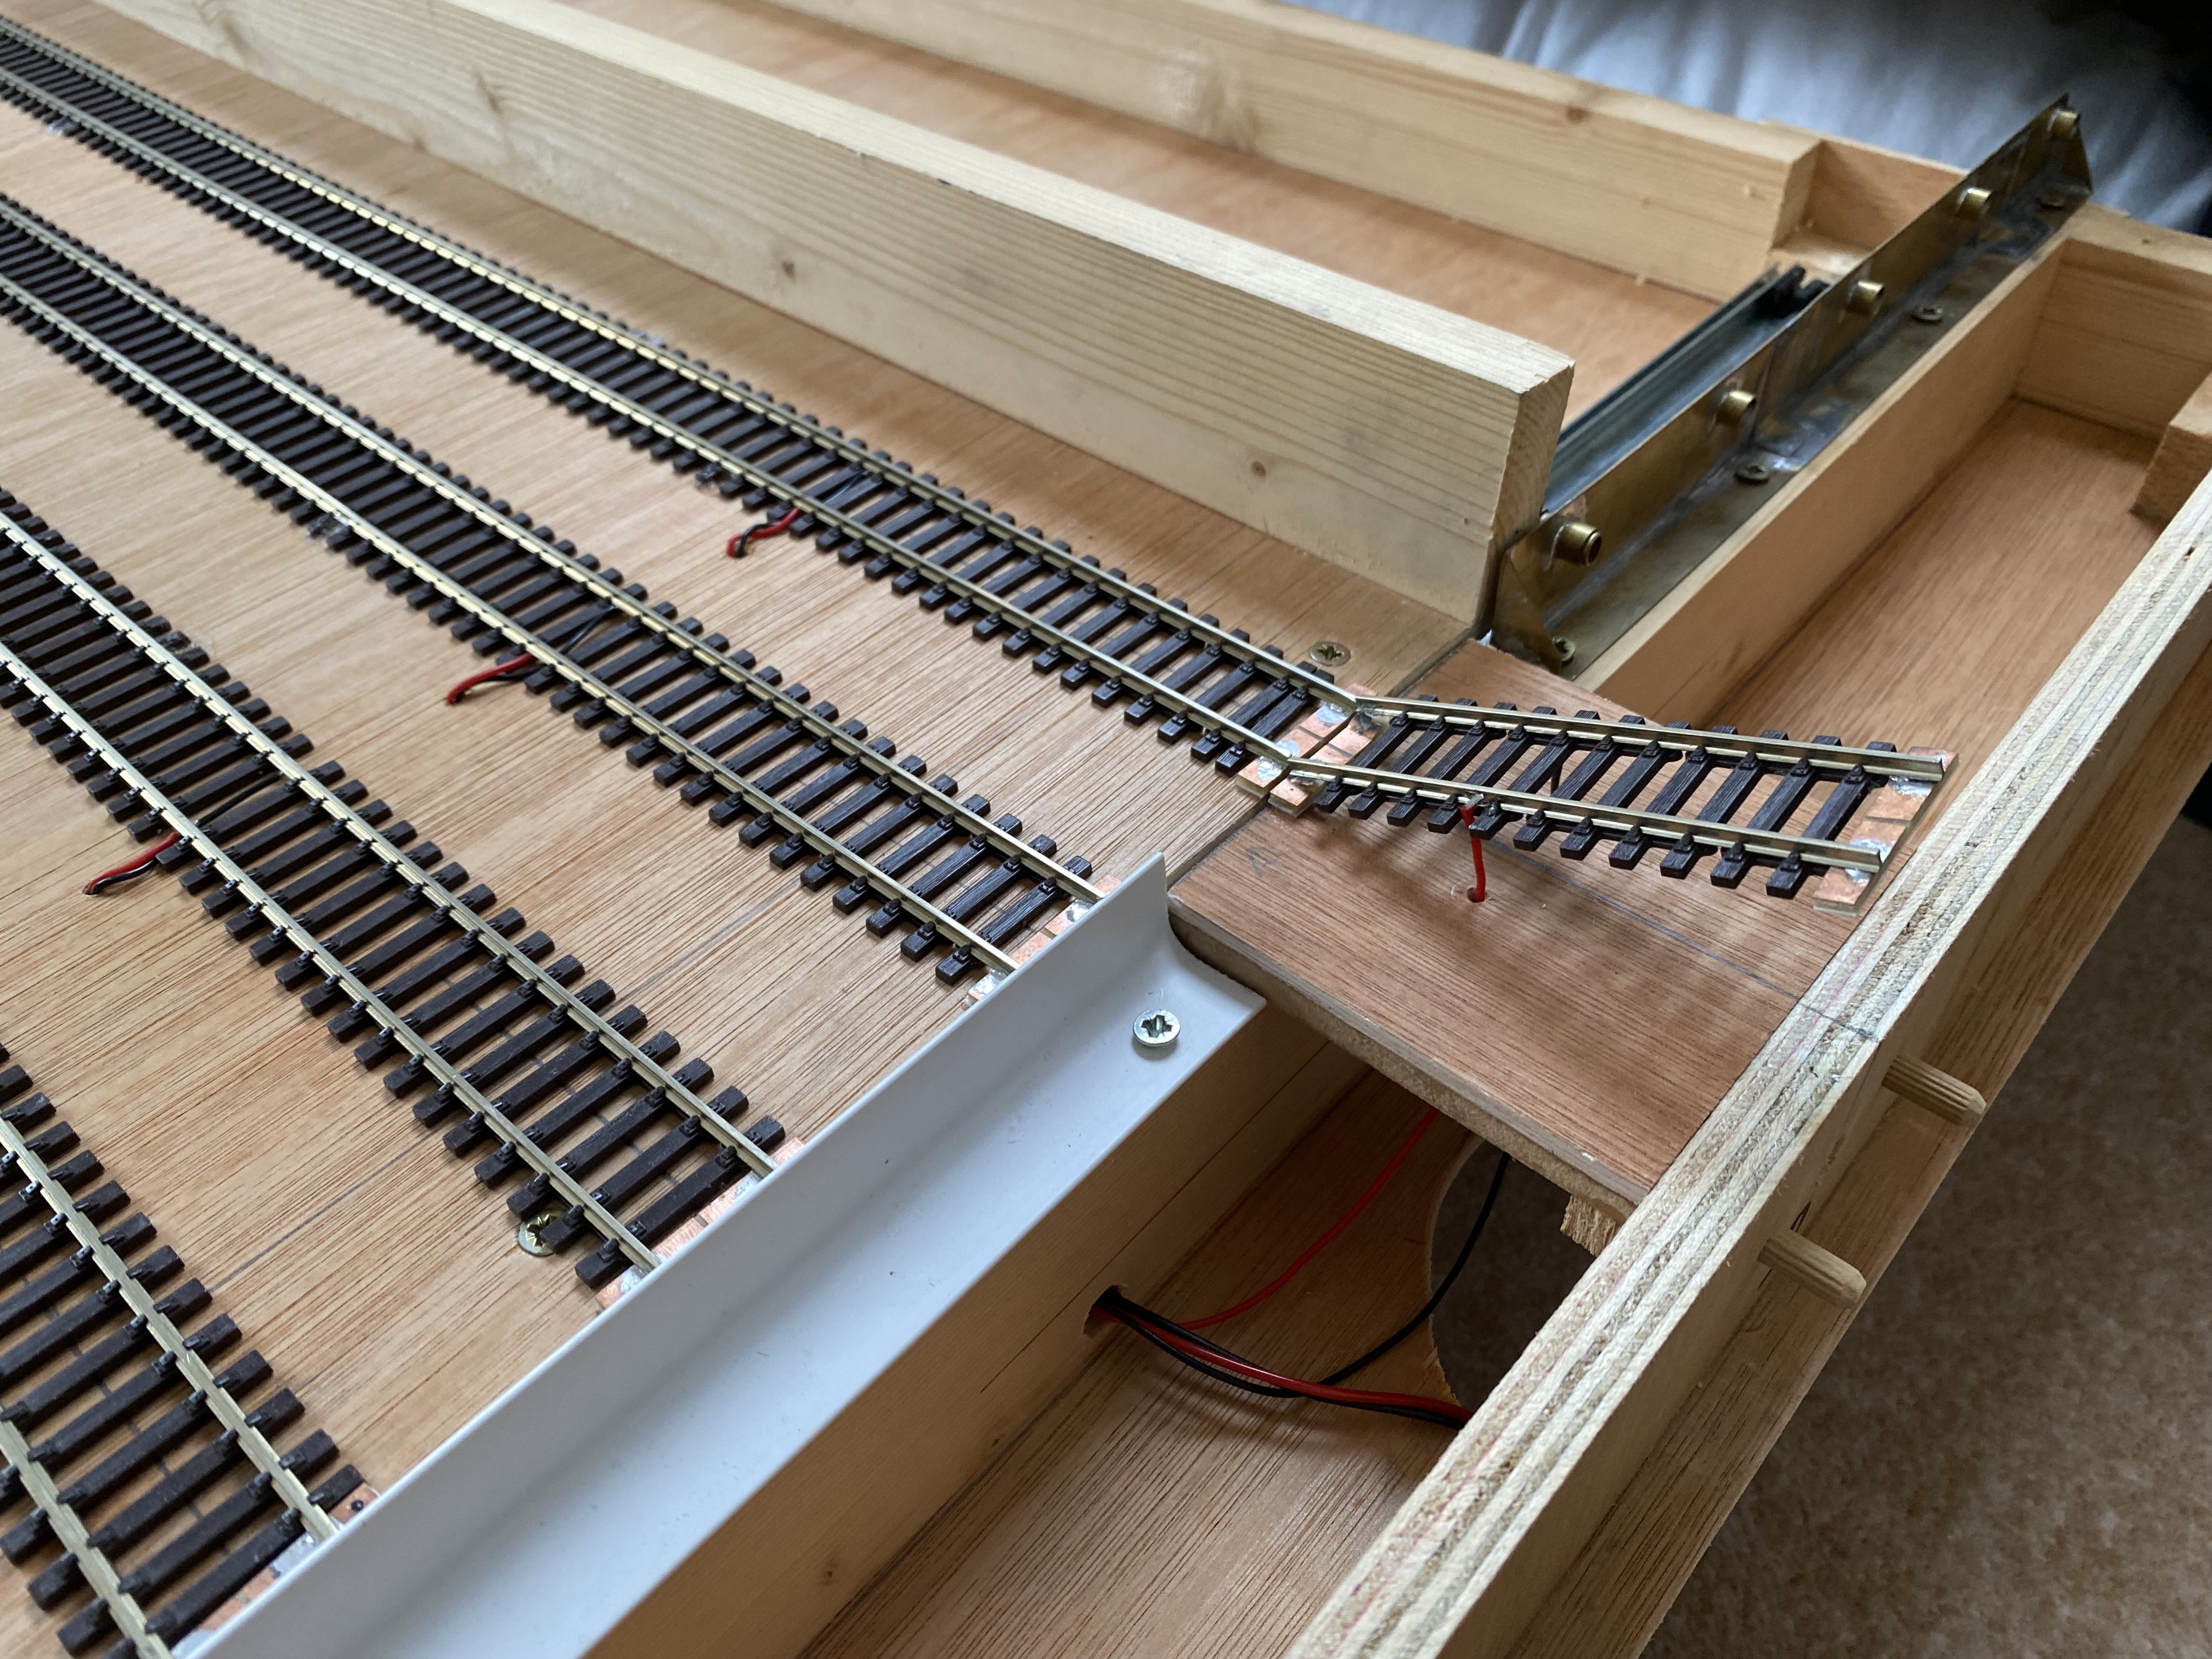
Thanks everyone. All being well, Kilmore's next outing will be at the Ulster Model Railway Club's exhibition on 15 & 16 August 2026 in Dundonald High School, East Belfast. Turn your back on the UTA for a second and they start lifting track! Some minor transit damage to Kilmore's traverser. Plenty of time to fix it.
-
Clogherhead - A GNR(I) Seaside Terminus
Tullygrainey replied to Patrick Davey's topic in Irish Model Layouts
Look at the finger prints on that! You’d think the fitters would wash their hands now and then -
That's tricky stuff alright!
-
Thanks Damien
-
Wonderful! Thanks for posting this David
-
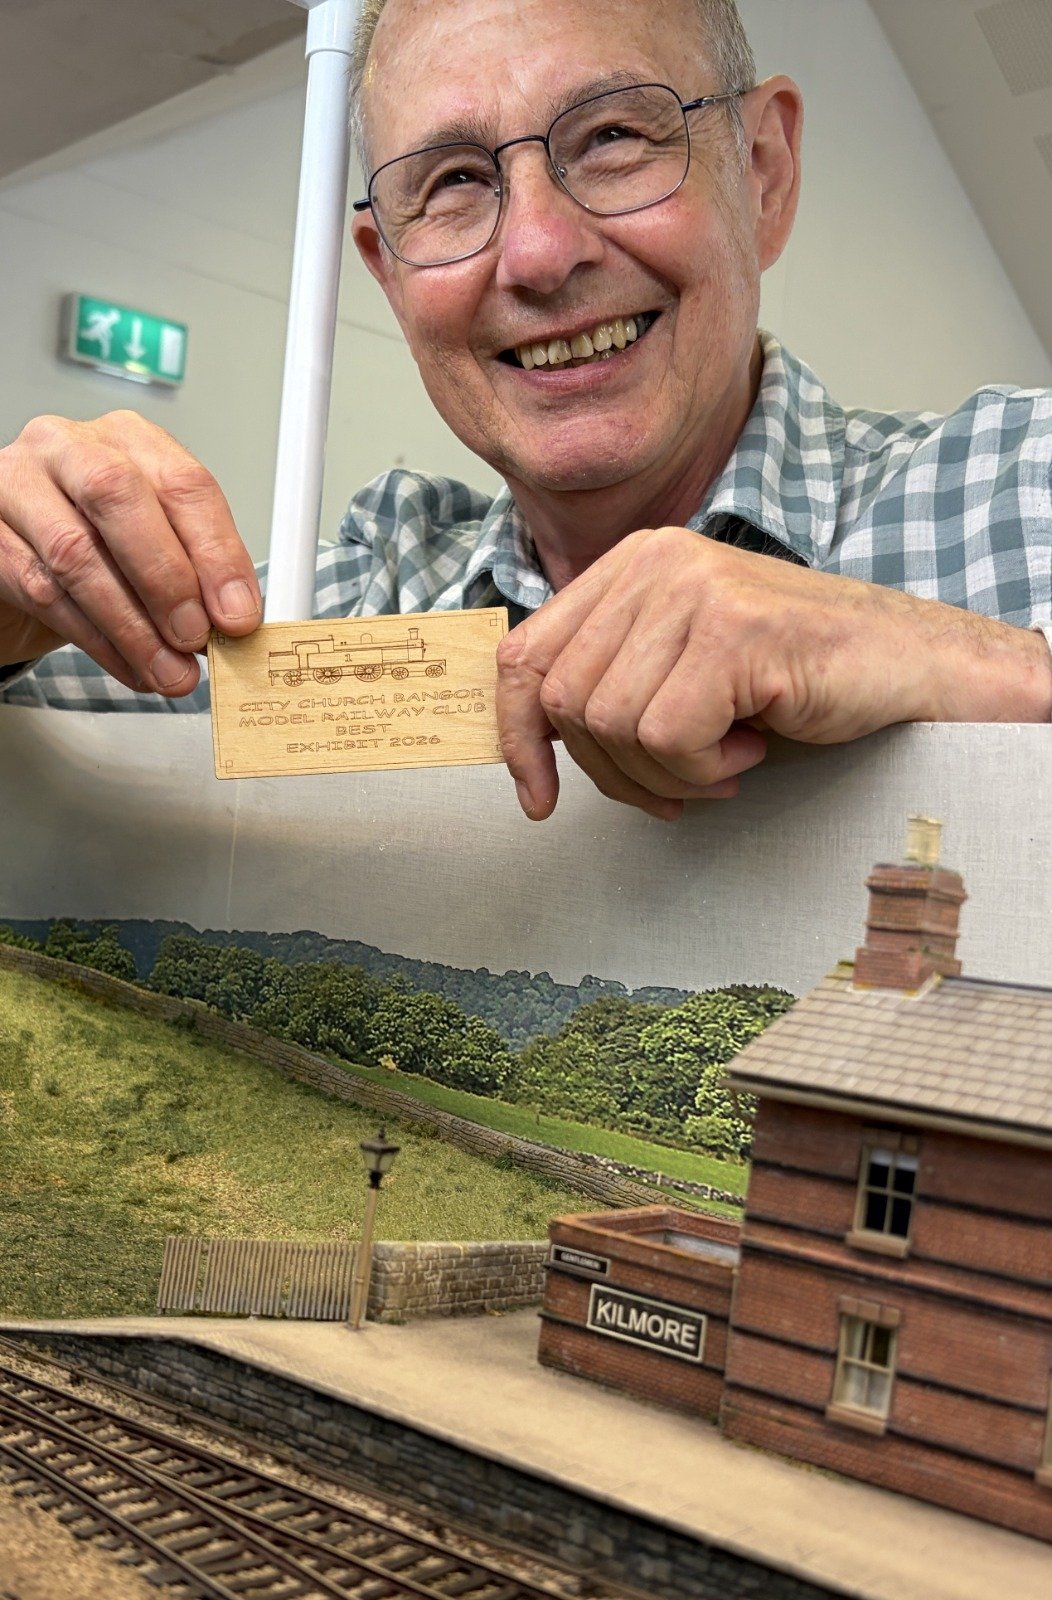
Bangor City Church MRC Annual Exhibition, 29&30 May 2026 One very pleased bloke Kilmore behaved itself again and nothing broke! Thank you BCC MRC for a great show and an enjoyable 2 days. Thanks also to everyone who stopped to talk and who voted for us. And thanks as always to Kieran Lagan for his stalwart help with setting up and running the layout.
- 176 replies
-
- 15
-

-

-

-
Found another map which I didn't realise I had. Another facsimile of a 1902 OS map. This looks like our photo location with all the features - cutting, skewed bridge, crossover, signal post, footpath and house(s)
-
Excellent detective work Patrick. Thanks. It ticks most of the boxes so I think you've found it. I grew up locally and well remember the original bridge before it was filled in and the road junction realigned. It had become too narrow for the increasing traffic load. I also have a vivid memory of an encounter with that bridge. My first car after a few years of motorbikes was a second hand 3 wheeler Isetta bubble car bought for £50. Three wheeled cars were classed with motorcycle sidecar outfits and you could drive them unaccompanied on a motorcycle licence so I taught myself to drive in mine. Coming out of that road in the middle of Patrick's picture one day and turning sharp left over the bridge, I misjudged it badly and wiped off a headlight on the parapet. How we laughed. Afterwards.
-
On second thoughts It's not the North Road bridge. This is a facsimile copy of a 1902 map. No crossover.
-
The BCDR seemed to mix and match as regards signal posts - some lattice, some wooden but I'm only going on photos I've seen. I agree the bridge looks pretty BCDR. There's a bridge in East Belfast between Bloomfield and Neill's Hill that might fit the bill. It's still there and carries road traffic on North Road over what is now a greenway. I've seen a photo but I can't remember where now.
-
Any idea where this might be, anyone? The photo was taken by one of my 2 times great grandfathers around 1895-1900. We thought it might be BCDR given where he lived.
-
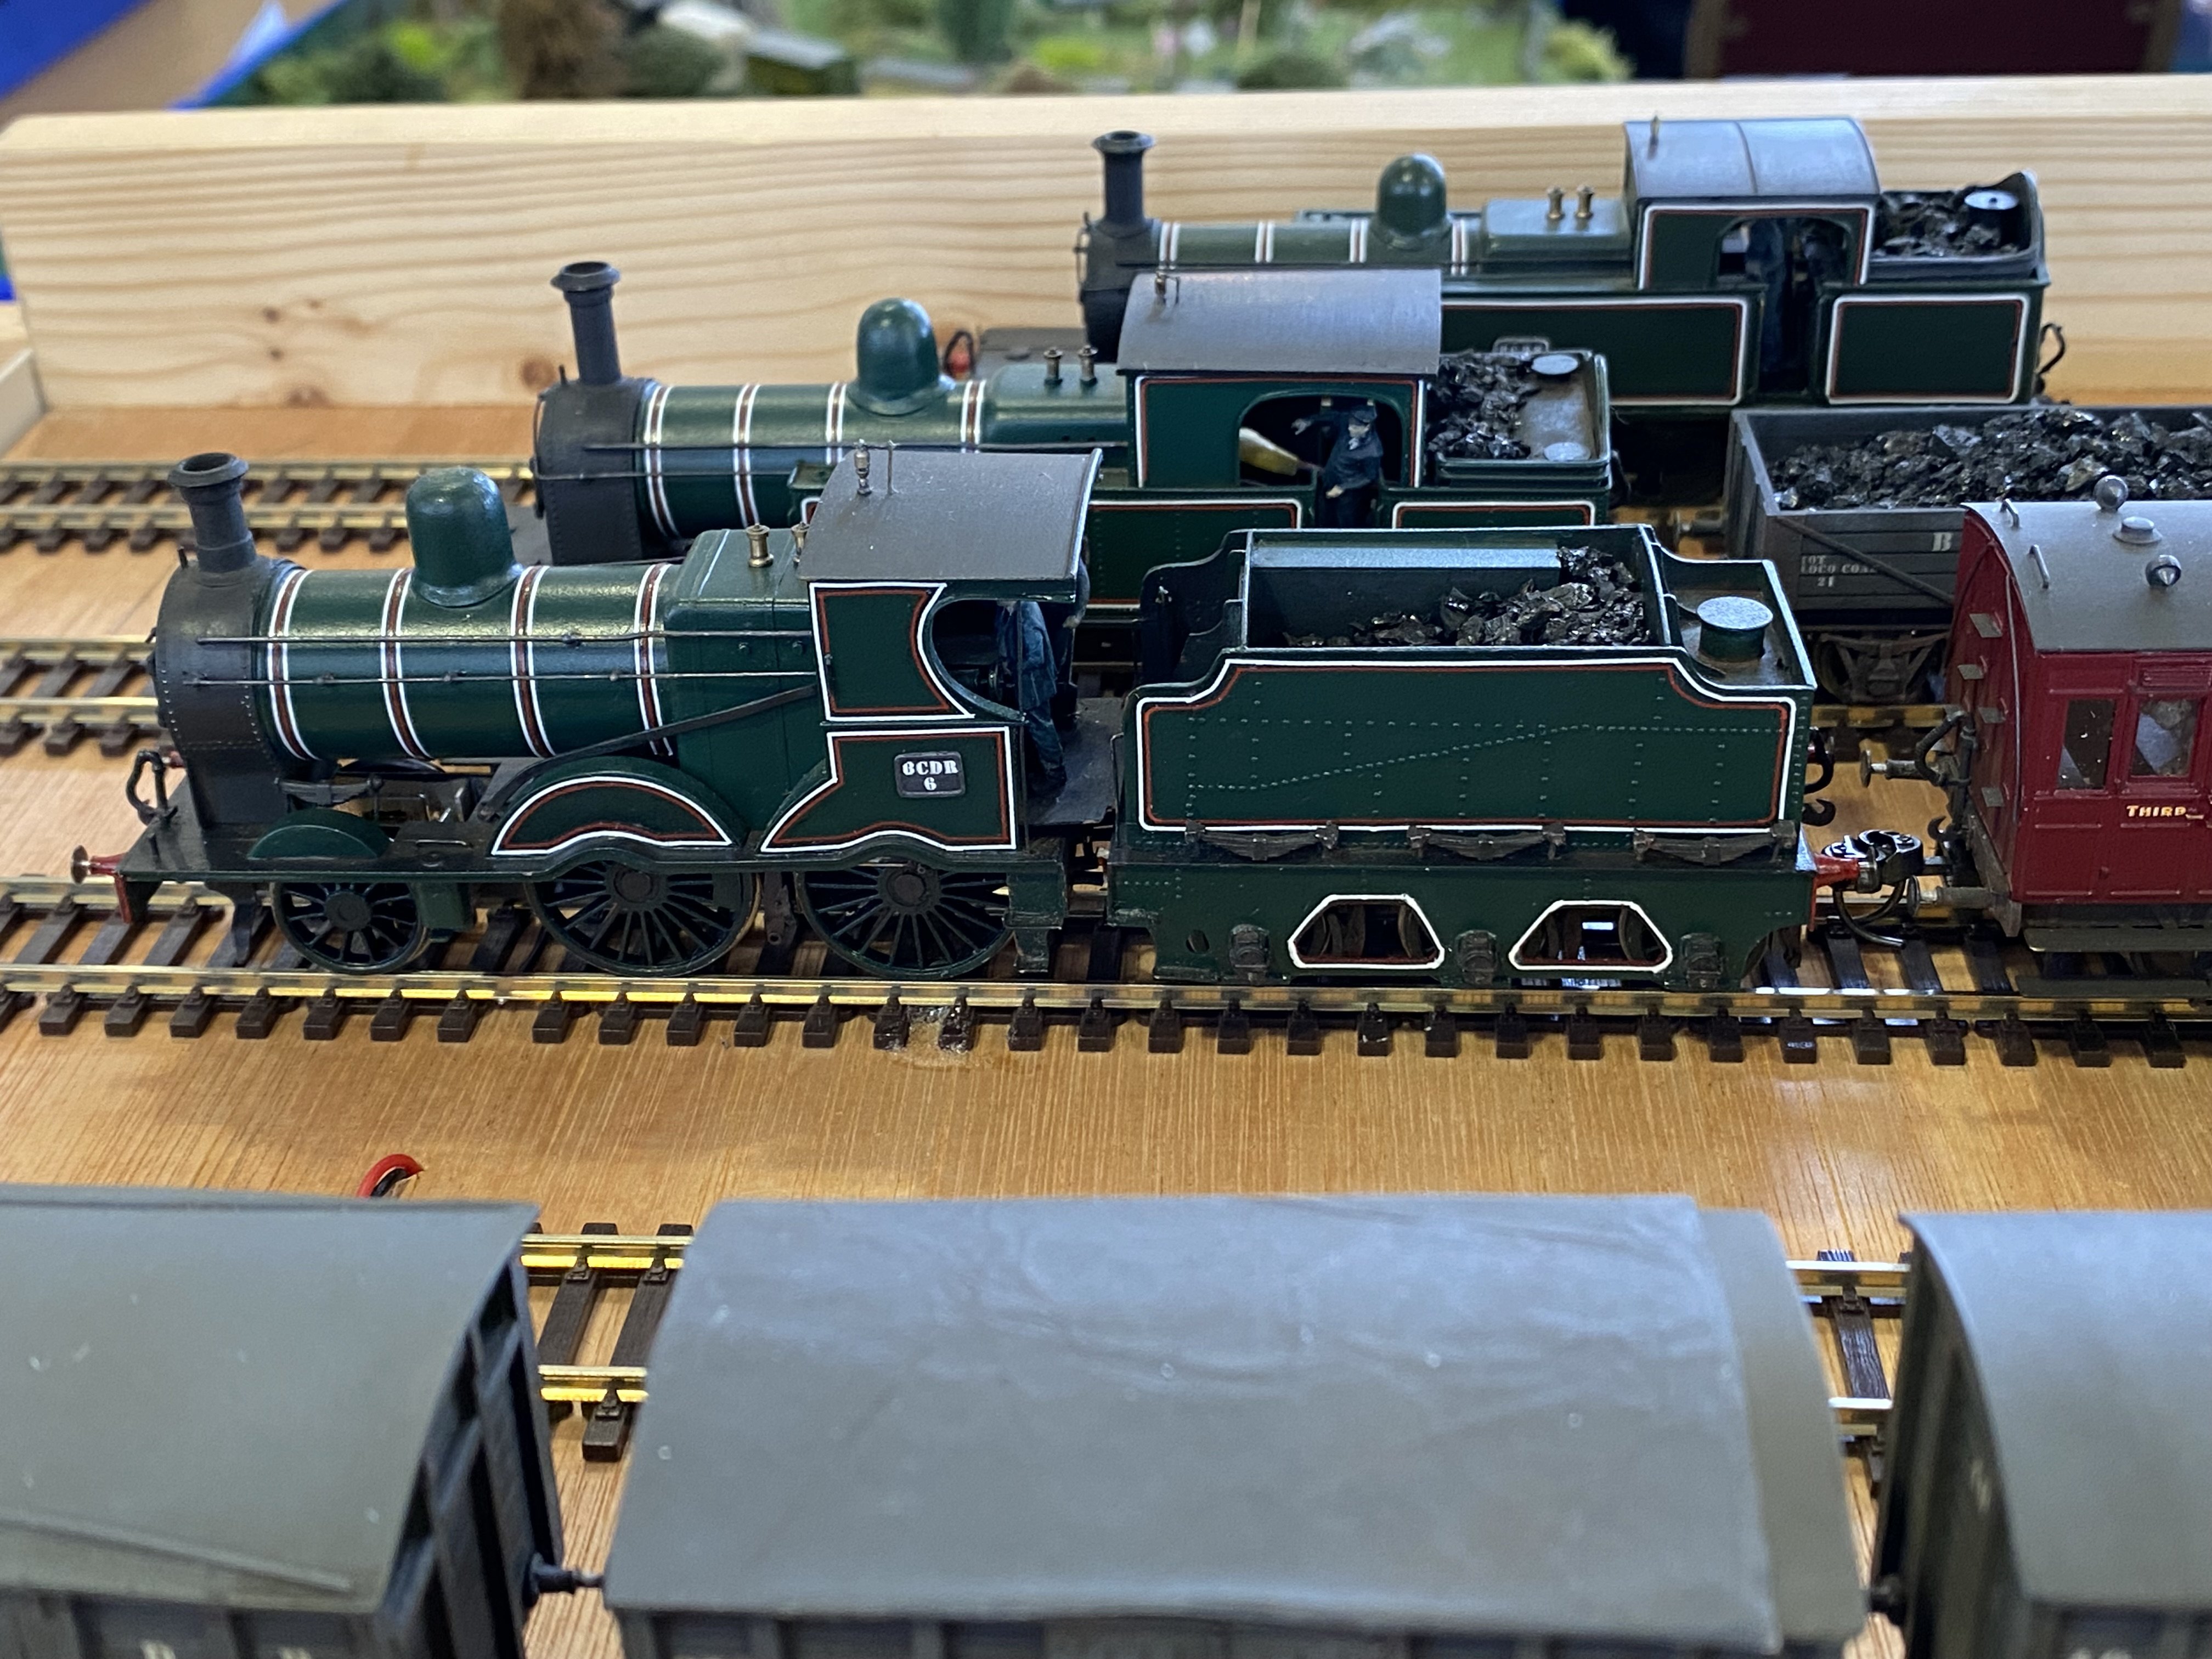
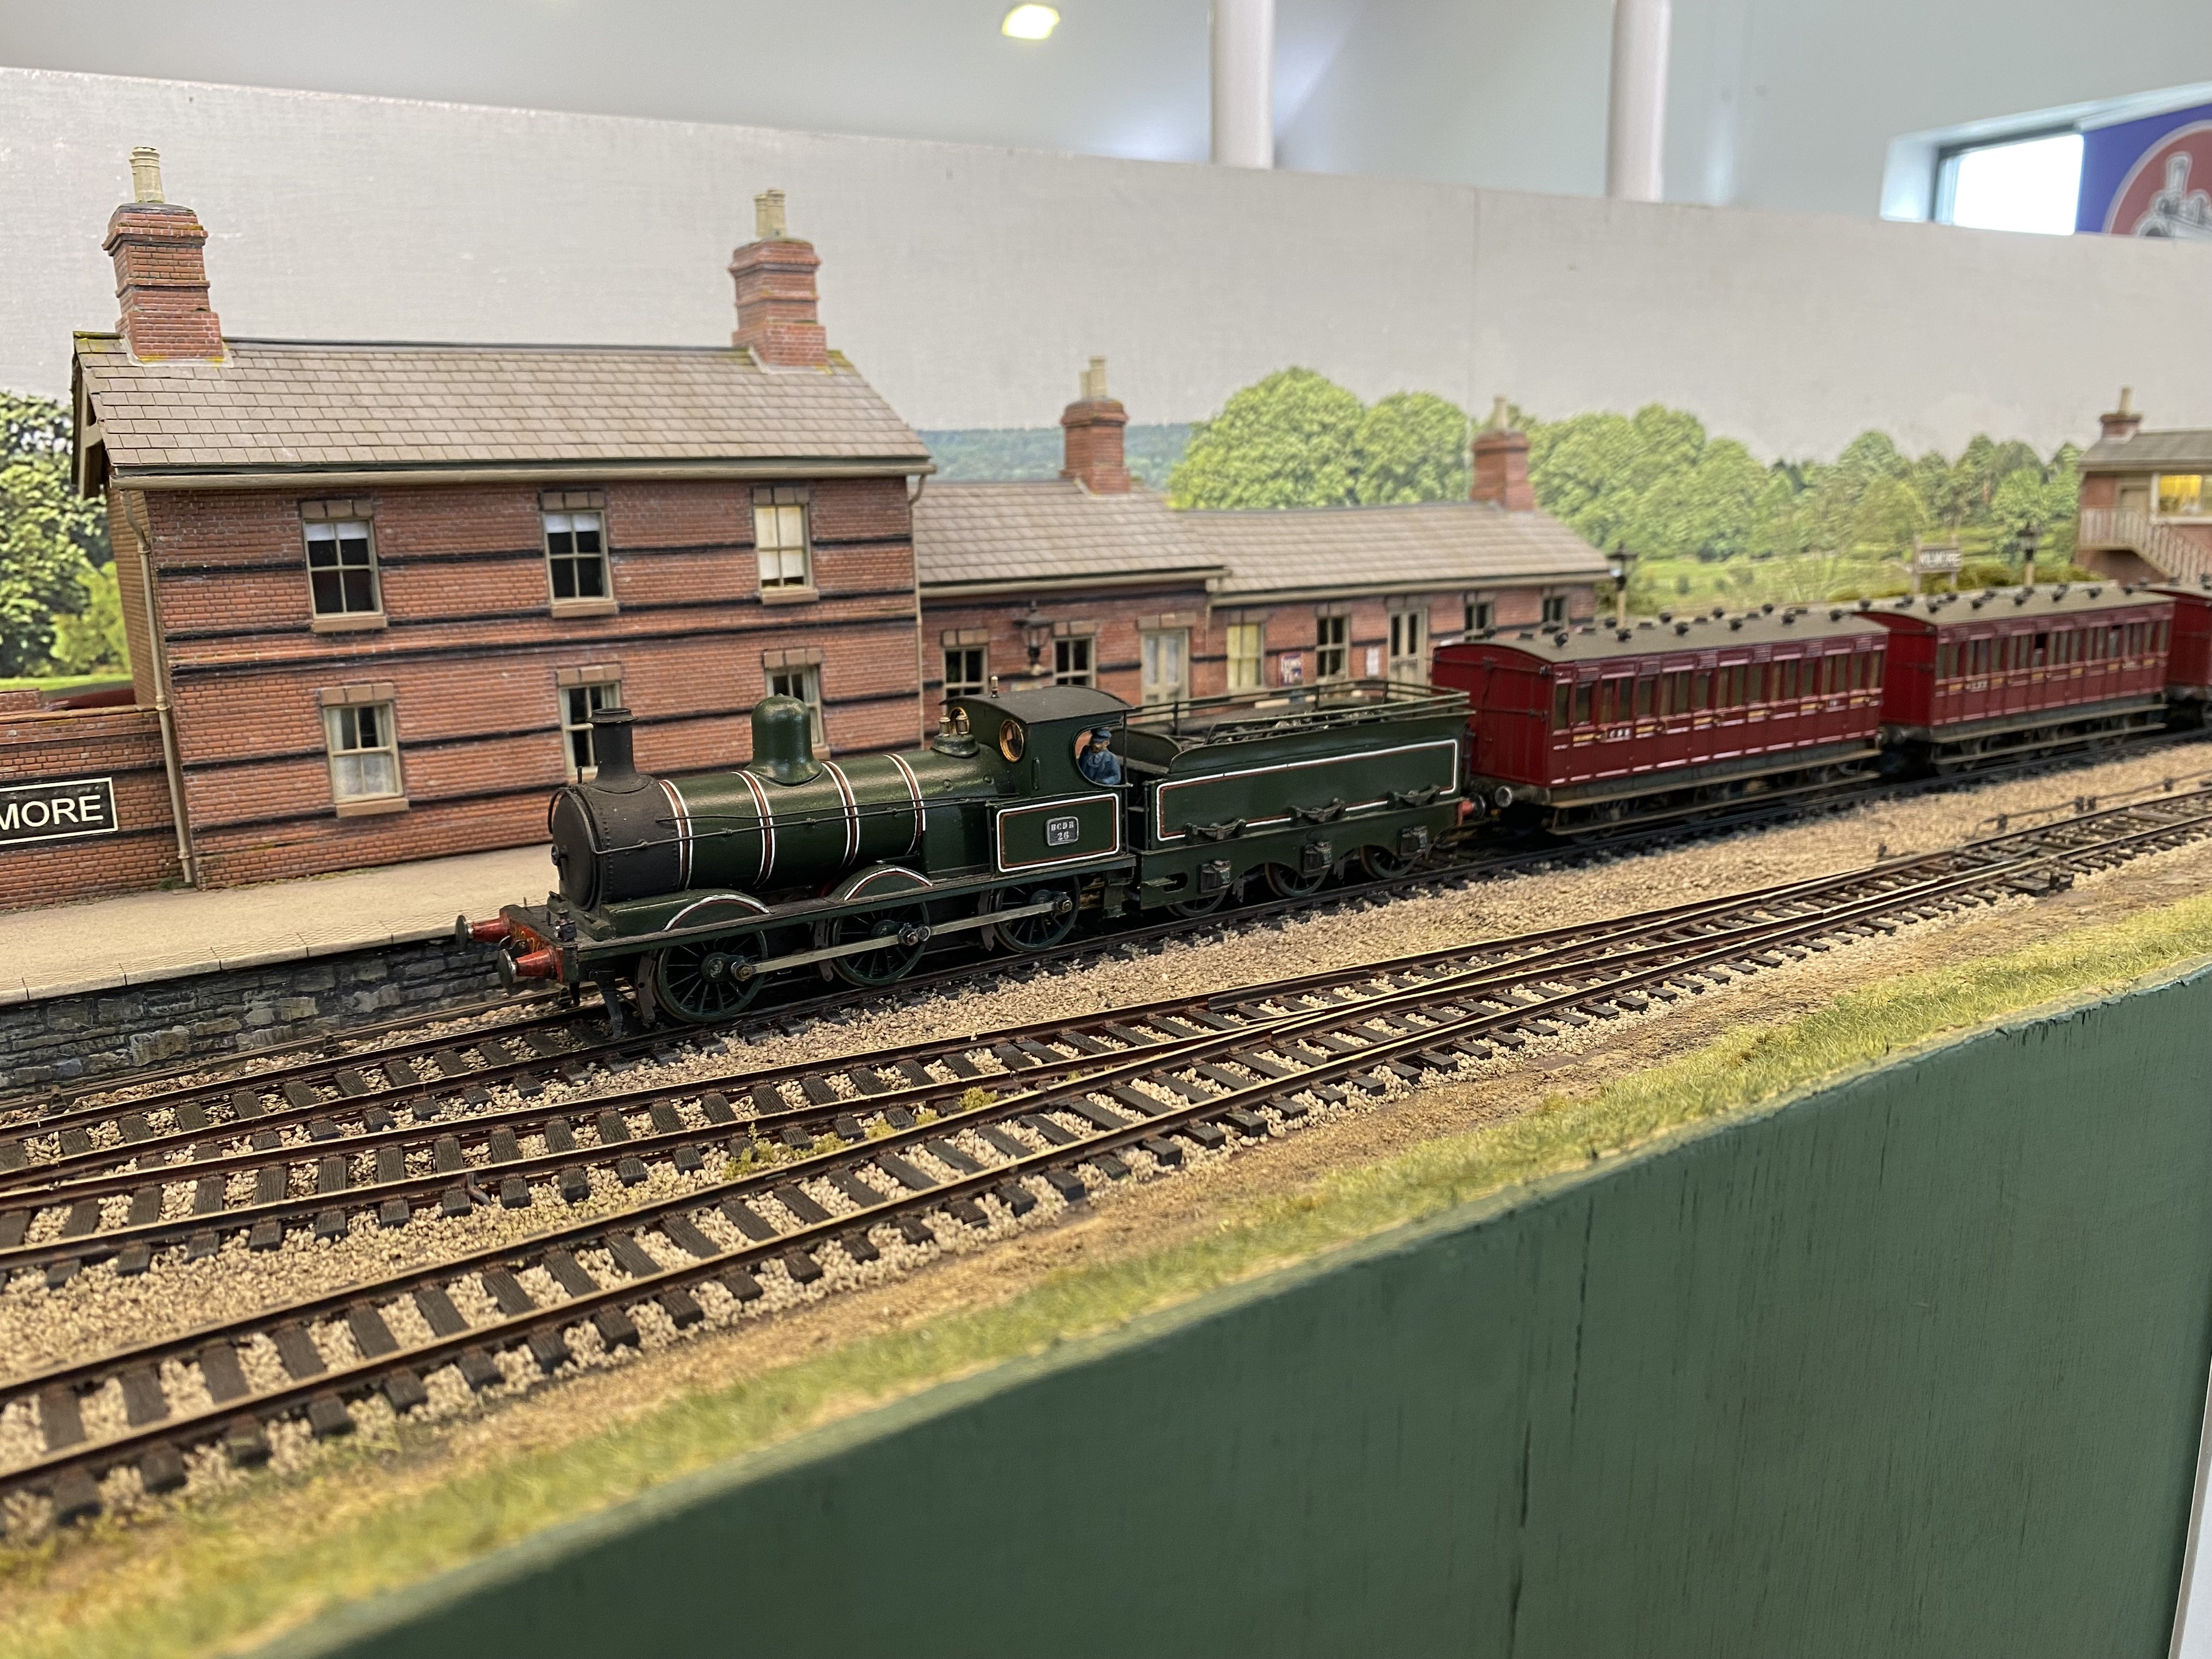
Kilmore packed up ready for its 2nd public outing to City Church Bangor Model Railway Club's annual exhibition at City Church Bangor Church Halls, Upper Main Street, Bangor. Dates and times: Friday 29 May 2026, 7.00pm - 9.30pm Saturday 30 May 2026, 10.00am - 4.30pm Earlier, locos were queueing up to get their wheels cleaned and paintwork touched up. Alan
- 176 replies
-
- 15
-
-
A campaign has started on You Tube to support local model shops
Tullygrainey replied to Dawn Quest's topic in News
That takes the biscuit for tone deaf! -
Thanks. Yes, the instructions that come with them recommend that. They’ve been filed back since that photo was taken. It’s negotiating points ok so far
-
Rice wrote about it. He said it was amazing how many poorly running locos could be improved just by slackening off one of the bolts!
-
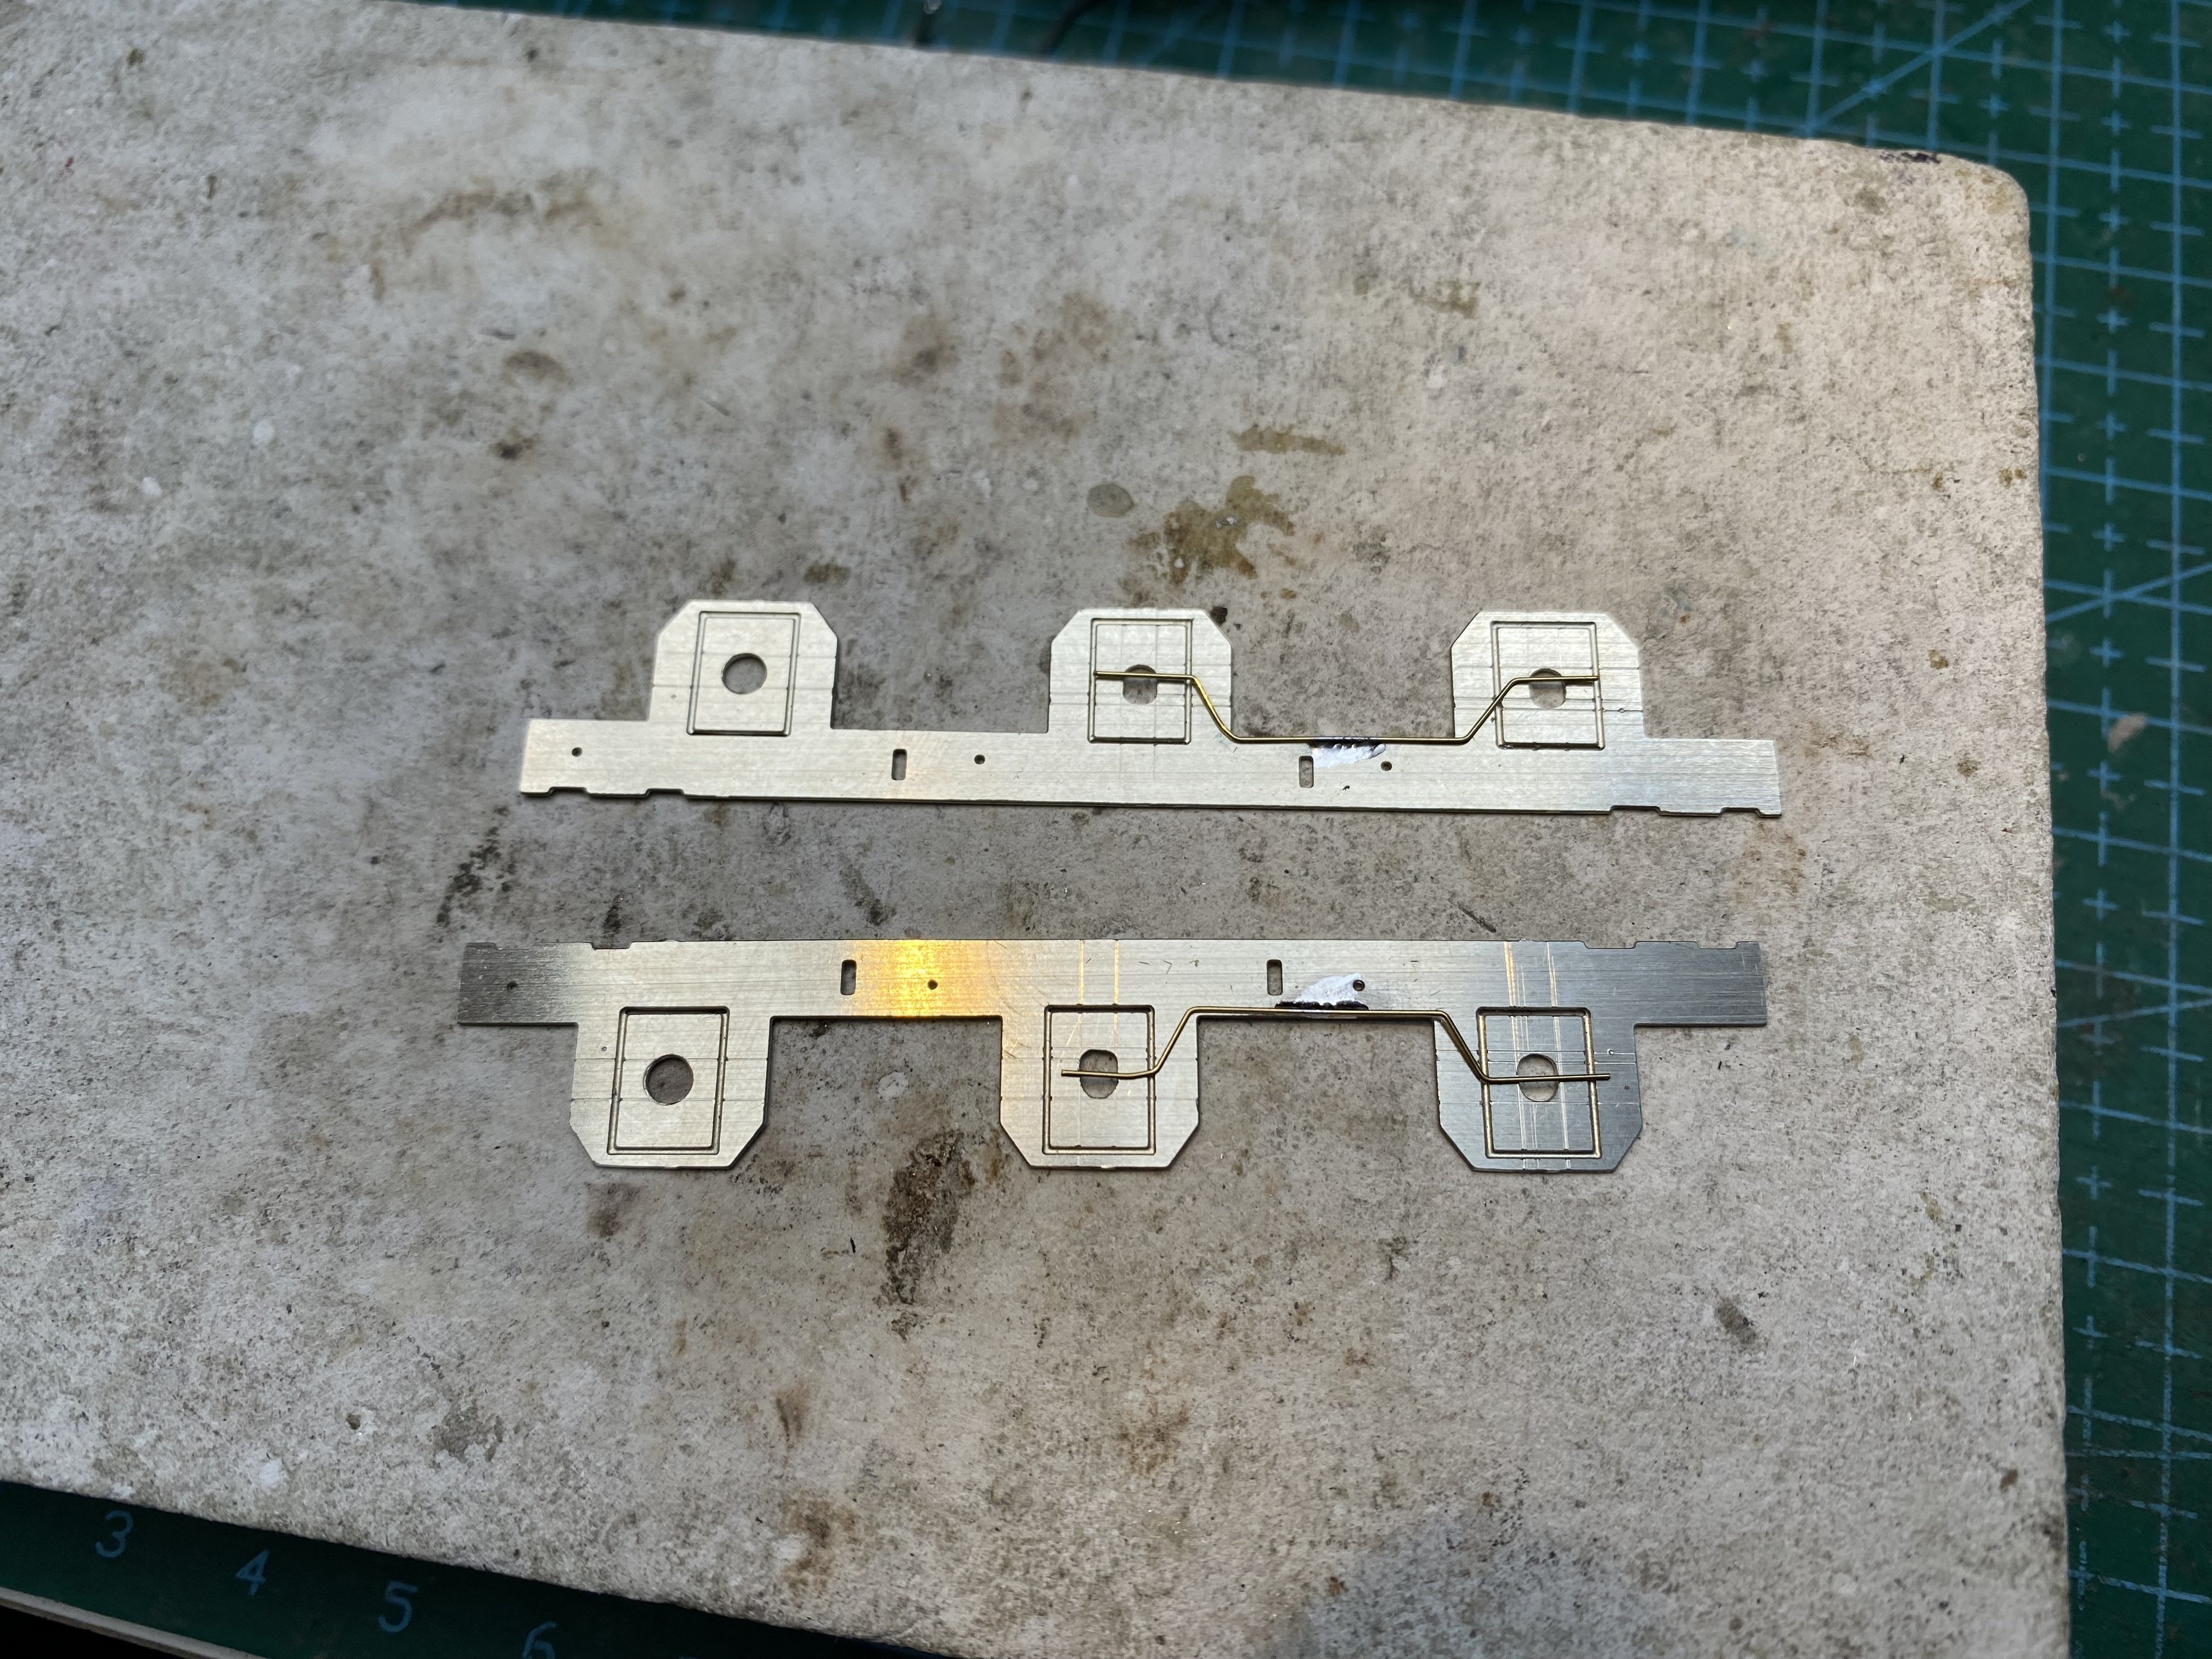
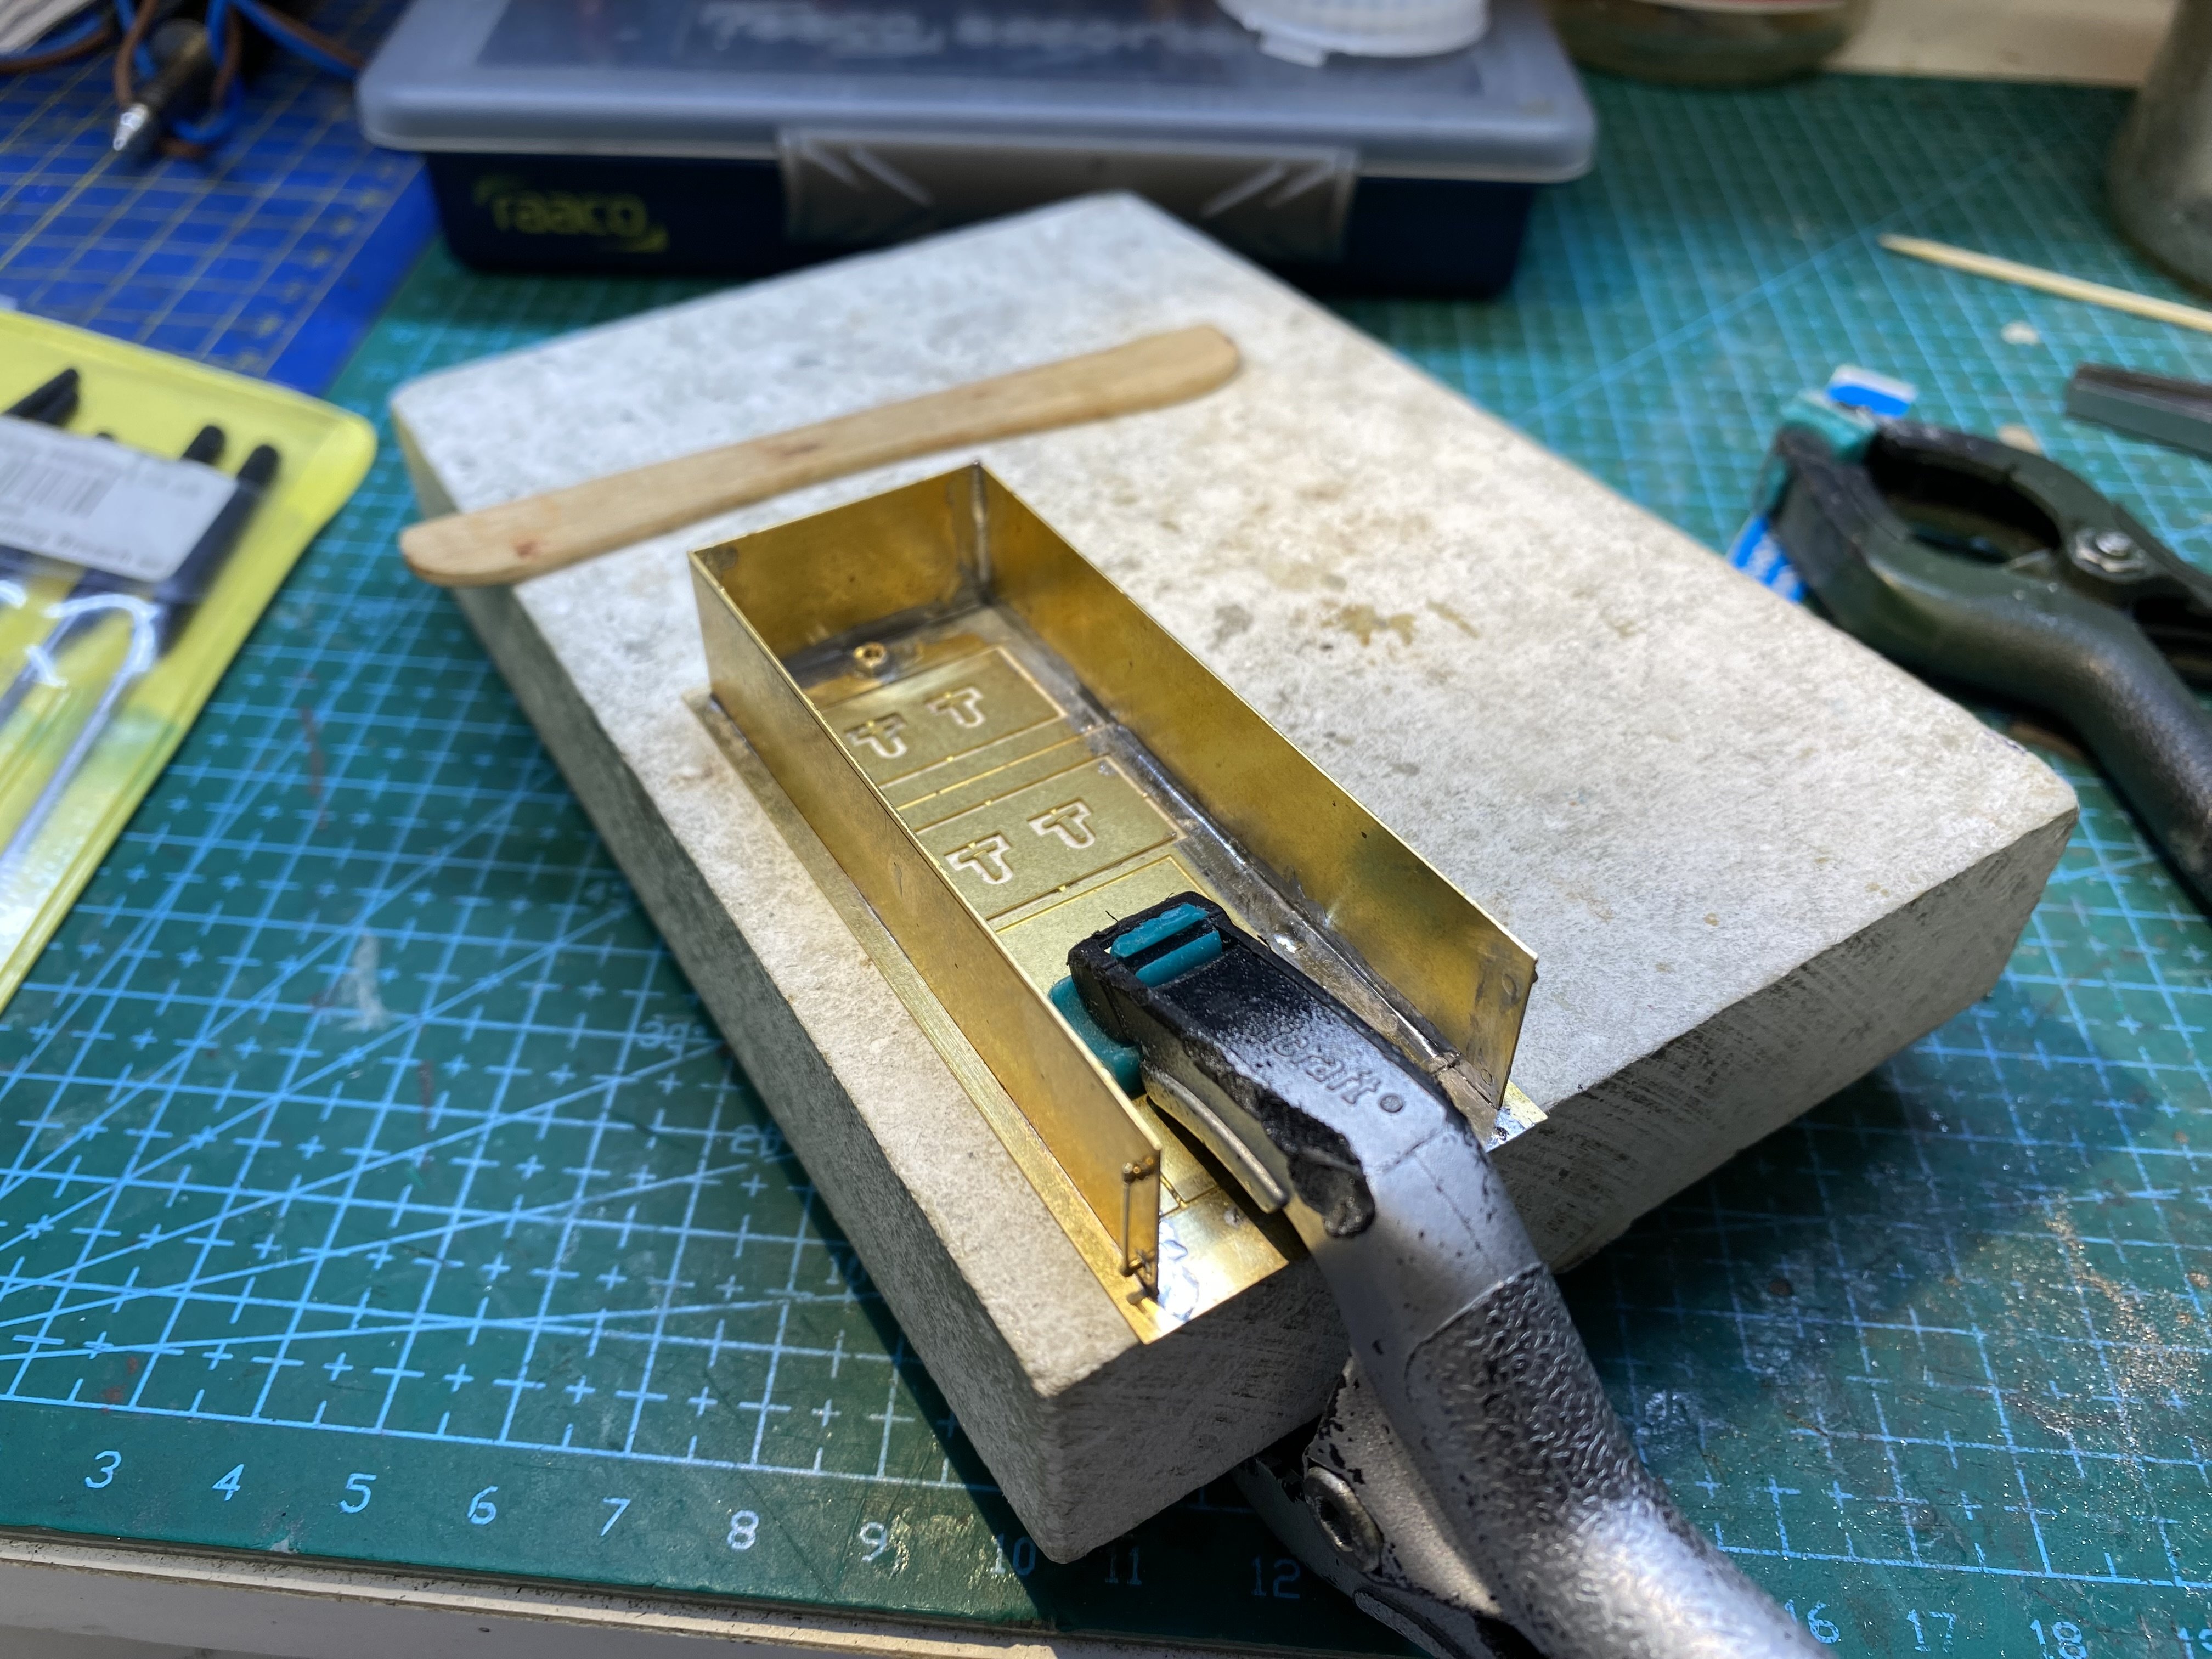
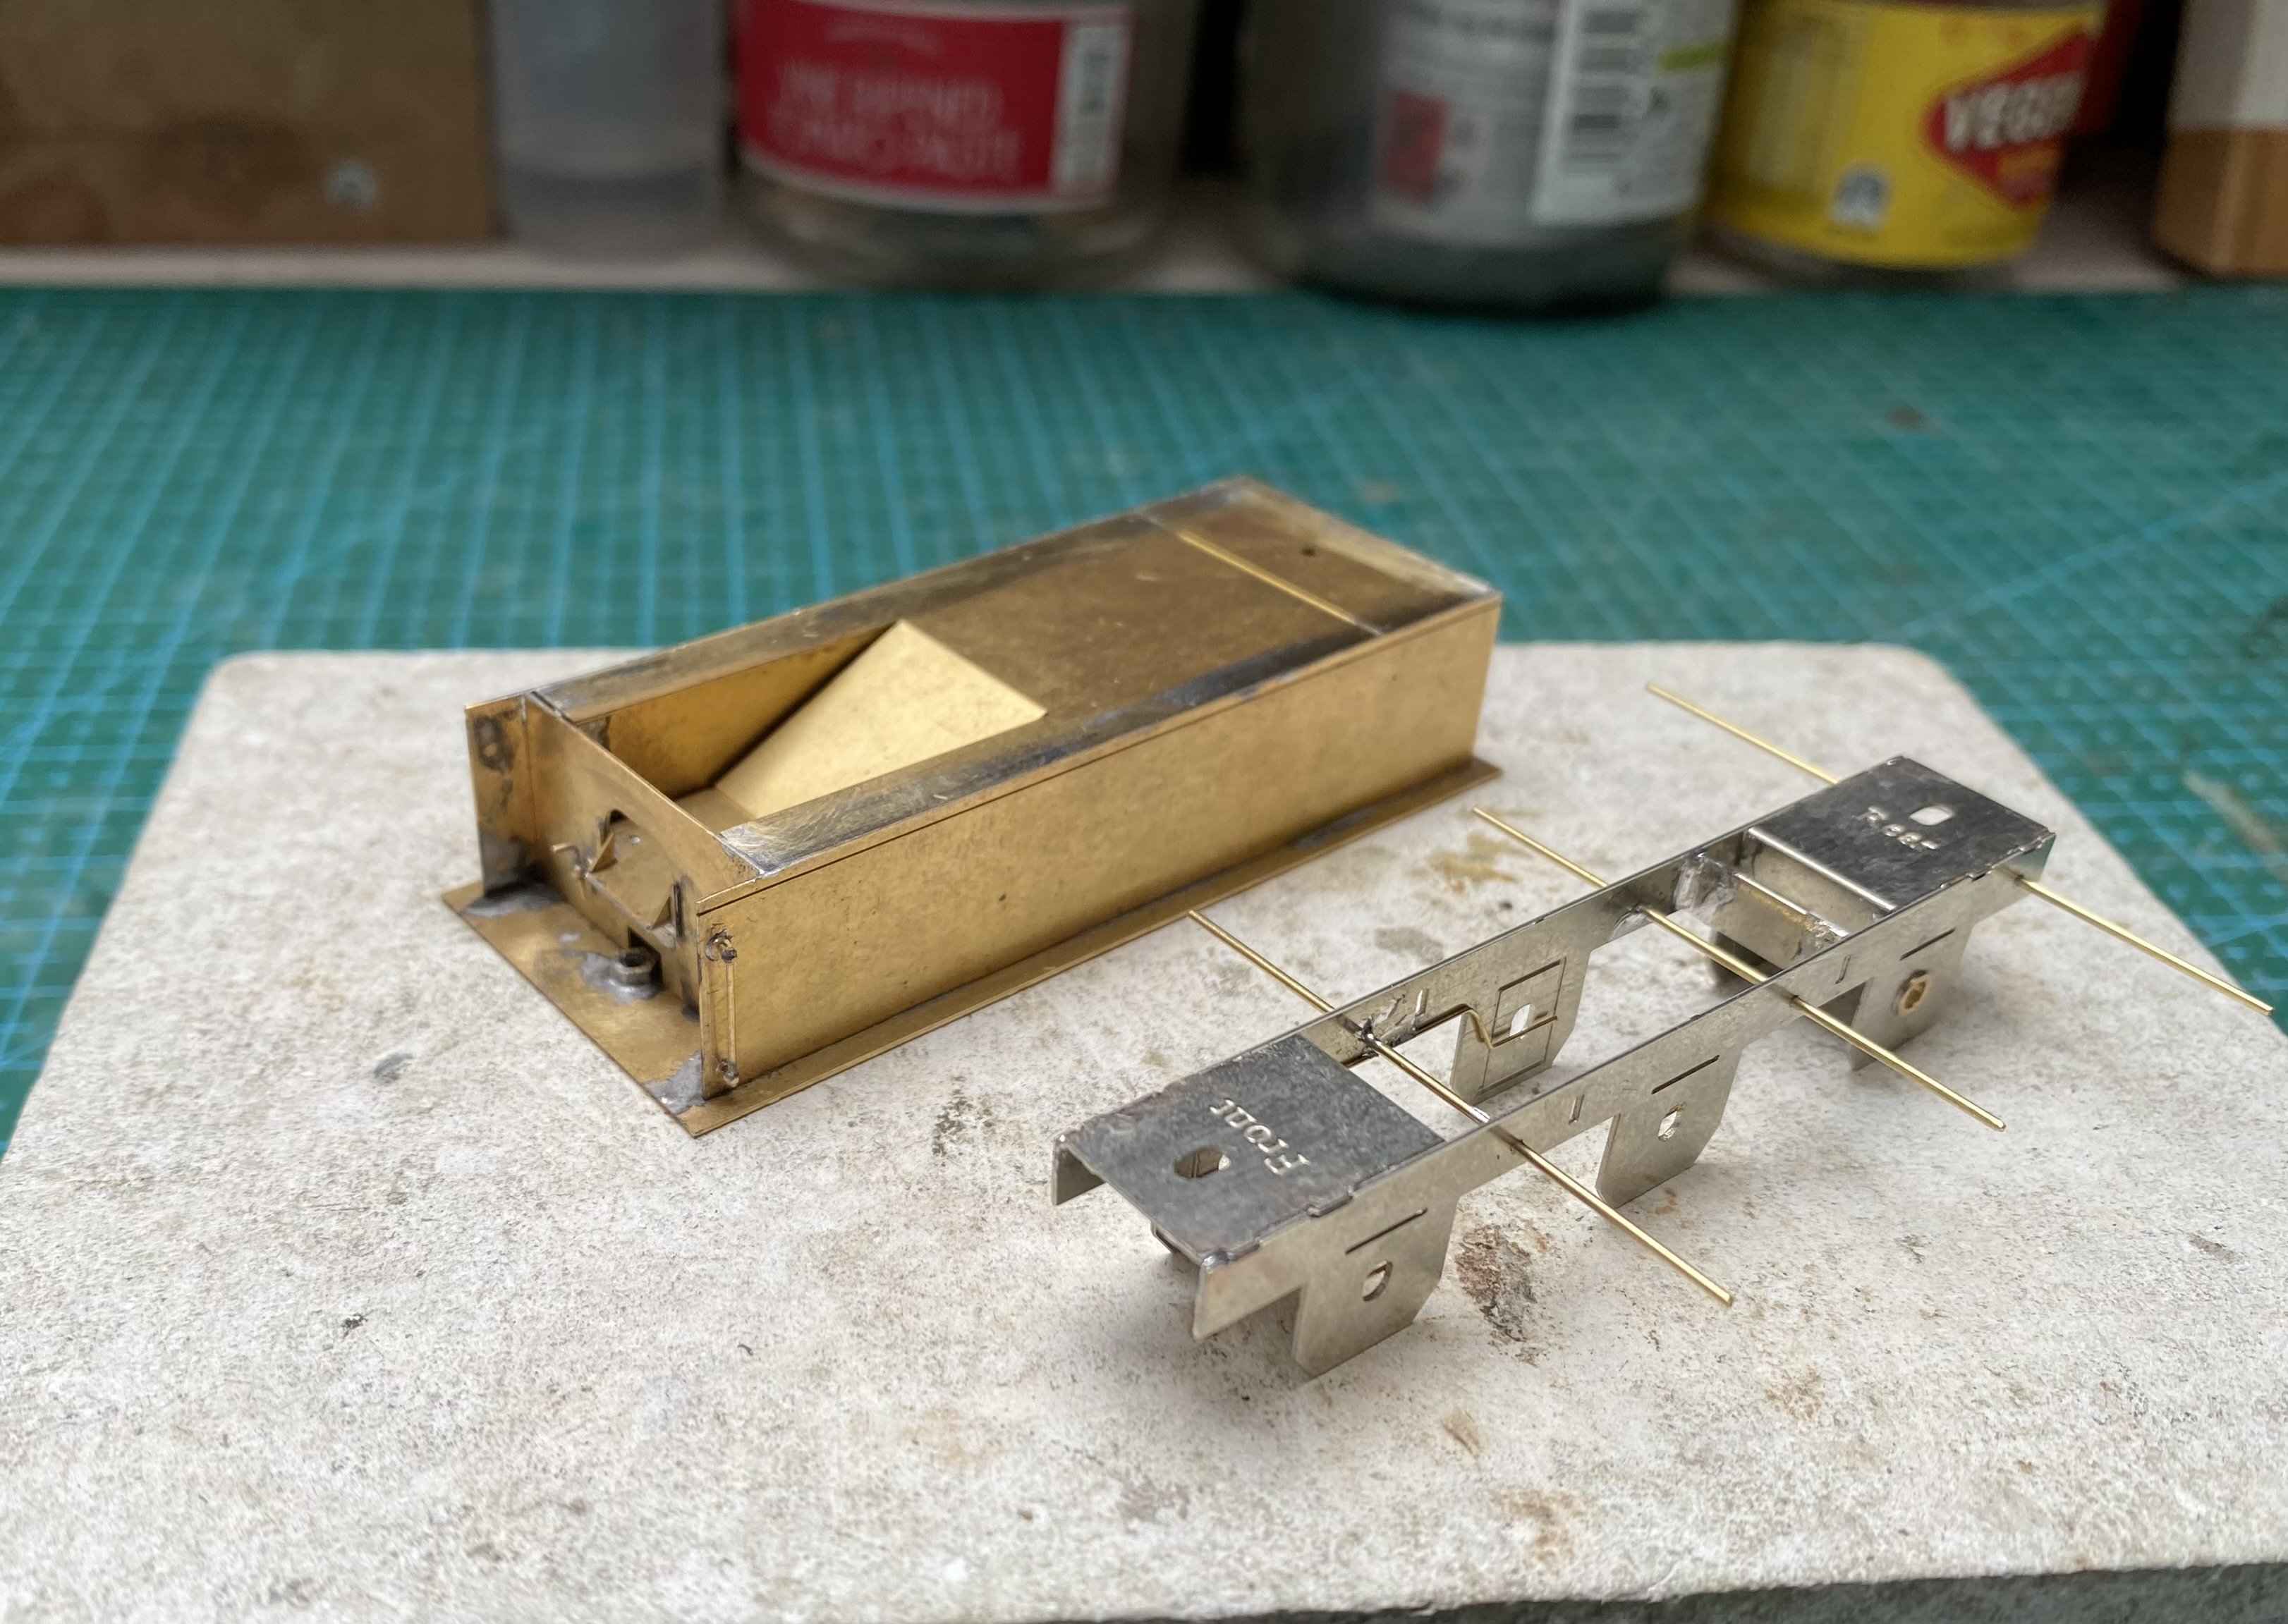
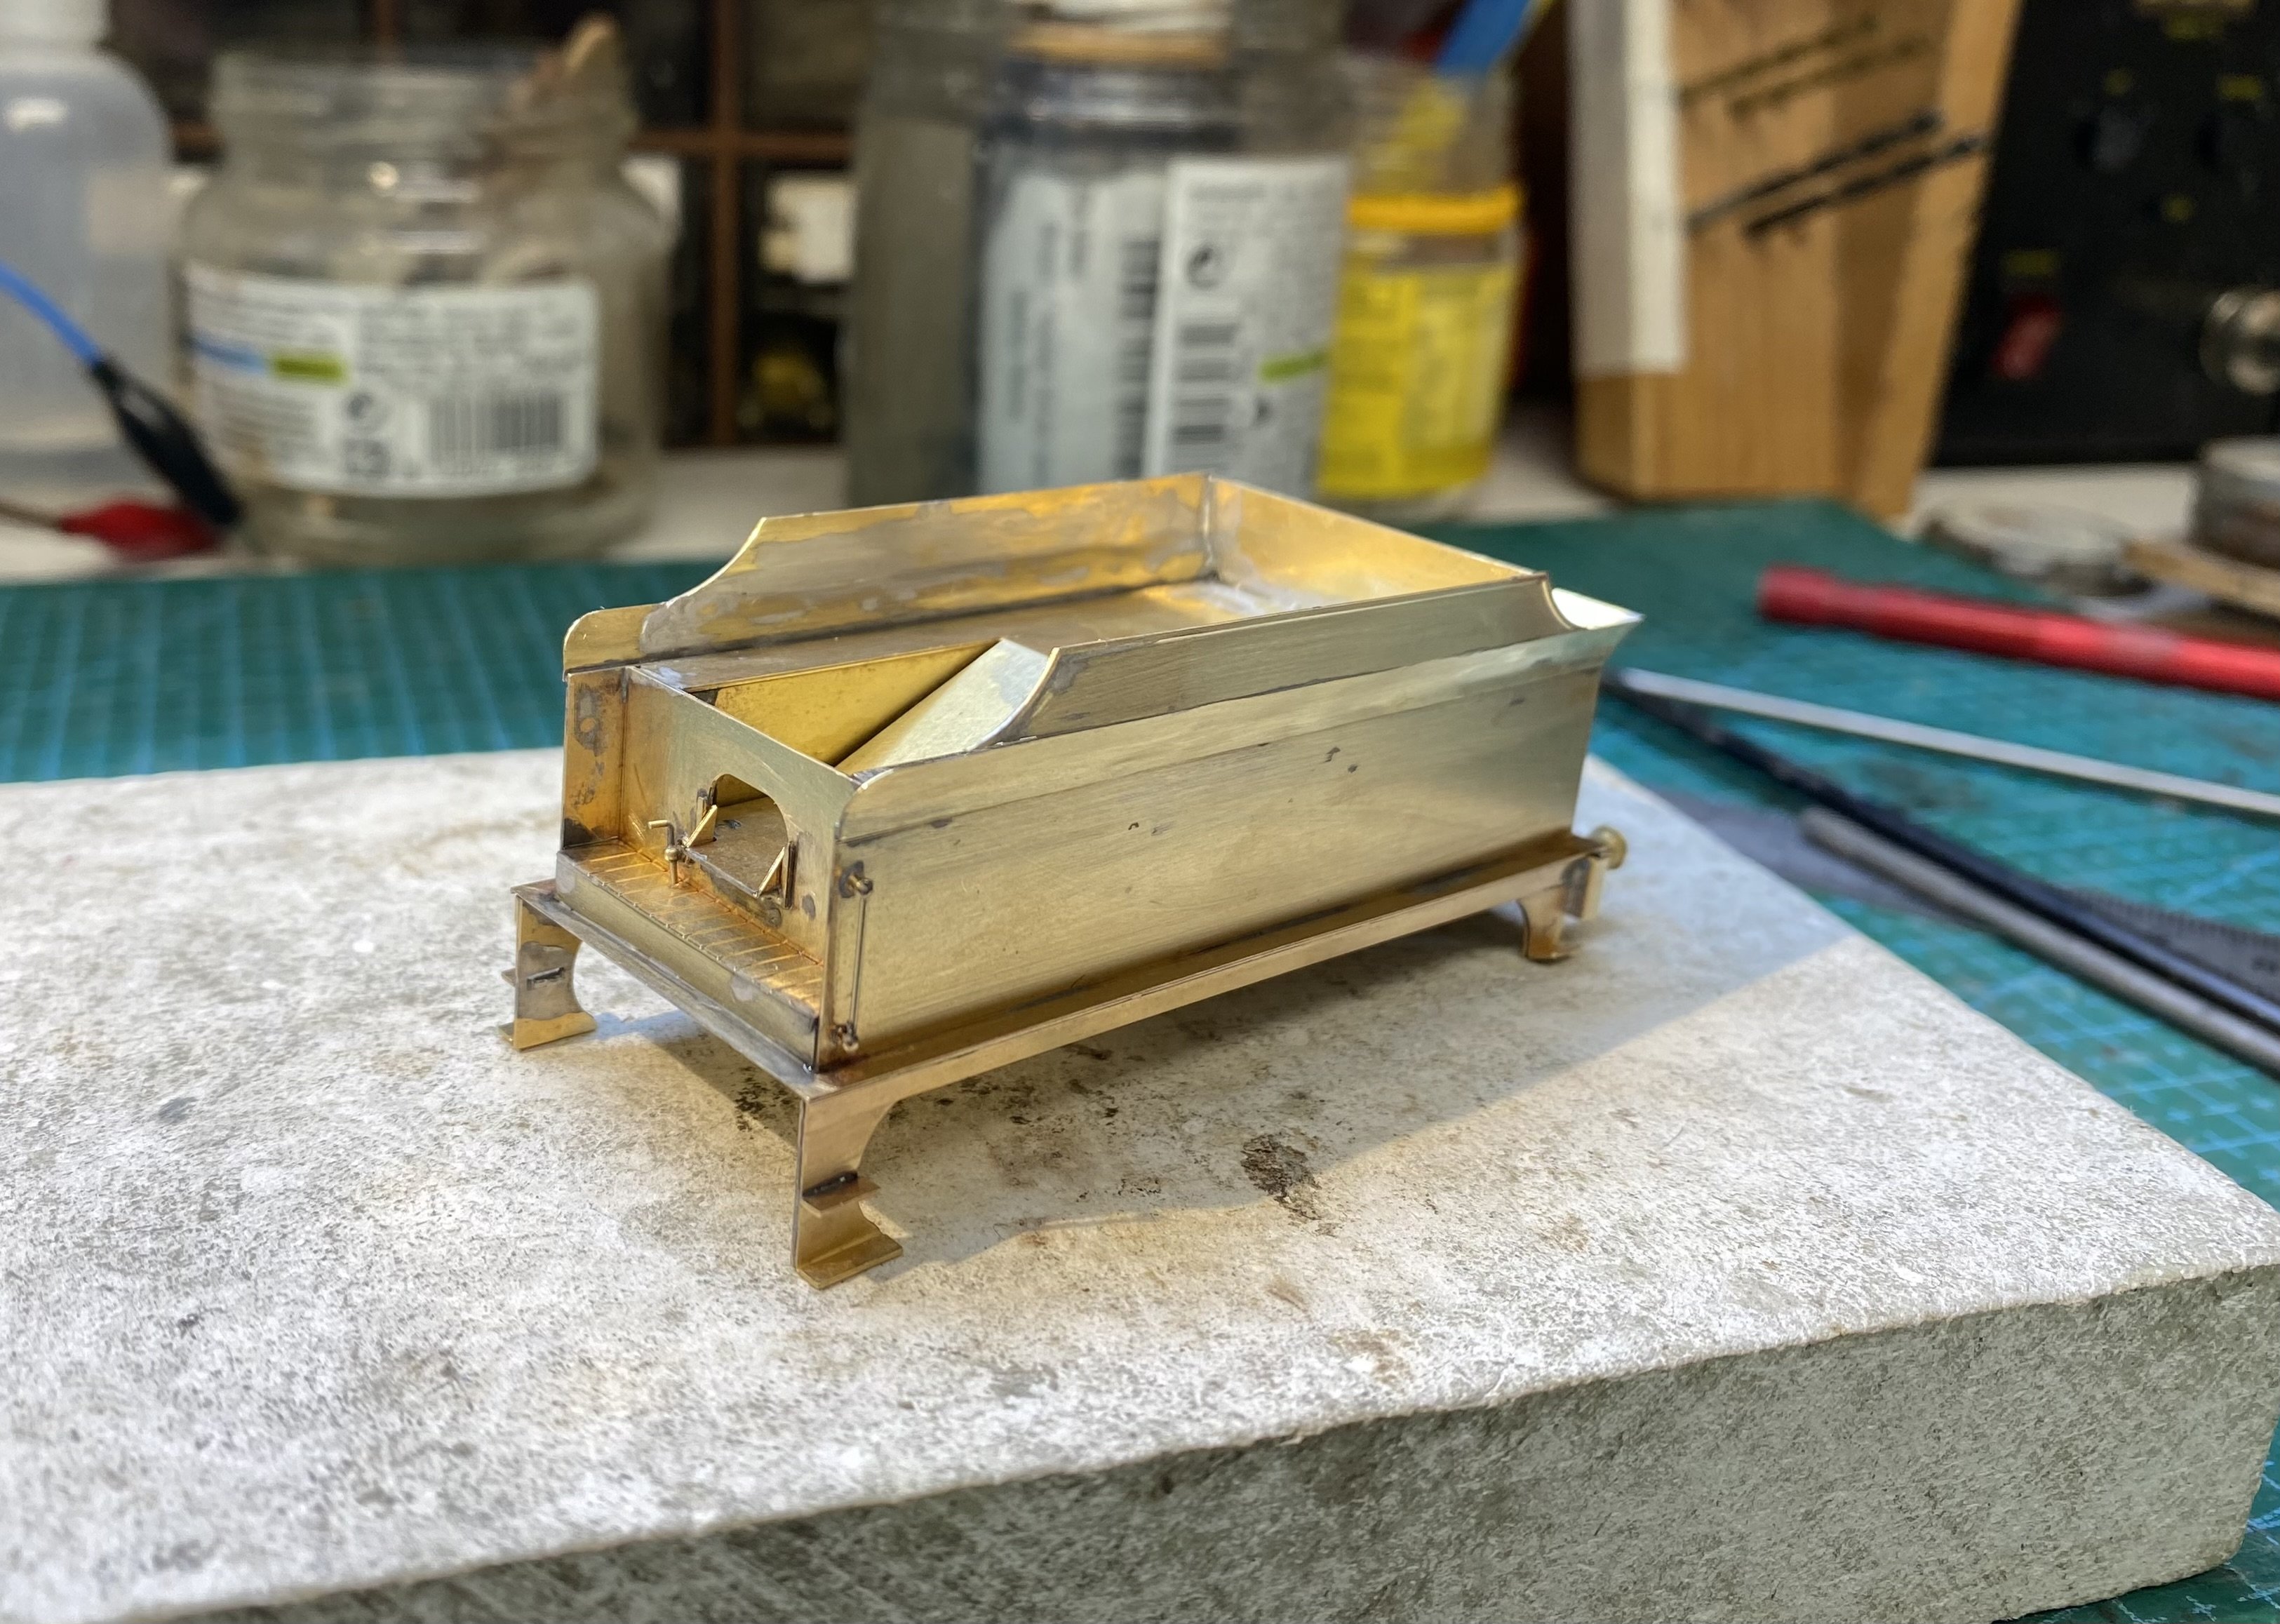
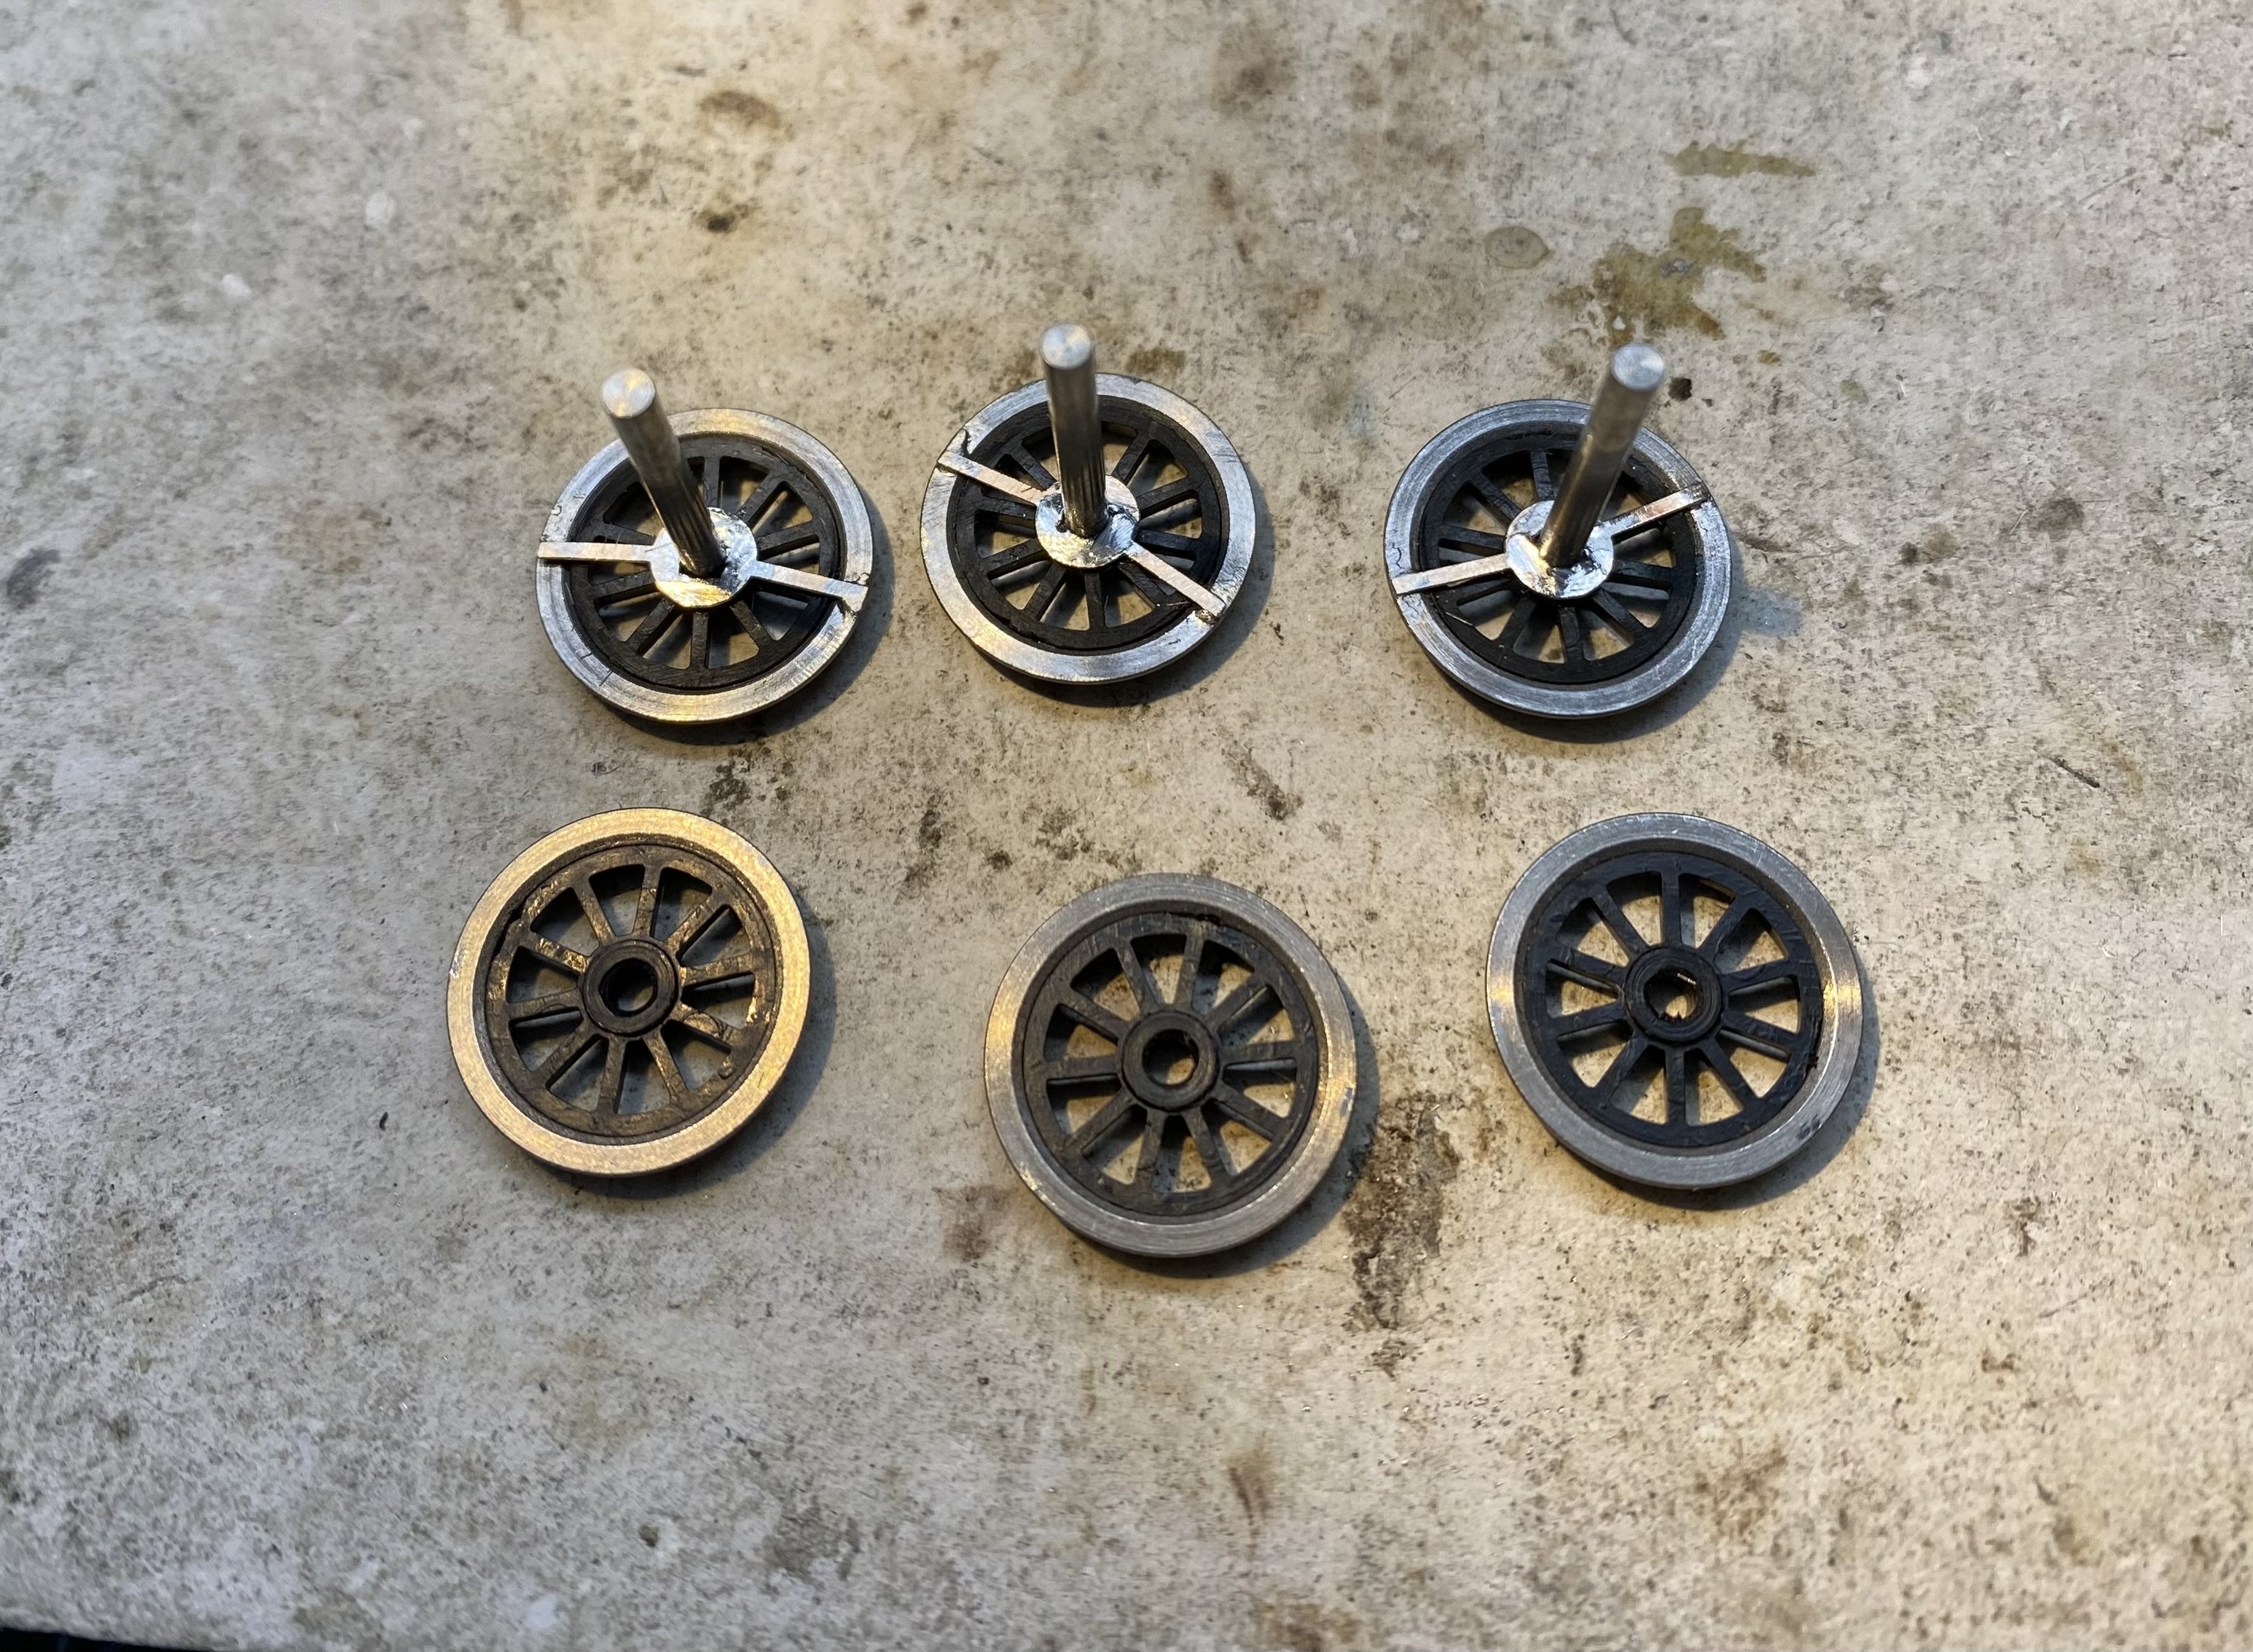
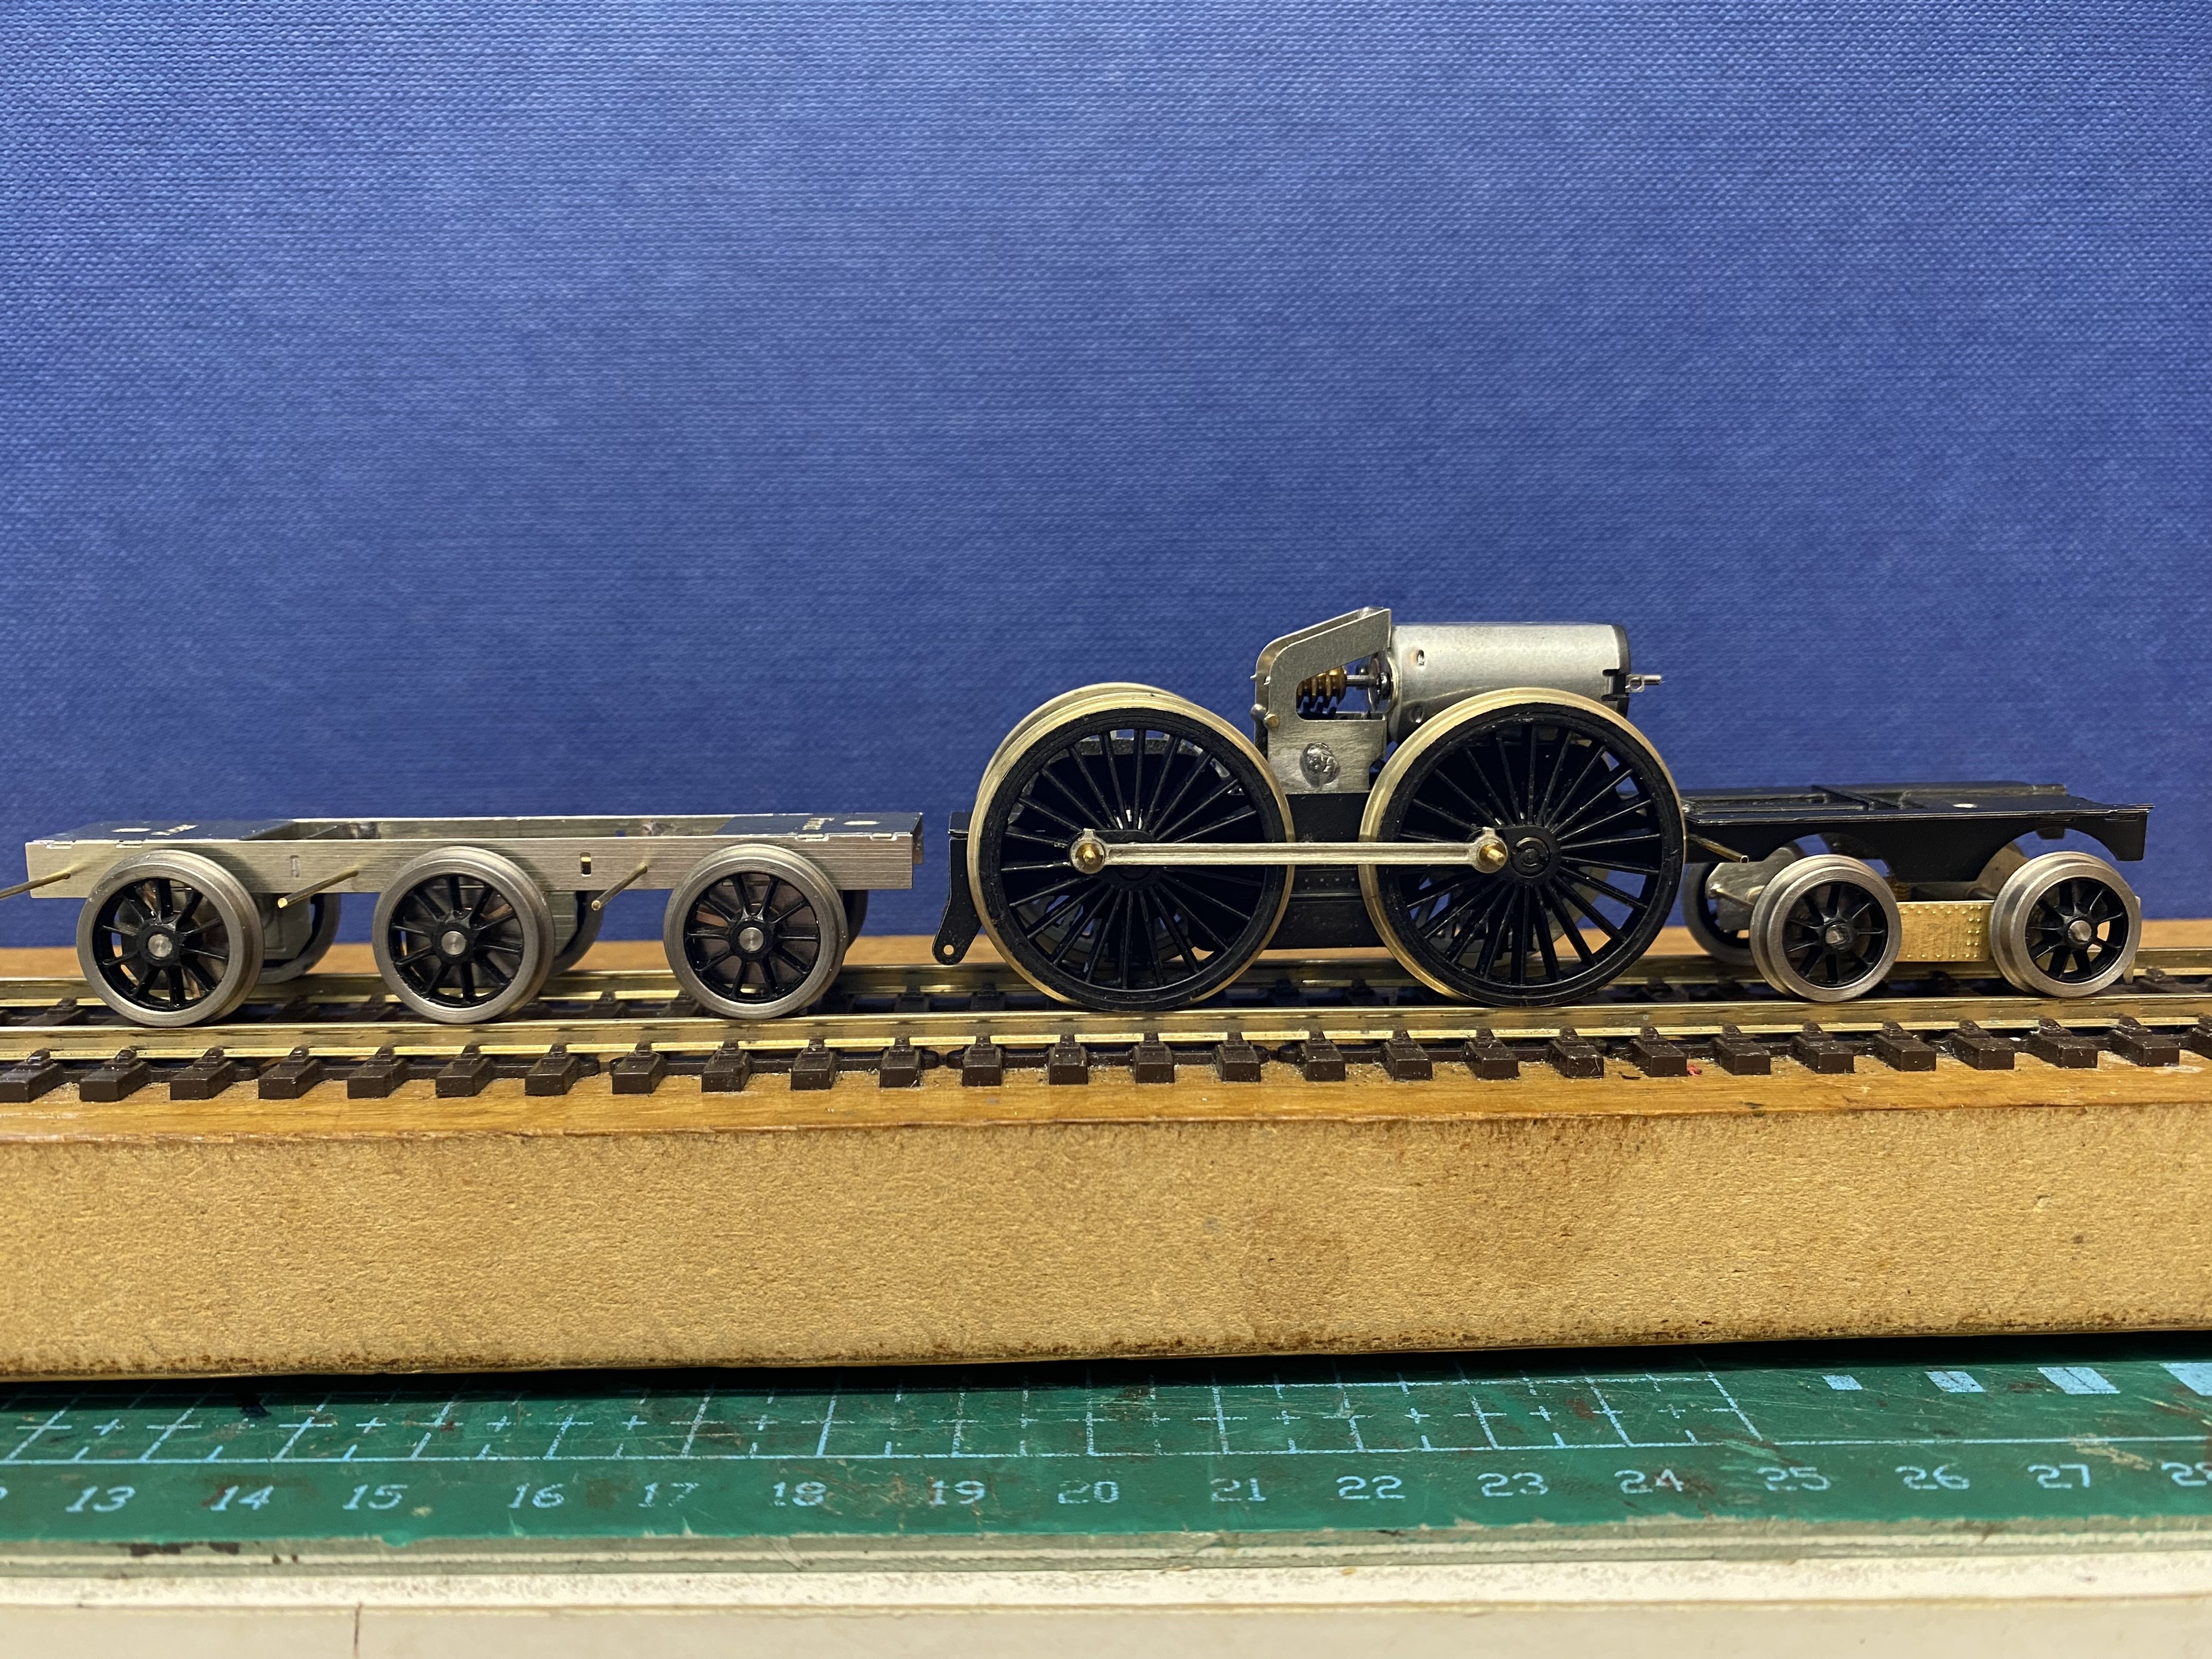
More ThreePee. Time for the tender. A fixed rear axle and the others lightly sprung. Good old lolly sticks. My excuse for eating Magnums. Quite a lot of tricky edge to edge soldering needed here. Hard not to get the stuff everywhere. I think I used a whole fibreglass pencil cleaning this one up. ThreePee is being built with live chassis to escape from pickup purgatory. The loco has Markit insulated driving wheels one side, uninsulated ones the other, but the tender needs its Gibson wheels shorted out on one side. I've used 'spiders' from ScaleLink with the square hole in the centre reamed a little to be a tight fit on the 2mm axles. They're then soldered to the axle and to the back of the wheel rims. Belt and braces. I've done the same for the loco bogie too. Brake rigging fitted. Fiddly stuff with the bits tending to flop around everywhere until the first few joints get soldered. I looked in my notebook to see how I did it when I built Kieran's PPs a few months back. I'd written "Chassis wheeled up and brakes added" Really useful. Quite a handsome beast. The boiler furniture is just set on for the photo. Mating chassis and body always turns up the odd problem and ThreePee is no exception. The first to occur was the driving wheels locking up when the 2 chassis mounting bolts were tightened down front and back. I usually avoid two bolt attachment because it can twist the chassis and affect the running and I think that's what was happening here. I dispensed with the rear bolt and soldered a little bit of angle inside the dragbeam instead. The chassis spacer slides under this and there's a little bit of wriggle room which avoids twisting pressure on the chassis. Seemed to cure the problem, but then.... I thought I'd filed enough clearance for motor and gearbox when I built the bodywork but of course I hadn't. The wheels were grinding on something - so hard to see exactly what - and when that was cured, the gearbox cogs started clouting something too. Par for the course really. At least it is when I build them. There's always a point when I think "This thing is never gonna work" but it's usually worth persevering. After an afternoon of filing, grinding and shouting I think we're out of the woods now but who knows what will turn up next. First run under its own motive power. Loco is a bit nose up and the tender is a bit skittish through points but a promising start. Plenty to do yet. The whole rig needs added weight here and there for a start. It's running on DC at the moment but it'll be chipped once the gremlins have been banished. IMG_5077.MOV Alan
- 860 replies
-
- 14
-
-
-
Kieran, whose models those are, tells me it’s a 1st Class Saloon coach
-
I'm quite sure it will David
-
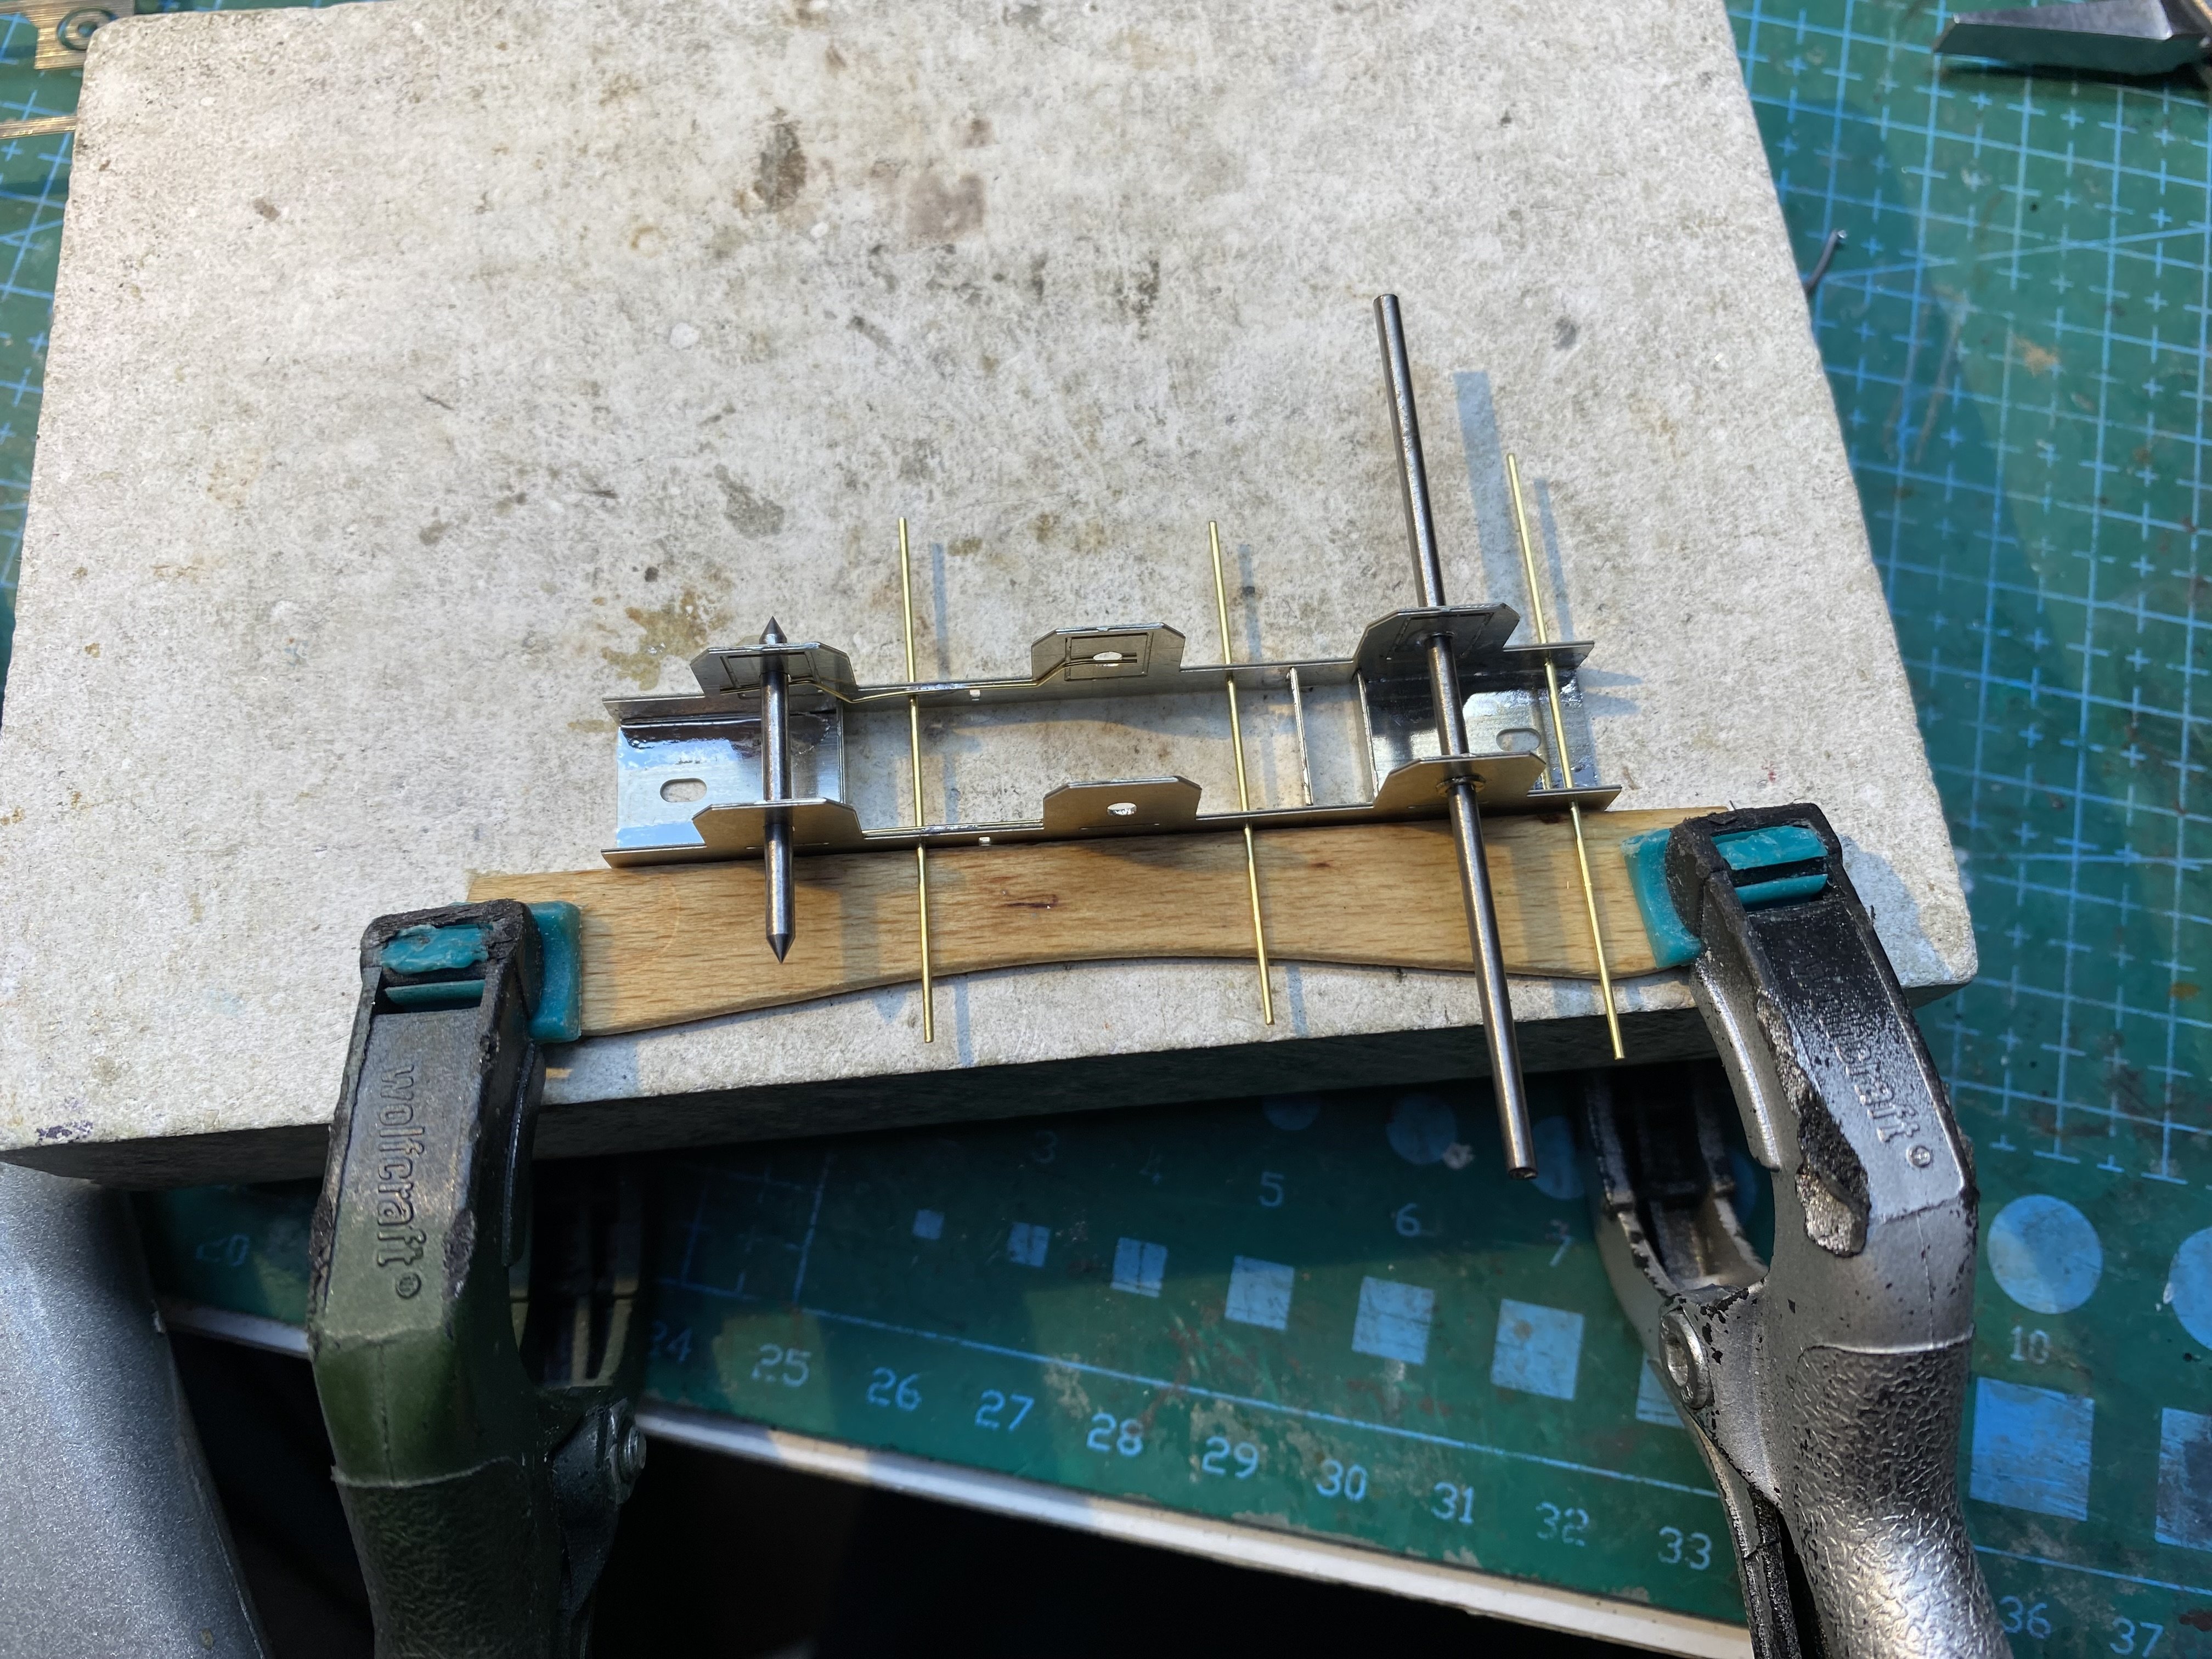
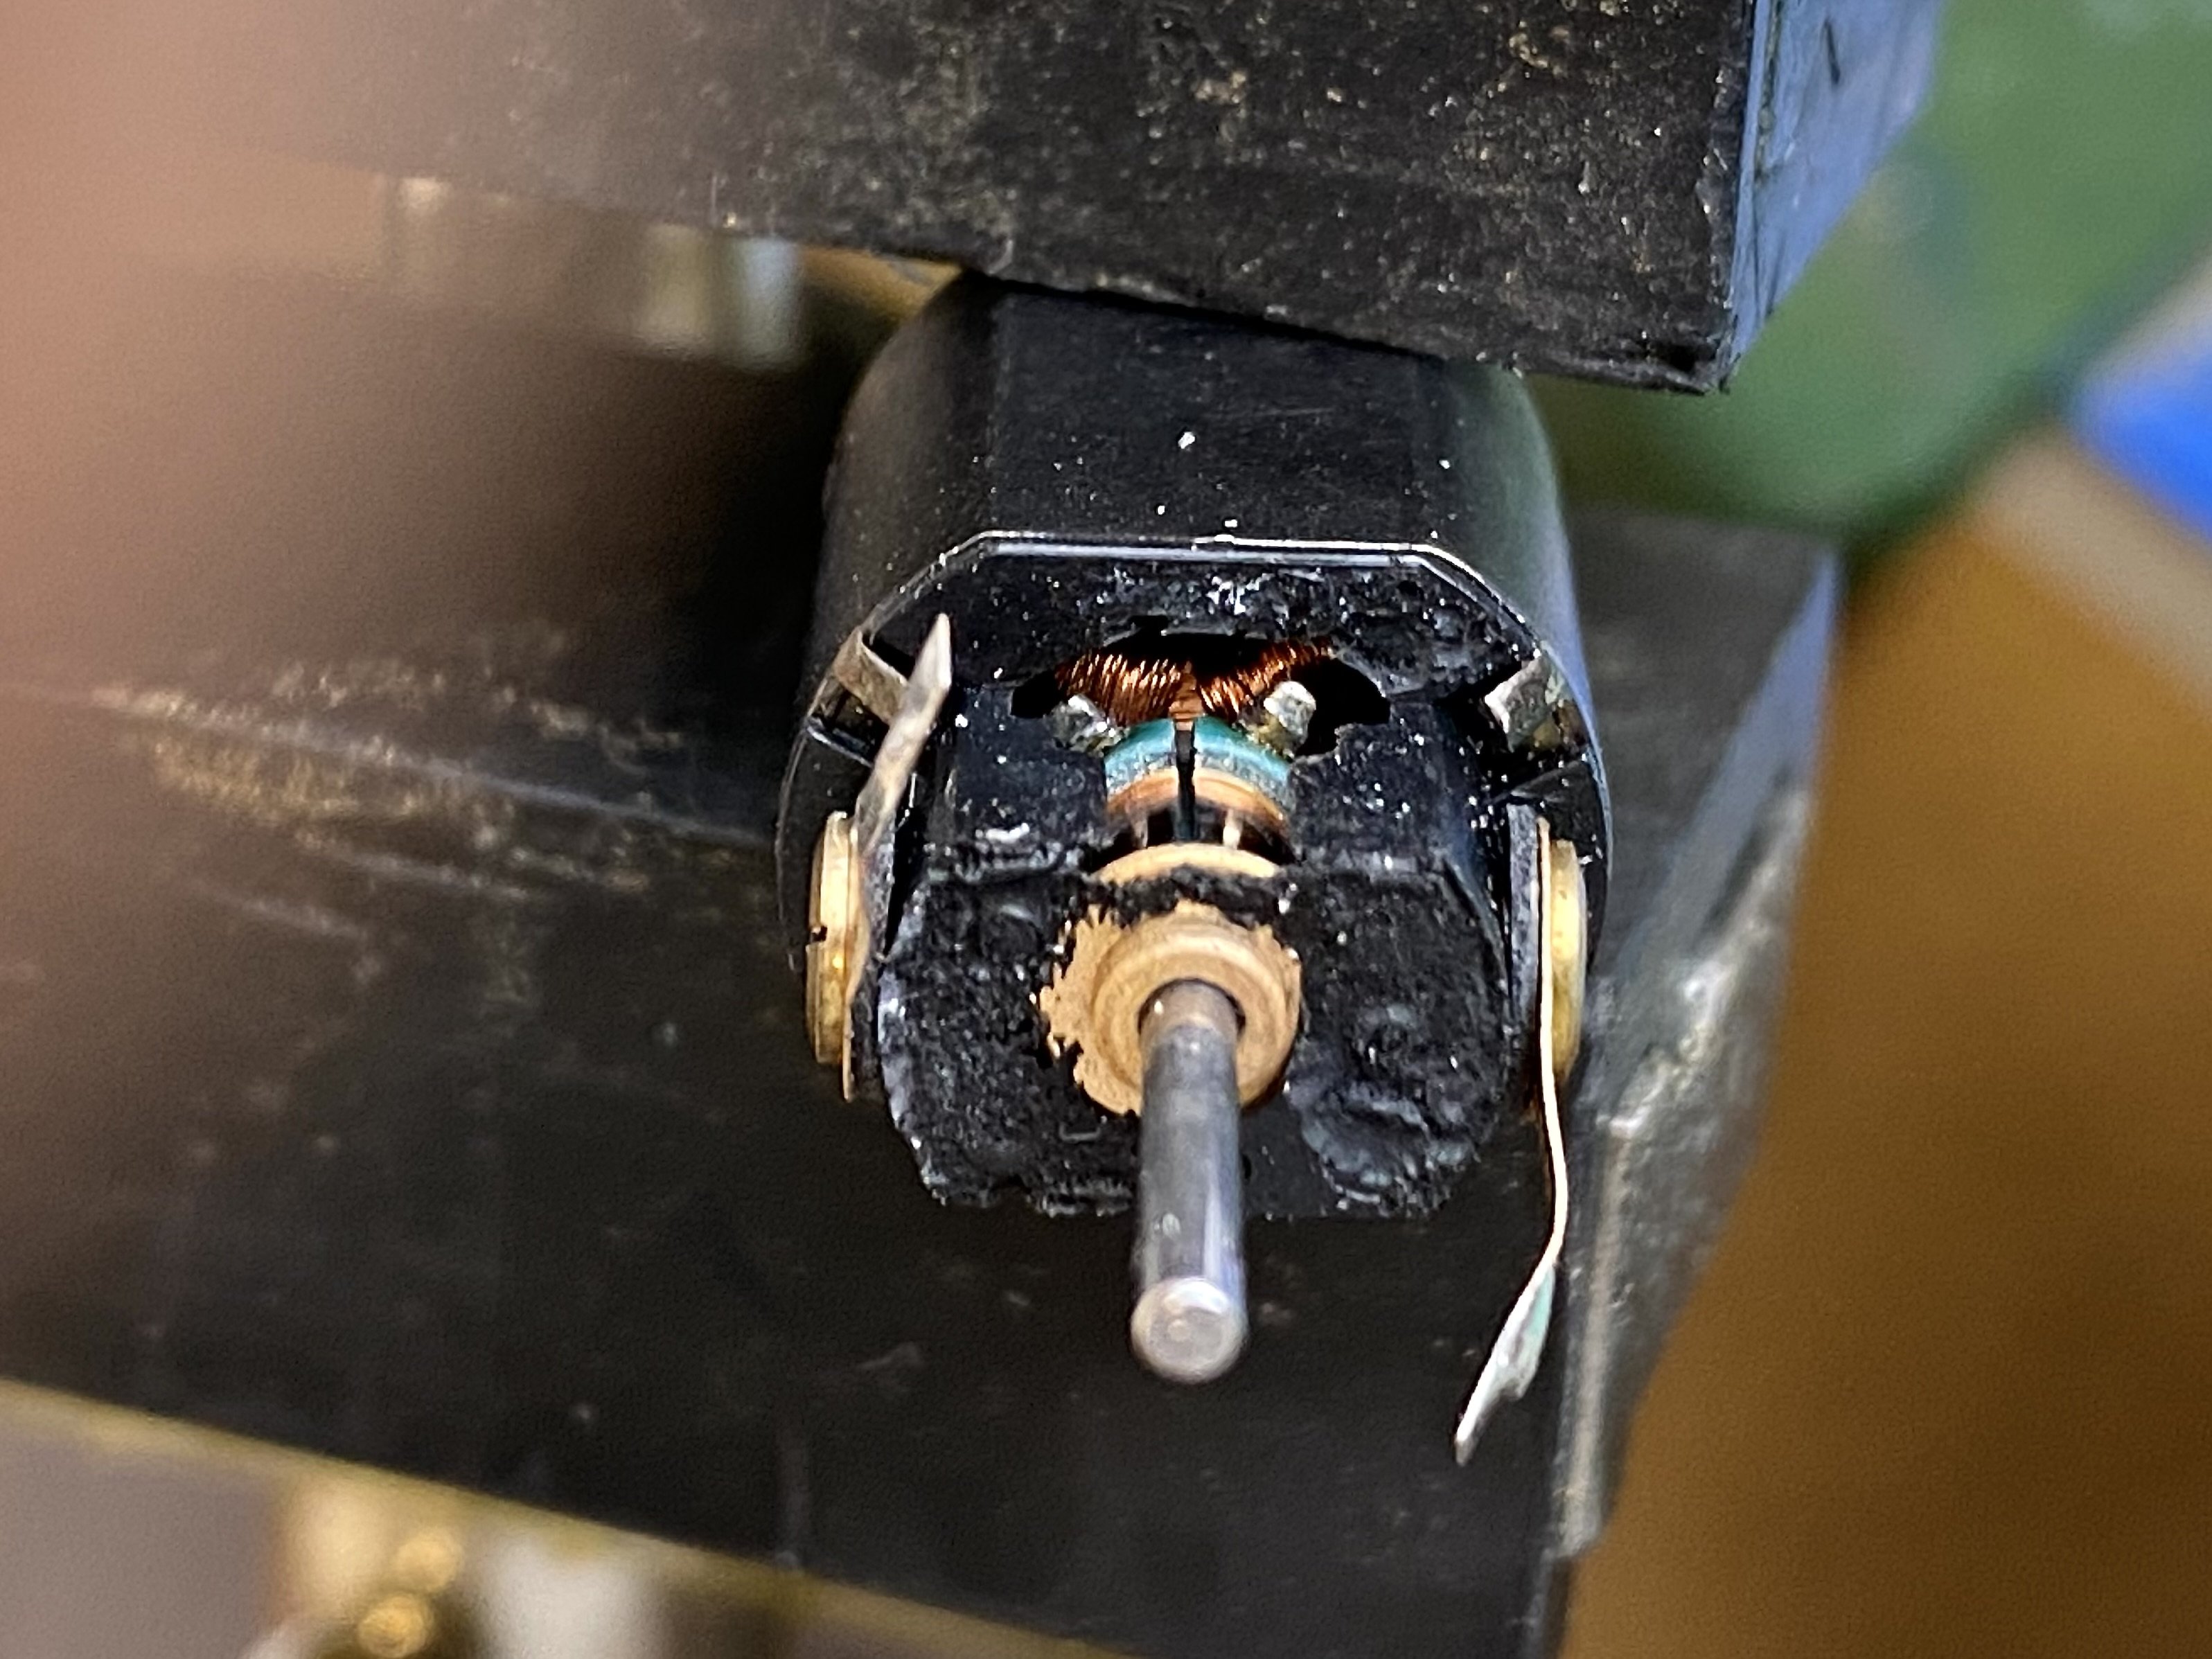
As it happens, J26 no556 was back with me this last week or so for a severe talking to. It went to its owner Kieran who painted and finished it for its career at Kirley Junction. All was well for a while but then it began to develop personality disorders, running lumpily, stopping and starting then refusing to run at all. On examination a number of issues emerged. Two of the ScaleLink wheels had developed cracks in the boss where the crankpin screws in, meaning the crankpins may not have been secure. Given that I’ve had trouble with cracking cranks on my little Kirtley project, I suspect I need to rein in my cack-handedness when fitting crankpins. The wheels were replaced with a set of Markits and running improved noticably. Then the final drive gear came loose on its axle. The gearbox that was bundled with the kit is an early High Level RoadRunner Compact Plus with a plain brass final drive cog which has no grub screw. After repeated failures to secure the cog (threadlock, superglue, shouting at it, solder! I suspect it had been over-reamed at some stage. Maybe by me) I gave 556 a fresh RRC+ gearbox. The current version has a more reliable final drive gearwheel with brass boss and grub screw. (I had intended to just use this final drive cog in the old box but the design of the box has changed and it wouldn’t fit). While fitting the motor to the new gearbox, I discovered that the motor shaft was waving about in the breeze. Not normal! IMG_5023.MOV The plastic moulding securing the motor bearing seems to have crumbled away leaving the bearing free to jiggle around. No idea what’s caused this but on reflection, it may have been one of the root causes of the stop-start problems. Anyway, 556 now has new wheels, a new motor and a new gearbox and seems infinitely happier. It has a DCC chip stowed in the boiler and a ton of lead in the tanks. The Markit wheels are insulated/uninsulated pairs so pickups are now only needed on one side. A problem halved! After trial runs at Loughan Quay, 556 is now back on home turf and earning its keep. J26 at Kirley.mov Alan
-
I tried that but the one I had was a left handed thread and didn't fit. The gauge was wrong too.
-
I had one of those once but the wheels fell off
-
Long long ago, on a topic far from here...... Started a thread we did. Lost control of it we have....