Tullygrainey
-
Posts
958 -
Joined
-
Last visited
-
Days Won
56
Content Type
Profiles
Forums
Events
Gallery
Everything posted by Tullygrainey
-
I think so David. Starting to get some logic into the loco roster on Loughan Quay Ah Patrick, a lie down in a darkened room
-
What a lovely touch!
-
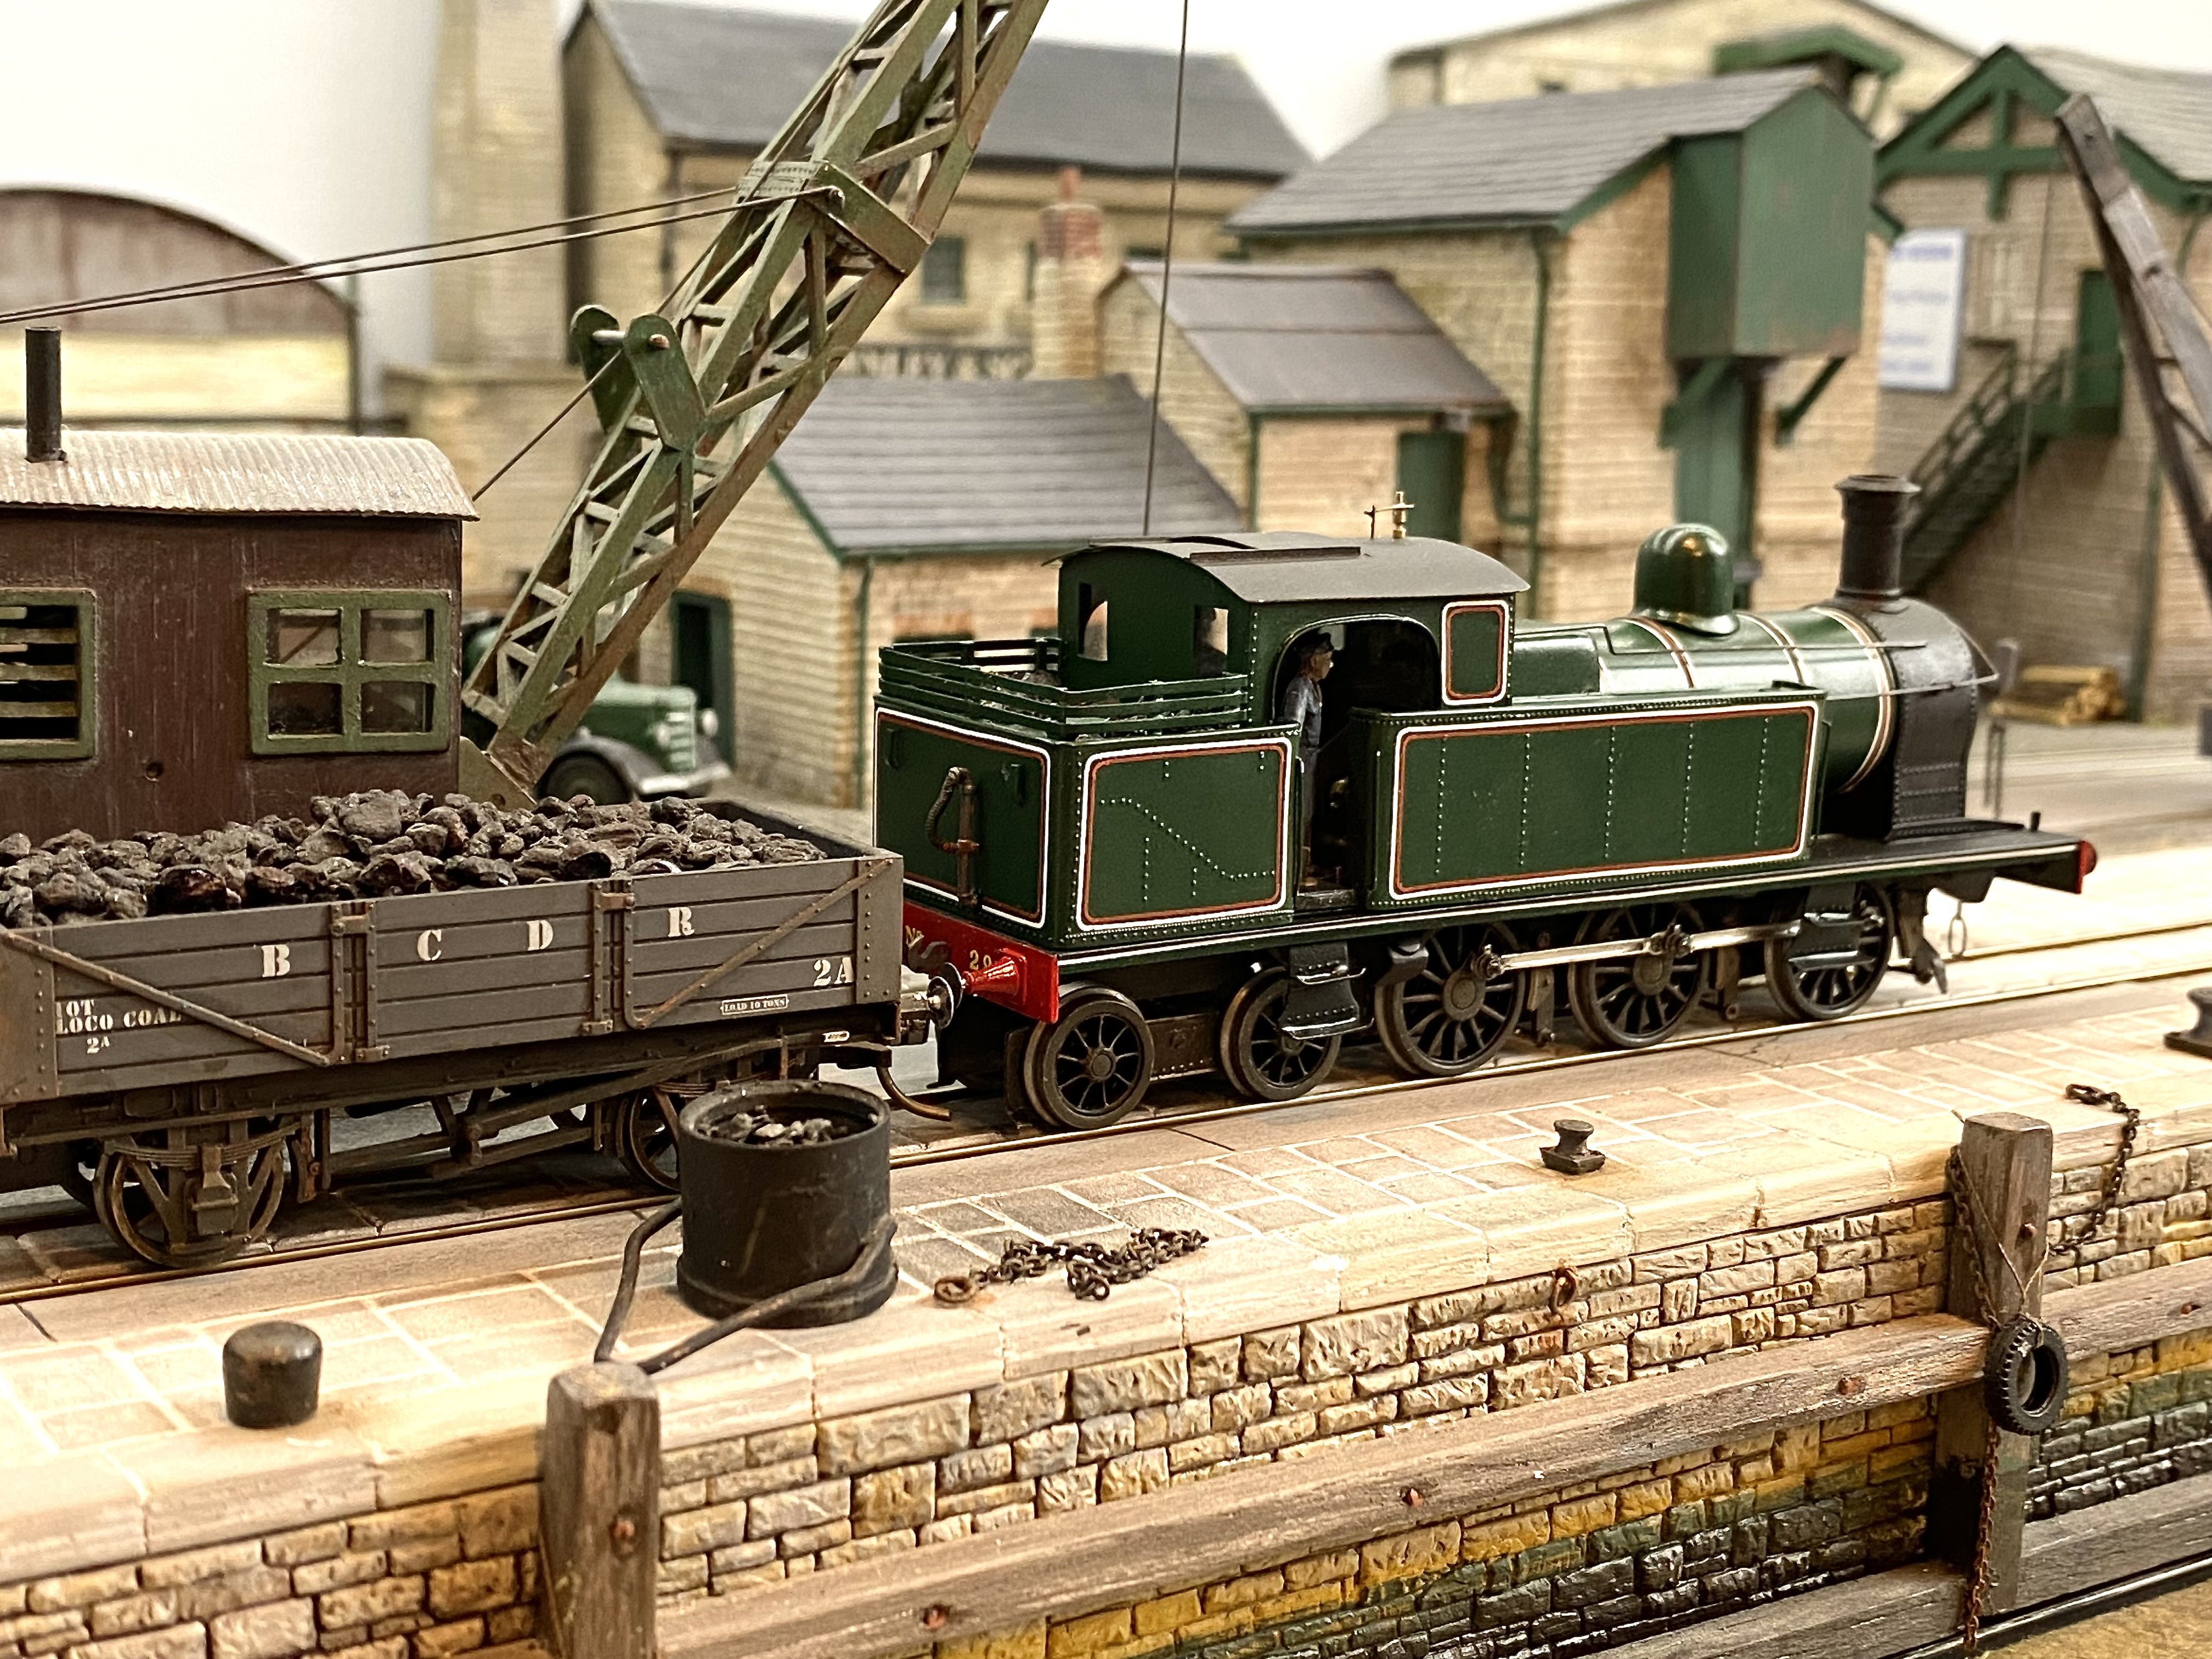
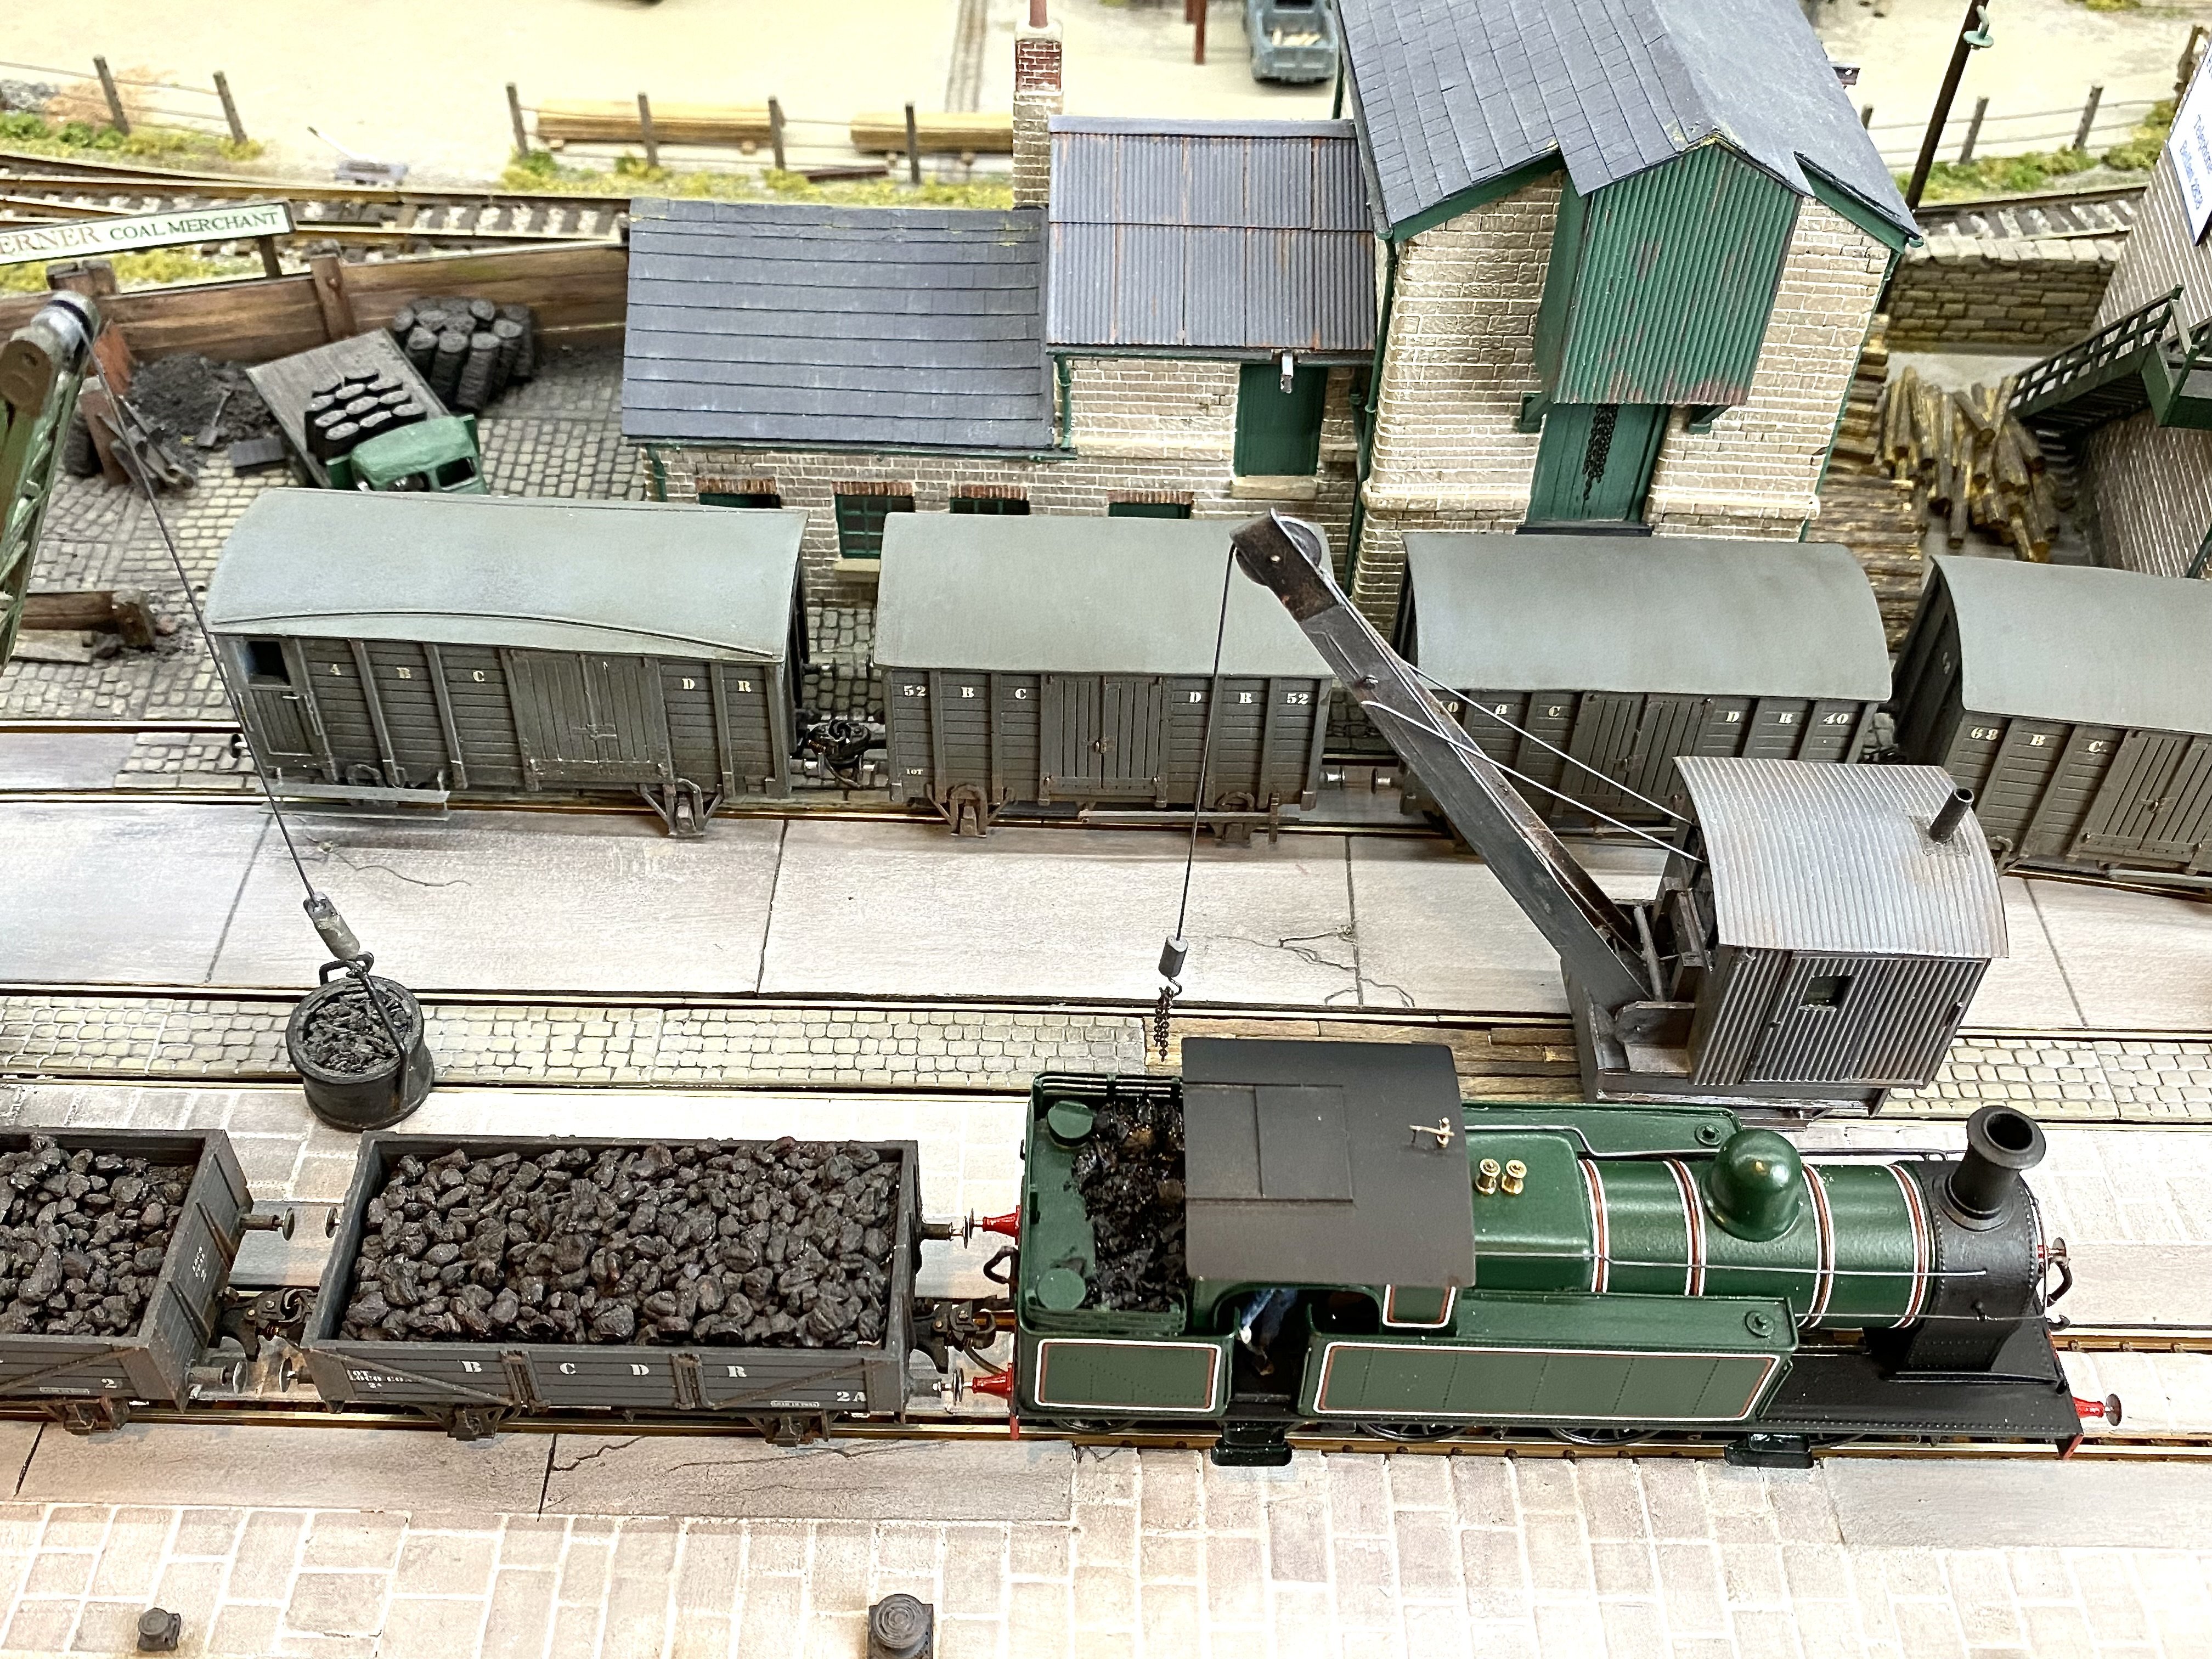
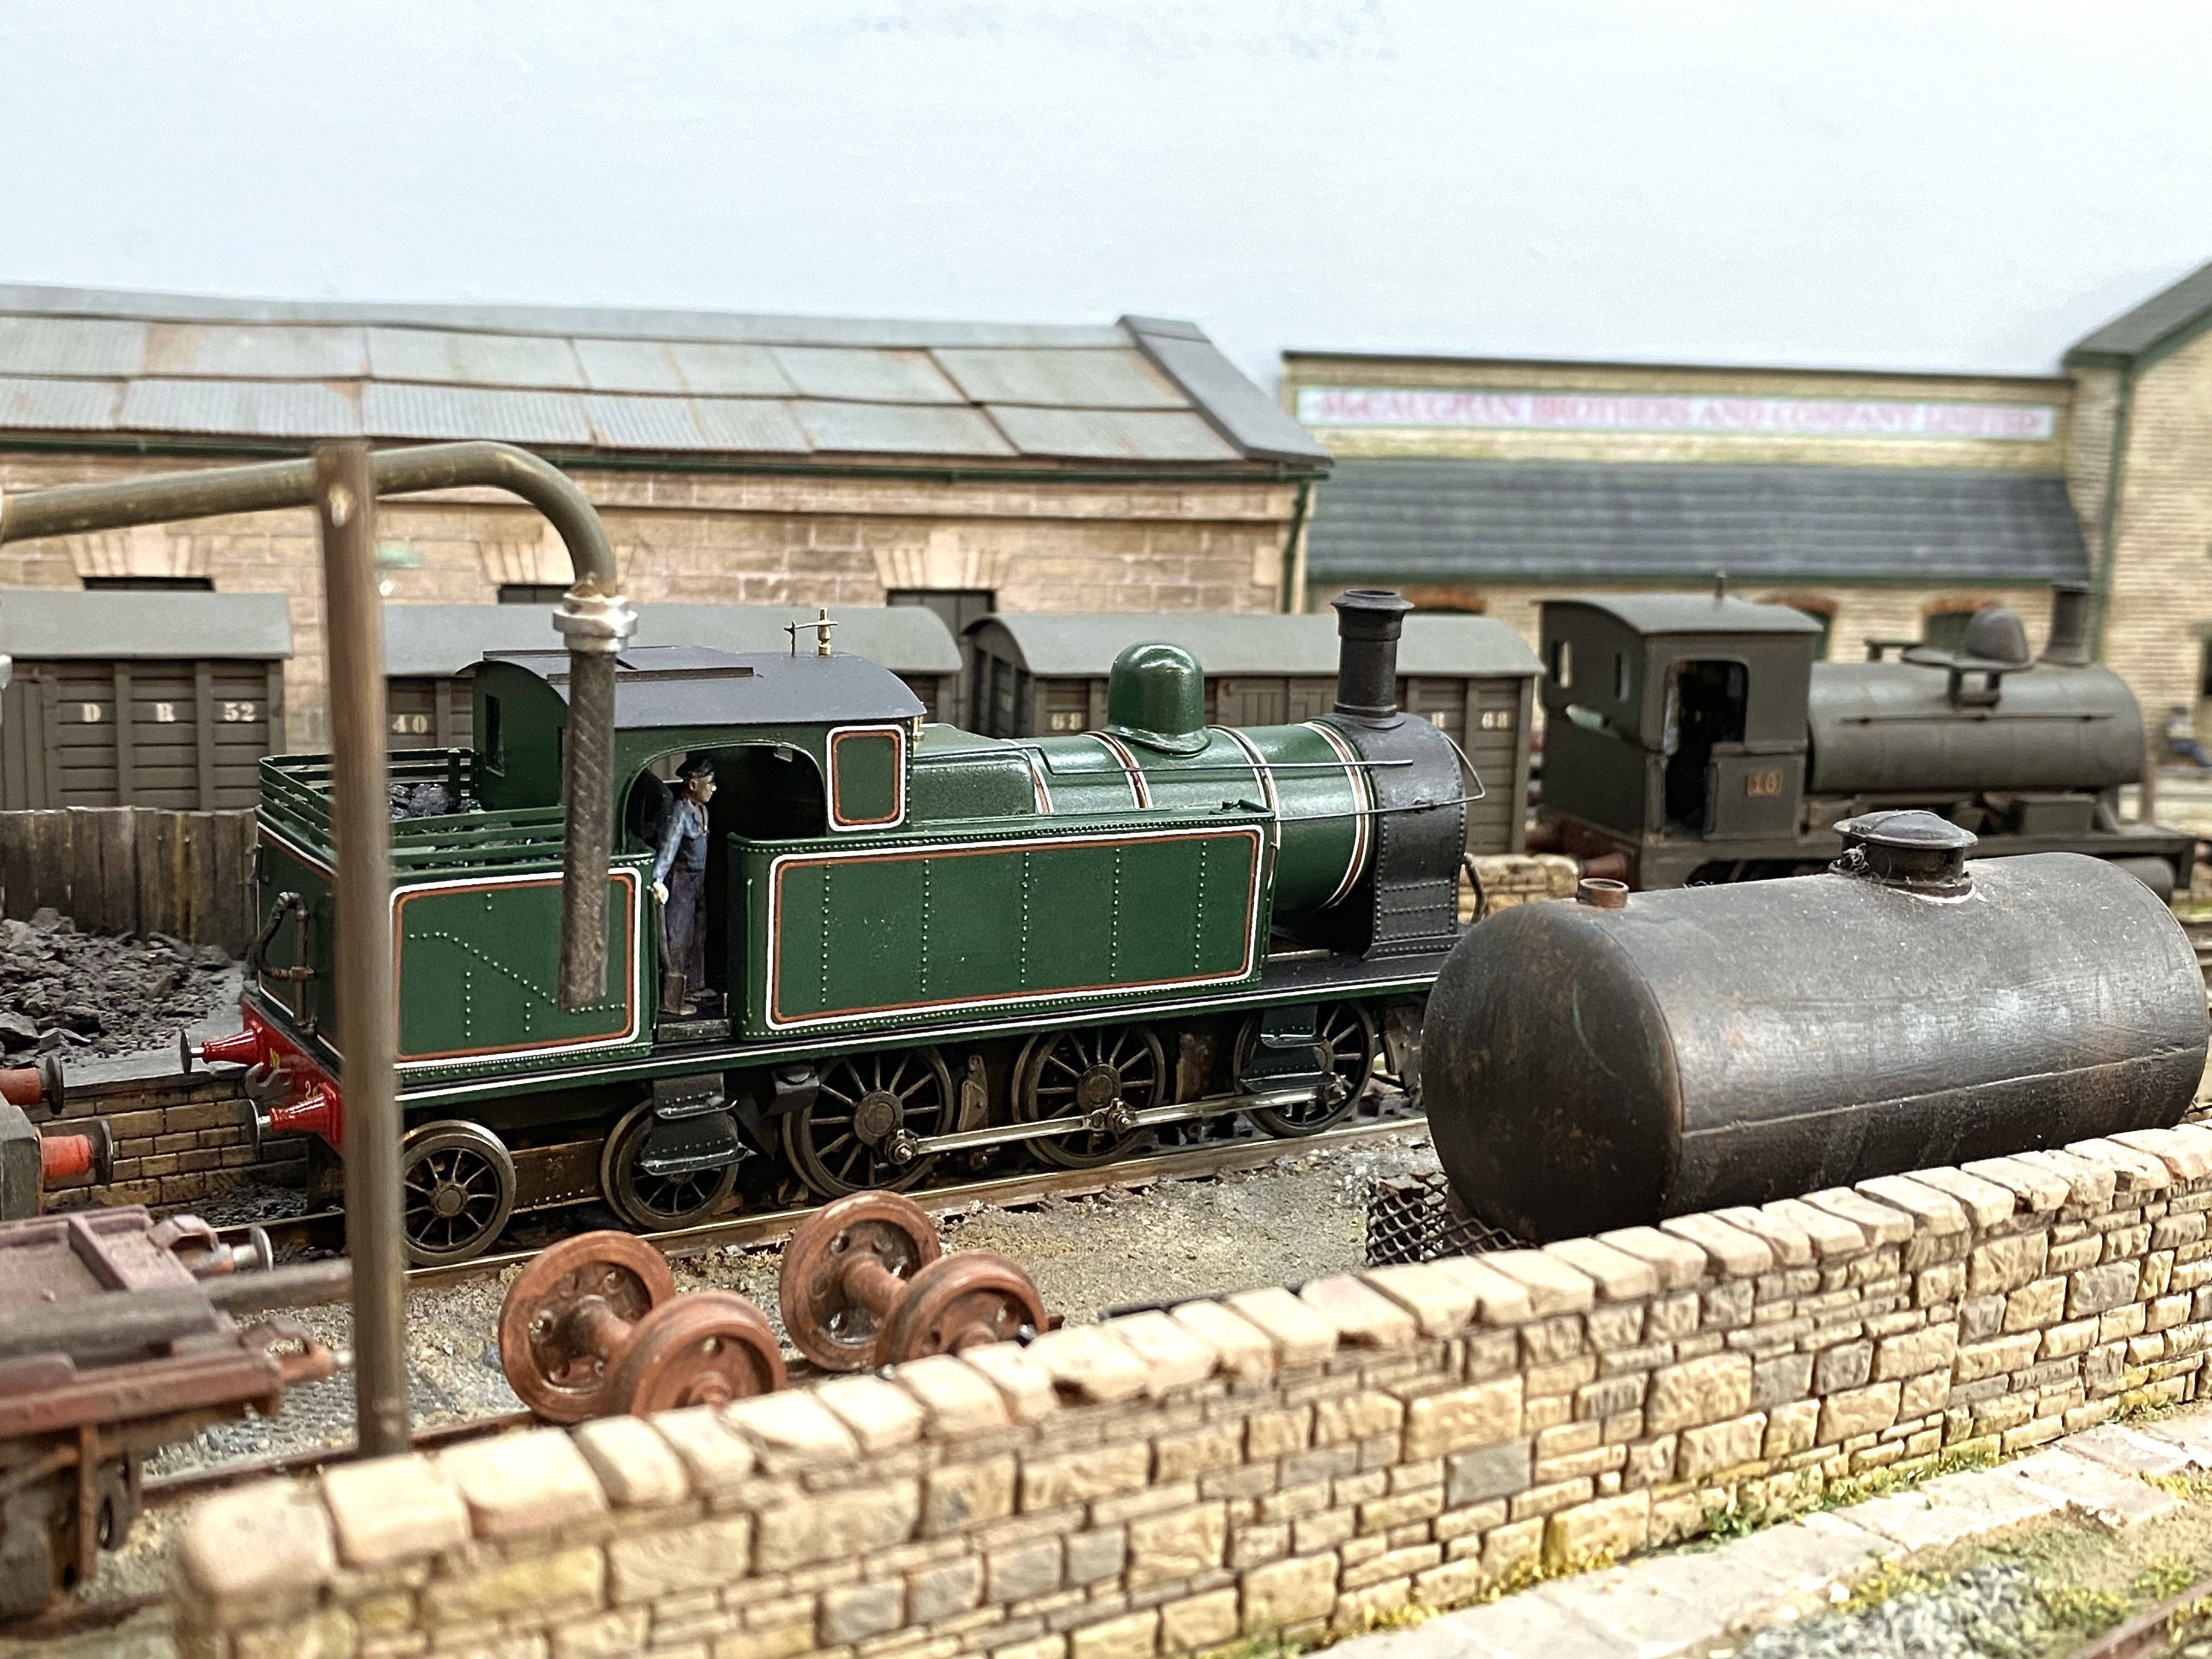
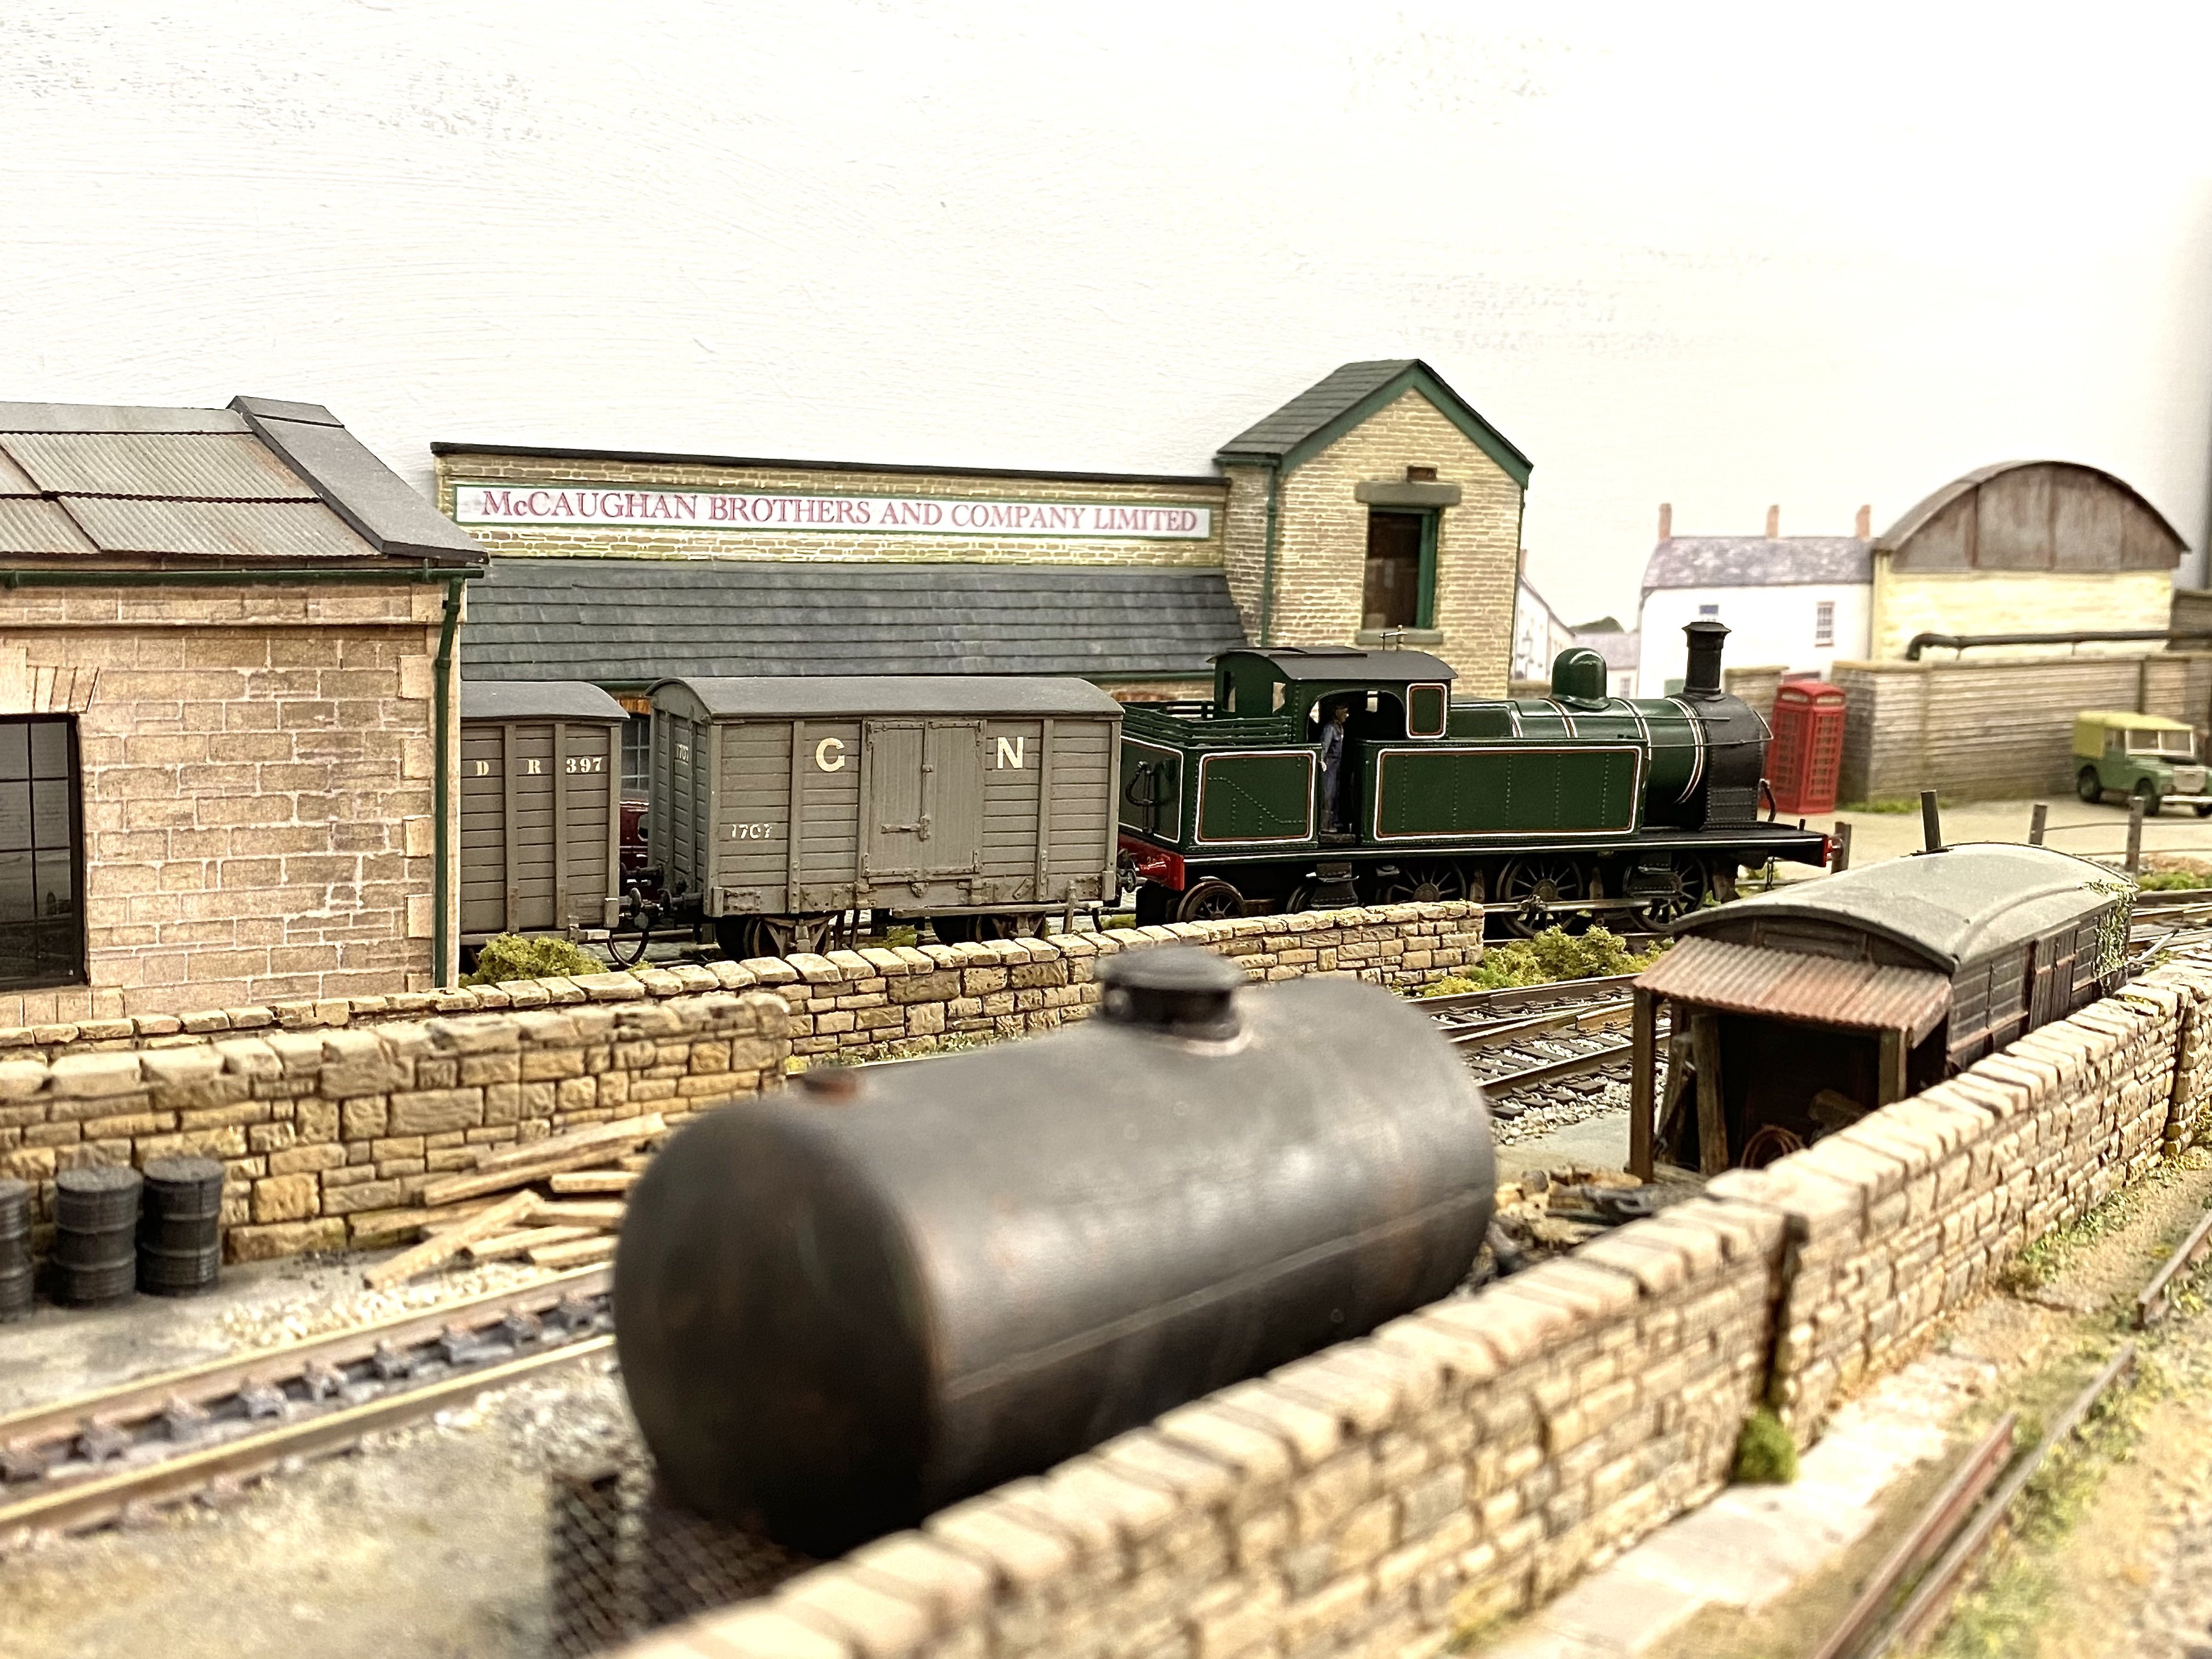
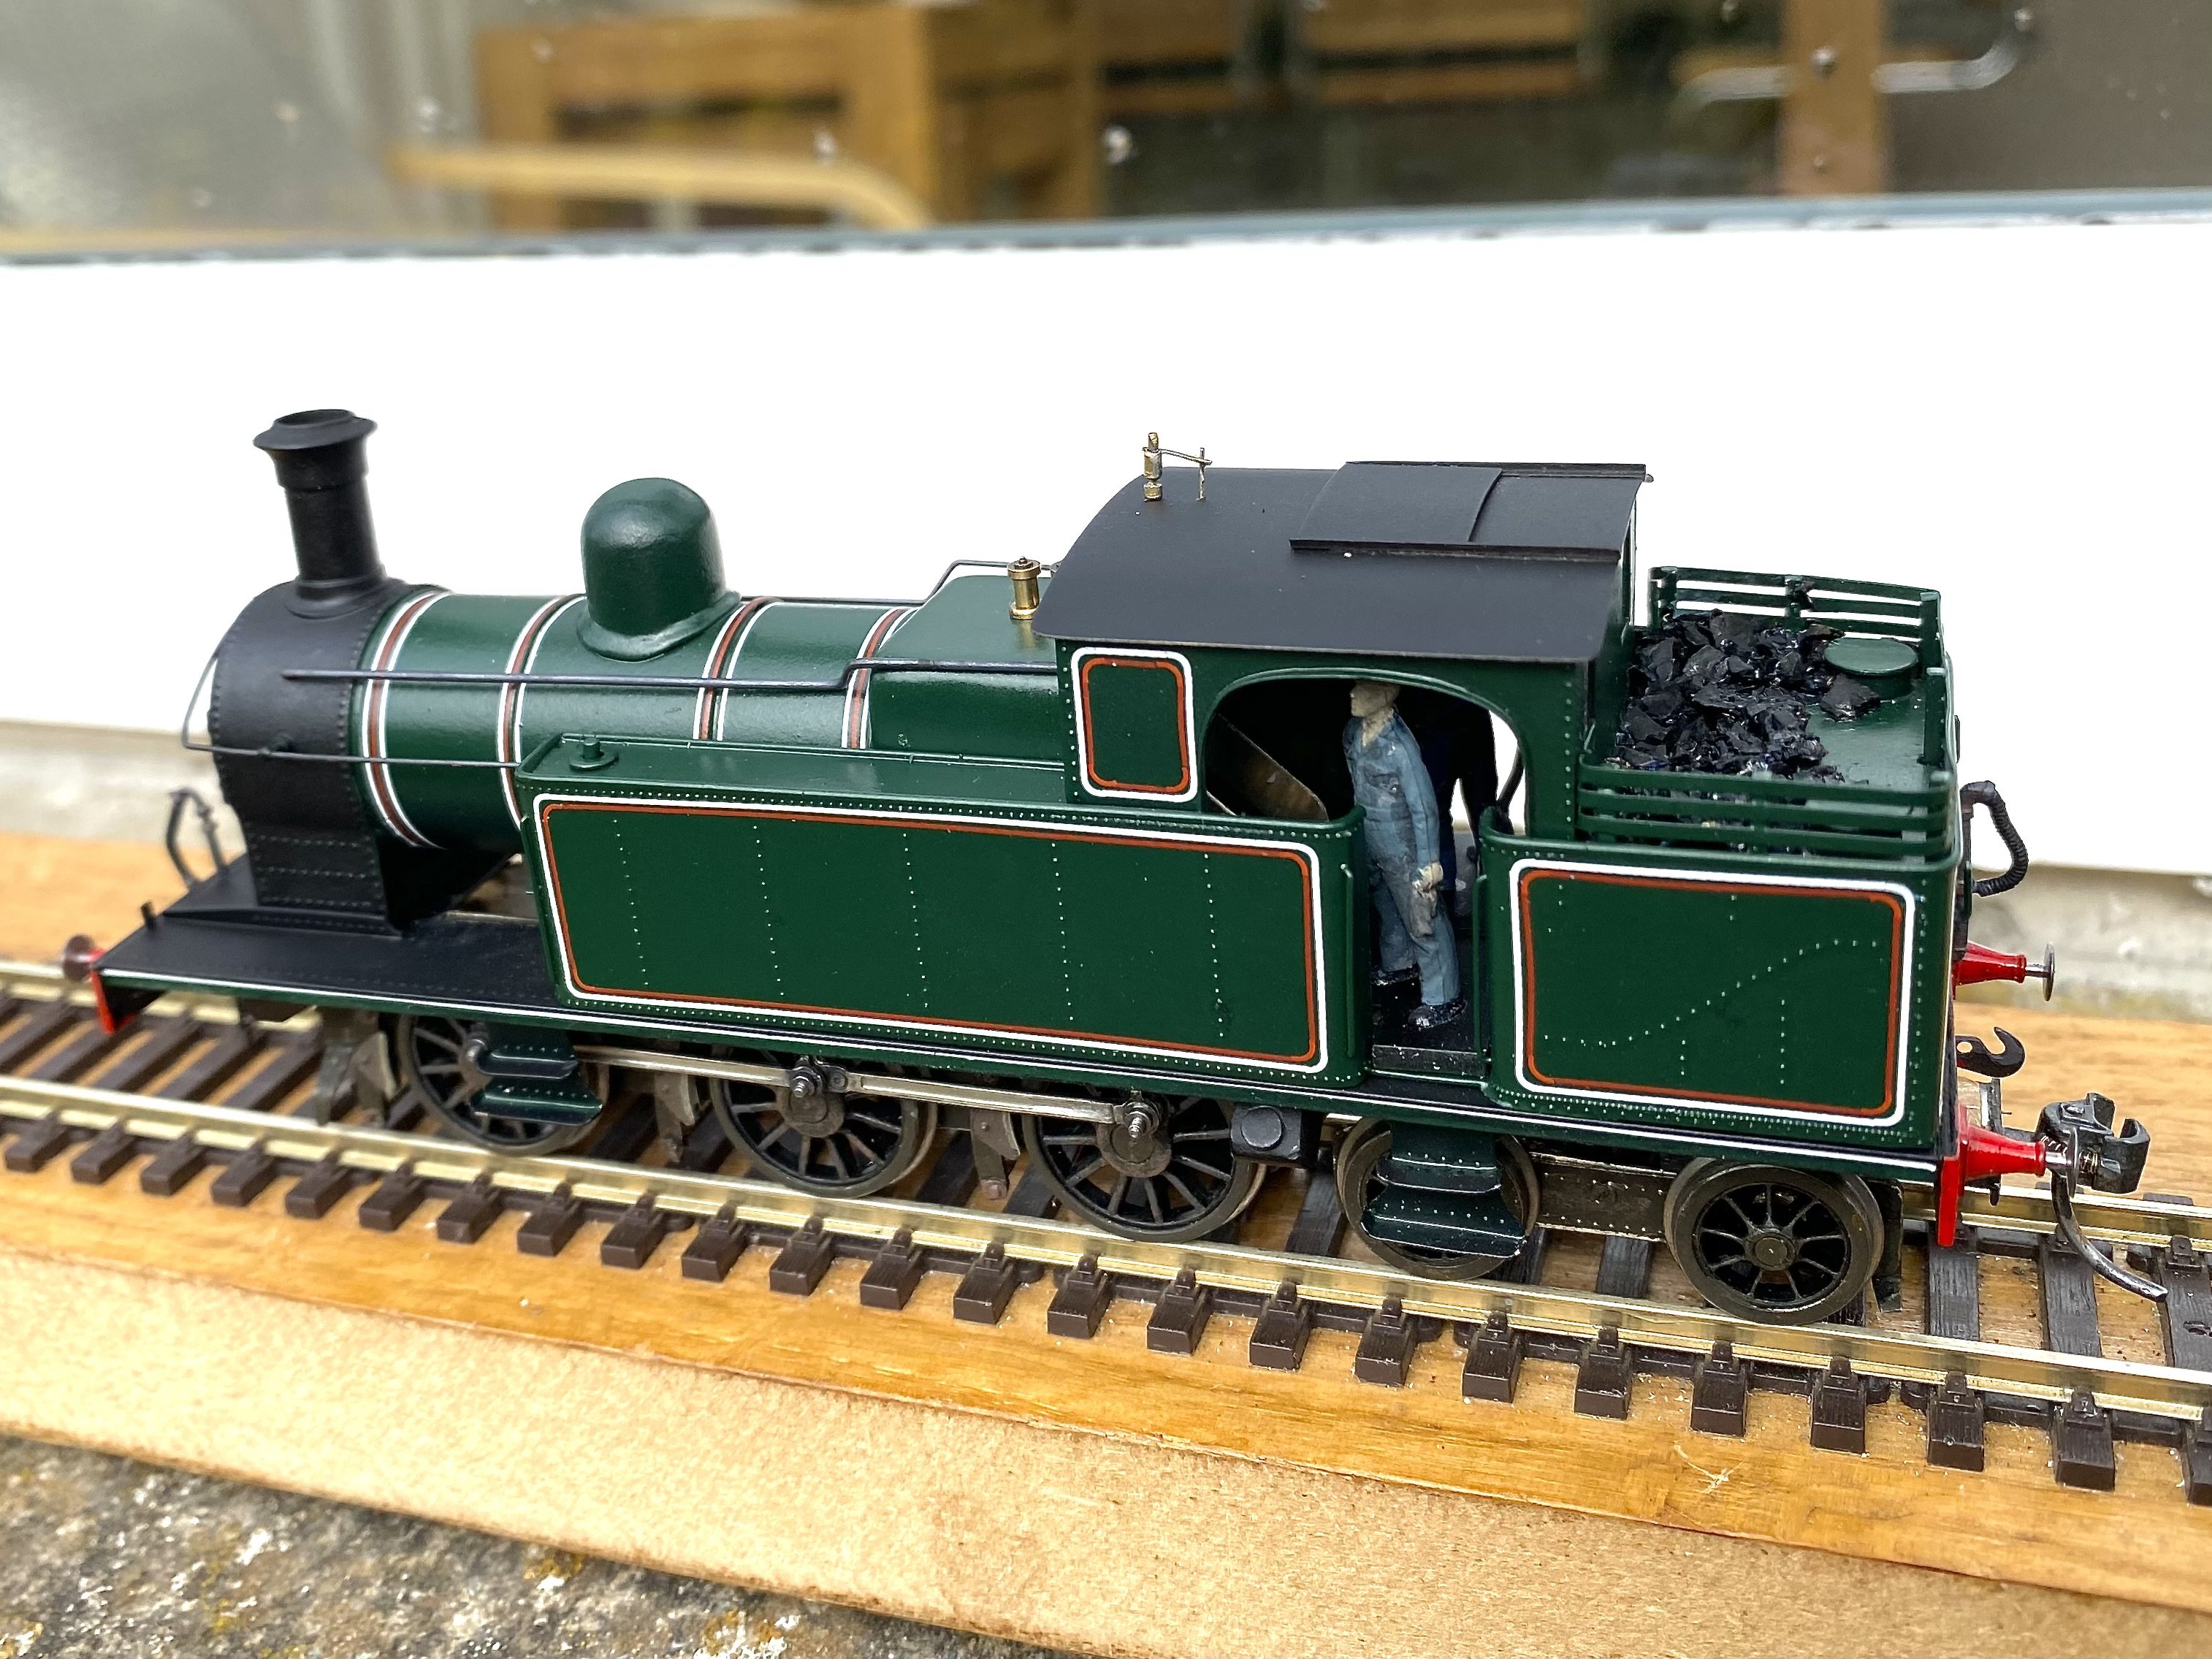
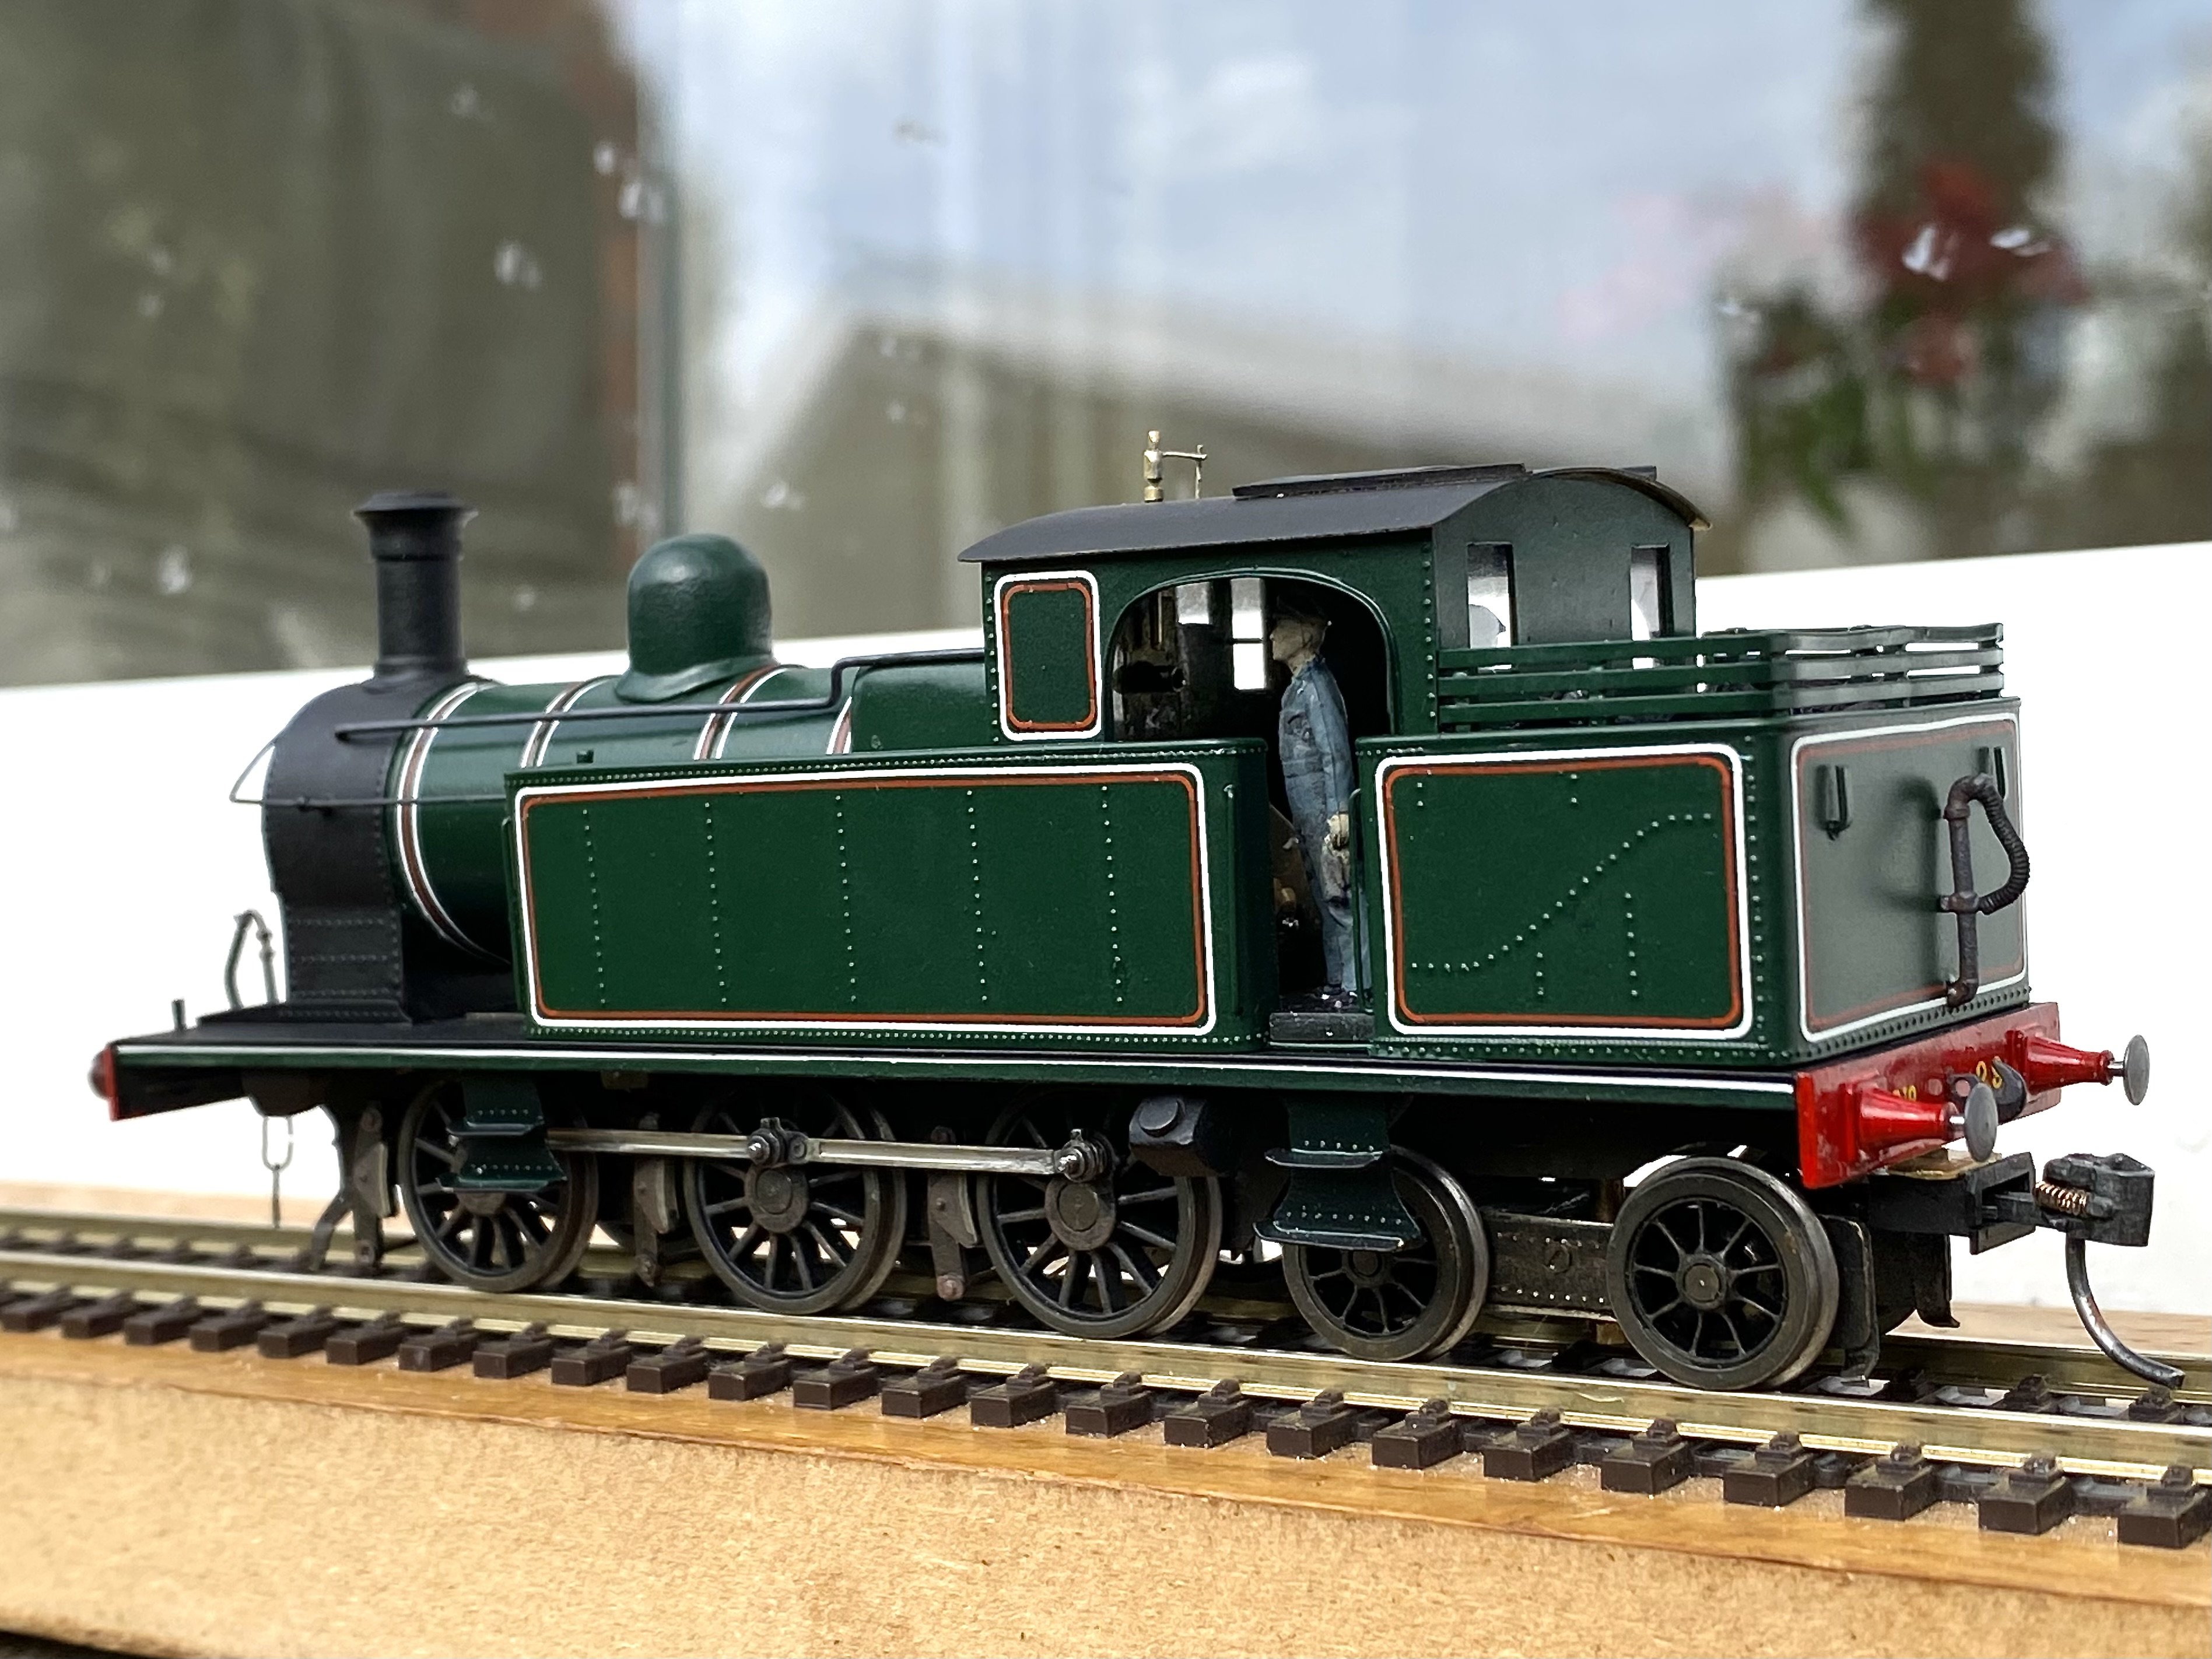
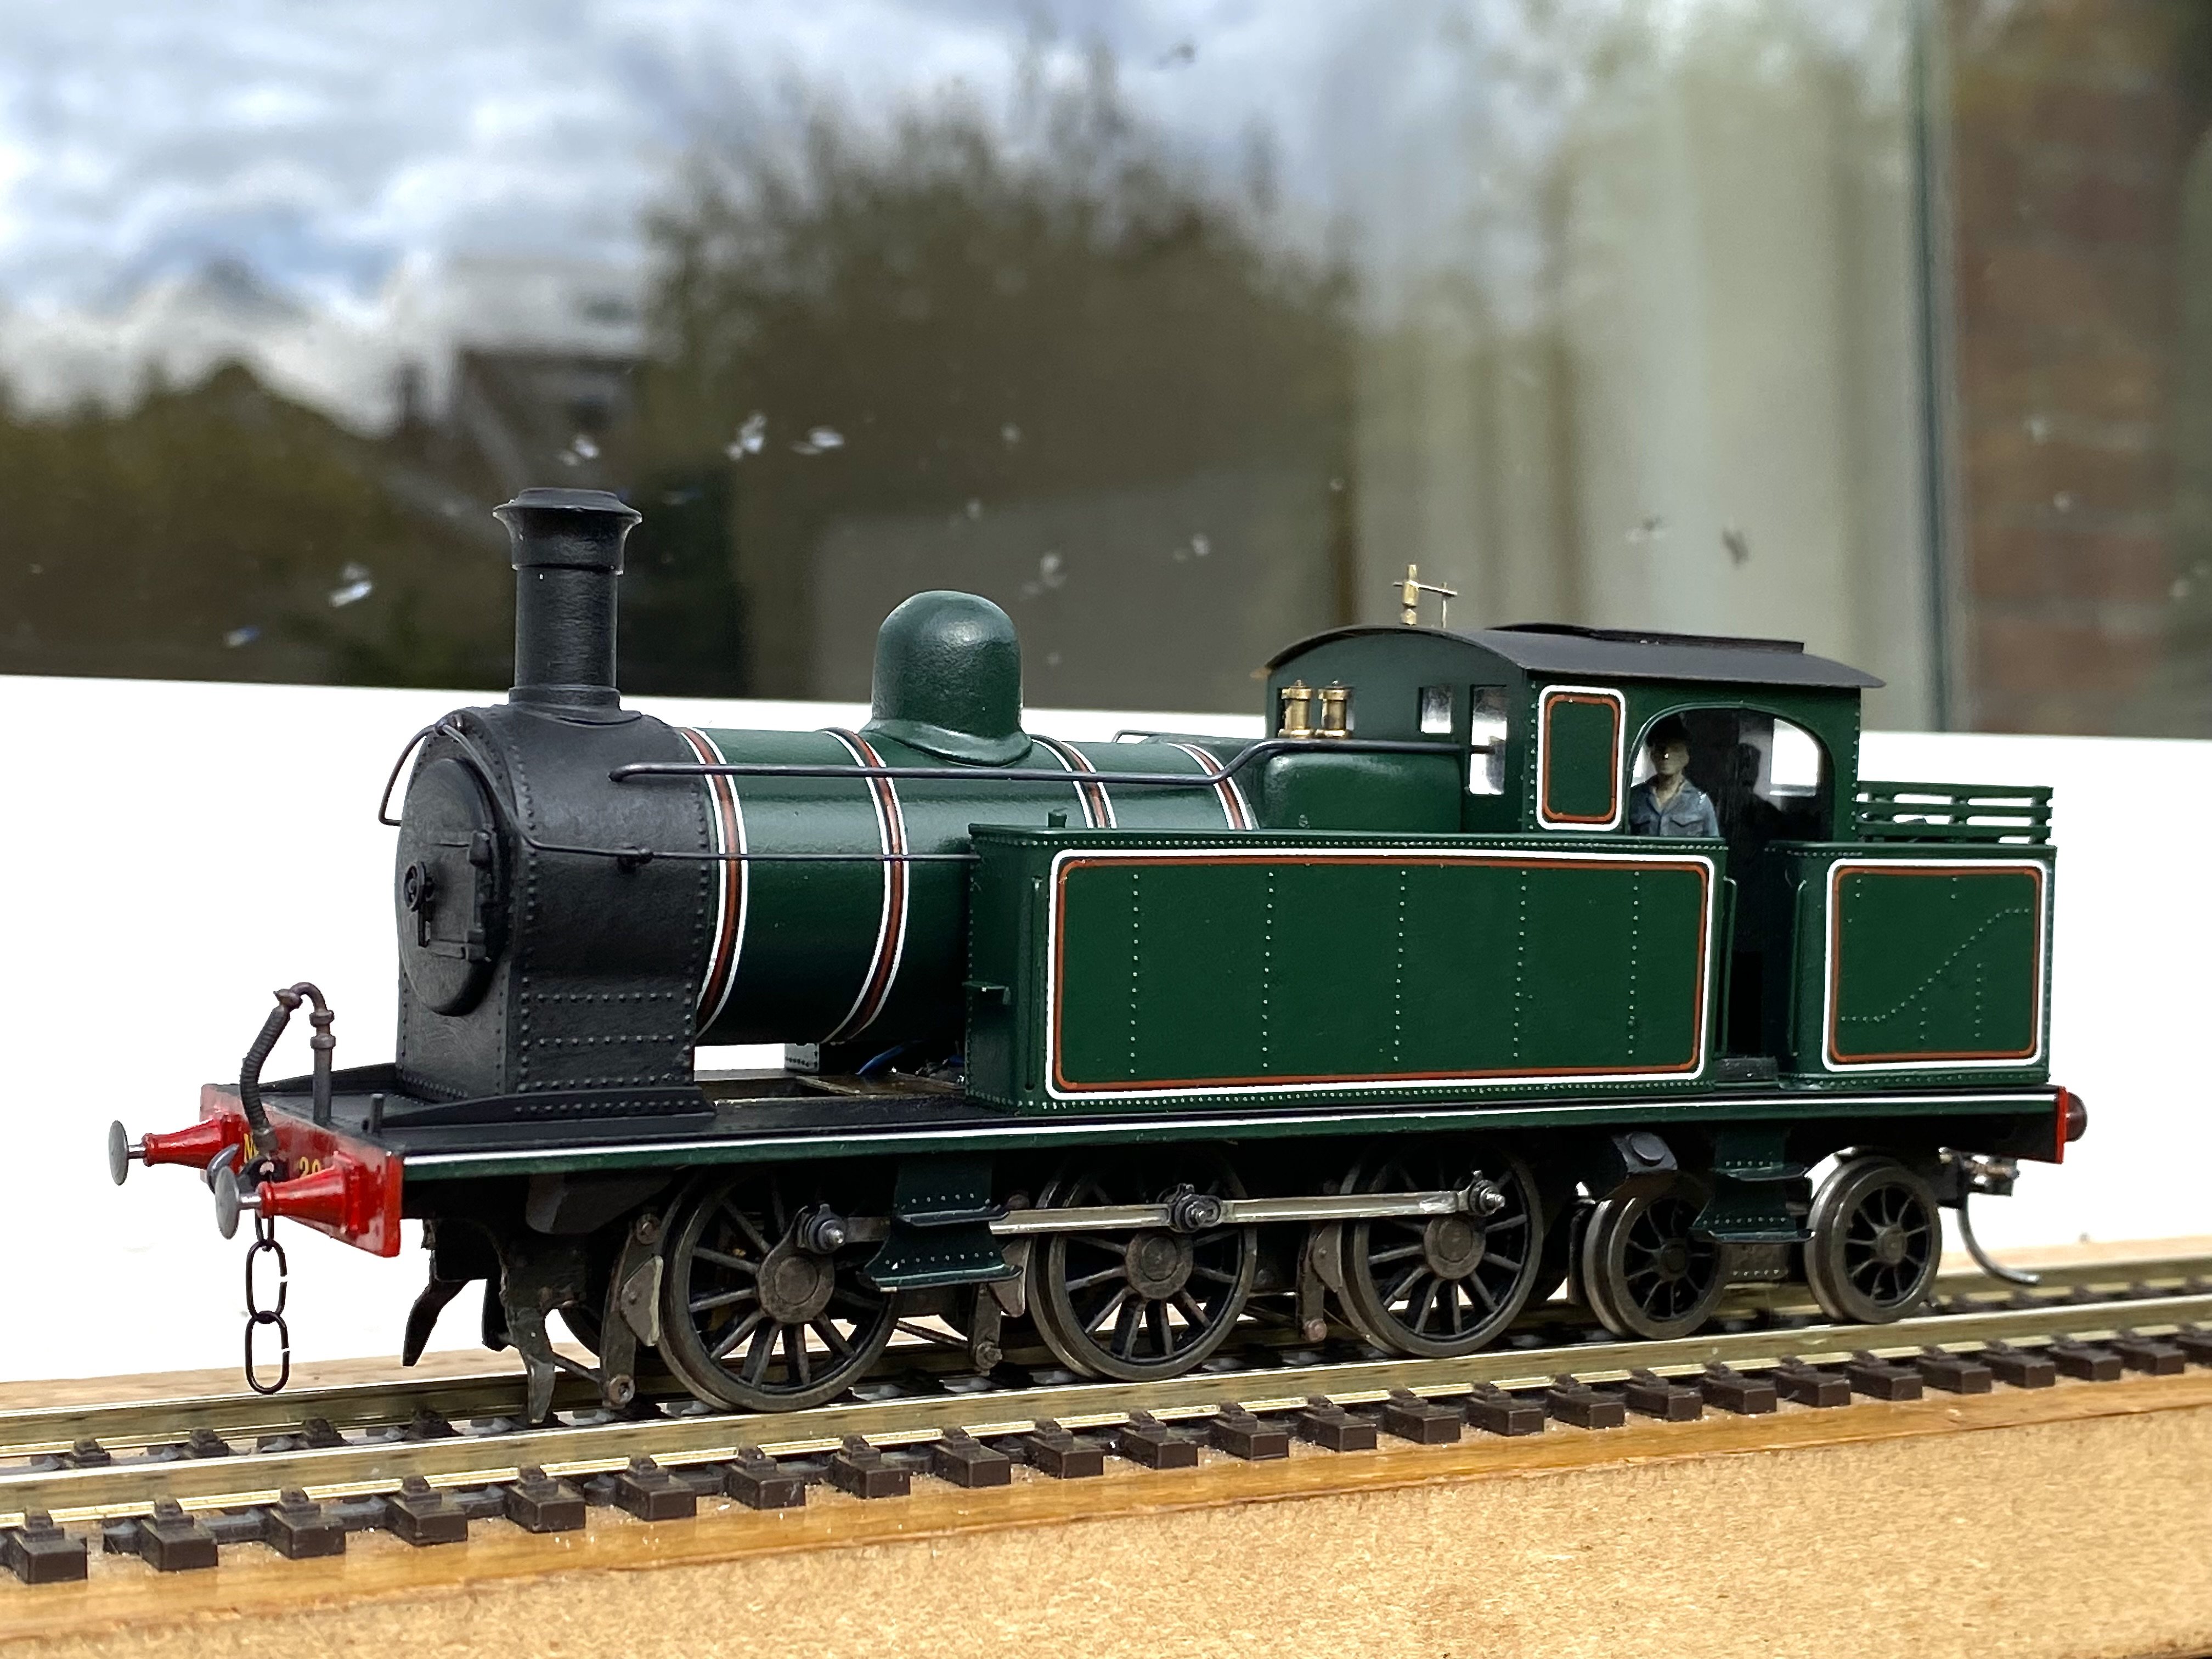
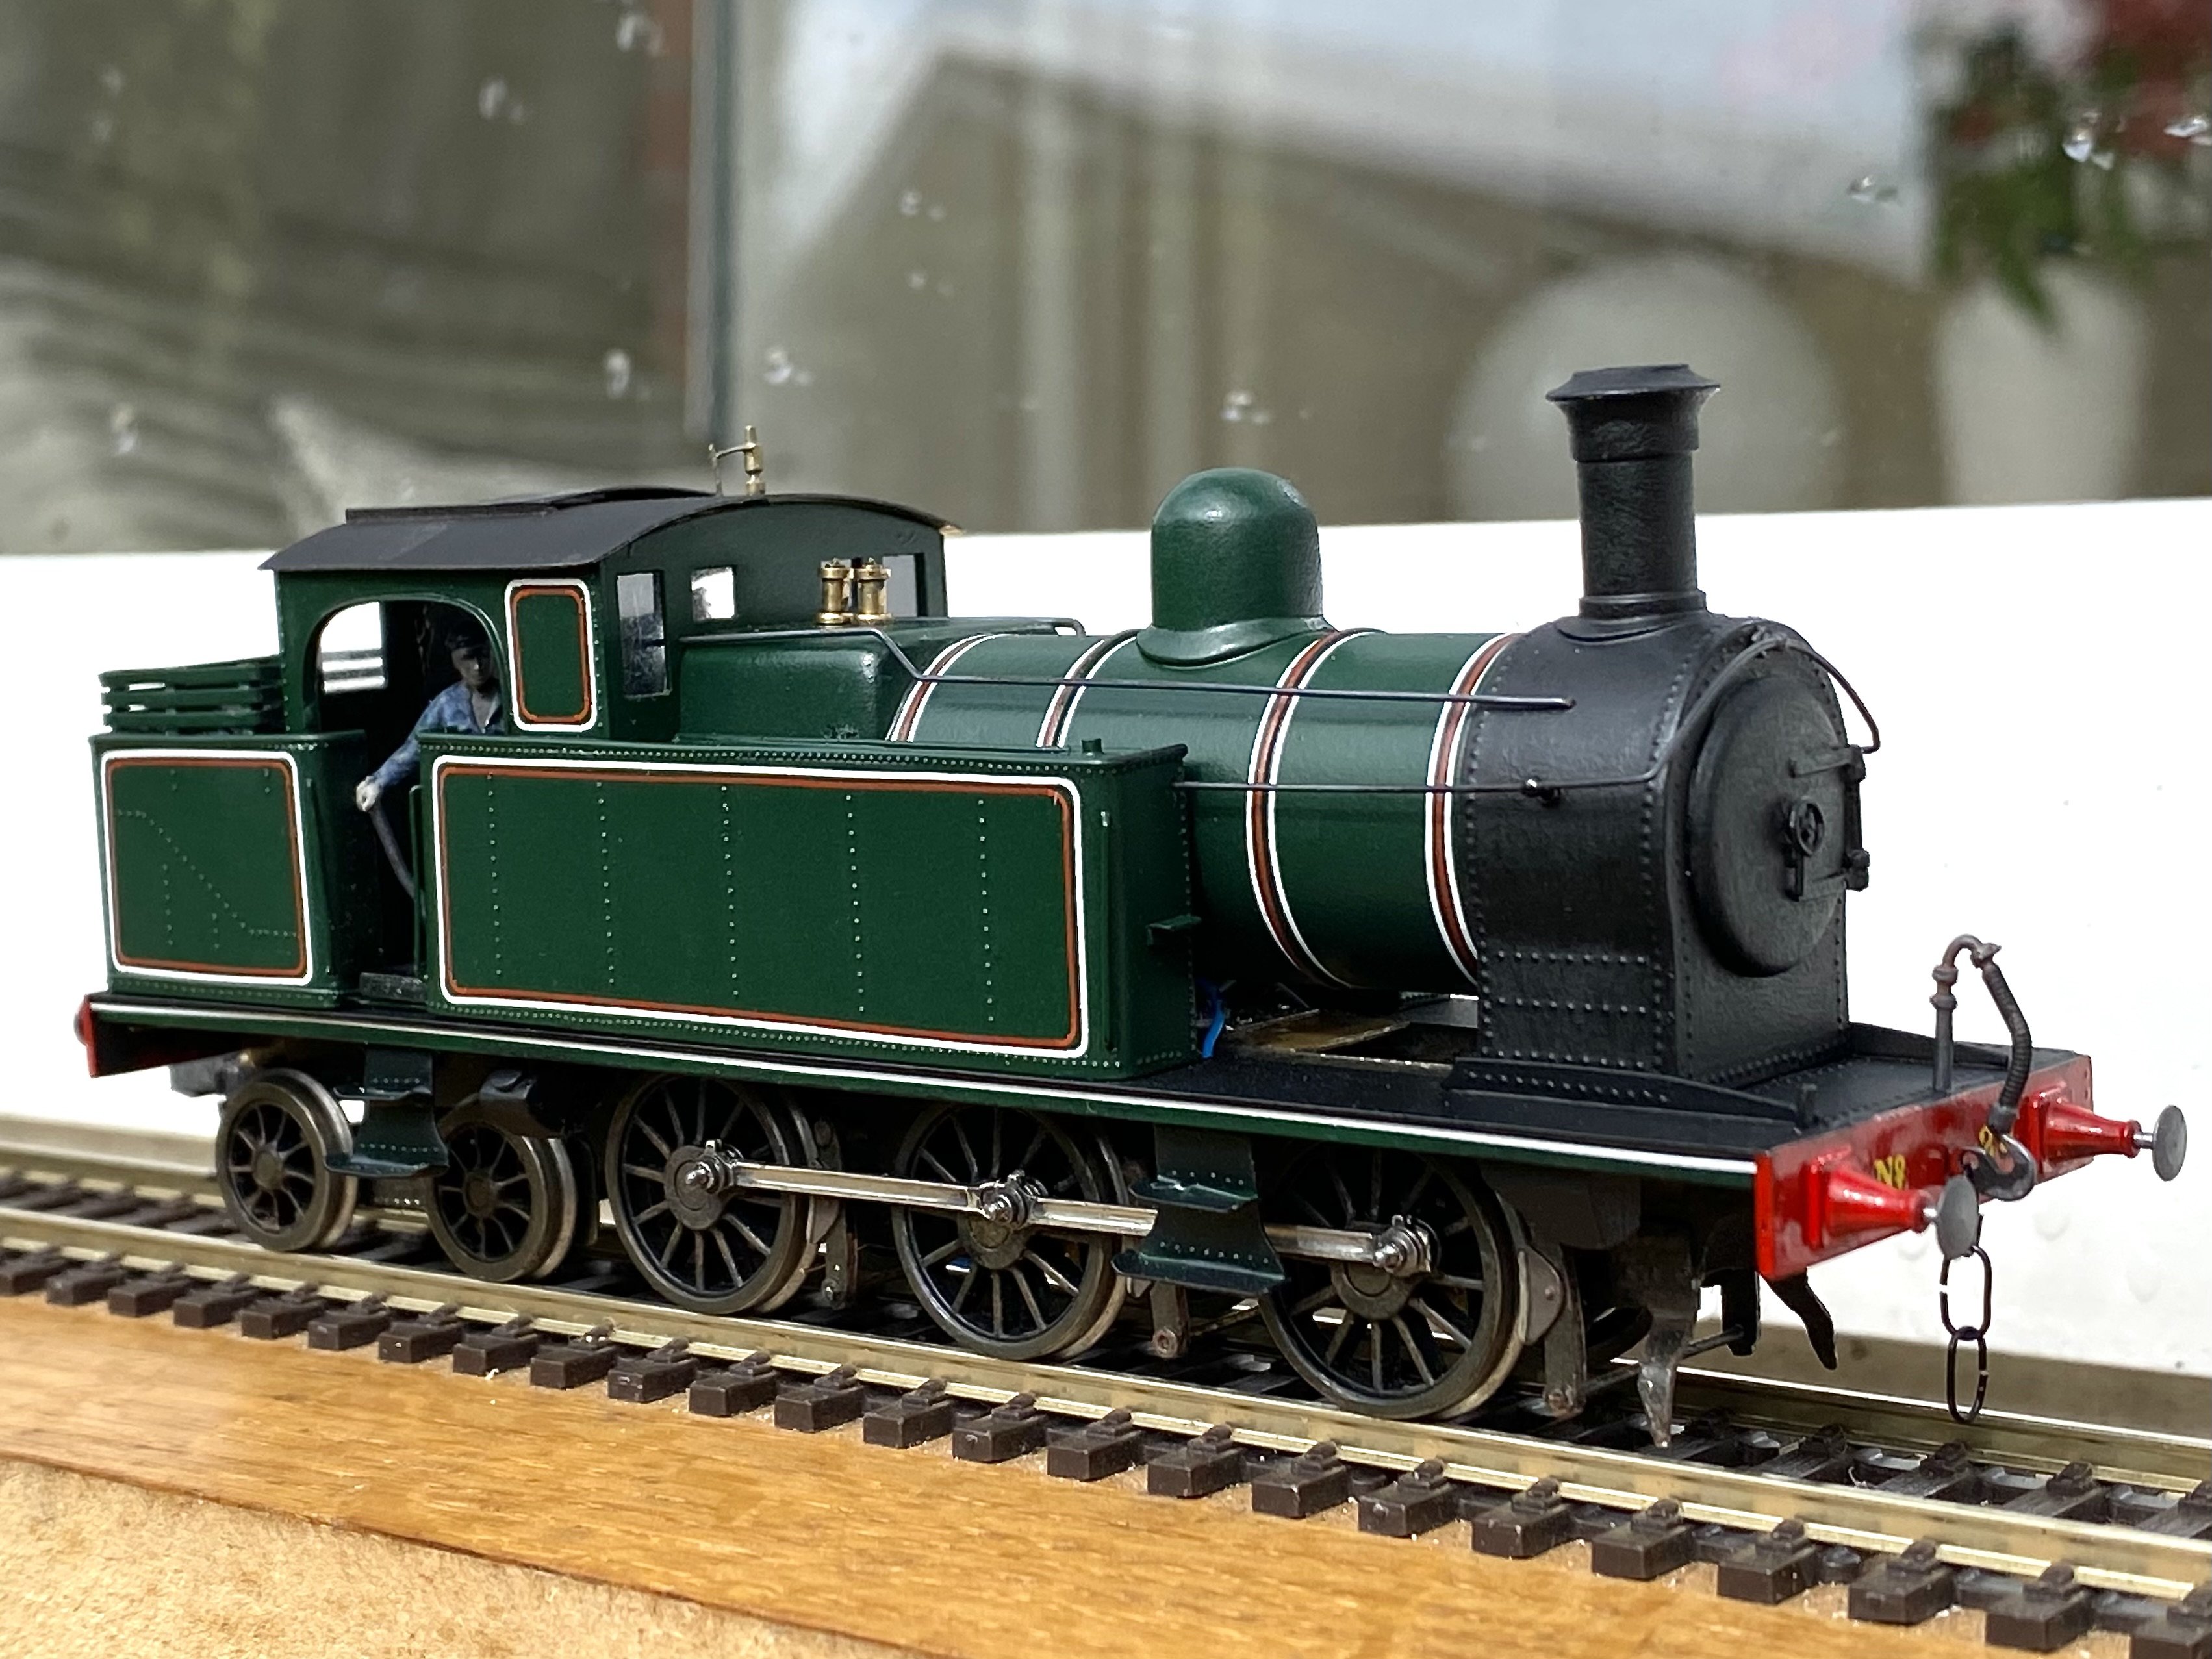
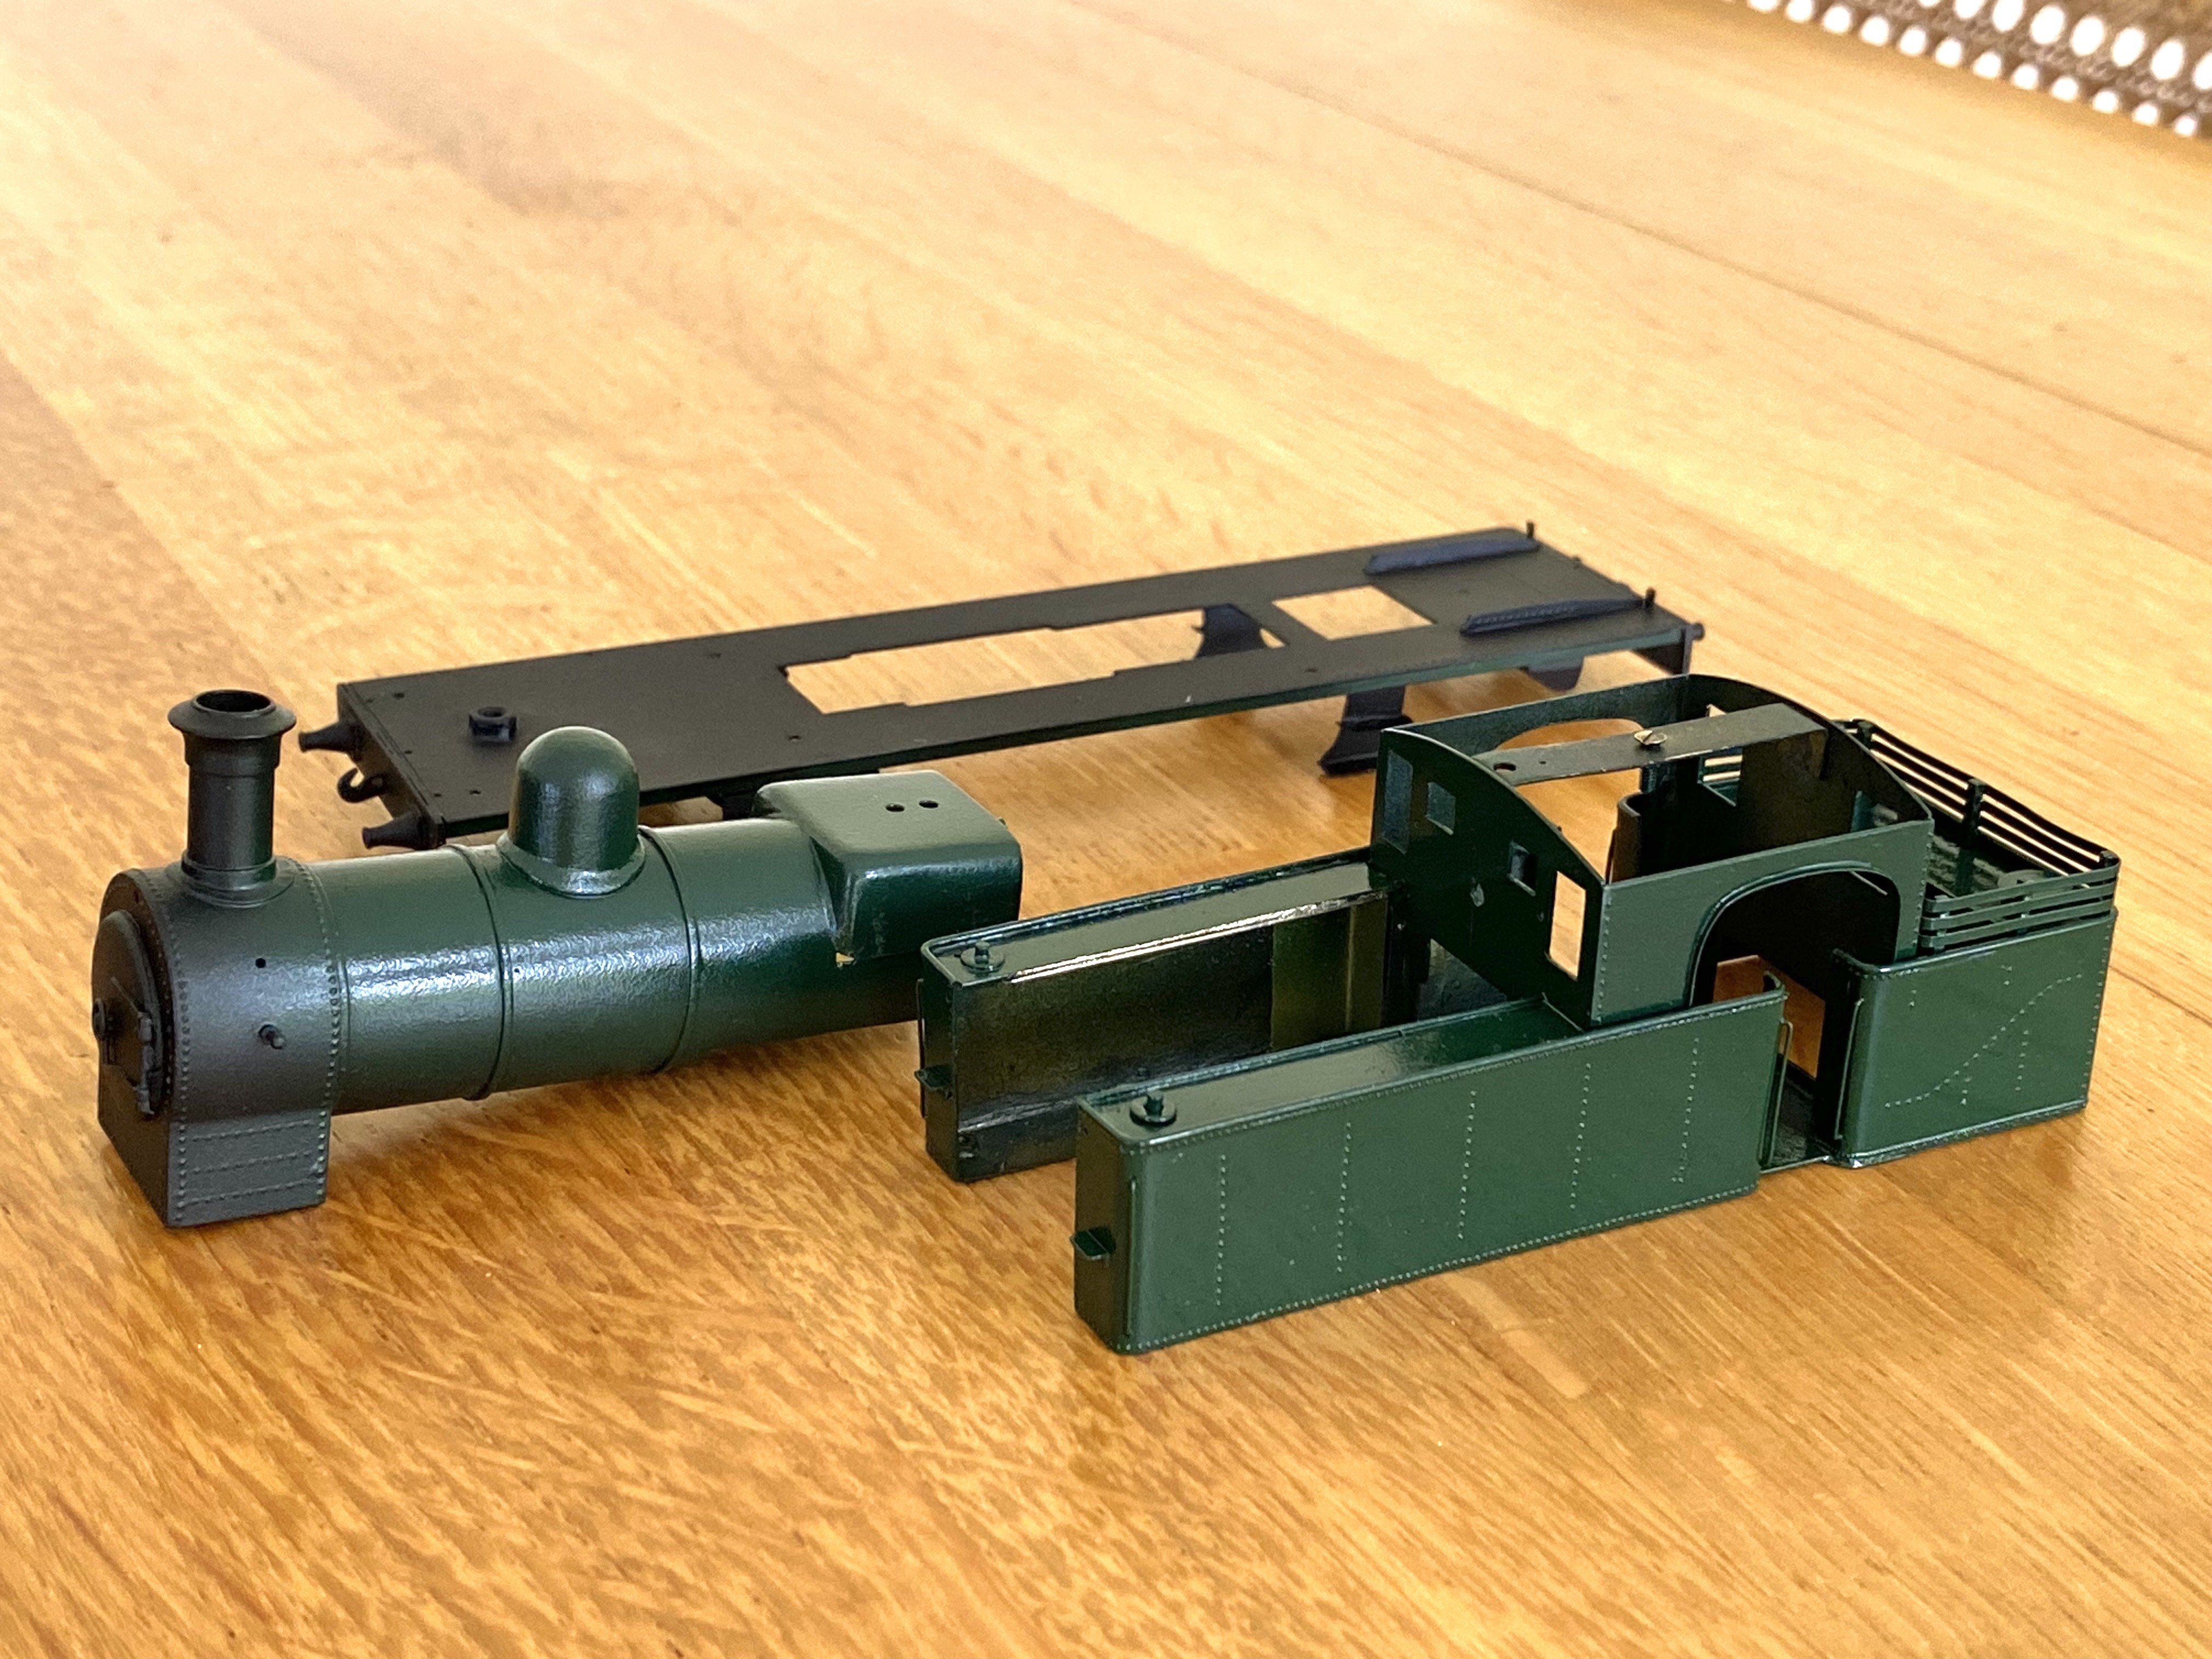
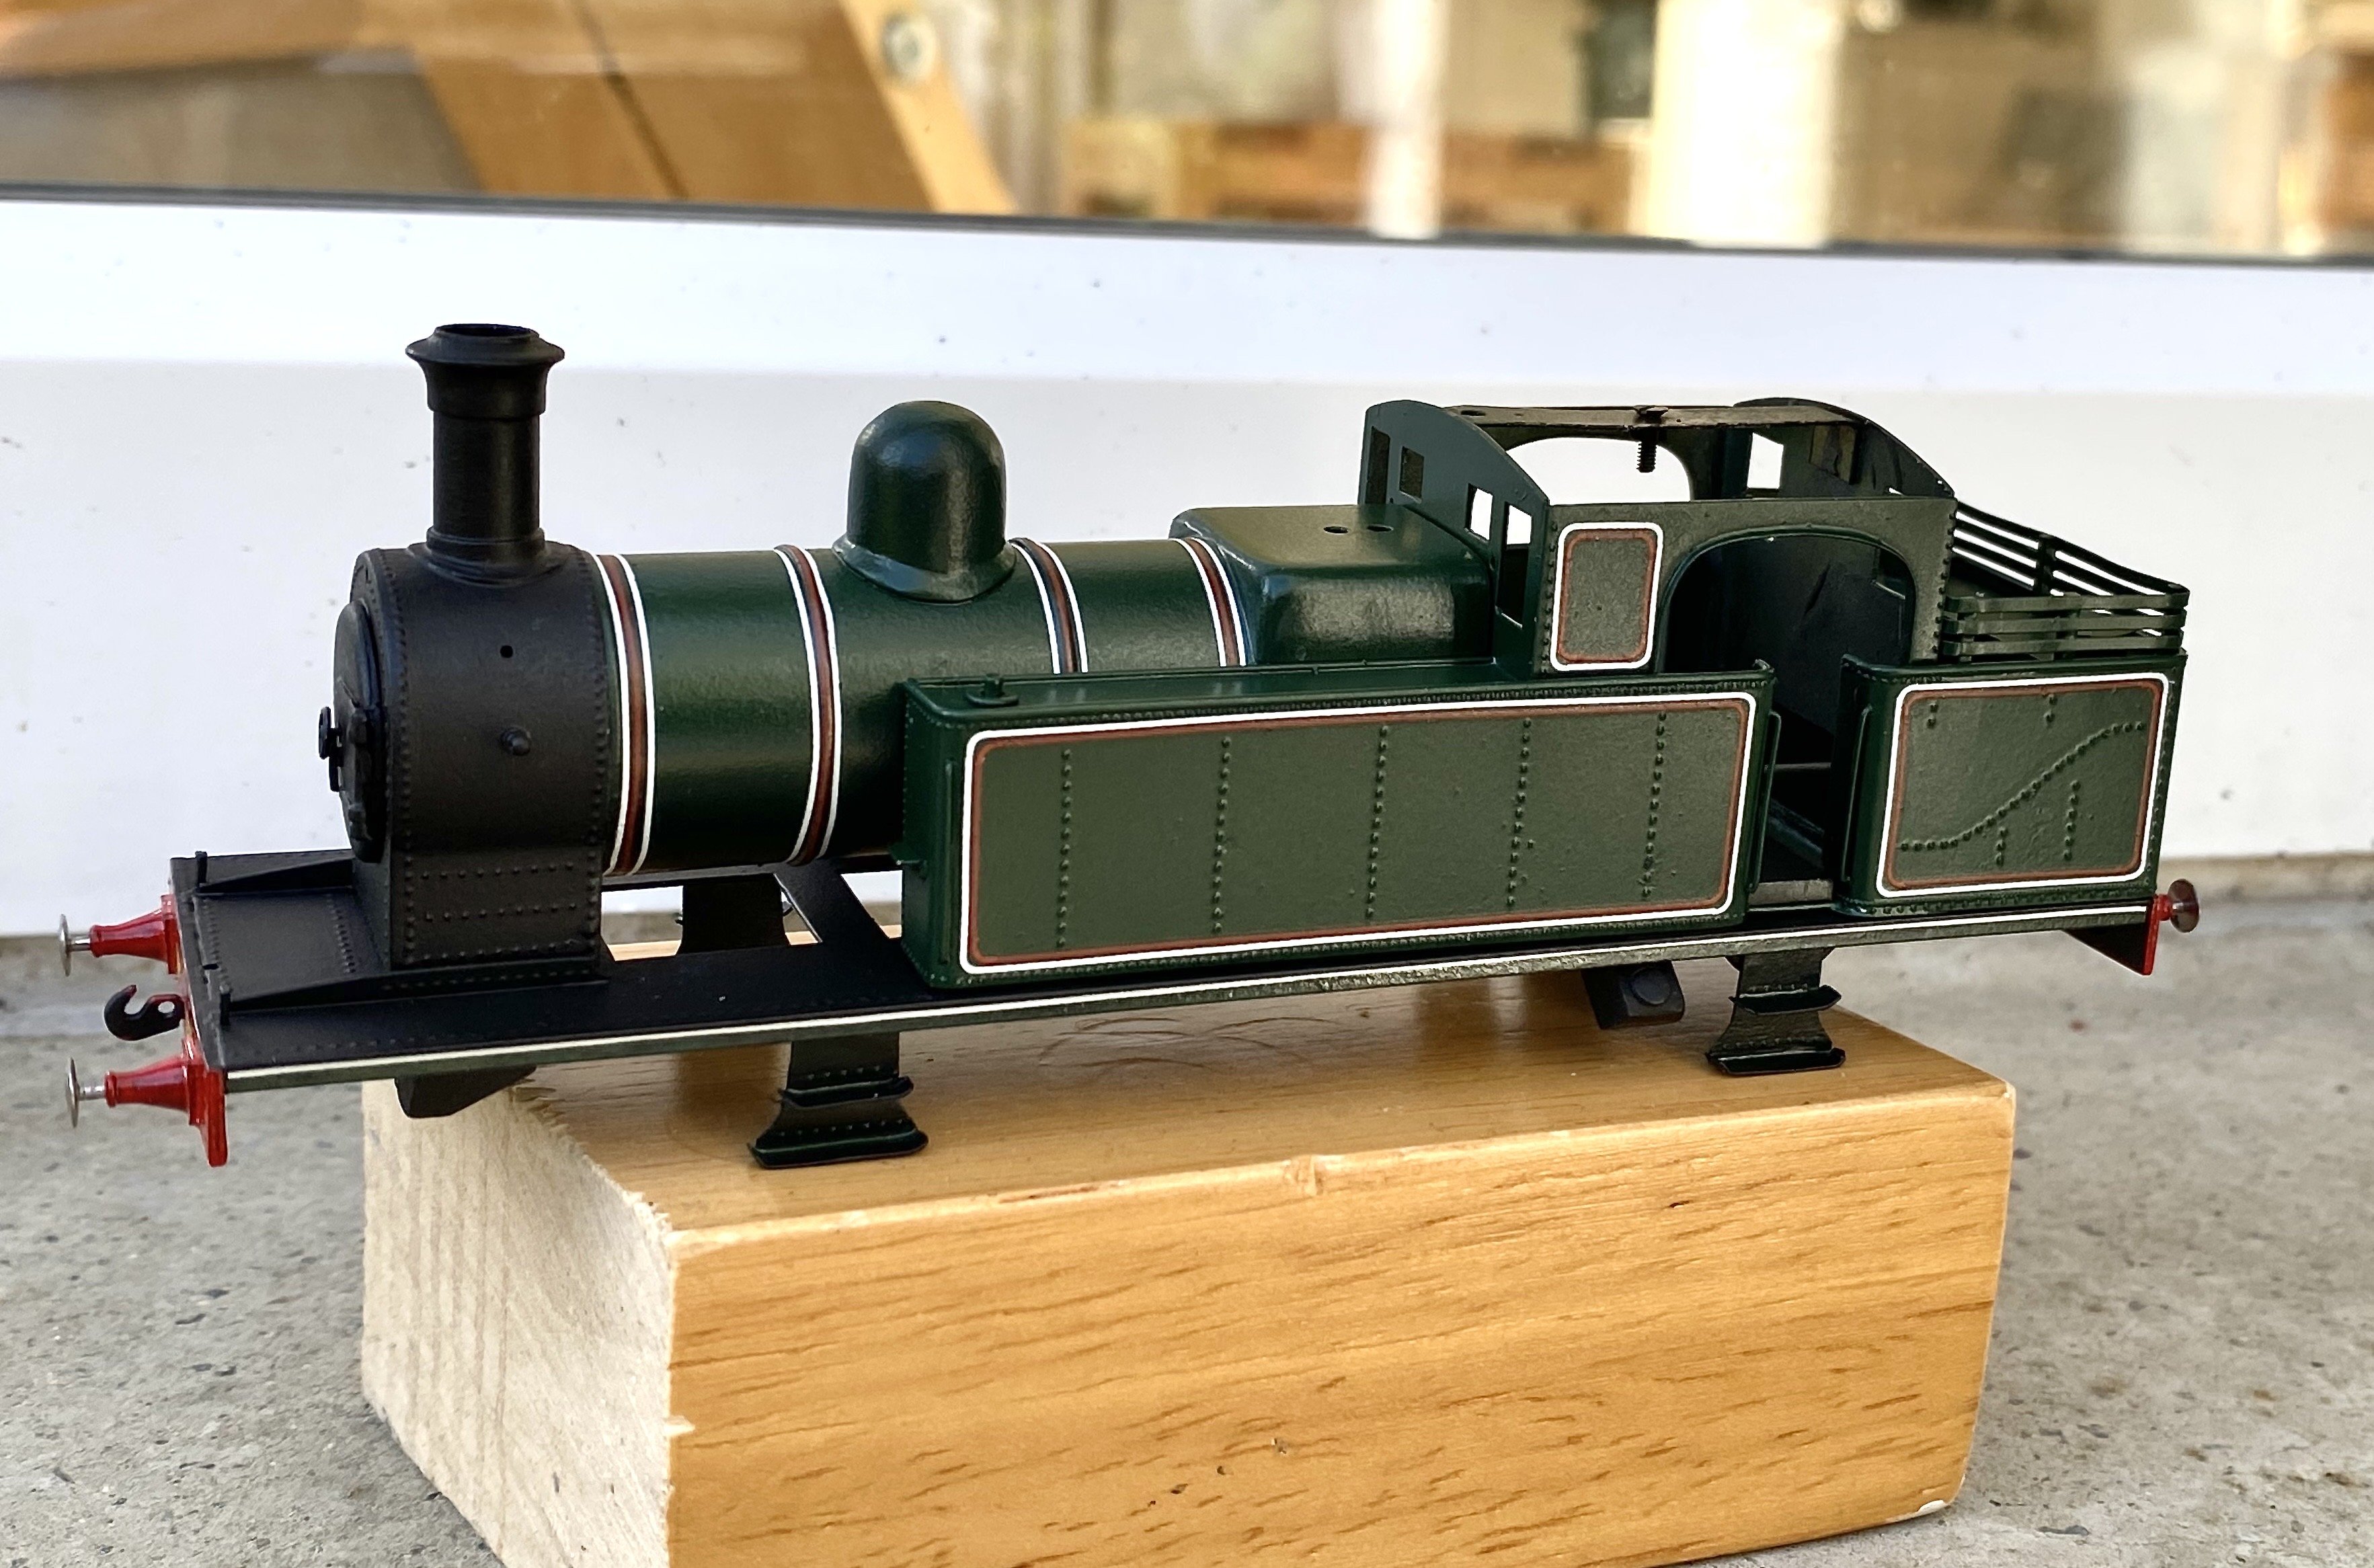
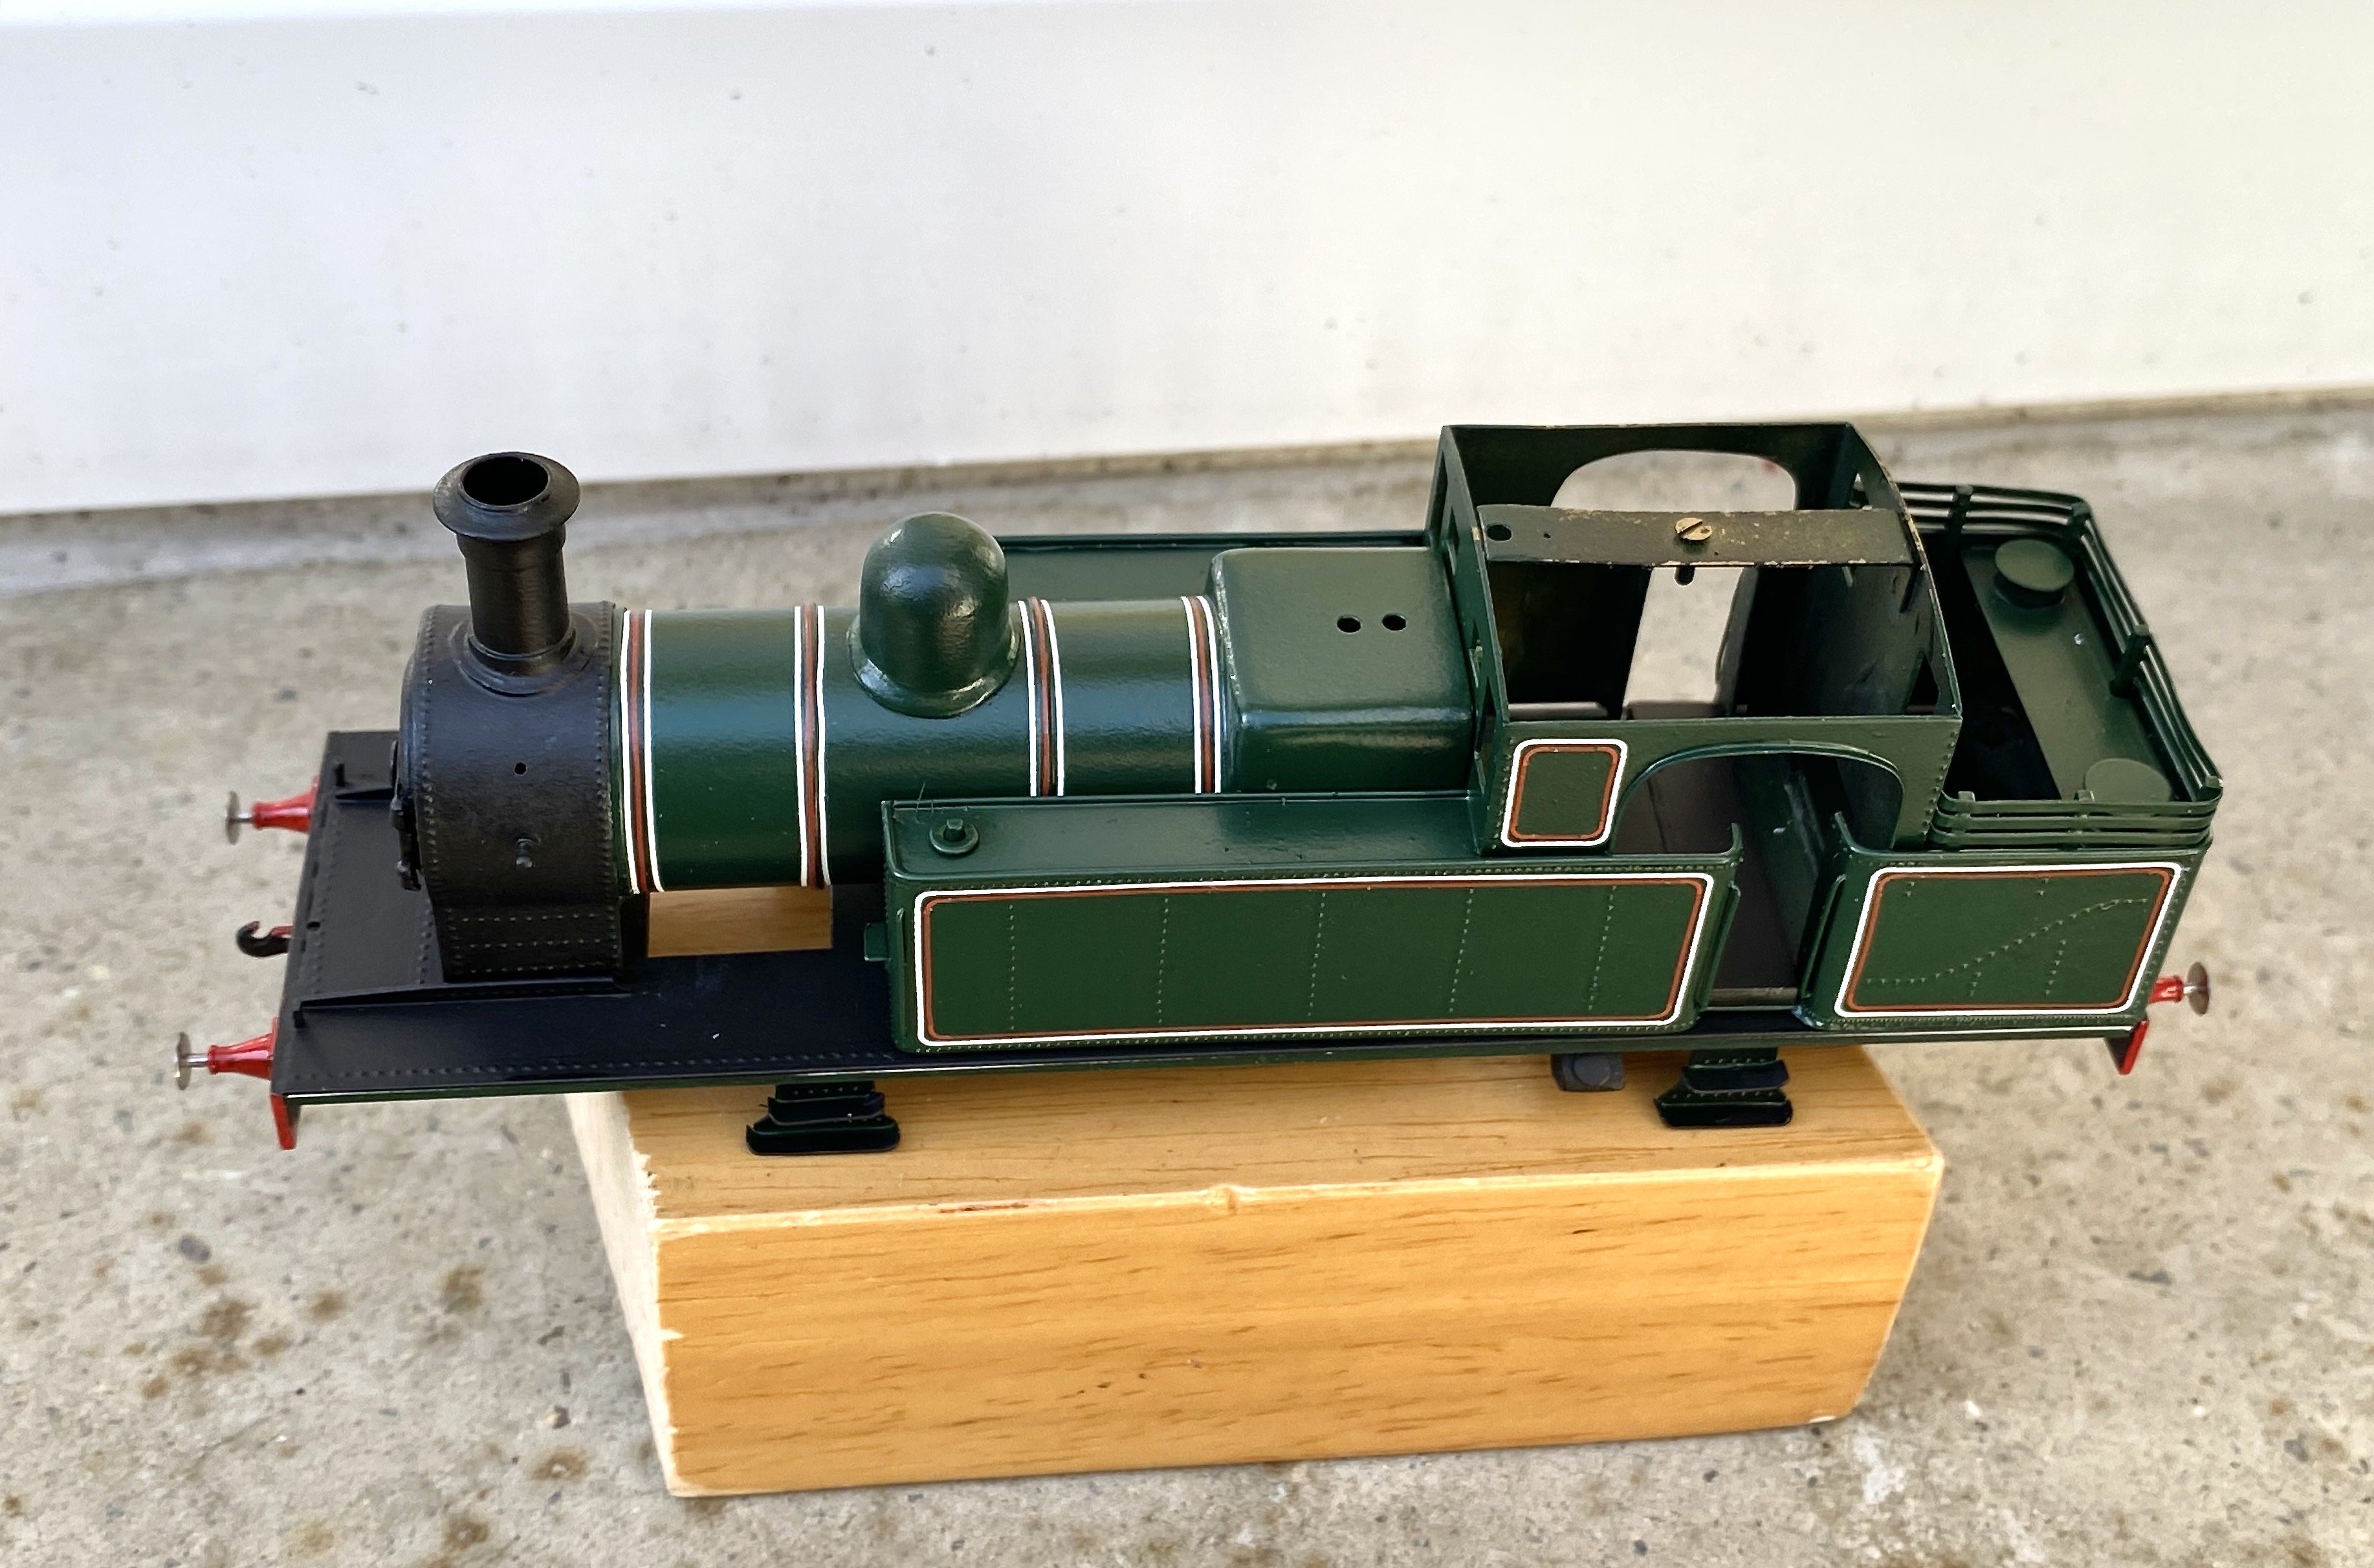
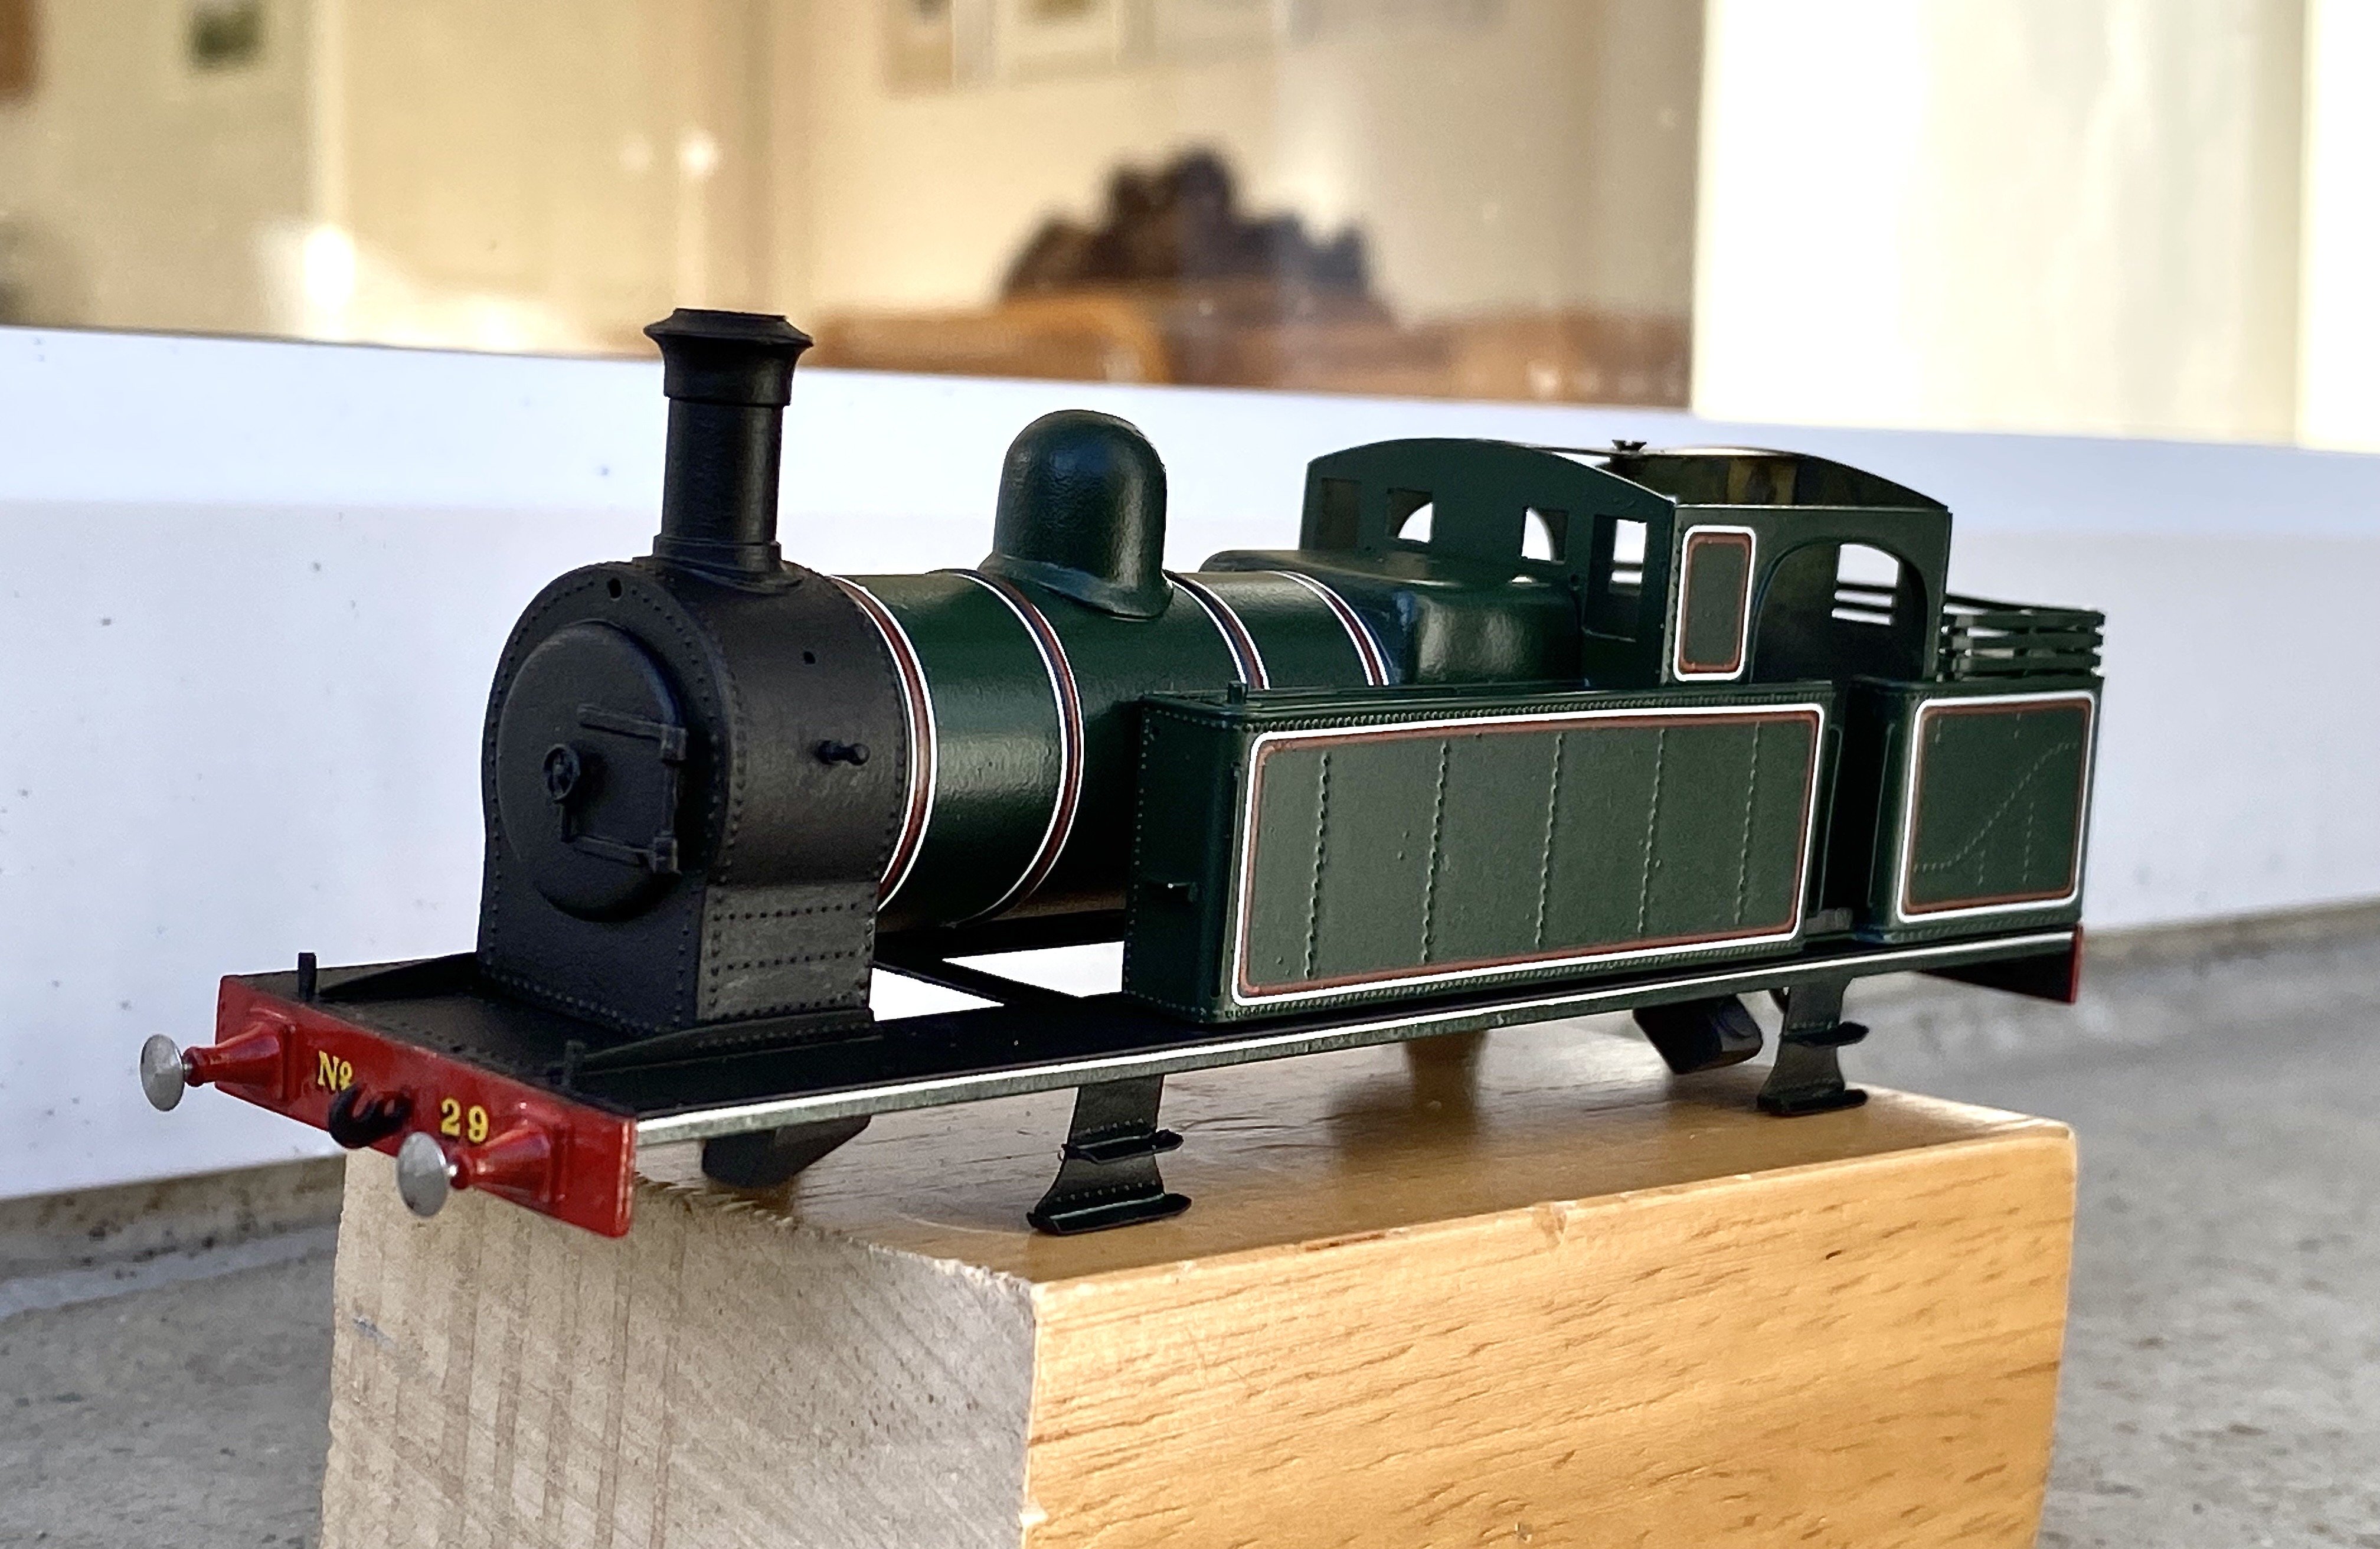
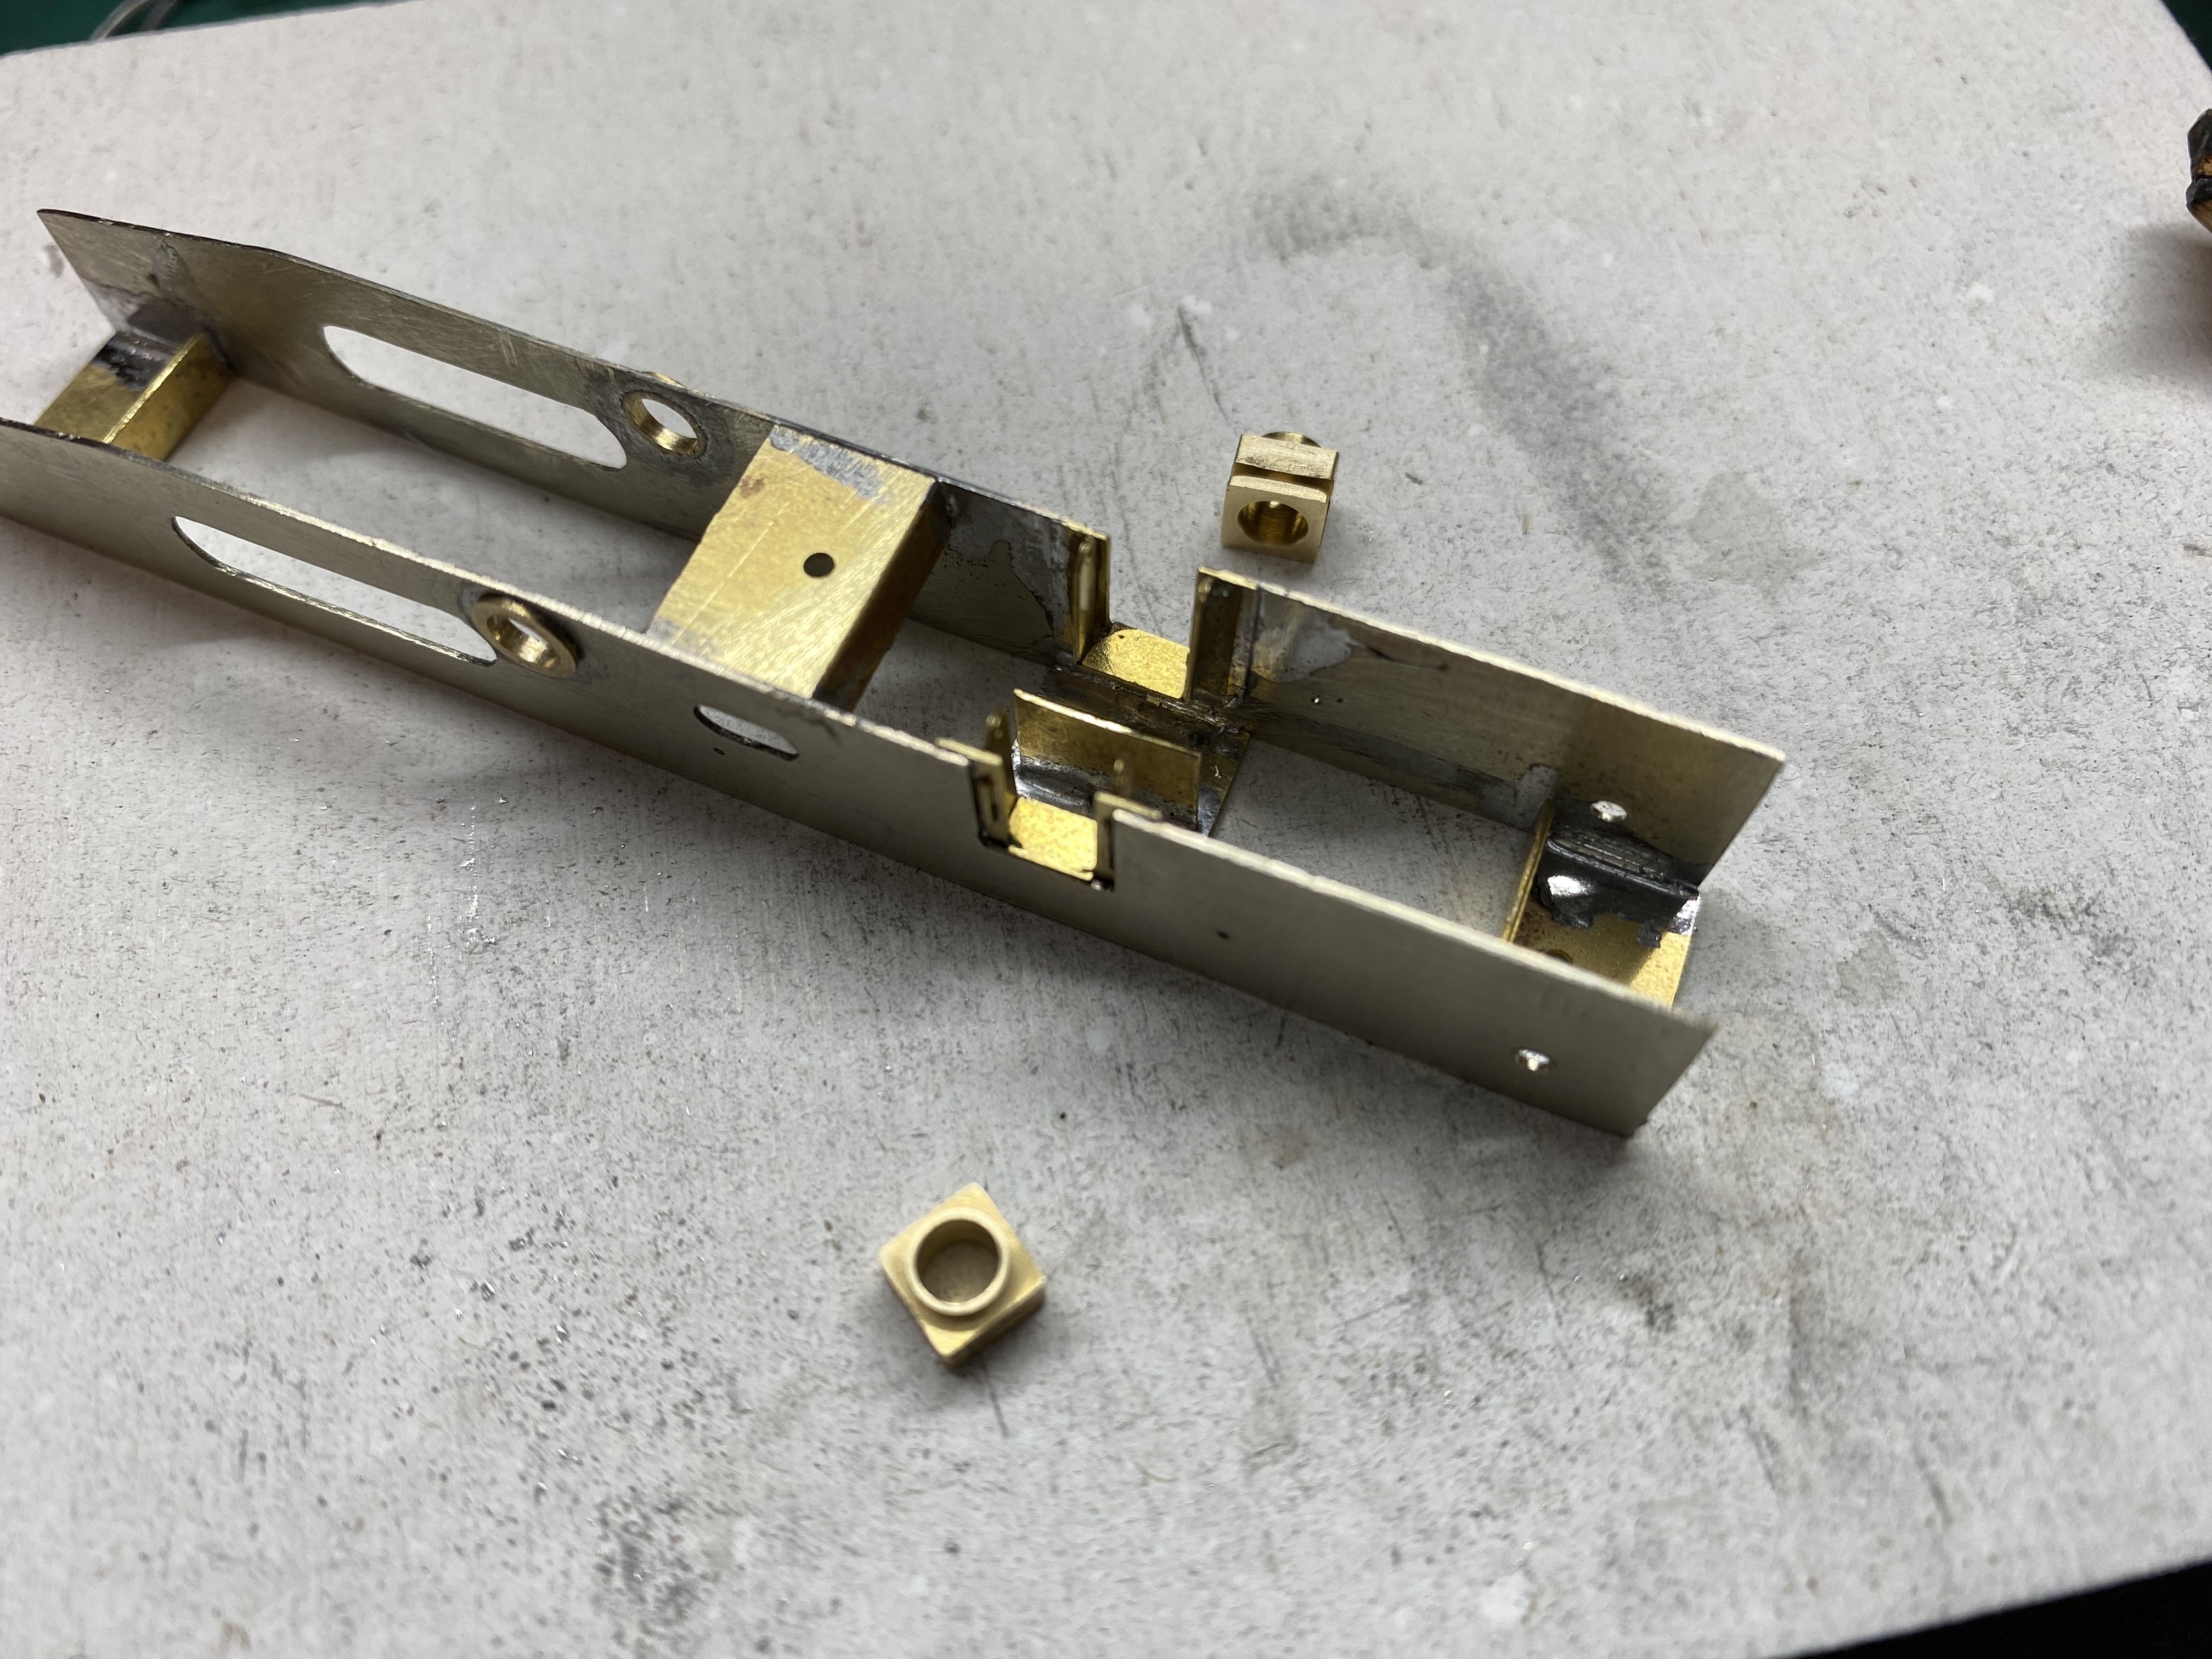
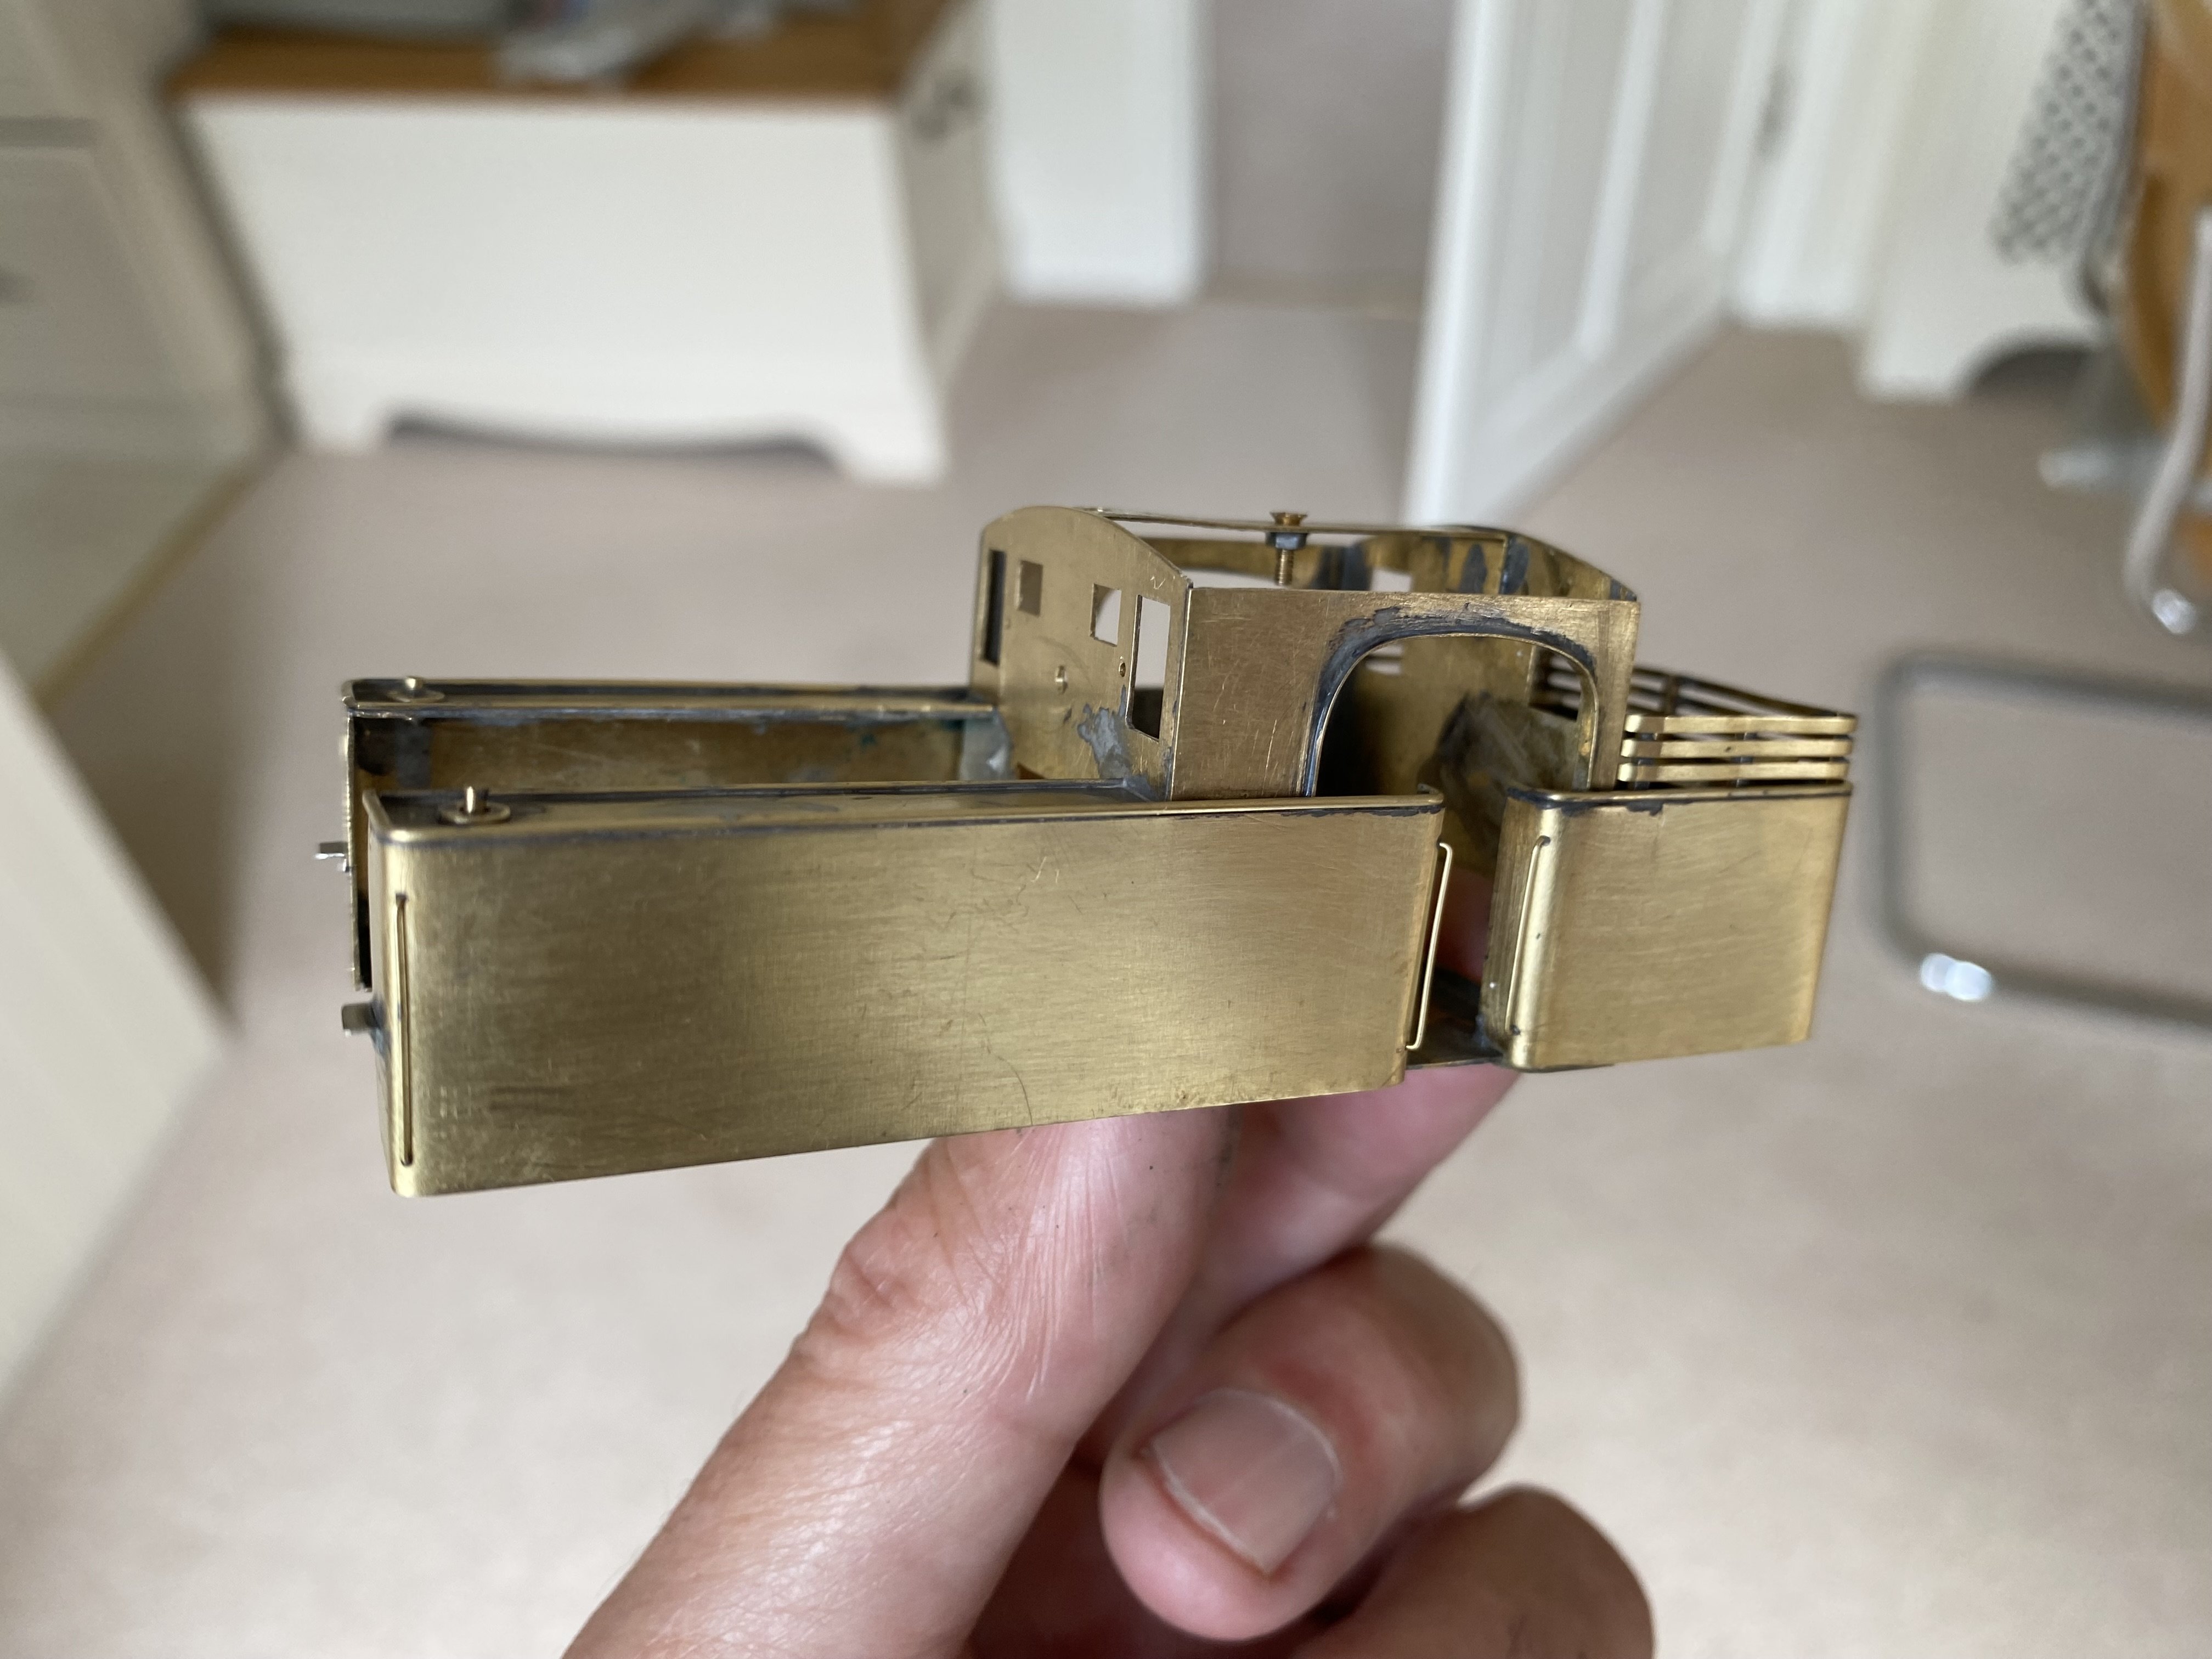
I made an inventory of all the proprietary bits that went into No.29. Quite a lot in the end. High Level Loadhauler gearbox and 1015FE motor Alan Gibson 4849N : 16.5mm 12 spoke driving wheels 4836 : 12mm 9 spoke bogie wheels 4M42B : Crankpin set (6 wheels) 4M92 : Universal coupling rods LM1-OO : OO frame spacers 4M104 : Midland Railway loco brake gear 4908 : Early GWR/Dean buffers 4M170 : Loco boiler bands (used for coal rails) Dart Castings 4003 : MJT Locomotive hornblocks (basic 1/8”) MSV39 : Monty’s Models whitemetal locomotive crew Wizard Models MT329 : Mainly Trains GWR smokebox door DCC Concepts DCD ZN8H : Nano locomotive decoder DCD SA3-SM.1 : Control board and small 3 wire stay-alive Chassis frames are 0.015” nickel silver, superstructure is 0.010” and 0.015” brass. Other bits from the spares box.

- 645 replies
-
- 16
-

-

-
Thanks David. Yes, that would be my instinct too. And maybe a dark wash over the buffer beams to simulate dirt round the rivets and buffer stocks. The chassis has already been weathered, in more ways than one! No.29 has now been chipped, using a decoder and stay-alive from DCC Concepts. These fit nicely inside the boiler and her tanks are now filled with lead. Here she is, doing the job she was built for. IMG_7939.MOV
- 645 replies
-
- 20
-
-
-

Clogherhead - A GNR(I) Seaside Terminus
Tullygrainey replied to Patrick Davey's topic in Irish Model Layouts
Better get the satnav fitted to No 29. PS: I’m not changing the livery! -
Clogherhead - A GNR(I) Seaside Terminus
Tullygrainey replied to Patrick Davey's topic in Irish Model Layouts
I have every confidence in you -
Clogherhead - A GNR(I) Seaside Terminus
Tullygrainey replied to Patrick Davey's topic in Irish Model Layouts
This is all shaping up very nicely Patrick. The sleepers look great. I'm enjoying watching this one take shape. * On active railway lines, the movement of trains throws up dirt etc which gives the sides of the rails a muddy brown colour * On lesser used lines, the lack of movement of trains allows the sides of the rails to assume the rusty colour Well observed. One to remember. Thanks for that. Alan -
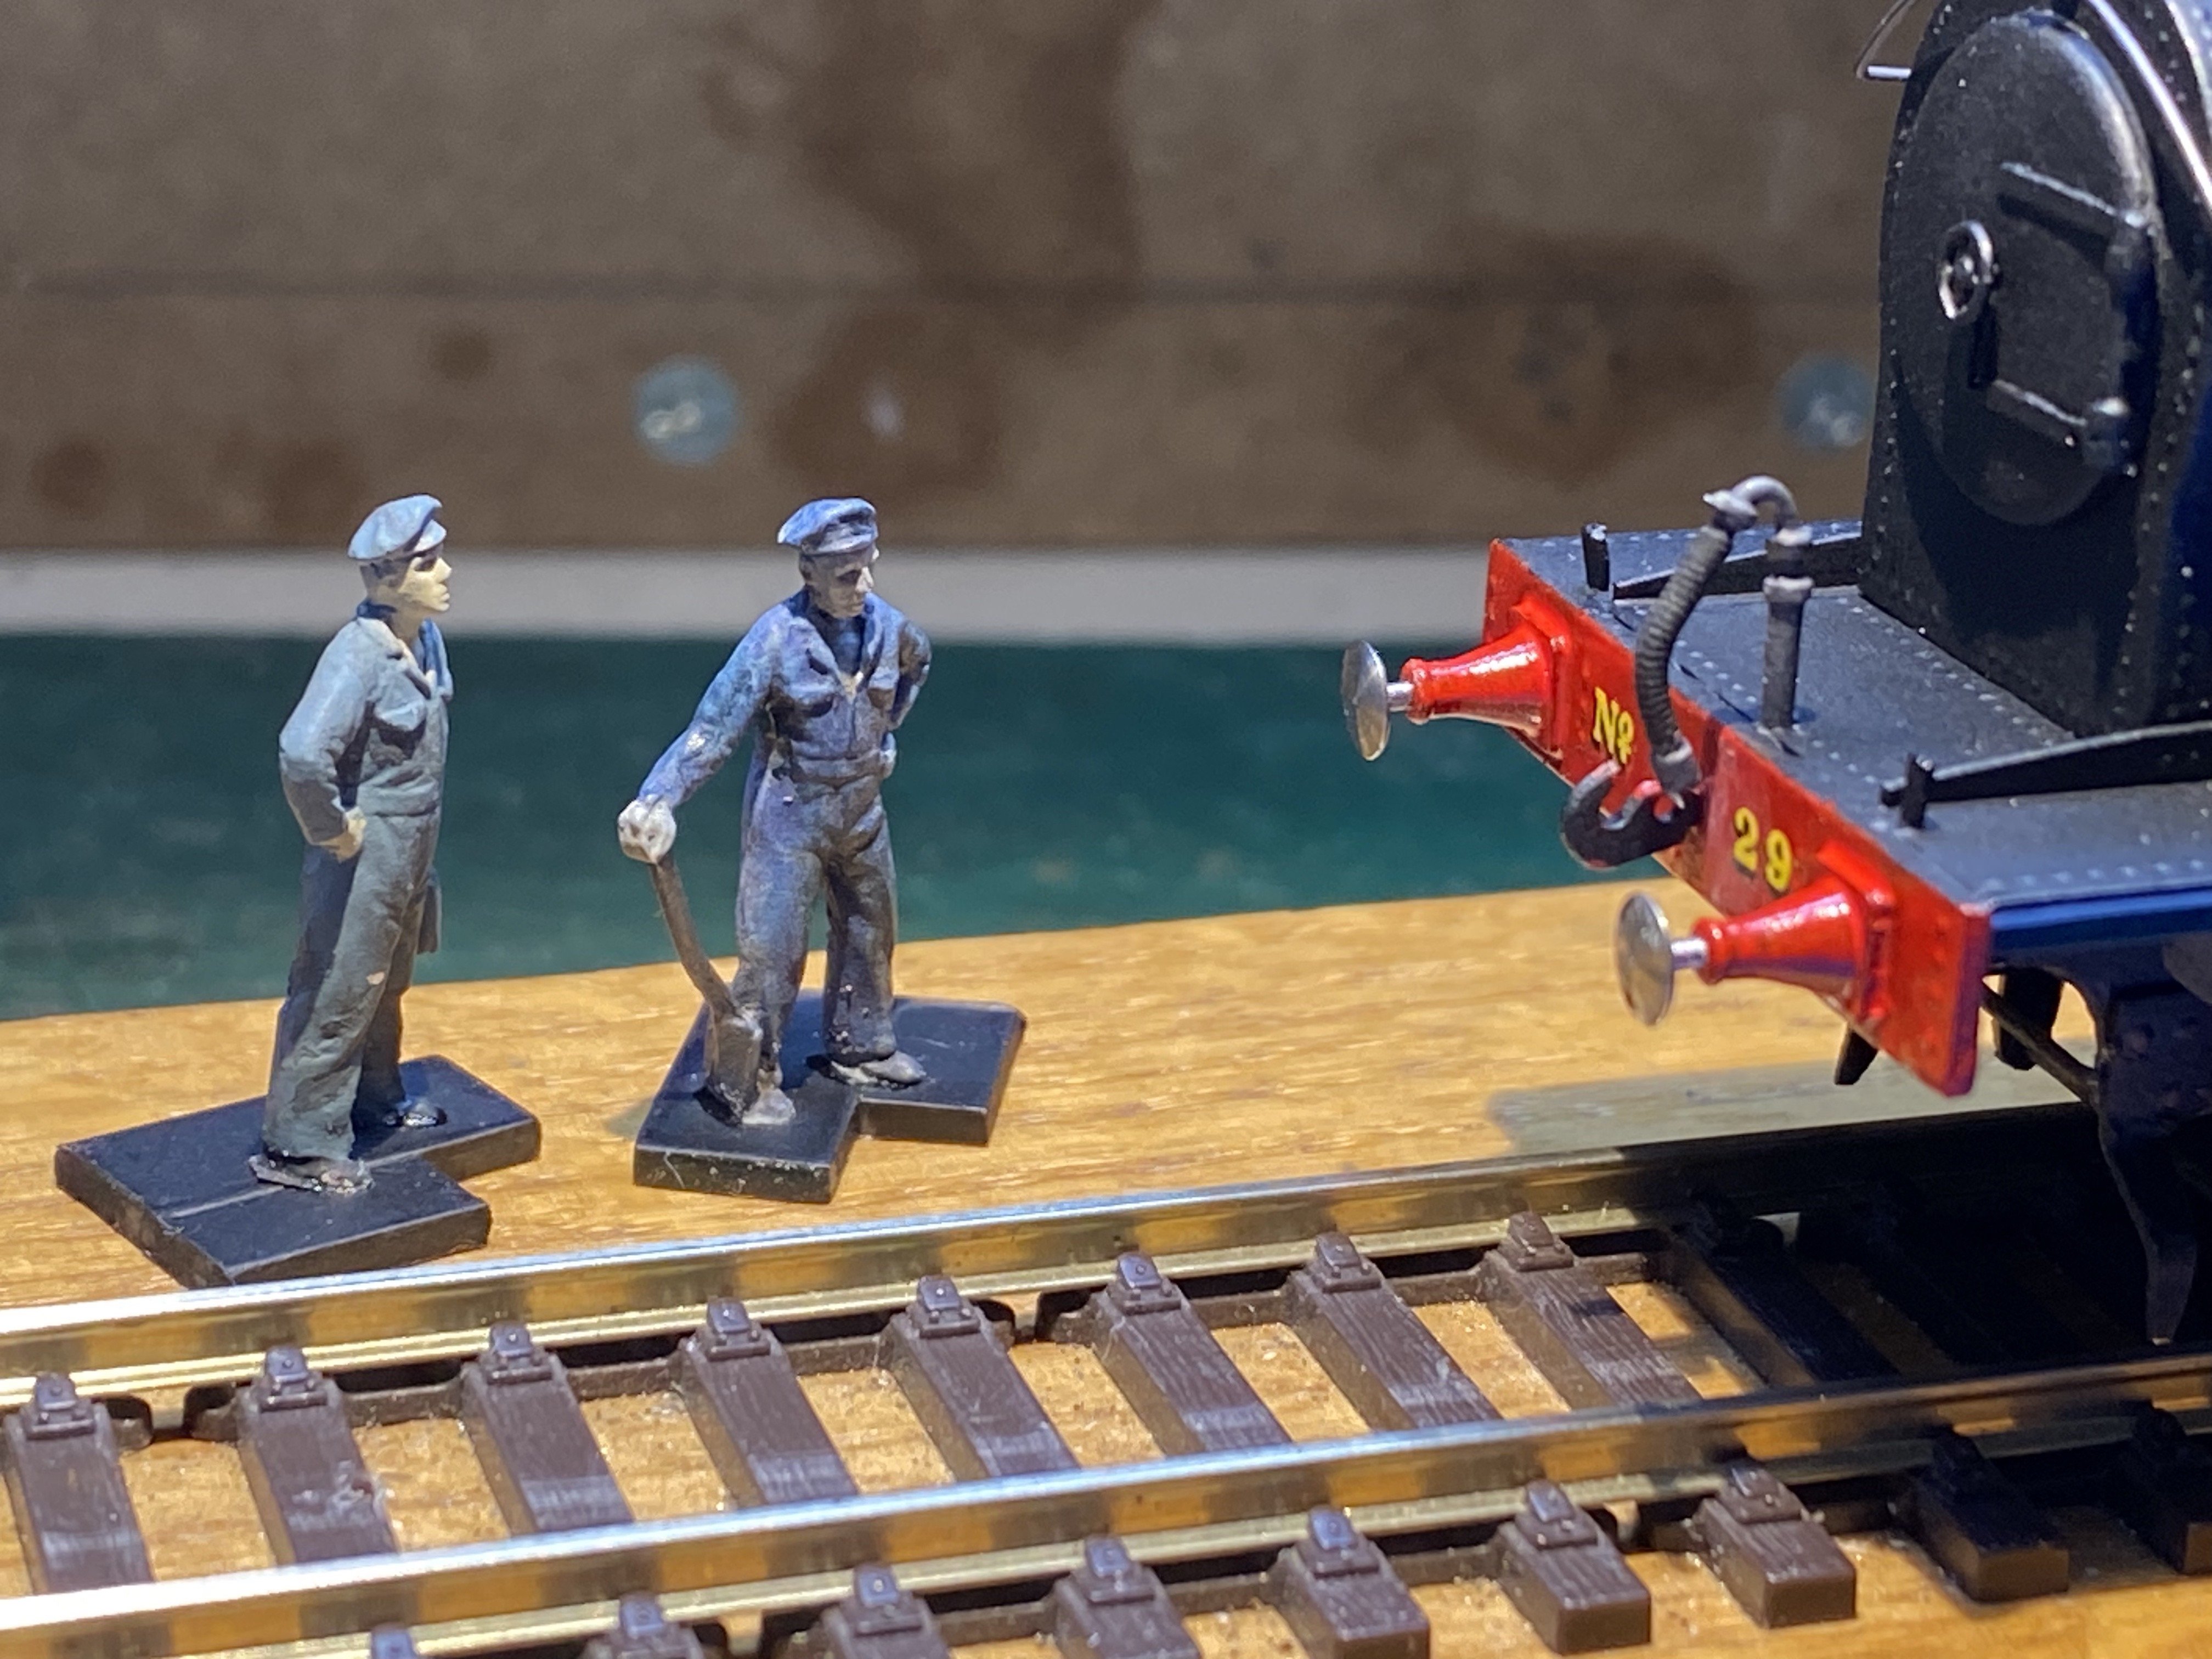
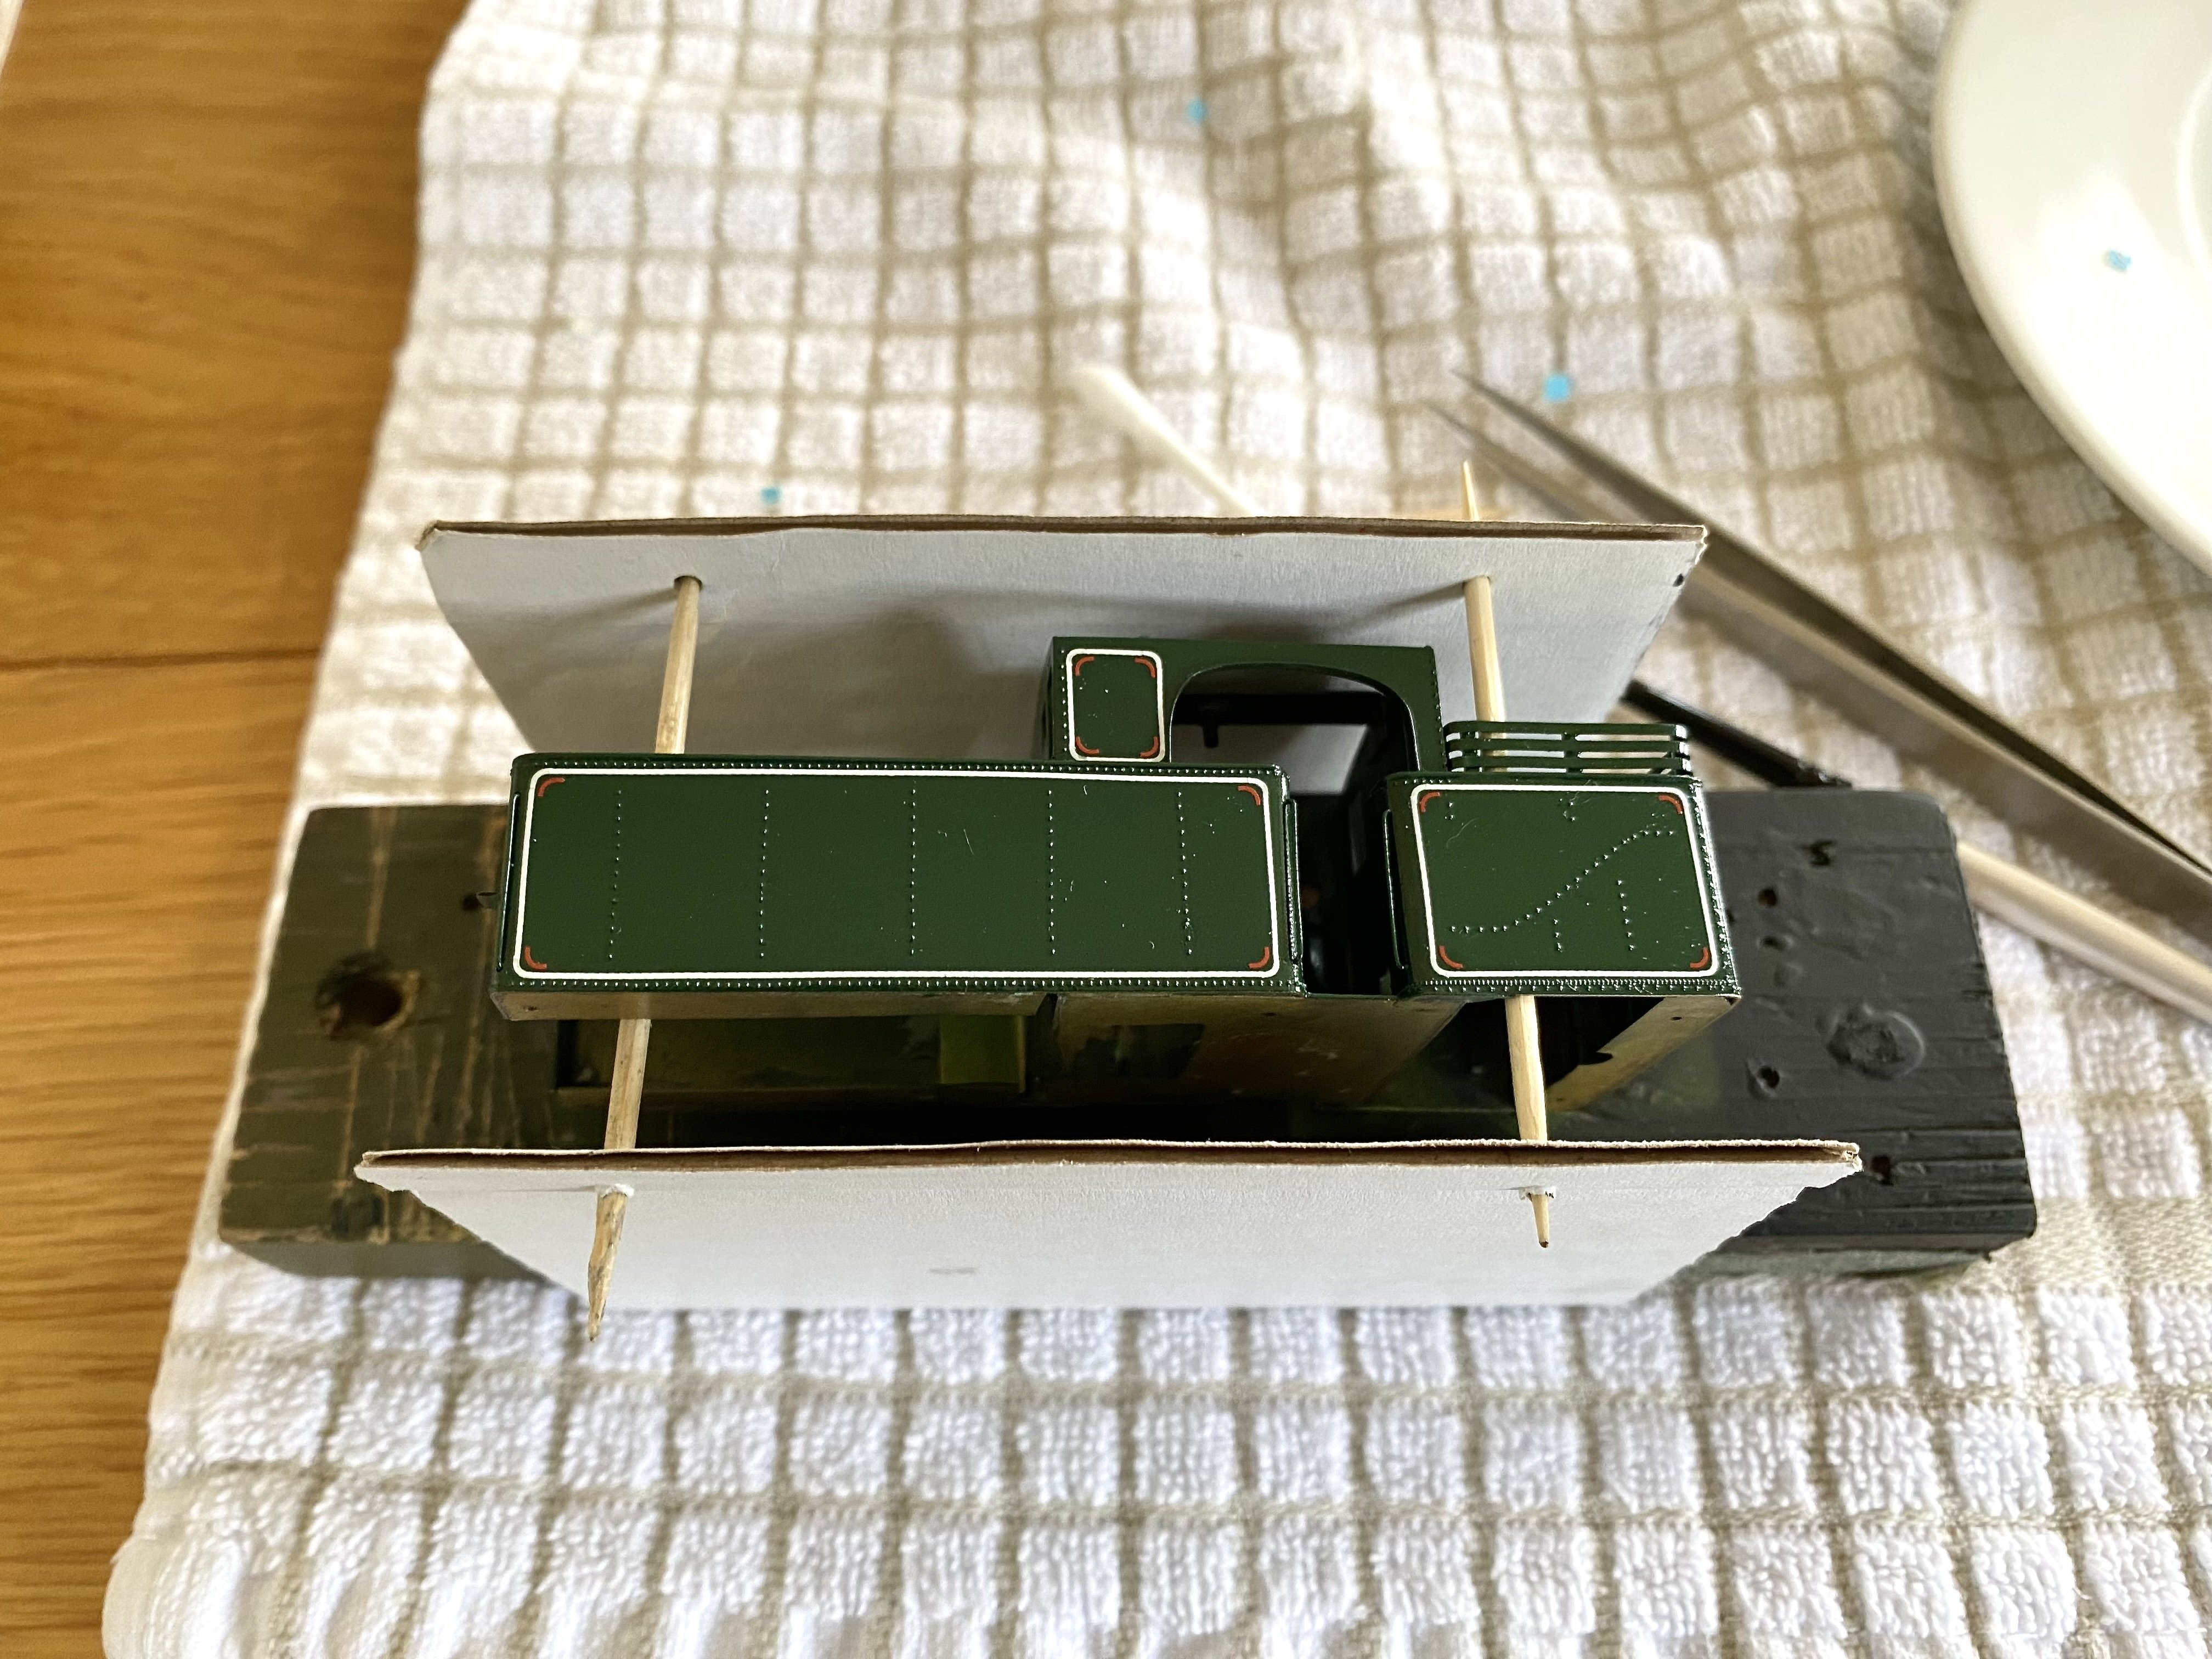
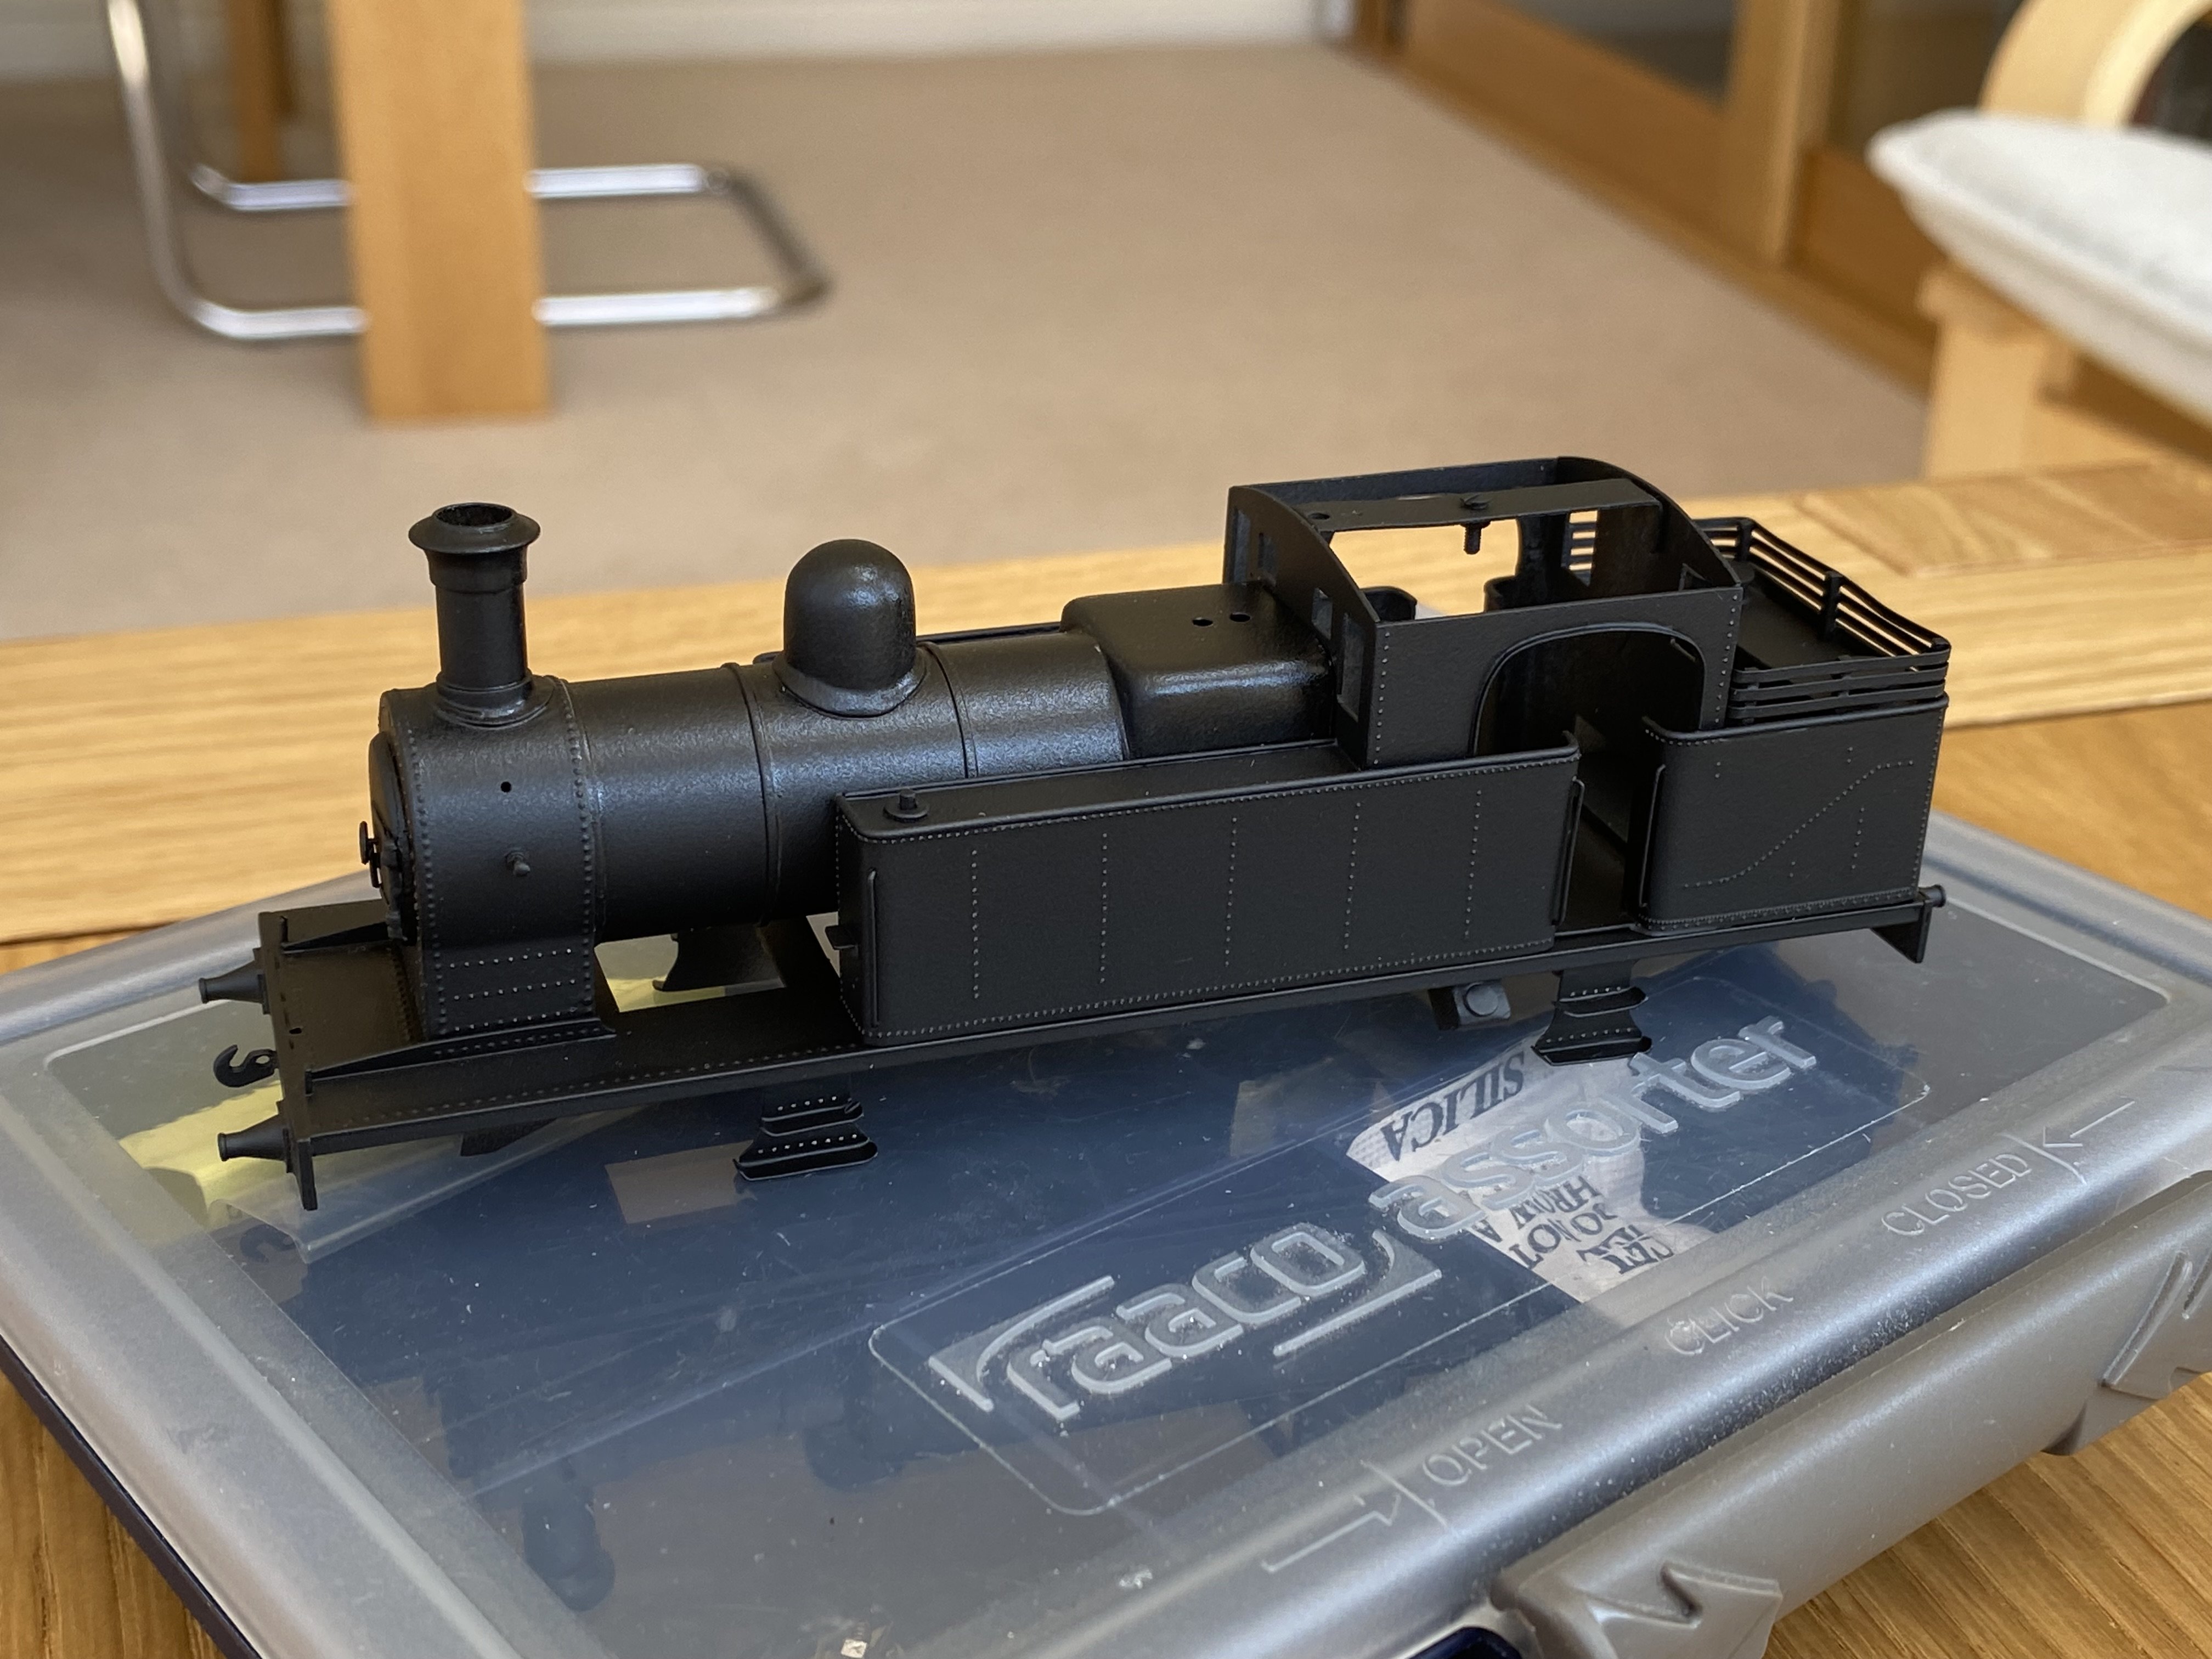
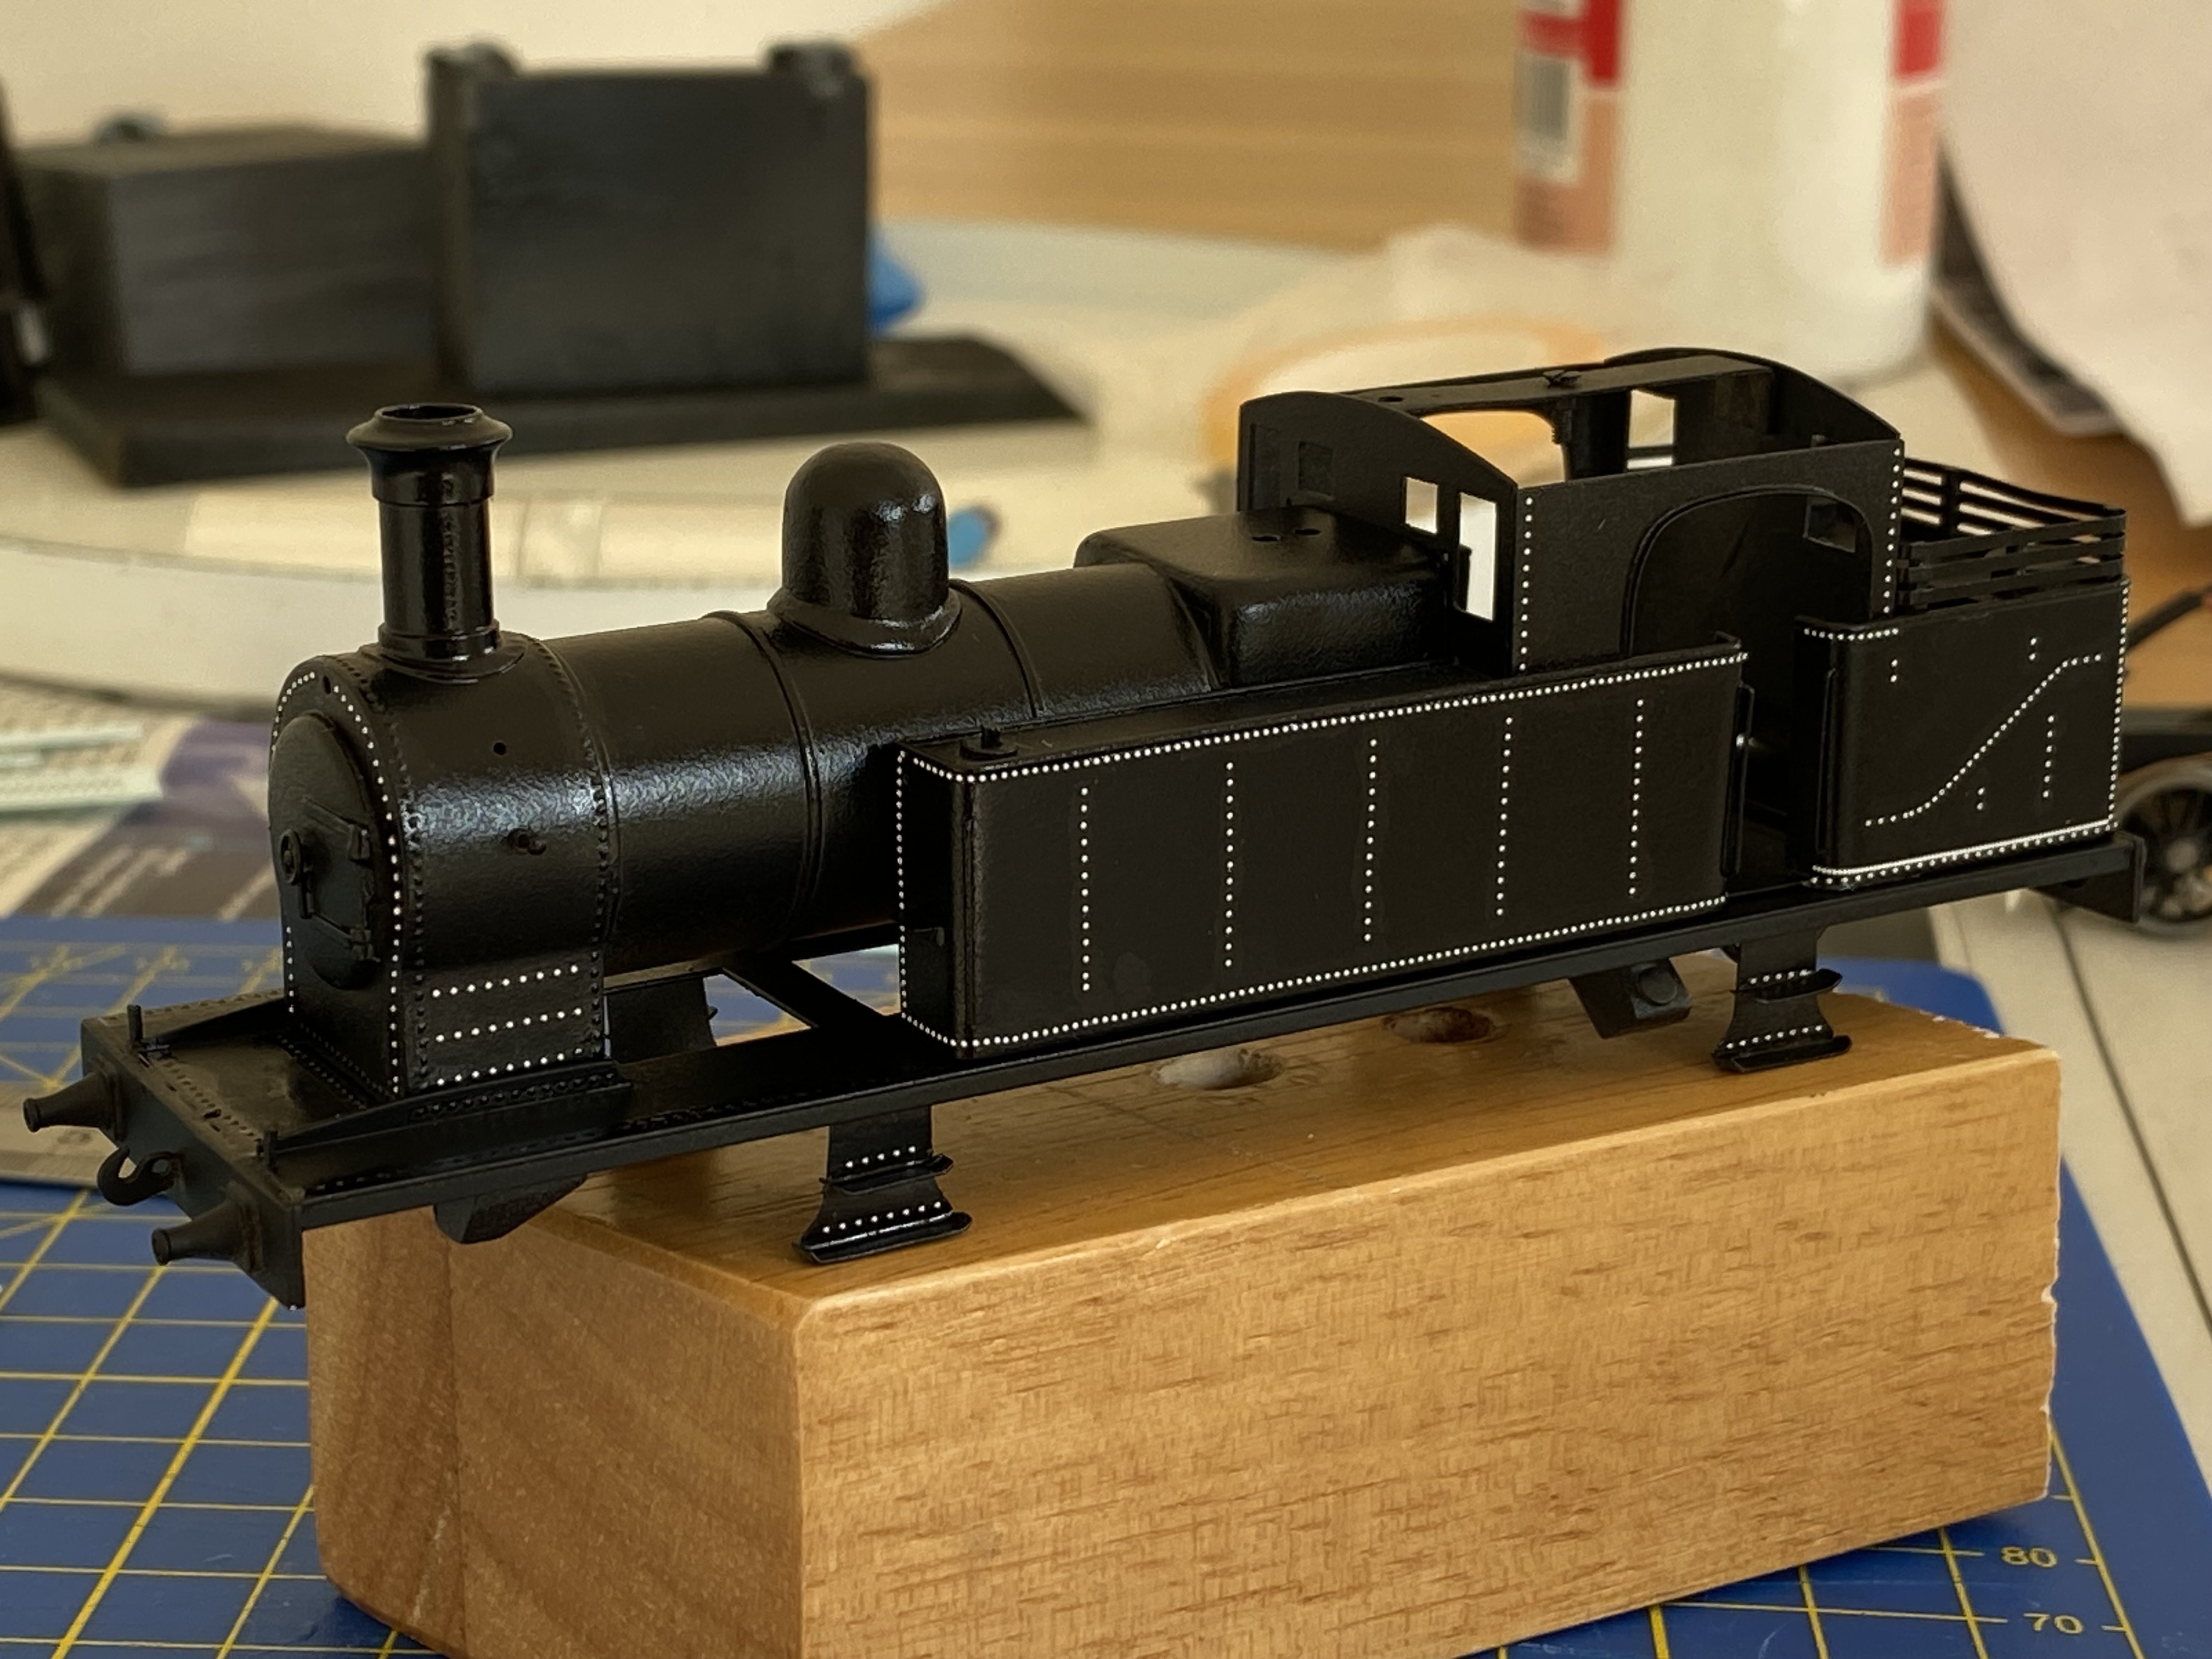
A bit of a hiccup with No.29 since finishing the paintwork. After re-uniting chassis with body for the first time in months, I could see that the running plate and everything above it was sitting too high because of a fundamental build error. I’d made the chassis frames too tall. I remember at the time erring on the generous side to avoid the possibility of compensated wheels hitting the underside of the running plate. Big mistake! The whole thing looked quite odd and I don’t know how I missed seeing it before. At first, I couldn’t see how it could be fixed short of a completely new chassis. I could sense the big hammer stirring in the tool cupboard. But having come this far and with nothing to lose, I attacked the chassis frames with a slitting disc, shears, files and appropriate vocabulary to shave metal off the top edges at front and back. It was a messy job which predictably had a knock on effect on other things. The motor had to come out, the pickup mounts had to be moved, two chassis spacers had to be unsoldered and relocated and the cab front had to be opened out a bit more to allow the motor/gearbox to sit higher inside the body. It was also painful having to butcher the chassis frames I’d carefully sculpted as a matched pair all those months ago. It took five hours of solid graft and picturesque language. Anyway, all’s well now. The running plate is 2mm lower than it was and the bodywork no longer looks like it’s on stilts. The paintwork survived and the chassis still runs as well as it did (Phew). Better actually. Before, it had a strange little wobble, lifting and dropping a tiny amount on one side with each revolution of the wheels, defying attempts to find the cause. While cleaning the wheels after the surgery, I discovered a minuscule blob of superglue on the tread of one wheel. Removing this cured the problem. It still needs number plates (tricky things to make) and a few more small details seeing to. That Kadee coupling needs relocated because it's fouling the bogie and causing derailments. A bit of weathering would also be in order. I'm a fan of weathering but I still find it hard to dirty up a pristine model. I never feel in control of the process either. The crew have gone on board to pretend to drive it but their primary role is to stand in the doorways, concealing the fact that the cab interior is completely devoid of detail. That’s for another time. Alan
- 645 replies
-
- 25
-
-
-
The crew inspect their new charge
- 645 replies
-
- 12
-
-
-
A big thank you to everyone for all the positive feedback. The enthusiasm and support on this forum is just brilliant. Alan
- 645 replies
-
- 10
-
-
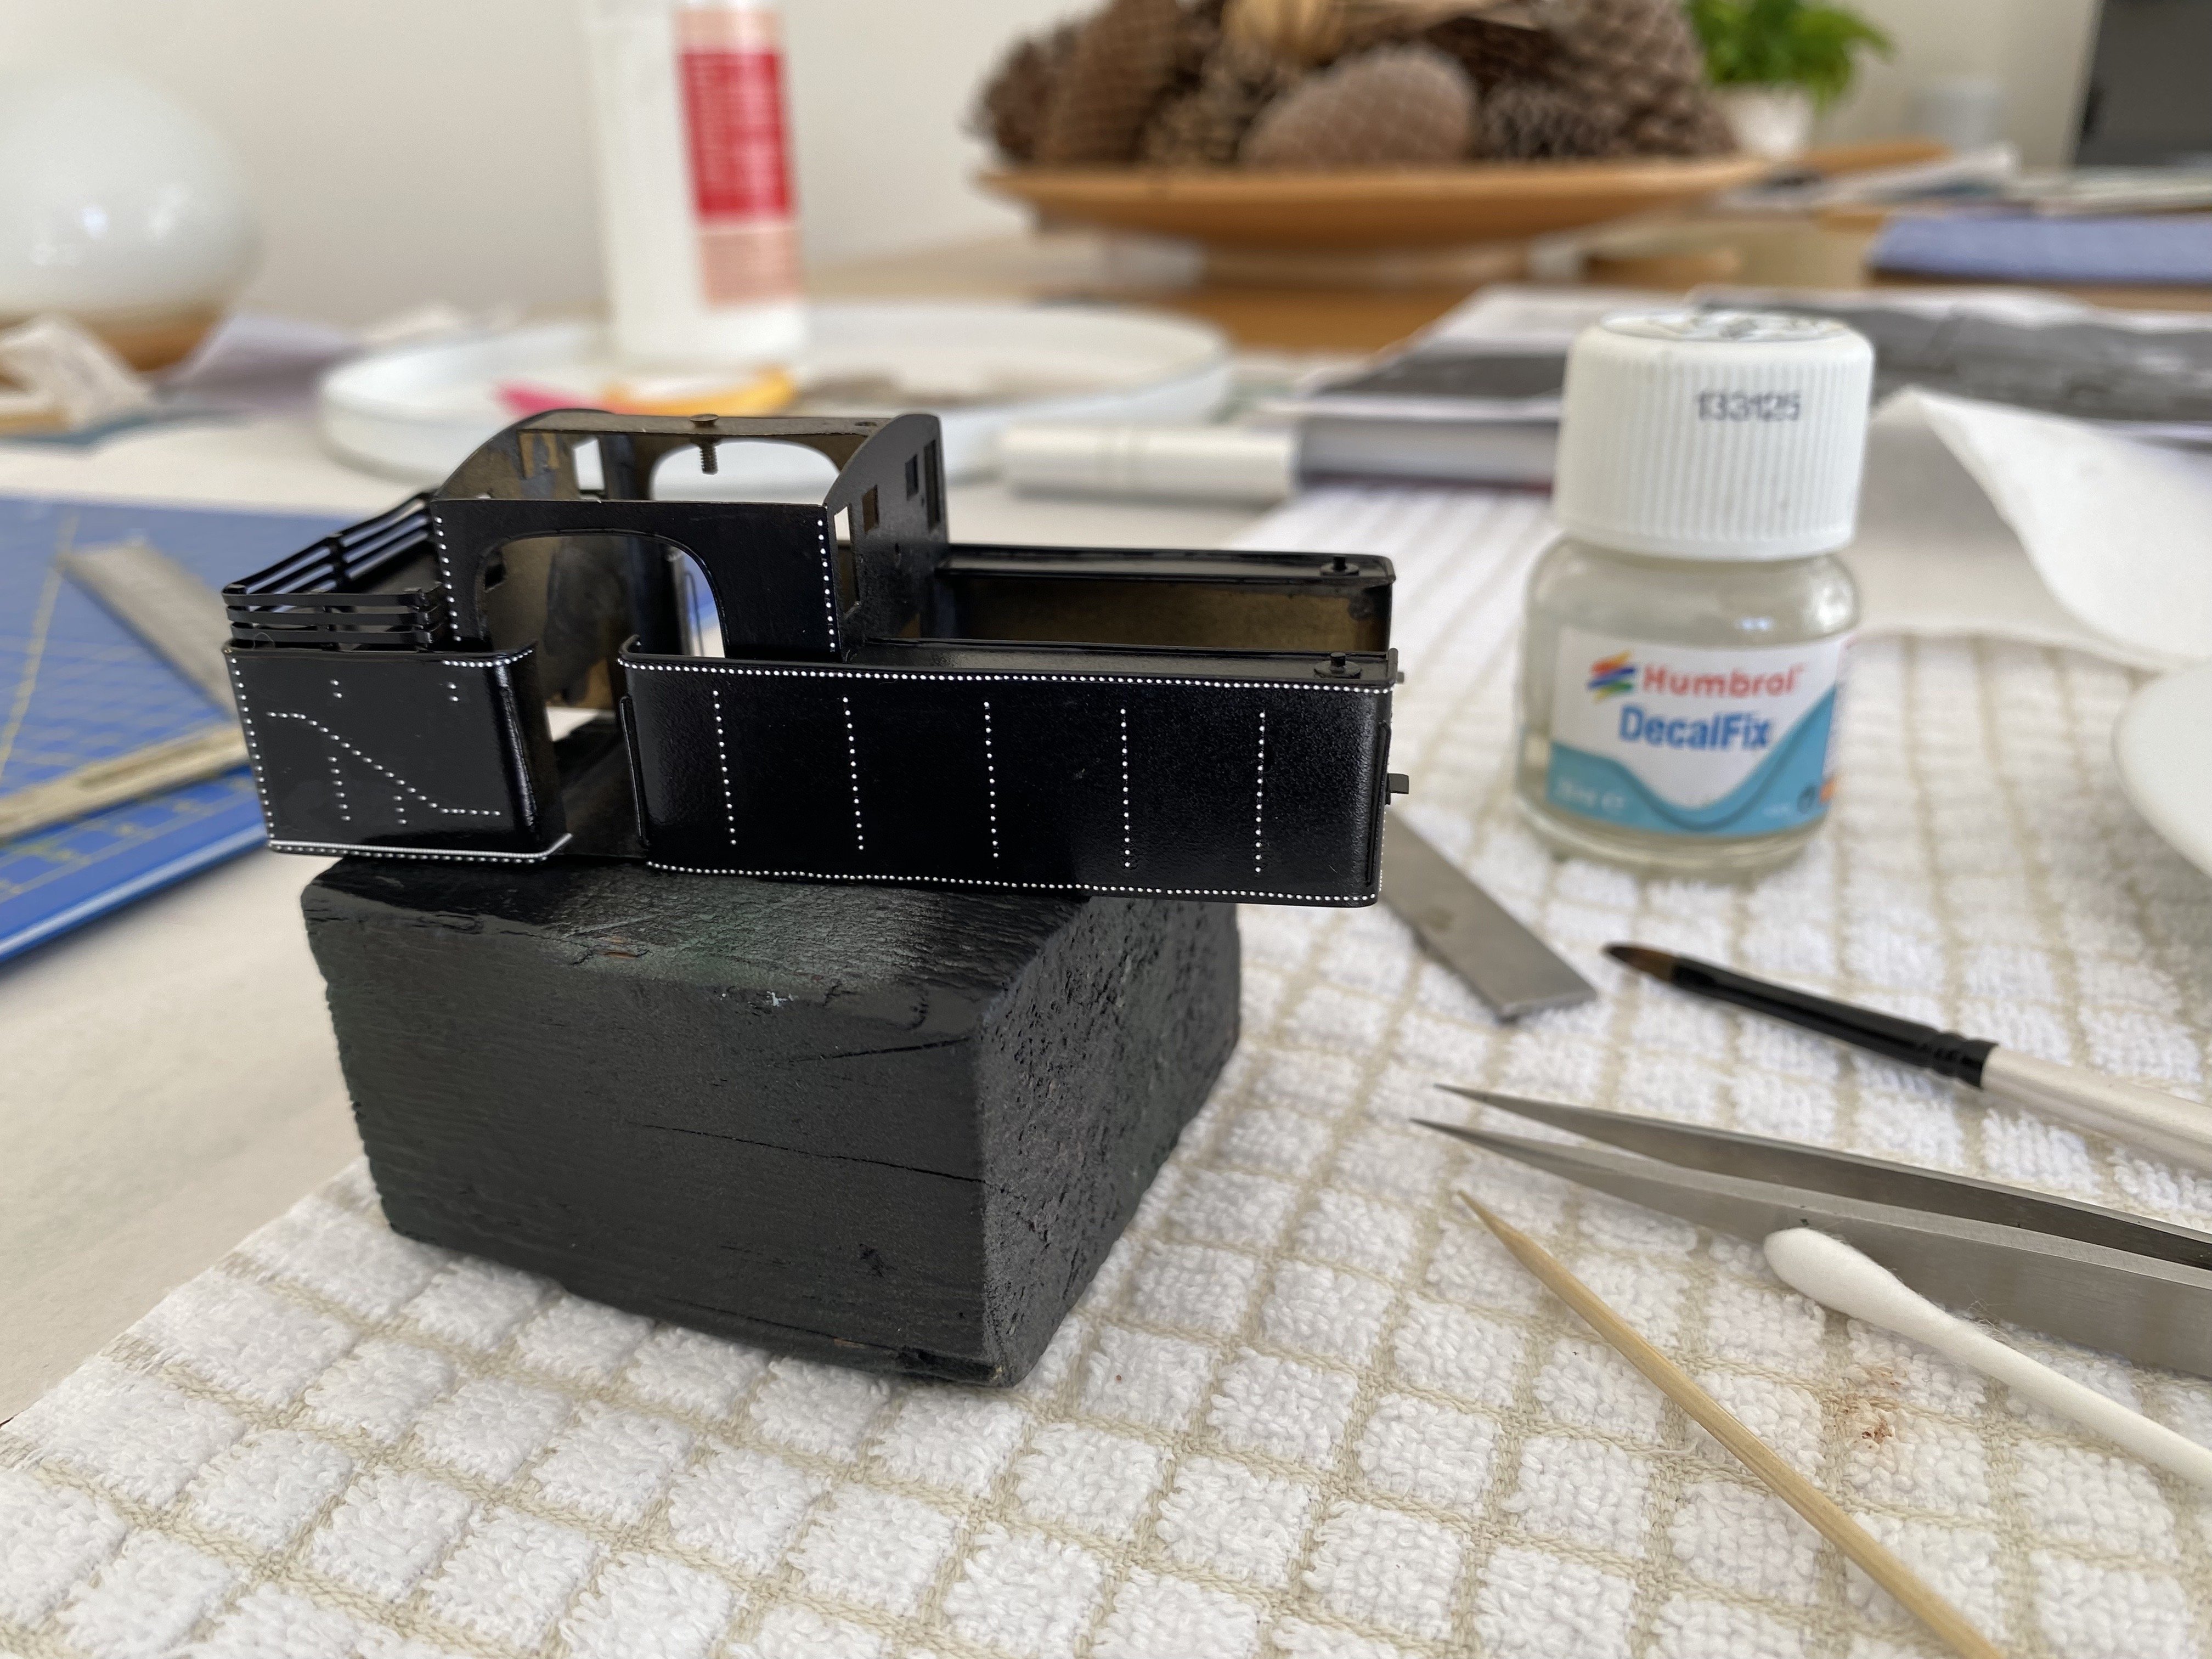
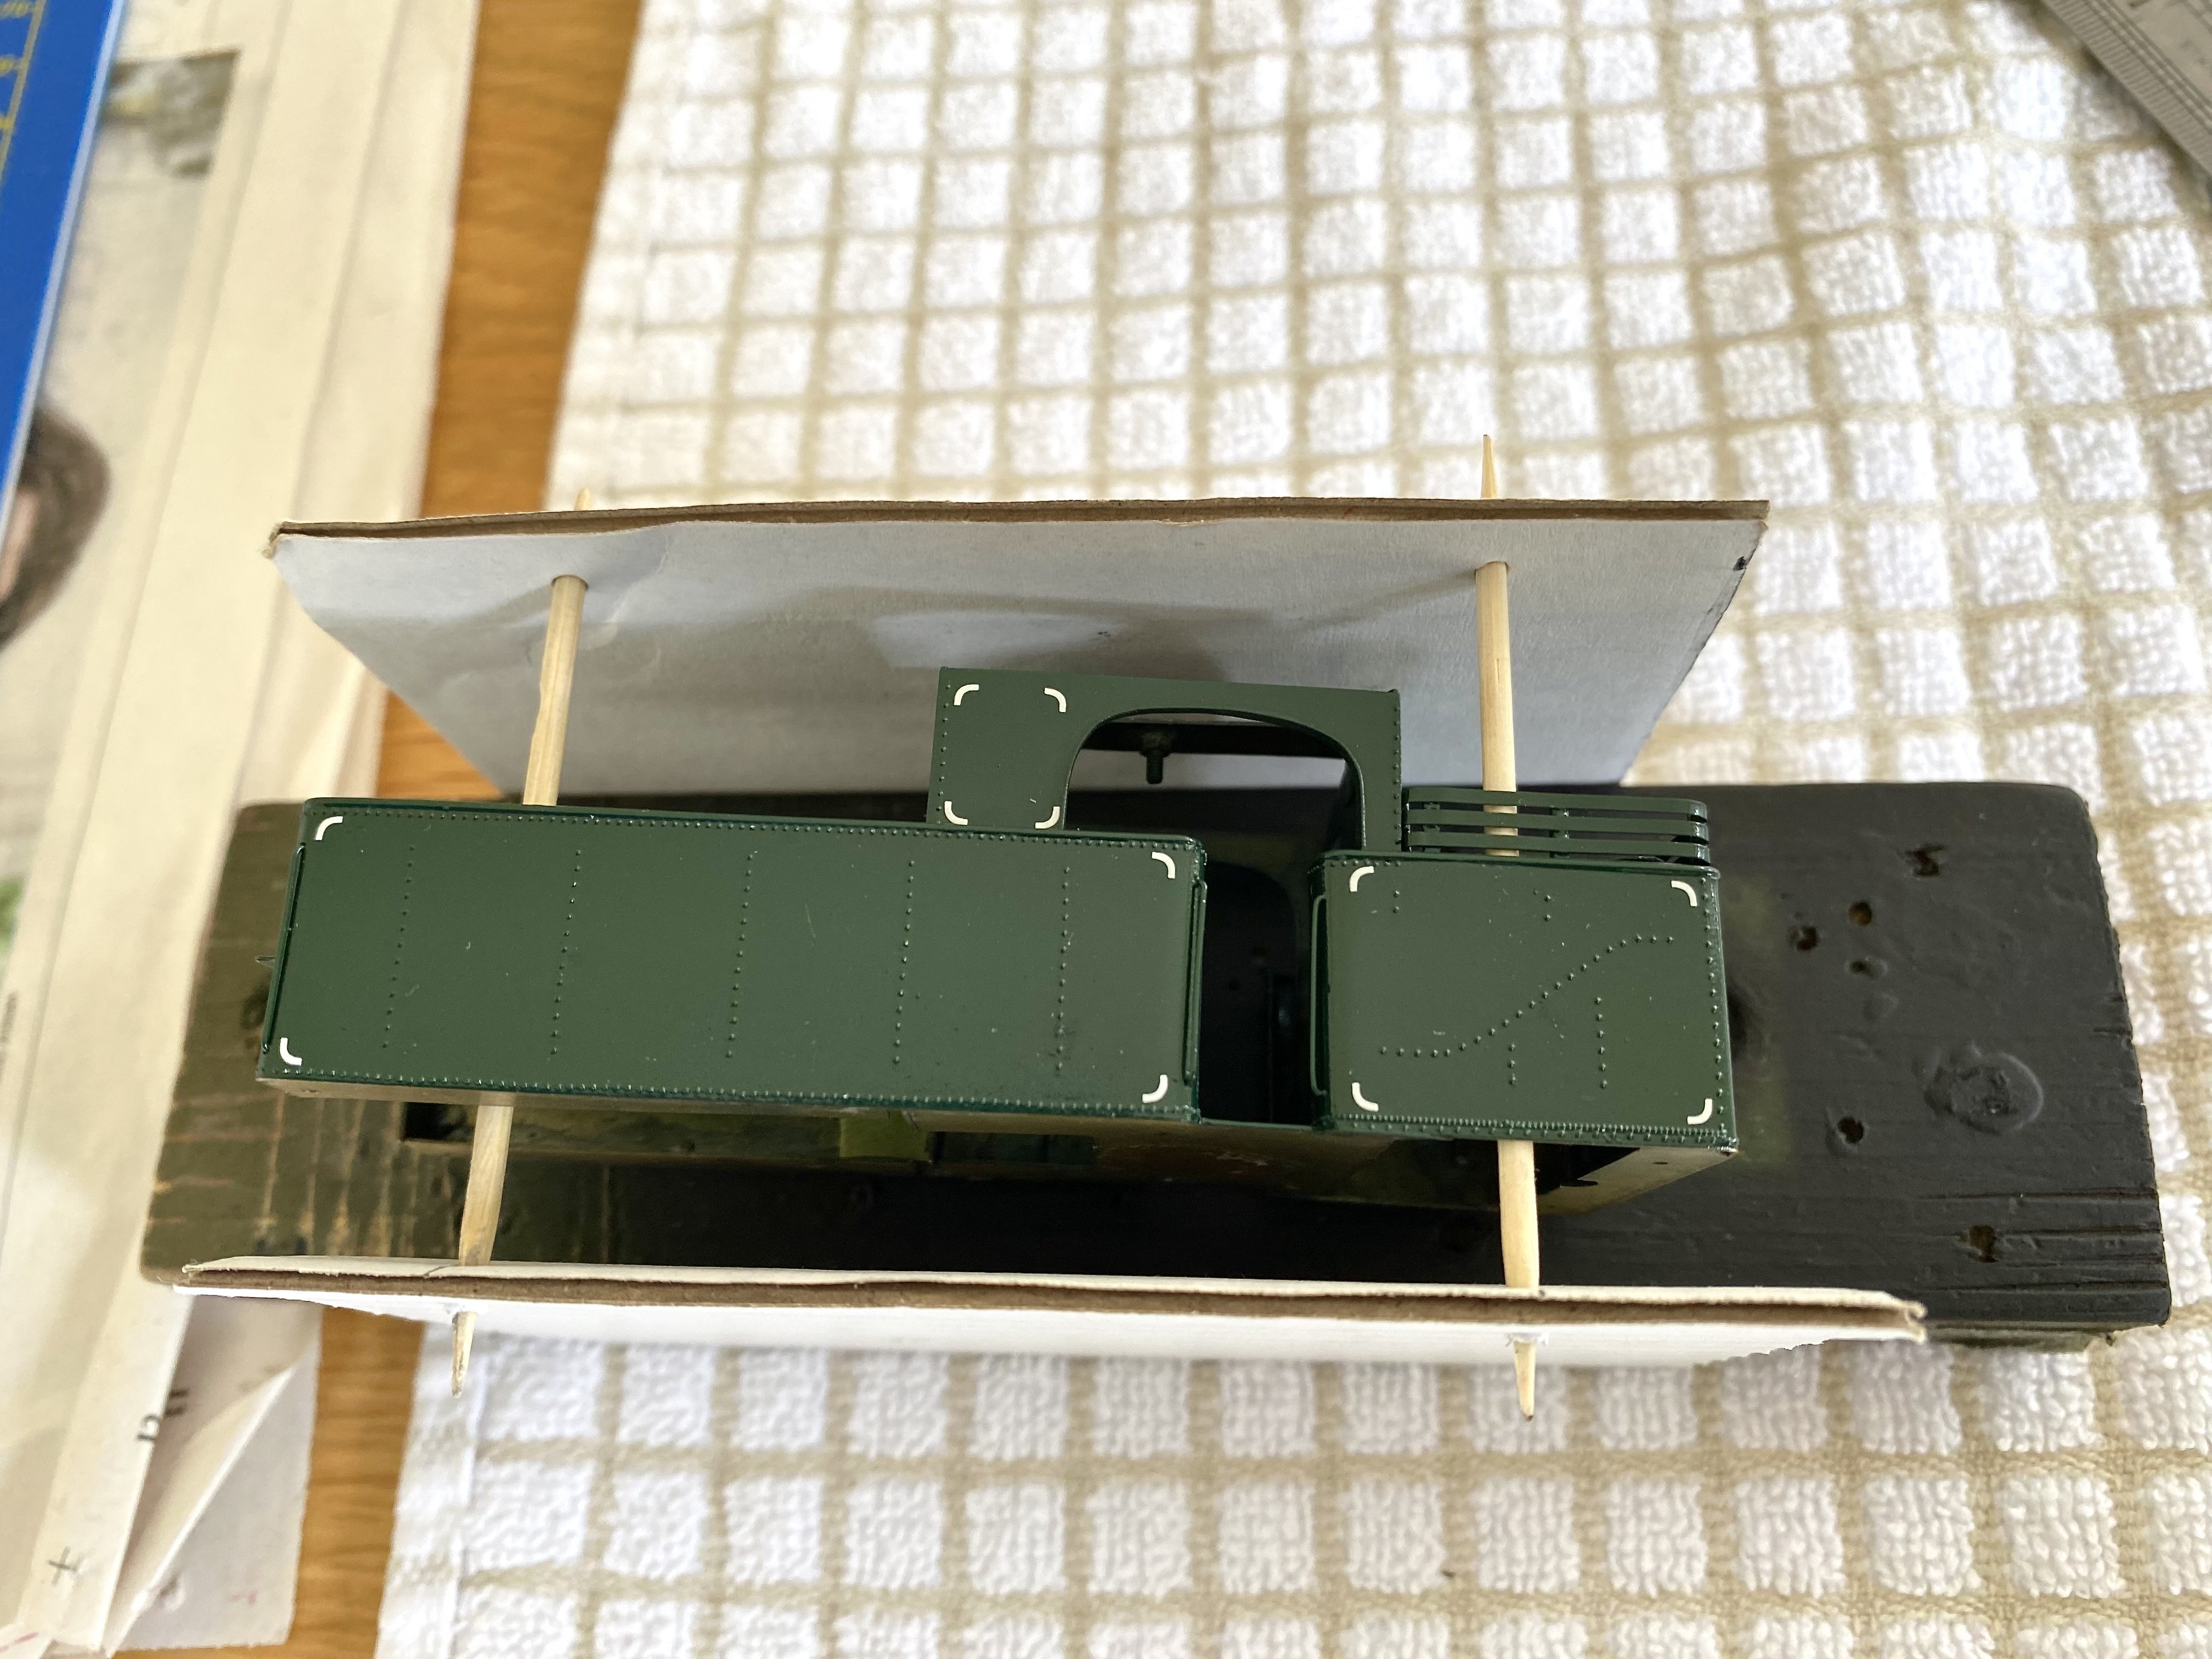
Some progress with former fluffy loco No.29, at last. I considered trying to build an anti-gravity device in case I dropped it again but decided in the end to just be more careful. Another black base coat sealed the brass, then the rivets were added. Again. Two coats of green enamel blended the rivets in. The boiler didn't get intimate with the carpet during the Butterfingers Affair so it wasn't stripped back. Next, the lining transfers (from Fox Transfers). As I've said before, the lining is over-scale but I can live with that. Challenging stuff, this. Frustrating and satisfying in equal measure. The little jig made of card and cocktail sticks suspends the thing above the work surface so the transfers on one side one don't get accidentally abraded or rubbed off whilst working on the other side. Another lesson learned the hard way. Lining finished and sealed with a coat of enamel satin varnish. I'll give the finish a few days to harden before re-fitting all the detail bits and re-uniting body and chassis. Onwards with a great sense of relief Alan
- 645 replies
-
- 24
-
-
-

-
I use this Gaugemaster power supply together with a Capacitor Discharge Unit from the same manufacturer to power the Peco solenoid turnout motors on my small (6ft x 2ft) layout. Together, they do the job well and turnouts can be switched in pairs without any problems. https://www.gaugemasterretail.com/gaugemaster-gmc-m1-16v-ac-cased-transformer.html https://www.gaugemasterretail.com/seep-gmc-cdu-capacitor-discharge-unit.html Alan
-
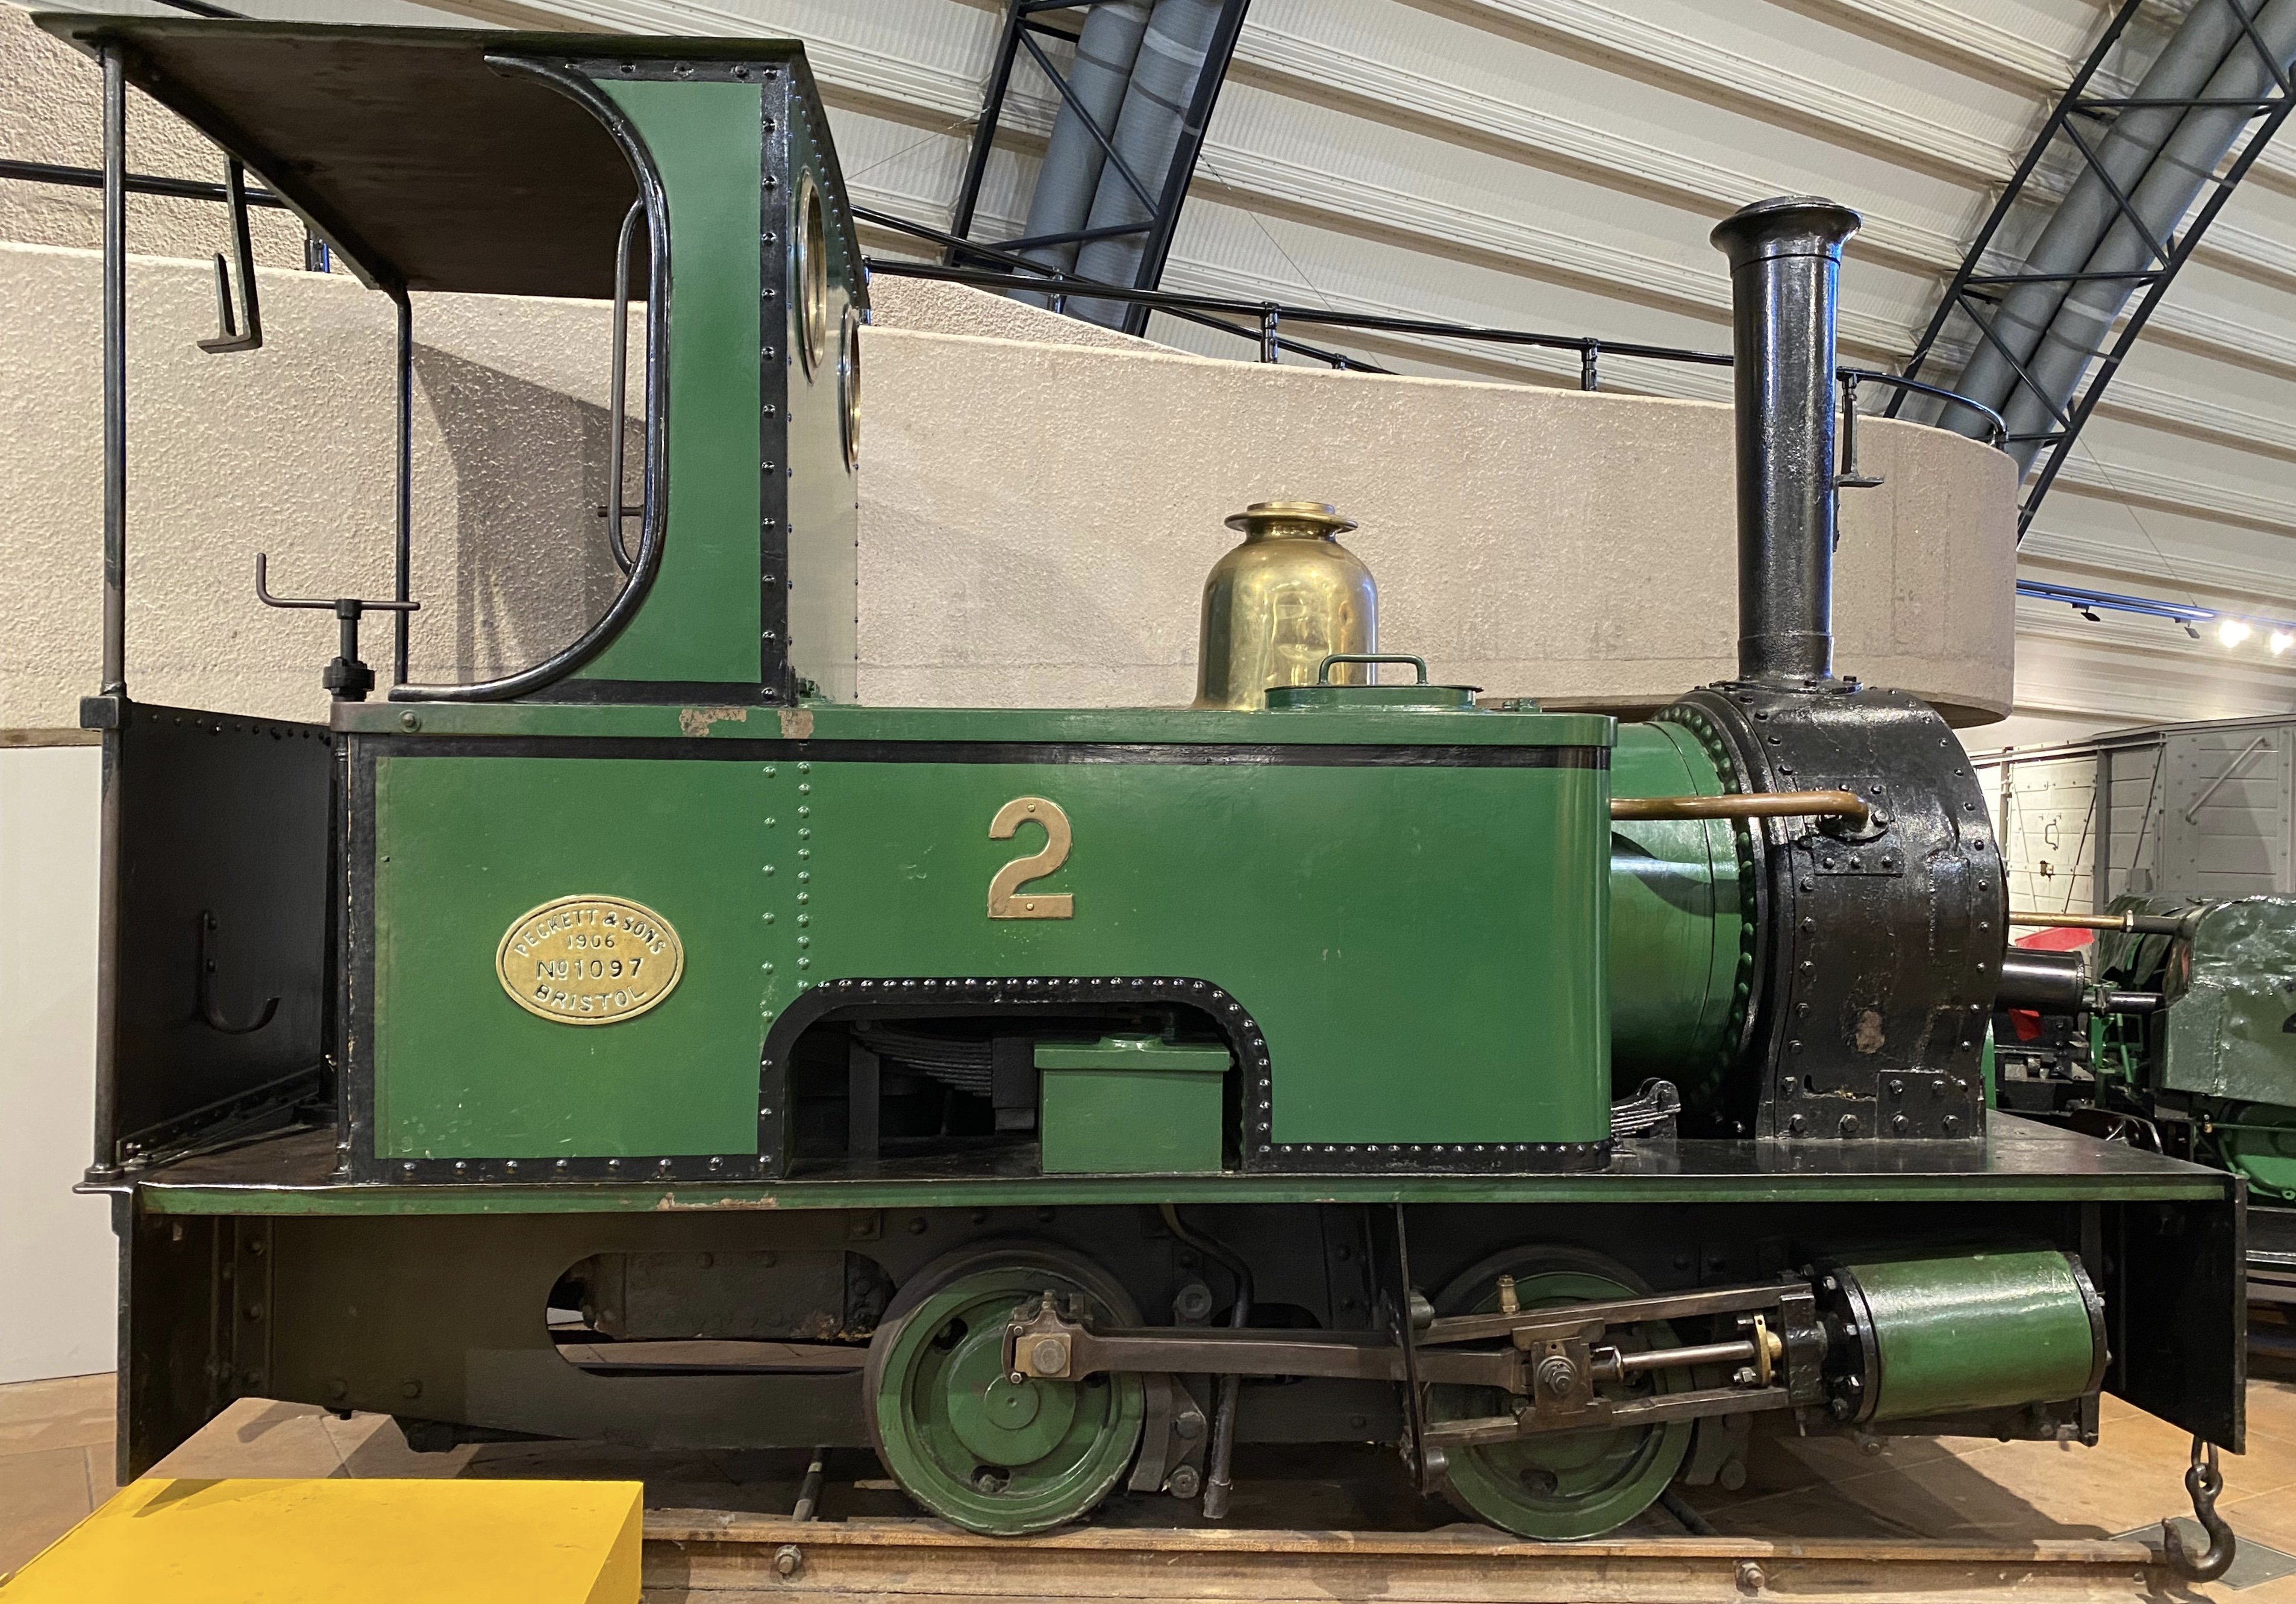
I forgot about the O/16.5 narrow gauge Peckett which I actually started at the same time as No 29. I spent an enjoyable morning at Cultra climbing over their example with a tape measure. I got as far as a compensated chassis and a set of rods before No 29 elbowed its way to the front. No cylinders or bodywork yet. So that probably needs finishing sometime. If I can remember where I put the bits
- 177 replies
-
- 11
-
-
That's very kind of you to say so LC. Thank you. No 29 is inching towards completion. I'm taking my time with it and trying not to drop it again! Hope to have something to post in the next day or so. As to what's next, I'm not really sure. Patrick Davey gifted me some Bill Bedford BCDR coach etches which I'd like to have a go at. I also have a couple of Provincial GNR(I) wagon kits to build. Then there's my drawer full of assorted diesel shunters which cry out for an industrial layout to run on. As to another BCDR loco, I haven't really given that much thought. Maybe a bogie tank? Too many projects! Alan
-
Very fine job indeed, David. The lining looks really well. I know how challenging (and frustrating) that can be!
-
No 4 Loch, Port Erin station, 26/08/2021 Loch.MOV Loch2.MOV Loch3.MOV
-
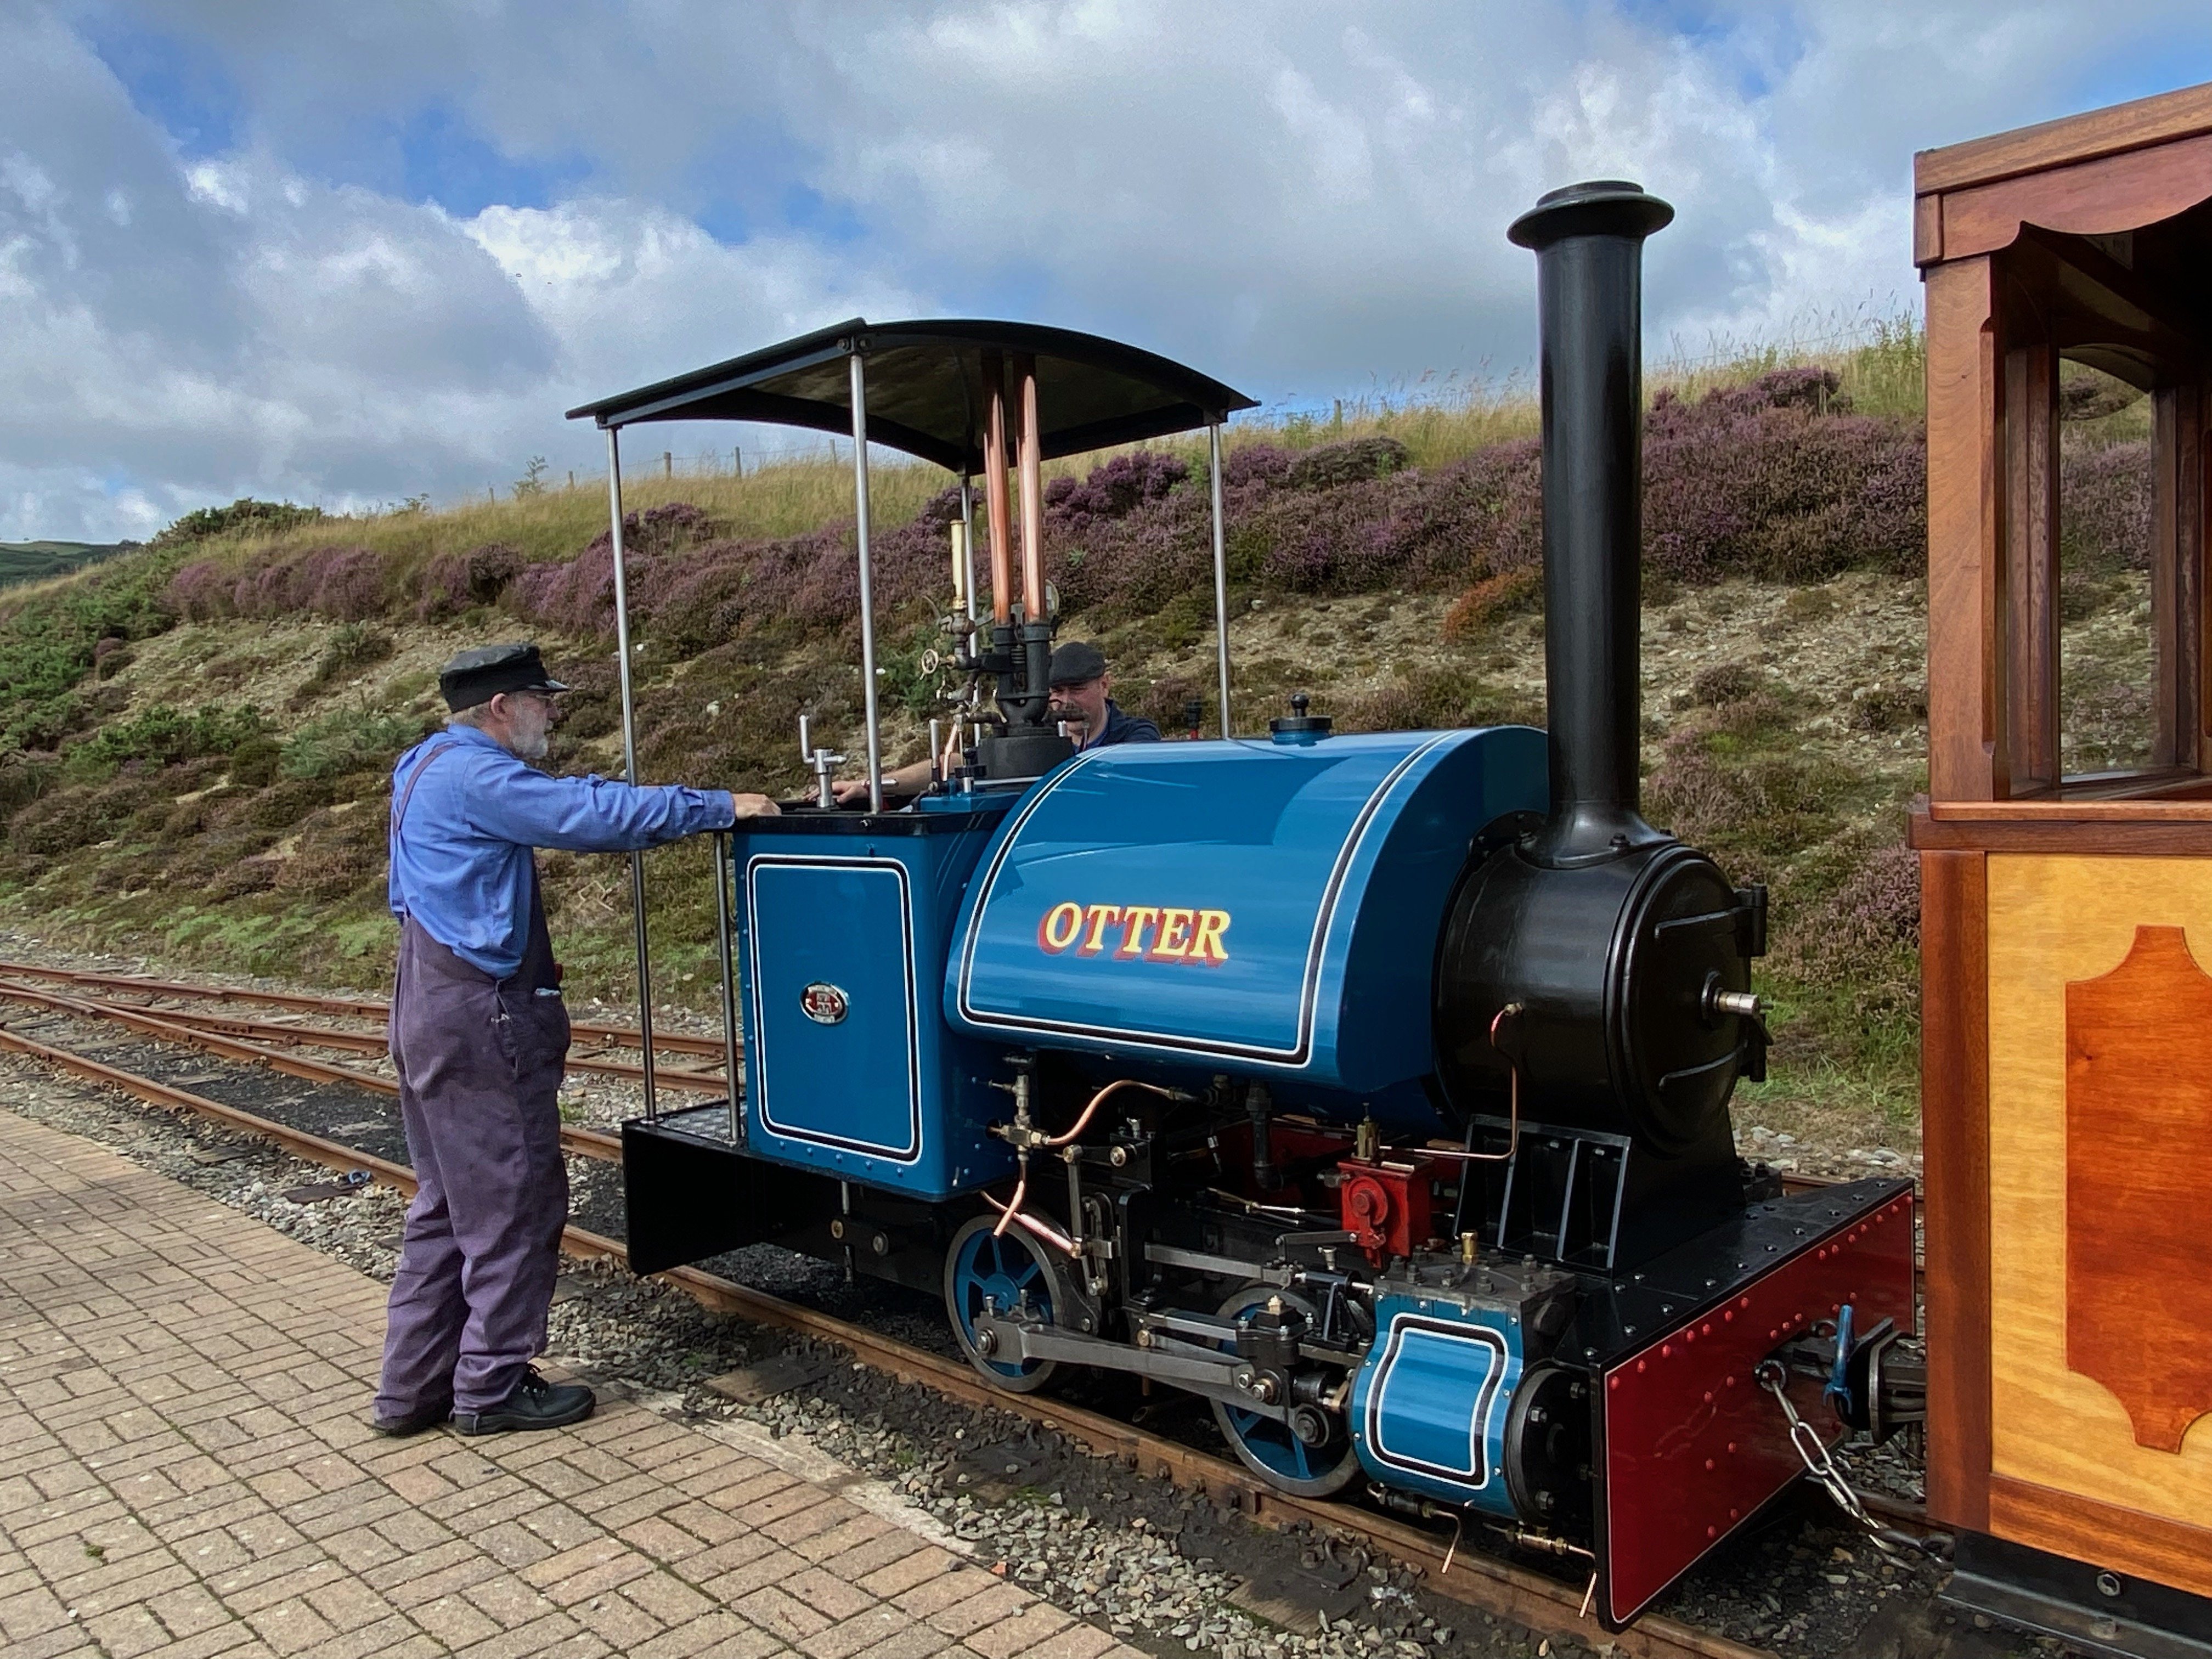
Locos at Groudle Glen and Sutherland in the railway museum at Port Erin, August 2021.
-
Very true John. I was able to just scrub away at it till all the paint was gone. Amazingly, a lot of the rivet transfers clung on longer than the paint before finally peeling off.
-
Well I fiddled and faffed with the fluffy loco, even tried another coat of green, but I knew I’d never be happy with it so out came the cellulose thinners. Hello again brass. Thought we’d seen the last of you! Must remember not to have my muesli from that bowl again. Onwards with nary a backward glance Alan
- 645 replies
-
- 10
-
-
That is a nifty tool. I could probably do a fair bit of damage with one of those
-
It was just the cab/tank/bunker section David but when it hit the carpet it rolled! Nice even coverage
-
Finally got all the rivets in place. Then another coat of black to blend them in…. Put the first green top coat on. Then, while examining the finish (and this is going to sound familiar David) I dropped it. On the carpet. Before the paint was dry. Enter the BCDR’s first fluffy locomotive. No photos. It’s too depressing. I picked the worst bits off with tweezers but I’m not sure it’s saveable. The disadvantage of rivet transfers is that they can’t be sanded and it’s difficult to sand round them. Stripping the paint will remove them. Bu**er! Seeking counselling Alan
- 645 replies
-
- 11
-
-
-
Absolutely beautiful!
-
That’s praise indeed! Thank you Leslie
-
It does Leslie but it leaves you with nothing to blame