David Holman
-
Posts
4,359 -
Joined
-
Last visited
-
Days Won
117
Content Type
Profiles
Forums
Events
Gallery
Blogs
Community Map
Everything posted by David Holman
-
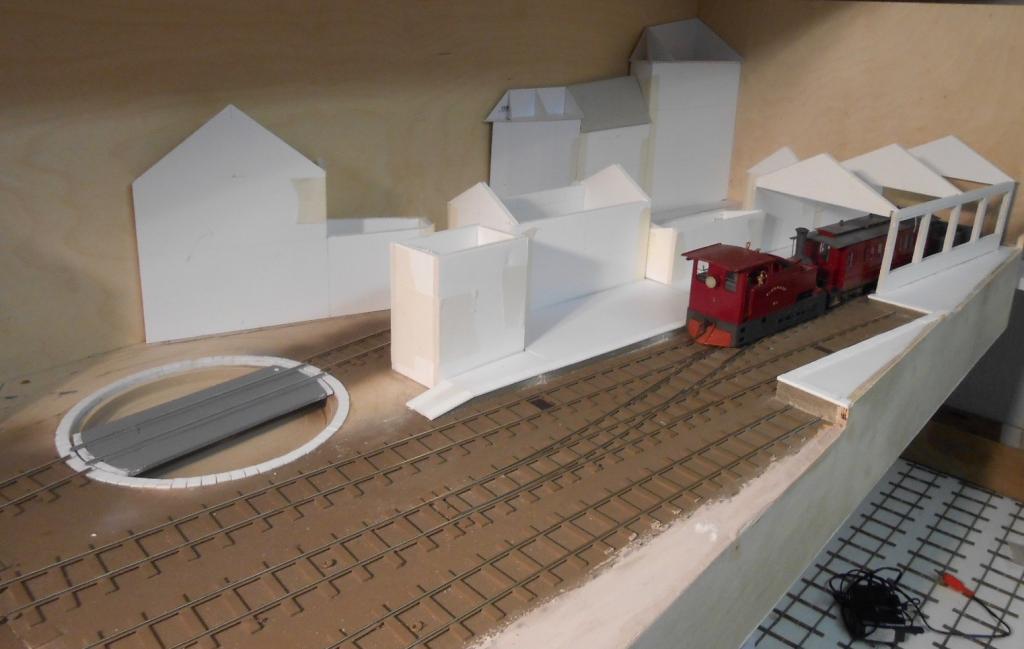
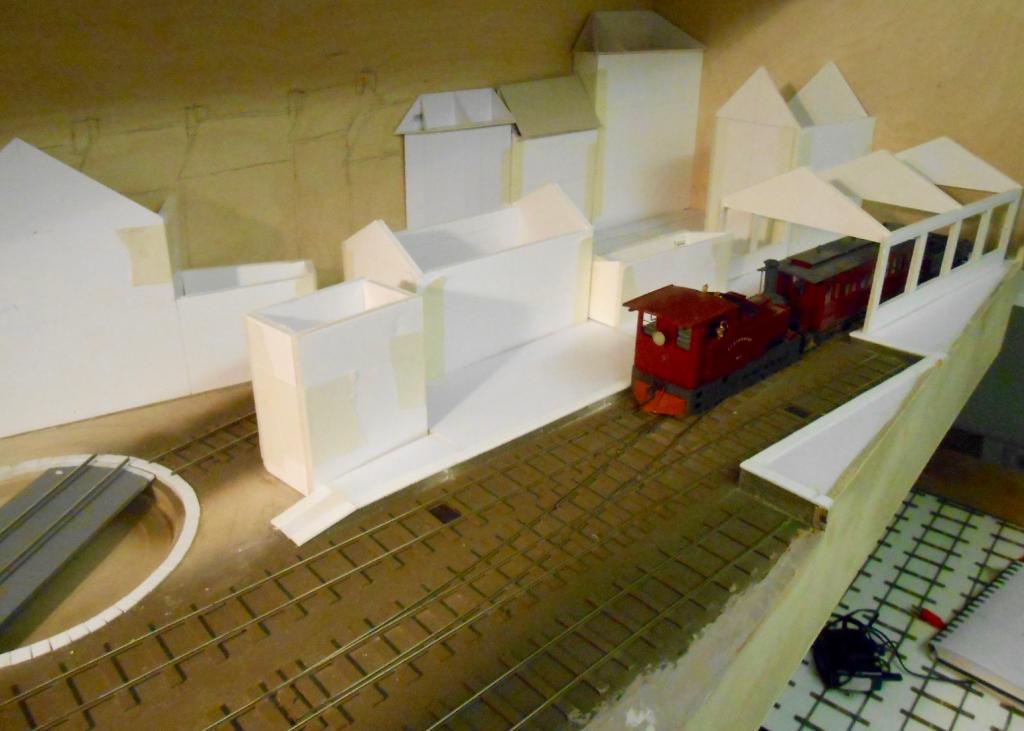
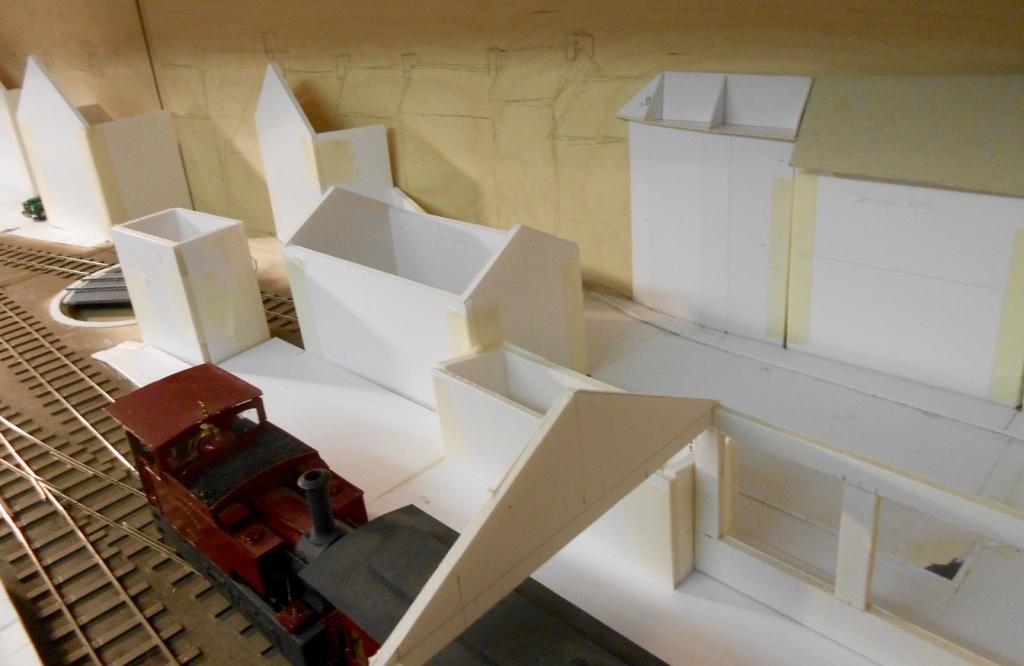
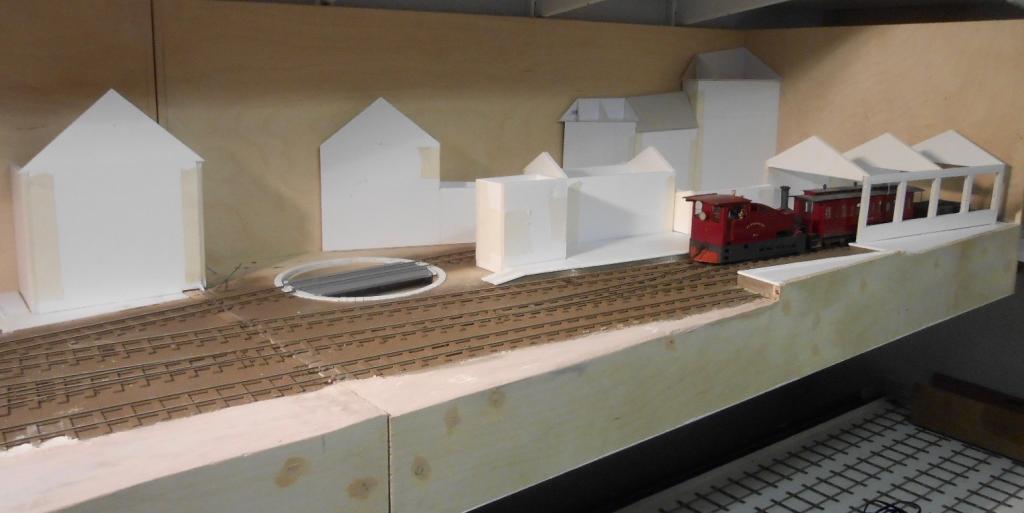
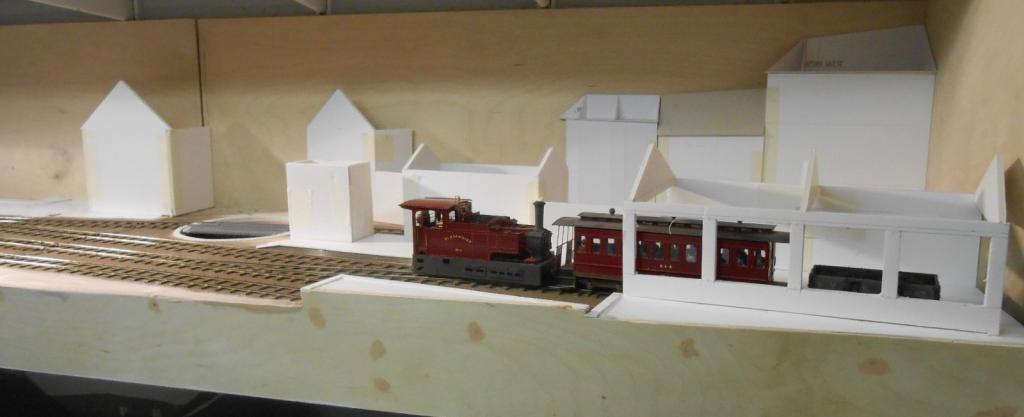
Spent spare time over Christmas doing more to the building shells & trying to create a better overall impression of the scene. Hence, the water tower has been moved behind the loco shed track, the shed itself has been enlarged slightly and several of the low relief buildings altered in an attempt to get the scene better balanced. Among my Christmas presents was a block of DAS clay [i know how to live!], which will feature a lot in the buildings as I want to try scribed stone and brickwork, a la Gravett. See if you can spot the changes from the two pics. The overall roof is yet to be finalised.

-
Great to see someone else doing the SLNCR, DB. No doubt, like me, you have seen how the Alphagraphix catalogue contains much that is useful, inching a kit if Florencecourt station. Don't know how far you have got, but would strongly suggest you consider doing it in 36.75mm gauge. If track building is not your thing, contact Marcway in Sheffield to enquire about custom made points. They did mine on Arigna Town for 50% more than Peco, but as they are self isolating, you can work them by wire in tube & it then costs the same as Peco with a point motor. Slaters do a broad gauge loco axle, while their wagon and coach wheels are easily moved out to 34mm back to back. It just sets the scene right from the start and everything else is no more difficult than anything else in 7mm scale. By all means send me a personal message & I will be happy to help. Depending on where you live, Arigna Town is out and about quite a lot in the New Year - Canterbury, Southhampton, Doncaster & Tonbridge, four shows in five weeks in Jan/Feb, so if you are anywhere near, come and say hello.
-
Noel's post sums it up nicely and as a fully paid up fan of at least getting close to correct gauge, I would always try to make it look right. However, if you have a load of stock already, then finer rail section will certainly help, as will keeping the viewing angle as shallow as possible [ie close to eye level] to hide the gauge problems. What always surprises me is that so few Irish modellers consider EM gauge. At 18.2mm this is at least close to 4'8.5" and with code 75 rail will certainly look better than 00/code 100. I get the impression that folk are put off by doing 21mm gauge as they think it needs P4 standards [ie very fine, replacement wheels]. In fact Irish EM works on 20.2mm gauge, but more importantly 1mm flange ways in the points, which means you only need longer axles and on Murphy's diesels, these are available as 'drop in' items with little, if any further work required. As for 7mm scale - just do it properly from the start, for the small amount of extra work required is more than repaid by the obvious visual effects. Sermon over! One other point is that Code 100 means '100 thousandths of an inch'. A tenth in other words, hence the 2.54mm mentioned early. This is readily related to plastic sheet/microstrip, where 40thou = 1mm, 80 thou = 2mm etc, etc Overall though, whatever works for you is fine by me. It is a hobby and therefore should be enjoyed. Mine comes from the challenge of trying to get things right, but there are plenty of other reasons for doing model railways that are just as valid.
-
Check out Iain Rice's book. Finescale in Small Spaces, Urban Layouts and Light Railways, all have masses of ideas and Iain is one of the best exponents of shunting themes. Has a new book out too, called Cameo Layouts. All from Wild Swan.
-
Basic question: why do my locos sometimes stop running?
David Holman replied to Modelrailwayman00's question in Questions & Answers
Check out the Gauge master adverts in RM. Even their basic models should be a vast improvement. However, note that clean track, wheels and pickups are essential for good running in the medium to long term. A solvent type cleaner, such as meths works much better than an abrasive, though a graphite pencil rubbed on the track is even better and then little if any cleaning is required. -
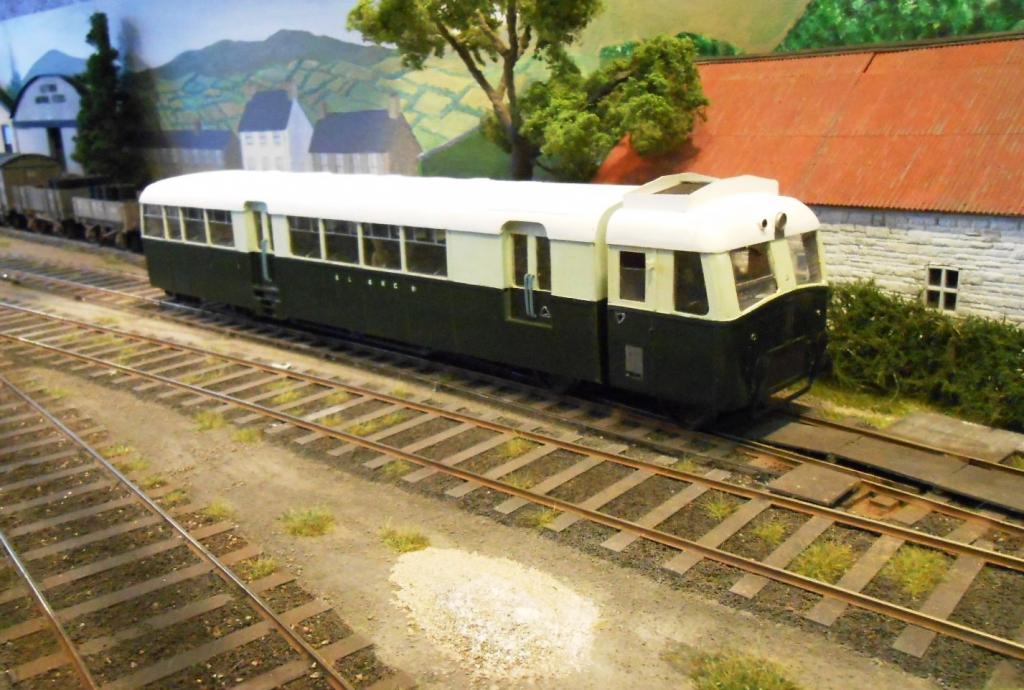
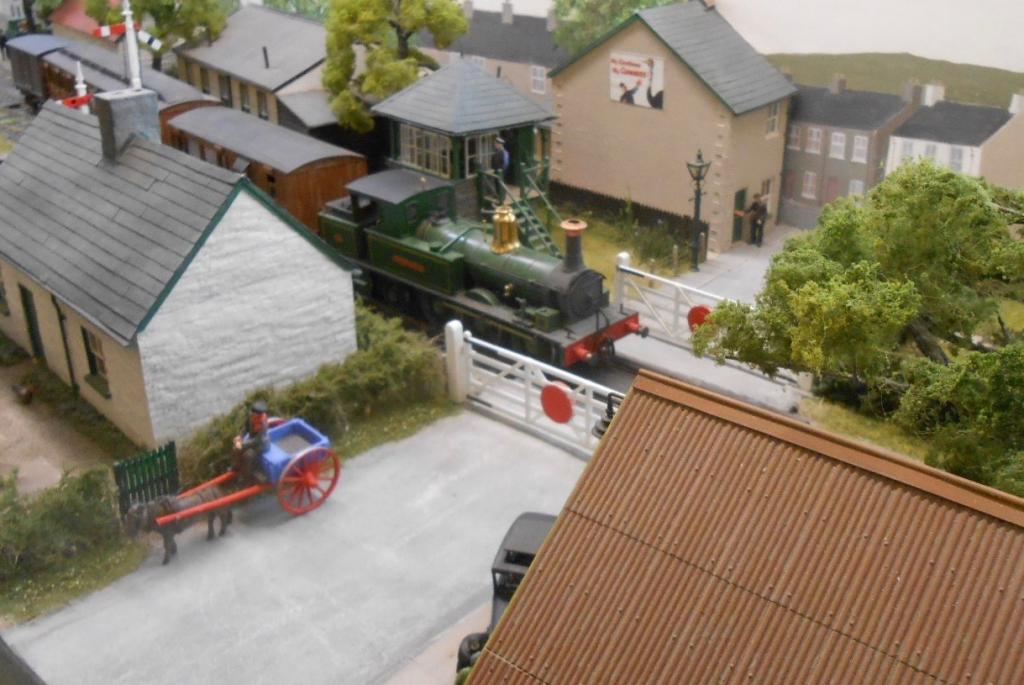
Many thanks gents - stars one and all! Have been peering at various photos in my different books on the CVR, but this one of the railcar certainly gives a glimpse of the guttering. I have some Wills cobbled setts sheets that will do nicely when sliced up as gutting. For the rest will be using tried and tested 'Gravett' techniques, namely pre-painted, pre-cut self-adhesive address labels for the paving slabs and talc on gloss paint for the tarmac. All modellers should note just how smooth the tarmac surface of the road is. No 'texture' needed at all in scales below 7mm [painted card will do] and even talc is pushing it a bit for texture in this scale. Same goes for ballast [always go one scale down at least in my opinion] while rough tracks and yard surfaces need little more than fine sand, even in larger scales.
-
A trifle bizarre and more than a little niche, but here is one for local historians among you... On my new Clogher Valley project, am interested to know what pavements were like in small town, rural Ireland in the pre-war period. In particular, would surfaces be paving slabs (and if so, what sizes), or gravel/tarmac? In addition, did roadside gutters in towns have a concrete slab next to the curb stone, or did the road surface extend right up to the curb. An idea of when town centre roads were tarmaced would be useful too, plus how the road would have been surfaced beforehand. Not much then, so fingers crossed!
-
Mine just appear in the email box and seems to contain something for everybody. Real history buffs will relish in detailed articles on stock numbering, but for me there are two significant highlights. Firstly a well illustrated article of Killybegs in 10mm scale. Stunning pictures of what is clearly a very classy model. Second, a 7mm scale model of the proposed SLNCR Garrett. Well it would tickle my fancy, wouldn't it? Also there is an interesting article on Clogher station, so Christmas has clearly come early for me. Congratulations to Alan & his team on yet another fine magazine.
-
That has always been my view, Rich, though I bow to others' expertise. Nevertheless, CVR 1 went to the CDR and subsequent versions soon got longer, with full width cabs. A likely factor in the SLNCR railcar being driven from both ends was that it was too long for their turntables, so it was a simple case of evolution I'd think
-
Arigna Town - this week's scenery
David Holman replied to David Holman's topic in Irish Model Layouts
Thanks Stephen, I'd forgotten about that. -
Arigna Town - this week's scenery
David Holman replied to David Holman's topic in Irish Model Layouts
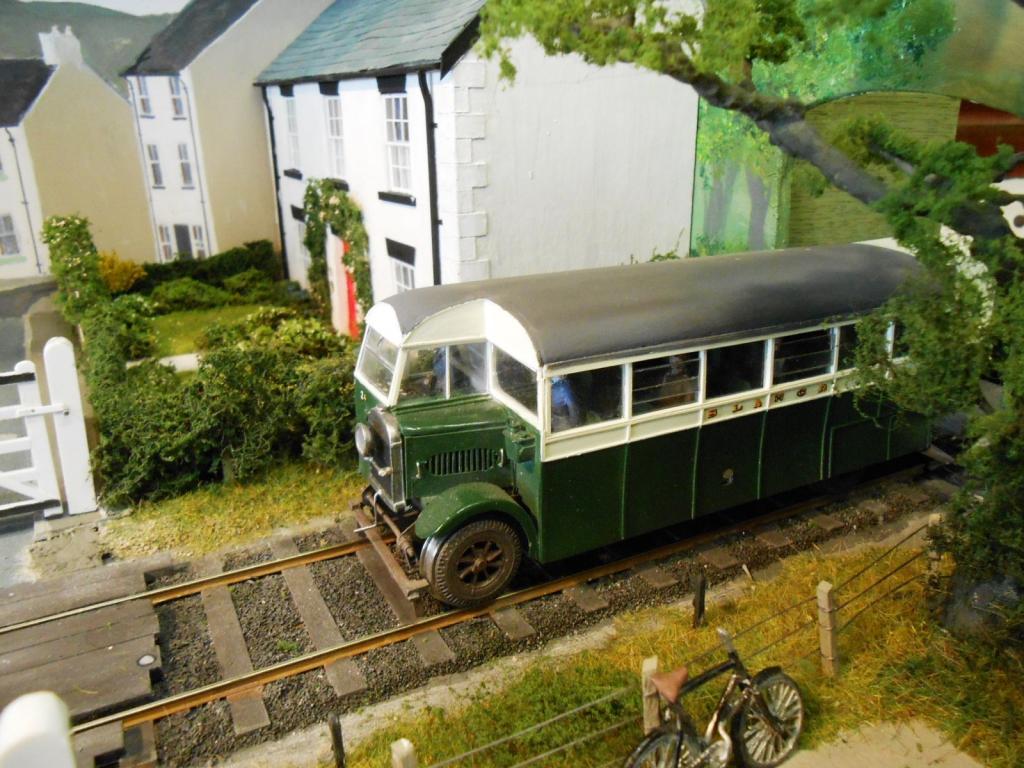
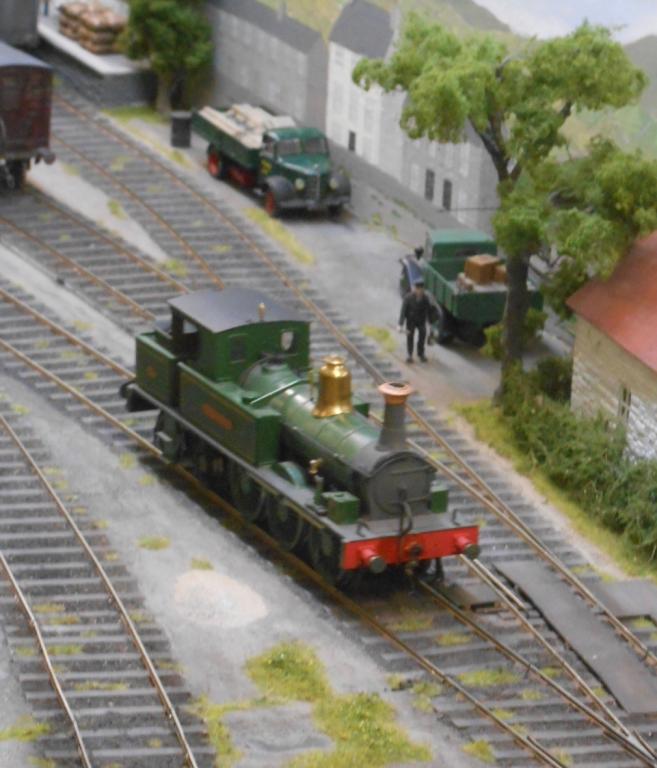
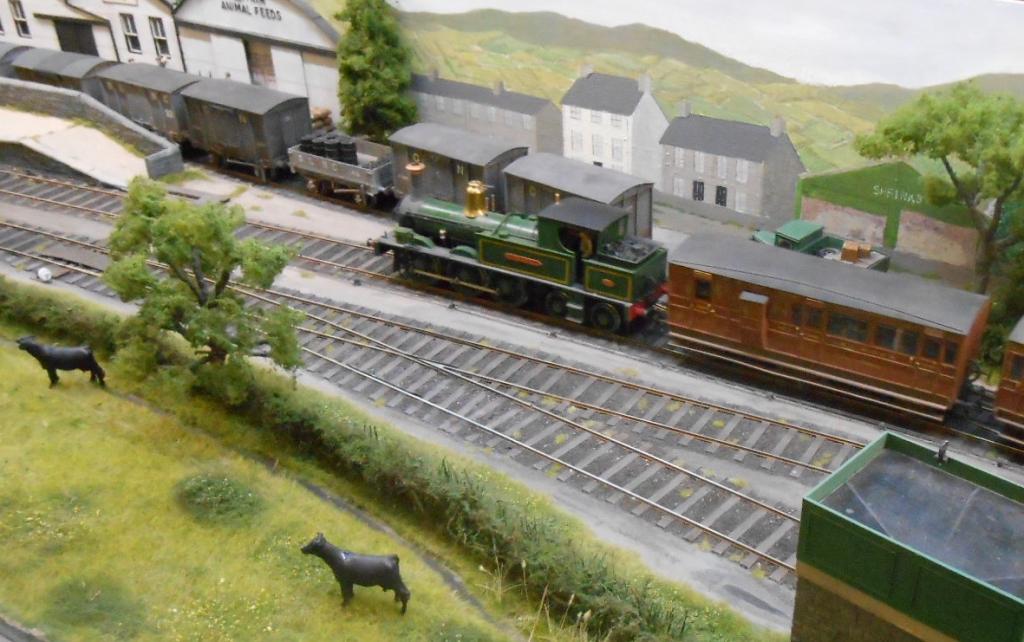
Oops! If the green 'small tank', that is Richard Chown's. He told me he had it professionally painted and am afraid I did not ask about the colour. If the railcar/bus, the green is Ford Laurel Green from Halfords and the cream is Model Colour Ivory acrylic, brush painted -
Is that a gauntlet being thrown I see? At half scale, will be 'only' around 10 metres long, with 1 metre diameter drivers, sitting on 2'7.5" track... Local timber merchants may already be considering exotic foreign holidays!
-
Rather more Donegal than Clogher, I think, Harry. That said, having used the Peco N gauge model, it would not be too difficult to add cosmetic sides to look like loco frames, there is plenty of room under the deck. Guess the unloved Blessingbourne would be favourite!
-
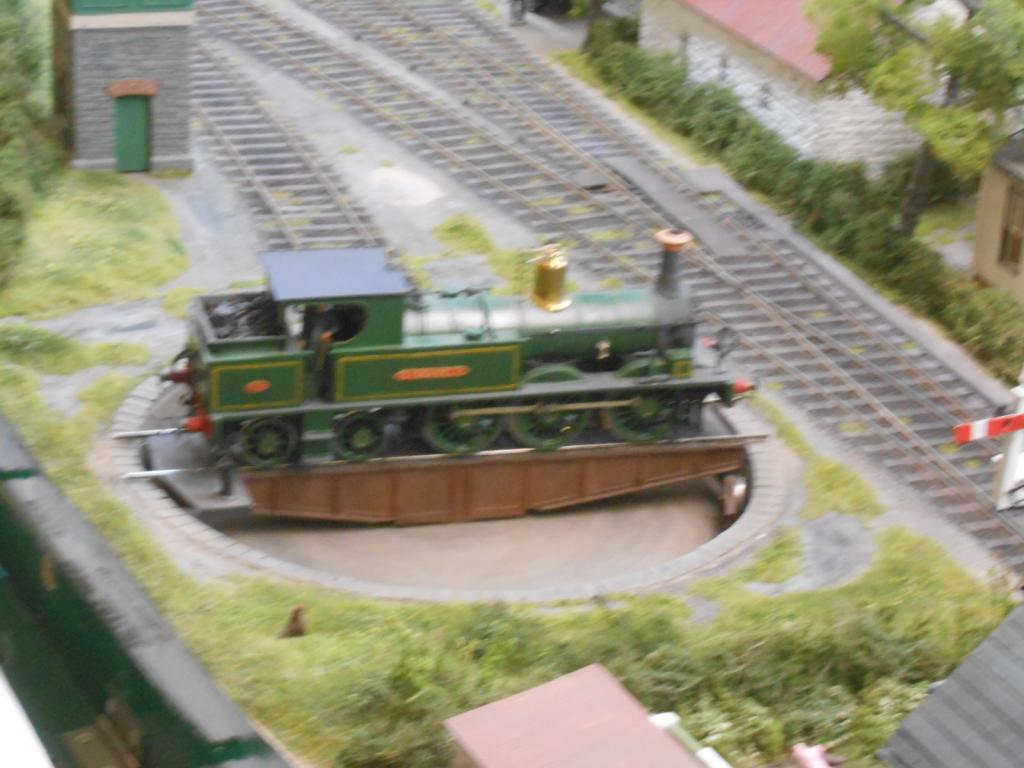
Water tank is right, Paul. It may well block the view and have already wired an isolating section there to park a loco. Am thinking I may have to move the tank slightly and make it smaller, perhaps on a pilevof sleepers, Colonel Stephens style.
-
Arigna Town - this week's scenery
David Holman replied to David Holman's topic in Irish Model Layouts
Straight out of Martyn Welch's book, The Art of Weathering, David. Halfords grey primer to start, followed by their matt black. The top coat is an air brushed mixture of Humbrol 53 gunmetal, 133 bauxite and matt/dirty black in equal amounts. One 95% dry, I then go with weathering powders, using the set sold by Roger Freestone. This seems to make the powders stick without resorting to any extra varnishing. A dusting of talc provides the final finish. Hope that helps. -
Need to check out his next post folks, methinks he is teasing...
-
So, not only are you building a half sized Maeve [in time for Christmas], but the smokebox door is going to have a circular layout inside it! Clearly solves the problem of how to fit the Maeve model in the garden - presume it will be mounted vertically, so when the smokebox door is swung open, the layout is ready to operate? Still track and 'Magnadhesian' to stop the trains falling off when in store too?
-
Good luck with it all GG. This is a project that deserves to do really well.
-
Am amazed that anyone could do such a complex shape in card. They look to have made a decent job too - when ever I've tried such methods, they invariably end up in the bin! Needless to say, my 'B' will not be having a repaint. Looks like it is not articulated? Not surprised - it was enough work in 7mm scale. Can't imagine trying it in anything smaller. Now, how about a 2A...? Doing that in 4mm scale really would be a challenge!
-
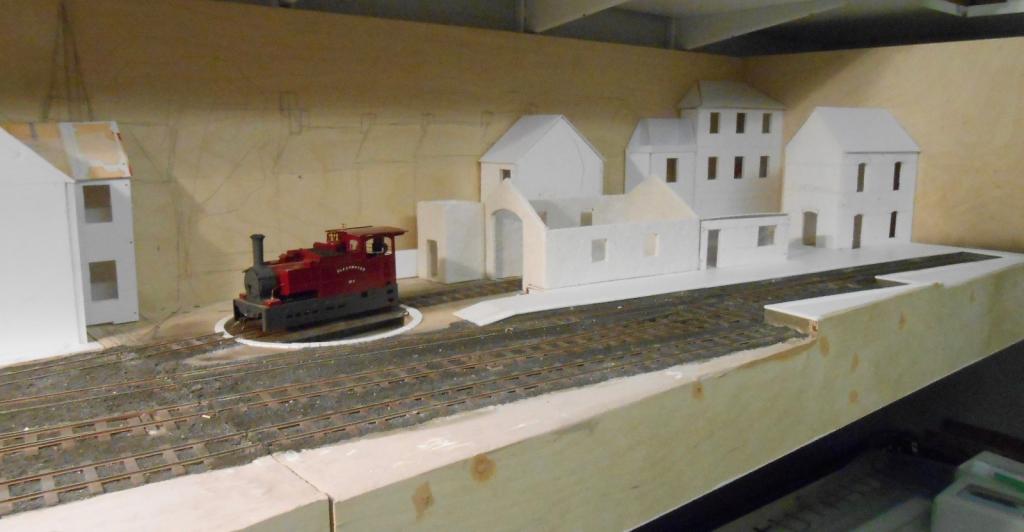
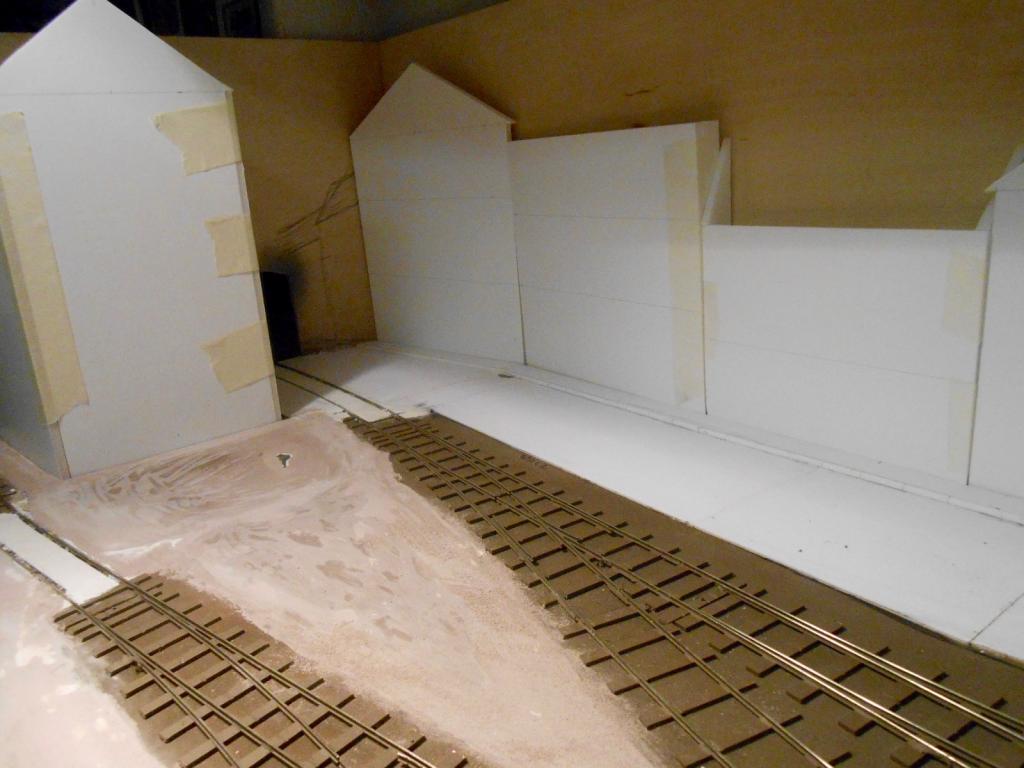
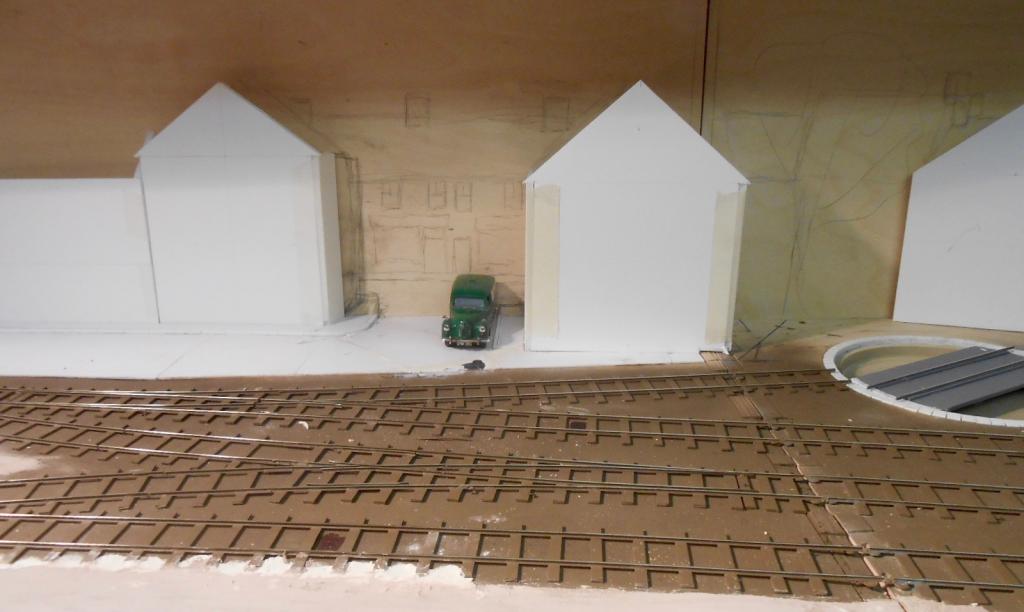
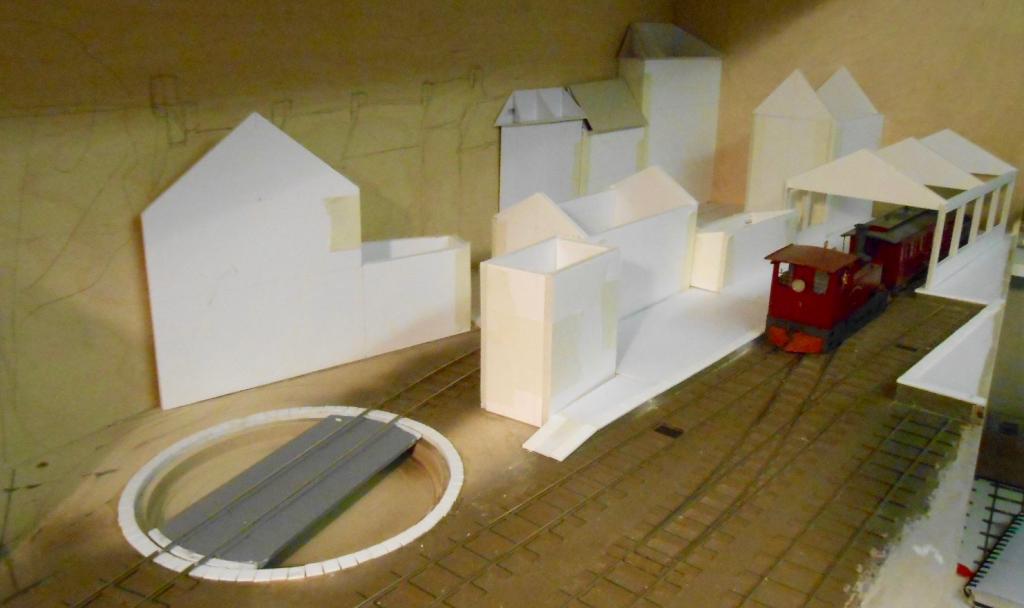
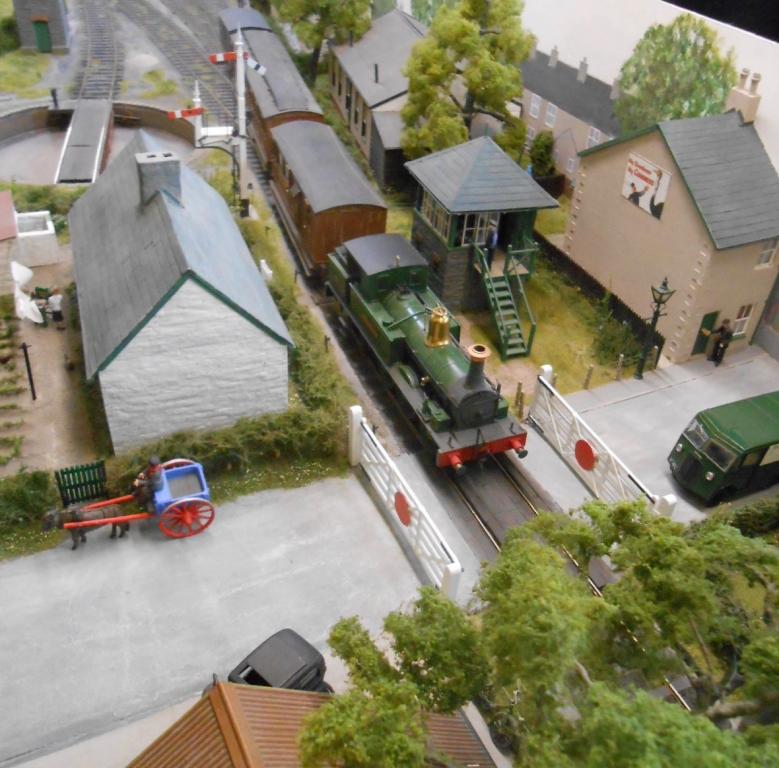
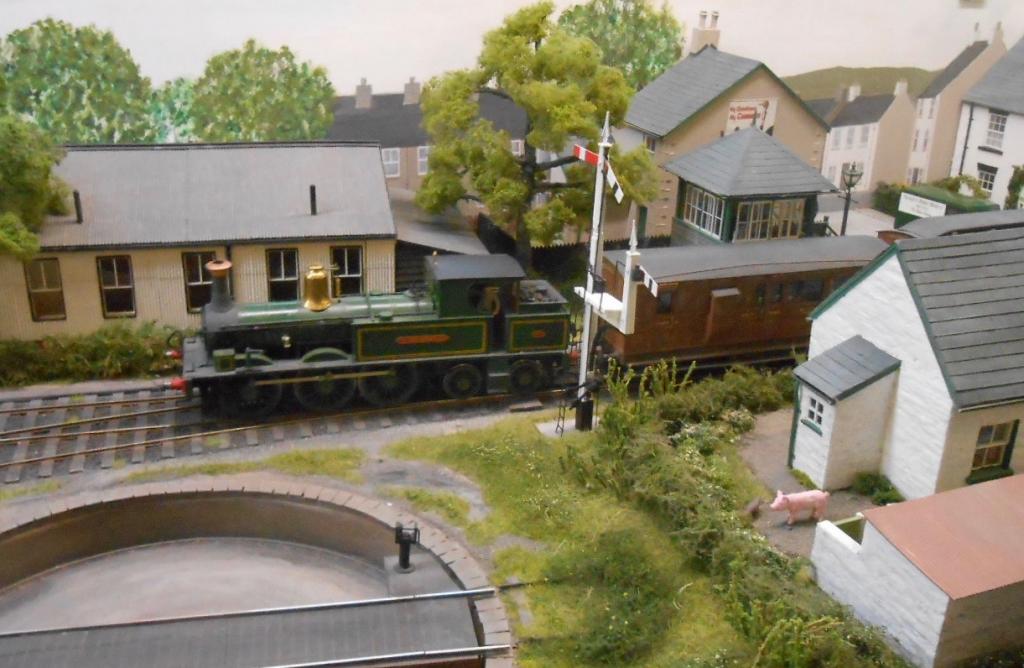
As per my last post, a bit of reflection & reviewing showed a couple of things needed adjusting. Firstly, making the station building/office two storey filled in the large empty space on the right hand end. Secondly, realised that the buildings on the right back scene needed their roof lines to be level, not sloping. in addition, while sketching in the back scene, it soon became clear that the road going off into the middle back scene needed to be slightly oblique to enable the solid buildings to merge with the painted ones. So, from left to right, what we have is a linen/woollen mill covering the exit to the fiddle yard. The track to this leaves the station yard and exits, along the centre of the main street. The low relief buildings will include various shops and houses, based on photos of the Clogher Valley and ones I took myself of those preserved at Cultra. In the centre of the layout, the road turns sharp left 'into' the back scene, by what will be another Railway Bar [as per Arigna]. To the right of this is the station/tramshed, its overall roof will be similar in style to that at Wantage, because I want it to be as open as possible, so you can look through it to the street behind, with several low relief shops/businesses, as per the left hand end. Between the station and shops are the loco shed and water tank, with the railway separated from the road throughout the station area by a stone wall. A half relief building behind the turntable hides the road running obliquely behind the bar and suggesting the two roads link up. Hopefully, you can just about see where I've started sketching in the back scene too. This is one of those situations on a layout where things seem to be coming together - then you realise that with 15 structures to build, it will take a while, though as I repeatedly tell myself - it is not a race and meant to be enjoyed! Hopefully, you can pick out the 'before and after' in the photos.
-
After weekends in Cultra & Manchester, now have a chance to get back to the new project & having done the foundations of the groundwork, next I want to block in the buildings. These are very much part of the overall scene, so getting positions/orientations right is really important. The aim is, even with this small project, to provide several different view points & viewing angles, in an effort to make the scene look bigger than it really is. Therefore have spent a few hours making mockups of the buildings, using foam board. These will form the basis of the finished models. It has been interesting to work out where & how I want things to go. For example, I had not realised how much empty space there would be on the right hand end's back scene, above the tram shed. It has also been useful to minimise the fact that over 50% of buildings are 'low relief'. What I am aiming for is that they will blend [fairly] seamlessly into the painted, flat, back scene. Pictures show how far I've got, with just the left hand street scene to be completed. However, it is often a good idea to take a break and go back to the model a few hours/days later, as things came appear very different to what you first perceived. A bit like trying to proof read your own writing - you tend to see what you THINK you have done & not what is really there. A bit more faffing about and you should start to get an idea of what I am trying to create.
-
Arigna Town - this week's scenery
David Holman replied to David Holman's topic in Irish Model Layouts
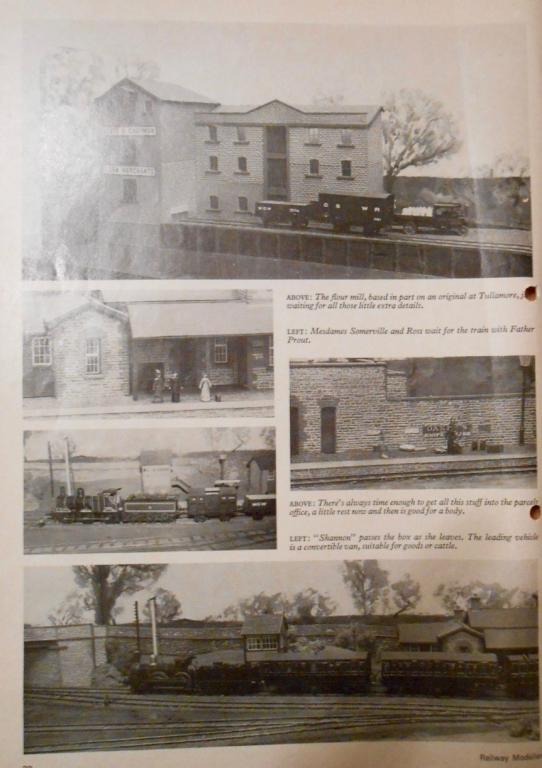
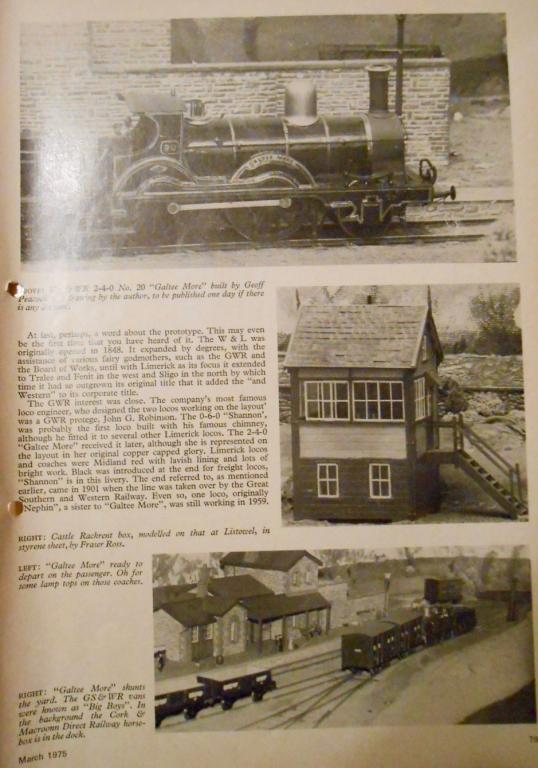
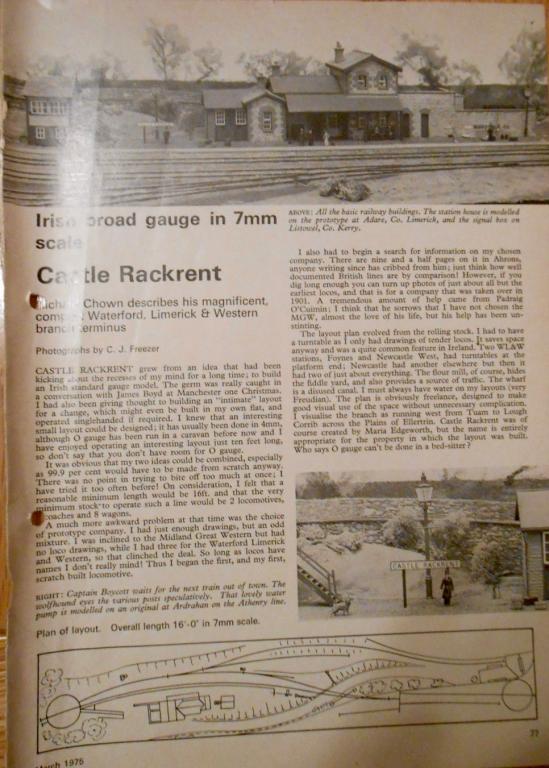
Kind words JB, but 1500 miles on the road for two shows tempers enthusiasm somewhat. If I could have it transported and fly there, now that might be an idea! Managed to dig out my 'preserved article on Castle Rackrent, not from Model Railways, but Railway Modeller. Only three pages, but have put in pictures of each, which hopefully are readable. If nothing else, the track plan bears scrutiny, not least for its elegant simplicity.
-
Arigna Town - this week's scenery
David Holman replied to David Holman's topic in Irish Model Layouts
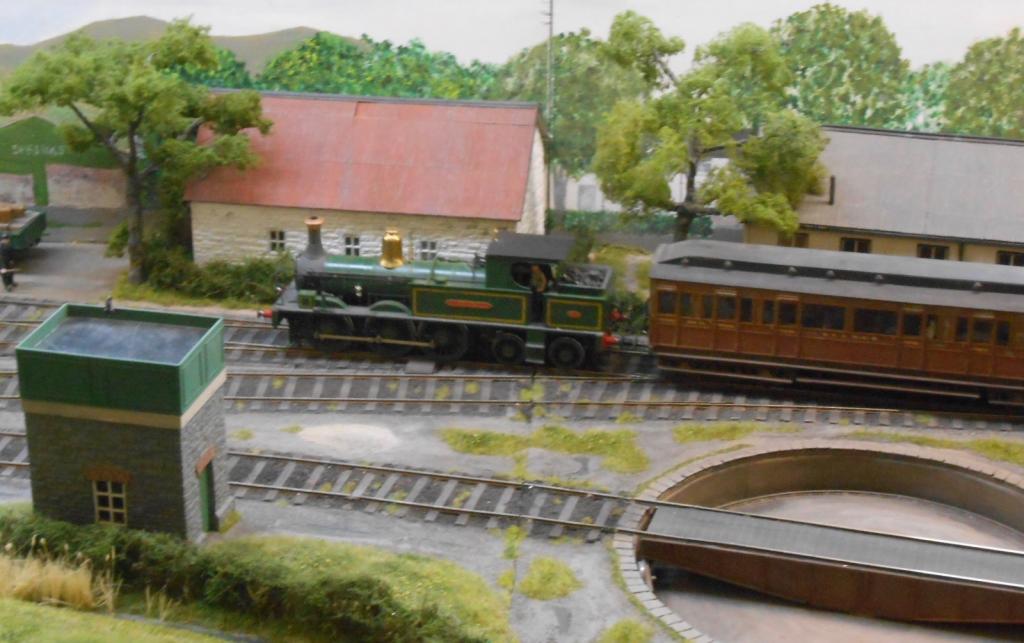
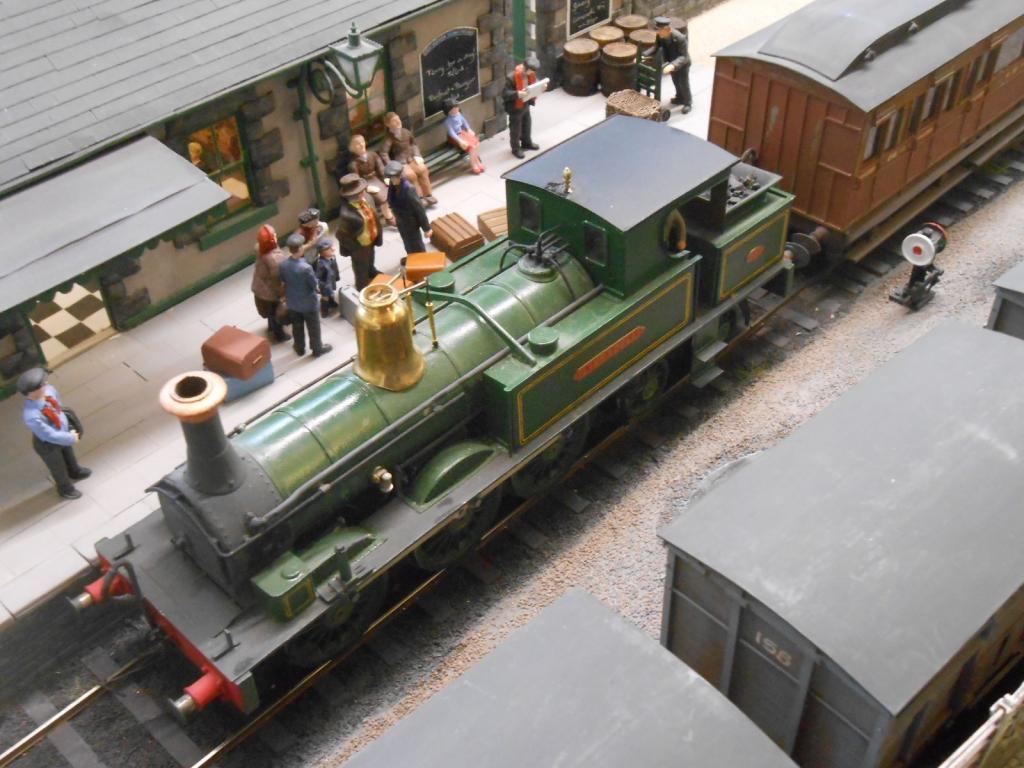
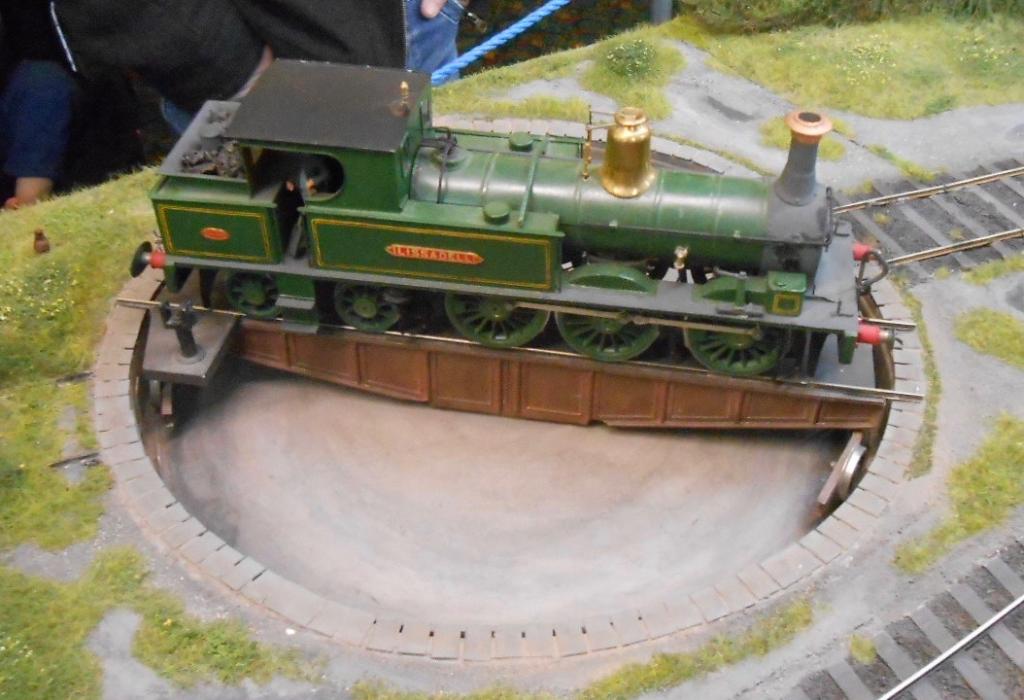
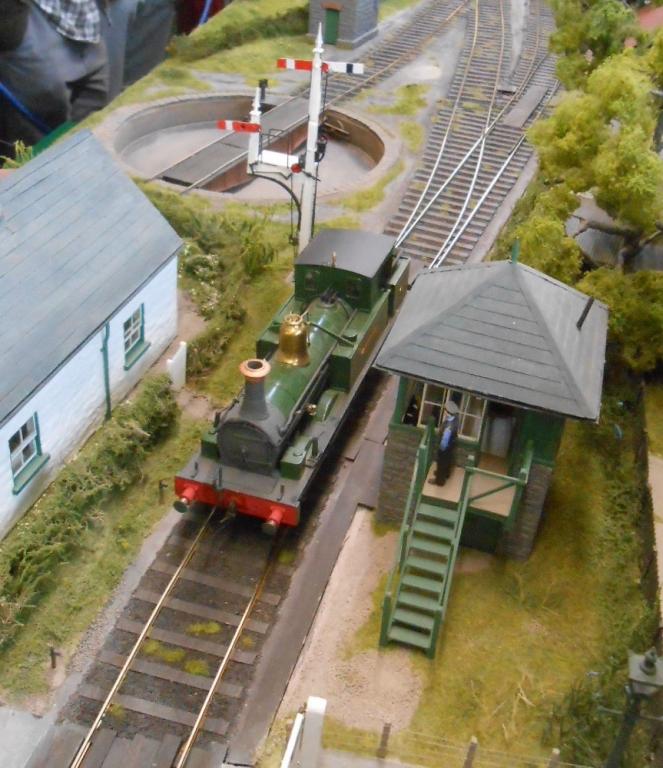
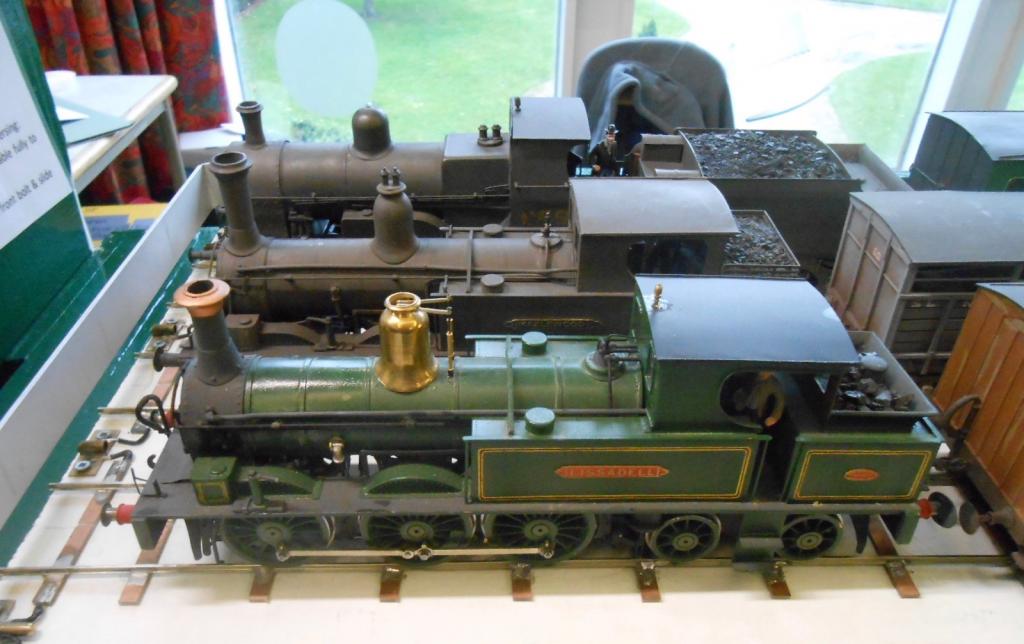
A thoroughly good time was had at Manchester, with the bonus of the fantastic Christmas Markets too. Saturday was VERY busy, with well over 1500 people through the doors. Would guess well under half that on the Sunday. Hence it was often four deep in front of the layout & I was busy talking to people when one gentleman casually asked if I was interested in running his 5'3 loco. I readily agreed, though slightly hesitant after Weshty's experience [turned out to be 32mm gauge] at Cultra. However, needn't have worried because another Lissadell appeared, this time in lined green with a polished brass dome. The visitor explained it was indeed a North Star kit, but adapted to early SLNCR livery & with new chimney & turned dome. Fortunately, I had my camera with me & was about to enquire of his name, for inclusion on the website, when he said 'by the way, I'm Richard Chown'. Now anyone who knows anything about modelling Irish railways will know that Richard began his magnificent Castle Rackrent project back in the early 1970s. It eventually grew to a vast empire, parts of which still get exhibited occasionally. He has also created several other model railways, including Norwegian 3'6 gauge and a big French layout with a 2 metre high viaduct - all in 7mm scale. However, Castle Rackrent was very much the initial inspiration for me to try Irish modelling one day and though it took over 30 years before I got round to Arigna, many of the design features I've included in previous layouts have their source in Castle Rackrent. In my humble opinion, Richard's influence is on the same level as the likes of Barry Norman, David Jenkinson, Martyn Welch and Gordon Gravett. And there we were talking at length and watching his Lissadell in charge of the SLNCR passenger train. During this time, Paul Green also appeared, so at that point 60% of the active Irish BROAD gauge exhibition modellers were present in one place. Only the Ballyconnell Road team and Andy Cundick [Valentia Harbour] were missing, though if I've missed anyone out, many apologies, but do let us know who you are! Needless to say, Lissadell ran beautifully for over two hours, while Richard visited the rest of the show, but [of course], eventually returned to reclaim it. For me, this was the highlight of the weekend and [alongside showing the layout at Cultra], was all I dared hope for as I was building it. Would very much like to meet Neil Sprinks one day too. At the reception on Saturday evening, discovered Arigna had just missed out, by one point, on the exhibition trophy [judged by the club committee]. Given the winner was the fantastic Melton Mowbray North [N gauge], this was still quite an accolade for what is such a niche layout, but my prize was meeting Richard - very much a dream come true. Now face a serious conundrum, as there is an invite to go to the Glasgow Show in February 2018. In reality, way too far to go & with it being a three day show, would mean 6 nights away. Then again, there might be a chance that some of Castle Rackrent's trains might appear on Arigna & just how cool would that be?
-
Absolutely! For its time, just amazing, given what was available. Even drawings were scarce and no internet, remember! Also, the track plan was a work of genius and has rarely been bettered in terms of fitting so much in a small space.
-
D&B/County Donegal Drewry Railcar Interior Query
David Holman replied to RichL's question in Questions & Answers
Hopton 1:14 is what I have always understood. The unlimited speed sign a bit tongue in cheek, methinks, given the locos available. North London 0-6-0T, Webb Radial 0-4-2T and, later, Austerity 0-6-0T. Doubt if any of these could get beyond 50mph...