David Holman
-
Posts
4,359 -
Joined
-
Last visited
-
Days Won
117
Content Type
Profiles
Forums
Events
Gallery
Blogs
Everything posted by David Holman
-
Mixed feelings. They have done a wonderful job on the pictures and plans, but splitting my notes in two has made parts of the article seem a bit muddled. Things are mentioned which will not be in text or pictures till October. Also, had the info about the Sligo in the first paragraph, as not everyone knows the line. I must bear some of the blame for writing too much! Overall though, it is still a nice buzz to see your own stuff in print in the biggest selling UK model railway mag.
-
Good modelling Nelson, but the subtlety of the finish is what really sets it off. Hard to believe it is 4mm scale.
-
Arigna Town - this week's scenery
David Holman replied to David Holman's topic in Irish Model Layouts
Many thanks JB - especially for your help with the colours -
Will commit total heresy here, I suspect. DCC certainly has its uses, but am finding that operating Arigna Town [very much analogue] a refreshing change. No dialling up loco addresses or worrying about chips shorting out on brass locos. Just set the direction and turn the speed dial. OK, no sound effects, but having recently seen a diesel loco depot where all the stock was in 'tick over' mode, the resultant white noise soon has me walking away. Felt sorry for the layouts nearby, who had to put up with the racket all day.
-
Arigna Town - this week's scenery
David Holman replied to David Holman's topic in Irish Model Layouts
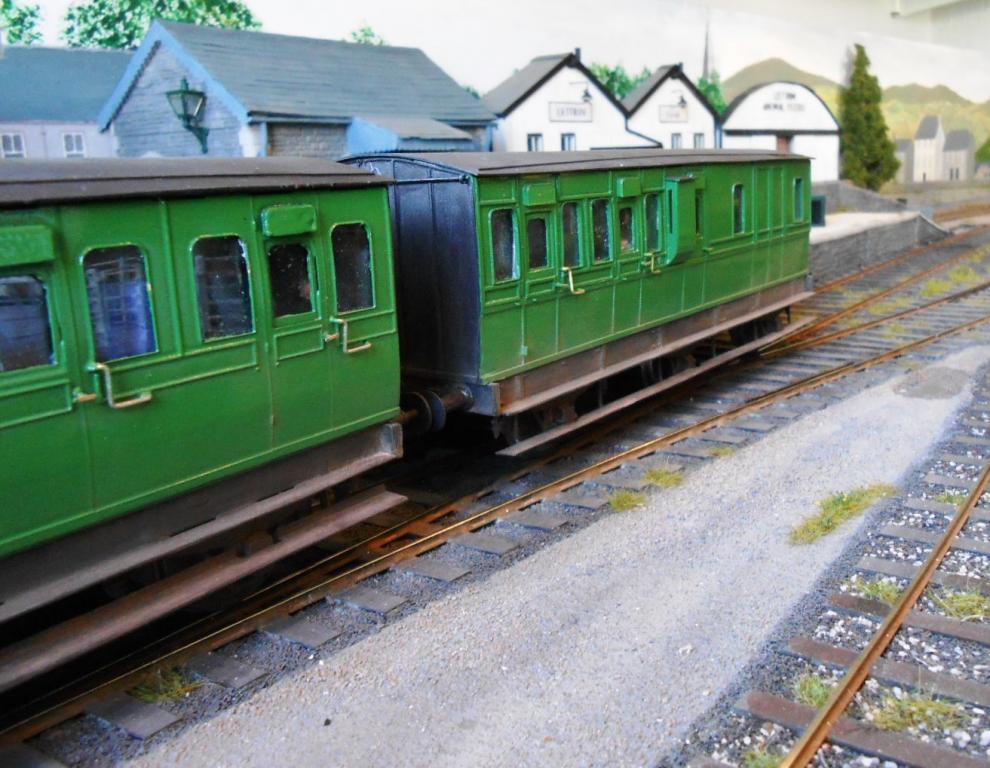
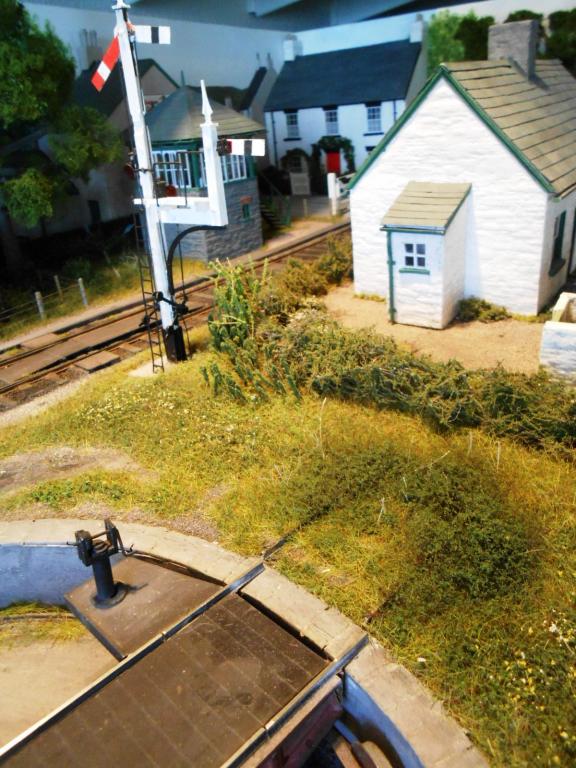
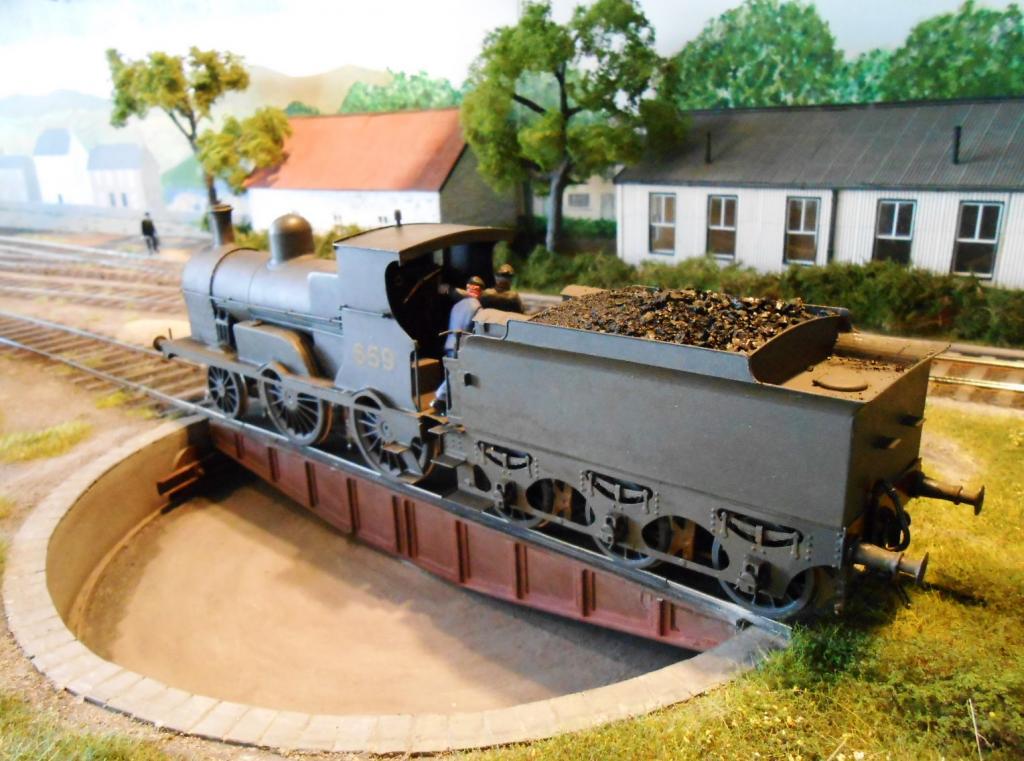
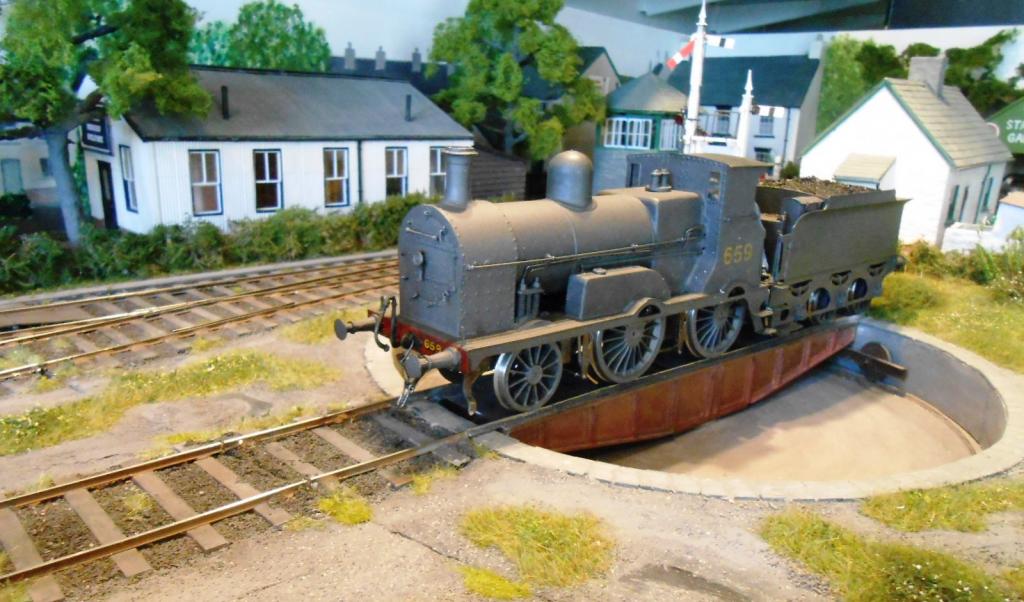
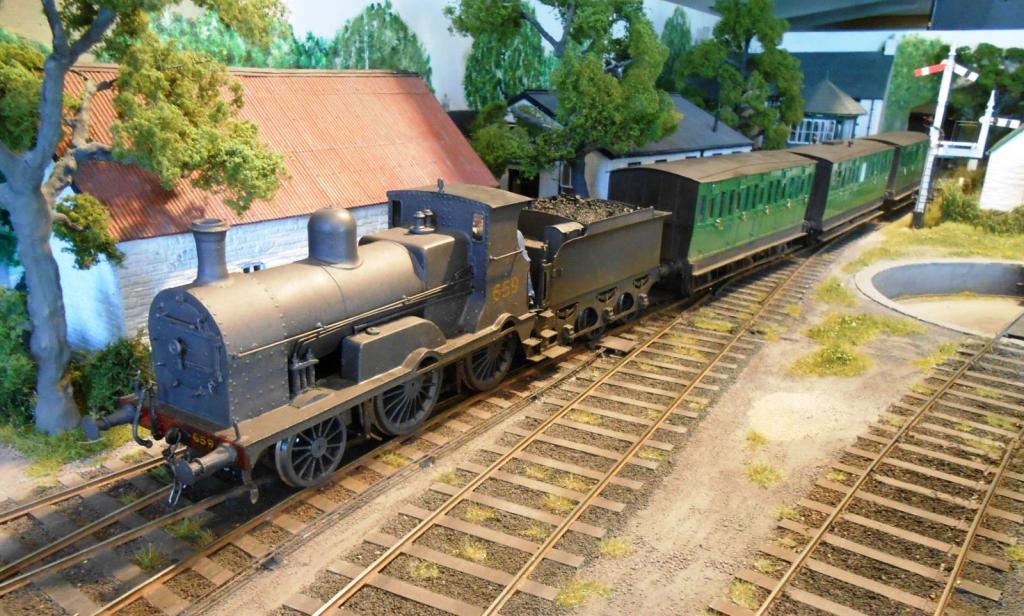
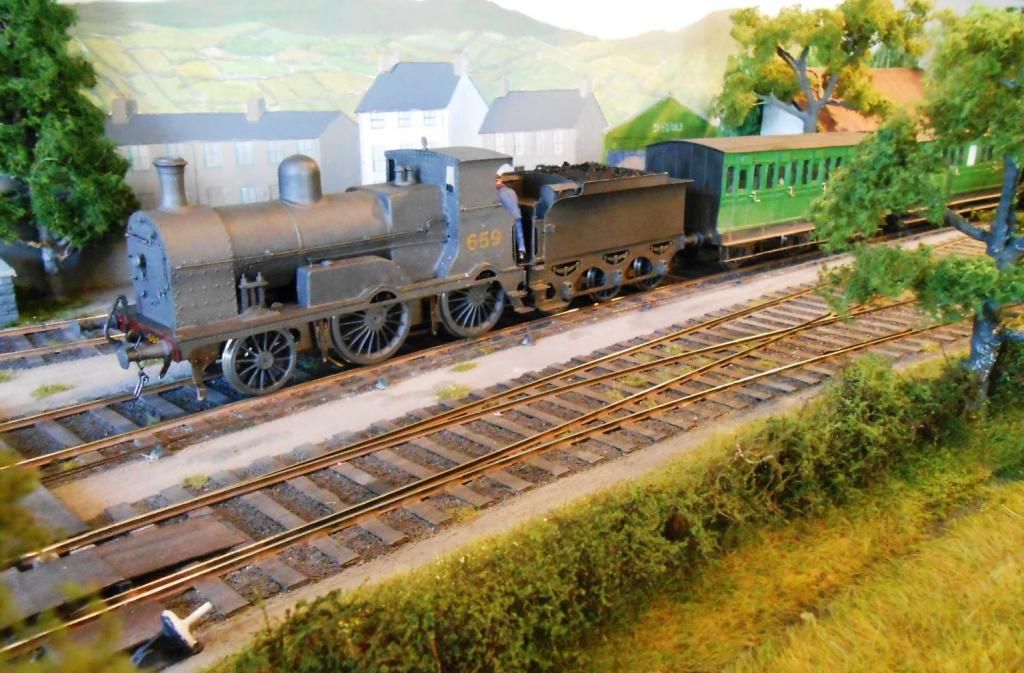
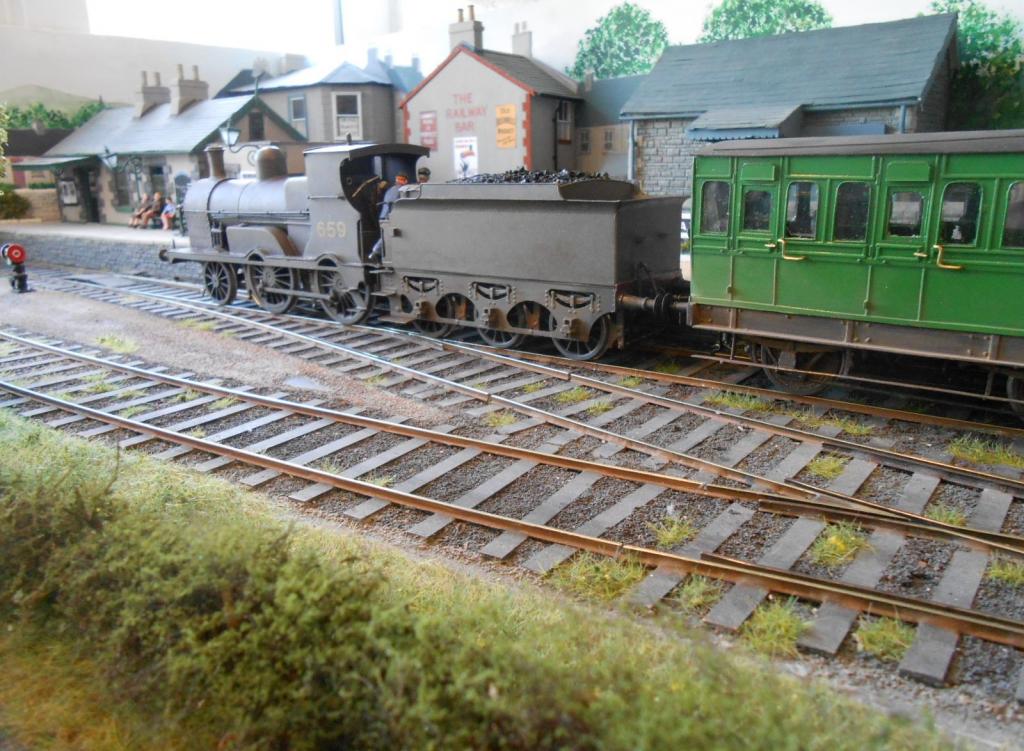
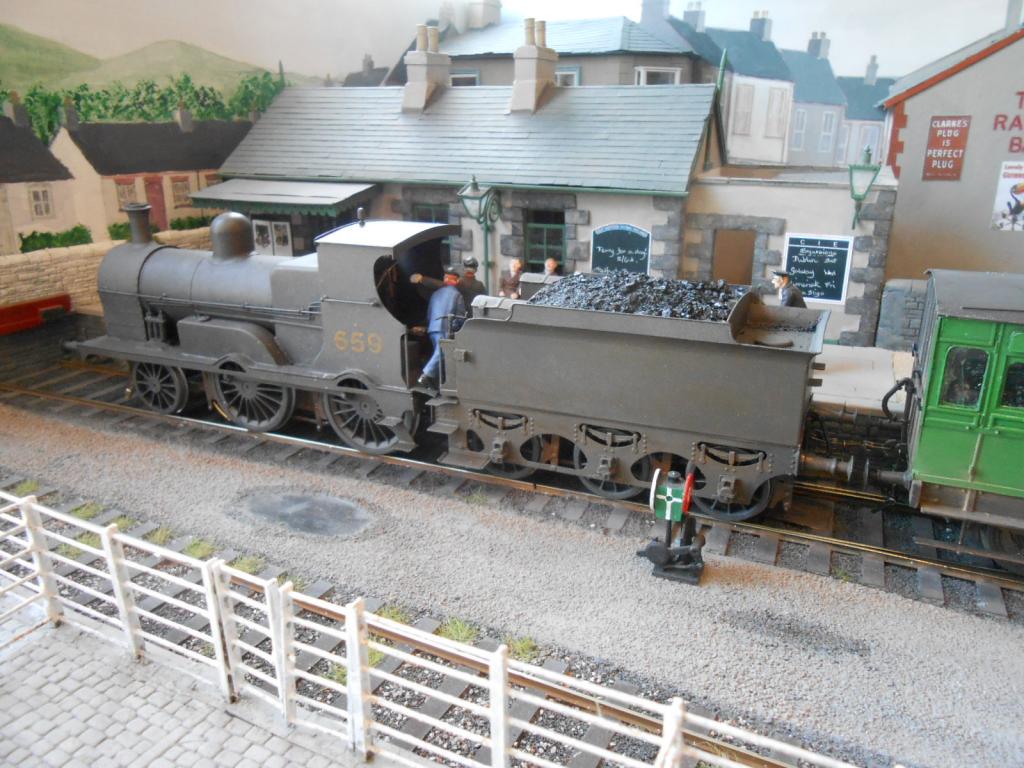
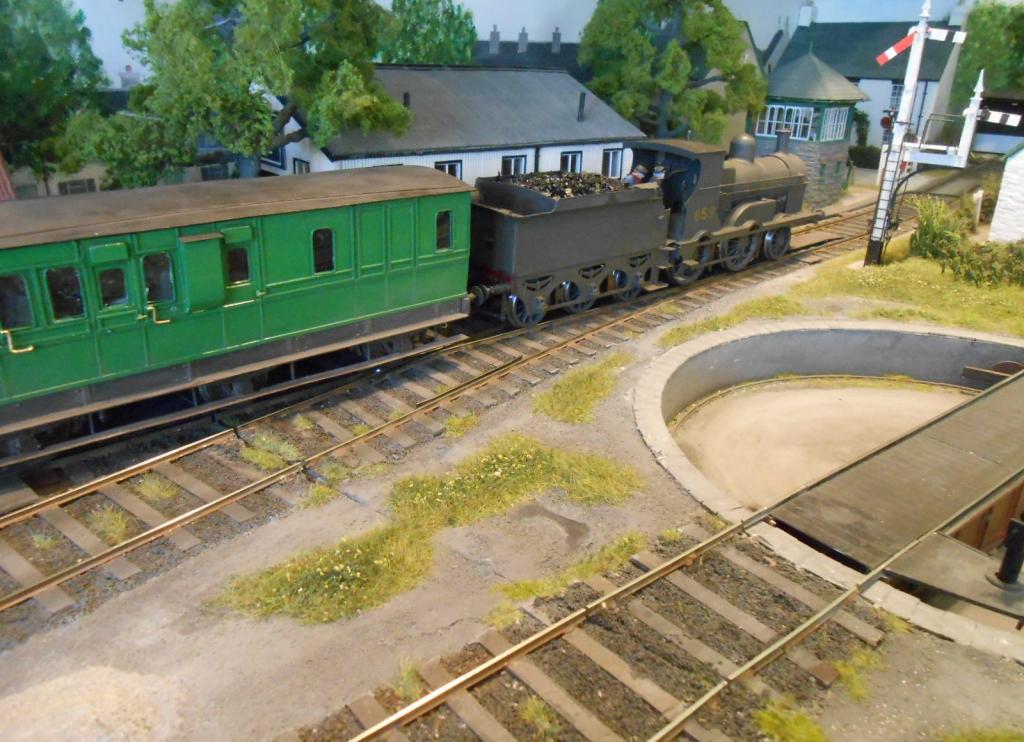
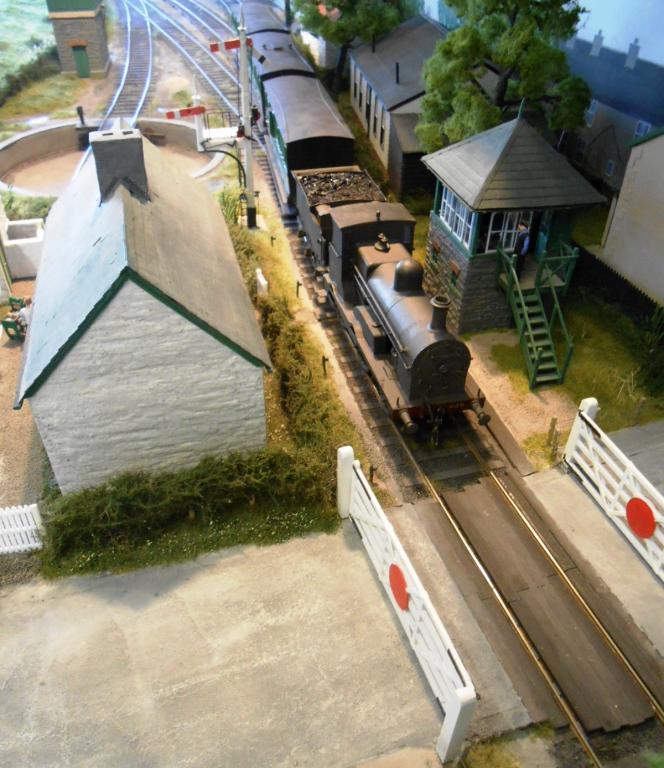
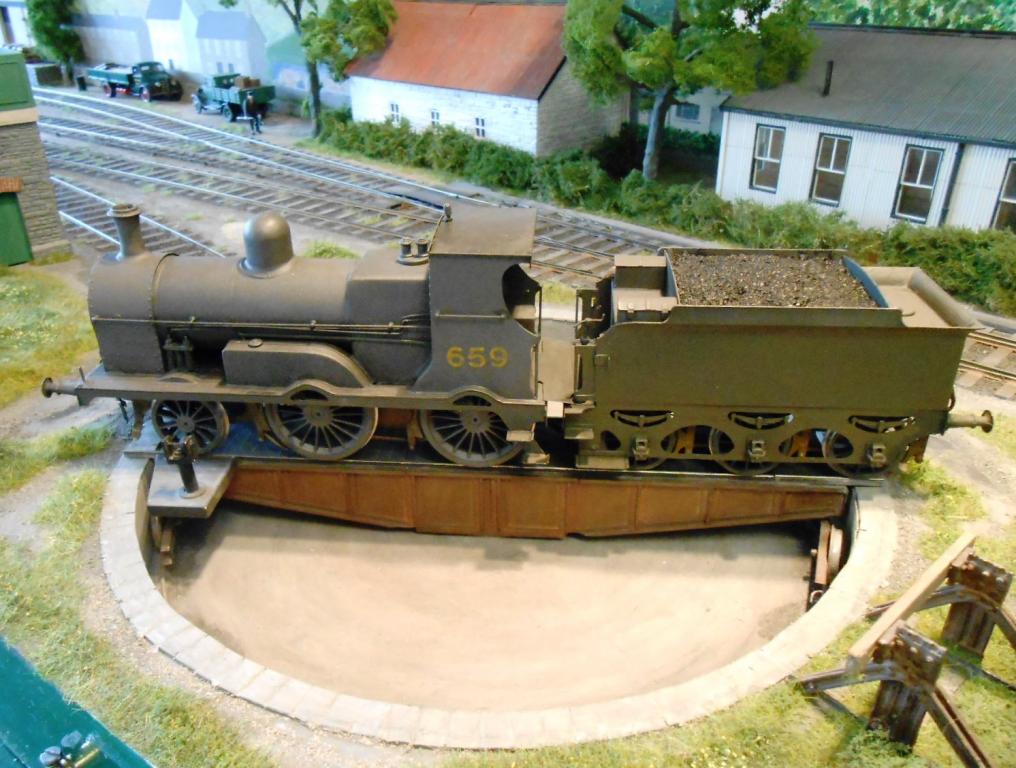
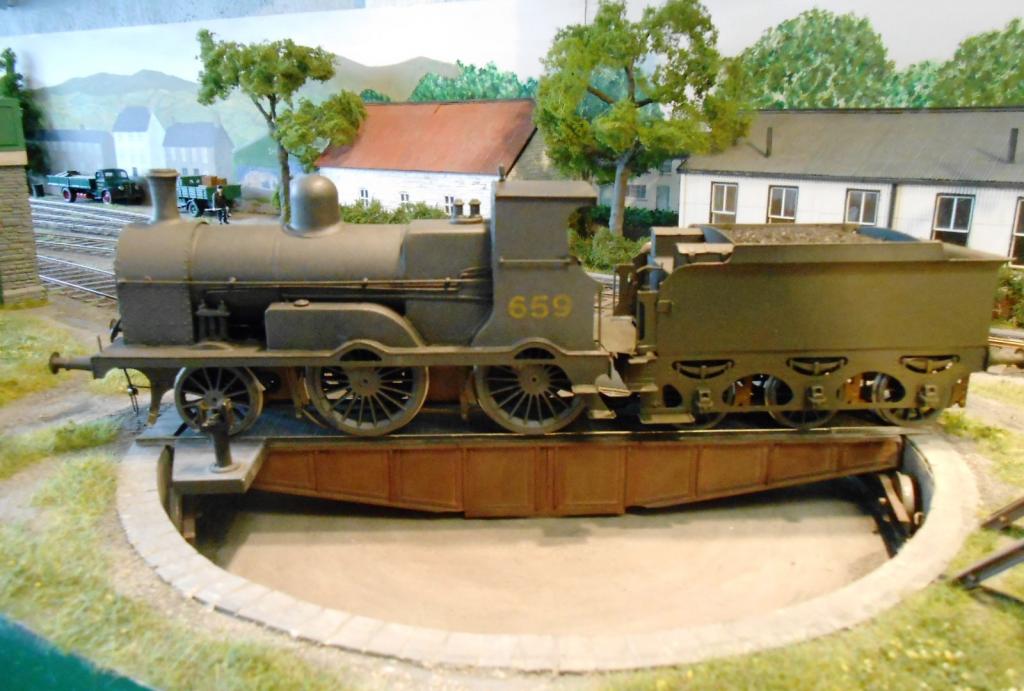
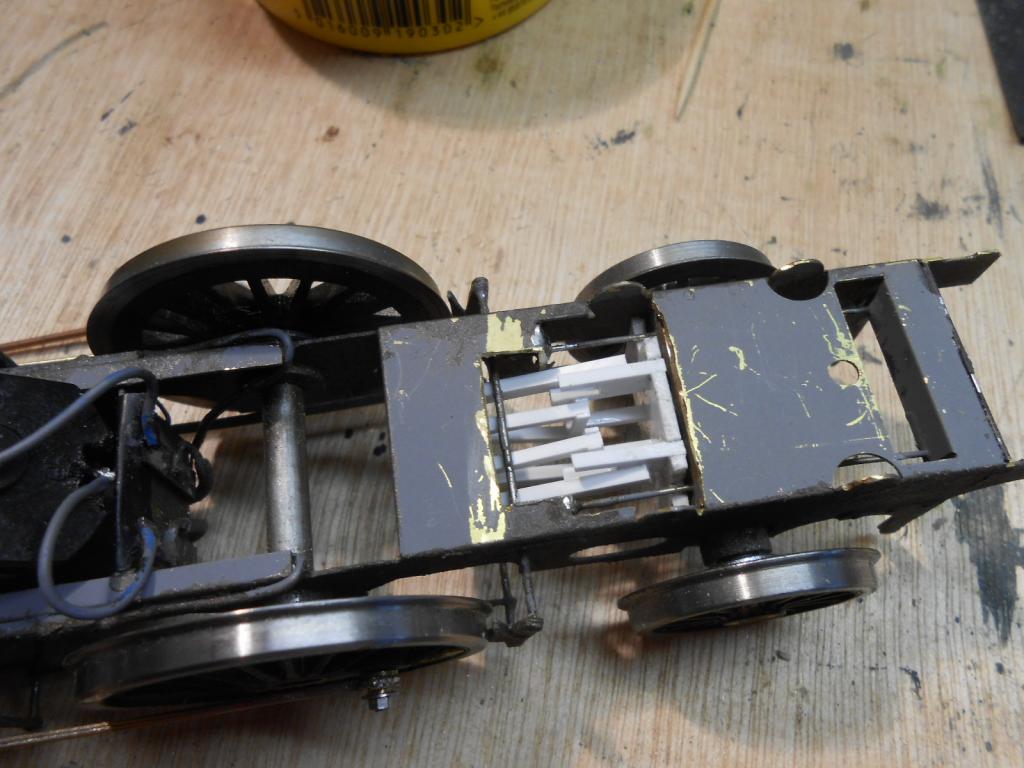
Not much happening on the layout itself these days, but the arrival of the new excursion train has meant the buffer stops beyond the turntable have had to go. This is because though the G2 2-4-0 [Tyrconnel kit], fits on the table, such are the overhangs, the buffers needed moving. considered shifting them back a few [scale] feet, but this would have meant digging up some of the scenery, so in best Sligo [or indeed, Donegal] practice, have decided to do without them. Not sure the crossing keeper's pig is too happy mind, his sty is right in the firing line if a loco should overshoot! The new excursion train has largely been described in the workshop section. However, a couple of points to note are as follows: The loco ran nicely, but soon found it would not pull the skin off a rice pudding. Traced the problem to several sources.Firstly the tender pickups were causing too much drag, then also realised that the nickel silver wire providing a degree of spring on the front pony wheels was lifting the front drivers fractionally off the track. Tried to fix by filling the firebox with lead, but not effective until I replaced the spring wires with thinner material. Also had to do a fair bit of work on the coaches, as their wheels were rubbing on the [cosmetic] axleboxes. This was also down to the wire springing, used to give a degree of flexibility in the 6 wheel chassis. Adding small blocks of plasticard to the underside of the coach body has limited the movement here, though the coaches are certainly heavy and not as free running as I would like. Nevertheless, the now well weighted loco has enough oomph to haul its intended three coach train. This is meant to represent anything from football/hurling specials to Galway, or pilgrimages to Claremorris [for Knock] and Westport [for Croagh Patrick]. The photos also show the repaint given to the coaches after some gentle [& valid] chiding from JHB & Mayner. The were originally far too dark, so resprayed them a lighter green, then removed the roofs to replace the glazing. Finished off with black roofs [instead of grey] & solebars, plus a bit of weathering. Hopefully now looks the part.
-
Lovely work AND a brass brake lever... First step towards etched brass perhaps? There again, when a model turns out this well, who cares what it is made of!
-
16' x 2' JB. Or 4.8m x 0.6m in new money. Overall though, it needs about 16 x 4 because of the sliding and rotating fiddle yard. The scenic section is 3.6 x 0.6m Will be in the April Railway Modeller in a couple of weeks!
-
Can only agree with your sentiments, especially the measuring and reading, though still need to do that twice as well! However, do find cutting out parts from the fret helpful if I do a few at a time. Use either a permanent pen or masking tape to label the part numbers. For me it speeds up the process. Not for everyone though.
-
They do indeed John. However, as an essentially one engine in steam line, the interlocking will be purely imaginary I'm afraid...
-
Looking back, I'm not quite sure myself how I did it in that time, Alan. However, I logged each session on the model and here is how they added up: Day 1: cutting out tender parts - 1 hour Day 2 & 3: soldering up tender body & frames - 4.5 hours Tender therefore completed in 5.5 hours Day 4: loco chassis - 2 hours Day 5: add rods & rolling test - 1 hour Day 6: footplate work - 2 hours Day 7: pickups added to loco & tender - 2 hours Day 8: paint chassis, then assemble cab & firebox on footplate - 3 hours Day 9: rebuild splashers to fit chassis & wire up motor gearbox to test - 4 hours Day 10: Boiler smokebox unit, plus general clean up - 5 hours Day 11: adding cast detail items [chimney, dome etc] - 2 hours The basic loco body structure therefore took 21 hours & the whole loco a total of 26.5 hours Painting preparation, including detailing the smokebox door took 7 hours Further fettling, painting the wheels & backhead took a further 4 hours Final painting, weathering & lettering another 5 hours, bringing the total so far to 42.5 hours So - must have miscounted earlier & there is still a bit more to do, but even so, the final tally should come in at under 50 hours. Not bad for a tender loco, but then it is a fairly simple loco, with not a lot of extra detailing. In the past, a lot of 7mm locos have run to 100 , hours each or more, though much depends on stuff like outside valvegear, external plumbing, plus things like lining, lettering & fancy paint job.
-
Would the Sligo have that many spare sleepers? A nice addition to the prototype for everything file and no wonder HF limps with those in his pockets. Not sure where I got witness coat from. May have been Martyn Welch's weathering book. Will certainly be the thing to wear on a protection programme...
-
Thanks chaps - though a good coat of paint hides a multitude of sins! Some of you may have noticed that, while the G2 wheelbase fits ok on my turntable, the loco currently fouls the buffer stops. Seems I have two choices - move the buffers back a bit, or remove them entirely. Thus far, have failed to track down any photos of SLNCR buffer stops - maybe they were like the Donegal and largely did without. The latter is the easier option for me as would only need to titivate the foliage a bit. Moving the 'stops back is a lot more work as will have to dig into the scenery a little. No prizes for guessing what I'd prefer, so any info on getting away with the easy route is welcome
-
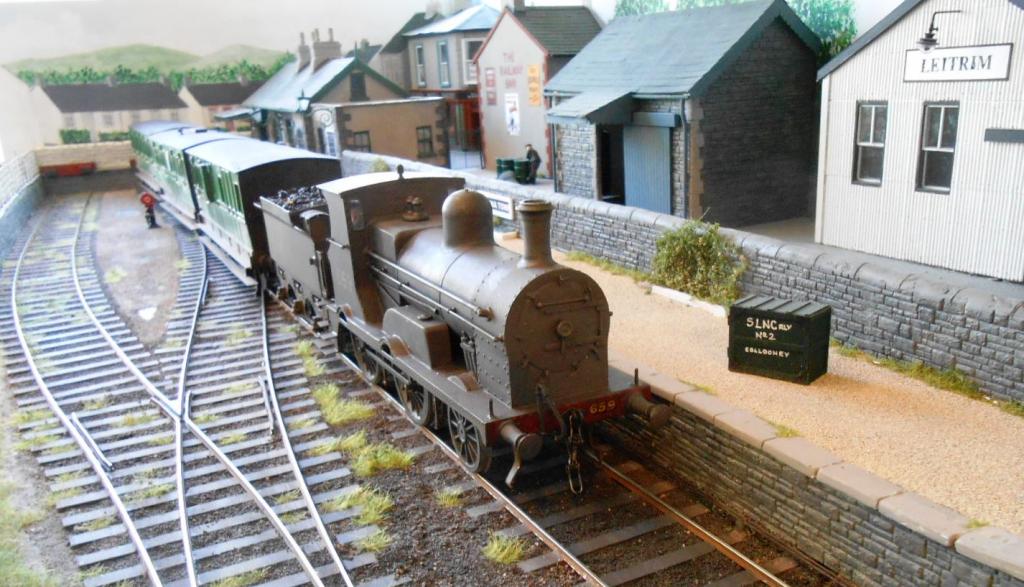
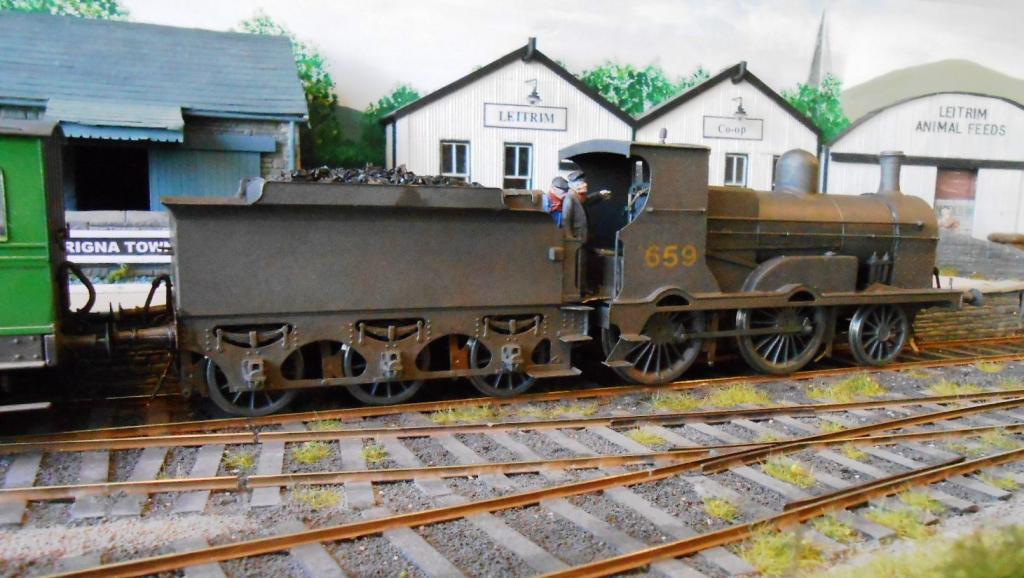
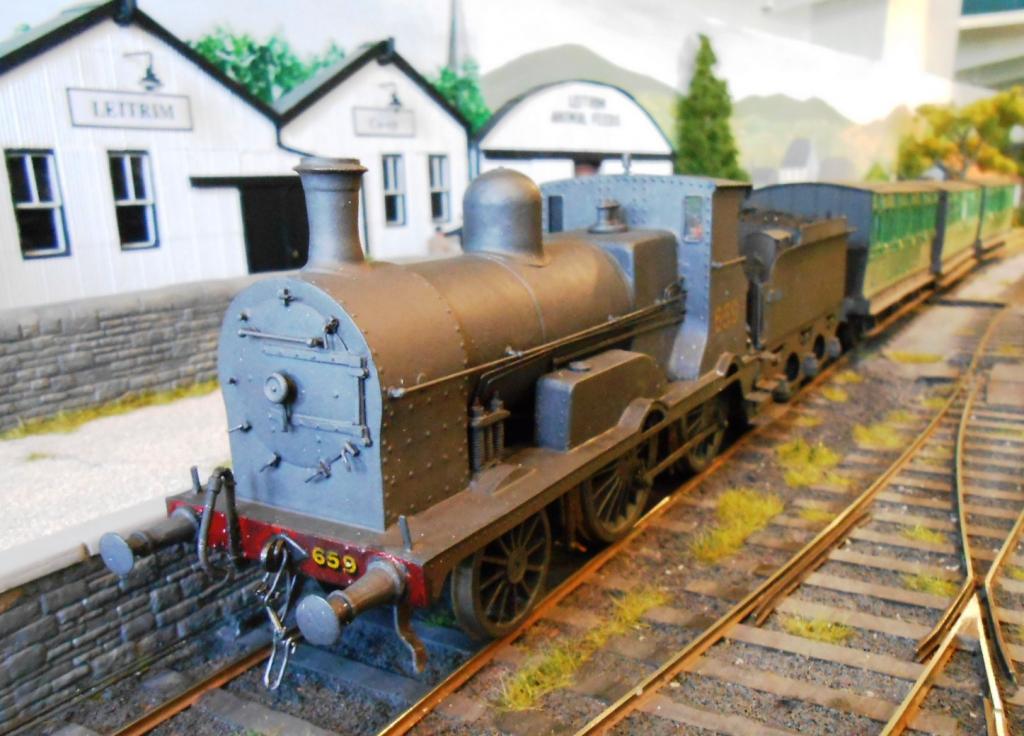
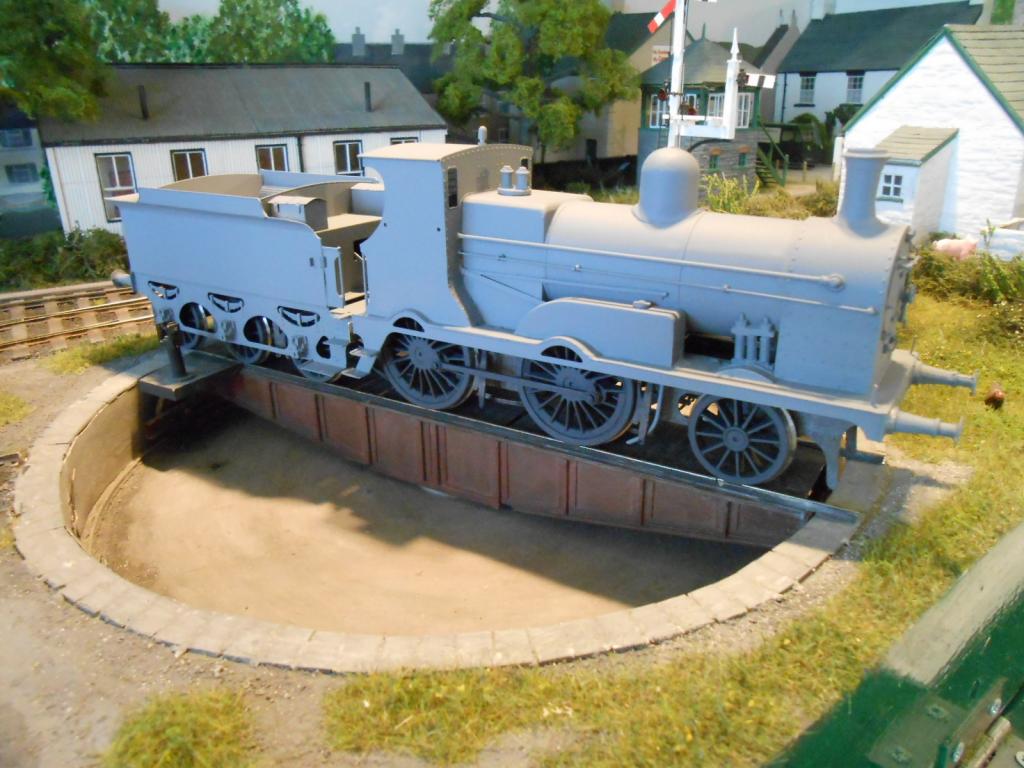
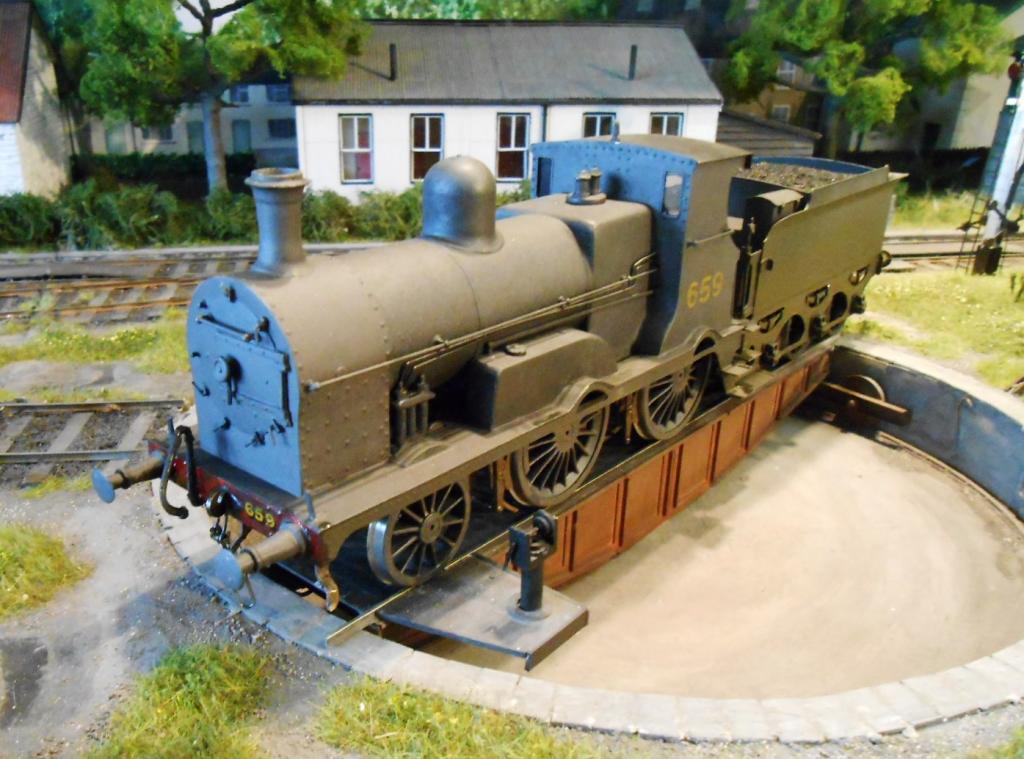
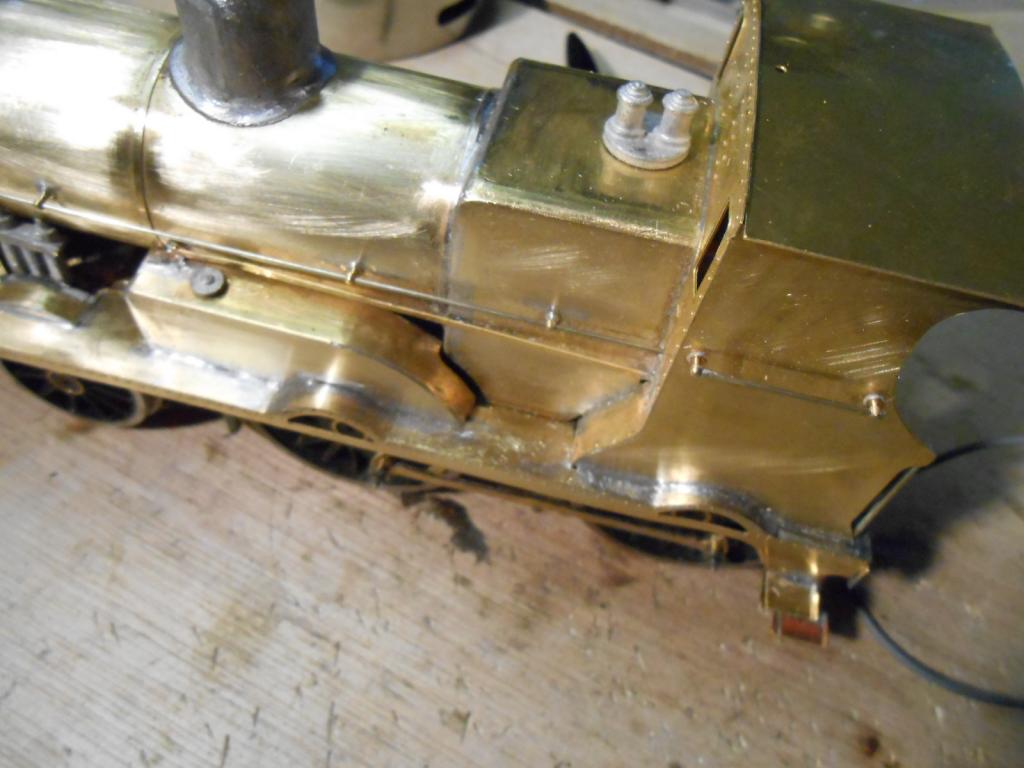
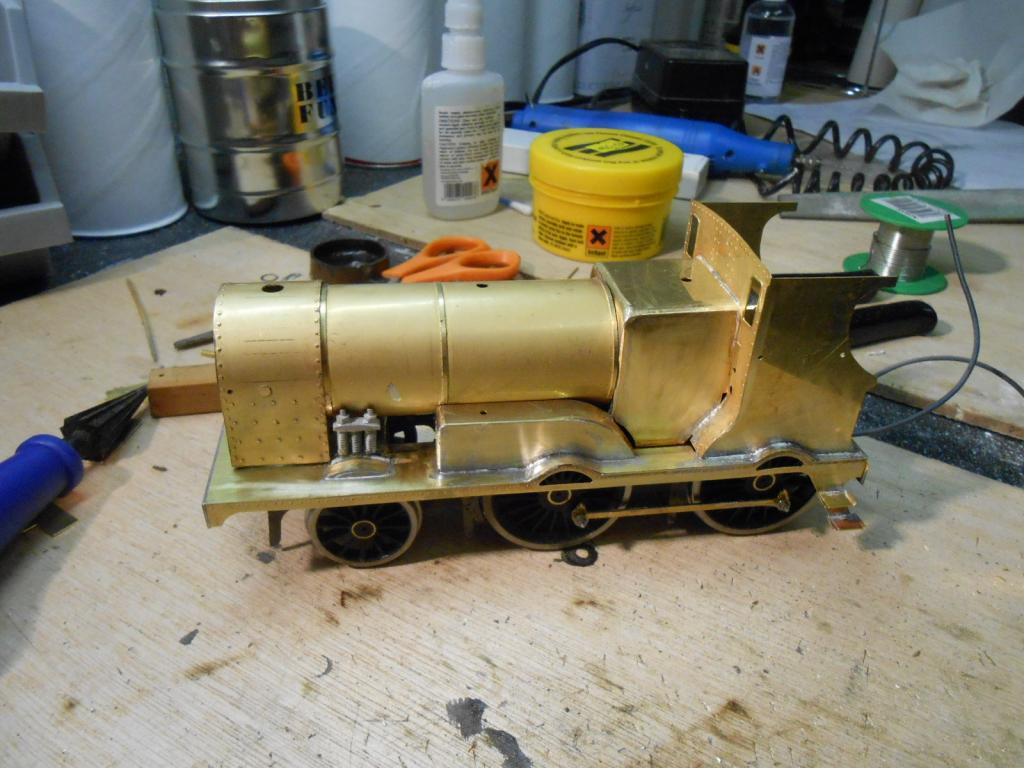
Approaching 40 hours work on the Tyrconnel G2 kit now & getting close to completion. Interestingly, close to half the total construction time has been spent on 'fettling', painting, lettering & weathering. Something that has made a real difference was to fix the smokebox door clips. Not included in the kit, I made then from small pieces of plastic strip [40 thou square], fixed with cyano & then drilled to take .7mm wire for the handles. The smokebox is the 'face' of a loco, so adding this bit of detail really makes a difference for me. At this point, it was worth doing a thorough clean up and giving the loco a witness coat of grey automotive primer. This showed where there were still things to fill & file, before a second coat of primer was added over the bald areas. For the top coat, it was a case of girding my loins to get the air brush out. Not my favourite modelling job, because the amount of setting up and cleaning time is significantly more than the actual painting - plus I always seem to end up wearing a fair amount of paint myself. Referring to The Art of Weathering again, decided that a fair representation of CIE dark grey would be a mix of matt black, gunmetal, plus some 'leather' as well [all Humbrol]. Thinned 50/50 with thinners, the first coat came out too light, so added more black and got what I hope is a reasonable result. not that any of you will be able to judge though, as the loco has since been weathered. Did this by stippling, with a flattie brush, using a similar mix to before, but with more leather, gunmetal and a blue/grey tarmac shade. More brown/leather on the tender sides, but blacker on the boiler top and cab roof. However, before the weathering, added the numbers. Cabside ones are Fox waterslide transfers from a Southern Railway sheet I had to hand. Seem the right size, though the 5 is not quite square enough, while the 6 and 9 could be more curly. The bufferbeam numbers are pressfix, 4mm scale numbers from a LSWR sheet which I must have had for over 20 years! They seem to match the shaded type used quite well, hopefully. Additional work has included fitting a fall plate, to cover the gap between loco and tender, plus adding couplings, vacuum pipes and coal in the tender. The fall plate is 10 thou nickel siver sheet to which I soldered some 0.7mm wire, which fits into holes drilled in the cab splashers. Another very fiddly job was to wire the loco to the tender, to give additional electrical pickup. Got some tiny plug and sockets so the tender can be separated from the loco. The extra pickups certainly make a difference, as only the driving wheels have them on the loco. Still needed to be done are to add some sheet lead to the inside of the boiler, plus the driver & fireman. Will also do a bit of extra weathering, using powders and talc, plus add a bit more coal. After that, must go back to the 6 wheel coaches & attempt to sort out the paintwork, then 569 will have a short excursion train to haul at the York exhibition over Easter. Before then though, look out for the April Railway Modeller, which has a full article on Arigna Town, with a feature on locos and rolling stock likely in October. The photos show the loco both in its initial primer paint, plus how it is now, lettered & weathered.
-
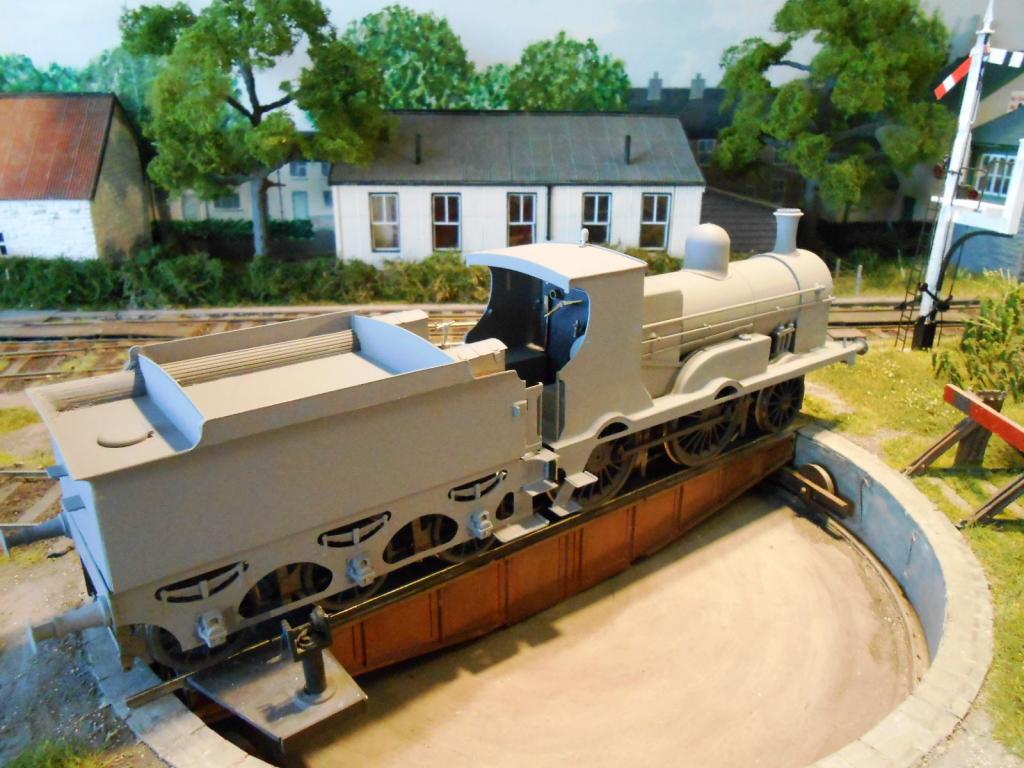
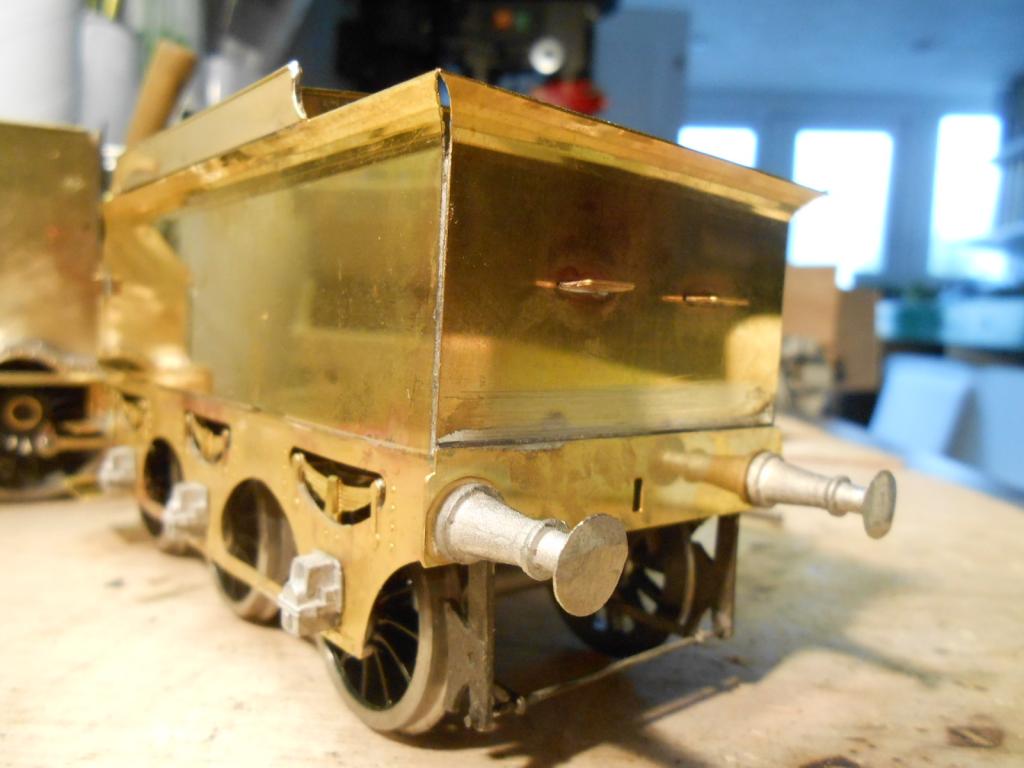
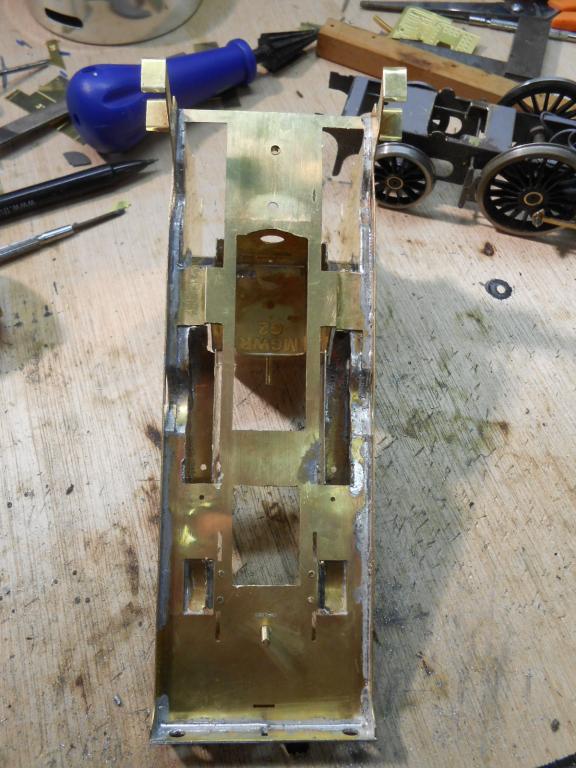
The G2 is approaching the end of the construction phase and moving into preparation for the paint shop. Have included a few pictures of where filling is needed - mainly around the splashers and firebox. If I was tidier at soldering, there'd be less general cleaning up too. The main tools I use are a set of 'whifflers' I picked up a few years ago. Essentially these are odd shaped needle files, which enable you to get into awkward places. Another favourite is a conical burr in the mini drill. While things are looking a lot neater, doubtless there will further work to do, though will probably do a 'witness' coat [car primer from a spray can], as this can help hide minor blemishes, but will also show others not easy to spot in raw brass. Another bit of work has been to chop out the middle section of the footplate [shouldn't be there anyway], to enable a small section of dummy inside motion to be installed - something not possible if I'd followed the instructions and put the gearbox on the front axle. As is often the case, the pics have not uploaded in the right order, but hopefully you'll see what I've been doing.
-
OK, I now have five steam locos, so this one is going to be grey! Colour photos can be very deceptive, methinks. Interestingly, my J26 0-6-0T was painted full matt black first, but a heavy weathering job knocked it back to grey. Will probably do the same with the G2. Am sure you can get into etched brass, Nelson. I started with plasticard and white metal, then did a brass coach and found it OK. Start with something simple and you'll soon gain confidence. You already have some enviable skills to build on.
-
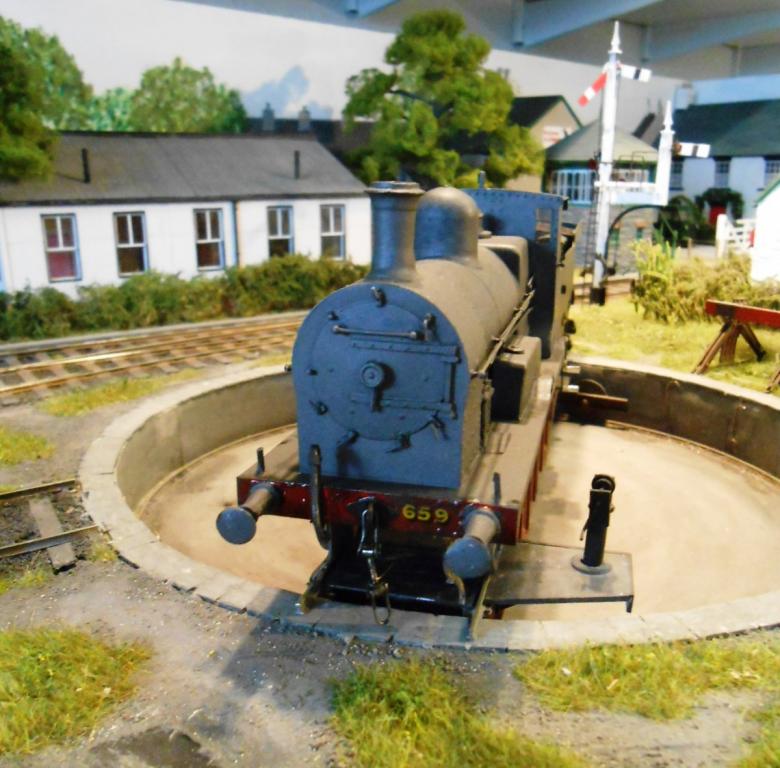
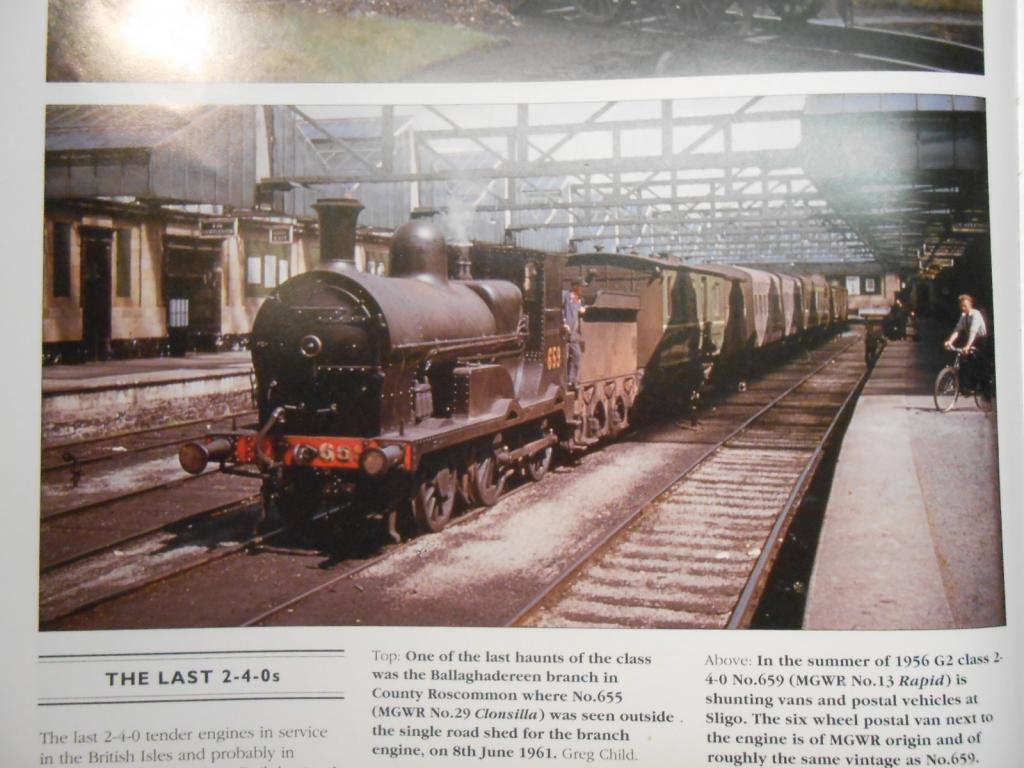
Here it is - from Tom Ferris' first colour album. The loco is clearly cleaner than its tender.
-
Thanks GG - that is not what the kit instructions say! Quote 'CIE black all over'. Doubt if Halfords do an appropriate shade, so will need to get the airbrush out. That said, my preferred weathered 'BR Black' - a mix of Humbrol dirty black, grey , gunmetal, plus a hint of bauxite, should be not far off. Most pics I have show them pretty dirty, though a colour pic of 659 at Sligo shows it fairly clean & may well be my 'template'.
-
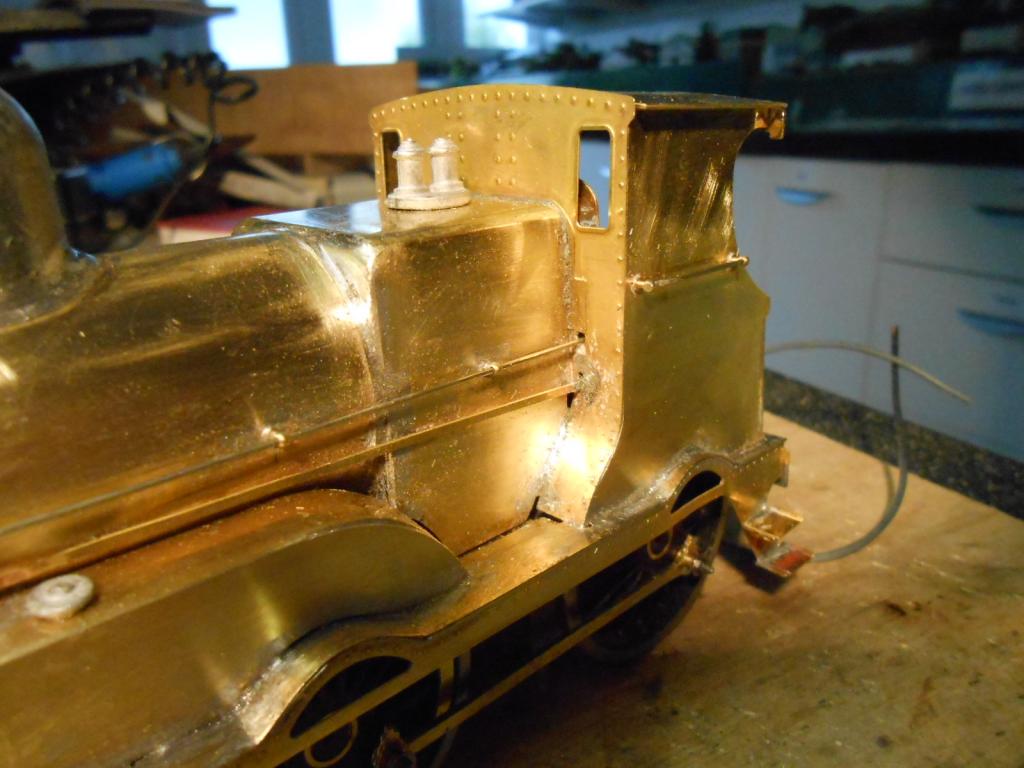
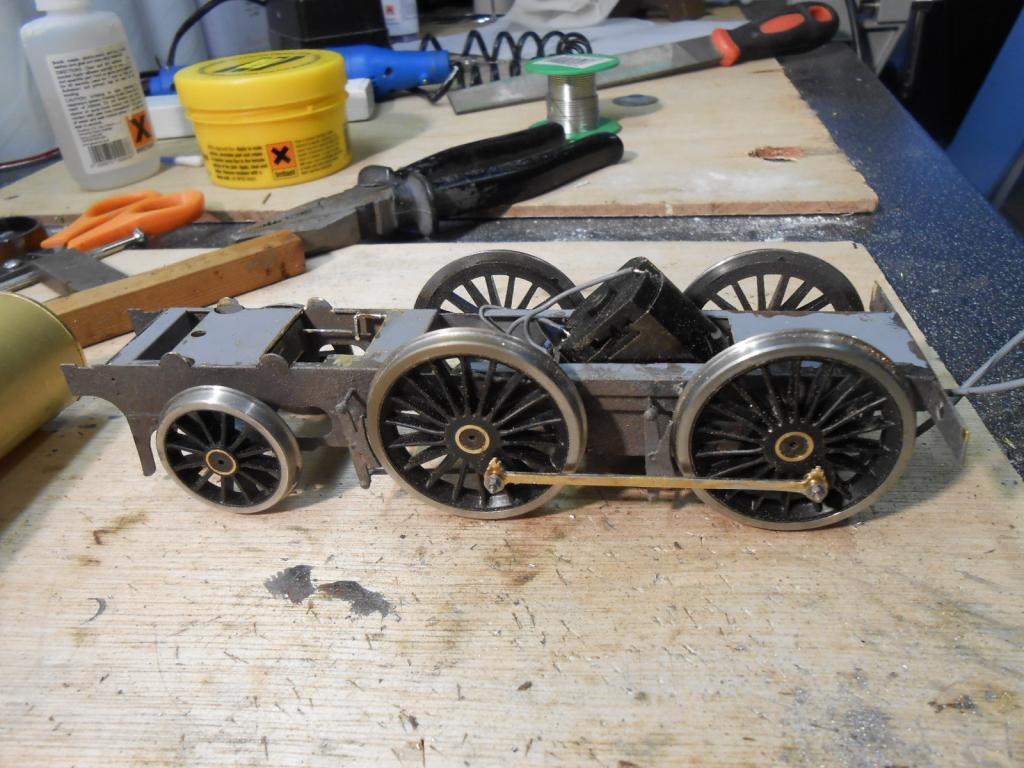
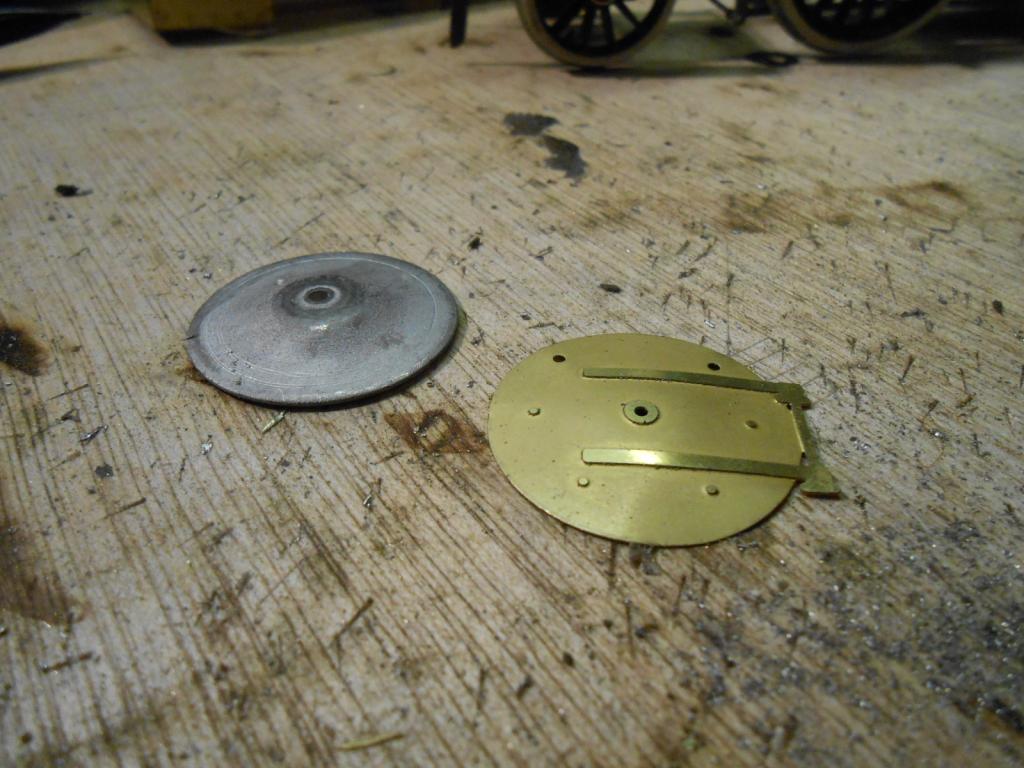
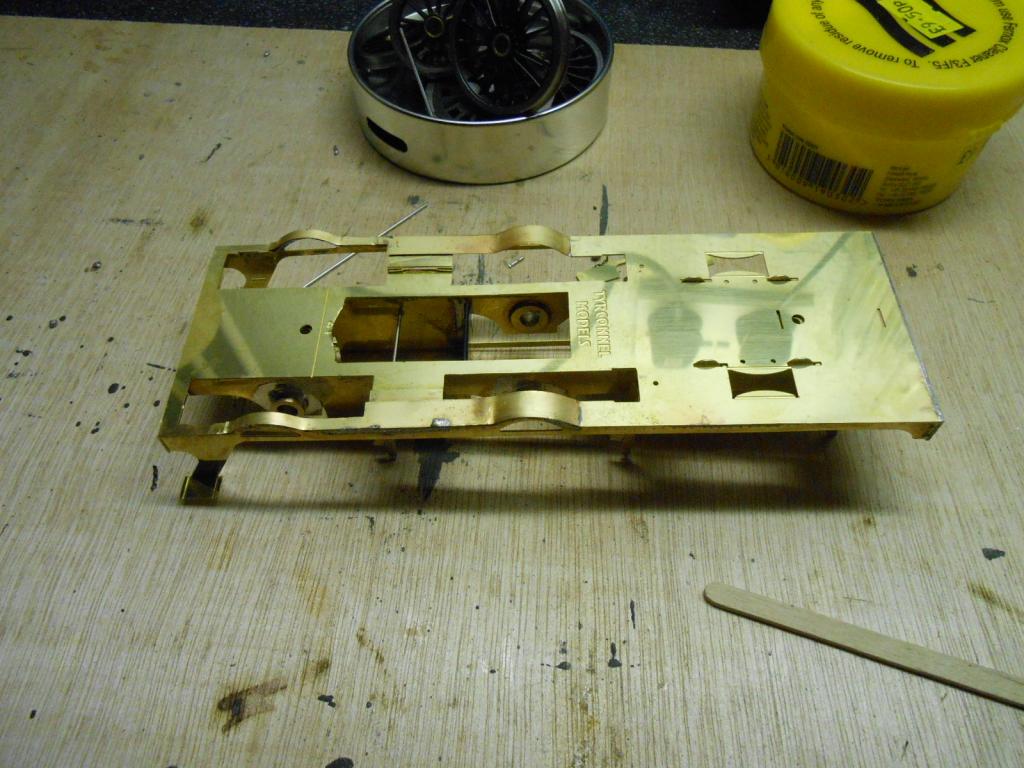
Managed to assemble and wire up the chassis, which runs quite nicely, even without any running in. Since then, stripped it down for priming and painting - grey primer and my usual mix of Humbrols 53 and 133 [gunmetal & bauxite], plus plenty of talc to give that oily effect on a chassis. Once dry, this gave me the chance to check to see how footplate and chassis fitted together. Not very well was the answer - because of my 36.75mm gauge, the drivers would not fit inside the splashers. Likewise, because the kit is designed for 32mm gauge, there is nowhere near enough room for the front springs either side of the boiler. Meanwhile, a slight issue with the latter was that the circular formers are actually about 1mm diameter too big as well, so it overlapped the firebox. So, much unsoldering and fettling was required. Said something like 'fettle it' a few times as well. Managed the splasher problem by moving them out slightly on the footplate, though in the case of the small splashers over the front wheels, these were ok on the outside edge, but needed trimming on the inside edge to enable the springs to clear the boiler. The latter was easy enough to roll, but had to undo it from the formers to file a bit off these so it would fit. A bit of a giveaway should have been the fact that there was a 3mm gap along the 'seam' when I first did it. The smokebox was more of a fiddle, because the shape is slightly more complex. The front edge comes with a nice set of rivets etched on, though in the case of my engine [659], these are absent, so I soldered it in wrong way round. The smokebox door is also a bit of a challenge. The instructions suggest 'dishing' the etched version using a screwdriver handle on a mouse mat. Not sure about this though [see pics], while there is also included a cast whitemetal 'blank' to help forming too - though not mentioned in the instructions. Am thinking I may use this casting for the smokebox door, though either will need additional detail in the form of the very noticeable fixing clips. Will decide once I've done more work on the model. Because of all the above, things do not fit as snugly as hoped, though my usual ham-fistedness [and an ability to ignore instructions at times], mean I've had to become well practised in the art of filling & sanding. Once the paint is applied, a multitude of sins are hidden!
-
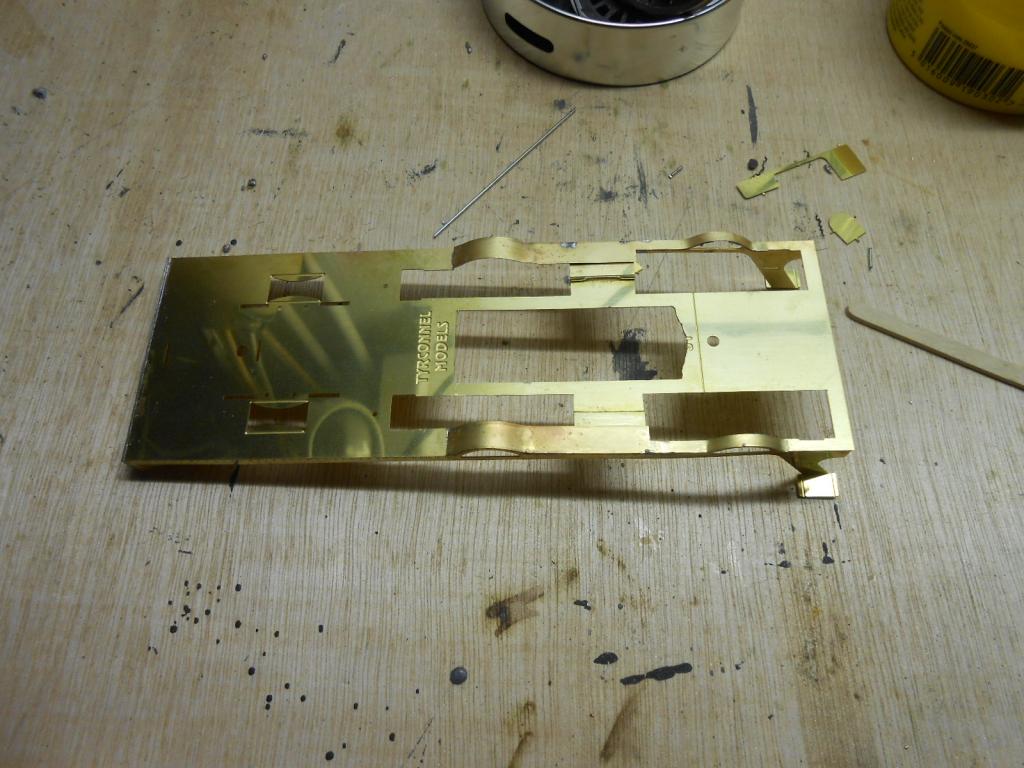
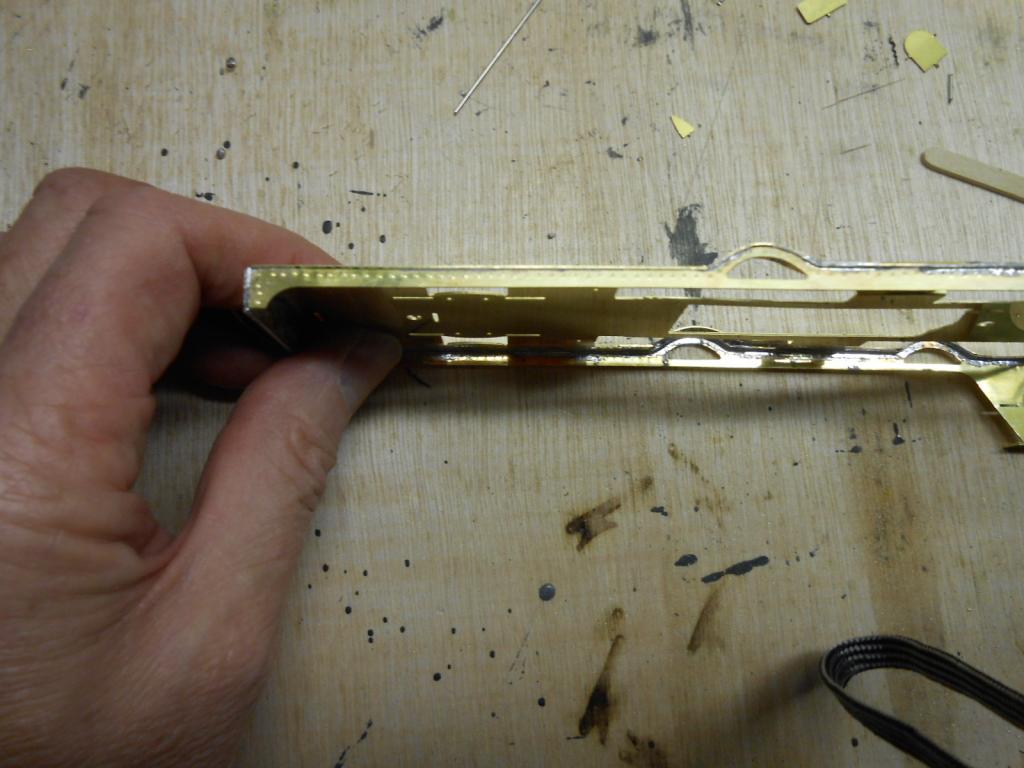
Progress has rather stalled on the G2 of late. Though still a nice kit, my preference for 36.75mm gauge has raised some issues. However, first of all thanks to JHB for the dark grey - an interesting model too. however, 'twill be late 50s, so am assuming all over black will be the 'colour'? As for the footplate assembly, like anything with curves, it is a bit of a fiddle, warmly spiced with dark mutterings and occasional profanities. The footplate curves were in two parts - a half-etched section, split in the middle on the 'plate itself, then further pieces soldered over the top. Did these after I'd soldered the valances in place, using various hair clips for clamps, along with singed fingers.
-
Seriously good stuff!
-
CIE coach livery in the late 1950s
David Holman replied to David Holman's question in Questions & Answers
A case of 'apart from that Mrs Lincoln, how was the show?'... If only I'd checked my photos first. Good job I'm currently occupied with the G2. A good sulk and pout may be in order! Equally, I'd much rather know than find it is wrong later. Comment from JHB and the rest of you are always much appreciated. -
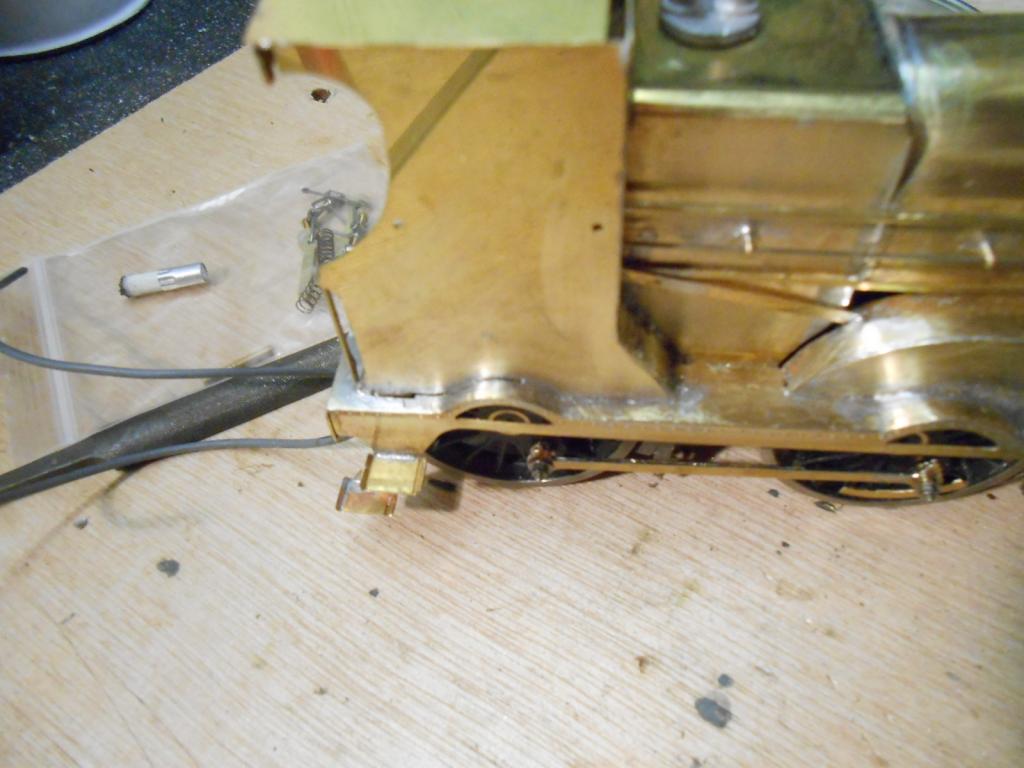
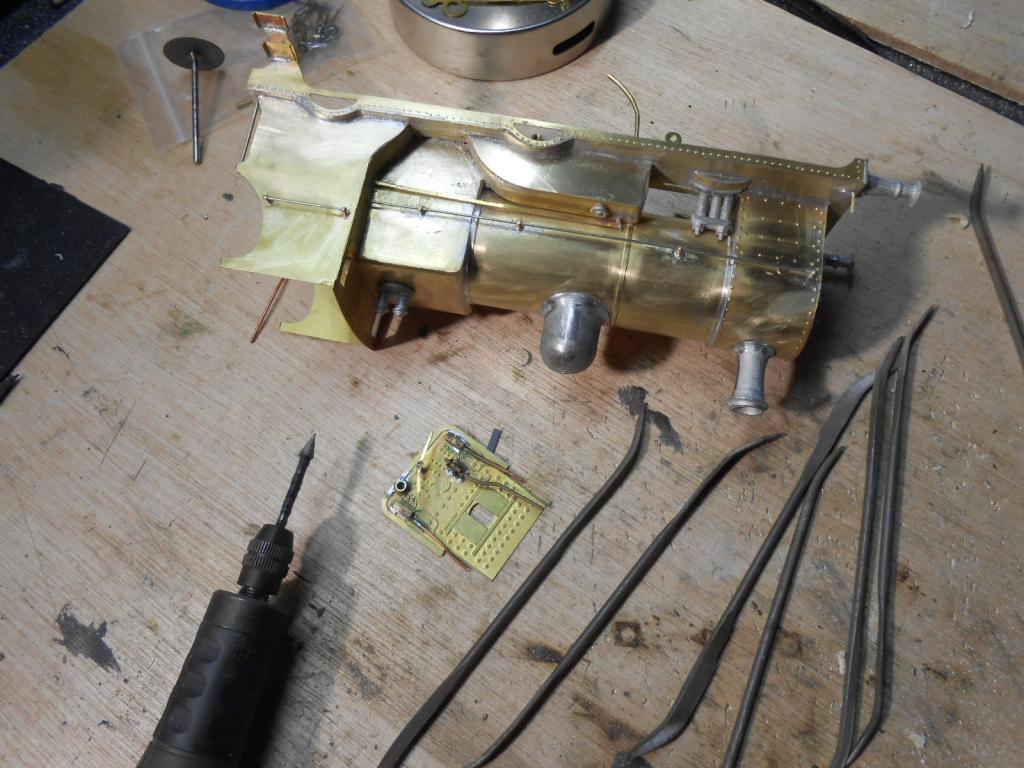
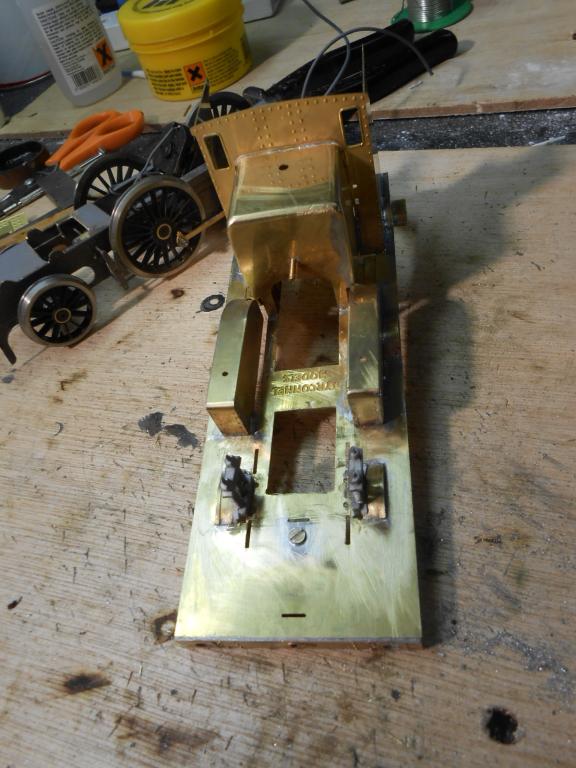
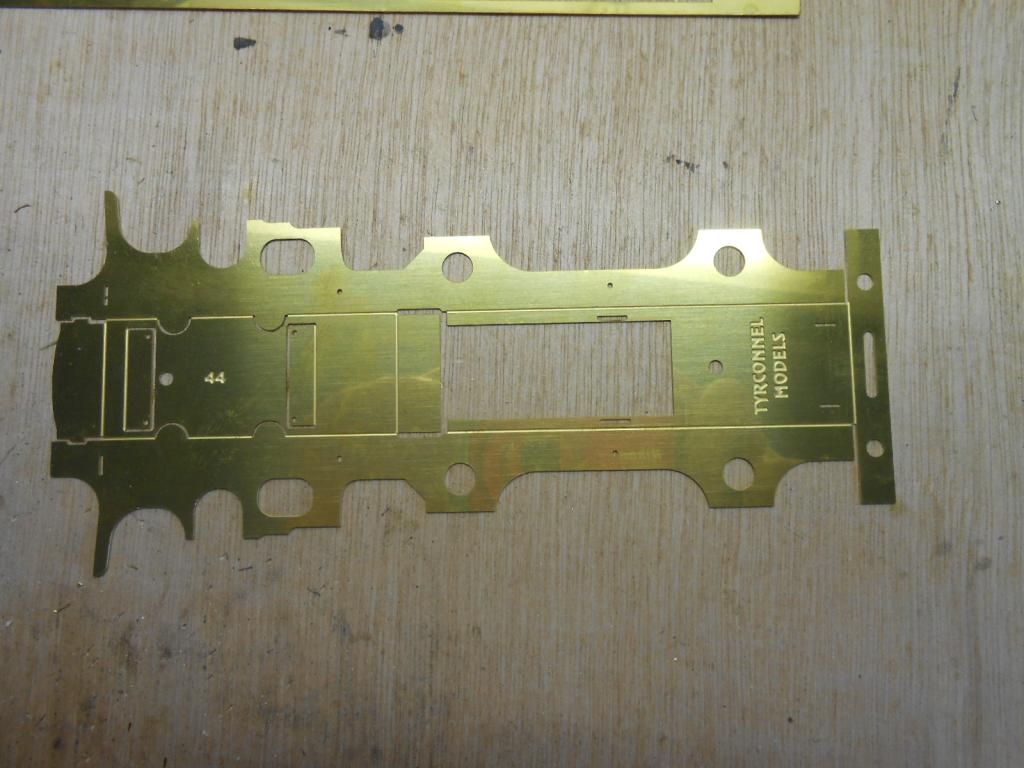
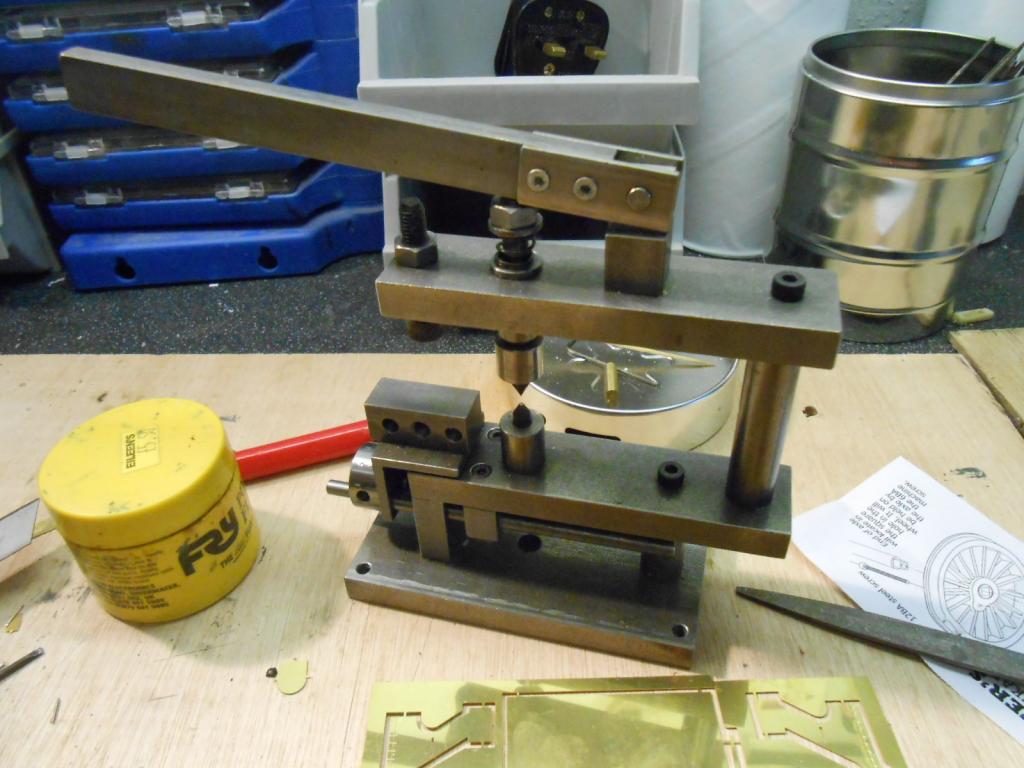
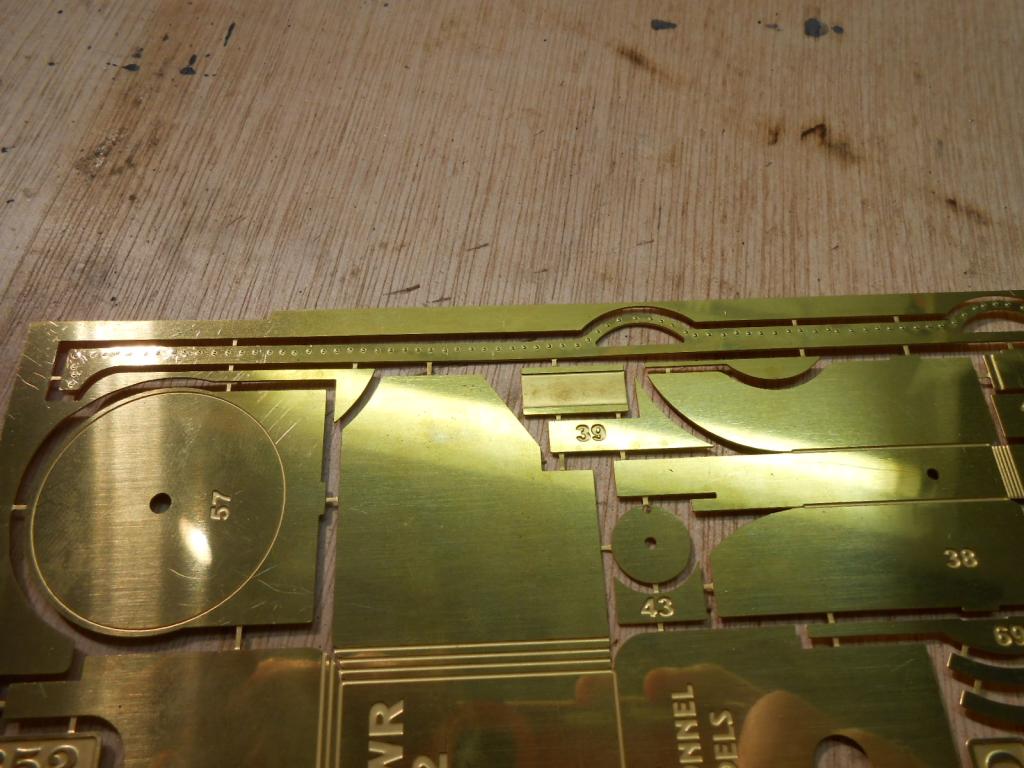
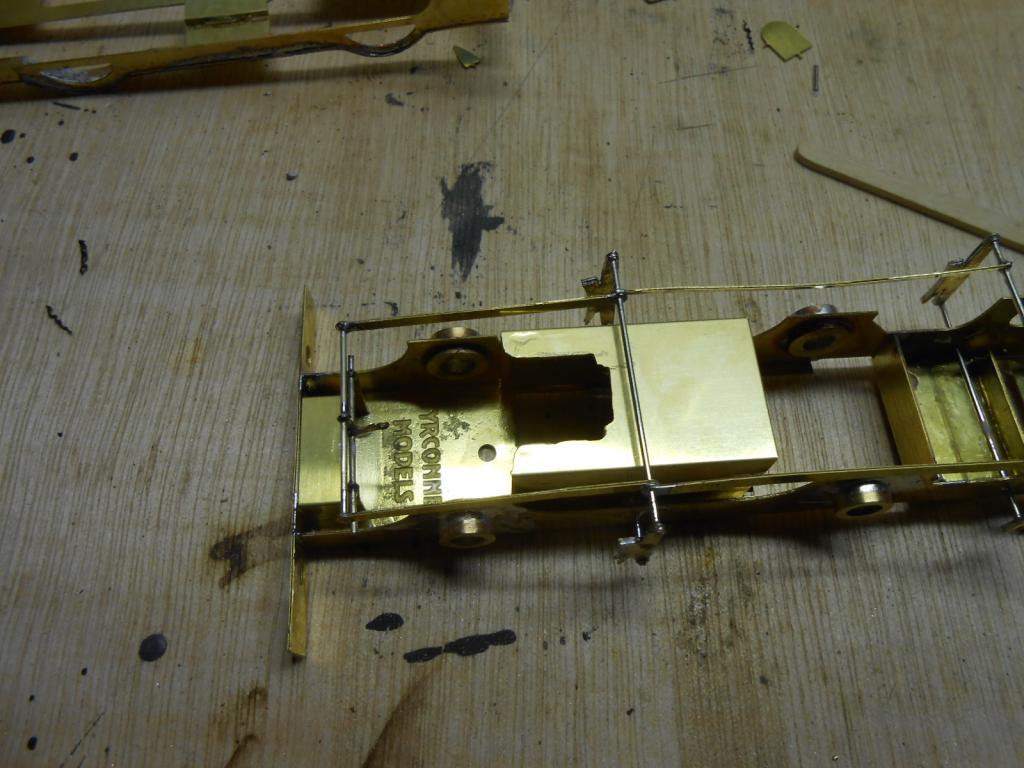
Monday afternoon saw a start made on the loco chassis and a couple of hours saw the basics folded up and soldered. Like the centre tender wheels, the front pony is lightly sprung with .7mm wire. Tyrconnel kits use a fold up chassis, which removes the risk of chassis sides not lining up & this seems to work well as this is the third kit from their range I've built & each time, things have worked out well. A double session on Tuesday got the coupling rods fitted and, with the loco rolling nicely first time, the motor fitted and a test under power with some fly leads connected to my trusty old H&M Clipper. A basic 'rheostat' type unit, I find that if things work well with this, they will work even better with my Gaugemaster hand held unit that I use on the layout. A change to the instructions has put the motor driving the rear axles, where it can be hidden in the ashpan and enable dummy inside motion to be fitted. Note also that, to enable building to 5'3" gauge [allegedly 33.98mm back to back], the wheel bearings have been installed back to front, as Tyrconnel locos are designed to run on 32mm track if required and the frames are to the narrower gauge. Don't think this is too noticeable. In the afternoon, made up the footplate - a ticklish job with some complex curves, but the kit design makes this quite simple with some neat half etching. One extra here is that my chosen loco has a clear line of rivets along the footplate valances, so made use of my GW models rivet press to do these. Hope the pictures show progress, if not necessarily in the right order.
-
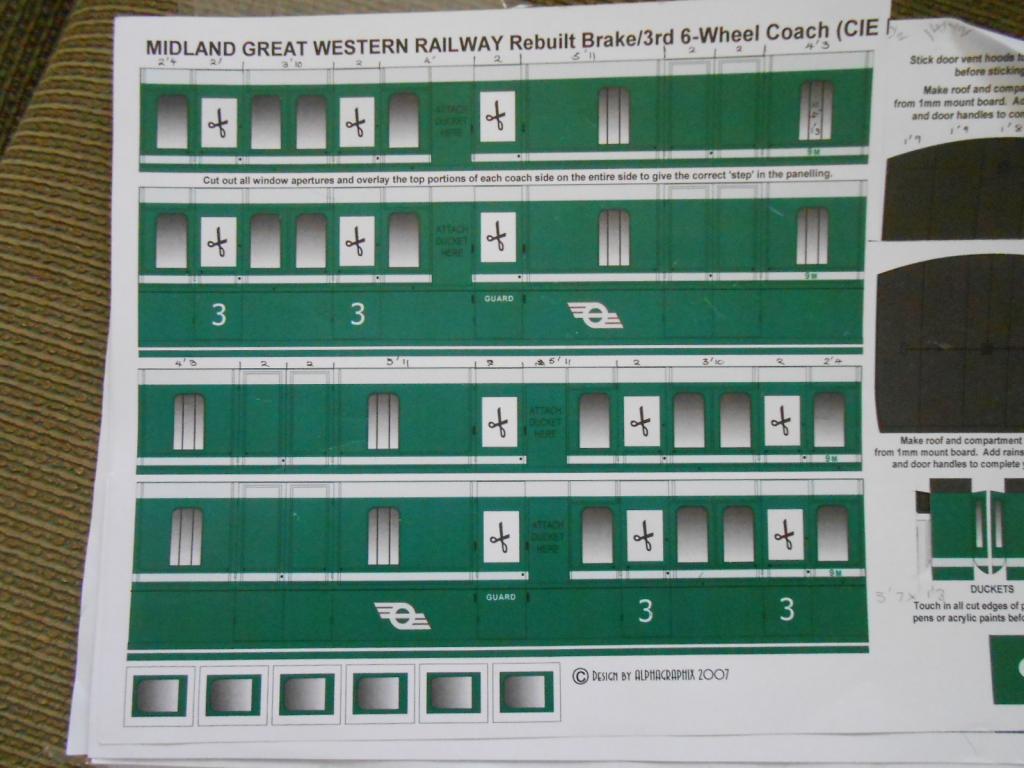
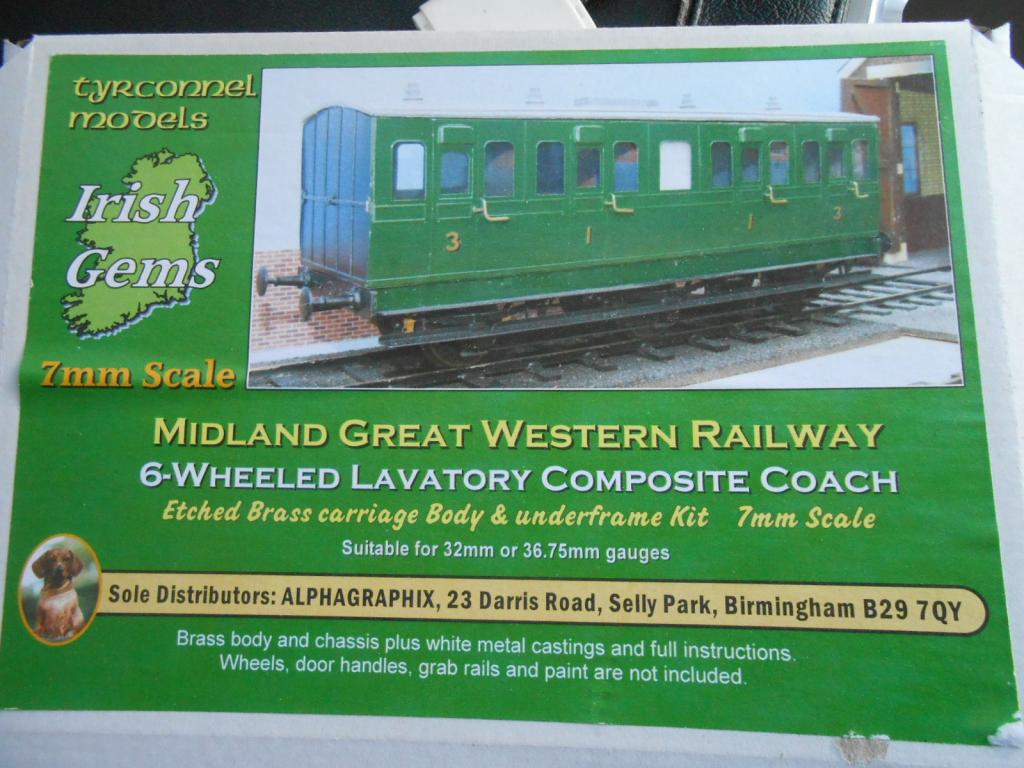
Those of you following my workshop thread on new 6w coaches will know I have a bit of a problem with their livery. One or two folk have rightly said that the dark green [Ford Laurel green] I have used is too dark. Having checked my three Irish colour books, can only concur. My own fault - should have checked first! However, it will be a real issue to correct & I'd prefer not to add more layers of paint if I can avoid it. So, is there a way out? Have posted two pics showing the Alphagraphix card kits [bit more of a medium green than mine], the Tryconnel kit box [definitely darker]. There is also one in Locomotive Compendium of Ireland [boocock] album showing two six wheelers of a somewhat darker hue than the faded versions in most other photos. The question is - can I legitimately get away without a full repaint? I will be sooooo grateful for any excuses not too!
-
There is a cunning plan behind the 'joint' nature of my Arigna branch JB. The layout is already 'finished', so future modelling is about widening its scope and there is a limited range of stock if I stick solely to SLNCR. With Tyrconnel bringing out new stuff all the time, it is tempting to expand the parameters a little. Eg dieselisation would be nice - perhaps a C and/or a G? Was recently re-reading the Oakwood Press book on the Achill branch [which I'm sure you know!] and there is an interesting chapter on proposed but never built lines to Belmullet. I was musing that Arigna could even be converted one day to represent part of this. One idea would be to built a new station building to sit over the top of the existing one - completed with an overall roof which could hide a 'hole in the sky' to make the station into a through line. Something similar could be done with the goods shed - so that it covered the siding, with one wall on the platform. Still at the thinking stage, but might be a way to extend the life of the layout, without building a completely new one. In the meantime, there is still much to do, such as another railbus, Sir Henry and more figures to depict a scene on the platform of an extended family saying their goodbyes to someone emigrating.
-
The other picture is from Neil Sprinks photo album of the SLNCR