David Holman
-
Posts
4,359 -
Joined
-
Last visited
-
Days Won
117
Content Type
Profiles
Forums
Events
Gallery
Blogs
Everything posted by David Holman
-
See folks, this is what you can do if you don't have a TV! Prolific is only half a description, especially when all Andy's projects are such good quality too. As for the Clare, have often thought it offer possibilities - nice 4-6-0Ts, those 0-6-2Ts with the big trailing wheels, plus the railcars and interesting centre cab diesel locos. Needs more space than I have available though!
-
At least it is a 2-4-0, so a Beattie Well Tank should be fine for sound and good luck to anyone trying to replicate the original As for the model, to steal a quote from Strictly: one word, three syllables: fab- u -lous!
-
Andy Cundick has done loads in 4mm - all to scale too. Castlederg, Donegal Town and Arigna all spring to mind, though wouldn't be surprised if there are others!
-
Yep, my Achill Movie cost me £125 for an ABC/Canon gearbox and motor in 7mm scale. Haven't really thought about it, but maybe tender drive, via a shaft to the loco drivers might be an option in 4mms scale? Very pretty loco in MGWR green, though less sure about later rebuild and grey livery.
-
Mmm... Beg to differ. If it was only a 'bit of weathering' all track would look this good!
- 486 replies
-
- 1
-

-
- ballyercall
- layout
- (and 1 more)
-
Making an ‘E’ – the Maybach Diesel Model Assembly thread
David Holman replied to Mol_PMB's topic in Irish Models
Fascinating. Another form of scratchbuilding and every bit as worthy. Just looking at the art work makes my brain hurt! -
Lovely work Alan, not least because there's that red line as well. Scary enough in 7mm, but in 4mm, where every minor error is amplified... Can't see any flaws though and did enlarge the picture to find the red lines. No wonder you haven't posted for over a week!
-
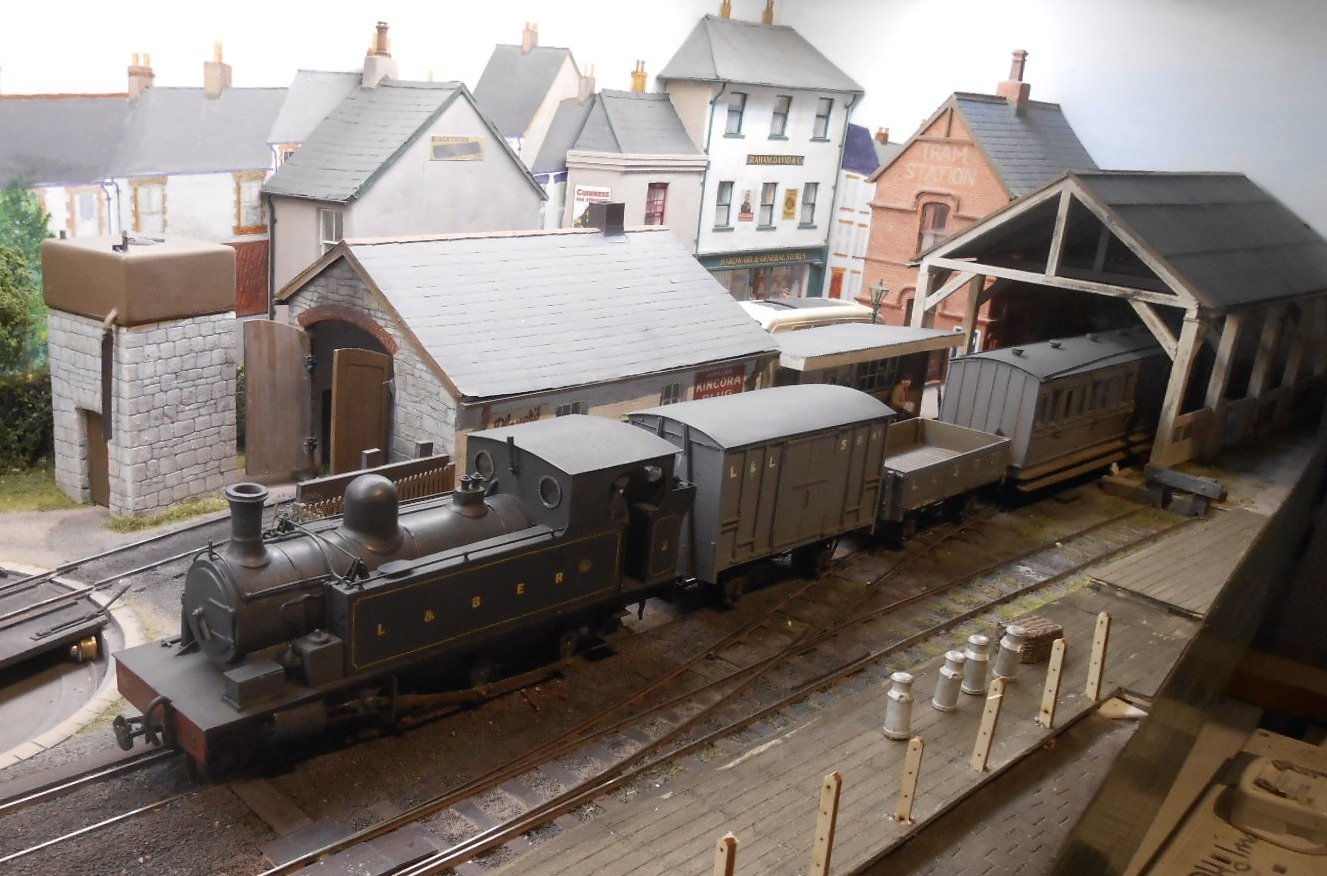
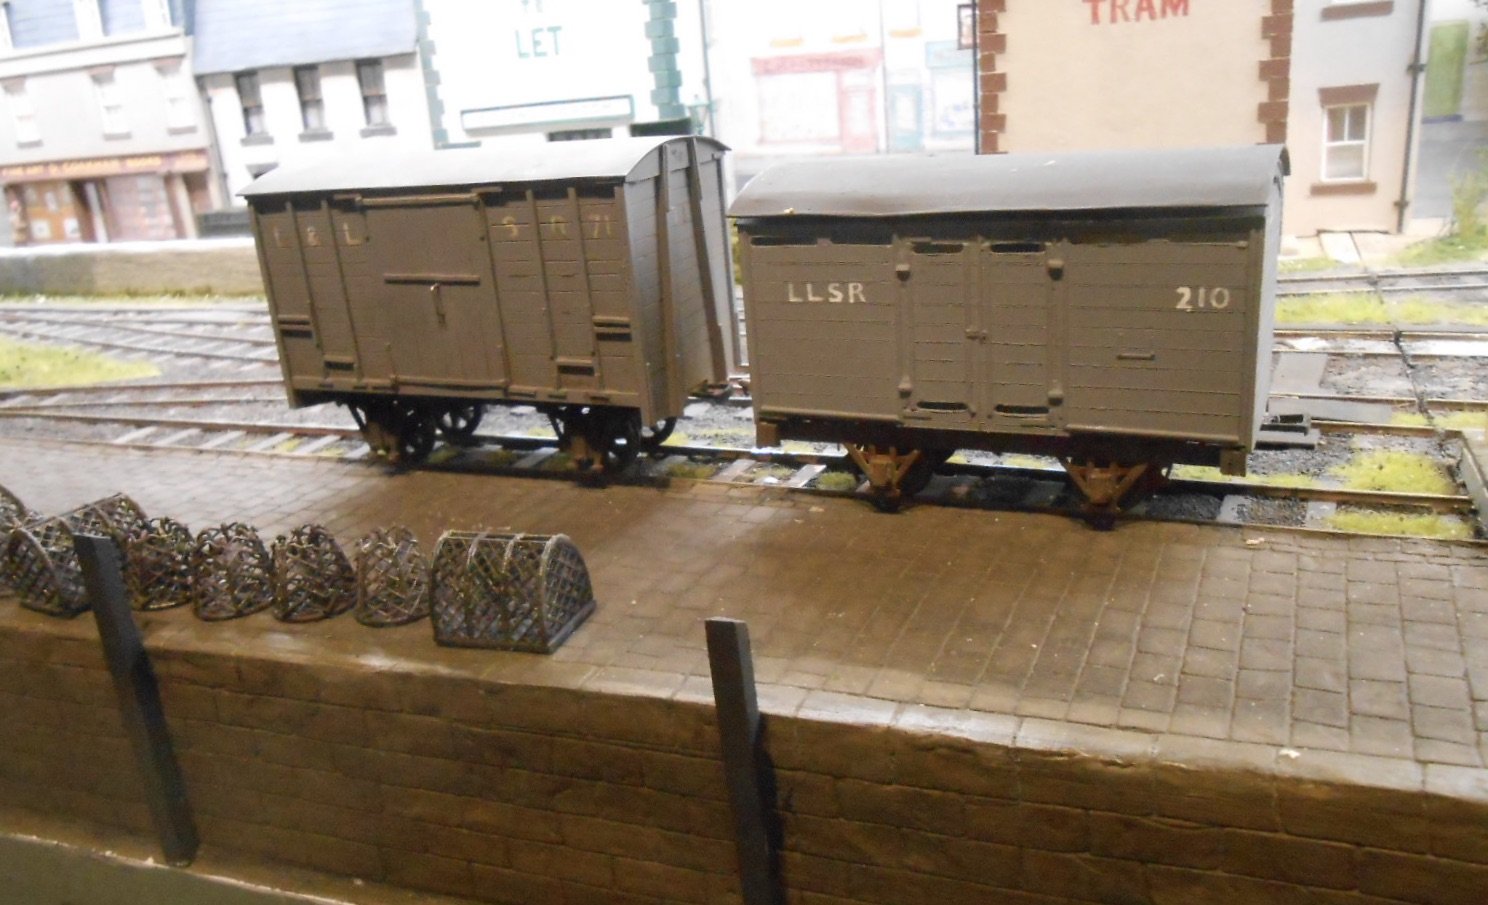
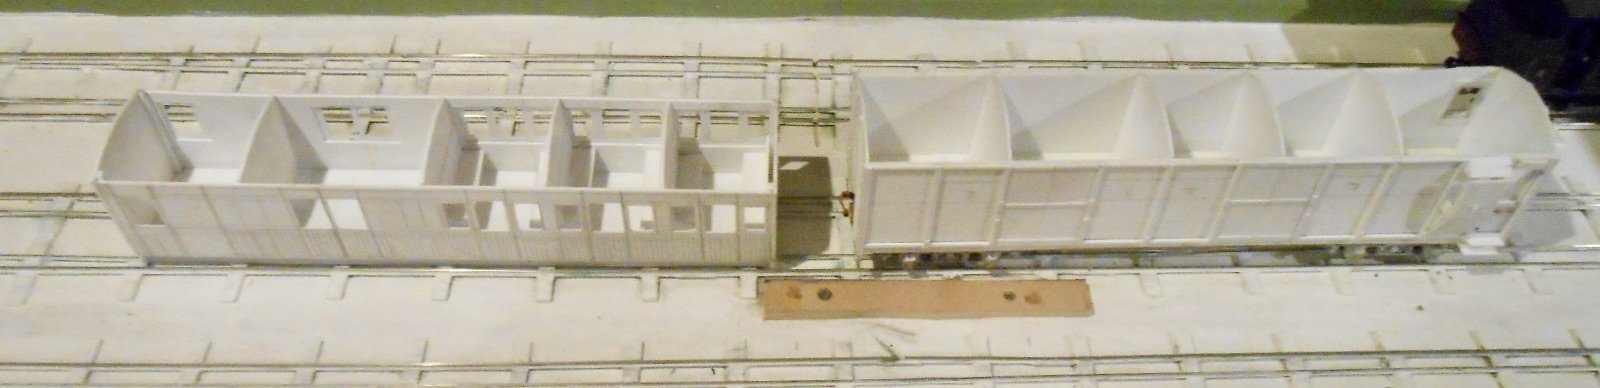
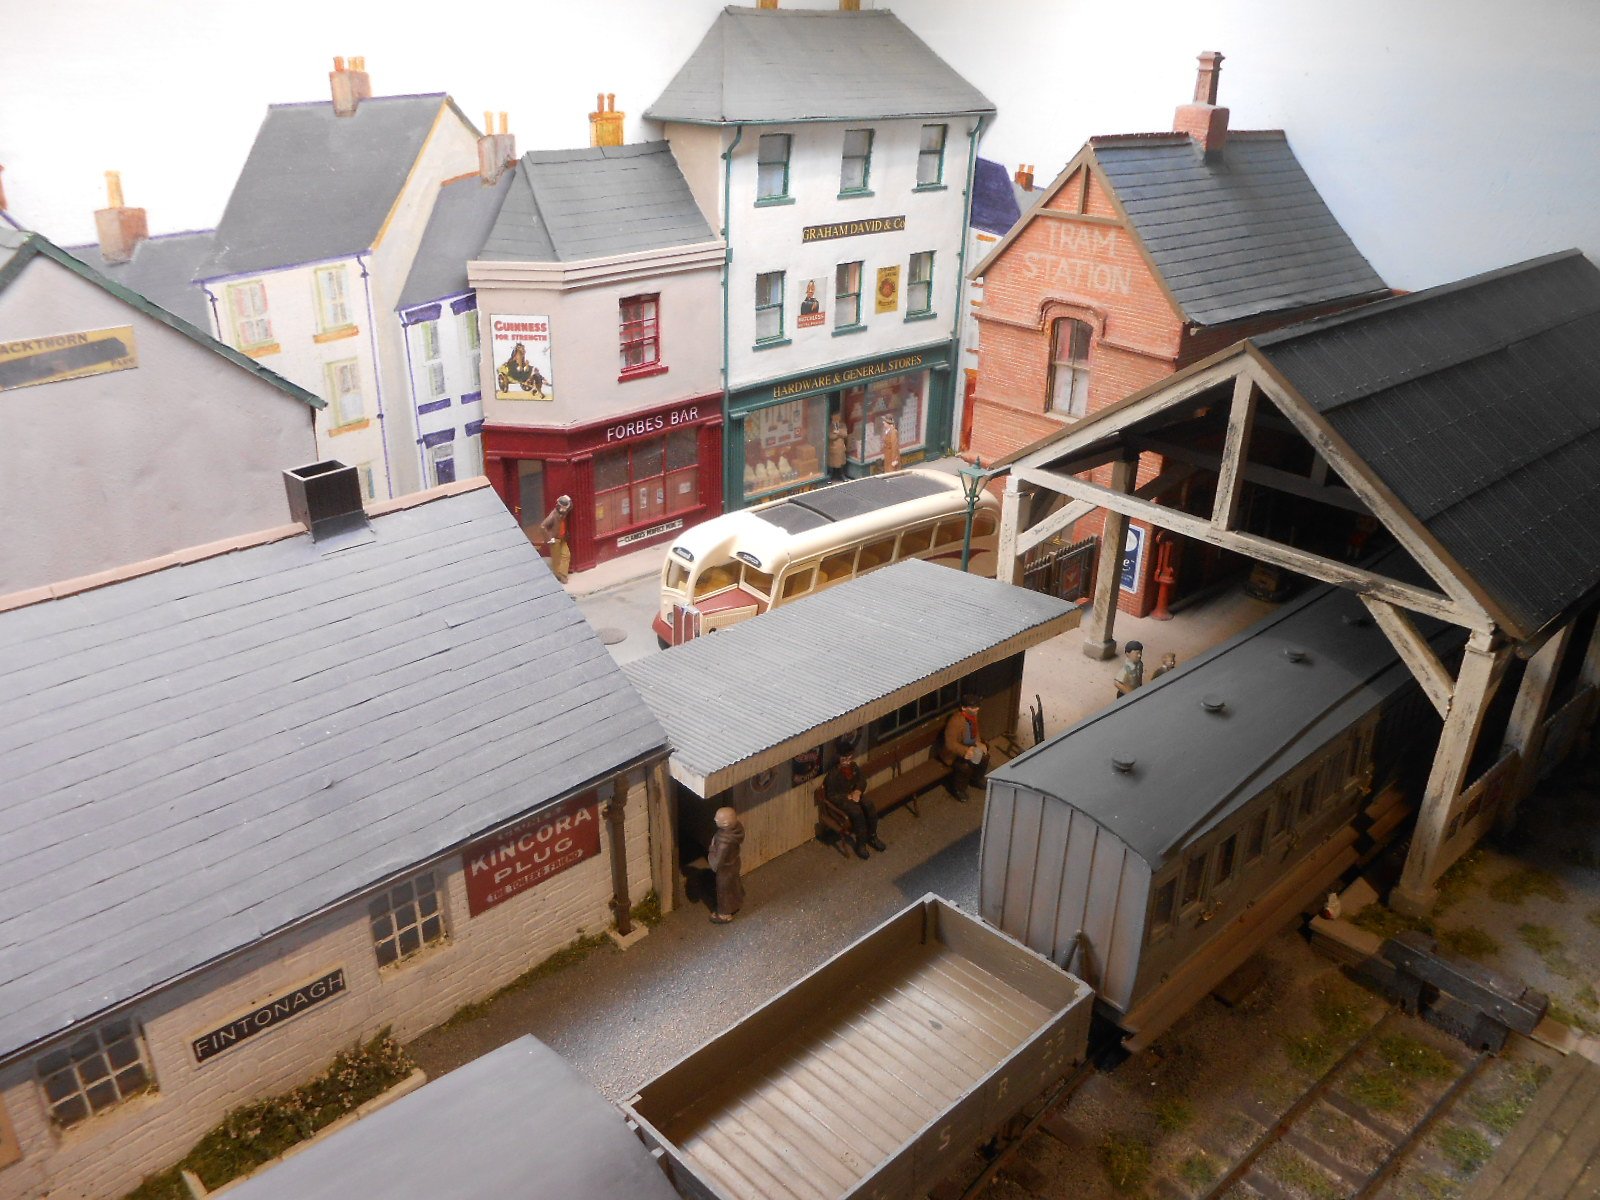
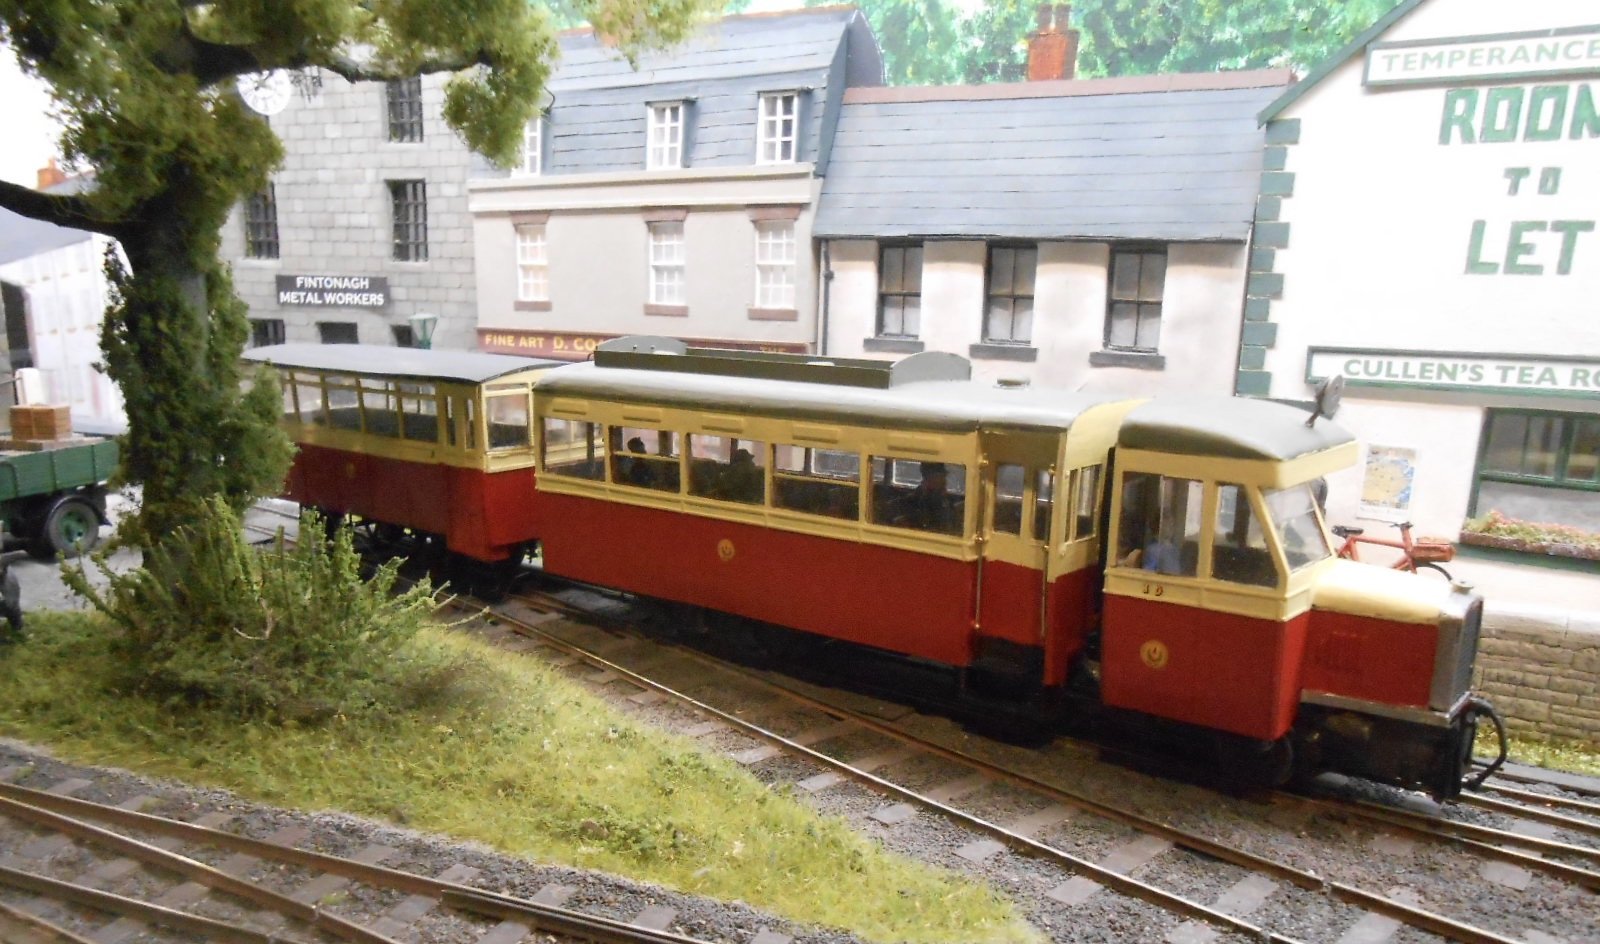
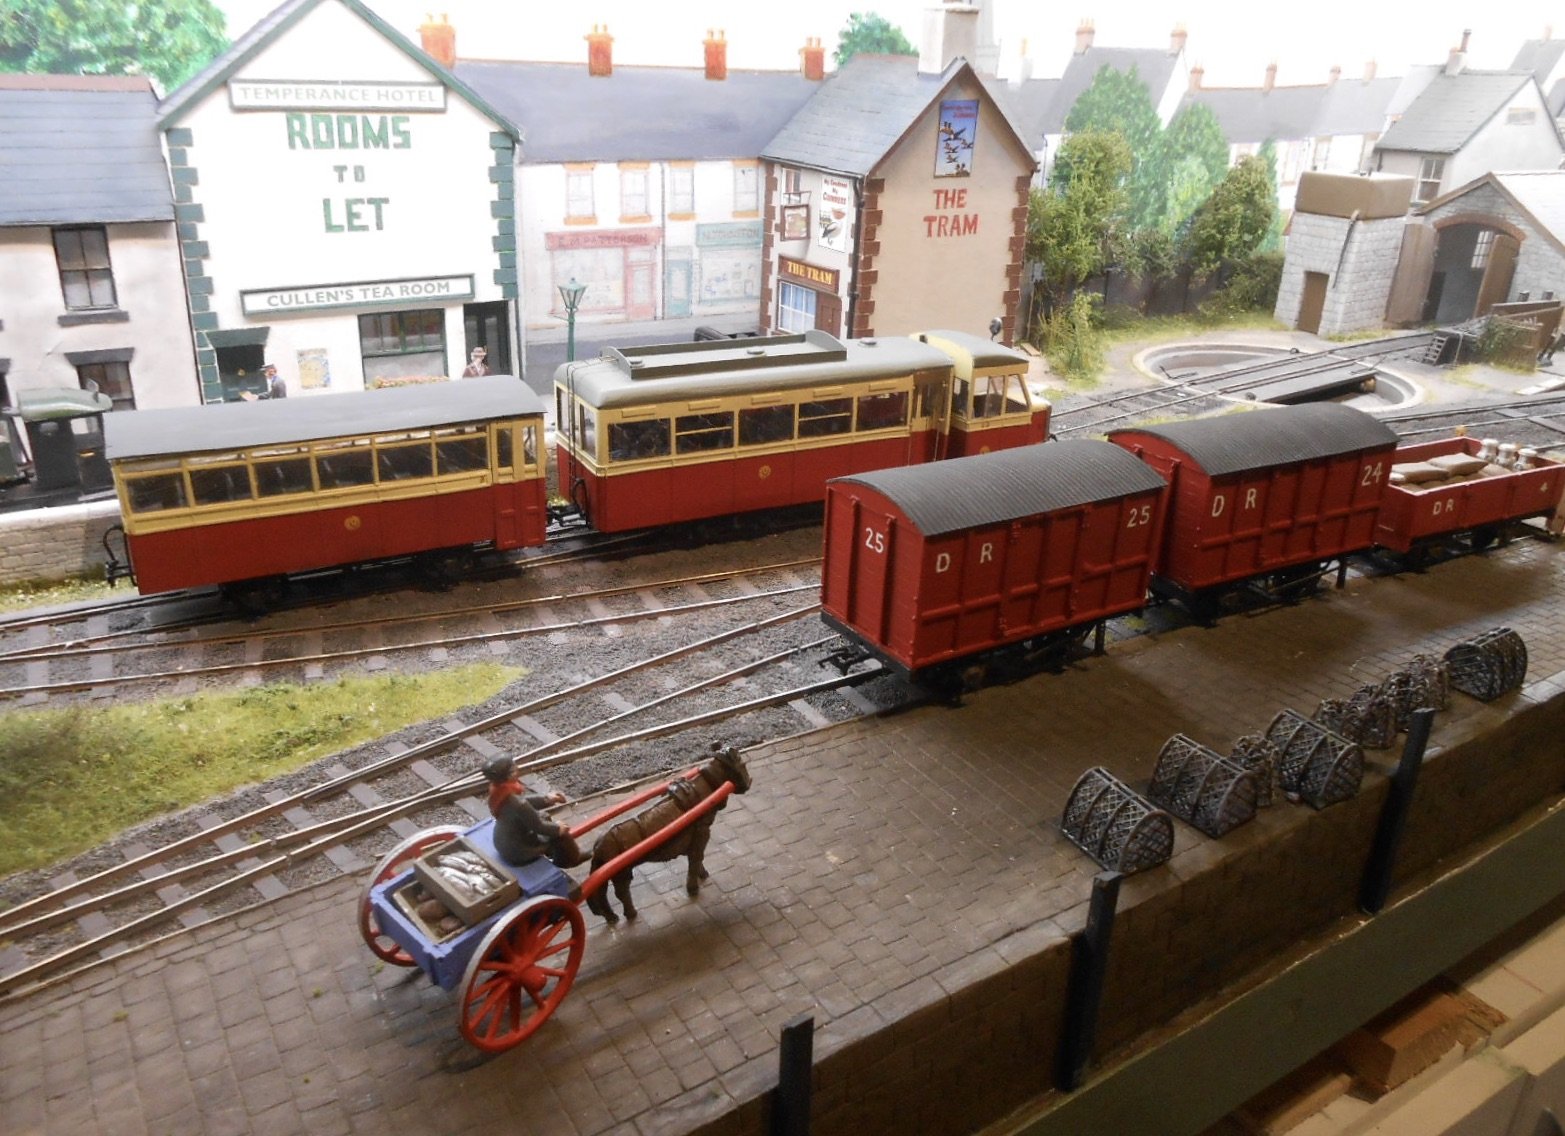
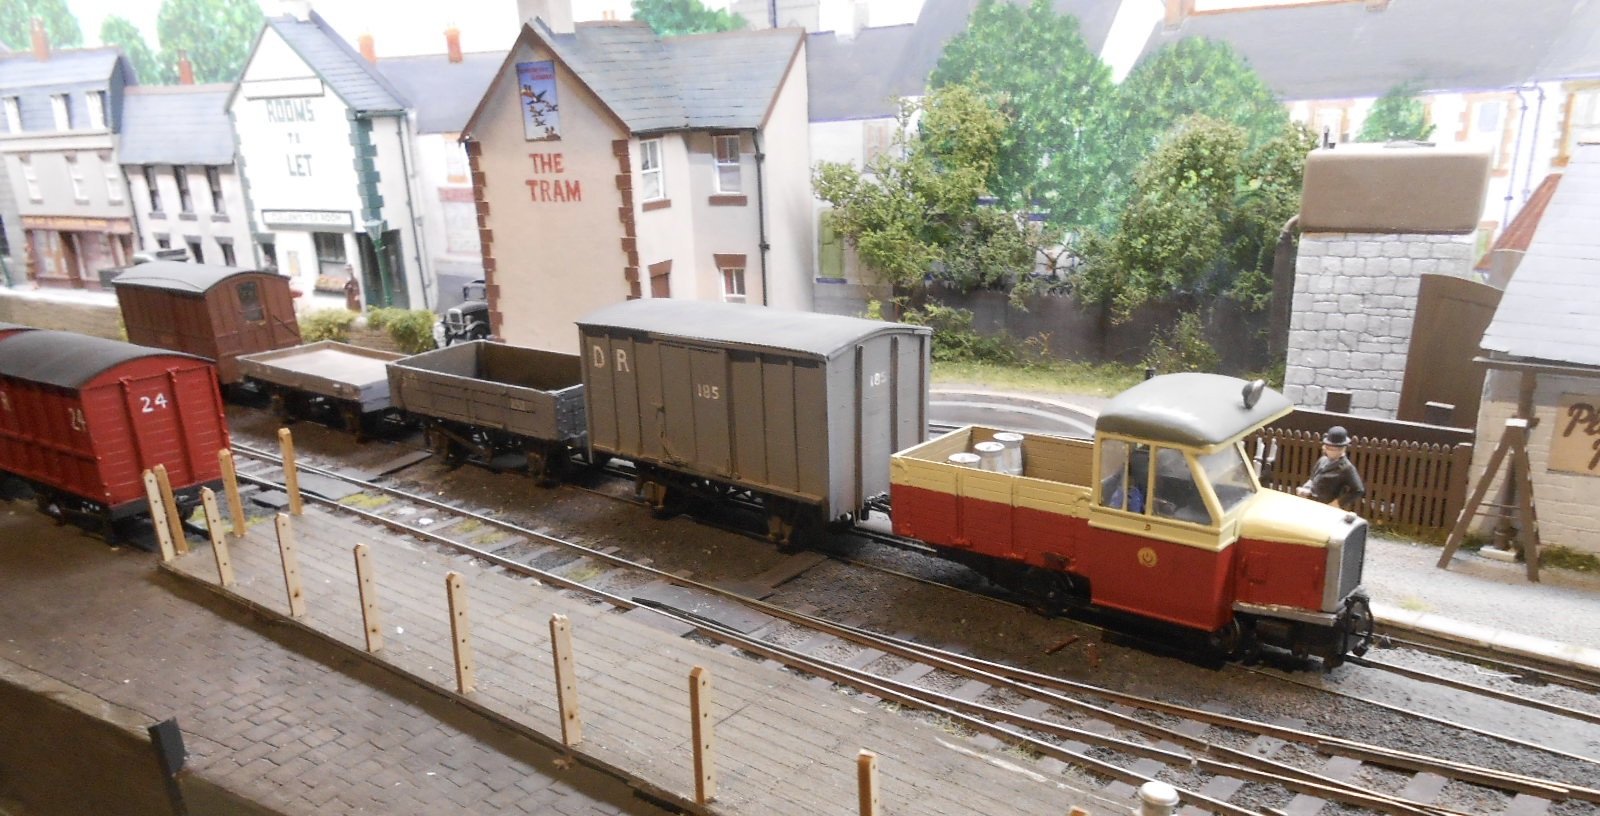
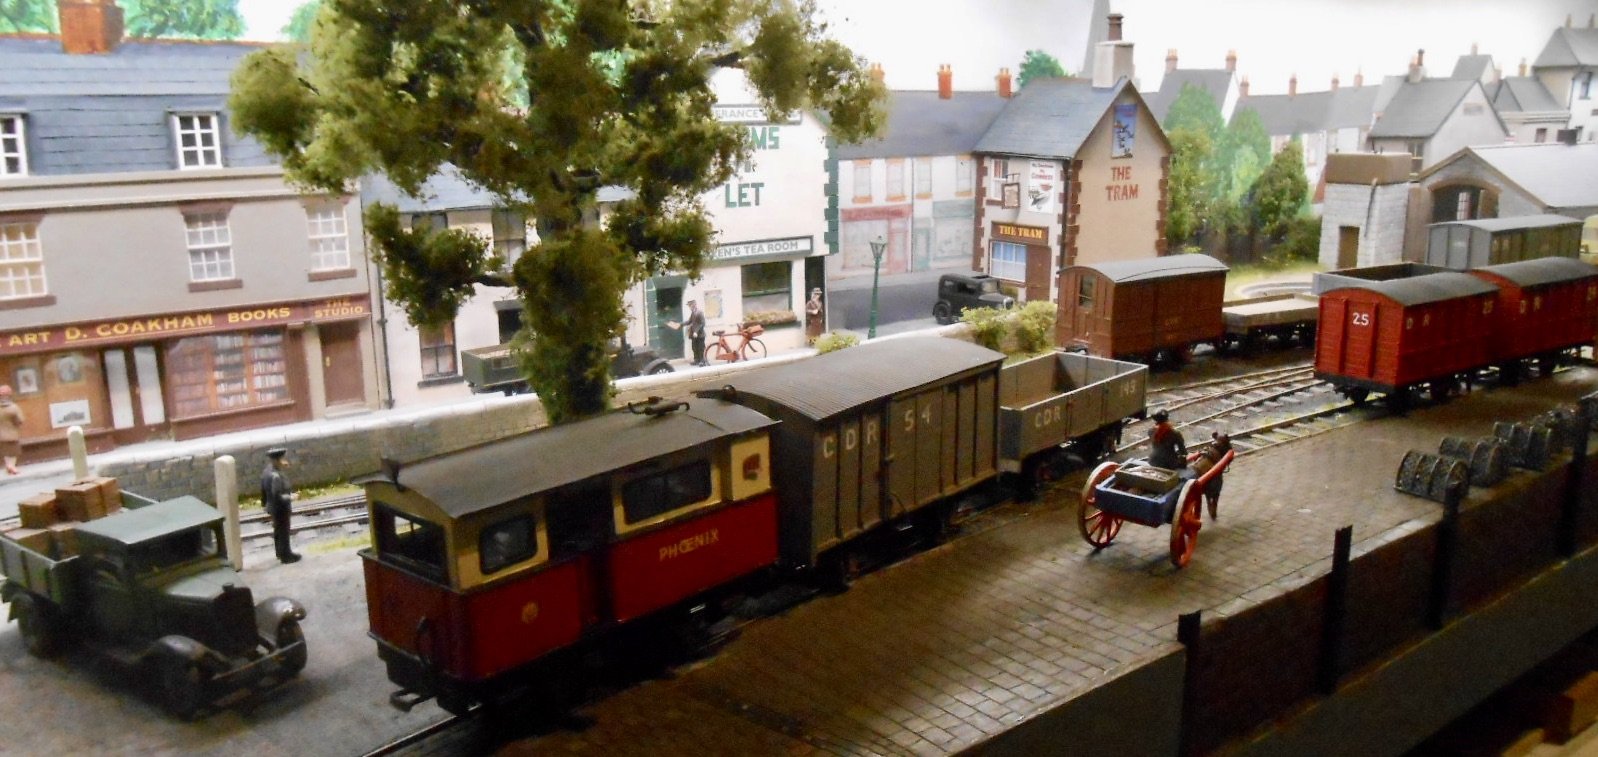
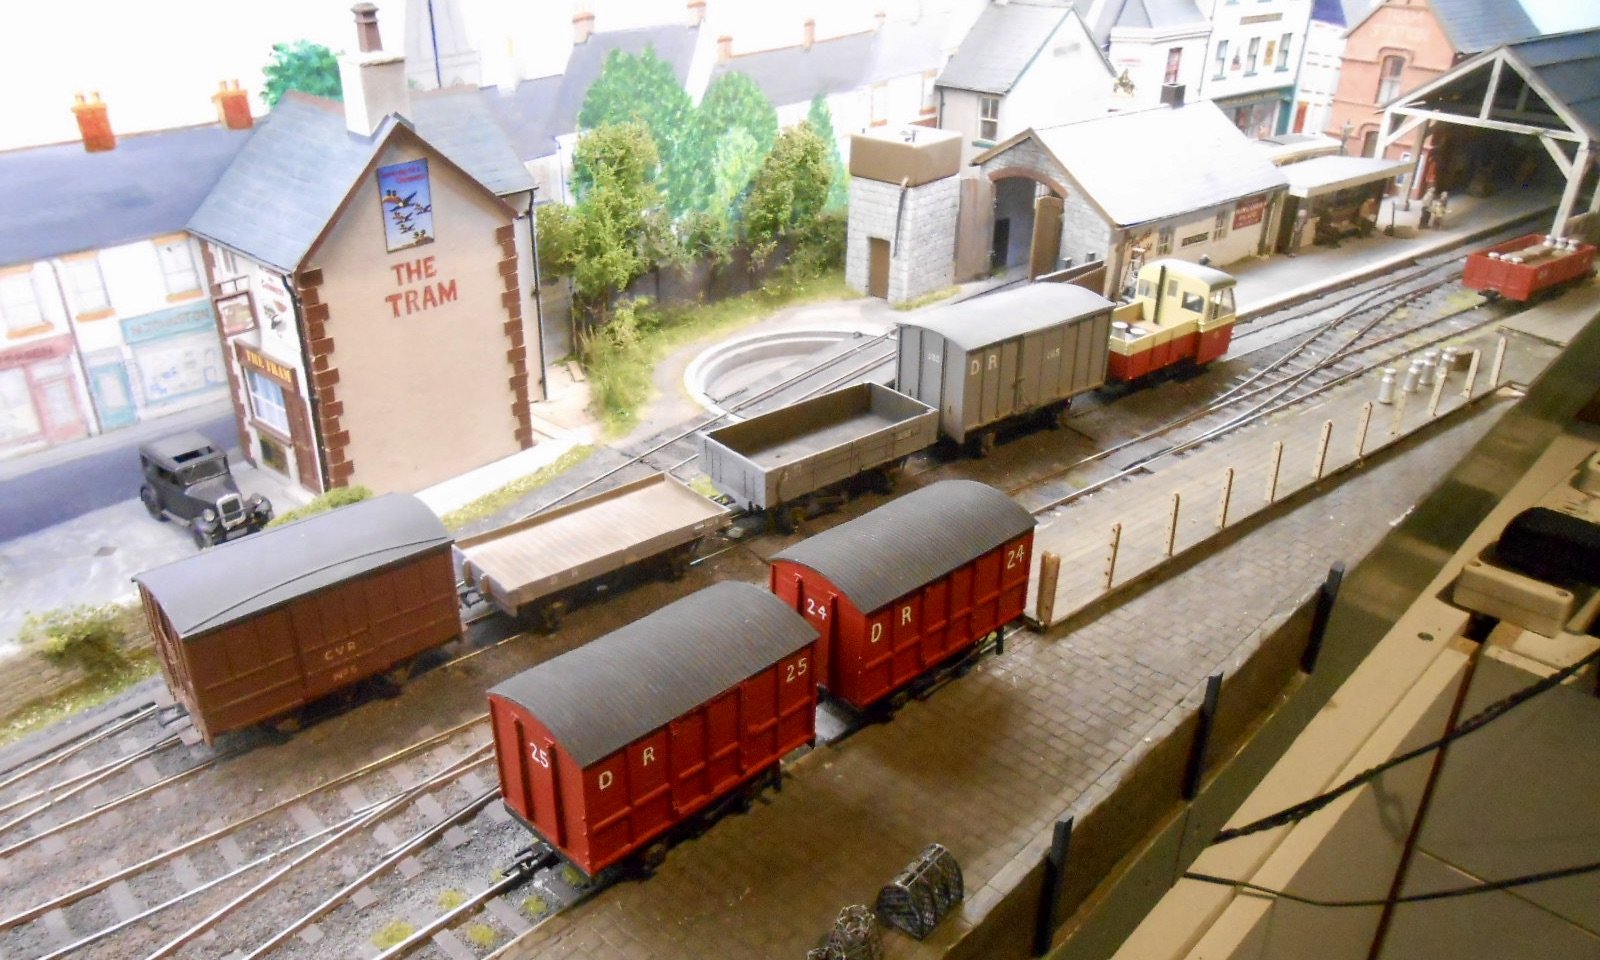
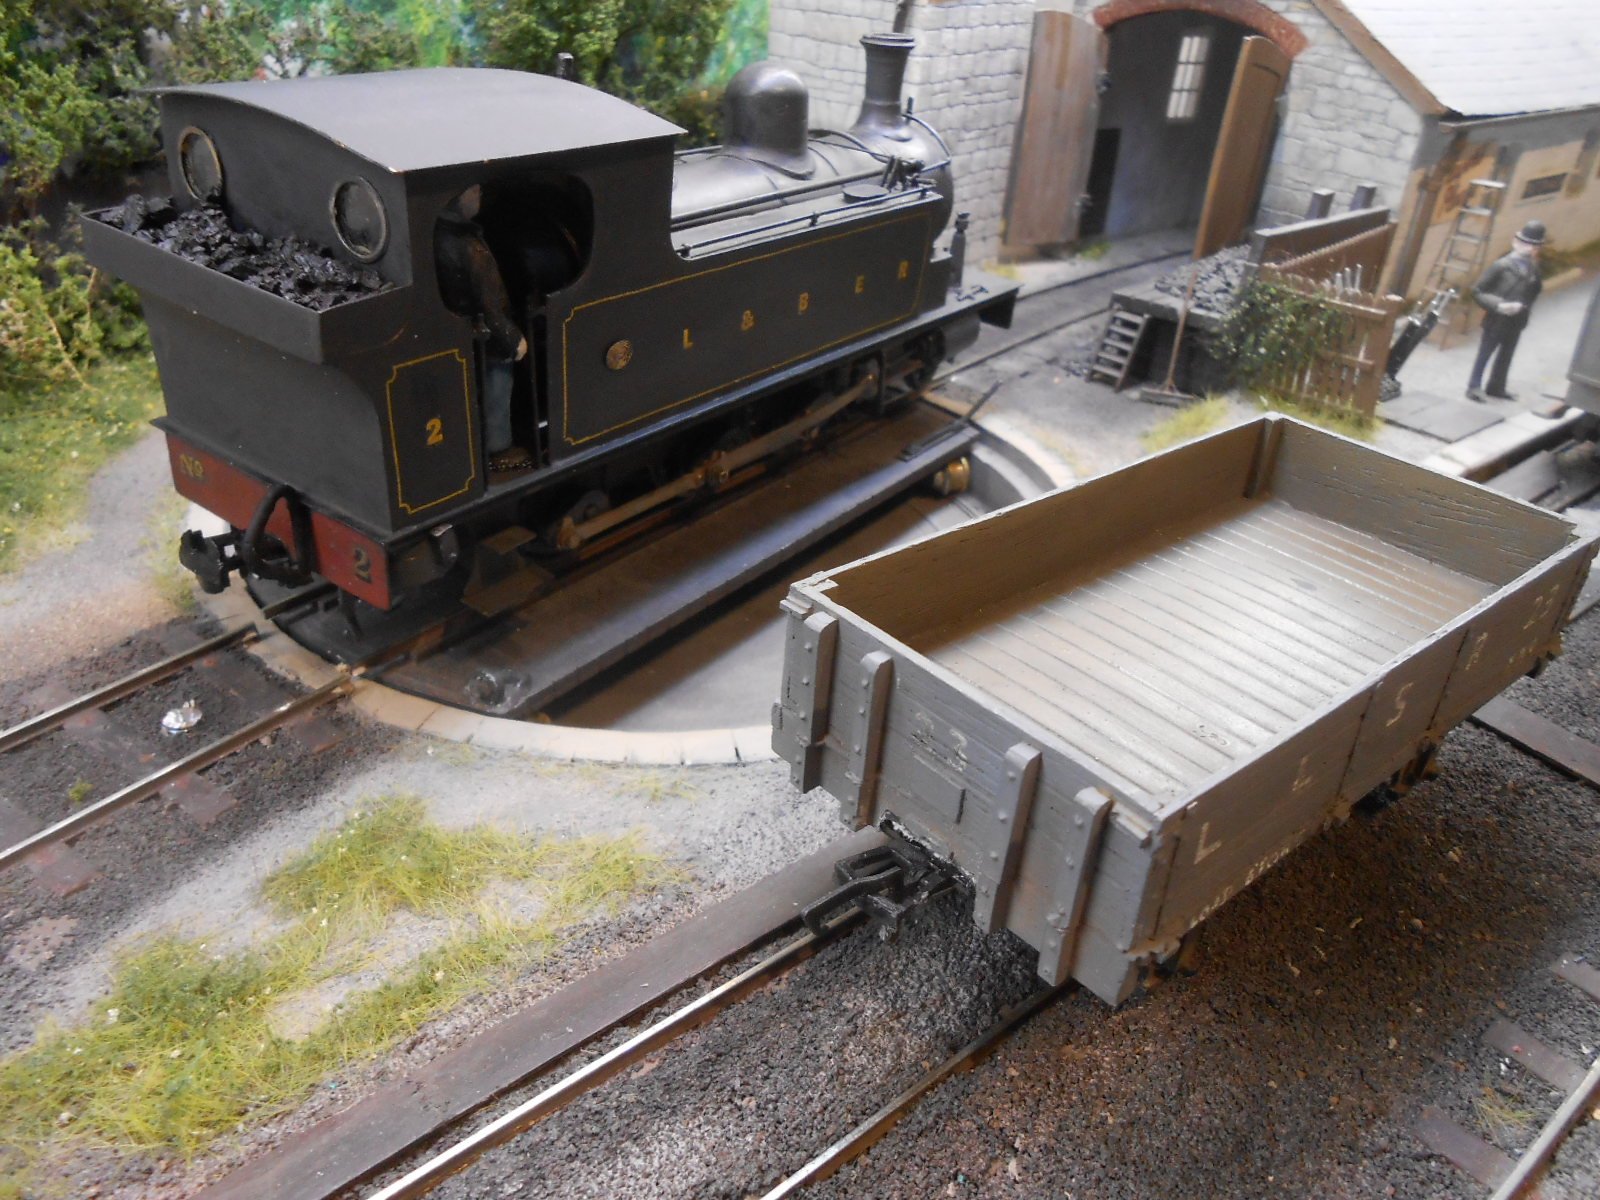
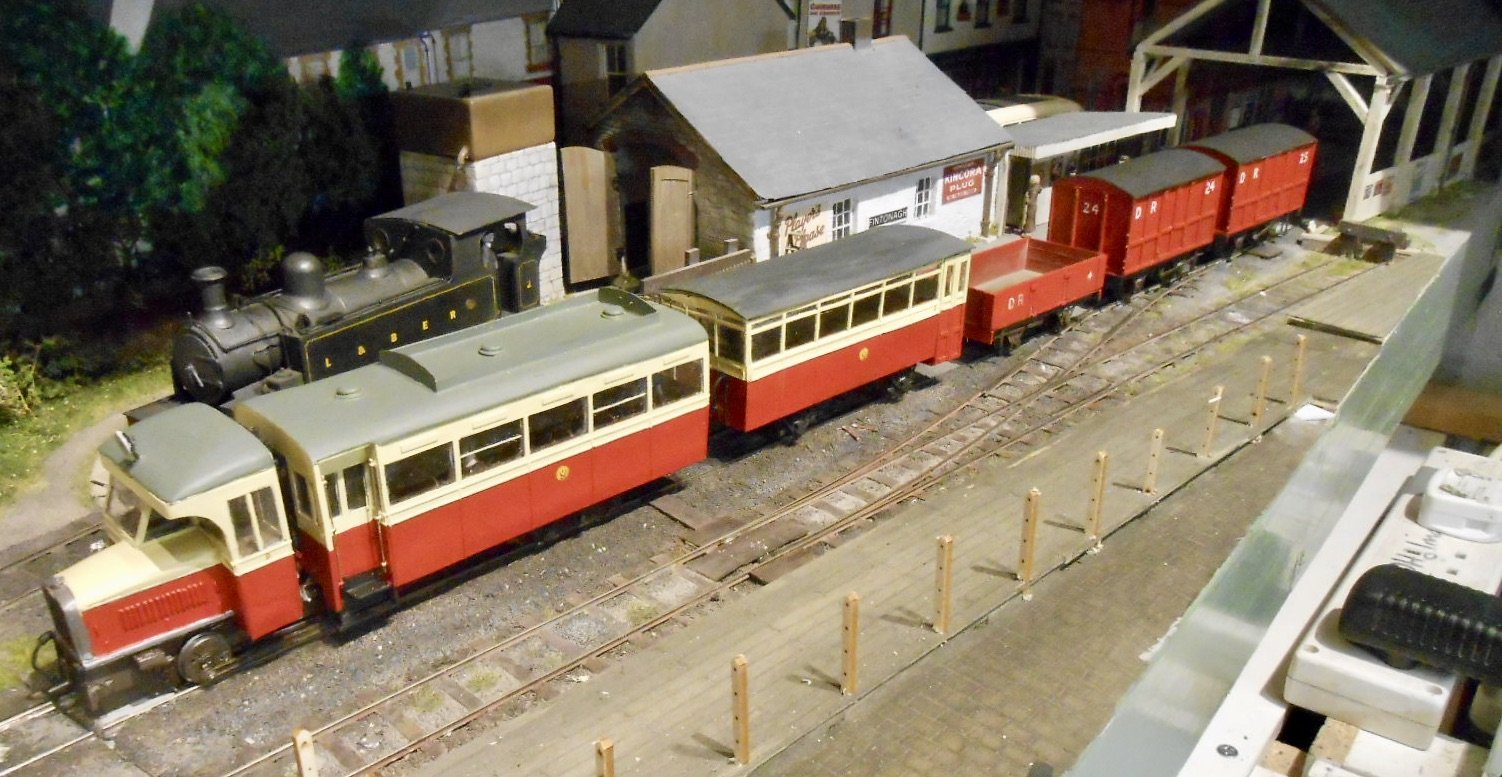
Have at last equipped all my new stock with couplings, so thought a few photos might be of interest. Whenever I build a layout, I usually have a very specific idea of the trains I want to depict and run and Swillybegs is no exception. For The Londonderry & Lough Swilly, there are two trains. Firstly a Barclay 4-6-0T and a short mixed train. It is made of two/three wagons and a brake third coach for the guard & occasional passengers. There are a couple of 'spare' wagons [one of which is a former CVR butter van] which are exchanged as part of the shunting moves. The second Swilly train is yet to be built, though have made a start on a bogie fish van & another brake third, which will be pulled by a Kerr Stuart 4-6-2T. Swilly traffic would not be complete without a bus service and this Corgi Class lurks outside the station, waiting to be relettered. For the Donegal, it is all internal combustion, starting with Railcar 10 [ex CVR] and a trailer. A second railcar [No 7 or 8] will have three 'red wagons' to play with. Freight will be handle by the ex CVR 'Unit', with Phoenix doing the shunting, to and from the off scene goods yard. Trains are just 'posed' at the moment. One of my next jobs is to get things up and running again, so I can properly test those new couplings. When that will be I have no idea. One of the joys of layout building is that you can go where the Muse takes you!

- 34 replies
-
- 18
-

-

-
Good to hear! We survived the '87 Michael Fish hurricane that wasn't supposed to be. Trees down everywhere, but only lost a few fence panels, though without power for a week. My wife, a notoriously light sleeper, slept right through it, while I was awake most of the night listening to the wind roaring outside. Whether the wind got to 100mph hereabouts I don't know, but it was scary stuff. More recently, we had a red warning, but the eye of the storm passed right overhead - I know this because our aneroid barometer needle actually fell off the bottom of the scale. The pressure was probably about 950, but the wind was negligible, whereas a few miles north and south it was a howling gale.
-
"Voiding the Warranty" - Mol's experiments in 21mm gauge
David Holman replied to Mol_PMB's topic in Irish Models
Have a look at www.locosnstuff.com Mark Clark is a Chatham Club member and seriously clever dude in all things mechanical. Taught himself CAD and 3D printing and now runs his own business. Mainly narrow gauge [& some exotic prototypes], but has produced various kits and bespoke chassis, which may provide inspiration or even something you can use. Either way, the website is well worth a look for its own sake. -
"Voiding the Warranty" - Mol's experiments in 21mm gauge
David Holman replied to Mol_PMB's topic in Irish Models
Seriously clever stuff, well beyond my pay grade - which is probably why my eyes are glazing over! On my Deutz G class shunter, I used Delrin chain and gears, but can this be done in 4mm? Once built a Y10 Double Sentinel, which relied on single axle drive and a lot of ballast, to move half a dozen wagons. The other axle could rock, so pick up was reasonable. -
Good luck to everyone on the north west coast tomorrow. Just checked Belmullet, where the wind is peaking at 116 mph!
-
Designing a model railway layout
David Holman replied to Ben howell's question in Questions & Answers
Amen to the above plus the following: Read as much as you can - magazines, books, online Start small - a simple track plan that can be incorporated into something larger later, or just be disposable in terms of building experience. Better than diving in feet first and finding it is all too much. Do you want to mostly play trains, or are more on the creative side of things? It can be fairly easy to lay some track on a board and get stuff running, but months and years to make it scenic. How are your basic skills? Carpentry (baseboards), electronics (soldering, wiring), kit building and so on. Doesn't matter what level you are coming from, because there is much fun in learning If you can, join a club. Great for advice and they may have a layout you can run your own stuff on too. -
That makes sense, because N gauge couplers are a real eyesore, especially in smaller stock. Terriers, 03 shunters and the like seem dwarfed by them.
-
Hmm... not sure to be honest. Might just need a bit of getting used to. Wonder what a whole train of these will look like alongside the black ones? Rather emphasises how big a tension lock is compared to three/screw links. If only the world had standardised on the buckeye! Life would be a lot simpler as we'd all be using Kadees.
-
Transparent tension lock? Interesting! Was talking to Andy Cundick at the Canterbury show today (he was in Llanfair & Welshpool mode and very fine too). He showed me his DG couplings, which work extremely well and maybe I should have gone down that route, but with a supply of free tension locks from the Club, plus their close similarity to narrow gauge choppers, it seemed worth giving it a go. Have tried thin brass but it adds thickness to the front bar, making latching of the hook tight. Tension locks are a surprisingly complex design, with the subtle curve of the front bar, small ledge for the hook to go over and so on.
-
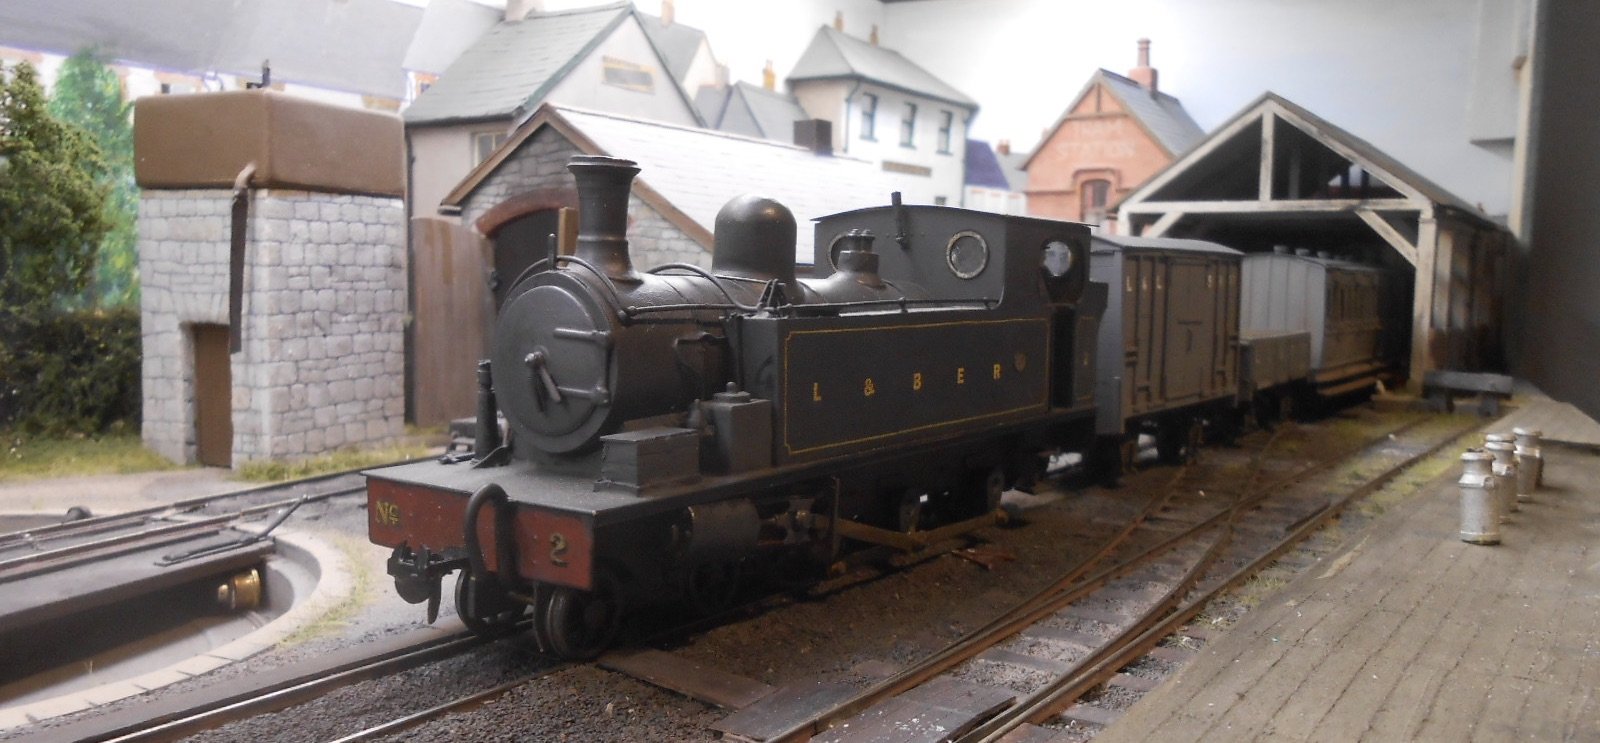
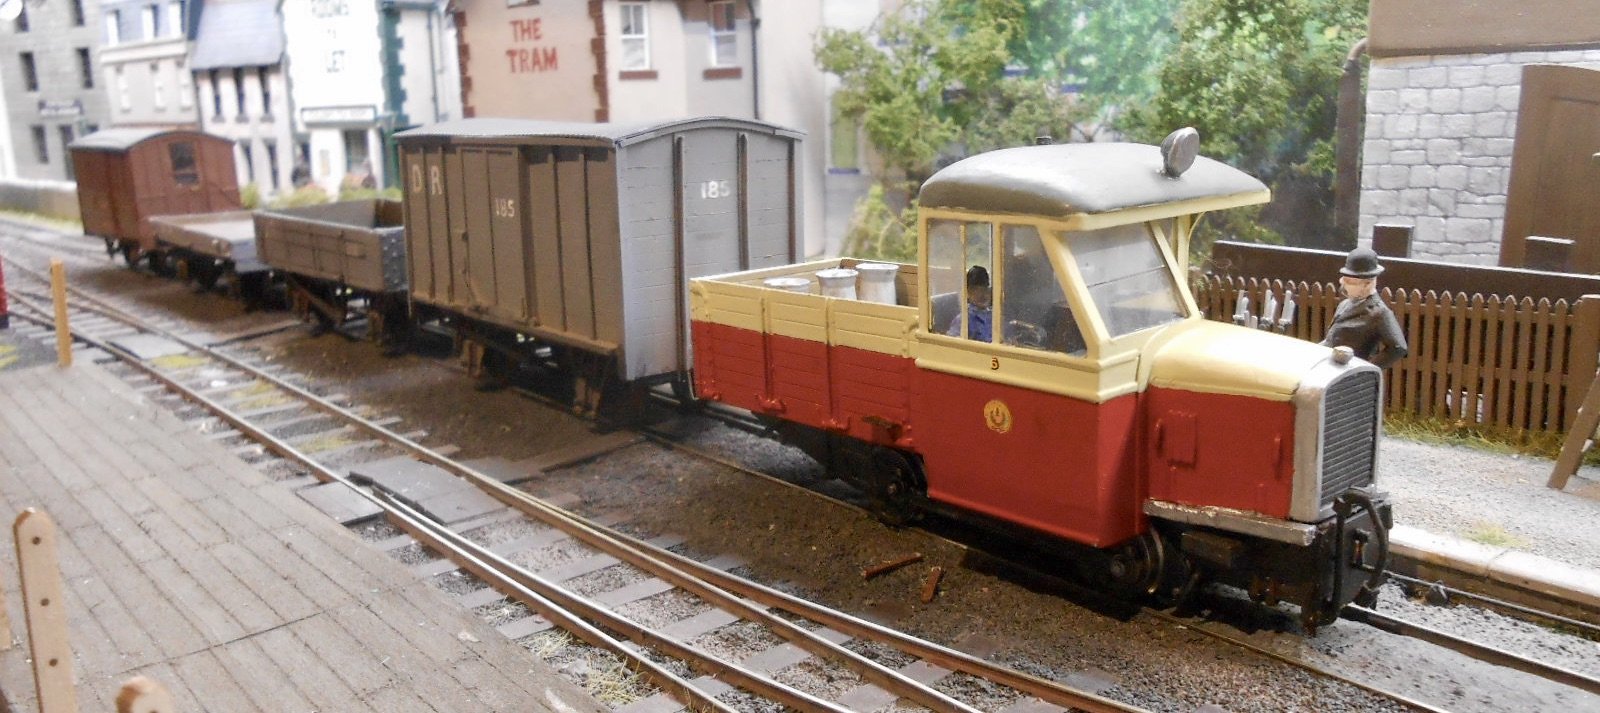
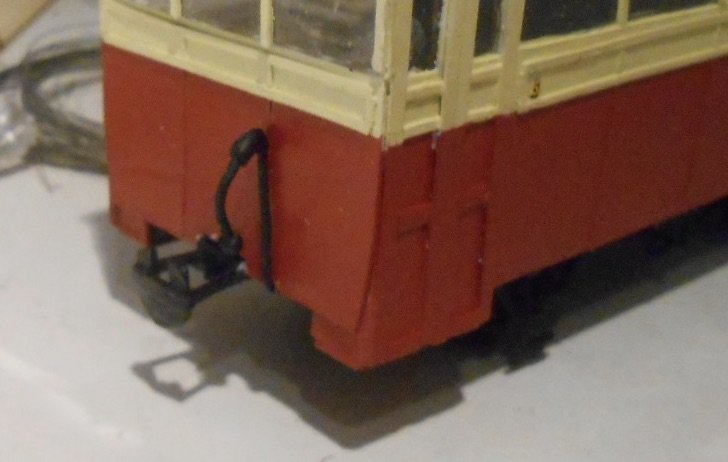
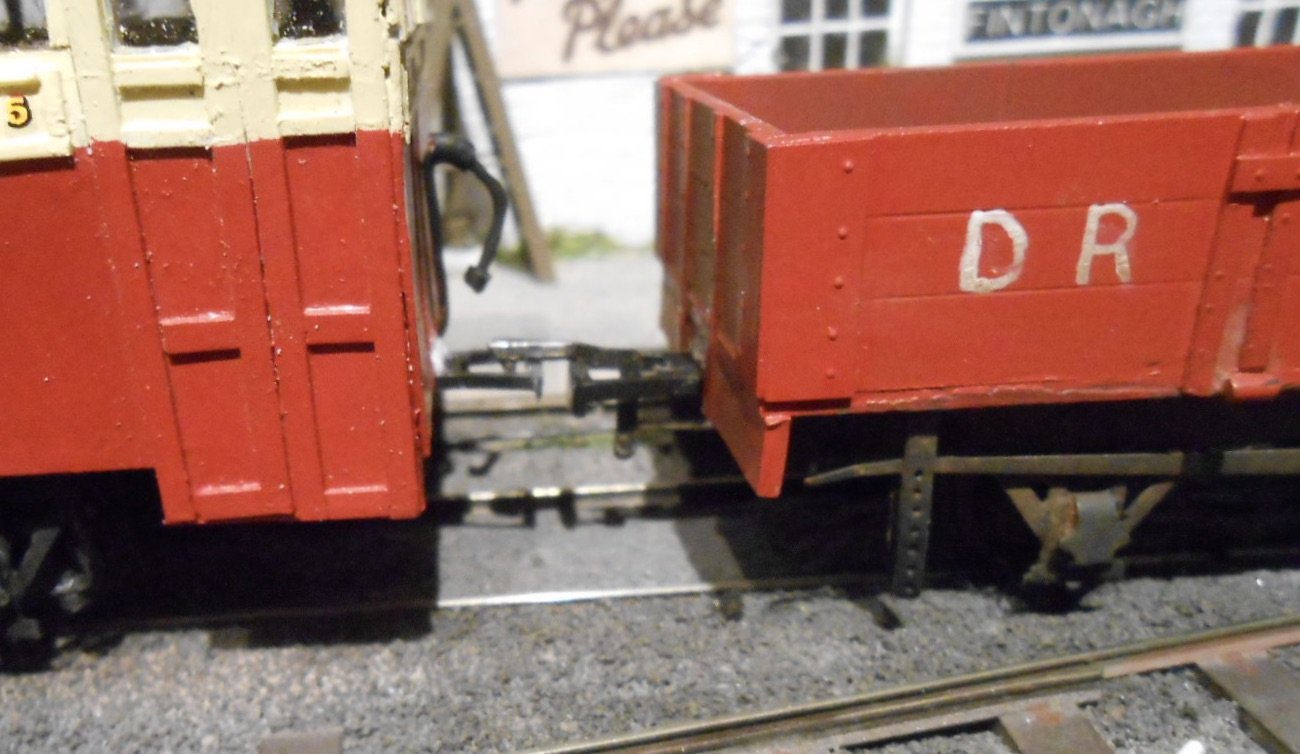
Nothing much to report, other than trying to make the cosmetic part of a chopper coupling has proved very frustrating. Cyano will stick to nylon type plastic, but the pieces are so small and ultimately not really that visible. Hence have decided to cut my losses and only add details to a few key items such as locomotives. The first picture below shows a detailed close up of a coupling on a Donegal railcar trailer. The second is the Barclay 4-6-0T while the third picture shows the same loco [with detailed coupler], alongside a wagon with just an adapted tension lock. Nuff said, methinks...
-
Yep, looking good. And if it just fits, then it is probably just right!
-
Lovely pics, but no snow on the loco though! It would be a brave soul to disfigured a prized loco for just a photo shoot, methinks.
-
Wonderful stuff and great to see the engine and tender together. Given my personal view of air brushes is that they are the Spawn of Satan, then the bowpen is the creation of even darker forces! Well, not quite, but they take more time to master than I've so far had time for... That said, master craftsman Ian Rathbone open a few secrets of the dark arts in his painting and lining book, the key one being the use of enamel thinners and a fine paint brush. Seems even the best don't always get it right, so when inevitable blemishes occur, you wait an hour or two, then dip the brush in thinners, remove most of it and then carefully apply the brush to the offending area. Hey presto, the excess paint lifts off like magic. Still needs care, but definitely works. As ever, practice on scrap material beforehand and use transfers wherever you can. You'll either love it or hate it. David, before you strip the paint off your new loco, might be worth trying T-cut. Shannon was utterly filthy when I acquired it, but it came up really well. If there are paint chips, you can trying filling these in, sand level then over paint and work back after with more T-Cut - though depends how bad the paint is overall.
-
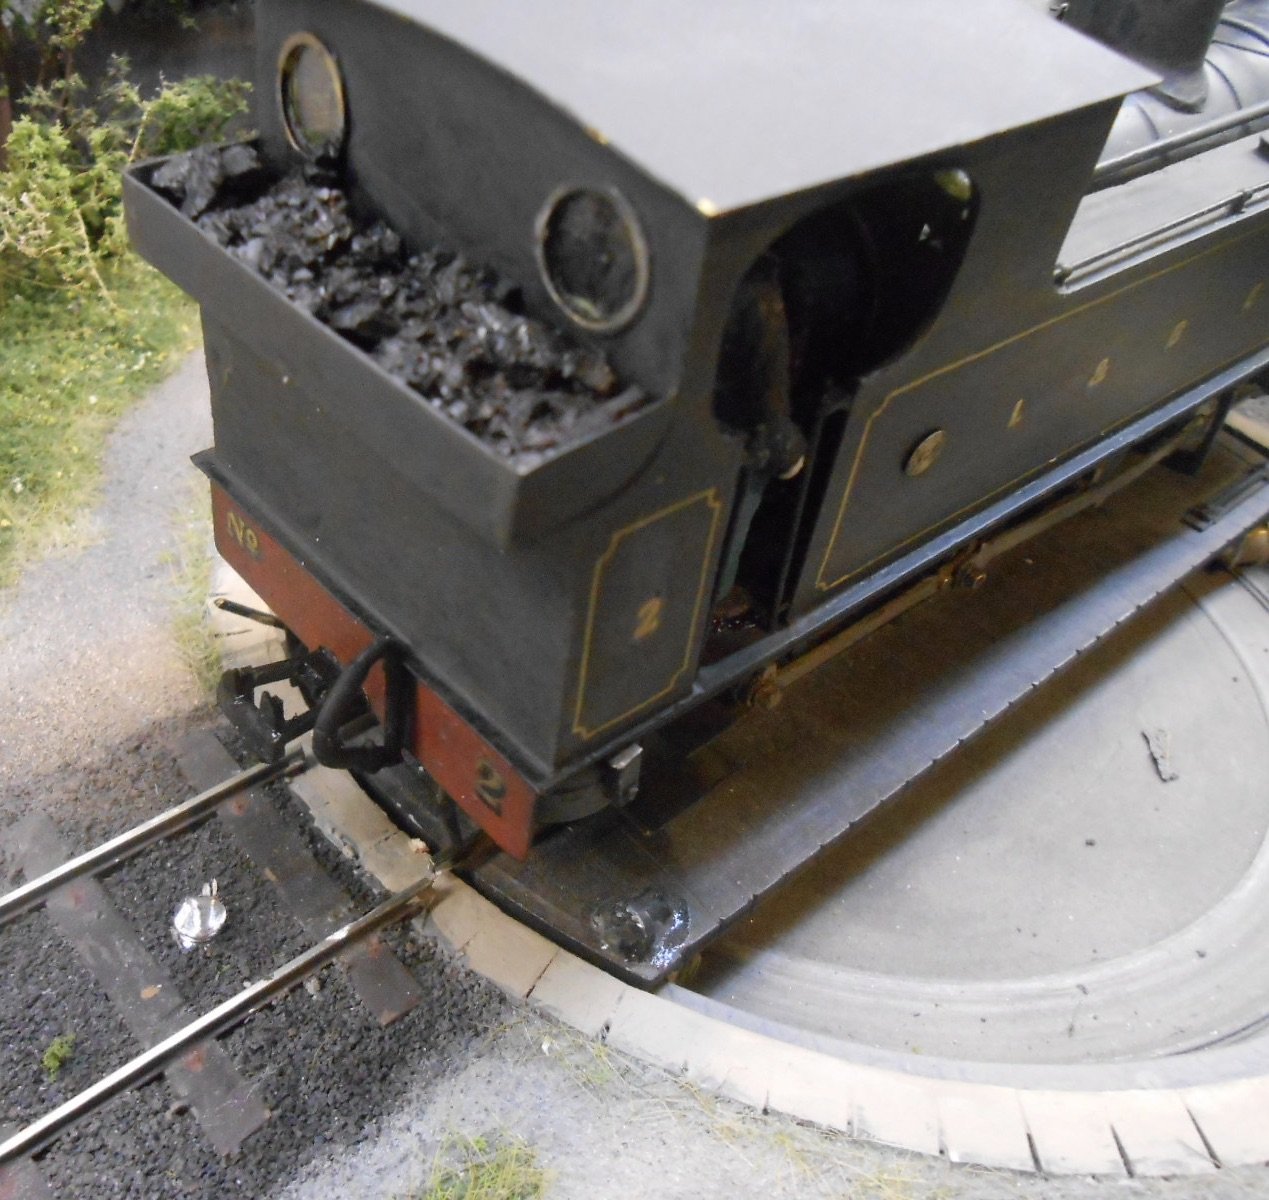
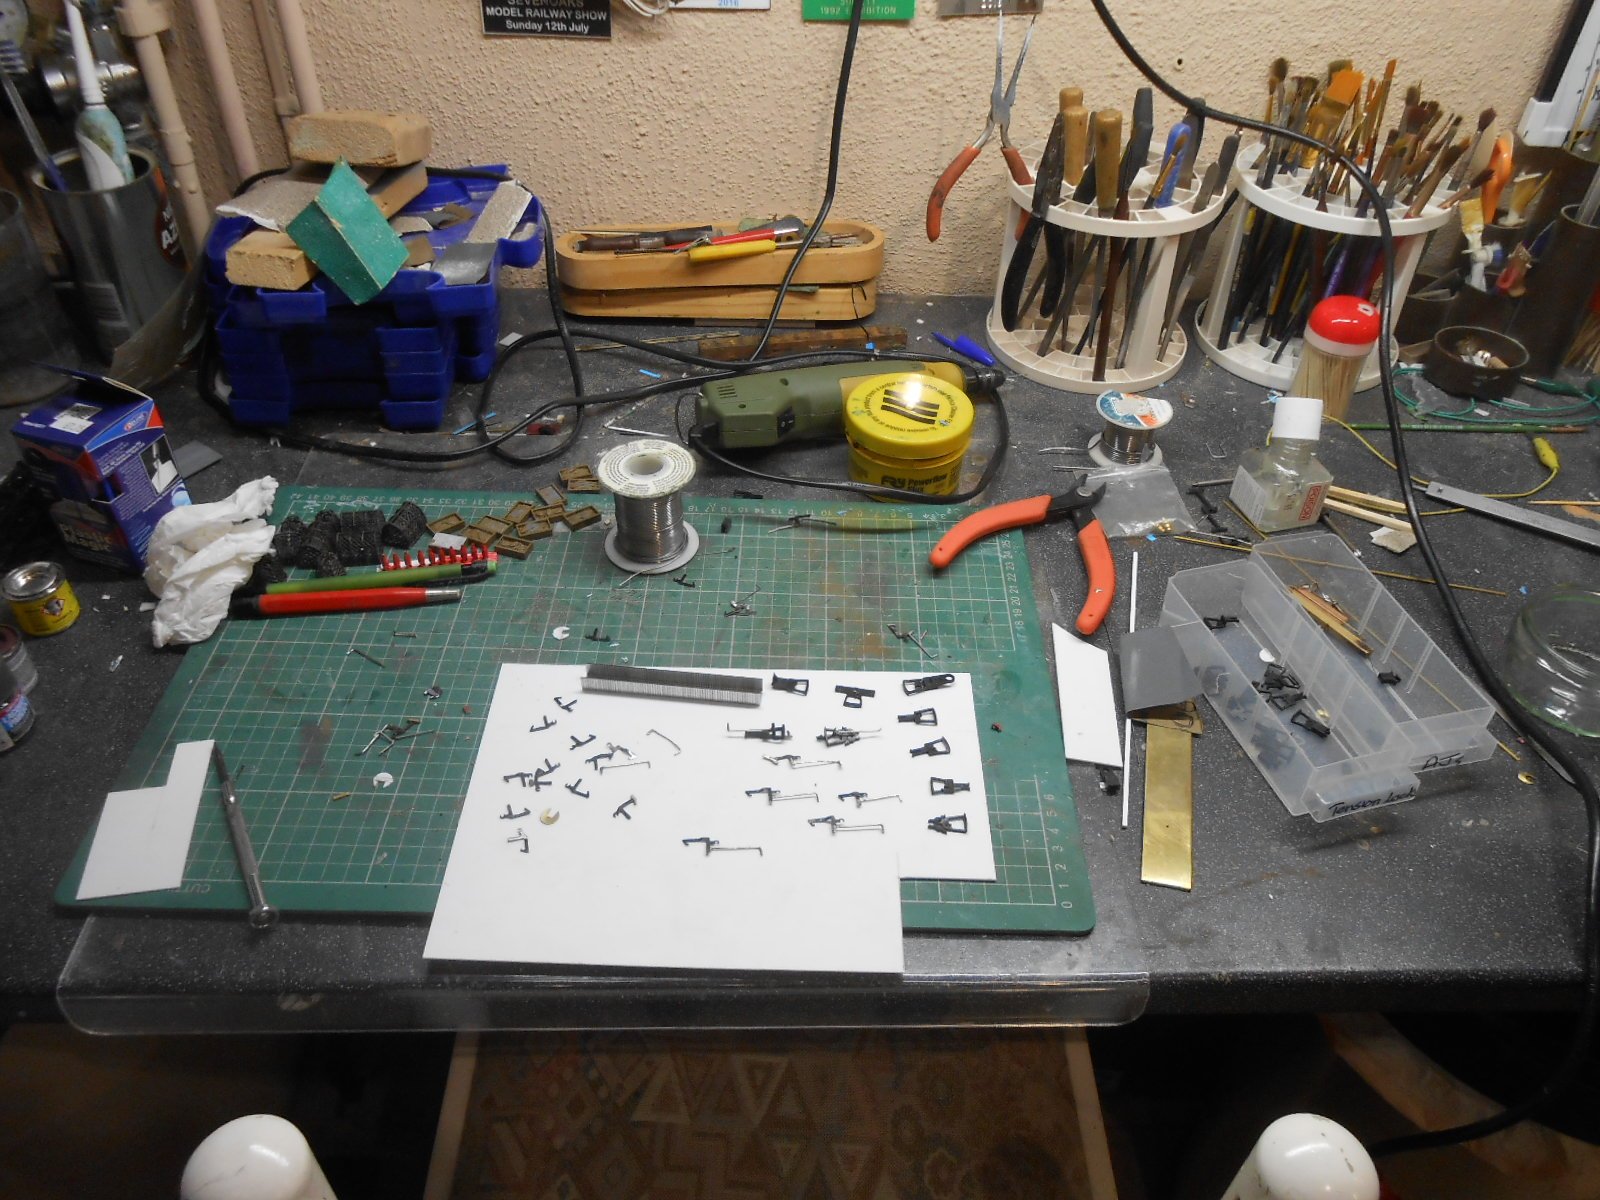
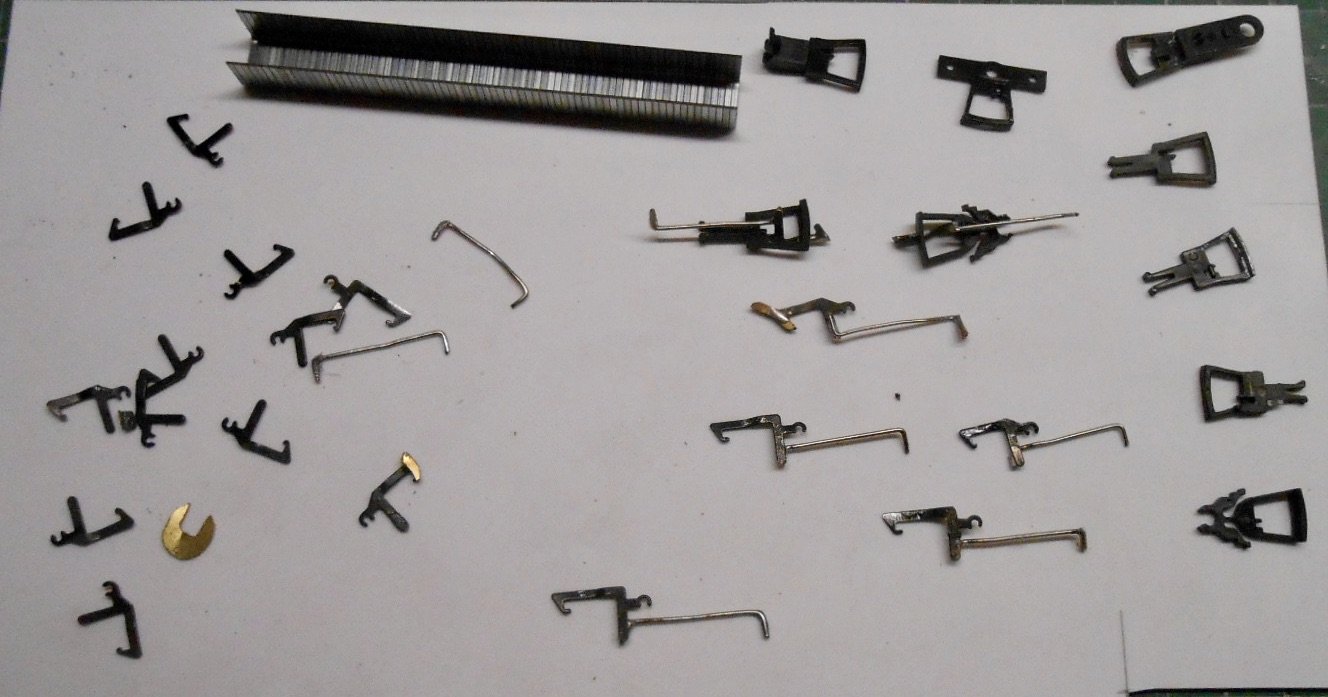
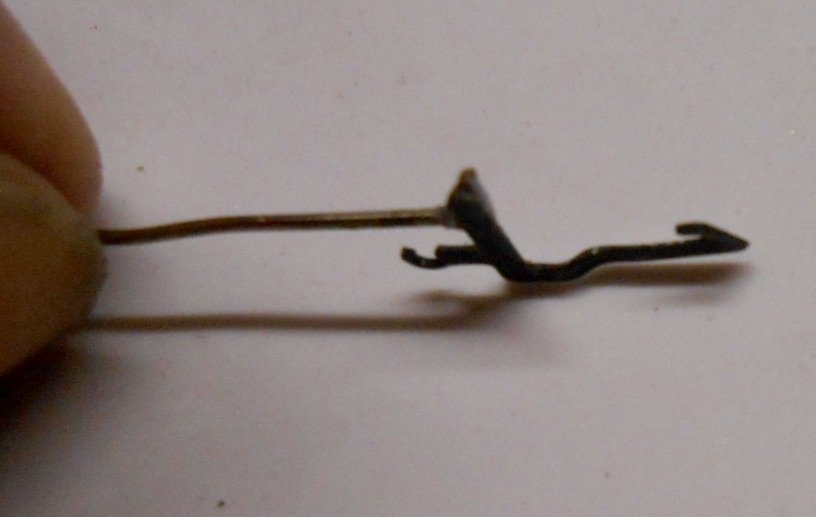
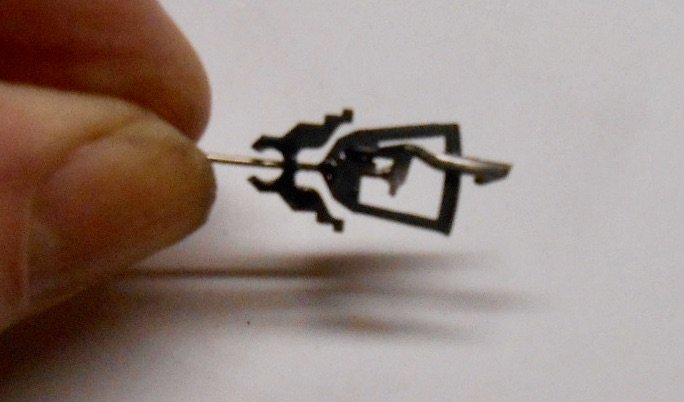
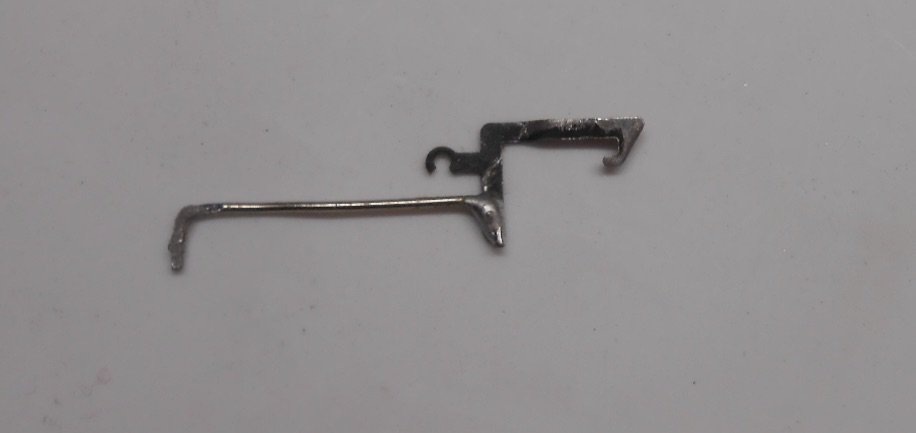
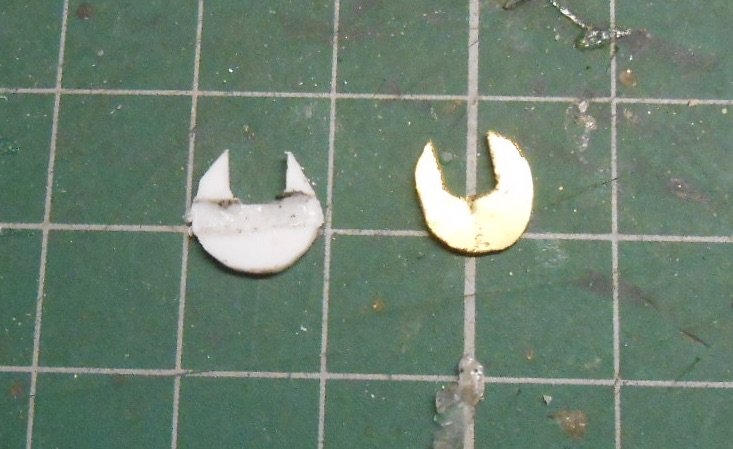
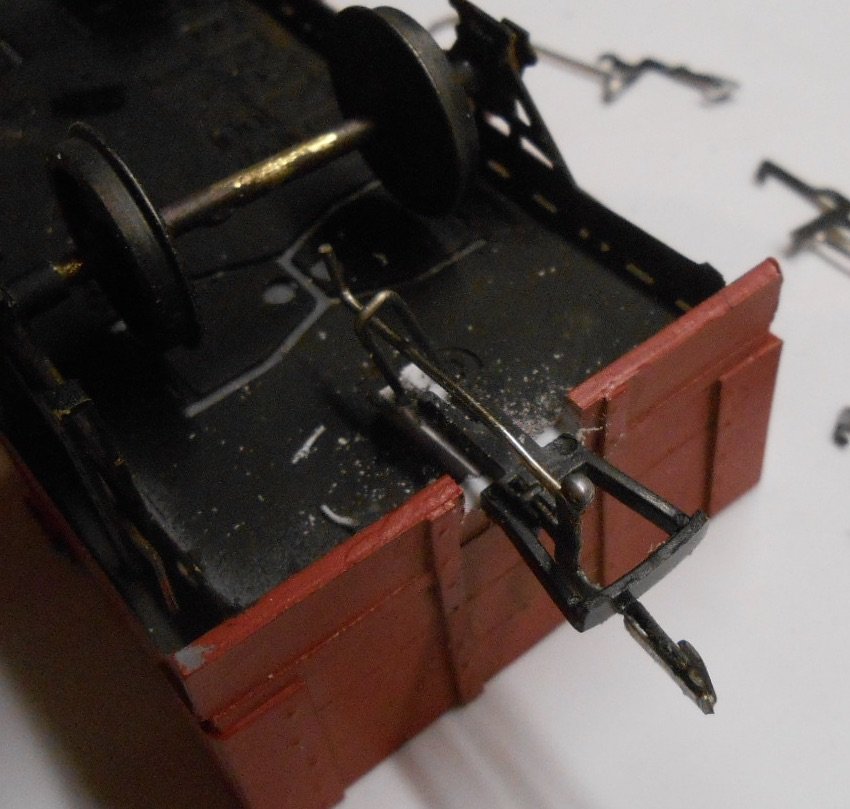
The bogie van has been put to one side for now, while I wait for some 3d printed louvres from fellow Chatham Club member Neal, so finally decided I had to grasp the nettle of... COUPLINGS Been brooding on this for a while - the idea being to make slim line tension locks work with Dingham electro magnets and then alter them cosmetically to look like narrow gauge chopper couplings. The photo below shows just a small part of my trial and [mostly] error work this week. Making tension locks work with a below baseboard electro magnet is relatively easy. A piece of iron wire [paper clip] is soldered to the dropper on a tension lock hook. The more challenging part is refining the set up so it works efficiently. Tried various fixing points and lengths until I found that [for 7mm scale/21mm gauge] a shallow, inverted U shaped wire approx 21mm long is about right. A selection of parts is shown below. Unlike standard tension locks, I only need a hook on one end of a vehicle, with just a plain loop at the other and indeed, just loops on locomotives. The hooks have been 'jiggled' so they line up centrally. As the picture above shows, this now means the pivot point of the hook is fairly central - and thinking about it just now, the wire could probably be made slightly shorter, as [despite appearances] it does, just, balance. However, to add a bit more weight to the hook end, I've soldered a small piece of staple to the hook 'arm', which both disguises the joggle and gives just enough weight to make the hook drop drop by gravity. Was pleasantly surprised to find that the Dingham electro magnet, the pole of which is an M4 bolt, has quite a wide field of influence - around centimetre, which hopefully will make sighting uncoupling spots easier than the 3mm 'window' the rare earth magnets I'd been using with Kadees. Fixing the new tension lock assembly to my stock has proved a bit of a pain, as the nylon like material doesn't much like any sort of adhesive. Cyano is just about ok, but takes a long time to go off, while neither plastic cement or solvent will touch it in my experience. I think I'll probably need to beef up the joints with 5 minute epoxy, though not until after I've done plenty of testing. One thing I have found was, as expected, the need to add a narrow U shaped piece of wire around the staple wire extension to stop this hitting the track when the magnet is activated. The biggest problem I've had has been trying to replicate the appearance of the the chopper coupling's buffing heads, which look like the mock ups below. Trouble is, trying to fix these to either the front or rear face of the tension lock buffing beam serious limits the space required for the hook to latch on. Am seriously thinking of not bothering at all, after multiple attempts to fabricate something, not least because, for practical reasons [including my own sanity] whatever is made needs to be simple. Current thinking is to have the buffer head fixed to the top and bottom edges of the tension lock: halfish circle below and two quarterish circles above. However fixing them is another matter! I'm wondering if I epoxy two pieces of micro strip [probably 40x60] behind the tension lock bar, I can then fix the curved pieces to these with solvent. Watch this space... Anyway, have done some of my Donegal stock and, fingers crossed, this seem to be working well. The system doesn't allow for delayed uncoupling [like Kaydee, AJs etc], while the fact that I turn locos on the layout and the whole train in the fiddle yard means there will have to be clearly defined shunting moves to avoid two hooks [or two loops] meeting up. As the photo shows below, the staple wire is nicely hidden most of the time and even when pulled down by the magnet is behind the wheel, so all in all, pretty unobtrusive. Doubt if this is an original idea, but feel it could well have its uses in 4mm scale, though tension locks are not exactly prototypical in 12 inches to the foot...
-
Welcome to the singed fingers club! Really nice work, especially with it being so small and fiddly. Onwards and upwards!
-
Always welcome!
-
Looks like quite a find! Jealous? Absolutely!
-
Nice to see there are other folk who have been working in 36.75mms too - though it still seems to be a very small, or even secretive club. Often wonder just how many folk there are out there indulging? Ultimately, there is perhaps a single item that is crucial - Slater's broad gauge loco axle. Wagon and coach axles, plus wheels, not a problem, while fixtures and fittings can be found or adapted. Without that loco axle though, things would be a lot more challenging.