David Holman
-
Posts
4,359 -
Joined
-
Last visited
-
Days Won
117
Content Type
Profiles
Forums
Events
Gallery
Blogs
Everything posted by David Holman
-
Proposed Donegal congestion railways from the 1880's
David Holman replied to Colin R's topic in General Chat
And there was me thinking my Swillybegs fiction was just nonsense. Clear induction of proposals through Ramelton to Downies and beyond. -
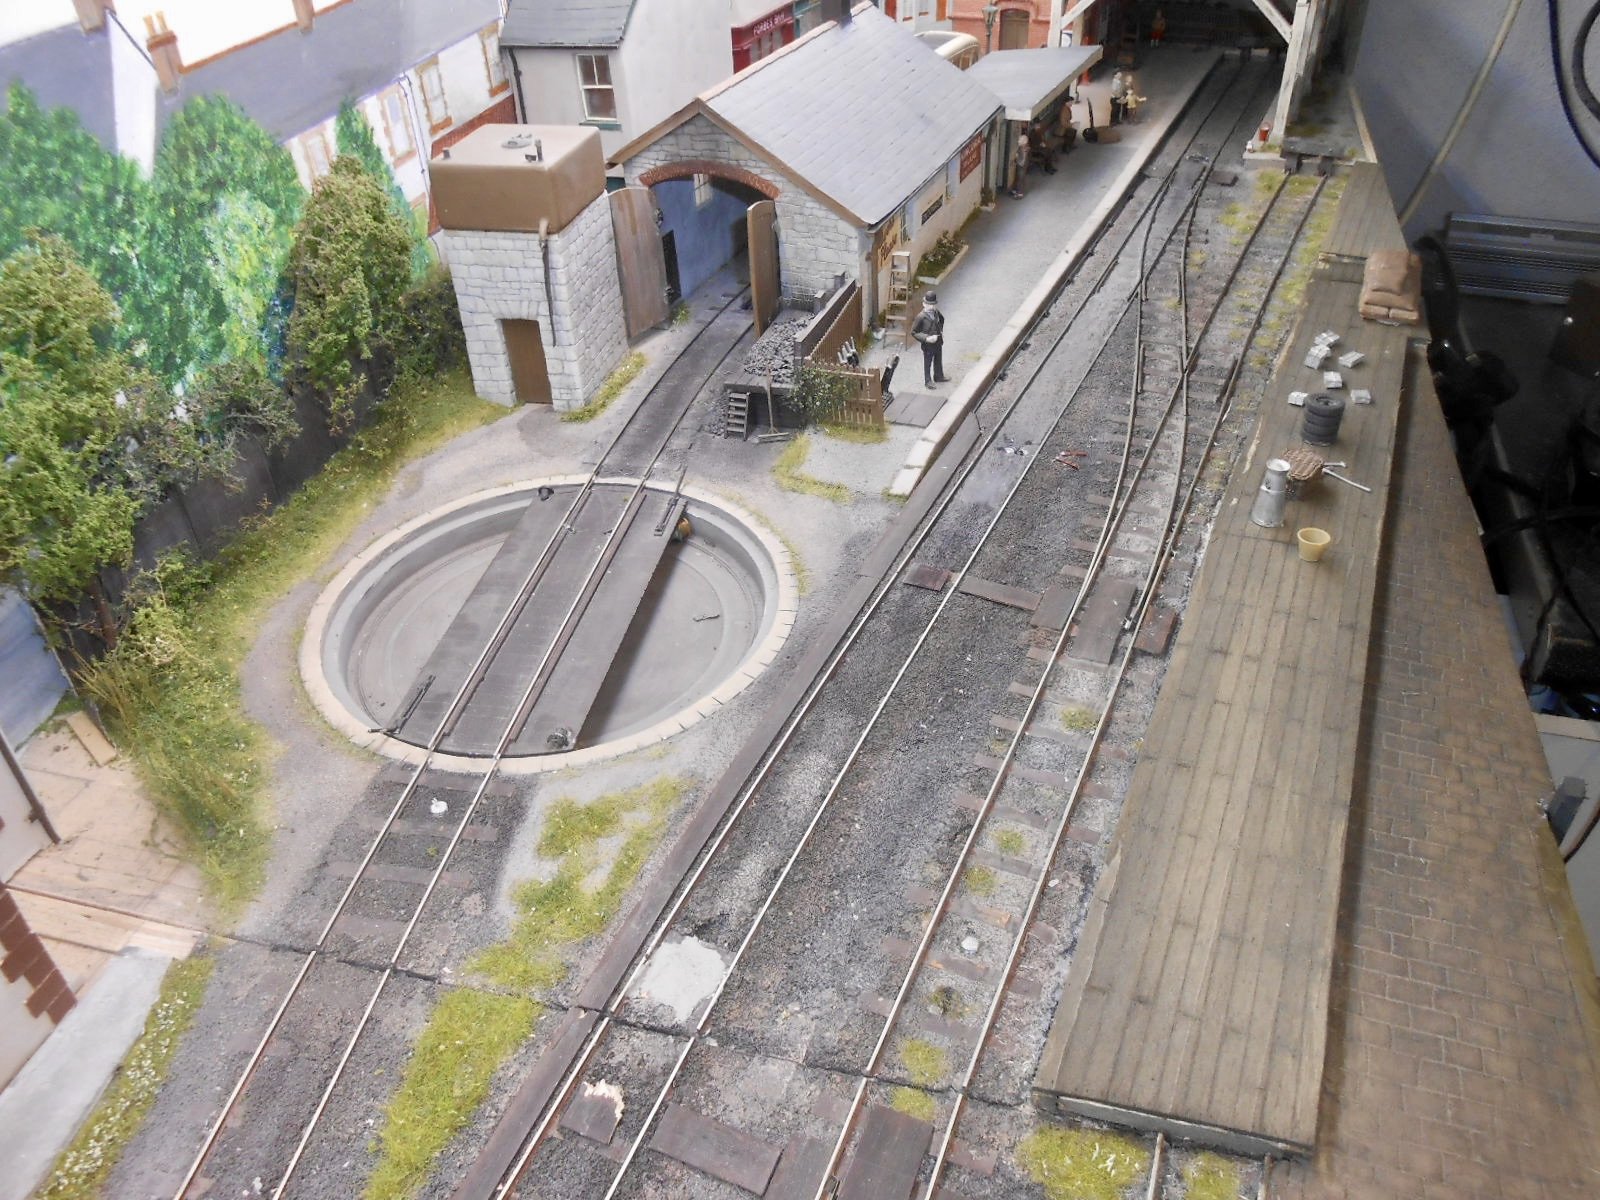
Fintonagh/Swillybegs turntable has similar situation with encroaching foliage! Been meaning to trim it back a little, but have a good excuse not to now.
-
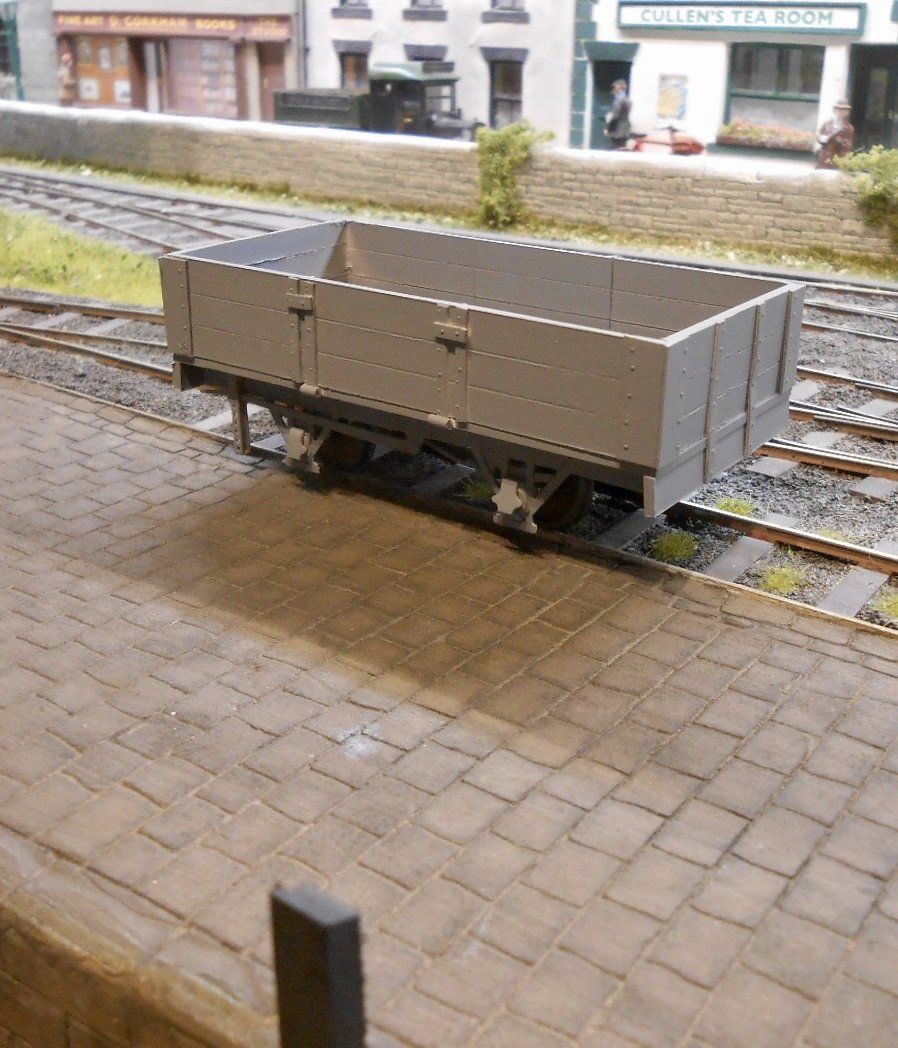
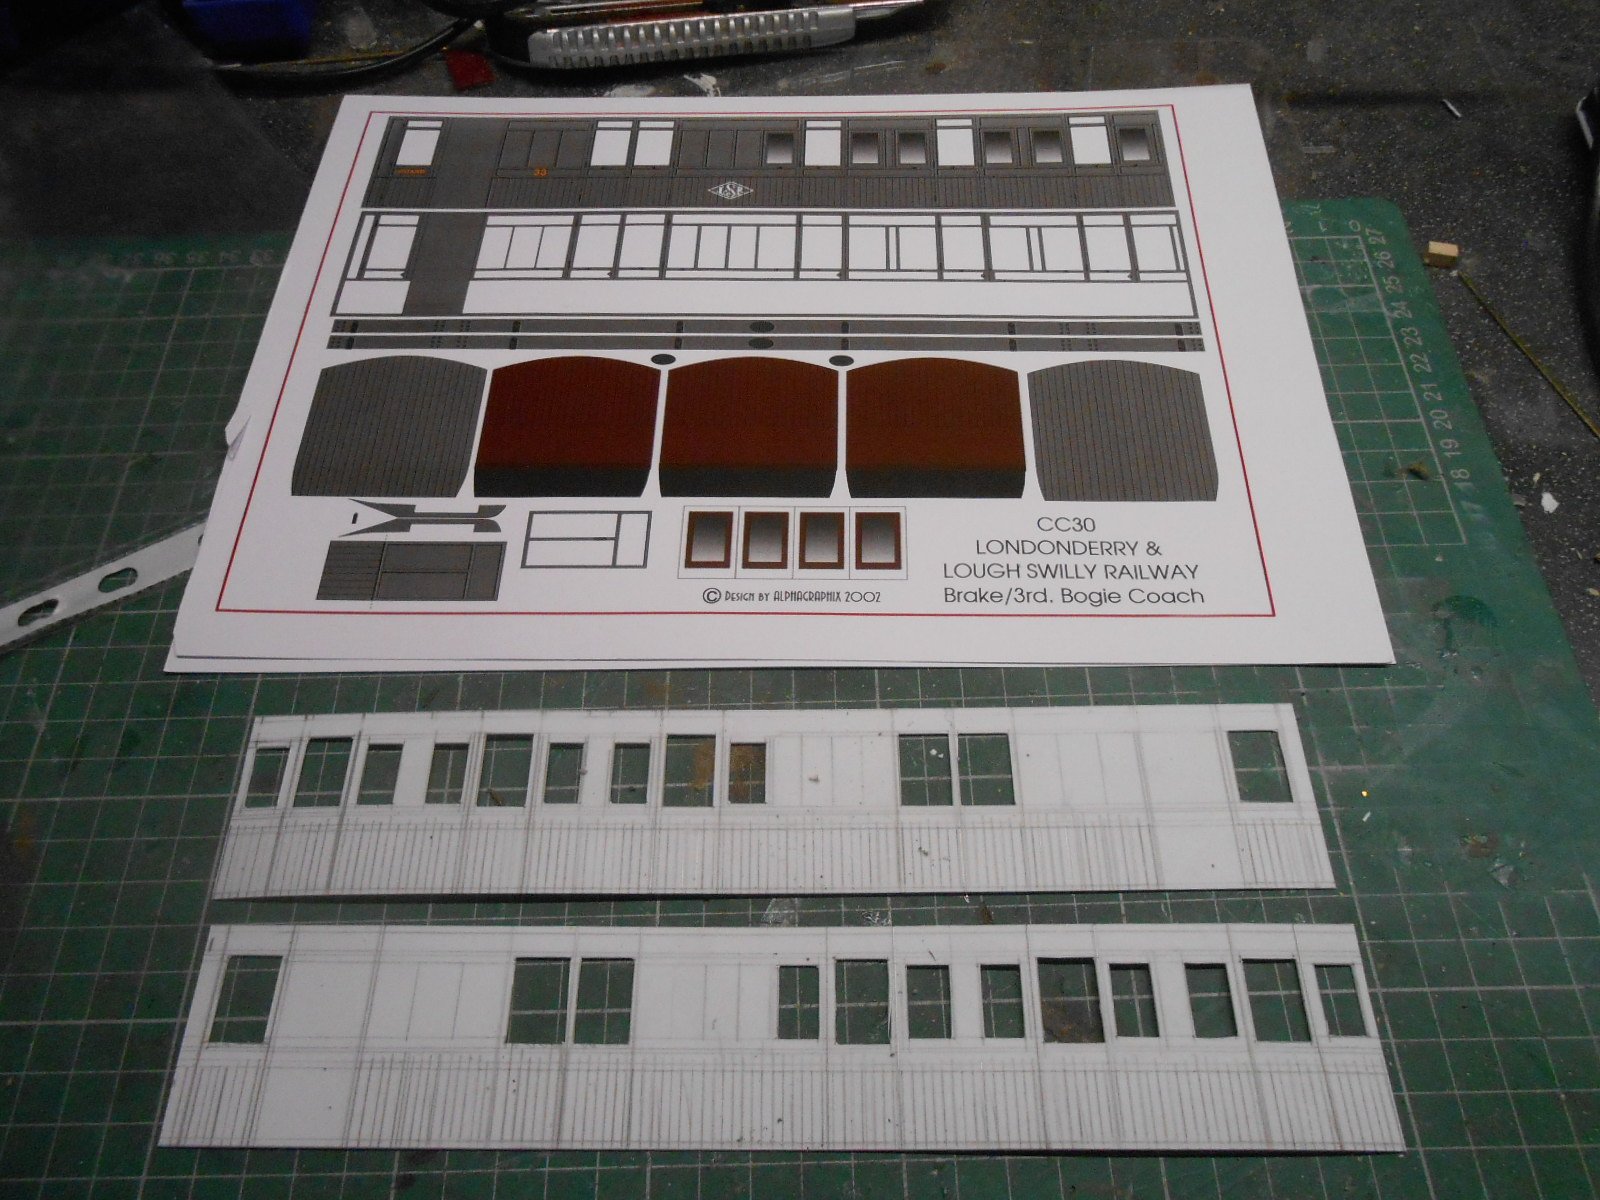
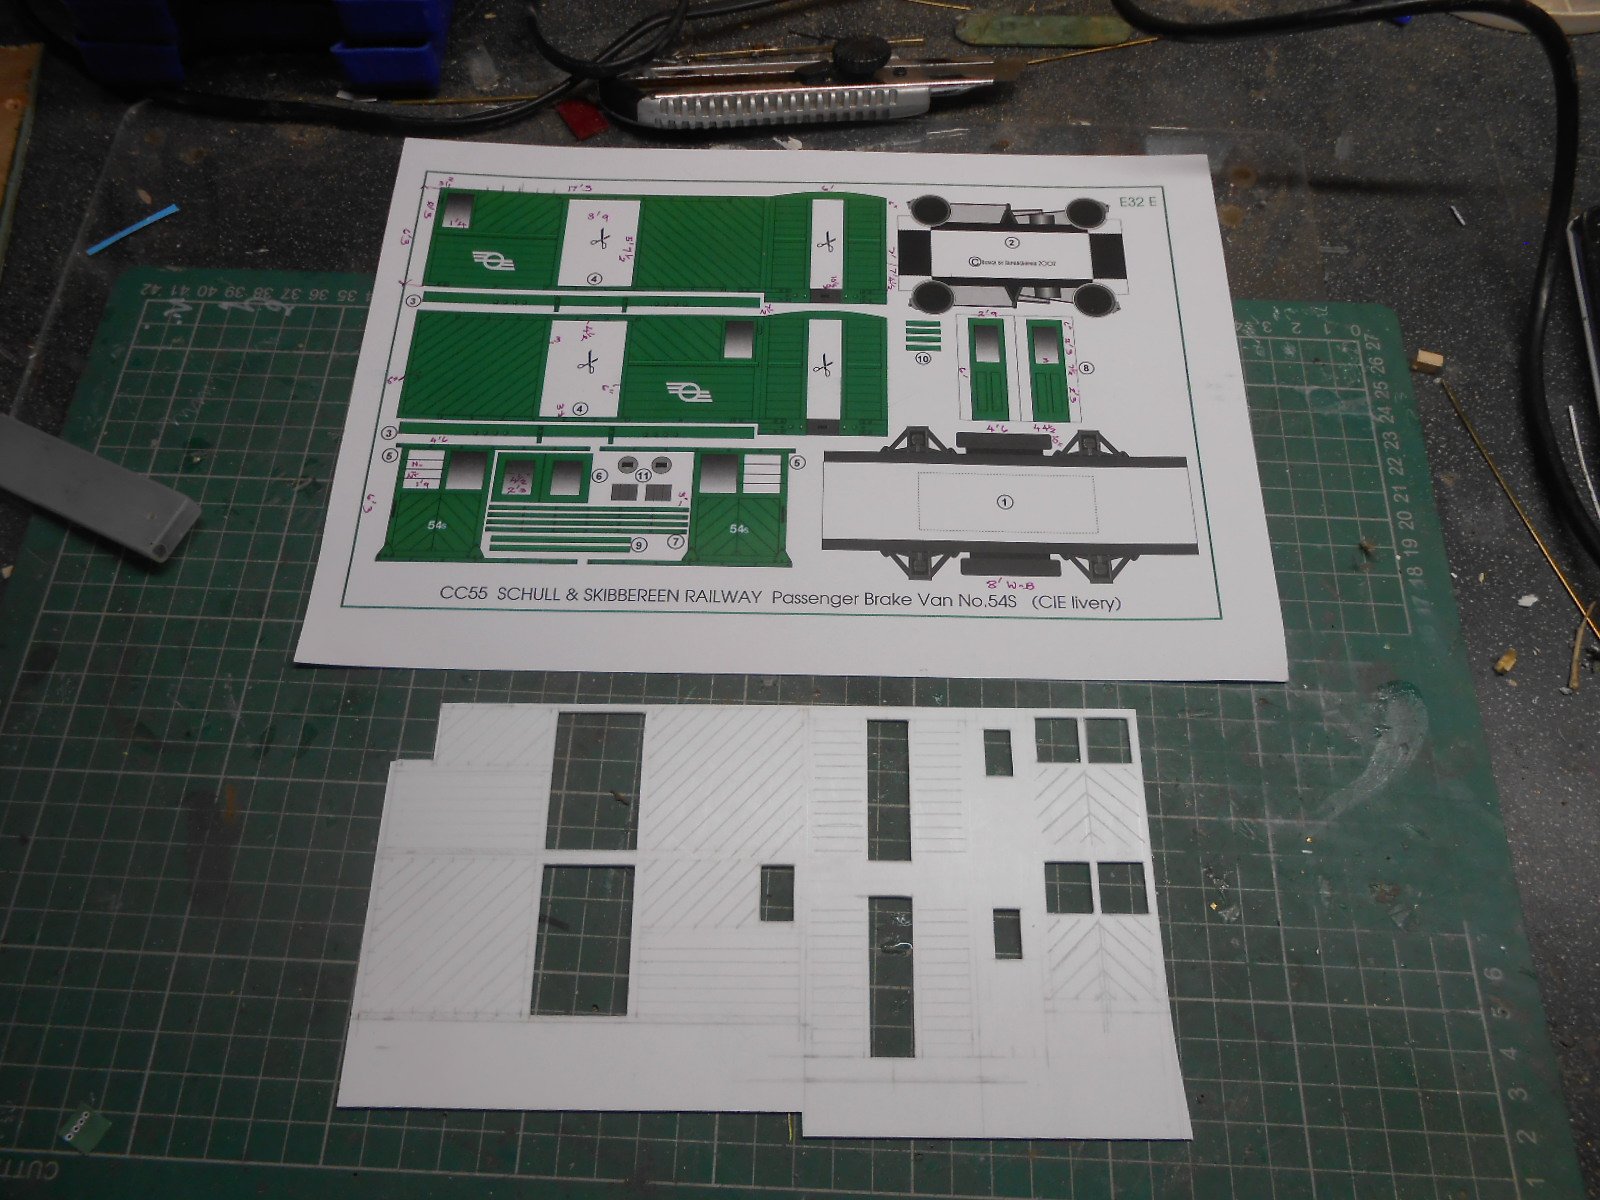
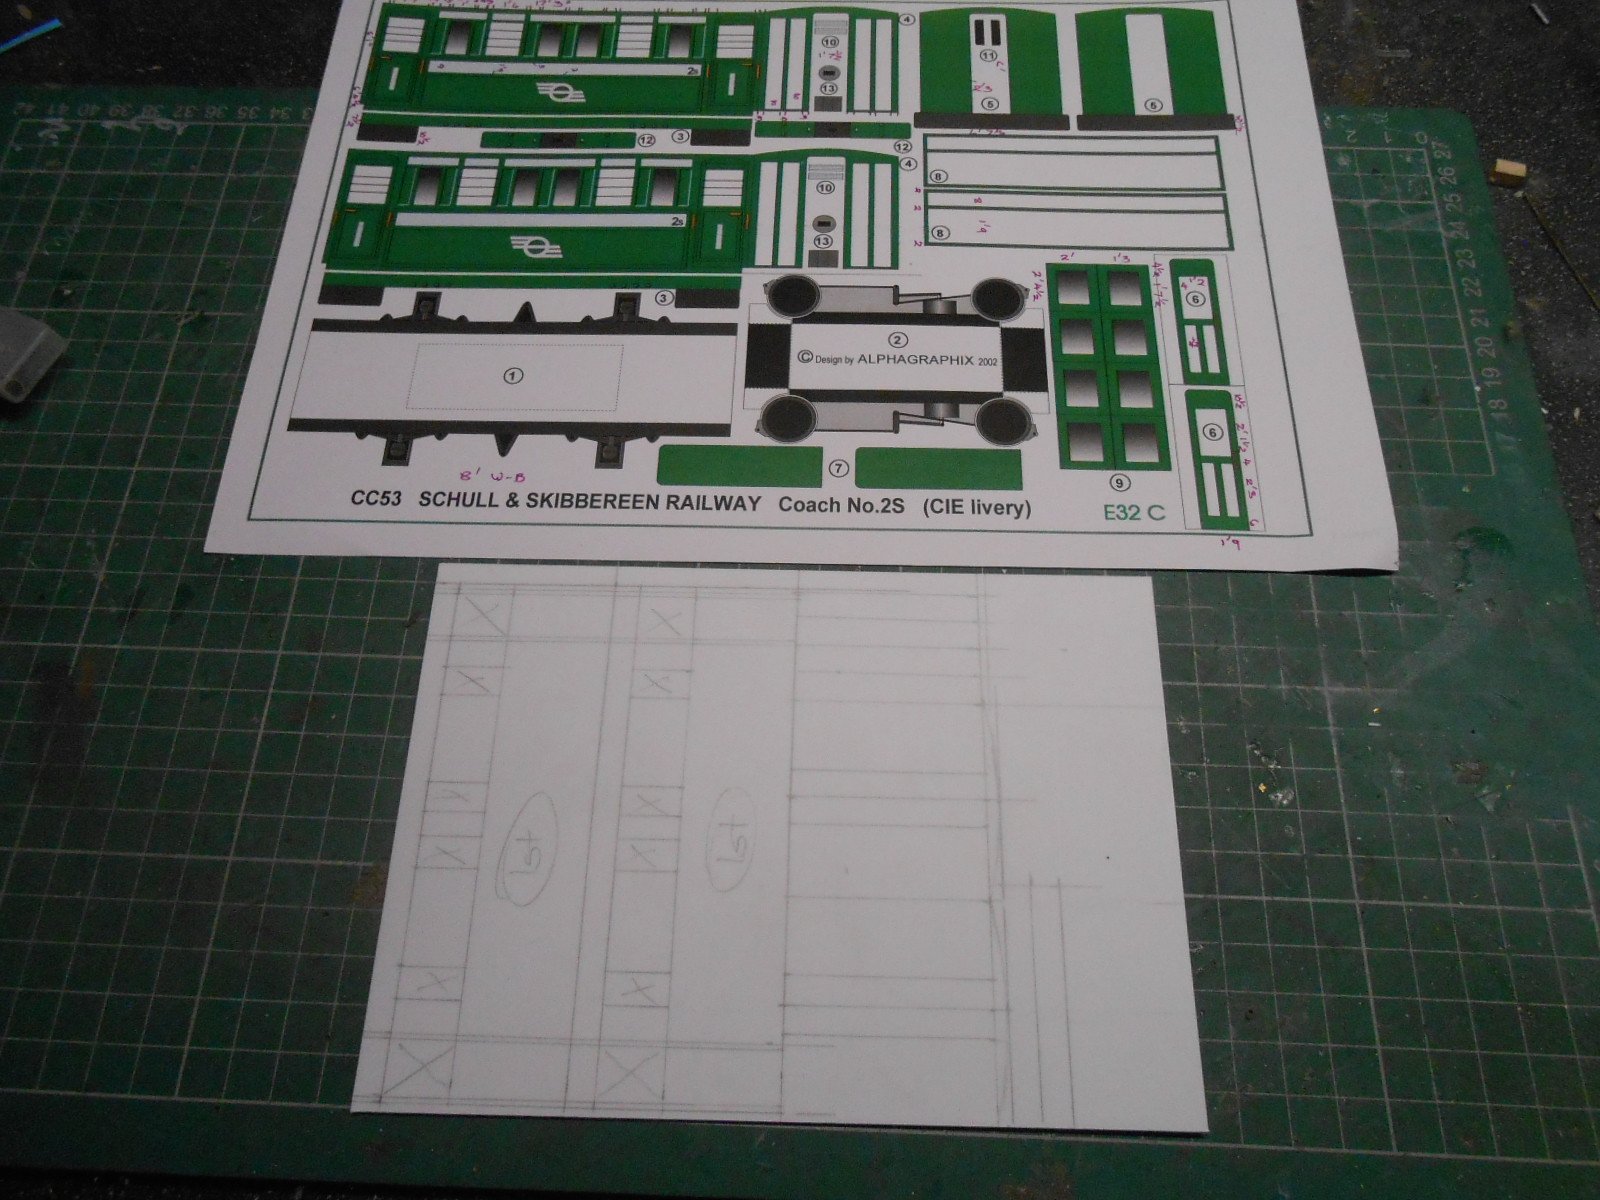
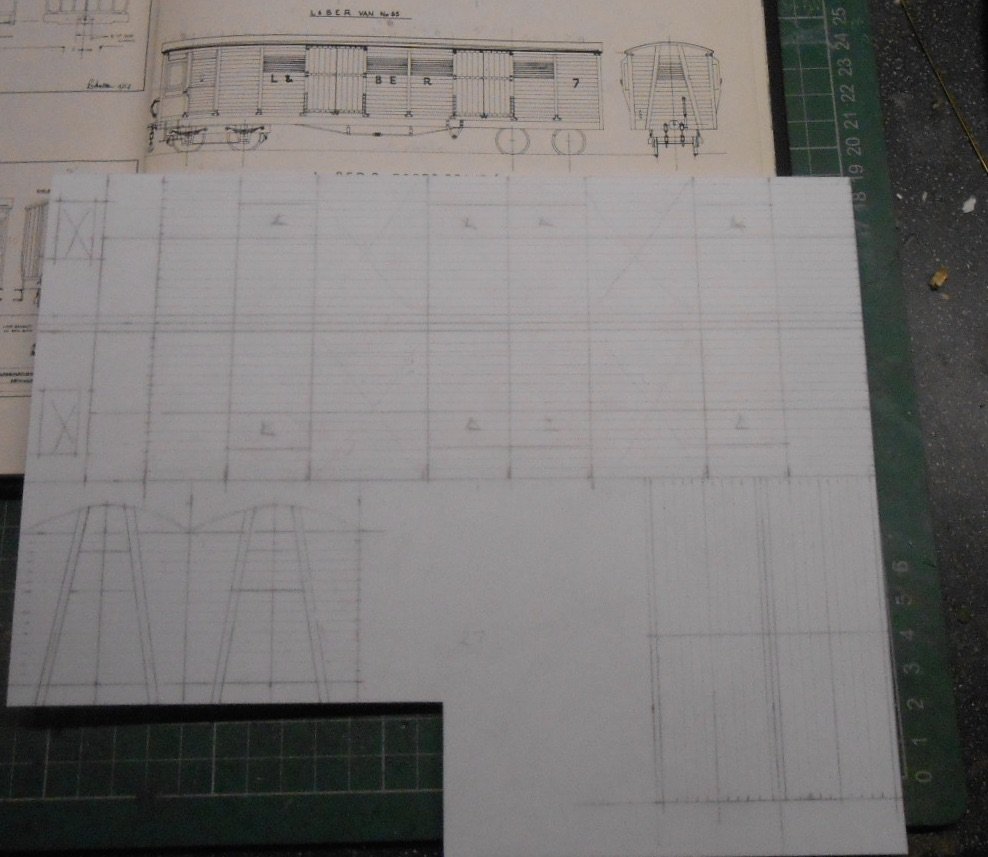
The structural work for the quayside is now largely complete, though much titivation and detailing is still required and orders are going in for some fish boxes [Langley] and some rather nice 3D printed lobster/crab pots I've found on the web. Maybe a couple of figures and some luggage too, while fencing along the back of the tram platform is also needed. The latter has been made from basswood, scored to represent planking, while more basswood strip has been used to make the large posts protecting the quay wall. Am tempted by the Langley fishing boat, though this would need a baseboard extension to sit on and at nearly £150 ain't cheap, so this is in the maybe file at the moment. Over Christmas, had to content myself with drawing out some coaches and a wagon on to plastic sheet. We were away at my mother's and it was suggested that taking the soldering iron, solvents etc might not be a good idea. Can't think why... Anyway, at least now have some basic 'kits' that can be made up when the Muse takes me: two Schull & Skibbereen 4 wheel tram coaches, a Swilly Brake 3rd, also a bogie fish van, plus one of the Donegal red wagons. The latter has already been made up and awaits painting.

- 43 replies
-
- 16
-

-

-
Nothing was running when my wife and I passed through Chama, but we had stayed in motel outside Durango and did the trip up to Silverton. Those chime whistles do it for me and the level crossing just outside Durango is as good a place as any to experience the sights and sounds. The loco bell is tolling all the way from the terminus and then the whistling starts on the approach to the main road. The gradient begins here too, so as the loco is opened up it is a delight for all the senses. There is lots of footage on YouTube of both railways and, like George, spent a happy hour or two watching stuff over Christmas, including the 100 year old rotary snow plough.
-
Didn't realise it was DCC, Leslie. Despite all what is said, seems to me that analogue is simpler...
-
Amen to all that, Leslie - especially the last sentence! Re wheel cleaning, I use either a couple of crocodile leads from my old H&M Clipper, or an old wall plug transformer (checking it is no more than 12v DC, of course). Have the loco suitably cradled, upside down and apply the wires to the wheels with one hand and the cotton buds with IPA to the other. The Peco wheel cleaner does the same, but find that separate wires enable checking for poor pick up contact on individual wheels - important on kit built locos. Been away this Christmas, so limited to drawing out coach and wagon sides on plastic sheet for future assembly. It will be good to get back in the workshop!
-
Coming to life!
-
My favourites were the 'Stock' trains of the former Great Eastern section, where even in BR days, there would be a mixture of bogie and four wheel parcels stock, fitted vans, fish vans and milk tankers, often with a B17 at the front. Lovely!
-
What is it about parcels trains? Probably the variety of stock - length, 4/6/8 wheels, varying heights and profiles too. Either way, love 'em all.
-
The Belturbut shot does it for me. Atmosphere in spades.
-
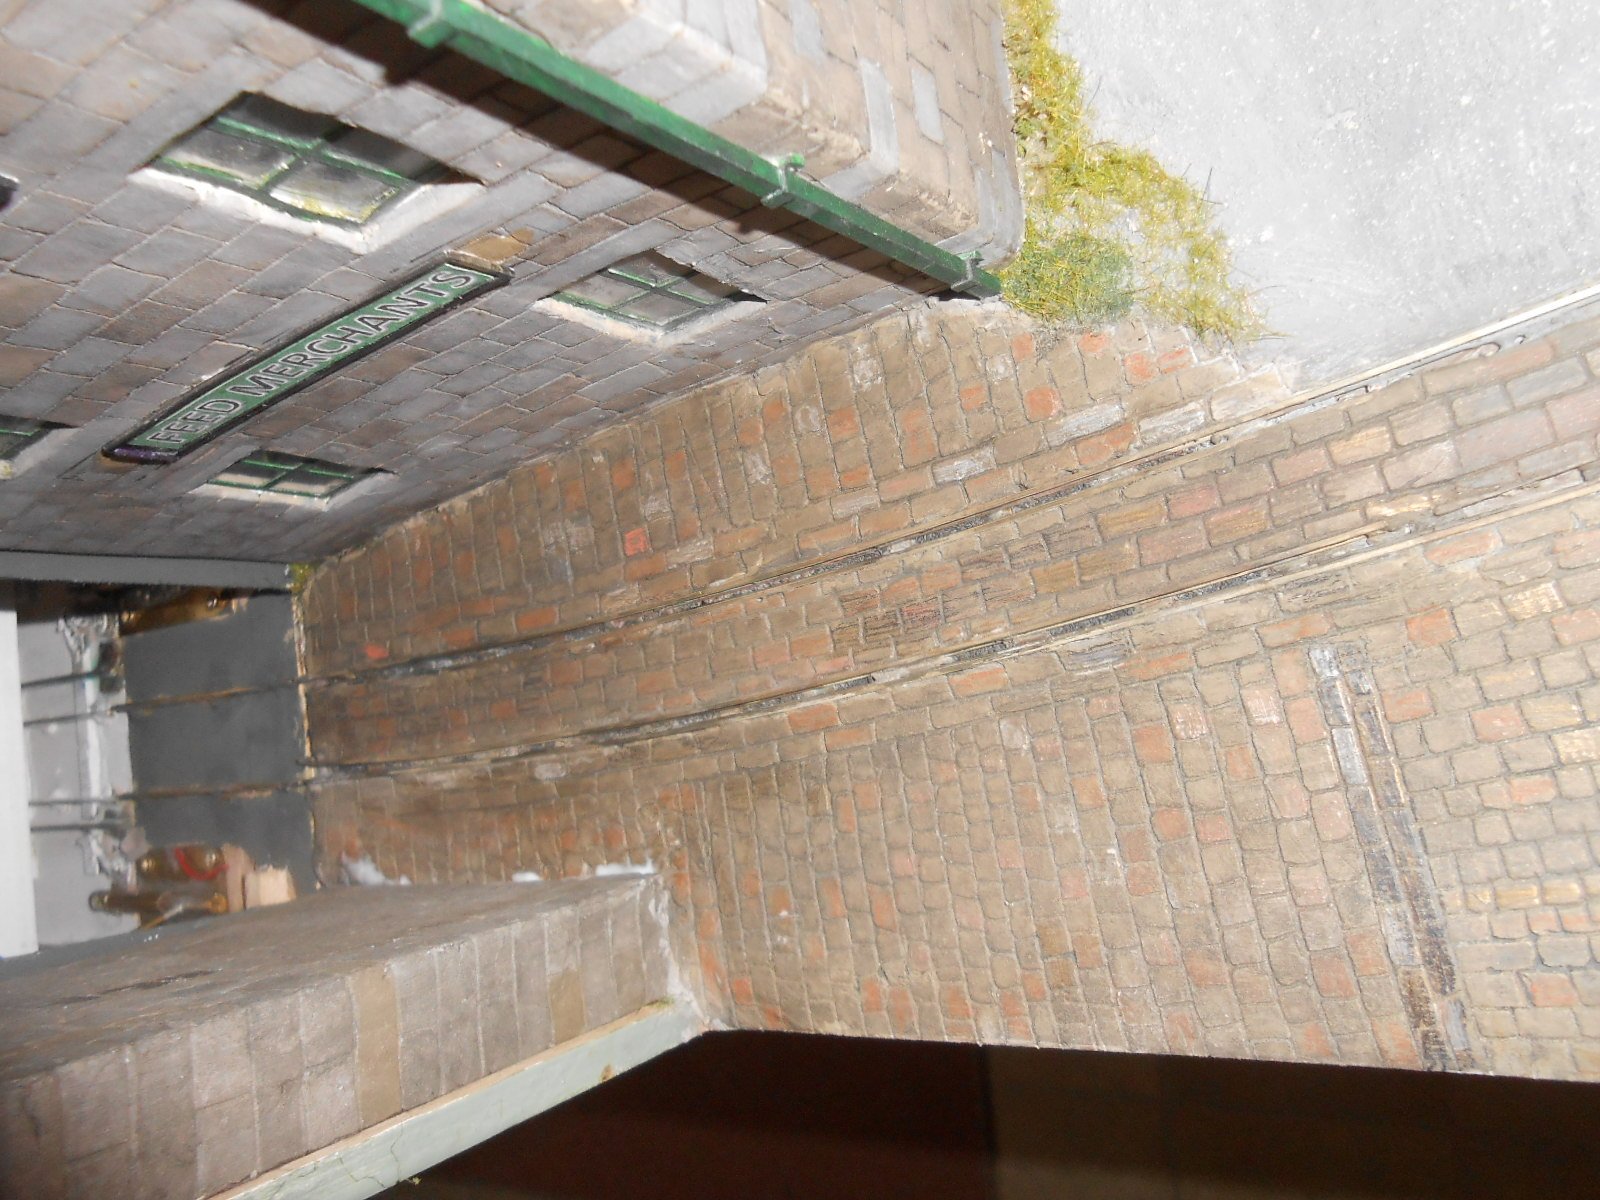
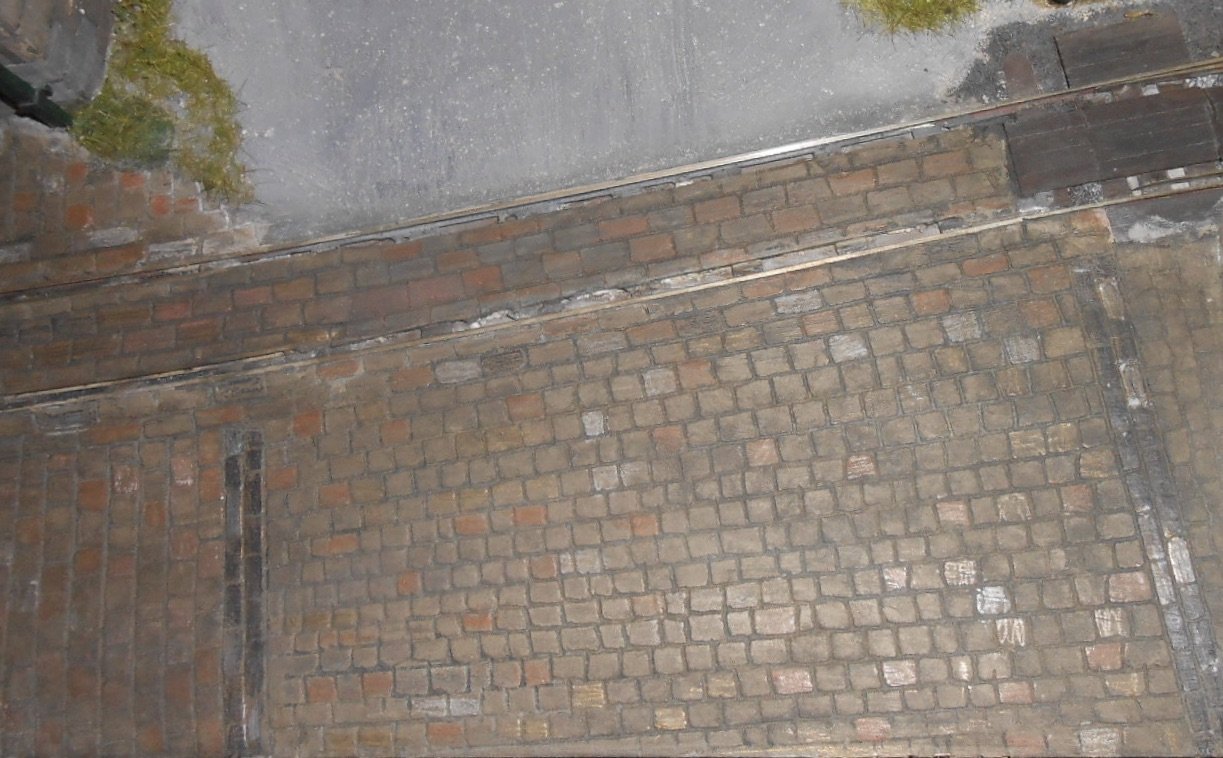
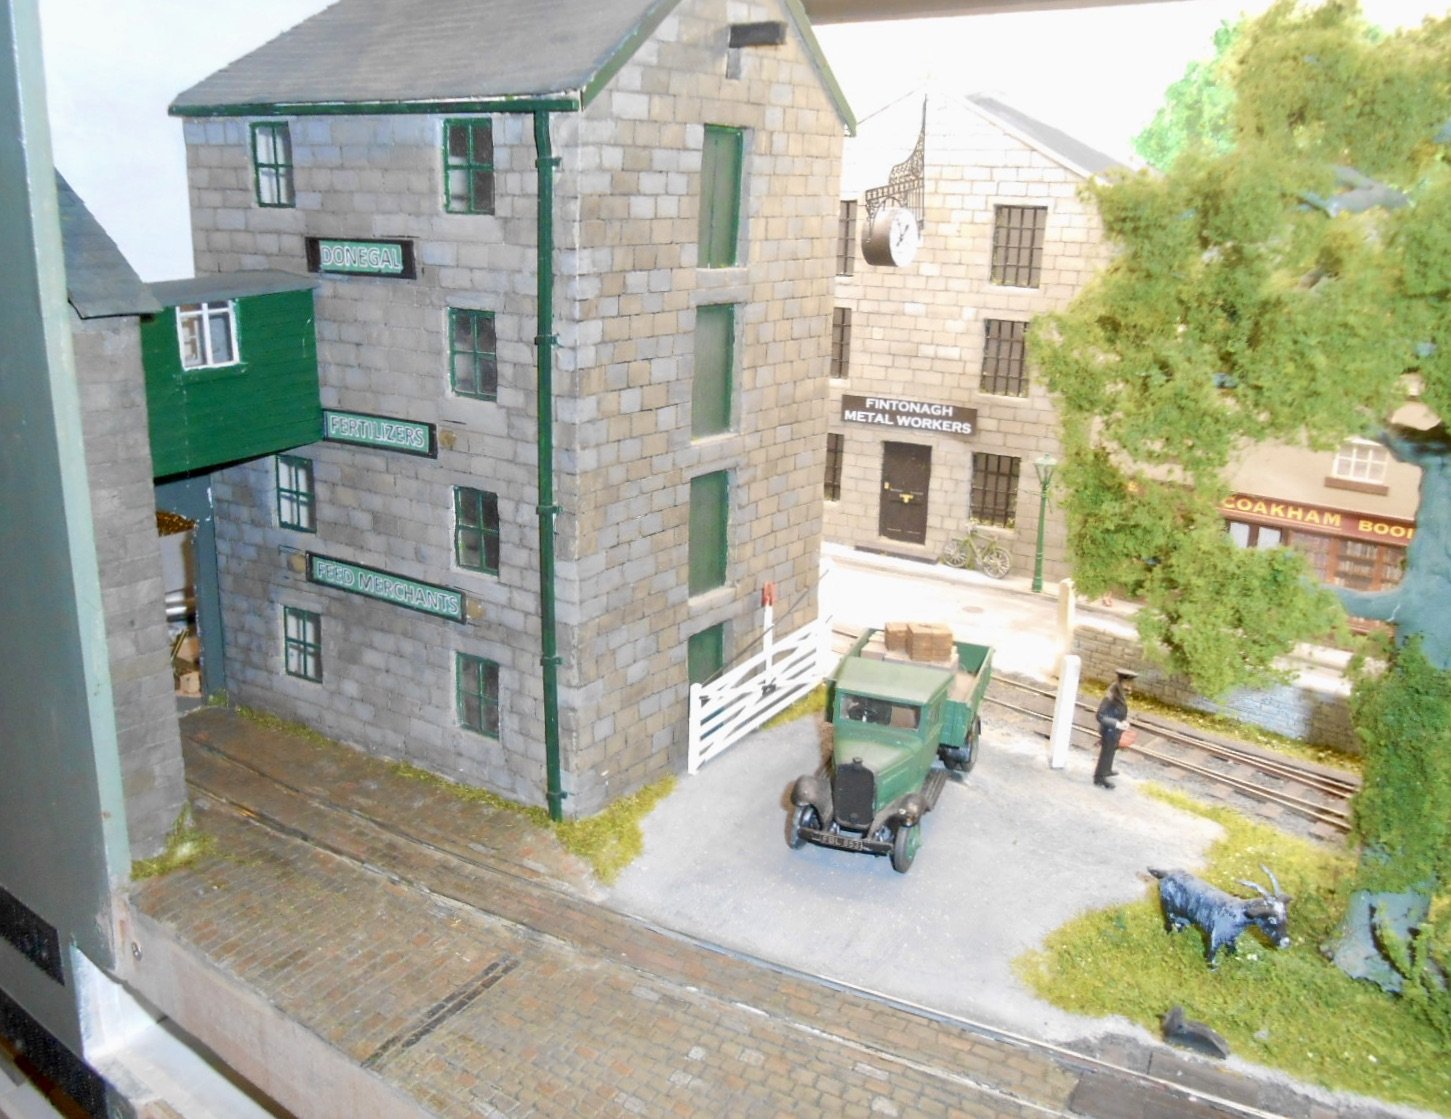
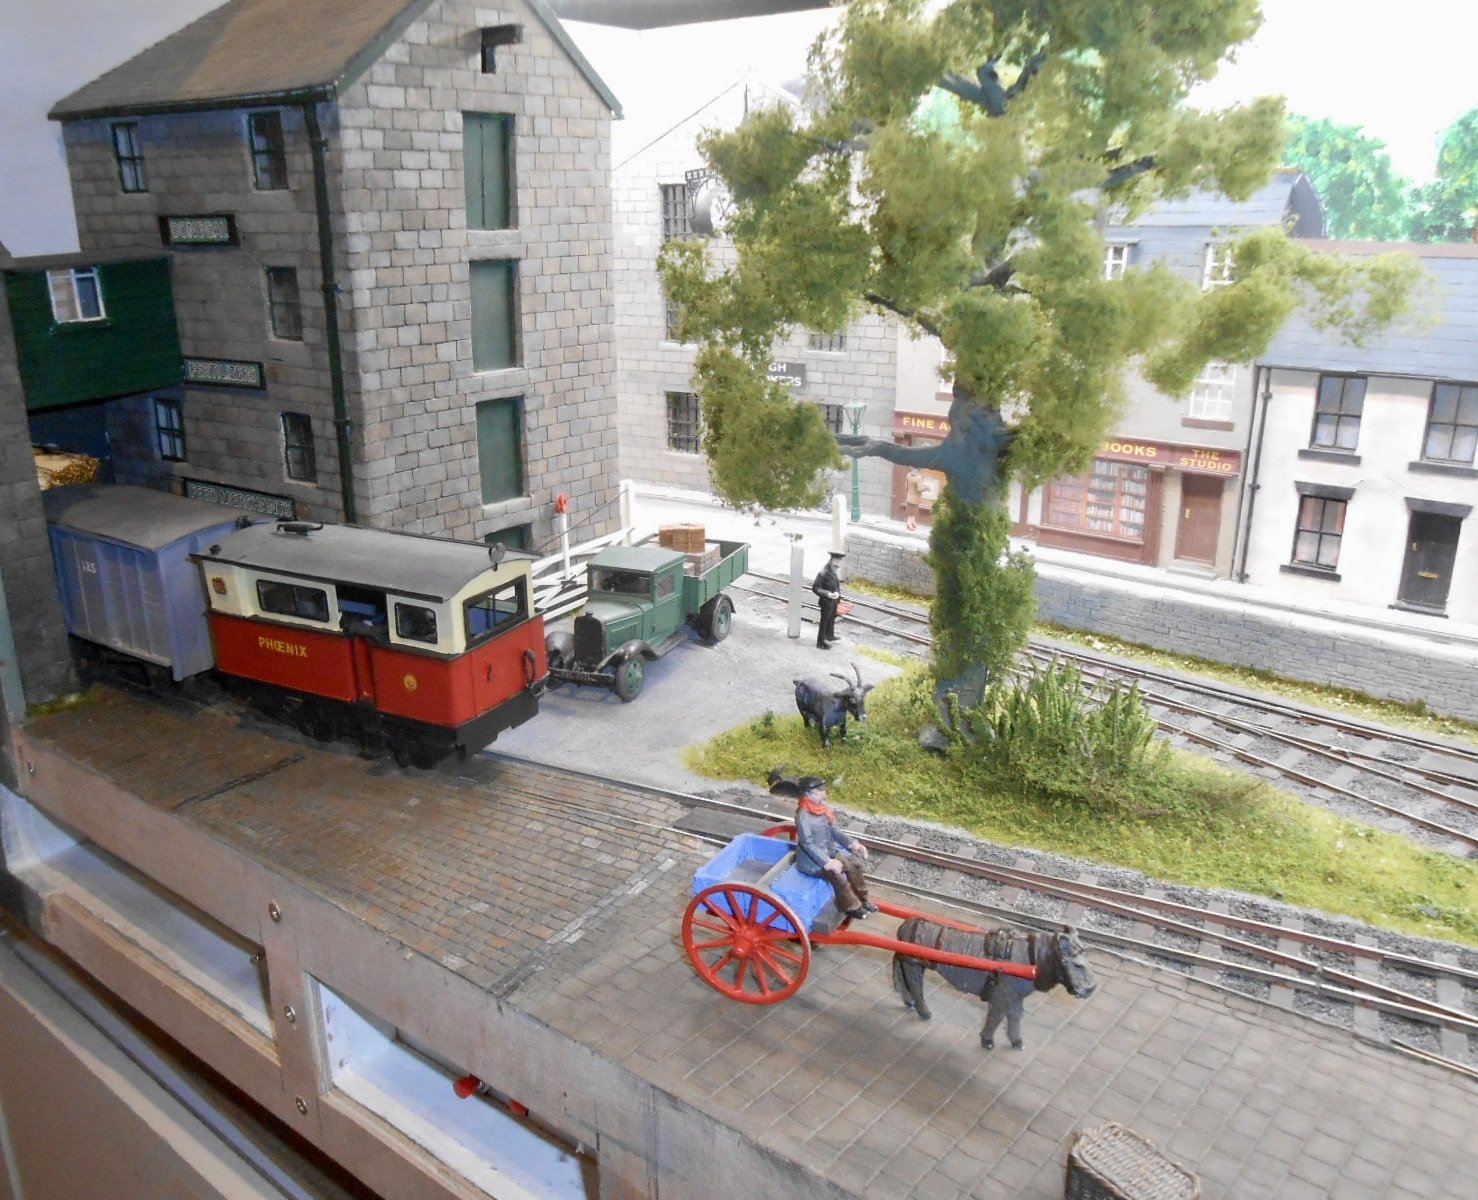
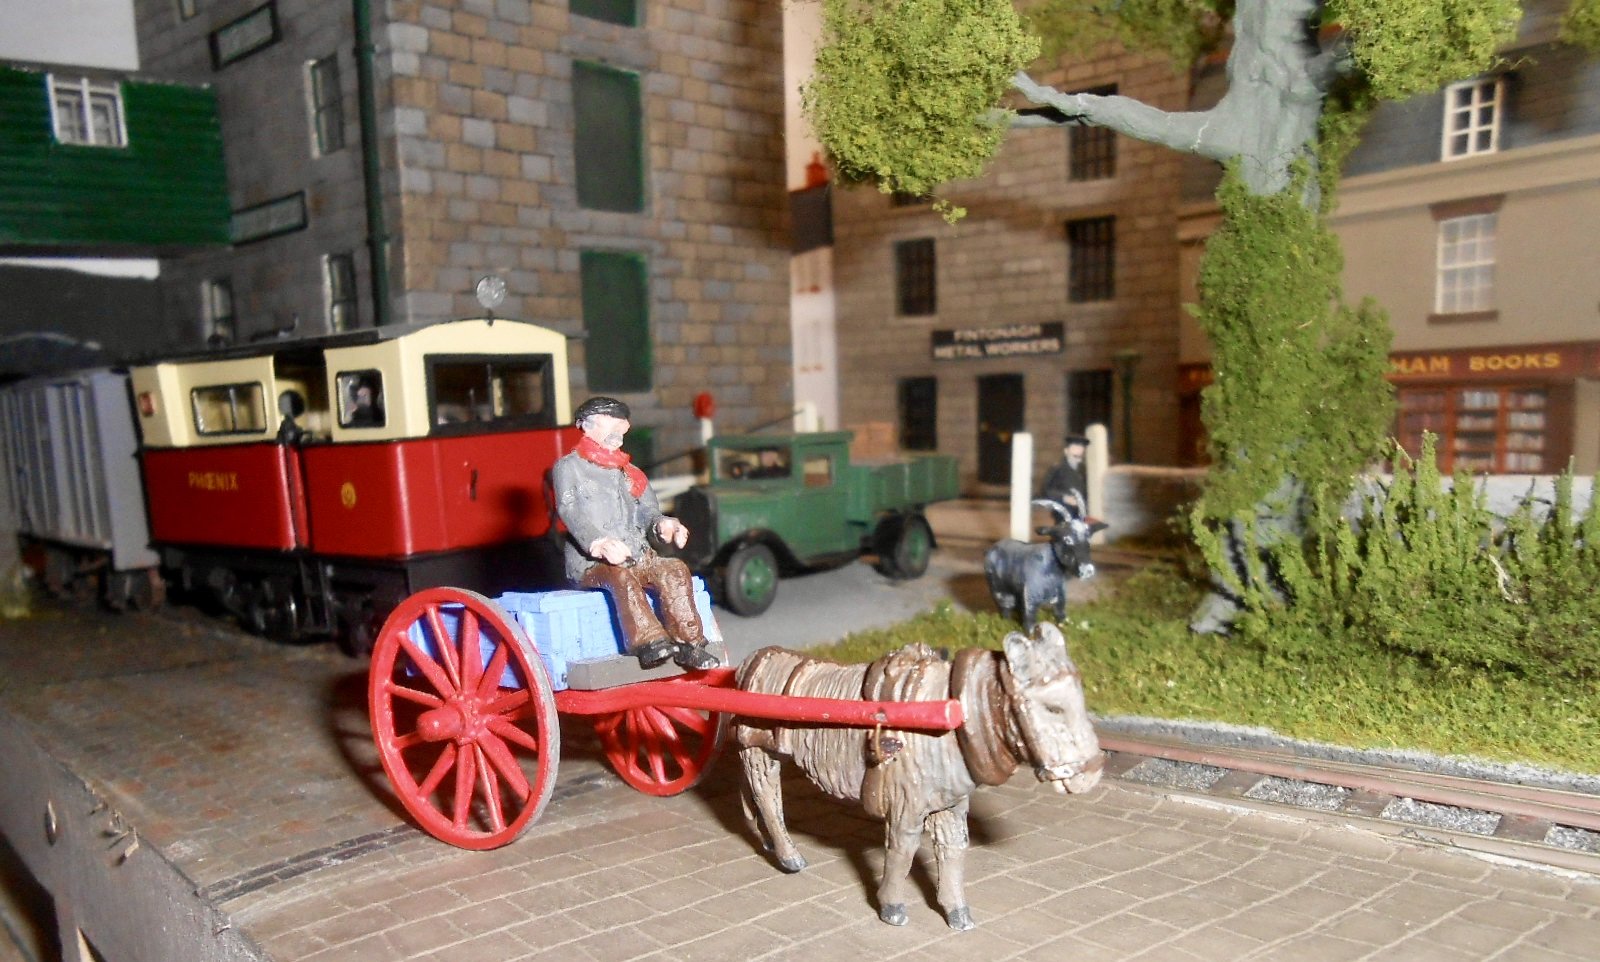
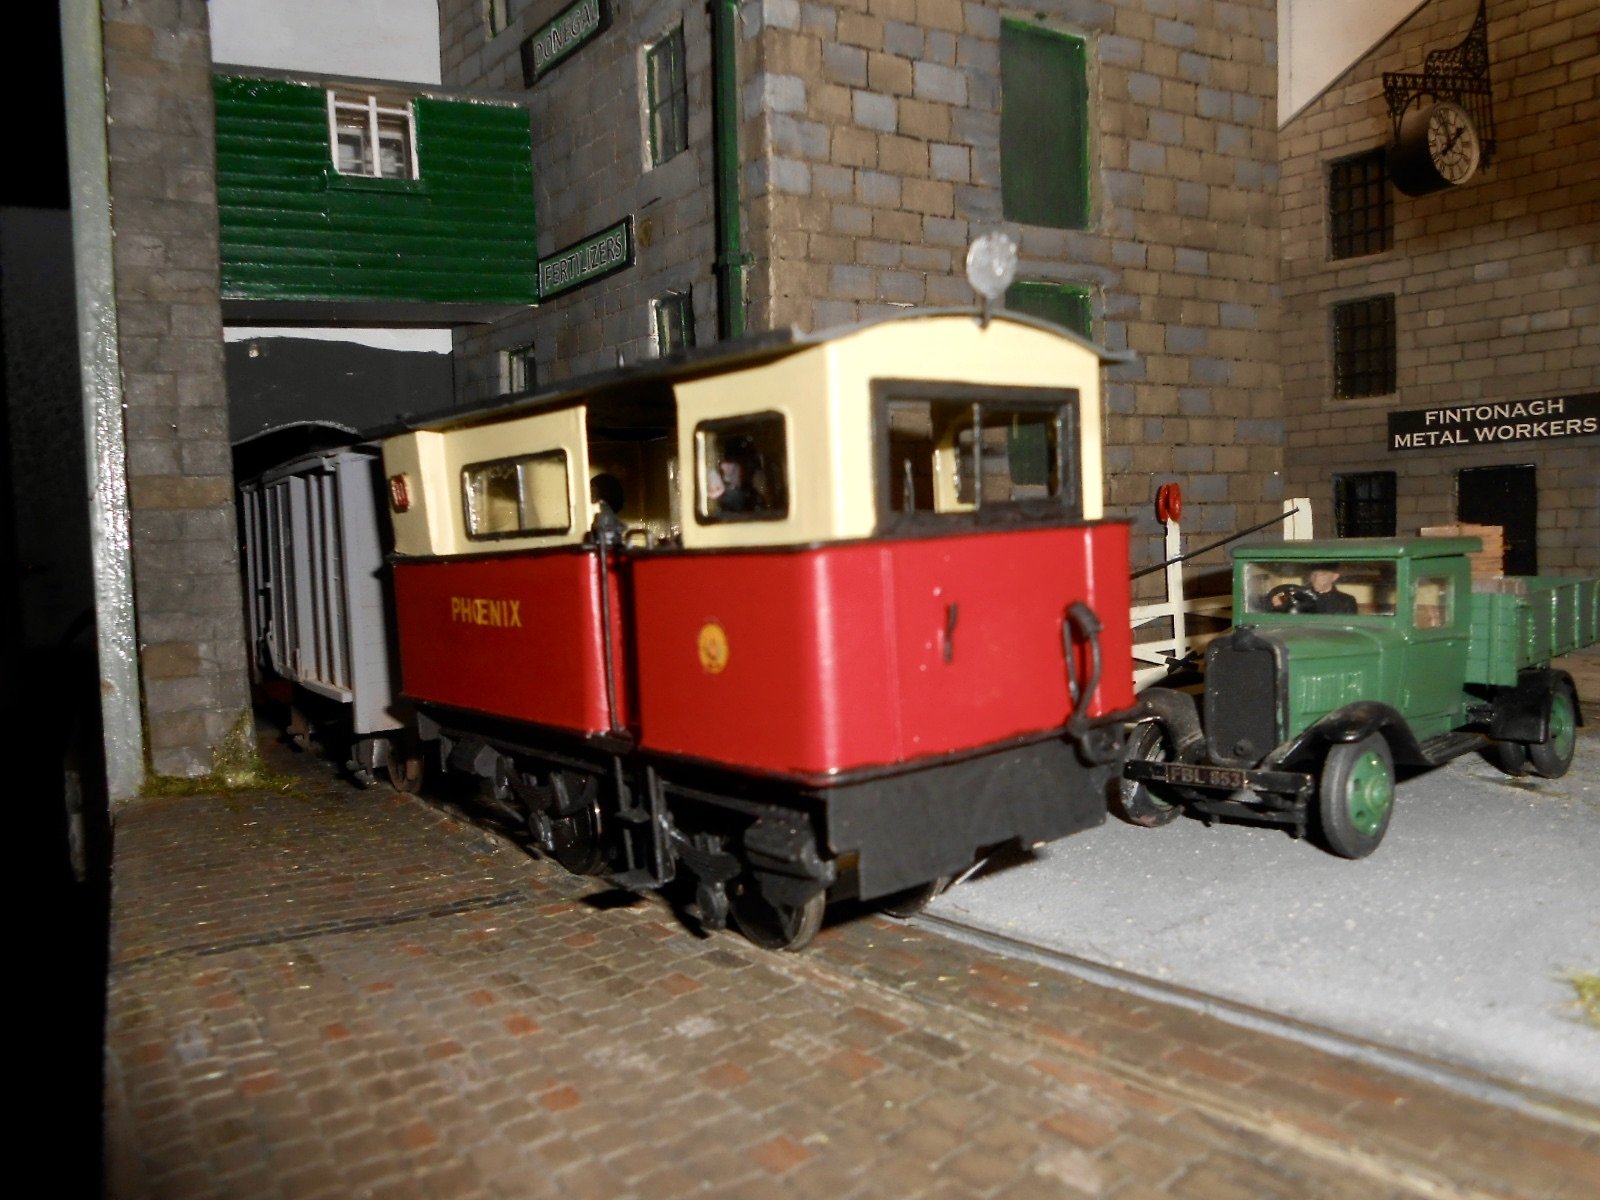
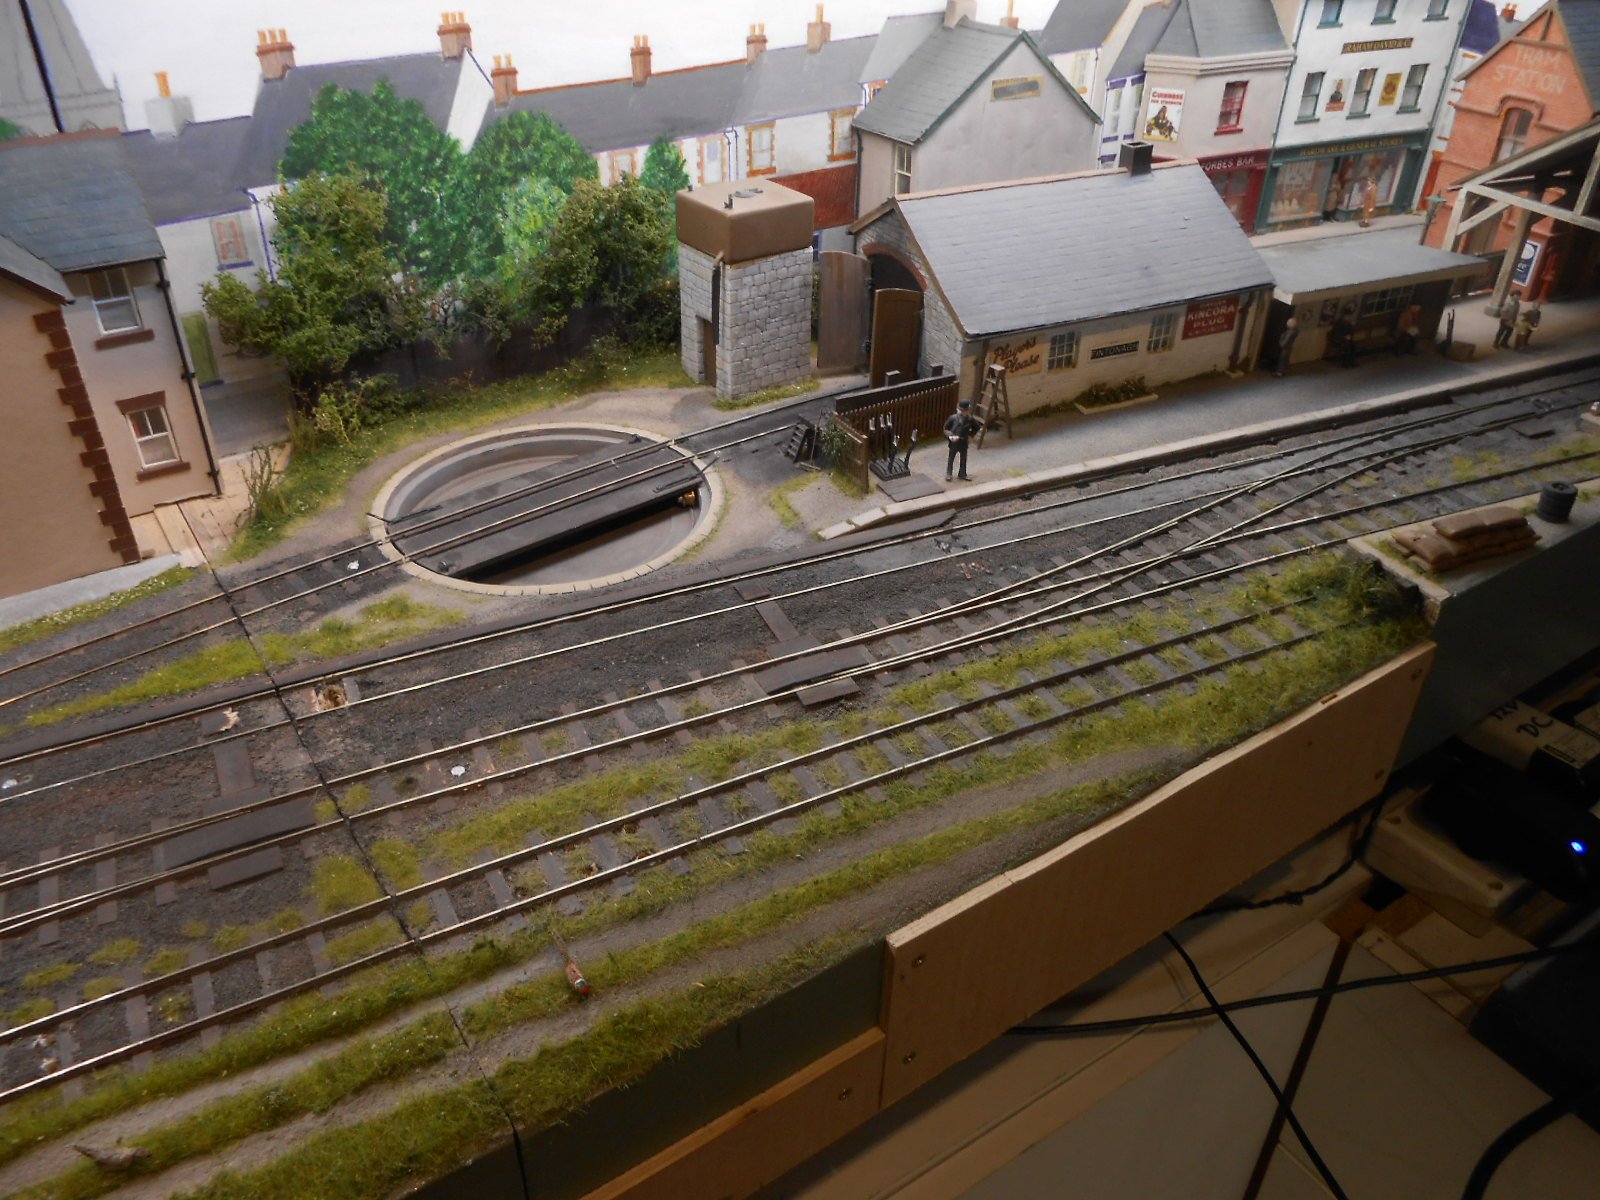
Having cleared the scenics on the front edge of the baseboard, a thin layer of DAS was applied and then once dry, the laborious process of scribing in all the stones began. Decided to use small setts for the road surfaces [including the tramway section leading off scene under the new warehouse bridge. It turned out to be not as tedious as I'd thought: scribing straight lines for one axis and then doing the individual setts by hand, including rounding the edges and ensuring there was a decent amount of mortar space between each one. I was a bit concerned about the painting, because photos often show a wide range of colours and I really didn't fancy having to pick out individual setts with a small brush... Began with a wash of a fairly light stone colour, using acrylics, then, once dry went over this with a wash of dark grey, which toned down the top colour and went nicely into the mortar lines. Then remembered my [many] crayons - pastels, various pencil ones and, in particular, a set of much prized Berol Karismas. These are water colour pencils and can be blended nicely with each other. So, using various shades from yellow to brown, it was a much simpler matter to touch in various setts with these, rather than using a paint brush. Further titivation is needed, but am quite pleased with the effect thus far, as shown below. Only this corner has made significant progress, but have also scribed in the larger stone blocks on the quayside itself, which now await painting. Meanwhile, couldn't resist doing a few trial scenes with the initial corner. I've added a few weeds along the base of the warehouse and posed the lorry and donkey cart for effect too. The main action on this section will be either Phoenix transferring wagons to/from the off scene goods yard and tramway traffic, so there are also a few posed shots of this too.
- 43 replies
-
- 18
-
-
-
Neat. VERY neat! As another member of the 'Smokeboxes are a real bummer Club' can only concur with the challenges involved, so hopefully a couple of glasses of falling down water have been awarded. Plus it is nearly Christmas after all.
-
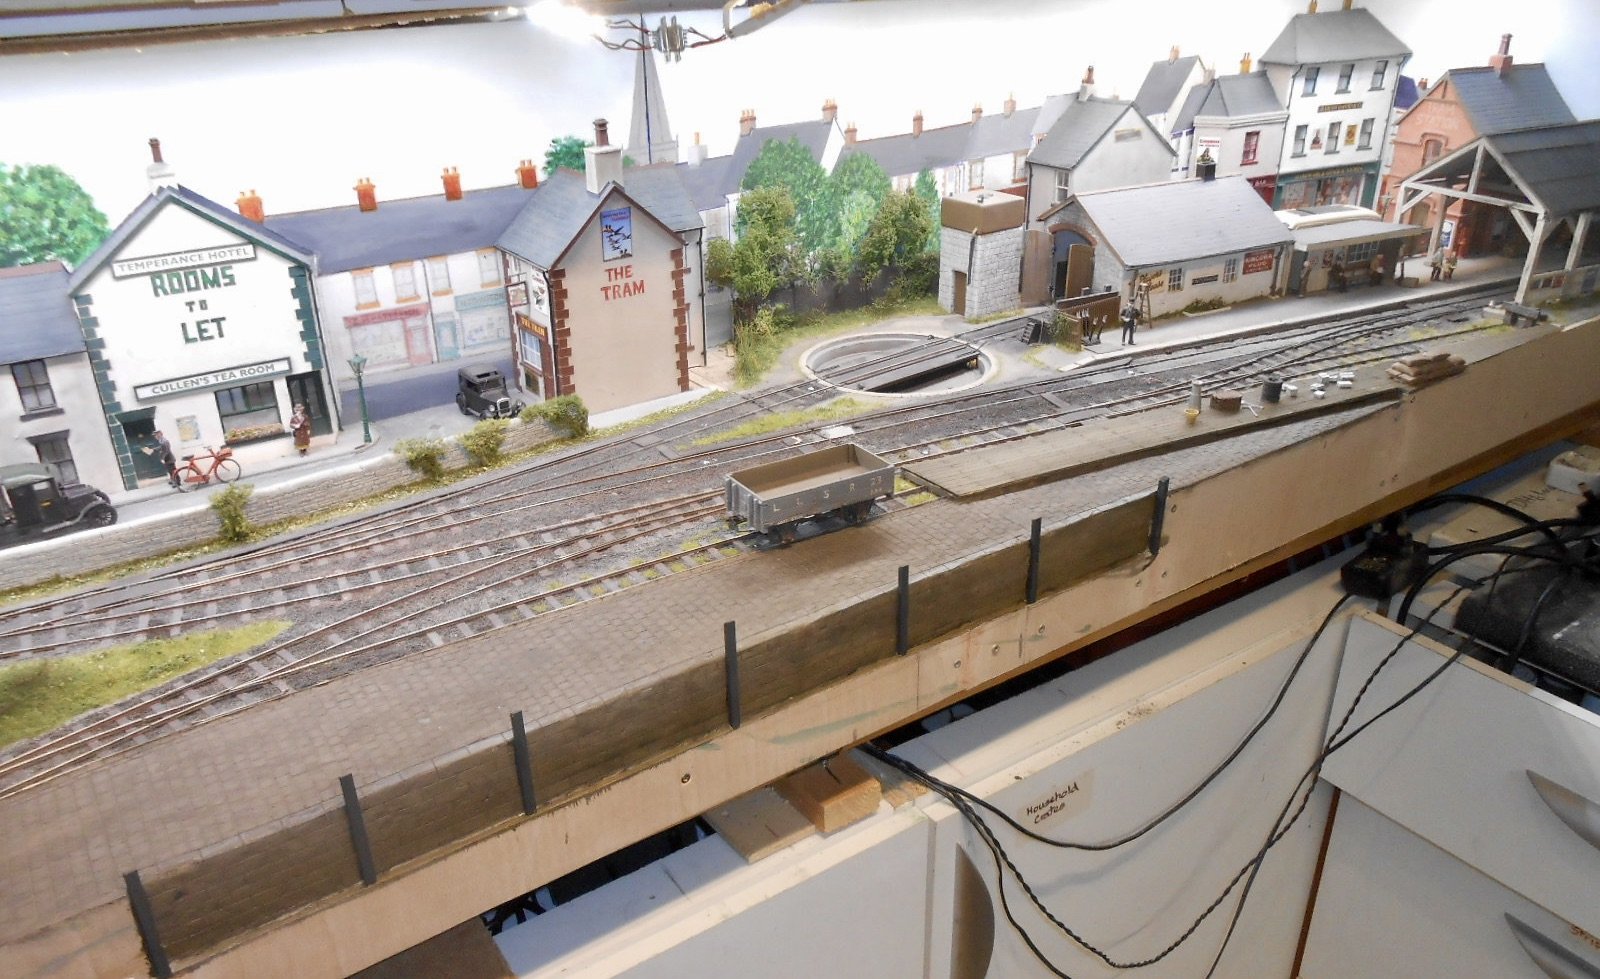
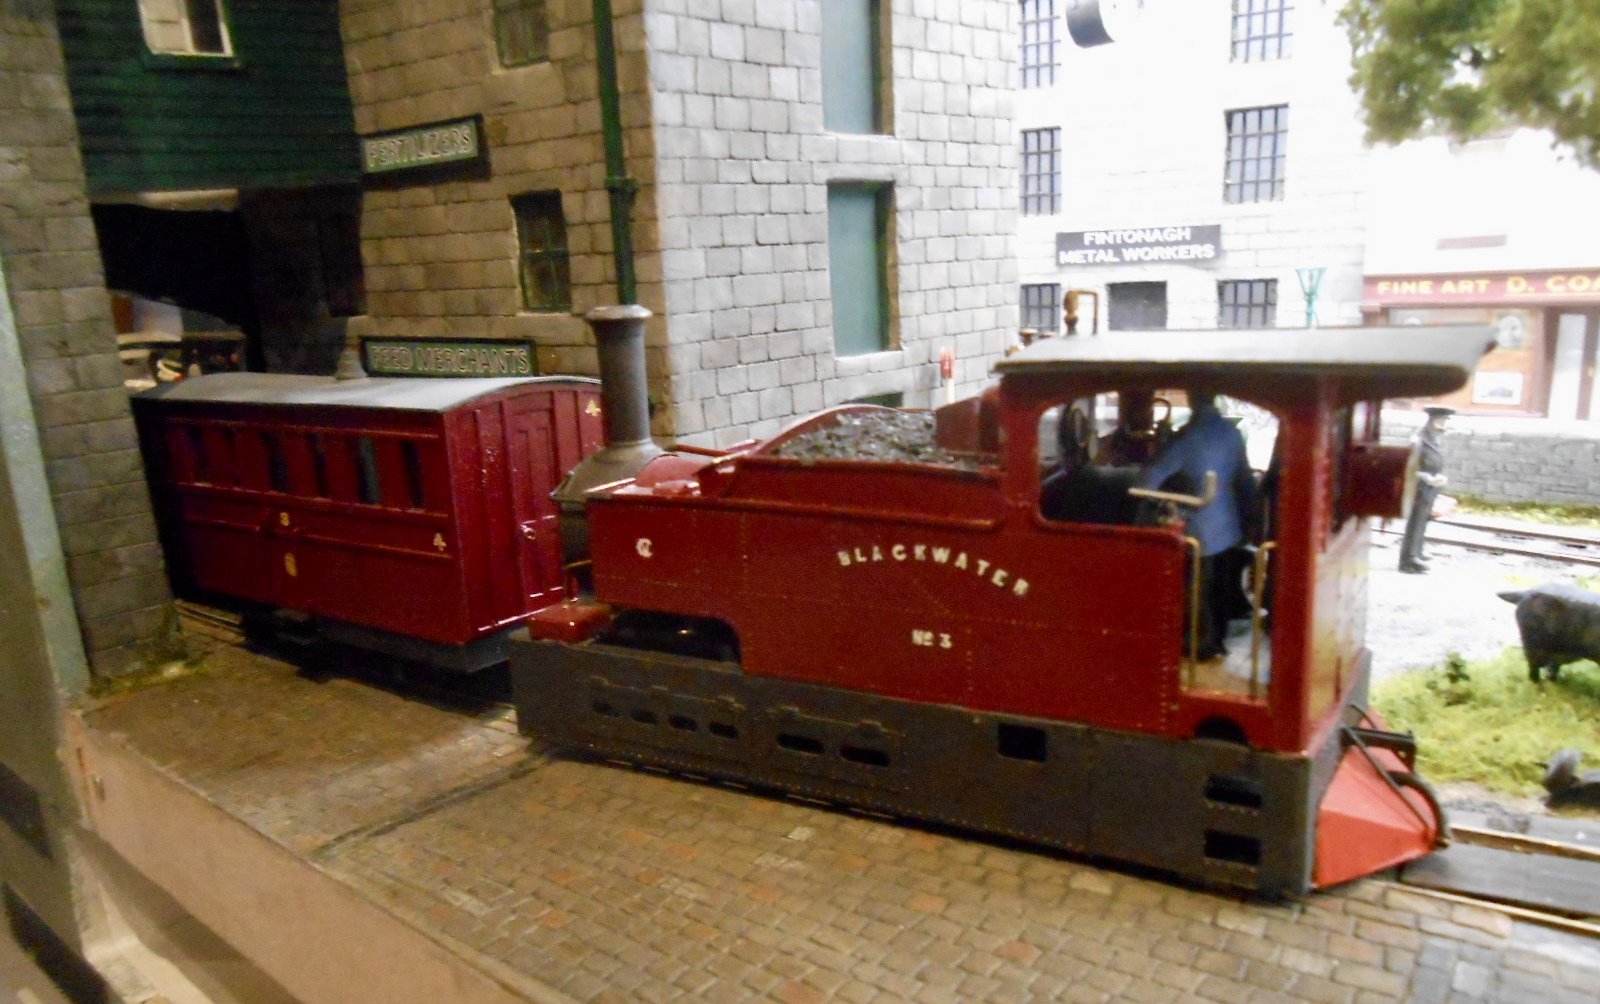
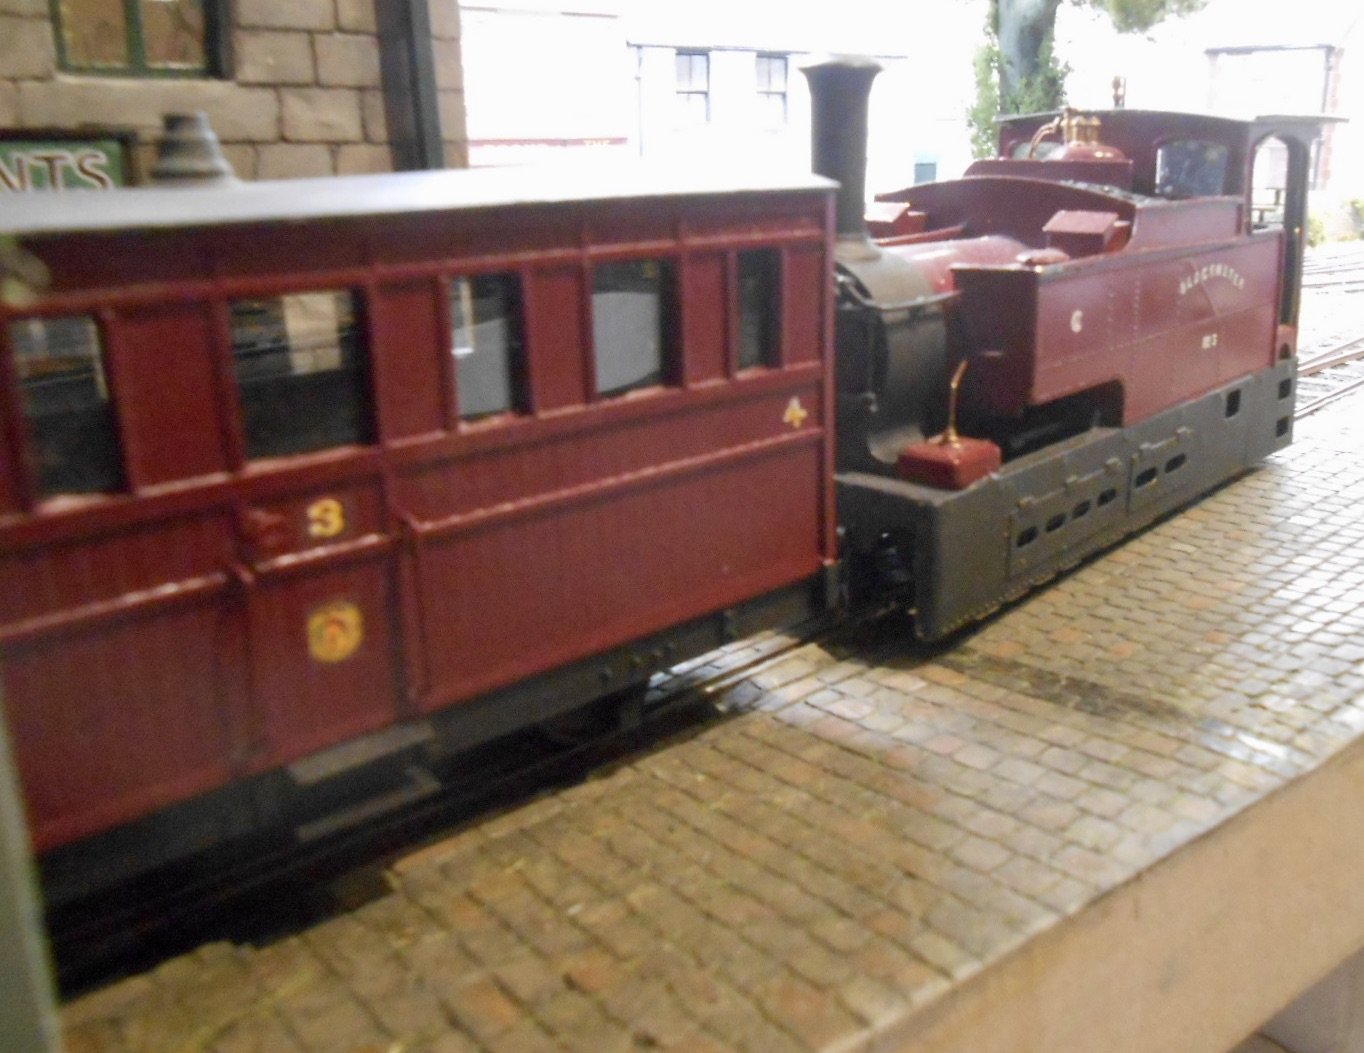
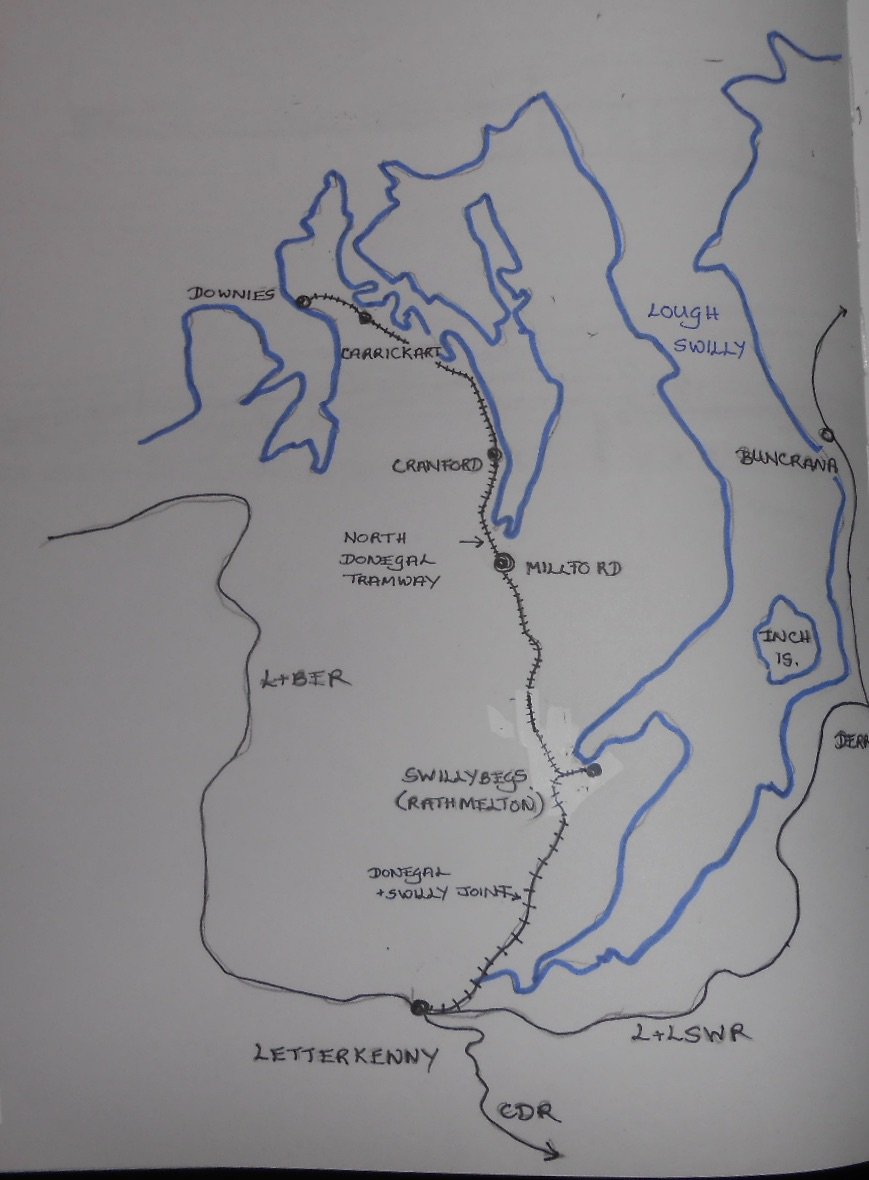
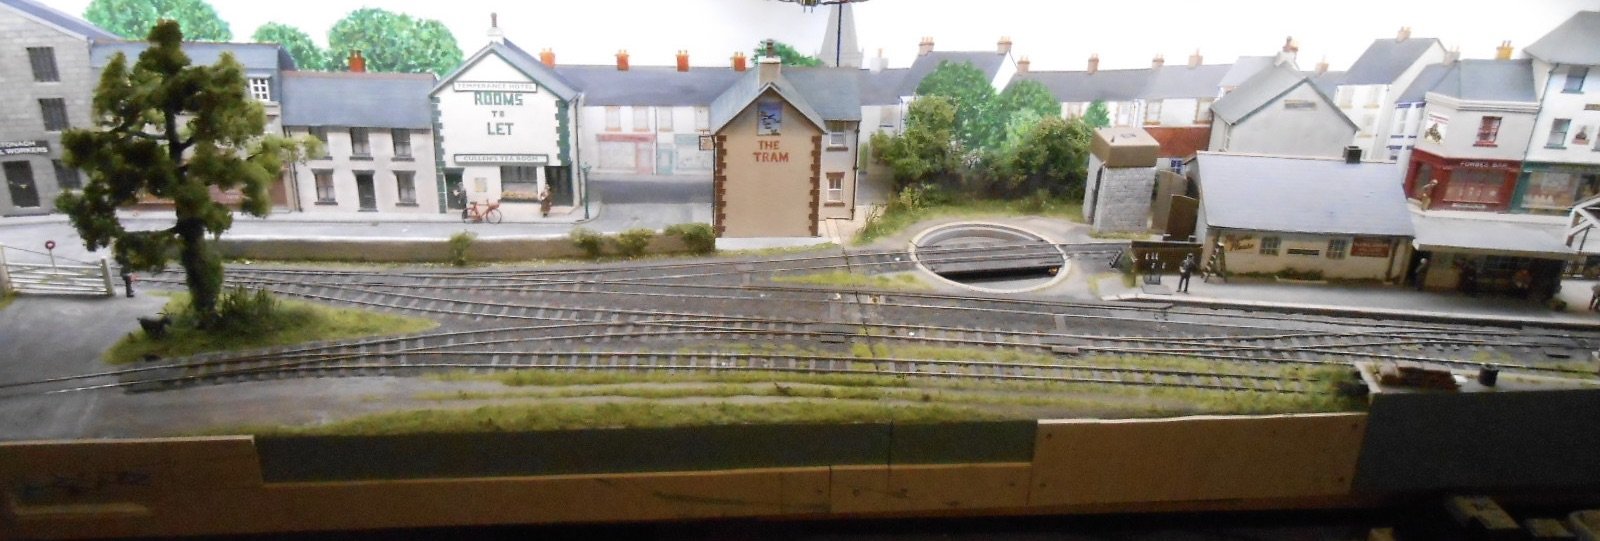
Swillybegs out of Fintonagh Guess it is about time I started a new thread for the conversion of Fintonagh to Swillybegs. The work isn’t too drastic [& certainly far less so than Arigna Town to Belmullet], but an explanation as to my rationale may be useful first. The idea is that the Famine wasn’t quite as severe in this part of Ireland, which then didn’t suffer the same population decline as other parts of the country. Hence there was scope for the sort of railway development seen in Brittany, France, where in addition to the main lines and metre gauge systems like the Reseau Breton, various other feeder lines were built, including some roadside tramways. Hence, when the Londonderry & Lough Swilly Railway arrived in Letterkenny in 1883, the County Donegal Railway came soon after [rather than in 1909]. The two companies then joined forces to construct a branch to the port of Swillybegs on the shore of Lough Swilly, somewhere near present day Rathmelton. Meanwhile, an independent roadside tramway, the North Donegal, was building a line from Downies [on the Atlantic coast], via Carrickart and Millport to Swillybegs. Downies was an important herring fishery in the 19th century [true], so there was a decent amount of traffic at first. However, this soon declined in the 20th century, so it is likely that the section beyond Millport gradually fell out of use. Indeed, both railways would have struggled from the 1930s onwards, but my assumption is that The Emergency [aka 2nd World War] kept them going. Redundant locos and stock from the Clogher Valley Railway found work on both lines during the fuel crisis, right up until the early 1950s, when both sections finally closed at the same time as the L&LS railway. The reasons for all this nonsense go back to the last Cultra Exhibition, when I took Fintonagh there and got several new books from the Donegal Society stand. From these, I learned about how Clogher Valley stock went to both the Donegal and the Swilly and with a long held admiration for both railways, the die was cast! However, both lines tended towards quite long trains and big locomotives, which made me think that the only way to do it would be a brand new layout. Equally, the smaller Donegal railcars and latter day trains on the Swilly – which could be as short as a couple of wagons and a bogie brake coach – gave food for thought that maybe Fintonagh could be adapted. Both the Barclay 4-6-0T and Kerr Stuart 4-6-2T would fit on the turntable, while from the CVR, Railcar No1 [Donegal No 10] and Phoenix diesel tractor were easily converted – little more than a repaint. CVR wagons went to both companies, but I still needed to find a role for my two 0-4-2T – hence the additional fiction of the North Donegal Tramway. Still with me? Well done! So what of the layout? The map below shows the geography, while the track plan shows how the two lines meet up at Swillybegs. If you haven’t clocked the name yet, it is of course a play on Killybegs, the actual Donegal terminus. There are no changes to the track plan of Fintonagh. All I’m doing is adapting the front edge of the layout to look like a quayside. The Donegal/Swilly line comes in, at the rear, behind the rebranded warehouse, while the Tramway enters at the front, squeezing between that warehouse and a new ‘flat’, complete with a bridge joining the two, which will also hide the exit to the fiddle yard. The Tramway is deemed to be where the goods yard is, so there is some transfer traffic, which will largely be in the hands of Phoenix. Swilly trains will most likely be short mixed ones, with a coach and a couple of vans, while Donegal ones will be railcars, one with a passenger trailer, the other with a couple of vans. There’s a temptation to enhance the layout wiring to enable two trains on the layout at once, but this will probably make the scene very crowded and also cause sight line problems for operators. So things will probably remain one train at a time, though [as on Fintonagh], a train loco can go to the turntable while Phoenix does the shunting. So, there we are – an introduction to my latest piece of nonsense. Most of the layout stays the same and the backscene is not entirely unlike the Rathmelton townscape anyway. The new and revised stock will partly set the scene, but presenting a convincing quayside will be the main challenge, especially with so little room to work with. The photos below show where I’ve got to and with this new thread to chart progress, more will follow in due course. Anyone invested in Fintonagh can find the whole story in the Layouts thread under Clogher Valley Project, while locos and stock are within David's Workbench in that section.
- 43 replies
-
- 25
-
-
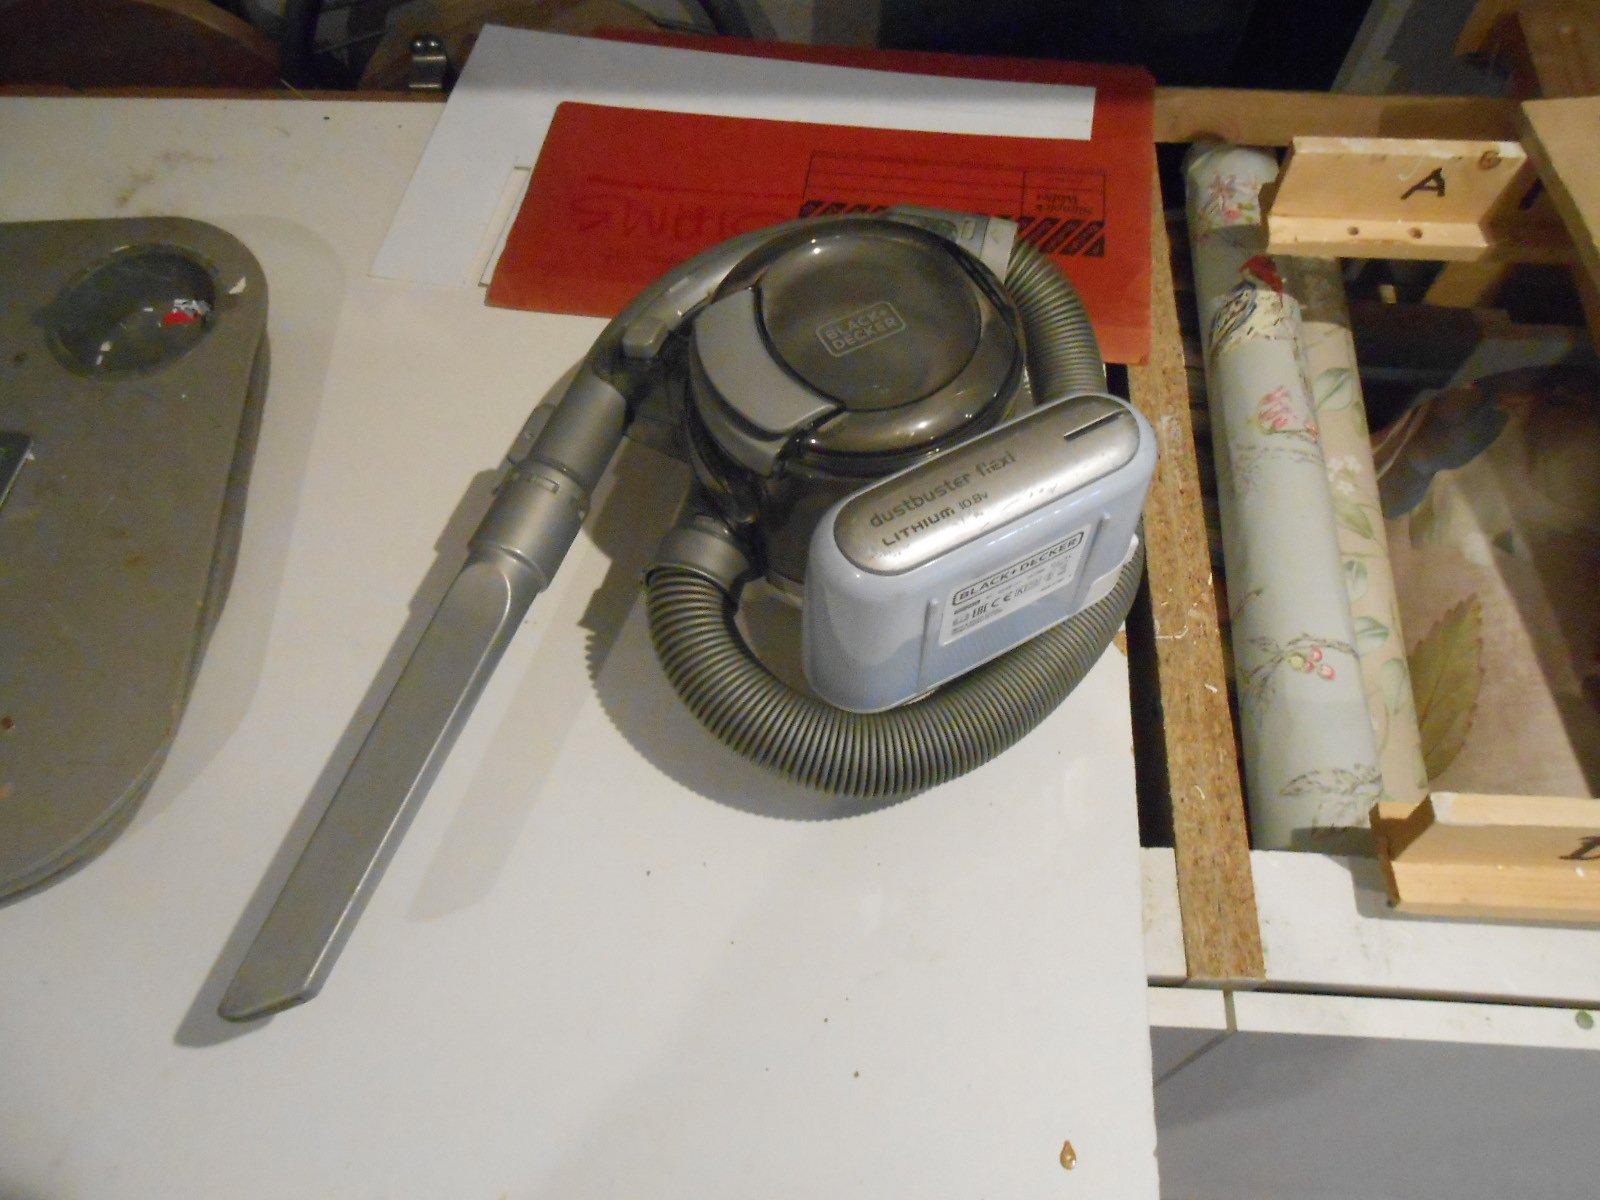
Been working on the front edge of Fintonagh/Swillybegs, stripping off the foliage & beginning the change to a quayside. Much of the work involves the application of DAS modelling clay. A bit like doing a building, you first put down a layer of PVA, then press on pea sized balls of the clay, smoothing them out so there is an overall depth of about one millimetre. Once dry, this is then sanded level, after which comes the laborious process of scribing in all the setts and stonework. Sanding creates a lot of fine dust & this is not something you want to use your domestic vacuum clean on. For years, I've used cordless car vac, but the motor bearings were sounding extremely knackered, so was pleased to find a replacement in a basic Goblin hand held model. Mains powered, at just £25 from Asda it is less than half the price of rechargeable models and a lot more powerful. Even if it only lasts a couple of years, it will be worth it. Have also finally got round to finishing the first Schull & Skibbereen coach, which is shown below sitting by the mock up of the new tramway platform.
-
Heard on the news this morning about disruption caused by recent storm damage to Holyhead port. Closed till at least mid January, so something else to add to the litany of problems?
-
Amazing how a relatively simple looking loco can turn out so complex. So many different (and difficult) curves. Quite dainty too and coming on really well.
-
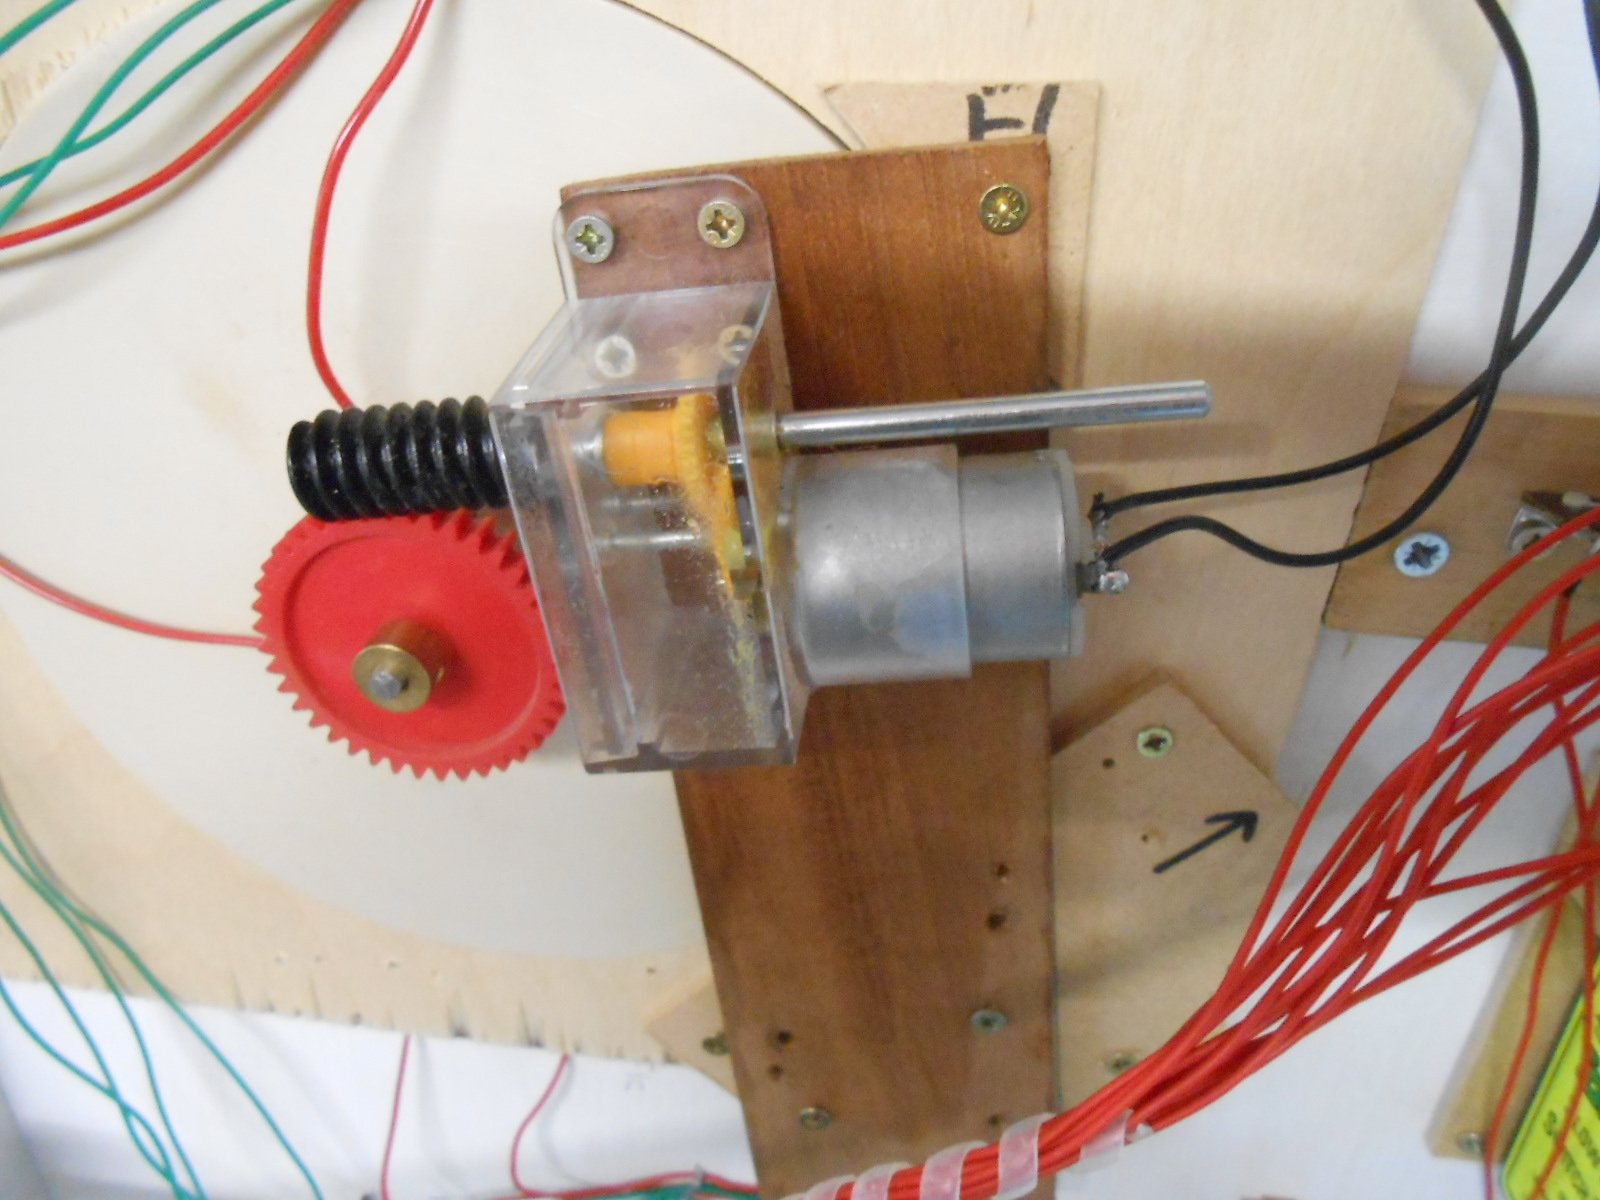
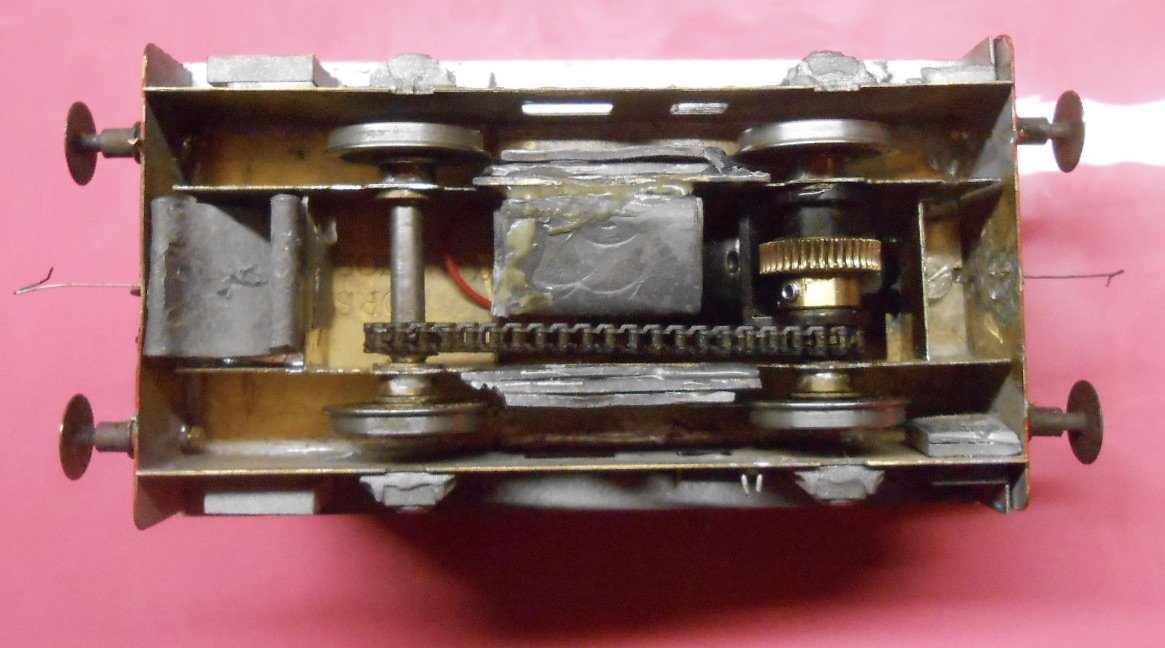
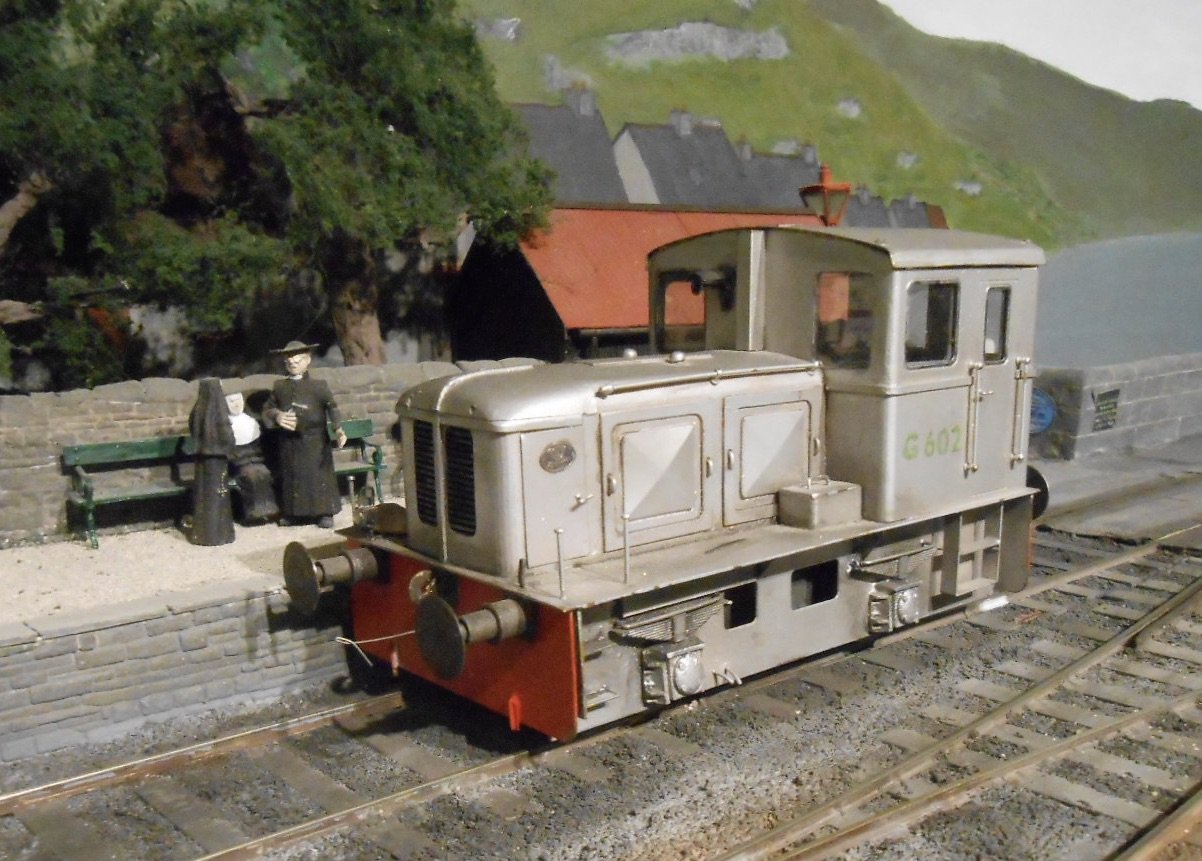
Several weeks with much ado about very little! Far too much faffing around with NPQ after Tolworth, but most of it has been fettled & I suspect I will just have to live with the foibles of the track work - that or put in an order to Marcway for two new Y points, but I really want to get on with something new. Testing NPQ threw up a fresh issue with the Deutz G class shunter which suddenly lost traction. Traced the problem to the Delrin gear train, where both spur gears had worked loose on the axles - probably a result of too much oil. Fixing it was a pain, requiring the chassis to be completely stripped down and cleaned before reassembly. Fingers crossed, it seems ok now. This morning, wasted a couple of hours trying to get the signal mechanism repaired, but looks like it will required a complete rebuild, for which I need to send off for some more piano wire for the wire in tube linkage. Still, need some more for my narrow gauge couplings, so all is not lost. After all that, NPQ is back on the top shelf with Fintonagh's baseboards on the main beams so I can get back to new stuff. Sod's Law struck again though when I discovered the turntable wasn't working. Similar problem to the Deutz, but this time the motor had worked loose from its housing. Turned out it was only glued in place, so with a bit of Evostick, it didn't take long to fix. Having considered Ramelton and several other options for the Donegalisation of Fintonagh, the name 'Swillybegs' is currently favourite, being a direct crib of Killybegs, but sited on Lough Swilly, somewhere in the Rathmelton area. Rather than mess around with the back scene, have decided to work on the front edge of the layout. By adding some more 6mm ply to the front framework, I can create a short section of quayside [similar to NPQ], while the front siding will be cut short and a tramway platform installed in its place. This will represent a line from Downies and Carrigart using my two CVR tank engines and coaches based on the Schull and Skibbereen.
-
Lovely stuff!
-
Hopefully, the shed is still healthy and as others have said, a quick set up to just run trains may prove to be just the tonic.
-
Makes sense to me. My 7mm scale G2 has a sprung front axle, which works ok, but occasionally needs tweaking as these wheels sometimes stop turning because of lack of downward pressure.
-
See that Tara Junction has just reached another milestone with 900 000 views. Didn't seem that long ago it was 800k and all this in 12 years!
-
All power to your elbows good sir!
-
Such a lovely scale. S is actually 1:64, so 5'3 works out as a rather splendid 63/64ths of an inch, which in metric is 25.003mm. I won't tell if you dont!
-
Brave man! Looks like a complete basket case to me, but if anyone has the skills, it's you.