David Holman
-
Posts
4,359 -
Joined
-
Last visited
-
Days Won
117
Content Type
Profiles
Forums
Events
Gallery
Blogs
Everything posted by David Holman
-
Developing a range of Irish wagons in 4 and 7mm
David Holman replied to Bob49's topic in General Chat
Great to see 5'3 being the benchmark. According Slaters, the b2b in 7mm scale is 33.98mm - so 34 then... For 7mm 3' gauge, I use b2b of 19.2 mm. P4 axles aren't long enough for wagon axle boxes in 21mm gauge, but using 2mm brass wire means uncoupling magnets can't cause mischief. -
Good advice from John, as ever. Smith's couplings aren't completely to scale, but the more open hook and slightly larger links make them useable while still looking the part. Definitely better than tension locks, though a lot of people use threes links within takes of wagons and coaches, with something else either end for easier shunting. Screw link couplings certainly look good, but operationally are the Spawn of Satan and (especially between corridor coaches) are best avoided!
-
N Scale Ballywillan, Co Longford.
David Holman replied to Kevin Sweeney's topic in Irish Model Layouts
Pendon also houses John Ahern's Madder Valley Railway. Although it looks it's age now (parts of it must be over 80 years old), it nevertheless remains inspirational, because it is completely scenic, but built in an era when almost everything had to be created from recycled materials. No Woodlands Scenics, no plasticard, no pva glue - Cow Gum and flour and water were all they had. Have his books on loco building and model buildings and much of what they contain are still relevant, albeit with modern materials. Love the diorama concept, Kevin. -
Couldn't have put it better. Love its craft and soft colours
-
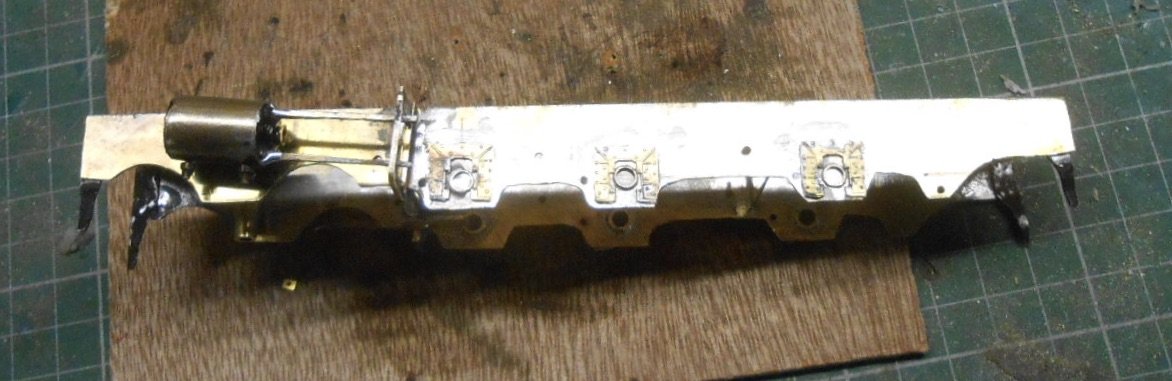
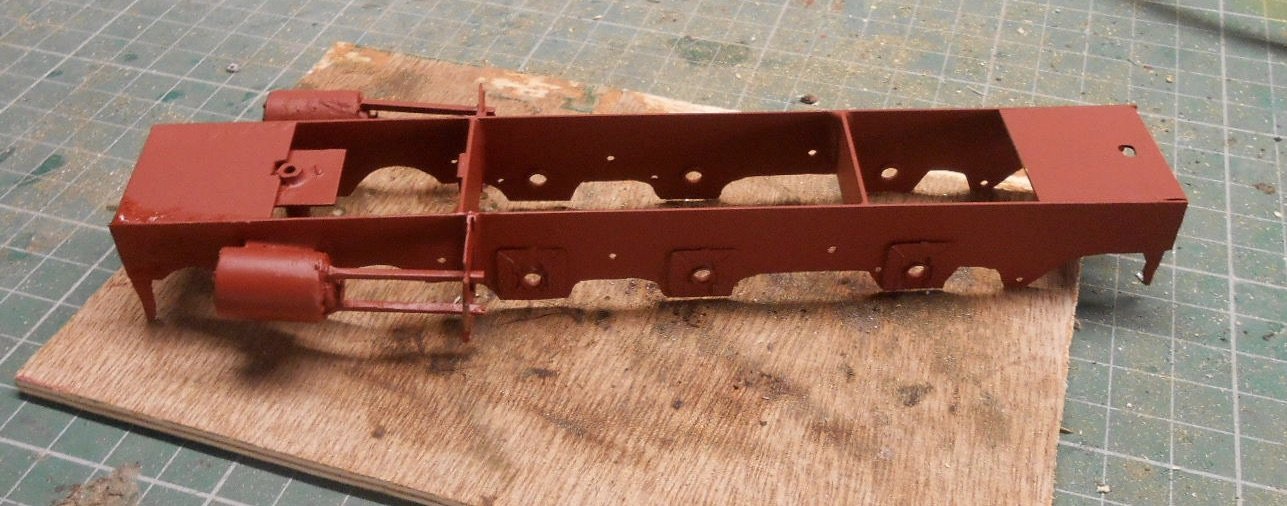
Slow but steady progress on the Barclay chassis. The top spacers were put in next - the rear one containing the hole for the bolt fixing to the body, the front with the plate to which the bogie swivel post is attached. There is no front fixing as the front top spacer slots under a piece of L shaped channel to hold it in place. Next up was a small piece of L shaped brass on which sits the 8ba nut for the bolt for the bogie unit. The fiddliest bit [inevitably with the most rude words] involved fitting the cylinders, slide bars and motion brackets. For reasons I can't explain, these were fitted to the loco body originally, which made it a complete faff when adding the crossheads to the cylinders. Most of the bits were retained from the original effort though there were times when I wondered if I should have made new ones! I did end up making new slide bars and was initially concerned that I could neither find, nor buy any brass strip of the right size. The local model shop came to the rescue with some small section U channel, into which I soldered some 0.8mm nickel silver wire which then plugged into the cylinders. Hopefully, all seems to be in place & you can see where I've put in a bit of packing between the cylinders and the frames, which gives an all important bit of extra clearance for the cranks, rods & so on. I'd bought some MJT horn blocks, but decided against using them. However, the cosmetic etches have been soldered to the frames. They will largely be hidden once the cranks have been put on, but should given a reasonable impression. And so to a squirt of automotive primer. Whether this is too soon or not remains to be seen, but at some point soon, I need to fit wheels/motor/gears and eventually the outside cranks and rods. Once in, the former will pretty much have to stay that way, because I certainly don't want to be dismantling everything too often or any time soon, once fitted. The chassis can be brush painted, while the wheels will be pretty much invisible - good job, as they have twice as many spokes as they should. Things like brake gear and the underslung dummy springs will be glued in place, as it is really not a good idea to get a hot soldering iron anywhere near the Gibson wheels. For now, I'll be waiting for the postman to send me a pack of 1/8th inch shim washers to pack the axles. The motor will drive on the centre axle, while the front and rear ones need bit of side play. Fingers crossed, once the wheels are in place I'll be able to get on with the cranks and rods. It would be rather nice if these worked nice and smoothly after all the hassle that went before, but I'm not holding my breath.

-
A fine and fitting tribute.
-
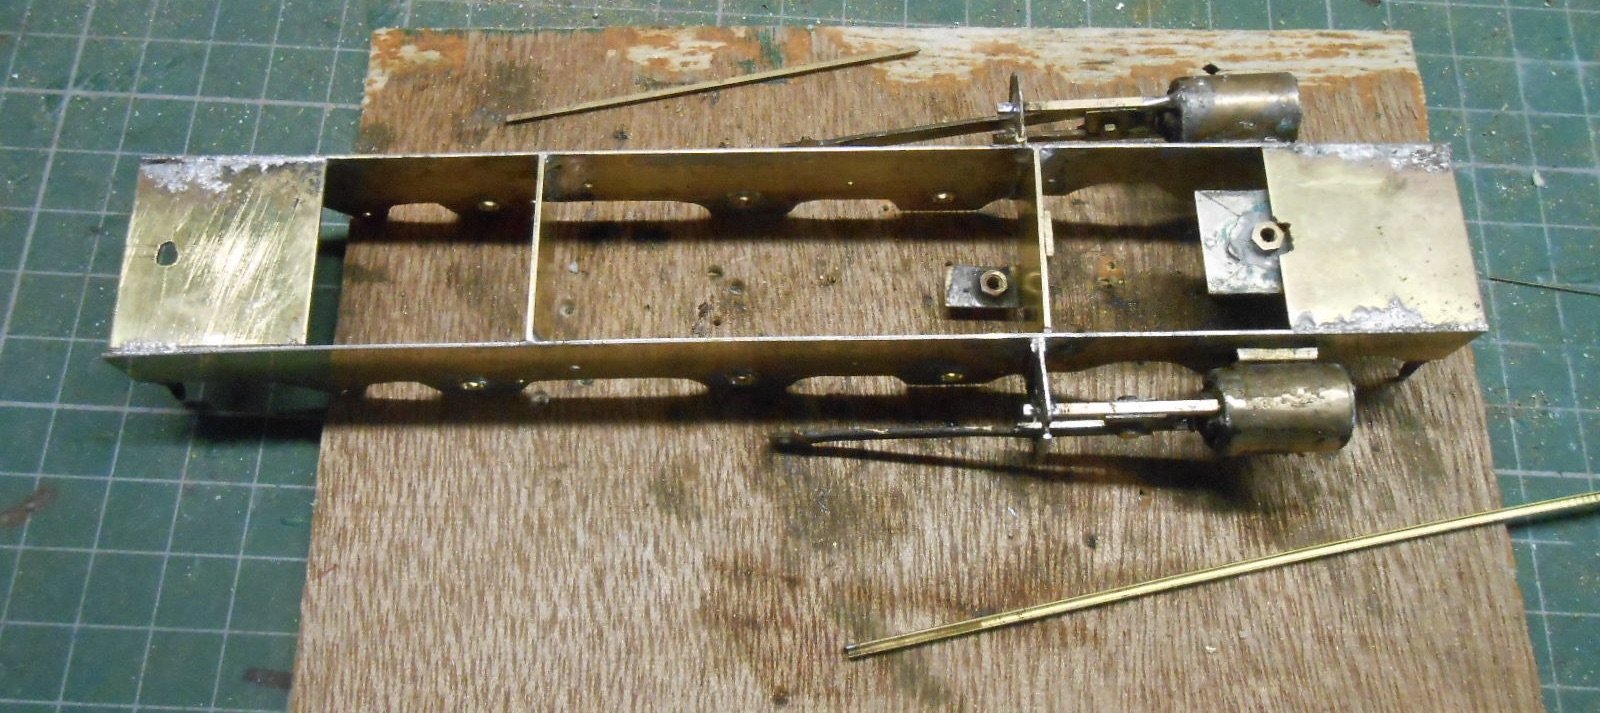
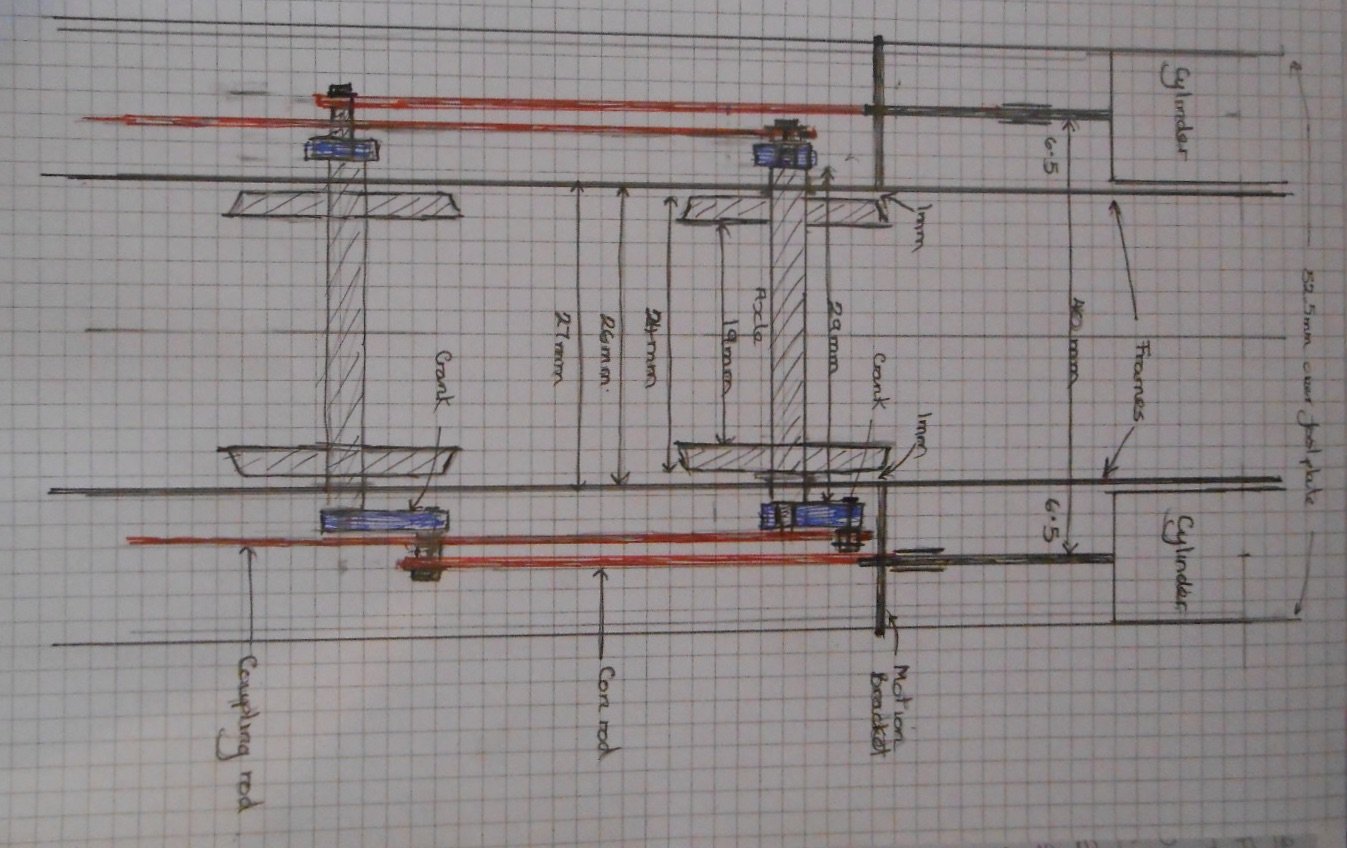
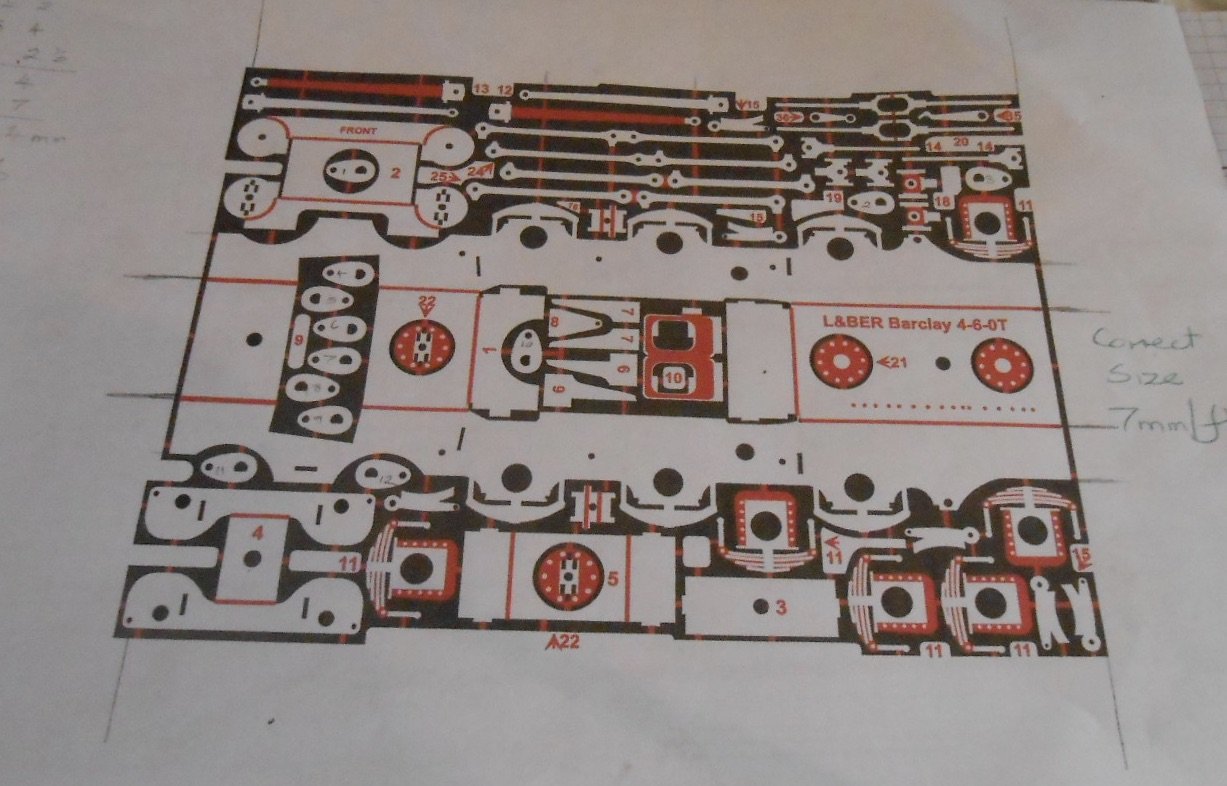
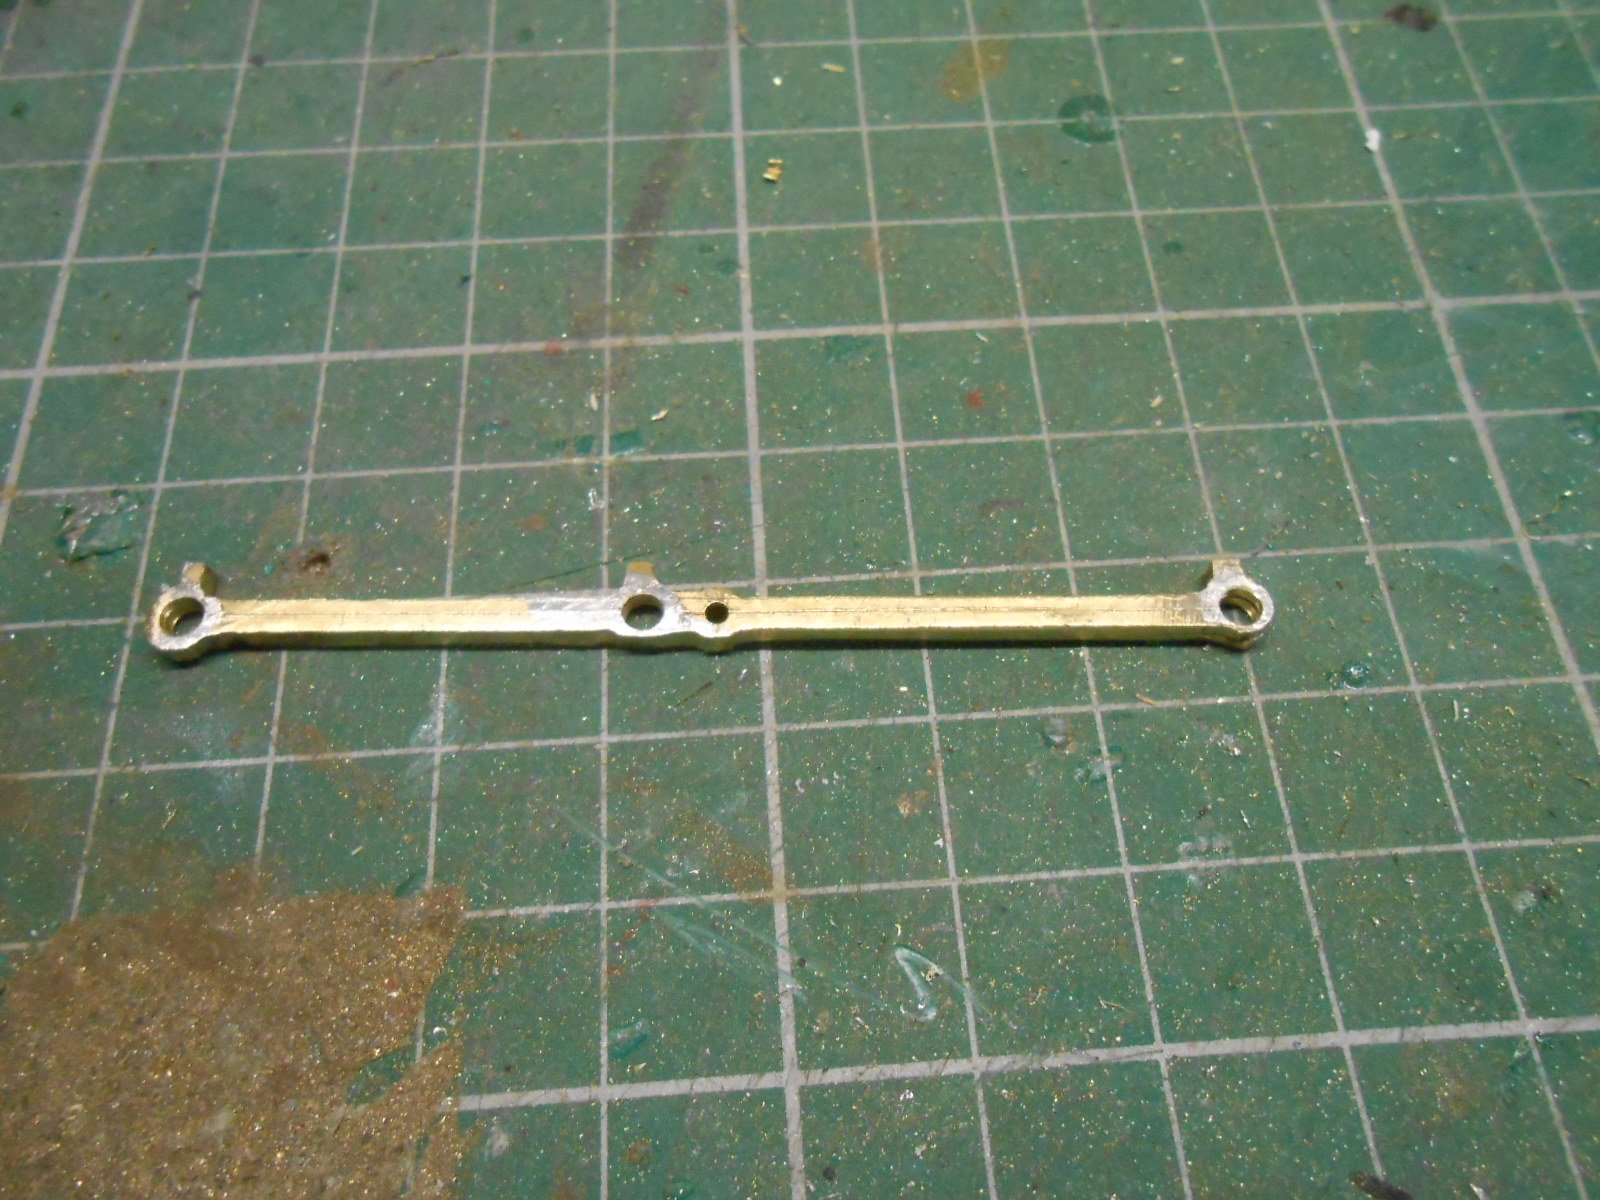
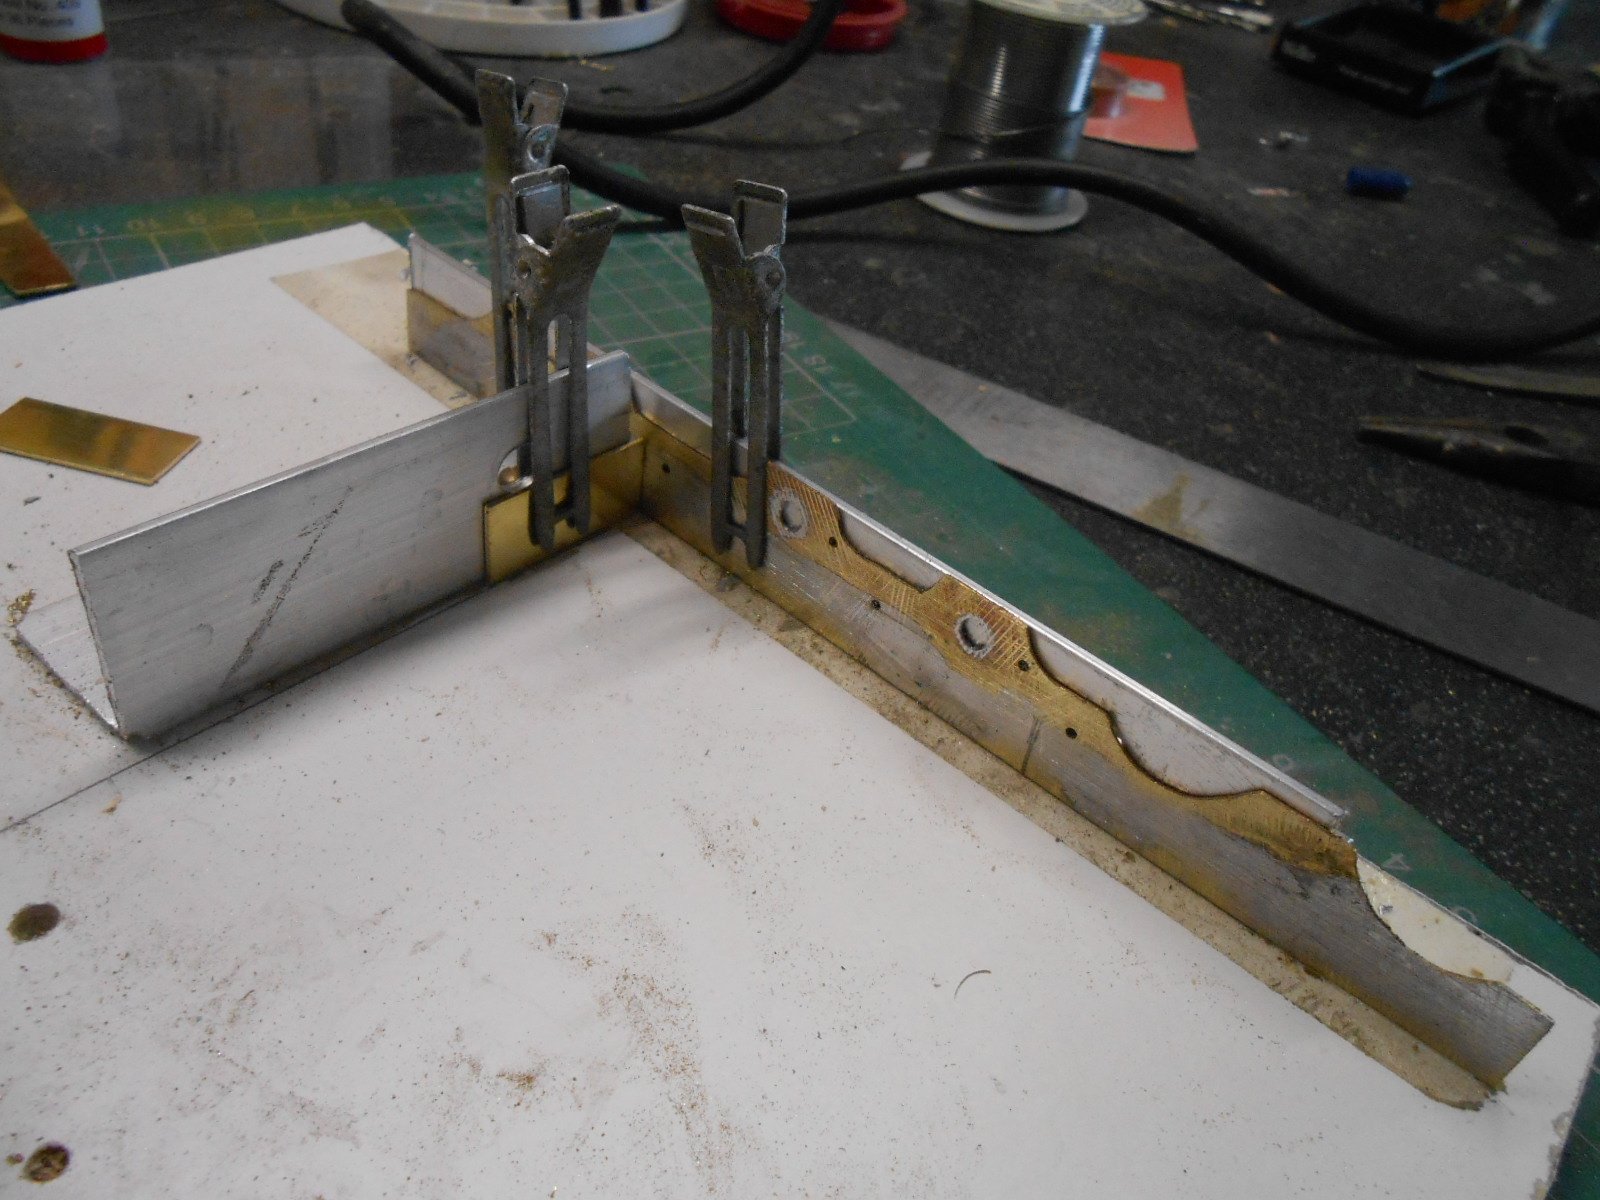
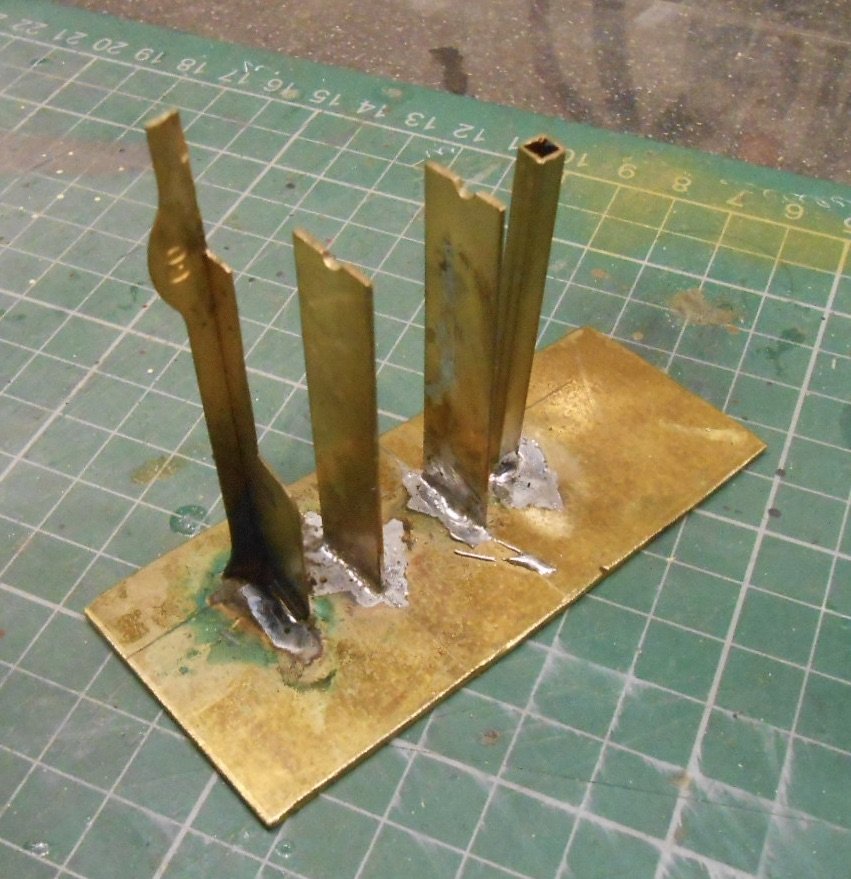
Barclay Chassis 2.0 Have been brooding a lot these last couple of weeks over my inability to get this chassis right, though I console myself with the fact that outside framed/outside cylinder chassis are far from common and there isn't a great deal of information around to help. Where there is, conventional wisdom seems to say do a conventional inside chassis & add dummy outside frames. Trouble here is that with the Barclay tanks having underslung springs, this makes getting wheels motor gears out rather difficult - hence my going along the keeper plate route. Was still thinking about that when I ordered some MJT horn blocks from Dart Castings, which use 14ba nuts to allow the bearings to be dropped out if required. However, in the end I decided this was not for me & have gone back to a more traditional approach. This was influenced by the drawings Roger Cromblehome [Alphagraphix] kindly sent me. Interestingly, these just use the outside frames & are therefore a much simpler affair than trying to build an inner and outer chassis, with horn blocks and compensation. I also made the drawing below, in order to establish clearances for wheels, motor/gearbox cranks, coupling rods and so on. As can be seen, there is plenty of room for the motor - though not if I'd used the MJT horn blocks, which are 4mm deep. High Level ones are much slimmer mind. Using washers will limit any side play on the centre, driven axle, but enable enough on the outer axles to cope with my 3' radius paintwork. The main problem with this approach is that wheels/motor/gears have to pretty much stay put, once fitted, plus working out when to prime and paint the chassis will also need careful thought. The trade off is [hopefully] a much simpler chassis. So, back to basics - starting with the coupling rods, made from two strips of brass, soldered together, drilled for the 4'2/5'4 wheel base, then filed to shape. Next came the outside frames, done in the same way, but with significant use of a slitting disc in the Dremel. Crude, but effective and [for me anyway], much quicker than a piercing saw. I then made myself a simple jig to add a couple of frame spacers to one of side frames. The jig is just two pieces of L shaped aluminium angle, screwed at right angles to a piece of Contiboard. Hair clips hold the frame and spacer in place while they are soldered together. Once both spacers had been soldered to one frame, it was time to dig out my Poppy's Woodtech chassis jig. Mine is actually designed for 0 gauge, 3/16th inch axles, but by using two lots of brass tube over the 1/8th axles, still works well enough, as shown below. The three long pieces of 1/8th steel rod indicate everything looks parallel, so [fingers crossed], the rest should follow. You might just be able to see the brass top hat bushes in the frames. I've deliberately put these facing outwards & have filed them down so that the 29mm 1/8th inch section of each axle sits nicely within them - allowing the outside cranks to clear the frames. So, there we are, with the final picture showing the new frames sitting nicely under the Barclay's bodywork. Unlike the previous version, the cylinders, slide bars and motion brackets will all be part of the chassis, because fixing them to the footplate was not a good idea. That's it for a few days though as the Domestic Authority has decreed we need to do some decorating and as we all know this [like work] is the curse of the modelling classes...
-
Lovely job - pretty engine & very fine model.
-
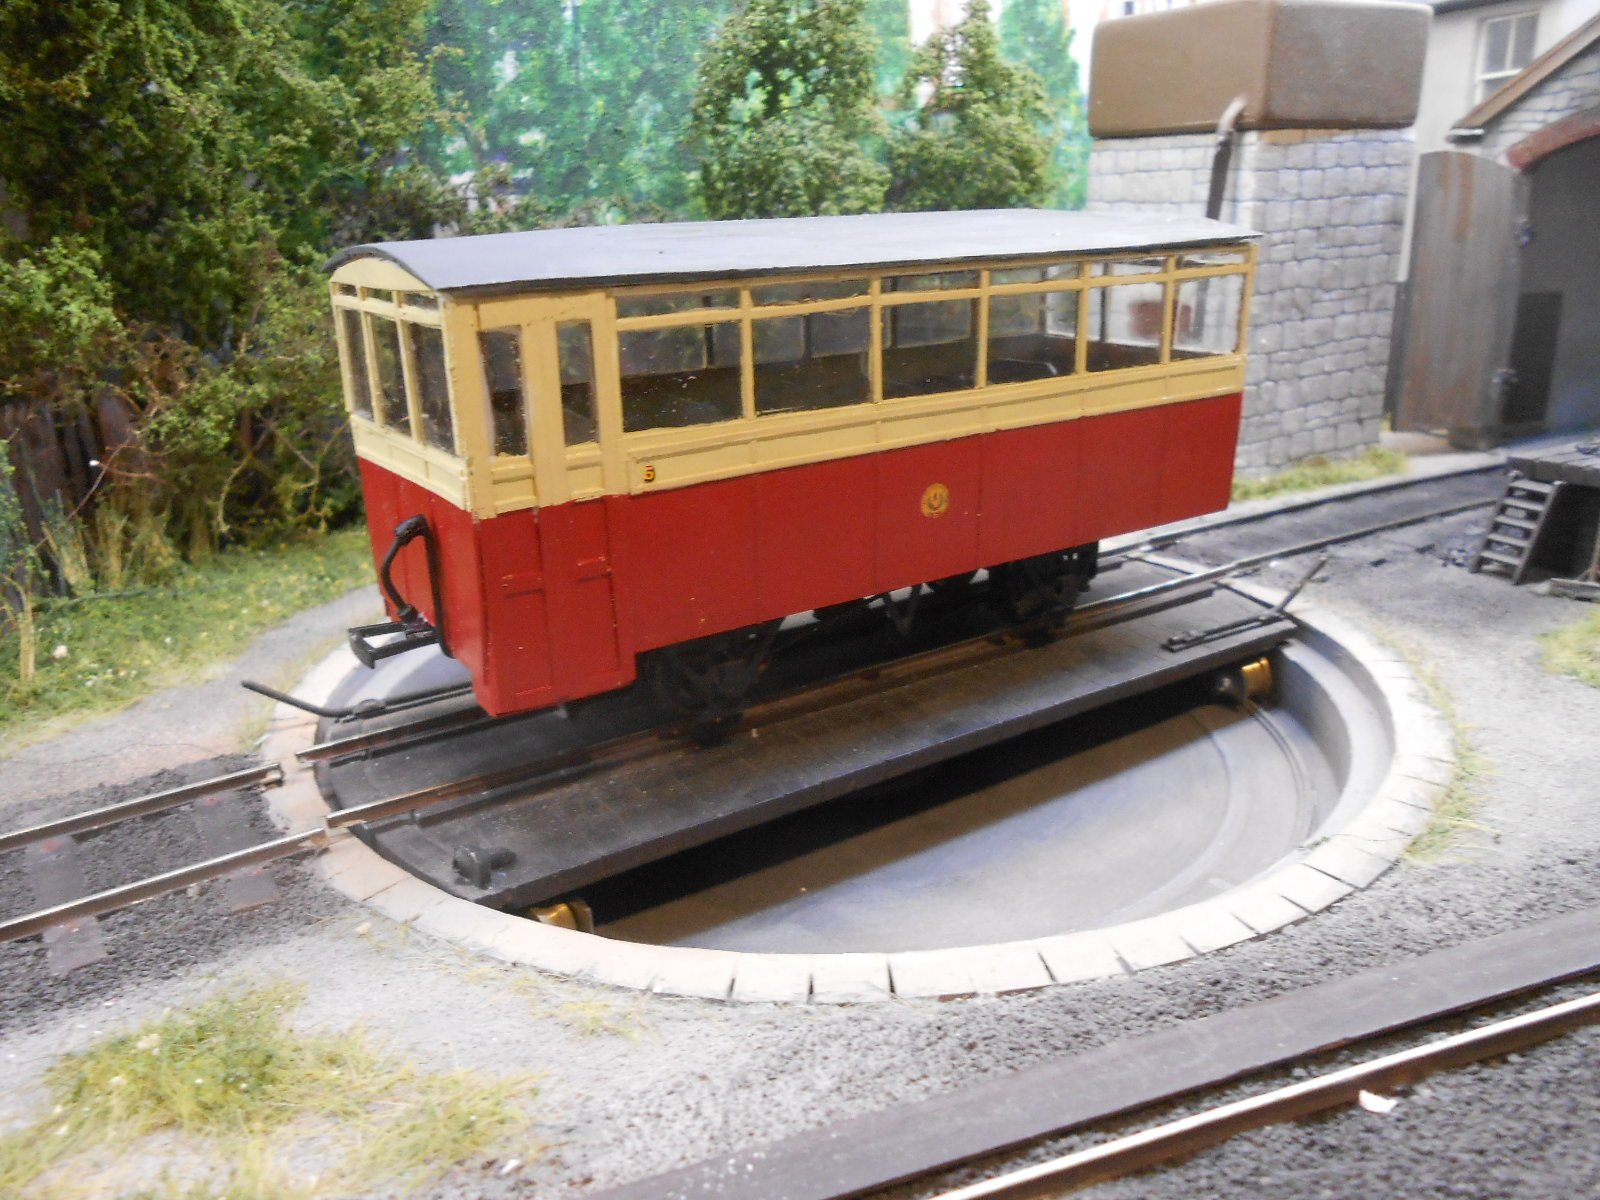
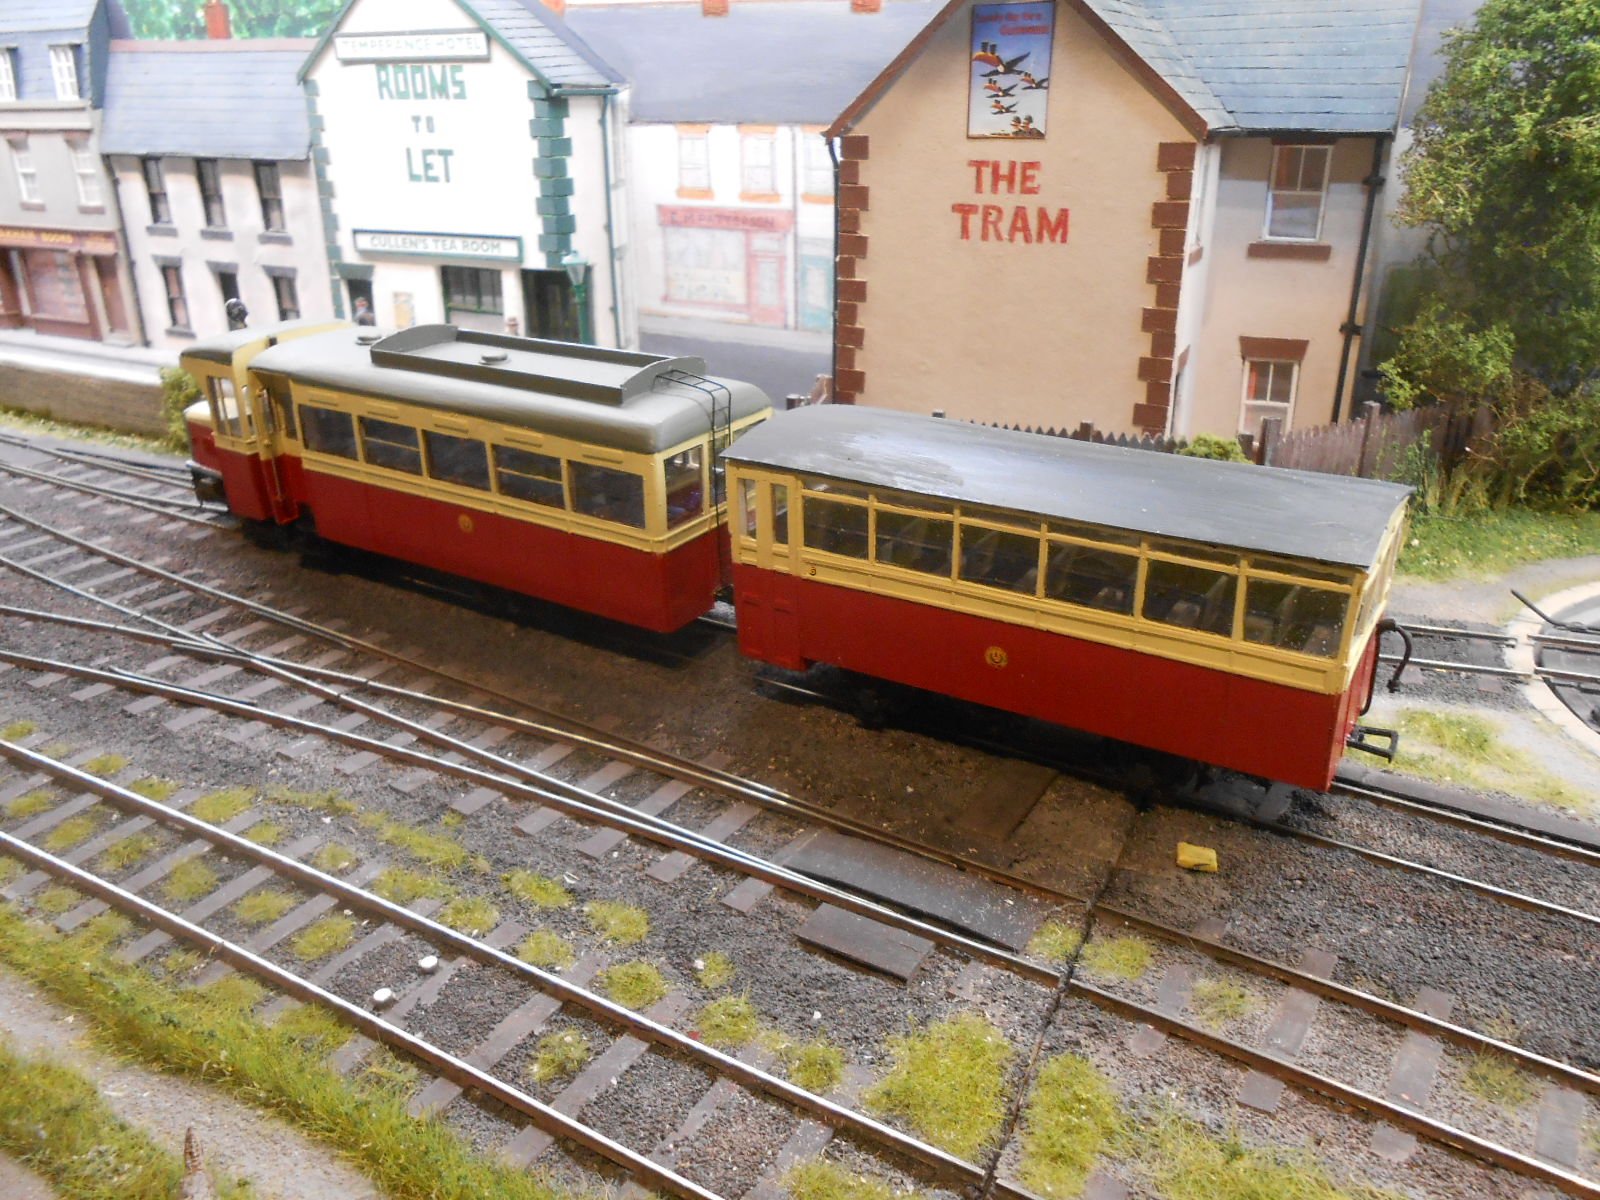
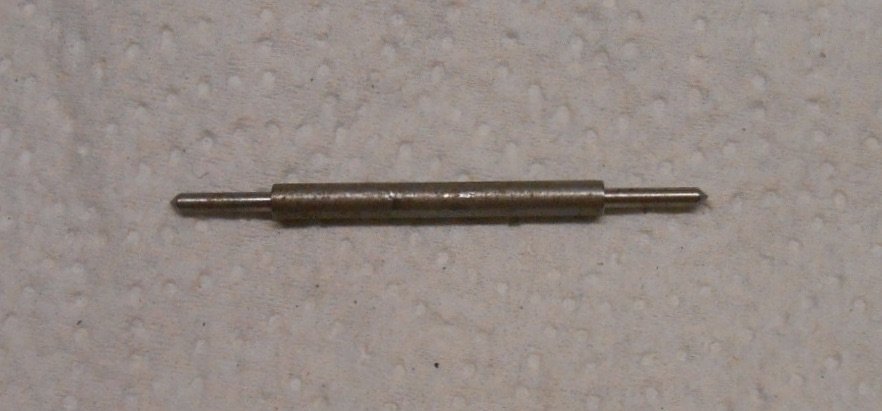
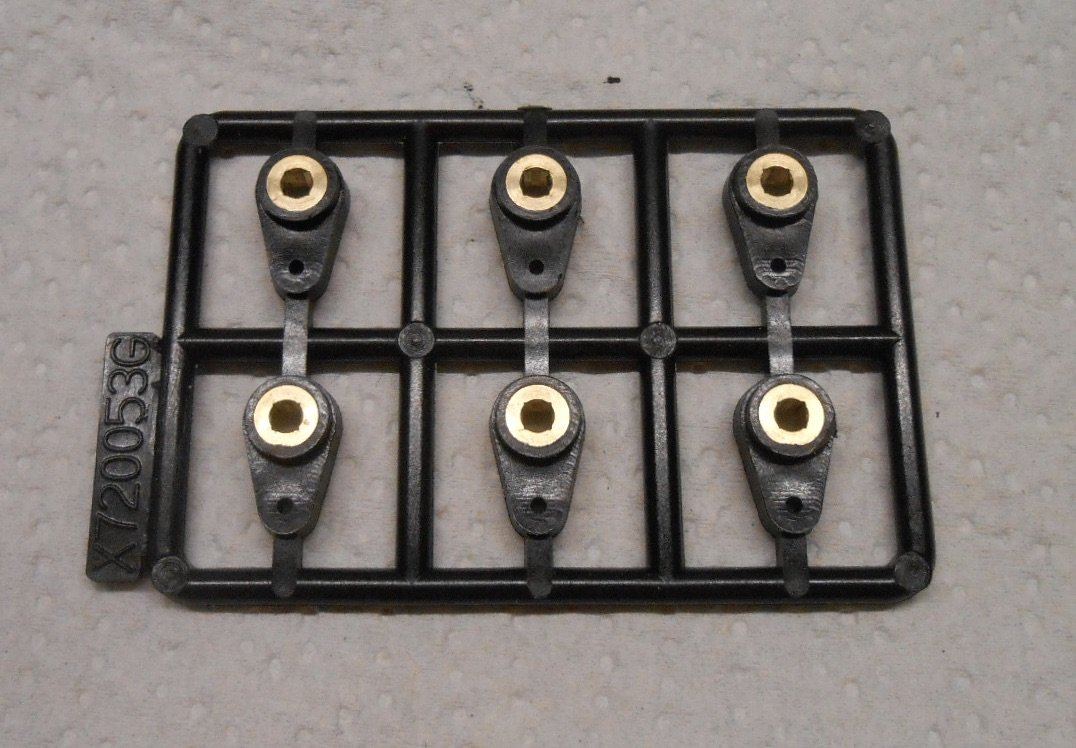
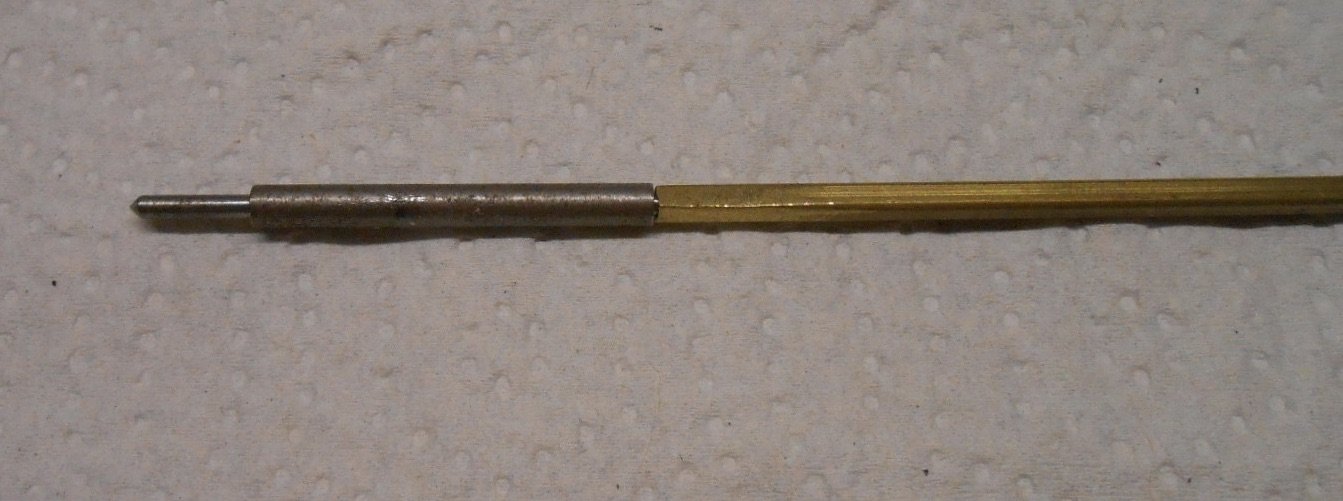
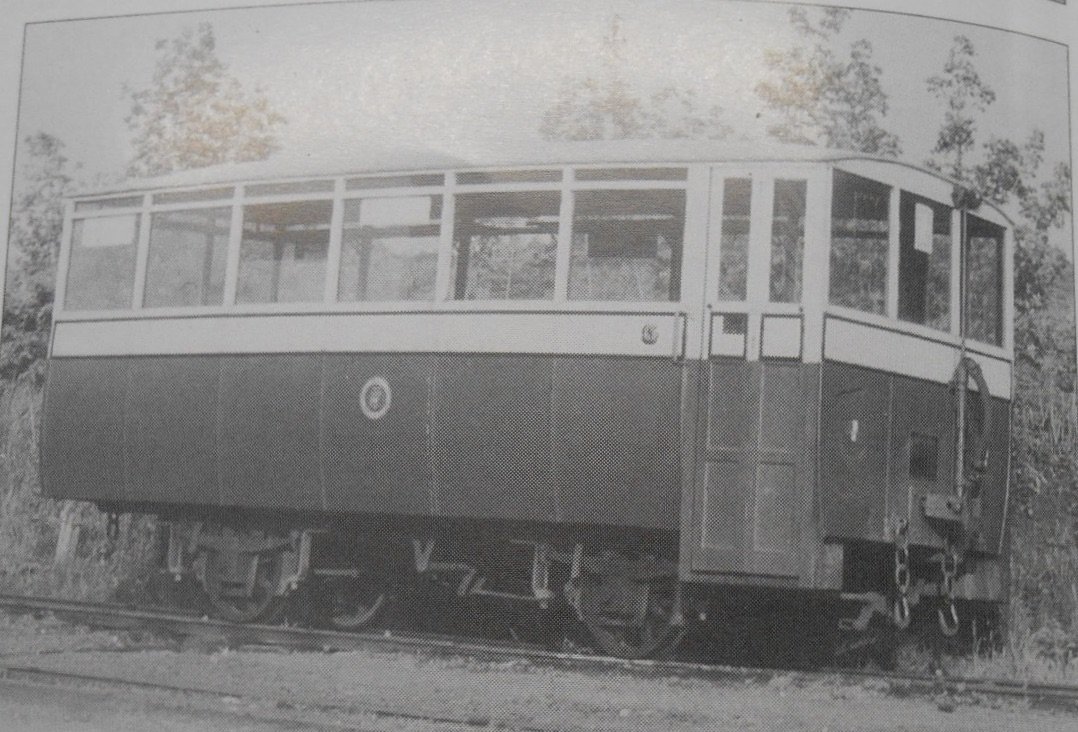
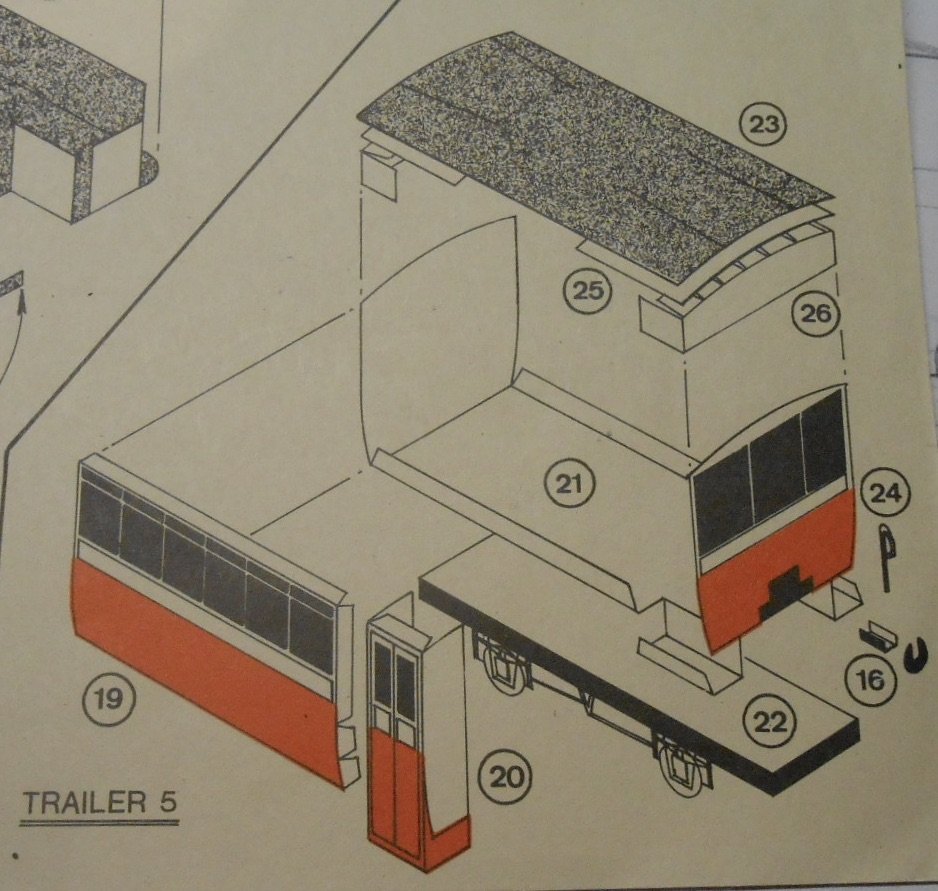
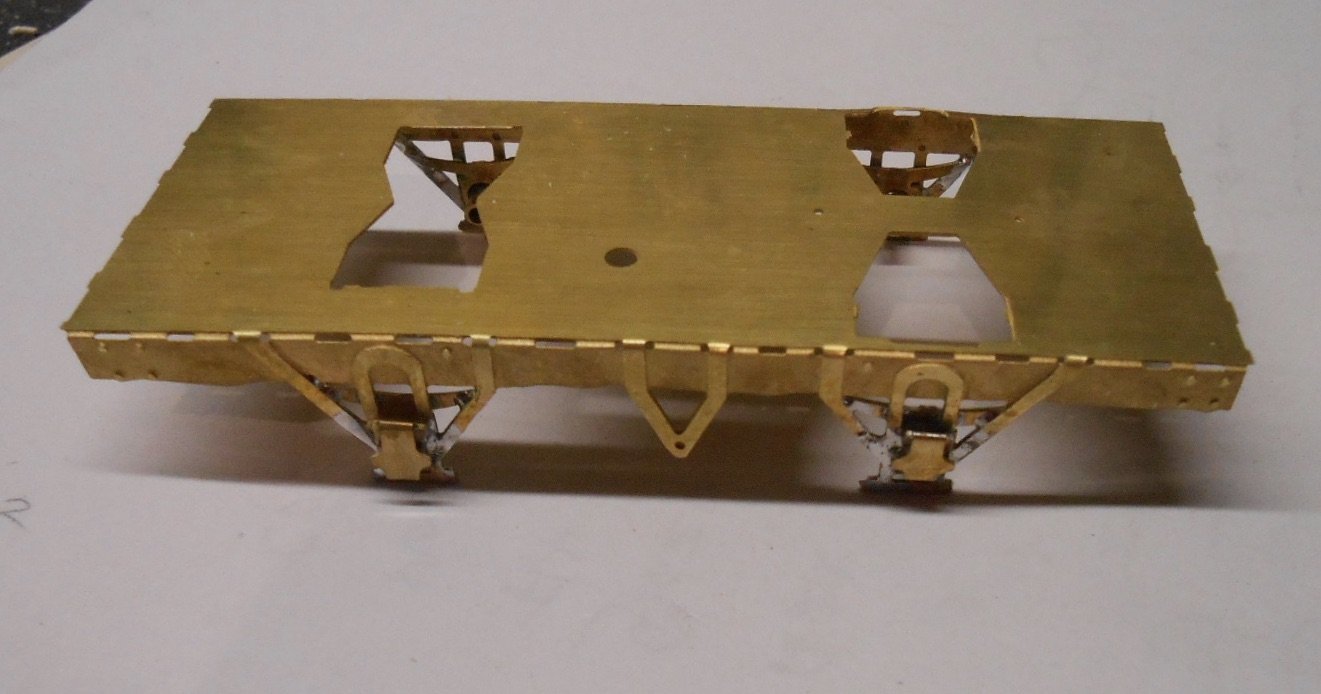
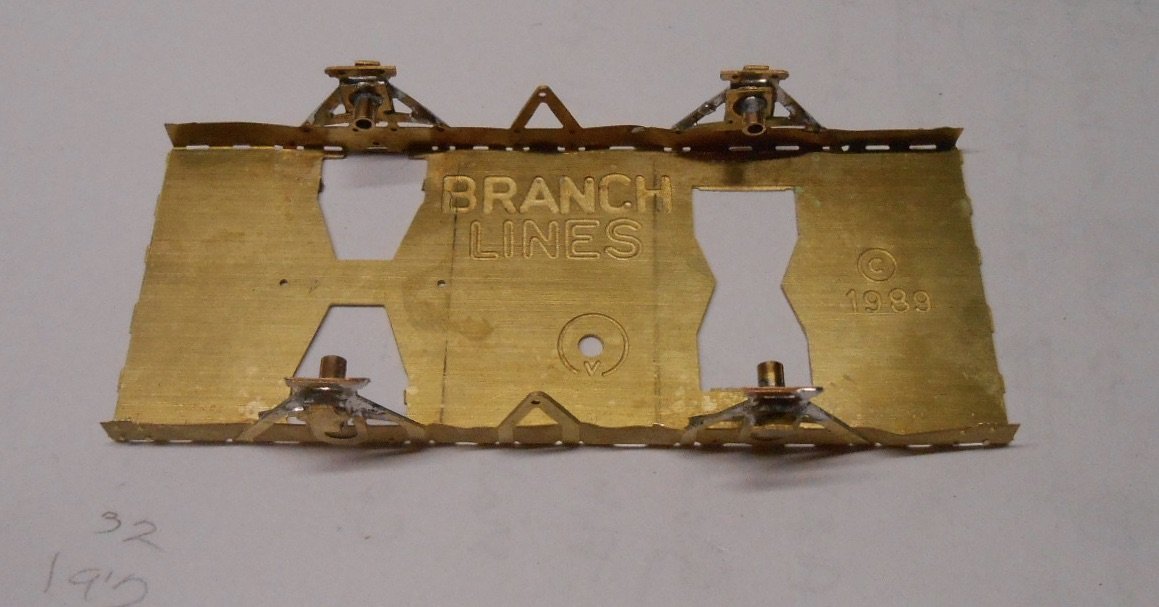
My little project of Donegal trailer No5 is about complete, though the couplings still need buffing plates, lamp irons need adding and a bit of weathering wouldn't go amiss. Overall though, a nice, cathartic exercise after the frustrations of the Barclay chassis! The roof was finished by a combination of a 20thou 'skin' and some car body filler. The chassis took a bit more thought, especially when I realised the wagon etch I'd used needed cutting down, because the trailer has no sole bars as such, while brake gear is a case of bits and pieces cobbled together and hiding under a coat of matt black. Couplings are work in progress. Am experimenting with slimline tension locks, removing one of the hooks from each pair & adding a round buffing plate, so they look like narrow gauge 'choppers'. A piece of soft iron wire [paperclip] will be soldered to the dropper of the remaining hook, so an electromagnet can be used to lift this hook to uncouple. As can be seen below, the trailer will be used with Railcar 10. Photos indicate that, because the seats weren't reversible, both trailer and railcar were turned at the end of each journey, which will make for a nice set of moves on the layout - ideal when trains are short. Have made sure the trailer is free running, so Railcar 10 has no problems in hauling it. Meanwhile, pondering on a replacement chassis for the Barclay, have now taken delivery of a few items to help in the form of MJT horn blocks and Slater's 7mm scale outside cranks. Decided my home made cranks were not up to standard, while the Slater's ones have the advantage of having square holes to sort out quartering. Still an issue though, because they don't do a 21mm gauge extended axle. However, am hoping I'll get round that by using their 7mm scale wagon axle, which has a 35mm central section an eight of an inch in diameter, with extensions each end of a smaller diameter. Rummaging in my box of brass tube, found some square section that nicely goes over the axle extensions and [with a bit of judicious filing] can be made into a good fit for the outside cranks. So, with a simple jig I can now have self quartering outside cranks and what's more Gibson driving wheels will fit nicely over the square section tube. So far, so good, though I'm still going to need to make new frames and coupling rods, for which I need to do a much better job than last time. Wish me luck!
-
Wonderful.
-
The thing about Trevor was his skills were museum quality across every aspect of his layouts. There are folk who make stunning locomotives, superb scenics, buildings or brilliant painting, but Trevor did it all and to see his work close up was a rare privilege.
-
Saddened to read of the passing of one of the great layout builders of our time. If you've never come across his work, he is well worth looking up. Trevor worked in S gauge (1:64) and his layout, East Lynn was just stunning. Everything scratchbuilt, working inside valve gear on all the locos and covering pre grouping Midland Great Northern/Great Eastern. Helped operate it a couple of times and it ran superbly. The real treat was to work the quayside, complete with wagon turntables and chain shunting. All in all a remarkable talent.
- 12 replies
-
- 12
-

-

-

-
N Scale Ballywillan, Co Longford.
David Holman replied to Kevin Sweeney's topic in Irish Model Layouts
Joyous! -
Good stuff - many thanks, Andy. My time period is second half of the '40s so that works out fine.
-
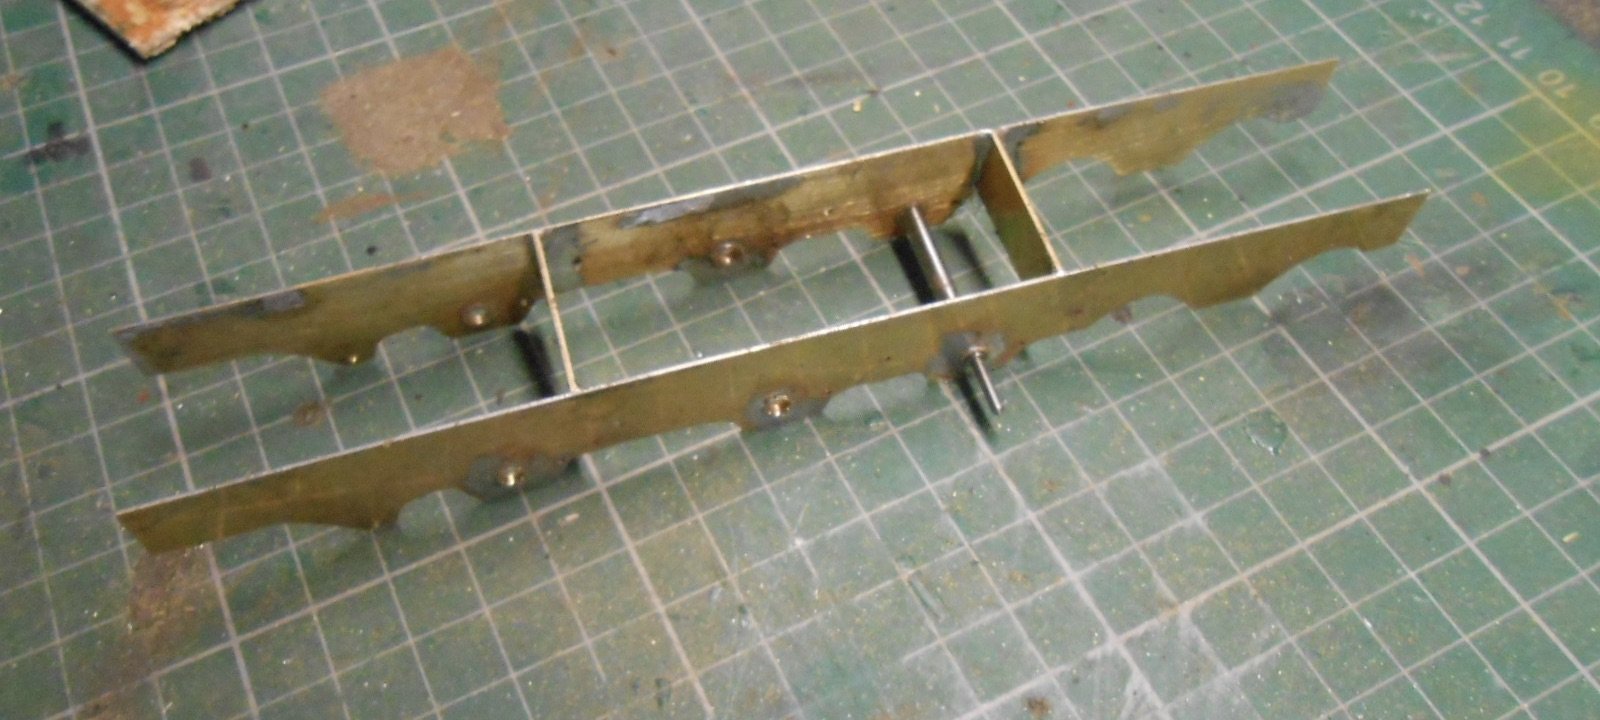
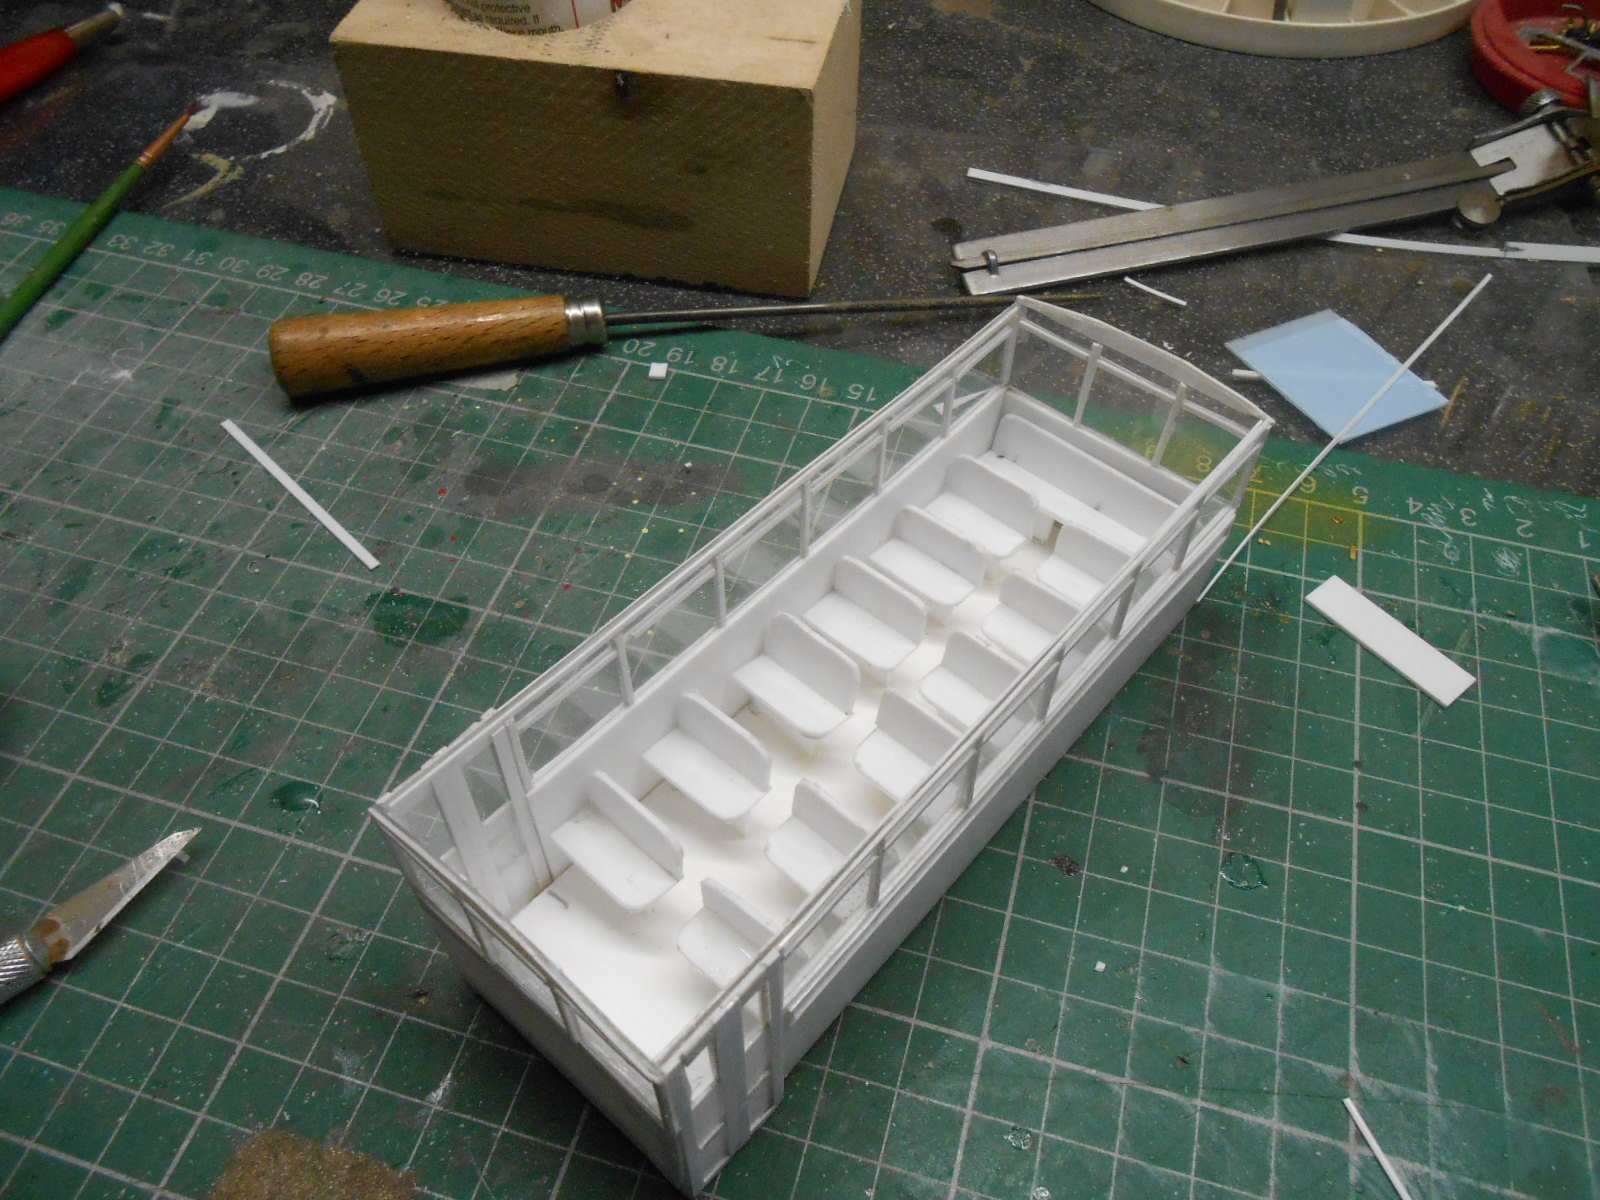
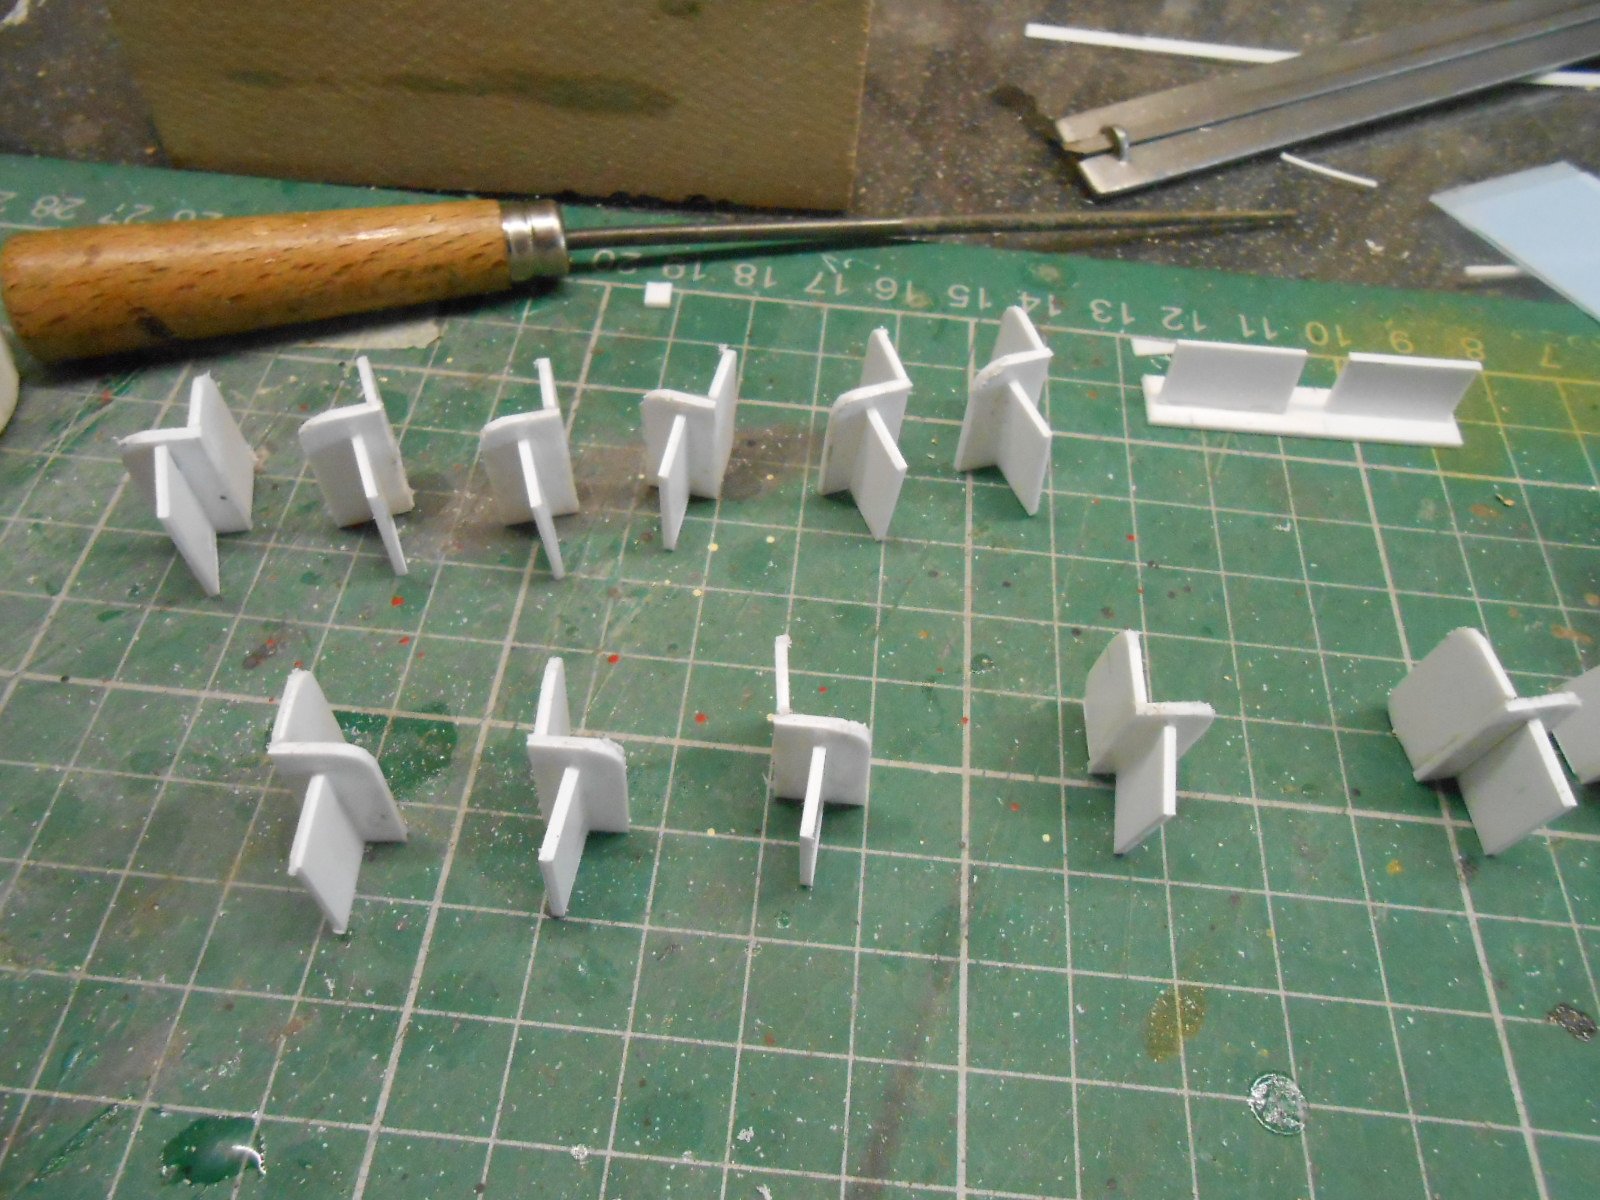
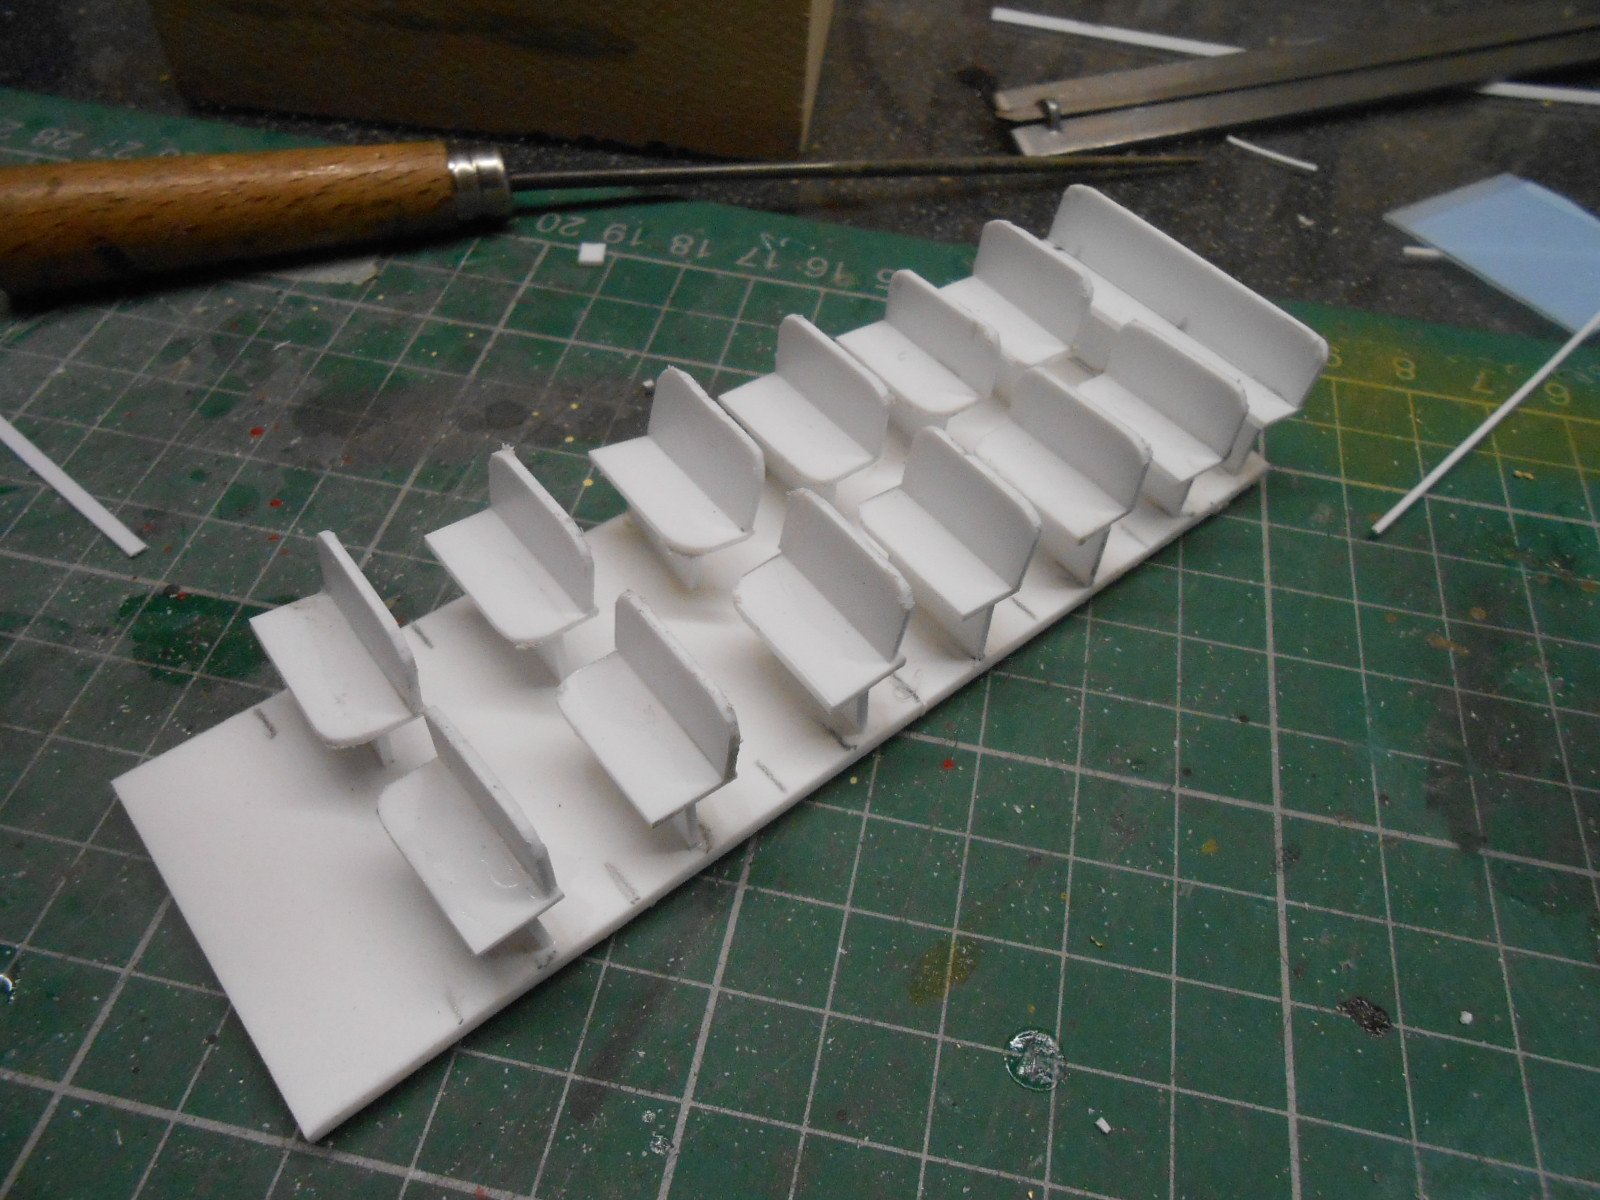
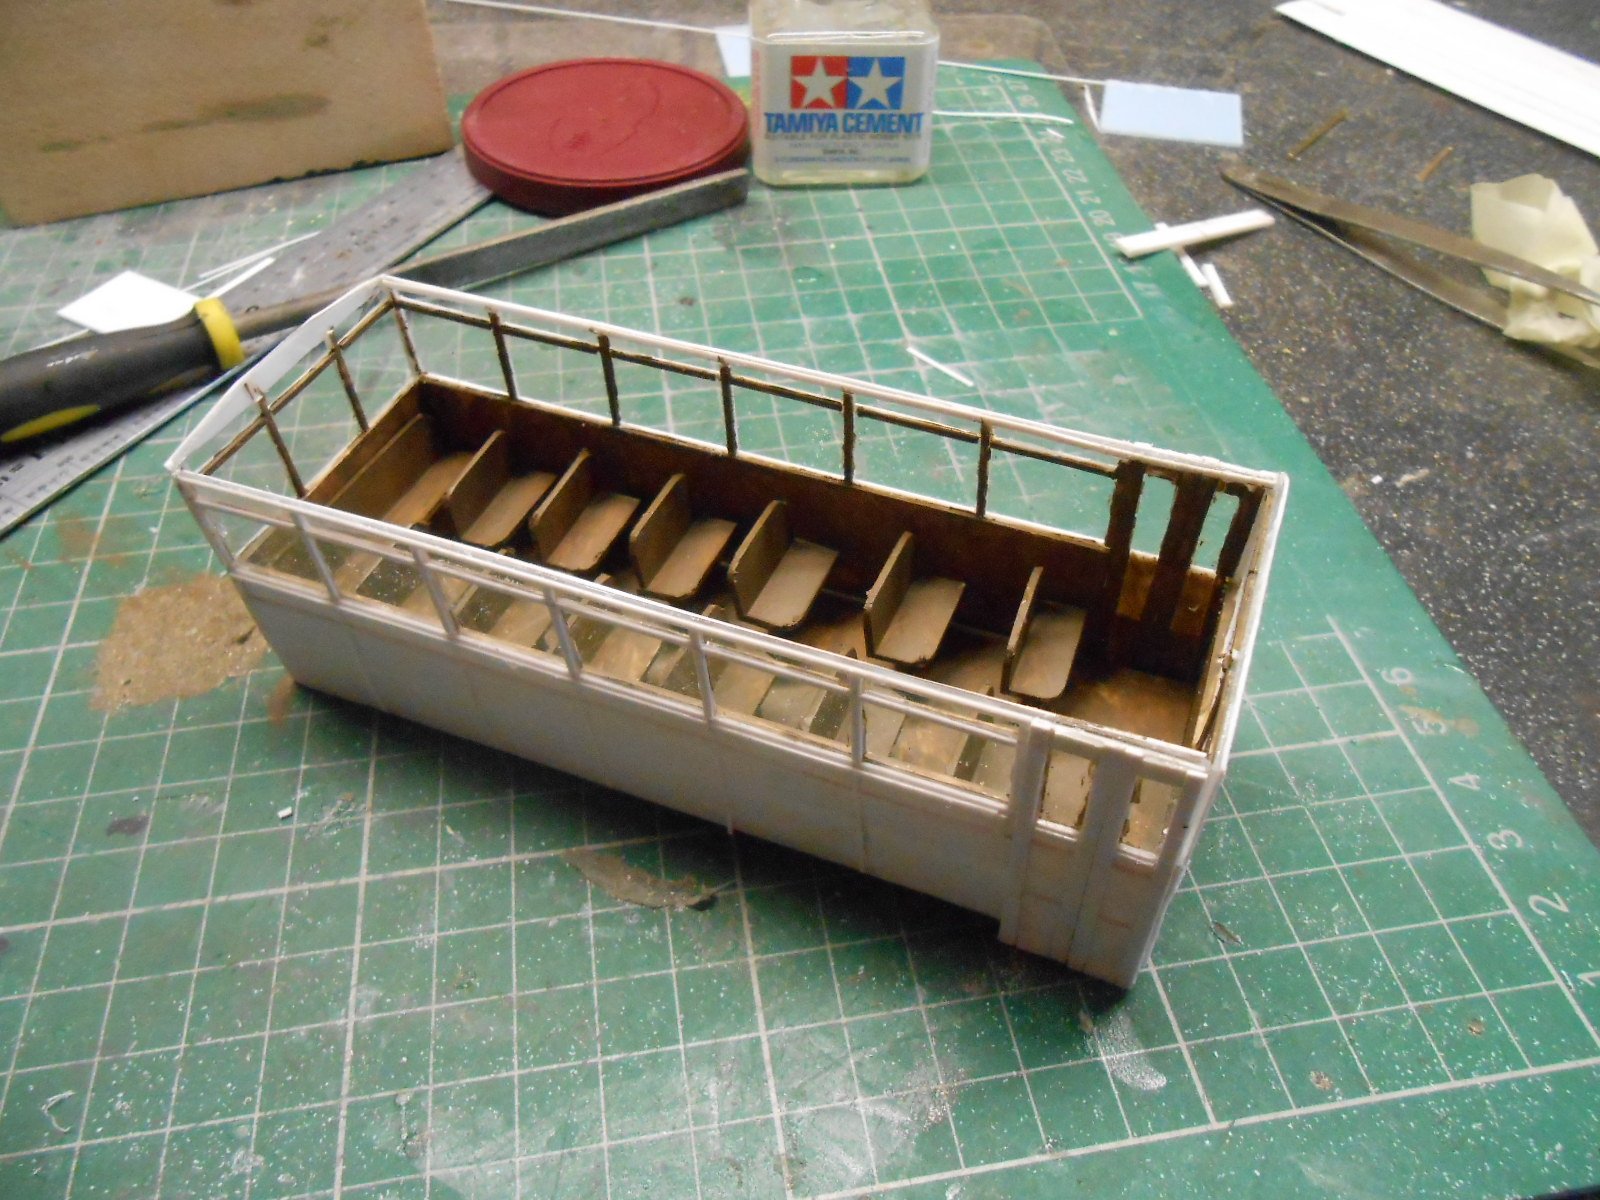
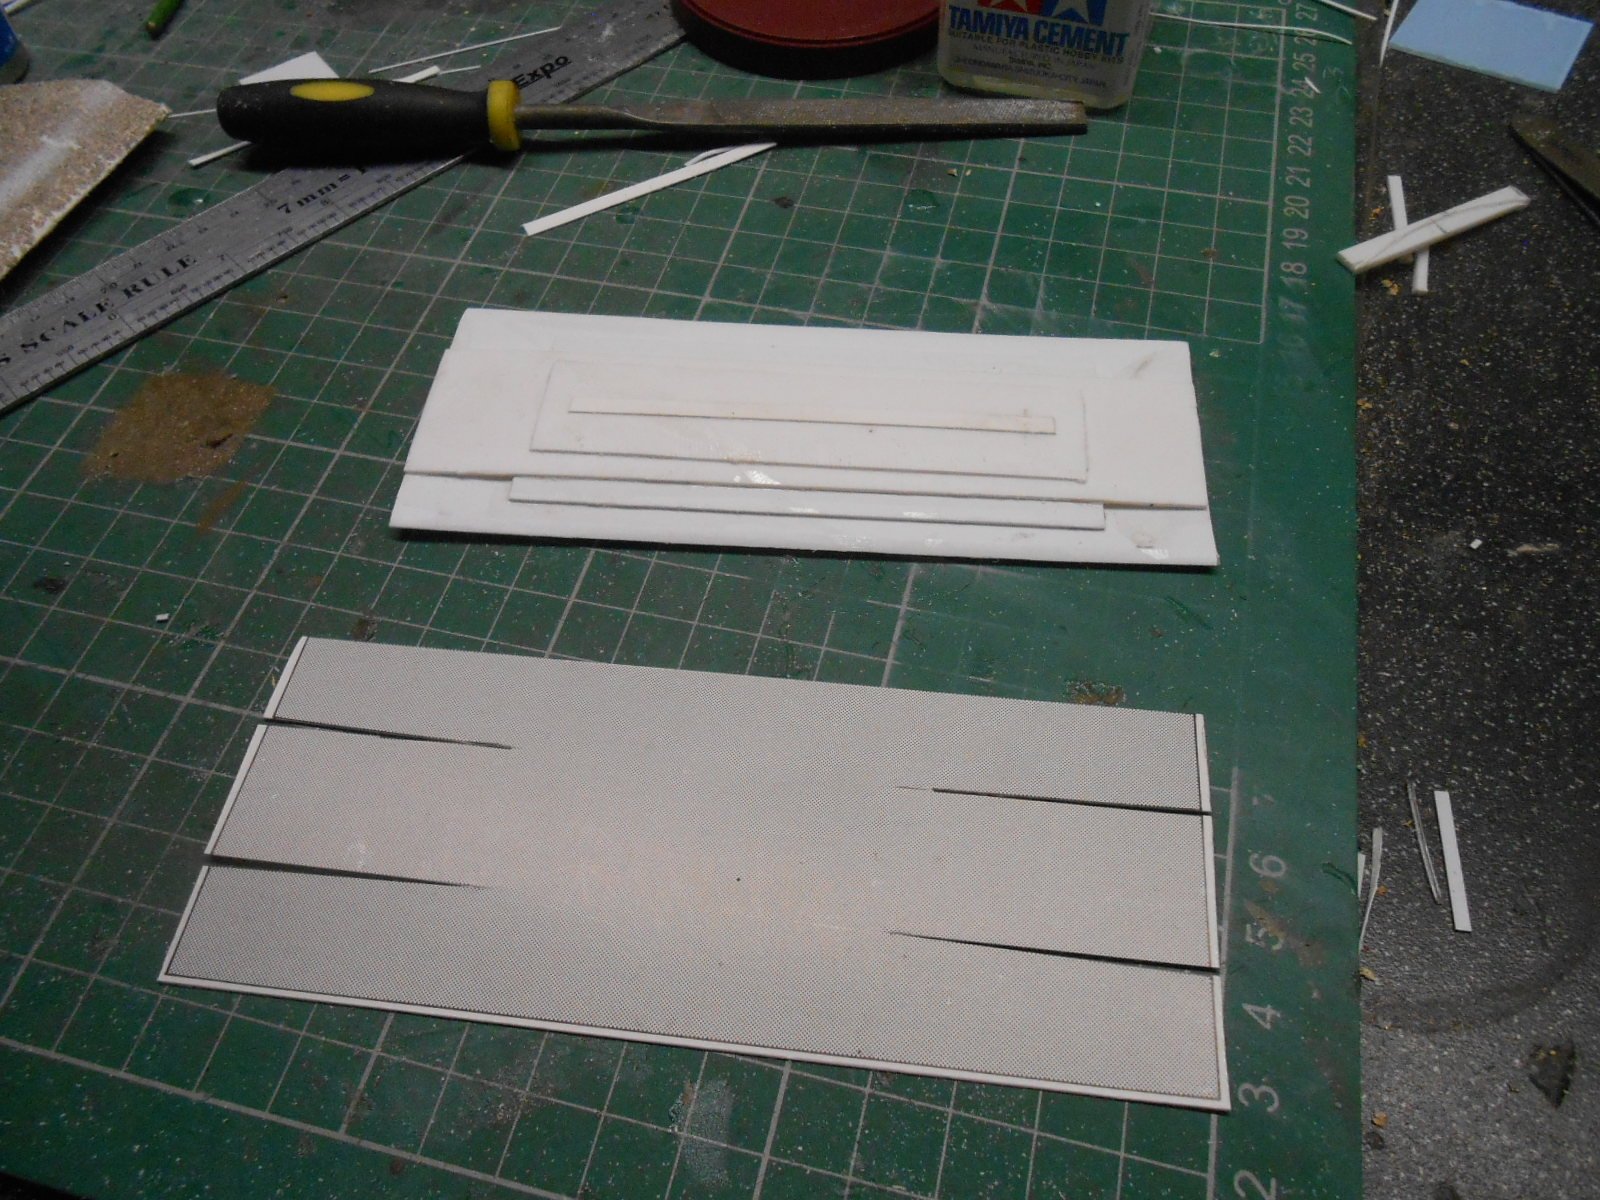
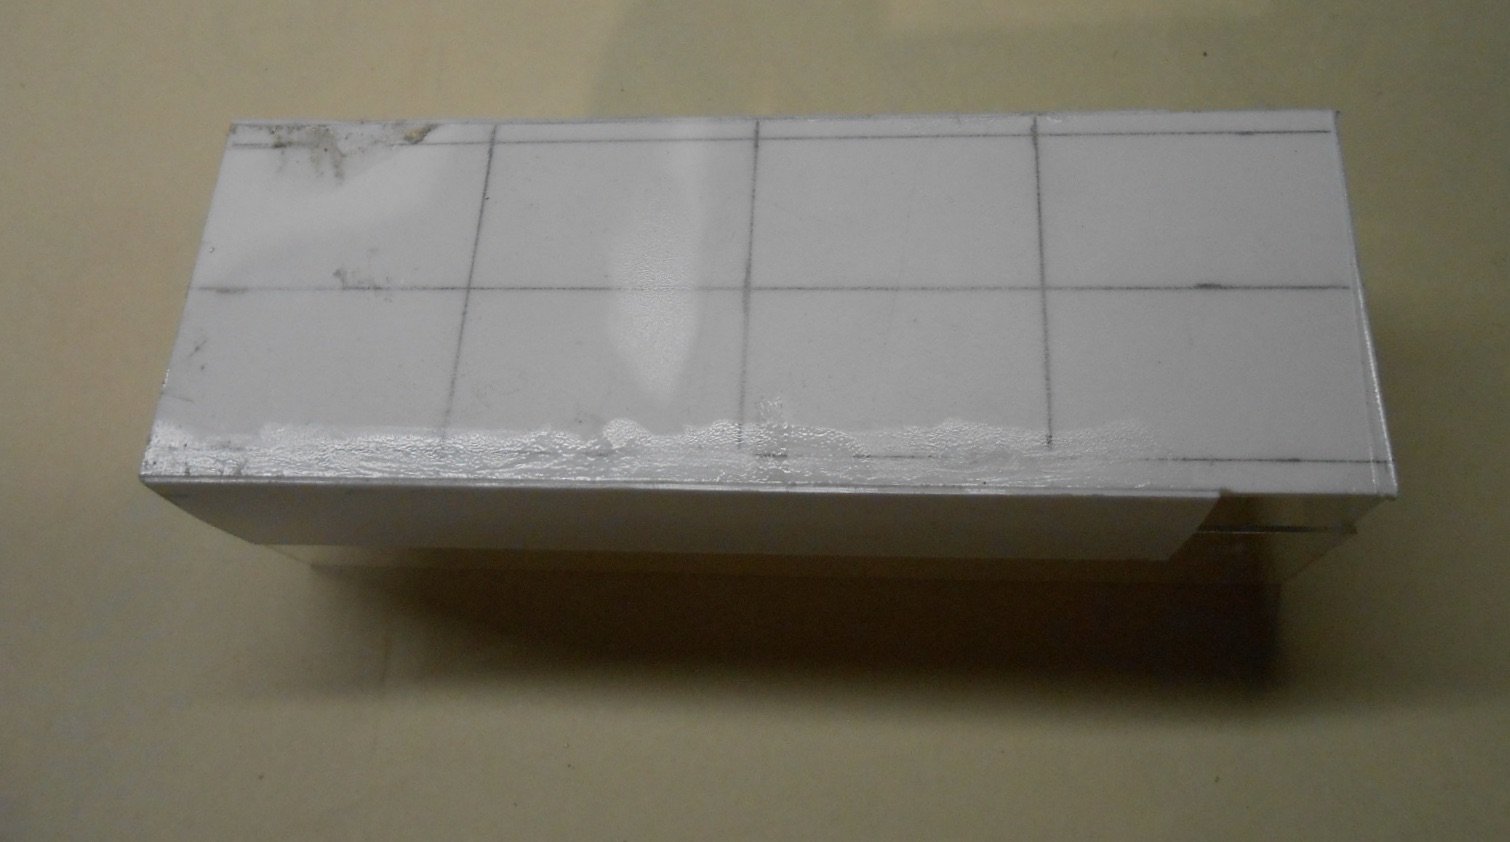
Steady progress on the trailer this week. As well as the AlphaG kit, there is help in the form of three quarter views from opposite ends in two photo albums - one the Steve Flanders pictorial, the other Michael Bunch's Donegal Diary, part 1. Indeed, only recently realised that Trailer 3 was custom built as such & not a repurposed earlier railcar like some of the others. Much of the work has been fiddly, with 40, 60 & 80 by 20 micro strip for the glazing [inside and out] and some 10 by 20 for the lower panels. The seats have been made from 40 thou sheet, with three separate pieces for each. To help with painting, these were mounted on a separate inner floor. Painting the interior has been quite a challenge too. Used Humbrol brown and a very fine brush to do the glazing bars and doors. The pagoda style roof has caused much pondering. The AlphaG card kit provides one idea and may use this as a template to create a 20thou 'cover' to the under frame illustrated below. Alternatively, may cover everything with filler and then sand to shape.
-
Though I have no knowledge of vaping, suspect there are opportunities in making a system usable for model railways. However, the impact of this on an exhibition doesn't bear thinking about!
-
Well worth the effort, while the weather sounds like a typical British summer! The latter not quite true. Since it rained on St Swithen's Day, it's been pretty warm and dry in my corner of Blighty.
-
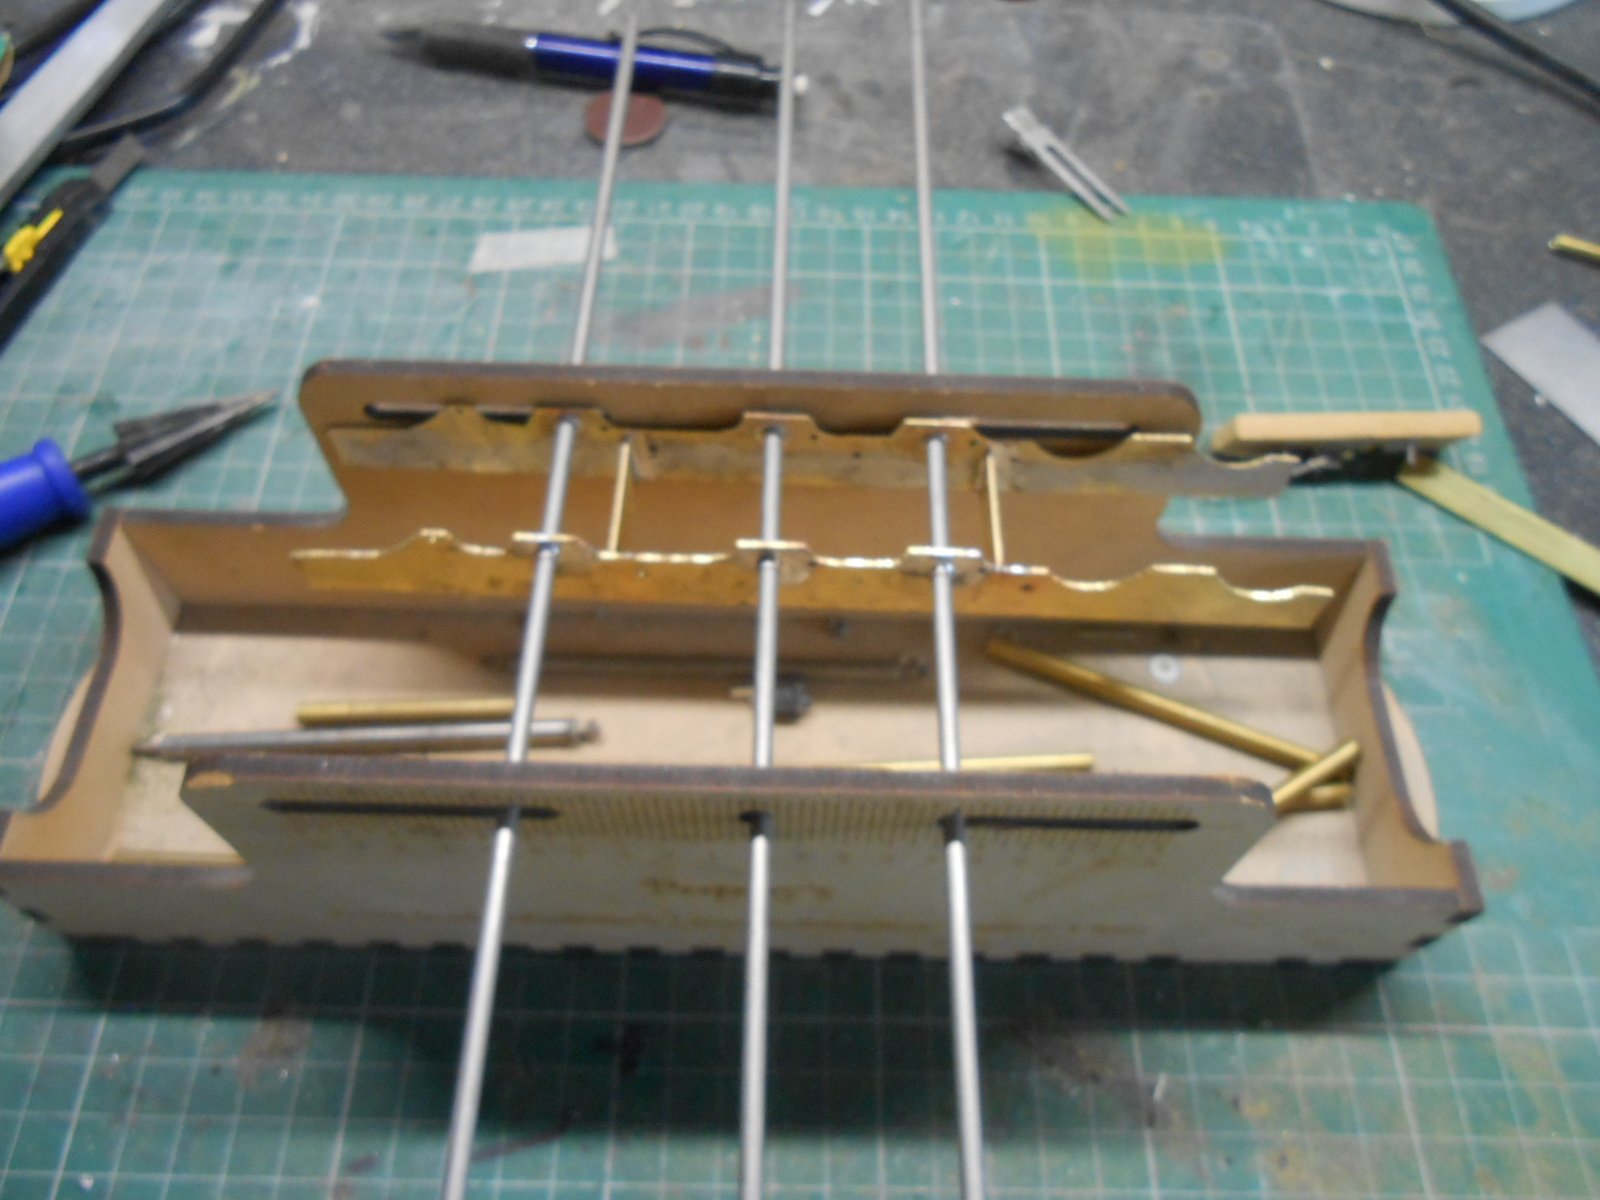
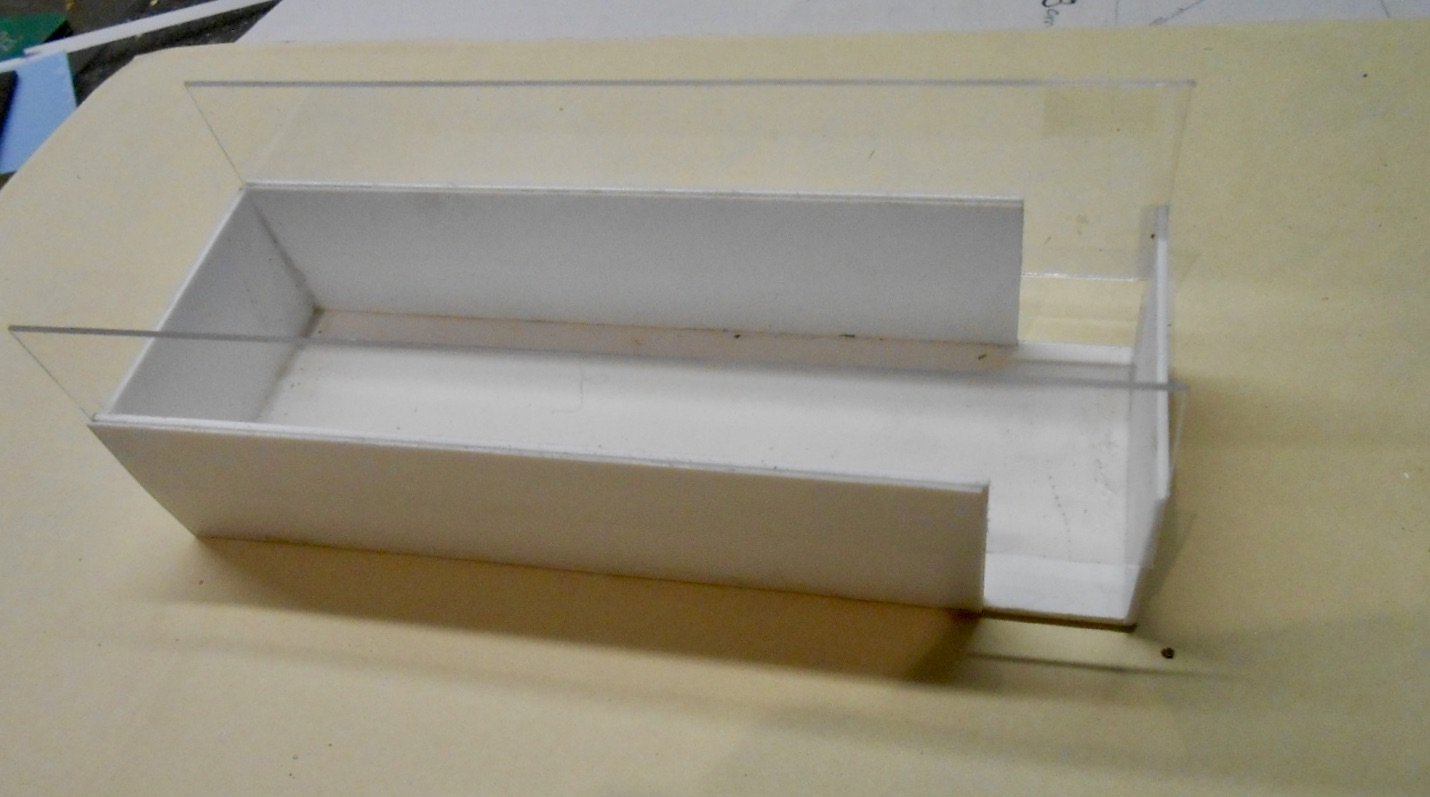
So, to a new project - and hopefully something simpler! On my list is Donegal Trailer No3, which will be running with recently converted CVR Railcar 10. Bought one of the Alphagraphix card kits for this a while ago & as ever, it makes a useful starting point for a scratch build. Began by making an outline drawing & then had a think about how to produce a chassis. I've still got a couple of Branchlines etched brass CVR wagon chassis kits & decided I could make one of these up & then slice it into three parts to create the 9' wheel base of the trailer. As per my other CVR wagons, I use Slater's top hat wagon bearings, drilled out to take axles made from 2mm brass wire, with 14mm wheels. The body is being built on a 2mm plasticard base with a 1mm inner frame on to which 0.5mm acrylic glazing is added for the windows, then 0.5mm plasticard outside that for the lower sides, creating the tumblehome in the process. After all the frustrations of the Barclay tank chassis, it was nice to get something new going in fairly quick time.
-
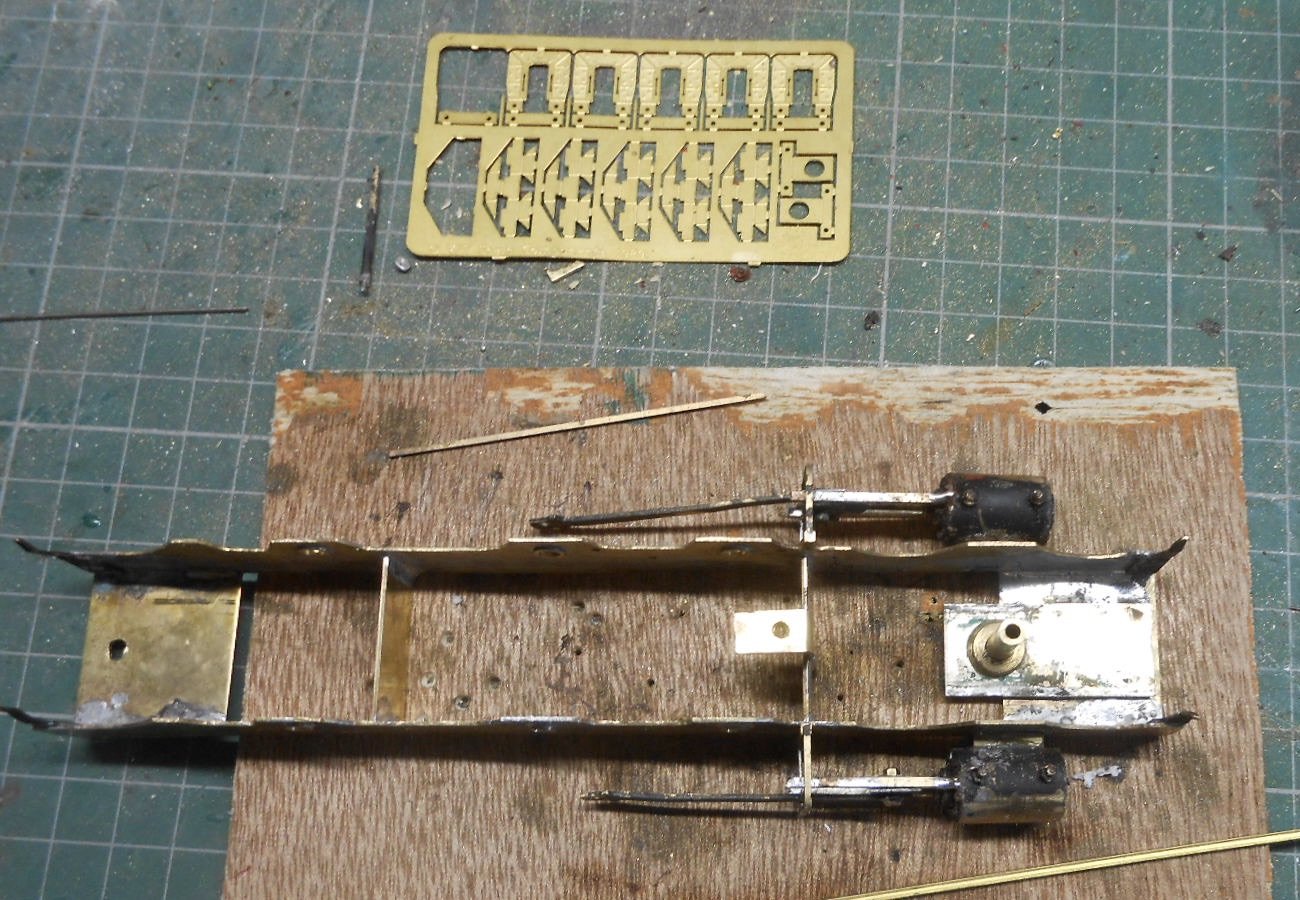
Well, I don't often give up, but the Barclay 4-6-0T's chassis is beyond redemption and the only option is to make another one. After a couple of days away from it, I went back and made a list. Some things were redeemable, but not all.The former included: cutting back the bolt holding the boiler to the firebox to give the motor sufficient clearance Straightening the crank pins Strengthening the keeper plate Taking inspiration from Tullygrainy and others, I made myself a wheel quartering jig Despite all the above [and the fact that it somehow worked before], I think I've 'over fettled it', to the point where there are too many issues with clearances, so its got to go. Am going to use horn blocks on the new chassis, though still trying to decide whether to just use outside frames, rather than inner ones with dummy outers. Also need to think about fitting better mountings for the underhung dummy springs, so they can be removed to allow attention to the wheels and motion. Probably need to make new cranks too... All the above means new stuff needs ordering, so the loco will go on the shelf for a while while I have a go at something else. When you build pretty much everything for a layout, there's always plenty of options, but for now have simply tidied up the workbench, so I can make a new start once I've decided. Meanwhile copies of the photos Andrew Burnham took at the Chatham Show for Railway Modeller arrived this week, so have been putting the finishing touches to an article on Northport Quay. Probably not until next year, but it is alway nice to know you are having something published - and you get paid too! While writing the article, cheered myself up by looking back at the one I did for Arigna Town in the April 2015 Modeller & Andrew's photos for that really came out well. The new ones are good too. Nothing that hasn't been seen on this forum - the layout isn't that big after all - but good to see that the mixture of cool and warm white LEDs I use give nice, muted colours. Can't post them here - Andrew uses a 25 megapixel camera so each file is way too big.
-
Looks like a lot of fun.
-
Though not CIE, but partly in the Republic, all of the Sligo Leitrim locos only had names, not numbers.
-
It all sounds VERY expensive! A million euros goes nowhere these days (though I wouldn't say no if someone offered me) and big projects seem to go into the hundreds, if not more. Then comes the question of whether or not such an investment, be it government or private, would ever recoup the cost? In these uncertain times, what are the chances of it being completed? Look at the HS2 debacle this side of the water. Love to see it happen, but suspect cost will ensure it doesn't.
-
Proper civil engineering!
-
Am wondering if the simple fact that I stick to one manufacturer for paint is why I haven't had many problems? Fairly sure Halfords is all acrylic. Do use Humbrol enamel for weathering, but am increasingly disappointed with the range and quality. Several of the co!ours advocated by Martyn Welch in his seminal Art of Weathering are no longer available and keep hoping that a revised edition might come out with some alternatives. That said, the cost of changing from Humbrol to say Tamiya would quickly add up!
-
Strange isn't it, these things sent to bite us? Very much tempting providence, my own go to hasn't got such issues. Halfords red or grey primer, with either their matt black or gloss top coat. Going over sharp edges with both qun blue and permanent market pen before priming help reduce future issues of brass shining through. I rarely use varnish for transfers either... If I get over spray or orange peel effect, then a bit of work with T-Cut soon cures the problem - and being naturally impatient, I only leave 24 hours between coats. Asking for trouble? Probably, but it has served me well enough for 60 odd loco kits and scratchbuilds. I have p!entry of my own issues (working on the theory that the final coat of paint covers a multitude of sins) and it seems very unfair that someone so skilful, organised and methodical should be plagued by paint. Nil bastardo carborundum Alan - or something like that!