David Holman
-
Posts
4,359 -
Joined
-
Last visited
-
Days Won
117
Content Type
Profiles
Forums
Events
Gallery
Blogs
Everything posted by David Holman
-
There are photos of J26 at Sligo and if you go back to pre grouping days, the MGW, WL&W, GSW and SLNC all had a hand I railways there
-
The Weald and Down Museum in Sussex is home to all sorts of restored timber frames buildings that have been rescued from all over the South-East. Well worth a visit if you are in the area. It is also home to The Repair Shop TV programme, which I find a constant source of inspiration.
-
Woodlands Scenics ballast is good. Made from crushed coconut shells and comes in a variety of grades and colours. As already said, go for finer grades. If only 1mm in size, that still works out at three inch/75mm lumps. Plenty big enough in 4mm scale, methinks.
-
Nice. Very nice indeed. Keep having to remind myself these models are 4mm scale.
-
Thanks Alan. You may well be right!
-
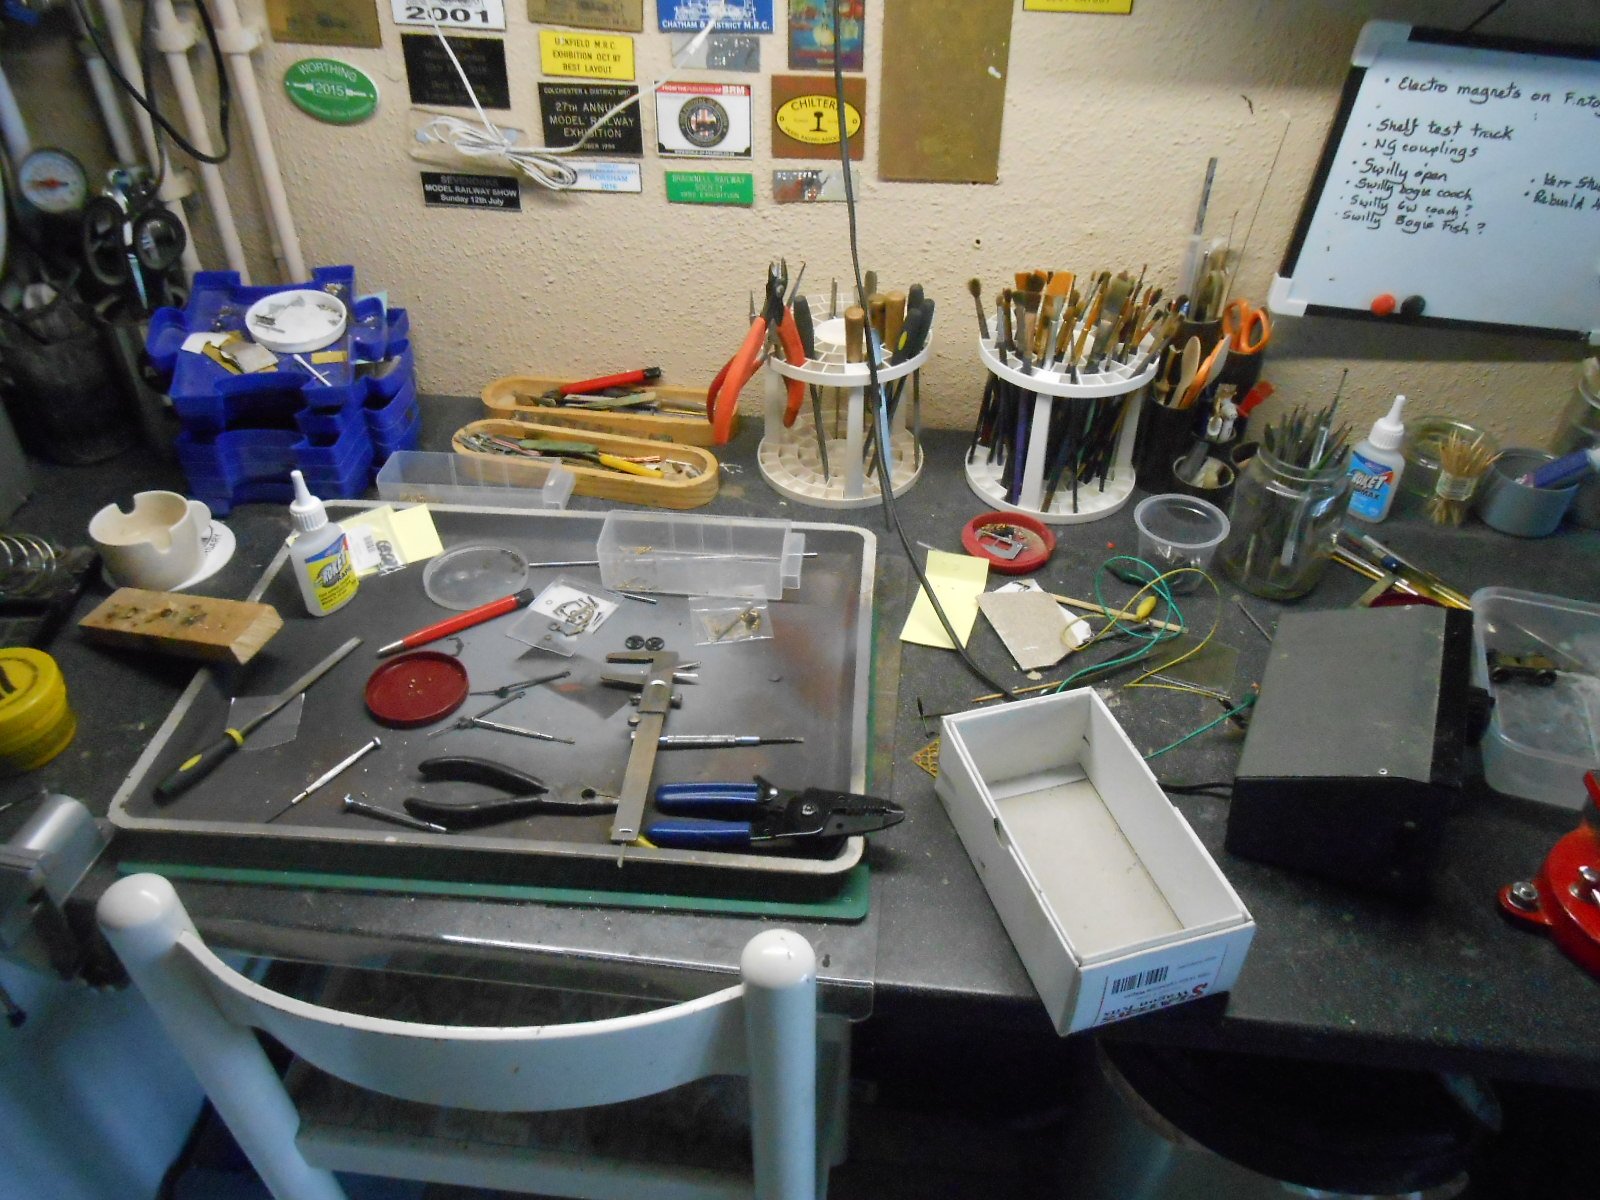
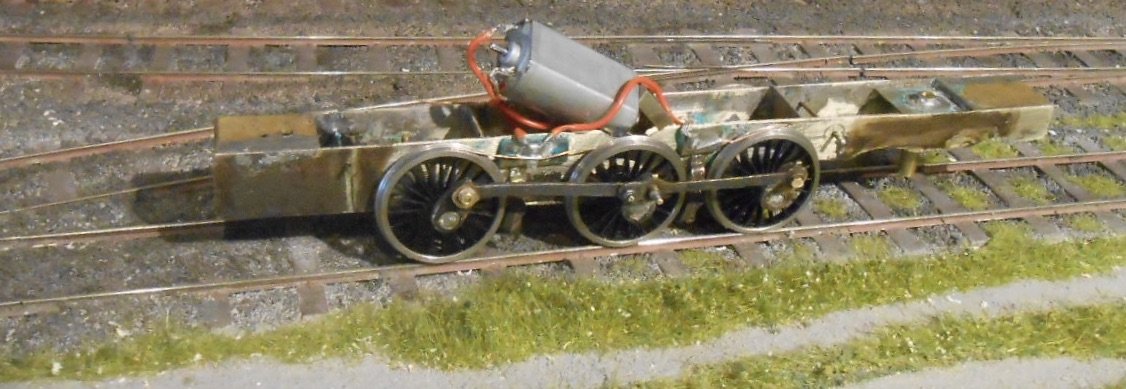
Nearly six weeks since I last reported on model making & while have not been entirely idle, it has mostly been getting NPQ ready for Chatham, plus a week's holiday on the stunning island of Corsica - fabulous scenery, lovely weather, amazing railway and challenging, often scary roads. Anyway, the photo below shows things have not entirely been going well in the workshop. I could share some of the adjectives used over the last couple of days, but none are appropriate for polite society. It all revolves around the Swilly Barclay tank. While it looks ok, running is not all it should be, partly because I used a High Level coreless motor, which really doesn't like my Gaugemaster Hand held controller [feedback type]. In addition, the chassis isn't happy on some of the points on Fintonagh. This is because I made the frame spacers the same width as my Clogher stock, but the Barclay's six wheel frame needs more side play. So, replace the motor with an open frame type and then remove the frame spacers one at a time [to ensure the frames stayed properly aligned] and reduce their width by 1.5mm. Simple enough? Well, no... Narrowing the chassis seems to have worked ok - everything still lines up, but having made a bit of a Horlicks with the Gibson driving wheels first time round, decided I'd replace them, along with the motor. I'd ordered a set of outside cranks with the wheels, but being 4mm scale, they are far too small, so decided to use the brass ones I'd made originally. This required a bit of work, as they were drilled for 2mm holes to go over Slater's wagon axles, but so far, so good with them going over full width 1/8th inch steel axles. Troubles really arose as I started to fit the cranks as the 12ba crankpin nuts didn't want to go back on their bolts, so I had to replace most of them, along with several nuts which disappeared into the ether. How Tullygrainy manages with 14ba ones I've no idea... Eventually got the chassis rolling again, only to find that the new motor is not only bigger, but sits at a 45 degree angle, requiring bits taken out of the chassis so that the body will sit properly. The latter is still tight, so more work needed there. That's as far as I've got, because for some reason, the cranks now foul the ends of the slide bars [didn't before!] and the conrods seem tight too. I don't give up easily, but am seriously thinking I might need to build a completely new chassis. A couple of other bits of work came from the need to fettle NPQ's track a bit more. Chatham showed there was still a bit of a ridge at the baseboard join - on the loop side - so rail was remove and new pieces fitted. Fingers crossed, stock now runs better over this section. The headshunt point has been eased a bit more, to keep the 0-6-4Ts happy, while the entry point to the loop needed the outer blade filing as Fermanagh's bogie was derailing for some reason. It was certainly very hot while setting up on the Friday, so it may be this was behind the problems. Off line lie in a darken room and seek solace with some falling down water.

-
Barely a straight line anywhere. Lovely!
-
They can be a bit scary, Mike. I eventually got round it by having separate loco and train cassettes. The loco ones, being short, are easy to pick up and move to the other end. The longer train cassettes then only need sliding around, or lifting within the confines of the train table.
-
Many thanks Paul. Am getting there with the AJs - for me, the issue is not the geometry of the hooks (the dimensions and angles don't need to be absolutely precise), however the height of the coupling hook does need to be consistent, as well as being level and straight. Even being slightly out of alignment causes problems, so stock boxes that protect the hooks are crucial. I think AJs are easier to work with in 7mm scale, because you can use a central mounting point, instead two at opposite ends.The Hope your new project is going well.
-
NPQ did ok, especially after I levelled the baseboards! The new fiddle yard works well and is only half the weight of the previous one. However, hadn't noticed that the main support beams weren't level, so the layout was effectively on a gradient of about 1 in 60. Most trains were fine, but the D16, F6 and Small Tanks spun their drivers going up hill. Ok once levelled and am now getting on top of the AJs. Next outing is Aldershot on October 19th. Visiting Sligo stock always welcome!
-
Looking at comments on RMweb, it seems to have been well received. There were a few glitches, notably catering, that need to be better next time, but as a show, it went well and planning is already under way for next year. Enormous credit to James, the Chatham Club's exhibition manager and his army of helpers. There were well over 100 stands and the effort required to provide power to all of these was epic as the Covered Slip has only a limited number of standard three pin sockets, so hats off to the team of Sparkies. As somebody who was there at the first Chatham Show in the Dockyard in 1987, it is interesting to reflect on changes in our hobby since then. A key feature of the original format was the high number of specialist traders who attended - something rarely seen these days. New and second hand 'box shifters' as they were known, were deliberately kept to a minimum - mainly to avoid duplication. It didn't seem fair to be charging traders to attend and compete to sell the same stuff. These days, the number of specialist traders willing to attend shows in person is much reduced, making it harder to seek out suppliers of materials and accessories, especially if you are a kit or scratchbuilder. On the other hand, the proliferation of ready to run models means you can have more traders of new models, because there is so much more variety on offer and few traders can afford to stock everything. Likewise the second hand trade. Back in the day, second hand meant old and often poor quality. Now, such has been the improvement in ready to run models, even something a few years old can still be well worth having, both in terms of appearance and running quality. With prices of brand new models being so high, folk are keener than ever to seek out bargains, while as modellers shuffle off to work the big train set in the sky, their collections mean there is really good stuff available for very low prices. This year, invited layouts were mainly sourced locally, to keep down costs. Next year, the net will be widened to bring in exhibits from further afield, while hopefully exhibitors previously reluctant to attend, because the Covered Slip previously had issues with an uneven, dirty floor and sometimes leaky roof, will be reassured things are much improved. Indeed, that was a key reason why the Club stopped using the Dockyard 12 years ago. This year though, it was great to be back, so hopefully a much loved annual event has returned.
-
That really is very nice indeed. Lovely work and great photos too.
-
N Scale Ballywillan, Co Longford.
David Holman replied to Kevin Sweeney's topic in Irish Model Layouts
Far more than an architectural model, the building has real life to it. -
Great to see some serious cool work at the end of a stiflingly hot day!
-
Don't know if this has been mentioned before, but there is an interesting idea in MRJ about making your own, white, transfers. Computer printers do not work in white ink, so over the years, have found myself resorting to white gel pens and Indian ink/dipping pens for lettering on Donegal, Swilly, Sligo Leitrim and so on. However, there is a way of making your own transfers - you need to make the space around the letters the colour of the wagon body, but leave the letters themselves clear. Before applying the transfers, you paint the bit where the white lettering will go white, so this shows through the clear lettering on your transfers. Not sure if it is worth doing for the fairly simple lettering used on much Irish stock, but might be worth a try with more complex lettering or fonts. There again, if you can still get hold of the old Letraset dry transfers, these work very well too.
-
This weekend, for anyone in the area. Northport Quay will be there, along with loads of other layouts, lots of traders, plus Societies. Indeed, over 100 stands in all, plus the delights of the Historic Dockyard.
-
Interesting editorial from Karl Crowther in the latest Model Railway Journal. Musing on the future of the hobby, he wonders whether the quality of ready to run models these days "makes the question of gauge superfluous". Coming from a magazine that, over the course of 300+ issues, has always been a champion of fine scale modelling (EM, P4 etc), that is quite something. Suspect the mailbag in the next issue could be bulging with protests, but food for thought maybe? Back in the day, RM editor Cyril Freezer once said that you can't count the spokes on loco driving wheels when they are going round. Mind you, he also once wrote that you don't notice a lack of scenery if you are running an intensive service. Less sure about that one...
-
There is no doubt that railway modellers have never had it so good in terms of the sheer range of stuff now available. Trouble is, there more we have, the more we want! Certainly do not blame anyone for this, because if I was starting again, I'd be going along the route of ready to run for locos and stock, but enjoy being creative with buildings and scenery because the quality is so good. Or would I? Returning to the hobby after pushing up the value of brewery shares, chasing girls and eventually settling down to married life, I found I already wanted something more than just opening the boxes. My route was to go EM gauge right from the start because I reasoned the extra effort would limit my spending (not sure about that!), though the one bit of discipline I have applied over the years is only to build one thing at a time, with no drawers or cupboards full of unmade kits. Gradually developing my experience and skills I eventually gained the confidence to build my own stuff. The process isn't quick, but eventually you realise that if there isn't something available that you want, you can, with effort and a few rude words, make it yourself. It can be annoying when, soon after scratchbuilding a model, one appears rtr - in my case a 7mm W&M railcar - but hey, I still had the satisfaction of building my own. Indeed, were I able to start again, knowing what I know now, then S gauge would be my route, being an ideal size between 4mm and 7mm scale, with a wonderfully quirky track gauge of 63/64ths of an inch for 5'3. What am I wittering on about? I suppose if you really want something, sometimes you have to do it yourself. On the other hand, when there are so many tempting things out there, why not enjoy them if you can?
-
Really coming together well!
-
Nice - and a less seen area of the layout too, perhaps?
-
British locos and stock that can be disguised as Irish
David Holman replied to Westcorkrailway's topic in Irish Models
In 7mm scale, Slater's do a kit. -
Good kit, with a clever six wheel compensation system. Should you want to build it in 5'3, the axles on Slater's wheels are plenty long enough to move them out to 34mm back to backs.
-
The wows keep coming, Alan! Reminds me I've got one of those jigs somewhere. Very handy when I remember to use it...
-
Lovely clean lines and coming on really well.
-
Clogherhead - A GNR(I) Seaside Terminus
David Holman replied to Patrick Davey's topic in Irish Model Layouts
How can it steal chips with no eyes? Seriously though, in 4mm scale, the model is many times smaller than in the photo!