David Holman
-
Posts
4,359 -
Joined
-
Last visited
-
Days Won
117
Content Type
Profiles
Forums
Events
Gallery
Everything posted by David Holman
-
Much simpler, thankfully! Only one coupler needs to work with the dropper wire to a magnet, so a shorter coupling wire is soldered to any convenient point on the loco chassis. Even just behind the buffer beam should work, though on my J26 there is a front frame spacer which is ideal.
-
Pretty much what I've used. The only issue I've found is that the silicon goo seems to have a shelf life. After 6-12 months, it increasingly won't set. The two part resin, used for the actual casting, lasts much longer.
-
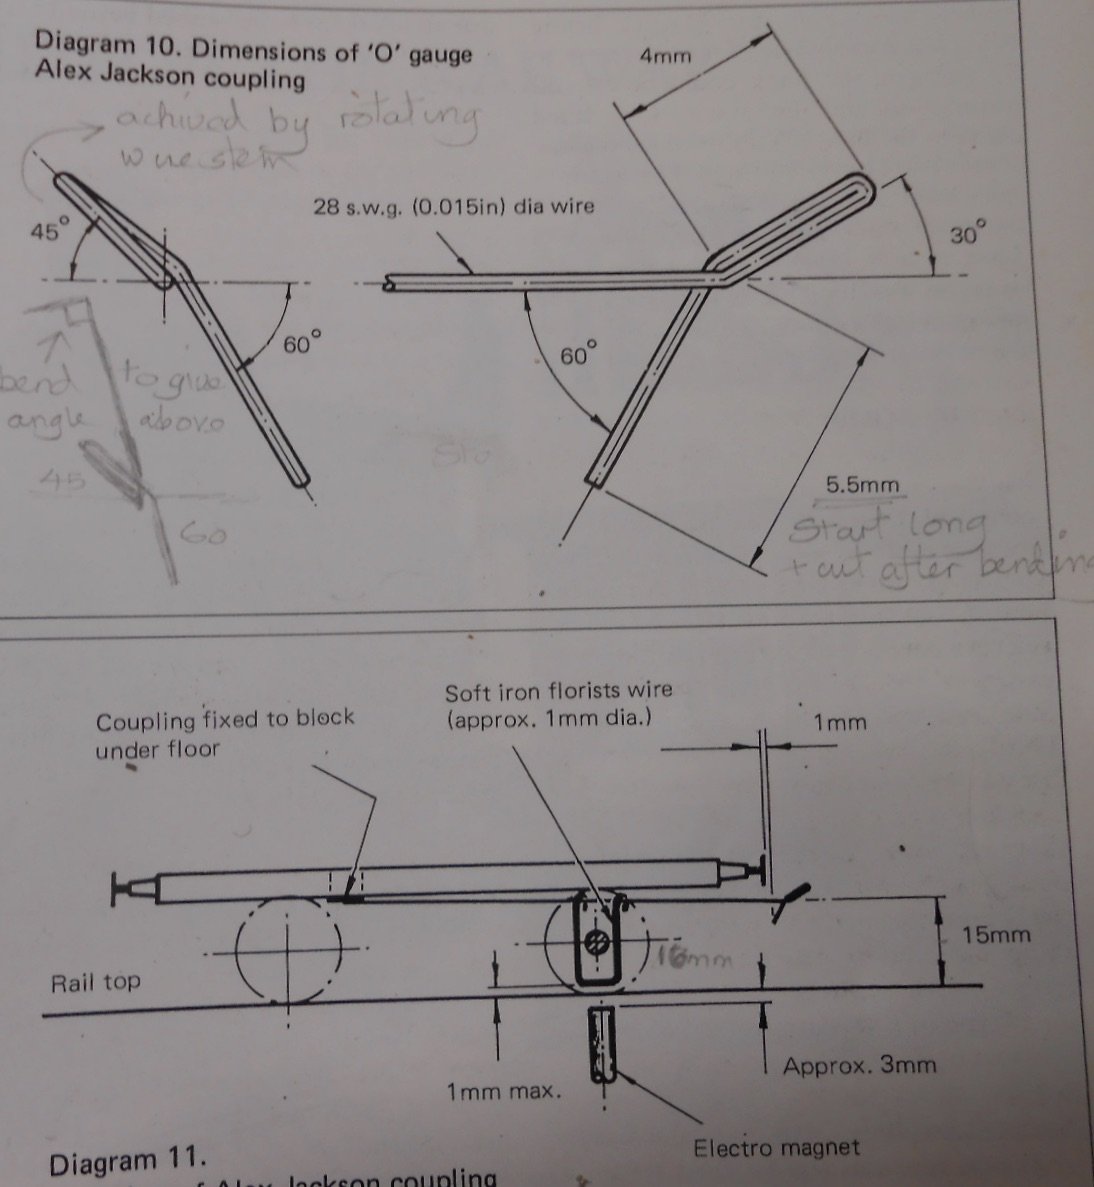
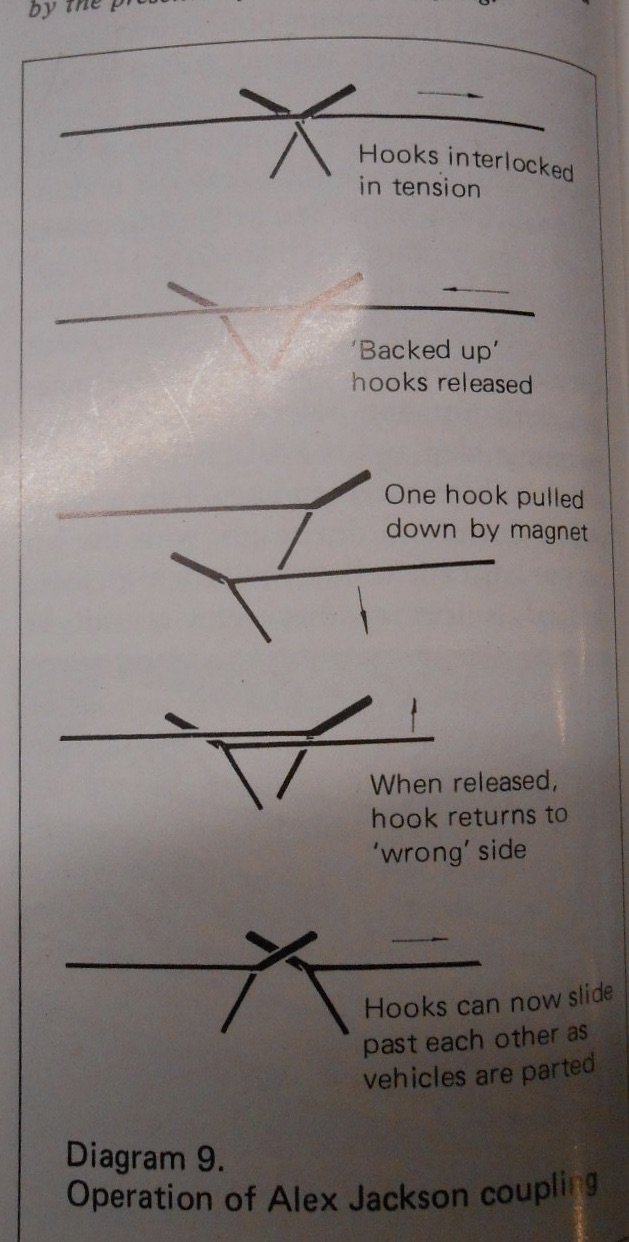
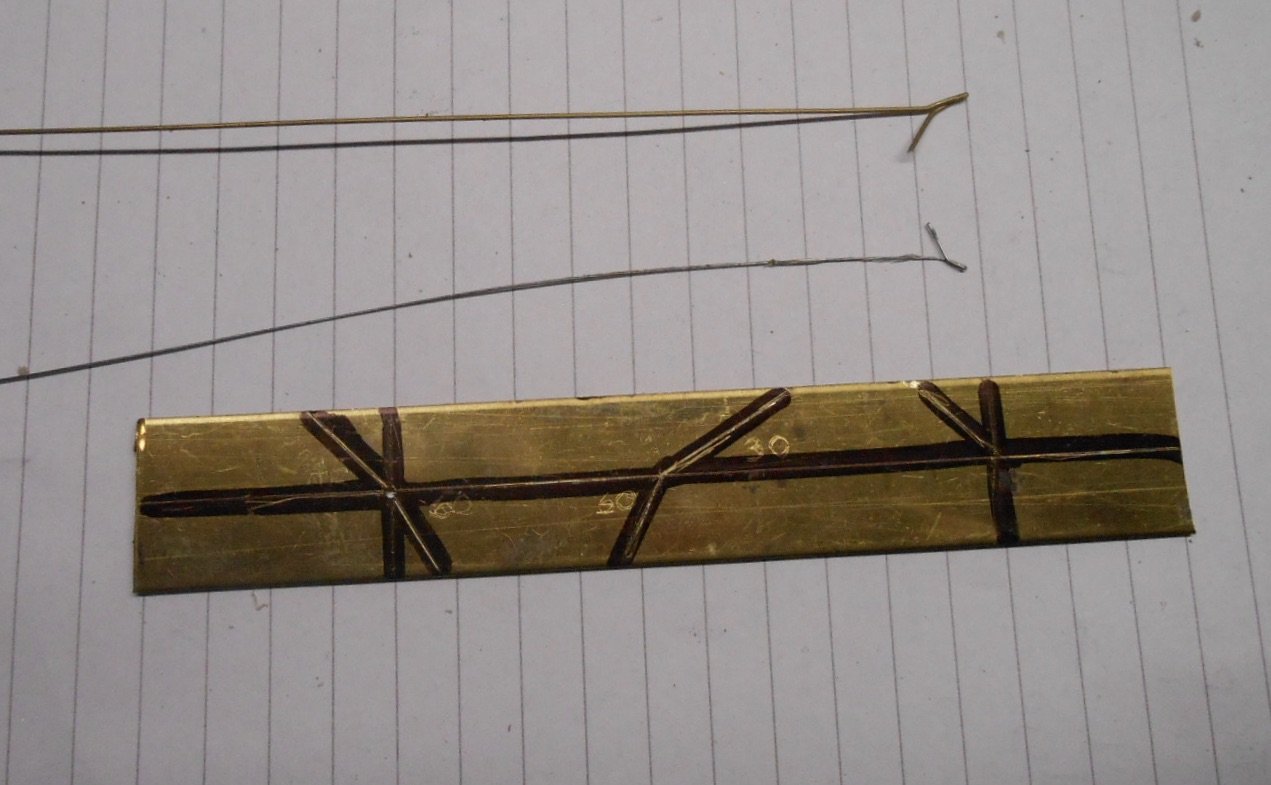
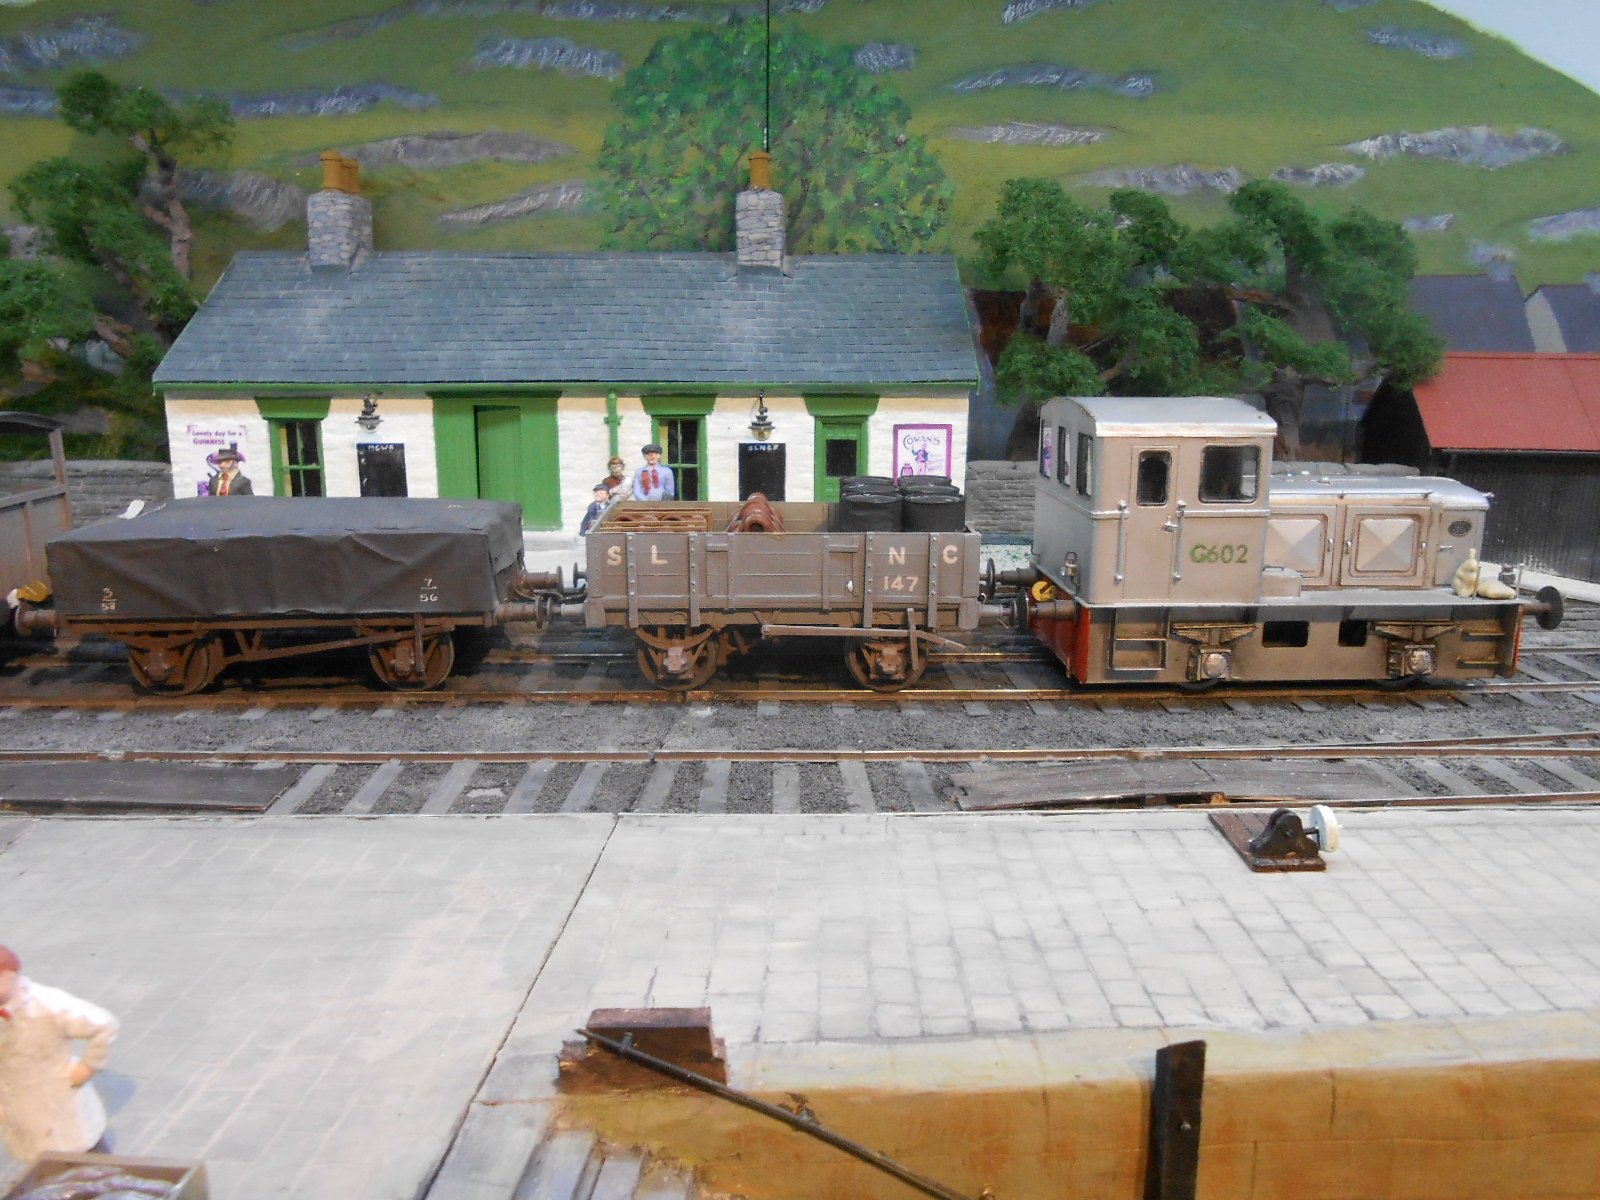
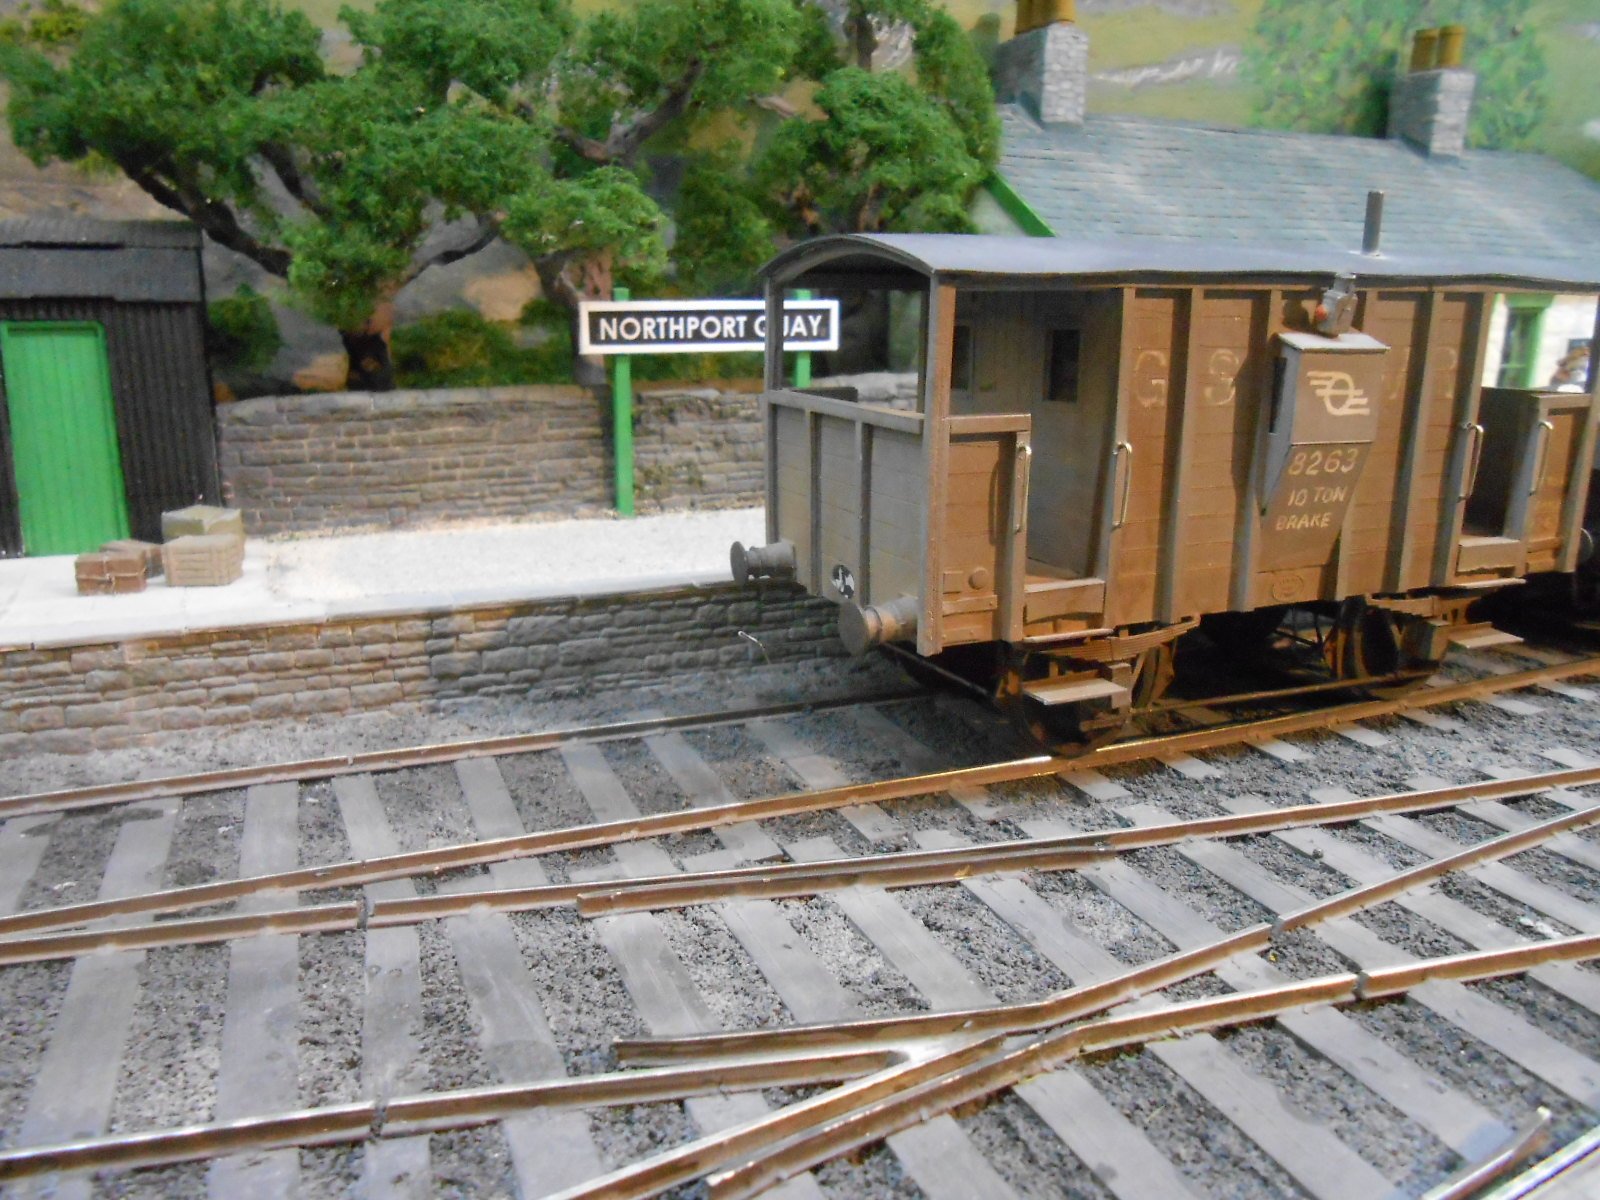
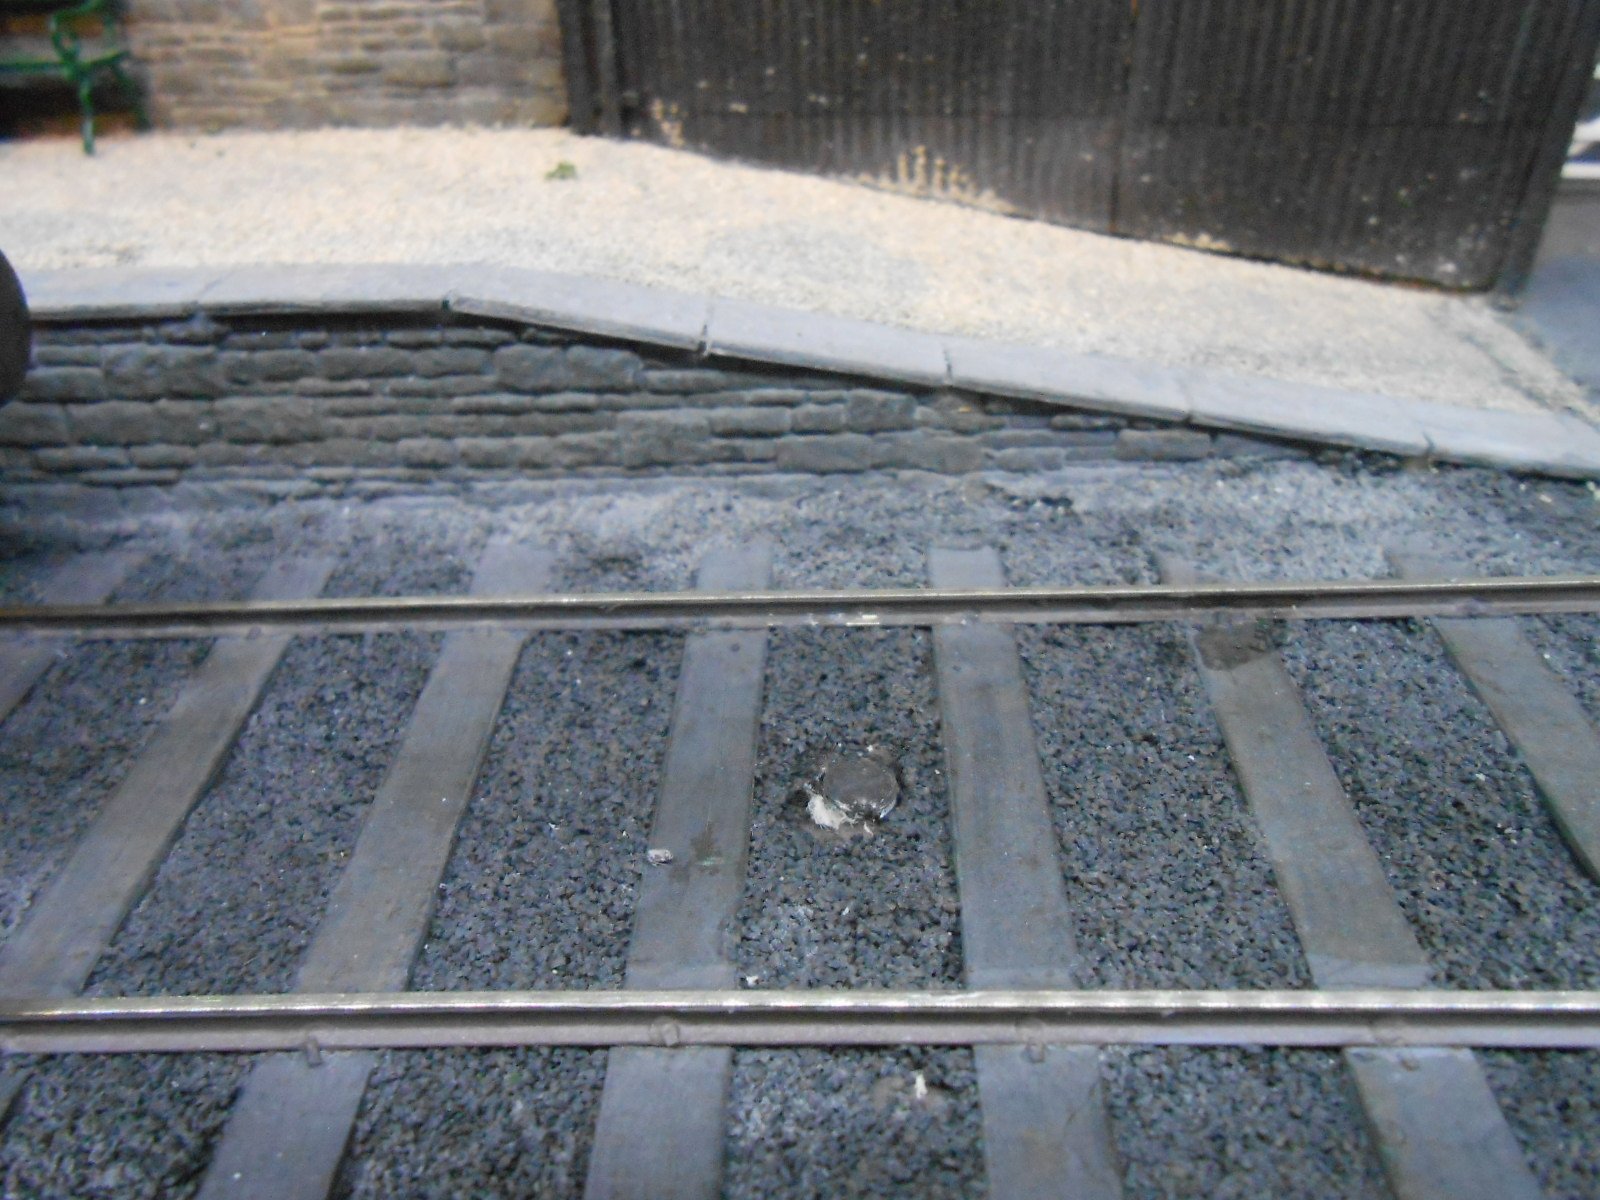
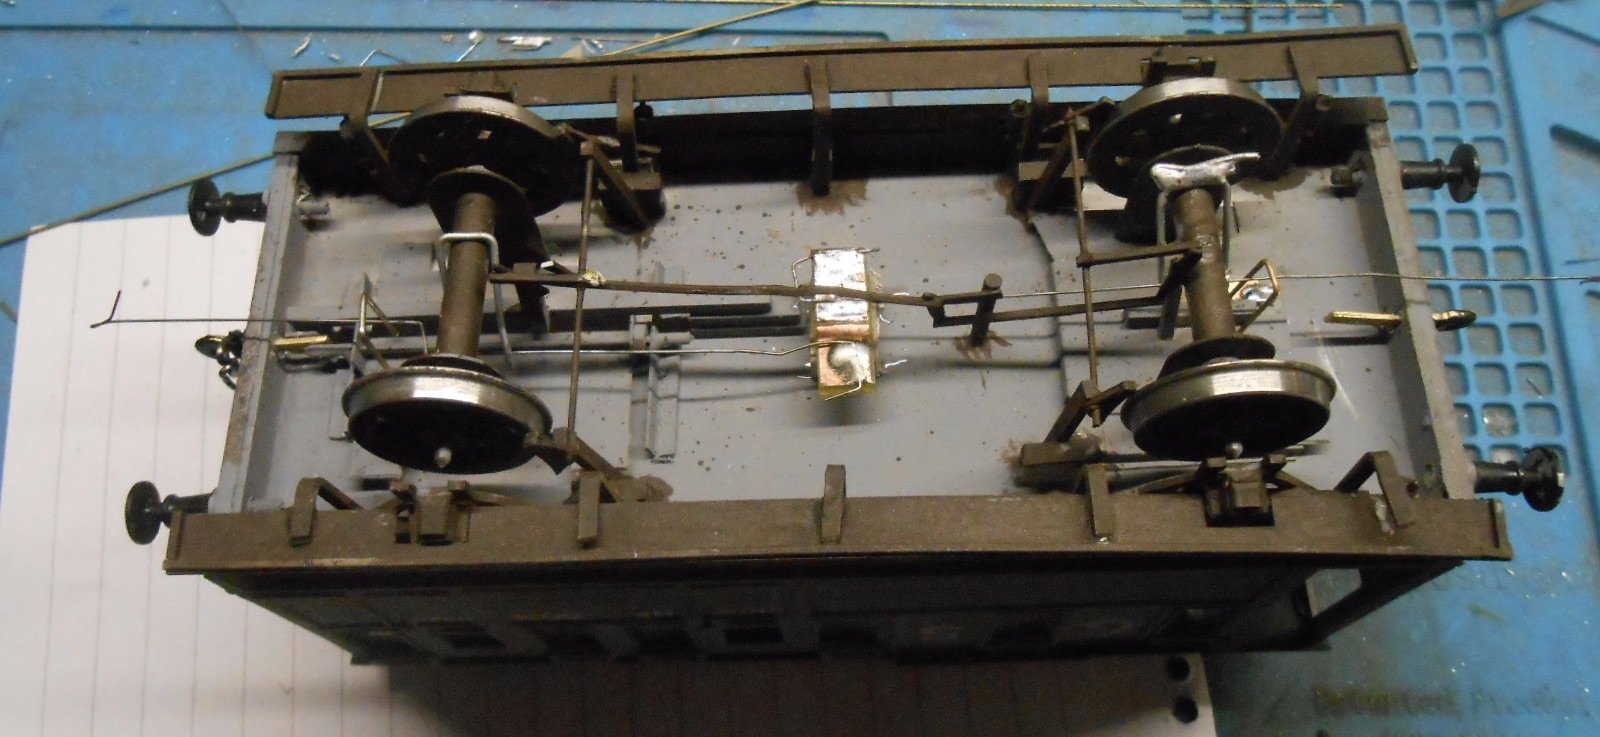
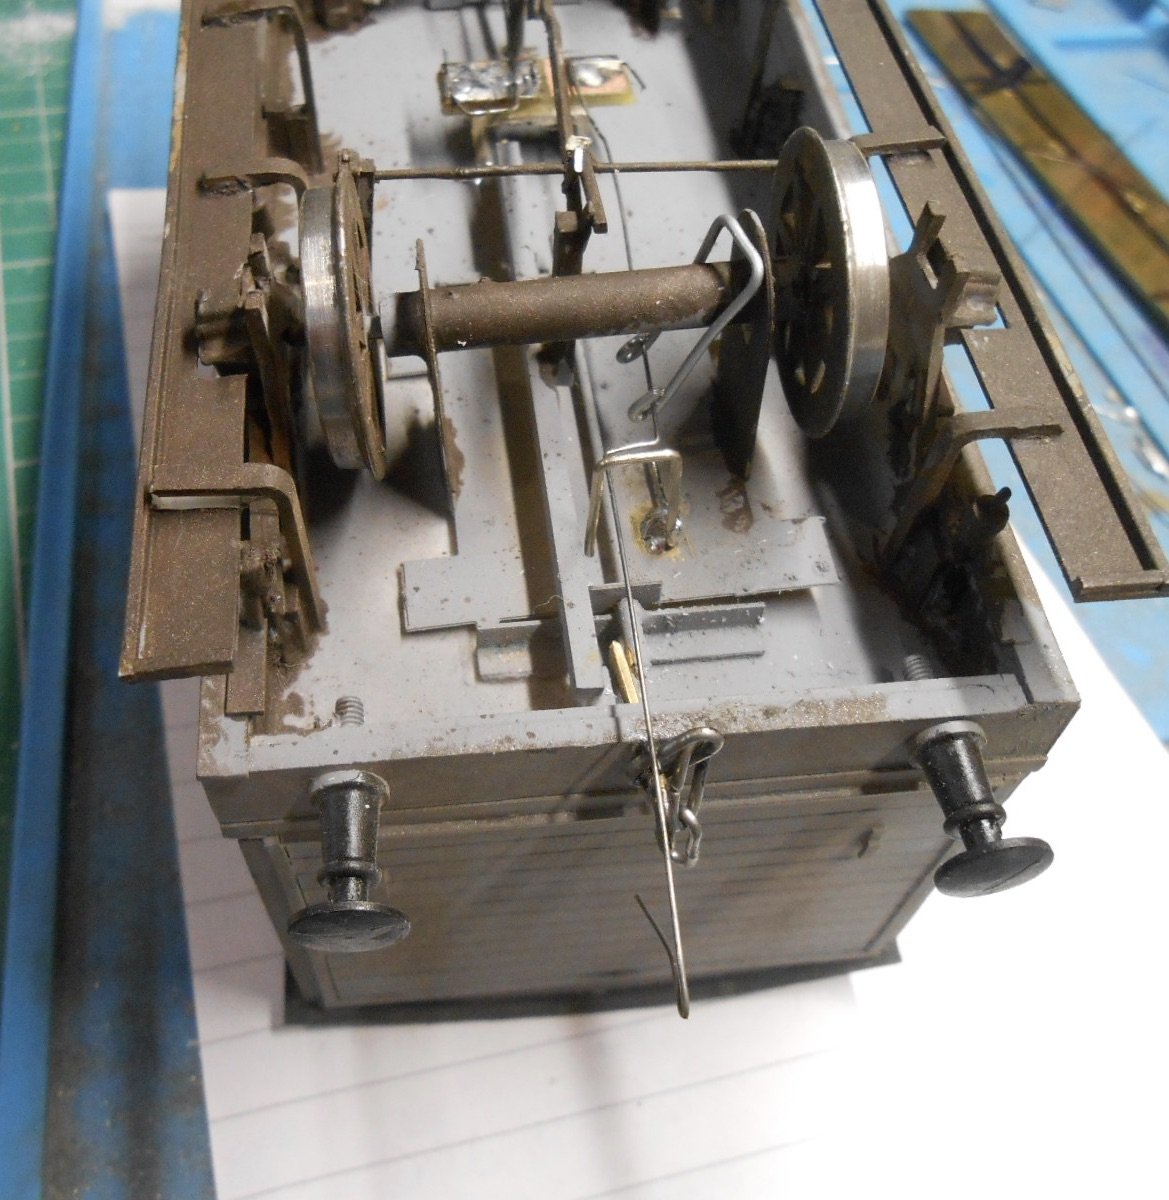
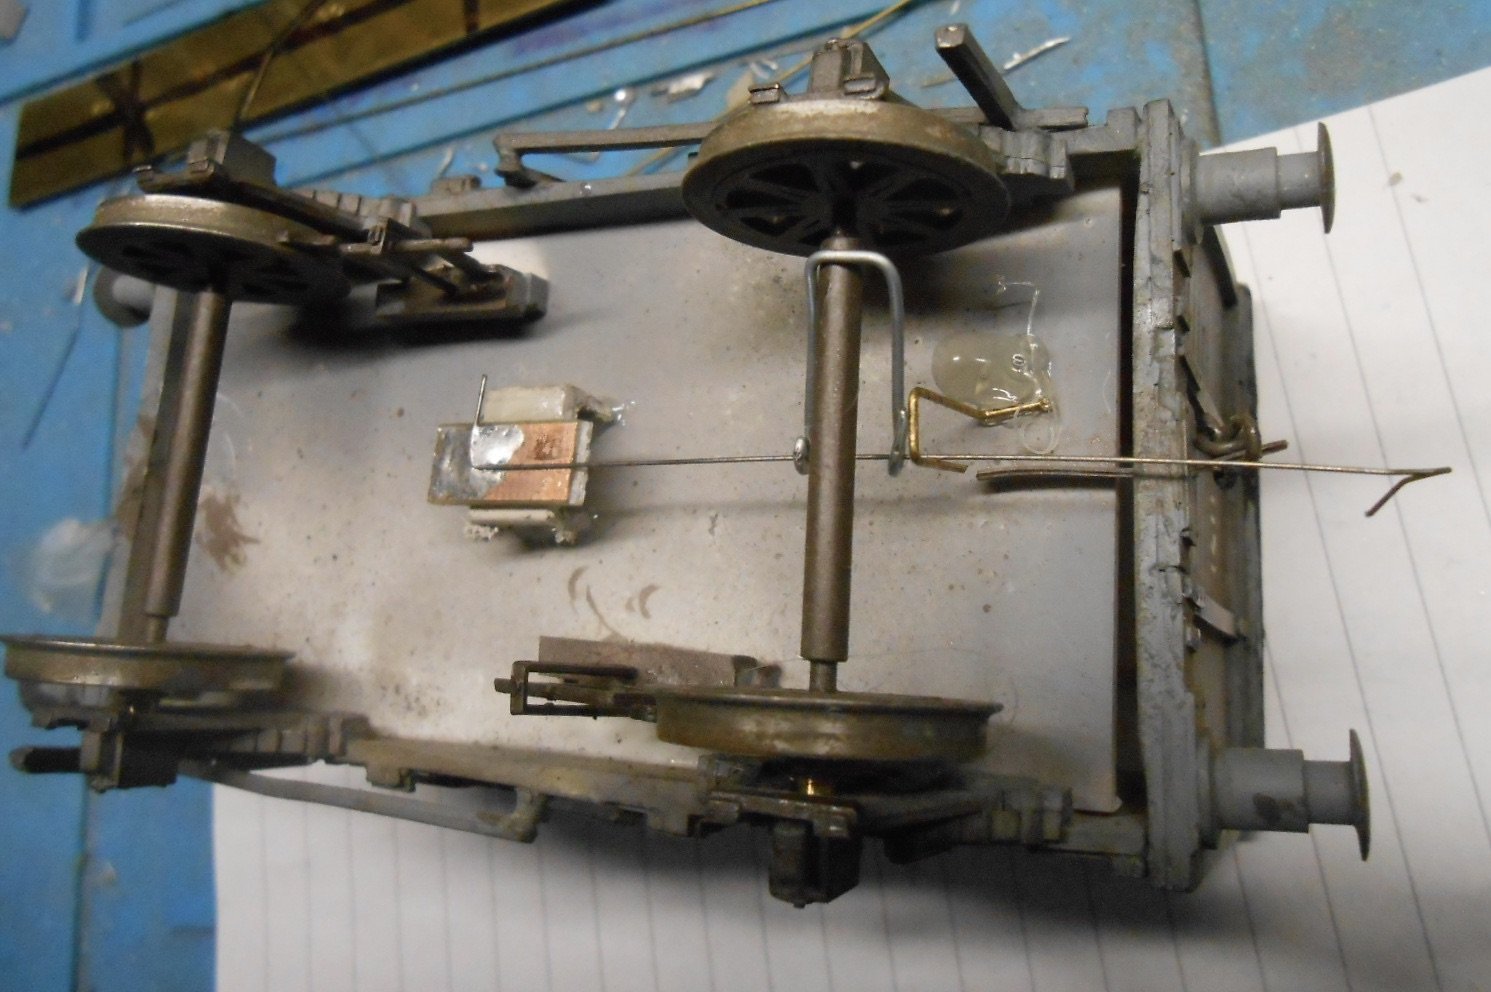
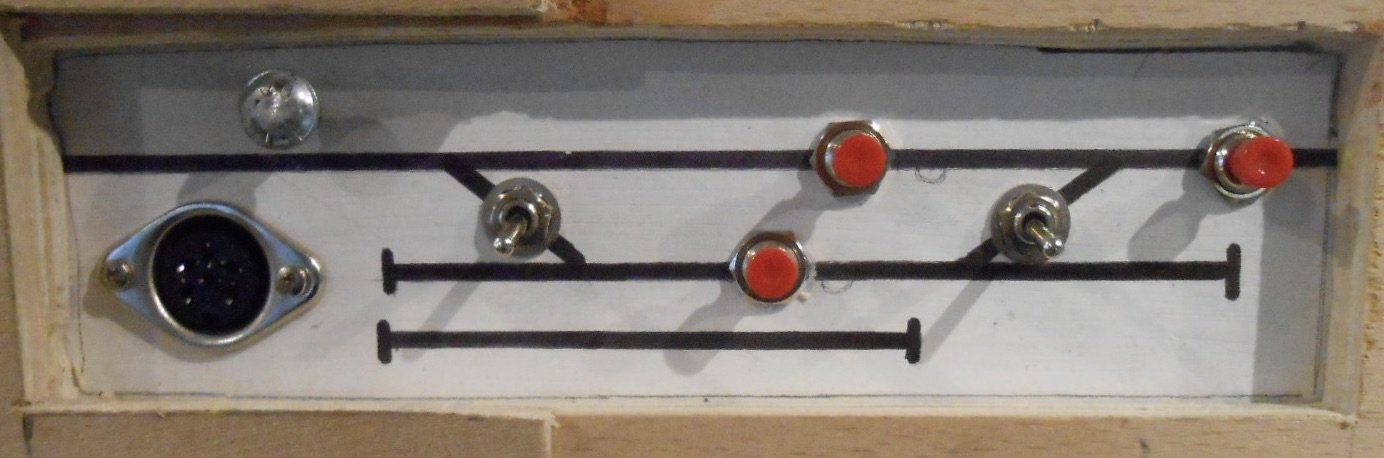
Alex Jackson Couplings It's been a while, a couple of months in fact. Not all of this time has been spent on the AJs, but this has been pretty much the sum of my modelling efforts this year, which have at times driven me nuts! For those of you not in the know, the AJ coupling was developed by the man himself, way back in the last century. In many ways, it is very simple - a piece of sprung steel wire has three bends put in it to make a hook. However, setting this up and fitting it to your stock can be a serious pain in the primary orifice. Undoubtedly easier in 7mm scale, would certainly not recommend it in 4mm, unless you have serious masochistic tendencies. The basic elements are shown below. Note, none of this has ever been available ready made, while there are all sort of adaptations possible as well. In 7mm scale 28swg [0.4mm] steel piano wire is recommended [problem number one, straightening it]. Using a simple jig, the first bend is 180 degrees, followed by 30 and 60. The front view, shows the hook tilted at 45 degrees, though this is not a bend, merely how the wire is mounted. The latter requires a small block glued in the centre of a wagon, to which a piece of copper clad sleeper is glued and the wire is soldered to that. Fiddly and not fun, though am getting better at that bit. The lower diagram shows how the coupling is operated - you hook a U shaped piece of iron wire over the coupling wire & an electro magnet can be used to pull the coupling wire downwards as shown below. The great thing about this [and why I'm torturing myself] is that once uncoupled, vehicles can be pushed anywhere you want without coupling up again. Yes, other systems offer this, but AJs are very discreet, almost invisible from some angles and having looked at various options, I've decided that I'm going to make it work. The tools required are pretty basic - mainly various type of pliers, plus the wire. I've used a piece of brass to help with making the bends. The top wire is 1mm brass, which I use to help get my head around this, while the middle wire is the actual hook. The pictures below show the first train that I've equipped with AJs for Northport Quay, along with an electromagnet, almost hidden in the track. Note how discreet the couplings are. Below are three pictures of how the coupling wires are mounted underneath wagons. The brake van has one at each end, but most stock will only have an AJ at one end, and some none at all, as trains will run in fixed rakes. Hopefully, you can see how the coupling wire is soldered to the central block, also the U shaped dropper wire which is attracted to the magnet in the track. The second, brass U shaped wire is a simple limiter to stop the dropper going too low and catching on the magnet. Finally, a picture of my control panel. The three red buttons are push to make switches. The first one on the top line is for locos to uncouple and run round. Top right is the uncoupler for the small fiddle yard acting as the pier. The lower middle button is the most important magnet though, because this is where most of the shunting takes place. In the case of the G class shunter, it arrives in the loop and then pushes its train into the left hand siding, picking up the two wagons there, with the brake van sandwiched in the middle. The G can then pull all five wagons back into the loop, then [using the middle magnet], leaves the brake and two wagons from the siding on the 'mainline', by the controller socket. The incoming wagons can then be pushed into the siding, then the G can move its return train back into the loop, before running round, ready to depart. I'll leave you to work out how a freight to the pier is shunted - though a clue is that you use the right hand siding and the train arrives in the platform, not the loop. I think I'm getting there & have fitted AJs to the two trains which will do the shunting in my 1950s period. Need to do the same for the 1900s period. Only eight AJs for each train, but it has taken an average of an hour per coupling because of all the faffing about, getting things wrong, many rude words etc. Hopefully, things will speed up now, not least because there are eight other trains to fit, though these will only need four couplings each. It all adds up though and then I'll need to test everything on NPQ - thus far testing has been done on Belmullet...

-
Oozes atmosphere. Even in its part built condition, everything just looks right. Little things like the road surface/colour, line markings and so on. Super buildings and there is something about that bridge which just sets the whole scene. Lovely modelling!
-
Or even more expensive, the original Tortoise point motor. Very good though...
-
And there is the A3 Pacific Galtee More! As the old saying goes - you are never alone with a clone...
-
That could well be Galteemore in the foreground - so now you know what he looks like!
-
Haven't done any resin casting for a while, but as Alan clearly shows, putting a bit of effort into making just one side and one end soon reaps rewards. Last time I looked (admittedly pre Covid), a kit cost about 30 or 40 quid. This includes the two part resin, plus the silicon goo to make the moulds. Probably enough for 20-50 wagons depending on scale, so ultimately good value and potentially a fair bit faster than 3D printing - ideal for a Luddite like me!
-
The Hornby Desmond chassis has always been a good runner, as many 7mmNG users will confirm, though scaling it up certainly helps.
-
Very little to report of late - I'm in the process of converting all my stock to Alex Jackson couplings, in the hope of making operation on Northport Quay easier. To be honest have always thought AJs looked a bit of a nightmare in 4mm scale, but are potentially more straightforward in 7mm. However, first I needed to understand how they work and that means making some first, though Gordon Gravett helped at the recent Tonbridge show. Much easier when you can see actual wagons and in particular how the couplings are fixed to the wagon body. Very much work in progress though. Meanwhile, my GS&WR 2-4-2T, built from the Alphagraphix kit won the loco shield at the annual club competition last night, while the coaster, Acla, won the non-railway and overall shields, which was rather nice, especially as the overall standards were really high this year.
-
So much better than the Desmond/Pug and am sure the loco feels all the better for it. Sow's ear to silk purse.
-
Now there's a good thought!
-
Recent layout posts have shown that track and gauge aren't necessarily important when all the other modelling comes together. As the post above says, you don't notice the compromises when everything else looks right. This is me, by the way 7mm scale, 21mm and 36.75mm gauge on my 4 Irish layouts. Nothing quite sets the scene like correct broad gauge track, but get the viewing angles right and it becomes far less of an issue. Get the scenics, colours and stock looking right and it all blends together. I'll stick with my broad gauge, but a recent conversation with one of our eminent posters here set me thinking - had I done all my stuff in 32mm/0 gauge, I could occasionally run much longer trains round the club's 32x15 test track. Broad gauge prevents that and likewise makes the option of selling stuff much more limited. Not that I want to do that, but food for thought all the same.
-
They all look very much at home.
-
Keep the pics coming and how about a track plan? Love the raison d'etre too and finally worked out the pronunciation! In the past have played with Ballyrina, Killyconcarnay and my favourite, Ballyshawbeagan. Think zebra crossings! Ever thought of doing a magazine article? Loughan Quay deserves a wider audience, methinks.
-
Superb. Well done Alan. Especially like the soft, muted colours you use - very realistic and atmospheric. Indeed a well balanced beautifully modelled scene!
-
What code of flat bottom rail would be appropriate for an 7mm branch line?
David Holman replied to Bob49's question in Questions & Answers
Peco also do Code 100 FB, while Marcway will custom build points using this type rail on copperclad sleepers. Expect to pay about £80 per point with a four week completion. -
Photos too - lots. And descriptions. Just more please!
-
Didn't realise India Pale Ale worked as paint stripper, though I've had a few beers that tasted like it! Dettol is new on me and sounds a neat idea. Anyway... That is a fine looking model and the lining looks very sharp too, though confess I know little about its accuracy. A freight engine wouldn't stay that way long though, so weathering could well be the way to go. That said, the boiler bands look over scale and there is a school of thought that says in 4mm scale just transfers are enough. If you don't fancy adding layers of paint, try weathering powders. There are some nice varieties out there, often sold for wargaming, but fine for railways too. Otherwise, Martyn Welch's The Art of Weathering (Wild Swan) is the seminal work and, for me, never been bettered, despite being out nearly 30 years. Should be available cheaply secondhand. Key colours are all Humbrol: gunmetal 57, bauxite 133 and metalcote gunmetal, plus matt black and leather along with talc for texture. The key to it all is to find colour pictures (not necessarily the exact loco) and copy what you see. All my Irish locos are weathered using Martyn's ideas and his book is invaluable. While an airbrush is recommended, dry brushing and stippling (short stabbing strokes) can also be used and are what I've done. You can see the effect on my thread in this section. Take your time and enjoy, but make sure you only drink the right sort of ipa and certainly not Dettol - though root beer smells like it to me, so you never know!
-
Yep, they are on the list too... Lovely stuff!
-
Plastruct do a similar range to Evergreen, including some chunky sections, alongside the finer ones. Good quality, though the strips are shorter, probably 25cm. Worth doing an internet search to see if there are suppliers in your area. There's always Slater's Plasticard of course. Haven't checked their website recently, but they used to do a range of sheet and strip.
-
Thanks Leslie - a Robinson 4-4-0 in full WL&W regalia is something I'd like to build one day, but probably too big for Belmullet, let alone NPQ. One day, perhaps!
-
Very atmospheric - makes me want to turn the heating up!
-
I don't find it too bad to be honest, Alan - though the stuff that makes the moulds is as hard to get rid of as silicon sealant. Maybe there is a clue there? Have always been impressed by how well the castings pick up fine detail, right down to scuffing plastic sheet with a fibreglass pencil to simulate wood grain. I also like the fact that a resin casting will set in under an hour, so the process can be quicker than 3D printing. However, have only done flat sides and ends, rather than complete wagon bodies. Glad you like the G, I only have photos to go on, but am sure it was a lot simpler than your recent diesel!