David Holman
-
Posts
4,359 -
Joined
-
Last visited
-
Days Won
117
Content Type
Profiles
Forums
Events
Gallery
Blogs
Everything posted by David Holman
-
Nice one. There is much to be said for the American waybill system for creating operational interest.
-
Looking at the body shape, a fair representation could probably be built using Lego!
-
What did you do to colour the sleepers? Looks very effective - including a subtle hint of wood grain.
-
Almost a shame to clean the rail tops!
-
Fascinating stuff Ken - really pushing boundaries. Amazing to see what can be squeezed into such a tiny loco!
-
A real shock and didn't see that coming, there was always a queue several deep at shows. Squires do a similar range, but nowhere near as comprehension for me.
-
LARNE CABIN's LMS Upper Quadrant Semaphore Signals Workbench
David Holman replied to LARNE CABIN's topic in Workbench
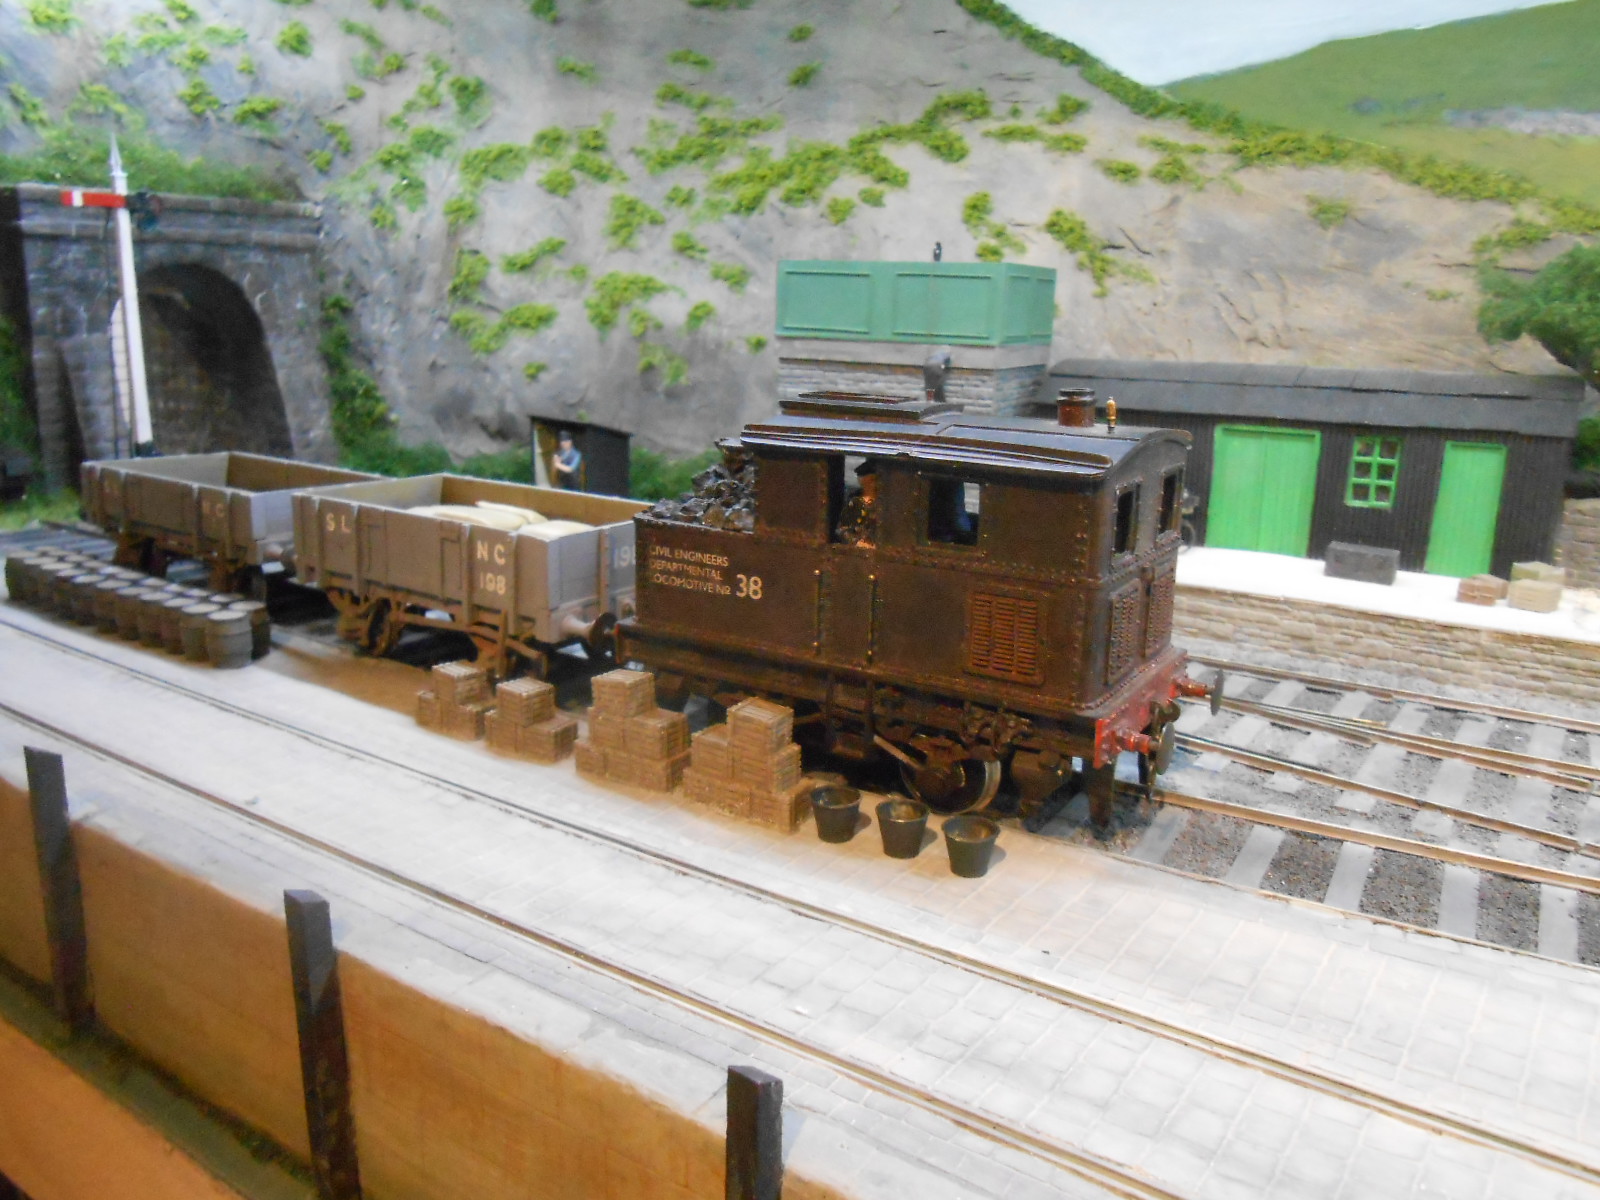
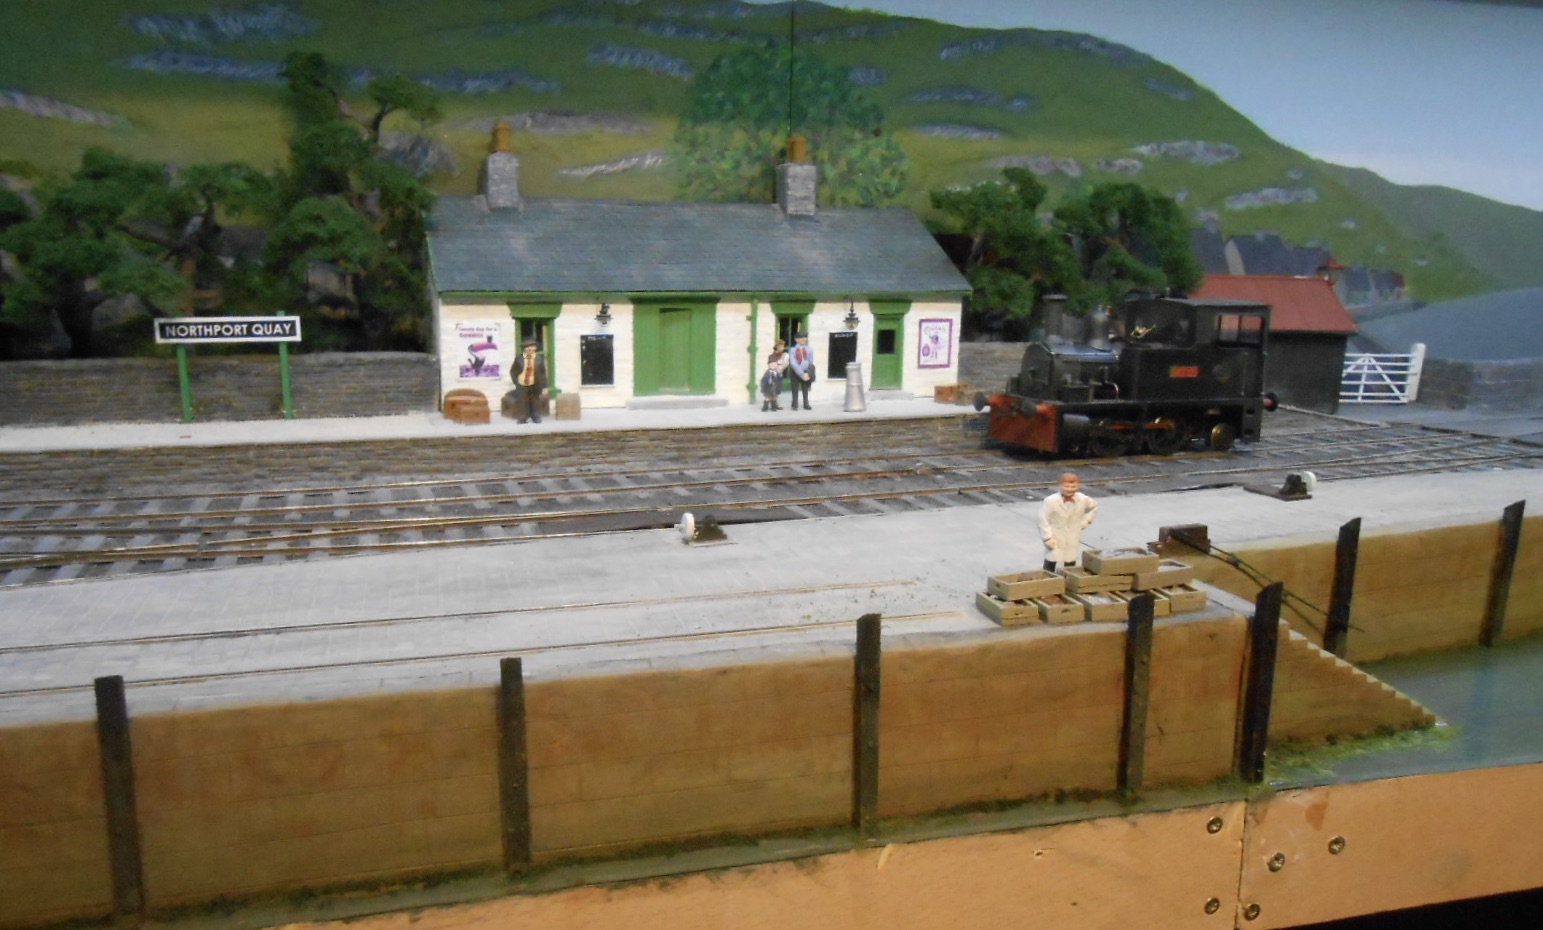
Signals are complex things to make operational, with bouncing semaphores owing much to iceberg theory in pre microchip days - 90% below the baseboard, it seemed. These days, servos offer a, fairly, simple option, though old school is still worth considering. The starter on Northport Quay uses wire in tube, which might be an ideal method of you only need one or two to work. Very nice models, by the way! -
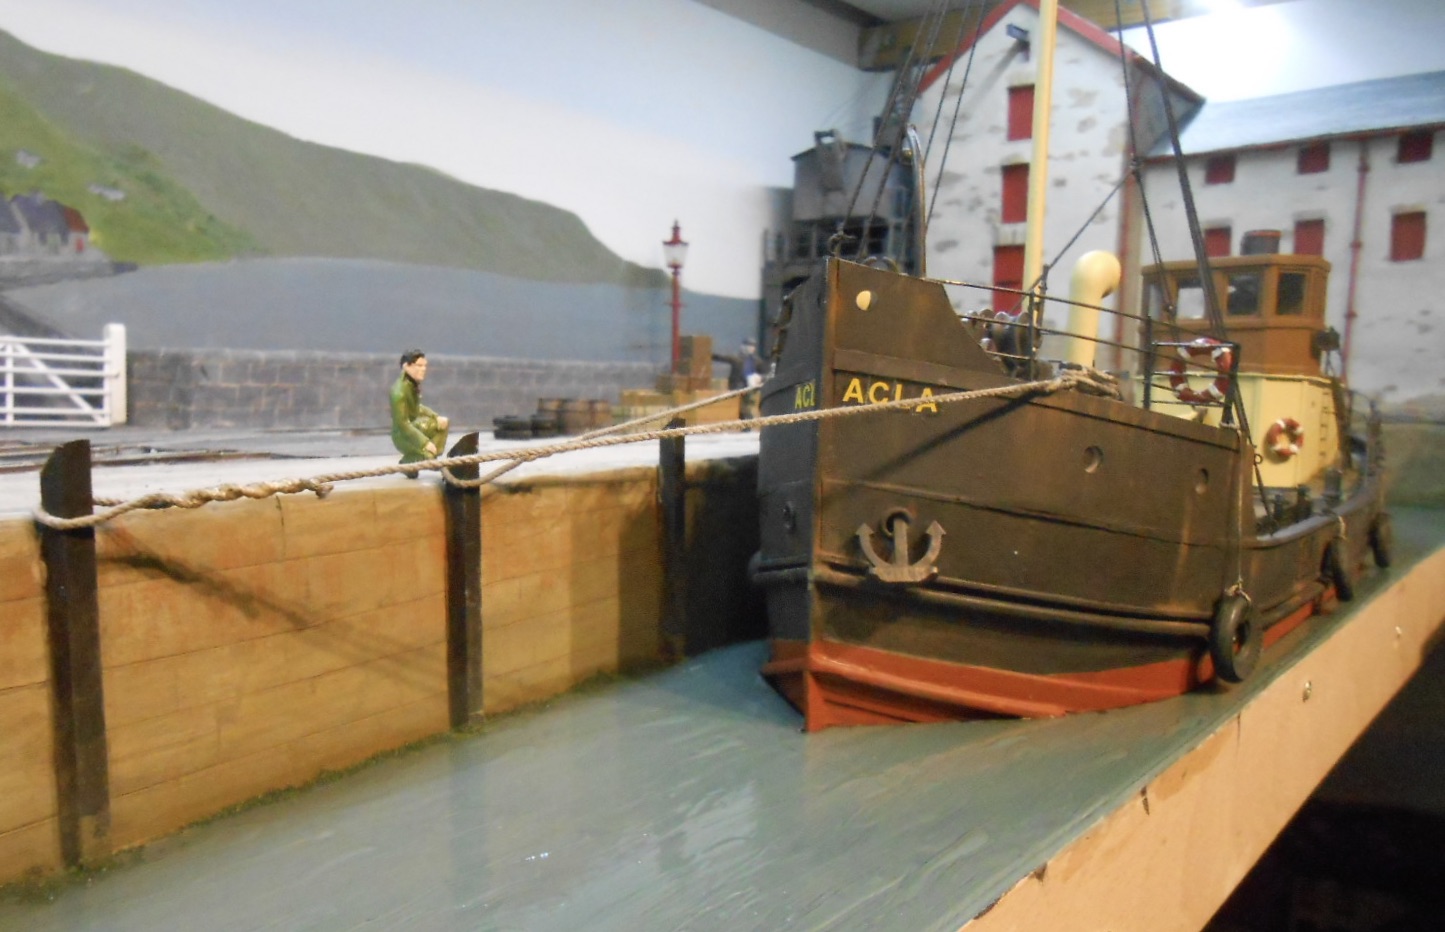
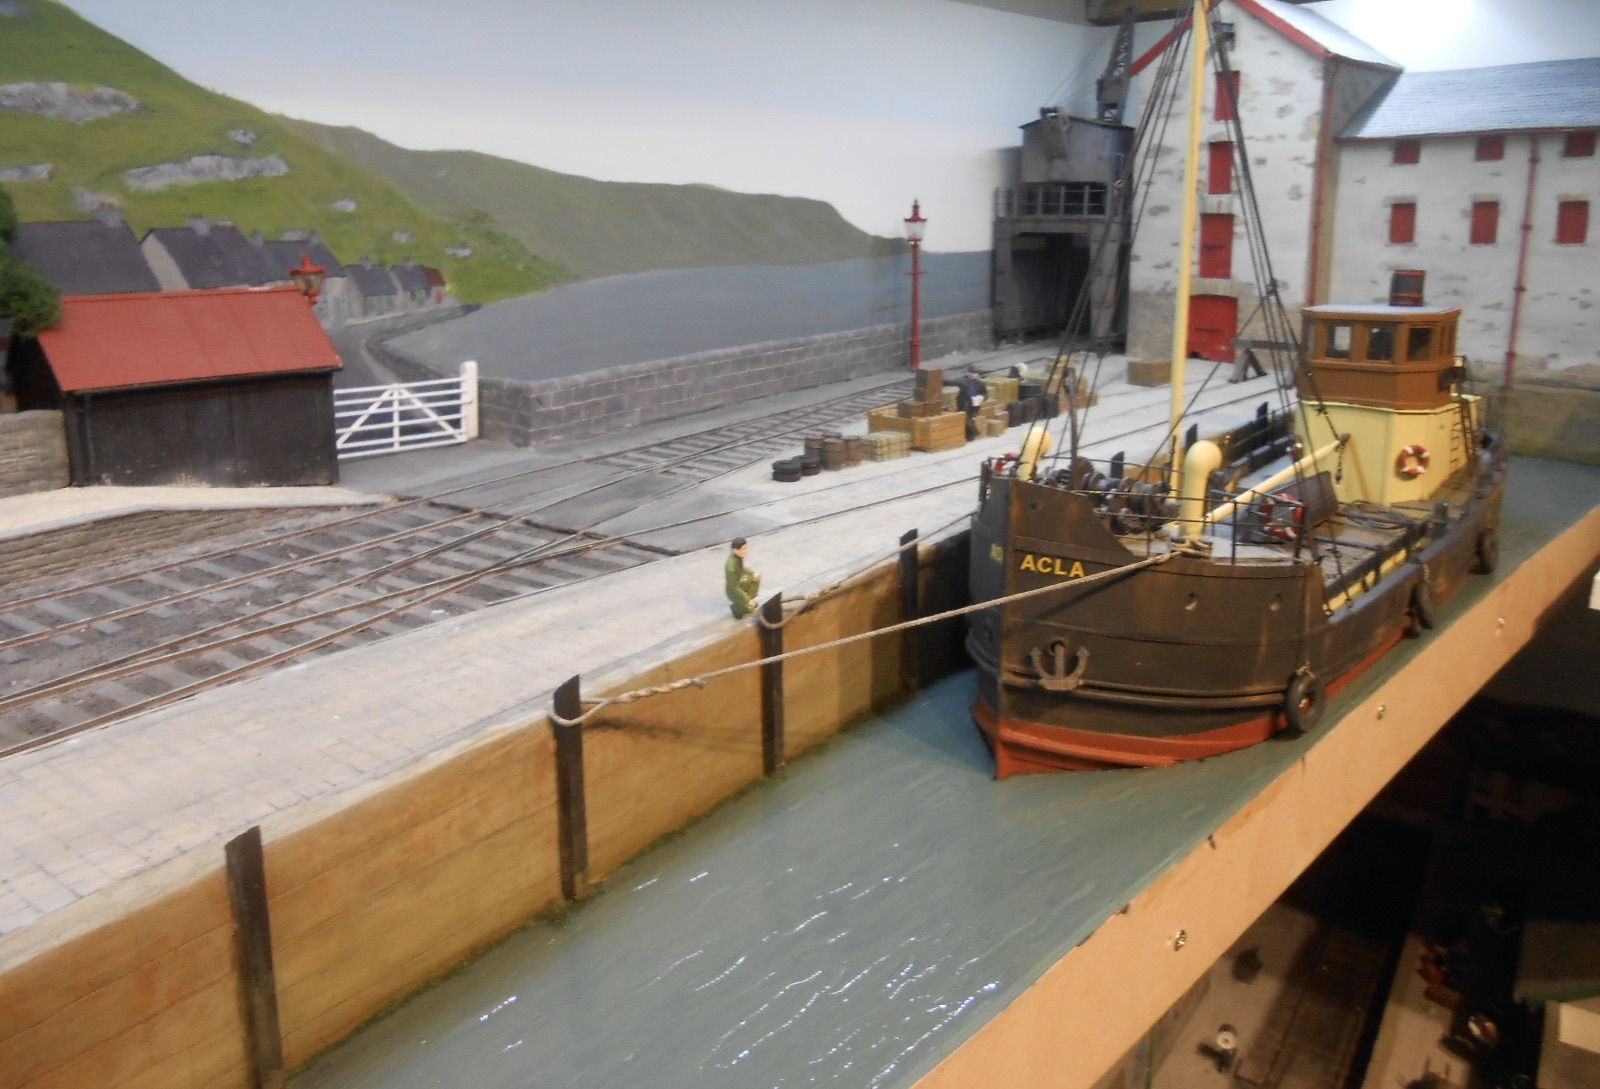
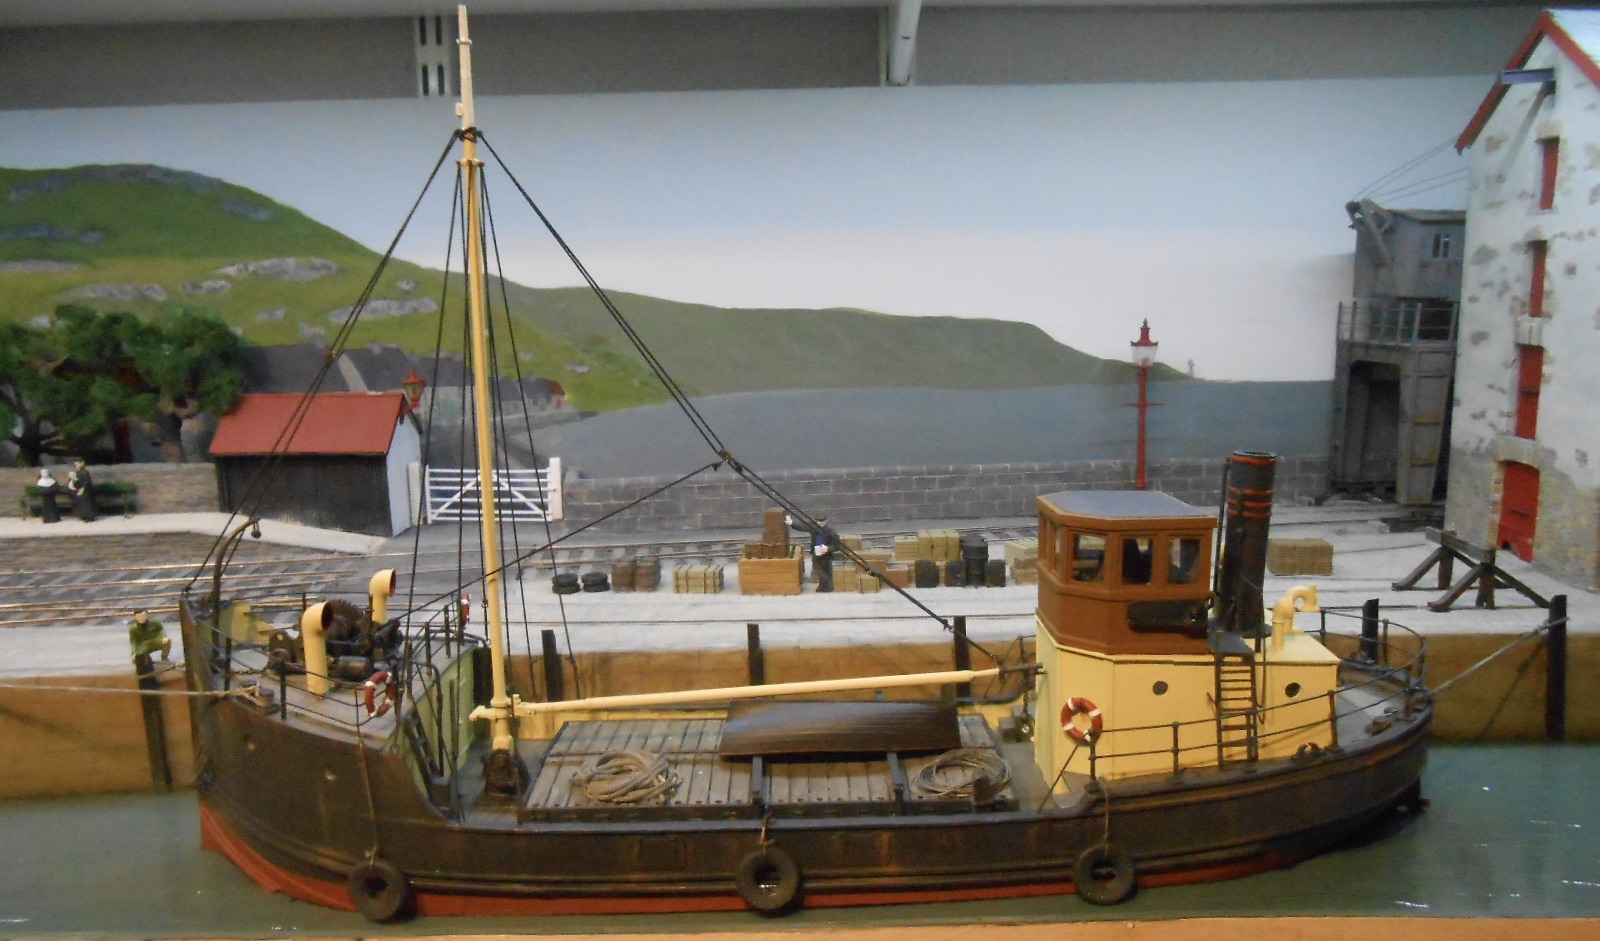
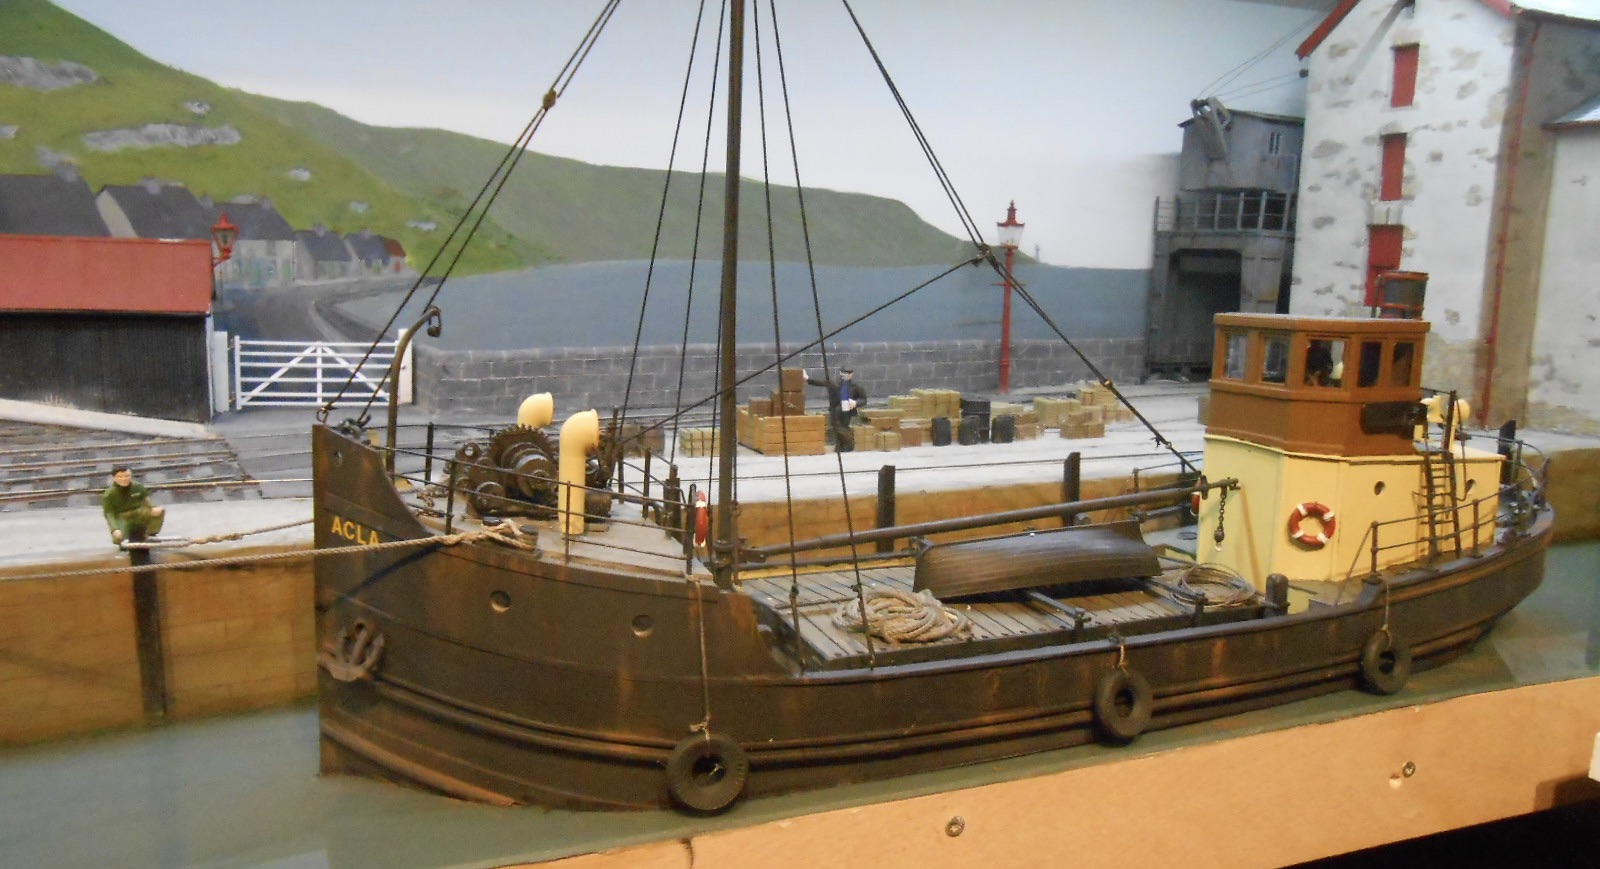
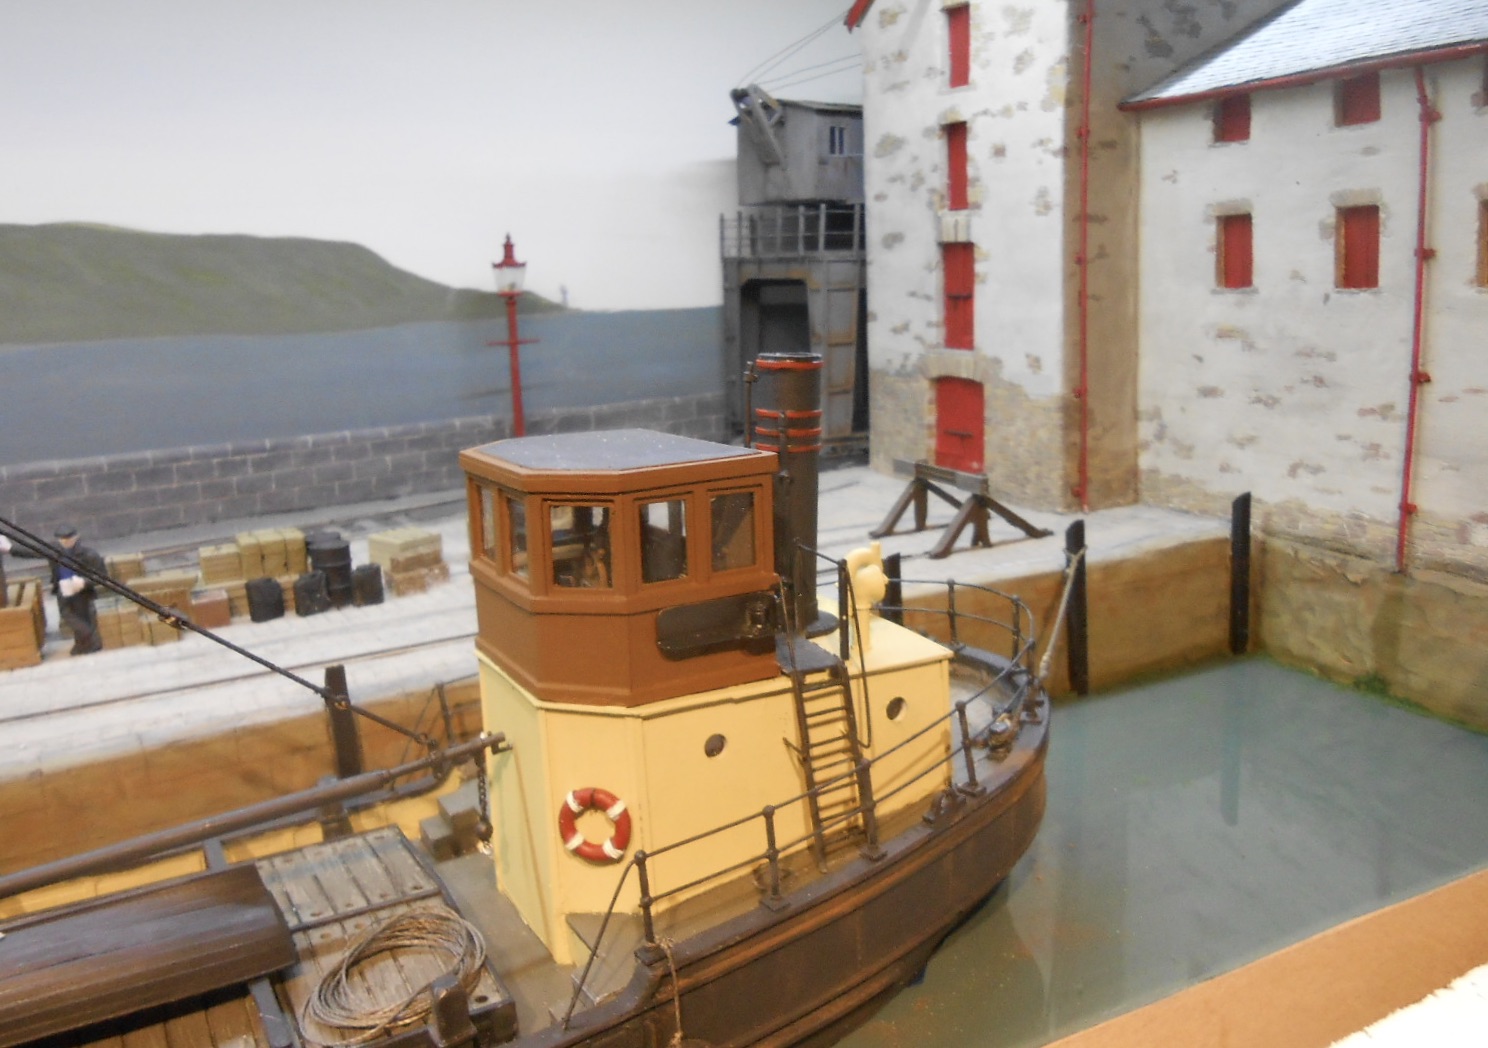
After a few emails back and forth to Gravett Land, have made a few alterations to the Acla. For example, the VIC96 doesn't have the red waterline paint, but seems this was standard in the periods I'm covering. Hence, used a mix of Humbrol 70 [brick/rust], with some bright red. Needed a couple of coats, but didn't take long. Also discovered that masts and booms tended to be painted cream, with the very top of the mast white. At some point, I'm going to have to steel myself to create some ratlines, so an unfortunate crewman can climb up to the masthead and attend to the navigation light, though right now it is not at the top of my 'to do' list! The other thing I asked about was making ripples on the surface of the acrylic sheet water. Turns out I already had the answer as it is covered in the Scenics book. It is simply a case of using clear, gloss lacquer. I've used both Tamiya No 22 and Humbrol Glosscote. You paint a succession of short wave like lines [all in the same direction], wait for them to dry and repeat - around 4-6 times, gradually building up the ripple effect. Not waves, but certainly the impression of the wind blowing across the top of a fairly still stretch of water, which is what I wanted. A couple more coats may yet be needed, while the effect is more noticeable under certain lighting [and definitely more than in the photos].

- 257 replies
-
- 16
-

-

-

-
Nice new viewing angles - very much like from the footbridge
-
Going through the Green Bible, we have:-- pretty much all the 2-4-0, 2-4-2 and 4-4-2 tanks - no splashers, with drivers inside side tanks J28 and J27- tiny Hunslets The 4-8-0T The Bandon 4-6-0T 2-4-0T and 4-4-0T St Mologa K1 2-6-0 And it is the same problem in the GNRI Blue Bible - four coupled tanks and that is it. Just so many splashers making re-gauging awkward.
-
A sensible option for a steam loco would be one without splashers, so conversion to or from 16.5 to 21mm. Am now trying to think of one!
-
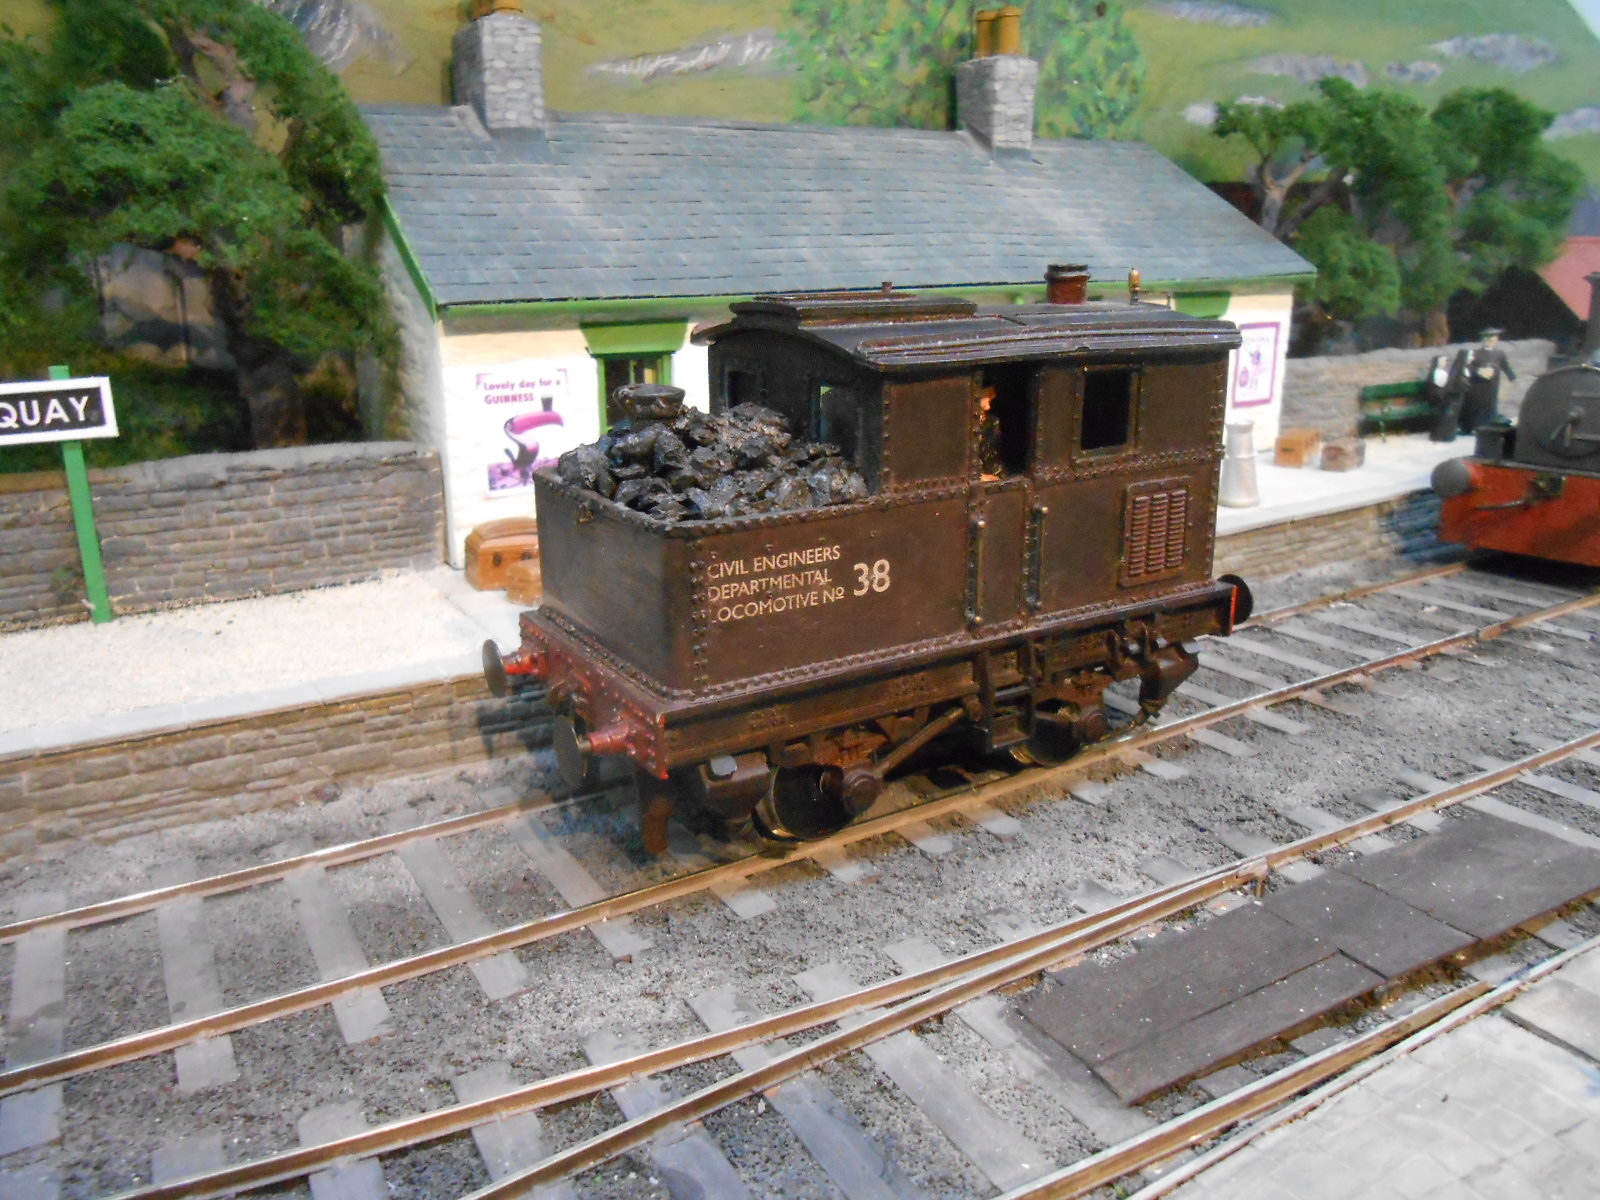
Nice one! A job I certainly need to do is get rid of that hideous pile of coal on the 'bonnet'. Photos very much suggest they just had a loose pile of it on the cab floor.
-
N Scale Ballywillan, Co Longford.
David Holman replied to Kevin Sweeney's topic in Irish Model Layouts
Love those roof trusses. -
Questions on using Electrofrog points on DC layout.
David Holman replied to raymurph's question in Questions & Answers
To echo Mayner, always best to use supplementary polarity change switches on all Peco points. Even the 0 gauge ones on our club layout need them. -
Companies falling over themselves to produce decidedly niche models at the moment it seems, exemplified by two different Titfield Thunderbolt models coming out soon, to say nothing of all the pioneer diesels and the revival of TT. Might be a while before there is a Hibernia train set, but a John Wayne revival might result in a J15.
-
Starting to gild the lily.
-
Fascinating stuff, as ever! Meanwhile, in the prototype for everything department, nice to see where the cab handrail protrudes inside, just like the wire does on my models!
-
Gordon did indeed build model ships as his day job, working for a firm that made large scale models for shipping companies and so on. I was wrong about the rigging on the 2mm model though - that is there too. I think he must have a tame spider to do it. Articles in MRJ about the ships and a beautiful model he made of a French metre gauge loco, plus numerous tributes to Iain Rice.
-
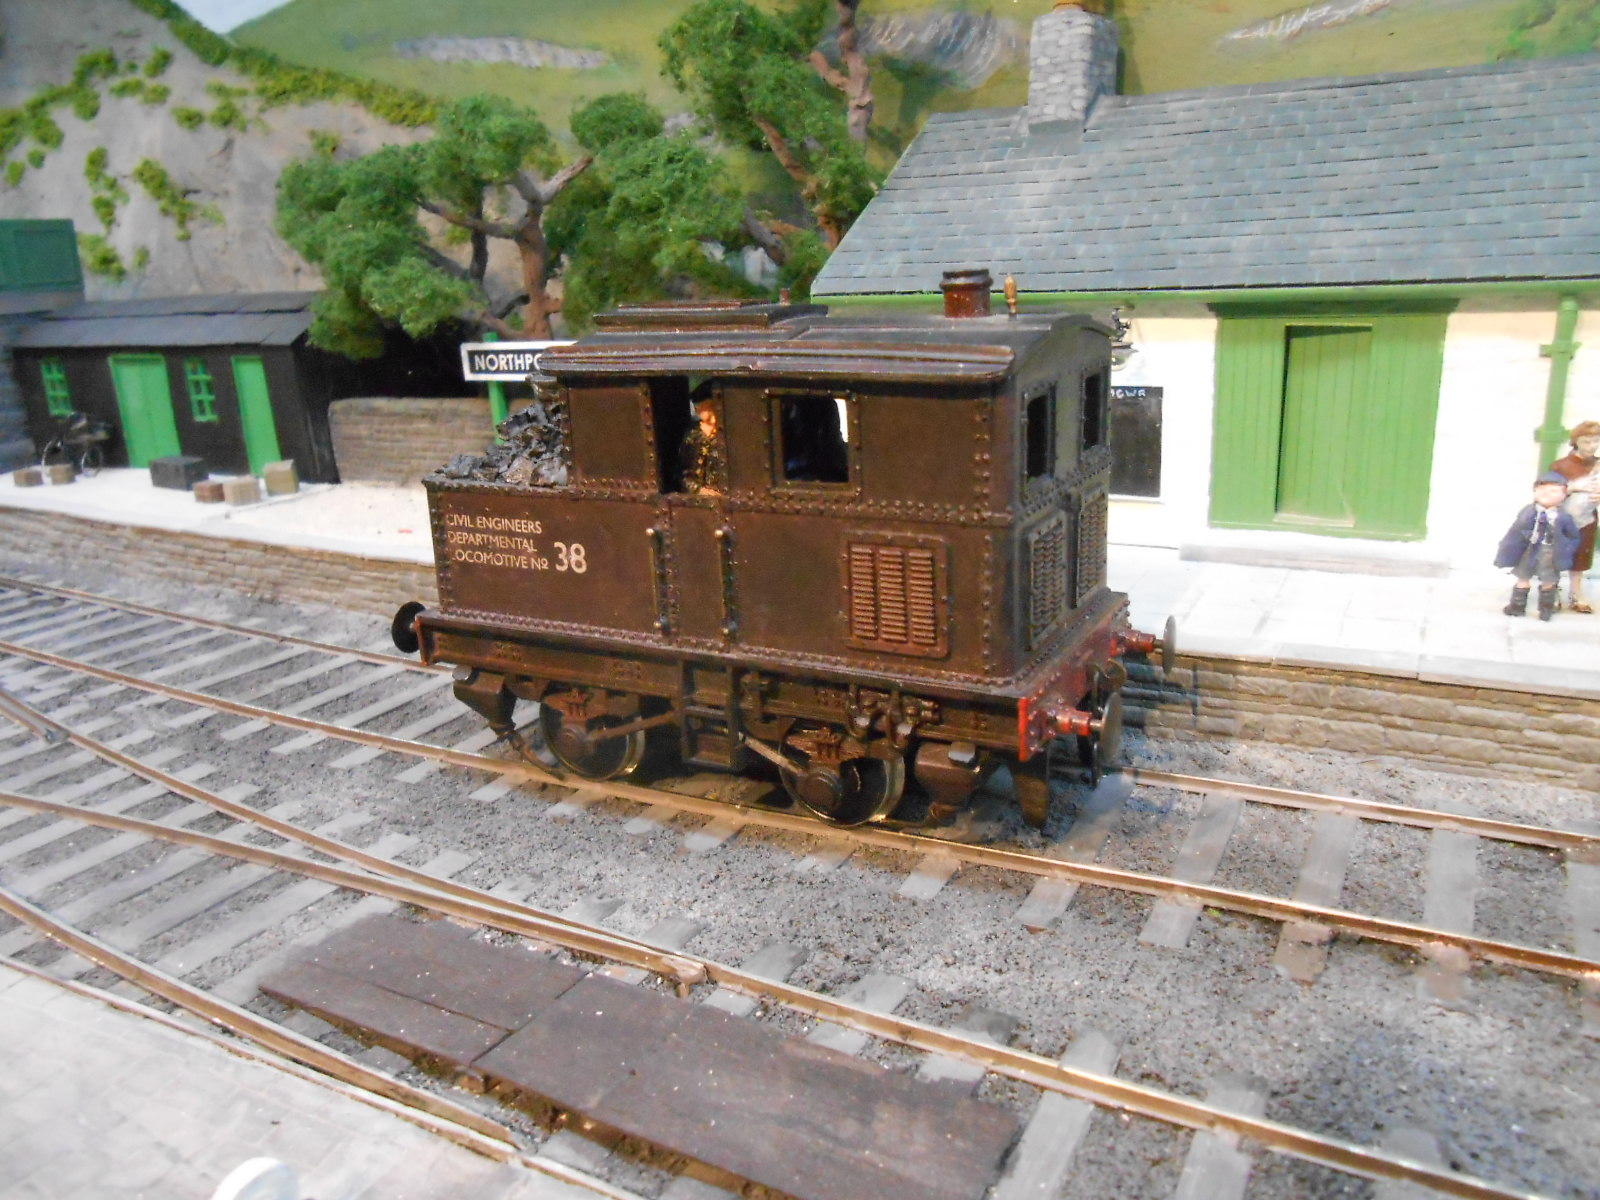
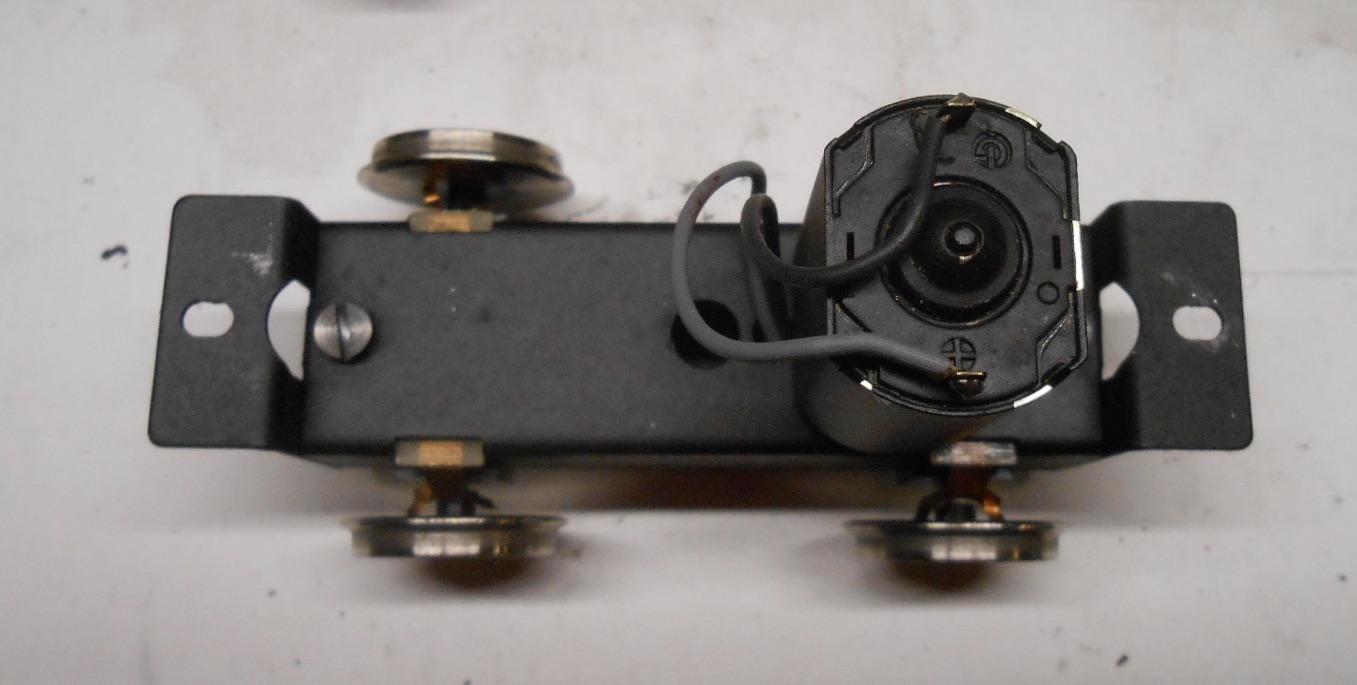
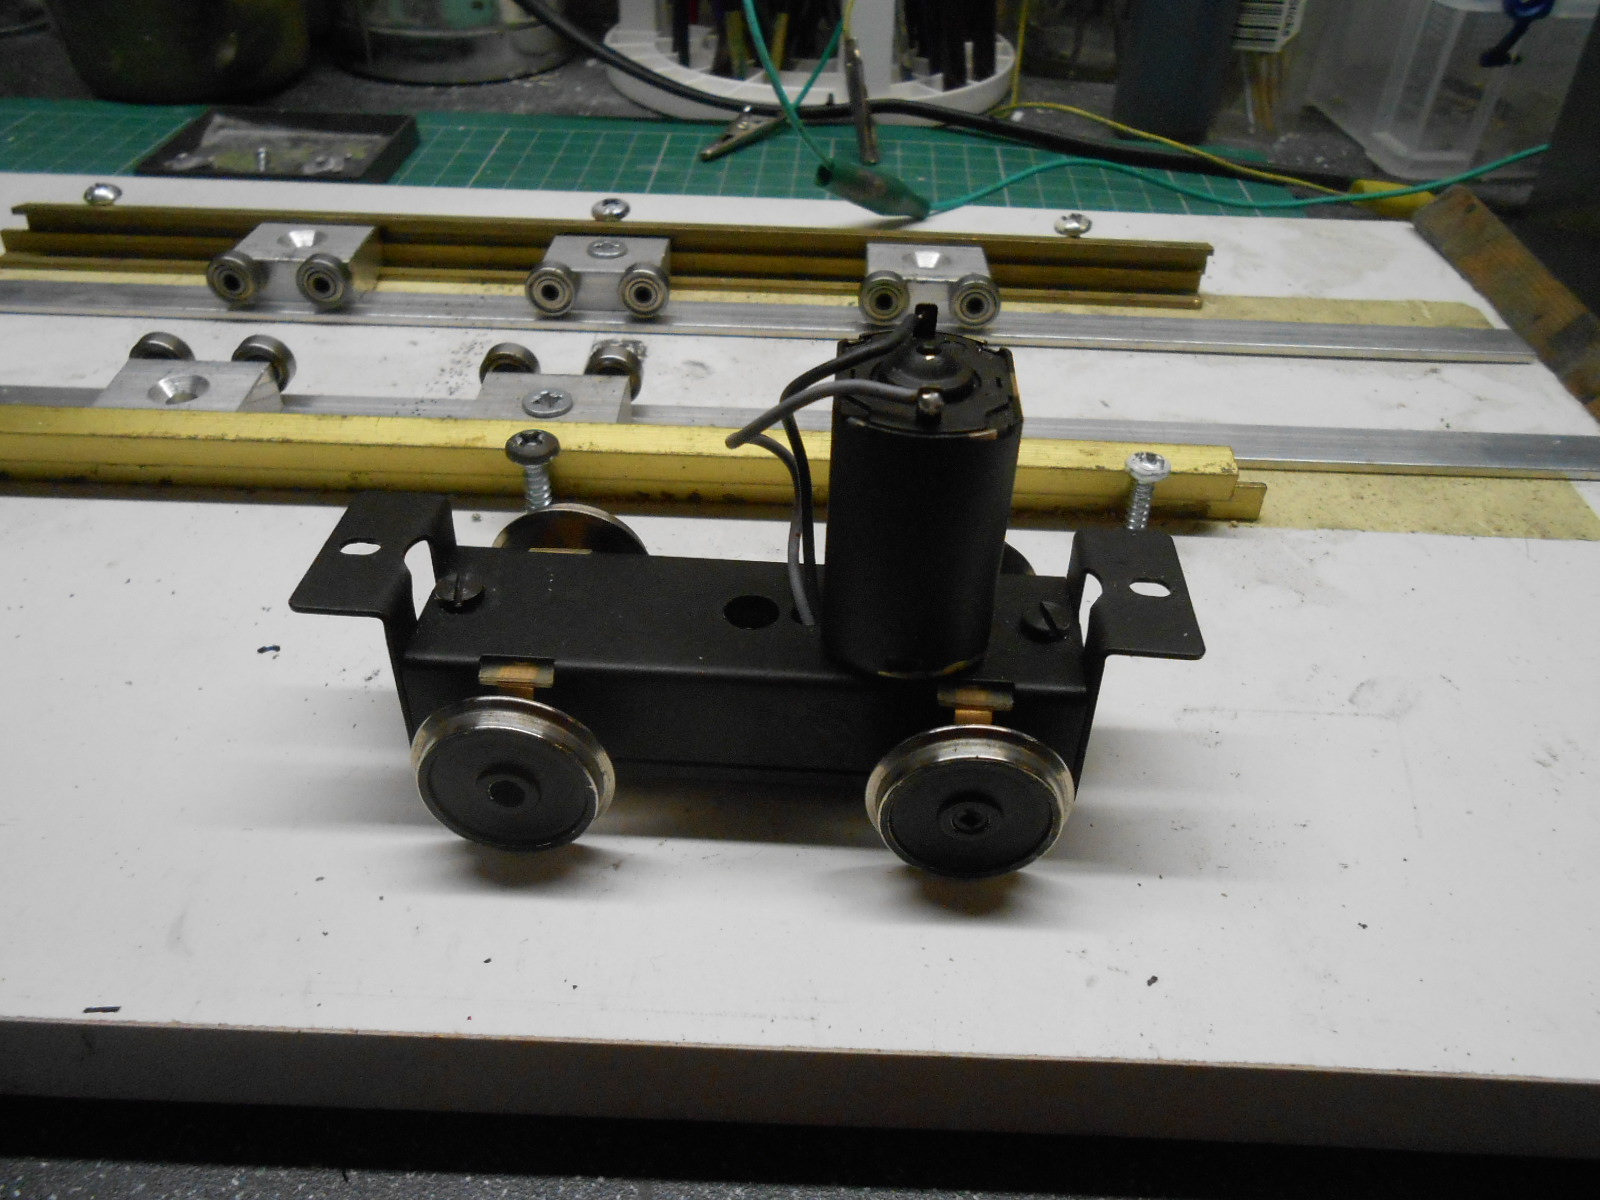
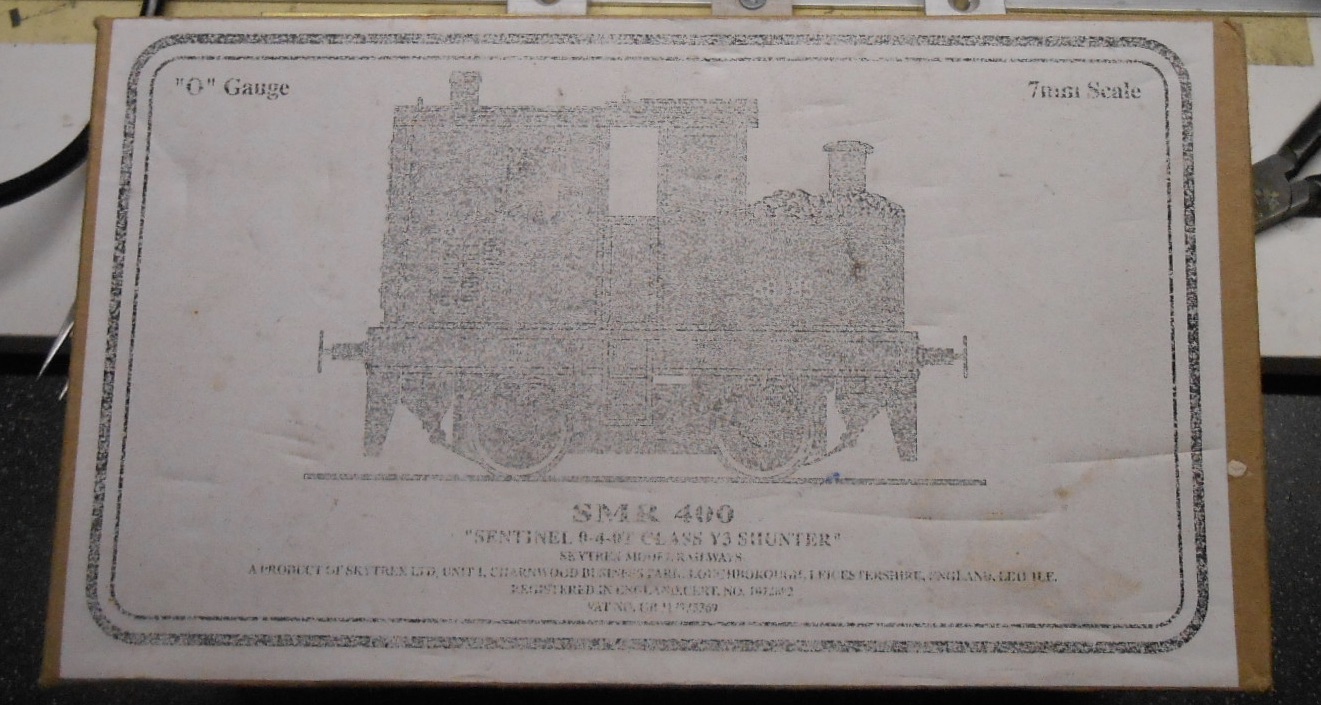
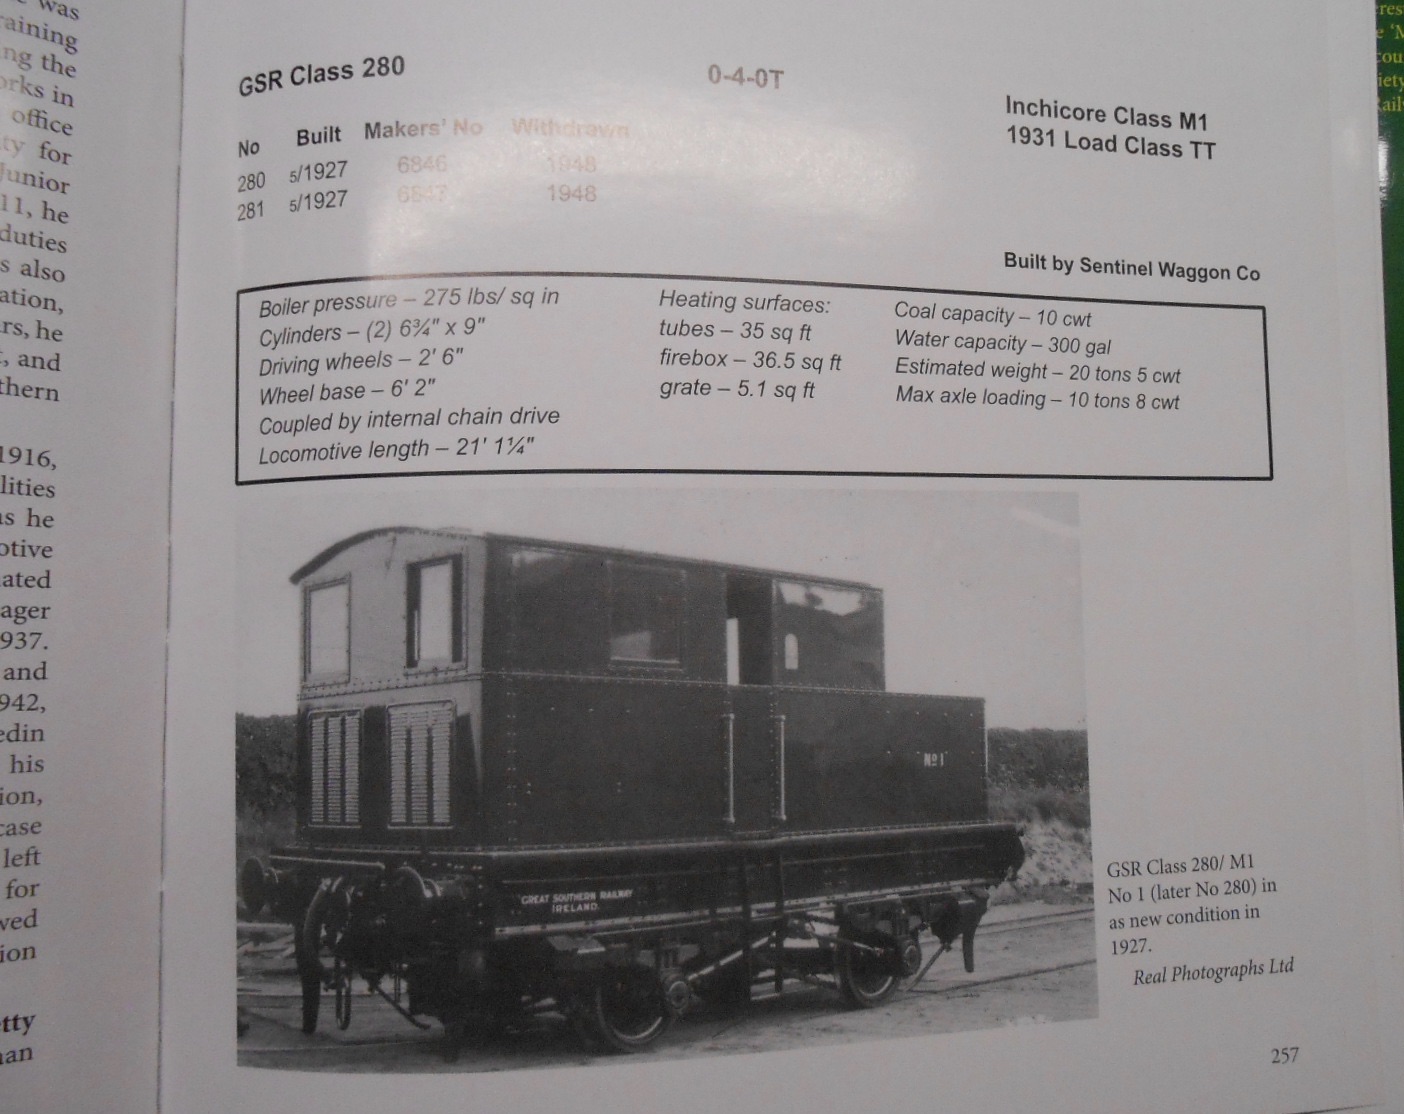
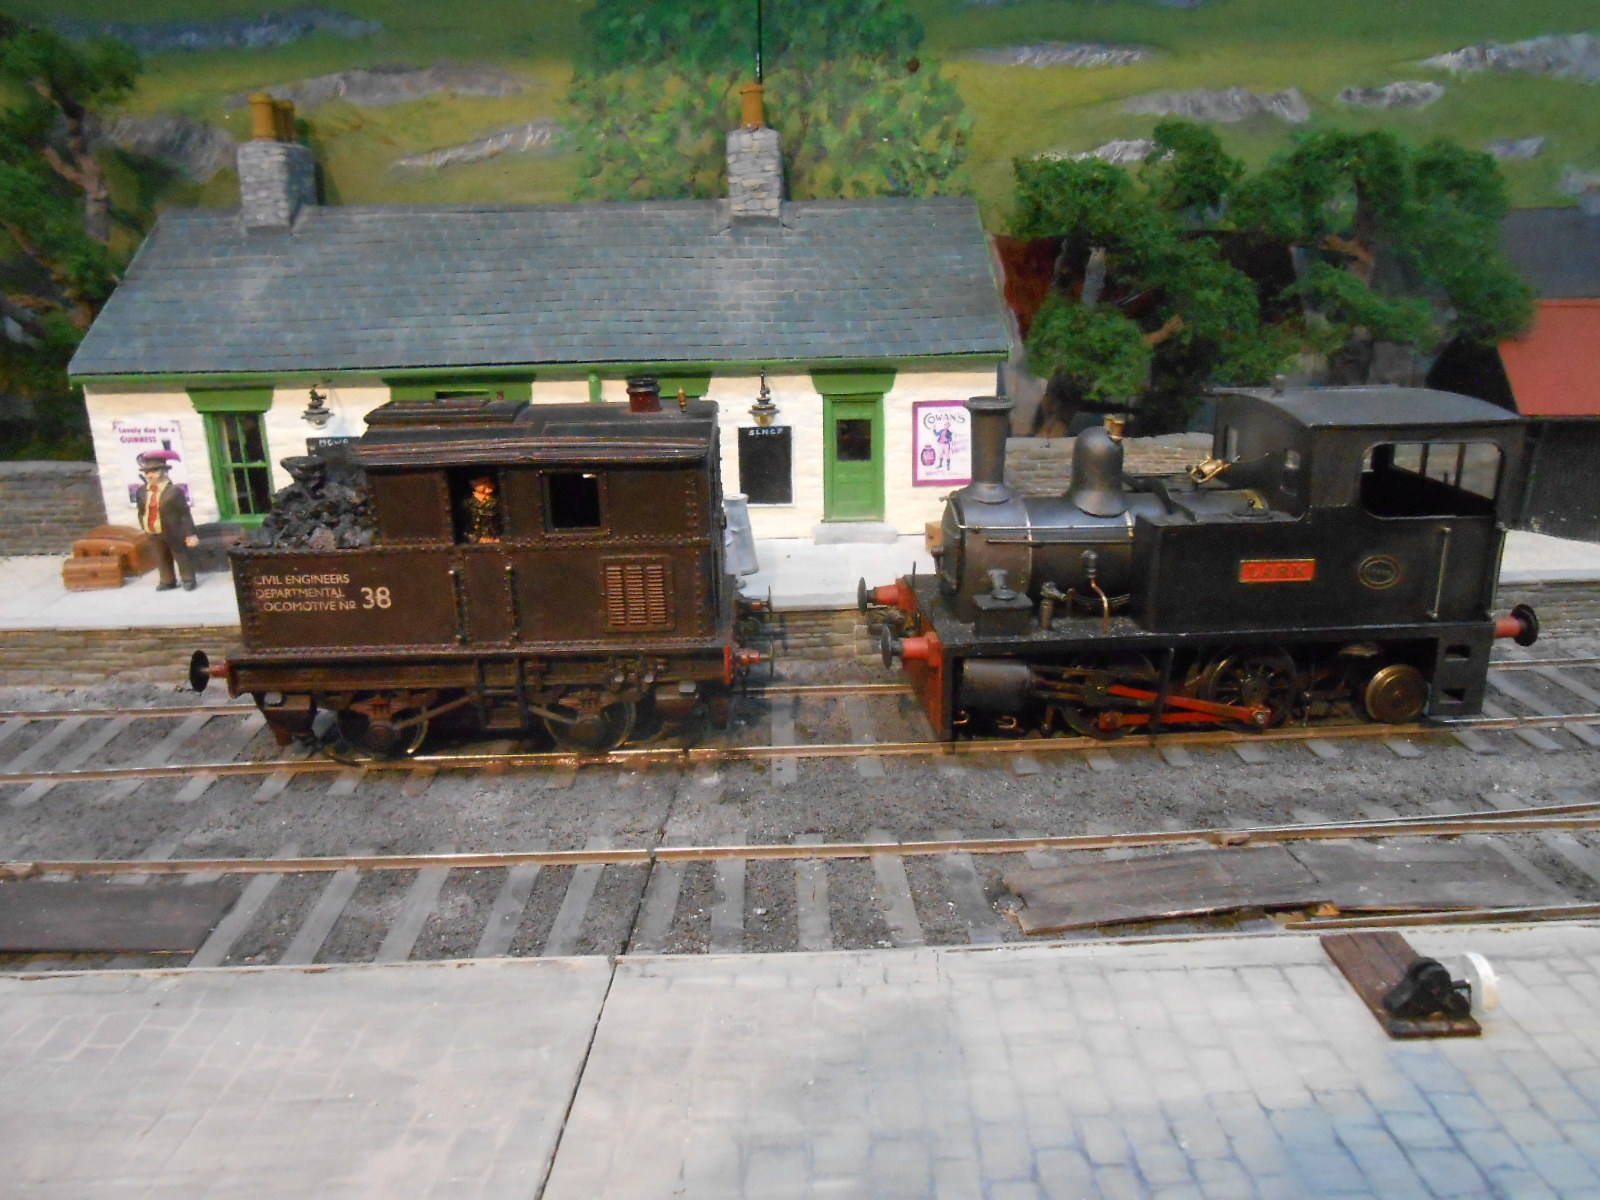
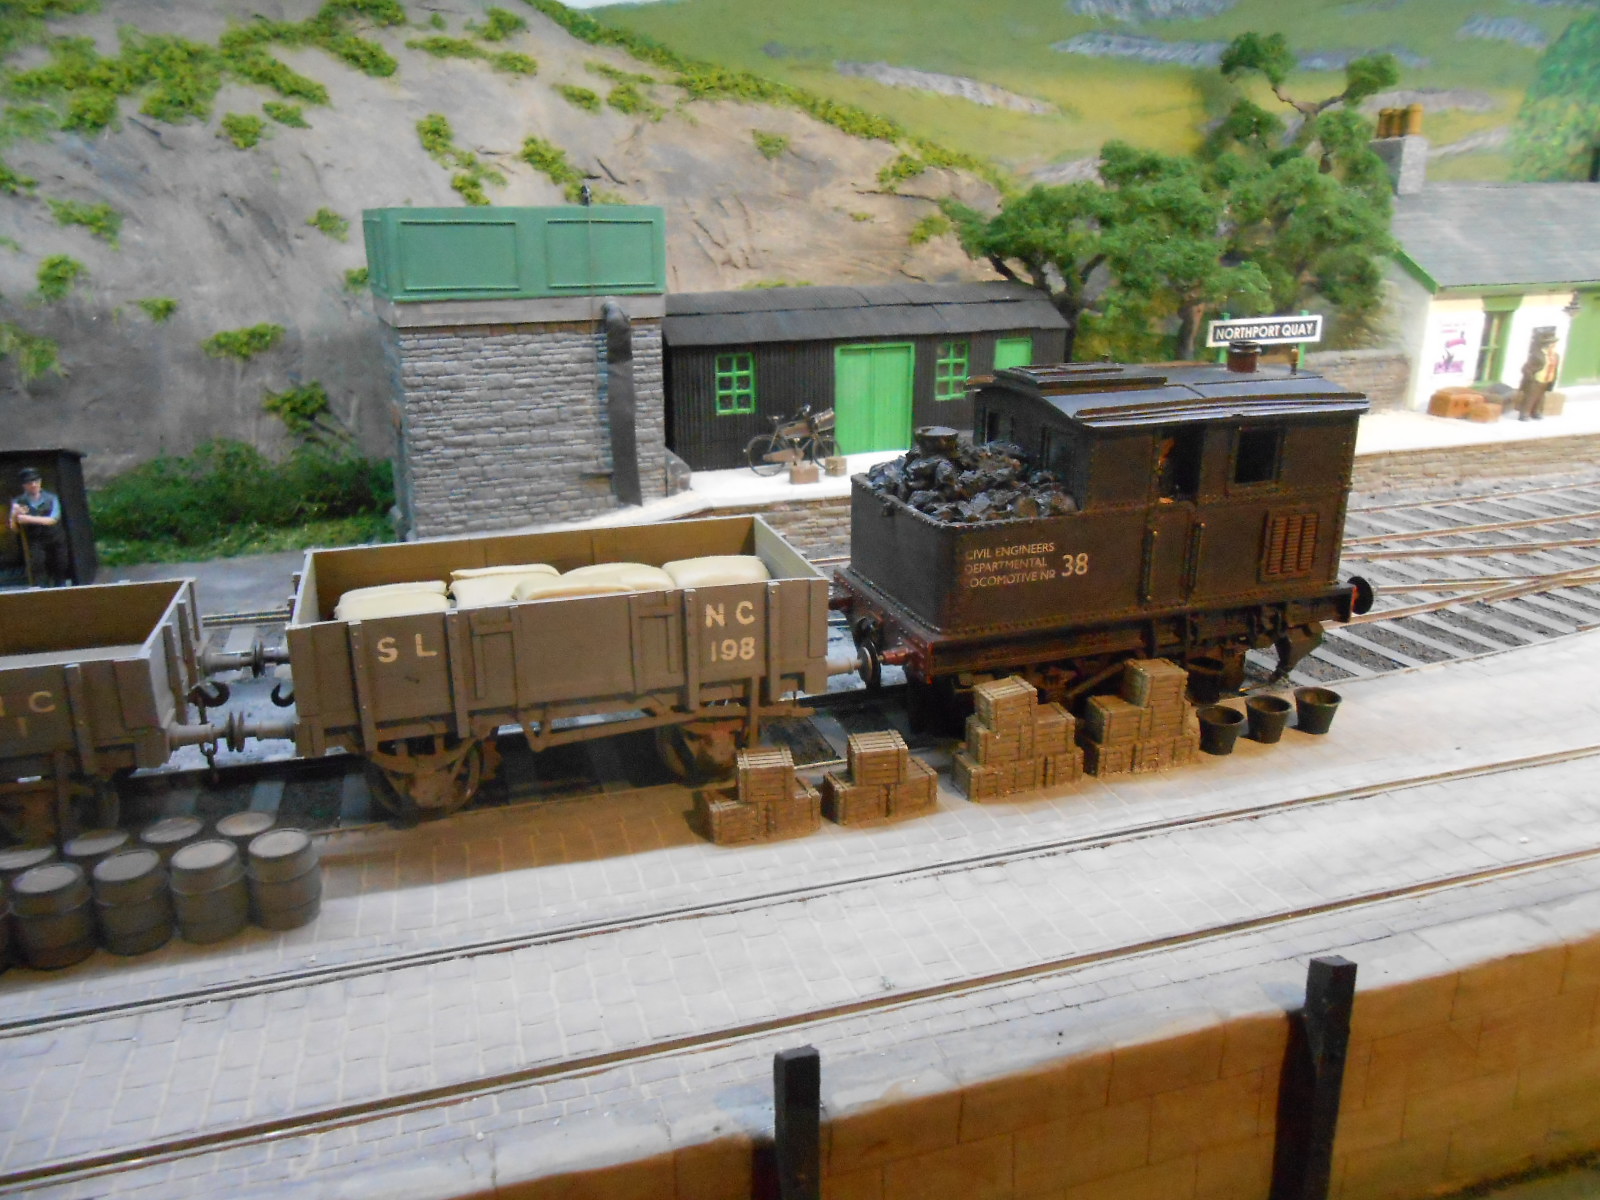
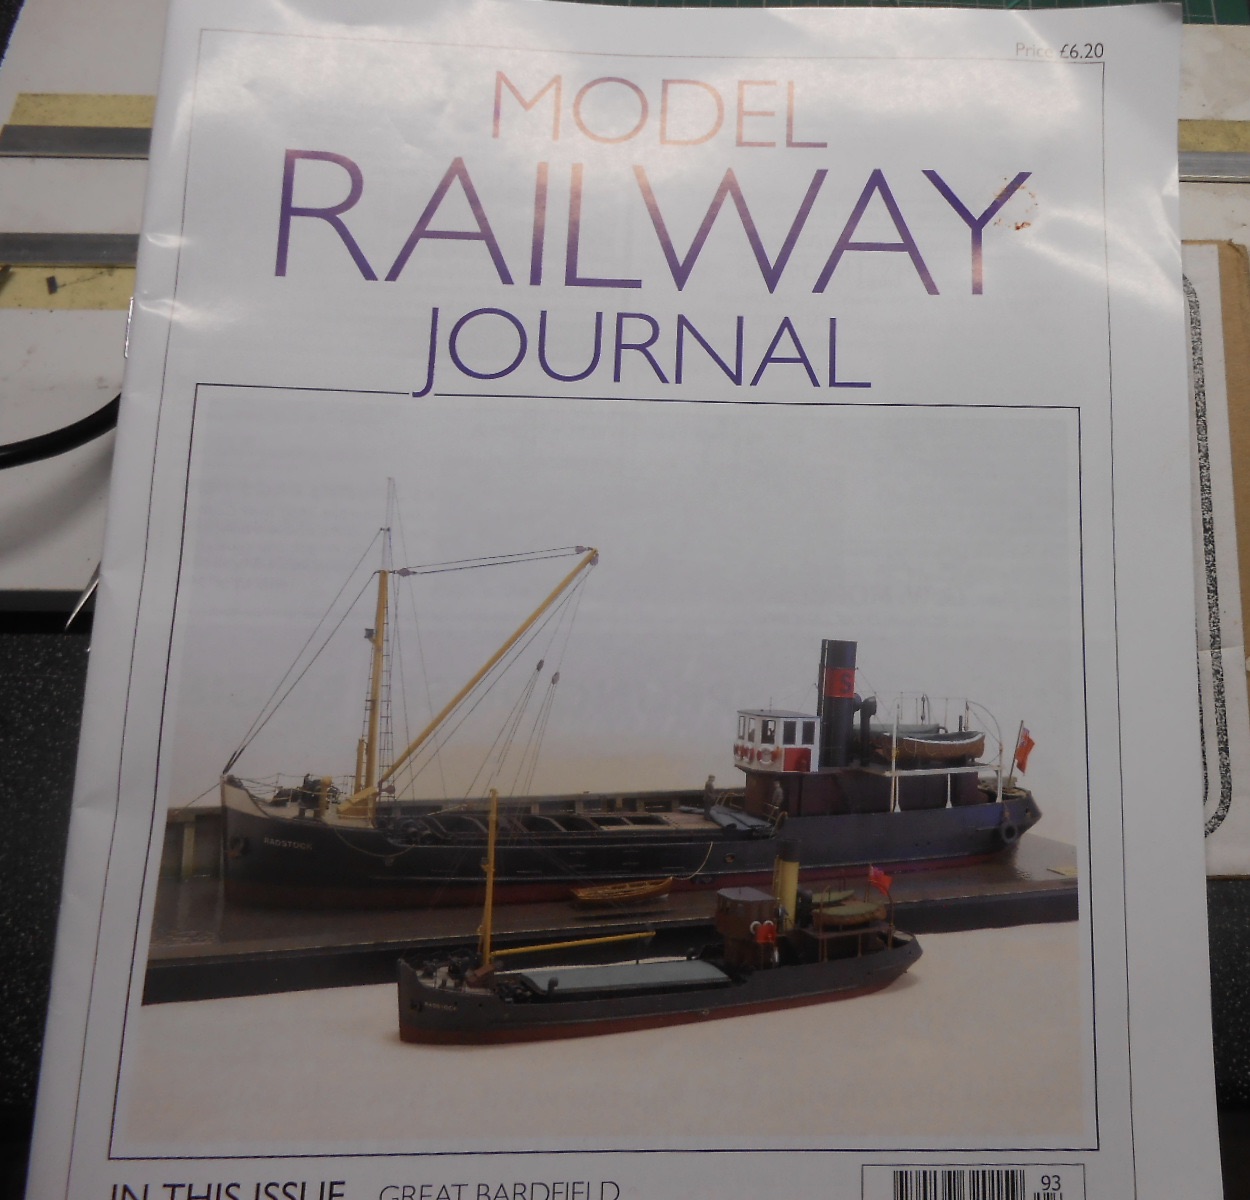
A couple of distractions came my way this week. The first was the latest copy of Model Railway Journal, which arrived by post on Monday. On the front cover is a fine picture of one of Gordon Gravett's recent creations - a pair of Somerset and Dorset Colliers, one in 4mm scale and one in 2mm. I can take a [very] small amount of credit for these, after sending Gordon a photo of VIC96 in Chatham Marina, though he'd been thinking about building one for ages, while the 2mm scale version was built for another master modeller, Jerry Clifford. A bit bigger than a VIC and certainly over 30 feet longer than a Puffer, the heritage is clear to see from both. Needless to say, both models are completely scratchbuilt and stunningly good in the flesh, as anyone who went to this year's Uckfield show will testify. However, what also stands out is that Gordon has included ALL the rigging, for the mast, derrick, anchor, etc, etc. I hadn't really appreciated this at Uckfield, but now, haven't done a very limited, hamfisted version on Acla am feeling somewhat inadequate at his exquisite work. This is 4mm scale, remember - though I don't think he's done anything like as much on the 2mm version, so the man is human after all... The other distraction came from the Chatham Model Club, when I decided to liberate an old SMR model of a Sentinel shunter, to see if was possible to regauge it to 5'3. We must have had it for at least ten years, maybe more. It's a good little runner, with belt drive giving four wheel drive, so surprisingly powerful too. Seem to remember they only cost about £100 & obviously were the precursor of the current Dapol model. Why a Sentinel? Well those of you who know your Green Bible will realise the GSR bought two standard Sentinels, which variously worked in Cork, Tralee and [especially] on the Limerick Market Branch. Not out of the question therefore to think that one might have made its way to Northport Quay as the resident shunter and the temptation to acquire an [almost] ready to run loco is another of those itches that has needed scratching for a while now. Turns out that all that is needed to regauge the model is to tweak the wheels out to 34mm back to back and then adjust the pick ups so they still touch the wheels. Just as well, because the axles are very much not standard diameter, so best not messed with. The only other thing needed was to grind a bit off the back of the axle boxes, though a fair bit of cosmetic work to the body will be needed to make the guard irons line up, along with a few other improvements too. Probably best if I asked the Club if I can have it before I go any further though! I'm well aware that this SMR model is far from perfect. The wheels don't line up with the axle boxes for one thing, while best not to compare it too closely with the two Limerick shunters. Nevertheless, the Green Bible opines that it is perhaps a bit odd that GSR/CIE didn't go for a few more of these little engines, especially during the various fuel shortages, so I will not feel in the least bit guilty if this one eventually appears on Northport Quay's roster. Could make a basis for a nice little 7mm scale cameo layout too - one was tried out on the Castleisland branch, a sort of steam powered Deutz G class diesel. Any takers? The Dapol one can be got for around £100 or so, though I have no idea if it can be regauged in the same way.
-
Looking into both - including an email to Gordon. If anyone knows, it's him!
-
Questions on using Electrofrog points on DC layout.
David Holman replied to raymurph's question in Questions & Answers
Build my own track, Ray so assume you can cut the wires - after all, you can always solder them back. -
Questions on using Electrofrog points on DC layout.
David Holman replied to raymurph's question in Questions & Answers
No electrician Ray, but have always used live frog points and as far as the third question is concerned a live frog point will isolate a loco if switched against it. So you are correct. -
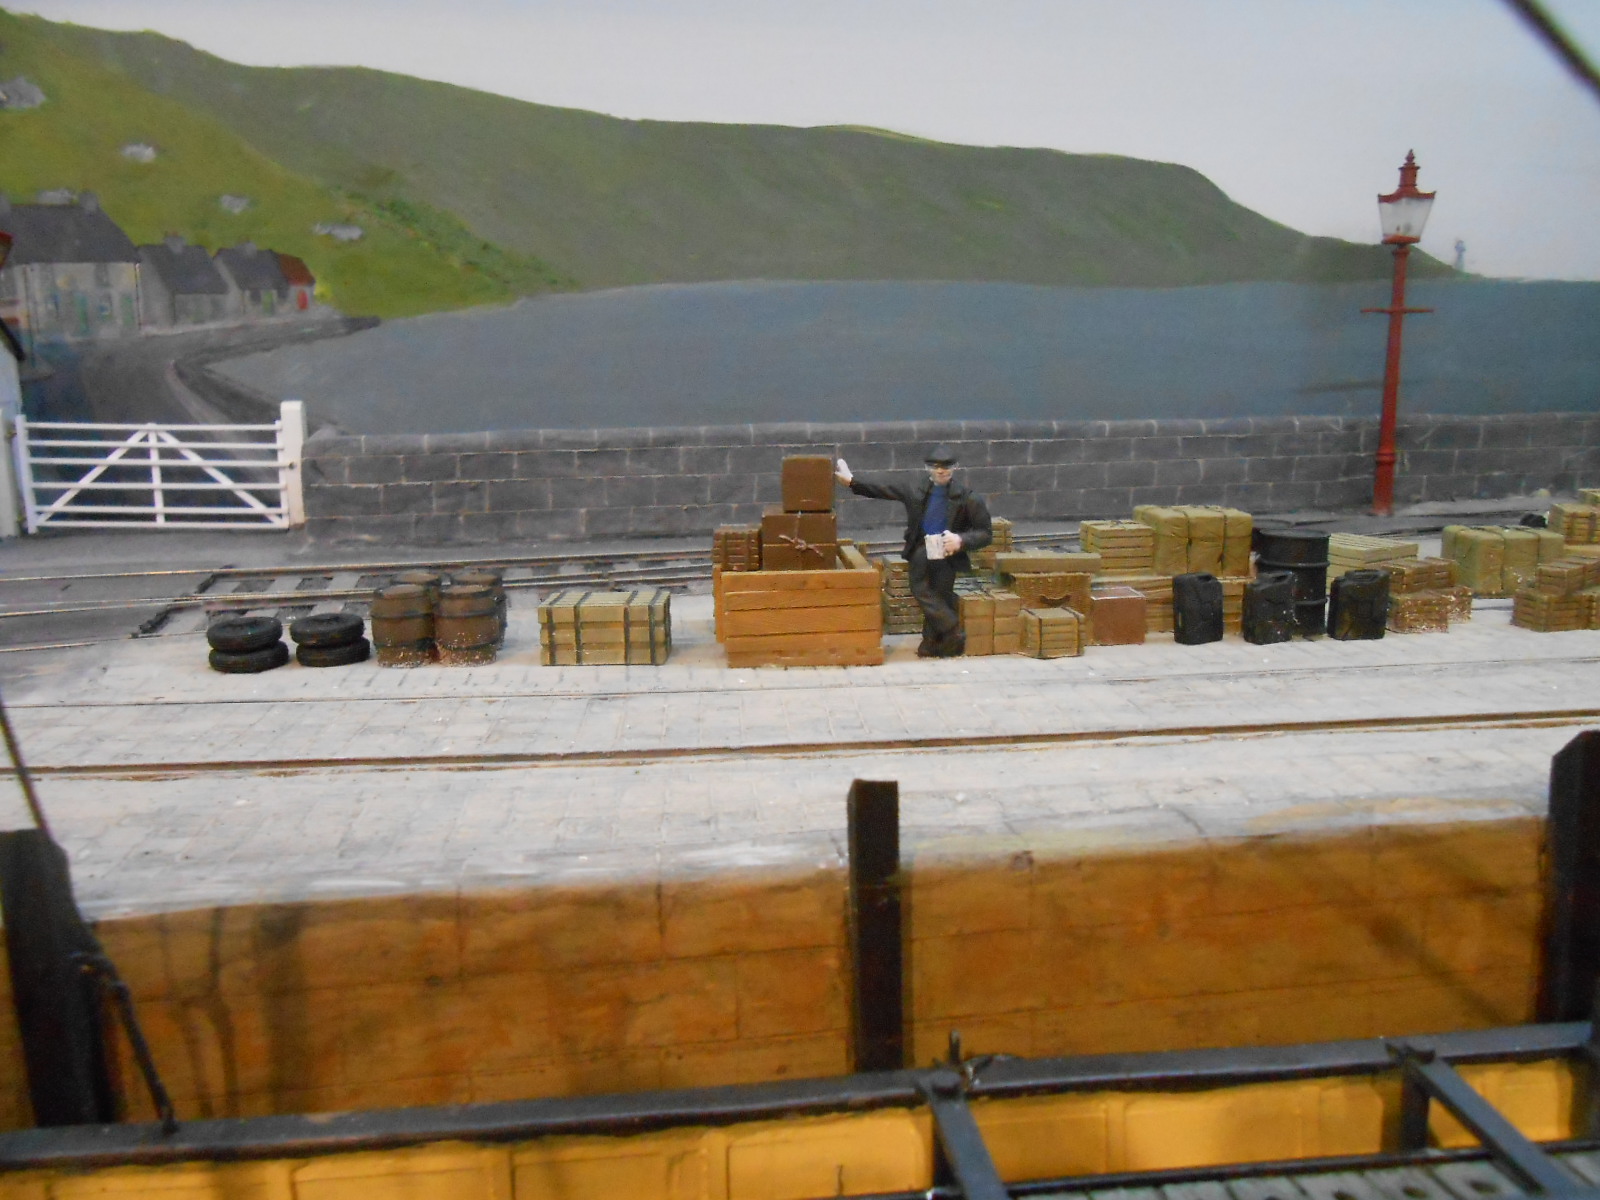
A mixture of crabs, flat fish and silvery fish, Leslie! Courtesy of Skytrex Models, as is most of the other cargo.
-
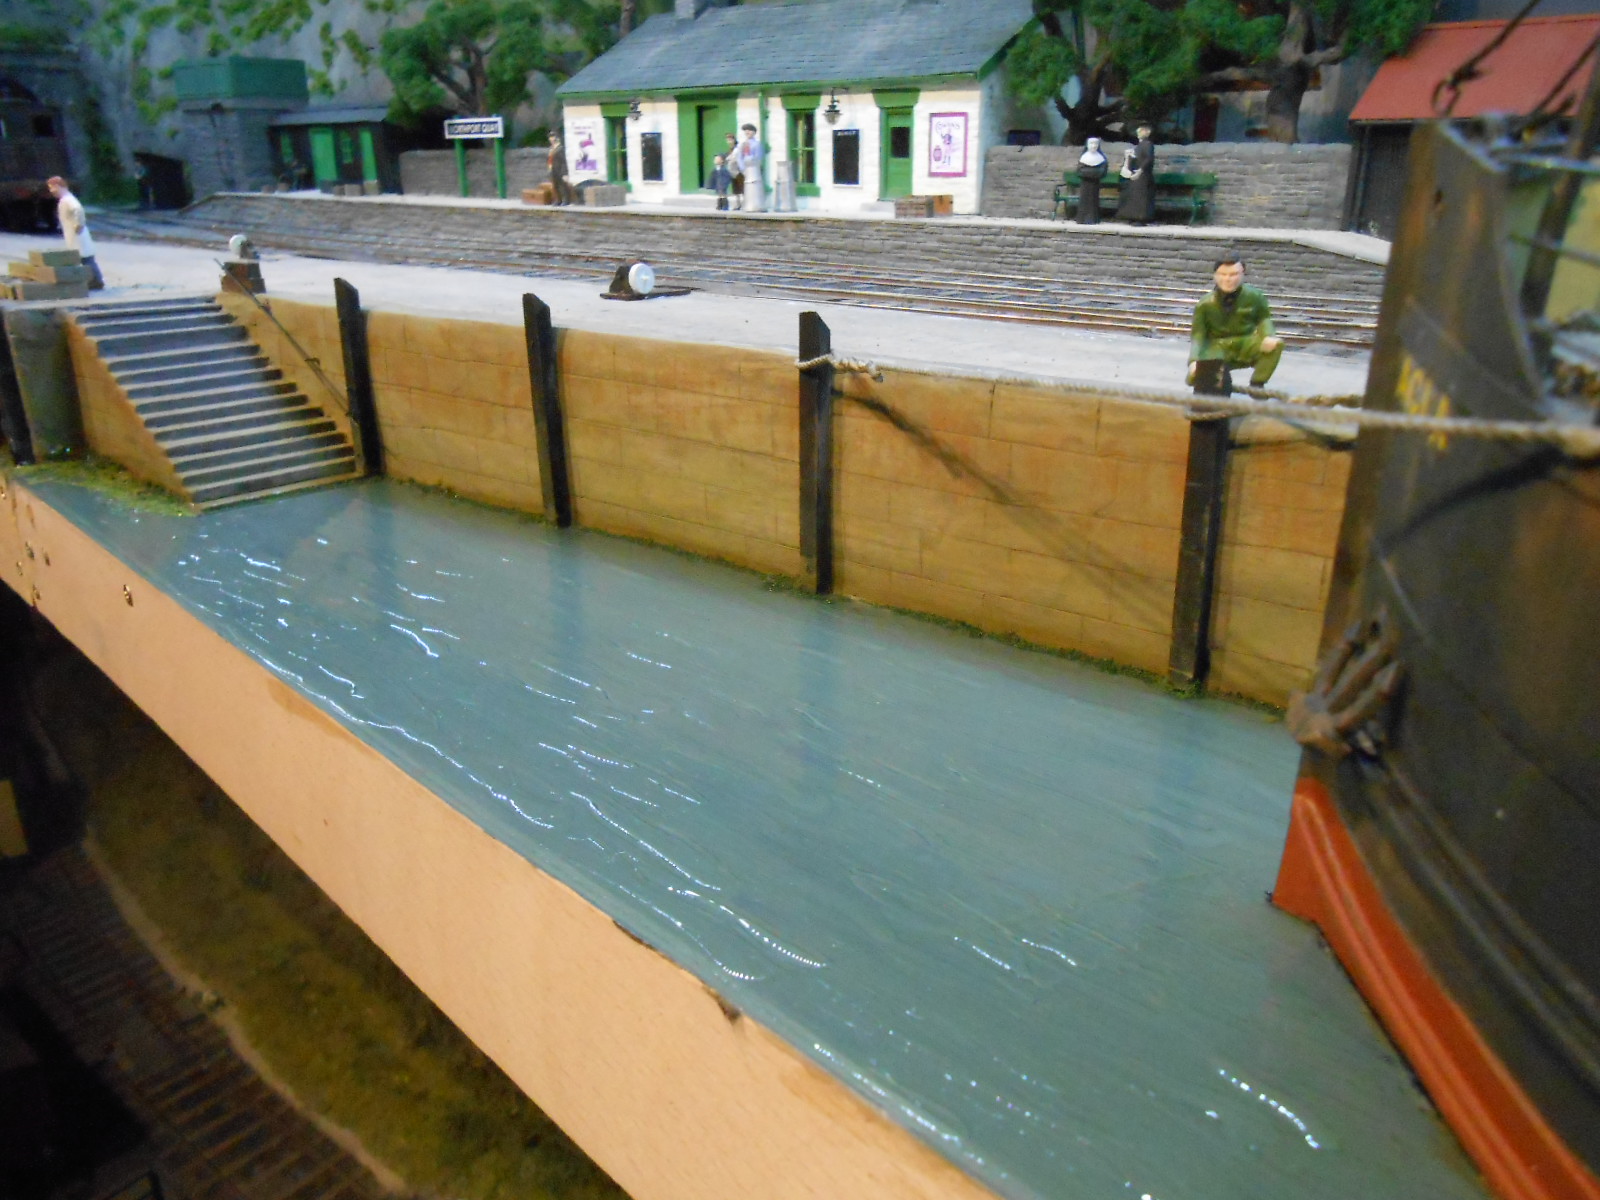
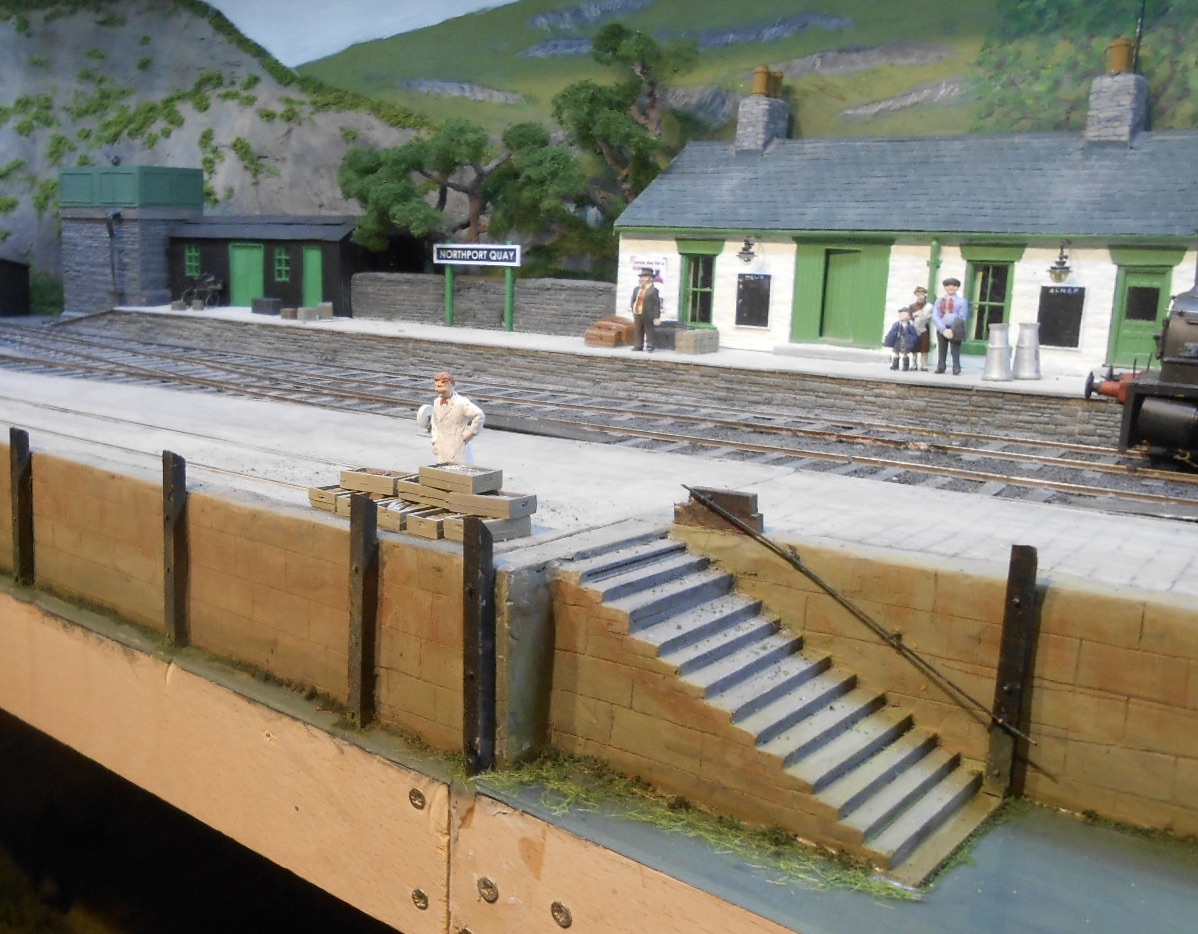
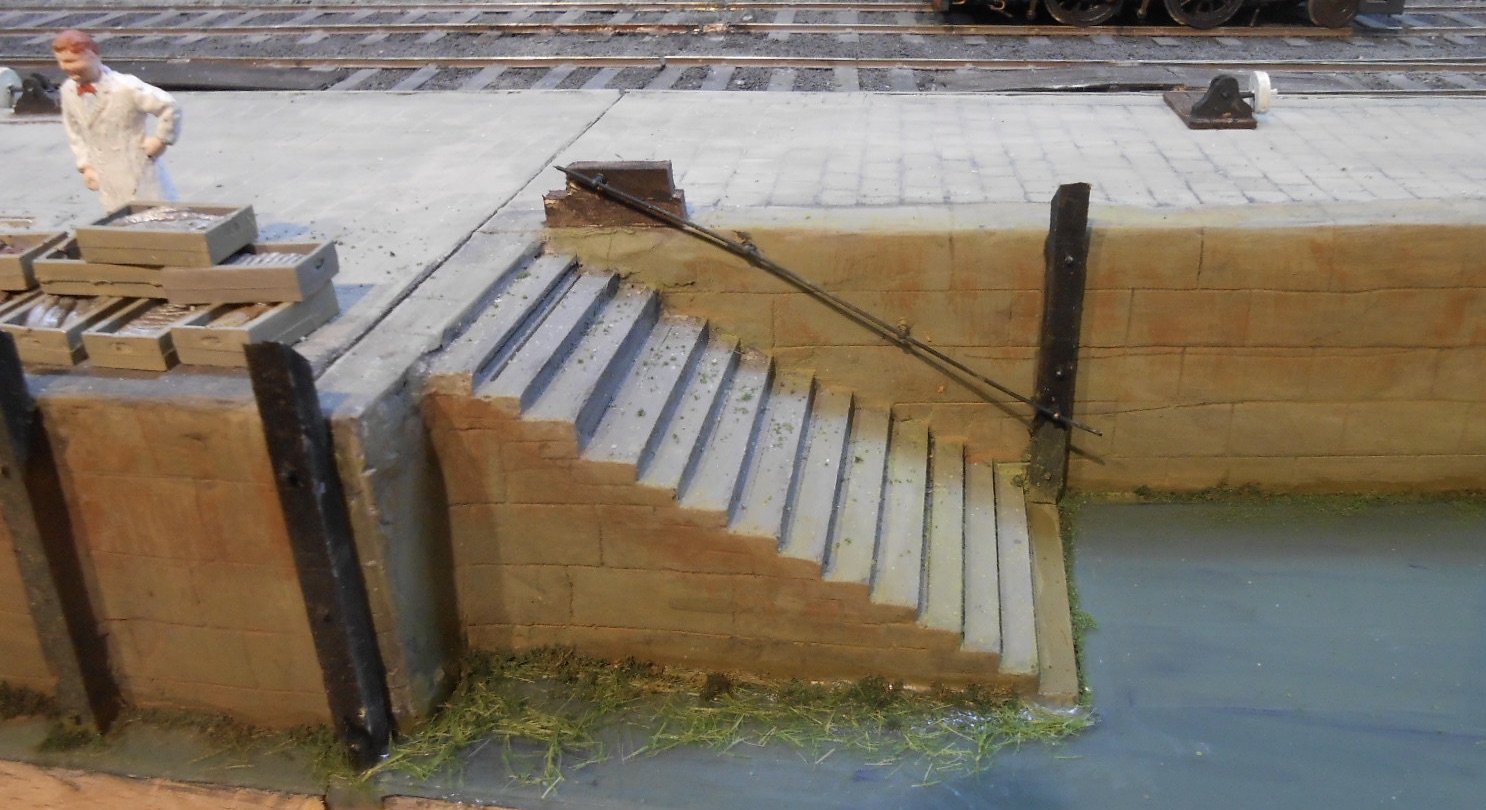
With the missus laid up with a broken foot for at least a couple of weeks [no, she didn't kick me, nor me her], apart from being chief cook, bottle washer and general dogsbody, there has at least been time for multiple short modelling sessions in between the chores. A good chance therefore to experiment with some weathering of various kinds. Weathering in more ways than one, as I've attempted to create things like seaweed and the green patina you get on sea walls. Various acrylic washes seemed to be the way to go, but also noticed there can be orange brown stains [rust?] higher up. Got a bit heavy handed with this, but found that I could sand it back with some fine wet'n'dry. Seaweed comes in various colours [you can Google pretty much anything of course], so went for my finest grade of dark green crumb along the join between water & quay wall, with strands of weed done with long static grass fibres, flattened down & held with dilute pva. Not sure about this at the moment & may well need longer [& thicker] fibres, like painted sisal perhaps? The Acla has received a bit of weathering too - a mixture of dry brushed rust coloured acrylic and weathering powders. It may need a bit more, or even some of the powders removed. I find such things need going back to multiple times before I'm happy, so the last few days [and the next few!] are ideal for this sort of thing. Finally, felt a figure was needed amongst the cargo on the right hand quay and found a nice one of a chap leaning against something, holding a mug of tea.
- 257 replies
-
- 14
-
-
A seasonal favourite round here is a store that do Christmas Reefs - this is the land of Estuary English, after all! Technically speaking, I fink reefs ought to have multiple 'f's [you hear of lot of those too], while on Sheppey, where they speak a sub-dialect, known as Swampy, there are many more, richer varieties...