David Holman
-
Posts
4,359 -
Joined
-
Last visited
-
Days Won
117
Content Type
Profiles
Forums
Events
Gallery
Blogs
Everything posted by David Holman
-
Wow, what a fabulous model, George! That is a ridiculous amount of detail, but then suppose in 1:24 stuff becomes ever more noticeable - right down to the toilet pan. Not sure I'm going to be chasing all that rigging, but looks like I need to add at least some now you've shown me. Fantastic work - thank you. Slapped wrist for me in not keeping an eye on other threads too.
-
The Official Irish 'Might Have Beens' Thread
David Holman replied to minister_for_hardship's topic in General Chat
Plus of course their buses reached out long after the railway closed. By the by, another reason I can't do a project like this at the moment is there is no space in the workshop, with Belmullet occupying the lower level and Fintonagh and Northport Quay the space above. Could have a go at a loco, of course, but ahead of it on my 'to do' list is the travelling crane for NPQ, the Castlederg 2-6-2T for Fintonagh, plus (as the muse takes me) Sprite and the Pay Train and/or a GSWR 4-4-0, all of which already have somewhere to run. One day maybe.... -
The Official Irish 'Might Have Beens' Thread
David Holman replied to minister_for_hardship's topic in General Chat
Mentioned the other day that the Swilly is an itch I repeatedly have to scratch and following the Cultra show found myself musing on a might have been that I've already made use of. The place is Rathmelton. A few miles north of Letterkenny, if you Google it, you find not only an interesting industrial waterfront, but also some splendid Victorian/Georgian [?] terraces that would make a rather fine setting for a model railway. The warehouse on Northport Quay is based on one of those in Rathmelton. Quite why the Swilly, or indeed the Donegal never made it there, I have no idea, but I could envisage that a joint line might have been possible, with the Swilly being responsible for traffic to Derry and the Donegal to, well Donegal. Personally, I wouldn't have the space for the long trains that both companies ran, let alone 4-8-0s or 4-8-4Ts - and the big Donegal 2-6-4Ts weren't much smaller. However, shorter trains were run, so the Swilly 4-6-0Ts and 4-6-2Ts with two or three six wheel or bogie carriages or a few vans and a bogie brake would make for a nice set up. Not much in the way of variety though, which is why a joint line is appealing because a couple of Donegal railcars [either coupled together, or towing trailers and vans], along with mixed or freight traffic would be very appealing. I can envisage a stretched version of Fintonagh [on a Northport Quay sized footprint], with a quayside as the front edge of the baseboards and the warehouses/houses behind, or a larger, Belmullet sized project allowing for longer trains and more scenery. Drawing a couple of track plans has helped scratch the itch for now and realistically such a project aint going to happen anytime soon with Northport Quay needing to be ready for its show debut in less than a year. Also, a project like Rathmelton would probably take at least two or three years, given the amount of stock required - all of which would need to be scratch built - so the plans have gone into the folder for now. However, if someone were to bring out a couple or three 7mm scale kits, then who knows?! -
N Scale Ballywillan, Co Longford.
David Holman replied to Kevin Sweeney's topic in Irish Model Layouts
Wowsers! -
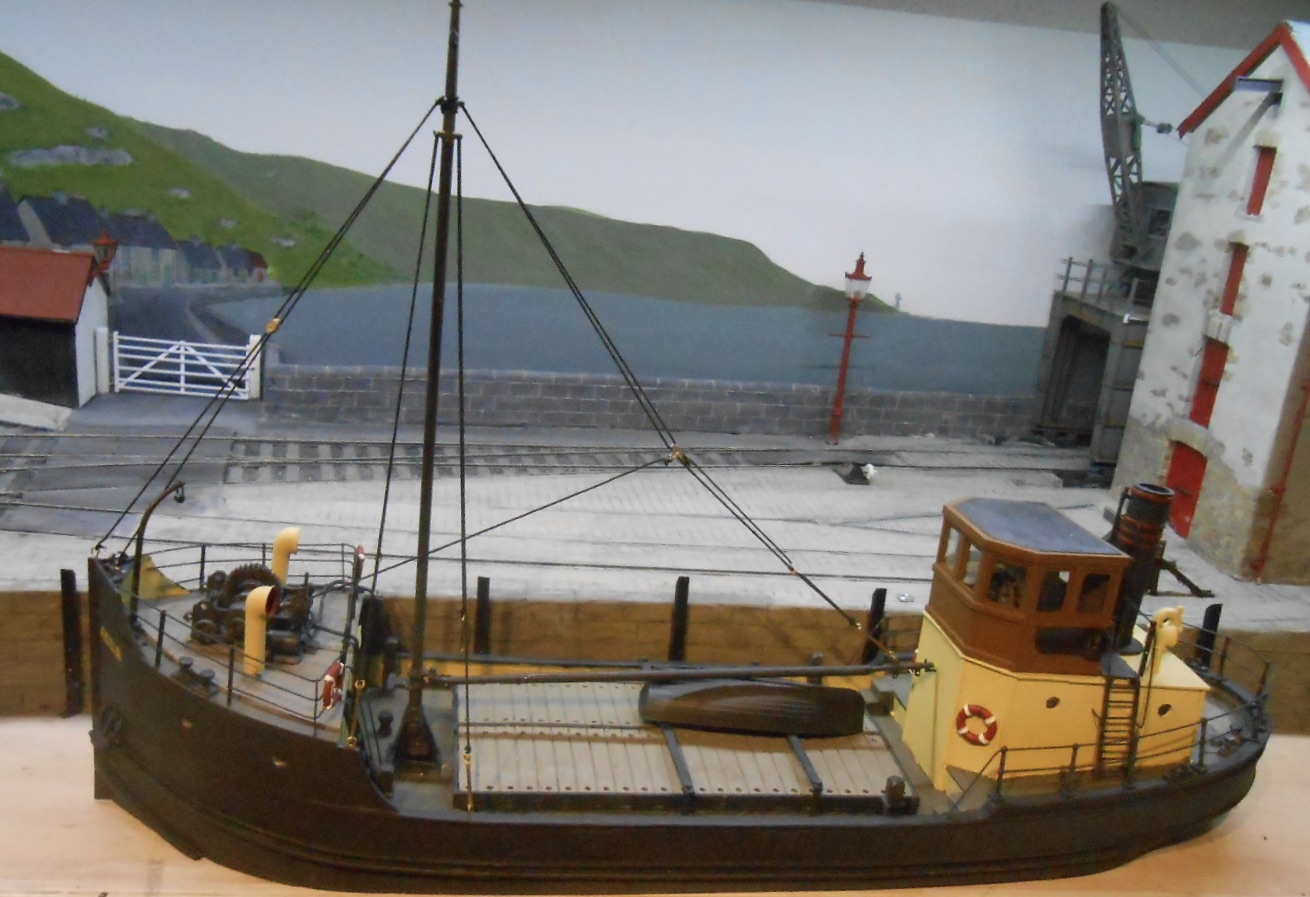
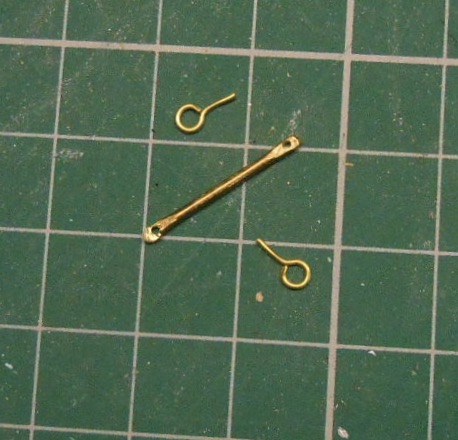
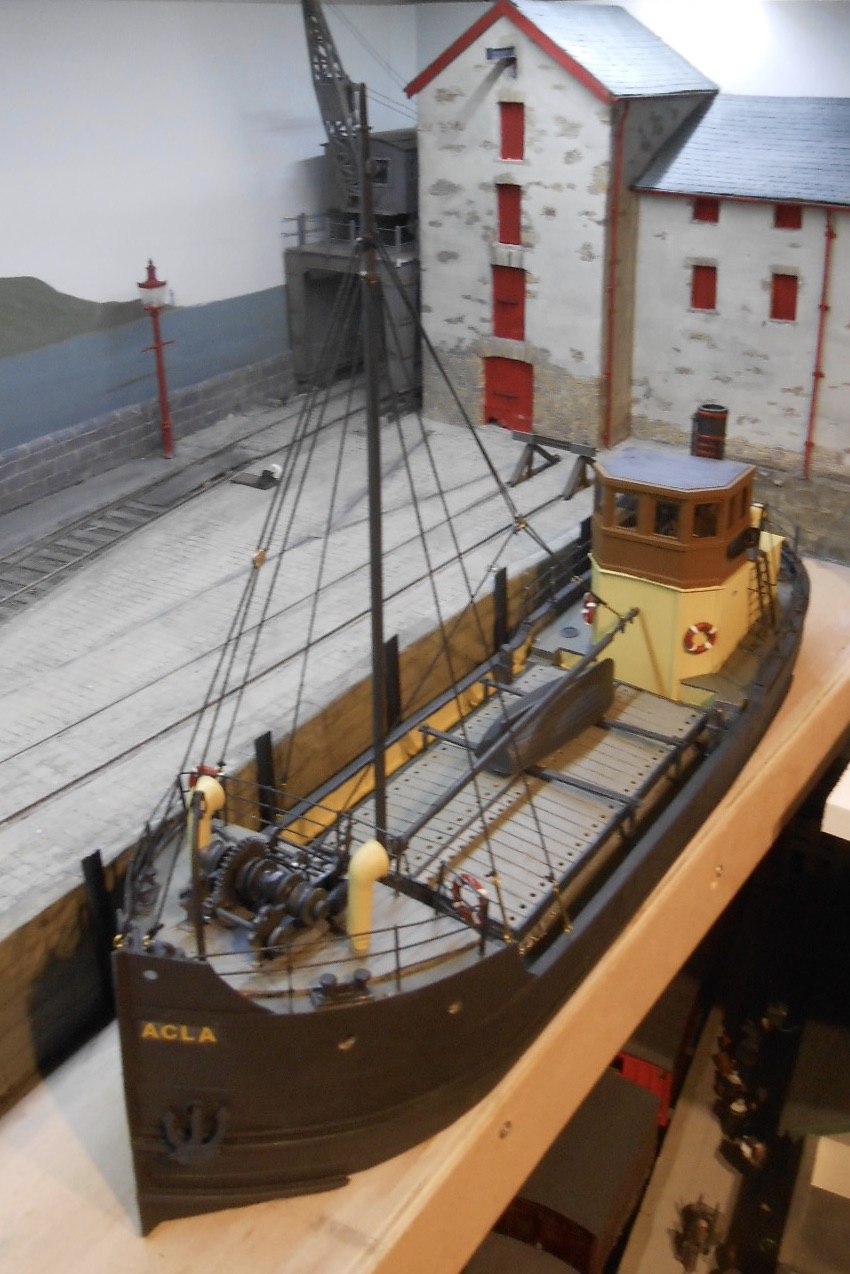
Frigging in the rigging No, not the name of one of the local beers produced in the Chatham Dockyard Brewery, though I could do with a bottle or three after trying to set up rigging on the Acla. Indeed, compared to a three hour crossing in a Force 9 between Cairnryan and Belfast a week last Friday, it would be a hard choice on which I'd do again in a hurry... ... and this is just a simplified version! The Langley instructions use the term "plumber's nightmare" to describe what doing the whole lot can be and looking at scale plans, am afraid I've taken the easy way out. Goodness knows what it must be like to include it all, let alone in 4mm scale! I've used elasticated thread, so that I can unplug the main mast for transport. There should be six lines [three each side, but I've only done two] from the mast, plus one to the bow and then the cabling to the derrick. Most of these lines use a type of adjustable "turnbuckle" affair to secure them to the hull. The model boat shop in the Historic Dockyard does sell working versions of these - and very nice they are too - but at £3.50 each, that wasn't going to happen. Instead, I fabricated [bodged] alternatives by flattening the end of some 1mm brass wire and then drilled holes in each end to take loops of .5mm brass wire to which I could then attach the thread. Those a 1cm squares below. To say that all of this was a bit of a faff is an understatement - likewise drilling out tiny white metal castings of pulley blocks, while threading elasticated thread through all of this was challenging to say the least. Ultimately though, it all came together [ish], as can be seen from the two main pictures. I would hate to have to rig a sailing ship!

-
Yep, everything is a compromise - even P4, so you just have to go with what you feel most comfortable with. Ultimately, pics like the one above show there are many other aspects which, if got right, really make model railway sing.
-
Templot do track plans for 20.2mm, which they call "Irish EM". Flangways are the usual 1mm, for 00 finescale. On Fintonagh, I've used these standards without problems.
-
Doing a few track plans helps me. It either develops the idea, or just scratches an itch! With me, the Swilly periodically comes up - not helped at the weekend by new books on the Donegal Society stand!
-
Brookhall Mill - A GNR(I) Micro Layout
David Holman replied to Patrick Davey's topic in Irish Model Layouts
Some really good photos here. Somebody is having fun methinks! -
I think they are merely snow spreaders - designed to clear a path either side of the track, presumably to reduce the chances of it building up on the rails again.
-
While overall, the 'Irish Market' may be small compared to GB, there is no doubt that any and every announcement of something then creates a lot of interest and enthusiasm, as per the posts above. The problem is that it may not be enough in terms of overall sales to make it worthwhile. And yet... ... increasingly we see what can only be described as 'niche' models being released over here that you have to wonder who is going to buy them? The 10800 prototype diesel, the Leader, even Big Bertha, the Lickey Banker. How many can justify one of those?? So perhaps there is yet hope for more Irish stuff, though will not hold my breath for anything in 7mm scale!
-
It is a curious fact that models of dmus and railcars are almost always more attractive than the prototype!
-
Have used the Archer rivets, which a very good, so fingers crossed for you.
-
Check out my Midland Great Western Mail Train thread (now on page 2), for how I did the lining on the Achill Bogie.
-
Adapting Hatton's coaches is almost a throwback to modelling a generation or more ago. Hornby clerestories were a case in point for any pre grouping stock and no doubt there were many who learned useful skills in adapting them, so perhaps history will repeat itself? No bad thing, in my opinion. Current models are stunning compared to what came before, but there is nothing quite like making something your own to get real satisfaction. It may just be 're lettering or numbering, a bit of detail here or there, but suddenly it is yours, not just something out of a box. Will we get the basis of some steam outline locos to go with the six wheelers? It would be nice to think so!
- 703 replies
-
- 10
-

-

-
Great pics! The combination of models and the real thing is just perfect.
-
Seemed like many of the great and good were there... and me too
-
Great to see so many folk today and put faces to names, not least JHB. The best venue anywhere for a model railway show? I don't know of a better one! Many thanks for the hospitality and support from all the organisers, especially Ian and his wife from Friends of Cultra, plus so many kind comments from visitors. Likewise J-Mo for helping out with the operating too. Thoroughly enjoyed the day.
-
Well, made it to Cultra this afternoon and the layout is set up and (hopefully) ready for Saturday. Lovely to see all the main exhibits and to pitch up in front of Railcar 1, masquerading as Donegal 10. An interesting trip, shall we say, starting with a battle with Just Say No activists, who made it impossible to access the Dartford tunnels on Wednesday morning. A half hour trip turned into three hours... After an overnight stop to see my mother, headed further up the A1 to Ripon and then across the Pennines to Dumfries. This morning, got the Stena ferry to Belfast. Greeted by the captain saying it wouldn't be a good idea to go outside as the combined wind speed of ship into gale was adding up to 80mph! Turned out it wasn't even a good idea to try standing up in waves close to 20 feet from trough to crest, though things improved once we turned into Belfast Lough. Belfast traffic meanwhile has not improved since we were here last time, but has it anywhere ? At least it wasn't raining while we unloaded. Very much looking forward to the show!
-
Tasty!
-
Will always be one of my favourite museums. The railway hall is just fabulous, whether it be the Queen, the C&L 4-4-0, horse tram or any number of exhibits. This time, it will be Donegal Railcar 10, or more properly CVR No1, where Fintonagh will be. Before that, the small matter of gales on the crossing tomorrow morning!
-
The museum website has been saying the show doesn't open until 11am, when in fact it is 10am, like the rest of the place and closes at 4pm
-
N Scale Ballywillan, Co Longford.
David Holman replied to Kevin Sweeney's topic in Irish Model Layouts
Coming along rather well! -
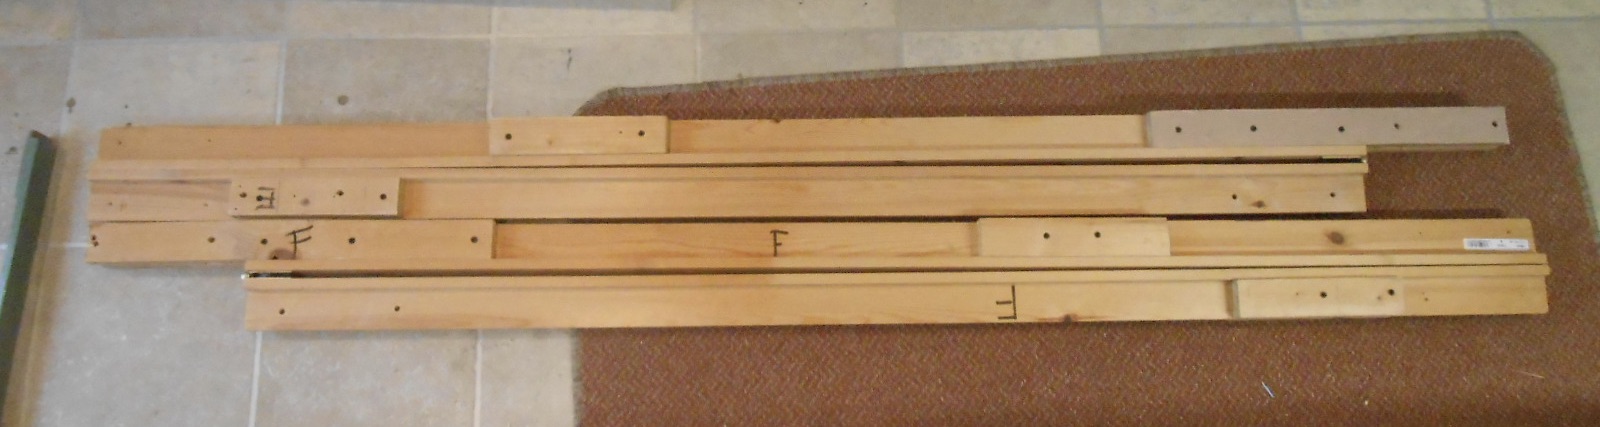
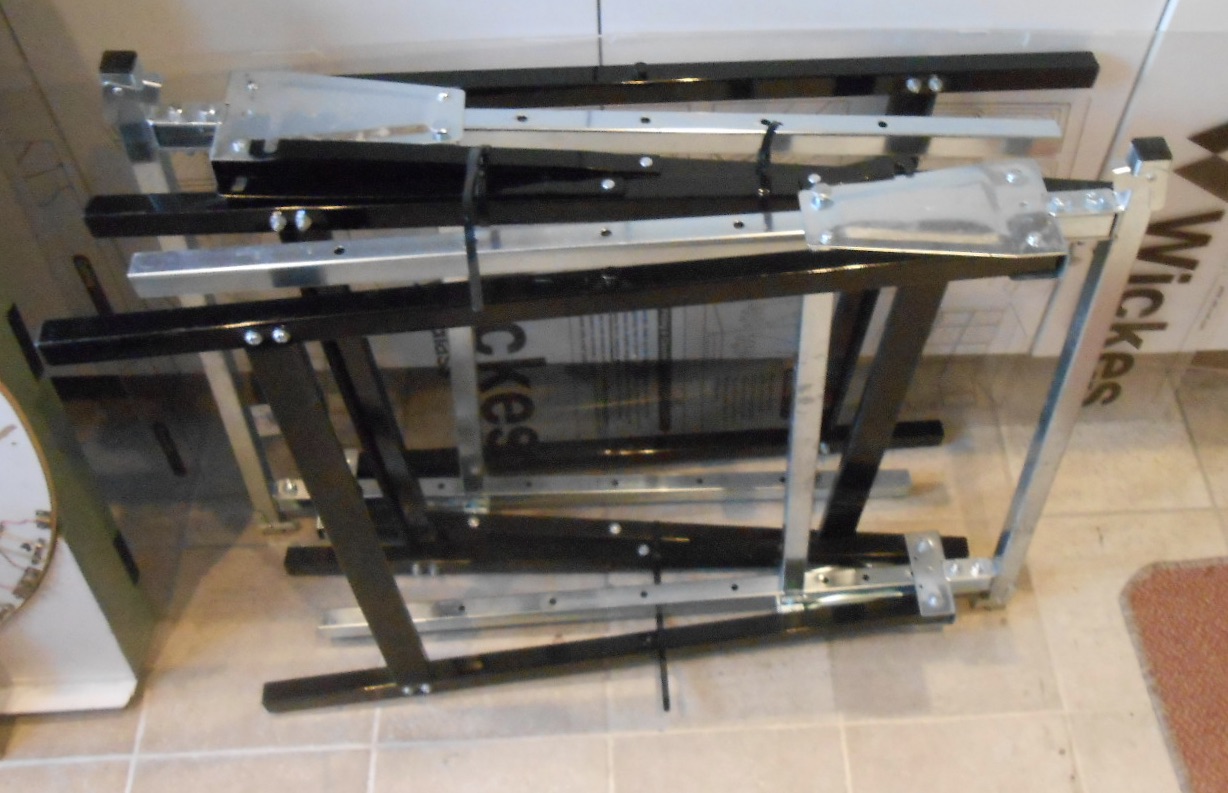
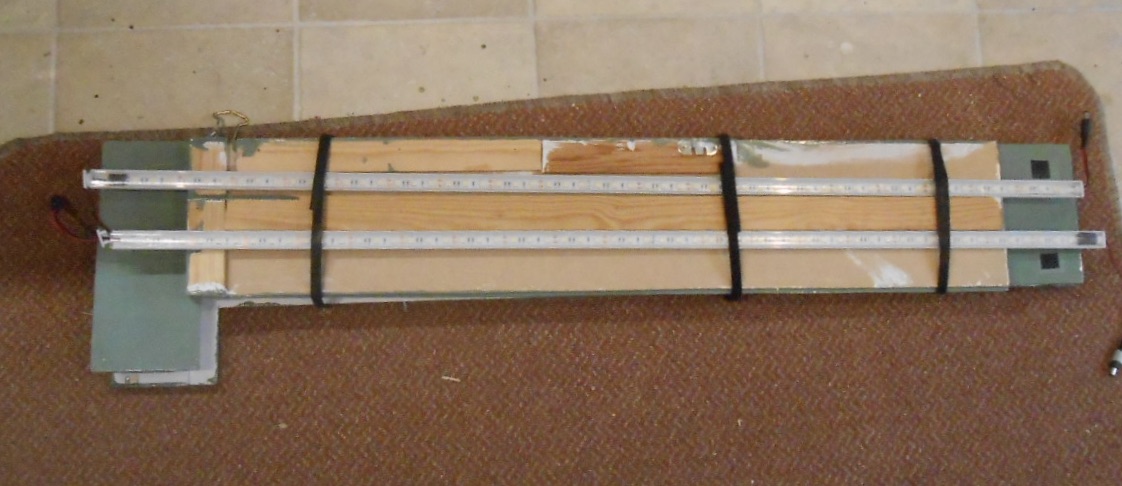
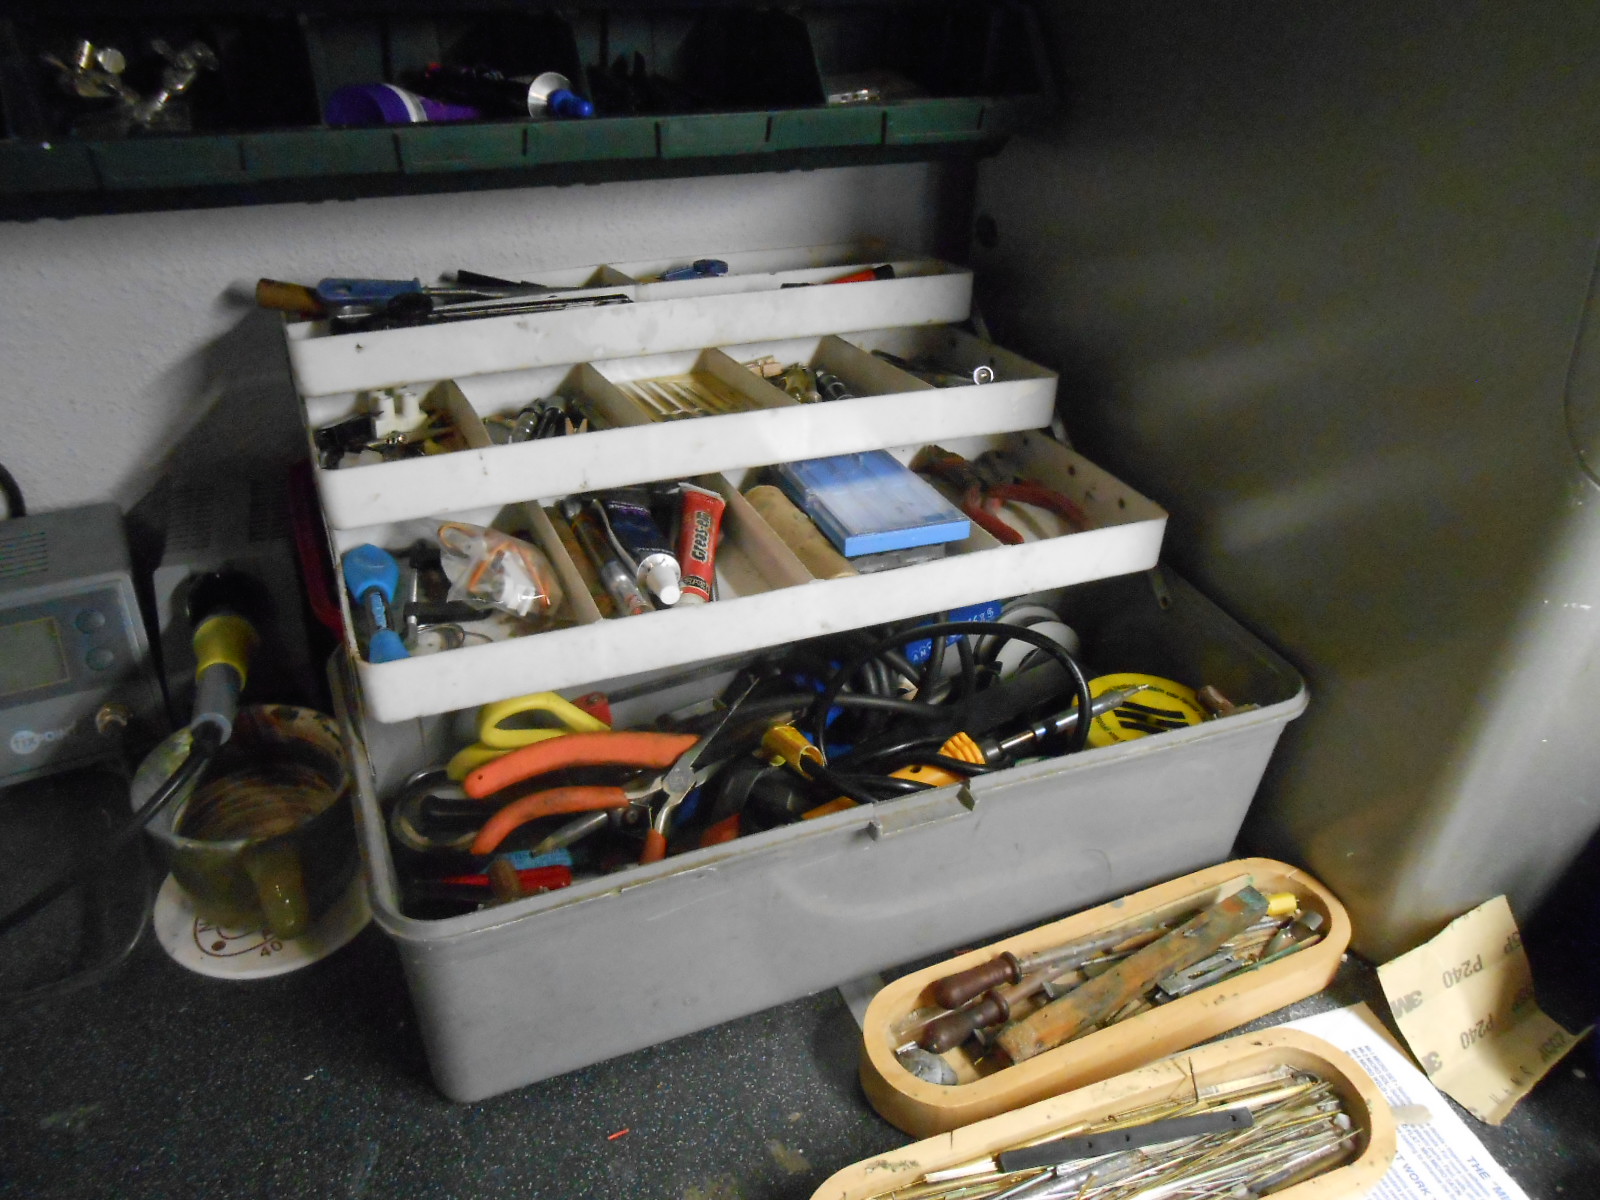
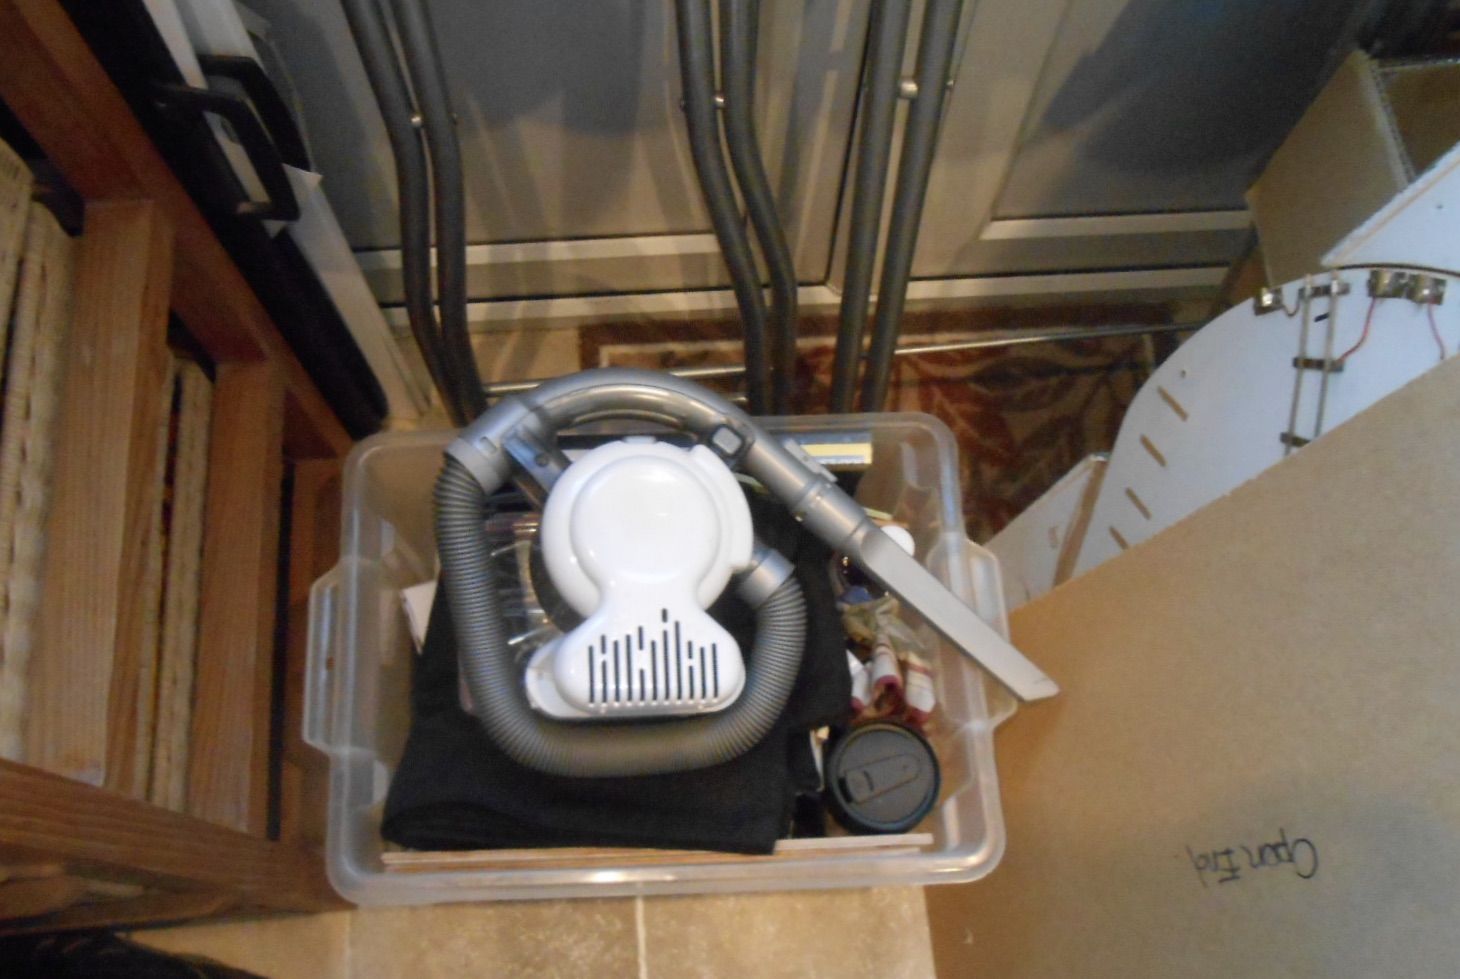
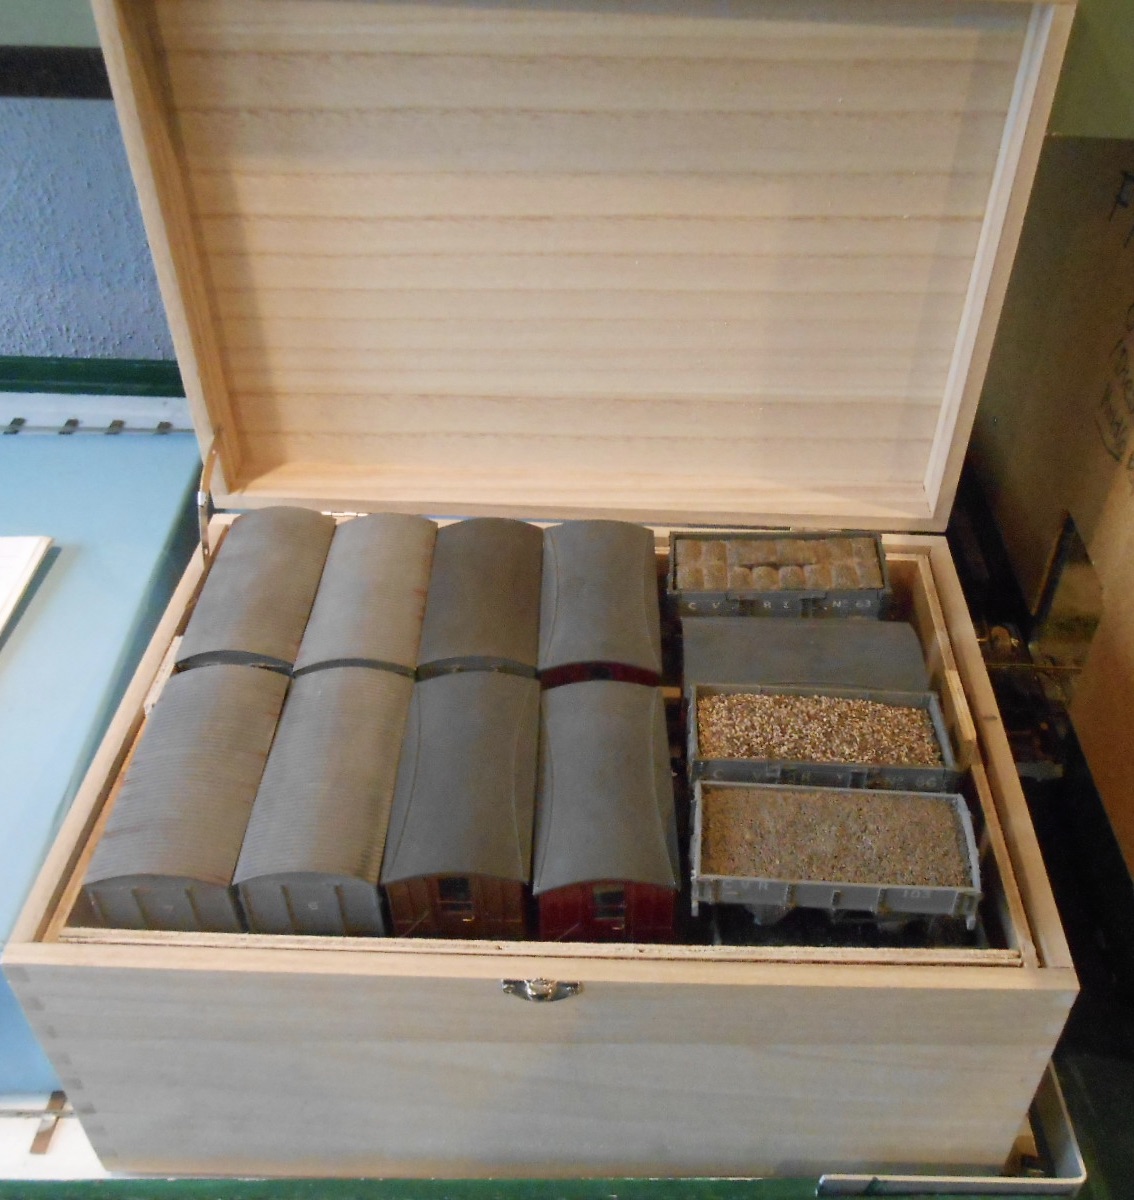
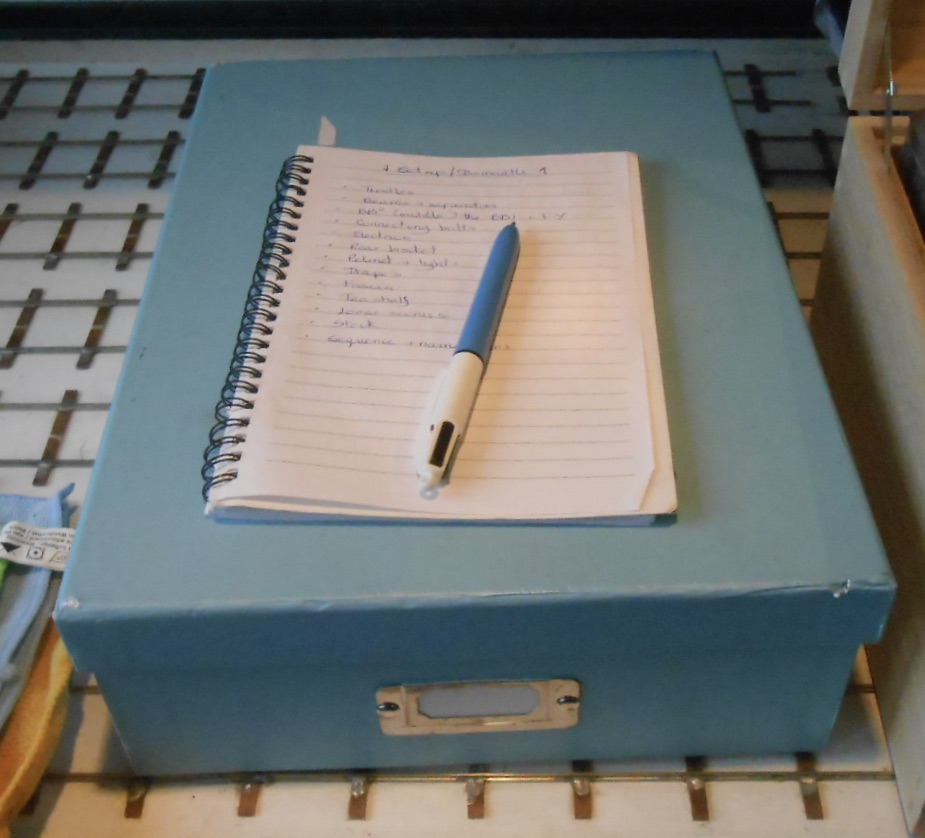
Exhibition Stuff Watching a young couple fussing over their new baby in town the other day, it struck me that the amount of stuff they need to cart around for their baby is not unlike what exhibitors need to take a layout to a show. Ok, thankfully not nappies and feeding stuff, but no matter how hard you try, the amount of extras required to take a layout on the road often takes up as much space as the baseboards themselves. Later this week, Fintonagh starts its 1000 mile round trip from Kent to Belfast, so have been going through all the necessary stuff, in the hope I don't leave anything behind! First, there are the two baseboards of course, plus the fiddle yard Next comes the support framework: two folding beams and two adjustable trestles The pelmet and fascia, plus the two lighting strips and rear bracket make up the rest of the infrastructure Two very important items are my tool box [hopefully enabling any minor repairs] and what I call the 'sundries crate'. The latter has all the other essential bits and pieces such as all the electrics [transformers, controllers, extension leads], drapes, cleaning materials,[including portable vacuum], fixing bolts etc. There is also the all important notebook, which details loading in the car, setting up, train formations and the ability to record any issues before the next outing. Two more boxes contain the locos/ rolling stock and the loose scenic items such as road vehicles and the pub [which covers the baseboard join]. A couple of bar stools complete the ensemble All this needs to be carefully loaded into the car and hopefully leaving room for personal luggage! It also has to be well secured too, for there is nothing worse than undertaking a long trip only to find that a few miles in, something has come loose and you then have to put up with an annoying rattle. Given the state of many of our public roads, there is also the worry that your layout might be reduced to kit form by the time you arrive, while this time there is the added issue of the sea crossing from Cairnryan to Belfast - which is currently forecast for gales on Friday... Wish me luck!
- 266 replies
-
- 15
-
-

-

-
Lovely work, Ken and notes have been taken for when I get round to detailing Northport Quay! Great to hear you are also coming along well too.