David Holman
-
Posts
4,359 -
Joined
-
Last visited
-
Days Won
117
Content Type
Profiles
Forums
Events
Gallery
Blogs
Store
Community Map
Everything posted by David Holman
-
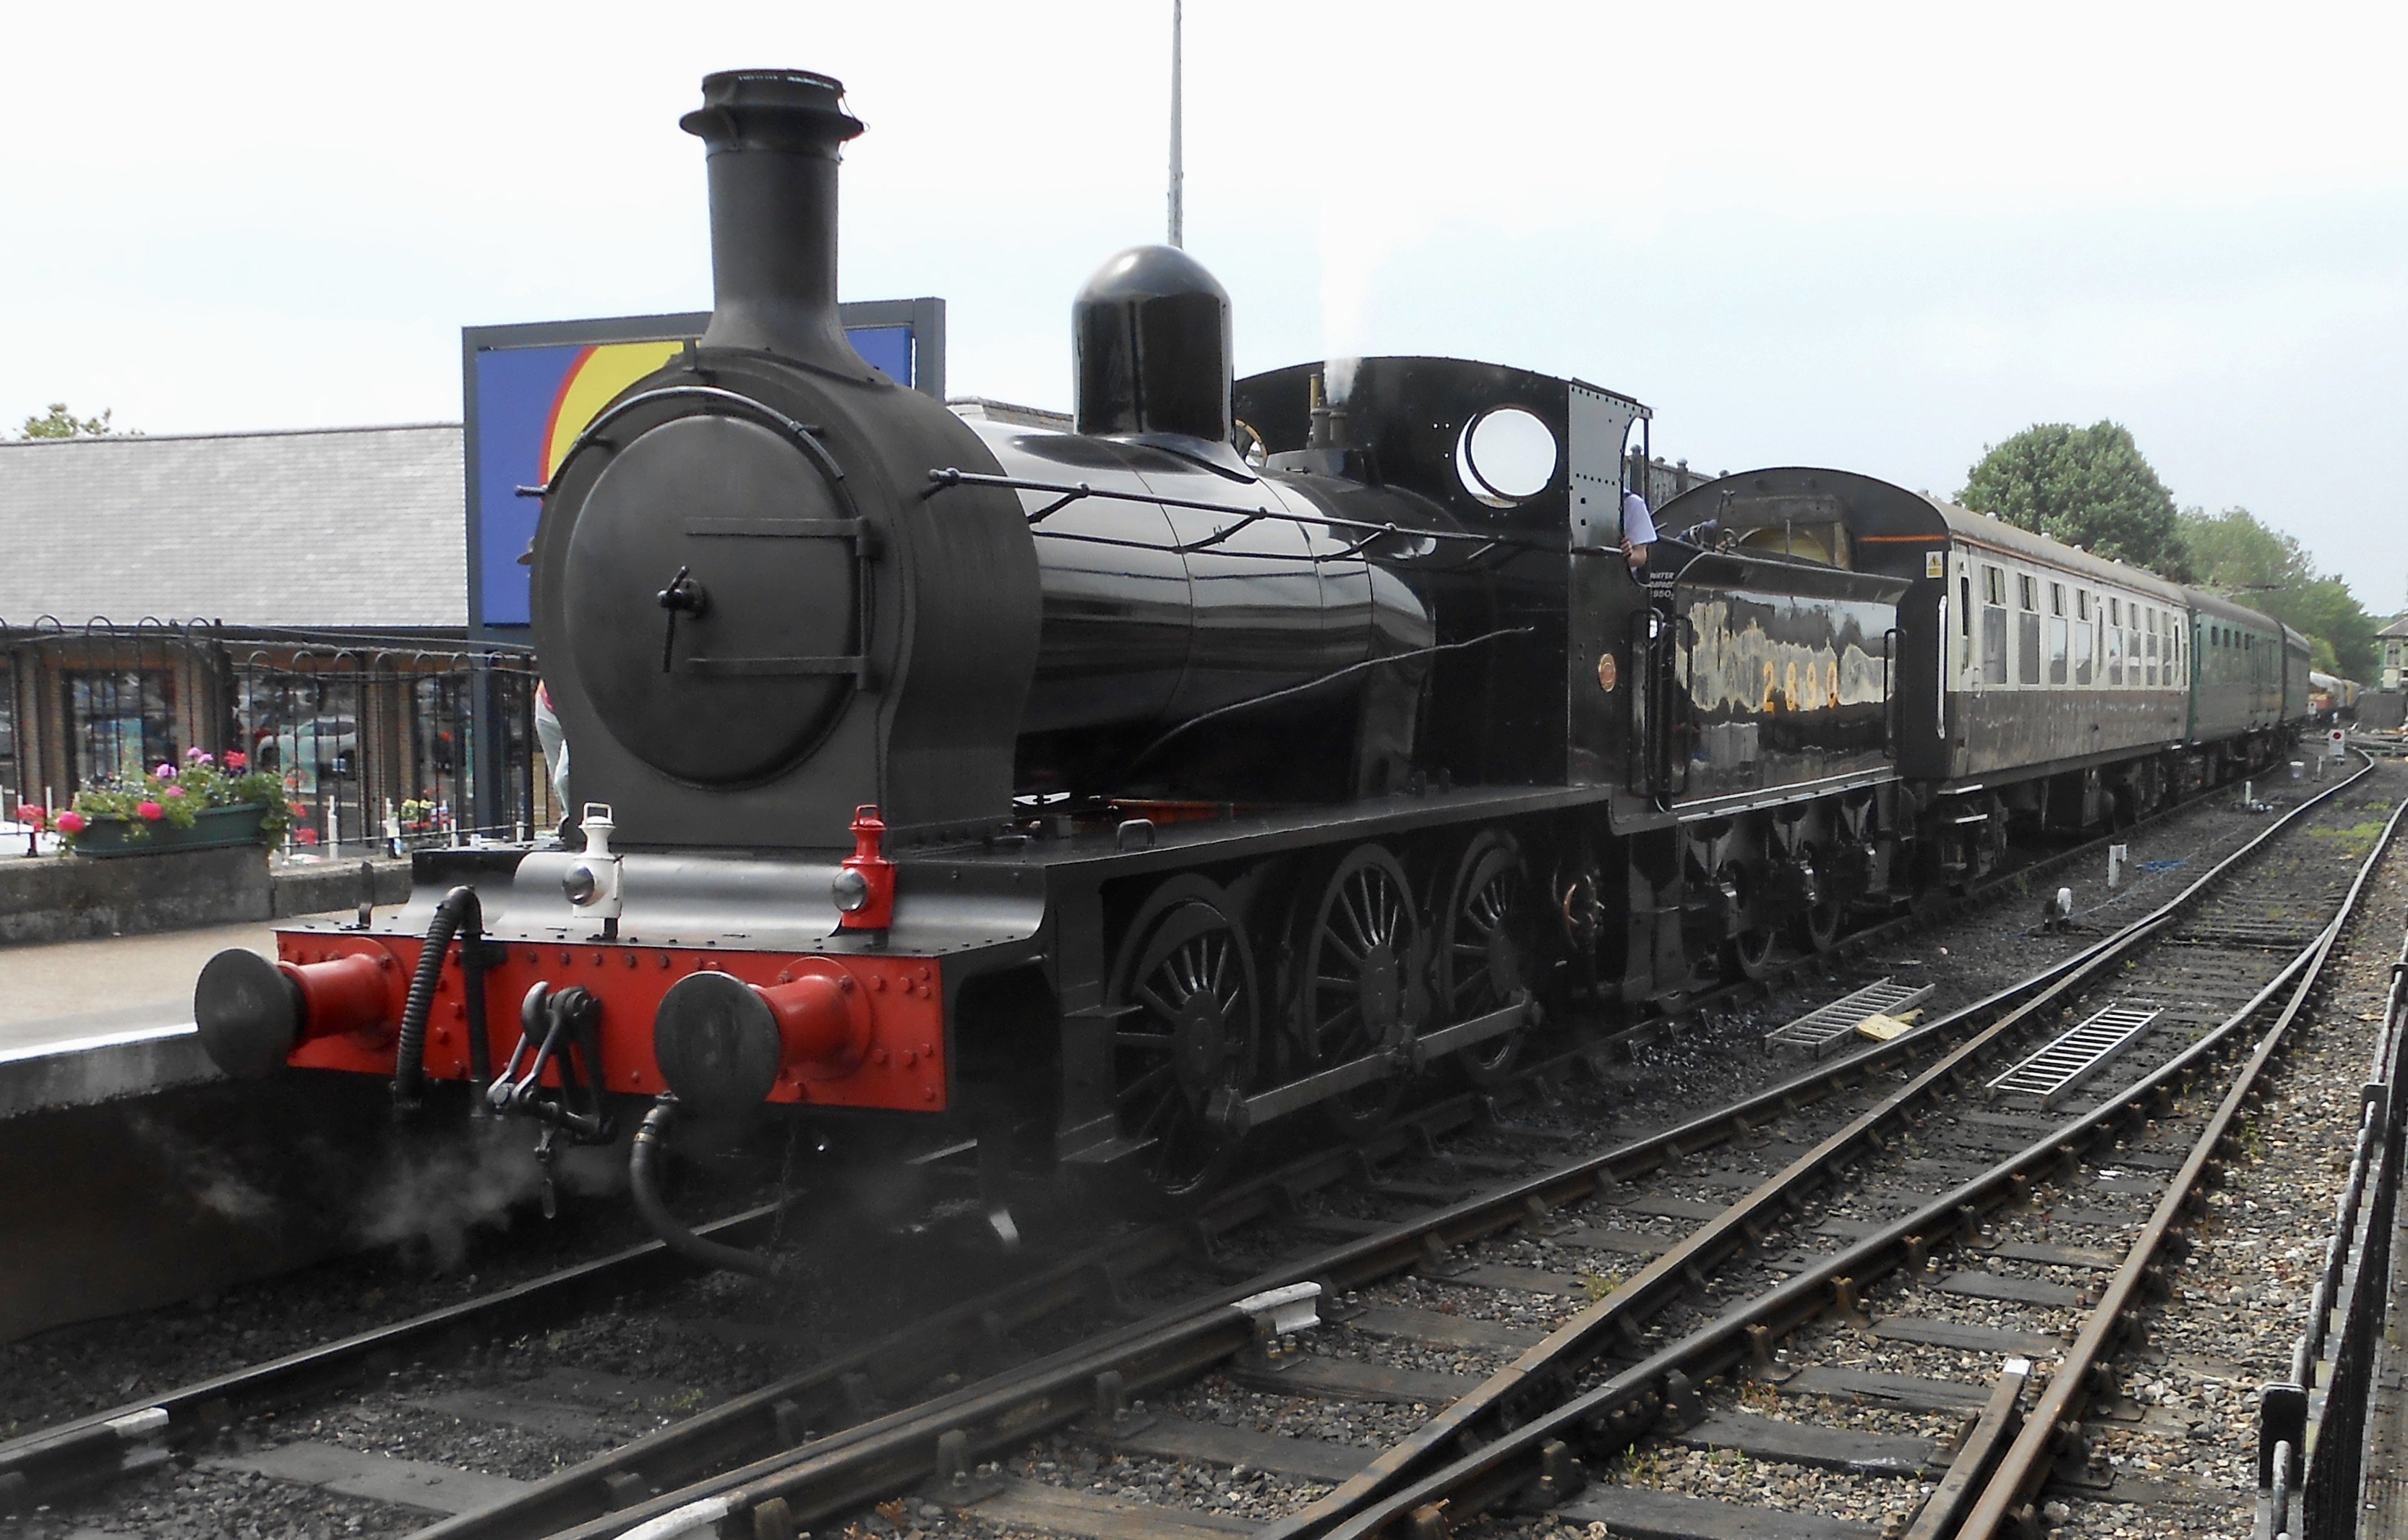
Went to the Spa Valley Railway yesterday for a birthday treat and came across this curious beastie. A strange hybrid to say the least, so double House Points if, unlike me, you know its ancestry. Not even remotely Irish of course, but begs the question of what 'might have beens' could be created on the other side of the water...? The answer to this loco's heritage is that it is a bog standard Hunslet Austerity/LNER J94 0-6-0ST. It belongs to a private owner, though before that spent time at Longmoor and also at Swindon, where after fitting Kylchap ejector and mechanical stoker was tested with a dynamometer car and produced almost 900bhp! Anyway, after time on the Bristol Suburban Railway and Dart Valley/South Devon Railway, it found its way to Mid Hants, where they removed the saddle tank and bunker before adding a Fowler 3500 gallon tender. All this to turn it into 'Douglas' from the Thomas the Tank Engine stories. Since then, it has been at the Ribble Steam Railway and is now based on the East Lancs Railway, but is at Tunbridge Wells on loan at the moment. Quite the wanderer! Anyway, thought it interesting enough to share. Given the very limited numbers of preserved Irish locos, can't think for a minute that the IRPS will want to do anything similar, but equally, found myself wondering what conversions or adaptions were proposed back in the day - after all the Great Northern certainly based some of their 4-4-0s and 0-6-0s on the same underpinnings. Will look forward to seeing both facts and fiction.

-
Brookhall Mill - A GNR(I) Micro Layout
David Holman replied to Patrick Davey's topic in Irish Model Layouts
Louvres have to be one of the most awkward things to do in a building. Not seen ones made of wiggly tin before, but suspect that wear and tear would soon give an uneven finish. -
Presumably, there are decent sound chips available? The Chatham Club have a big 00 layout. Wonder if anyone is interested?!? There again, we have an 0 gauge layout too. Heljan do a Deltic, I think, so couple of grand for one of these and eight Mark1s should make for a nice bit of nostalgia - or maybe not!
-
Not bad, but only six on and 25mph. Now imagine one with 13 coaches, over 400 tons, full throttle, around 85mph on the climb to Peascliffe Tunnel. The two tone green my favourite - worked pretty well on all the BR diesels, though steam locos, where they still existed, we're pretty filthy by then.
-
And worth every penny. What a stunner.
-
Black, see my MGWR Mail Train thread in this workshop section. At least the wheels are green.
-
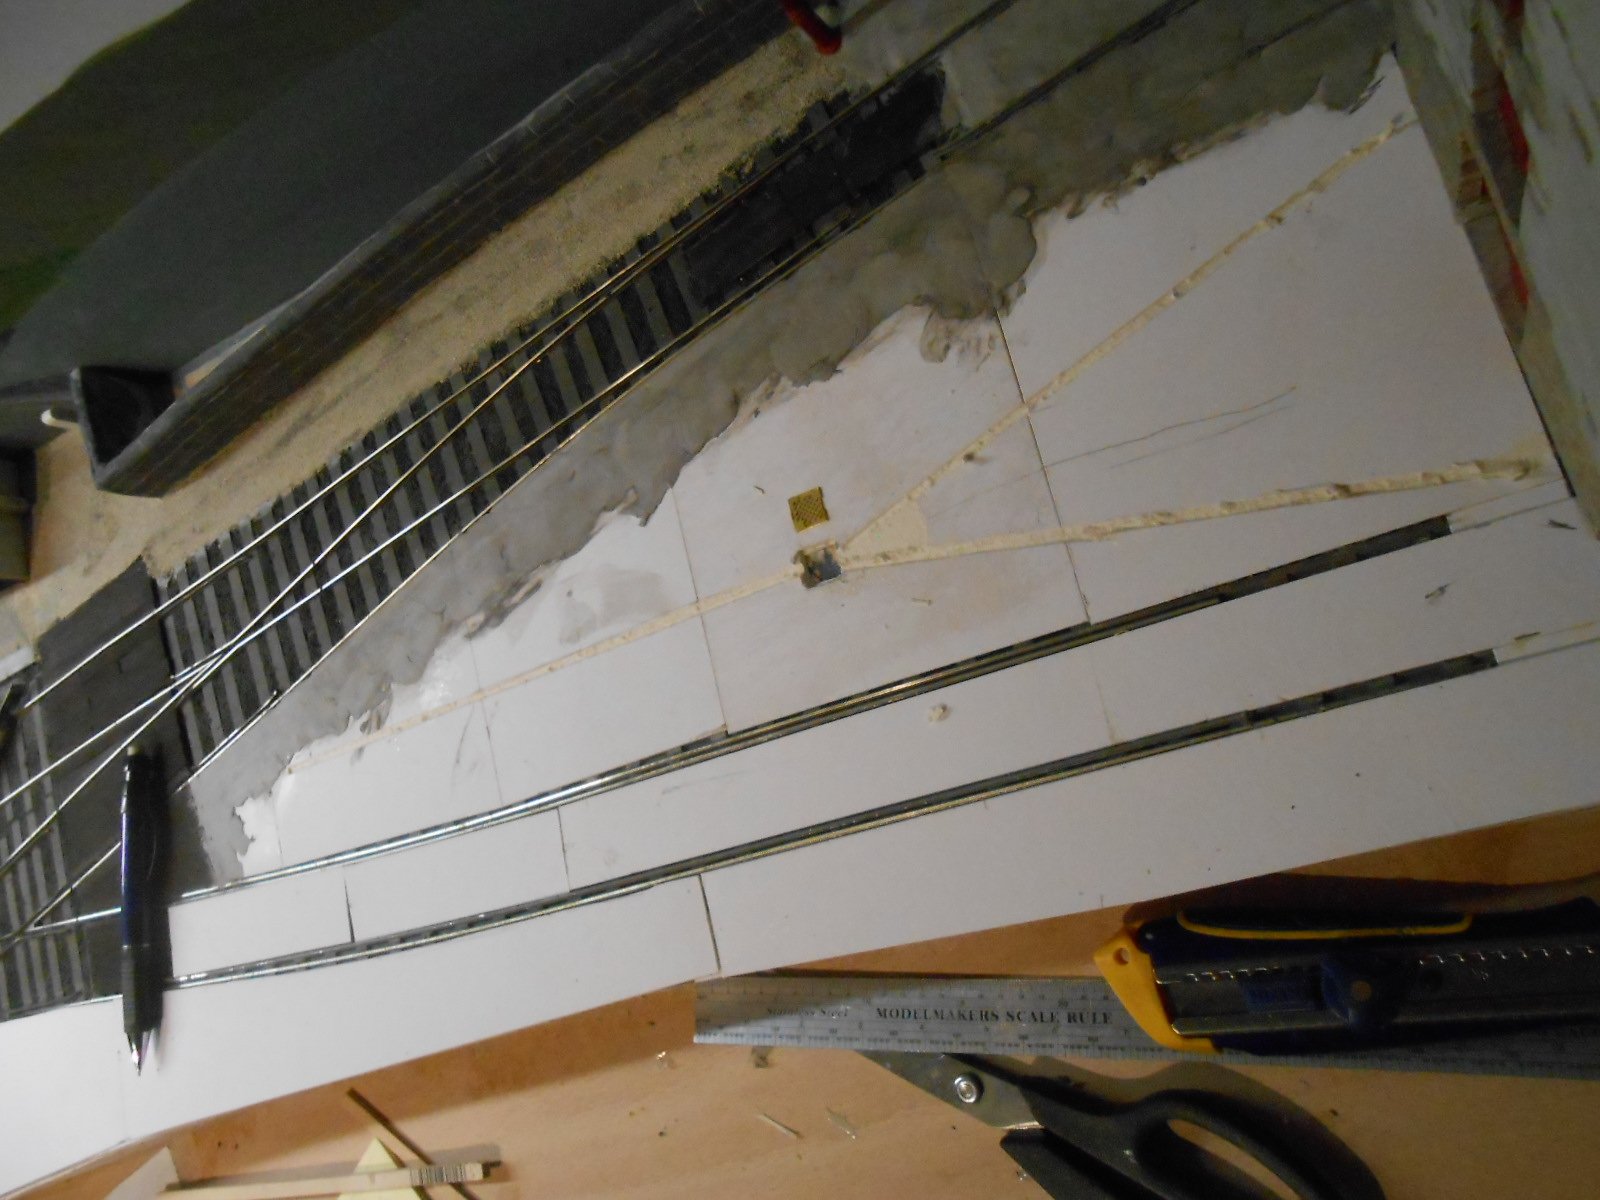
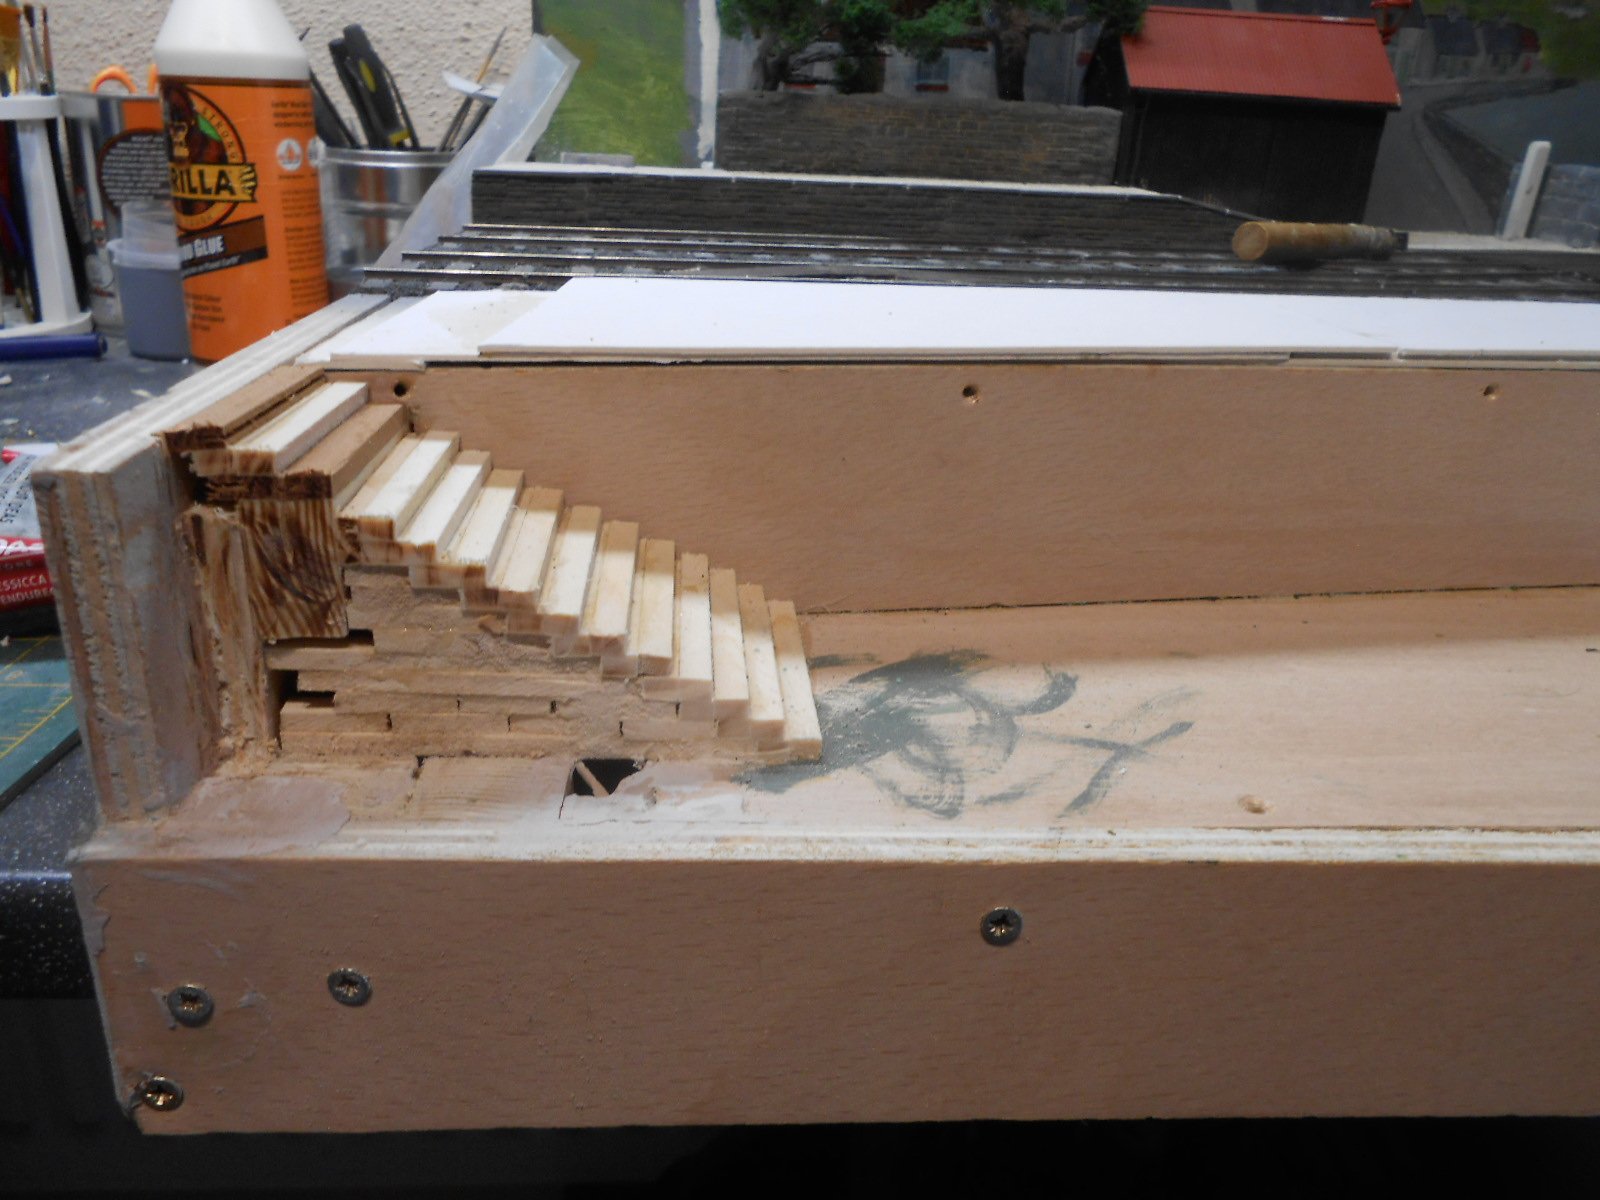
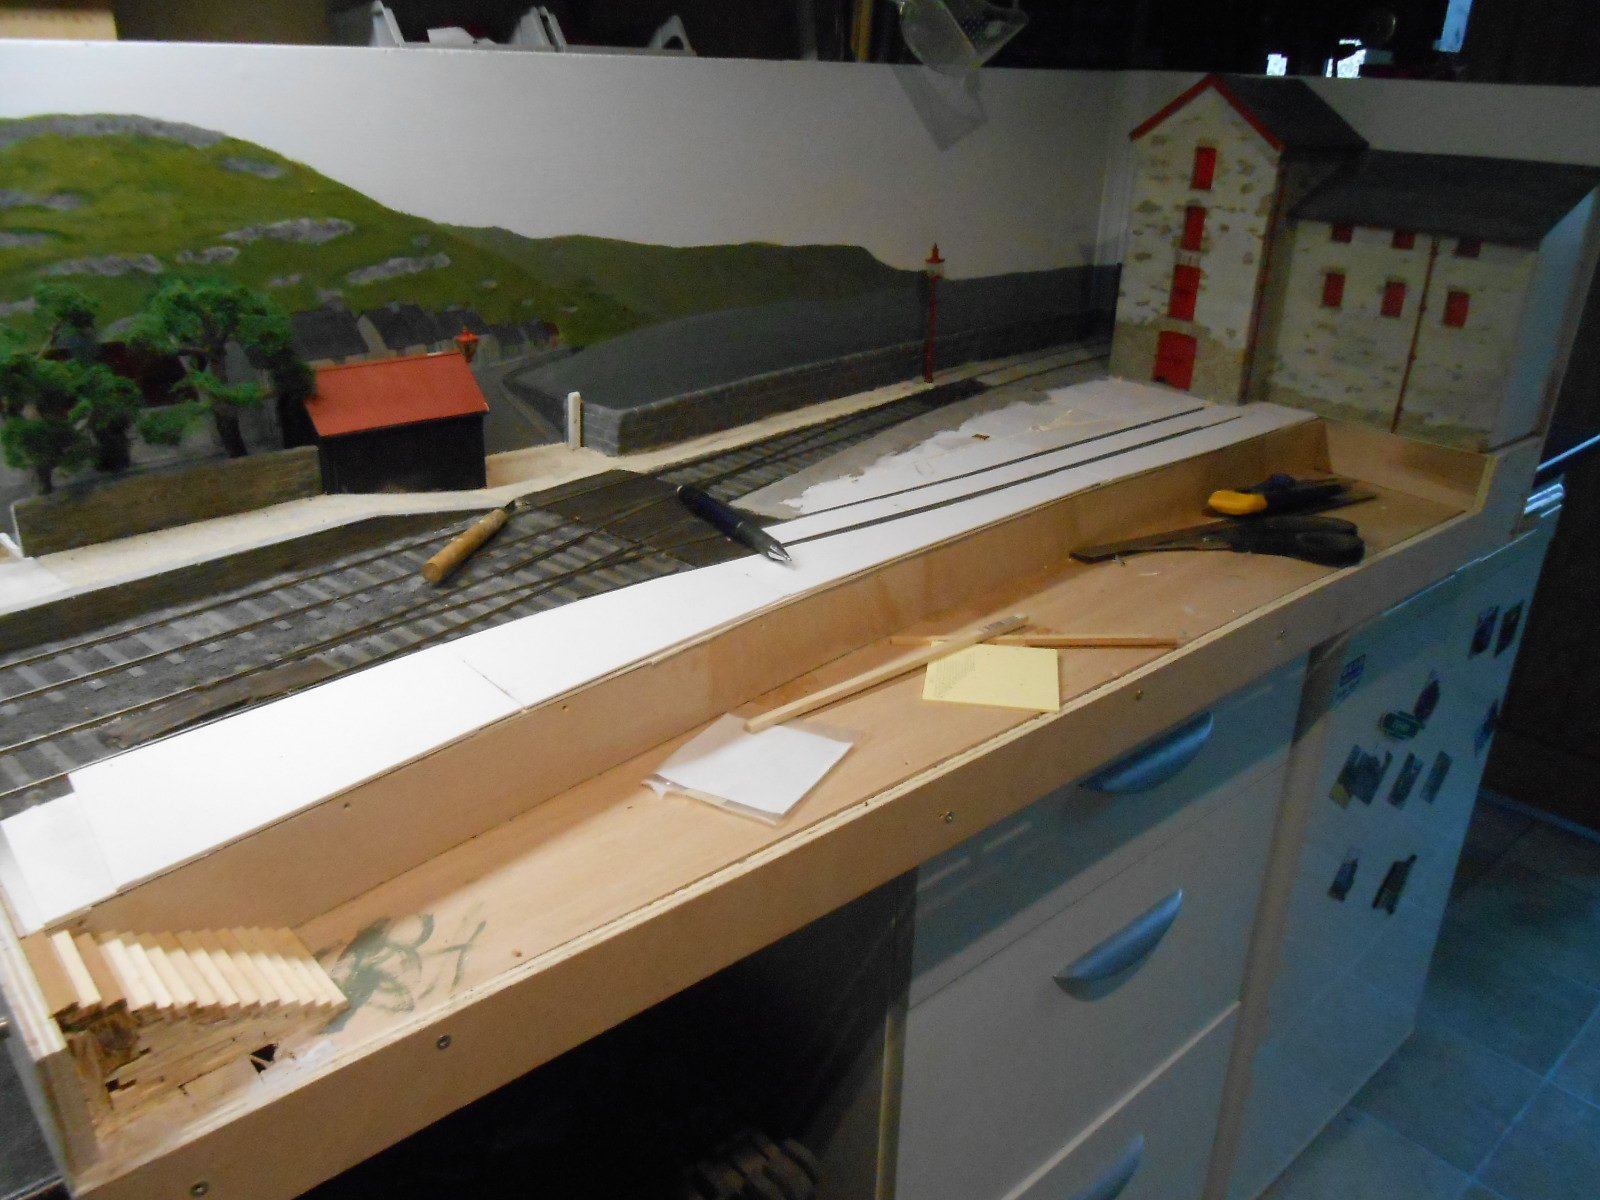
Very much work in progress at the moment, doing the ground cover on the right hand baseboard. First up, used some DAS to bring the approach road level with the board crossing, then painted it [and the area between the track and the sea wall] with gloss black, before covering with chinchilla dust. Next came an attempt to create some steps leading down from the quayside to what will be the embarkation point for the small passenger ferries to offshore islands. As can be seen, this has been built up from wood strip & will eventually be covered [like pretty much everything else] in more DAS. Currently am building up the rest of the ground cover, as per the other board, with two layers of mounting board, which will then be given a layer of you know what, before scribing commences for setts & so on. Hopefully, you can see narrow troughs have been cut into the card to represent drainage channels. Not exactly pretty at the moment!
- 242 replies
-
- 11
-

-
Green frames may be needed, JB. Hopefully not too difficult once I get round to it.
-
Sounds like my Wolf Dog needs some attention then...
-
Sutton Locomotive works too. It will be interesting to see what Model Railway Journal make of the new Deltic. Nothing if not picky, but willing to praise where it is due and you'd certainly think they should. Grew up to the sound of those Napiers on the ECML and saw them all eventually. Always looked forward to being hauled by one when going to/from college in London. Drivers seemed to enjoy the extra power over a class 47 and you always got 100mph down Stoke Bank. Best run though was on the Aberdeen Mail, which always loaded to 15 bogies or more and did Grantham to Newark (just over 14 miles) start to stop in 12 minutes 30 seconds, hauling well over 500 tons. It was dark, so couldn't get actual speed by timing the mileposts, but the demonic howl from those engines was quite something. Likewise a growing concern that we weren't going to stop at Newark, but we did, just! However, when the 125s arrived, it was another step up in speed, when I found we'd got to Grantham (105 miles from Kings Cross) in exactly an hour. Somehow not as iconic as a Deltic though... The name Deltic comes from the triangular arrangement of the cylinders. It wasn't unknown for one to much a hole in the engine casing - pretty catastrophic and known to crews as 'putting a leg out of bed'. I believe that riding in the engine compartment was not advised at speed for that very reason.
-
Interesting! Never been keen on the Jarvis stuff, while fine granite can look very green - but certainly not here! Still find Woodland Scenics hard to beat and use their fine ash even in 7mm. They do several colours and mixing the pale with brown can work well for newish ballast. I think the stuff is made from crushed coconut shells, so is fairly light too. A pox on my spellchecker - substituted Jewish, for newish. As if, already....
-
Brookhall Mill - A GNR(I) Micro Layout
David Holman replied to Patrick Davey's topic in Irish Model Layouts
Splendid! -
What Sean says about sleeper density is certainly interesting, because the big issue with Peco Code 100 is just that - it has never been right, even for 'standard' gauge. The new Code 75 looks better, even portraying 5'3, because rail size and sleeper spacing are correct for 00 track on these islands. Let's hope other manufacturers pick up on what Peco have done. In some ways, it is perhaps surprising that we don't see 3mm Irish models on 16.5 track, but on the other hand, considering the lack of anything rtr in that scale it makes more sense to do as per the wonderful Ballyconnell Road and do the right gauge in the first place. Another way of doing Irish broad and narrow is to do American 0 Gauge, which is 1:48. 32mm track is pretty close, while 18mm, EM is spot on for 3' of course and there are plenty of scenic items like figures and road vehicles available. Unfortunately, wheels are a big problem because a 36mm wheel would have fewer spokes in 7mm scale (5'2) than 1:48, where it would be about 6'. Anyway, enough of that - makes my brain hurt just thinking about it!
-
Brookhall Mill - A GNR(I) Micro Layout
David Holman replied to Patrick Davey's topic in Irish Model Layouts
Yep, piece of cake next time! Perseverance and patience the watch words in our hobby. Well worth all the effort. -
Brookhall Mill - A GNR(I) Micro Layout
David Holman replied to Patrick Davey's topic in Irish Model Layouts
The trials of portable layouts! The main advantage of DAS is that it means you can scribe round corners, to avoid ugly joints when using embossed materials. However, quoins (why does my spellchecker offer Wilkins????) cover that up if you use thin card and fold it round the corner. Weight is a real issue on portable layouts though, you build a nice set of lightweight boards and then make them heavy with wiring, scenery and buildings! One way out is to use lightweight filler for scenics. Strange stuff as compared to the ordinary mix, it feels like the box/tub is empty. Much merit in filler anyway as you can mix in pva to stop it chipping and pre colour with water colour paint too. Doesn't scribe as well as DAS, which is why foamboard a good base for buildings. -
Brookhall Mill - A GNR(I) Micro Layout
David Holman replied to Patrick Davey's topic in Irish Model Layouts
Looking at the photos, would think thin card would work for the quoins, especially if you sand the DAS back a bit. -
Good stuff. Would think Eileens Emporium will have PB wire. Another alternative would be steel piano wire, while also likely an Amazon search would suffice. When I bought my mini lathe, got brass rod offcuts very cheaply that way.
-
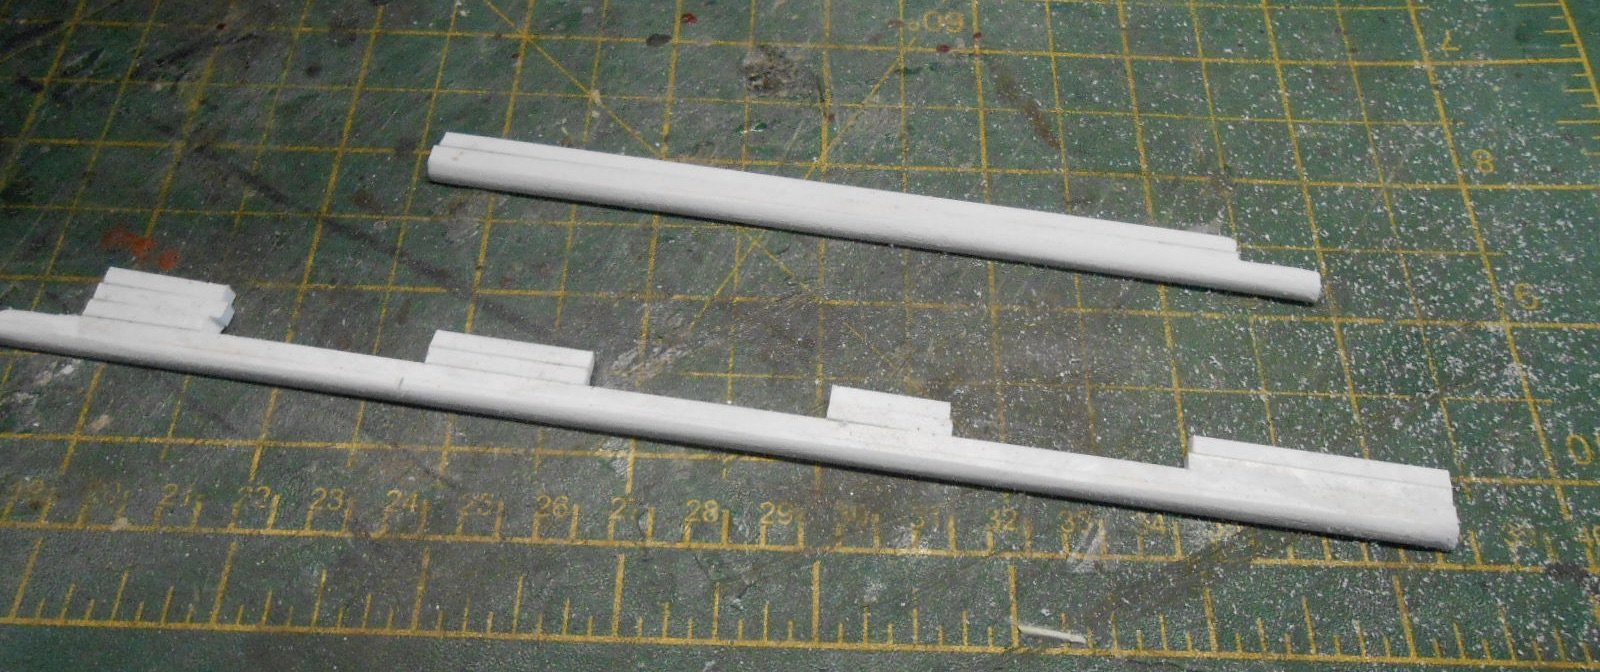
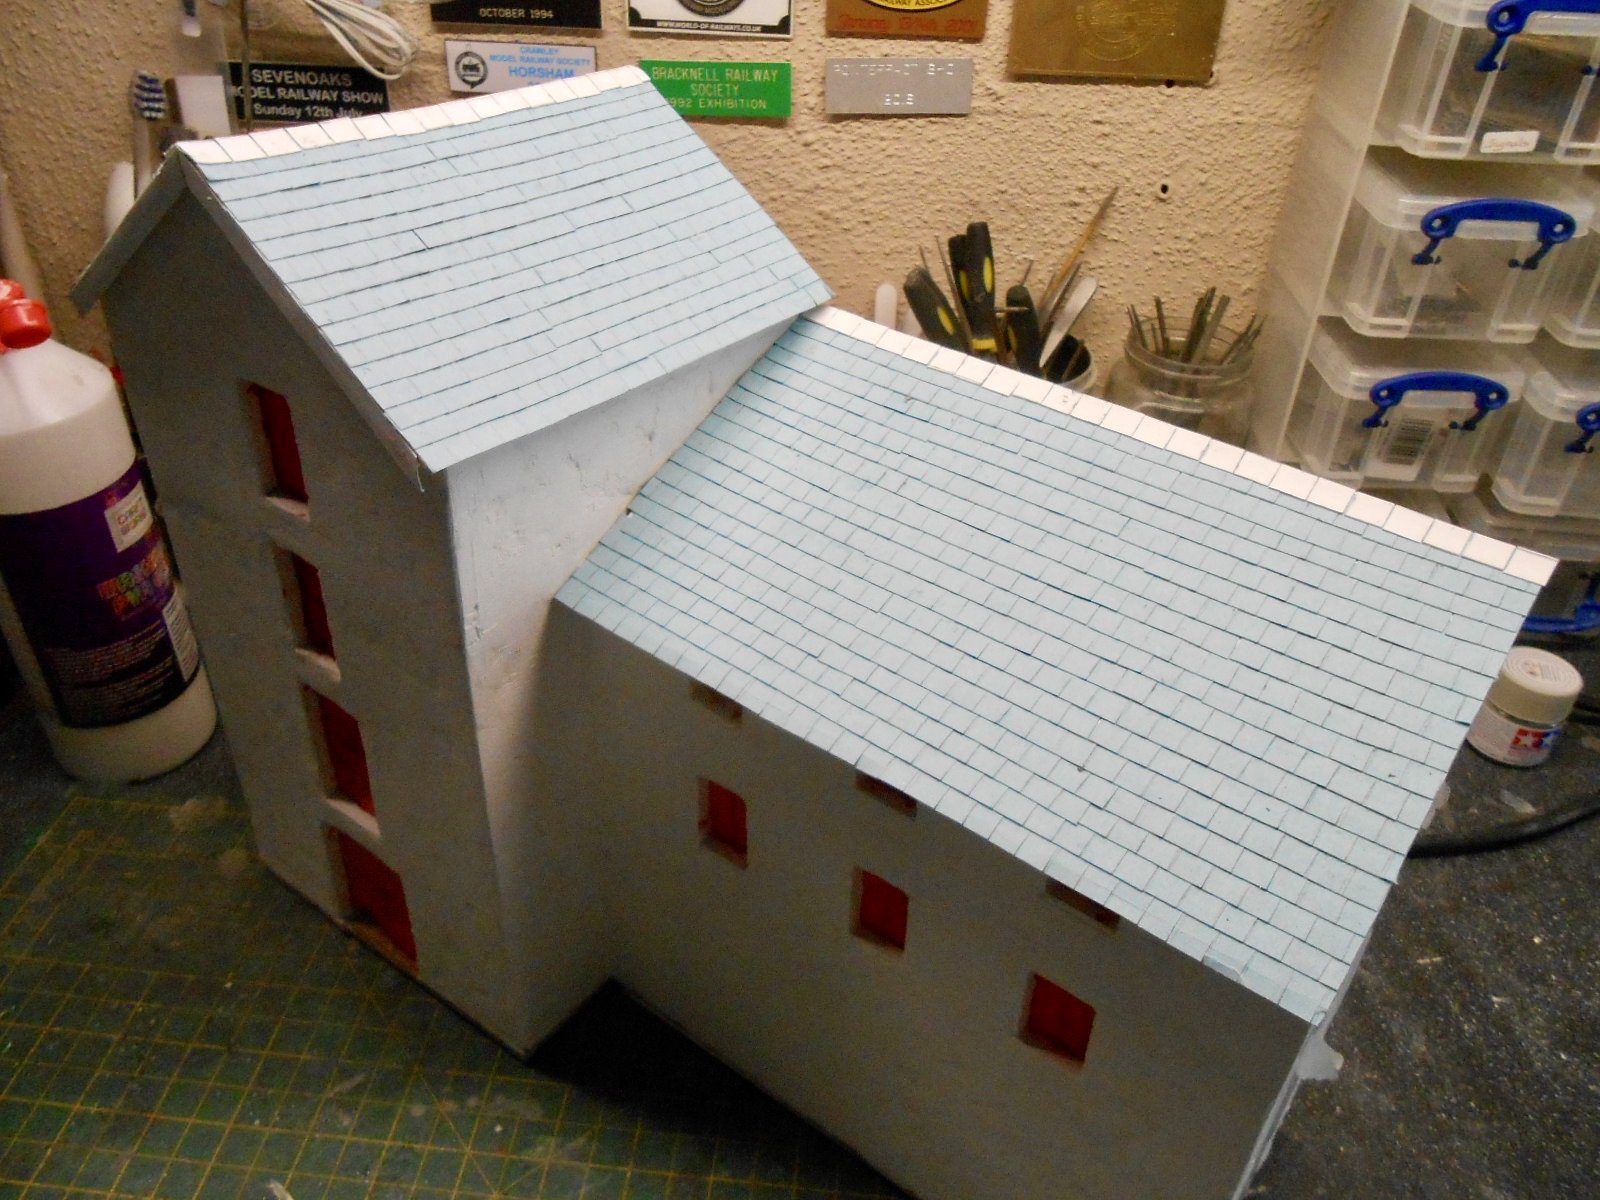
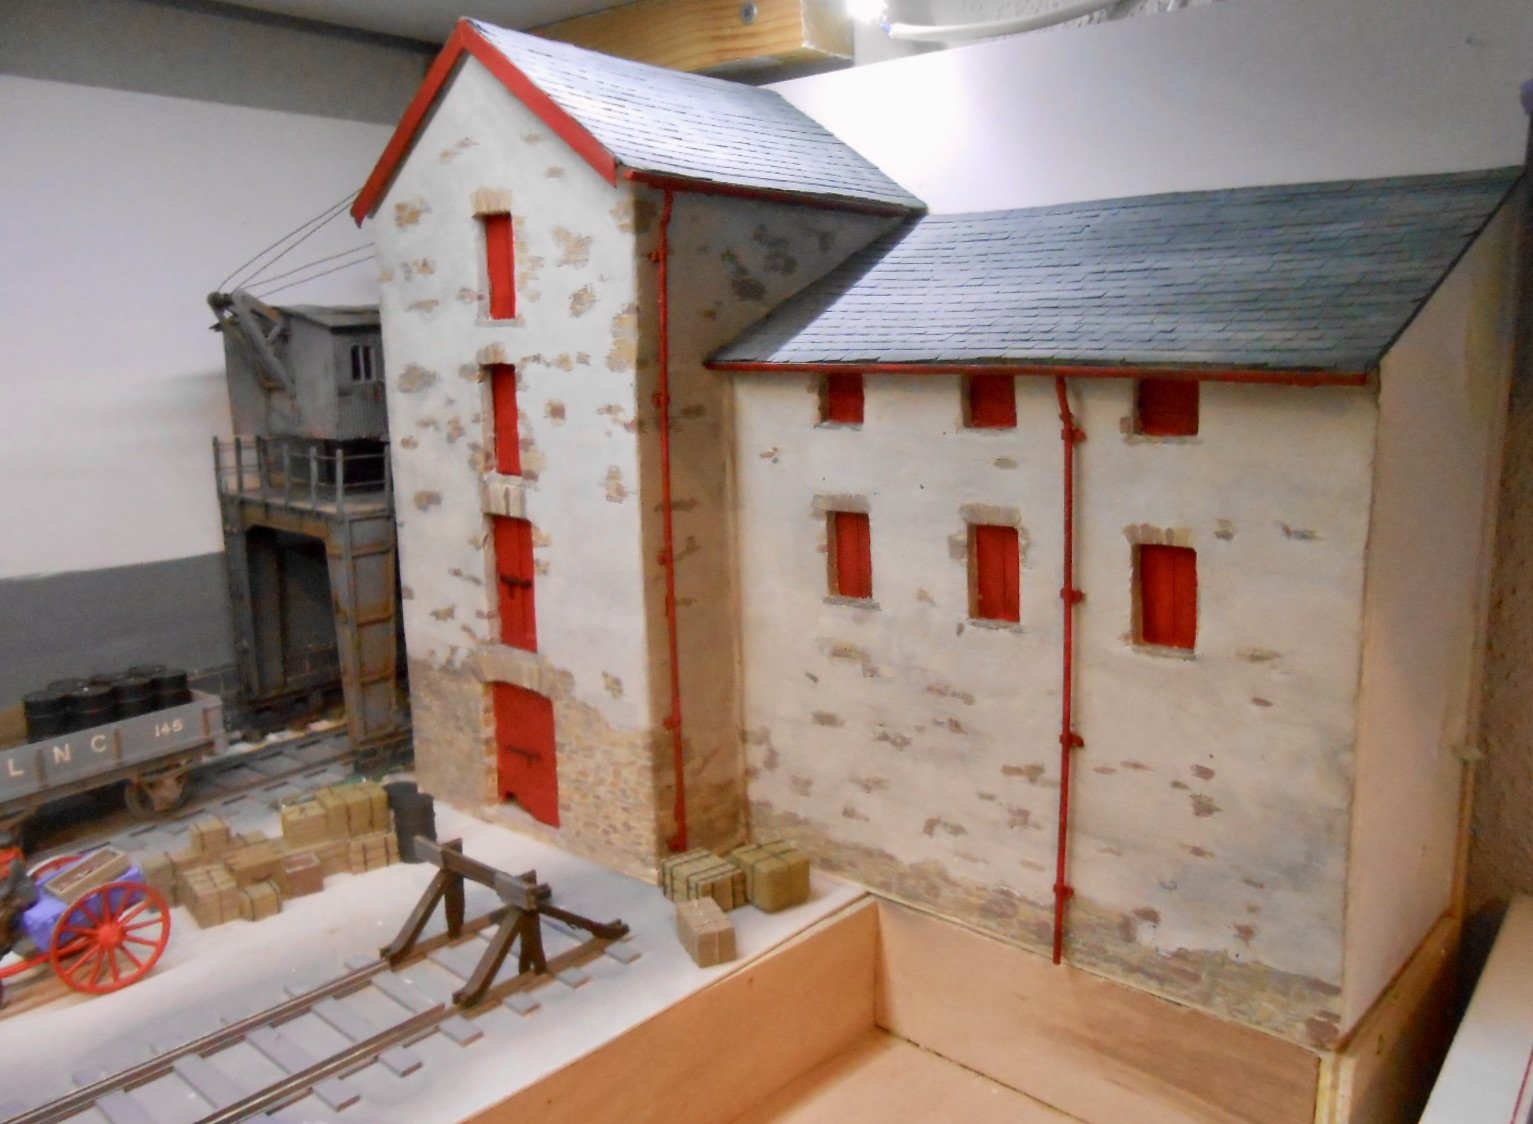
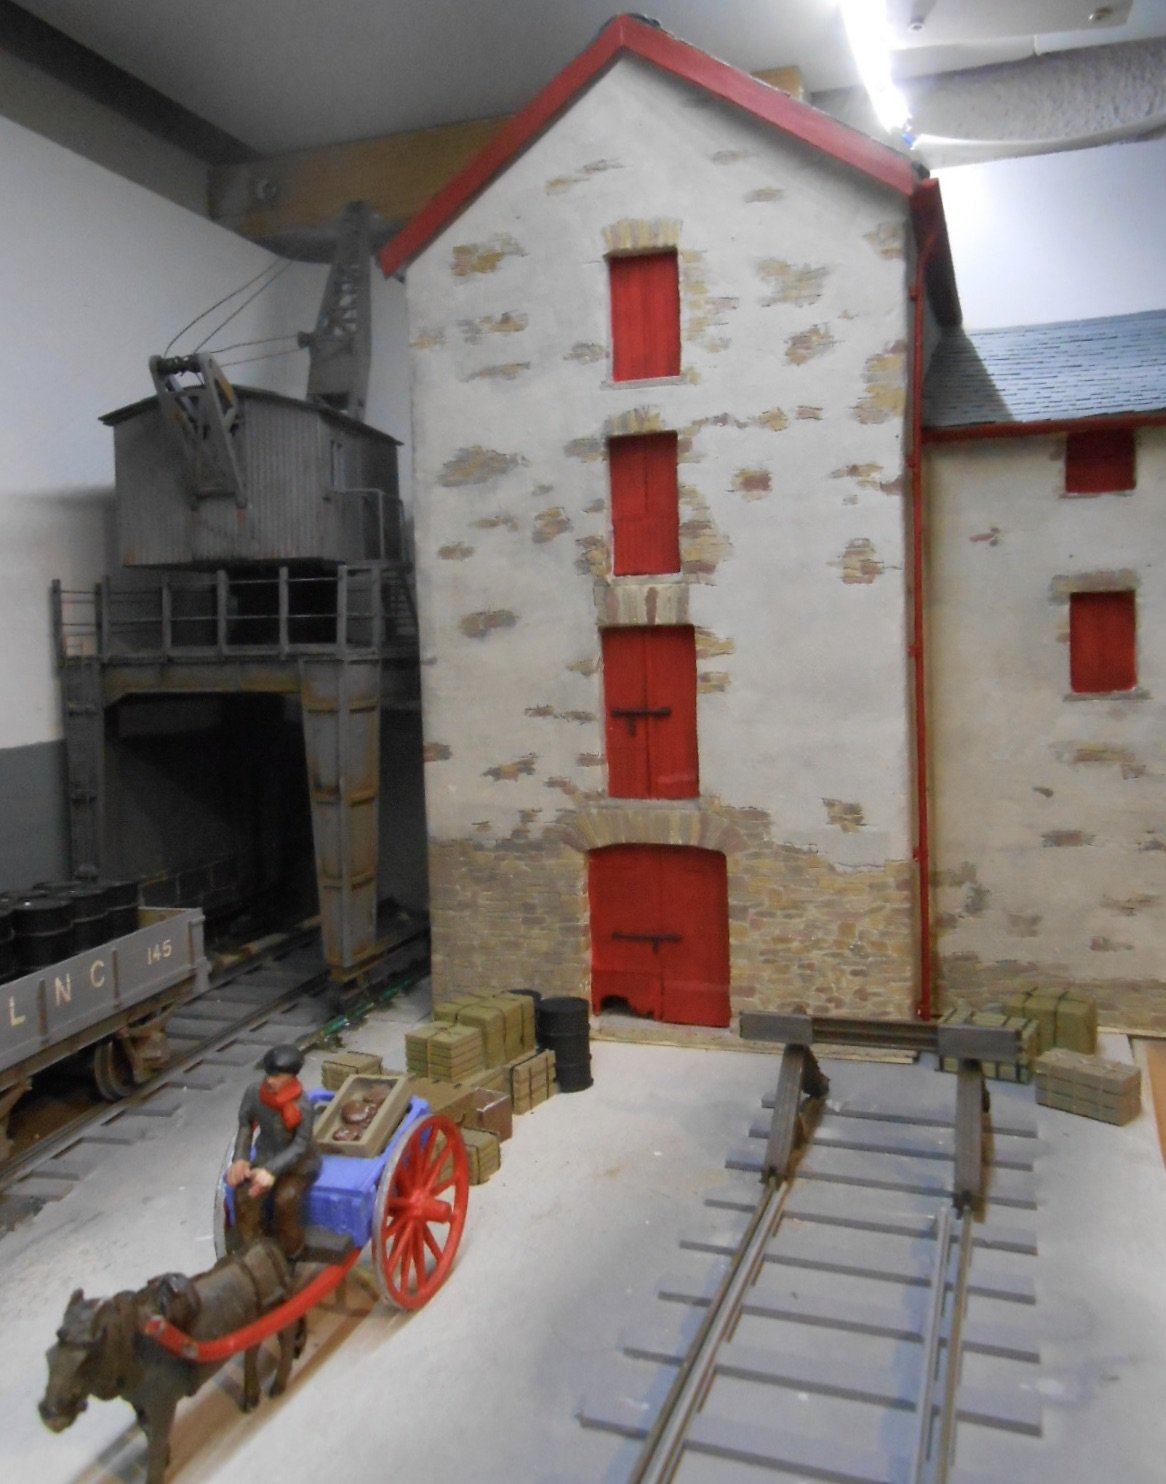
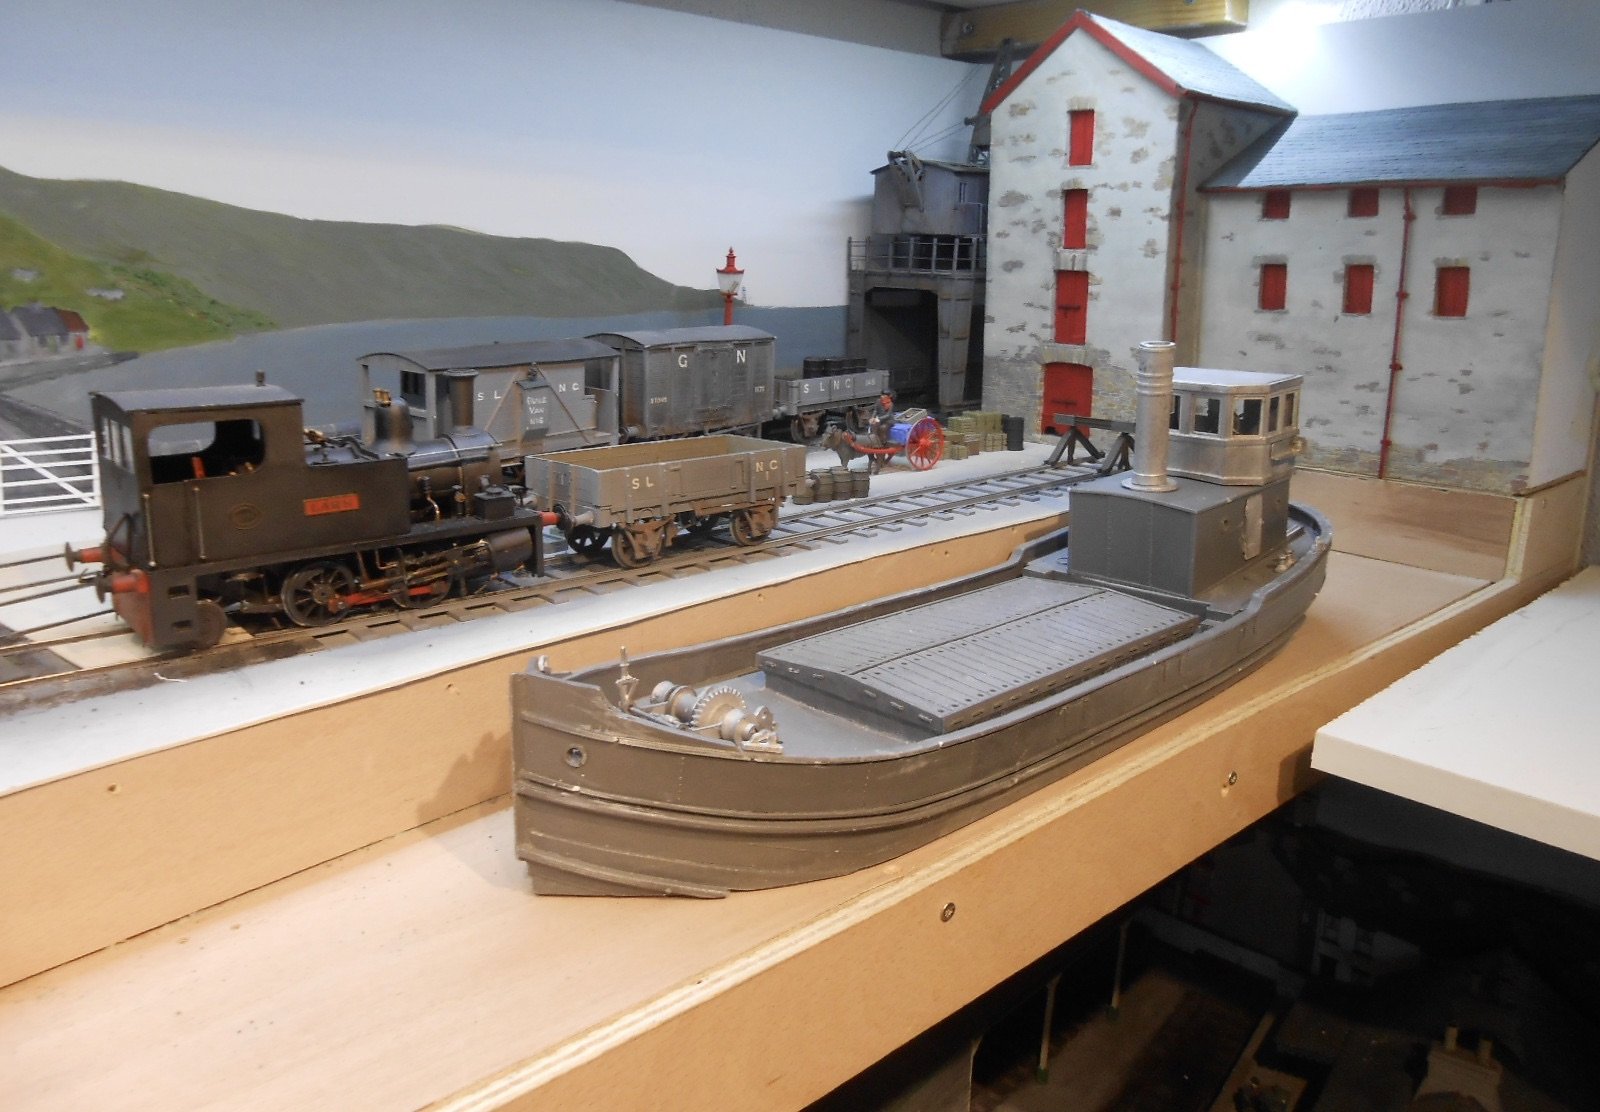
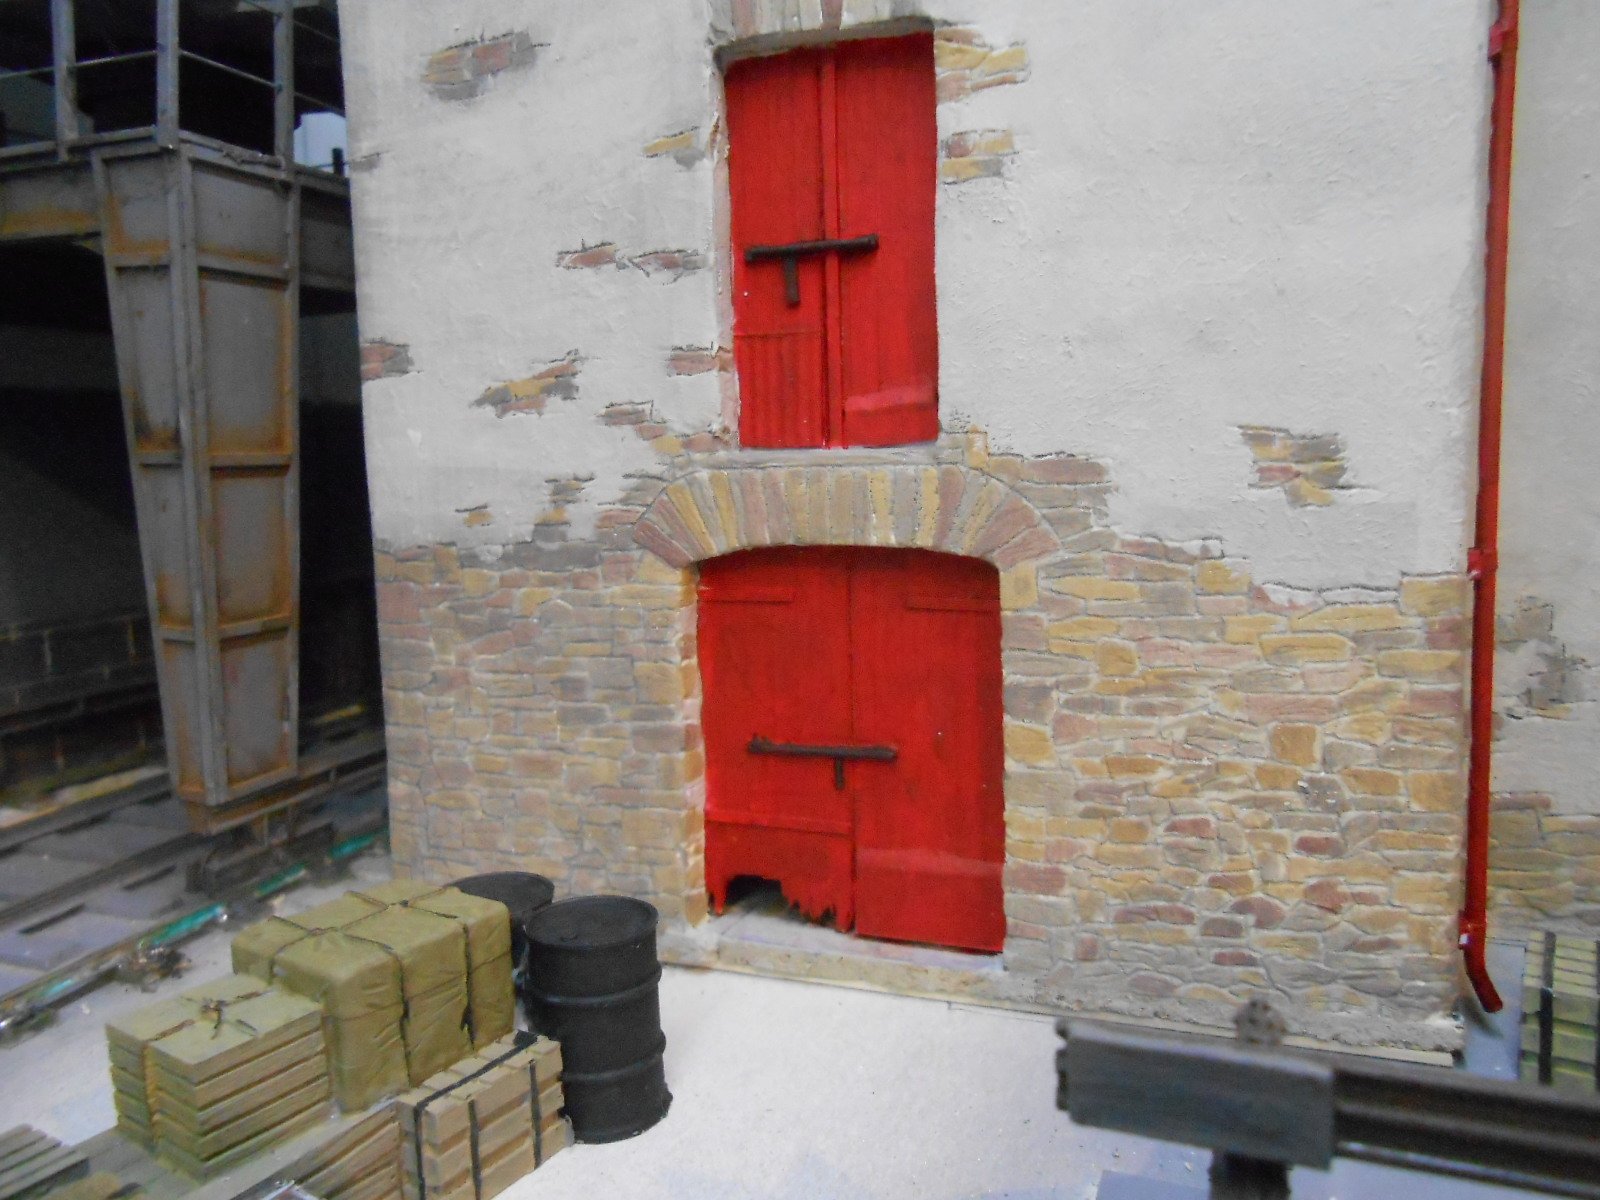
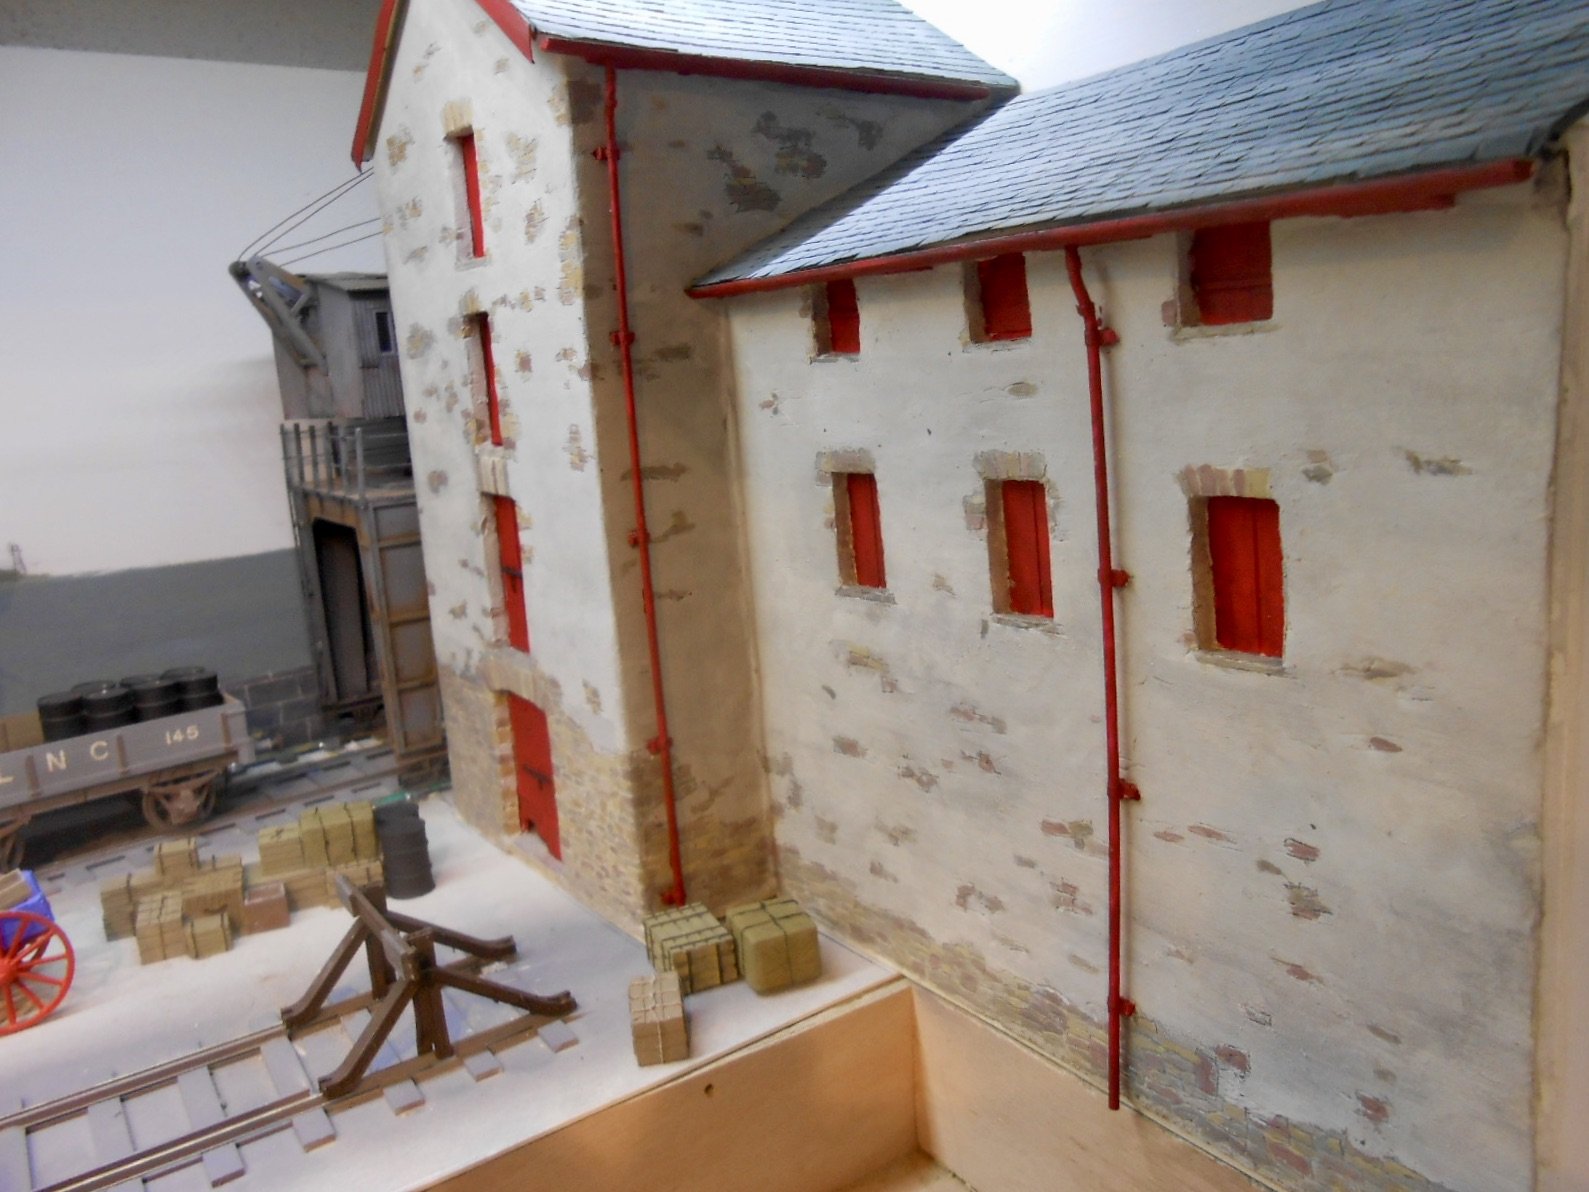
One project that has been very much in the background of late has been the large warehouse at the right hand end of the layout. Various bits and pieces have been worked on, such as making and laying the roof slates, but nothing of any great interest. However, with the left hand board now awaiting more fine detail, attention has moved to the other. The roof slates are fairly conventional 'old school' - strips of thin card, a scale 18" deep and snipped with scissors every foot, then laid [from the lower edge upwards] on PVA. Card was also used for the bargeboards, which are stuck to matchsticks just under the edges of the roof. Guttering is my standard dodge. Strips of 100 thou plasticard have one corner rounded off with files/sandpaper. Only the ends are fully profiled to represent a half round gutter - the rest becomes the soffit boards and the whole is glued to the top of the building's walls with contact adhesive. Most of recent efforts have gone into painting though. The DAS covered walls, partly scribed to show stonework showing through crumbling render, were first given a coat of Tamiya 'deck tan' acrylic. Next, the individual stones were picked out in light washes of more deck tan, tinted with either burnt sienna, ochre or grey. To try and add both texture and extra depth to the rendered areas, these were painted with a mix of deck tan and white, thickened with talc. At first, this seemed to work ok, but when I put the building on the layout, it looked far too bright and colourful, compared the the grey stone elsewhere, so gave everything a wash of grey, which seems to have toned things down fairly well. Roof slates are Precision 'slate grey' enamel, while the doors, shutters, gutters and downpipes are vermilion red acrylic. This probably needs a bit of weathering, as does the rest of the building, but I've posed my ex Timoleague & Courtmacsherry 0-4-2T on the quay, alongside the Clyde Puffer, which has had nothing done to it since Christmas, but hopefully its time will come soon!
-
A lovely piece of traditional scratchbuilding, though not sure the description does the model justice! Takes a lot of care, effort and not a little skill to produce a model like that. And then there is the paint job... Wonderful.
-
Excellent project - good on you!
-
Full of promise.
-
Seriously cool!
-
Brookhall Mill - A GNR(I) Micro Layout
David Holman replied to Patrick Davey's topic in Irish Model Layouts
Been making buildings from mounting board for over 30 years and never had any problems from paint of any kind. Humbrol enamel tarmac was great for slates before it was discontinued, so use Precision enamel now for that. For brick and stonework I use cheap artist's acrylic - usually two or three thin coasts, but have used water colours and enamel too. Any problems with warping probably come from how many layers the model is made from. When I first started, John Ahern's book on Model Buildings was my reference and still is. He used postcards as his main material (the book was first written in the late 1940s) and stressed the importance of using an odd number of layers - three normally like plywood - to avoid warping. In 7mm scale, tend to use foamboard these days, which has three layers and holds its shape well, even with another layer of DAS. However, painting the inside with watered down PVA does the equivalent of adding another layer. So, not the paint, but how many layers. Overall, think I prefer card for buildings as plasticard can also warp, especially if you use too much solvent. It becomes brittle with age too, while card seems to age much better and if it does warp, it is more subtle and protypical. -
Brookhall Mill - A GNR(I) Micro Layout
David Holman replied to Patrick Davey's topic in Irish Model Layouts
Sounds very sensible to me! -
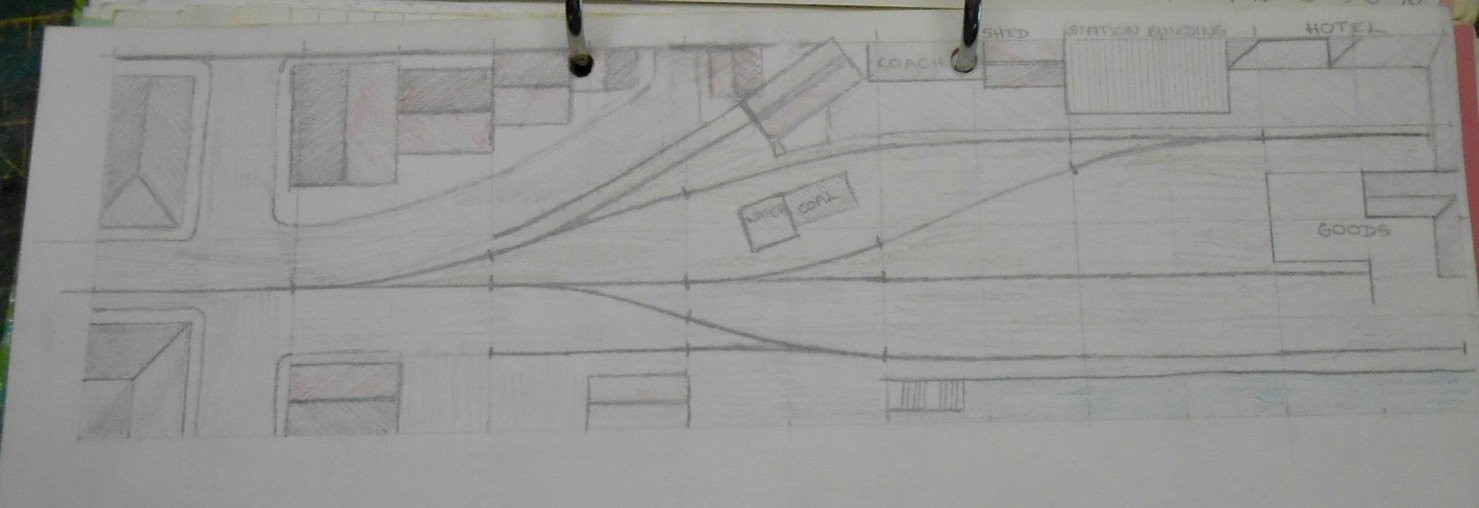
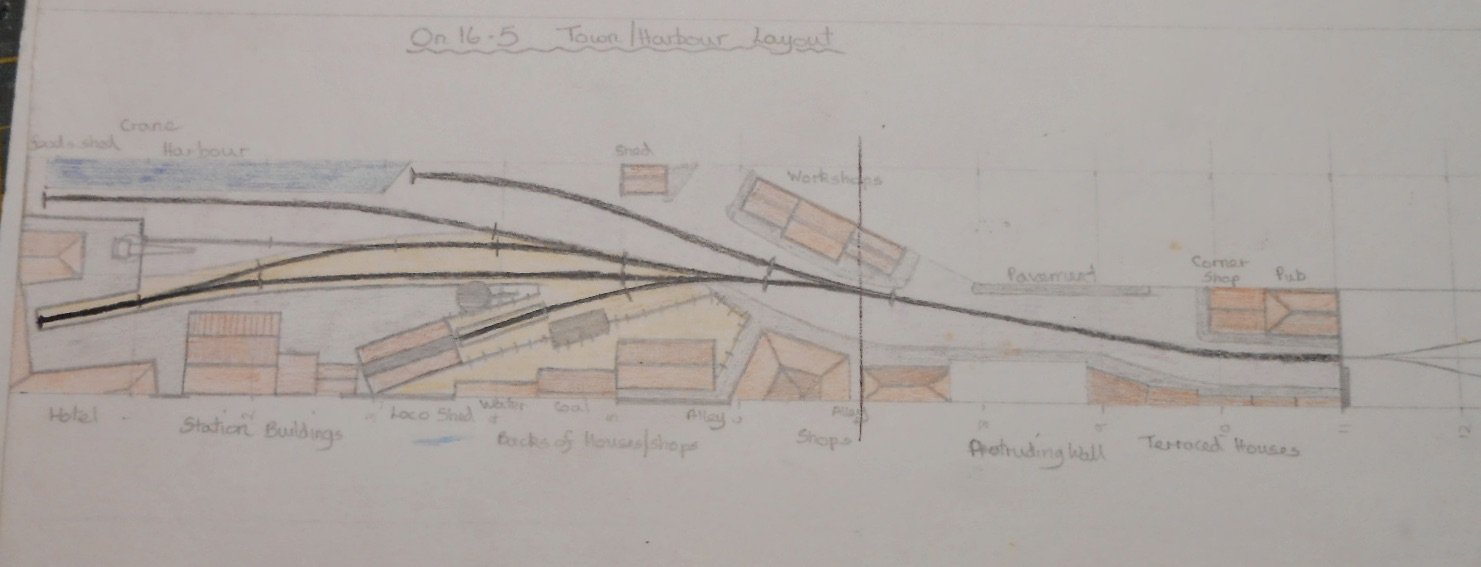
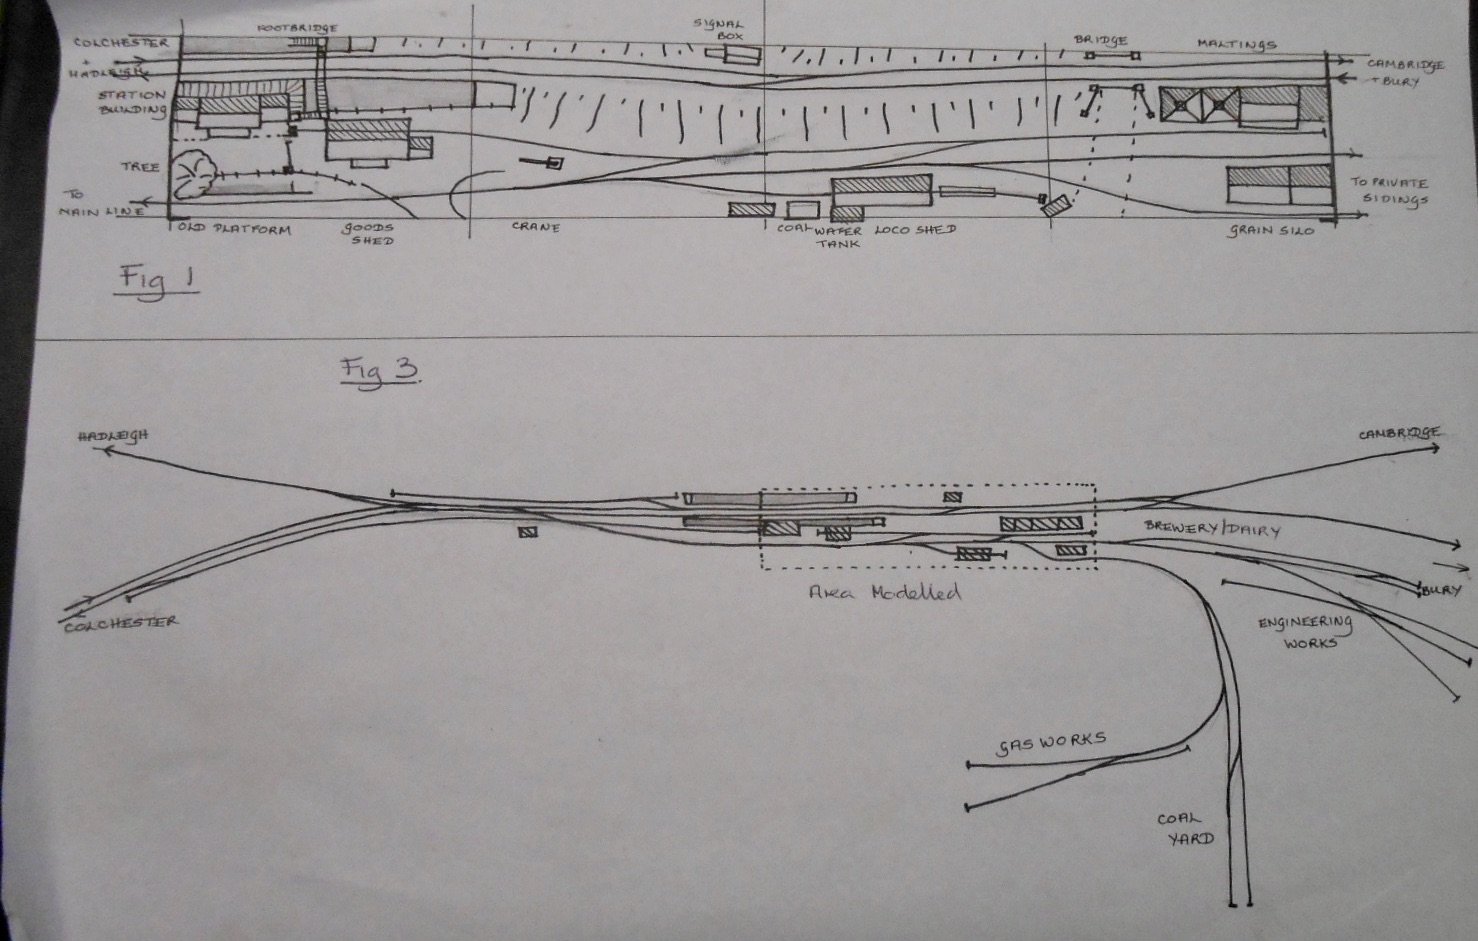
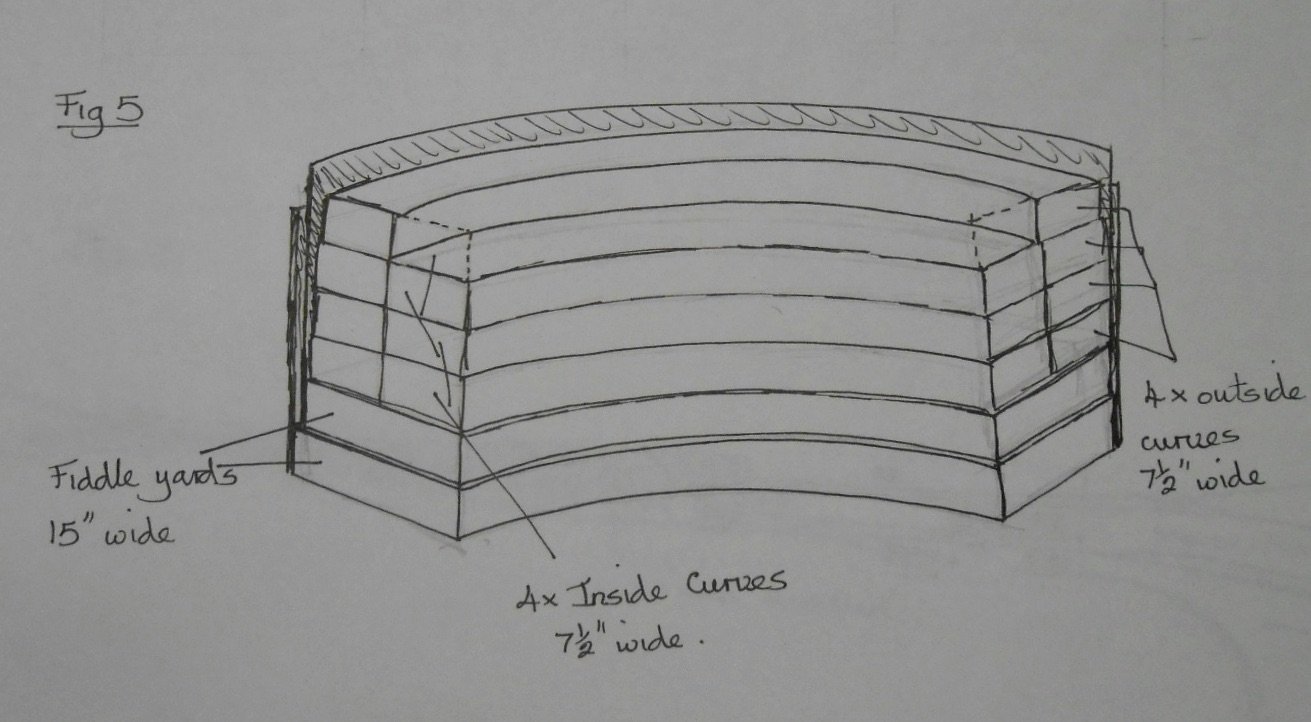
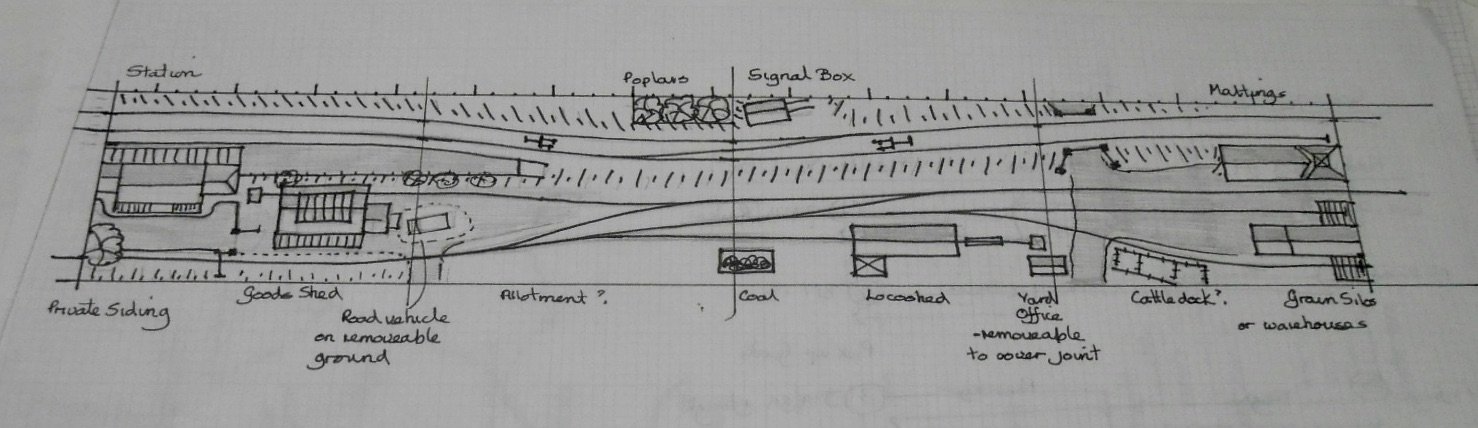
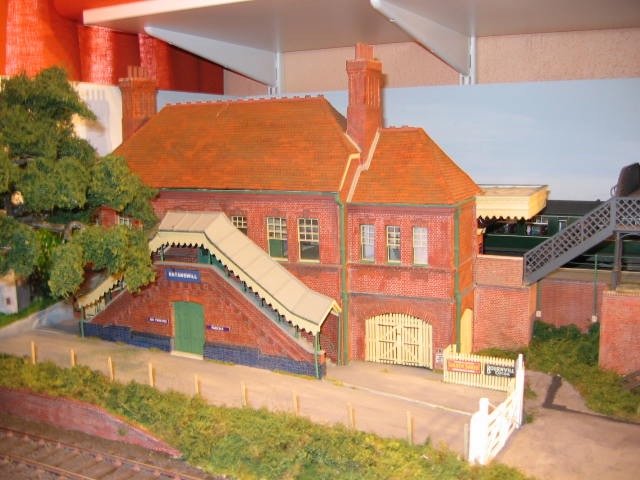
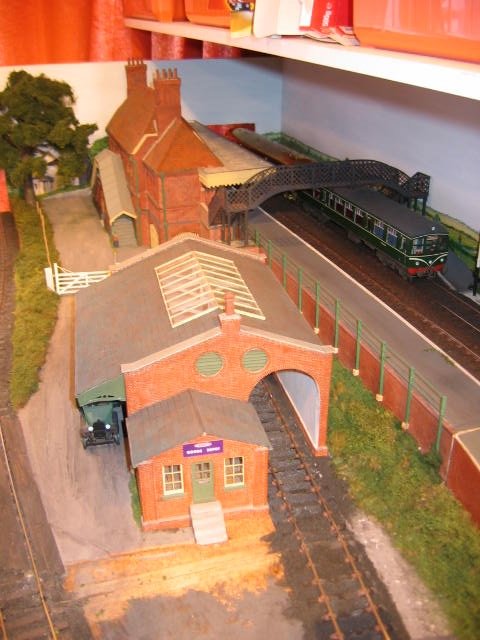
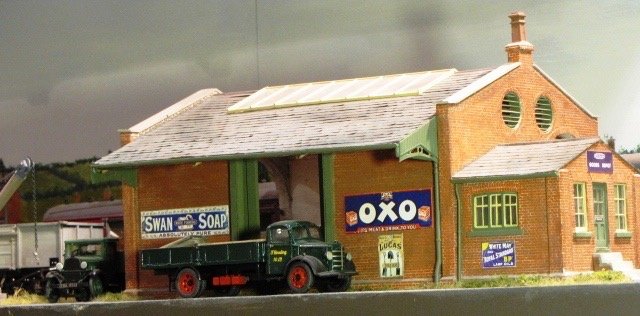
Here's another selection of track plans - only one of which actually got built - though there is quite a story behind it... This first one was very much drawn around Peco 0n16.5 points and track and shows a small quayside station, which could almost be a precursor of Northport Quay. It was done quite a few years ago, quite probably in the last century [!]. There are a few useful view blockers employed, but the track plan looks a bit stiff and stilted now to my eyes, because the track has too many straight lines, which are also parallel to the baseboard edges. The next plan is very similar, but see how making the track flow better, significantly improves the overall feel of things. Any comparison with Iain Rice's drawing of Wantage Town in his Light Railways book is more than coincidental - only the train shed is missing. Now for something completely different. Above is Eatonswell, by some distance the largest model railway I've ever built. This comes from a time when I was very much into British Railways, 1950's East Anglia, but feel it merits inclusion because of the concepts involved and the fact that, in its original version, shown here, there are similarities to Claremorris or Athlone. Eatanswill, was the name invented by Charles Dickens for Sudbury, Suffolk in The Pickwick Papers. My model railway was 0 gauge and involved part of a high level passenger station, where four separate single lines formed a junction, plus a low level goods yard. The actual track plan is at the top, with a sketch map of the wider area below. The station building, an accurate model of Chapel & Wakes Colne, hid the exit at one end, while the Maltings did the same at the other. The four baseboards were each 3'10" long and 2'6" deep, with the mainline tracks set about 6" higher than the goods yard at the front. They were a challenge to make and a swine to move about and set up... As if this were not enough, this layout was my sole attempt to scratch the itch of an oval layout - so the front scenic section was match by storage loops the same length and the two straight bits were joined by what was [for me at least] a bit of inspiration: the 180 degree, double track curves, were actually two separate radii - one was 5'9, the other 6'3: four of each and just 7" wide. The result of all this was that these curved sections nested against each other as shown below and fitted in the same footprint as the main baseboards, so could be stored below the scenic section in the workshop. So far, so good - well mostly. I had built myself a portable layout 28' long and 13' wide, with a scenic section that fitted in my [integral garage] workshop. And it worked, I suppose, but such a massive undertaking was far too ambitious as a solo project in terms of taking it to exhibitions. For starters it needed a minimum of four operators - one for the storage loops, two for the mainline and one to shunt the goods yard. Then the was the simple fact that this 30x15 monster actually only had a 16x 2'6 scenic section - not ideal if you are an exhibition manager, trying to fit as many layouts as possible into your venue! It went to one of the Chatham Shows that we held in the No5 Covered Slip at the Historic Dockyard - a semi open space, with a very uneven floor. Not good when you have 16 baseboards to link together: some of them needed house bricks to achieve this, when beer mats are the more usual solution! It ran ok, but unsurprisingly didn't receive any further invites. I sold the curved sections [assembled, they looked like the Stargate] and instead built four new boards to create a two level fiddle yard at each end, creating a long thin layout, 32' in all. This went to a couple of shows, but still needed just as many operators and was still a nightmare to move around because of the awkward size and shape of all the boards. In the end, I bit the bullet, saved all the buildings and made a terminus-fiddle yard layout of the same name which was much easier to handle and operate, doing over a dozen shows before the Irish bug bit! Below are a couple of photos of the station & goods shed. I guess it taught me a lot about what doesn't work and the importance of reigning in your ambitions. However, the track plan could well have some merit, especially in 4mm scale or less, when baseboard size would be much more manageable for exhibitions, while as a home project, you could easily fit it into a medium sized shed or single garage.