David Holman
-
Posts
4,359 -
Joined
-
Last visited
-
Days Won
117
Content Type
Profiles
Forums
Events
Gallery
Blogs
Everything posted by David Holman
-
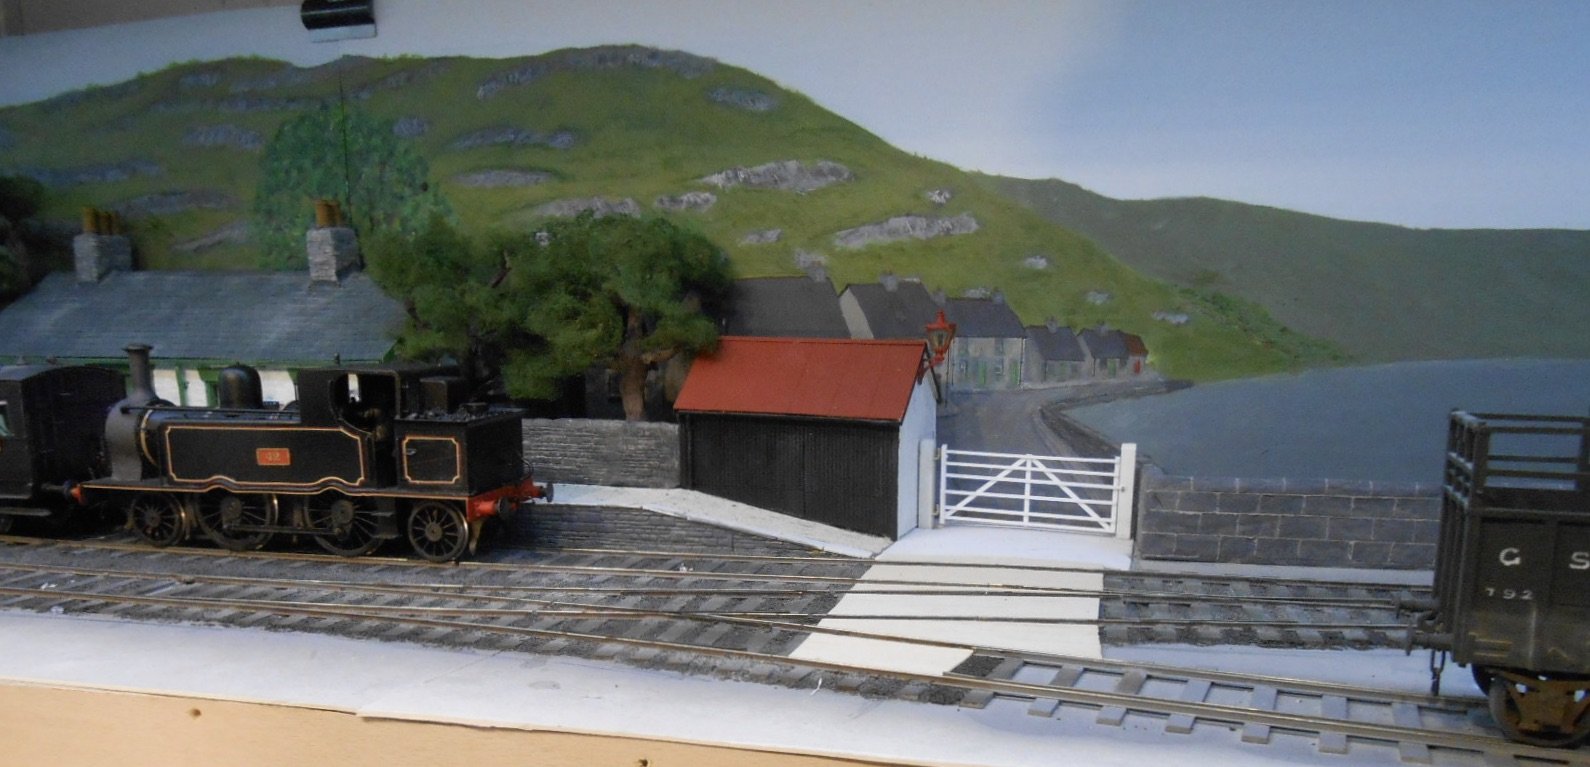
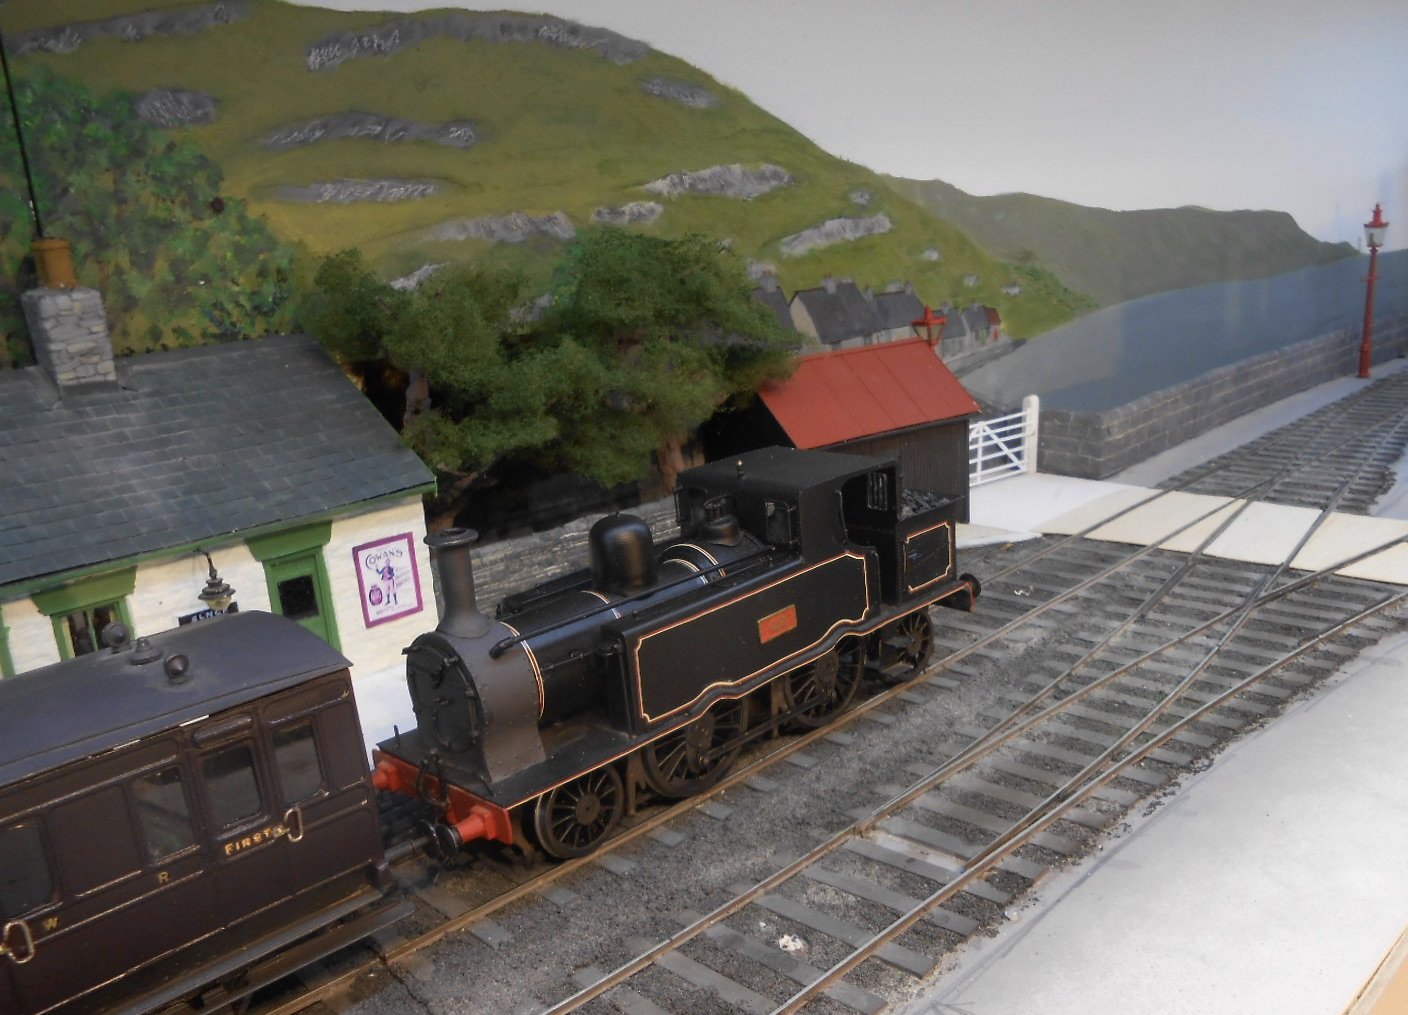
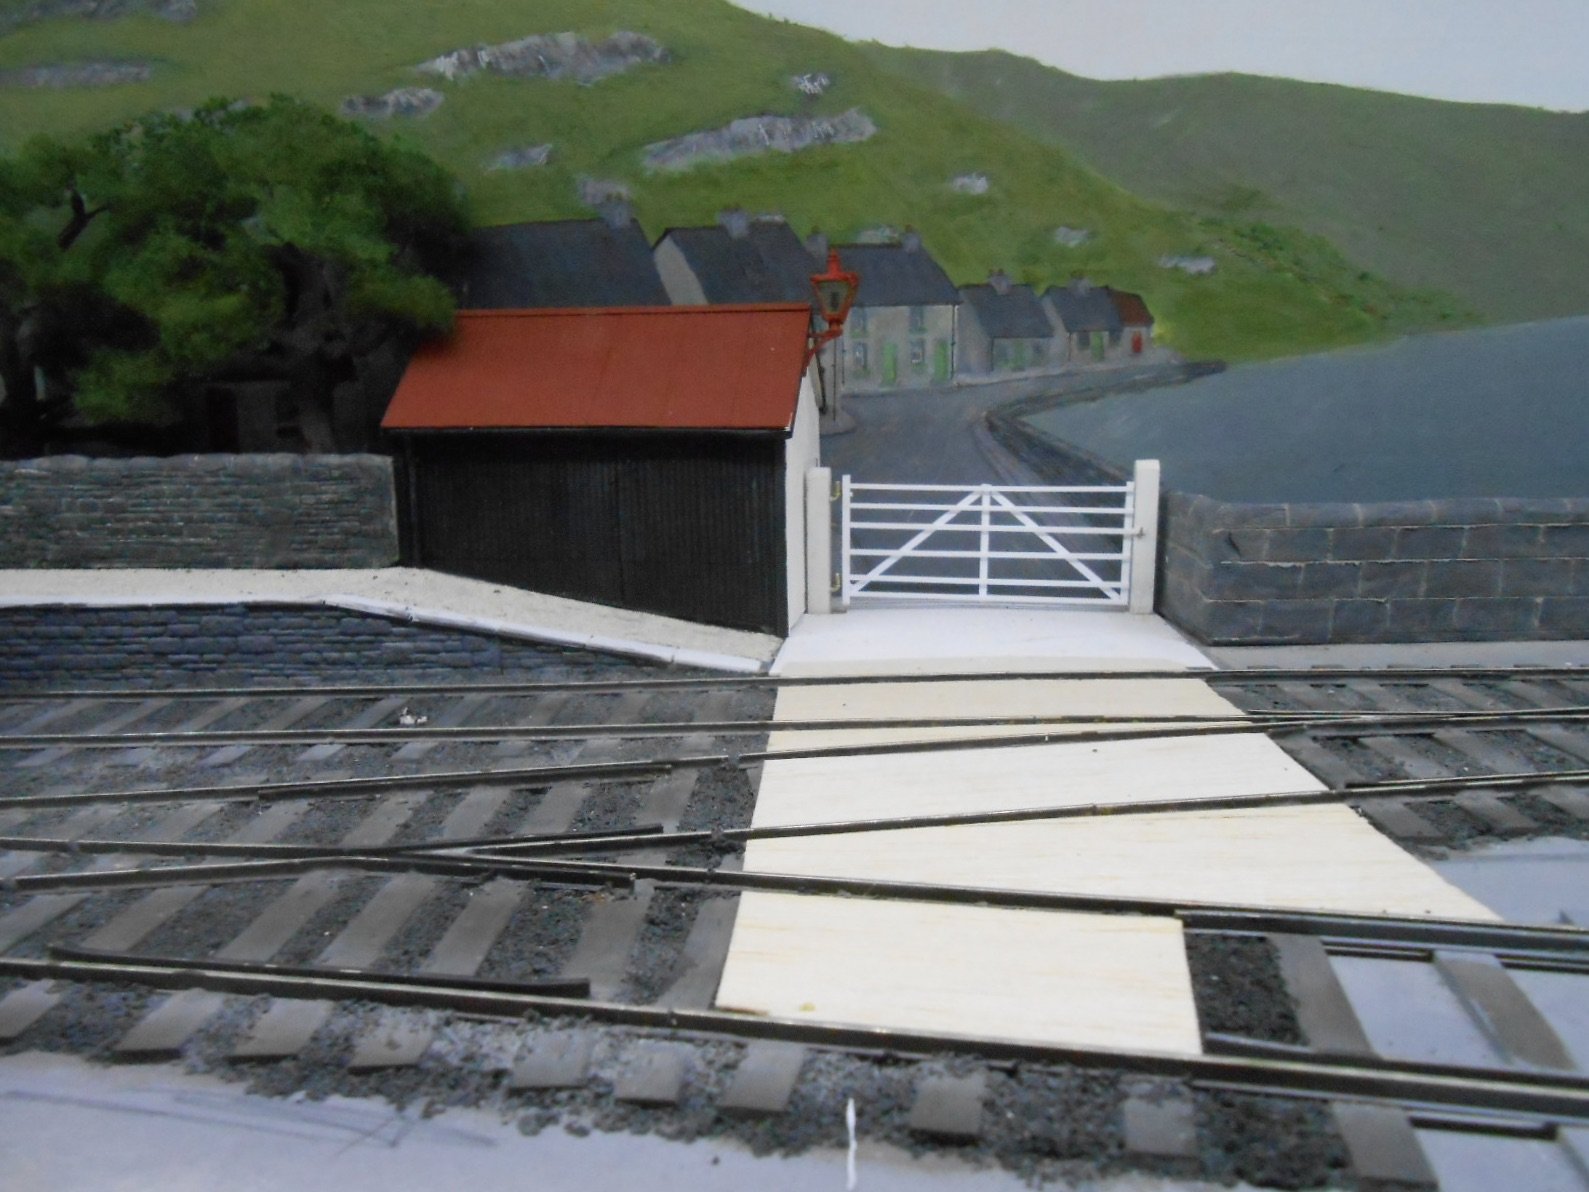
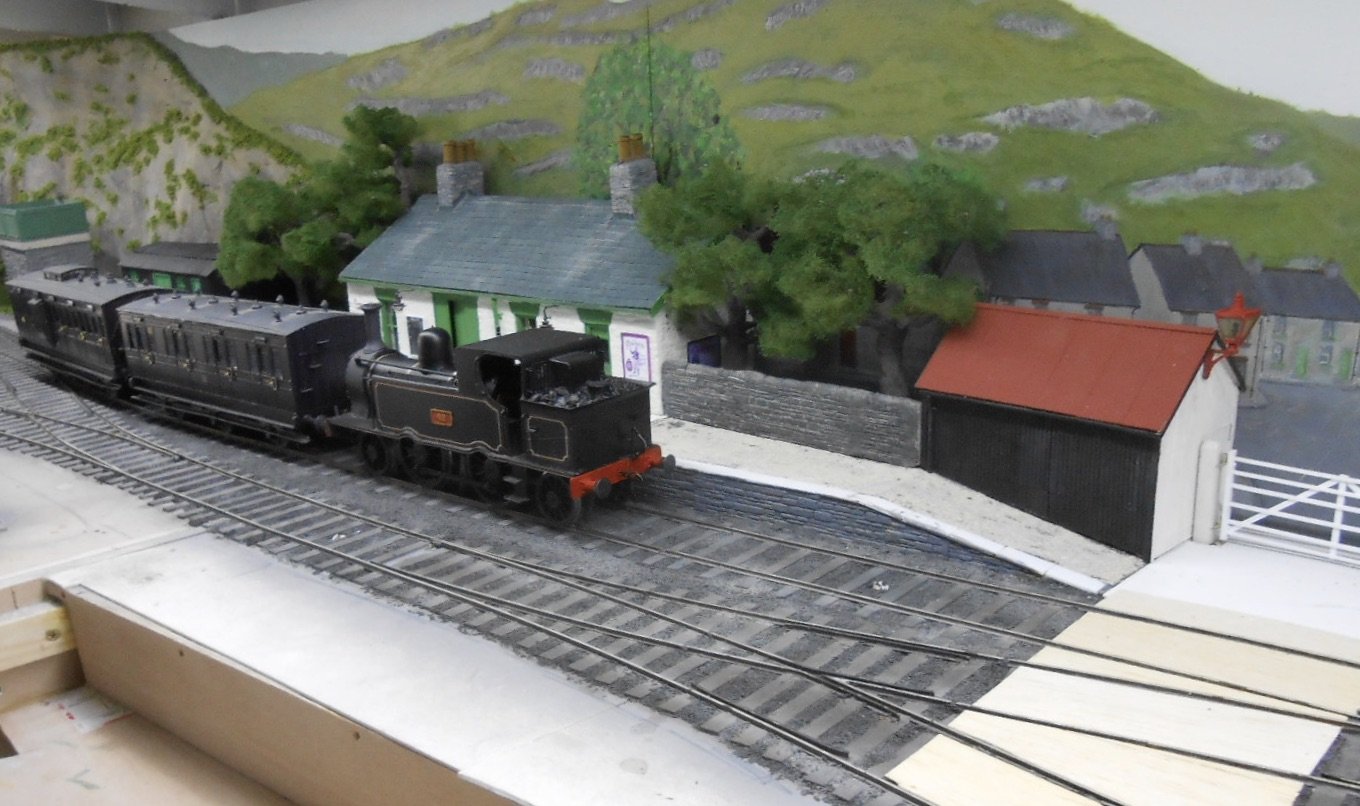
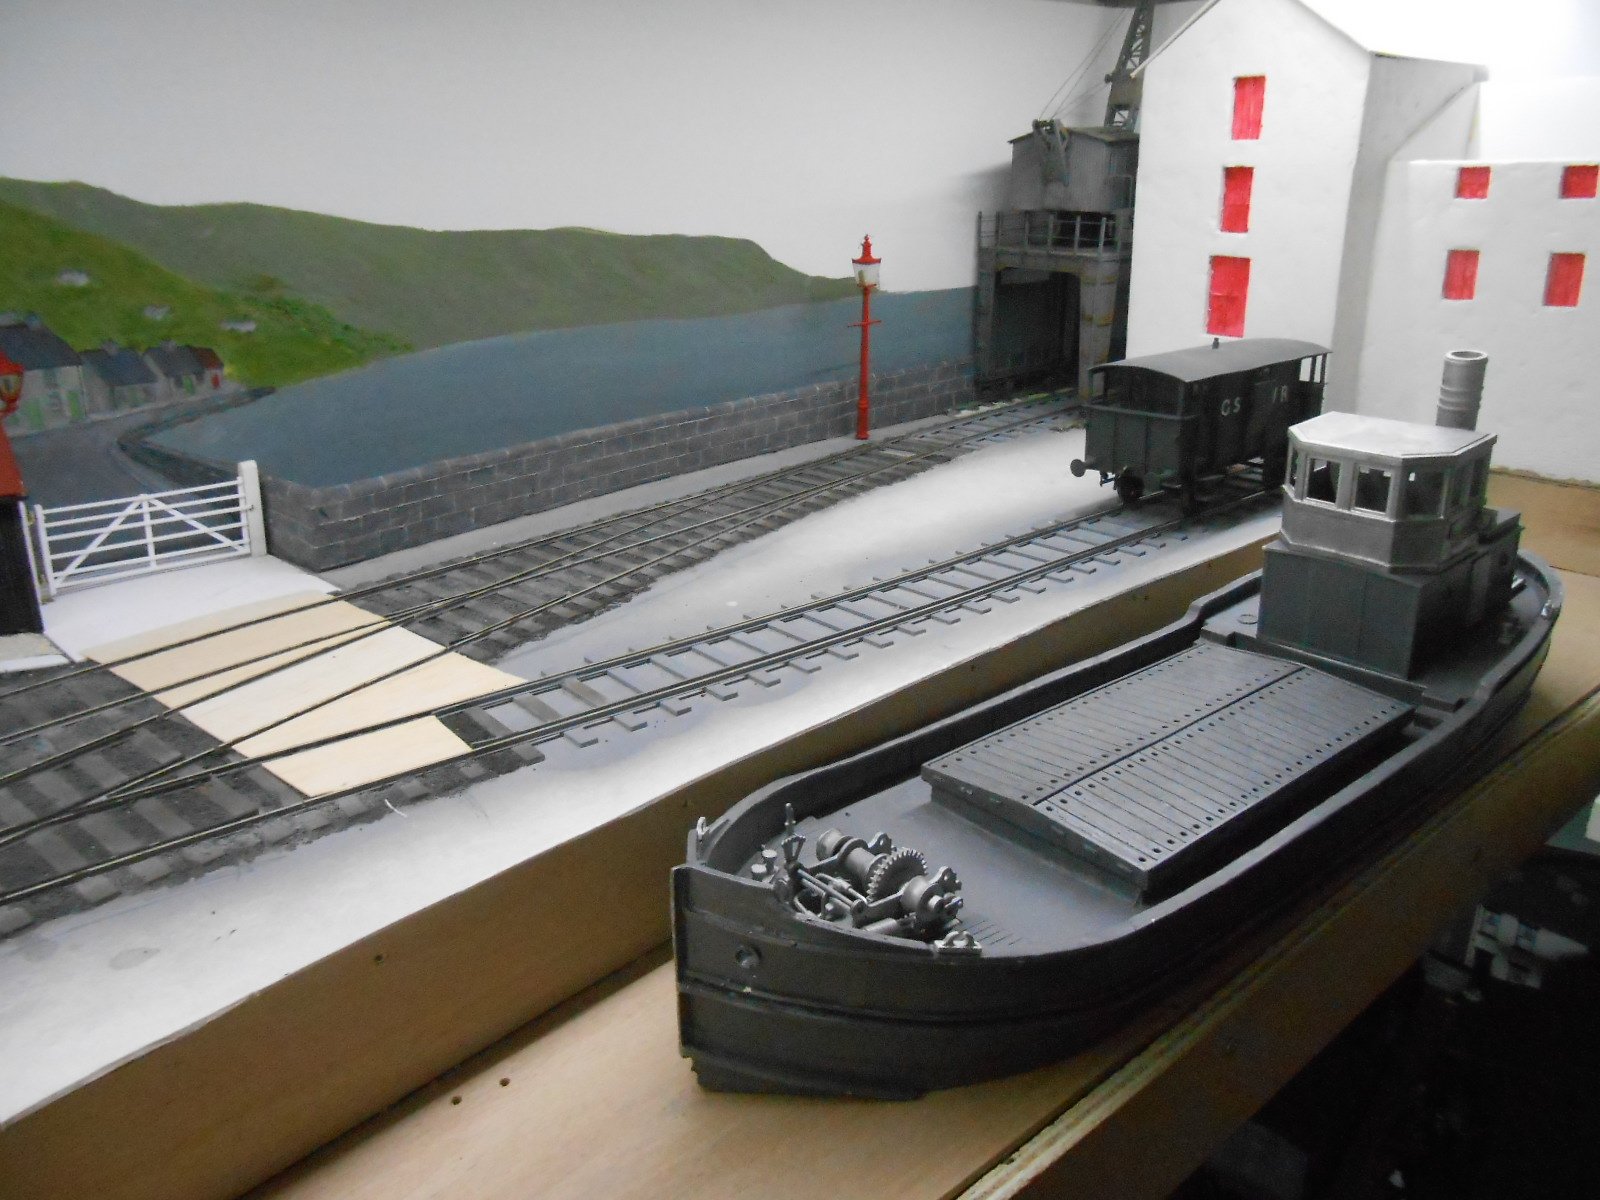
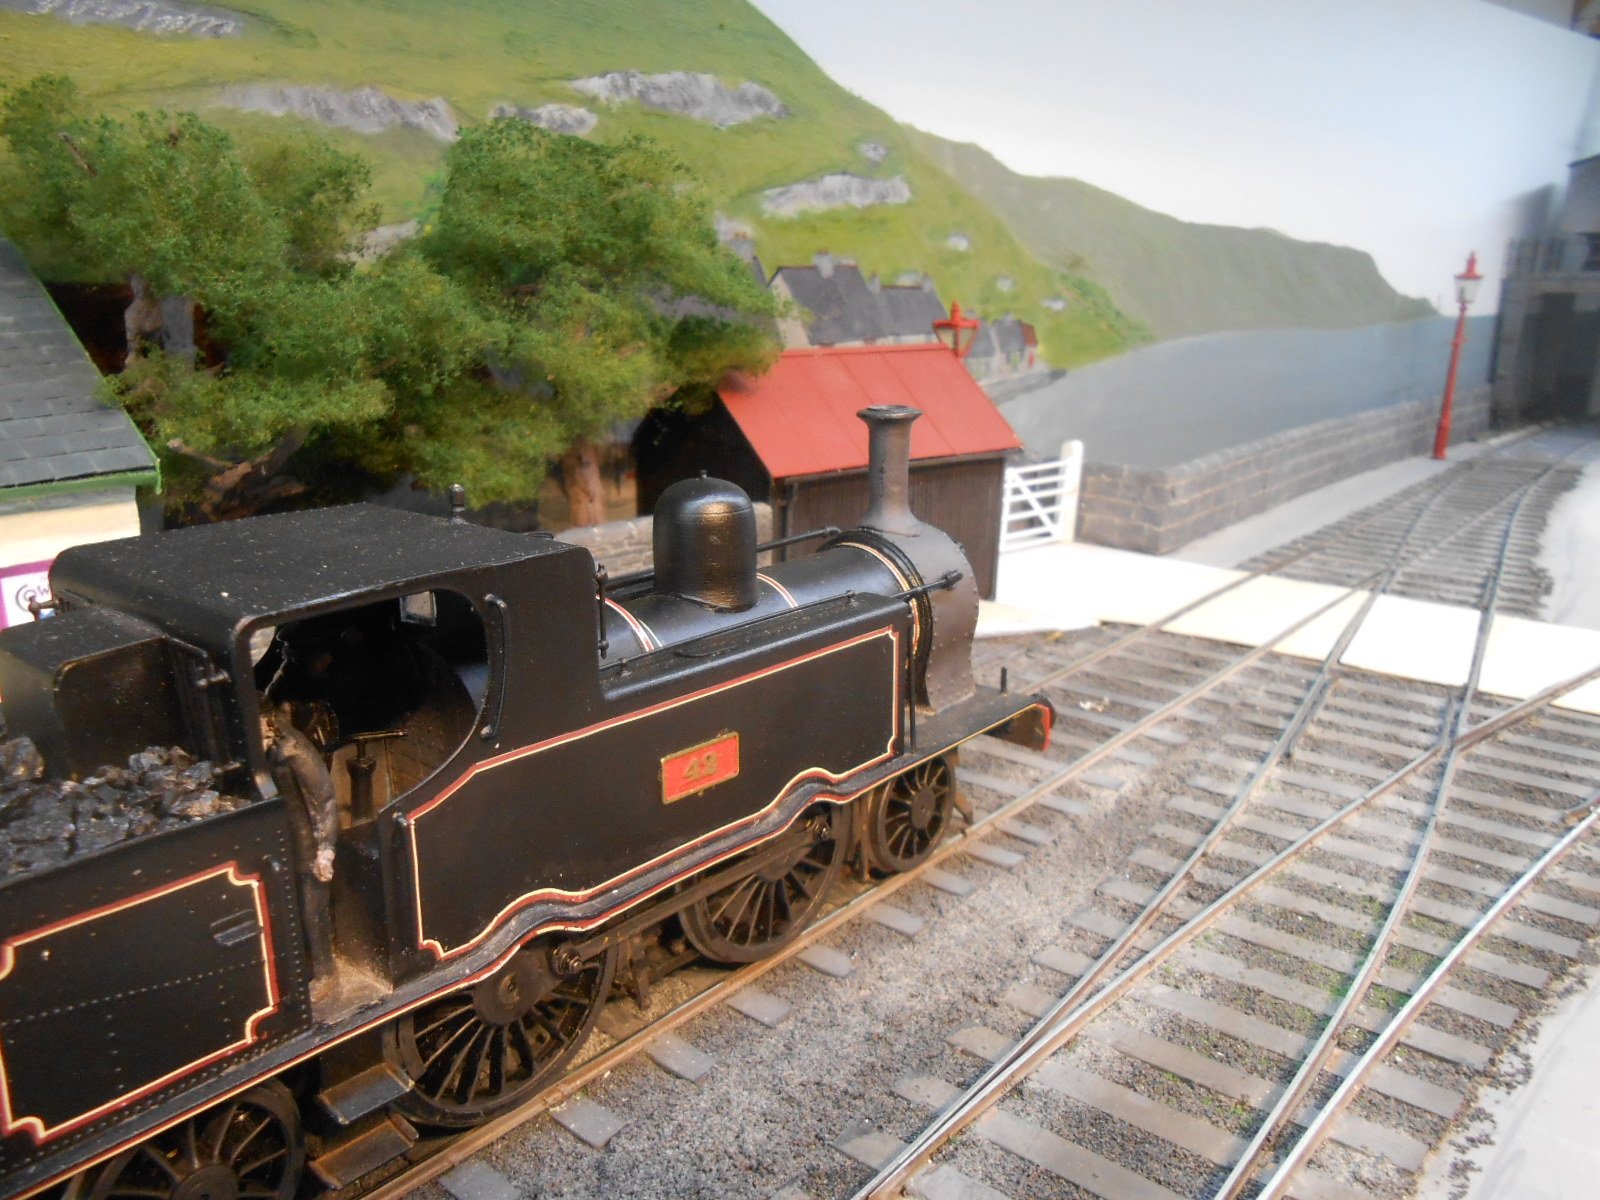
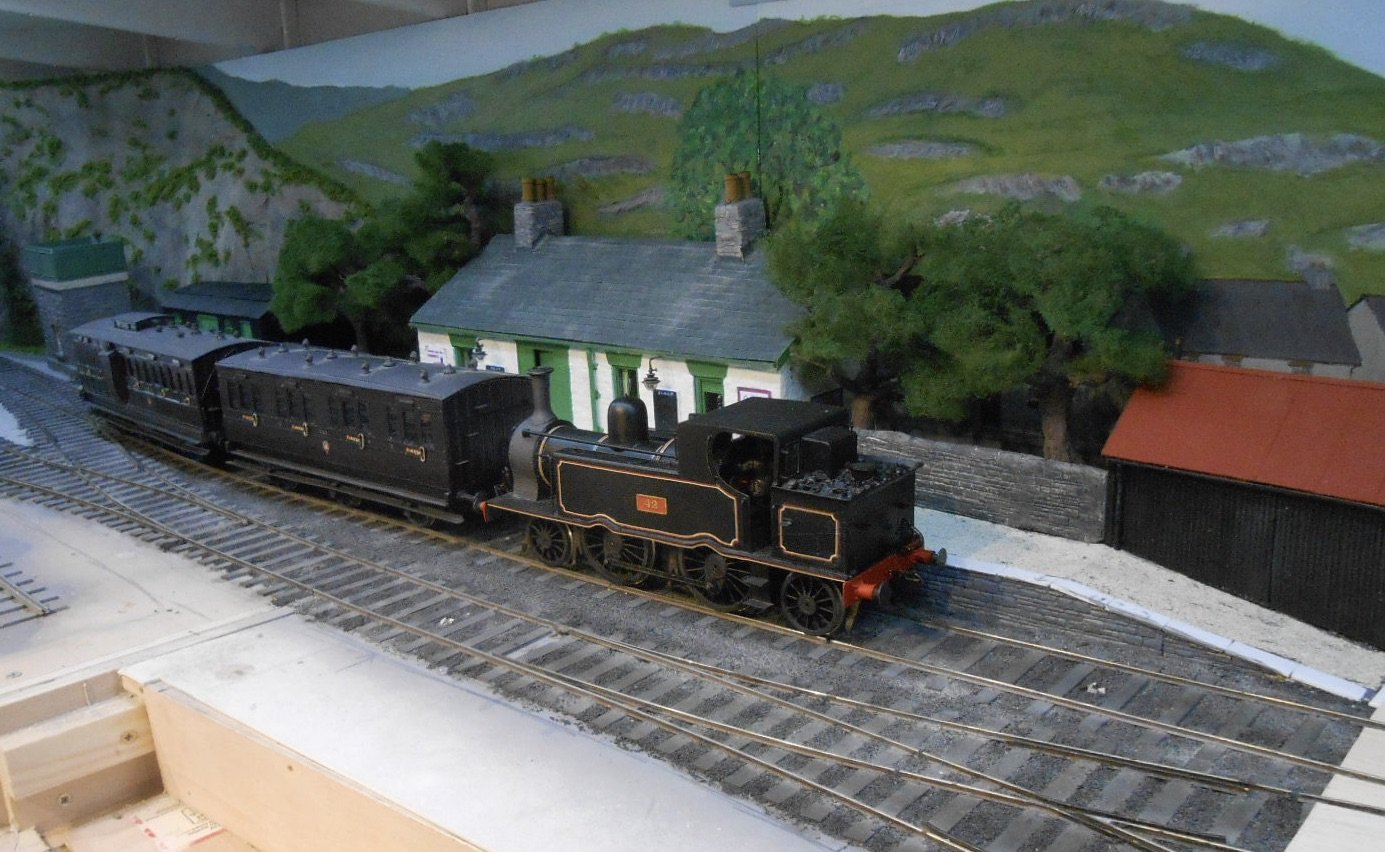
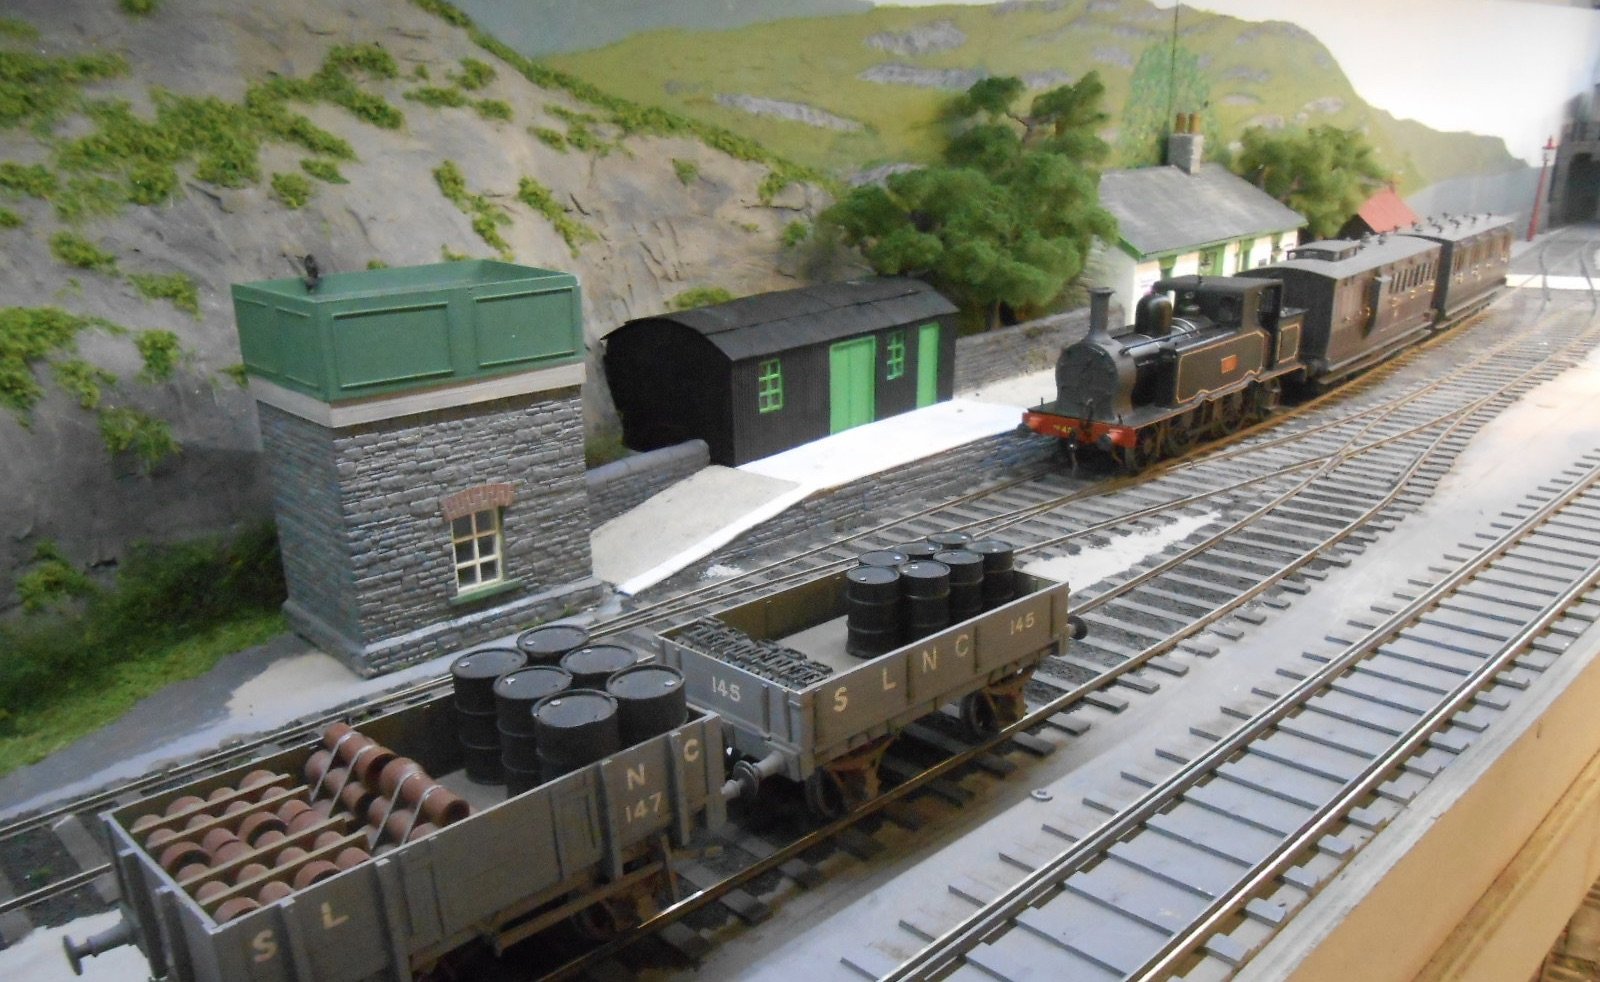
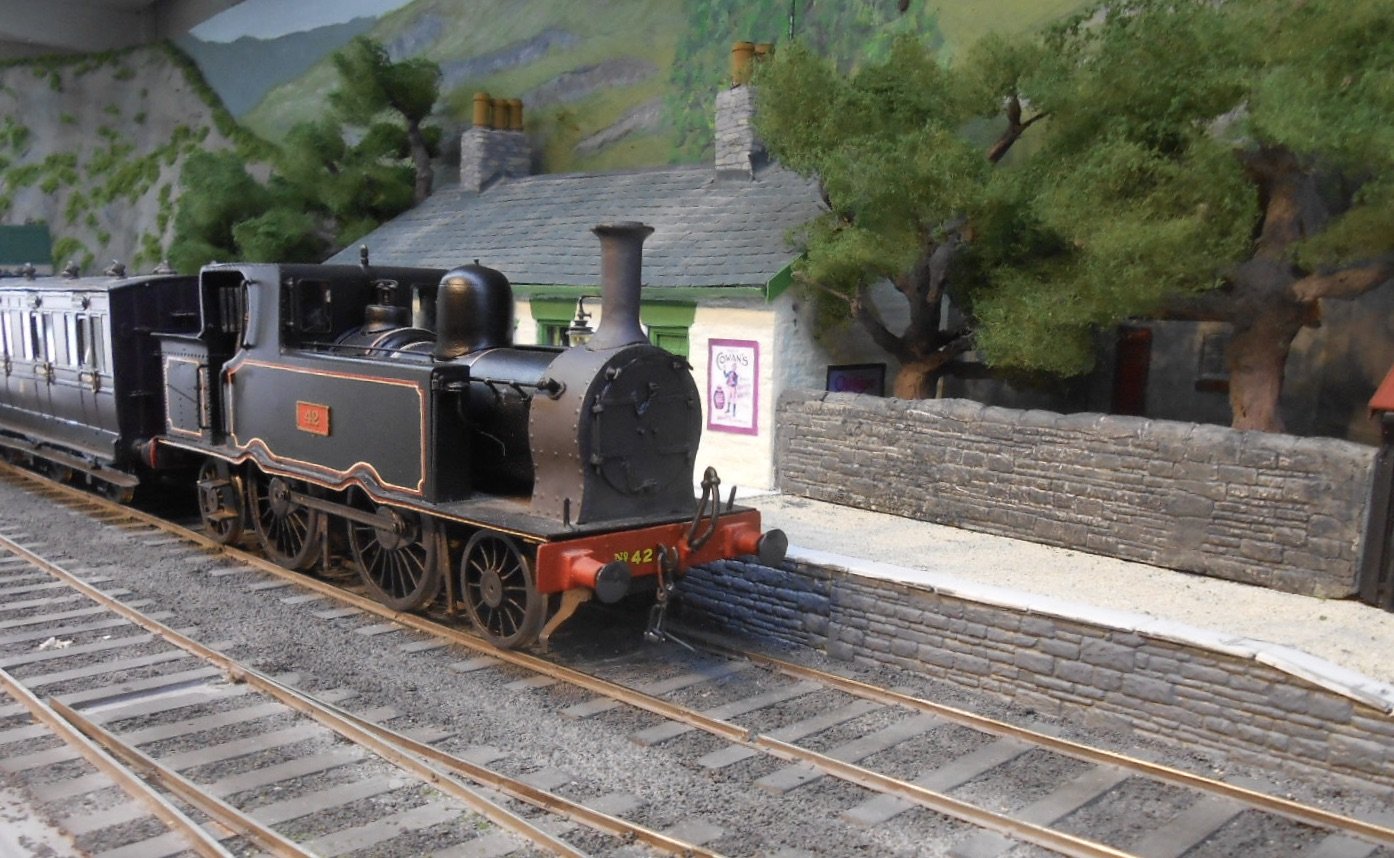
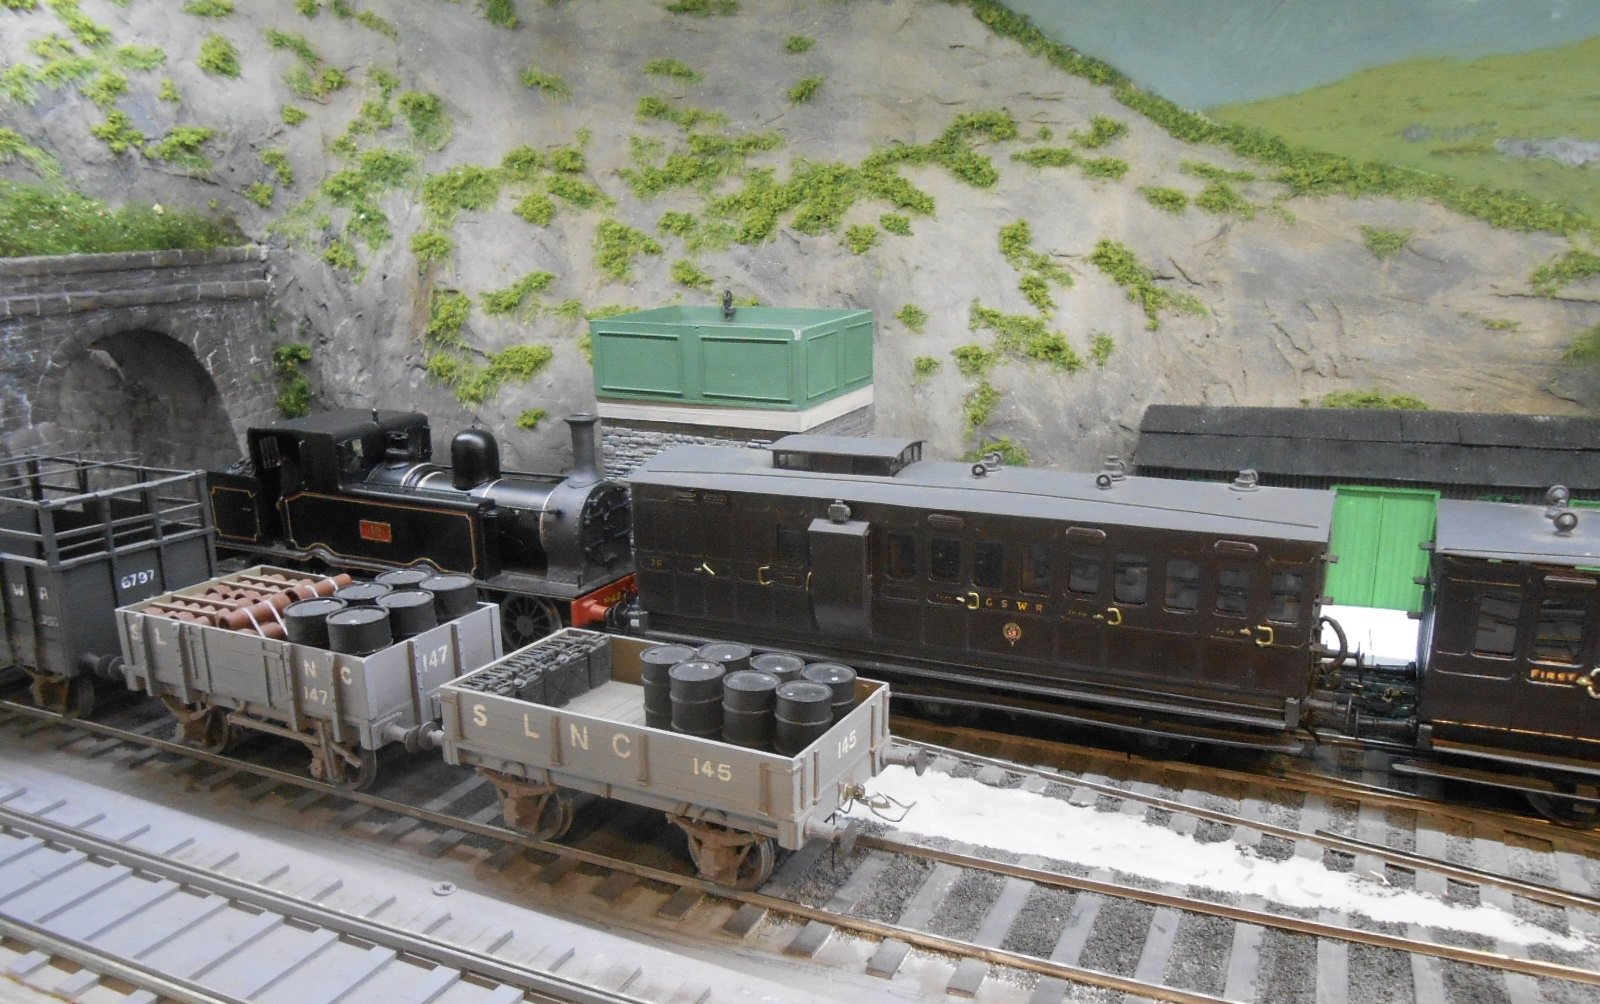
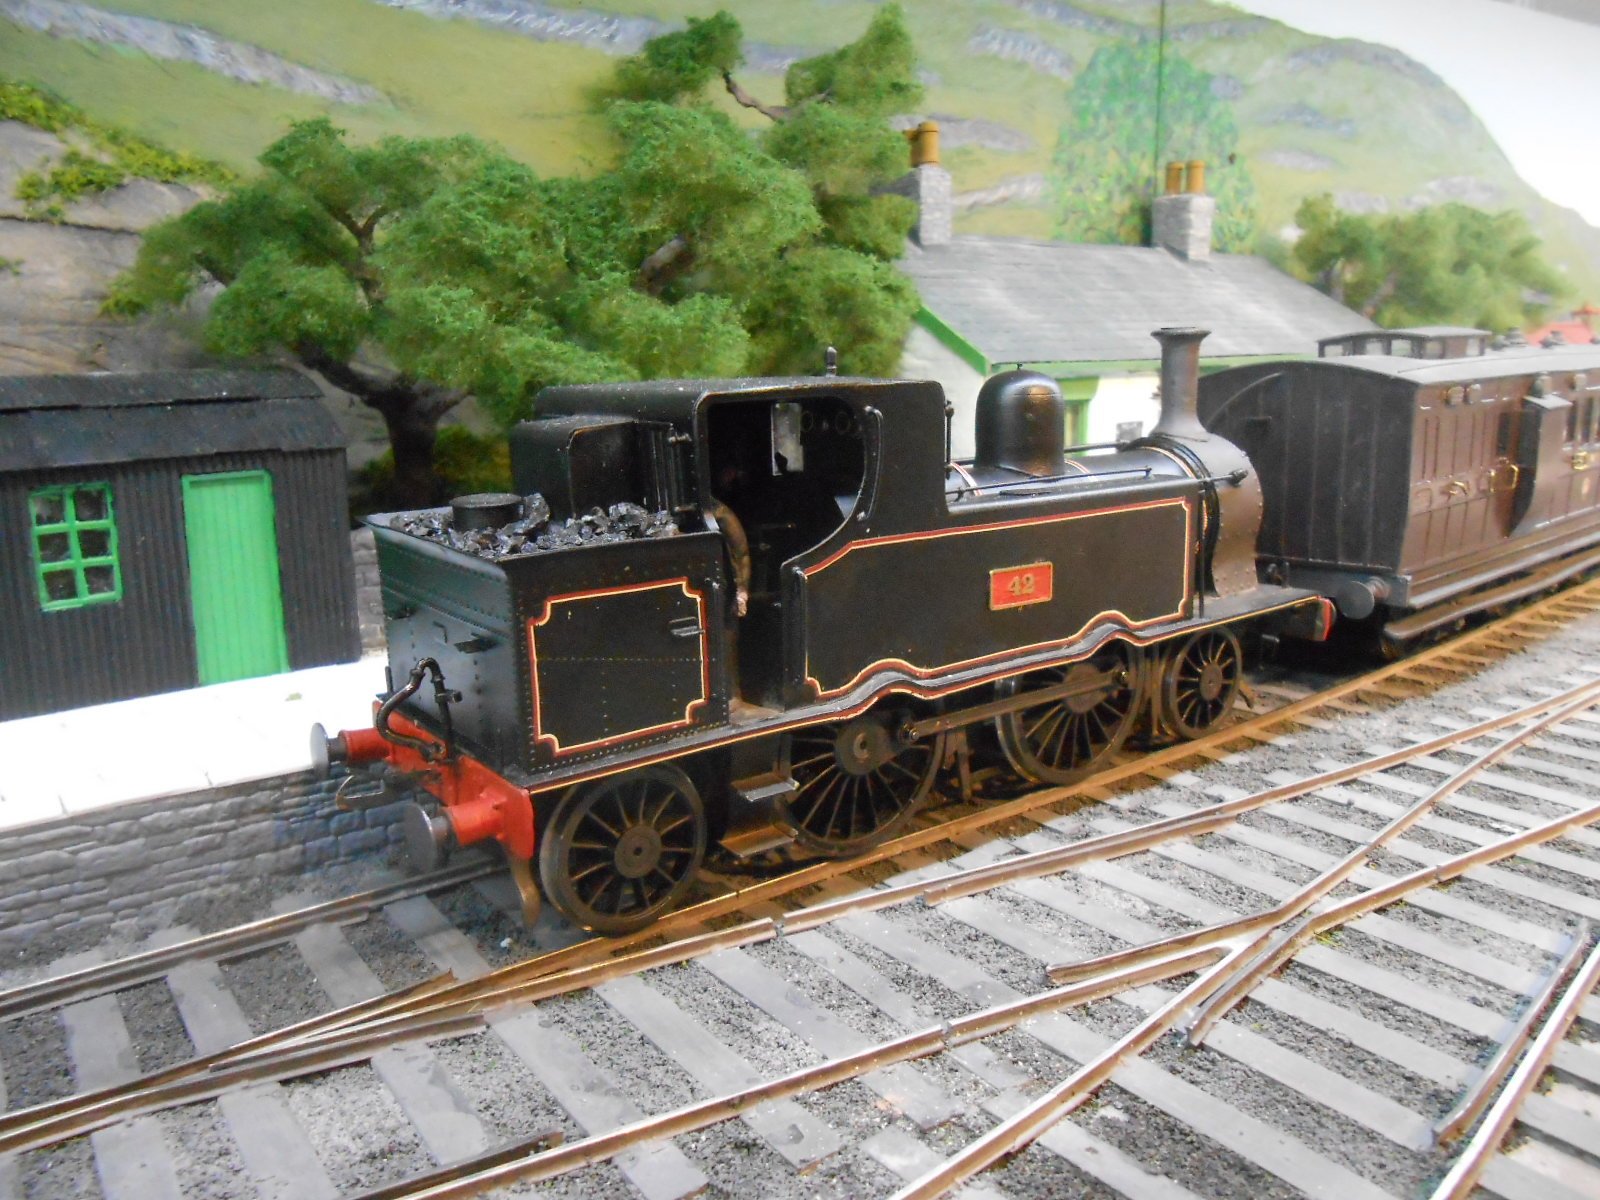
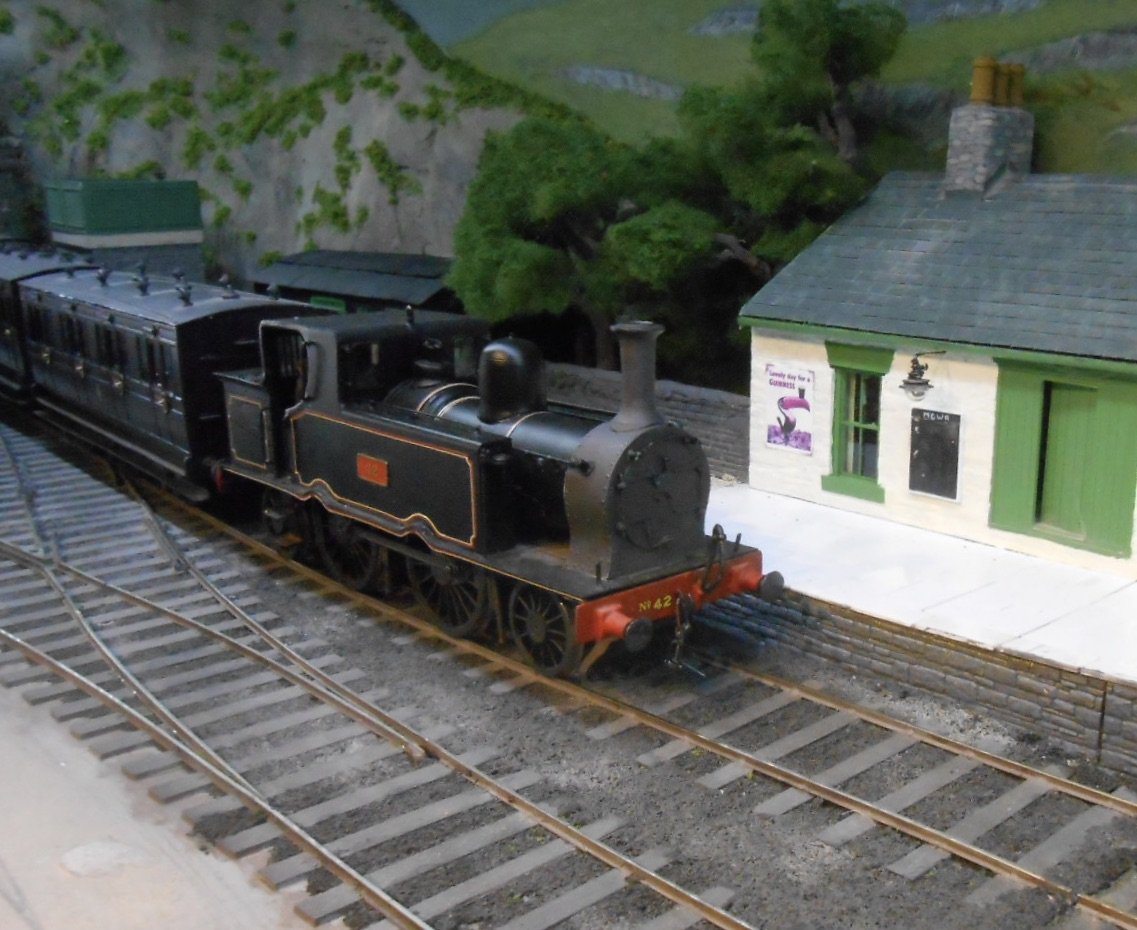
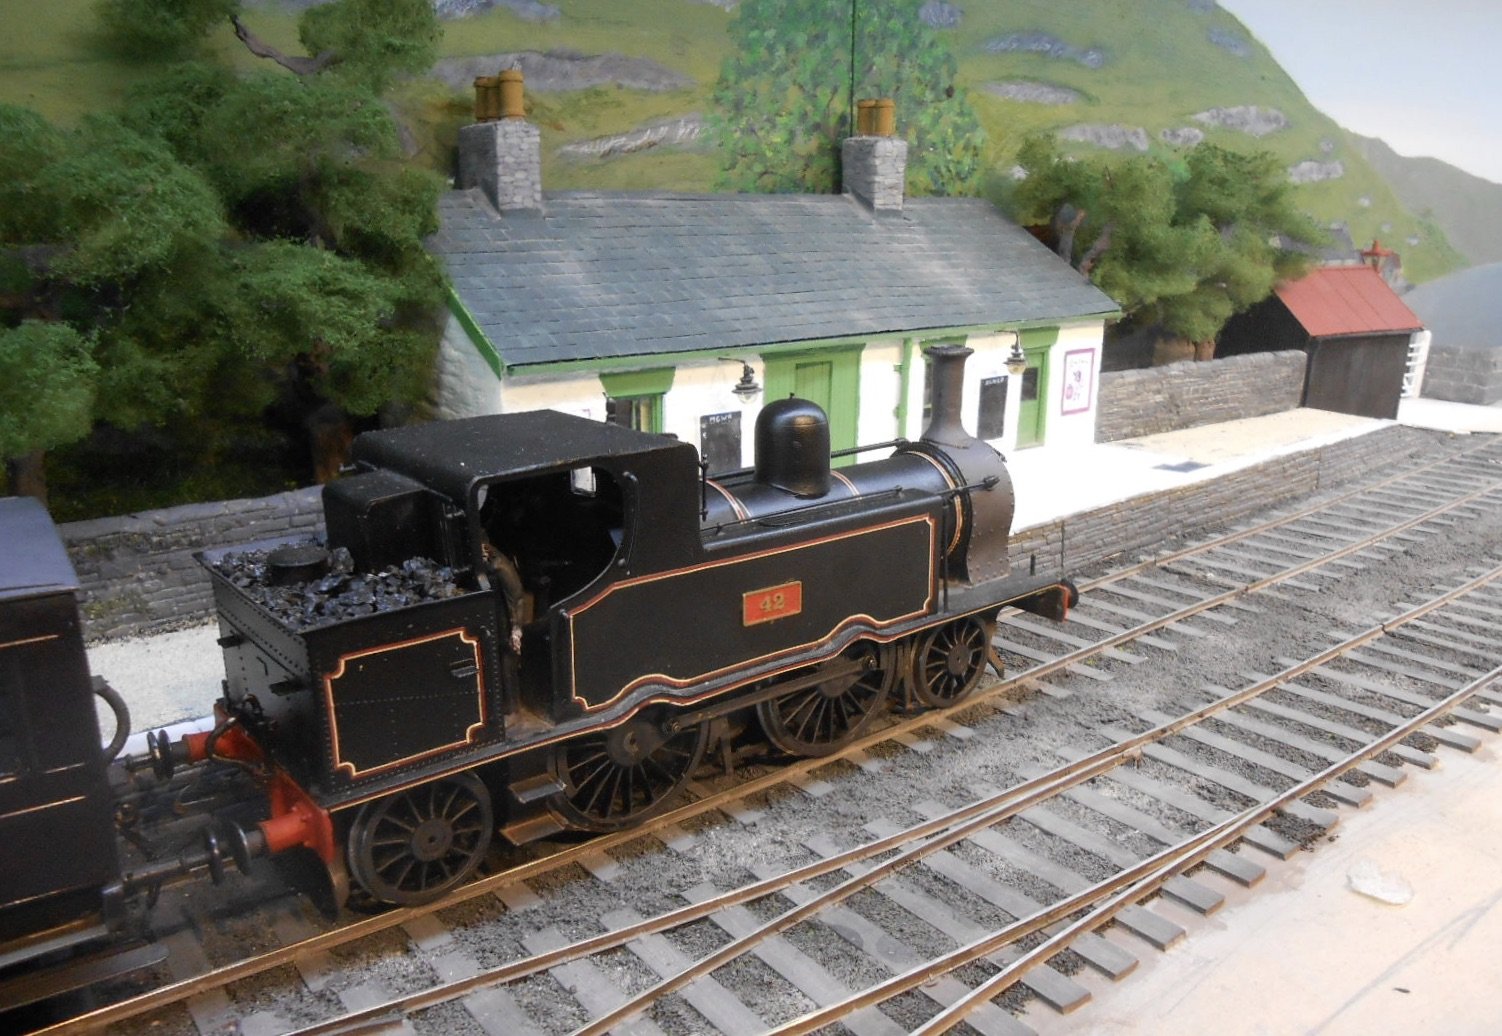
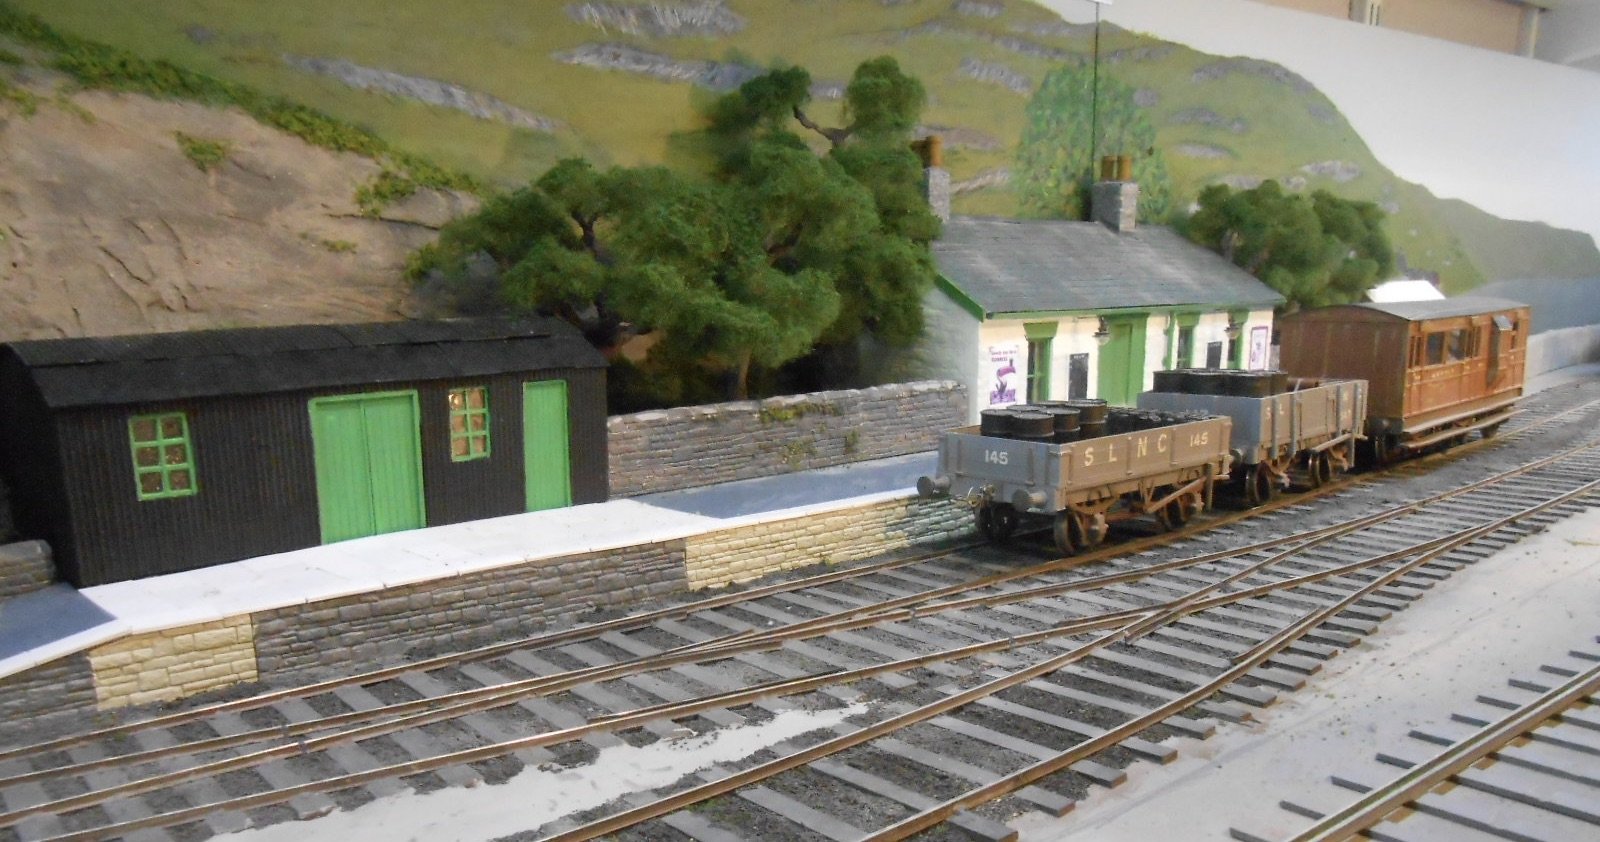
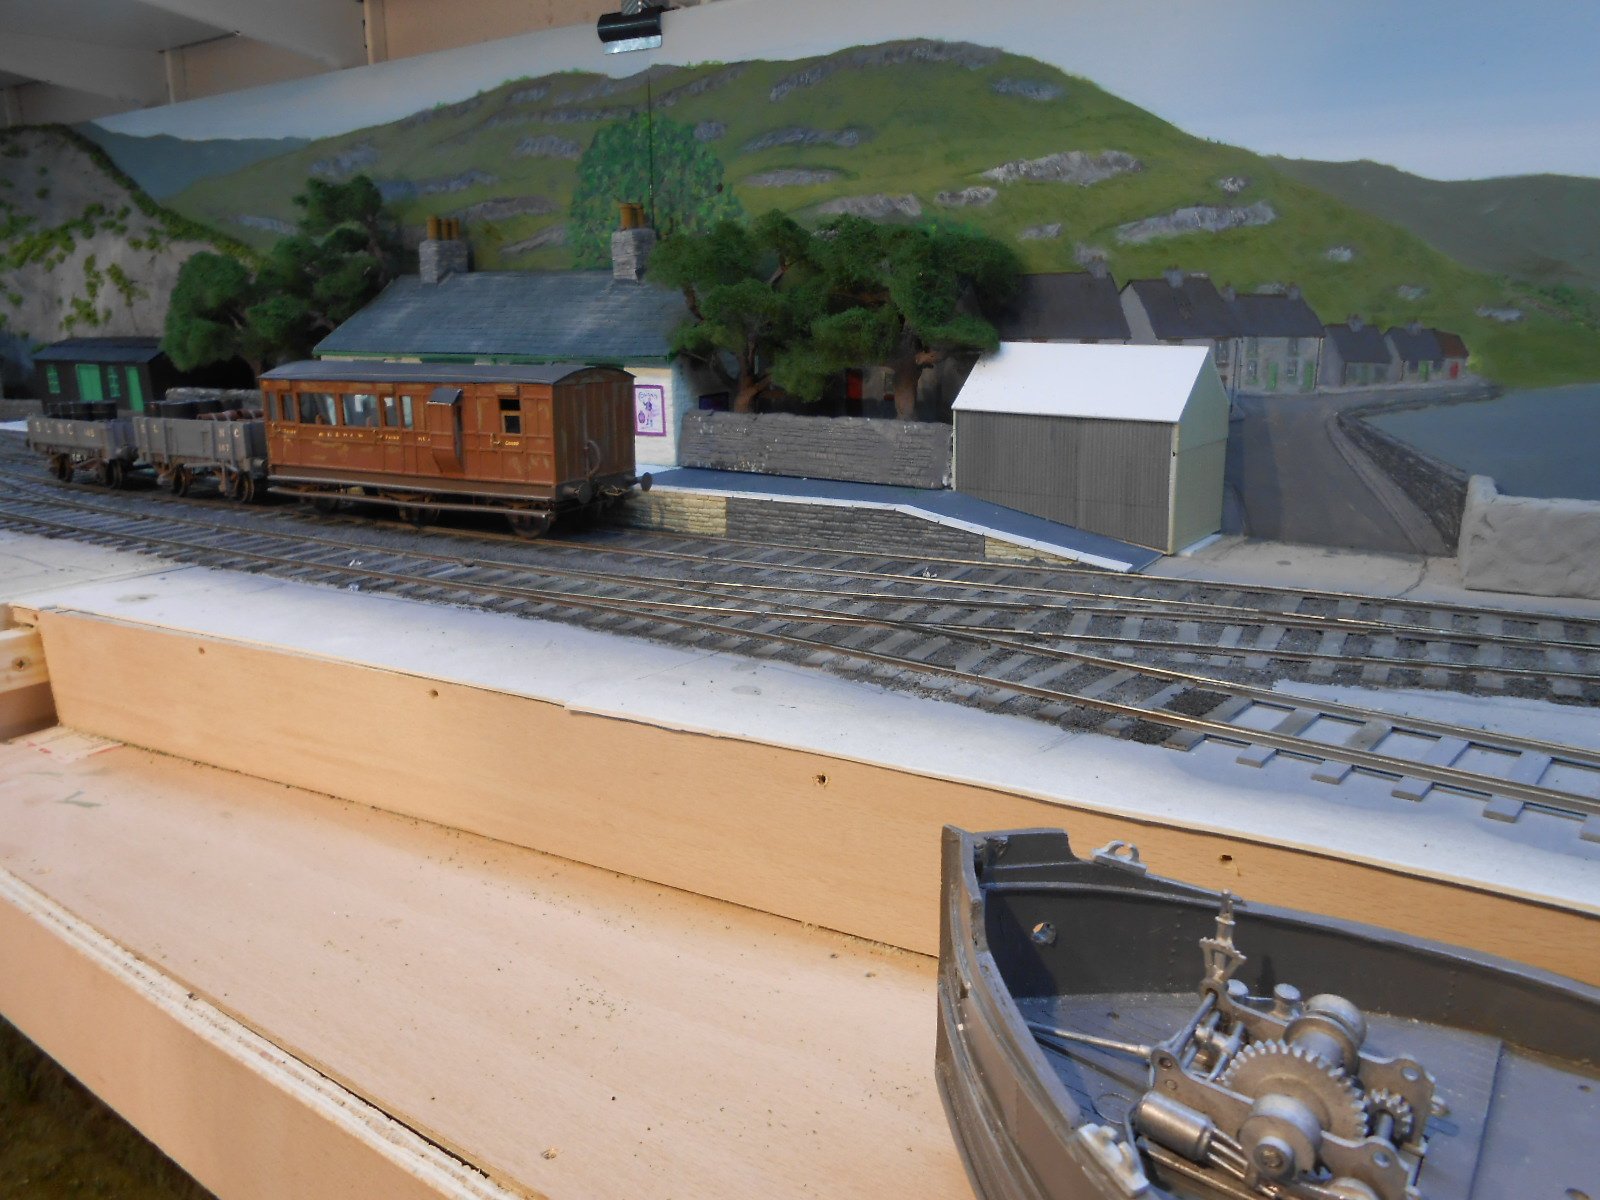
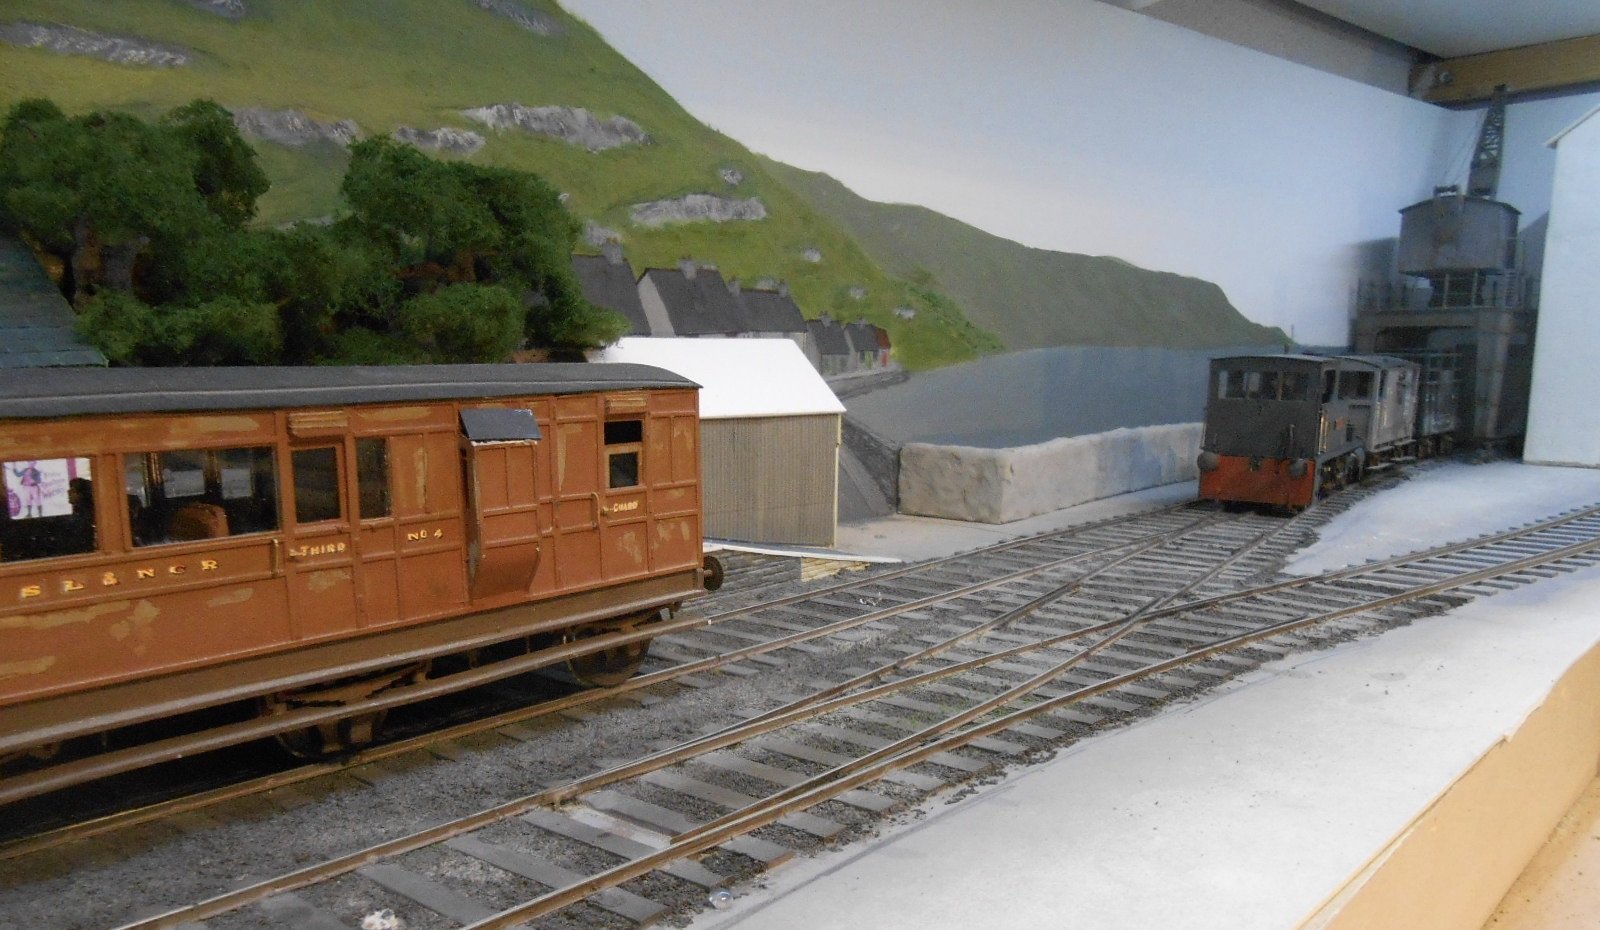
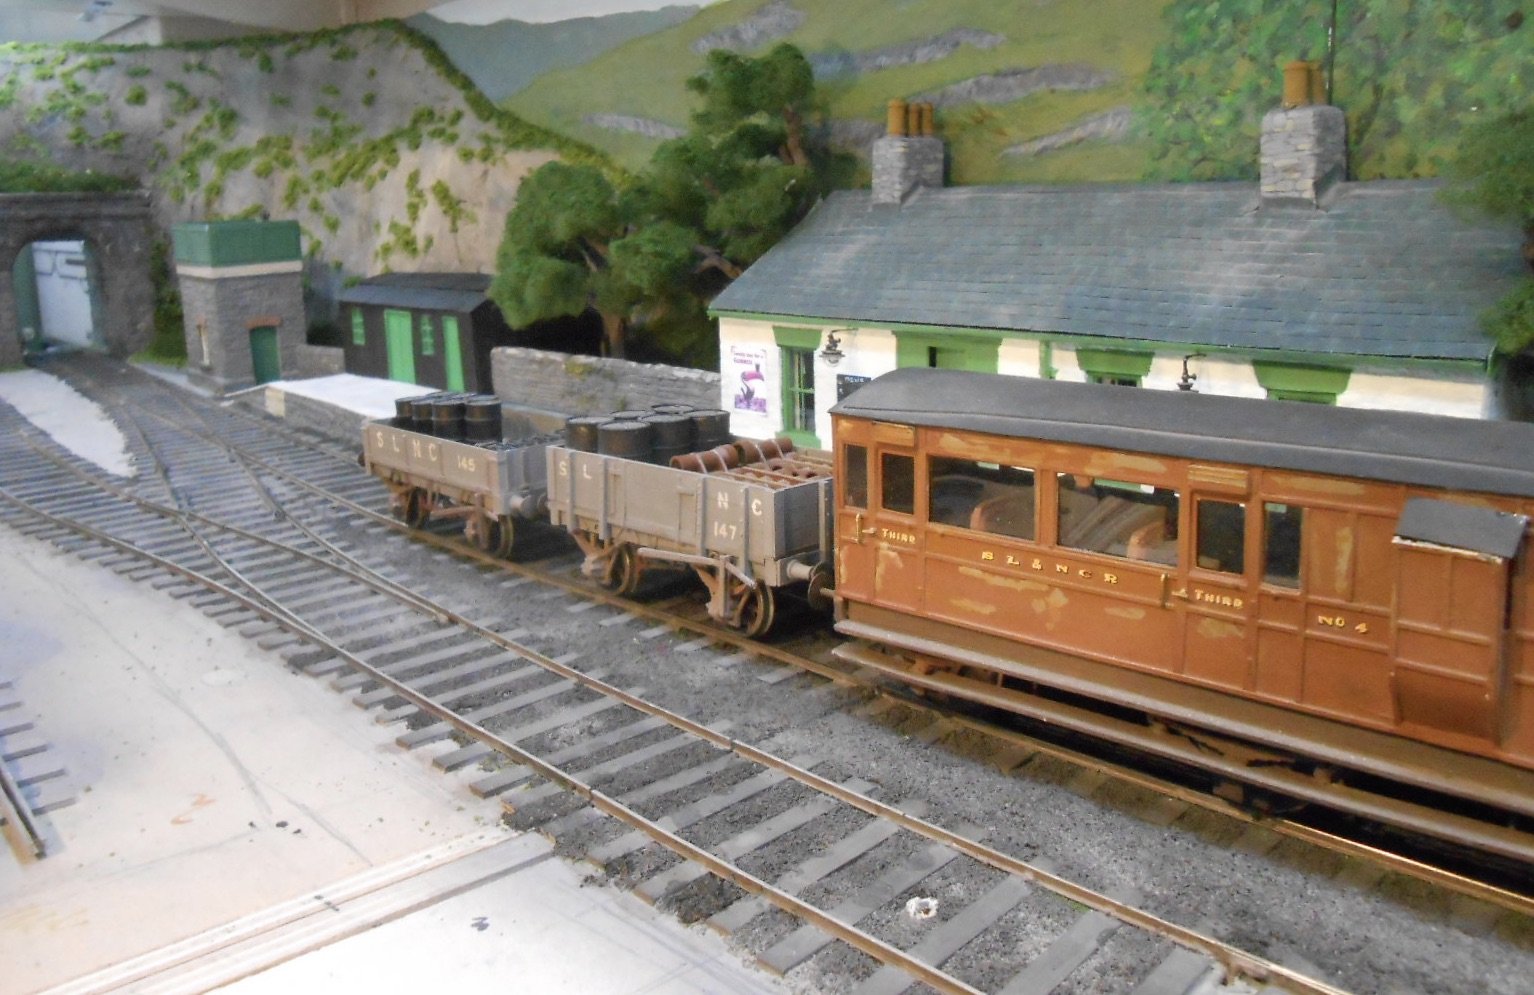
Things are slowly moving forwards, away from the backscene now. The harbour office has been finished & decided it would make sense for there to be a gate to guard against public access to the quayside, so made one from plastic strip and added a couple of hefty gate posts too. The sea wall has been worked on, with representation of large stone blocks scribed on to the Das coating - Donaghadee harbour the inspiration here. Also thought it would be useful for there to be some lighting & found a standard lamp and a wall bracket one in the spares box, which have been added. At the moment, these have been painted red, to match the doors on the big warehouse [based one ones at Rathmelton], the idea being that this is the colour scheme of the harbour company. Saying the public will not be allowed on the quayside is not actually true though, as it is envisaged foot passengers will make their way across the tracks and down steps to a small ferry which will take them to/from a group of unspecific off shore islands. Some thin balsa has been put down to indicate where the board crossings will be & as such mark a major piece of future work, namely the ground cover, which will be a mix of granite setts and larger stone blocks. A fair bit of Das clay and a lot of scribing to be done eventually. One of these days, the temptation of the Clyde Puffer kit is going to get the better of me, though am still looking at ways of adapting it into a small coaster - giving it a high forecastle and moving the funnel behind the wheelhouse is currently favourite. In the meantime my GSWR passenger train has been posed for some pictures to help set the scene.

- 257 replies
-
- 23
-

-

-
Haven't used RMWeb for a long time, so disappointing to hear things not going well at the moment. However, size matters, as the saying goes and the larger the forum, the more managing it requires, especially if it becomes prone to more extreme views. IRM is so friendly and helpful, I rarely go anywhere else, unless a wider Google type search is needed. That said, when I do go off piste, looking for something obscure, it is often not long before I find myself taken back to IRM, looking at something I have posted myself, including maps of my fictitious projects, which is a bit worrying. This forum will do me nicely, so many thanks to all those involved!
- 32 replies
-
- 10
-
-

-
Signals or how to get burnt fingers and eye strain!
David Holman replied to Mike 84C's topic in Irish Models
Great work, Mike. Signals are such delicate, fiddly things to build, but so worthwhile when done as well as this. -
Brookhall Mill - A GNR(I) Micro Layout
David Holman replied to Patrick Davey's topic in Irish Model Layouts
Modelling has to be good to poke the camera in that close! Fine work. -
Wow. Where to start? No idea really. The vision, the skill, the running, the... oh for goodness sake! Quite possibly one of the finest model railways anywhere. To follow the movie, now needs an album and a novel - though preferably not a musical and certainly a major series in the Model Press. Quite remarkable and to say 'well done' is not enough but thank you and keep sharing.
-
You've struck a rich vein here, Jb! Wonderful stuff from Mayner, JHB and Galteemore. Knowledge like this is pure gold dust. The Collooney to Sligo line must have been interesting in the early 1900s, with the MGW, WL&W, GS&W and the SLNCR all present. Modeller's Licence is always a good excuse and my early 1900s stock stretches things by assuming the GSW didn't take over the WLW until about 1905, while if the line to Belmullet was built as a joint venture, that also gives me more options, albeit tenuous. For example, my GSW F6 2-4-2T has come North from the Valencia line because the Belmullet route is very similar, so is being tried out there. It would have been a major journey for a Sligo tank from Enniskillen to Belmullet, but Sligo to there would just about have been in range. Based on the Achill line, Wolf Dog and E class would have been at home for the Midland, while my beloved WLW Shannon (built by Richard Chown 50 years ago) would have got to Belmullet because of the Canadian Pacific mail traffic. Unfortunately, none of this solves your stock problem, but Galteemore's idea of concentrating on Midland infrastructure has a lot going for it. The argument that you should be able to identify a railway without seeing any of its trains is a good one, with most having signature items like buildings, signals and so on. Ernie Shepherd's history vital here. Get that right and using the two foot rule, generic stock will blend in well enough. Plus of course, none of us woke up one morning suddenly able to kit or scratchbuild and though it takes time to learn, it is certainly VERY rewarding and folk on this forum are endlessly encouraging.
-
Superb. Thanks Mark!
-
Brookhall Mill - A GNR(I) Micro Layout
David Holman replied to Patrick Davey's topic in Irish Model Layouts
Excellent stuff - well worth the effort. Very much what I'm thinking of for Northport Quay. -
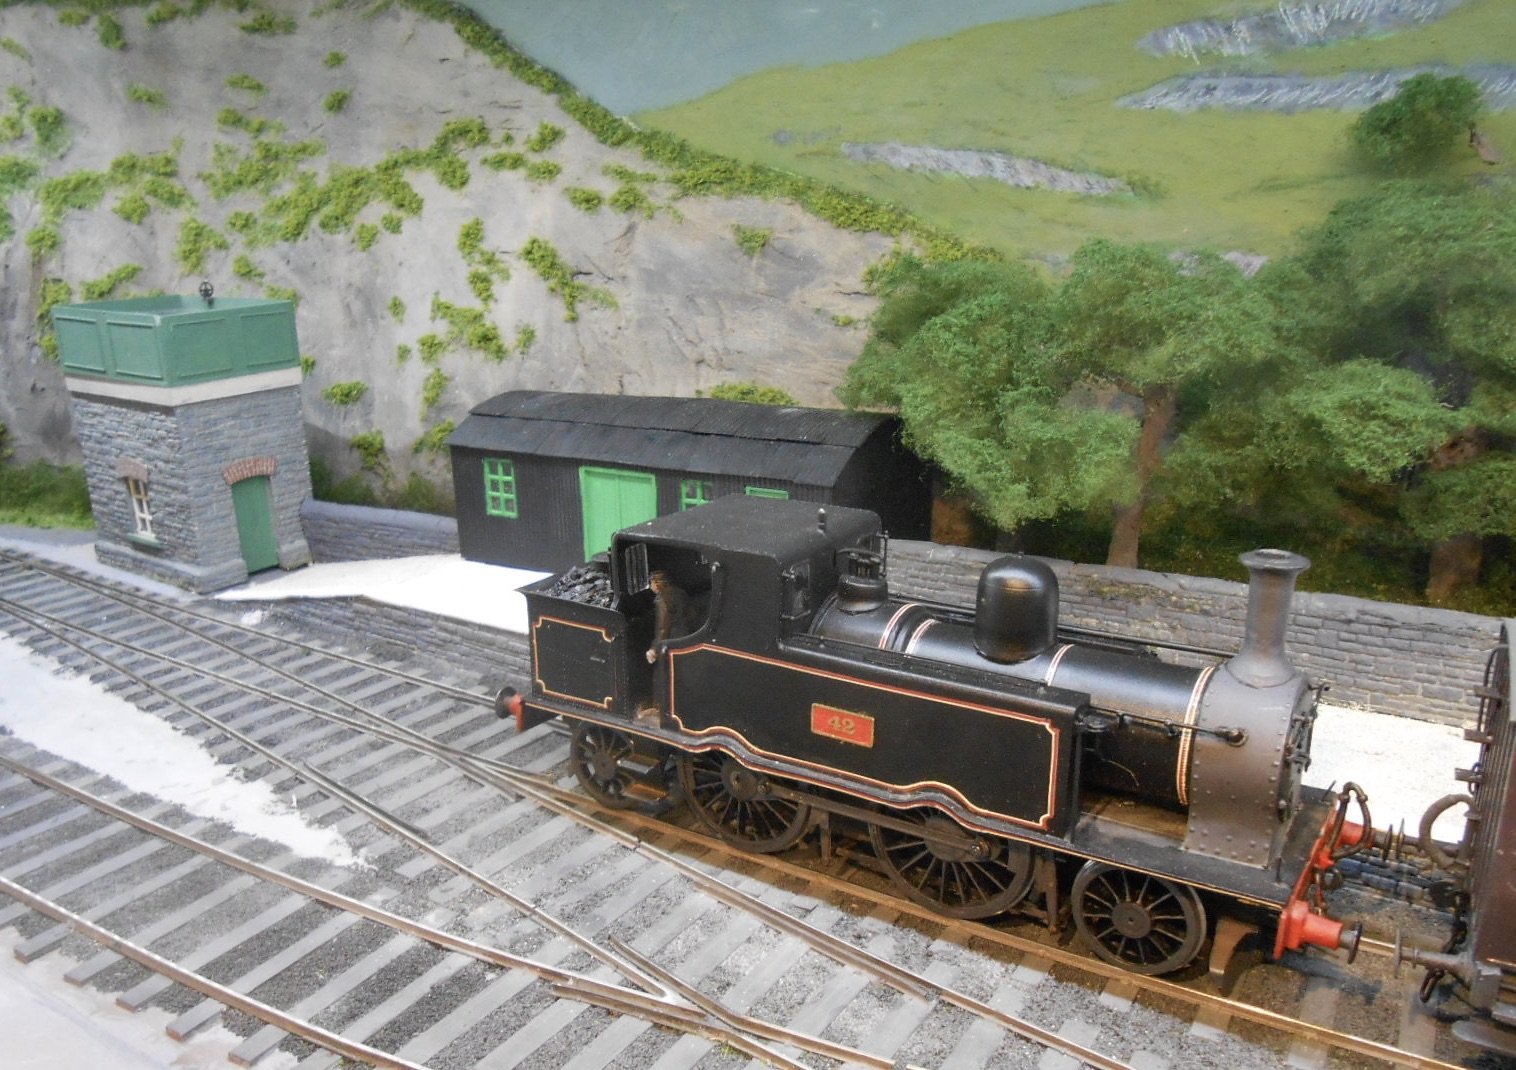
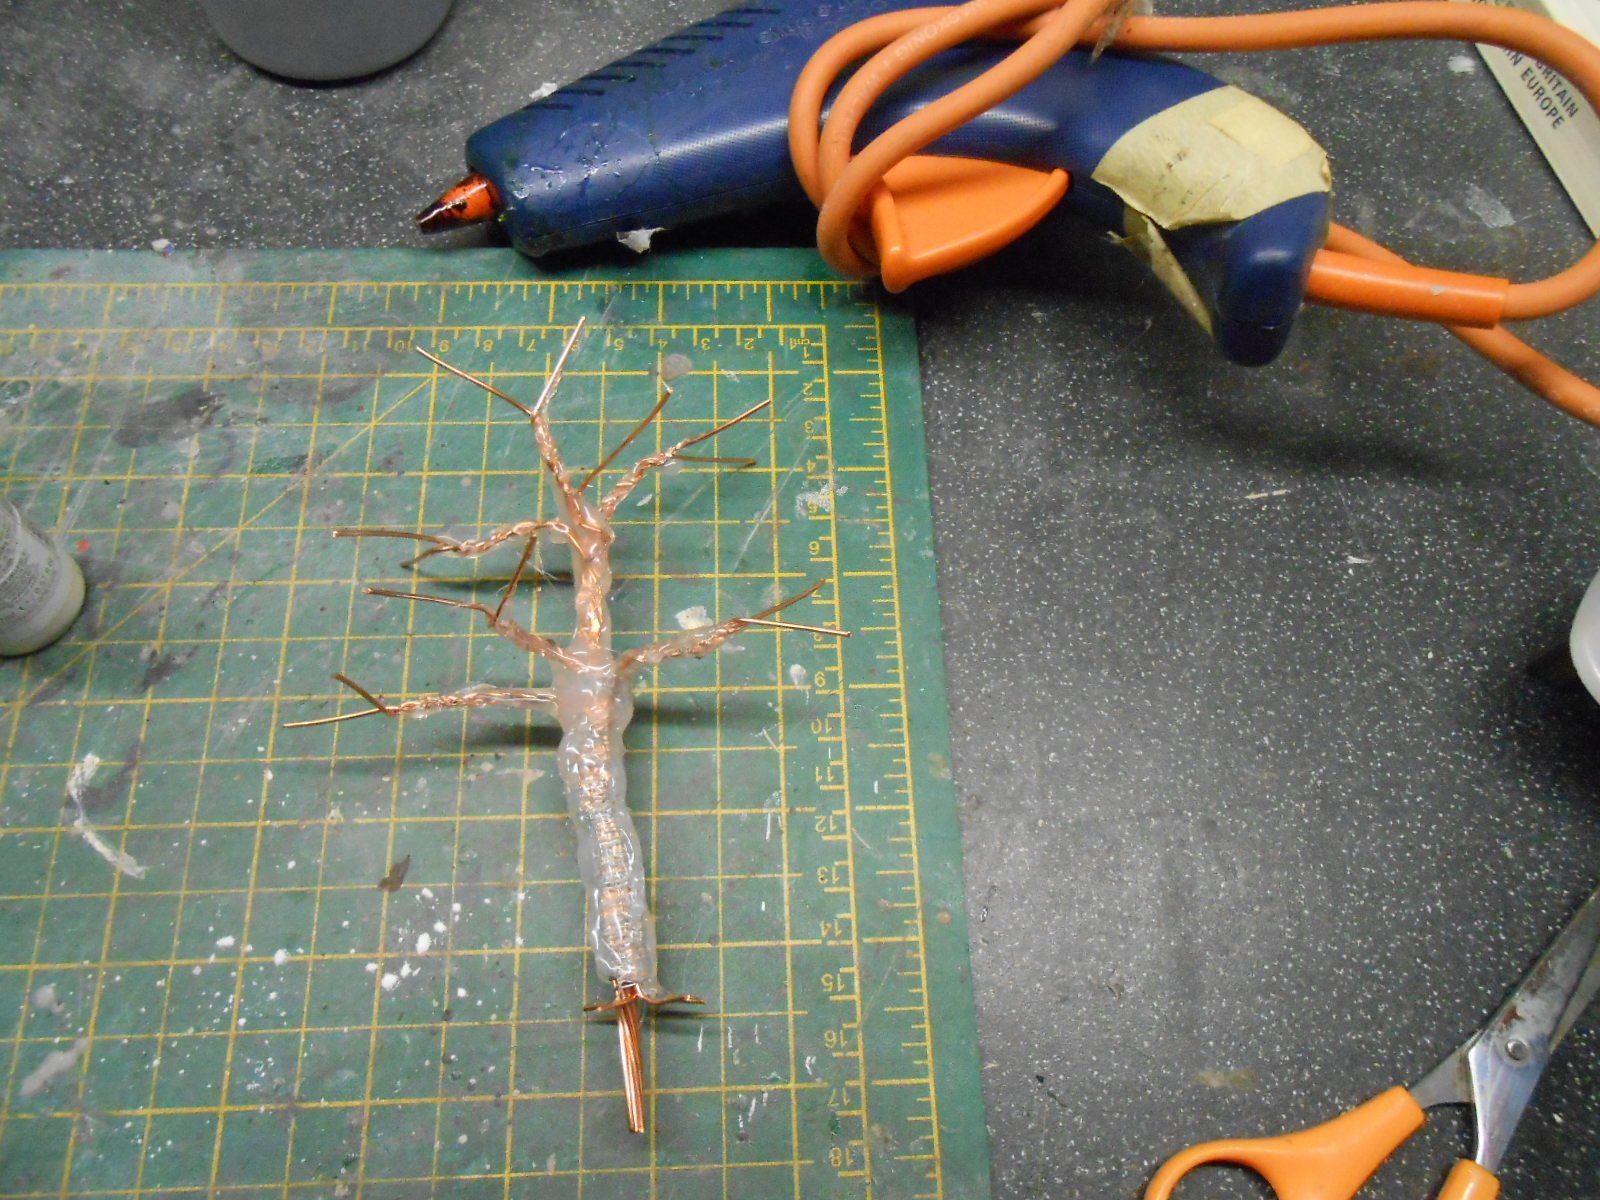
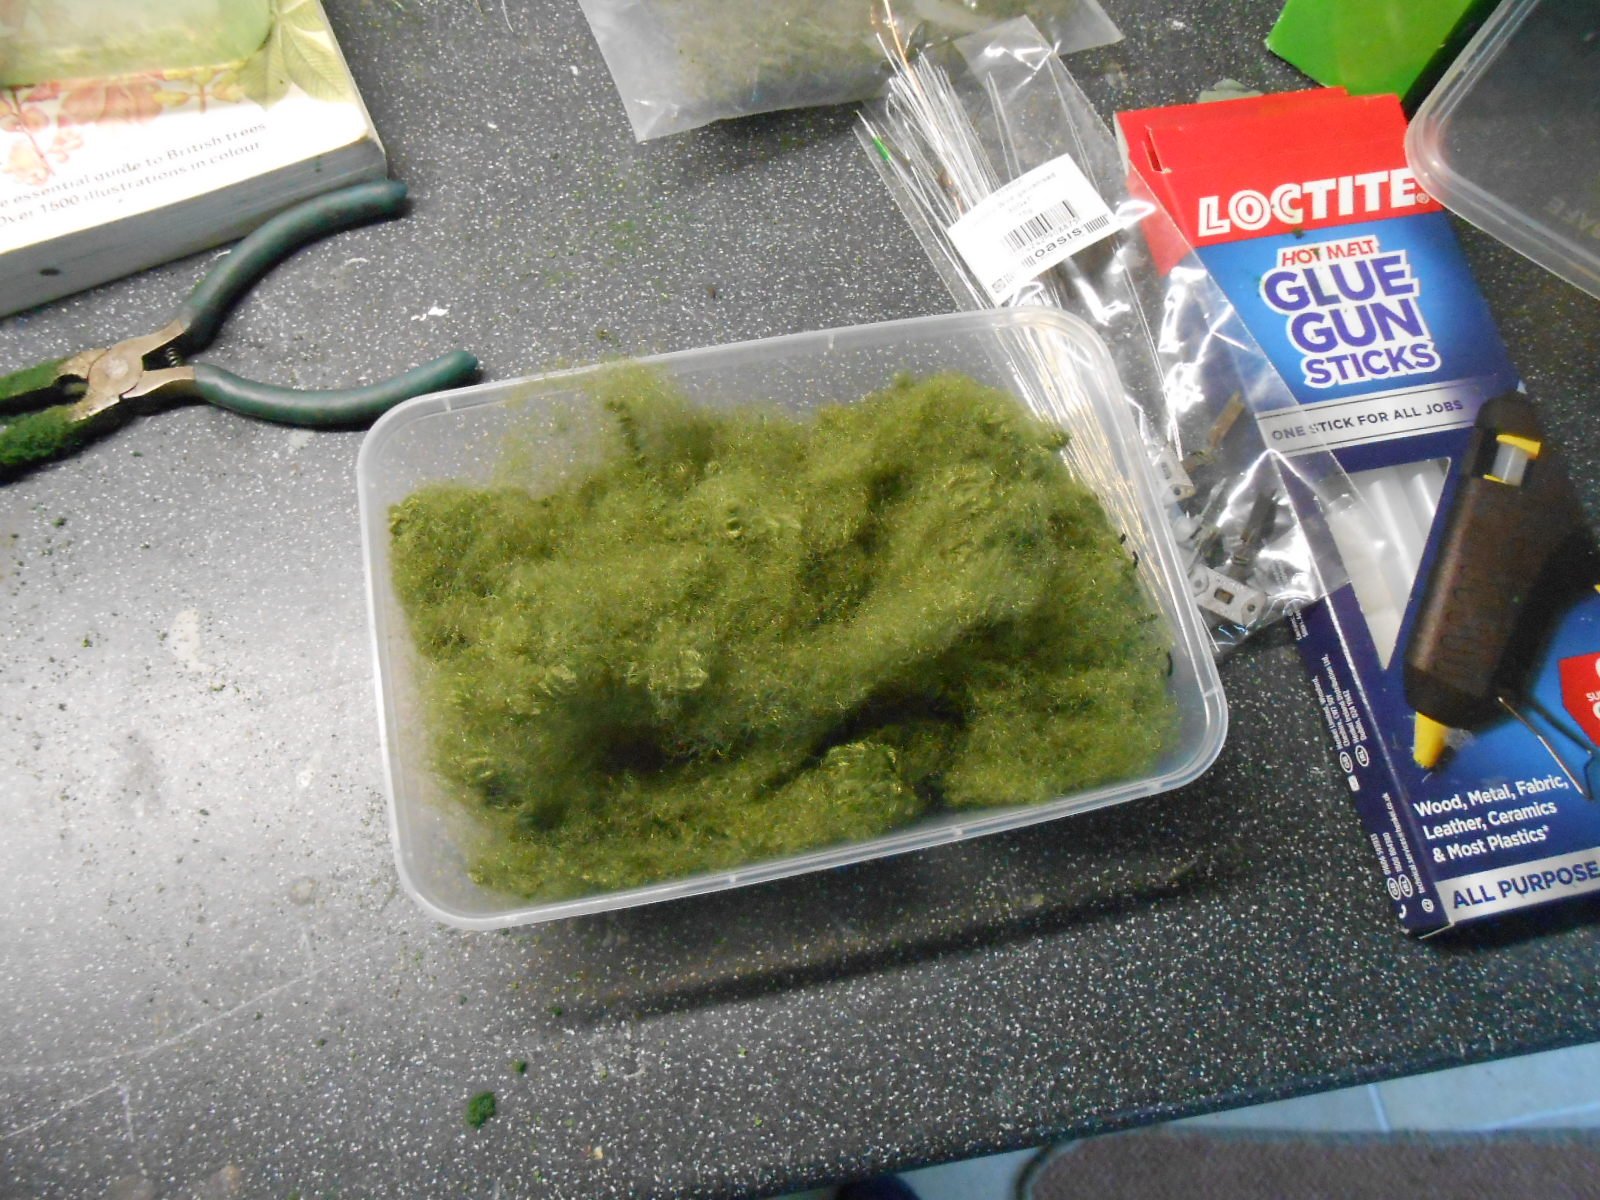
Trees next and have been working on five this week. Nothing special, just the usual wire skeleton, aiming for something fairly small and anonymous, though being able to hide the ends of the low relief station building is important. Indeed, the trees are also low relief, being no more than a half circle when seen from above. Have departed a little from the norm in two ways. First, the wire skeleton was coated using a hot glue gun. This builds up the trunk and branches much quicker than filler, though I do add a layer of this on top to get better texture for the bark. The other change has been to use Woodland Scenics 'polyfibre'. This is essentially the material that forms the basis of their scenic matting and [just like using Postiche], you tease out a small piece, spray it with fixative and then sprinkle on scatter material, before fixing to the frame. The trees were then planted to go behind the station walls - two on one side, three on the other. After, I teased out the foliage some more, until I got the shape I wanted. Another addition has been a 'wiggly tin' hut at the far end of the platform. Looking at pictures of Fenit pier, it seemed that some sort of 'harbour office' might be appropriate, so Northport Quay now has one controlling the entrance to the waterfront. Knocked up the basic shell this morning and with no doors or windows visible, it was pretty simple to do.
- 257 replies
-
- 11
-
-
Galteemore's latest model should provide all the inspiration you need, Jb and if not, check out my Belmullet thread where there are also models of MGWR locos in the early 1900s. After 1925 of course, it all goes a bit grey. However, in terms of readily available models, then little, if any is available rtr, in any scale. Modern image is increasingly well catered for, but not early stuff. As already suggested, kit and/or scratch building is the only way and the Alphagraphix catalogue is definitely worth a look, but all in 7mm scale. As well as the E class, there is a G2 2-4-0 and J18 0-6-0, along with a nice range of 6w coaches. Then there are the card kits, which form a good basis for scratch building. Worsley Works do a number of etches and these can be available in a number of scales. Note though that they are not kits in the accepted sense - there are no instructions and you need to find your own castings & fittings too, so think more an aid to scratch building. Kitbuilt stock does turn up on the second hand market from time to time, but note that, especially if you want to do proper broad gauge [and why not?] there are only a few of us in any of the scales. For example, I can only think of a handful of layouts in 2mm and 3mm scale, while Galteemore and I are pretty much flying the flag on our own in 7mm scale. There again, if you like to be different and do your own thing, I can only say that it is great fun and the folk on this forum are endlessly helpful and encouraging. Come on in - the water's lovely!
-
Interesting! Seems I need to go back to school... While I love reading about all the latest innovations in the hobby, guess I am (reasonably) happy with the skills I have learned, in that they enable me to do what I need. CAD seems a big step forward in terms of learning and while I can see the advantages of being able to design something that can be printed, etched, laser cut etc, I still enjoy the practical side of just doing things by hand. However, also think it is brilliant to see modellers developing and using new techniques. Just go for it!
- 309 replies
-
- 3
-
-
-
- mgwr
- 21mm gauge
- (and 1 more)
-
A lovely half hour film on BBC 4 this week going behind the scenes at Cultra. No railway content sadly, but really interesting in terms of social history, so therefore important to us modellers. Catch it on I-player of you can.
-
- 4
-
-

-
Fabulous!
-
The only time I used Templot was to print a left and right hand point plan for Fintonagh. Used the 'Irish EM', 20.2mm gauge version, which I enlarged to 21mm on the copier. Sounds like I got off lightly!
- 309 replies
-
- 2
-
-
- mgwr
- 21mm gauge
- (and 1 more)
-
Oh my. A stunning layout in a fantastic home. As Popeye says, when can we buy tickets?
-
Irish Houses in the Early 1900s - What Colour Paint To Use?
David Holman replied to 2996 Victor's question in Questions & Answers
One that interests me too. Looking at monochrome pictures, it appears that finish is certainly geographic, with plain stone in some areas, rendered in others and a degree of whitewash in some. Suspect that poorer areas would be plainer too, while there is evidence that not a lot changed until well into the 1950s in some areas. Feel sure answers will be available before too long. -
Very much the sort of thing I have in mind for Northport Quay, Mark and certainly looks very effective. The list of colours to be used very helpful too.
-
Not a million miles from the Lydham Heath track plan on the Bishops Castle Railway in Shropshire, though that was really just a reversing point. Have long thought that a 'terminus junction' makes for an ideal model railway scenario because of the more intensive nature of operations. Mayner's post exemplifies it, which Richard Chown was a big fan of minimal track too. Nice though it is to have more, and it always looks impressive, you don't always need it for interesting operations. Having plenty of fiddle yard or storage siding space is another matter though, but this can be alleviated if you use cassettes.
-
Interesting, JB. My 7mm TTs have all been around 42', being mostly adapted 00 ones. My G2 fits, just, but Wolf Dog barely, so that extra 3' would make all the difference!
- 309 replies
-
- 2
-
-
- mgwr
- 21mm gauge
- (and 1 more)
-
Some great examples there, Mark, but I like yours better! The problems with all those termini is the amount of space they need, so yours is a nice compromise, while still incorporating all the key features. Think you are right about the TT and track spacing. Being built while still ruled from London, suspect the platform widths would be the same, so a minimum of six feet for a single platform and twelve for a double faced one. In practice they were wider on all but the most basic stations, so am sure you will have enough space.
- 309 replies
-
- 2
-
-

-
- mgwr
- 21mm gauge
- (and 1 more)
-
Looks very effective to me. Well done you.
-
Then of course there's Mr Spok, from Star Trek, who has three ears: left ear, right ear and final frontier... Sorry!
-
So much fun to be had doctoring commercial chassis into something plausible and nice to have outside valve gear too. Not many eight coupled locos in Ireland though, with only the Swilly having them on narrow gauge. Suspect that large motor precludes one of their 4-8-0s, but would probably fit inside the tanks of the 4-8-4s. Wheels might be a bit small, mind. If you could fit a pony truck at each end, then a new, as yet unheard of, class of Swilly or Donegal tank could emerge. On the continent, they were happy with 0-8-0s with large overhangs, but pony wheels would look better, methinks.
-
This would make a very fine project for someone and a great place for watching trains go by.
-
Nice! And a rather elegant 4-4-0 too...